Natural Ways to Support Healthy Weight Management

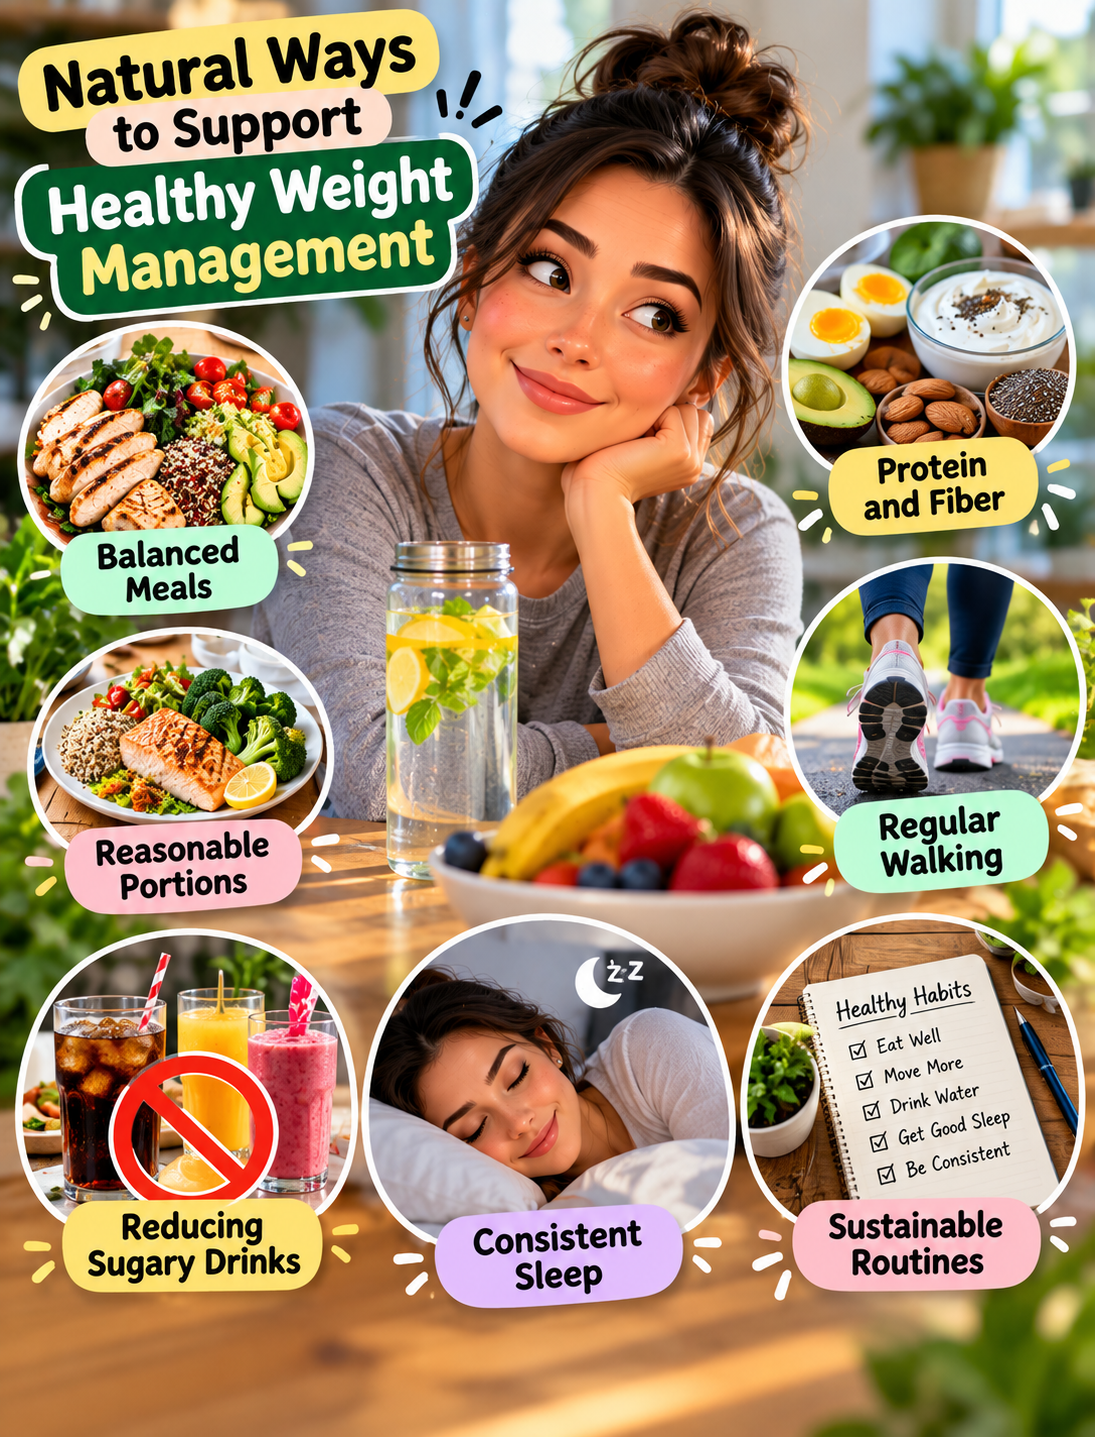
Natural ways to support healthy weight management with balanced meals, protein, fiber, walking, portions, and healthy daily habits

Natural Ways to Support Healthy Weight Management

“Forget extreme diets — start with these simple everyday habits.”

Healthy weight management does not require a drastic diet, expensive supplements, or a single “magic” food. A better approach is to build everyday habits that you can maintain for months and years.

For many adults, that means eating balanced meals, choosing filling foods, watching portions, moving regularly, drinking fewer sugary beverages, getting enough sleep, and creating routines that fit real life. The CDC also notes that healthy weight management involves nutrition, physical activity, sleep, and stress management rather than one isolated strategy.

This step-by-step guide focuses on practical changes you can start at home without following an extreme plan.

1. Build Balanced Meals Instead of Cutting Out Entire Food Groups

A balanced meal gives your body a mix of nutrients while helping you feel satisfied.

Try building most meals around:

  • Vegetables: spinach, broccoli, peppers, carrots, tomatoes, or leafy greens.
  • Protein: eggs, chicken, fish, Greek yogurt, beans, lentils, tofu, or cottage cheese.
  • High-fiber carbohydrates: oats, beans, potatoes, brown rice, quinoa, or whole-grain bread.
  • Healthy fats: avocado, nuts, seeds, or a small amount of olive oil.
  • Fruit: berries, apples, oranges, bananas, or other whole fruits.

NIDDK recommends a healthy eating pattern that includes vegetables, whole fruits, whole grains, dairy or suitable alternatives, and a variety of protein foods.

Simple example:
Instead of eating a large plate of pasta alone, add grilled chicken, vegetables, and a smaller portion of pasta. You get protein, fiber, and other nutrients in the same meal.

2. Add Protein and Fiber to Keep Meals More Satisfying

Protein and fiber are useful building blocks for meals because they can make food more filling and help you create a balanced eating pattern.

Good protein choices include:

  • Eggs
  • Greek yogurt
  • Chicken
  • Fish
  • Cottage cheese
  • Beans
  • Lentils
  • Tofu
  • Nuts and seeds

Fiber-rich choices include:

  • Oatmeal
  • Berries
  • Apples
  • Beans
  • Lentils
  • Vegetables
  • Chia seeds
  • Whole grains

Easy meal idea:
Try oatmeal topped with berries, chia seeds, and Greek yogurt instead of plain oatmeal with added sugar.

Another simple option is a chicken-and-vegetable bowl with brown rice or another whole grain.

The goal is not to make every meal perfect. The goal is to make your usual meals more nutritious and satisfying.

3. Pay Attention to Portions Without Obsessing Over Calories

Healthy foods can still contribute more calories than you need when portions become very large.

Start by checking how much food you normally put on your plate.

Try this simple portion strategy:

  1. Put vegetables or fruit on a large part of the plate.
  2. Add a reasonable serving of protein.
  3. Add a moderate portion of whole grains or another carbohydrate.
  4. Include a small amount of healthy fat.
  5. Eat slowly enough to notice when you are comfortably satisfied.

NIDDK explains that portion size matters because the amount you eat affects total calorie intake. It also recommends paying attention to serving information on Nutrition Facts labels.

Helpful habit:
Instead of eating snacks directly from a large bag, place one portion in a bowl and put the package away.

This small change can make it easier to notice how much you are actually eating.

4. Make Water Your Default Drink

Sugary drinks can add substantial amounts of sugar and calories without making you feel as full as a solid meal.

Common examples include:

  • Regular soda
  • Sweetened iced tea
  • Sugary coffee drinks
  • Energy drinks
  • Sweetened fruit drinks

Try replacing one sugary drink each day with:

  • Plain water
  • Sparkling water
  • Unsweetened tea
  • Water with lemon or lime

The CDC notes that replacing sugary drinks with plain water can reduce calorie intake because water contains no calories.

You do not have to eliminate every favorite drink overnight. Start with the drink you have most often and make one practical change.

5. Walk More During the Day

You do not need to begin with an intense workout program.

Walking is a simple way to add more movement to your routine.

Start with weeks plan:

1: Walk for 10 minutes after one meal.

2: Increase the walk to 15–20 minutes when comfortable.

3: Add another short walk during the day.

Over time, work toward regular moderate physical activity. U.S. guidance recommends adults aim for at least 150 minutes of moderate-intensity aerobic activity each week, along with muscle-strengthening activity on at least two days a week.

If you are currently inactive, starting with shorter sessions is reasonable. Even 10- or 15-minute periods of activity can count toward your weekly movement.

6. Create a Consistent Sleep Routine

Sleep is often overlooked when people think about weight management.

Instead of focusing only on food and exercise, create a regular nighttime routine.

Try these simple steps:

  • Go to bed around the same time most nights.
  • Keep your bedroom comfortable and dark.
  • Reduce unnecessary screen time before bed.
  • Avoid making late-night snacking an automatic habit.
  • Give yourself enough time to sleep.

The CDC includes adequate sleep as part of a healthy lifestyle for weight management.

Better sleep will not replace healthy eating or physical activity, but it can support a healthier daily routine.

7. Make Your Habits Easier to Repeat

The biggest problem with extreme diets is that they can be difficult to maintain.

Instead of changing everything on Monday, choose one or two habits first.

A practical 7-day starting plan:

1: Replace one sugary drink with water.

2: Add a vegetable to lunch or dinner.

3: Add a protein source to breakfast.

4: Take a 10–15 minute walk.

5: Check the portion size of one regular snack.

6: Prepare a simple balanced meal at home.

7: Review what worked and repeat your easiest habits.

After that, add another small change.

This approach turns weight-related goals into daily behaviors instead of a short-term challenge.

8. Focus on Progress, Not Perfection

One restaurant meal, dessert, birthday party, or missed workout does not erase your progress.

If you eat more than planned, simply return to your normal routine at the next meal.

NIDDK notes that people do not have to completely eliminate favorite foods; smaller amounts can fit within an overall healthy eating plan.

A sustainable routine might look like:

  • Mostly nutritious meals
  • Regular movement
  • Reasonable portions
  • Occasional treats
  • Consistent sleep
  • Enough flexibility to enjoy social occasions

The goal is to create habits you can realistically continue.

9. Track the Habits That Matter

Tracking can help you identify patterns instead of relying only on the scale.

For one week, write down:

  • What you eat and drink
  • Your daily walking or activity
  • Your sleep schedule
  • How often you drink sugary beverages
  • Your usual snack portions
  • How consistently you follow your routine

The CDC recommends tracking nutrition, physical activity, and sleep as part of creating a practical weight-management plan.

After seven days, look for one habit that could be improved.

For example, if you notice that you regularly drink soda with dinner, replacing that one drink may be a more useful first step than trying to completely change your diet.

10. Avoid “Natural” Weight-Loss Shortcuts

The word natural does not automatically mean safe or effective.

Be cautious with products or social-media claims promising:

  • Rapid fat burning
  • Guaranteed belly-fat loss
  • Effortless weight loss
  • Detox drinks
  • “Fat-burning” teas
  • Extreme fasting plans
  • Unregulated weight-loss supplements

Healthy weight management is usually built from eating patterns, physical activity, sleep, and other lifestyle factors rather than one ingredient or home remedy.

If you have a medical condition, take medications, are pregnant, or are considering a major change in diet or exercise, talk with your healthcare professional about an approach that fits your situation.

A Simple Daily Routine to Start Today

You can put the ideas above into one simple routine:

Morning

  • Drink water.
  • Eat a protein-rich breakfast.
  • Add fruit or another fiber-rich food.

Lunch

  • Include vegetables.
  • Add protein.
  • Choose a reasonable portion of whole grains or another carbohydrate.

Afternoon

  • Choose fruit, yogurt, nuts, or another satisfying snack if hungry.
  • Take a short walk or movement break.

Dinner

  • Build another balanced plate.
  • Choose water or an unsweetened drink.
  • Eat slowly and pay attention to portions.

Evening

  • Avoid automatic snacking in front of the TV.
  • Prepare for tomorrow.
  • Follow a consistent bedtime routine.

Small habits become more useful when you repeat them consistently.

Frequently Asked Questions

1. What is the best natural way to manage weight?

A combination of balanced eating, reasonable portions, regular physical activity, adequate sleep, and sustainable daily habits is more useful than relying on one remedy.

2. Can walking help with healthy weight management?

Yes. Regular walking increases physical activity and can support maintaining a healthy weight when combined with an appropriate eating pattern.

3. Should I completely stop eating carbohydrates?

No. Whole grains, potatoes, beans, fruits, and other carbohydrate foods can be part of a balanced eating pattern; portion size and overall food quality matter.

4. Can drinking water help with weight management?

Replacing sugary drinks with plain water can reduce calorie intake because water contains no calories.

5. Is skipping meals a good way to manage weight?

Skipping meals is not necessary and may make some people overly hungry later, which can make portion control harder.

6. Do I need an extreme diet to lose weight?

No. Healthy weight-management plans focus on sustainable eating, activity, sleep, and behavior changes rather than extreme restrictions.

7. How much exercise should adults get each week?

A common U.S. guideline is at least 150 minutes of moderate aerobic activity weekly, plus muscle-strengthening activities on two or more days.

8. What if I cannot lose weight despite healthy habits?

Medications, medical conditions, hormones, genetics, stress, age, and environment can affect weight, so persistent concerns are worth discussing with a healthcare professional


Whipped Feta Mediterranean Dip with Roasted Vegetables & Herbs

Whipped Feta Dip with creamy feta cheese, roasted vegetables, fresh herbs, olive oil, and Mediterranean flavors

Whipped Feta Mediterranean Dip with Roasted Vegetables & Herbs

This Whipped Feta Dip is a creamy, flavorful, and refreshing Mediterranean-inspired appetizer made with rich feta cheese, creamy yogurt, extra virgin olive oil, garlic, fresh herbs, and colorful roasted vegetables. It is a perfect combination of smooth texture, tangy flavor, and fresh Mediterranean ingredients that create an elegant dish for any occasion.

Mediterranean cuisine is loved around the world because of its simple ingredients and fresh flavors. This recipe brings together traditional Mediterranean elements like feta cheese, olive oil, herbs, roasted vegetables, and lemon to create a dip that is both delicious and visually beautiful.

Unlike traditional heavy dips, this Whipped Feta Dip has a light yet creamy texture. The feta cheese provides a rich salty flavor, while Greek yogurt makes the dip smooth and balanced. Roasted vegetables add sweetness, depth, and a beautiful contrast to the creamy base.

This recipe is perfect for family gatherings, holiday appetizers, healthy snacks, brunch tables, or as a flavorful addition to Mediterranean meals. Serve it with warm pita bread, crackers, fresh vegetables, toasted bread, or as a spread for sandwiches and wraps.

The best part about this recipe is that it looks restaurant-quality but requires simple ingredients and easy preparation. With fresh herbs, roasted vegetables, and creamy whipped feta, this Mediterranean dip can quickly become one of your favorite homemade appetizers.

Preparation Time: 20 minutes

Roasting Time: 25 minutes

Total Time: 45 minutes

Servings: 6 to 8 servings

Ingredients for Whipped Feta Mediterranean Dip

Creating the Creamy Feta Base

For the creamy dip base, you will need:

8 ounces of good quality feta cheese
½ cup Greek yogurt
3 tablespoons extra virgin olive oil
2 garlic cloves
2 tablespoons fresh lemon juice
1 teaspoon lemon zest
¼ teaspoon black pepper
2 tablespoons fresh parsley

The combination of feta cheese and Greek yogurt creates a smooth and creamy texture. Olive oil adds richness, while lemon and garlic provide freshness and a beautiful Mediterranean aroma.

Ingredients for Roasted Vegetables

For the roasted vegetable topping, use:

1 red bell pepper sliced into strips
1 yellow bell pepper sliced
1 small zucchini chopped into pieces
1 cup cherry tomatoes
1 small red onion sliced
2 tablespoons olive oil
1 teaspoon dried oregano
½ teaspoon paprika
½ teaspoon sea salt
¼ teaspoon black pepper

These vegetables add natural sweetness, color, and texture to the dip. Roasting brings out their natural flavors and creates a delicious contrast with the creamy feta mixture.

For Garnishing

Use:

Fresh basil leaves
Fresh parsley
Fresh dill
Extra feta cheese
Crushed black pepper
Chili flakes if desired
A drizzle of olive oil for the final presentation.

Instructions

Preparing the Roasted Mediterranean Vegetables

Start by preparing the vegetables because they need time to roast and develop their flavor.

Preheat your oven to 425°F (220°C).

Place the sliced bell peppers, zucchini, cherry tomatoes, and red onion on a large baking tray.

Drizzle olive oil over the vegetables and add oregano, paprika, salt, and black pepper.

Mix everything gently until all vegetables are evenly coated with seasoning.

Spread the vegetables into a single layer so they roast properly instead of steaming.

Bake for 20 to 25 minutes until the vegetables become tender, slightly caramelized, and golden around the edges.

Roasting helps concentrate the natural sweetness of vegetables and gives the dip a deeper Mediterranean flavor.

Allow the roasted vegetables to cool slightly before adding them to the whipped feta.

Making the Whipped Feta Dip Recipe

Creating a Smooth and Flavorful Texture

While the vegetables are roasting, prepare the creamy feta base.

Add feta cheese, Greek yogurt, olive oil, garlic, lemon juice, lemon zest, and black pepper into a food processor.

Blend everything until smooth and creamy.

The texture should be light, fluffy, and spreadable.

If the mixture feels too thick, add another tablespoon of olive oil or yogurt until you reach the desired consistency.

Taste the dip and adjust the seasoning according to your preference.

You can add extra lemon juice for more freshness or more garlic for a stronger flavor.

The key to a perfect Whipped Feta Dip is achieving a balance between creamy, salty, tangy, and fresh flavors.

Assembling the Mediterranean Dip

Combining Creamy Feta with Roasted Vegetables

Transfer the whipped feta mixture into a serving bowl or shallow dish.

Use the back of a spoon to create a smooth surface.

Arrange the roasted vegetables beautifully over the creamy feta layer.

Add fresh herbs like parsley, basil, and dill.

Finish with a drizzle of extra virgin olive oil and a sprinkle of chili flakes if you enjoy a little heat.

The colorful roasted vegetables on top make this dish attractive and perfect for serving guests.

Tips for the Best Whipped Feta Dip

Use High Quality Feta Cheese

The flavor of this dip depends heavily on the feta cheese. A good quality feta provides a creamy texture and authentic Mediterranean taste.

Roast Vegetables Properly

Do not overcrowd the baking tray because vegetables need space to caramelize and develop flavor.

Balance the Flavors

Feta is naturally salty, so taste before adding extra salt.

Lemon juice helps balance the richness and creates a fresh flavor.

Serve at the Right Temperature

Allow the dip to sit at room temperature for a few minutes before serving because the flavors become more noticeable.

Prepare Ahead of Time

The whipped feta mixture can be prepared a day before serving, making it convenient for gatherings.

Common Mistakes to Avoid

Using Too Much Salt

Feta cheese already contains salt, so additional seasoning should be added carefully.

Not Roasting Vegetables Enough

Lightly cooked vegetables will not provide the same sweet and smoky flavor.

Over blending with Too Much Liquid

Adding too much yogurt or oil can make the dip too thin.

Skipping Fresh Herbs

Fresh herbs add brightness and complete the Mediterranean flavor profile.

Recipe Variations

Spicy Mediterranean Whipped Feta Dip

Add roasted jalapeños, chili flakes, or red pepper flakes for a spicy version.

Creamy Garlic Herb Version

Increase garlic and add rosemary, thyme, and extra parsley for a stronger herb flavor.

Protein Rich Version

Add chickpeas or grilled chicken pieces on top to turn it into a complete meal.

Sun-Dried Tomato Whipped Feta

Blend sun-dried tomatoes into the feta mixture for a rich Mediterranean twist.

Low Carb Serving Option

Serve with cucumber slices, bell pepper strips, and celery instead of bread or crackers.

Storage Instructions

Refrigerator Storage

Store leftover Whipped Feta Dip in an airtight container.

It can stay fresh in the refrigerator for up to 4 days.

Before serving again, allow it to sit at room temperature for a few minutes and mix gently.

Roasted Vegetable Storage

Keep roasted vegetables separately in the refrigerator for up to 4 days.

Warm them slightly before adding to the dip if preferred.

Serving Suggestions

Perfect Pairings for Mediterranean Dip

This dip can be served with many different foods.

Enjoy it with warm pita bread, toasted sourdough, crackers, cucumber slices, carrots, bell peppers, or fresh salad.

It also works beautifully as a spread inside wraps, sandwiches, and Mediterranean bowls.

For a complete Mediterranean appetizer table, serve it alongside hummus, olives, roasted vegetables, and fresh herbs.

Health Benefits

Rich in Protein

Feta cheese and Greek yogurt provide protein that helps keep you satisfied.

Contains Healthy Fats

Extra virgin olive oil provides healthy fats commonly used in Mediterranean eating patterns.

Provides Vitamins and Minerals

Roasted vegetables provide important vitamins, minerals, and antioxidants.

Supports Balanced Eating

This recipe combines dairy, vegetables, herbs, and healthy fats into a balanced appetizer.

Fresh Mediterranean Ingredients

Garlic, lemon, herbs, and olive oil provide natural flavor without needing heavy sauces.

Nutrition Information

Approximate values per serving:

Calories: 220 kcal

Protein: 9g

Carbohydrates: 10g

Fiber: 3g

Fat: 16g

Saturated Fat: 7g

Sodium: 520mg

Frequently Asked Questions

Can I make Whipped Feta Dip ahead of time?

Yes, this recipe is perfect for preparation ahead. The creamy feta mixture can be stored in the refrigerator and topped with roasted vegetables before serving.

Can I use cream cheese instead of Greek yogurt?

Yes, cream cheese can create a richer texture, but Greek yogurt provides a lighter Mediterranean flavor.

How can I make this dip smoother?

Blend the feta mixture longer and add small amounts of olive oil until the texture becomes fluffy and creamy.

What vegetables work best for this recipe?

Bell peppers, zucchini, tomatoes, and onions are excellent choices, but you can also use eggplant, mushrooms, or roasted carrots.

Is this recipe suitable for meal preparation?

Yes, the dip stores well and can be enjoyed throughout the week as a snack or spread.

How long does Whipped Feta Dip last?

Whipped Feta Dip can be stored in an airtight container in the refrigerator for up to 4 days.

Conclusion

This Whipped Feta Dip with roasted vegetables and fresh herbs is a perfect example of how simple Mediterranean ingredients can create an impressive and flavorful dish. The creamy feta base, sweet roasted vegetables, fresh herbs, and bright lemon flavors come together beautifully.

Whether you serve it at a gathering, enjoy it as a healthy snack, or use it as a spread for everyday meals, this Mediterranean-inspired recipe delivers incredible taste and presentation.

With its creamy texture, vibrant colors, and fresh ingredients, this Whipped Feta Dip is a recipe that brings the flavors of the Mediterranean kitchen straight to your table.

Air Fryer Parmesan Broccoli Bites

Crispy Air Fryer Parmesan Broccoli Bites with golden edges, grated Parmesan, parsley, and dipping sauce

Air Fryer Parmesan Broccoli Bites

These Air Fryer Parmesan Broccoli Bites turn simple broccoli into crispy, cheesy little bites with a tender center. They are easy to prepare, use everyday ingredients, and cook quickly in the air fryer.

Fresh broccoli is chopped into small pieces, mixed with Parmesan, breadcrumbs, egg, and simple seasonings, then shaped into bite-size portions. The air fryer gives them golden edges without the need for deep frying.

Serve these broccoli bites as a vegetable side, snack, appetizer, or easy addition to a family dinner. They also pair well with ranch, marinara, garlic yogurt sauce, or a creamy dipping sauce.

Why You’ll Love This Recipe

  • Crispy outside: The air fryer creates golden edges with a light crunch.
  • Tender inside: Finely chopped broccoli keeps the center soft and flavorful.
  • Cheesy flavor: Parmesan adds a rich, savory taste.
  • Easy ingredients: Most items are common pantry and refrigerator staples.
  • Quick cooking: The bites are ready in less time than many baked vegetable snacks.
  • Kid-friendly: The small shape and cheesy coating make broccoli more approachable.
  • Versatile: Serve them as a side dish, appetizer, snack, or meatless option.
  • Easy to customize: Add herbs, spices, or another cheese to change the flavor.

Ingredients You’ll Need

For the Broccoli Bites

  • 3 cups fresh broccoli florets
  • ½ cup finely grated Parmesan cheese
  • ½ cup plain panko breadcrumbs
  • 1 large egg
  • 2 tablespoons finely chopped onion
  • 1 clove garlic, minced
  • ½ teaspoon garlic powder
  • ½ teaspoon Italian seasoning
  • ¼ teaspoon paprika
  • ¼ teaspoon black pepper
  • ¼ teaspoon salt
  • 1 tablespoon olive oil
  • Cooking spray

For Serving

  • Grated Parmesan, optional
  • Fresh parsley, optional
  • Lemon wedges, optional
  • Ranch dressing
  • Marinara sauce
  • Garlic yogurt dip

Step-by-Step Instructions

1. Prepare the Broccoli

Wash the broccoli florets and pat them dry.

Cut the broccoli into small pieces. You can use a sharp knife or pulse the florets briefly in a food processor.

Do not puree the broccoli. Small pieces give the bites better texture and help them hold their shape.

2. Steam or Blanch the Broccoli

Bring a small pot of water to a boil.

Add the broccoli and cook for about 2 minutes.

Drain immediately and transfer the broccoli to a bowl of cold water.

Drain again and squeeze out as much moisture as possible.

You can also steam the broccoli until just tender.

The broccoli should be softened but not mushy.

3. Remove Excess Moisture

Place the cooked broccoli on a clean kitchen towel or several layers of paper towels.

Press gently to remove excess water.

This step is important because wet broccoli can make the mixture too soft and prevent the bites from becoming crisp.

4. Combine the Ingredients

Add the chopped broccoli to a large mixing bowl.

Add Parmesan, panko breadcrumbs, egg, onion, garlic, garlic powder, Italian seasoning, paprika, black pepper, salt, and olive oil.

Mix until the ingredients are evenly combined.

The mixture should hold together when pressed between your fingers.

5. Adjust the Mixture

If the mixture feels too wet, add another 1–2 tablespoons of panko.

If it feels too dry and does not hold together, add a small amount of beaten egg.

Avoid adding too much liquid because a firm mixture produces better-shaped bites.

6. Shape the Broccoli Bites

Scoop about 1½ tablespoons of the mixture into your hands.

Press and shape it into a small round or oval bite.

Continue until all the mixture has been used.

Keep the pieces similar in size so they cook evenly.

7. Chill the Bites

Place the shaped bites on a plate or small baking sheet.

Refrigerate them for about 15 minutes.

Chilling helps the bites firm up and reduces the chance of them breaking apart during cooking.

8. Preheat the Air Fryer

Preheat the air fryer to 375°F (190°C) for about 3 minutes.

Lightly spray the basket with cooking spray.

A preheated basket helps the outside begin crisping quickly.

9. Arrange the Broccoli Bites

Place the bites in the air fryer basket in a single layer.

Leave space between each piece.

Do not overcrowd the basket because proper airflow helps create crisp, golden edges.

Cook in batches if necessary.

10. Air Fry Until Golden

Lightly spray the tops with cooking spray.

Air fry at 375°F for 10–14 minutes.

Carefully flip the bites around the halfway point.

Continue cooking until both sides are golden brown and the edges look crisp.

11. Check for Doneness

The broccoli bites should feel firm on the outside and hold their shape when lifted.

If you want a deeper golden crust, cook for another 1–2 minutes.

Keep an eye on the Parmesan during the final minutes because it can brown quickly.

12. Finish and Serve

Transfer the cooked bites to a serving plate.

Sprinkle with a little extra Parmesan and fresh parsley if desired.

Serve warm with your favorite dipping sauce.

Tips for Extra Crispy Broccoli Bites

  • Remove excess water: Moisture is one of the main reasons vegetable bites become soft.
  • Use panko: Panko creates a lighter and crunchier coating than fine breadcrumbs.
  • Grate Parmesan finely: Fine cheese distributes more evenly through the mixture.
  • Keep the bites small: Smaller portions cook more evenly and develop better browning.
  • Chill before cooking: A short chill helps the bites maintain their shape.
  • Don’t overcrowd: Air needs room to circulate around each piece.
  • Spray lightly with oil: A small amount helps the exterior turn golden.
  • Flip halfway: This gives both sides an even texture.

How to Make the Bites Without Steaming

You can use raw broccoli if you chop it very finely.

Pulse the florets in a food processor until they resemble small crumbs, then mix them directly with the other ingredients.

Raw broccoli produces a slightly firmer texture, while briefly cooked broccoli creates a softer center.

Easy Variations

Cheddar Broccoli Bites

Replace half of the Parmesan with finely shredded sharp cheddar for a stronger cheesy flavor.

Garlic Herb Broccoli Bites

Add extra minced garlic, dried parsley, and a small amount of dried basil to the mixture.

Spicy Broccoli Bites

Add ¼ teaspoon crushed red pepper flakes or cayenne pepper for extra heat.

Mozzarella Broccoli Bites

Mix a small amount of shredded mozzarella into the mixture for a softer, stretchy cheese texture.

Lemon Parmesan Bites

Add ½ teaspoon fresh lemon zest to the mixture and serve with lemon wedges.

Ranch Broccoli Bites

Add 1 teaspoon ranch seasoning to the mixture and serve with ranch dressing.

What to Serve With Broccoli Bites

These crispy vegetable bites work with many meals and sauces.

Try serving them with:

  • Grilled chicken
  • Air fryer salmon
  • Turkey burgers
  • Baked chicken breast
  • Roasted potatoes
  • Tomato soup
  • Vegetable soup
  • Garden salad
  • Pasta
  • Rice bowls

For a snack or appetizer, serve them with ranch, marinara, garlic aioli, or a lemon yogurt dip.

For dinner, pair them with grilled protein and a fresh salad for a simple balanced plate.

How to Store Leftovers

Allow the cooked bites to cool completely before storing them.

Place them in an airtight container and refrigerate for up to 3 days.

Keep them in a single layer when possible to prevent the crispy coating from becoming too soft.

How to Reheat Broccoli Bites

The air fryer is the best option for reheating these bites.

Preheat the air fryer to 350°F (175°C) and cook the refrigerated bites for about 3–5 minutes.

Turn them once during reheating if needed.

Avoid using the microwave when possible because it can make the breadcrumb coating soft.

Can You Freeze Them?

Yes. Freeze the shaped, uncooked bites on a parchment-lined tray until firm.

Transfer them to a freezer-safe container or bag and freeze for up to 2 months.

You can cook them from frozen, adding a few extra minutes to the cooking time.

Check the center before serving to make sure the bites are fully heated.

Common Mistakes to Avoid

Using wet broccoli: Excess water can make the mixture loose and difficult to shape.

Making large bites: Large portions take longer to cook and may not become crisp before the center is heated.

Skipping the chill: Soft bites can break apart more easily during cooking.

Overcrowding the basket: Too many pieces reduce airflow and can lead to uneven browning.

Adding too much cheese: Excess cheese can melt out before the broccoli mixture becomes firm.

Overcooking: Cooking too long can make the bites dry and overly brown.

Frequently Asked Questions

Can I use frozen broccoli?

Yes. Thaw it completely and squeeze out as much moisture as possible before chopping and mixing.

How long do broccoli bites take in an air fryer?

They usually take 10–14 minutes at 375°F, depending on their size and your air fryer.

Why are my broccoli bites falling apart?

The mixture may contain too much moisture or need more breadcrumbs to hold together properly.

Can I make these without breadcrumbs?

Yes. Use finely ground oats or almond flour as an alternative, adjusting the amount until the mixture holds together.

Can I prepare broccoli bites ahead of time?

Yes. Shape them up to one day ahead and refrigerate them in a covered container until ready to cook.

What dipping sauce goes best with broccoli bites?

Ranch, marinara, garlic aioli, and lemon yogurt sauce all pair well with the Parmesan flavor.

Can I freeze cooked broccoli bites?

Yes. Freeze cooled bites in an airtight freezer-safe container for up to 2 months and reheat them in the air fryer.

Can I use another cheese instead of Parmesan?

Yes. Sharp cheddar, mozzarella, or Pecorino Romano can be used for different flavors and textures.

Final Thoughts

These Air Fryer Parmesan Broccoli Bites are a simple way to turn fresh broccoli into a crispy, cheesy snack or side dish. The combination of Parmesan, panko, garlic, and Italian seasoning gives the bites plenty of flavor without making the recipe complicated.

For the best texture, remove as much moisture as possible from the broccoli, keep the bites evenly sized, and avoid overcrowding the air fryer basket.

Serve them hot with ranch, marinara, or a creamy dipping sauce, or add them beside your favorite chicken, fish, or vegetable dinner.

Air Fryer Pumpkin Pie Bites

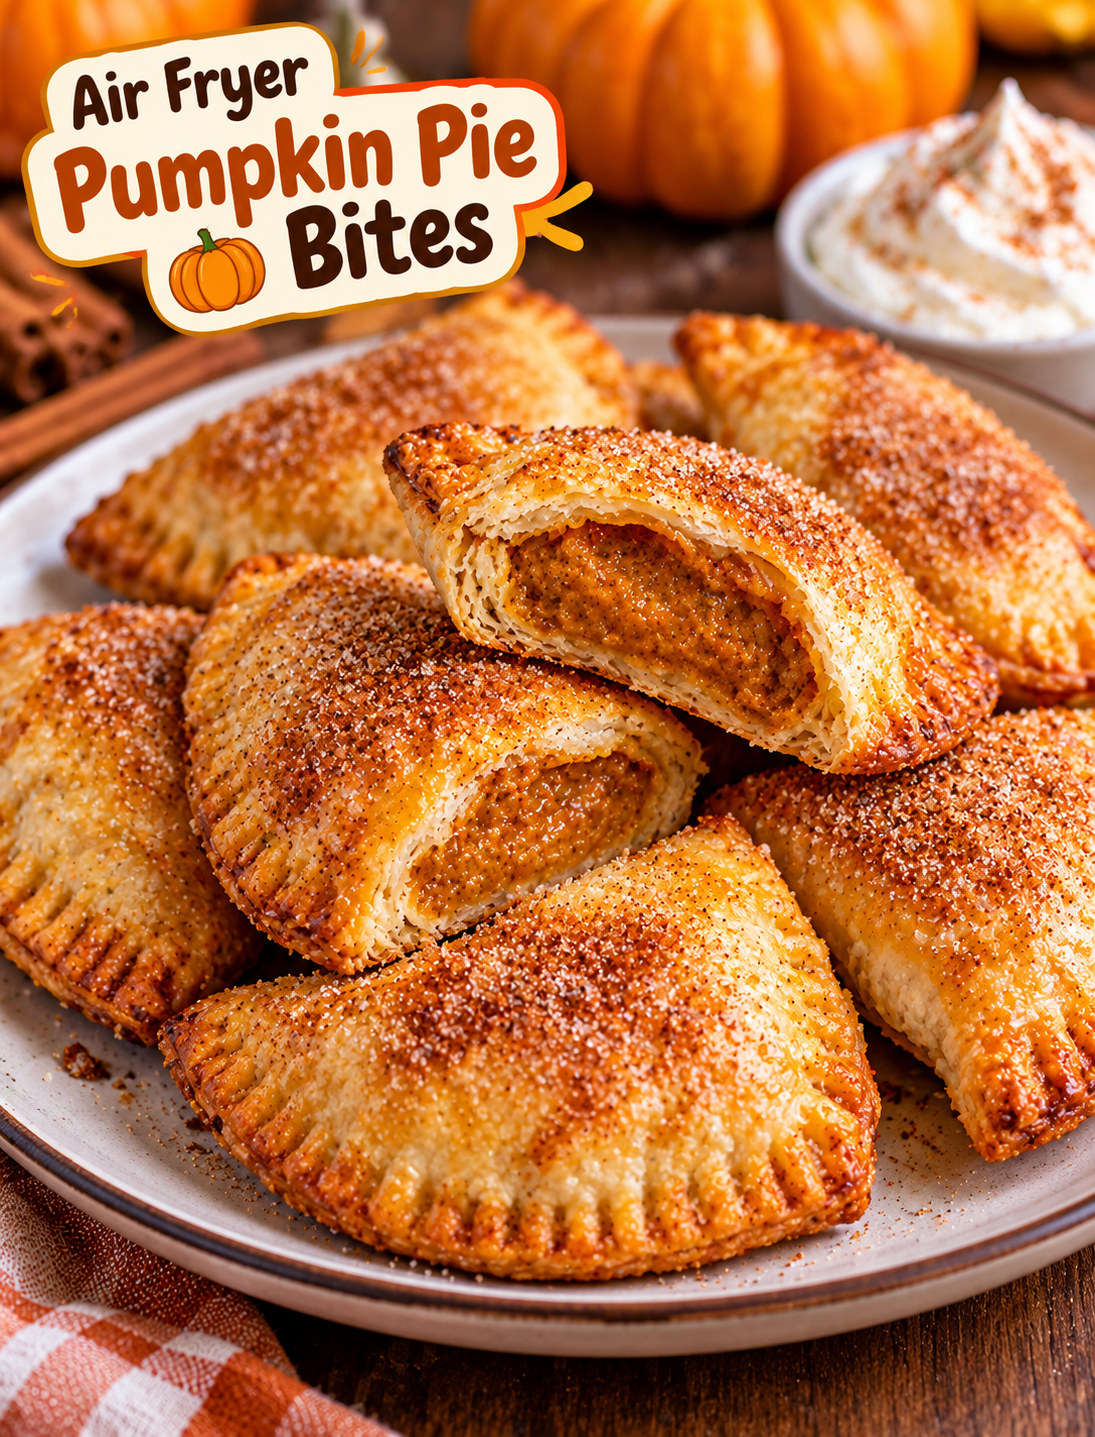
Air fryer pumpkin pie bites with golden flaky crust, spiced pumpkin filling, cinnamon sugar, and whipped cream

Air Fryer Pumpkin Pie Bites

These Air Fryer Pumpkin Pie Bites bring the cozy flavor of classic pumpkin pie into small, golden pastry bites. Each piece has a flaky crust, creamy pumpkin filling, and warm fall spices.

The air fryer helps the pastry turn crisp and golden without needing a full-size pie. These little treats are easy to prepare, simple to serve, and perfect for fall gatherings, Thanksgiving, holiday parties, or an afternoon dessert.

The filling uses pumpkin puree, brown sugar, pumpkin pie spice, vanilla, and a few simple ingredients. The bites cook quickly and can be finished with powdered sugar, whipped cream, or a drizzle of caramel.

Why You’ll Love These Pumpkin Pie Bites

  • Quick dessert: Small pastry bites cook much faster than a traditional pie.
  • Classic fall flavor: Pumpkin, cinnamon, nutmeg, and vanilla create a familiar pumpkin pie taste.
  • Easy portions: Each bite is ready to serve without slicing a whole pie.
  • Air fryer friendly: The pastry becomes golden and crisp with a light coating of egg wash.
  • Great for gatherings: They are easy to arrange on a dessert tray.
  • Make-ahead friendly: Prepare the filling and pastry pieces ahead of time.
  • Easy to customize: Add nuts, caramel, chocolate, or extra spices to change the flavor.

Ingredients You’ll Need

 Pumpkin Filling

  • ½ cup pumpkin puree
  • ¼ cup packed brown sugar
  • 1 large egg yolk
  • 2 tablespoons evaporated milk or heavy cream
  • 1 teaspoon vanilla extract
  • 1 teaspoon pumpkin pie spice
  • ½ teaspoon ground cinnamon
  • ⅛ teaspoon ground nutmeg
  • Pinch of salt

For the Pastry

  • 1 package refrigerated pie crusts, about 14–16 ounces
  • 1 large egg
  • 1 tablespoon water
  • 1 tablespoon granulated sugar
  • ½ teaspoon ground cinnamon

Serving

  • Powdered sugar
  • Whipped cream
  • Caramel sauce
  • Chopped pecans, optional
  • Extra cinnamon, optional

Step-by-Step Instructions

1. Prepare the Pumpkin Filling

Add the pumpkin puree, brown sugar, egg yolk, evaporated milk, vanilla, pumpkin pie spice, cinnamon, nutmeg, and salt to a bowl.

Whisk until the mixture is smooth and evenly combined.

The filling should be thick enough to sit on the pastry without spreading too much.

2. Chill the Filling

Cover the bowl and refrigerate the pumpkin mixture for about 15–20 minutes.

Chilling makes the filling easier to portion and helps prevent it from spreading during assembly.

3. Prepare the Pie Crust

Remove the refrigerated pie crust from its package and place it on a lightly floured surface.

If the crust feels very cold or stiff, let it sit for a few minutes so it becomes easier to work with.

4. Cut the Pastry

Use a 3-inch round cookie cutter or the rim of a small glass to cut circles from the pie crust.

Gather the scraps, gently press them together, and roll them again to cut additional circles.

Avoid overworking the dough because too much handling can make the crust less tender.

5. Add the Pumpkin Filling

Place about 1 teaspoon of chilled pumpkin filling in the center of each pastry circle.

Do not overfill the dough.

Leaving a clean border around the filling gives you enough space to seal each bite securely.

6. Fold and Seal

Fold each pastry circle in half over the filling to create a small half-moon.

Press the edges together with your fingers.

Then use a fork to crimp the edges firmly.

Make sure there are no open gaps where the filling could escape.

7. Prepare the Egg Wash

Whisk the egg with 1 tablespoon of water.

Lightly brush the tops of the pumpkin pie bites with the egg wash.

The egg wash helps the pastry develop a glossy golden-brown finish.

8. Add Cinnamon Sugar

Mix the granulated sugar and cinnamon in a small bowl.

Sprinkle a light amount over the egg-washed pastry.

This adds a subtle crunchy topping and extra cinnamon flavor.

9. Preheat the Air Fryer

Preheat your air fryer to 350°F (175°C) for about 3 minutes.

A preheated basket helps the pastry begin cooking immediately and promotes even browning.

10. Arrange the Bites

Lightly spray the air fryer basket with cooking spray if needed.

Place the pumpkin pie bites in a single layer.

Leave a little space between each piece so hot air can circulate around the pastry.

Avoid stacking the bites.

11. Air Fry Until Golden

Air fry at 350°F for 7–10 minutes.

Check the bites around the 7-minute mark.

They are ready when the pastry is puffed and golden brown and the edges are firmly sealed.

Cooking time can vary slightly between air fryer models.

12. Cool Before Serving

Carefully remove the bites from the basket and place them on a cooling rack or plate.

Let them cool for about 5 minutes.

The pumpkin filling will be very hot immediately after cooking, so allow enough time before serving.

13. Add Your Favorite Toppings

Dust the cooled bites with powdered sugar.

For a richer dessert, serve them with whipped cream and a small drizzle of caramel sauce.

Chopped pecans also add a pleasant crunch and pair well with the pumpkin filling.

Tips for Crispy Pumpkin Pie Bites

  • Keep the filling chilled: Cold filling is easier to control during assembly.
  • Don’t overfill: Too much pumpkin mixture can leak through the pastry.
  • Seal the edges well: Firm crimping keeps the filling inside.
  • Use a light egg wash: Too much can make the surface overly wet.
  • Don’t overcrowd the basket: Proper airflow helps the pastry crisp.
  • Check early: Small pastry bites can brown quickly.
  • Cool before topping: Powdered sugar stays cleaner when the pastry is not piping hot.

How to Keep the Filling From Leaking

The most important step is controlling the amount of filling.

Use about 1 teaspoon per pastry circle and keep the filling away from the outer edge.

Press the pastry together firmly before crimping with a fork.

If the dough becomes too warm or soft while assembling, place the prepared bites in the refrigerator for 10 minutes before air frying.

Easy Variations

Caramel Pumpkin Pie Bites

Add a tiny drizzle of caramel sauce over the finished bites.

Use only a small amount so the pastry remains crisp.

Pecan Pumpkin Pie Bites

Add finely chopped pecans to the pumpkin filling for a nutty texture.

Keep the pieces small so they do not interfere with sealing the pastry.

Maple Pumpkin Pie Bites

Replace half of the brown sugar with pure maple syrup.

Reduce the evaporated milk slightly if the filling becomes too loose.

Chocolate Pumpkin Pie Bites

Add a few mini chocolate chips to the center before sealing the pastry.

Dark or semi-sweet chocolate works especially well with pumpkin spices.

Extra-Spiced Pumpkin Bites

Add a small pinch of ground ginger and cloves to the filling for a stronger warm-spice flavor.

What to Serve With Pumpkin Pie Bites

These small desserts pair well with simple toppings and warm drinks.

Try serving them with:

  • Vanilla ice cream
  • Whipped cream
  • Caramel sauce
  • Powdered sugar
  • Chopped pecans
  • Cinnamon whipped cream
  • Hot coffee
  • Chai tea
  • Apple cider

For Thanksgiving or holiday gatherings, arrange the bites on a large platter with small bowls of caramel and whipped cream for dipping.

How to Store Leftovers

Allow the pumpkin pie bites to cool completely before storing them.

Place them in an airtight container and refrigerate for up to 3 days.

For the best texture, reheat them in the air fryer at 325°F for 2–4 minutes.

Avoid reheating them for too long because the pastry can become dry.

If you are serving them at a gathering, warm only the amount you plan to eat.

Can You Make Them Ahead?

Yes. You can assemble the unbaked bites several hours ahead and keep them covered in the refrigerator.

When ready to cook, brush them with egg wash, add cinnamon sugar, and place them directly into the preheated air fryer.

For the best pastry texture, avoid keeping unbaked assembled bites refrigerated for more than one day.

Frequently Asked Questions

Can I use canned pumpkin pie filling?

Use plain pumpkin puree rather than prepared pumpkin pie filling because the recipe already includes sugar and spices.

How long do pumpkin pie bites take in an air fryer?

They usually take about 7–10 minutes at 350°F, depending on their size and your air fryer model.

Can I use homemade pie crust?

Yes. Homemade pie crust works well as long as it is rolled thin enough to fold and seal easily.

Why did my pumpkin filling leak out?

Overfilling, weakly sealed edges, or overly warm pastry can cause the filling to escape during cooking.

Can I freeze pumpkin pie bites?

Yes. Freeze fully cooled baked bites in an airtight freezer-safe container for up to 2 months.

Can I make these without egg wash?

Yes. The egg wash can be replaced with a light brushing of milk, although the pastry may not become as glossy.

What pumpkin puree should I use?

Use plain canned pumpkin puree rather than pumpkin pie mix for better control over the sweetness and spices.

Can I reheat pumpkin pie bites in the air fryer?

Yes. Reheat them at 325°F for 2–4 minutes until warm and crisp.

Final Thoughts

These Air Fryer Pumpkin Pie Bites are a simple way to enjoy classic pumpkin pie flavor without making a full-size dessert. The flaky pastry, creamy spiced pumpkin filling, and cinnamon-sugar finish make each bite warm, crisp, and satisfying.

They are especially useful when you want an easy fall dessert for Thanksgiving, holiday parties, family gatherings, or a weekend treat. Serve them warm with whipped cream, vanilla ice cream, or caramel sauce for an extra special finish.

Lentil Vegetable Soup

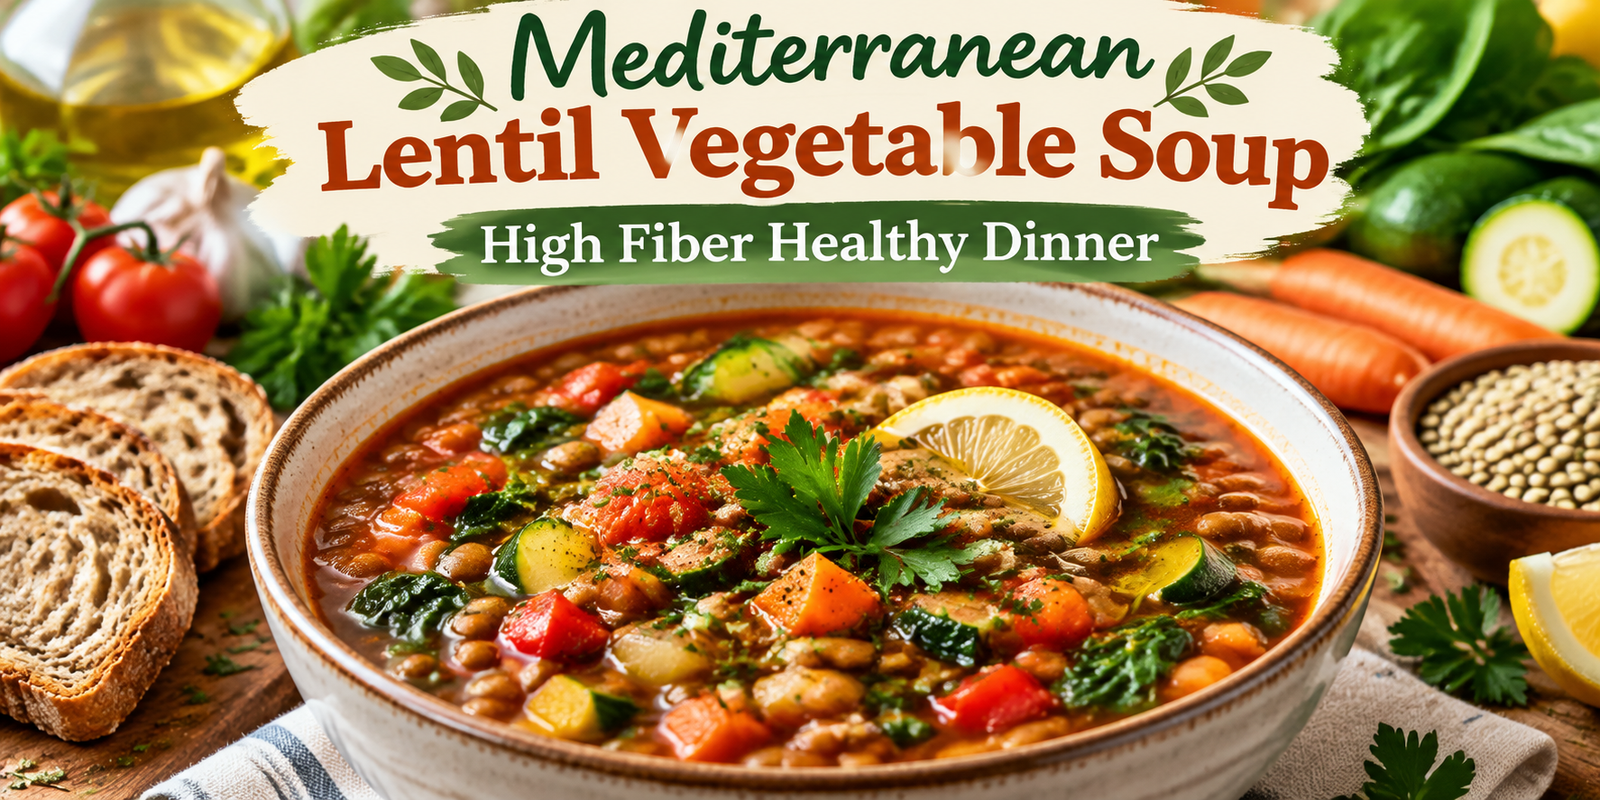
Mediterranean Lentil Vegetable Soup with fresh vegetables, lentils, spinach, and herbs for a high fiber healthy dinner

Mediterranean Lentil Vegetable Soup (High Fiber Healthy Dinner)

A warm bowl of Lentil Vegetable Soup is the perfect combination of comfort, nutrition, and amazing flavor. This Mediterranean-inspired soup is packed with protein-rich lentils, fresh vegetables, herbs, and wholesome ingredients that make it a satisfying dinner option for the entire family.

Inspired by the traditional Mediterranean diet, this soup focuses on simple ingredients that provide maximum nutrition. Lentils are naturally rich in fiber and plant-based protein, while vegetables like carrots, zucchini, tomatoes, and spinach add vitamins, minerals, and natural flavors.

Whether you are looking for a healthy weeknight meal, a meal-prep recipe, or a comforting soup for colder days, this Lentil Vegetable Soup is an excellent choice. It is naturally vegetarian, budget-friendly, easy to prepare, and full of Mediterranean goodness.

If you enjoy hearty and nutritious soups, you can also try our Lentil Vegetable Soup, another fiber-rich Mediterranean-inspired dinner packed with vegetables and plant-based protein.

Why You’ll Love This Lentil Vegetable Soup

There are many reasons this recipe can become a regular part of your healthy meal routine:

High in Fiber and Protein

Lentils are one of the best plant-based sources of protein and dietary fiber. Fiber helps support digestion and keeps you feeling full for longer, making this soup a satisfying dinner choice.

Packed With Vegetables

This soup contains colorful vegetables that provide important nutrients while creating a delicious natural flavor.

Mediterranean Diet Friendly

The Mediterranean diet focuses on vegetables, legumes, olive oil, herbs, and simple whole foods. This recipe follows those principles perfectly.

Easy One-Pot Meal

Everything cooks together in one pot, making preparation and cleanup simple.

Great for Meal Prep

The flavors become even better after resting, making it perfect for preparing ahead for busy days.

Ingredients for Lentil Vegetable Soup

Main Ingredients

Lentils

  • 2 cups green or brown lentils, rinsed well

Green and brown lentils work best because they maintain their shape while cooking and create a hearty texture.

Vegetables

  • 2 tablespoons extra virgin olive oil
  • 1 large onion, finely chopped
  • 3 garlic cloves, minced
  • 2 medium carrots, diced
  • 2 celery stalks, chopped
  • 1 medium zucchini, diced
  • 1 red bell pepper, chopped
  • 2 cups fresh spinach leaves
  • 1 can (14 oz) diced tomatoes
  • 2 tablespoons tomato paste

Herbs and Spices

  • 1 teaspoon dried oregano
  • 1 teaspoon dried thyme
  • 1 teaspoon ground cumin
  • ½ teaspoon smoked paprika
  • 1 bay leaf
  • Salt according to taste
  • Black pepper according to taste

Liquid

  • 6 cups vegetable broth

For Serving

  • Fresh parsley
  • Fresh lemon juice
  • Extra virgin olive oil drizzle
  • Crumbled feta cheese (optional)

How to Make Lentil Vegetable Soup

Step 1: Prepare the Vegetable Base

Start by heating olive oil in a large soup pot over medium heat.

Add chopped onion, carrots, and celery. Cook for about 5–7 minutes until the vegetables become soft and the onion turns slightly translucent.

Add minced garlic and cook for another 30 seconds. Garlic adds a beautiful aroma and enhances the Mediterranean flavor of the soup.

Step 2: Add Tomatoes and Mediterranean Seasonings

Add tomato paste and diced tomatoes to the pot. Stir everything together.

Now add oregano, thyme, cumin, smoked paprika, salt, and black pepper.

Cook the mixture for 2–3 minutes. This allows the herbs and spices to release their flavors and creates a rich base for the soup.

Step 3: Cook the Lentils

Add rinsed lentils and vegetable broth into the pot.

Add one bay leaf and bring the soup to a gentle boil.

Reduce the heat, cover partially, and allow it to simmer for 30–35 minutes.

Stir occasionally to prevent the lentils from sticking to the bottom.

The lentils should become tender but still maintain some texture.

Step 4: Add Remaining Vegetables

Once the lentils are almost cooked, add zucchini and red bell pepper.

Continue cooking for another 8–10 minutes until the vegetables become tender.

Finally, add fresh spinach and cook for 2 minutes until it wilts into the soup.

Step 5: Finish and Serve

Remove the bay leaf from the soup.

Taste and adjust seasoning if needed.

Add fresh lemon juice before serving. The lemon brightens the flavors and balances the richness of the lentils.

Serve warm with fresh parsley, a drizzle of olive oil, and optional feta cheese.

Tips for Making the Best Lentil Vegetable Soup

Use Quality Olive Oil

Extra virgin olive oil adds authentic Mediterranean flavor and enhances the taste of vegetables and herbs.

Do Not Overcook Vegetables

Adding vegetables at different cooking times helps maintain their texture and flavor.

Make It Creamier

For a thicker soup, blend one or two cups of the cooked soup and mix it back into the pot.

This creates a creamy texture without adding cream.

Add Extra Protein

You can add chickpeas, white beans, or extra lentils for more protein.

Adjust the Thickness

If the soup becomes too thick, simply add more vegetable broth or warm water.

Variations of Lentil Vegetable Soup

Mediterranean Chickpea Version

Add one cup of chickpeas for extra protein and texture.

Spicy Version

Add red chili flakes or cayenne pepper for a spicy kick.

Creamy Version

Blend more of the soup for a smoother restaurant-style texture.

Low-Carb Vegetable Version

Reduce the amount of lentils and add more low-carb vegetables like spinach, mushrooms, and zucchini.

How to Store Lentil Vegetable Soup

This soup is excellent for meal preparation.

Refrigerator Storage

Store leftover soup in an airtight container for up to 5 days.

Freezer Storage

Allow the soup to cool completely before freezing.

Store in freezer-safe containers for up to 3 months.

Reheating

Warm gently on the stovetop or microwave. Add a little broth if the soup becomes too thick.

Serving Suggestions

This Lentil Vegetable Soup pairs beautifully with:

  • Whole grain bread
  • Mediterranean salad
  • Roasted vegetables
  • Fresh herbs
  • Greek yogurt topping
  • Homemade garlic toast

It can be served as a complete dinner because it already contains protein, fiber, and vegetables.

If you enjoy comforting homemade soups, you can also try our Spicy Dumpling Soup recipe for another flavorful and satisfying meal.

Nutrition Information (Approximate Per Serving)

Serving Size: 1 bowl

  • Calories: 320 kcal
  • Protein: 18g
  • Carbohydrates: 52g
  • Fiber: 17g
  • Fat: 8g

Nutrition values may vary depending on ingredients and serving sizes.

Frequently Asked Questions

Is Lentil Vegetable Soup healthy?

Yes, this soup is highly nutritious because it contains fiber-rich lentils, vegetables, and healthy olive oil.

Can I make Lentil Vegetable Soup vegan?

Yes. The basic recipe is completely vegan. Simply avoid adding feta cheese.

Which lentils are best for this recipe?

Green or brown lentils are ideal because they keep their shape and create a hearty texture.

Can I prepare this soup ahead of time?

Yes. In fact, the flavor often improves after a day because the herbs and spices combine better.

Conclusion

This Mediterranean Lentil Vegetable Soup is a simple, healthy, and delicious dinner recipe that proves nutritious food can also be comforting and flavorful.

With fiber-rich lentils, fresh vegetables, aromatic herbs, and Mediterranean ingredients, this soup is perfect for anyone wanting a wholesome meal that supports a balanced lifestyle.

Make this easy one-pot recipe for your next dinner and enjoy a bowl full of warmth, nutrition, and Mediterranean flavor.

Air Fryer Crispy Tandoori Cauliflower

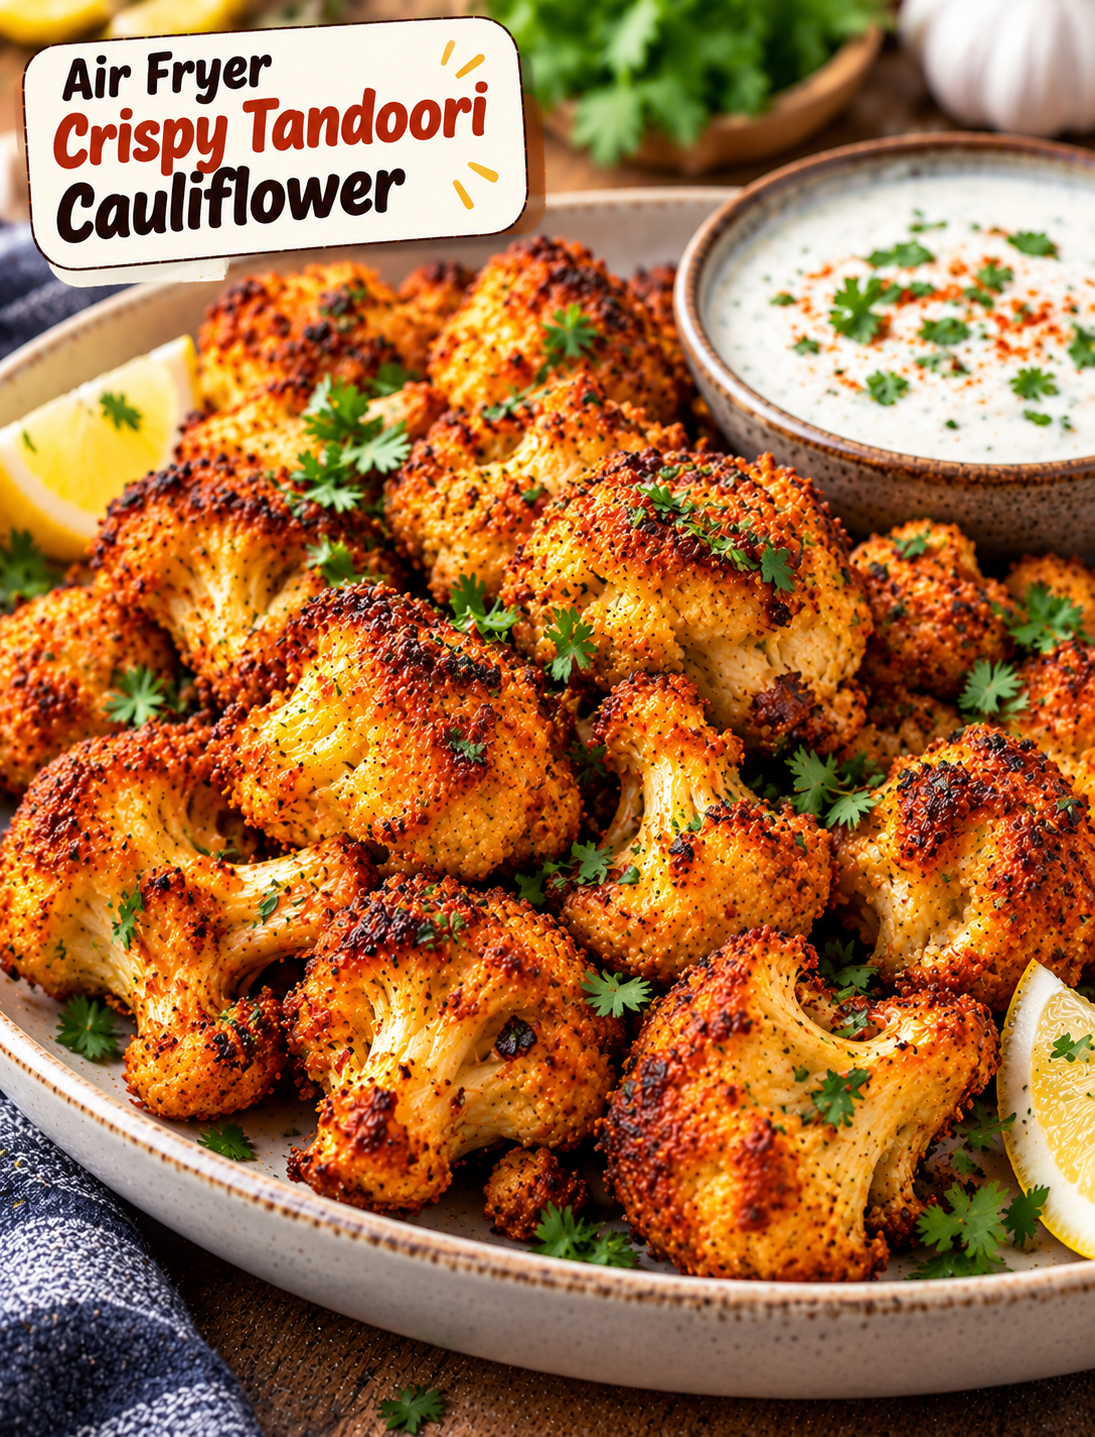
Crispy air fryer tandoori cauliflower with golden spiced edges, cilantro, and lemon wedges

Air Fryer Crispy Tandoori Cauliflower

If you love bold Indian-inspired flavors and crispy vegetables, this Air Fryer Crispy Tandoori Cauliflower is an easy recipe to add to your dinner rotation. Tender cauliflower florets are coated in a spiced yogurt marinade, then air fried until the edges become browned, crisp, and slightly charred.

The air fryer gives this cauliflower a roasted texture without deep frying. It also makes the recipe quick enough for a weeknight meal, snack, appetizer, or side dish.

The marinade combines Greek yogurt, lemon juice, ginger, garlic, paprika, cumin, coriander, and garam masala for a rich tandoori-style flavor. A small amount of cornstarch helps create a crisp coating while the cauliflower stays tender inside.

Why You’ll Love This Recipe

  • Crispy texture: Air frying creates browned and crunchy edges without deep frying.
  • Bold flavor: Tandoori spices add warmth, smokiness, and a mild kick.
  • Easy preparation: The marinade comes together in one bowl.
  • Weeknight friendly: The cauliflower cooks quickly after marinating.
  • Versatile: Serve it as a side dish, appetizer, snack, or meatless meal.
  • Less oil: You only need a light coating of oil for browning.
  • Naturally vegetarian: The recipe works well for vegetarian meals and meat-free gatherings.
  • Easy to customize: Adjust the spice level and toppings to suit your taste.

Ingredients You’ll Need

For the Cauliflower

  • 1 large head cauliflower, cut into bite-size florets
  • ¾ cup plain Greek yogurt
  • 1 tablespoon lemon juice
  • 1 tablespoon olive oil
  • 1 tablespoon cornstarch
  • 1 teaspoon grated fresh ginger
  • 2 cloves garlic, finely minced
  • 1 teaspoon paprika
  • 1 teaspoon ground cumin
  • 1 teaspoon ground coriander
  • 1 teaspoon garam masala
  • ½ teaspoon turmeric
  • ½ teaspoon chili powder
  • ½ teaspoon salt
  • ¼ teaspoon black pepper
  • ¼ teaspoon smoked paprika, optional
  • Cooking spray or a small amount of oil

For Serving

  • Fresh cilantro, chopped
  • Lemon wedges
  • Plain yogurt or raita
  • Sliced red onion, optional
  • Chaat masala, optional

Step-by-Step Instructions

1. Prepare the Cauliflower

Wash the cauliflower and dry it thoroughly with paper towels.

Cut it into small, evenly sized florets so the pieces cook at the same rate.

Patting the cauliflower dry is important because excess moisture can prevent the coating from becoming crisp.

2. Make the Tandoori Marinade

Add the Greek yogurt, lemon juice, olive oil, cornstarch, ginger, garlic, paprika, cumin, coriander, garam masala, turmeric, chili powder, salt, black pepper, and smoked paprika to a large bowl.

Stir until the mixture becomes smooth and evenly combined.

The yogurt adds moisture and tang, while the spices create the signature tandoori-style flavor.

3. Coat the Cauliflower

Add the dry cauliflower florets to the marinade.

Toss gently until every piece is covered with a thin, even layer.

Avoid adding an overly thick coating because too much yogurt mixture can make the cauliflower soft instead of crisp.

4. Marinate the Cauliflower

Cover the bowl and let the cauliflower marinate for at least 20 minutes.

For deeper flavor, refrigerate it for up to 2 hours.

If you are short on time, you can cook it after a short 10-minute rest, but a longer marinade gives the spices more time to flavor the florets.

5. Preheat the Air Fryer

Preheat your air fryer to 380°F (193°C) for about 3–5 minutes.

A preheated basket helps the coating start browning quickly and promotes a crisp exterior.

6. Arrange the Cauliflower

Lightly spray the air fryer basket with cooking spray.

Place the marinated cauliflower florets in a single layer.

Leave some space between the pieces so hot air can circulate around them.

Do not overcrowd the basket. Cook in batches if necessary.

7. Air Fry Until Crispy

Air fry the cauliflower at 380°F for 12–16 minutes.

Shake the basket or turn the florets halfway through cooking.

Continue cooking until the edges are golden brown and slightly charred.

The exact cooking time can vary depending on the size of the florets and your air fryer model.

8. Check for Doneness

The cauliflower should be tender when pierced with a fork, while the outside should have browned edges and a lightly crisp coating.

If you want darker, more roasted edges, air fry for another 2–3 minutes.

Watch closely during the final minutes because the spices can darken quickly.

9. Add Fresh Toppings

Transfer the cooked cauliflower to a serving plate.

Sprinkle with fresh cilantro and a small amount of chaat masala if desired.

Serve with lemon wedges so everyone can add fresh citrus flavor to their portion.

10. Serve Immediately

For the crispiest texture, serve the cauliflower while it is hot.

Pair it with mint yogurt, cucumber raita, or your favorite dipping sauce.

It also works well inside wraps, grain bowls, or naan sandwiches.

Tips for Extra Crispy Tandoori Cauliflower

  • Dry the cauliflower well: Water left on the florets can make the coating less crisp.
  • Use small florets: Smaller pieces cook faster and develop more browned edges.
  • Do not overcrowd: Air circulation is essential for crisping.
  • Use cornstarch: A small amount helps create a lighter, crispier coating.
  • Preheat the air fryer: Starting with a hot basket improves browning.
  • Flip halfway: Turning the pieces helps them cook evenly.
  • Avoid excessive marinade: A thin coating works better than a thick layer.
  • Serve immediately: Air-fried vegetables soften as they sit.

How to Make It Spicier

For a hotter version, increase the chili powder or add a pinch of cayenne pepper to the marinade.

You can also add finely chopped jalapeño or red chili before serving.

For a milder version, reduce the chili powder and use sweet paprika instead.

Easy Variations

Tandoori Cauliflower Bites

Cut the cauliflower into smaller florets and cook until deeply browned. These smaller bites are perfect for appetizers and party snacks.

Cheesy Tandoori Cauliflower

Sprinkle a small amount of shredded cheddar or Monterey Jack cheese over the cooked cauliflower. Return it to the air fryer for 1–2 minutes until the cheese melts.

Tandoori Cauliflower Wrap

Place the crispy cauliflower inside warm naan or a flatbread with lettuce, sliced onion, cucumber, and yogurt sauce.

Tandoori Cauliflower Bowl

Serve the roasted florets over cooked basmati rice or quinoa with cucumber, tomatoes, greens, and a spoonful of raita.

Extra Smoky Version

Add a little smoked paprika to the marinade for a deeper roasted flavor without needing a traditional clay tandoor.

What to Serve With Tandoori Cauliflower

This cauliflower pairs well with many simple sides and sauces.

Try serving it with:

  • Basmati rice
  • Garlic naan
  • Cucumber raita
  • Mint yogurt sauce
  • Fresh green salad
  • Roasted vegetables
  • Lentil soup
  • Chickpea curry
  • Mango chutney
  • Lemon wedges

For a light meal, combine the cauliflower with a fresh salad and yogurt-based dipping sauce.

For a more filling dinner, serve it with rice, naan, and a vegetable or lentil dish.

How to Store Leftovers

Allow the cooked cauliflower to cool before placing it in an airtight container.

Refrigerate leftovers for up to 3 days.

For the best texture, reheat the cauliflower in the air fryer at 350°F for 3–5 minutes.

Avoid reheating it in the microwave if you want to maintain the crisp edges because microwaving can make the coating soft.

Common Mistakes to Avoid

Using wet cauliflower: Extra water prevents the marinade from coating properly and reduces browning.

Overcrowding the basket: Too many florets trap steam and can leave the cauliflower soft.

Adding too much yogurt marinade: A heavy coating takes longer to crisp and can become soggy.

Skipping the preheat: A cold basket can delay browning and change the cooking time.

Cutting uneven florets: Large pieces may remain firm while small pieces become overcooked.

Walking away during the final minutes: The spice coating can brown quickly once the cauliflower is nearly finished.

Frequently Asked Questions

Can I make tandoori cauliflower without yogurt?

Yes. Use an unsweetened dairy-free yogurt or a thick plant-based yogurt as a substitute.

How long does cauliflower take in an air fryer?

At 380°F, bite-size florets usually take about 12–16 minutes, depending on their size and the air fryer.

Why is my cauliflower not crispy?

Excess moisture, too much marinade, overcrowding, or insufficient cooking time can prevent the coating from crisping.

Can I prepare the cauliflower ahead of time?

Yes. Marinate the cauliflower up to 2 hours ahead and keep it refrigerated until ready to air fry.

Can I use frozen cauliflower?

Fresh cauliflower gives the best texture, but frozen florets can work if thawed and dried thoroughly before marinating.

Is tandoori cauliflower spicy?

It can range from mild to hot depending on the chili powder and cayenne used in the marinade.

Can I reheat leftover tandoori cauliflower?

Yes. Reheat it in an air fryer at 350°F for 3–5 minutes to help restore some of the crisp texture.

What dipping sauce goes with tandoori cauliflower?

Mint yogurt, cucumber raita, garlic yogurt sauce, and mango chutney all pair well with the spiced cauliflower.

Final Thoughts

This Air Fryer Crispy Tandoori Cauliflower is an easy way to turn everyday cauliflower into a flavorful, crispy dish. The yogurt-based marinade keeps the florets seasoned and tender, while the air fryer creates browned edges with very little oil.

Serve it as an appetizer, side dish, snack, or meatless dinner with rice, naan, salad, or a cooling yogurt sauce. For the best results, keep the florets dry, avoid overcrowding the basket, and serve the cauliflower while it is hot and crisp.