Simple and Natural Solution for Joint Pain

Homemade gelatin drink with lemon for natural joint health and wellness

Simple and Natural Solution for Joint Pain

Joint pain can make simple daily tasks feel harder. Walking, climbing stairs, getting out of a chair, or bending down may become uncomfortable when your knees, hips, or back feel stiff.

Many people look for simple ways to support healthy joints at home. Gelatin is one food ingredient that has attracted attention because it comes from collagen, a structural protein found in connective tissues.

Research on oral collagen supplements suggests they may provide modest improvements in pain and physical function for people with osteoarthritis. However, most studies have examined specific collagen products rather than a simple homemade gelatin drink, so gelatin should be viewed as a supportive food choice, not a proven treatment for joint pain.

Here is a simple way to prepare a gelatin drink and include it as part of a balanced approach to joint health.

Why Gelatin May Support Joint Health

Gelatin is made by processing collagen from animal connective tissues. It contains amino acids such as glycine and proline, which are involved in the body’s normal production of proteins and connective tissue.

Collagen research has shown promising results for osteoarthritis symptoms. A 2025 systematic review of 11 randomized trials involving 870 participants found improvements in knee osteoarthritis pain and function with oral collagen supplementation.

Still, it is important to keep expectations realistic. Eating gelatin does not directly rebuild damaged cartilage, cure arthritis, or guarantee relief from knee or back pain.

Step 1: Understand the Potential Benefits

Gelatin may fit into a healthy diet because it provides protein-derived amino acids.

Possible reasons people include gelatin in their diet include:

  • It contains collagen-derived amino acids.
  • It can be an easy addition to a daily routine.
  • It may complement an overall joint-friendly eating pattern.
  • It can be prepared with simple ingredients.
  • Collagen-related research shows potential benefits for osteoarthritis symptoms.

The strongest evidence is for specific collagen derivatives rather than this exact homemade recipe, so avoid treating gelatin as a guaranteed remedy.

Step 2: Prepare a Simple Gelatin Drink

You only need a few ingredients for this easy preparation.

Ingredients:

  • 1 tablespoon unflavored powdered gelatin
  • ½ cup cold water
  • ½ cup hot water
  • 1 teaspoon honey, optional
  • A small squeeze of fresh lemon juice, optional

Using unflavored gelatin makes it easier to control the sweetness and flavor.

Step 3: Bloom the Gelatin

Start by adding the gelatin powder to ½ cup of cold water.

Stir well so the powder becomes evenly moistened.

Let the mixture sit for about 2–5 minutes.

This process helps the gelatin absorb the water before you add the hot liquid.

Step 4: Add the Hot Water

Slowly pour ½ cup of hot water into the bloomed gelatin.

Stir continuously until the gelatin dissolves.

Avoid drinking the mixture while it is extremely hot.

Allow it to cool to a comfortable drinking temperature.

Step 5: Add Flavor if Needed

Plain gelatin water can have a mild taste, so you can add a small amount of honey or lemon juice.

Honey adds sweetness, while lemon gives the drink a fresh flavor.

Keep added sugar modest if you are trying to maintain a balanced diet.

Step 6: Make It Part of a Healthy Routine

If you enjoy the drink, you can include it as one small part of your normal eating routine.

However, there is no well-established evidence that drinking this exact recipe once a day will eliminate joint pain.

For better joint support, combine healthy eating with regular movement, adequate rest, and appropriate medical care.

Other Natural Ways to Support Comfortable Joints

Gelatin should not be the only strategy for managing joint discomfort.

Lifestyle habits can make a meaningful difference, especially for people with osteoarthritis. The CDC recommends physical activity, healthy weight management, joint protection, and self-management as important parts of arthritis care.

Try these practical steps:

  • Walk regularly: Gentle walking can help maintain movement and physical function.
  • Try low-impact exercise: Swimming, cycling, water exercise, and tai chi can place less stress on joints.
  • Strengthen supporting muscles: Stronger muscles can help support joints during everyday activities.
  • Maintain a healthy weight: For people with overweight or obesity, even modest weight loss may reduce arthritis-related pain and disability.
  • Stay hydrated: Drink enough fluids throughout the day based on your individual needs.
  • Eat a balanced diet: Include vegetables, fruits, whole grains, healthy fats, and adequate protein.
  • Protect painful joints: Avoid activities that repeatedly cause or worsen pain.
  • Start slowly: Increase exercise gradually instead of making sudden changes.

Adults with arthritis can benefit from regular physical activity, and even short periods of movement can contribute toward the weekly activity goal.

What to Know Before Trying Gelatin

Gelatin is generally used as a food ingredient, but it should not be considered a replacement for diagnosis or treatment.

Joint pain can have many causes, including osteoarthritis, injuries, overuse, gout, inflammatory arthritis, and other conditions. The right treatment depends on the cause.

Also remember that research on collagen supplements does not automatically prove that ordinary gelatin drinks produce the same results. Studies use different collagen types, doses, and formulations.

If your joint pain is persistent, severe, worsening, or interfering with normal activities, speak with a healthcare professional. A proper evaluation can help identify the cause and guide appropriate treatment.

Frequently Asked Questions

1. Can gelatin help with joint pain?

Gelatin contains collagen-derived amino acids, and research on collagen derivatives suggests possible improvements in osteoarthritis pain and function, but gelatin is not a proven cure.

2. How often can I drink gelatin water?

There is no established medical dosage for this homemade gelatin drink specifically for joint pain, so follow the product label and discuss regular use with your healthcare professional.

3. Does gelatin rebuild damaged cartilage?

There is not enough evidence to say that drinking gelatin rebuilds damaged cartilage; current research mainly examines symptom and function changes with collagen products.

4. Is gelatin good for knee pain?

Collagen supplementation has shown potential benefits for knee osteoarthritis symptoms, but evidence for ordinary gelatin drinks is more limited.

5. Can gelatin cure arthritis?

No. Gelatin cannot cure arthritis, and persistent joint pain should be evaluated to determine its underlying cause.

6. What exercises are good for painful joints?

Walking, swimming, cycling, water exercise, and tai chi are generally joint-friendly activities that can support movement and function.

7. Can weight management help joint pain?

Yes. For people carrying excess weight, even modest weight loss can help reduce arthritis-related pain and improve function.

8. When should I see a doctor about joint pain?

Seek professional advice when pain persists, becomes severe, limits daily activities, or comes with other concerning symptoms.

Final Thoughts

A simple gelatin drink can be an easy way to add a collagen-derived food to your routine. Research on collagen supplements offers encouraging evidence for modest improvements in osteoarthritis symptoms, but more specific research is needed before a homemade gelatin drink can be considered a treatment.

For lasting joint health, think beyond one ingredient. Regular movement, muscle-strengthening exercise, healthy weight management, nutritious food, and appropriate medical care all play important roles.

If you decide to try gelatin, keep it simple, use it as part of a balanced diet, and focus on consistent healthy habits rather than expecting an overnight solution.

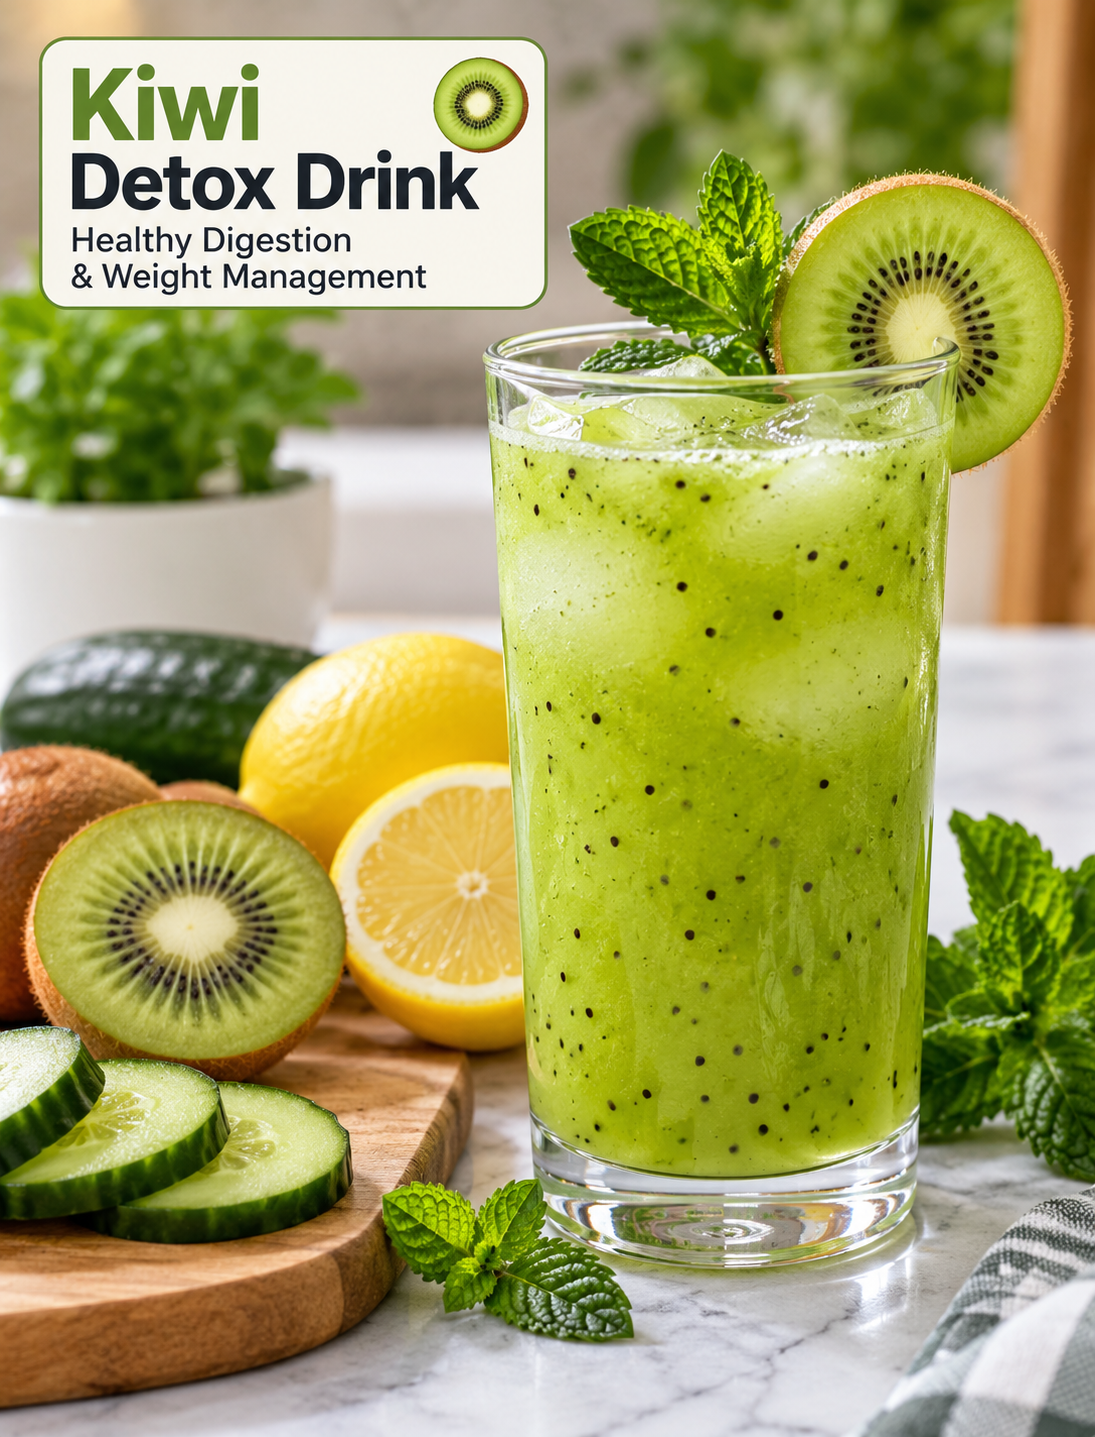
Kiwi Detox Drink Burn Belly Fat Cleanse the Colon and Lose Weight

Fresh kiwi detox drink with cucumber, lemon, mint, and ice in a glass

Kiwi Detox Drink Burn Belly Fat Cleanse the Colon and Lose Weight

If you want a fresh drink that fits into a healthy weight-loss routine, this kiwi detox drink is an easy option to try. Made with kiwi, cucumber, lemon, fresh mint, and water, it has a bright flavor and provides fluids, vitamin C, and fiber when the blended pulp is kept in the drink.

Despite the popular term “detox drink,” your liver and kidneys already handle your body’s natural detoxification process. A kiwi-based beverage cannot directly burn belly fat or cleanse the colon. However, choosing a low-calorie drink made with whole fruits and vegetables can be a useful alternative to sugary beverages while supporting a balanced diet.

This simple recipe takes only a few minutes to prepare and works well as a refreshing morning or afternoon drink.

Why Kiwi Is a Good Choice

Kiwi is a nutrient-rich fruit that can add more flavor and nutrition to homemade drinks. It contains vitamin C, vitamin K, vitamin E, folate, potassium, and dietary fiber.

The fiber in whole kiwi can support normal digestion and help you feel satisfied after eating. Kiwi also contains actinidin, an enzyme that may help break down proteins during digestion.

For weight management, the main advantage is not that kiwi melts fat. Instead, using whole fruit in place of high-sugar drinks can make it easier to manage overall calorie intake.

Kiwi also contains a large amount of water, which makes it a refreshing ingredient for a homemade fruit drink.

Health Benefits of This Kiwi Drink

Supports Hydration

Water is the main ingredient in this recipe, making the drink a simple way to add more fluids to your day. Cucumber and kiwi also contribute water to the finished beverage.

Staying hydrated supports normal body functions and can help you feel better throughout the day.

Provides Vitamin C

Kiwi and lemon provide vitamin C, an antioxidant nutrient that supports normal immune function and helps protect cells from oxidative stress.

One kiwi can provide a meaningful amount of vitamin C without adding many calories.

Adds Dietary Fiber

Keeping the blended kiwi and cucumber pulp in the drink provides more fiber than straining it completely.

Dietary fiber supports digestive health and can help promote regular bowel movements when consumed as part of an overall fiber-rich diet.

May Support a Healthy Weight-Loss Routine

This drink can fit into a calorie-conscious eating plan when it replaces soda, sweetened tea, or other sugary beverages.

Weight loss depends on overall eating patterns, activity, sleep, and calorie balance rather than one specific drink or ingredient.

Refreshes Without Heavy Ingredients

Fresh mint, cucumber, lemon, and kiwi create a naturally bright flavor without requiring a large amount of added sugar.

If you prefer a sweeter taste, use a small amount of honey rather than turning the drink into a high-sugar beverage.

How to Make Kiwi Detox Drink

Ingredients

  • 2 ripe kiwis
  • 1 medium cucumber
  • Juice of 1 lemon
  • A small handful of fresh mint leaves
  • 2 cups cold water
  • 1 tablespoon honey, optional
  • Ice cubes, optional

Step 1: Prepare the Kiwi

Wash the kiwis under cool running water. Peel them and cut the fruit into small pieces so they blend easily.

Step 2: Prepare the Cucumber

Wash the cucumber thoroughly and cut it into chunks. You can leave the skin on if it is clean and you prefer extra texture and nutrients.

Step 3: Add the Ingredients

Place the kiwi, cucumber, lemon juice, mint leaves, and cold water into a blender.

Step 4: Blend Until Smooth

Blend the ingredients for about 30 to 60 seconds, or until the mixture reaches your preferred consistency.

For more fiber, keep the drink unstrained. If you prefer a thinner texture, strain it through a fine-mesh sieve.

Step 5: Add Sweetness if Needed

Taste the drink before adding honey. Ripe kiwi often provides enough natural sweetness, but you can add up to 1 tablespoon of honey if you want a sweeter flavor.

Step 6: Serve Cold

Pour the drink into glasses and add ice if desired. For the best flavor, serve it immediately after blending.

Best Time to Drink It

There is no special time when a kiwi drink will suddenly burn fat or “detox” your body. You can enjoy it whenever it fits comfortably into your daily routine.

A morning serving can provide fluids after waking up, while an afternoon serving can be a refreshing alternative to sweetened beverages.

If drinking acidic beverages bothers your stomach, enjoy the drink with food instead of having it on an empty stomach.

How to Include This Drink in a Healthy Routine

Use the drink as part of a balanced eating pattern rather than as a replacement for meals.

Choose whole foods such as vegetables, fruits, beans, whole grains, eggs, fish, poultry, nuts, and other protein-rich foods throughout the day.

For healthy weight management, focus on portions and overall calorie intake rather than relying on a single “fat-burning” food.

Regular movement also matters. Walking, strength training, cycling, swimming, or other activities can help increase daily energy expenditure and support long-term fitness.

Adequate sleep and consistent hydration are also important parts of a sustainable lifestyle.

Tips for a Better Kiwi Drink

  • Use ripe kiwi for a naturally sweeter flavor.
  • Keep the pulp if you want more dietary fiber.
  • Use cold water for a fresher taste.
  • Add extra mint for a stronger cooling flavor.
  • Skip honey if you are trying to reduce added sugar.
  • Drink it soon after blending for the freshest taste.
  • Do not rely on the drink as a meal replacement.
  • Pair it with nutritious meals for a more balanced routine.
  • If you are increasing fiber, also drink enough water throughout the day.

Can This Drink Burn Belly Fat?

No food or drink can specifically target fat around the belly. Body fat decreases when your overall energy intake is appropriate for your body and you maintain healthy eating and activity habits over time.

This kiwi drink can still support a weight-conscious diet when it replaces higher-calorie or sugar-sweetened beverages.

Can Kiwi Help With Regularity?

Kiwi contains dietary fiber and may support normal bowel function as part of a fiber-rich diet. It should not be viewed as a colon cleanser or a treatment for constipation.

If constipation is persistent, severe, or accompanied by concerning symptoms, speak with a healthcare professional.

Frequently Asked Questions

1. Does kiwi burn belly fat?

No. Kiwi does not specifically burn belly fat, but it can be included in a balanced, calorie-conscious diet that supports healthy weight management.

2. Does this drink cleanse the colon?

No drink can literally cleanse the colon. The digestive system naturally removes waste, while fiber and adequate fluids can support normal bowel function.

3. Can I drink this every day?

Yes, most people can enjoy this drink regularly as part of a varied diet, provided the ingredients suit their individual dietary needs.

4. Is this kiwi drink good for weight loss?

It can fit into a weight-loss plan, especially when used instead of sugary drinks, but weight loss depends on your overall calorie intake and lifestyle.

5. Should I strain the drink?

You can strain it if you prefer a smoother texture, but keeping the pulp provides more of the fruit and vegetable fiber.

6. Can I make this drink without honey?

Yes. Ripe kiwi and cucumber provide natural flavor, so honey is completely optional.

7. Is it better to drink this on an empty stomach?

Not necessarily. There is no proven fat-burning advantage to drinking it on an empty stomach, and people with sensitive stomachs may prefer it with food.

8. How long can I store the drink?

For the best quality and flavor, drink it shortly after preparation and refrigerate any leftovers in a sealed container for a short period.

Final Thoughts

This kiwi drink is a simple way to combine fruit, vegetables, herbs, lemon, and water in one refreshing recipe. Kiwi contributes vitamin C and fiber, while cucumber and water make the drink light and hydrating.

Rather than expecting a detox beverage to burn belly fat or cleanse the colon, use this recipe as one small part of a healthy lifestyle. A balanced diet, regular physical activity, adequate hydration, good sleep, and consistent habits have a much stronger role in long-term weight management.

Chamomile Ginger Honey Evening Tea

Warm chamomile ginger honey tea in a glass mug with lemon slices, fresh ginger, chamomile flowers, honey, and cinnamon

Chamomile Ginger Honey Evening Tea

Chamomile Ginger Honey Evening Tea is a warm, soothing beverage made with chamomile tea, fresh ginger, honey, and hot water. The floral taste of chamomile pairs with the gentle warmth of ginger and the natural sweetness of honey.

This simple tea is easy to prepare with a few everyday ingredients. It works well as an evening drink when you want something warm and comforting without caffeine from traditional black or green tea.

Fresh ginger adds a mild spicy note that balances the soft floral flavor of chamomile. Honey rounds out the drink with gentle sweetness and can be adjusted to suit your taste.

The recipe can be prepared in one cup or made as a larger batch for several servings. Add a lemon slice if you enjoy a brighter citrus flavor.

Why You’ll Love This Evening Tea

This homemade herbal tea has a simple ingredient list and requires very little preparation. You can make a fresh cup in just a few minutes.

Chamomile provides a naturally floral flavor, while ginger adds warmth and a slightly peppery finish. Honey brings the two flavors together without requiring complicated sweeteners or syrups.

The drink is naturally caffeine-free when made with pure chamomile tea. That makes it a useful option for people who prefer to avoid caffeinated beverages in the evening.

It also offers a comforting alternative to sugary desserts or heavy drinks after dinner. A warm cup can become part of a relaxing nighttime routine.

The recipe is easy to adjust. Use more ginger for a stronger spicy flavor, reduce the honey for a lighter drink, or add lemon for extra brightness.

Ingredients You’ll Need

Chamomile Tea

Use chamomile tea bags or loose dried chamomile flowers. Choose a pure chamomile product if you want the drink to remain naturally caffeine-free.

Chamomile has a delicate floral flavor, so avoid steeping it for too long if you prefer a mild taste.

Fresh Ginger

Fresh ginger gives the tea its warm, slightly spicy flavor. Peel a small piece and slice it thinly so the flavor can infuse into the hot water.

You can grate the ginger for a stronger infusion, but strained grated ginger may leave more particles in the finished drink.

Honey

Honey adds natural sweetness and helps balance the sharper flavor of ginger. Add it after steeping so you can control the amount based on your preferred sweetness.

Different types of honey can create slightly different flavors. Mild clover honey keeps the tea simple, while wildflower honey provides a deeper taste.

Hot Water

Use fresh, hot water for the best infusion. Water that is too cool may produce a weak tea, while aggressively boiling water can make delicate herbal flavors less pleasant.

Lemon

Fresh lemon is optional. A small lemon slice or splash of juice adds acidity and creates a brighter flavor.

Cinnamon

A small cinnamon stick is another optional addition. It adds a warm, lightly sweet spice that pairs well with ginger and honey.

How to Make Chamomile Ginger Honey Evening Tea

Prepare the Ginger

Peel a small piece of fresh ginger with the edge of a spoon or a vegetable peeler.

Slice the ginger into thin pieces. Thin slices expose more surface area to the hot water and allow the flavor to infuse efficiently.

For a stronger ginger taste, grate the ginger instead of slicing it. If you grate it, plan to strain the tea before serving.

Heat the Water

Bring fresh water to a boil, then allow it to cool slightly before pouring it over the tea.

Very aggressively boiling water is not necessary for preparing chamomile. Hot water is enough to extract the floral flavor while keeping the drink pleasant.

Use approximately one cup of hot water for each serving and adjust the amount if you prefer a weaker or stronger beverage.

Steep the Ginger

Place the sliced ginger in a mug or small teapot. Pour the hot water over it and allow it to steep for several minutes.

A longer steep produces a stronger ginger flavor. Start with a moderate steeping time and adjust the next cup based on your preference.

If you are using grated ginger, strain the liquid through a fine tea strainer before adding the chamomile.

Add the Chamomile

Place the chamomile tea bag or loose chamomile flowers into the ginger-infused water.

Steep according to the instructions on your tea package. If using loose flowers, strain the tea before serving.

Avoid over-steeping if you want a lighter floral flavor. The goal is to create a balanced drink where neither chamomile nor ginger overwhelms the other.

Add Honey

Remove the tea bag or strain the loose flowers. Let the drink cool for a moment, then stir in honey.

Adding honey after steeping makes it easier to control the sweetness. Start with a small amount and add more if needed.

For a different flavor, use maple syrup instead of honey. The taste will be slightly deeper and more caramel-like.

Finish and Serve

Add a small squeeze of fresh lemon or place a lemon slice on the rim of the mug.

A cinnamon stick can be added while the drink is warm for extra aroma.

Serve the tea warm and stir before drinking so the honey remains evenly distributed.

Tips for the Best Flavor

Use fresh ginger when possible because it provides a cleaner and brighter flavor than older ginger.

Slice the ginger thinly for a moderate infusion. Grating it creates a stronger flavor but requires straining.

Do not use an excessive amount of ginger. Too much can overpower the delicate floral notes of chamomile.

Add honey gradually. The sweetness of different honey varieties can vary, so tasting before adding more helps maintain balance.

Use fresh lemon rather than bottled lemon juice when possible. Fresh lemon provides a cleaner citrus aroma.

If the tea tastes too strong, dilute it with additional hot water rather than adding more honey.

How to Make It More Flavorful

For a warmer spice profile, add a small cinnamon stick while the ginger steeps. Remove it before serving if you prefer a lighter cinnamon flavor.

A few thin apple slices can add subtle fruit sweetness. Use fresh apple and remove the slices before drinking if desired.

Orange peel can provide a gentle citrus aroma. Use only a small piece of washed peel to avoid excessive bitterness.

Fresh mint can create a cooler finish. Add a few leaves after steeping rather than boiling them with the ginger.

A small amount of turmeric can also be used for earthy flavor and color. Its taste is strong, so start with a very small amount.

Caffeine-Free Evening Drink Option

Pure chamomile tea is naturally caffeine-free, which makes it a popular choice for people looking for an evening beverage without the caffeine found in many traditional teas.

Check the ingredient label when purchasing a tea blend because some products combine chamomile with black, green, or other caffeinated teas.

If avoiding caffeine is important to you, choose a product labeled as pure chamomile or caffeine-free.

The addition of ginger and honey does not add caffeine. Lemon, cinnamon, mint, and other common flavor additions are also naturally caffeine-free.

How to Adjust the Sweetness

Honey can be adjusted easily based on taste. Start with a small spoonful and add more only if the tea needs additional sweetness.

For a less sweet version, rely on the natural flavor of chamomile and ginger with a small amount of lemon.

Maple syrup can replace honey if you prefer its richer flavor.

Avoid adding a large amount of sweetener simply to balance an overly strong ginger infusion. Diluting the tea with more hot water is often a better solution.

If serving guests, provide honey separately so each person can sweeten their own cup.

How to Prepare It Ahead

You can prepare a larger batch of ginger-infused water and refrigerate it for later use. Reheat the amount you need and add fresh chamomile before serving.

For the best flavor, add honey after reheating rather than storing it mixed into the entire batch.

Fresh lemon should also be added close to serving time for a brighter flavor.

Avoid keeping brewed tea at room temperature for long periods. Refrigerate leftovers promptly in a covered container.

When reheating, warm the tea gently rather than repeatedly boiling it.

What to Serve With Evening Tea

This warm beverage pairs well with light evening snacks and simple desserts.

Serve it with oatmeal cookies, shortbread, fresh berries, apple slices, or a small piece of dark chocolate.

For a savory option, whole-grain crackers with mild cheese can complement the floral and spicy flavors.

The tea can also be served on its own when you want a simple, warm beverage after dinner.

Keep the food pairing light if you want the tea to remain the main flavor experience.

Common Mistakes to Avoid

Do not use too much ginger because its spicy flavor can easily overpower chamomile.

Avoid over-steeping delicate chamomile tea if you prefer a soft floral taste.

Do not add excessive honey before tasting the tea. The right amount depends on the strength of the ginger and the type of honey.

Avoid using stale or old ginger with dry, shriveled flesh because it may provide weaker flavor.

Do not assume every chamomile blend is caffeine-free. Check the ingredient list if caffeine matters to you.

Avoid serving the tea immediately after adding boiling water. Allow it to cool to a comfortable drinking temperature first.

Frequently Asked Questions

Is chamomile tea naturally caffeine-free?

Pure chamomile tea is naturally caffeine-free, but check blended tea labels because some products may contain caffeinated ingredients.

Can I use ground ginger?

Yes, but fresh sliced or grated ginger usually provides a cleaner flavor and aroma in brewed tea.

How much honey should I add?

Start with a small spoonful and adjust gradually based on the tartness of the lemon and strength of the ginger.

Can I make this tea without honey?

Yes, you can leave out honey or use maple syrup if you prefer a different sweetener.

Can I add lemon?

Yes, fresh lemon adds a bright citrus note that balances the floral chamomile and warm ginger.

Can I drink this tea cold?

Yes, brew it normally, allow it to cool, refrigerate it, and serve over ice for a chilled version.

Can I use dried ginger?

Yes, dried ginger works, but use a small amount because its flavor is more concentrated than fresh ginger.

How long can I store leftover tea?

Refrigerate leftover tea in a covered container and use it within a few days for the best flavor and quality.

Final Thoughts

Chamomile Ginger Honey Evening Tea is a simple caffeine-free beverage with floral chamomile, warm ginger, and gentle honey sweetness. Fresh lemon and cinnamon can be added when you want more flavor.

The recipe is easy to adjust based on your preferences. Use thinly sliced ginger for a mild infusion, add more for a stronger spice note, and sweeten gradually until the flavors are balanced.

For the best cup, use fresh ingredients, steep the tea according to the package directions, and serve it warm. It makes a comforting addition to an evening routine without requiring complicated preparation.

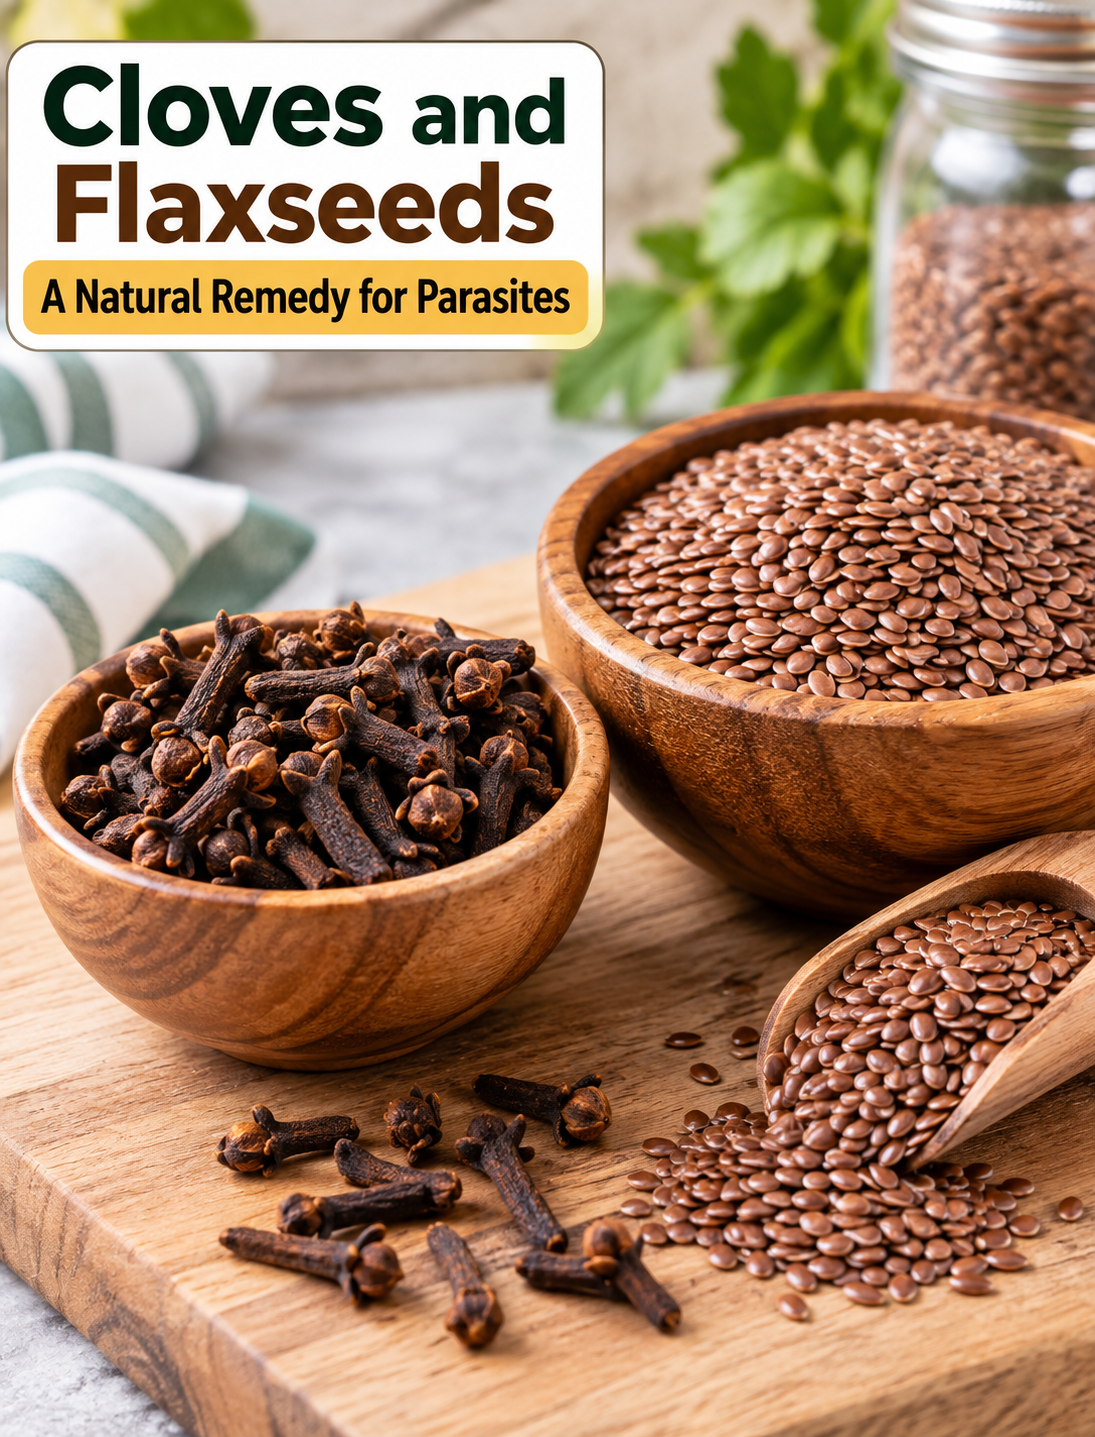
Cloves and Flaxseeds: A Natural Remedy for Parasites

Ground cloves and flaxseeds in bowls as a traditional natural digestive wellness remedy

Cloves and Flaxseeds: A Natural Remedy for Parasites

Both are common kitchen ingredients that have been used in traditional wellness practices for generations.  Cloves contain naturally occurring plant compounds, while flaxseeds provide fiber, healthy fats, and other nutrients. Because of these properties, some people use a mixture of ground cloves and flaxseeds as part of a digestive wellness routine.

However, it is important to understand the difference between a traditional remedy and a medically proven treatment. There is not enough reliable human evidence to show that eating cloves and flaxseeds can eliminate intestinal parasites. If you suspect a parasitic infection, proper testing and treatment from a healthcare professional should come first.

That does not mean these foods have no nutritional value. Flaxseeds can support regular bowel movements because they contain dietary fiber, while cloves can add flavor and naturally occurring plant compounds to the diet. Used sensibly, they can be included in a balanced eating pattern.

Why Do You Use Cloves and Flaxseeds?

Cloves and flaxseeds are combined in some traditional wellness routines because each ingredient offers different nutritional properties.

Cloves contain eugenol, a naturally occurring compound that has been studied for its antioxidant and antimicrobial properties. Laboratory research has explored cloves and their compounds, but laboratory findings do not prove that eating cloves can treat parasites in people.

Flaxseeds are especially valued for their fiber content. Ground flaxseed contains soluble and insoluble fiber, which can support normal digestion and bowel regularity when consumed with enough fluid.

The combination may therefore be useful as a nutritional digestive routine, but it should not replace an antiparasitic medicine prescribed for a confirmed infection.

If you have symptoms such as persistent diarrhea, unexplained weight loss, abdominal discomfort, nausea, or visible worms in stool, speak with a healthcare professional rather than relying on a home remedy alone.

What You Will Require:

For a simple traditional mixture, you can use:

  • 1 part ground cloves
  • 10 parts ground flaxseeds
  • A clean, airtight container for storage
  • Water or another food you normally eat with ground flaxseed

For example, you could combine 1 tablespoon of ground cloves with 10 tablespoons of ground flaxseed.

Using ground flaxseed is generally more practical than using whole seeds because the ground form is easier to mix into foods. Freshly grinding the ingredients can also help maintain their flavor and quality.

There is no medically established dosage of this mixture for treating parasites. Avoid increasing the amount simply because you believe more will produce faster results.

Step-by-Step Instructions:

Step 1: Choose fresh ingredients.
Select food-grade cloves and flaxseeds from a reputable source. Check the packaging for freshness and avoid ingredients that smell stale or show signs of moisture or spoilage.

Step 2: Grind the ingredients.
If using whole cloves or whole flaxseeds, grind them separately using a clean spice grinder or food processor. A fine or medium grind makes the mixture easier to combine with food.

Step 3: Measure the ingredients.
Use a ratio of approximately 1 part ground cloves to 10 parts ground flaxseed for this traditional preparation.

Step 4: Mix thoroughly.
Place both ingredients in a clean, dry bowl and stir until they are evenly distributed.

Step 5: Store the mixture properly.
Transfer the mixture to an airtight container and keep it in a cool, dry place. Ground flaxseed can become rancid over time because it contains delicate oils, so refrigeration can help preserve freshness.

Step 6: Add it to food if desired.
Instead of taking a large spoonful on an empty stomach, consider adding a small food-appropriate amount of ground flaxseed to oatmeal, yogurt, smoothies, or another meal.

Step 7: Drink enough fluid.
Fiber absorbs water, so adequate fluid intake is important when increasing flaxseed in your diet.

Step 8: Pay attention to your body.
Stop using the mixture if it causes significant stomach discomfort, diarrhea, constipation, or another unwanted reaction.

Keeping Good Storage:

Proper storage helps protect the flavor and quality of ground flaxseed.

Keep the mixture in a tightly sealed container away from heat, sunlight, and moisture. Because ground flaxseed contains oils that can spoil, refrigeration is a useful option for maintaining freshness.

Check the mixture before use. A bitter, paint-like, or unusually strong smell can indicate that the flaxseed has gone rancid.

Keep the container away from children and do not store it next to sources of heat such as a stove or oven.

Daily Consumption:

There is no established medical dose of cloves and flaxseeds for eliminating parasites. The common traditional practice of taking a large spoonful on an empty stomach has not been proven to treat intestinal infections.

If you want to include ground flaxseed in your diet, start with a modest amount and increase gradually as tolerated. Mix it into foods such as:

  • Oatmeal
  • Plain yogurt
  • Smoothies
  • Whole-grain cereal
  • Soups or other prepared foods

Cloves have a strong flavor, so a small culinary amount may be easier to tolerate than a concentrated mixture.

People taking medications should ask a healthcare professional before regularly consuming concentrated amounts of herbs or seeds. This is especially important if you have a medical condition or follow a restricted diet.

How Long Does the Treatment Last?

The traditional three-days-on and three-days-off routine is sometimes promoted online, but there is no strong clinical evidence establishing this schedule as a treatment for parasites.

A suspected parasitic infection should not be managed by repeatedly cycling a homemade mixture. Different parasites require different medicines, doses, and treatment durations.

If testing confirms an infection, follow the treatment plan recommended by your healthcare provider. Do not delay appropriate care while trying a home remedy.

For general nutrition, flaxseed can be part of a balanced diet when tolerated. Its fiber content may support regular bowel function, but that benefit is different from treating a parasitic infection.

Take Pleasure in the Advantages It Offers

Cloves and flaxseeds can be useful kitchen ingredients, but their benefits should be described realistically.

Flaxseed provides dietary fiber, plant-based omega-3 fatty acid ALA, protein, and other nutrients. Regular fiber intake can support digestive health and bowel regularity.

Cloves provide flavor and naturally occurring plant compounds, including eugenol. They can be used in small culinary amounts in foods and beverages.

The most important point is that natural does not automatically mean proven or risk-free. A food-based mixture should be viewed as a dietary option, not a substitute for medical treatment.

If you think you have intestinal parasites, contact a qualified healthcare professional. Depending on your symptoms and travel or exposure history, a provider may recommend stool testing or another appropriate evaluation.

Seek medical advice promptly if symptoms are severe, persistent, or accompanied by dehydration, blood in the stool, significant weight loss, severe abdominal pain, or other concerning changes.

A balanced diet, safe food preparation, clean drinking water, regular handwashing, and appropriate medical care are more reliable ways to protect digestive health than relying on an unproven parasite cleanse.

Frequently Asked Questions

Can cloves and flaxseeds get rid of parasites?

There is not enough reliable human evidence to show that this mixture eliminates intestinal parasites or cures a parasitic infection.

Is the cloves and flaxseeds remedy scientifically proven?

No. Cloves and their compounds have been studied in laboratory research, but that evidence does not establish the mixture as an effective human parasite treatment.

Can I take cloves and flaxseeds every morning?

Ground flaxseed can be included in a balanced diet, but concentrated cloves should not be taken routinely as a medical treatment without professional guidance.

Should I take this mixture on an empty stomach?

An empty stomach is not medically required, and taking concentrated ingredients this way may cause digestive discomfort in some people.

What is the best way to use ground flaxseed?

Ground flaxseed can be mixed into foods such as oatmeal, yogurt, smoothies, and cereal while drinking enough fluid to support its fiber content.

How do I know if I have intestinal parasites?

Symptoms can vary, so suspected infections should be evaluated by a healthcare professional rather than diagnosed from symptoms alone.

Can this mixture replace parasite medicine?

No. If a parasitic infection is confirmed, use the treatment recommended by your healthcare professional instead of replacing it with a homemade remedy.

Who should avoid this remedy?

Anyone with a medical condition, medication use, pregnancy, or concerns about digestive reactions should consult a healthcare professional before using concentrated amounts of cloves or flaxseed.

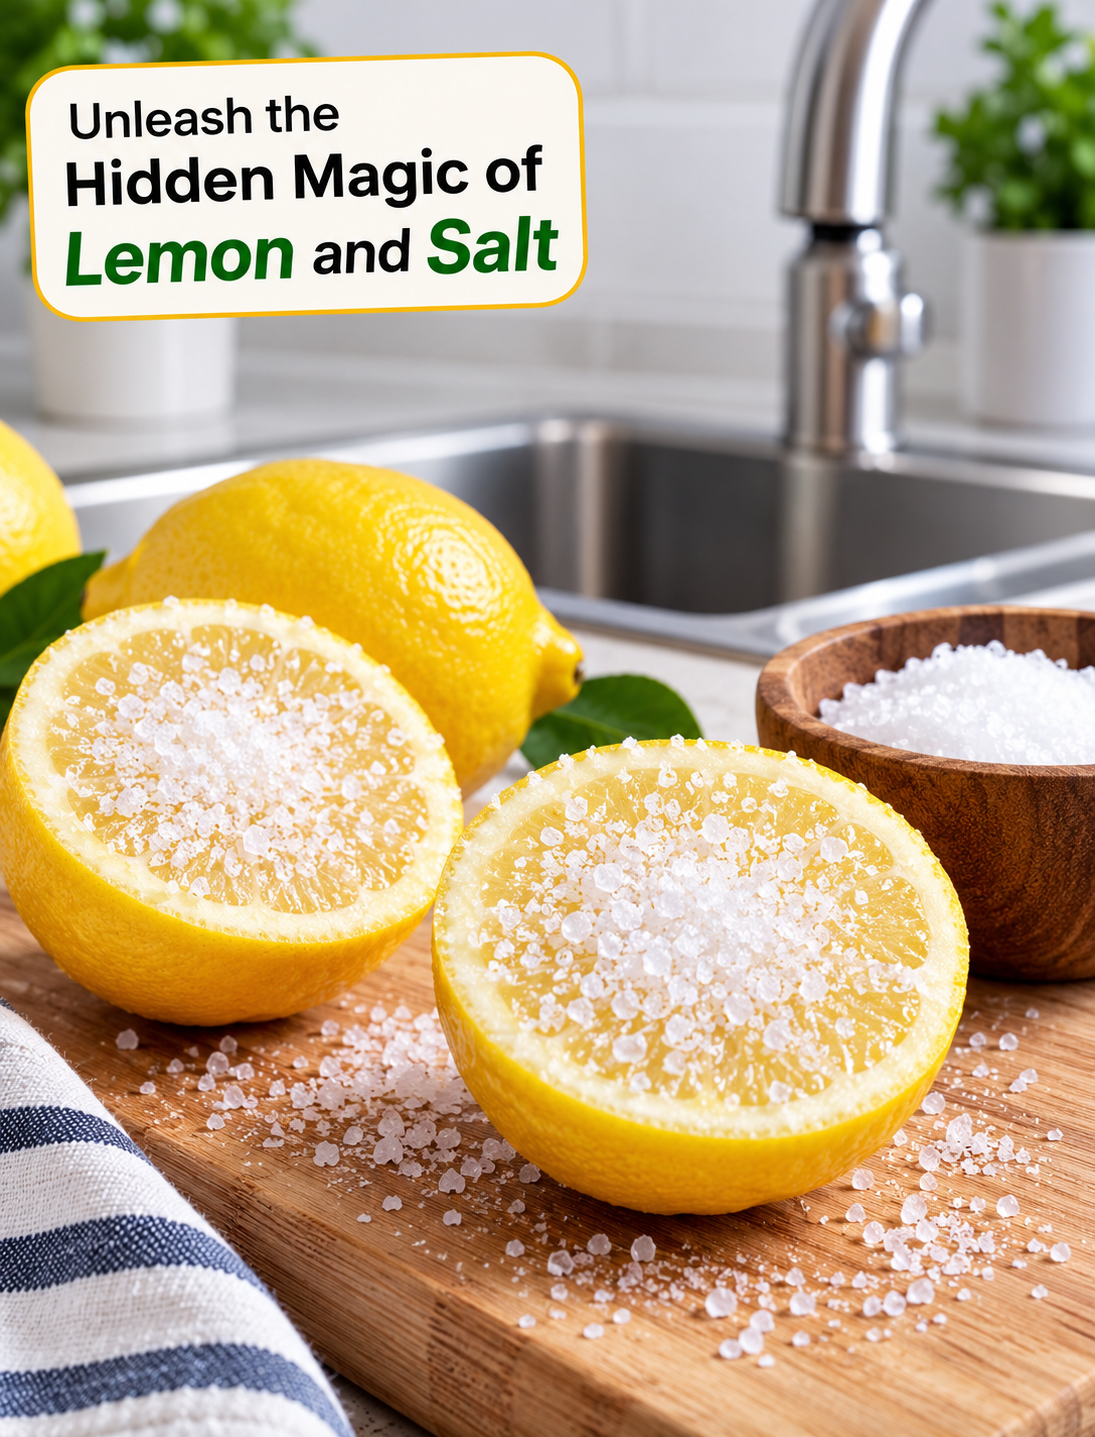
Unleash the Hidden Magic of Lemon and Salt

Lemon halves sprinkled with salt beside a clean kitchen sink showing a natural lemon and salt cleaning method

Unleash the Hidden Magic of Lemon and Salt

Lemon and salt are two simple kitchen staples that can do much more than add flavor to food. When used correctly, their acidity, texture, and fresh scent make them useful for everyday household tasks, food preparation, and simple self-care routines.

A fresh lemon contains citric acid and vitamin C, while salt provides a mild abrasive texture that can help loosen grime. Together, they can become a practical, low-cost option for certain cleaning jobs and kitchen tasks.

The key is knowing where this combination works well and where it should be avoided. Lemon and salt are not a cure-all, and they should not replace medical treatment or proven cleaning products when stronger solutions are needed.

Why Lemon and Salt Work So Well Together

Lemon juice contains citric acid, which can help break down some mineral deposits, food residue, and surface buildup. Salt adds gentle scrubbing power, making it easier to lift stuck-on residue from suitable surfaces.

This combination is especially useful for:

  • Removing light stains and food residue
  • Freshening certain kitchen surfaces
  • Cleaning some cutting boards and sinks
  • Loosening mineral buildup
  • Deodorizing areas with food odors
  • Creating a simple homemade cleaning paste

The results depend on the surface, the type of residue, and how long the mixture remains in contact with it.

Lemon and Salt for Natural Kitchen Cleaning

One of the easiest ways to use this combination is for basic kitchen cleaning. The acidic juice helps loosen residue, while salt provides a textured surface for gentle scrubbing.

Step-by-Step Kitchen Cleaning Method

  1. Cut a fresh lemon in half. Use a juicy lemon for the best coverage.
  2. Sprinkle a small amount of salt over the cut surface.
  3. Rub the lemon gently over a suitable non-porous surface.
  4. Let the juice sit briefly if residue needs extra time to loosen.
  5. Wipe the area with a clean damp cloth.
  6. Rinse the surface thoroughly if it comes into contact with food.
  7. Dry the area completely to prevent leftover moisture.

This method can work well on stainless-steel sinks and some cutting boards, but always check the manufacturer’s care instructions first.

Freshen Up Cutting Boards and Kitchen Surfaces

Cutting boards can hold strong food odors after preparing ingredients such as garlic, onions, and fish. Lemon can help provide a fresh citrus scent, while salt can help scrub away surface residue.

For a basic cleaning routine, sprinkle salt over a suitable cutting board and rub it gently with half a lemon. Rinse the board well with clean water and allow it to dry completely.

For food-safety purposes, washing with hot soapy water remains important, especially after handling raw meat, poultry, or seafood. Lemon and salt should be treated as a supplemental cleaning method rather than a substitute for proper sanitation.

Remove Light Mineral Buildup

Citric acid in lemon juice can help loosen some hard-water deposits. This can be useful around faucets, sinks, and other suitable non-porous areas.

Step-by-Step Mineral Deposit Method

  1. Apply fresh lemon juice to the affected area.
  2. Sprinkle a small amount of salt over the surface.
  3. Rub gently with a soft sponge or cloth.
  4. Leave it for a short period if the buildup is stubborn.
  5. Rinse the area thoroughly with water.
  6. Dry the surface with a clean towel.

Do not use acidic lemon juice on marble, limestone, travertine, or other acid-sensitive stone because it can etch or dull the finish.

Use Lemon and Salt to Freshen Your Home

The bright scent of lemon can make a room feel fresher, while salt can help with light scrubbing jobs. This makes the combination handy for small household cleaning tasks where heavy-duty chemicals are unnecessary.

You can use it around appropriate sinks, stainless-steel surfaces, and other acid-safe areas. Always test the mixture on a small hidden spot before treating a larger surface.

For strong odors, mold, heavy grease, or sanitation concerns, use a cleaner specifically designed for the problem instead of relying only on homemade mixtures.

Lemon and Salt for Simple Self-Care

Lemon and salt are sometimes promoted online as a natural beauty treatment, but caution is important. Lemon juice is acidic and may irritate skin, increase sensitivity to sunlight, or cause a reaction in some people.

Salt can also be abrasive, so rubbing a concentrated lemon-and-salt mixture on the face or irritated skin may cause dryness or discomfort.

If you want to use lemon as part of a beauty routine, avoid applying concentrated lemon juice directly to your skin. Choose gentle, tested skincare products when treating dark spots, uneven tone, acne, or sensitive skin.

Can You Drink Lemon Water With Salt?

Lemon water can be a refreshing drink, but adding salt is not necessary for most people. Lemon provides flavor and vitamin C, while most diets already provide enough sodium.

A simple glass of water with lemon can be an easy way to increase fluid intake. However, lemon water should not be presented as a treatment for digestive disorders, infections, or other medical conditions.

If you have been advised to limit sodium, avoid adding salt to drinks unless your healthcare professional recommends it.

Important Safety Tips

Natural ingredients are not automatically safe for every surface or person. Follow these precautions before using a lemon-and-salt mixture.

  • Avoid natural stone: Lemon acid can damage marble, limestone, and similar surfaces.
  • Protect sensitive skin: Do not use lemon juice on irritated, broken, or sunburned skin.
  • Rinse food-contact surfaces: Wash treated kitchen surfaces thoroughly after cleaning.
  • Patch-test surfaces: Test an inconspicuous area before widespread use.
  • Do not mix with bleach: Never combine lemon or other acids with chlorine bleach.
  • Protect your eyes: Keep the mixture away from your eyes and rinse with water if contact occurs.
  • Use proper disinfectants when needed: Homemade mixtures should not replace products designed for disinfection.

Easy Lemon and Salt Routine to Try at Home

If you want to make this simple combination part of your household routine, start with one practical task rather than trying to use it everywhere.

Step-by-Step Routine

  1. Choose a surface that is safe for acidic cleaners.
  2. Cut a fresh lemon into halves or quarters.
  3. Sprinkle a light layer of salt onto the cut lemon.
  4. Rub the lemon gently over the surface.
  5. Avoid aggressive scrubbing that could scratch the finish.
  6. Wipe away the residue with a damp cloth.
  7. Rinse food-contact areas thoroughly.
  8. Dry the surface with a clean towel.
  9. Store the remaining lemon in the refrigerator for later use.

This simple approach keeps the process inexpensive, quick, and easy to repeat.

The Simple Power of Everyday Ingredients

Lemon and salt are not magical cures, but they can be surprisingly useful when used for the right jobs. Lemon’s citric acid can help loosen certain deposits, while salt adds mild scrubbing power.

The best results come from using this combination selectively and safely. It can be a helpful addition to a household cleaning routine, especially for suitable kitchen surfaces and light residue.

At the same time, proper cleaning methods, food-safety practices, and surface-care instructions should always come first. Simple ingredients can be useful without being treated as miracle solutions.

Frequently Asked Questions

1. What happens when you mix lemon and salt?

Lemon provides acidic juice while salt adds mild abrasive action, creating a mixture that can help loosen and scrub certain types of surface residue.

2. Can lemon and salt clean a kitchen sink?

Yes, the mixture can help clean suitable non-porous sinks, especially stainless steel, but the surface should be rinsed and dried afterward.

3. Can lemon and salt remove hard-water stains?

Lemon’s citric acid can help loosen some mineral deposits, while salt provides gentle scrubbing action on compatible surfaces.

4. Is lemon and salt safe for marble?

No. Lemon is acidic and can etch or dull marble and other acid-sensitive natural stone surfaces.

5. Can you use lemon and salt on your face?

It is not recommended because lemon can irritate skin and increase sun sensitivity, while salt can be too abrasive for facial skin.

6. Does lemon water with salt detox the body?

There is no need for a lemon-and-salt drink to “detox” the body, and adding extra sodium is unnecessary for most people.

7. Can lemon and salt disinfect surfaces?

They can help clean and freshen some surfaces, but they should not be considered a reliable substitute for a properly labeled disinfectant.

8. How often can you use lemon and salt for cleaning?

Use it only when appropriate for the surface and task, and follow the manufacturer’s cleaning instructions to prevent surface damage.

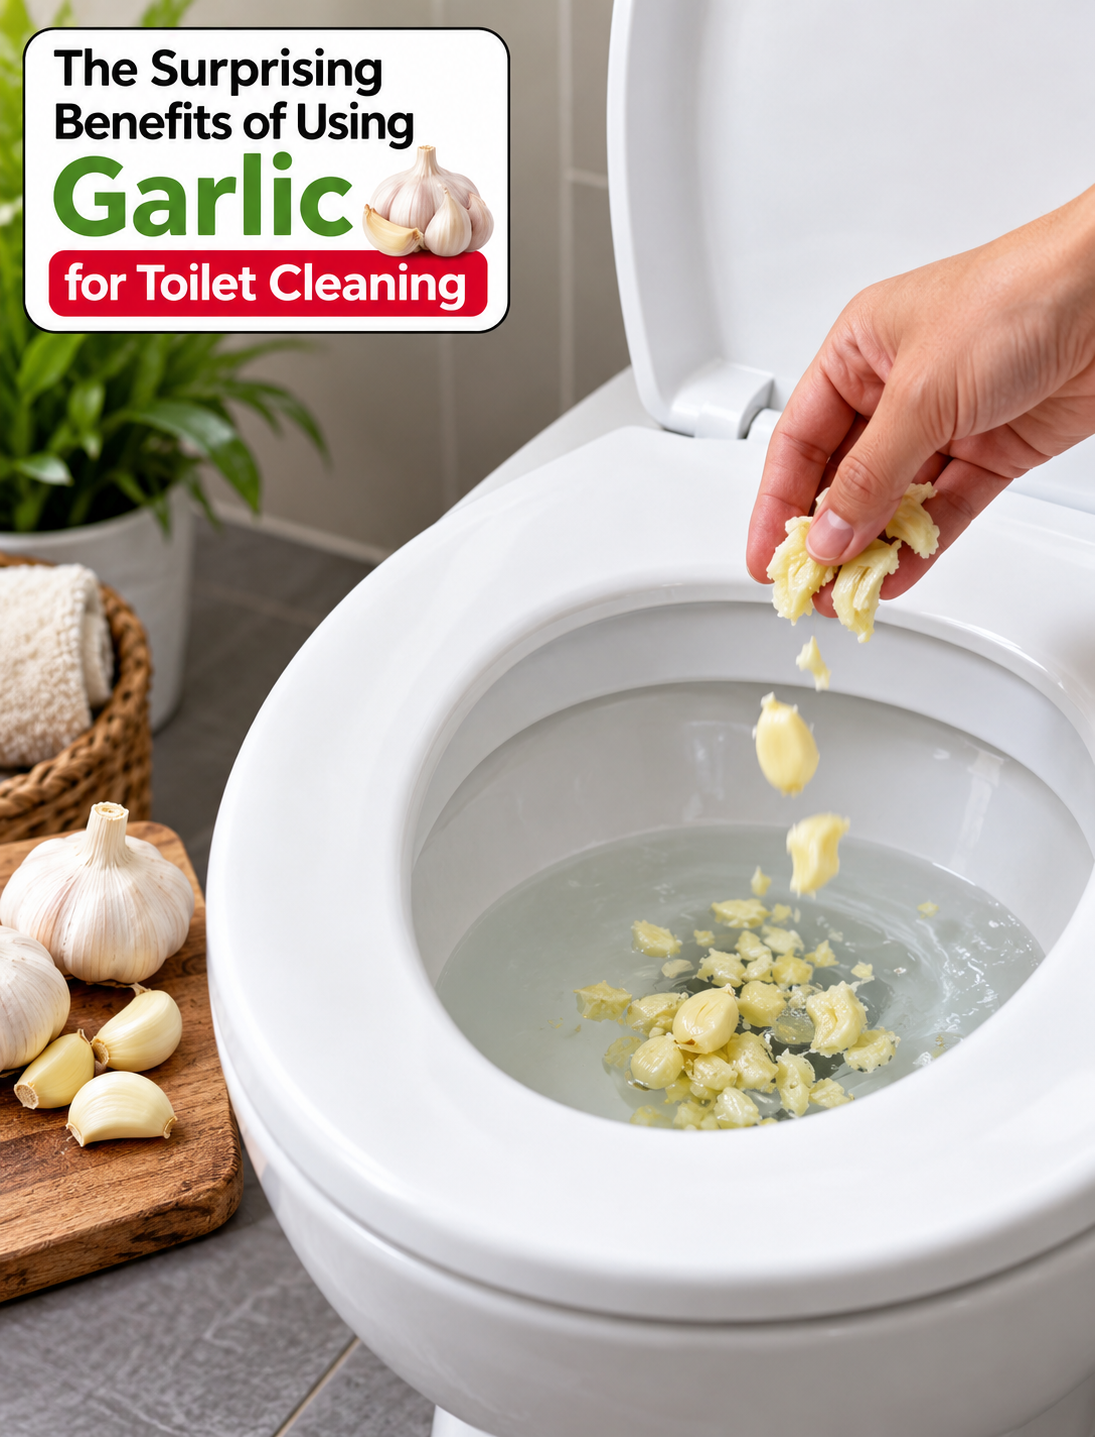
The Surprising Benefits of Using Garlic for Toilet Cleaning

Crushed garlic cloves being used as a natural toilet cleaning method in a clean bathroom

The Surprising Benefits of Using Garlic for Toilet Cleaning

Garlic is usually found in the kitchen, but some homeowners also use it as an unusual natural toilet-cleaning idea. The reason is simple: fresh garlic contains compounds such as allicin that have antimicrobial activity in laboratory settings. The Surprising Benefits of Using Garlic for Toilet Cleaning makes garlic an interesting ingredient to explore for light bathroom cleaning, although it should not replace a proper toilet disinfectant when sanitation is the main goal.

Using garlic in the toilet is best viewed as a simple household experiment rather than a powerful cleaning treatment. It may help freshen a toilet between regular cleanings, while brushing and routine bathroom care remain the most important steps for removing buildup and maintaining hygiene.

Why Garlic?

Fresh garlic produces allicin when its cloves are crushed or cut. Allicin is responsible for much of garlic’s strong smell and has been studied for its antimicrobial properties.

That does not mean garlic can disinfect a toilet as reliably as a product specifically labeled for bathroom sanitation. Toilet bowls can contain bacteria, mineral deposits, stains, and other residues that require proper cleaning.

Still, garlic can be an inexpensive ingredient for people who enjoy trying simple household cleaning methods. It is also biodegradable and does not introduce a conventional chemical cleaner into the toilet bowl.

Important points to remember:

  • Garlic is better suited to light cleaning experiments than deep sanitation.
  • It should not replace a registered bathroom disinfectant when disinfection is needed.
  • Crushing the cloves releases more of their active compounds.
  • Garlic has a strong odor, so good bathroom ventilation is helpful.
  • Never mix garlic with bleach, ammonia, or other cleaning chemicals.

How to Use Garlic for Toilet Cleaning

If you want to try this method, follow these steps carefully. Use fresh garlic and clean the toilet normally before or after the experiment when necessary.

Step 1: Gather Fresh Garlic

Take about four to six fresh garlic cloves and remove their papery skins. Fresh cloves are preferable because crushing them helps release their natural compounds.

You will also need a toilet brush, disposable gloves, and access to clean water.

Step 2: Crush the Garlic

Place the peeled cloves on a clean surface and crush them with the flat side of a knife or a garlic press.

Crushing the garlic helps form allicin from compounds naturally present in the clove. Use the crushed garlic soon after preparing it rather than storing it for later.

Step 3: Add the Garlic to the Bowl

Flush the toilet first so the bowl is relatively clean and wet. Drop the crushed garlic into the toilet water and spread the pieces around the bowl if possible.

Avoid pushing large pieces into the drain because solid food waste can create an unnecessary plumbing problem.

Step 4: Let It Sit

Leave the crushed garlic in the bowl for about 30 minutes.

This waiting period gives the garlic compounds time to remain in contact with the bowl surface. Keep the bathroom ventilated because the odor can become noticeable.

Step 5: Scrub the Bowl

Put on gloves and use a toilet brush to scrub the inside of the bowl.

Focus on areas where light residue or surface marks are visible. Scrubbing provides the main physical cleaning action and is more important for stain removal than the garlic itself.

Step 6: Flush Thoroughly

Flush the toilet to remove the garlic and loosened residue.

Check the bowl afterward and repeat normal toilet cleaning if stains or buildup remain. Do not assume the absence of visible dirt means the toilet has been disinfected.

Step 7: Clean the Brush and Surrounding Area

Rinse the toilet brush properly and clean any surface that may have been splashed during the process.

Wash your hands thoroughly after removing your gloves. Regular hand hygiene remains an important part of bathroom sanitation.

Potential Benefits of Garlic for Toilet Cleaning

The main appeal of this method is its simplicity. Garlic is inexpensive, widely available, and easy to prepare.

Its naturally occurring sulfur compounds have antimicrobial properties that have been studied in controlled settings. However, household toilet conditions are different from laboratory conditions, so these properties should not be treated as proof that garlic disinfects a toilet.

Garlic may also appeal to people who prefer experimenting with biodegradable household ingredients. It does not contain the strong cleaning chemicals found in many commercial toilet products.

Some potential advantages include:

  • Easy access to an everyday kitchen ingredient.
  • Low cost compared with specialty cleaning products.
  • A biodegradable ingredient that can be disposed of with normal organic waste.
  • An interesting option for light cleaning between routine toilet washes.
  • No need to create a complicated homemade cleaning mixture.

The biggest benefit may simply be encouraging regular cleaning. A toilet that is brushed and maintained often is easier to keep fresh than one that is cleaned only after heavy buildup develops.

What Garlic Cannot Replace

Garlic should not be treated as a complete toilet disinfectant. Commercial bathroom products are formulated and tested for specific cleaning or disinfecting purposes, while the effectiveness of crushed garlic in a household toilet has not been established as an equivalent sanitation method.

For visible mineral scale, hard-water rings, heavy stains, or significant buildup, use a suitable toilet cleaner according to its label.

For situations where disinfection is important, choose a product specifically labeled for toilet or bathroom disinfection and follow its contact-time instructions.

Avoid these mistakes:

  • Do not mix garlic with bleach or other chemical cleaners.
  • Do not pour large amounts of food into the toilet.
  • Do not rely on garlic alone to control harmful germs.
  • Do not leave garlic in the bowl for an extended period.
  • Do not use this method as a substitute for regular bathroom sanitation.

Additional Tips for Better Toilet Care

Good toilet maintenance involves more than the bowl itself. Clean the seat, lid, handle, base, and nearby high-touch surfaces regularly.

Ventilate the bathroom during and after cleaning to reduce strong odors and moisture. Moisture control can also help make the bathroom less inviting to mold and mildew.

If your toilet has a persistent ring or discoloration, identify the cause before choosing a cleaner. Hard water can leave mineral deposits that require a product designed to dissolve scale.

For everyday maintenance, a toilet brush and an appropriate bathroom cleaner are usually more dependable than unusual household ingredients.

How Often Should You Clean Your Toilet?

For a busy household, regular toilet cleaning can help prevent stains and buildup from becoming difficult to remove. A weekly cleaning routine is a practical starting point for many homes, while frequently used bathrooms may need attention more often.

Garlic can be an occasional experiment within that routine, but it should not replace established cleaning practices.

A simple routine is more useful than relying on one unusual ingredient. Flush regularly, keep the bowl clean, wipe high-touch surfaces, and address stains before they become heavy deposits.

Final Thoughts

Using garlic for toilet cleaning is an unusual home-cleaning idea that may be worth trying for light maintenance. Crushed garlic releases allicin and other sulfur compounds with antimicrobial activity, but that does not make garlic a proven replacement for a toilet disinfectant.

The safest approach is to treat garlic as an optional natural cleaning experiment rather than a sanitation solution. Regular scrubbing, appropriate bathroom products, good ventilation, and proper hand hygiene remain the foundation of a clean toilet.

If you try this method, use a small amount of crushed garlic, allow brief contact, scrub the bowl, flush thoroughly, and continue with your normal cleaning routine.

Frequently Asked Questions

Can garlic really clean a toilet?

Garlic contains compounds with antimicrobial activity, but there is not enough evidence to consider crushed garlic a reliable toilet disinfectant. Scrubbing remains the key cleaning step.

How much garlic should I use for a toilet?

Four to six fresh cloves are enough for this household experiment. Crush them first and avoid putting large pieces into the toilet drain.

How long should garlic stay in the toilet?

About 30 minutes is sufficient for this method. Leaving food in the bowl longer does not make garlic a proven or stronger disinfectant.

Does garlic remove hard-water stains?

Garlic is not a dependable treatment for hard-water scale. Mineral deposits usually require a suitable cleaner designed to dissolve limescale.

Can garlic replace bleach for toilet cleaning?

No. Garlic should not replace a disinfectant when sanitation is required. Use a toilet product labeled for the specific cleaning or disinfecting task.

Is garlic safe for toilet plumbing?

Small crushed pieces are unlikely to be an issue when flushed promptly, but large food pieces should never be put into a toilet. Dispose of leftover garlic in household waste instead.

Will garlic remove toilet odors?

Garlic has a very strong natural odor, so it may temporarily make the bathroom smell more like garlic rather than fresher. Ventilation is recommended during use.

How often should I clean my toilet?

A weekly cleaning routine works well for many households, while heavily used bathrooms may need more frequent cleaning. Regular maintenance helps prevent stubborn buildup.

Natural Solutions for a Pest Free Home

Natural pest control spray with vinegar, peppermint oil, and household ingredients for a pest-free home

Natural Solutions for a Pest Free Home

Pests such as ants, cockroaches, mosquitoes, and flies can quickly make a home uncomfortable.Natural Solutions for a Pest Free Home Many homeowners want effective ways to manage these unwanted visitors without relying heavily on strong chemical products.

Natural pest control can be a useful part of a home-care routine when combined with good sanitation, moisture control, and simple prevention steps. Common household items such as vinegar, baking soda, and certain essential oils may help discourage some insects from entering or staying in problem areas.

The key is to focus on prevention first. A clean, dry, well-sealed home gives pests fewer places to find food, water, and shelter.

Why Opt for Natural Approaches?

Natural methods can reduce the need for frequent use of conventional pesticides inside living spaces. They can also be simple, inexpensive, and convenient for routine household maintenance.

However, natural does not always mean risk-free. Essential oils can irritate skin, and some ingredients may be harmful to pets if used incorrectly. Always follow product labels and keep homemade mixtures away from children, pets, food, and food-preparation surfaces.

For a lasting solution, combine natural deterrents with practical pest prevention. Removing crumbs, fixing leaks, sealing gaps, and reducing standing water can address the conditions that attract insects.

Natural Ingredients for Pest Control

Several common household ingredients are often used as insect deterrents. Their effectiveness can vary depending on the pest, location, and severity of the problem.

1. Vinegar

Vinegar has a strong smell that can help discourage ants from traveling across treated surfaces. A diluted vinegar solution can also be useful for cleaning areas where food residue may attract insects.

How to use it:

  • Mix equal parts water and white vinegar.
  • Place the solution in a labeled spray bottle.
  • Wipe suitable hard surfaces where ants commonly travel.
  • Avoid using vinegar on surfaces that can be damaged by acidic cleaners.

2. Baking Soda

Baking soda is commonly included in DIY pest-control recipes. It is sometimes combined with sugar as a homemade cockroach bait, but results are inconsistent and it should not be considered a reliable replacement for professional treatment during a serious infestation.

Keep any bait completely inaccessible to children and pets.

3. Peppermint Oil

Peppermint oil has a strong scent that some insects may avoid. It can be used as a scent-based deterrent around selected entry points.

Always dilute essential oils before household use and avoid applying them directly to skin, pets, or food-contact surfaces.

4. Lavender and Eucalyptus

Lavender and eucalyptus oils are also commonly used in natural insect-repellent routines. Their strong aromas may help make certain areas less attractive to some flying insects.

Essential oils should be stored safely and used according to their labels.

Recipe for Natural Insecticide Made at Home

A simple vinegar-based spray can be used as a household cleaning and deterrent solution for appropriate hard surfaces.

Ingredients:

  • ½ cup white vinegar
  • ½ cup water
  • 10 drops peppermint essential oil
  • 1 teaspoon mild dish soap

Important: Do not mix this solution with bleach or other cleaning chemicals.

Step-by-Step Instructions

Step 1: Prepare the Spray Bottle

Use a clean spray bottle that has not previously contained bleach or another chemical cleaner. Label the bottle clearly after preparing the mixture.

Step 2: Add Water and Vinegar

Pour ½ cup of water and ½ cup of white vinegar into the bottle. This creates the basic solution without making the mixture unnecessarily concentrated.

Step 3: Add Peppermint Oil

Add about 10 drops of peppermint essential oil. Close the bottle before gently mixing the ingredients.

Step 4: Add Dish Soap

Add 1 teaspoon of mild dish soap. Avoid excessive soap because too much can leave a sticky residue on surfaces.

Step 5: Shake Gently

Close the bottle securely and shake it gently before each use. Natural mixtures can separate during storage.

Step 6: Apply Carefully

Spray appropriate hard surfaces, cracks, or entry areas where insects are commonly noticed. Do not spray near food, pet bowls, electrical outlets, or sensitive materials.

Step 7: Clean the Area

After treating the area, remove crumbs, food residue, standing water, and other conditions that may attract pests. Prevention makes any deterrent strategy more useful.

Extra Advice for a House Free of Pests

Natural sprays work best when they are part of a broader prevention routine. Follow these practical steps to make your home less attractive to common household insects.

Keep Food Sealed

Store cereal, flour, sugar, snacks, and pet food in tightly closed containers. Wipe counters and dining areas after meals to remove crumbs and spills.

Take Out the Trash

Use bins with secure lids and remove household garbage regularly. Clean the inside of trash containers if food residue or liquid accumulates.

Seal Cracks and Gaps

Inspect areas around doors, windows, pipes, cabinets, and utility openings. Use suitable caulk or weatherstripping to close small entry points.

Fix Water Leaks

Leaking faucets and pipes can create moisture that attracts insects. Repair plumbing problems and dry wet areas as soon as possible.

Remove Standing Water

Mosquitoes can breed in small amounts of stagnant water. Empty water from buckets, plant saucers, outdoor containers, and other items that collect rain.

Keep Bathrooms Dry

Use ventilation after showers and wipe excess moisture from surfaces. Check under sinks for leaks or damp areas.

Maintain Outdoor Areas

Keep vegetation trimmed away from exterior walls and remove piles of leaves or debris near the foundation. These areas can provide shelter for insects.

When Natural Methods Are Not Enough

DIY solutions may help with minor pest activity, but they are not guaranteed to eliminate an established infestation. A large number of cockroaches, recurring ant trails, mosquito problems, or signs of pests inside walls may require professional evaluation.

Look for warning signs such as repeated sightings, droppings, damaged food packaging, nests, unusual odors, or pest activity that continues despite cleaning and prevention.

Professional pest control can identify the source of the problem and recommend an appropriate treatment plan. If you use any pesticide, read the label carefully and follow all directions for application, storage, ventilation, and re-entry.

A Simple Pest Prevention Routine

Use this step-by-step routine each week:

  1. Inspect: Check kitchens, bathrooms, basements, garages, and entry points.
  2. Clean: Remove crumbs, grease, food residue, and trash.
  3. Dry: Address leaks and wipe away standing moisture.
  4. Seal: Close small cracks and gaps around potential entry points.
  5. Declutter: Reduce cardboard, paper piles, and unused items where pests can hide.
  6. Monitor: Pay attention to recurring insect activity and possible sources.
  7. Act Early: Address signs of infestation before the problem becomes widespread.

FAQs About Natural Solutions for a Pest Free Home

Are natural pest control methods effective?

They can help deter some insects and support prevention, but their results vary by pest and infestation level.

Does vinegar kill cockroaches?

Vinegar is mainly useful as a cleaner and odor-based deterrent; it should not be relied on to eliminate a cockroach infestation.

Can peppermint oil keep ants away?

Peppermint oil may discourage some ants because of its strong scent, but it does not remove the colony or solve the underlying infestation.

What naturally keeps mosquitoes away from a home?

Removing standing water, using screens, reducing outdoor breeding areas, and keeping doors closed can help reduce mosquito activity.

How can I prevent cockroaches naturally?

Keep food sealed, remove garbage, fix moisture problems, clean regularly, and seal cracks around doors, pipes, cabinets, and walls.

Is baking soda safe for pest control?

Baking soda should be used carefully and kept away from children and pets, especially when combined with other ingredients as bait.

How often should I clean areas where pests appear?

Clean kitchens, bathrooms, and food-preparation areas regularly, while immediately removing spills, crumbs, food waste, and excess moisture.

When should I call a pest control professional?

Contact a professional when pest activity is persistent, widespread, or returns after cleaning and basic prevention measures.

Final Thoughts

A pest-resistant home starts with simple daily habits. Keeping food sealed, controlling moisture, removing standing water, cleaning regularly, and closing entry points can make your home less appealing to unwanted insects.

Natural ingredients such as vinegar and peppermint oil may complement these habits, but they should not be treated as a guaranteed cure for infestations. When pest activity continues or becomes extensive, professional assessment is the safer and more dependable next step.

For more practical home-care ideas and helpful household solutions, visit DoorDraz and make simple prevention part of your regular home routine.

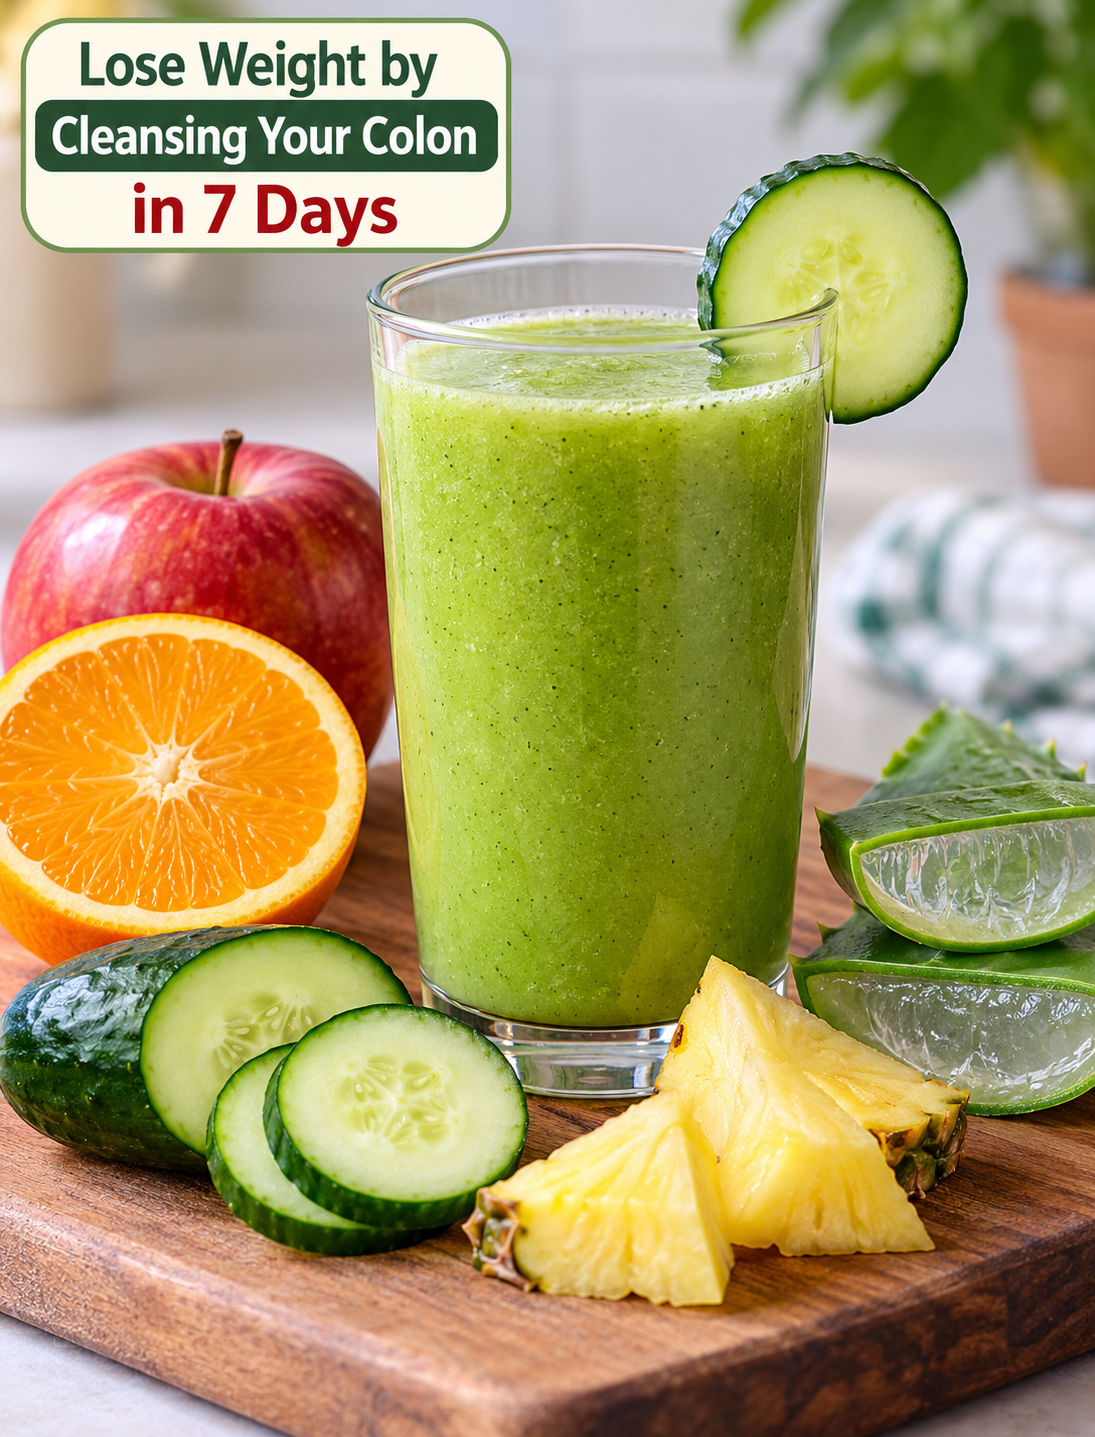
Lose Weight by Cleansing Your Colon in 7 Days

7-day healthy digestive reset drink with apple, cucumber, orange, pineapple, and aloe vera for digestive health and weight management

Lose Weight by Cleansing Your Colon in 7 Days

Lose Weight by Cleansing Your Colon in 7 Days?A healthy digestive system can support comfortable digestion, regular bowel movements, and better overall eating habits. However, the idea that waste or “toxins” build up inside a healthy colon and need to be flushed out for weight loss is not supported by strong scientific evidence. Your body already has natural systems, including the digestive tract, liver, and kidneys, that handle waste removal.

If your goal is to feel less bloated and start healthier habits, a week of balanced meals, adequate fluids, regular movement, and fiber-rich foods can be a more practical approach. Juice-based cleanses may cause short-term changes on the scale mainly because they reduce calorie intake and food volume, but that does not mean they are burning body fat. Research reviewed by the National Center for Complementary and Integrative Health does not provide compelling evidence that detox diets remove toxins or produce lasting weight loss.

Problems of an Unhealthy Colon

Digestive discomfort can make you feel sluggish or uncomfortable, but many symptoms blamed on a “dirty colon” can have different causes.

Common digestive concerns may include:

  • Occasional bloating or gas
  • Constipation or irregular bowel movements
  • Feeling overly full after meals
  • Low fiber intake
  • Not drinking enough fluids
  • Changes in eating patterns
  • Limited physical activity

A healthy colon does not normally need routine detox treatments, enemas, or colon hydrotherapy. Colon cleansing procedures can cause side effects, including diarrhea, dehydration, and electrolyte problems, and some complications can be serious.

Persistent constipation, blood in the stool, severe abdominal pain, unexplained weight loss, or ongoing digestive changes should be discussed with a healthcare professional instead of treated with a cleanse.

Benefits of Colon Cleansing

Colon cleansing should not be promoted as a guaranteed weight-loss method or as a treatment for diseases. There is limited evidence that detox or cleanse programs provide lasting health benefits, and severely restricting calories can make it difficult to get enough nutrients.

For better digestive health, focus on habits that support normal bowel function:

  • Eat fruits, vegetables, beans, and whole grains for dietary fiber.
  • Drink enough fluids throughout the day.
  • Stay physically active.
  • Eat regular, balanced meals.
  • Limit highly processed foods and excess added sugar.
  • Increase fiber gradually if your current intake is low.

These habits can support healthy weight management when followed consistently. The National Institute of Diabetes and Digestive and Kidney Diseases recommends sustainable eating and physical activity rather than short-term approaches for maintaining weight loss.

A Juice Cleanse for Colon Health

Instead of treating the following drink as a medical colon cleanse, consider it a fruit-and-vegetable smoothie that can fit into a balanced eating pattern.

The ingredients provide water, fruit, and plant foods, but they should not be expected to flush toxins from the colon or guarantee weight loss.

Ingredients

  • 1 apple, green or red
  • Juice of 1 orange
  • ½ cucumber
  • 1 slice of pineapple
  • ½ aloe vera leaf using only properly prepared, food-grade inner gel
  • 1 glass of water

Important: Aloe vera products can contain latex compounds that may cause diarrhea and other adverse effects. Do not consume aloe leaf latex, and avoid homemade aloe preparations if you are unsure how to remove the latex safely. People who are pregnant, breastfeeding, taking medications, or managing a medical condition should ask a healthcare professional before using oral aloe products.

Step-by-Step Instructions

Step 1: Prepare the produce

Wash the apple, cucumber, and pineapple thoroughly under running water. Cut the apple into small pieces and slice the cucumber.

Step 2: Prepare the aloe

If using aloe, use a commercially prepared food-grade inner-leaf gel intended for oral consumption. Do not use the yellow latex layer beneath the leaf skin.

Step 3: Add the ingredients

Place the apple, cucumber, pineapple, aloe gel, orange juice, and water into a blender.

Step 4: Blend until smooth

Blend until the mixture reaches a smooth consistency. Add a little more water if needed.

Step 5: Drink as part of a balanced day

Enjoy the smoothie with a balanced diet rather than replacing all meals with juice. Whole fruits and vegetables are also valuable because they provide dietary fiber.

Step 6: Stay hydrated

Drink water regularly according to your thirst and individual needs. You do not need to force large amounts of water simply because you are following a cleanse.

Step 7: Add healthy movement

A daily walk or another enjoyable form of physical activity can complement healthy eating and support long-term weight management.

What to Expect in 7 Days

You may notice less bloating if you replace very salty, highly processed meals with lighter, balanced foods. However, a quick decrease on the scale does not necessarily represent body-fat loss.

Weight can change from day to day because of hydration, food volume, sodium intake, and bowel movements. Sustainable fat loss generally requires consistent eating and activity habits over time rather than a seven-day colon cleanse.

If weight loss is your goal, consider setting a realistic target and focusing on habits you can continue after the first week. Healthy weight management can also reduce the risk of several conditions associated with overweight and obesity.

Safety Tips Before Trying a Cleanse

Keep these points in mind before making major changes to your diet:

  • Do not use laxatives or enemas for routine weight loss.
  • Avoid prolonged fasting or extremely low-calorie diets.
  • Do not rely on juice alone for several days.
  • Stop if you develop significant diarrhea, dizziness, weakness, or dehydration.
  • Be cautious with unpasteurized juices because they can contain harmful bacteria.
  • Ask your healthcare professional before making major dietary changes if you have a medical condition or take medication.
  • People with kidney or heart problems should be especially careful with colon-cleansing procedures because complications may be more likely.

A “natural” ingredient is not automatically safe, and cleanse products can sometimes contain ingredients that are not clearly disclosed or adequately tested.

FAQs

1. Can you lose weight by cleansing your colon in 7 days?
A cleanse may cause temporary scale changes, but there is no strong evidence that colon cleansing produces lasting fat loss.

2. Does colon cleansing remove toxins from the body?
There is not compelling evidence that detox diets or colon cleanses remove toxins from a healthy body.

3. Can this apple, orange, cucumber, and pineapple drink help digestion?
It can provide fluids and plant foods, but it should not be considered a proven treatment for digestive problems or constipation.

4. How often should you cleanse your colon?
Routine colon cleansing is not necessary for most healthy people and may cause dehydration or other complications.

5. Is aloe vera safe to drink?
Only properly prepared food-grade inner-leaf products should be considered; aloe latex can cause diarrhea and other adverse effects.

6. Can drinking more water help with weight loss?
Adequate hydration supports normal body function, but simply drinking excessive water does not directly remove body fat.

7. What is better than a seven-day detox for weight management?
A sustainable eating pattern, appropriate calorie intake, regular physical activity, adequate sleep, and consistent habits are better long-term strategies.

8. When should I see a doctor about digestive symptoms?
Seek medical advice for persistent constipation, blood in the stool, severe abdominal pain, unexplained weight loss, or significant changes in bowel habits.

A seven-day reset can be a useful opportunity to improve everyday habits, but your goal should be better nutrition and sustainable weight management—not flushing your colon. Choose fiber-rich foods, drink fluids normally, stay active, and build routines that you can continue well beyond one week.

Grandma’s Simple Warm Ginger Compress for Achy Muscles

Warm ginger compress made with fresh ginger and a clean cloth for a traditional achy muscle comfort routine

GRANDMA’S SIMPLE TRICK FOR ACHY MUSCLES!

A Warm Ginger Compress Takes Just 10 Minutes to Prepare

Sometimes your back feels tight after a long day at the desk. Other times, your shoulders, neck, or legs simply feel worn out after chores, exercise, or too much time on your feet. Before reaching for a complicated routine, there is an old-fashioned home comfort idea worth knowing: a warm ginger compress.

This simple method combines the soothing feeling of gentle warmth with fresh ginger, an ingredient that has been used in traditional wellness practices for generations. Ginger has a long history of use in folk medicine, although modern research is still unclear about whether ginger itself provides meaningful relief for muscle or joint pain.

The main appeal of this remedy is its simplicity. You need only fresh ginger, water, a small saucepan, and a clean washcloth. Preparation takes about 10 minutes, making it an easy addition to a relaxing evening routine.

What Is a Warm Ginger Compress?

A warm ginger compress is a cloth soaked in warm ginger-infused water and placed over an area that feels tight or achy.

Unlike a ginger supplement, this method does not require you to eat or drink ginger. It is a traditional topical comfort practice. The warmth is an important part of the routine because heat is commonly used as a home-care option for back discomfort and muscle stiffness.

Think of it as a cozy self-care ritual rather than a medical treatment.

Why People Like This Traditional Home Remedy

Fresh ginger has a warm, spicy aroma that can make a simple home routine feel special. When combined with a comfortably warm cloth, it can be a relaxing way to slow down at the end of the day.

There are also a few practical reasons this remedy is popular:

  • It uses inexpensive kitchen ingredients.
  • It takes only a few minutes to prepare.
  • You control the temperature and application time.
  • It does not require special equipment.
  • It can fit easily into an evening self-care routine.
  • The warm compress can feel comforting on areas affected by everyday muscle tension.

It is important to keep expectations realistic. Research does not currently establish topical ginger as an effective treatment for muscle or joint pain.

Ingredients You’ll Need

You only need a few basic ingredients and supplies.

  • 2–3 inches of fresh ginger
  • 3 cups of water
  • 1 clean cotton washcloth
  • Small saucepan
  • Clean bowl or plate
  • Optional kitchen tongs for handling the hot cloth

Fresh ginger works well because you can slice it directly into the water.

How to Make a Warm Ginger Compress Step by Step

Step 1: Wash the Ginger

Rinse the fresh ginger under cool running water to remove dirt from the surface.

You can peel it if you prefer, but peeling is not required when the ginger is washed well.

Step 2: Slice the Ginger

Cut about 2–3 inches of ginger into thin slices.

Thin pieces allow the ginger to infuse into the water more easily during simmering.

Step 3: Heat the Water

Pour 3 cups of water into a small saucepan and add the sliced ginger.

Bring the mixture to a gentle boil.

Step 4: Simmer for 10 Minutes

Reduce the heat and let the ginger simmer gently for about 10 minutes.

This creates a warm, fragrant ginger-infused liquid without requiring a complicated preparation.

Step 5: Let It Cool Slightly

Remove the saucepan from the heat and allow the liquid to cool until it is comfortably warm.

This step matters because the cloth will be placed directly against your skin.

The compress should feel pleasantly warm, never painfully hot.

Step 6: Soak the Washcloth

Place the clean washcloth into the warm ginger water.

Let it soak thoroughly, then carefully remove it.

Wring out excess liquid so the cloth is damp rather than dripping.

Step 7: Apply the Compress

Place the warm cloth over the area that feels tight or achy.

A common choice is the lower back, upper back, shoulders, or another area of everyday muscle tension.

Keep the compress in place for approximately 10–15 minutes.

Step 8: Re-Warm if Needed

If the cloth becomes cool before you finish, soak it again in the warm liquid.

Always check the temperature with your hand before putting it back on your skin.

Step 9: Finish With Gentle Movement

After removing the compress, stand up slowly and move comfortably.

A short, easy walk can be a better choice than staying in bed for a long period when dealing with uncomplicated back discomfort. MedlinePlus advises staying as active as possible when there are no warning signs of a serious problem.

When to Try This Comfort Routine

A warm ginger compress may fit well into a relaxing evening after ordinary activities such as:

  • Sitting at a computer for several hours
  • Spending the day doing household chores
  • Gardening
  • Walking or exercising
  • Standing for long periods
  • Feeling generally tight after a busy day

The goal is comfort, not forcing the body to relax.

If the warmth feels unpleasant, remove the compress and stop.

Important Safety Tips

Natural ingredients still require sensible precautions.

Never place a very hot compress directly against your skin. Excessive heat can cause burns.

Do not apply the compress over cuts, irritated skin, rashes, or areas with reduced sensation.

Do not sleep with a heating compress on your body.

If you have a condition that affects your ability to feel temperature, ask a healthcare professional whether heat-based self-care is appropriate for you.

Ginger can also cause skin irritation in some people. If you notice burning, redness, itching, or discomfort, remove the compress and wash the area with clean water. NCCIH notes that ginger products may be safe for topical use, but research on topical ginger is limited.

When Back Pain Needs Medical Attention

A home comfort remedy should never delay medical care when symptoms suggest something more serious.

Contact a healthcare professional if your back pain is severe, follows an injury, or does not improve. MedlinePlus also recommends prompt medical attention for symptoms such as weakness, numbness, loss of bladder or bowel control, fever, severe pain, or pain traveling down the leg.

If the pain is sudden and severe or accompanied by serious symptoms, seek urgent medical care instead of relying on a home remedy.

The Bottom Line

Grandma’s warm ginger compress is a simple traditional wellness idea that requires very little preparation. Fresh ginger, warm water, and a clean washcloth are enough to create a comforting routine in about 10 minutes.

The warmth may feel soothing when ordinary muscle tightness or back discomfort has left you feeling stiff after a busy day. However, ginger itself has not been proven to treat back pain or muscle pain when applied to the skin.

Use this idea as a gentle self-care practice, listen to your body, and seek professional advice when pain is severe, persistent, or accompanied by warning signs.

Frequently Asked Questions

1. How long does it take to prepare a warm ginger compress?

It takes about 10 minutes to simmer the sliced ginger and prepare the warm infusion.

2. How long should I leave the compress on?

Keep it on the affected area for about 10–15 minutes while making sure the temperature remains comfortably warm.

3. Can I use a ginger compress for lower back discomfort?

You can use gentle warmth as a comfort measure for ordinary muscle tightness, but persistent or severe back pain should be evaluated by a healthcare professional.

4. Does ginger actually treat muscle pain?

Current evidence is not strong enough to show that topical ginger treats muscle or joint pain.

5. Can I use powdered ginger instead of fresh ginger?

Fresh ginger is the simplest choice for this compress because it can be sliced and simmered directly in water.

6. How hot should the ginger water be?

The water should be comfortably warm rather than very hot, because excessive heat can burn the skin.

7. Can I use the compress every day?

If your skin tolerates it, occasional use as a comfort routine may be reasonable, but ongoing or worsening pain should not be managed only with home remedies.

8. When should I see a doctor for back pain?

Seek medical care for severe pain, pain after an injury, weakness or numbness, bowel or bladder changes, fever, or pain that does not improve.

5-Minute Fall “Grandma’s Cozy Wellness” Ritual

5-minute fall wellness ritual with ginger, lemon, honey, cinnamon, and warm water in a cozy mug

5-Minute Fall “Grandma’s Cozy Wellness” Ritual

As the weather turns cooler, simple home rituals can make fall mornings and evenings feel more comforting. This 5-minute fall wellness ritual combines warm water, fresh ginger, lemon, honey, and optional cinnamon in one easy drink inspired by traditional kitchen habits.

The idea is simple: warm a mug, add a few familiar ingredients, and take a few quiet minutes to enjoy it. It is not meant to replace medical care or treat illness. Instead, it can be a comforting addition to a balanced fall routine.

For many families, warm drinks have long been part of everyday home care. Ginger, lemon, honey, and cinnamon are common pantry ingredients that bring warmth, flavor, and aroma to a simple cup. This version keeps the preparation quick enough for busy mornings while also working well as a relaxing evening ritual.

Why You’ll Love This Fall Wellness Ritual

This homemade wellness drink takes about five minutes and needs only a handful of ingredients. There is no special equipment, complicated preparation, or long cooking time.

The warm liquid makes the drink especially appealing on cool fall days. Fresh ginger adds a mild spicy flavor, lemon brings brightness, and honey adds natural sweetness. A cinnamon stick can provide a gentle, warming aroma.

Another benefit is flexibility. You can adjust the ginger, lemon, and honey to match your taste. You can also leave out cinnamon if you prefer a cleaner citrus-and-ginger flavor.

The ritual itself can be just as useful as the drink. Sitting down with a warm mug gives you a small pause during a busy day. Pairing it with a few minutes of quiet can turn a basic kitchen drink into a simple self-care habit.

Ingredients You’ll Need

For one serving, gather:

  • 1 cup water
  • 3 to 4 thin slices of fresh ginger
  • 1 to 2 teaspoons fresh lemon juice
  • 1 teaspoon honey
  • 1 small cinnamon stick, optional

Fresh ginger works well because it gives the drink a clean, bright flavor. Ground ginger can be used when fresh ginger is not available, but start with a small amount because its flavor can be stronger.

Use fresh lemon juice when possible for a brighter taste. Honey can be adjusted according to your preferred sweetness.

If you are making this drink for a child under 1 year old, do not use honey. Honey should not be given to infants younger than 12 months.

How to Make Grandma’s Cozy Wellness Ritual

Start by bringing 1 cup of water to a gentle simmer. You do not need a rolling boil.

Add the ginger slices to a mug or small heat-safe pitcher. Pour the hot water over the ginger and let it steep for about 3 minutes.

Add the lemon juice after steeping. This keeps the lemon flavor fresh and prevents the drink from becoming overly bitter.

Allow the drink to cool slightly, then stir in the honey. Adding honey after the liquid has cooled a little makes it easier to control the sweetness and enjoy the drink at a comfortable temperature.

Add the cinnamon stick if you want a warmer spice note. Let it sit in the mug for another minute before drinking.

The entire process takes about five minutes, making it easy to fit into a morning routine, afternoon break, or quiet evening.

Best Time to Enjoy This Ritual

There is no required time to drink it. Choose a moment that fits naturally into your schedule.

Morning, it can become a gentle alternative to another caffeinated beverage. In the

Afternoon, it can provide a warm break during a busy workday.

Evening, the simple preparation can become part of a relaxing wind-down routine.

Fall is especially suitable because cooler temperatures naturally make warm drinks more appealing. Keeping ginger, lemons, and honey available in the kitchen also makes the ritual easy to repeat.

Traditional Wellness Ideas Behind the Ingredients

Ginger has been used in food and traditional wellness practices for generations. Its naturally spicy flavor makes it a popular ingredient in warm drinks.

Lemon is valued for its bright citrus taste and is an easy way to add flavor to warm water.

Honey has traditionally been used as a sweetener in homemade drinks. Its smooth texture also pairs well with ginger and lemon.

Cinnamon is commonly used in fall beverages because of its warm aroma and familiar spice flavor.

These ingredients can make a flavorful drink, but they should not be presented as a cure for allergies, colds, flu, or other health conditions. A traditional home remedy can be comforting without being a substitute for appropriate medical treatment.

Simple Ways to Personalize Your Cup

You can make this recipe your own without changing the basic method.

For a stronger ginger flavor, use an extra slice or two and allow it to steep slightly longer. For a lighter flavor, reduce the ginger and add more warm water.

If you prefer a sweeter drink, add another small amount of honey. If you enjoy a sharper citrus flavor, increase the lemon gradually.

For a cozy fall version, keep the cinnamon stick in the mug while you sip. You can also serve the drink with a simple breakfast such as oatmeal, whole-grain toast, or fresh fruit.

Avoid adding too many ingredients at once. Keeping the recipe simple lets the ginger, lemon, honey, and cinnamon flavors remain distinct.

Helpful Tips for Making It at Home

Use thin ginger slices so the flavor releases quickly. A clean teaspoon works well for measuring honey and lemon juice.

Do not drink the beverage while it is extremely hot. Give it enough time to reach a comfortable drinking temperature.

If you prepare several servings, make only what you expect to use soon and store leftovers safely according to standard food-storage practices.

People with food allergies should check every ingredient before preparing the drink. Anyone managing a medical condition or taking medication should ask a healthcare professional if they have concerns about using concentrated herbs or dietary ingredients regularly.

Most importantly, think of this as a simple comfort ritual rather than a medical treatment.

When to Skip or Modify This Drink

This recipe is not suitable for infants under 1 year because it contains honey.

People who are sensitive to ginger, citrus, cinnamon, or honey should leave out the ingredient that causes problems or choose another beverage.

If you have been advised to limit certain foods or ingredients because of a medical condition, follow your healthcare professional’s guidance rather than relying on a traditional wellness recipe.

Persistent or severe symptoms should not be managed with homemade drinks alone. Seek appropriate medical advice when symptoms require professional attention.

Make It Part of Your Fall Routine

A wellness routine does not have to be complicated. Five quiet minutes with a warm drink can create a useful pause between busy parts of the day.

Keep fresh ginger in the refrigerator, lemons nearby, and honey in the pantry so the ingredients are ready when you want them. A small cinnamon jar can complete the setup.

You can also make the ritual more enjoyable by putting your phone away, sitting somewhere comfortable, and taking a few slow breaths while the drink cools.

The goal is not to create a perfect routine. It is to create a small habit that feels easy enough to repeat.

That is what makes this grandma-inspired home ritual practical for modern fall living: simple ingredients, quick preparation, and a few peaceful minutes for yourself.

Frequently Asked Questions

1. What is the 5-Minute Fall “Grandma’s Cozy Wellness” Ritual?

It is a warm drink made with ginger, lemon, honey, and optional cinnamon that can be prepared in about five minutes.

2. Can I drink this every day?

For most people, an occasional or regular serving can fit into a balanced routine, but individual dietary or medical needs may differ.

3. Can I use ground ginger instead of fresh ginger?

Yes, but use a small amount because ground ginger has a stronger and more concentrated flavor than fresh slices.

4. Can I make this drink without honey?

Yes. Simply leave out the honey or use another sweetener that fits your dietary preferences.

5. Is this drink a treatment for a cold or flu?

No. It is a traditional wellness drink for comfort and flavor and should not be considered a treatment or cure for illness.

6. Can children drink this recipe?

Children should not receive honey before age 1; for older children, consider their individual dietary needs and ask a pediatric professional when unsure.

7. Can I prepare it before bedtime?

Yes, but choose a caffeine-free version and allow the drink to cool to a comfortable temperature before drinking.

8. Why is this a good fall wellness idea?

The warm ginger-and-lemon drink is easy to prepare and fits naturally into cozy morning, afternoon, or evening routines during cooler weather.

Final Thoughts

This 5-minute fall wellness ritual brings a traditional kitchen idea into a simple modern routine. Warm water, ginger, lemon, honey, and optional cinnamon create a comforting combination without complicated preparation.

The best part is how easy it is to make. You can prepare one cup when you need a quiet break, enjoy it during a cool fall morning, or make it part of your evening routine.

Traditional wellness ideas do not need to be complicated to be enjoyable. Sometimes, a warm mug and five peaceful minutes are enough to make an ordinary fall day feel a little more comforting.

Cinnamon for Sleep & Digestion: A Warm Nighttime Wellness Drink

Warm cinnamon tea in a glass cup with cinnamon sticks for a relaxing nighttime wellness routine

Cinnamon The Sleep & Digestion Superhero

Cinnamon The Sleep & Digestion Superhero warm, fragrant, and naturally sweet, cinnamon is one of the most popular spices in American kitchens. It adds flavor to oatmeal, coffee, baked goods, smoothies, and warm drinks without needing much added sugar.

Cinnamon has also been used in traditional wellness practices for centuries. Today, many people enjoy cinnamon tea as part of a relaxing evening routine or after a meal.

But there is an important difference between traditional use and proven health effects. Cinnamon is not a sleeping pill, and there is not enough strong evidence to say that it treats insomnia or directly prevents bloating. Research on cinnamon and health is still developing, and results vary between studies.

That does not mean cinnamon has no value. Used as a flavorful food ingredient, it can be part of a balanced diet and a calming nighttime routine.

How Cinnamon May Support Better Sleep

Cinnamon does not directly make you fall asleep. However, a warm cinnamon drink can become part of a relaxing bedtime habit, especially when it replaces sugary drinks or late-night caffeine.

A consistent nighttime routine can help your body prepare for sleep. Drinking a warm, caffeine-free beverage, dimming bright lights, and stepping away from screens may create a calmer environment before bed.

1. Cinnamon and Blood Sugar

Cinnamon has been studied for its possible effect on blood glucose, but the findings are not strong enough to recommend it as a treatment for diabetes or blood sugar problems.

Some clinical studies have reported improvements in certain blood sugar measures, while other research has produced conflicting results. The National Center for Complementary and Integrative Health notes that more research is needed before firm conclusions can be made.

For everyday use, think of cinnamon as a spice rather than a replacement for prescribed diabetes treatment.

2. A Warm Bedtime Ritual

A cup of caffeine-free cinnamon tea can make a simple evening routine feel more comforting.

The benefit may come less from cinnamon acting as a sedative and more from creating a predictable signal that the day is winding down.

Try drinking your tea while reading, stretching gently, or preparing for bed instead of scrolling through your phone.

3. Antioxidant Compounds

Cinnamon contains naturally occurring plant compounds with antioxidant activity.

Antioxidants help protect cells from oxidative stress, but this does not mean cinnamon can treat inflammation, insomnia, or another medical condition.

Adding a small amount of cinnamon to nutritious foods is a simple way to increase flavor while keeping meals interesting.

How Cinnamon May Support Digestion

Cinnamon has traditionally been used after meals, and its warm flavor makes it a popular ingredient in digestive teas.

However, strong human evidence showing that cinnamon directly treats gas, bloating, or digestive disorders is limited. Claims that cinnamon can eliminate bloating should therefore be treated cautiously.

Supports a Comfortable After-Meal Routine

A warm, caffeine-free cinnamon drink may be a pleasant alternative to heavy desserts or sugary beverages after dinner.

Keeping evening meals moderate, eating slowly, and staying hydrated are more reliable habits for supporting comfortable digestion.

May Complement a Balanced Diet

Cinnamon can add strong flavor without requiring much sugar.

Try it with plain oatmeal, unsweetened yogurt, apples, roasted sweet potatoes, or whole-grain toast for a simple addition to a balanced meal.

Cinnamon and Gut Health

Cinnamon contains plant compounds that have shown antimicrobial activity in laboratory research, but laboratory findings do not prove that cinnamon can balance human gut bacteria or treat digestive conditions.

More human research is needed before cinnamon can be recommended for specific gut health problems.

Simple Cinnamon Sleep Tea Recipe

8-Hour Rest Cinnamon Drink

This caffeine-free drink is designed as a relaxing evening beverage, not as a treatment for insomnia.

Ingredients:

  • 1 cup hot water
  • 1 cinnamon stick or a small amount of ground cinnamon
  • 1 teaspoon honey, optional
  • Small squeeze of lemon, optional

Instructions:

  1. Heat one cup of water until hot.
  2. Add a cinnamon stick and let it steep for about 10 minutes.
  3. Remove the cinnamon stick before drinking.
  4. Add honey or lemon if desired.
  5. Enjoy the drink as part of your evening wind-down routine.

If using ground cinnamon, stir well and expect some spice particles to settle at the bottom of the cup.

For a gentler flavor, combine cinnamon with caffeine-free herbal tea such as chamomile.

Important Tips

Choose food-grade cinnamon and use it as a spice rather than taking large amounts as a supplement.

There are two common types of cinnamon: Ceylon and cassia. Cassia cinnamon, which is common in the United States, contains varying amounts of coumarin. Large or prolonged amounts of coumarin can be a concern for people who are sensitive to it, particularly those with liver disease.

Cinnamon used in normal food amounts is generally considered safe for most people. Larger amounts may cause digestive discomfort or allergic reactions in some individuals.

If you take diabetes medication, blood-thinning medication, or other prescription drugs, talk with your healthcare professional before using concentrated cinnamon supplements.

Pregnant or breastfeeding individuals should also ask a healthcare professional before using cinnamon in amounts greater than those normally found in food.

Do not use cinnamon tea as a replacement for treatment prescribed for diabetes, chronic digestive symptoms, or sleep disorders.

Final Thoughts

Cinnamon is best viewed as a flavorful food and a comforting addition to an evening routine rather than a miracle remedy.

A warm cinnamon drink may help make bedtime feel more relaxing, while cinnamon can also add flavor to nutritious foods without relying on large amounts of sugar.

For better sleep, pair your evening drink with habits that have a stronger foundation, such as keeping a consistent sleep schedule, reducing bright screens before bed, and creating a quiet, comfortable bedroom.

For digestion, focus on regular meals, adequate fluids, slower eating, and a balanced diet.

If frequent bloating, abdominal pain, or ongoing sleep problems continue, speak with a healthcare professional rather than relying on home remedies.

Frequently Asked Questions

Can cinnamon help you sleep?

Cinnamon has not been proven to treat insomnia, but caffeine-free cinnamon tea can be included in a relaxing bedtime routine.

Does cinnamon reduce bloating?

There is not enough strong human evidence to confirm that cinnamon directly reduces bloating or treats digestive disorders.

Is cinnamon tea good before bed?

Caffeine-free cinnamon tea can be a comforting nighttime beverage, especially when included in a consistent wind-down routine.

Which cinnamon is best for regular use?

Ceylon cinnamon contains much less coumarin than cassia, making it an option for people concerned about frequent cinnamon intake.

Can cinnamon lower blood sugar?

Some studies suggest cinnamon may affect certain blood sugar measures, but the evidence is inconsistent and it should not replace diabetes treatment.

Is cinnamon safe every day?

Cinnamon is generally safe in normal food amounts, while large or prolonged amounts may increase the risk of side effects, particularly with cassia cinnamon.

Can I drink cinnamon tea every night?

A modest food-level amount may be reasonable for many healthy adults, but people with liver disease or those taking medications should seek professional advice first.

Does cinnamon burn belly fat?

There is no reliable evidence that drinking cinnamon tea alone burns belly fat or produces meaningful weight loss.