Air Fryer Chocolate Hazelnut Stuffed Croissant Bites

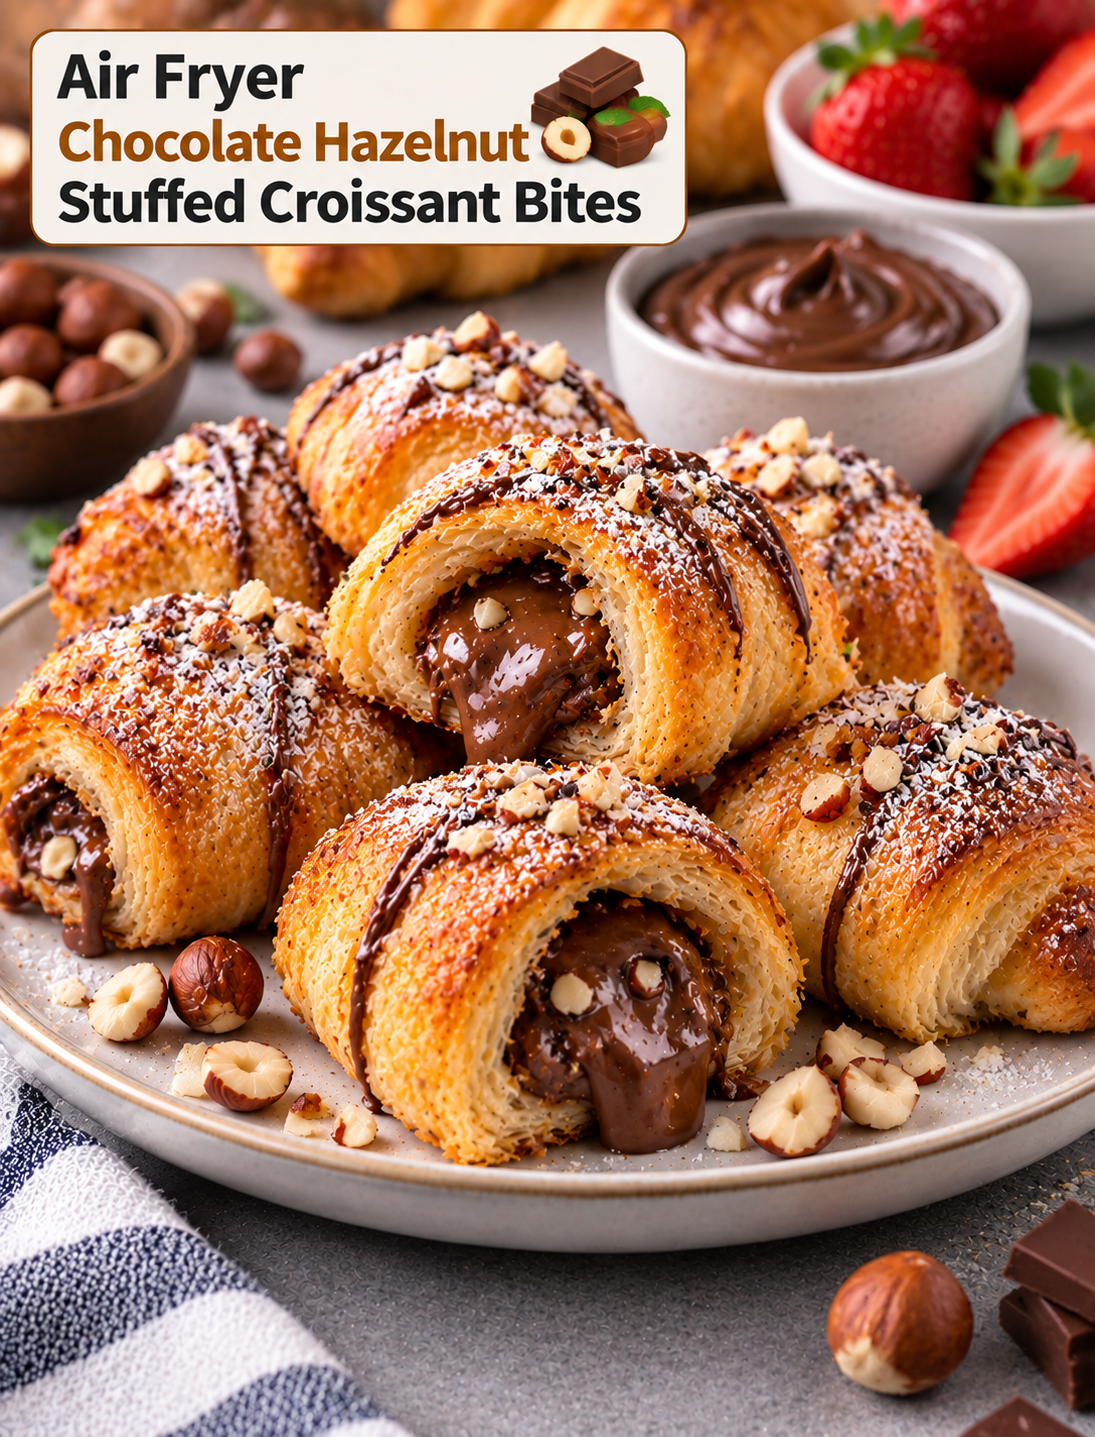
Golden air fryer croissant bites filled with melted chocolate hazelnut spread and topped with powdered sugar and chopped hazelnuts

Air Fryer Chocolate Hazelnut Stuffed Croissant Bites

Air Fryer Chocolate Hazelnut Stuffed Croissant Bites turn refrigerated crescent dough and creamy chocolate hazelnut spread into a warm, flaky dessert. Each bite has a golden exterior with a soft, rich chocolate center.

These small pastries are easy to prepare and cook quickly in the air fryer. The circulating heat helps the dough become crisp and golden without deep frying.

They are a great choice for breakfast treats, weekend brunch, afternoon snacks, holiday gatherings, or simple desserts. A light dusting of powdered sugar adds a bakery-style finish, while fresh berries can provide a bright contrast to the rich filling.

Why You’ll Love These Croissant Bites

These stuffed croissant bites combine flaky pastry with a smooth chocolate hazelnut center. The contrast between the crisp outside and soft filling makes each bite satisfying.

The recipe also requires only a few basic ingredients. Refrigerated crescent dough keeps preparation simple, while chocolate hazelnut spread provides most of the sweetness and chocolate flavor.

The small size makes these pastries easy to portion. You can make them for a family breakfast or prepare a larger batch for guests.

Air frying also makes cleanup easier than traditional frying. There is no large pot of hot oil, and the pastries can be cooked directly in the air fryer basket when your appliance allows it.

Ingredients You’ll Need

Crescent Dough

Refrigerated crescent roll dough provides a soft, buttery base that becomes flaky and golden during cooking. Use a fresh package that is easy to unroll and separate.

Puff pastry can also be used, but the texture will be lighter and more layered than crescent dough.

Chocolate Hazelnut Spread

A smooth chocolate hazelnut spread creates the creamy center. Use enough to provide a noticeable filling without making the dough difficult to seal.

Keep the spread chilled for a short time if it feels too soft to handle. A firmer filling is easier to portion onto small pieces of dough.

Butter

Melted butter can be brushed over the dough before air frying. It encourages browning and adds a richer pastry flavor.

Powdered Sugar

Powdered sugar provides a simple finishing touch. Add it after cooking so it stays bright and does not melt into the pastry.

Hazelnuts

Finely chopped toasted hazelnuts are optional but add crunch and reinforce the nutty flavor of the filling.

Optional Flavorings

A small amount of vanilla extract, cinnamon, or orange zest can add extra flavor. Use these additions lightly so they do not overpower the chocolate.

How to Make Air Fryer Chocolate Hazelnut Stuffed Croissant Bites

Prepare the Dough

Open the refrigerated crescent dough carefully and separate it into triangles along the existing perforations.

If the triangles are large, cut them into smaller pieces to create bite-sized pastries. Keep the pieces reasonably similar in size so they cook at the same rate.

Place each piece on a clean work surface with the wider end facing toward you.

Add the Chocolate Filling

Place a small amount of chocolate hazelnut spread near the wide end of each dough piece. Avoid adding too much because the filling can escape as the pastry cooks.

If using chopped hazelnuts, sprinkle a small amount over the spread.

Roll the dough toward the narrow tip, keeping the filling enclosed. Pinch the edges gently if needed to create a secure seal.

For smaller bites, tuck the ends inward slightly after rolling. This helps keep the filling inside during air frying.

Prepare the Air Fryer

Preheat the air fryer according to your model’s instructions if preheating is recommended.

Lightly grease the basket if necessary. Arrange the croissant bites in a single layer with space between each piece.

Do not stack the pastries. Proper airflow helps the dough become evenly browned and crisp.

Brush the tops lightly with melted butter. Avoid using too much because excess butter can make the pastry greasy.

Air Fry Until Golden

Cook the bites until the dough is puffed, golden brown, and fully cooked.

Cooking time depends on the size of the pastries, dough thickness, and air fryer model. Begin checking early during the first batch because smaller pieces can brown quickly.

If the outside becomes dark before the center is fully baked, reduce the temperature slightly and continue cooking until the dough is done.

Allow the bites to cool for several minutes before serving. The chocolate filling can remain extremely hot after cooking.

Tips for Flaky and Golden Croissant Bites

Keep the refrigerated dough cold until you are ready to use it. Cold dough is easier to handle and can produce a better flaky texture.

Use a small amount of filling in each pastry. Overfilled bites are more likely to split and leak chocolate.

Seal the dough carefully around the filling. Press the seams gently so there are no obvious openings.

Leave space between the pastries in the air fryer basket. Crowding can reduce airflow and cause uneven browning.

Brush the dough lightly with butter rather than soaking it. A thin coating is enough to support a golden exterior.

Watch the final minutes closely. Pastry can brown quickly once it reaches the right temperature.

How to Prevent Chocolate From Leaking

The most important step is controlling the amount of filling. A teaspoon or small spoonful is usually easier to contain than a large scoop.

Keep the spread toward the center of the dough and away from the edges. This gives you enough dough to close around the filling.

Do not stretch the dough too thin around the chocolate. Thin areas can tear during rolling.

Pinch or press the seams gently before placing the bites in the basket. Positioning the seam underneath can also help keep it closed.

If the chocolate hazelnut spread is very soft, chill it briefly before assembling the pastries. Firmer spread is easier to handle and less likely to run during preparation.

Best Toppings and Serving Ideas

Powdered sugar is one of the simplest toppings for these pastries. Dust it lightly over the cooled bites just before serving.

Fresh strawberries, raspberries, and blueberries add color and a slightly tart contrast to the sweet filling.

For extra crunch, sprinkle finely chopped toasted hazelnuts over the finished pastries.

A small drizzle of melted chocolate can create a richer dessert presentation. Allow the drizzle to set briefly before serving.

For brunch, serve the bites with fresh fruit, yogurt, coffee, or hot chocolate.

For dessert, pair them with vanilla ice cream or a small spoonful of whipped cream.

Easy Variations to Try

Chocolate Almond Bites

Replace the hazelnut spread with chocolate almond spread and add finely chopped toasted almonds to the filling.

Peanut Butter Chocolate Bites

Add a small amount of creamy peanut butter alongside the chocolate filling. Keep the portions small so the dough remains easy to seal.

Cinnamon Chocolate Bites

Add a light sprinkle of cinnamon to the filling before rolling. Cinnamon gives the chocolate a warm bakery-style flavor.

Strawberry Chocolate Bites

Add a very small piece of fresh strawberry with the chocolate spread. Pat the fruit dry first to reduce excess moisture.

Orange Chocolate Bites

Add a little finely grated orange zest to the chocolate filling. The citrus aroma provides a bright contrast to the rich pastry.

White Chocolate Hazelnut Bites

Use white chocolate hazelnut spread for a sweeter variation. Finish with chopped hazelnuts for extra texture.

How to Make Them for a Party

These croissant bites work well for brunches, birthdays, holiday breakfasts, and casual gatherings.

Prepare the pastries in several small batches instead of overcrowding the air fryer. This gives each piece enough room to brown evenly.

Arrange the finished bites on a serving platter and add powdered sugar shortly before guests arrive.

Serve different toppings on the side. Fresh berries, chopped nuts, chocolate drizzle, and whipped cream allow guests to customize their pastries.

For a breakfast spread, pair them with savory items such as scrambled eggs, breakfast potatoes, or turkey sausage. The sweet pastries can then serve as a simple dessert-style option.

How to Store and Reheat

Allow leftover pastries to cool completely before storing them. Place them in an airtight container and refrigerate if you plan to keep them for more than a short period.

The air fryer is the preferred method for reheating because it helps restore the flaky exterior.

Reheat the bites until warmed through, then allow them to cool briefly before eating. The chocolate center can become very hot during reheating.

Avoid adding powdered sugar before storage because moisture can cause it to disappear into the pastry.

If you want to freeze the finished bites, cool them completely and store them in a freezer-safe container. Reheat them in the air fryer until warm and crisp.

Common Mistakes to Avoid

Do not overfill the dough because excess chocolate can leak during cooking.

Avoid using dough that has become warm and difficult to handle. Refrigerated dough is easier to roll and seal.

Do not crowd the air fryer basket. Limited airflow can leave the pastries pale or unevenly cooked.

Avoid brushing the dough with too much butter because excess fat can make the exterior greasy.

Do not add powdered sugar while the pastries are extremely hot. Wait until they have cooled slightly for a cleaner finish.

Avoid eating the pastries immediately after cooking. The filling can stay much hotter than the pastry exterior.

Frequently Asked Questions

Can I use puff pastry instead of crescent dough?

Yes, puff pastry works well and creates a lighter, more layered texture than refrigerated crescent dough.

How much chocolate hazelnut spread should I use?

Use a small spoonful for each bite so the filling stays enclosed and does not leak during cooking.

Why did my chocolate filling leak out?

Overfilling, weak seams, or placing the spread too close to the dough edges can cause the filling to escape.

Can I make these ahead of time?

Yes, assemble the unbaked bites ahead and keep them refrigerated until you are ready to air fry them.

Can I freeze chocolate croissant bites?

Yes, cooled baked bites can be frozen in an airtight container and reheated in the air fryer.

How do I make them extra crispy?

Keep the dough cold, avoid overcrowding the basket, and lightly brush the pastries with butter before cooking.

Can I use other fillings?

Yes, peanut butter, almond spread, fruit preserves, caramel, or white chocolate spread can be used in small amounts.

What should I serve with these bites?

Fresh berries, coffee, hot chocolate, yogurt, whipped cream, or vanilla ice cream all pair well with the warm chocolate pastries.

Final Thoughts

Air Fryer Chocolate Hazelnut Stuffed Croissant Bites are an easy way to make a bakery-style treat with refrigerated dough and a creamy chocolate filling. The air fryer creates a golden exterior while keeping the center soft and rich.

The key to successful bites is simple: use a moderate amount of filling, seal the dough carefully, leave space between pastries, and watch the final minutes of cooking closely.

Serve them with powdered sugar and fresh berries for a simple breakfast treat, or add nuts and chocolate drizzle for a more indulgent dessert. With a few easy filling swaps, the same method can create several different sweet pastry variations.

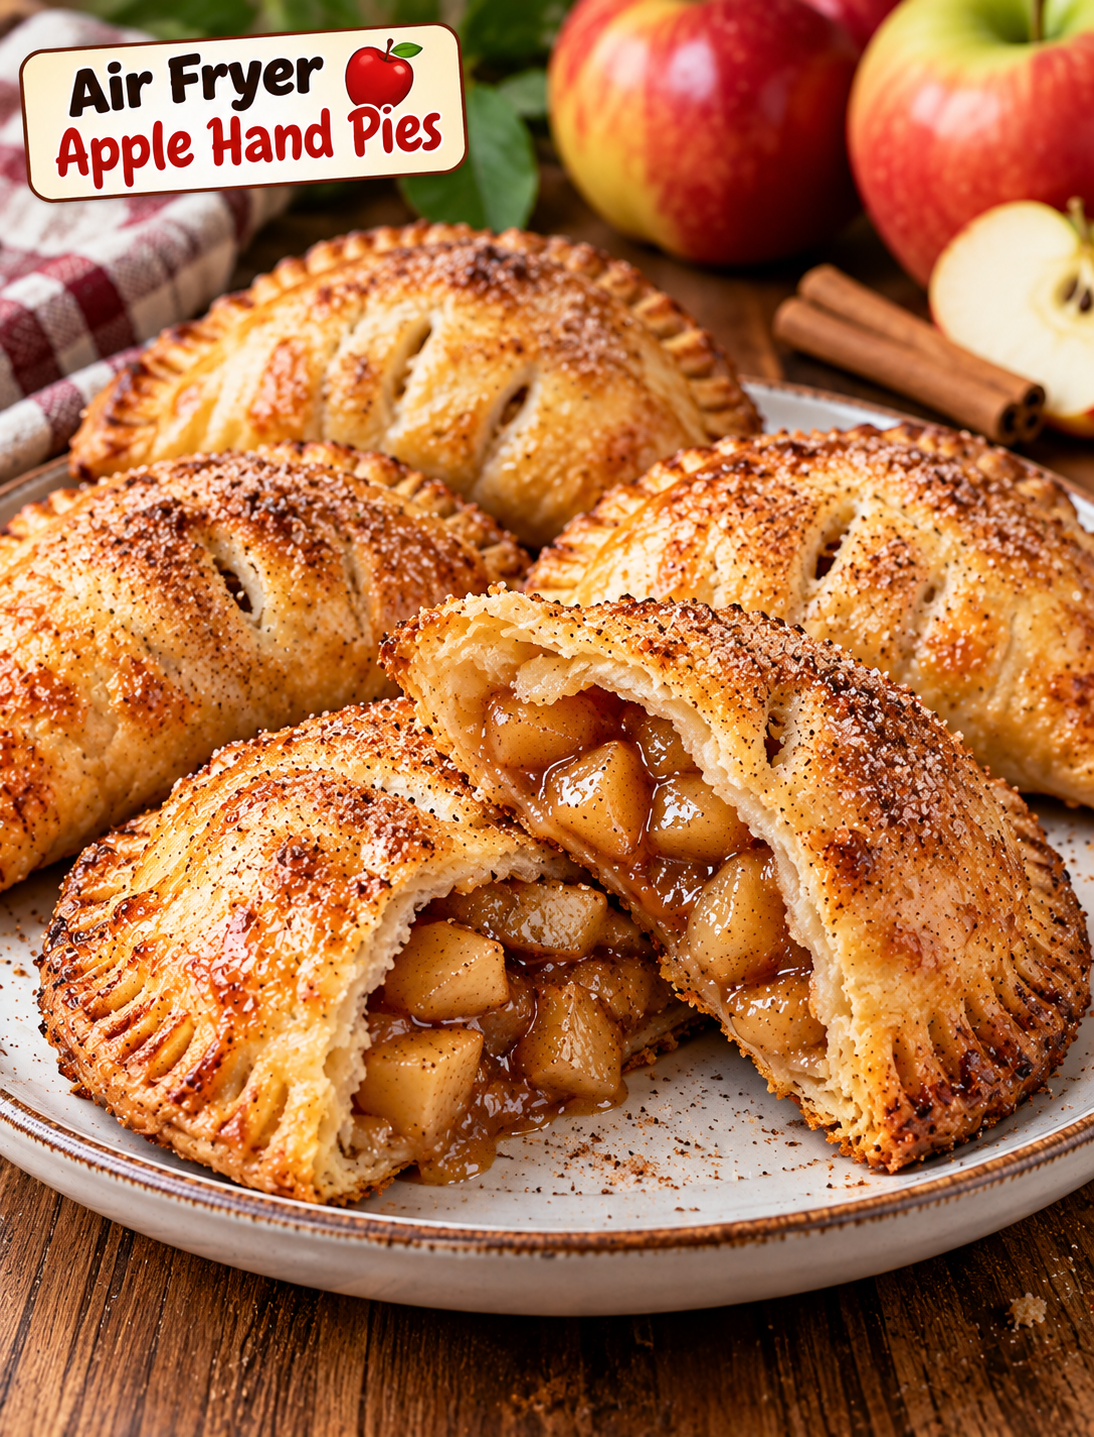
Air Fryer Caramel Apple Pie Bites

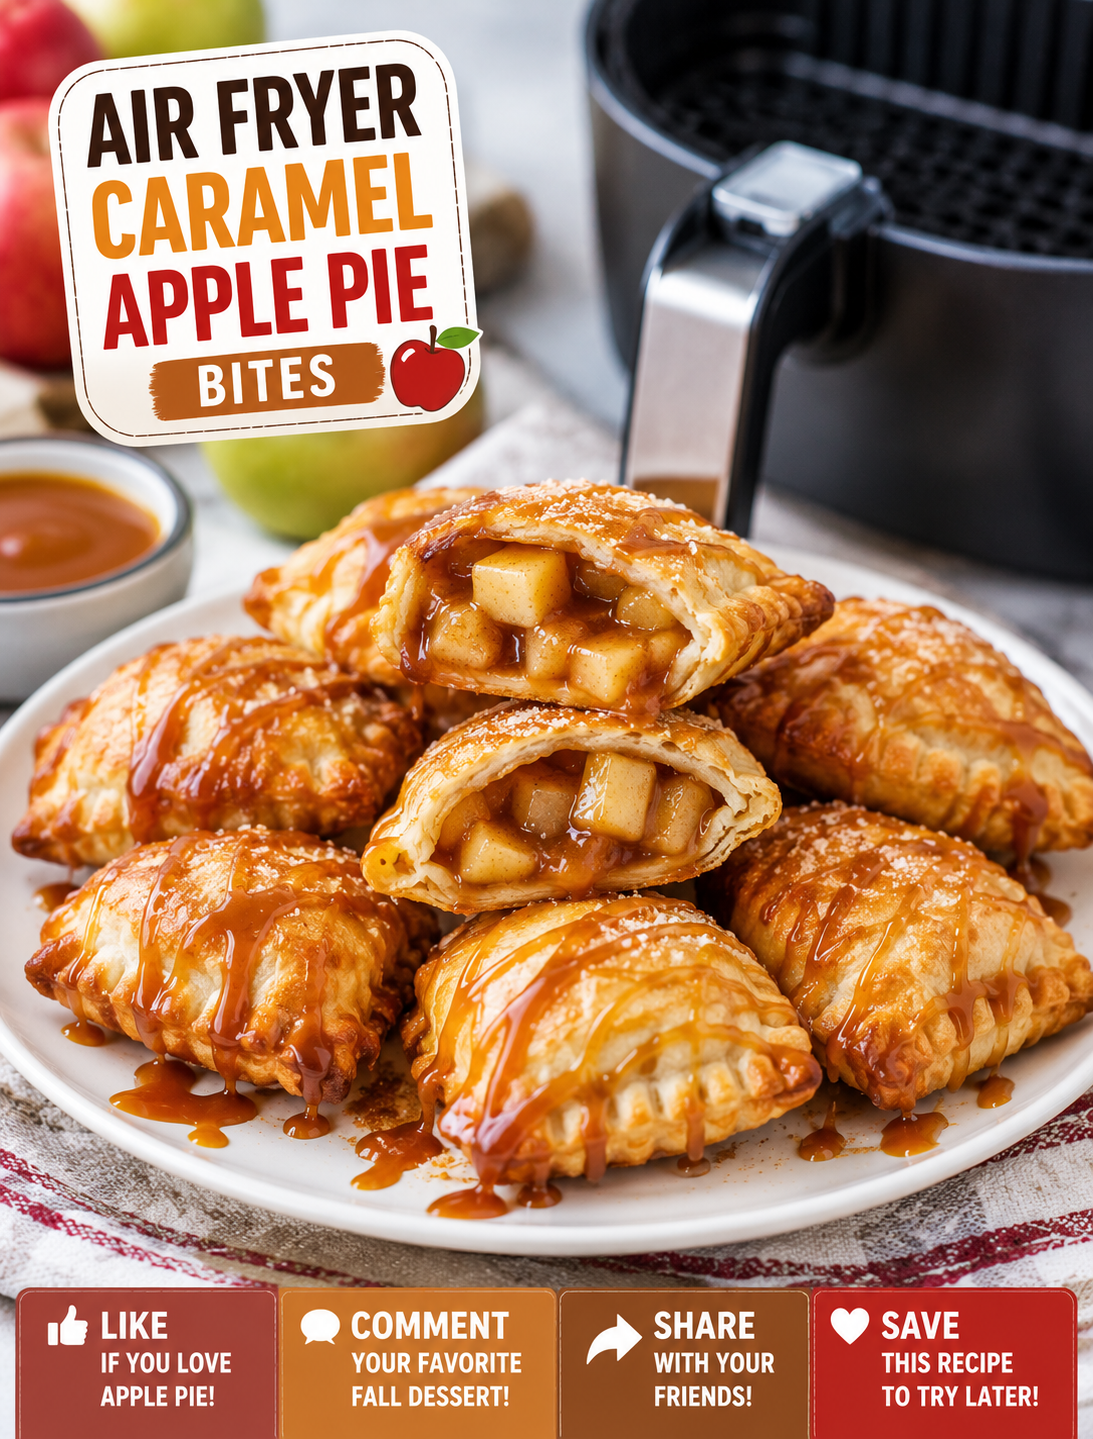
Golden air fryer caramel apple pie bites filled with cinnamon apples and caramel, served as a warm bite-sized fall dessert

Air Fryer Caramel Apple Pie Bites

If you love classic apple pie but want a faster dessert, these Air Fryer Caramel Apple Pie Bites are an easy treat to make at home. They combine warm cinnamon apples, gooey caramel, and flaky pie crust in small, golden bites.

Each bite has the cozy flavor of homemade apple pie without the work of making a full-size pie. The air fryer cooks the pastry quickly and gives the outside a crisp, golden finish while the apple filling becomes tender and sweet.

These mini apple pie bites are perfect for fall gatherings, Thanksgiving dessert tables, game nights, family snacks, or a simple weekend treat. They are also easy to serve because everyone can grab an individual bite without slicing a whole pie.

The recipe uses simple ingredients that are easy to find at most American grocery stores. Refrigerated pie crust keeps preparation quick, while fresh apples, caramel sauce, cinnamon, and brown sugar create the familiar apple pie flavor.

Why You’ll Love These Caramel Apple Pie Bites

These bite-sized desserts are made for anyone who wants homemade flavor without spending hours in the kitchen.

The air fryer shortens the cooking time compared with traditional baking. It also creates a crisp crust with a lightly browned surface that pairs well with the soft apple filling.

Another reason to love this dessert is portion size. Small pastry bites are easy to serve at parties and make it simple to enjoy a sweet treat without preparing a large pie.

The caramel adds extra richness to the apples and creates a delicious contrast between the buttery crust and warm cinnamon filling.

You can also adjust the recipe to match your taste. Use tart Granny Smith apples for a sharper flavor or Honeycrisp apples for a naturally sweet filling.

Ingredients You’ll Need

For the best texture, use firm apples that hold their shape during cooking.

  • 1 refrigerated pie crust, homemade or store-bought
  • 1 medium apple, peeled, cored, and finely diced
  • 2 tablespoons caramel sauce
  • 1 tablespoon brown sugar
  • 1/2 teaspoon ground cinnamon
  • 1/4 teaspoon vanilla extract
  • 1 tablespoon melted butter
  • 1 teaspoon lemon juice
  • 1 tablespoon all-purpose flour
  • Pinch of salt
  • 1 egg, beaten, for brushing
  • Optional: coarse sugar for topping
  • Optional: extra caramel sauce for drizzling

Use a thick caramel sauce when possible because a very thin sauce can spread during cooking. Finely diced apples also make the bites easier to fill and seal.

How to Make Air Fryer Caramel Apple Pie Bites

Prepare the Apple Filling

Start by peeling and coring the apple. Cut it into very small pieces so the filling cooks evenly inside the pastry.

Place the diced apple in a bowl and add brown sugar, cinnamon, vanilla, lemon juice, flour, and a small pinch of salt.

Stir until the apple pieces are evenly coated. The flour helps absorb some of the moisture released by the apples during cooking.

Add the caramel sauce and gently mix until the filling is combined.

Prepare the Pie Crust

Place the refrigerated pie crust on a lightly floured surface. Cut the dough into small circles using a round cookie cutter or the rim of a small glass.

Make each piece large enough to hold a small spoonful of filling while still leaving enough dough around the edges for sealing.

Place a small amount of apple filling in the center of each circle. Avoid overfilling because excess filling can leak through the crust.

Seal the Bites

Fold each dough circle over the filling to create a half-moon shape.

Press the edges firmly with your fingers, then use a fork to crimp the seal. A tight seal helps keep the caramel and apple mixture inside during cooking.

Brush the top of each pastry with beaten egg. This gives the crust a shiny, golden finish.

For extra sweetness and crunch, sprinkle a small amount of coarse sugar over the egg wash.

Cut a tiny slit in the top of each bite to allow steam to escape while cooking.

Air Fryer Cooking Instructions

Preheat your air fryer to 350°F if your model requires preheating.

Lightly spray the air fryer basket with cooking spray or use a suitable liner designed for air fryer use.

Arrange the apple pie bites in a single layer. Leave space between them so hot air can circulate around the pastry.

Air fry at 350°F for about 7 to 10 minutes, or until the crust is golden brown and crisp.

Cooking time can vary between air fryer models, so begin checking the bites around the 7-minute mark.

Carefully remove the finished pastries and let them rest for several minutes. The caramel filling can become extremely hot during cooking.

Drizzle the warm bites with additional caramel sauce just before serving if desired.

Best Apples for Mini Apple Pie Bites

Choosing the right apple can make a noticeable difference in the final texture.

Granny Smith apples provide a tart flavor that balances the sweetness of caramel and brown sugar. They also hold their shape well during cooking.

Honeycrisp apples offer a crisp texture and naturally sweet flavor. They are a good choice when you prefer a sweeter filling.

Pink Lady apples provide a balanced sweet-tart flavor and work well in small baked desserts.

Avoid apples that become very soft during cooking if you want noticeable apple pieces inside each bite.

Tips for Crispy Apple Pie Bites

Keep the pastry cold until you are ready to assemble the bites. Chilled dough is easier to handle and can help create a flaky crust.

Do not add too much filling to each pastry. A small amount is enough to give every bite a good balance of crust, apple, and caramel.

Seal the edges firmly before placing the bites in the air fryer. Leaking caramel can make cleanup difficult and may cause the pastry to stick.

Avoid overcrowding the basket. A single layer allows hot air to circulate around each pastry and helps the crust brown evenly.

Check the bites early during cooking because smaller pastries can brown quickly.

Let them cool slightly before eating. The caramel inside can remain much hotter than the pastry surface.

Easy Variations to Try

You can change this dessert in several simple ways without changing the basic cooking method.

Add a small pinch of nutmeg to the apple filling for a deeper fall flavor.

Mix finely chopped pecans or walnuts into the filling for extra crunch.

For a stronger caramel flavor, drizzle the finished bites with warm caramel sauce and add a tiny pinch of flaky sea salt.

You can also use puff pastry instead of pie crust for a lighter, more layered texture.

For a festive Thanksgiving version, add a little extra cinnamon and serve the bites with vanilla ice cream.

If you prefer a less sweet dessert, reduce the brown sugar and use a tart apple such as Granny Smith.

What to Serve With Caramel Apple Pie Bites

These warm apple pie bites taste great on their own, but a few simple toppings can turn them into a complete dessert.

Serve them with a scoop of vanilla ice cream for a classic apple pie combination.

Whipped cream adds a light, creamy contrast to the warm pastry and caramel filling.

A drizzle of caramel sauce works well for parties and dessert boards.

You can also sprinkle the finished bites with powdered sugar for a simple presentation.

For fall gatherings, arrange them on a serving platter with extra apple slices, caramel dip, and cinnamon sticks.

How to Store Leftover Apple Pie Bites

Allow the bites to cool completely before storing them.

Place leftovers in an airtight container and refrigerate them for up to 3 days.

To restore some of their crisp texture, reheat them in the air fryer at 325°F for about 2 to 4 minutes.

Avoid overheating the pastries because the caramel filling can become extremely hot.

For the best crust texture, use the air fryer rather than the microwave when reheating.

Common Mistakes to Avoid

One of the most common mistakes is overfilling the pastry. Too much apple or caramel can cause the seams to open during cooking.

Using large apple chunks can also make sealing difficult and may leave the filling undercooked.

Do not skip the egg wash if you want a deeply golden surface.

Avoid stacking the bites inside the air fryer basket because overlapping pastry prevents even browning.

Finally, do not eat the bites immediately after cooking. Give them a few minutes to cool so the hot caramel filling is safer to enjoy.

Frequently Asked Questions

Can I use store-bought pie crust?

Yes, refrigerated store-bought pie crust works well and makes these mini apple pie bites much faster to prepare.

What temperature should I use for air fryer apple pie bites?

Cook them at 350°F until the pastry is golden and crisp, usually about 7 to 10 minutes depending on your air fryer.

Can I use puff pastry instead of pie crust?

Yes, puff pastry can be used for a lighter and flakier version of these caramel apple bites.

Can I make these apple pie bites ahead of time?

Yes, assemble the uncooked bites several hours ahead, refrigerate them, and air fry them when you are ready to serve.

Why is my caramel leaking out?

Caramel can leak when the pastry is overfilled or the edges are not sealed tightly, so use a small amount of filling and crimp the seams well.

Can I freeze caramel apple pie bites?

Yes, freeze assembled uncooked bites in a single layer, then transfer them to a freezer-safe container for longer storage.

Can I use different apples?

Yes, Granny Smith, Honeycrisp, and Pink Lady apples are good choices because they provide flavor and hold their texture during cooking.

How do I reheat leftover apple pie bites?

Reheat them in an air fryer at 325°F for 2 to 4 minutes to bring back some of the crisp pastry texture.

Final Thoughts

Air Fryer Caramel Apple Pie Bites are a simple way to enjoy the flavors of classic apple pie in a quick, individual dessert. The combination of flaky pastry, cinnamon apples, and rich caramel makes every bite warm, sweet, and satisfying.

The recipe is especially useful when you want a homemade dessert without making a full pie. With store-bought pie crust and a few basic ingredients, you can have golden apple pie bites ready in minutes.

For the best results, keep the apple pieces small, avoid overfilling the pastry, seal each bite firmly, and give the finished desserts time to cool before serving.

Whether you make them for a family dinner, fall party, Thanksgiving gathering, or weekend treat, these bite-sized desserts are an easy crowd-pleaser. Serve them warm with vanilla ice cream and an extra caramel drizzle for an irresistible finishing touch.

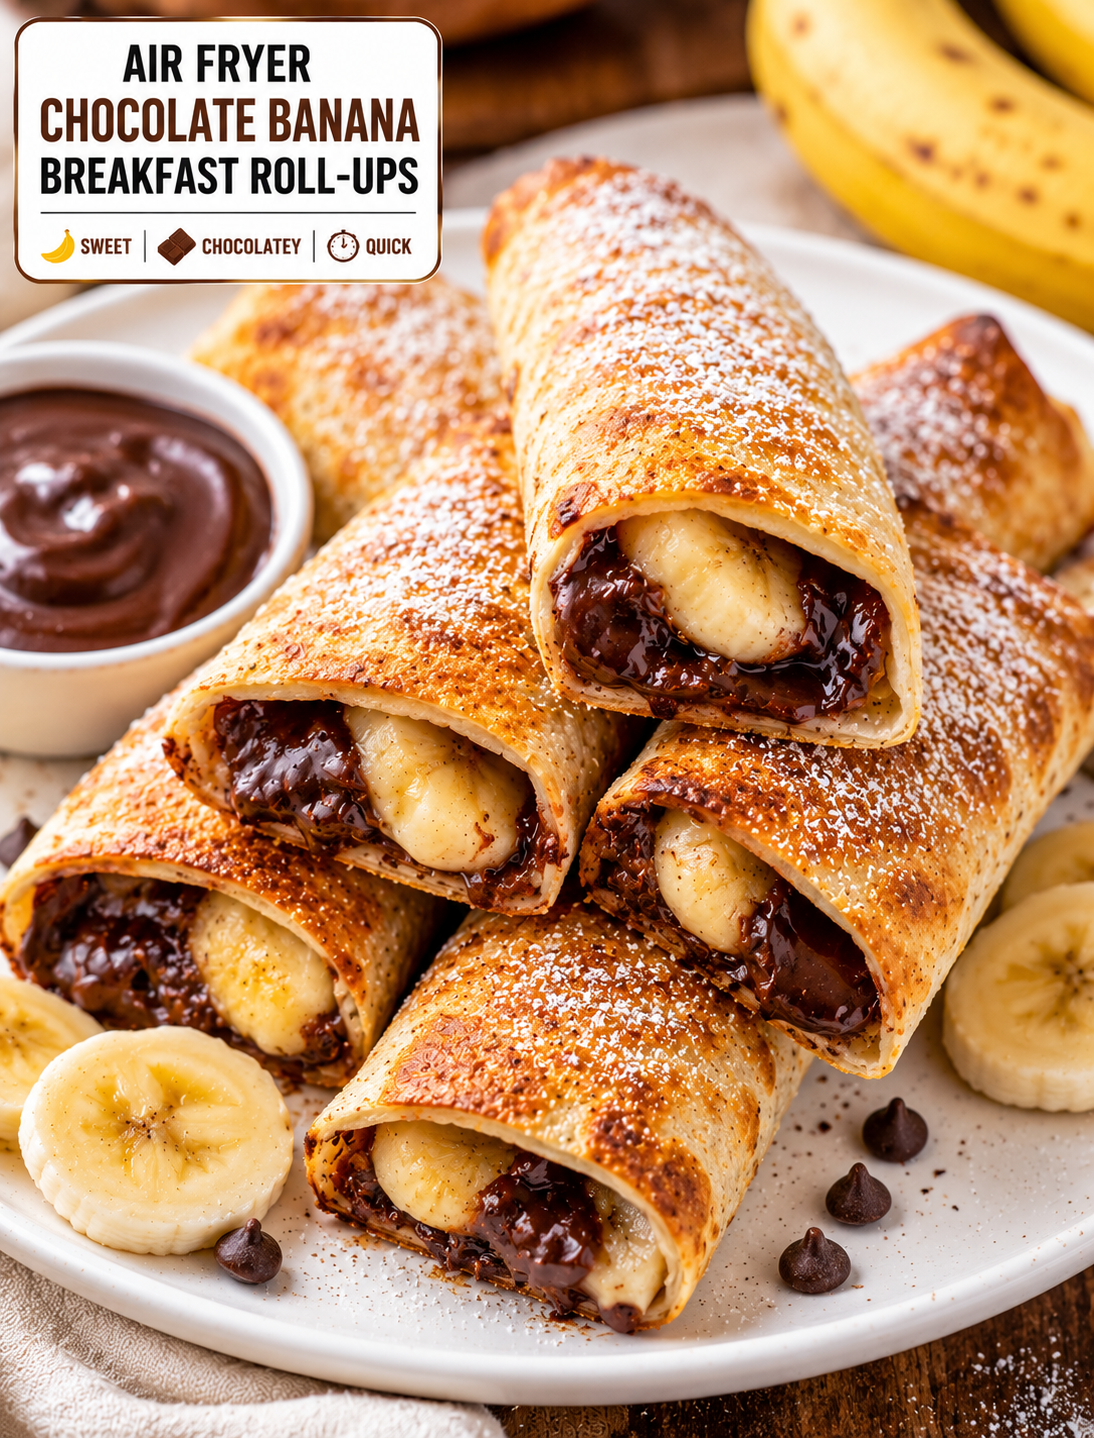
Air Fryer Chocolate Banana Breakfast Roll-Ups

Golden air fryer chocolate banana breakfast roll-ups dusted with powdered sugar, showing melted chocolate and warm banana filling

Air Fryer Chocolate Banana Breakfast Roll-Ups

These Air Fryer Chocolate Banana Breakfast Roll-Ups are a fun way to start the morning with warm bananas, melted chocolate, and a golden crispy tortilla. They use simple ingredients and take only a few minutes to prepare.

Soft flour tortillas are filled with banana slices and chocolate, rolled tightly, lightly brushed with butter, and air fried until golden. The outside becomes crisp while the chocolate melts around the warm banana.

This easy breakfast recipe also works as a quick snack or simple dessert. You can prepare a batch for busy mornings, weekend brunch, after-school treats, or family gatherings.

A little powdered sugar on top gives the roll-ups a sweet finish. You can also serve them with Greek yogurt, fresh berries, peanut butter, or a small drizzle of honey.

Why You’ll Love These Breakfast Roll-Ups

These roll-ups combine a few ingredients into a warm and satisfying treat.

The banana provides natural sweetness and a soft texture, while chocolate adds a rich flavor that melts during air frying. The tortilla creates a crisp outer layer that contrasts with the warm filling.

The air fryer makes this recipe especially convenient. You do not need a frying pan filled with oil, and the roll-ups cook quickly.

They are also easy to customize. Use dark chocolate for a deeper flavor, milk chocolate for a sweeter version, or chocolate chips when you want a quick filling.

Peanut butter, almond butter, cinnamon, coconut, and chopped nuts can also be added for different flavors and textures.

Because the roll-ups are individually portioned, they are easy to serve and share.

Ingredients You’ll Need

  • 4 medium flour tortillas
  • 2 ripe bananas
  • ½ cup semi-sweet chocolate chips
  • 2 tablespoons creamy peanut butter, optional
  • 1 tablespoon melted butter
  • ½ teaspoon ground cinnamon
  • 1 tablespoon granulated sugar, optional
  • Powdered sugar for serving

Optional Toppings

  • Fresh strawberries
  • Blueberries
  • Greek yogurt
  • Honey
  • Maple syrup
  • Chopped walnuts
  • Chopped pecans
  • Shredded coconut
  • Extra melted chocolate

Use ripe but firm bananas. Very soft bananas can release too much moisture and make the tortillas harder to crisp.

Semi-sweet chocolate gives the roll-ups a balanced flavor. Dark or milk chocolate can be used depending on your preference.

Medium flour tortillas are flexible enough to roll without tearing. Avoid tortillas that are dry or cracked.

How to Make Air Fryer Chocolate Banana Breakfast Roll-Ups

1. Prepare the Bananas

Peel the bananas and slice them lengthwise or into thin rounds.

If using very large bananas, cut the slices into smaller pieces so they fit neatly inside the tortillas.

Set the banana pieces aside while preparing the tortillas.

2. Prepare the Tortillas

Place the tortillas on a clean work surface.

Warm each tortilla in the microwave for about 10–15 seconds.

This makes the tortillas softer and easier to roll.

Do not overheat them because very hot tortillas can become sticky or difficult to handle.

3. Add the Filling

Spread a thin layer of peanut butter across the center of each tortilla if using it.

Arrange banana slices over the peanut butter.

Sprinkle chocolate chips evenly over the banana.

Add a small pinch of cinnamon.

Do not spread the filling all the way to the edges. Leaving space around the outside makes the roll-up easier to seal.

Avoid adding too much filling because excess chocolate or banana can leak during cooking.

4. Roll the Tortillas

Fold the sides of the tortilla inward.

Fold the bottom edge over the filling and roll upward tightly.

Keep the roll compact without squeezing the filling out.

Place each finished roll-up seam-side down while you prepare the remaining pieces.

Keeping the seam underneath helps the tortilla stay closed during air frying.

5. Add the Butter Coating

Brush each roll-up lightly with melted butter.

Mix the cinnamon with sugar if you want a lightly sweet crust, then sprinkle a small amount over the buttered surface.

You can also use cooking spray instead of butter.

A thin coating is enough to help the tortilla develop a golden finish.

6. Air Fry Until Golden

Preheat your air fryer to 375°F if your model requires preheating.

Place the roll-ups in the basket with the seam-side down.

Leave a little space between each piece so hot air can circulate.

Air fry for approximately 5–8 minutes, turning them carefully halfway through cooking.

The roll-ups should be golden brown and crisp on the outside.

Check them early because tortillas can brown quickly.

Cooking time may vary depending on the air fryer model and the size of the roll-ups.

7. Finish and Serve

Carefully remove the hot roll-ups from the air fryer.

Allow them to cool for 1–2 minutes before serving.

Dust them lightly with powdered sugar.

Cut them in half diagonally to reveal the warm banana and melted chocolate inside.

Serve with fresh berries, Greek yogurt, peanut butter, or a small drizzle of honey.

How to Make Them Extra Crispy

The texture depends on keeping the tortilla relatively dry.

Use only a small amount of filling so the tortilla can crisp properly.

Avoid using overly ripe bananas that release a lot of moisture.

Do not add too much peanut butter because a thick layer can soften the tortilla.

Keep space between the roll-ups in the air fryer basket.

Turn them halfway through cooking for more even browning.

A light butter coating helps create a golden exterior without making the roll-ups greasy.

For the best texture, serve them soon after cooking.

Best Chocolate to Use

Semi-sweet chocolate chips are a simple choice because they provide enough sweetness without overpowering the banana.

Dark chocolate works well when you prefer a richer, less sweet flavor.

Milk chocolate creates a sweeter and creamier filling.

Mini chocolate chips are useful because they spread evenly throughout the roll-up.

Chocolate chunks can also be used, but large pieces may create uneven melting.

White chocolate provides a sweeter flavor and pairs well with banana and cinnamon.

You can even combine two types of chocolate for a more interesting filling.

Easy Flavor Variations

There are several ways to change these roll-ups.

Peanut butter banana version, spread a thin layer of peanut butter beneath the banana.

A cinnamon banana version, increase the cinnamon and add a small amount of brown sugar.

Chocolate coconut version, sprinkle unsweetened shredded coconut over the chocolate.

Nutty version, add finely chopped walnuts or pecans.

Berry version, add a few thin strawberry slices with the banana.

For a s’mores-inspired version, add mini marshmallows and crushed graham crackers, using a small amount to prevent leaking.

For a breakfast-style version, serve the finished roll-ups with Greek yogurt and fresh berries.

How to Prevent Chocolate From Leaking

Chocolate can melt quickly during air frying, so the filling needs to be placed carefully.

Keep chocolate away from the outer edges of the tortilla.

Do not overfill the roll-ups.

Roll the tortilla tightly so there are no large gaps around the filling.

Place the seam underneath when cooking.

If you notice a small amount of chocolate escaping, reduce the filling slightly in the next batch.

A few melted chocolate spots are normal and can add to the caramelized appearance of the finished roll-ups.

What to Serve With Chocolate Banana Roll-Ups

These roll-ups can be served on their own or paired with simple sides.

Fresh strawberries, blueberries, and raspberries add a bright fruit flavor.

Greek yogurt provides a cool contrast to the warm roll-ups.

Peanut butter or almond butter works well for dipping.

A small drizzle of maple syrup adds extra sweetness.

For brunch, serve the roll-ups with scrambled eggs, fresh fruit, and coffee.

A dessert-style plate, add vanilla ice cream and a little chocolate drizzle.

Children, cut the roll-ups into smaller pieces after they have cooled enough to handle.

Can You Make Them Ahead?

You can prepare the filling and assemble the roll-ups a short time before cooking.

For the best texture, keep the uncooked roll-ups covered and refrigerated until you are ready to air fry them.

Avoid assembling them too far in advance because the banana can release moisture into the tortilla.

If you are preparing breakfast for several people, assemble the roll-ups while the air fryer preheats.

Cook them in batches if your basket cannot hold all the pieces in one layer.

Freshly air-fried roll-ups have the best crisp texture.

Can You Freeze Them?

These roll-ups can be frozen, but the tortilla may not be quite as crisp after freezing and reheating.

To freeze, prepare the roll-ups without powdered sugar and place them in a single layer on a parchment-lined tray.

Freeze until firm, then transfer them to a freezer-safe container.

When ready to cook, air fry from frozen at about 350°F, adding a few extra minutes as needed.

Check the center before serving because the banana and chocolate should be warm.

Avoid thawing the roll-ups at room temperature because moisture can soften the tortillas.

Storage and Reheating

Store leftover roll-ups in an airtight container in the refrigerator.

For the best texture, reheat them in the air fryer at 350°F for 2–4 minutes.

The air fryer helps restore some of the crisp exterior while warming the chocolate and banana.

Avoid using the microwave if you want a crisp tortilla because microwave heating can make the exterior soft.

Allow the roll-ups to cool slightly before eating because melted chocolate can be very hot.

Discard leftovers that have an unusual smell, appearance, or texture.

Tips for the Best Results

Use ripe but firm bananas.

Warm the tortillas before rolling.

Keep the filling in the center.

Do not overfill each tortilla.

Roll the tortillas tightly.

Keep the seam facing down during cooking.

Use a light coating of butter or cooking spray.

Avoid overcrowding the air fryer basket.

Turn the roll-ups halfway through cooking.

Check them early because tortillas brown quickly.

Allow them to cool briefly before serving.

Add powdered sugar and toppings after cooking.

The Bottom Line

Air Fryer Chocolate Banana Breakfast Roll-Ups are a simple way to turn bananas, chocolate, and tortillas into a warm, crispy treat.

The air fryer creates a golden exterior while the banana softens and the chocolate melts inside. A little cinnamon and powdered sugar add extra flavor without requiring a complicated recipe.

These roll-ups work well for breakfast, brunch, snacks, and simple desserts. You can also customize them with peanut butter, nuts, berries, coconut, or different types of chocolate.

For the best results, use firm ripe bananas, avoid overfilling the tortillas, and serve the roll-ups soon after cooking.

Frequently Asked Questions

1. How long do chocolate banana roll-ups take in the air fryer?

Air fry them at 375°F for about 5–8 minutes, turning halfway, until the tortillas are golden and crisp.

2. Can I use corn tortillas?

Flour tortillas work best because they are flexible and easier to roll without cracking.

3. What chocolate works best with bananas?

Semi-sweet chocolate chips are a balanced choice, but milk, dark, or white chocolate can also be used.

4. Can I make these without peanut butter?

Yes. Simply fill the tortillas with banana, chocolate, and cinnamon without adding peanut butter.

5. How do I keep the roll-ups from opening?

Roll them tightly and place them seam-side down in the air fryer basket before cooking.

6. Can I use frozen bananas?

Fresh bananas work better because thawed frozen bananas release extra moisture that can soften the tortilla.

7. Can I freeze chocolate banana roll-ups?

Yes. Freeze assembled roll-ups in a single layer and air fry them from frozen, adding extra cooking time as needed.

8. How do I reheat leftover roll-ups?

Reheat them in the air fryer at 350°F for about 2–4 minutes to restore some of the crisp texture.

Final Thoughts

Air Fryer Chocolate Banana Breakfast Roll-Ups are an easy recipe for mornings when you want something warm, sweet, and satisfying without spending a lot of time in the kitchen.

The combination of crispy tortilla, soft banana, melted chocolate, and cinnamon creates a simple treat that can work for breakfast or dessert.

Keep the filling light, seal the tortillas tightly, and avoid overcrowding the air fryer for the best golden finish.

Serve them with fresh berries, yogurt, peanut butter, or a light dusting of powdered sugar.

Crispy, chocolatey, and packed with banana flavor, these roll-ups are a simple treat that can make an ordinary morning feel a little more special.

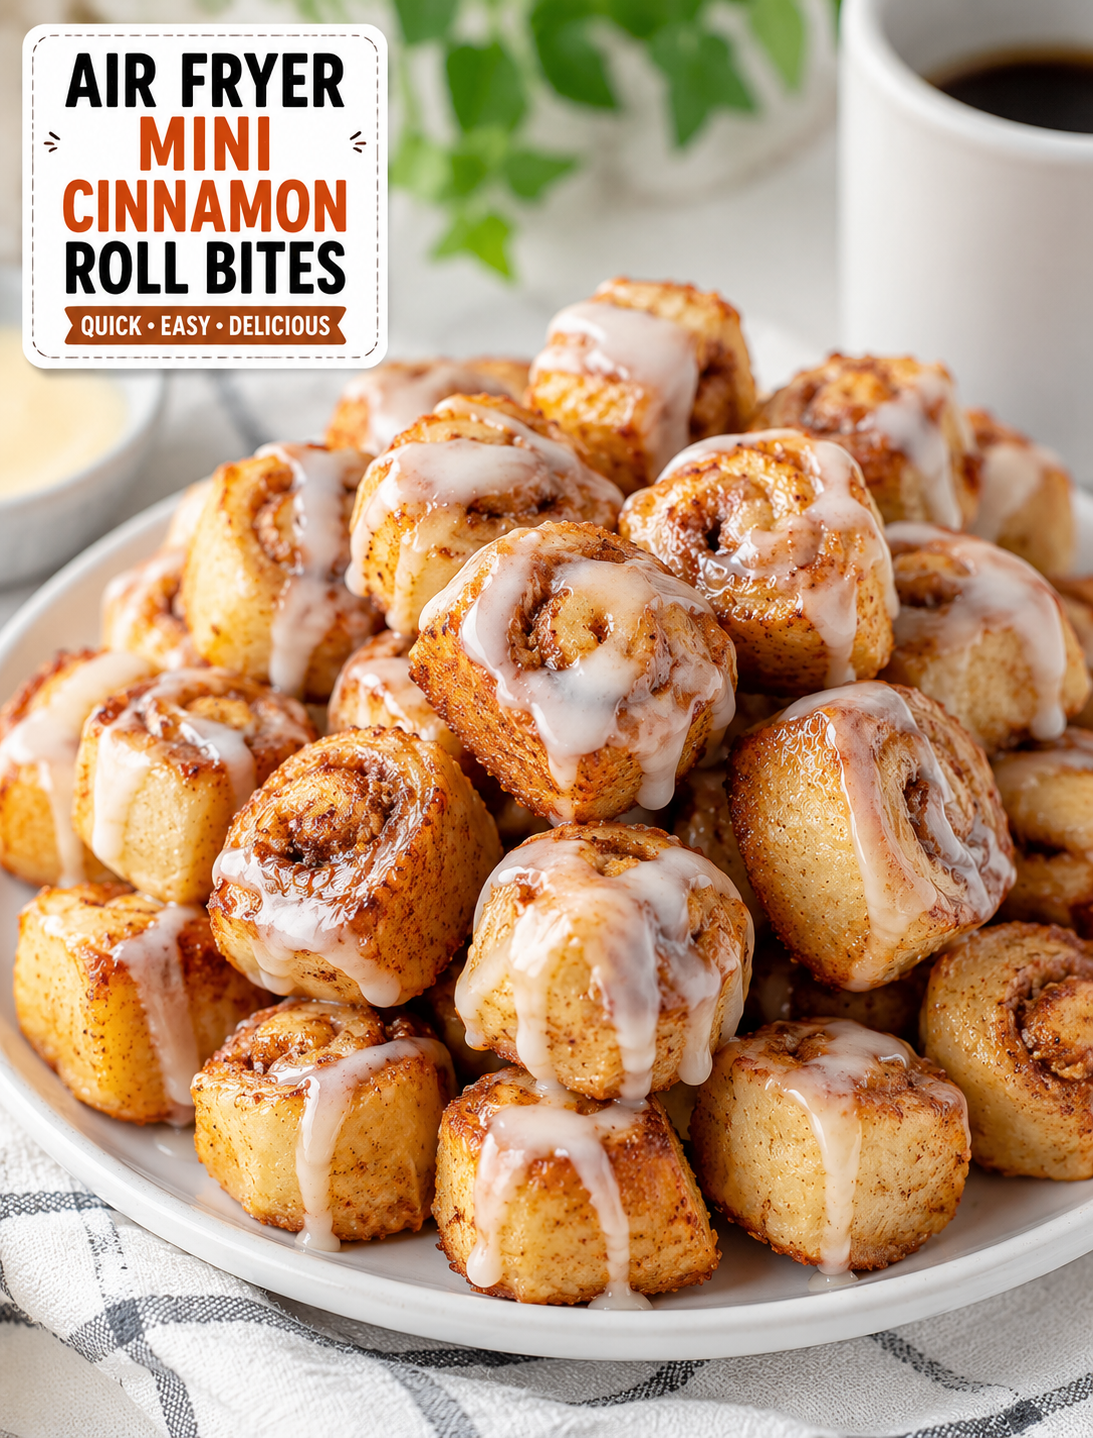
Air Fryer Mini Cinnamon Roll Bites

Golden mini cinnamon roll bites with cinnamon sugar and sweet icing served on a white plate

Air Fryer Mini Cinnamon Roll Bites

These Air Fryer Mini Cinnamon Roll Bites are a quick way to enjoy warm, gooey cinnamon rolls without making a full batch from scratch. Each bite has a soft center, golden edges, sweet cinnamon flavor, and a simple glaze that makes them hard to resist.

Using an air fryer keeps the cooking time short and gives the little cinnamon bites a lightly crisp outside while keeping the inside tender. They are perfect for breakfast, brunch, an afternoon snack, or a quick dessert when a sweet craving hits.

The recipe uses refrigerated cinnamon roll dough, so there is no need to wait for yeast to rise. Cut the dough into small pieces, air fry until golden, and finish with the included icing or a quick homemade glaze.

Ingredients

You only need a few everyday ingredients to make these bite-sized cinnamon treats.

  • 1 can refrigerated cinnamon roll dough with icing
  • 1 tablespoon melted butter
  • 1 teaspoon ground cinnamon
  • 1 tablespoon brown sugar
  • Cooking spray, as needed
  • Optional: powdered sugar for extra sweetness

If your cinnamon roll dough already contains plenty of cinnamon filling, you can reduce the additional cinnamon and brown sugar. The extra mixture is mainly useful when you want a stronger cinnamon flavor and slightly caramelized edges.

For the best texture, use refrigerated dough that is still cold when you begin cutting it. Cold dough is easier to handle and keeps its shape better in the air fryer.

How to Make Air Fryer Mini Cinnamon Roll Bites

Step 1: Prepare the Dough

Open the refrigerated cinnamon roll package and separate the dough pieces. Keep the icing aside for later.

Place the dough on a clean cutting board and gently unroll each piece if needed. Cut each cinnamon roll into several small pieces, depending on how large you want the bites.

Aim for pieces that are similar in size. Even pieces cook at the same rate and help prevent some bites from becoming too dark while others remain undercooked.

Step 2: Add Extra Cinnamon Flavor

Combine the brown sugar and ground cinnamon in a small bowl.

Lightly brush the dough pieces with melted butter, then sprinkle them with the cinnamon-sugar mixture. Toss gently so the coating stays on the dough instead of falling away.

Do not add too much butter. A thin coating is enough to help the sugar mixture stick and encourage golden browning.

Step 3: Preheat the Air Fryer

Preheat your air fryer to 330°F to 350°F for about 3 minutes if your model recommends preheating.

The exact temperature can vary between air fryer brands. A moderate temperature works better than very high heat because the small dough pieces cook quickly.

Step 4: Arrange the Cinnamon Bites

Lightly spray the air fryer basket with cooking spray if needed.

Place the dough pieces in the basket in a single layer. Leave a little space between them so hot air can circulate around each bite.

Avoid overcrowding the basket. If you are making a large batch, cook the bites in multiple batches for more even browning.

Step 5: Air Fry

Air fry the cinnamon roll bites at 330°F to 350°F for about 6 to 9 minutes.

Check them around the 6-minute mark because small pieces can brown quickly. The bites are ready when they are puffed, golden on the outside, and cooked through in the center.

If your air fryer cooks aggressively, use the lower temperature and check early. Cooking times can also change based on the size of the dough pieces.

Step 6: Add the Icing

Remove the warm cinnamon bites from the basket and let them cool for a minute or two.

Drizzle the included cinnamon roll icing over the top while the bites are still warm. The gentle heat helps the icing soften and coat the pieces.

For easier serving, place the bites on a plate or small serving tray before adding the glaze.

Why These Mini Cinnamon Roll Bites Work

The air fryer is ideal for small portions of refrigerated dough because it circulates hot air around the food. This helps the outside brown quickly while the center becomes soft and tender.

Cutting the cinnamon rolls into small pieces also increases the amount of golden surface area. Each bite gets more caramelized edges compared with one large cinnamon roll.

The short cooking time makes this recipe especially useful when you want a warm breakfast or dessert without turning on a full-size oven.

Another benefit is portion flexibility. You can make only as many bites as you need and save the remaining refrigerated dough for another recipe if the package allows.

Tips for the Best Cinnamon Roll Bites

Cut evenly sized pieces. Uniform dough pieces cook more consistently and reduce the chance of burnt edges.

Do not overcrowd the basket. Good airflow helps the bites puff and brown properly.

Check early. Small pieces can go from golden to over-browned quickly.

Use moderate heat. Extremely high temperatures can brown the outside before the center finishes cooking.

Avoid excessive butter. Too much butter can cause the sugar to spread and make the bites greasy.

Add icing after cooking. This keeps the glaze smooth and prevents it from burning in the air fryer.

Serve warm. The texture is best shortly after cooking while the centers are soft and the icing is slightly melted.

Easy Variations

These cinnamon bites are easy to customize with different toppings and flavors.

For cream cheese cinnamon bites, mix softened cream cheese with powdered sugar, vanilla extract, and a small splash of milk for a quick homemade frosting.

For pecan cinnamon bites, sprinkle finely chopped pecans over the dough before air frying. Press them gently into the dough so they stay attached.

For apple cinnamon bites, add a small amount of finely diced cooked apple to the center before shaping the pieces. Avoid adding too much filling because excess moisture can affect the dough.

For maple cinnamon bites, replace part of the glaze with a light drizzle of maple syrup after cooking.

For extra crunch, add chopped walnuts or pecans to the finished bites.

You can also add a small pinch of nutmeg to the cinnamon-sugar mixture for a warmer spice flavor.

How to Serve Cinnamon Roll Bites

These mini treats work well for casual breakfasts and special occasions.

Serve them with scrambled eggs, fresh fruit, yogurt, or breakfast sausage for a simple brunch spread. They also pair nicely with coffee, hot chocolate, tea, or a cold glass of milk.

For dessert, arrange the bites on a serving plate and drizzle them with icing. A light dusting of powdered sugar can make them look extra inviting.

They are also convenient for parties because guests can grab individual pieces without needing a knife or fork.

For a weekend breakfast, place the warm bites in a basket or serving bowl and let everyone add extra icing according to taste.

How to Store and Reheat

If you have leftovers, allow the cinnamon roll bites to cool completely before placing them in an airtight container.

Keep them at room temperature for short-term storage or refrigerate them if you want to keep them longer. Follow the storage directions on the refrigerated dough package for any unused dough.

To reheat cooked bites, place them back in the air fryer at 300°F for 2 to 4 minutes. Check them frequently so the icing does not become overly hot or burn.

You can also warm them briefly in the microwave, but the air fryer does a better job of restoring the lightly crisp exterior.

Common Mistakes to Avoid

One common mistake is cutting the dough into pieces that are too large. Larger pieces need more time to cook and may brown unevenly.

Another mistake is filling the basket too tightly. When the dough pieces touch or overlap, the trapped steam can make them softer instead of lightly crisp.

Cooking at excessive heat can also cause problems. The sugar may brown too quickly while the center is still doughy.

Finally, avoid adding icing before cooking. Most cinnamon roll icing is meant to be used after baking, and direct air fryer heat can cause it to melt or scorch.

Frequently Asked Questions

Can I use any refrigerated cinnamon roll dough?

Yes, most standard refrigerated cinnamon roll dough works well, but cooking time may vary based on the dough thickness and piece size.

What temperature should I use for mini cinnamon roll bites?

A temperature between 330°F and 350°F works well for small pieces because it allows the centers to cook without quickly burning the sugar.

How long do cinnamon roll bites take in an air fryer?

Most small pieces take about 6 to 9 minutes, but check early because air fryer models and dough sizes vary.

Do I need to preheat the air fryer?

Preheating can help the dough begin cooking evenly, but it is not required for every air fryer model.

Can I make these without extra butter?

Yes, you can skip the extra butter if the refrigerated dough already has enough filling and fat for your preferred texture.

Why are my cinnamon roll bites still doughy inside?

The pieces may be too large or need additional cooking time; return them to the air fryer for 1 to 2 minutes and check again.

Can I use homemade cinnamon roll dough?

Yes, homemade dough works, but you may need to adjust the cooking time because homemade dough can differ in thickness and moisture.

How do I keep cinnamon roll bites soft?

Store cooled bites in an airtight container and reheat them gently to help maintain a soft center.

Final Thoughts

These Air Fryer Mini Cinnamon Roll Bites are proof that you do not need a complicated recipe to make something special. Refrigerated cinnamon roll dough, a little cinnamon, and a few minutes in the air fryer can turn into warm, bite-sized treats with golden edges and a soft center.

The most important steps are cutting the dough evenly, leaving space between the pieces, and checking them early during cooking. These simple details help prevent over-browning and give the bites a better texture.

Finish them with the included icing, homemade cream cheese glaze, chopped nuts, or your favorite topping. Whether you serve them for a relaxed weekend breakfast, a holiday brunch, or an easy after-dinner treat, these little cinnamon bites are made for sharing.

Save this recipe whenever you need a quick air fryer dessert or breakfast treat that delivers warm cinnamon flavor without the long preparation time.

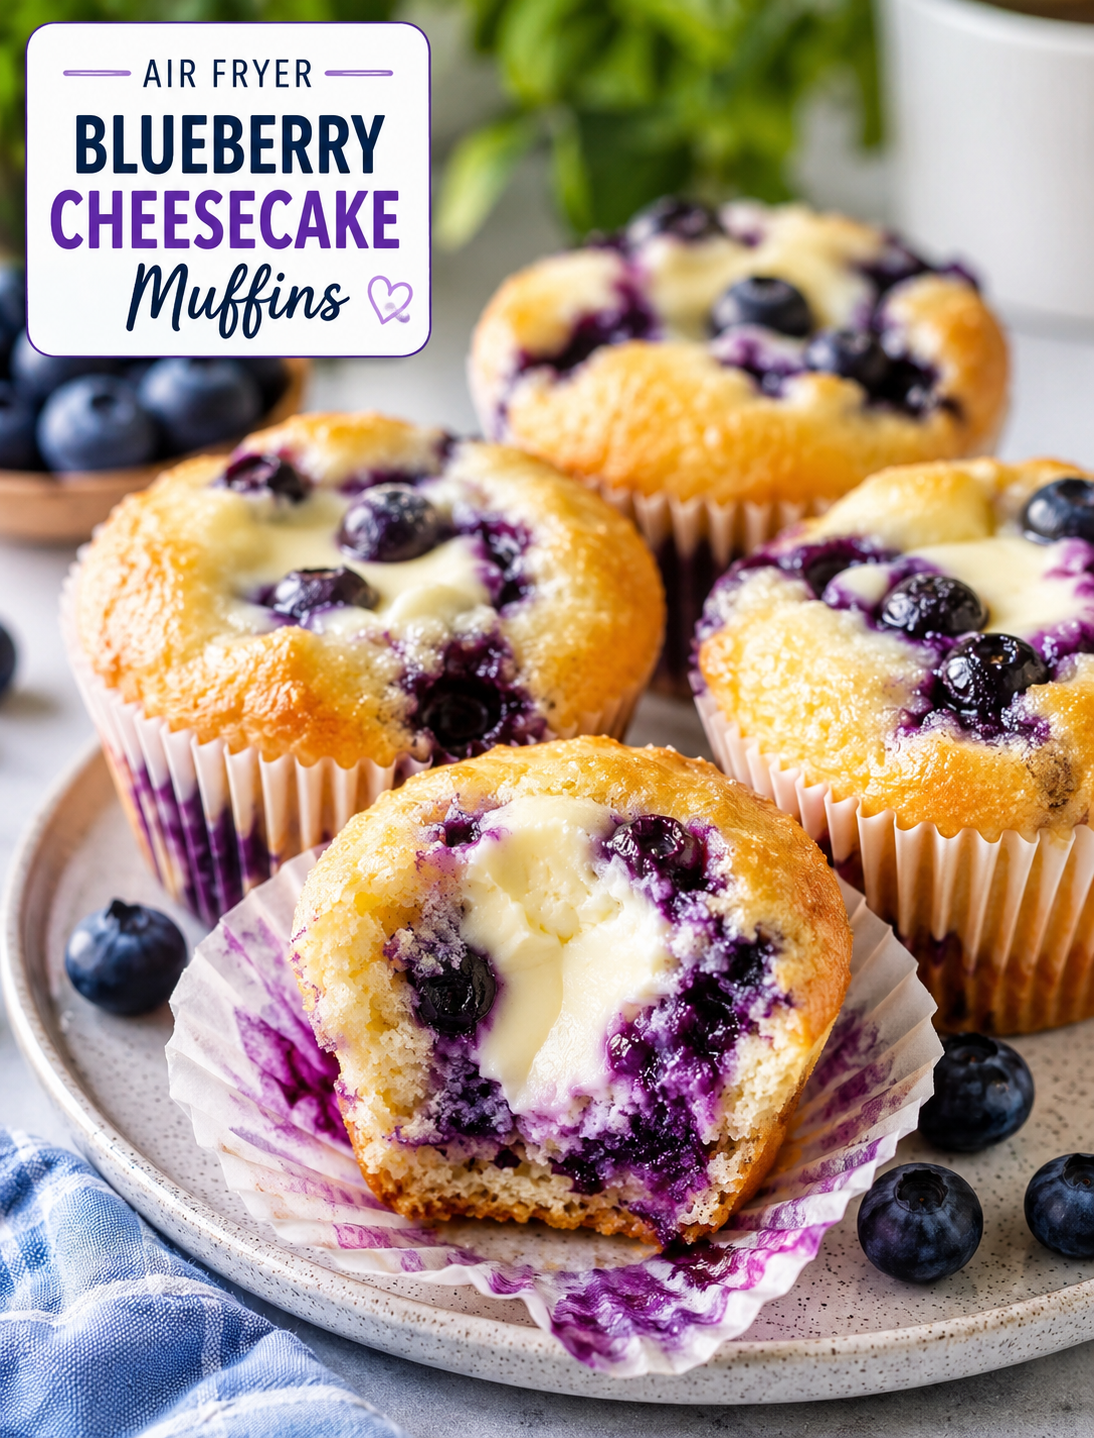
Air Fryer Blueberry Cheesecake Muffins

Air Fryer Blueberry Cheesecake Muffins with juicy blueberries and creamy cheesecake filling

Air Fryer Blueberry Cheesecake Muffins

These Air Fryer Blueberry Cheesecake Muffins are soft, fluffy, and filled with juicy blueberries and a creamy cheesecake center. They have golden tops, tender crumbs, and a sweet cream cheese filling in every bite. The air fryer makes a small batch quickly, so you do not need to heat the whole oven.

This easy muffin recipe is perfect for breakfast, brunch, afternoon snacks, or a simple homemade dessert. Fresh or frozen blueberries both work well, and the ingredients are easy to find at any U.S. grocery store.

Why You’ll Love This Recipe

  • Quick to make: The muffins cook in about 12–16 minutes.
  • Small-batch friendly: The recipe makes about 8 muffins, making it useful for smaller households.
  • Creamy center: Sweetened cream cheese creates a cheesecake-style filling.
  • Fresh blueberry flavor: Blueberries add natural sweetness and a juicy texture.
  • No large oven needed: An air fryer handles the baking with less preheating.
  • Easy ingredients: Most items are pantry and refrigerator staples.
  • Great for meal prep: Store the finished muffins in the refrigerator for easy breakfasts or snacks.

Ingredients

For the Muffins

  • 1 cup all-purpose flour
  • 1/2 cup granulated sugar
  • 1 teaspoon baking powder
  • 1/4 teaspoon baking soda
  • 1/4 teaspoon salt
  • 1 large egg
  • 1/3 cup whole milk
  • 1/4 cup melted unsalted butter
  • 1 teaspoon vanilla extract
  • 3/4 cup fresh blueberries

For the Cheesecake Filling

  • 4 ounces softened cream cheese
  • 3 tablespoons granulated sugar
  • 1/2 teaspoon vanilla extract
  • 1 tablespoon all-purpose flour

Optional Topping

  • 1 tablespoon coarse sugar
  • 1/4 cup powdered sugar for a simple glaze

How to Make Air Fryer Blueberry Cheesecake Muffins

Step 1: Prepare the Cheesecake Filling

Place the softened cream cheese in a small bowl. Add the sugar, vanilla extract, and flour.

Mix until the filling is smooth and creamy. Set it aside while you prepare the muffin batter.

  • Use softened cream cheese for a smooth filling.
  • Do not overmix once the ingredients are combined.
  • If the cream cheese is cold, let it sit at room temperature for about 20–30 minutes.

Step 2: Mix the Dry Ingredients

Add the flour, sugar, baking powder, baking soda, and salt to a medium mixing bowl.

Whisk the ingredients until evenly combined. Breaking up any flour lumps at this stage helps create a smooth muffin batter.

Step 3: Mix the Wet Ingredients

In a separate bowl, whisk together the egg, milk, melted butter, and vanilla extract.

Make sure the melted butter has cooled slightly before adding the egg. Very hot butter can partially cook the egg.

Step 4: Make the Batter

Pour the wet mixture into the bowl of dry ingredients.

Stir gently with a spatula until the flour is almost incorporated. Avoid overmixing because it can make the muffins dense instead of tender.

Fold in the blueberries carefully so they remain whole.

  • Fresh blueberries work best for a firm batter.
  • If using frozen berries, add them directly from the freezer.
  • Do not thaw frozen blueberries because they can release too much liquid.

Step 5: Fill the Muffin Cups

Place silicone muffin cups or sturdy paper liners into your air fryer basket if your model allows them.

Add a small spoonful of batter to each cup. Place about 1 tablespoon of cheesecake filling in the center, then cover it with more muffin batter.

Fill each cup about two-thirds to three-quarters full.

Sprinkle a little coarse sugar over the tops if you want a lightly crisp finish.

Step 6: Preheat the Air Fryer

Preheat the air fryer to 320°F for about 3 minutes.

Air fryer models vary, so check the manufacturer’s instructions before using silicone cups, liners, or baking accessories.

Step 7: Air Fry the Muffins

Carefully place the filled muffin cups into the air fryer basket.

Cook at 320°F for 12–16 minutes.

Start checking around the 12-minute mark. The tops should look golden, and a toothpick inserted into the muffin portion should come out mostly clean.

Avoid inserting the toothpick directly into the cheesecake center because the filling will remain soft.

Step 8: Cool Before Serving

Remove the muffins carefully and place them on a cooling rack.

Let them cool for at least 10 minutes before serving. The cheesecake filling becomes thicker as it cools, making the center easier to enjoy.

Tips for the Best Results

  • Do not overmix: Stir only until the dry ingredients are incorporated.
  • Use room-temperature cream cheese: It creates a smoother cheesecake filling.
  • Watch the cooking time: Smaller air fryers may cook muffins faster.
  • Leave space between cups: Good airflow helps the muffins cook evenly.
  • Use a light touch with blueberries: Gentle folding prevents crushed berries.
  • Check early: Air fryers can differ in temperature and cooking speed.
  • Cool completely: The creamy center sets as the muffins cool.
  • Avoid overcrowding: Cook in batches if the basket does not have enough room.

Fresh vs. Frozen Blueberries

Both fresh and frozen blueberries can be used in this recipe.

Fresh blueberries provide a bright flavor and usually keep the batter cleaner. Frozen blueberries are convenient and work especially well when fresh berries are out of season.

If using frozen berries, do not thaw them first. Add them directly to the batter and fold them in gently.

Serving Suggestions

Serve these muffins warm or chilled depending on your preference.

For breakfast, pair one with coffee, tea, or a glass of milk. For brunch, arrange them on a serving platter with fresh blueberries and a light dusting of powdered sugar.

You can also add a simple glaze by mixing powdered sugar with a small amount of milk or lemon juice. Drizzle it over completely cooled muffins.

For a dessert-style serving, add a few fresh berries and a spoonful of whipped cream.

Storage and Reheating

Because the muffins contain cream cheese, store leftovers in an airtight container in the refrigerator.

They are best enjoyed within 3–4 days.

To warm one muffin, place it in the air fryer at 300°F for 2–3 minutes. Let it cool briefly before eating because the cheesecake center can become very hot.

You can also enjoy them cold straight from the refrigerator for a firmer cheesecake texture.

Nutrition Facts

Approximate nutrition per muffin, based on 8 muffins:

  • Calories: 245
  • Protein: 4g
  • Carbohydrates: 31g
  • Fat: 12g
  • Saturated Fat: 7g
  • Sugar: 16g
  • Fiber: 1g
  • Sodium: 180mg

Nutrition values are estimates and can change depending on the brands and ingredients used.

Frequently Asked Questions

Can I use frozen blueberries?

Yes. Add frozen blueberries directly to the batter without thawing them to prevent excess moisture.

What temperature should I use for these muffins?

Cook them at 320°F for about 12–16 minutes, checking early because air fryer models vary.

Can I make these muffins without paper liners?

Yes. Silicone muffin cups are a good alternative, but make sure they fit securely inside your air fryer basket.

How do I know when the muffins are done?

The tops should be lightly golden, and a toothpick inserted into the muffin portion should come out mostly clean.

Can I use low-fat cream cheese?

Yes, but full-fat cream cheese gives the filling a richer texture and smoother cheesecake flavor.

Why are my muffins dense?

Overmixing the batter can develop too much gluten and make the muffins dense. Stir just until the ingredients are combined.

How should I store leftover muffins?

Store them in an airtight container in the refrigerator for up to 3–4 days because the filling contains cream cheese.

Can I freeze these muffins?

Yes. Cool them completely, wrap them individually, and freeze them in a sealed freezer-safe container for up to about 2 months.

Final Thoughts

These Air Fryer Blueberry Cheesecake Muffins combine everything you want in an easy homemade treat: fluffy muffin batter, juicy blueberries, and a creamy cheesecake center. The air fryer keeps the process simple and works especially well when you want a small batch without turning on a full-size oven.For the best texture, avoid overmixing, use softened cream cheese, and check the muffins early during cooking. Serve them with coffee for breakfast, add them to a weekend brunch spread, or enjoy one as a sweet afternoon snack.

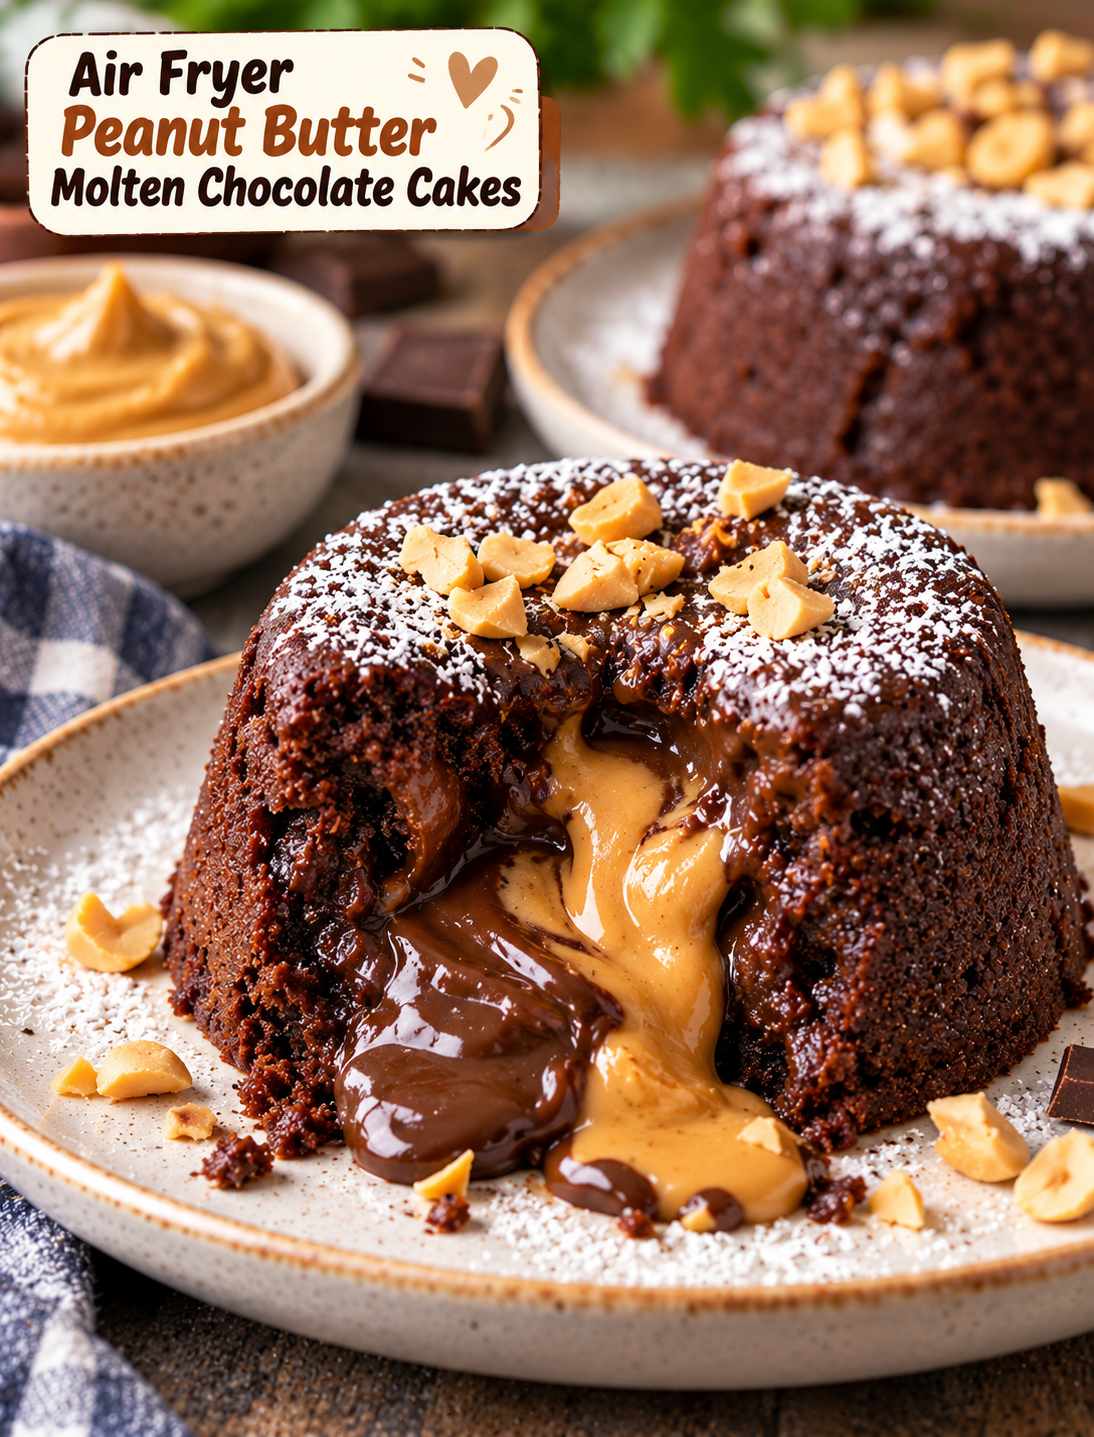
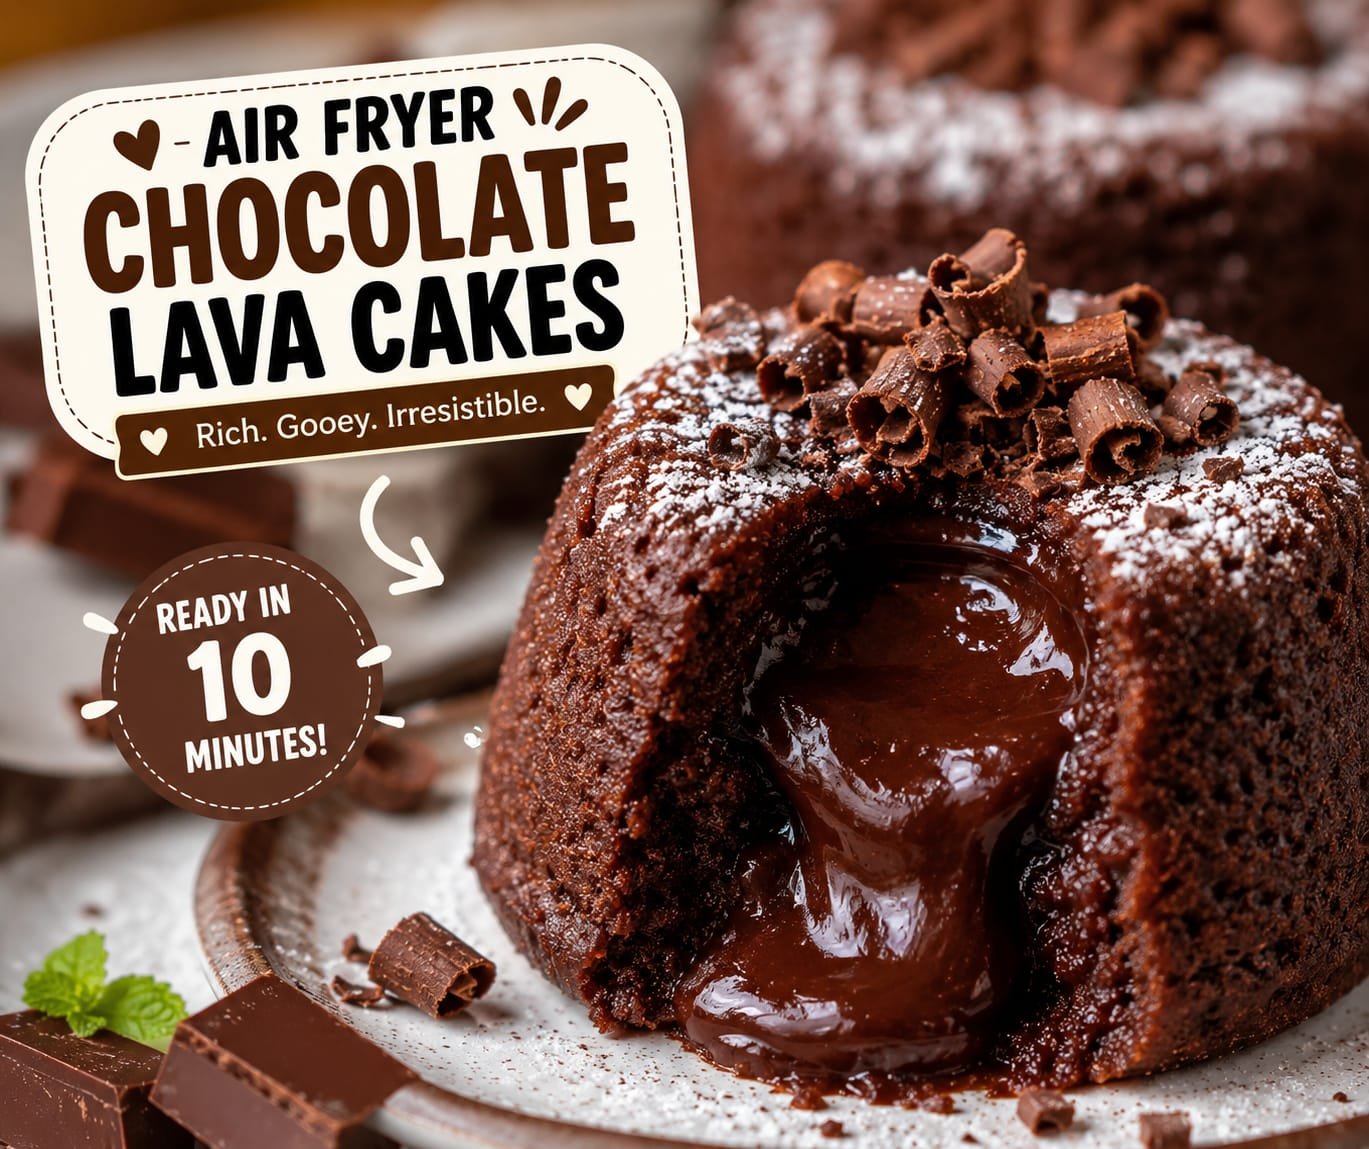
Air Fryer Chocolate Lava Cakes

Air Fryer Chocolate Lava Cakes

Air Fryer Chocolate Lava Cakes

Rich, gooey, and irresistibly chocolatey, these Air Fryer Chocolate Lava Cakes are the ultimate easy dessert! With a soft, cake-like exterior and a warm, molten chocolate center, they look fancy but are surprisingly simple to make. Best of all, the air fryer cooks them quickly without heating up your entire kitchen.Whether you’re planning a romantic dessert, a weekend treat, or simply craving something chocolatey, this recipe is sure to become a favorite.

Prep Time: 10 minutes

Cook Time: 8–10 minutes

Total Time: 18–20 minutes

Servings: 4 lava cakes

Why You’ll Love This Recipe

There are plenty of reasons these chocolate lava cakes deserve a spot in your dessert rotation:

  • Ultra chocolatey: Rich cocoa and chocolate create an indulgent flavor.
  • Air fryer friendly: No need to turn on a large oven.
  • Quick dessert: Ready in about 20 minutes.
  • Soft center: The slightly underbaked center creates the signature lava effect.
  • Easy ingredients: Uses basic baking ingredients.
  • Perfect for special occasions: Looks restaurant-worthy with minimal effort.
  • Small batch: Makes four individual desserts, so there’s less temptation sitting around.

Ingredients For Air Fryer Chocolate Lava Cakes

Lava Cakes

  • 4 tablespoons unsalted butter, plus extra for greasing
  • 4 oz semi-sweet or dark chocolate, chopped
  • 2 large eggs
  • Egg yolks 2 large
  • ¼ cup granulated sugar
  • 1 teaspoon vanilla extract
  • All-purpose flour ¼ cup
  • Unsweetened cocoa powder 2 tablespoons
  • ¼ teaspoon salt

For the Centers

  • 4 small squares of dark or semi-sweet chocolate

Serving

  • Powdered sugar
  • Fresh strawberries or raspberries
  • Vanilla ice cream
  • Fresh mint, optional
  • Chocolate sauce, optional

Instructions For Air Fryer Chocolate Lava Cakes

1. Prepare the Ramekins

Lightly grease four small oven-safe ramekins with butter.

For extra easy release, dust the inside with a little cocoa powder after greasing. Tap out any excess.

Place the ramekins aside while you prepare the batter.

2. Melt the Chocolate and Butter

Add the chopped chocolate and butter to a microwave-safe bowl.

Heat in short intervals, stirring between each one, until completely melted and smooth.

Allow the mixture to cool slightly before adding the eggs.

Tip: Don’t overheat the chocolate. Gentle melting helps keep the mixture smooth.

3. Whisk the Eggs

In a separate bowl, whisk together the eggs, egg yolks, sugar, and vanilla extract.

Whisk for about 1–2 minutes until the mixture becomes smooth and slightly lighter.

4. Combine the Mixtures

Slowly pour the melted chocolate mixture into the egg mixture while whisking gently.

Continue until everything is well combined.

5. Add the Dry Ingredients

Sift in the flour, cocoa powder, and salt.

Fold gently with a spatula until just combined.

Avoid overmixing. You want the batter smooth but not heavily worked.

6. Add the Chocolate Centers

Divide about half of the batter between the four prepared ramekins.

Place one small square of chocolate in the center of each.

Cover with the remaining batter.

The chocolate center helps create an especially rich molten middle.

7. Preheat the Air Fryer

Preheat your air fryer to 375°F (190°C) for about 3 minutes if your model recommends preheating.

Place the ramekins carefully into the air fryer basket.

Make sure there is enough space around them for hot air to circulate.

8. Air Fry

Cook for approximately 8–10 minutes at 375°F (190°C).

The edges should look set while the centers remain slightly soft.

This is the most important part of the recipe. Overcooking the cakes will turn the molten center into a fully baked cake.

Because air fryer models vary, your first batch may require a little experimentation.

9. Rest Briefly

Remove the ramekins carefully from the air fryer.

Let them rest for approximately 1 minute.

Run a thin knife around the edges if necessary.

10. Flip and Serve

Place a serving plate over each ramekin and carefully invert it.

Lift the ramekin slowly.

When done correctly, the cake should release onto the plate while the warm chocolate center flows out when cut.

Dust with powdered sugar and serve immediately.

Tips for Perfect Lava Cakes

Don’t Overcook

The signature lava center depends on slightly underbaking the middle. Start checking around the 8-minute mark.

Use Good Chocolate

Since chocolate is the star ingredient, using good-quality semi-sweet or dark chocolate can make a noticeable difference.

Don’t Skip Greasing

Properly greased ramekins make releasing the cakes much easier.

Don’t Overmix

Once the flour is added, gently fold until combined. Overmixing can make the cakes heavier.

Test One Cake First

Air fryers differ in power and basket design. If you’re making these for the first time, test one cake to determine the ideal cooking time for your appliance.

Serve Immediately

Lava cakes are best when served warm. The longer they sit, the more the center continues to set.

Benefits For Air Fryer Chocolate Lava Cakes

Let’s be realistic—this is an indulgent dessert, not a health food. However, making it at home allows you to control the ingredients and portion sizes.

The recipe uses individual ramekins, which naturally create a defined serving size. You can also choose dark chocolate with a higher cocoa percentage if you prefer a more intense chocolate flavor.

Compared with making a large dessert, individual lava cakes are convenient for portioning and serving.

For a lighter presentation, pair one lava cake with fresh berries instead of a large scoop of ice cream.

Serving Suggestions For Air Fryer Chocolate Lava Cakes

These lava cakes are delicious on their own, but a few simple toppings can make them spectacular.

With Vanilla Ice Cream

Place a small scoop of vanilla ice cream beside the warm cake. The combination of hot chocolate cake and cold ice cream is irresistible.

With Fresh Berries

Serve with strawberries, raspberries, or blueberries for a fresh contrast to the rich chocolate.

With Powdered Sugar

A simple dusting of powdered sugar gives the cakes a beautiful bakery-style finish.

With Chocolate Sauce

For serious chocolate lovers, drizzle a small amount of chocolate sauce over the plate.

With Whipped Cream

A spoonful of lightly sweetened whipped cream adds a creamy, airy contrast.

Nutrition Facts For Air Fryer Chocolate Lava Cakes

Approximate nutrition per serving, without optional toppings:

  • Calories: 390
  • Protein: 7g
  • Carbohydrates: 35g
  • Fat: 25g
  • Saturated Fat: 14g
  • Fiber: 3g
  • Sugar: 23g
  • Sodium: 150mg

Nutrition information is an estimate and may vary depending on the chocolate, butter, sugar, and other ingredients used.

Frequently Asked Questions

Can I make lava cakes without ramekins?

Small oven-safe ceramic or metal baking cups may work, but cooking time can change depending on their size and material. Make sure any container you use is specifically rated for the temperatures involved.

Why didn’t my lava cake have a molten center?

The most common reason is overcooking. Even an extra minute or two can significantly change the center. Try reducing the cooking time slightly next time.

Can I prepare the batter ahead of time?

Yes. You can prepare the batter and refrigerate the filled ramekins until you’re ready to cook. You may need to add a little extra cooking time when starting from cold.

Can I use milk chocolate?

Yes, but the cakes will be sweeter and less intense. Semi-sweet or dark chocolate generally provides a richer chocolate flavor.

Can I freeze chocolate lava cakes?

You can freeze prepared, unbaked portions, but cooking from frozen will require adjustments to the cooking time. Always make sure the center is properly heated before serving.

What size ramekins should I use?

Small individual ramekins around 4–6 ounces work well. The exact cooking time will depend on their size and depth.

Can I make these without the extra chocolate center?

Yes. The batter itself can produce a soft chocolate center when correctly timed. Adding a chocolate square simply makes the molten center more pronounced and reliable.

How do I know when they’re ready?

The edges should look firm and set, while the center should still have a slight softness or jiggle. Avoid waiting until the entire surface is completely firm.

Final Thoughts For Air Fryer Chocolate Lava Cakes

These Air Fryer Chocolate Lava Cakes are proof that an impressive dessert doesn’t have to be complicated.In less than 20 minutes, you can transform a handful of simple ingredients into individual chocolate cakes with a warm, gooey center. The air fryer makes the process fast and convenient, while the individual portions make them perfect for date nights, dinner parties, holidays, or a cozy night at home.The key to success is timing. Keep a close eye on the cakes during the final minutes because every air fryer cooks a little differently.Serve them warm with powdered sugar, fresh berries, or a scoop of vanilla ice cream, and get ready for that satisfying moment when the chocolate center finally flows out.

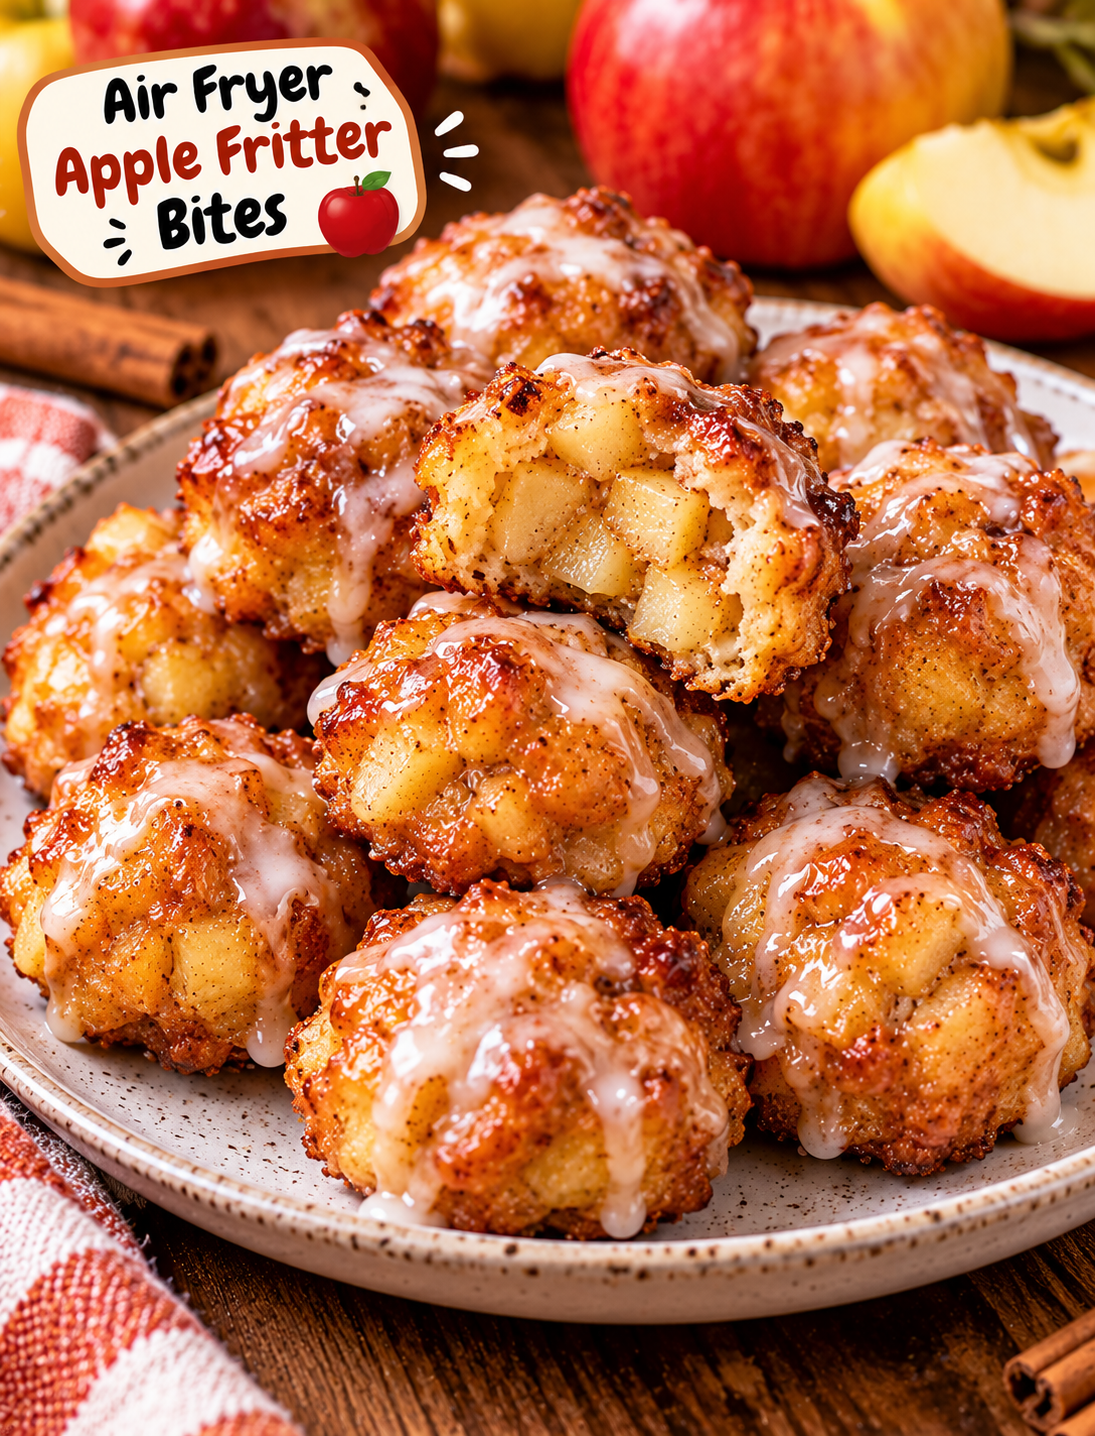
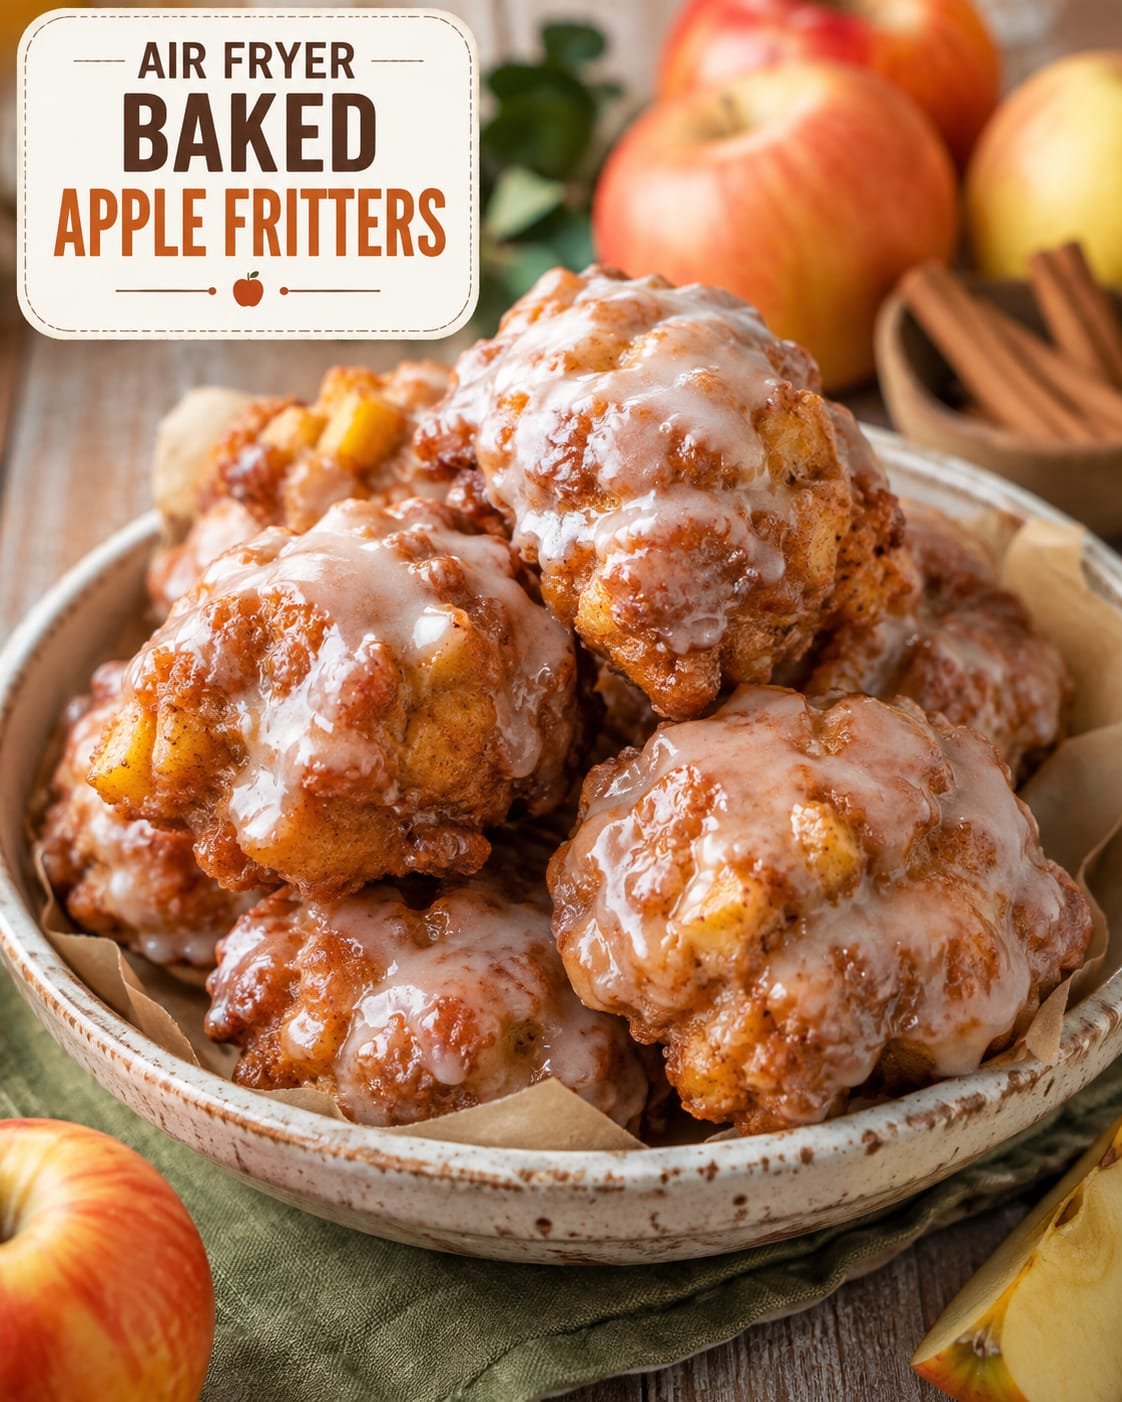
Air Fryer Baked Apple Fritters

Air Fryer Baked Apple Fritters

These Air Fryer Baked Apple Fritters are a delicious way to enjoy the cozy flavor of classic apple fritters without deep-frying. They are soft and fluffy inside, lightly crisp and golden around the edges, and filled with juicy pieces of fresh apple. A simple sweet glaze drizzled over the top adds the perfect finishing touch.Traditional apple fritters are usually dropped into hot oil, but the air fryer offers a much easier alternative. You can achieve beautifully browned fritters with just a small amount of oil, making this recipe less messy and convenient for everyday baking.These homemade apple fritters are perfect for breakfast, brunch, an afternoon snack, or a comforting dessert. The combination of warm cinnamon, sweet apples, vanilla, and a delicate glaze makes every bite taste like fall.

Prep Time: 15 minutes

Cook Time: 10–14 minutes

Total Time: 25–30 minutes

Servings: 8 fritters

Air Fryer Temperature: 350°F (175°C)

Why You’ll Love This Recipe

No Deep-Frying

You can enjoy the classic apple fritter flavor without a pot full of hot oil.

Quick and Easy

The batter comes together quickly, and the air fryer cooks the fritters in just minutes.

Soft Inside, Golden Outside

The hot circulating air creates lightly crisp edges while keeping the center soft and tender.

Full of Apple Flavor

Fresh diced apples are mixed throughout the batter, giving you juicy apple pieces in every bite.

Cozy Cinnamon Flavor

Cinnamon and vanilla complement the apples beautifully and make these fritters taste warm and comforting.

Perfect for Any Time of Day

Enjoy them for breakfast with coffee, as an afternoon snack, or as a simple dessert.

Ingredients For Air Fryer Baked Apple Fritters

For the Apple Fritters

1½ cups all-purpose flour

2 teaspoons baking powder

½ teaspoon ground cinnamon

¼ teaspoon nutmeg

salt ¼ teaspoon

granulated sugar ¼ cup

1 large egg

½ cup milk

1 teaspoon vanilla extract

2 tablespoons melted butter

1½ cups peeled and finely diced apples

Cooking spray or 1 tablespoon melted butter, for brushing

For the Glaze

1 cup powdered sugar

2 tablespoons milk

½ teaspoon vanilla extract

½ teaspoon fresh lemon juice, optional

Optional Toppings

Extra cinnamon

Chopped walnuts or pecans

Thin apple slices

A light dusting of powdered sugar

Instructions For Air Fryer Baked Apple Fritters

Prepare the Apples

Peel the apples and remove the cores.

Cut them into small, evenly sized pieces. Small pieces distribute more evenly through the batter and cook more quickly.

For the best flavor, use apples that are slightly sweet and firm, such as Honeycrisp, Gala, Pink Lady, or Granny Smith.

If using Granny Smith apples, the slight tartness creates a wonderful contrast with the sweet glaze.

Mix the Dry Ingredients

In a medium bowl, whisk together the flour, baking powder, cinnamon, nutmeg, salt, and sugar.

Mix thoroughly to distribute the baking powder and spices evenly.

Mix the Wet Ingredients

In another bowl, whisk together the egg, milk, vanilla extract, and melted butter.

Make sure the melted butter has cooled slightly before adding it to the egg mixture.

Make the Batter

Pour the wet ingredients into the dry ingredients.

Gently stir until just combined.

Do not overmix the batter. A few small lumps are perfectly fine.

Fold in the diced apples.

The batter should be thick enough to hold its shape when spooned.

If it seems excessively dry, add another tablespoon of milk. If it is too loose, add a small amount of flour.

Preheat the Air Fryer

Preheat your air fryer to 350°F (175°C) for approximately 3 minutes.

Lightly spray the air fryer basket with cooking spray.

If your air fryer tends to stick, you can place a perforated piece of parchment paper designed for air fryers underneath the fritters.

Form the Fritters

Scoop approximately 2 tablespoons of batter for each fritter.

Place the portions into the air fryer basket, leaving space between each one.

Gently flatten each fritter slightly with the back of a spoon.

Avoid making them too thick because the centers need enough time to cook.

Depending on the size of your air fryer, you may need to cook the fritters in batches.

Air Fry

Lightly spray or brush the tops of the fritters with melted butter or cooking spray.

Air fry at 350°F (175°C) for 5–7 minutes.

Carefully flip each fritter.

Continue cooking for another 5–7 minutes, or until the fritters are golden brown and cooked through.

Insert a toothpick into the center of one fritter. It should come out clean or with a few moist crumbs.

Prepare the Glaze

While the fritters are cooking, prepare the glaze.

Add powdered sugar to a small bowl.

Gradually whisk in milk and vanilla extract.

Add the optional lemon juice for a subtle tang that balances the sweetness.

The glaze should be smooth and thick enough to coat the fritters while still being easy to drizzle.

If it is too thick, add a few drops of milk. If it is too thin, add a little more powdered sugar.

Glaze the Fritters

Allow the cooked fritters to cool for about 5 minutes.

Drizzle the glaze generously over the tops.

For a thicker coating, dip the tops directly into the glaze and allow the excess to drip off.

Let the glaze sit for a few minutes before serving.

Tips for Perfect Air Fryer Apple Fritters

Choose the Right Apples

Firm apples work best because they maintain some texture during cooking. Avoid very soft apples that can turn mushy.

Cut the Apples Small

Small apple pieces distribute throughout the batter and make the fritters easier to cook evenly.

Don’t Overmix

Overmixing can produce dense fritters. Stir only until the flour is incorporated.

Don’t Overcrowd the Basket

Leave space between fritters so hot air can circulate around them.

Flatten Slightly

A slightly flattened fritter cooks more evenly than a tall mound of batter.

Check the Center

The outside can brown before the center is fully cooked. Use a toothpick to check before removing the fritters.

Glaze While Slightly Warm

Fritters that are slightly warm absorb the glaze beautifully without making it disappear completely.

Benefits For Air Fryer Baked Apple Fritters

These air fryer apple fritters can be a more convenient alternative to traditional deep-fried fritters because they require very little added oil.

Apples provide dietary fiber, vitamin C, and naturally occurring antioxidants. Using fresh apples also adds moisture and natural fruit flavor to the fritters.

Air frying can reduce the amount of oil absorbed compared with deep-frying, while still giving the fritters attractive golden edges.

For a more balanced breakfast, serve one fritter with Greek yogurt and fresh fruit rather than treating several fritters as a full meal.

Serving Suggestions For Air Fryer Baked Apple Fritters

With Coffee

Serve warm apple fritters alongside coffee, cappuccino, or tea for a cozy breakfast or afternoon snack.

With Greek Yogurt

Add a spoonful of plain Greek yogurt for a creamy contrast to the sweet fritter.

With Fresh Fruit

Serve with sliced apples, berries, or pears for extra freshness.

With Cinnamon

Sprinkle a tiny amount of cinnamon over the glaze for an extra burst of warm spice.

With Ice Cream

For dessert, serve a warm fritter with a small scoop of vanilla ice cream.

With Caramel Sauce

Drizzle lightly with homemade or store-bought caramel sauce for an extra-indulgent treat.

Nutrition Facts For Air Fryer Baked Apple Fritters

Approximate nutrition per fritter, based on 8 fritters:

Calories: 225

Protein: 4 g

Carbohydrates: 38 g

Fat: 7 g

Saturated Fat: 4 g

Fiber: 2 g

Sugar: 20 g

Sodium: 190 mg

Calcium: 65 mg

Iron: 1.5 mg

Nutrition information is an estimate and will vary depending on the apples, milk, flour, butter, and amount of glaze used.

Frequently Asked Questions

Can I use different types of apples?

Yes. Granny Smith, Honeycrisp, Gala, Pink Lady, and Fuji are all excellent choices. You can even combine sweet and tart apples.

Can I make these fritters without a glaze?

Absolutely. They are delicious on their own. You can dust them with powdered sugar or sprinkle them with cinnamon sugar instead.

Why are my apple fritters dense?

The most common reason is overmixing the batter. Stir gently and only until the ingredients are combined.

Why are my fritters raw in the middle?

They may be too thick or your air fryer may cook the exterior faster than the center. Flatten the fritters slightly and cook them for a few additional minutes at the same temperature.

Can I use whole-wheat flour?

Yes, but the texture will be denser. For a lighter texture, replace only half of the all-purpose flour with whole-wheat flour.

Can I use frozen apples?

Fresh apples are recommended because frozen apples contain extra moisture and can make the batter too wet.

How should I store leftover fritters?

Store cooled fritters in an airtight container at room temperature for up to 1 day or refrigerate them for up to 3 days.

How do I reheat apple fritters?

Reheat them in the air fryer at 325°F (165°C) for 2–4 minutes until warmed through.

Can I freeze apple fritters?

Yes. Freeze the unglazed fritters in an airtight freezer-safe container for up to 2 months. Thaw and reheat them in the air fryer, then add fresh glaze before serving.

Final Thoughts For Air Fryer Baked Apple Fritters

These Air Fryer Baked Apple Fritters are a simple and delicious way to enjoy a classic apple treat without deep-frying. Fresh apples, cinnamon, vanilla, and a sweet glaze create the perfect combination of cozy flavors, while the air fryer gives the fritters beautifully golden edges.For the best results, use firm apples, cut them into small pieces, avoid overmixing the batter, and leave enough room between the fritters for air to circulate. Checking the center with a toothpick will also help you achieve perfectly cooked fritters every time.Serve them warm with coffee or tea for breakfast, enjoy them as an afternoon snack, or turn them into an easy dessert with vanilla ice cream and caramel sauce. Once you try this simple air fryer method, these homemade apple fritters may quickly become a family favorite.