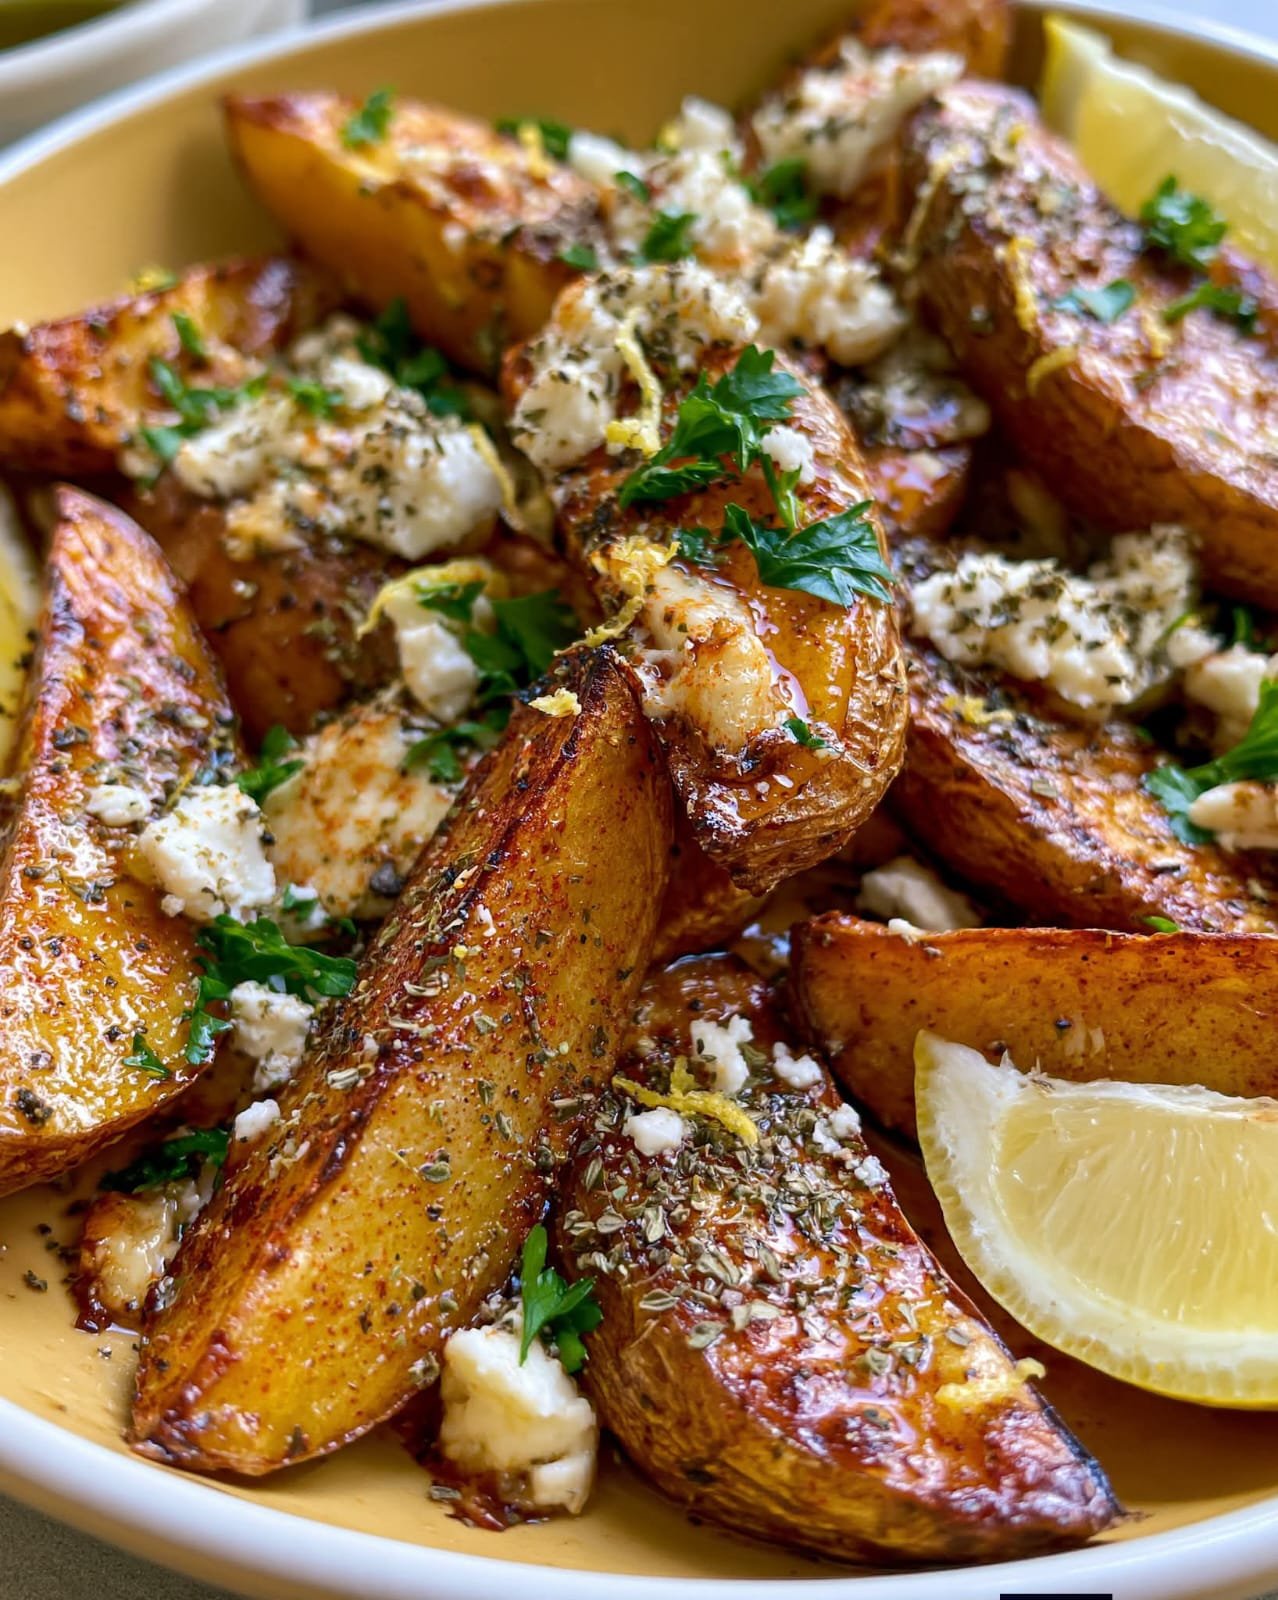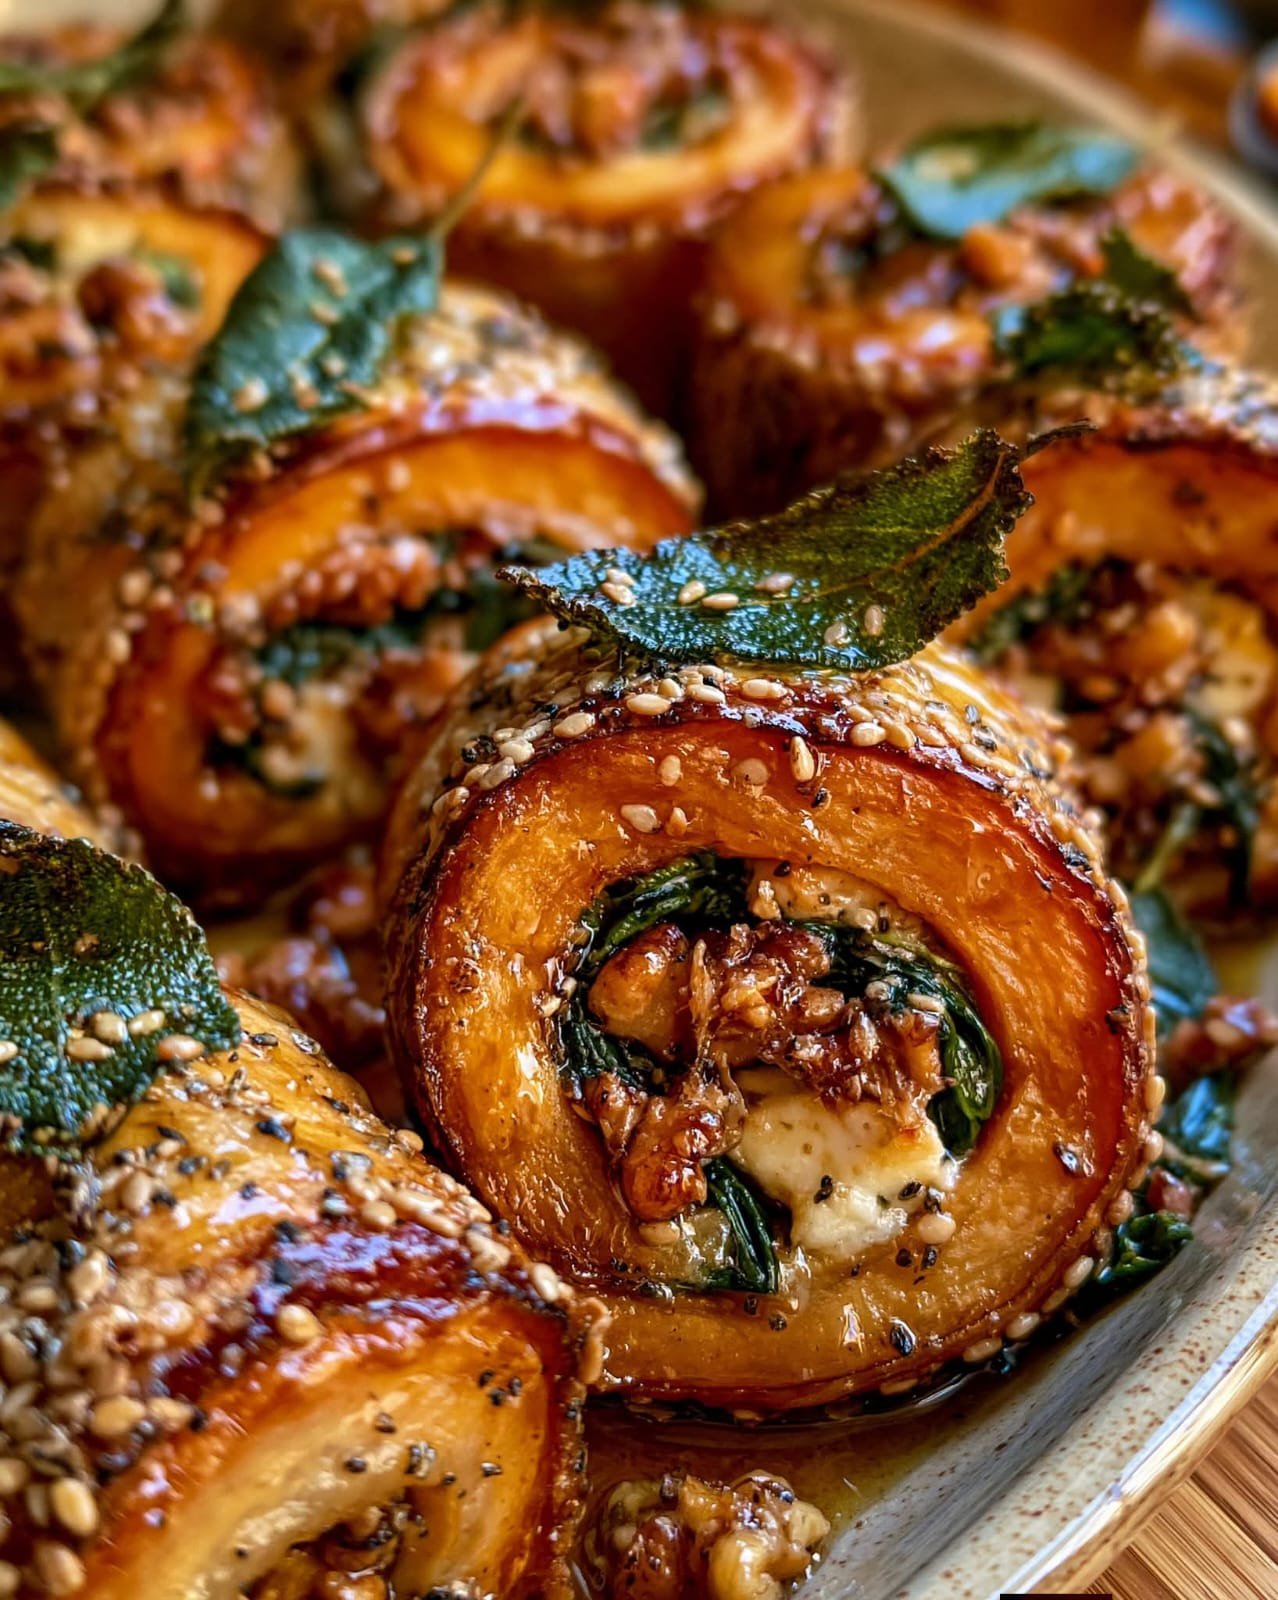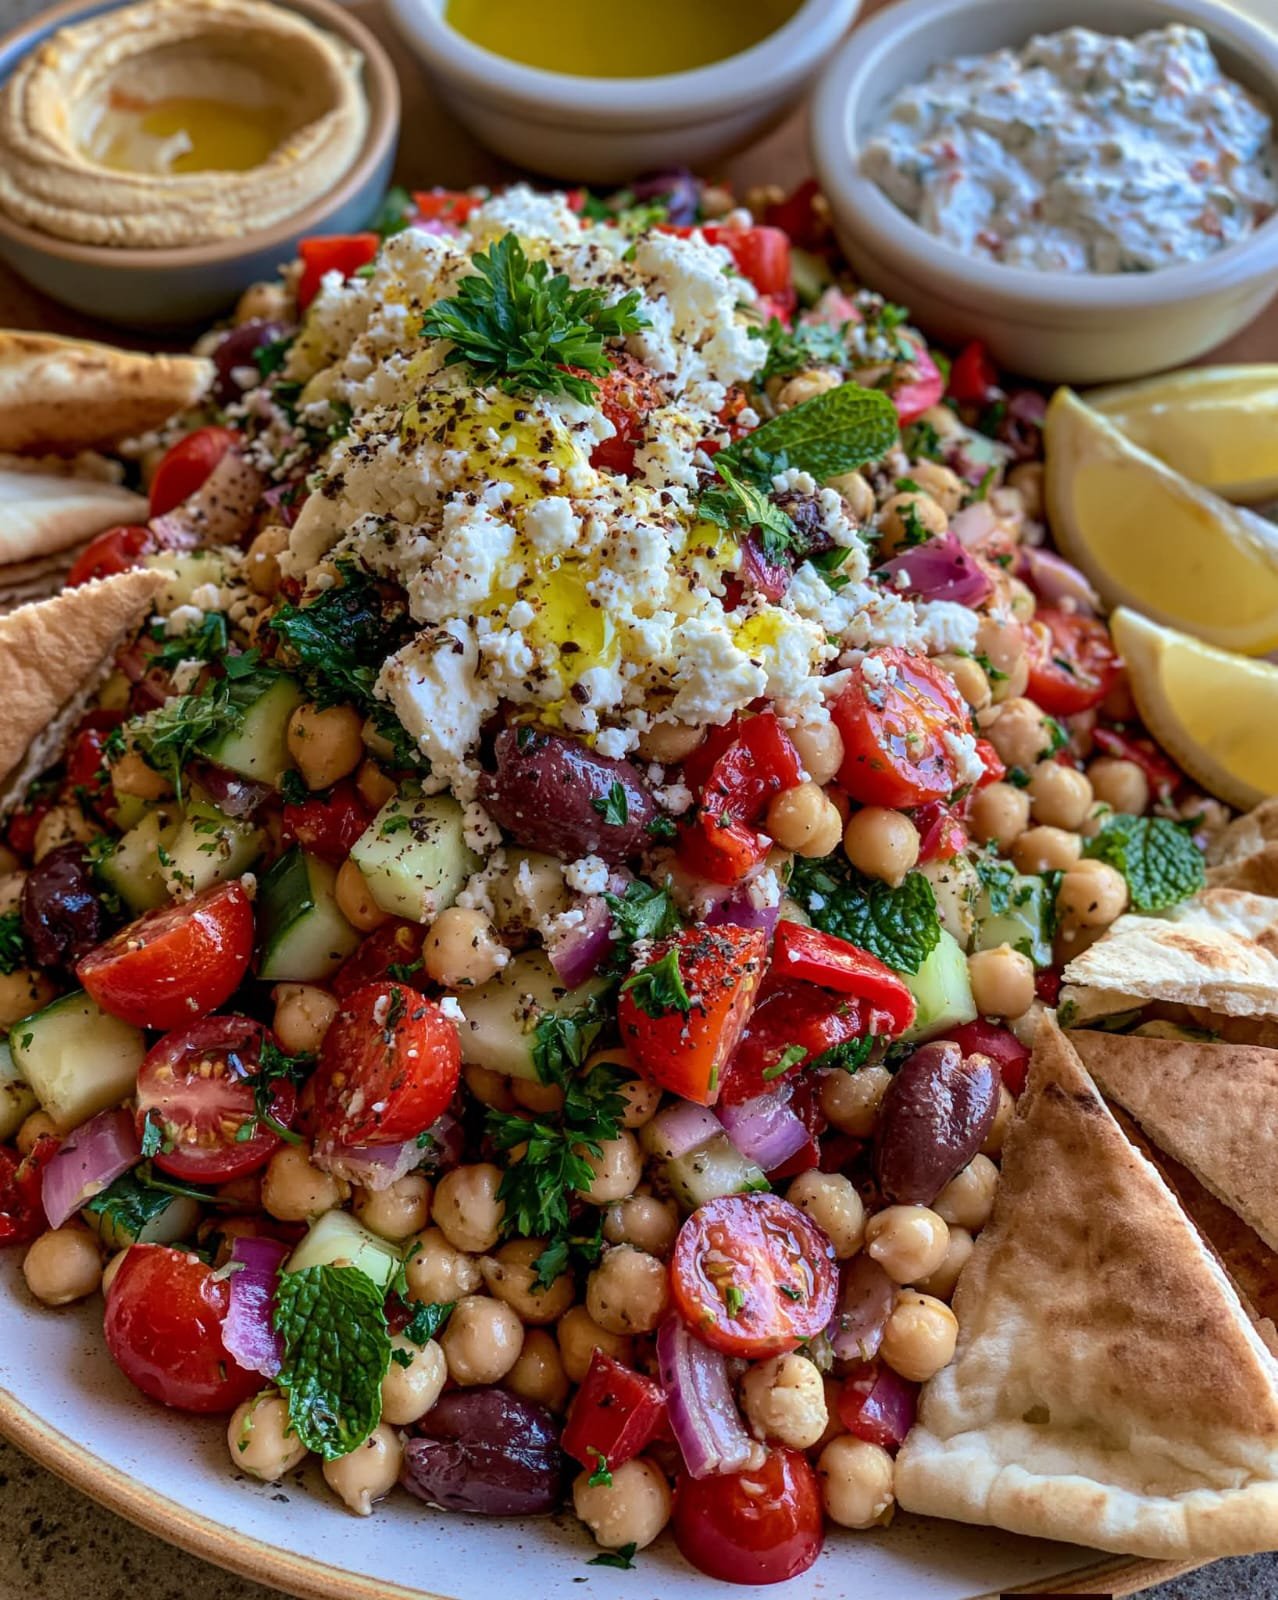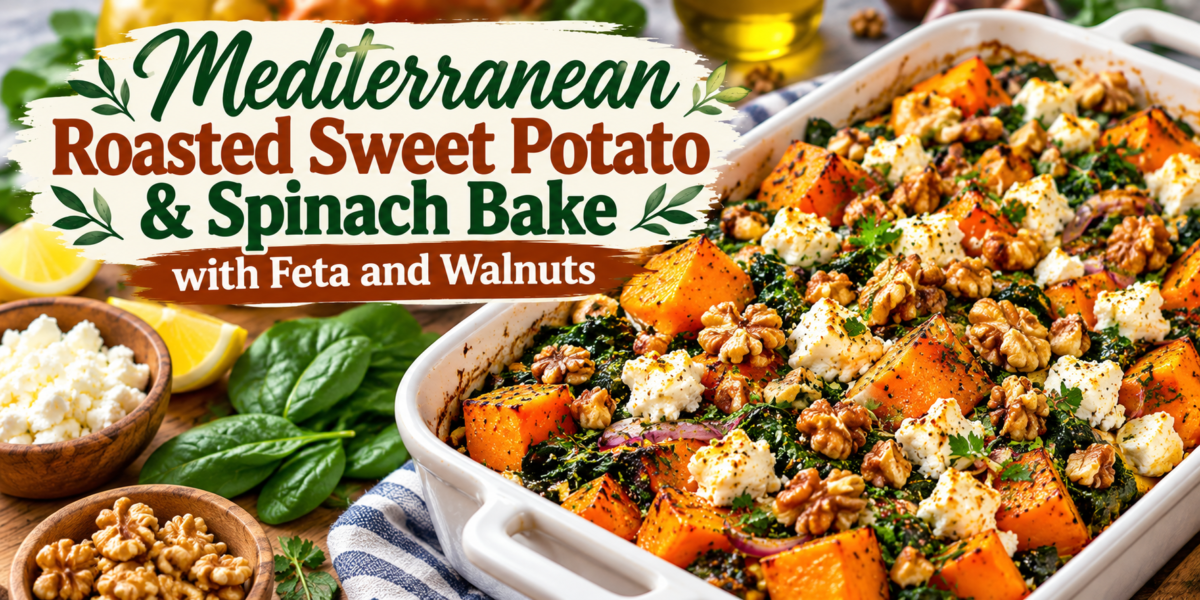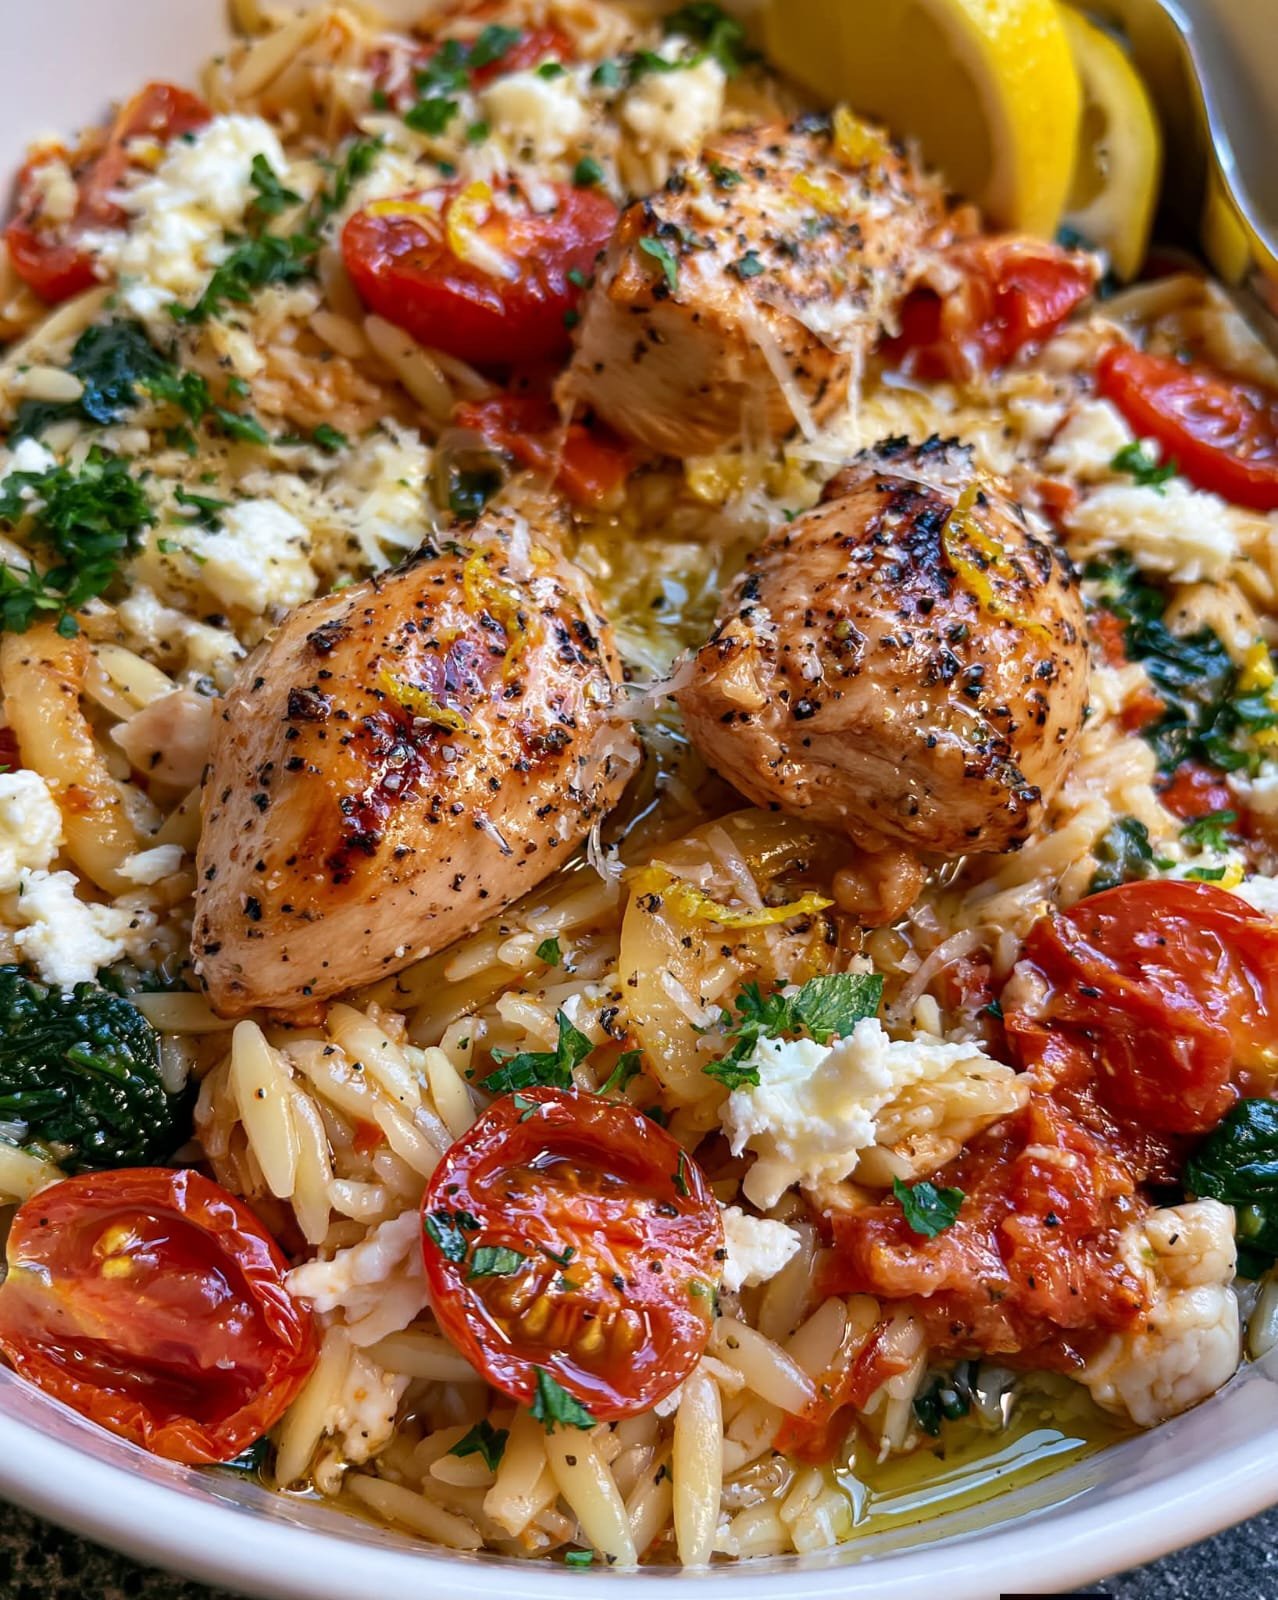
Mediterranean Vegetable Orzo with Feta

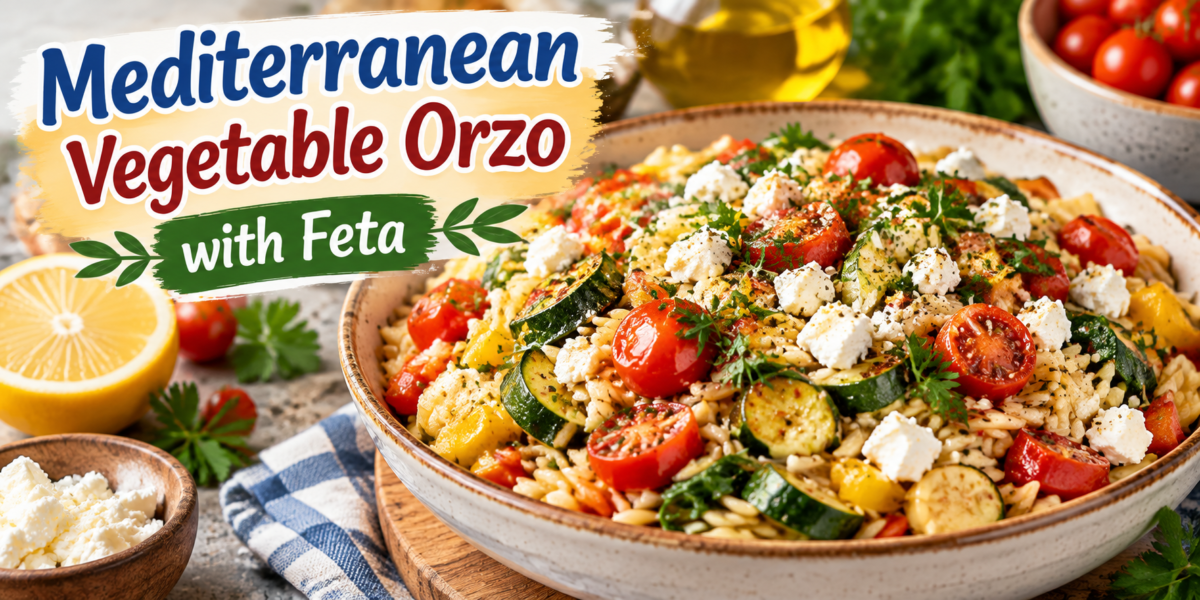
Mediterranean Vegetable Orzo with Feta topped with roasted vegetables, herbs, and fresh Mediterranean flavors

Mediterranean Vegetable Orzo with Feta

Mediterranean Vegetable Orzo is a colorful, flavorful, and wholesome dish inspired by the fresh ingredients commonly found in Mediterranean cuisine. This recipe combines tender orzo pasta with roasted vegetables, creamy feta cheese, fresh herbs, and a delicious blend of Mediterranean flavors. It is a perfect choice for lunch, dinner, meal preparation, or a light family meal.

This Mediterranean Vegetable Orzo recipe brings together simple ingredients that create a satisfying combination of textures and flavors. The soft orzo absorbs the rich flavors of olive oil, garlic, herbs, and vegetables, while feta cheese adds a creamy and slightly tangy finish.

Unlike heavy pasta dishes, this recipe focuses on fresh vegetables, balanced seasoning, and nourishing ingredients. Colorful bell peppers, zucchini, cherry tomatoes, and spinach provide natural flavors, while herbs like parsley and basil create a refreshing taste.

Mediterranean Vegetable Orzo is also a versatile dish that can be enjoyed warm or cold. It works beautifully as a main meal, a side dish for gatherings, or a convenient make-ahead lunch. The combination of vegetables, grains, and cheese makes it filling while still keeping the meal light and refreshing.

Whether you are looking for a healthy weeknight dinner or a flavorful dish for entertaining guests, this Mediterranean-inspired recipe delivers a restaurant-quality experience using simple homemade ingredients.

Preparation Time: 15 minutes

Cooking Time: 30 minutes

Total Time: 45 minutes

Servings: 6 people


Ingredients

2 cups orzo pasta

3 tablespoons extra virgin olive oil

3 cloves minced garlic

1 medium onion, finely chopped

1 red bell pepper, sliced

1 yellow bell pepper, sliced

1 medium zucchini, chopped

1 cup cherry tomatoes, halved

2 cups vegetable broth

2 cups fresh spinach

1 teaspoon dried oregano

1 teaspoon dried basil

1/2 teaspoon red pepper flakes

Salt, according to taste

Freshly ground black pepper, according to taste

3/4 cup crumbled feta cheese

1/4 cup fresh parsley, chopped

2 tablespoons fresh lemon juice

Lemon zest, for extra freshness

Sliced black olives (optional)

Toasted pine nuts (optional)

Chickpeas (optional)

Extra fresh herbs (optional)

Step-by-Step Instructions

To prepare Mediterranean Vegetable Orzo, begin by washing and preparing all vegetables. Chop the zucchini, slice the bell peppers, cut the cherry tomatoes in half, and finely chop the onion and garlic.

Heat olive oil in a large skillet or deep pan over medium heat. Add the chopped onion and cook for 2–3 minutes until it becomes soft and slightly translucent. Add minced garlic and cook for another 30 seconds until fragrant.

Add the sliced bell peppers and zucchini to the pan. Cook the vegetables for 5–7 minutes until they become tender while still maintaining some texture. Add cherry tomatoes and cook for another few minutes until they soften and release their natural juices.

Stir in the dried oregano, basil, red pepper flakes, salt, and black pepper. These seasonings create the signature Mediterranean flavor that makes this Mediterranean Vegetable Orzo so delicious.

Add the dry orzo pasta to the vegetables and mix well so the pasta absorbs the flavors. Pour in vegetable broth and bring the mixture to a gentle boil.

Reduce the heat, cover the pan, and allow the orzo to cook for about 10–12 minutes. Stir occasionally to prevent sticking and ensure even cooking.

When the orzo becomes tender and absorbs most of the liquid, add fresh spinach and stir until it wilts completely. The spinach adds color, nutrients, and a fresh taste to the dish.

Remove the pan from heat and add lemon juice, lemon zest, chopped parsley, and crumbled feta cheese. Gently mix everything together while keeping some feta pieces visible for a beautiful presentation.

Allow the dish to rest for a few minutes before serving. This helps the flavors combine and creates the perfect texture.

Tips for Perfect Orzo

For the best Mediterranean Vegetable Orzo, use fresh vegetables whenever possible because they provide better flavor and texture.

Do not overcook the orzo because it can become too soft. Cook until it is tender but still has a slight bite.

Using vegetable broth instead of water adds much more flavor to the dish. The orzo absorbs the broth while cooking, creating a richer taste.

Add feta cheese at the end of cooking to maintain its creamy texture and prevent it from completely melting into the dish.

For extra flavor, use good quality extra virgin olive oil and fresh herbs. These ingredients make a noticeable difference in Mediterranean recipes.

If preparing this recipe ahead of time, add a small drizzle of olive oil before serving to refresh the texture.

Variations

Mediterranean Vegetable Orzo can easily be customized based on your taste and available ingredients.

For a protein-rich version, add grilled chicken, shrimp, chickpeas, or white beans. These additions make the dish more filling while keeping the Mediterranean style.

For a vegan option, replace feta cheese with vegan cheese or nutritional yeast. The vegetables and herbs will still create a flavorful meal.

You can create a roasted vegetable version by baking zucchini, peppers, and tomatoes before mixing them with cooked orzo.

For extra creaminess, add a spoonful of Greek yogurt before serving. This creates a creamy Mediterranean-style pasta dish.

You can also add artichoke hearts, olives, sun-dried tomatoes, or mushrooms for different flavor combinations.

A spicy version can be made by increasing red pepper flakes or adding fresh chili peppers.

Serving Suggestions

Mediterranean Vegetable Orzo can be served in many delicious ways. It makes an excellent main course when paired with a fresh green salad and a glass of refreshing drink.

For family dinners, serve it alongside grilled vegetables, roasted chicken, or baked fish. The fresh Mediterranean flavors complement many dishes.

This recipe is also perfect for meal preparation. Store portions in airtight containers and enjoy them throughout the week for quick lunches.

Serve Mediterranean Vegetable Orzo warm with extra feta cheese, fresh parsley, and a drizzle of olive oil on top for an attractive presentation.

It can also be served chilled as a pasta salad during summer gatherings, picnics, or outdoor events.

Health Benefits

Mediterranean Vegetable Orzo provides a variety of nutritional benefits because it combines vegetables, herbs, olive oil, and balanced carbohydrates.

The vegetables in this recipe provide important vitamins, minerals, antioxidants, and dietary fiber. Bell peppers contain vitamin C, while spinach provides iron and other essential nutrients.

Olive oil is a traditional ingredient in Mediterranean cooking and contains healthy fats that support a balanced diet.

Feta cheese adds protein and calcium, which are important for maintaining healthy bones and muscles.

The herbs used in Mediterranean Vegetable Orzo provide natural flavor without needing excessive salt or processed seasonings.

Including a variety of colorful vegetables in your meals can support overall wellness and help create a balanced eating pattern.

Questions and Answers

What is orzo pasta?

Orzo is a small rice-shaped pasta made from wheat. Although it looks similar to rice, it is actually pasta and cooks quickly.

Can I make this recipe ahead of time?

Yes, Mediterranean Vegetable Orzo is excellent for meal preparation. Store it in the refrigerator and reheat gently before serving.

Can I use different vegetables?

Yes, you can replace or add vegetables such as mushrooms, broccoli, carrots, peas, or asparagus.

How long does this dish stay fresh?

It can stay fresh in an airtight container in the refrigerator for up to four days.

Can I freeze vegetable orzo?

Yes, you can freeze it, although the texture of feta cheese may slightly change after freezing.

Is this recipe suitable for vegetarians?

Yes, this recipe is vegetarian-friendly when prepared with vegetable broth and feta cheese.

Nutrition Information

Approximate nutrition per serving:

Calories: 390

Protein: 12 grams

Carbohydrates: 55 grams

Fiber: 6 grams

Fat: 14 grams

Calcium: 180 mg

The nutritional values may vary depending on the exact ingredients and portion sizes used.

Storage and Reheating Tips

Proper storage helps maintain the freshness and delicious flavor of Mediterranean Vegetable Orzo for several days. After cooking, allow the dish to cool completely before transferring it into an airtight container. Store it in the refrigerator where it can stay fresh for up to four days.

When reheating Mediterranean Vegetable Orzo, add a small splash of vegetable broth or water before warming it. This helps restore the creamy texture and prevents the orzo from becoming dry. You can reheat it on the stovetop over low heat or use a microwave until warmed through.

This recipe is also a great option for weekly meal preparation. Prepare a large batch during the weekend and divide it into individual portions for quick lunches or dinners. The flavors often become even better after resting because the herbs, vegetables, and seasonings have more time to combine.

Why This Recipe Is Perfect for Busy Days

Mediterranean Vegetable Orzo is an ideal choice for busy families because it requires simple ingredients and minimal cooking effort. Everything cooks together in one pan, which means less cleanup and more convenience.

The recipe is also easy to adjust according to what you already have in your kitchen. If you have extra vegetables available, you can add them without changing the overall cooking method. This makes it a practical recipe for reducing food waste while creating a delicious meal.

Another reason to love Mediterranean Vegetable Orzo is its balance of flavors. The sweetness of roasted vegetables, the creaminess of feta cheese, the freshness of herbs, and the richness of olive oil come together to create a satisfying dish that does not feel heavy.

Cooking Notes for Best Results

For the most flavorful Mediterranean Vegetable Orzo, allow the vegetables to cook properly before adding the orzo. This helps develop deeper flavors and creates a more enjoyable texture.

Fresh herbs can make a big difference in the final taste. Adding parsley, basil, or mint just before serving gives the dish a bright and refreshing finish.

If you prefer a stronger Mediterranean flavor, increase the amount of lemon juice, herbs, or feta cheese according to your taste. These ingredients enhance the fresh and vibrant character of the recipe.

Serving the dish immediately after preparation provides the best texture, but leftovers remain delicious and convenient for future meals

Final Thoughts

Mediterranean Vegetable Orzo is a wonderful recipe that proves healthy meals can also be full of flavor and comfort. The combination of fresh vegetables, creamy feta, herbs, and perfectly cooked orzo creates a satisfying dish suitable for any occasion.

This recipe is easy enough for busy weeknights but impressive enough for serving guests. With simple ingredients and flexible variations, it can become a regular favorite in your kitchen.

Whether enjoyed warm for dinner or chilled as a refreshing lunch, Mediterranean Vegetable Orzo delivers delicious Mediterranean flavors in every bite. It is a perfect example of how fresh ingredients and simple cooking techniques can create a memorable homemade meal.

Feta and Cranberry Chickpeas with Lemon Vinaigrette

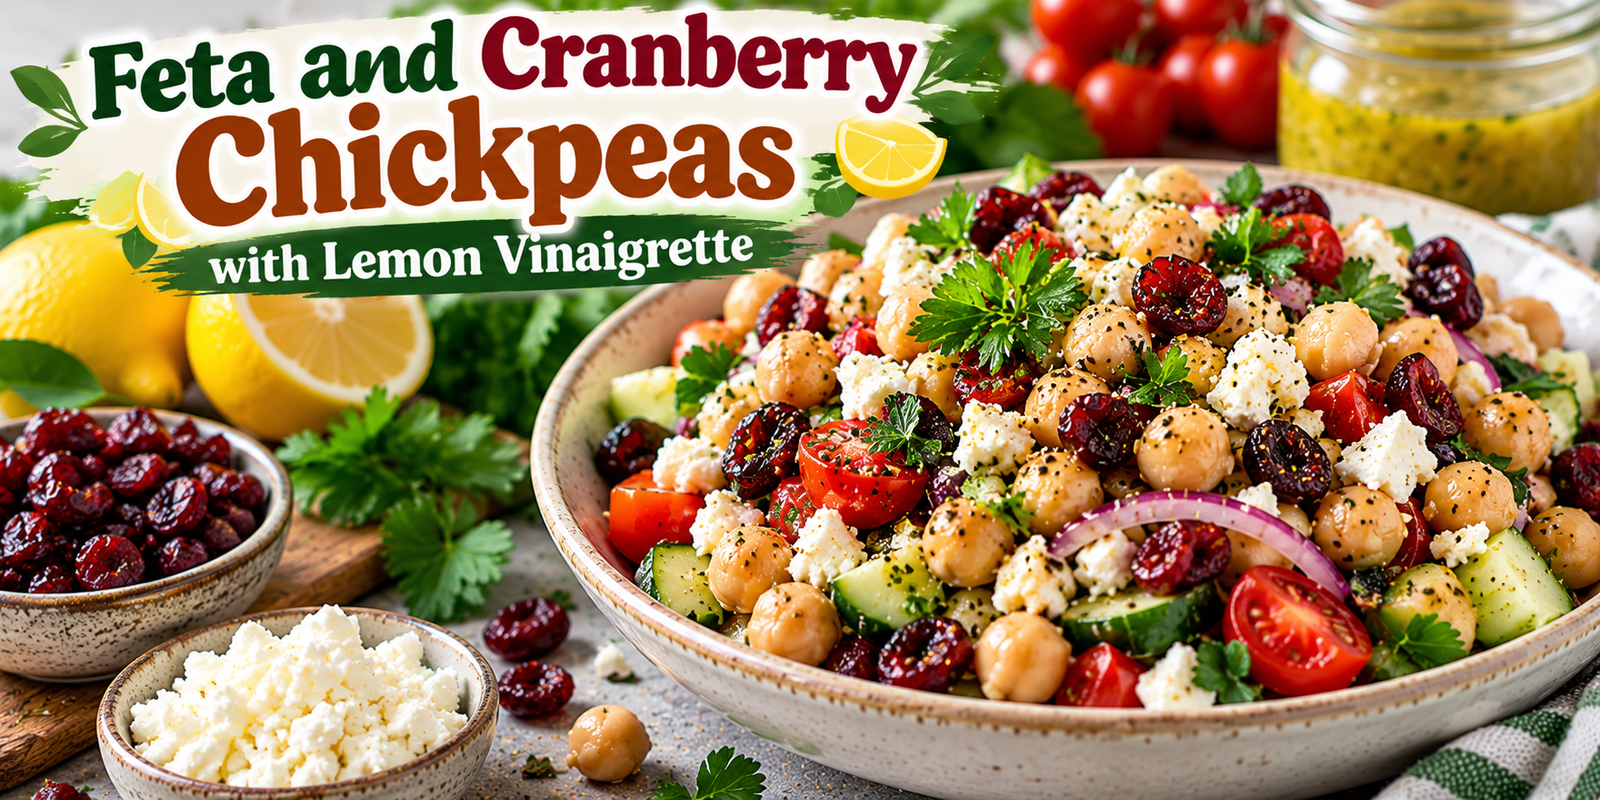
Feta and Cranberry Chickpeas with lemon vinaigrette, cucumber, tomatoes, fresh herbs, and feta cheese

Feta and Cranberry Chickpeas with Lemon Vinaigrette

These Cranberry Chickpeas combine creamy chickpeas, tangy feta, sweet dried cranberries, fresh herbs, crisp vegetables, and a bright lemon vinaigrette. The result is a colorful Mediterranean-inspired salad that is easy enough for a weekday lunch but attractive enough for a family gathering.

The contrast between savory chickpeas, salty feta, and sweet-tart cranberries makes Cranberry Chickpeas especially satisfying. A simple lemon vinaigrette adds acidity and ties all the ingredients together without making the salad heavy.

This recipe can be served chilled or at room temperature. Cranberry Chickpeas are also convenient for meal preparation because the salad can be assembled ahead of time and stored in the refrigerator.

Prep Time: 15 minutes
Cook Time: 0 minutes
Total Time: 15 minutes
Servings: 6

Ingredients

For the Chickpea Salad

3 cups cooked chickpeas, drained and rinsed

¾ cup dried cranberries

1 cup crumbled feta cheese

1 medium cucumber, diced

1 cup cherry tomatoes, halved

½ small red onion, finely sliced

¼ cup fresh parsley, chopped

2 tablespoons fresh mint, chopped

2 tablespoons toasted pumpkin seeds or sunflower seeds

¼ teaspoon black pepper

¼ teaspoon sea salt, or to taste

For the Lemon Vinaigrette

¼ cup extra virgin olive oil

3 tablespoons fresh lemon juice

1 teaspoon lemon zest

1 tablespoon red wine vinegar

1 teaspoon Dijon mustard

1 teaspoon honey or maple syrup

1 small garlic clove, finely grated

½ teaspoon dried oregano

¼ teaspoon black pepper

Pinch of sea salt

Ingredient Notes

For Cranberry Chickpeas, use chickpeas that are tender but still firm enough to hold their shape. Canned chickpeas are convenient, but freshly cooked chickpeas can also be used.

Choose dried cranberries that are soft and slightly tart. If they feel very dry, soaking them briefly in warm water can improve their texture.

For the feta, a creamy crumbly variety works particularly well. The salty cheese creates a delicious contrast with the sweet cranberries.

Fresh lemon juice is strongly recommended for the vinaigrette because bottled lemon juice may not provide the same bright flavor.

Step-by-Step Instructions

1. Prepare the Chickpeas

Drain the chickpeas thoroughly and rinse them under cool running water. Allow them to drain for a few minutes, then pat them gently with a clean kitchen towel.

Removing excess water helps the vinaigrette cling to the chickpeas instead of becoming diluted. If you are using canned chickpeas, choose plain chickpeas without added flavors and rinse them well.

For Cranberry Chickpeas, you can use either canned chickpeas or chickpeas cooked from dry. If cooking from dry, allow them to cool completely before preparing the salad.

2. Prepare the Vegetables

Dice the cucumber into small, even pieces. Halve the cherry tomatoes and thinly slice the red onion.

Place the vegetables in a large mixing bowl. Add the chopped parsley and fresh mint.

The combination of crisp cucumber, juicy tomatoes, sharp red onion, and fresh herbs gives Cranberry Chickpeas plenty of texture and freshness.

3. Add the Cranberries and Feta

Add the dried cranberries and crumbled feta to the bowl.

Choose soft dried cranberries for the best texture. If your cranberries are especially dry, soak them in warm water for five minutes, then drain and pat them dry before adding them.

Crumble the feta into medium-sized pieces rather than making it too fine. This allows little pockets of salty cheese to stand out in every bite of Cranberry Chickpeas.

4. Make the Lemon Vinaigrette

In a small bowl or jar, combine extra virgin olive oil, fresh lemon juice, lemon zest, red wine vinegar, Dijon mustard, honey or maple syrup, grated garlic, dried oregano, black pepper, and a small pinch of sea salt.

Whisk vigorously until the dressing becomes slightly creamy and well combined.

Taste the vinaigrette. If you prefer a sharper flavor, add a little more lemon juice. For a softer flavor, add another small drizzle of olive oil.

Fresh lemon is especially important because it keeps the Cranberry Chickpeas bright and balanced.

5. Combine Everything

Pour approximately two-thirds of the vinaigrette over the chickpea mixture.

Use a large spoon to gently toss everything together. Make sure the chickpeas, vegetables, cranberries, feta, and herbs are evenly coated.

Add the remaining vinaigrette only if needed. You want the salad to be moist and flavorful without becoming watery.

At this stage, the Cranberry Chickpeas can be served immediately, but allowing the mixture to rest for 10–15 minutes gives the flavors more time to blend.

6. Add the Seeds

Just before serving, sprinkle the toasted pumpkin seeds or sunflower seeds over the salad.

Seeds add a pleasant crunch that contrasts with the creamy feta and tender chickpeas.

For an especially fresh presentation, finish the Cranberry Chickpeas with extra parsley, mint, lemon zest, and a light drizzle of olive oil.

Tips for the Best Results

Use Well-Drained Chickpeas

Excess liquid can dilute the dressing and make the salad watery. Drain and rinse canned chickpeas thoroughly, then allow them to dry for a few minutes.

For the best texture, the chickpeas should be tender but still firm enough to hold their shape when tossed.

Balance Sweet and Savory Flavors

The dried cranberries provide sweetness while feta brings saltiness. The lemon vinaigrette adds acidity to balance both flavors.

If your feta is very salty, reduce the added salt in the dressing. If your cranberries are very sweet, increase the lemon juice slightly.

This balance is what makes Cranberry Chickpeas taste fresh rather than overly sweet.

Cut Vegetables Evenly

Small, similar-sized pieces make the salad easier to eat and help distribute the ingredients evenly.

Try to cut the cucumber and tomatoes into pieces that are similar in size to the chickpeas. Thinly sliced onion also spreads its flavor throughout the salad.

Let the Salad Rest

Although the salad can be eaten immediately, a short resting period improves the flavor.

After tossing, let Cranberry Chickpeas sit for 10–15 minutes at room temperature. The chickpeas absorb some of the lemon vinaigrette while the herbs release their aroma.

Add Crunch at the End

Seeds can soften when they sit in dressing for too long. Add them immediately before serving if you want maximum crunch.

Toasted pumpkin seeds, sunflower seeds, chopped almonds, or walnuts can all work well.

Serving Suggestions

Serve Cranberry Chickpeas as a light lunch with warm pita, whole-grain bread, or a simple vegetable soup.

The salad also makes an excellent side dish for grilled chicken, baked salmon, roasted vegetables, or grilled halloumi.

For a Mediterranean-inspired dinner, place it alongside hummus, olives, cucumber, tomatoes, and warm flatbread.

You can also spoon Cranberry Chickpeas over cooked quinoa, couscous, bulgur, or brown rice. The grains make the meal more substantial while absorbing the lemon dressing.

Recipe Variations

Add Avocado

Diced avocado creates a creamy texture that works beautifully with feta and lemon. Add it immediately before serving so it remains fresh.

Add Roasted Peppers

Chopped roasted red peppers bring sweetness and a mild smoky flavor. They also make Cranberry Chickpeas even more colorful.

Add Greens

Baby spinach, arugula, chopped romaine, or mixed greens can be added to create a larger salad. If using delicate greens, toss them in immediately before serving.

Add Grilled Chicken

For a higher-protein meal, top the salad with sliced grilled chicken seasoned with lemon, garlic, oregano, and black pepper.

Make It Spicy

Add a pinch of crushed red pepper flakes to the vinaigrette. A little chili heat creates a nice contrast with the sweet cranberries.

Change the Cheese

If feta is unavailable, goat cheese can provide a similar creamy and tangy character. For a dairy-free version, omit the cheese and add toasted nuts or seeds.

Make-Ahead Instructions

The chickpeas, vegetables, cranberries, and herbs can be combined several hours ahead of serving.

For the best texture, prepare the vinaigrette separately and toss it with the salad shortly before serving.

If preparing Cranberry Chickpeas the night before, keep the seeds separate and add them just before eating.

The salad can be served cold directly from the refrigerator or allowed to sit at room temperature for about 15 minutes.

Storage Instructions

Store leftovers in an airtight container in the refrigerator for up to three days.

The vegetables may release a little liquid as they sit, so gently stir the salad before serving.

If the flavors seem less bright after refrigeration, add a small squeeze of fresh lemon juice.

For the best texture, Cranberry Chickpeas should not be frozen because cucumber and fresh herbs can become watery and soft after thawing.

Frequently Asked Questions

Can I Use Dried Chickpeas?

Yes. Cook dried chickpeas until tender, drain them well, and allow them to cool completely before using them.

Can I Use Another Dried Fruit?

Yes. Dried cherries, chopped dates, raisins, or golden raisins can replace cranberries. Cranberries provide a particularly nice sweet-tart contrast with feta.

Can I Make the Vinaigrette Without Honey?

Absolutely. Use maple syrup for a plant-based option, or omit the sweetener if you prefer a sharper lemon dressing.

Can I Make This Salad Dairy-Free?

Yes. Omit the feta and add toasted almonds, pumpkin seeds, or sunflower seeds for extra richness and texture.

Is This Recipe Good for Meal Prep?

Yes. Keep the dressing and crunchy toppings separate when possible. This helps Cranberry Chickpeas stay fresh and prevents the seeds from becoming soft.

Can I Serve It Warm?

Yes. Gently warming the chickpeas before combining them with the other ingredients can create a slightly different texture. However, avoid heating the cucumber, feta, and herbs because they are best fresh.

Nutrition Information

Approximate nutrition per serving:

Calories: 330 kcal

Protein: 10g

Carbohydrates: 35g

Fat: 17g

Fiber: 8g

Sugar: 12g

Sodium: 470mg

Nutrition values are estimates and can vary according to ingredient brands, serving sizes, and optional additions.

Final Thoughts

This Cranberry Chickpeas recipe brings together creamy chickpeas, tangy feta, sweet-tart cranberries, crisp vegetables, fresh herbs, crunchy seeds, and a bright lemon vinaigrette.

The recipe is simple enough for everyday lunches but colorful enough for entertaining. It requires no complicated cooking and can be prepared in about 15 minutes when using ready-to-eat chickpeas.

For the freshest result, use firm cucumber, ripe cherry tomatoes, good-quality feta, fresh lemon juice, and extra virgin olive oil. Fresh herbs make a noticeable difference, while toasted seeds provide a satisfying crunch.

You can easily adapt Cranberry Chickpeas with avocado, roasted peppers, leafy greens, grilled chicken, or different nuts and seeds.

The sweet-and-savory combination makes this salad especially versatile. Serve it as a side, pack it for lunch, or turn it into a complete meal by adding quinoa or grilled protein.

With its bright flavors and simple preparation, Cranberry Chickpeas is an easy recipe to keep in your regular meal rotation.

Eggplant and Tomato Casserole with Feta and Herbs

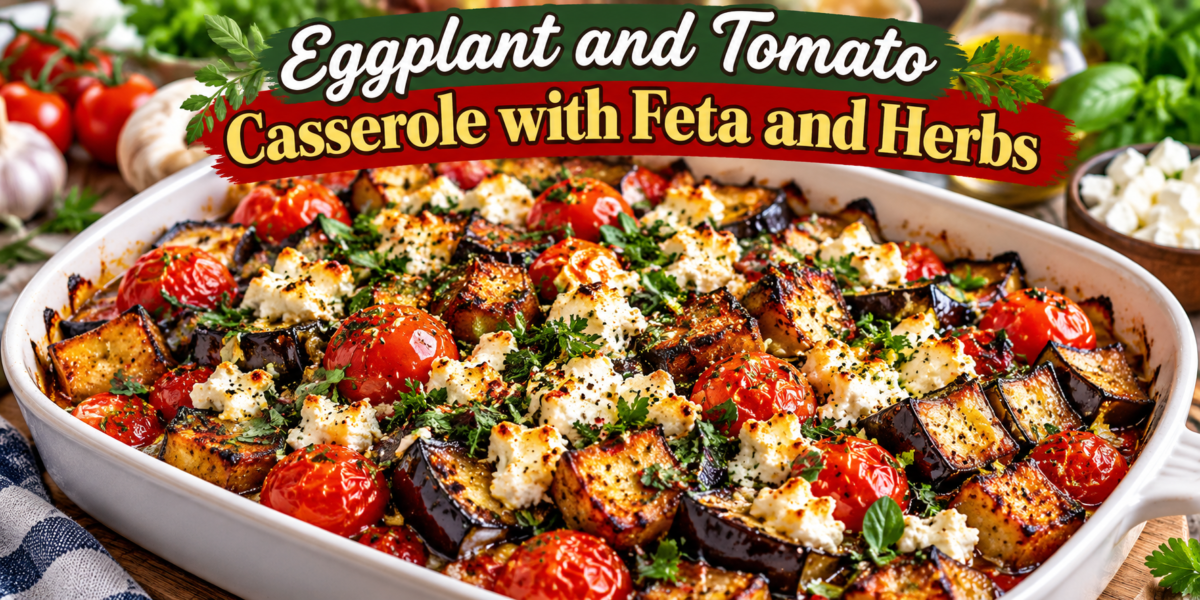
Eggplant and Tomato Casserole with Feta and Herbs featuring roasted eggplant, tomatoes, crumbled feta, garlic, and fresh herbs


Eggplant and Tomato Casserole with Feta and Herbs

This Eggplant and Tomato Casserole with Feta and Herbs is a warm, colorful Mediterranean-inspired dish made with tender roasted eggplant, juicy tomatoes, garlic, red onion, creamy feta, olive oil, and fresh herbs. The vegetables roast until their edges become beautifully caramelized while the feta adds a salty, creamy finish.

The short focus keyword for this recipe is Eggplant Tomato Casserole. This dish brings together a handful of everyday ingredients in one baking dish. Eggplant provides a soft, hearty texture, tomatoes add natural sweetness and acidity, and feta creates a salty contrast. Garlic, oregano, parsley, basil, lemon, and extra virgin olive oil give the dish its fresh Mediterranean character.

You can serve this Eggplant Tomato Casserole as a vegetarian main course with warm pita or crusty bread. It also works beautifully as a side dish with grilled chicken, baked fish, shrimp, or lamb. Because the vegetables can be prepared ahead, it is also useful for meal prep and relaxed family dinners.

Prep Time: 20 minutes
Cook Time: 45 minutes
Total Time: 1 hour 5 minutes
Servings: 6

Ingredients

For the Roasted Vegetables

  • 2 medium eggplants, cut into 1-inch cubes
  • 3 cups cherry tomatoes
  • 1 medium red onion, cut into wedges
  • 4 garlic cloves, finely minced
  • 4 tablespoons extra virgin olive oil
  • 1 teaspoon dried oregano
  • 1 teaspoon smoked paprika
  • 1 teaspoon sea salt
  • ½ teaspoon black pepper
  • ¼ teaspoon red pepper flakes, optional

For the Feta and Herb Topping

  • 1 cup crumbled feta cheese
  • 2 tablespoons fresh parsley, finely chopped
  • 2 tablespoons fresh basil, finely chopped
  • 1 teaspoon dried oregano
  • 1 teaspoon lemon zest
  • 1 tablespoon fresh lemon juice
  • 1 tablespoon extra virgin olive oil

Optional Additions

  • ½ cup Kalamata olives, sliced
  • ½ cup chickpeas, drained and rinsed
  • ¼ cup roasted red peppers, chopped
  • 2 tablespoons sun-dried tomatoes, chopped

Step-by-Step Instructions

1. Prepare the Eggplant

Start by washing the eggplants and drying them thoroughly. Cut off the tops and bottoms, then cut the eggplants into approximately 1-inch cubes. Try to keep the pieces close in size so they roast at the same rate.

Place the eggplant cubes in a large mixing bowl. Add three tablespoons of extra virgin olive oil, dried oregano, smoked paprika, sea salt, black pepper, and red pepper flakes if you are using them. Toss well until every piece is lightly coated with oil and seasoning.

For the best Eggplant Tomato Casserole, choose firm, fresh eggplants with smooth skin. Medium eggplants are usually tender and easy to roast. If the eggplant seems particularly large or has many visible seeds, you can scoop out some of the seed-heavy center before cutting it.

Let the seasoned eggplant sit for about 10 minutes while you prepare the remaining vegetables. This gives the seasonings a little time to settle onto the surface.

2. Prepare the Tomatoes, Onion, and Garlic

Preheat the oven to 425°F (220°C). Add the cherry tomatoes and red onion wedges to the bowl with the seasoned eggplant.

Add the minced garlic and the remaining tablespoon of olive oil. Toss gently so the tomatoes remain mostly intact while the onion and garlic become coated.

Cherry tomatoes are especially useful because they become soft and juicy in the oven without completely disappearing. If you prefer larger tomatoes, use ripe Roma tomatoes or another firm variety and cut them into large chunks.

The combination of tomato, onion, garlic, and eggplant creates the savory base of this Eggplant Tomato Casserole. Keep the garlic distributed throughout the vegetables so it roasts gently instead of sitting in one concentrated area.

3. Arrange the Vegetables

Transfer the vegetables to a large baking dish or rimmed sheet pan. Spread them into one even layer.

Try not to overcrowd the pan. When vegetables are packed too closely together, their moisture creates steam and prevents proper browning. If your baking dish is small, use two pans instead.

Place the pan in the preheated oven and roast for 20 minutes.

4. Roast Until Tender and Golden

After 20 minutes, carefully remove the pan from the oven. Use a spatula to turn the eggplant and gently move the tomatoes and onion around.

Return the pan to the oven and roast for another 15 to 20 minutes. The eggplant should be soft in the center with browned edges, while the tomatoes should look blistered and juicy. The onion should be tender with some caramelized edges.

Roasting is the most important flavor-building stage of this Eggplant Tomato Casserole. The high oven temperature concentrates the natural sweetness of the tomatoes and helps the eggplant develop deeper flavor.

If you want darker edges, roast for another five minutes, but watch carefully so the garlic does not burn. The finished vegetables should be tender without becoming completely mushy.

5. Prepare the Feta and Herb Topping

While the vegetables are roasting, prepare the feta mixture.

Place the crumbled feta in a small bowl. Add the chopped parsley, chopped basil, dried oregano, lemon zest, lemon juice, and one tablespoon of extra virgin olive oil.

Stir gently until the ingredients are combined. Do not mash the feta into a smooth paste. Small crumbles create a much better texture and allow the cheese to remain visible on top of the vegetables.

Taste the mixture before adding more salt. Feta can vary in saltiness, so additional salt may not be necessary.

For an extra bright finish, add a little more lemon zest instead of adding more salt. This keeps the topping fresh and aromatic.

6. Add the Feta

Remove the roasted vegetables from the oven. Scatter the feta and herb mixture evenly across the surface.

Return the dish to the oven for approximately five minutes. This warms the feta and allows it to soften slightly while keeping its crumbly character.

If you want a lightly browned top, place the dish under the broiler for one to two minutes. Watch it closely because feta can brown quickly under direct heat.

At this stage, the Eggplant Tomato Casserole should have tender eggplant, blistered tomatoes, soft red onion, fragrant garlic, and warm feta.

7. Finish and Rest

Remove the baking dish from the oven and let it rest for about five minutes.

Add a little extra parsley and basil if desired. A small drizzle of olive oil and a squeeze of fresh lemon juice can also be added just before serving.

Resting allows the tomato juices and olive oil to settle around the vegetables. It also gives the flavors a chance to come together.

Tips for the Best Results

Choose Fresh Eggplant

Select eggplants that feel firm and heavy for their size. The skin should be smooth and shiny without large soft spots.

Smaller and medium eggplants usually have a pleasant tender texture. Cut the pieces into similar sizes so they cook evenly. Even cubes help every serving of Eggplant Tomato Casserole contain a good balance of tender centers and browned edges.

Do Not Overcrowd the Pan

Good airflow is essential when roasting vegetables. If the pan is too crowded, the vegetables will steam instead of caramelizing.

Use the largest baking dish you have available, or divide the ingredients between two pans. This simple adjustment can make a noticeable difference in the final texture.

Use Olive Oil Wisely

Eggplant absorbs oil quickly, but adding too much can make the dish greasy. Start with the listed amount and toss the vegetables thoroughly.

If the vegetables look dry after roasting for several minutes, add a small drizzle. Avoid pouring a large amount of oil over the pan because the tomatoes will release their own juices.

Season in Layers

Seasoning the vegetables before roasting and finishing the casserole with fresh lemon and herbs creates more depth.

Oregano and garlic give the vegetables a savory foundation, while lemon, basil, and parsley brighten the final dish. The same approach works whenever you make Eggplant Tomato Casserole with different vegetables or optional toppings.

Use Good Feta

Choose a feta with a creamy, crumbly texture and a flavor you enjoy. Good feta provides much of the salty character of the dish.

If the feta is very salty, reduce the amount of added salt used on the vegetables.

Serving Suggestions

Serve With Warm Bread

Warm pita, flatbread, sourdough, or crusty Mediterranean bread is one of the easiest ways to serve this dish.

Bread is especially useful because it can soak up the tomato juices, olive oil, and softened feta. A spoonful of the vegetables over warm pita makes a simple and satisfying lunch.

Serve With Rice or Grains

Spoon the casserole over couscous, bulgur, quinoa, brown rice, or white rice.

The grains absorb the flavorful tomato juices and make the meal more filling. This combination is especially useful when serving Eggplant Tomato Casserole as a vegetarian main course.

Serve With Grilled Protein

The fresh vegetables pair well with grilled chicken, baked fish, shrimp, or lamb.

For a family-style meal, place the casserole in the center of the table and serve it alongside a simple protein, cucumber salad, olives, and warm pita.

Serve as a Mezze Dish

For a Mediterranean-inspired spread, serve smaller portions with hummus, tzatziki, olives, cucumber, tomatoes, roasted peppers, and toasted pita.

Eggplant Tomato Casserole also looks colorful on a shared table, with feta adding a savory finish.

Recipe Variations

Add Chickpeas

Add ½ cup of drained and rinsed chickpeas during the final 20 minutes of roasting. The chickpeas become lightly crisp on the outside and absorb the flavors of the vegetables.

This addition makes Eggplant Tomato Casserole more filling and provides extra plant-based protein and fiber.

Add Kalamata Olives

Add sliced Kalamata olives during the final 10 minutes of roasting. Their briny flavor works especially well with feta and sweet roasted tomatoes.

Use a moderate amount because both olives and feta can be salty.

Add Zucchini

Replace one cup of eggplant with chopped zucchini. Zucchini cooks quickly, so add it during the final 20 to 25 minutes if you want it to retain some texture.

Add Roasted Red Peppers

Chopped roasted red peppers bring sweetness, color, and a mild smoky flavor. Add them during the final five to ten minutes so they warm through without becoming too soft.

Make It Spicy

Increase the red pepper flakes or add a small pinch of cayenne pepper before roasting. You can also drizzle a little chili oil over the finished dish.

Storage and Reheating

Refrigerator Storage

Allow leftovers to cool before transferring them to an airtight container. Store the casserole in the refrigerator for up to three days.

The flavors often become more developed after resting overnight. Leftover Eggplant Tomato Casserole can be served warm for lunch or added to a grain bowl.

Oven Reheating

Place leftovers in a baking dish and cover loosely with foil. Heat at 350°F (175°C) for 10 to 15 minutes, or until warmed through.

Remove the foil during the final few minutes if you want the edges to become slightly crisp again.

Skillet Reheating

For a smaller portion, warm the casserole gently in a skillet over medium-low heat. Add a small splash of water if the vegetables seem dry.

Avoid high heat because it can make the feta firm and cause the vegetables to lose too much moisture.

Frequently Asked Questions

Do I Need to Salt Eggplant Before Roasting?

Modern eggplants usually do not require traditional salting. If you have an eggplant that tastes bitter, sprinkle the cubes lightly with salt and let them sit for about 20 minutes.

Rinse briefly and dry thoroughly before seasoning. This optional step can be useful when preparing Eggplant Tomato Casserole with a particularly large or mature eggplant.

Can I Use Regular Tomatoes?

Yes. Roma tomatoes or other firm ripe tomatoes work well. Cut them into large pieces so they maintain some texture during roasting.

Very watery tomatoes may release more liquid, so you may need to roast the vegetables slightly longer.

Can I Use Another Cheese?

Yes. Goat cheese, ricotta salata, or another mild crumbly cheese can replace feta. However, feta provides the salty Mediterranean flavor that makes this Eggplant Tomato Casserole distinctive.

Can I Make It Dairy-Free?

Yes. Use a dairy-free feta alternative or replace the feta with seasoned chickpeas or white beans.

The roasted vegetables are flavorful enough to stand on their own, especially when finished with fresh herbs and lemon.

Nutrition Information

Approximate nutrition per serving:

  • Calories: 310 kcal
  • Protein: 9g
  • Carbohydrates: 28g
  • Fat: 20g
  • Saturated Fat: 6g
  • Fiber: 8g
  • Sugar: 10g
  • Sodium: 650mg

Nutrition values are estimates and can vary according to ingredient brands, serving sizes, and optional additions.

Final Thoughts

This Eggplant Tomato Casserole is a simple way to turn everyday vegetables into a satisfying Mediterranean-inspired meal. The eggplant becomes tender and caramelized, the tomatoes develop concentrated sweetness, and the red onion becomes soft and lightly browned.

Feta provides a creamy, salty contrast, while parsley, basil, oregano, garlic, and lemon keep the dish bright. That combination makes Eggplant Tomato Casserole suitable for both casual weeknight meals and relaxed gatherings.

For the best result, give the vegetables plenty of space in the roasting pan and avoid using too much oil. This helps the Eggplant Tomato Casserole develop browned edges.

Serve Eggplant Tomato Casserole with warm pita, couscous, rice, quinoa, or a fresh salad. It also works beautifully as a side dish alongside grilled chicken or fish.

This Eggplant Tomato Casserole is flexible enough for different dietary preferences while keeping the original ingredients and method simple.

Whether you enjoy it fresh from the oven or as leftovers the next day, Eggplant Tomato Casserole is an easy recipe worth keeping in your regular meal rotation.

For a final finishing touch, add fresh parsley, lemon zest, and a small drizzle of extra virgin olive oil immediately before serving. The combination makes the dish colorful, fresh, and flavorful.

Enjoy this Eggplant Tomato Casserole while the feta is still warm and the roasted vegetables are tender. It is a practical Mediterranean-inspired recipe that brings plenty of flavor to the table without complicated preparation.

Whipped Feta Mediterranean Dip with Roasted Vegetables & Herbs

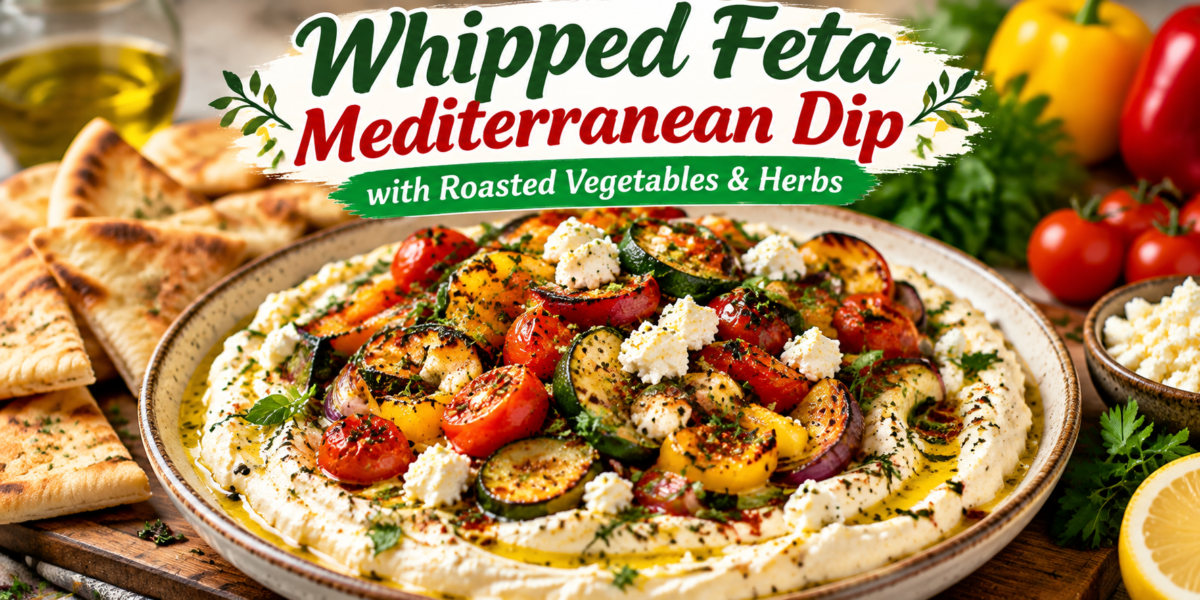
Whipped Feta Dip with creamy feta cheese, roasted vegetables, fresh herbs, olive oil, and Mediterranean flavors

Whipped Feta Mediterranean Dip with Roasted Vegetables & Herbs

This Whipped Feta Dip is a creamy, flavorful, and refreshing Mediterranean-inspired appetizer made with rich feta cheese, creamy yogurt, extra virgin olive oil, garlic, fresh herbs, and colorful roasted vegetables. It is a perfect combination of smooth texture, tangy flavor, and fresh Mediterranean ingredients that create an elegant dish for any occasion.

Mediterranean cuisine is loved around the world because of its simple ingredients and fresh flavors. This recipe brings together traditional Mediterranean elements like feta cheese, olive oil, herbs, roasted vegetables, and lemon to create a dip that is both delicious and visually beautiful.

Unlike traditional heavy dips, this Whipped Feta Dip has a light yet creamy texture. The feta cheese provides a rich salty flavor, while Greek yogurt makes the dip smooth and balanced. Roasted vegetables add sweetness, depth, and a beautiful contrast to the creamy base.

This recipe is perfect for family gatherings, holiday appetizers, healthy snacks, brunch tables, or as a flavorful addition to Mediterranean meals. Serve it with warm pita bread, crackers, fresh vegetables, toasted bread, or as a spread for sandwiches and wraps.

The best part about this recipe is that it looks restaurant-quality but requires simple ingredients and easy preparation. With fresh herbs, roasted vegetables, and creamy whipped feta, this Mediterranean dip can quickly become one of your favorite homemade appetizers.

Preparation Time: 20 minutes

Roasting Time: 25 minutes

Total Time: 45 minutes

Servings: 6 to 8 servings

Ingredients for Whipped Feta Mediterranean Dip

Creating the Creamy Feta Base

For the creamy dip base, you will need:

8 ounces of good quality feta cheese
½ cup Greek yogurt
3 tablespoons extra virgin olive oil
2 garlic cloves
2 tablespoons fresh lemon juice
1 teaspoon lemon zest
¼ teaspoon black pepper
2 tablespoons fresh parsley

The combination of feta cheese and Greek yogurt creates a smooth and creamy texture. Olive oil adds richness, while lemon and garlic provide freshness and a beautiful Mediterranean aroma.

Ingredients for Roasted Vegetables

For the roasted vegetable topping, use:

1 red bell pepper sliced into strips
1 yellow bell pepper sliced
1 small zucchini chopped into pieces
1 cup cherry tomatoes
1 small red onion sliced
2 tablespoons olive oil
1 teaspoon dried oregano
½ teaspoon paprika
½ teaspoon sea salt
¼ teaspoon black pepper

These vegetables add natural sweetness, color, and texture to the dip. Roasting brings out their natural flavors and creates a delicious contrast with the creamy feta mixture.

For Garnishing

Use:

Fresh basil leaves
Fresh parsley
Fresh dill
Extra feta cheese
Crushed black pepper
Chili flakes if desired
A drizzle of olive oil for the final presentation.

Instructions

Preparing the Roasted Mediterranean Vegetables

Start by preparing the vegetables because they need time to roast and develop their flavor.

Preheat your oven to 425°F (220°C).

Place the sliced bell peppers, zucchini, cherry tomatoes, and red onion on a large baking tray.

Drizzle olive oil over the vegetables and add oregano, paprika, salt, and black pepper.

Mix everything gently until all vegetables are evenly coated with seasoning.

Spread the vegetables into a single layer so they roast properly instead of steaming.

Bake for 20 to 25 minutes until the vegetables become tender, slightly caramelized, and golden around the edges.

Roasting helps concentrate the natural sweetness of vegetables and gives the dip a deeper Mediterranean flavor.

Allow the roasted vegetables to cool slightly before adding them to the whipped feta.

Making the Whipped Feta Dip Recipe

Creating a Smooth and Flavorful Texture

While the vegetables are roasting, prepare the creamy feta base.

Add feta cheese, Greek yogurt, olive oil, garlic, lemon juice, lemon zest, and black pepper into a food processor.

Blend everything until smooth and creamy.

The texture should be light, fluffy, and spreadable.

If the mixture feels too thick, add another tablespoon of olive oil or yogurt until you reach the desired consistency.

Taste the dip and adjust the seasoning according to your preference.

You can add extra lemon juice for more freshness or more garlic for a stronger flavor.

The key to a perfect Whipped Feta Dip is achieving a balance between creamy, salty, tangy, and fresh flavors.

Assembling the Mediterranean Dip

Combining Creamy Feta with Roasted Vegetables

Transfer the whipped feta mixture into a serving bowl or shallow dish.

Use the back of a spoon to create a smooth surface.

Arrange the roasted vegetables beautifully over the creamy feta layer.

Add fresh herbs like parsley, basil, and dill.

Finish with a drizzle of extra virgin olive oil and a sprinkle of chili flakes if you enjoy a little heat.

The colorful roasted vegetables on top make this dish attractive and perfect for serving guests.

Tips for the Best Whipped Feta Dip

Use High Quality Feta Cheese

The flavor of this dip depends heavily on the feta cheese. A good quality feta provides a creamy texture and authentic Mediterranean taste.

Roast Vegetables Properly

Do not overcrowd the baking tray because vegetables need space to caramelize and develop flavor.

Balance the Flavors

Feta is naturally salty, so taste before adding extra salt.

Lemon juice helps balance the richness and creates a fresh flavor.

Serve at the Right Temperature

Allow the dip to sit at room temperature for a few minutes before serving because the flavors become more noticeable.

Prepare Ahead of Time

The whipped feta mixture can be prepared a day before serving, making it convenient for gatherings.

Common Mistakes to Avoid

Using Too Much Salt

Feta cheese already contains salt, so additional seasoning should be added carefully.

Not Roasting Vegetables Enough

Lightly cooked vegetables will not provide the same sweet and smoky flavor.

Over blending with Too Much Liquid

Adding too much yogurt or oil can make the dip too thin.

Skipping Fresh Herbs

Fresh herbs add brightness and complete the Mediterranean flavor profile.

Recipe Variations

Spicy Mediterranean Whipped Feta Dip

Add roasted jalapeños, chili flakes, or red pepper flakes for a spicy version.

Creamy Garlic Herb Version

Increase garlic and add rosemary, thyme, and extra parsley for a stronger herb flavor.

Protein Rich Version

Add chickpeas or grilled chicken pieces on top to turn it into a complete meal.

Sun-Dried Tomato Whipped Feta

Blend sun-dried tomatoes into the feta mixture for a rich Mediterranean twist.

Low Carb Serving Option

Serve with cucumber slices, bell pepper strips, and celery instead of bread or crackers.

Storage Instructions

Refrigerator Storage

Store leftover Whipped Feta Dip in an airtight container.

It can stay fresh in the refrigerator for up to 4 days.

Before serving again, allow it to sit at room temperature for a few minutes and mix gently.

Roasted Vegetable Storage

Keep roasted vegetables separately in the refrigerator for up to 4 days.

Warm them slightly before adding to the dip if preferred.

Serving Suggestions

Perfect Pairings for Mediterranean Dip

This dip can be served with many different foods.

Enjoy it with warm pita bread, toasted sourdough, crackers, cucumber slices, carrots, bell peppers, or fresh salad.

It also works beautifully as a spread inside wraps, sandwiches, and Mediterranean bowls.

For a complete Mediterranean appetizer table, serve it alongside hummus, olives, roasted vegetables, and fresh herbs.

Health Benefits

Rich in Protein

Feta cheese and Greek yogurt provide protein that helps keep you satisfied.

Contains Healthy Fats

Extra virgin olive oil provides healthy fats commonly used in Mediterranean eating patterns.

Provides Vitamins and Minerals

Roasted vegetables provide important vitamins, minerals, and antioxidants.

Supports Balanced Eating

This recipe combines dairy, vegetables, herbs, and healthy fats into a balanced appetizer.

Fresh Mediterranean Ingredients

Garlic, lemon, herbs, and olive oil provide natural flavor without needing heavy sauces.

Nutrition Information

Approximate values per serving:

Calories: 220 kcal

Protein: 9g

Carbohydrates: 10g

Fiber: 3g

Fat: 16g

Saturated Fat: 7g

Sodium: 520mg

Frequently Asked Questions

Can I make Whipped Feta Dip ahead of time?

Yes, this recipe is perfect for preparation ahead. The creamy feta mixture can be stored in the refrigerator and topped with roasted vegetables before serving.

Can I use cream cheese instead of Greek yogurt?

Yes, cream cheese can create a richer texture, but Greek yogurt provides a lighter Mediterranean flavor.

How can I make this dip smoother?

Blend the feta mixture longer and add small amounts of olive oil until the texture becomes fluffy and creamy.

What vegetables work best for this recipe?

Bell peppers, zucchini, tomatoes, and onions are excellent choices, but you can also use eggplant, mushrooms, or roasted carrots.

Is this recipe suitable for meal preparation?

Yes, the dip stores well and can be enjoyed throughout the week as a snack or spread.

How long does Whipped Feta Dip last?

Whipped Feta Dip can be stored in an airtight container in the refrigerator for up to 4 days.

Conclusion

This Whipped Feta Dip with roasted vegetables and fresh herbs is a perfect example of how simple Mediterranean ingredients can create an impressive and flavorful dish. The creamy feta base, sweet roasted vegetables, fresh herbs, and bright lemon flavors come together beautifully.

Whether you serve it at a gathering, enjoy it as a healthy snack, or use it as a spread for everyday meals, this Mediterranean-inspired recipe delivers incredible taste and presentation.

With its creamy texture, vibrant colors, and fresh ingredients, this Whipped Feta Dip is a recipe that brings the flavors of the Mediterranean kitchen straight to your table.

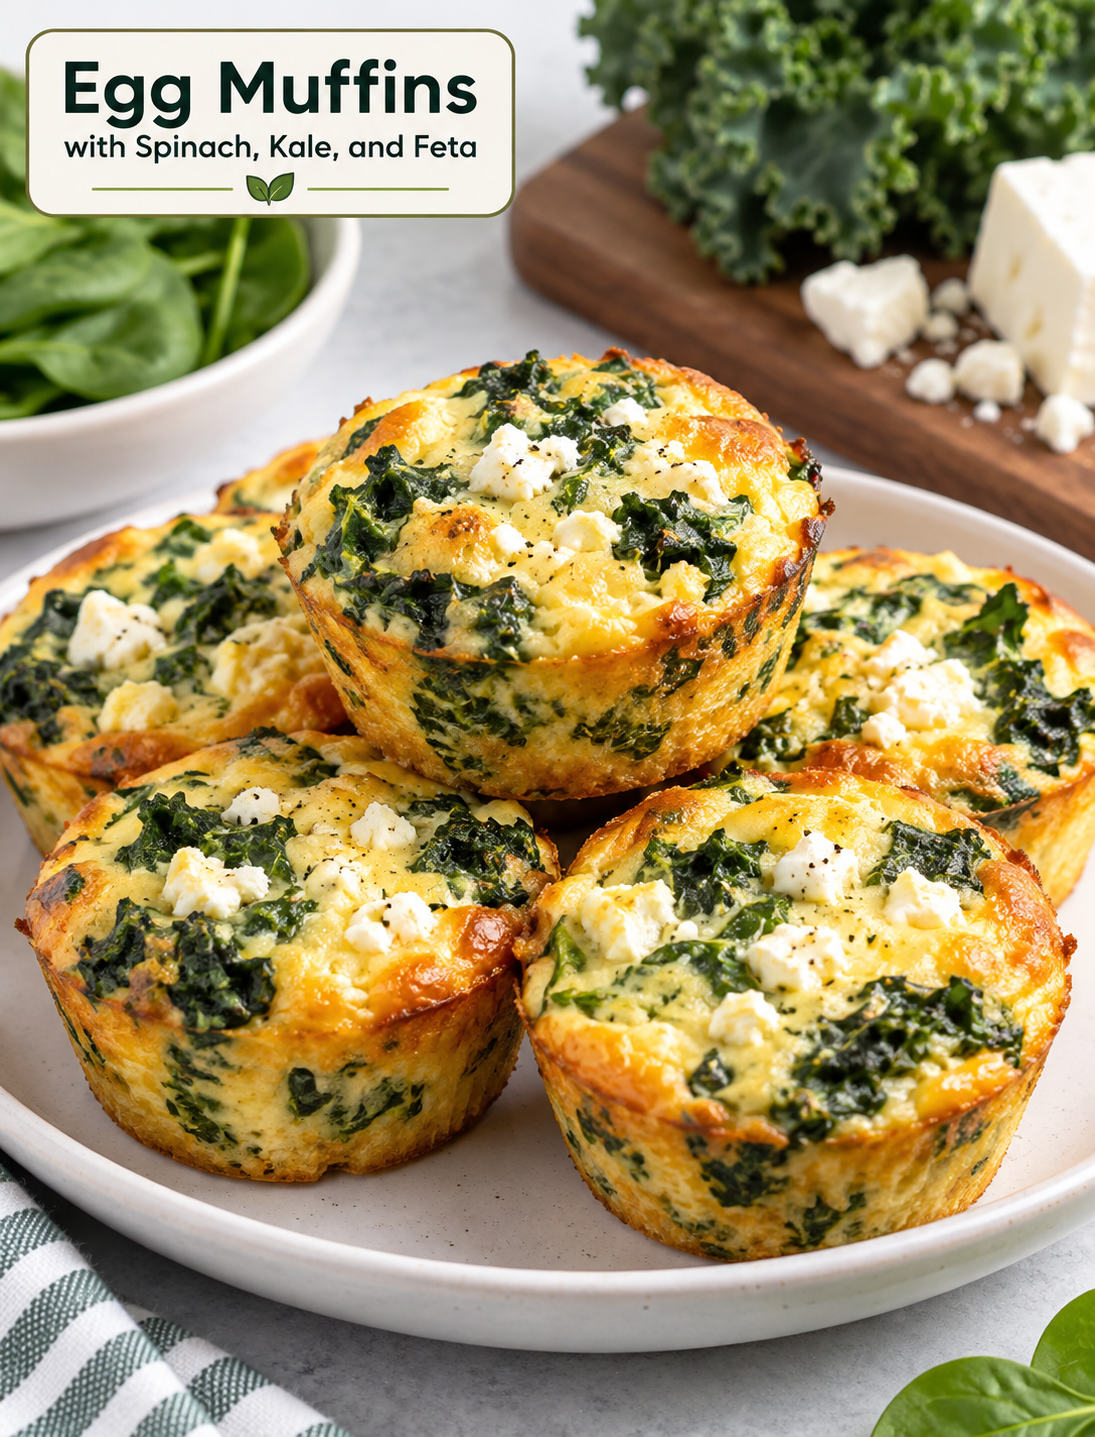
Egg Muffins with Spinach, Kale, and Feta (3 Main Ingredients)

Egg muffins with spinach, kale, and crumbled feta served as a healthy protein-rich breakfast

Egg Muffins with Spinach, Kale, and Feta (3 Main Ingredients)

These Egg Muffins with Spinach, Kale, and Feta (3 Main Ingredients) are a simple way to make a protein-rich breakfast ahead of time. Each muffin combines fluffy eggs, tender leafy greens, and creamy feta in a convenient bite-sized portion. They are easy to pack for work, school, or a quick breakfast at home.

The recipe uses three main ingredients—eggs, spinach, and kale—with feta adding a salty, creamy finish. A little milk keeps the eggs tender, while green onion, garlic, olive oil, and oregano add extra flavor without making the recipe complicated.

You can prepare a batch in about 30 minutes and keep the muffins in the refrigerator for several days. They taste good warm or cold, which makes them useful for busy mornings and meal prep.

Why You’ll Love These Egg Muffins

  • Easy meal prep: Bake one batch and have breakfast ready for several days.
  • Protein-rich: Eggs and feta provide protein that helps make the muffins satisfying.
  • Packed with greens: Fresh spinach and kale add color, texture, and nutrients.
  • Portable: The individual portions are easy to place in a lunchbox or take to work.
  • Flexible: You can add vegetables, herbs, or another cheese based on what you have.
  • Great hot or cold: Enjoy them straight from the refrigerator or warm them before serving.

Ingredients You’ll Need

Main Ingredients

8 large eggs: Eggs form the base of the muffins and provide structure as they bake.

1 cup fresh spinach: Chop the spinach into smaller pieces so it mixes evenly with the egg mixture.

1 cup kale: Remove the tough stems and finely chop the leaves for a softer texture.

½ cup crumbled feta cheese: Feta gives the muffins a creamy texture and a slightly salty Mediterranean flavor.

Additional Ingredients

¼ cup milk: Dairy milk or unsweetened almond milk helps create a softer, more tender texture.

2 green onions: Sliced green onions add a mild onion flavor and fresh color.

1 garlic clove: Minced garlic adds savory flavor and can be skipped if preferred.

1 tablespoon olive oil: Use olive oil to sauté the greens and garlic.

Salt and black pepper: Season according to taste, keeping in mind that feta already adds salt.

A pinch of dried oregano: Oregano gives these breakfast muffins a simple Mediterranean-style flavor.

How to Make Egg Muffins with Spinach, Kale, and Feta

Step 1: Prepare the Oven and Muffin Tin

  1. Preheat your oven to 375°F (190°C).
  2. Lightly grease a 12-cup muffin tin with cooking spray or olive oil.
  3. You can also use silicone muffin cups or parchment liners for easier removal.
  4. Make sure the oven reaches the correct temperature before baking for even cooking.

Step 2: Chop and Sauté the Greens

  1. Wash the spinach and kale and pat them dry.
  2. Remove the thick kale stems and finely chop the leaves.
  3. Heat 1 tablespoon olive oil in a skillet over medium heat.
  4. Add the chopped kale and cook for about 1 minute.
  5. Add the spinach and minced garlic.
  6. Sauté everything for 2–3 minutes, just until the greens wilt.
  7. Remove the skillet from the heat and let the vegetables cool slightly.

Tip: Do not overcook the greens because they will continue cooking inside the oven.

Step 3: Prepare the Egg Mixture

  1. Crack 8 large eggs into a large mixing bowl.
  2. Add ¼ cup milk.
  3. Whisk until the eggs and milk are fully combined.
  4. Add black pepper, a small amount of salt, and dried oregano.
  5. Stir in the sautéed spinach, kale, and garlic.
  6. Add the sliced green onions.
  7. Gently fold in the ½ cup crumbled feta cheese.

Tip: Go light on the salt because feta cheese can already be quite salty.

Step 4: Fill the Muffin Cups

  1. Pour the egg mixture evenly into the prepared muffin tin.
  2. Fill each cup about ¾ full to leave room for the eggs to rise.
  3. Give the mixture a gentle stir before filling the final cups so the vegetables and feta remain evenly distributed.
  4. Avoid filling the cups completely to prevent overflow during baking.

Step 5: Bake the Muffins

  1. Place the muffin tin on the center rack of the preheated oven.
  2. Bake for 18–20 minutes.
  3. Check the center of a muffin to make sure the egg mixture is fully set.
  4. The tops should look lightly golden and firm.
  5. Remove the tin from the oven and let the muffins cool for a few minutes.
  6. Carefully loosen the edges and remove the muffins from the tin.

Tip: Avoid overbaking because eggs can become rubbery when cooked for too long.

Easy Ways to Customize This Recipe

These savory egg bites are easy to change without altering the basic method. Add sun-dried tomatoes for a slightly sweet, tangy flavor or use roasted red peppers for extra color and sweetness.

Chopped olives can add a salty Mediterranean touch. You can also add mushrooms, diced bell peppers, or cooked onions for more vegetables.

If you do not have feta, try goat cheese or shredded mozzarella. Goat cheese gives the muffins a creamy, tangy flavor, while mozzarella creates a milder and softer cheese layer.

For extra herbs, use fresh parsley, basil, or chives. Keep added vegetables fairly dry because excess moisture can make the muffins watery.

How to Store and Reheat Egg Muffins

Allow the baked muffins to cool before storing them. Place them in an airtight container and refrigerate for up to 4 days.

For longer storage, freeze the muffins in a freezer-safe container or bag for up to 2 months. Separate individual muffins with parchment paper if you plan to remove them one at a time.

To reheat from the refrigerator, microwave one muffin for about 30–40 seconds. Frozen muffins may need additional heating time, so warm them in short intervals until heated through.

These make-ahead breakfast muffins are especially useful when you want a quick option without cooking eggs every morning.

Can You Make These Egg Muffins Dairy-Free?

Yes. Replace regular milk with unsweetened almond milk or another unsweetened dairy-free milk. Skip the feta or use a suitable vegan feta alternative.

The muffins will still hold together because the eggs provide the main structure. Choose an unsweetened milk so it does not change the savory flavor.

Can You Use Frozen Spinach or Kale?

Yes, frozen greens can work well in this recipe. Thaw them completely and squeeze out as much excess water as possible before adding them to the skillet.

Extra moisture can make baked egg muffins soft or watery. A quick sauté after thawing helps remove additional moisture and improves the final texture.

Frequently Asked Questions

Can I make these egg muffins ahead of time?

Yes. Bake them ahead, refrigerate them in an airtight container, and reheat individual portions when needed.

How long do egg muffins last in the refrigerator?

Properly stored egg muffins can be refrigerated for up to 4 days.

Can I freeze spinach and feta egg muffins?

Yes. Freeze cooled muffins in a freezer-safe container for up to 2 months and reheat them as needed.

Why are my egg muffins watery?

Excess moisture from vegetables is usually the cause, so sauté fresh greens or thoroughly squeeze thawed frozen greens before mixing.

Why did my egg muffins shrink after baking?

Eggs naturally puff during baking and settle slightly as they cool, so a small amount of shrinking is normal.

Can I use different cheese instead of feta?

Yes. Goat cheese and shredded mozzarella are good substitutes, although they will change the flavor and texture slightly.

Can I add other vegetables?

Yes. Diced roasted peppers, mushrooms, sun-dried tomatoes, and cooked onions are useful additions when kept relatively dry.

Are these egg muffins good for meal prep?

Yes. Their individual portions, short reheating time, and four-day refrigerator life make them convenient for breakfast meal prep.

Nutrition Information

Approximate nutrition per muffin:

  • Calories: 95 kcal
  • Protein: 7 g
  • Fat: 6 g
  • Carbohydrates: 2 g
  • Fiber: 1 g
  • Sodium: 160 mg

Nutrition values can vary depending on the type of milk, feta, and other ingredients used.

Final Thoughts

These spinach, kale, and feta egg muffins are a practical breakfast for busy mornings. The combination of eggs, leafy greens, and feta creates a savory bite with a tender texture and plenty of flavor.

Prepare a batch on the weekend, refrigerate or freeze them, and you will have an easy grab-and-go breakfast ready whenever you need it. For the best texture, avoid overcooking the eggs and remove excess moisture from the vegetables before baking.