Air Fryer Crispy Ravioli

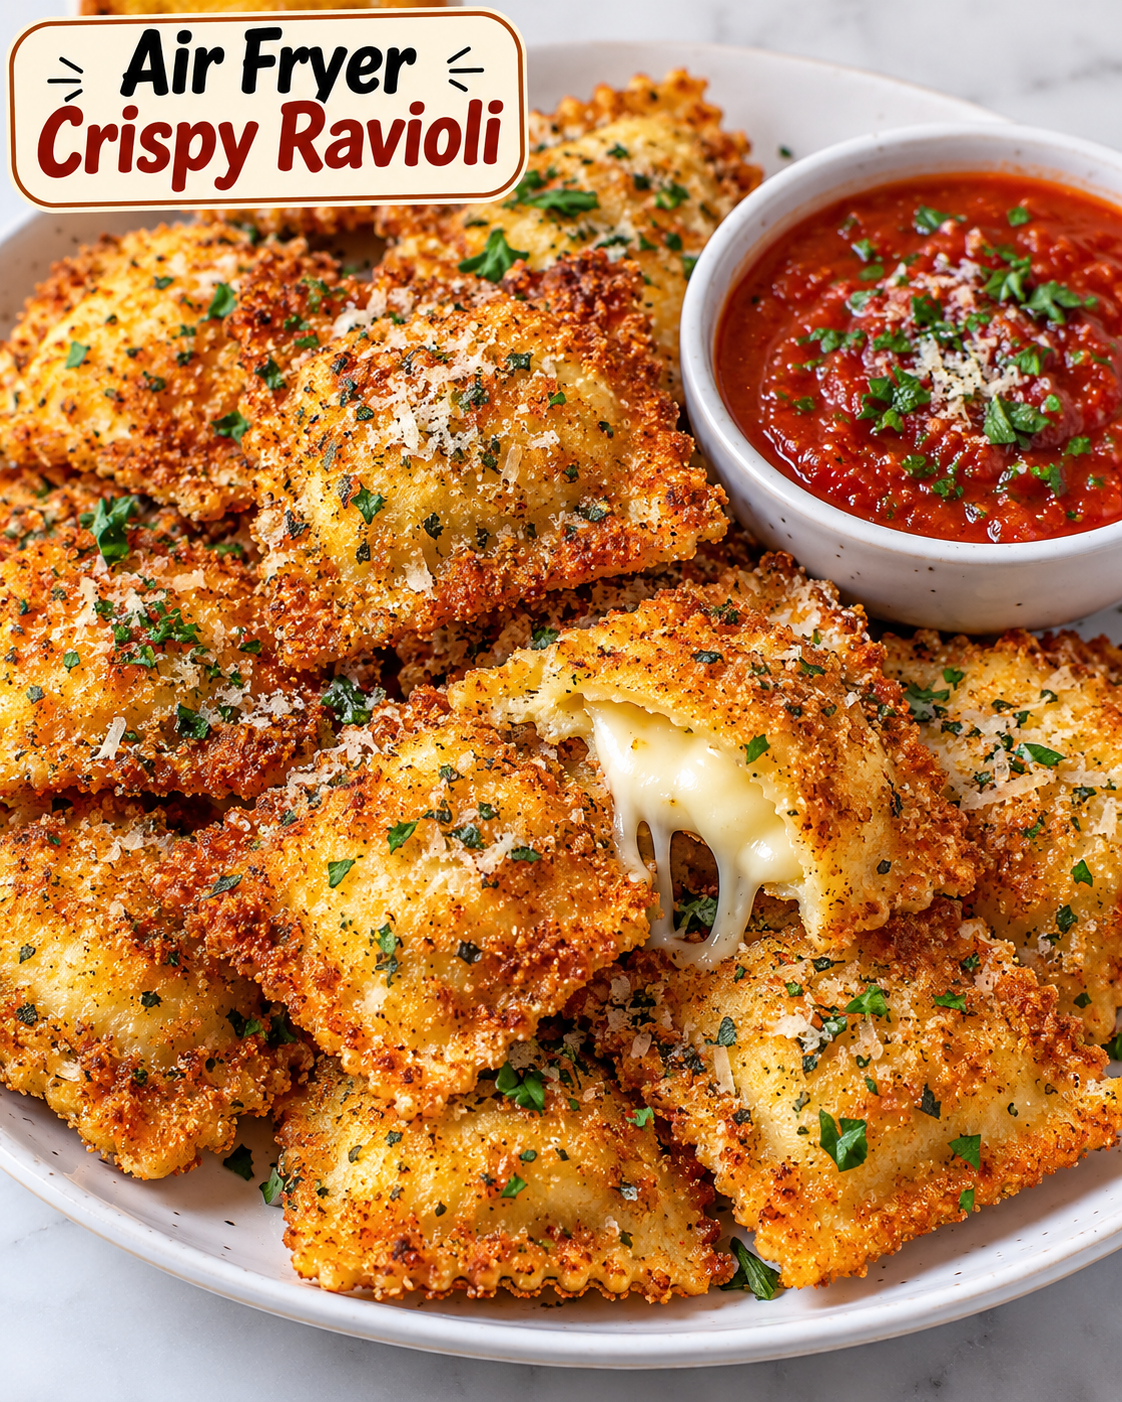
Air Fryer Crispy Ravioli with golden Parmesan breadcrumb coating served with marinara sauce.

Air Fryer Crispy Ravioli

If you love crispy appetizers with a warm, cheesy center, you need to try Air Fryer Crispy Ravioli. This easy snack turns tender cheese ravioli into golden, crunchy bites without deep frying.

Each piece has a crisp breadcrumb coating on the outside and a soft, flavorful filling inside. Serve the ravioli with warm marinara sauce for dipping, and you have an appetizer that works for game day, family movie night, parties, or a quick afternoon snack.

The air fryer makes this recipe simple because it uses hot circulating air to brown the coating evenly. You also need only a small amount of cooking spray instead of a pot full of oil.

Why You’ll Love This Crispy Ravioli Recipe

There are several reasons this appetizer is worth making at home.

  • Crispy texture: The breadcrumb and Parmesan coating becomes golden and crunchy in the air fryer.
  • Cheesy center: Cheese-filled ravioli stays warm and tender inside the crisp coating.
  • Less oil: Air frying requires only a light spray of oil.
  • Quick preparation: The ravioli can be ready in about 20 minutes.
  • Easy ingredients: Most items are available at a regular grocery store.
  • Great for sharing: The bite-sized pieces are easy to serve at parties and gatherings.
  • Simple dipping sauce: Warm marinara adds a bright tomato flavor that pairs well with the crispy coating.

Ingredients You’ll Need

Ravioli

Use refrigerated cheese ravioli for the best texture. Small or medium ravioli work well because they cook quickly and are easy to coat.

You can also use other filled varieties, such as spinach and cheese ravioli, if you want to change the flavor.

Breadcrumbs

Italian-seasoned breadcrumbs give the ravioli a flavorful crust. For a crunchier coating, use panko breadcrumbs or combine regular breadcrumbs with panko.

Parmesan Cheese

Finely grated Parmesan adds a salty, savory flavor to the coating and helps the outside become nicely golden.

Eggs

Beaten eggs help the breadcrumb mixture stick to the ravioli. Make sure each piece is lightly coated before pressing it into the breadcrumbs.

Seasonings

Garlic powder, Italian seasoning, and black pepper add extra flavor without making the coating complicated.

Cooking Spray

A light coating of olive oil or avocado oil spray helps the breading brown and crisp.

Marinara Sauce

Warm marinara sauce is the classic dipping option for toasted ravioli. You can also serve it with ranch, garlic aioli, or another favorite dipping sauce.

How to Make Air Fryer Crispy Ravioli

Step 1: Cook the Ravioli

Bring a pot of water to a gentle boil and cook the refrigerated ravioli according to the package directions.

Cook it until tender but not overly soft. Drain the ravioli carefully and allow it to cool for a few minutes.

Pat the ravioli gently with paper towels if it has excess moisture. A drier surface helps the egg and breadcrumb coating stick better.

Step 2: Prepare the Coating

Add the breadcrumbs, Parmesan cheese, garlic powder, Italian seasoning, and black pepper to a shallow bowl.

Stir everything together until the seasonings and cheese are evenly distributed through the breadcrumbs.

In a second shallow bowl, whisk the eggs until smooth.

Step 3: Coat the Ravioli

Dip one ravioli into the beaten egg and turn it gently so all sides are covered.

Allow excess egg to drip back into the bowl. Then place the ravioli into the breadcrumb mixture.

Press the breadcrumbs gently onto the surface so they stick.

Repeat with the remaining ravioli.

For an extra-crispy crust, dip each piece in the egg and breadcrumbs a second time.

Step 4: Preheat the Air Fryer

Preheat your air fryer to 400°F for about 3 minutes.

Preheating helps the coating begin crisping as soon as the ravioli enters the basket.

Step 5: Arrange the Ravioli

Lightly spray the air fryer basket with cooking spray.

Place the coated ravioli in a single layer with a little space between each piece.

Avoid stacking or overcrowding the basket. Proper airflow is important for an even, crunchy coating.

Lightly spray the tops of the ravioli with cooking spray.

Step 6: Air Fry

Cook the ravioli at 400°F for 6 to 8 minutes.

Flip the pieces halfway through cooking and lightly spray the other side if needed.

Continue cooking until the coating is golden brown and crisp.

Air fryer temperatures can vary, so start checking around the 6-minute mark to prevent over-browning.

Step 7: Serve Immediately

Transfer the crispy ravioli to a serving plate.

Warm your marinara sauce and place it in a small bowl alongside the ravioli.

For extra flavor, sprinkle the finished pieces with grated Parmesan and chopped fresh parsley.

Serve while warm for the best crunchy texture.

Tips for Extra-Crispy Ravioli

A few simple techniques can make a big difference in the final texture.

  • Do not overcrowd the basket. Crowding blocks hot air and can leave the coating soft.
  • Dry the cooked ravioli. Excess water can prevent the breadcrumbs from sticking properly.
  • Use panko for more crunch. Panko creates a lighter and crispier crust than fine breadcrumbs.
  • Add Parmesan to the coating. It gives the crust more flavor and helps it brown.
  • Spray lightly with oil. A small amount helps the breadcrumbs become crisp and golden.
  • Flip halfway through. This helps both sides cook evenly.
  • Serve right away. The coating is crispiest immediately after air frying.

Can You Use Frozen Ravioli?

Yes, frozen ravioli can be used, but the preparation may need a small adjustment.

For the most reliable coating, thaw the ravioli first and pat it dry before dipping it into the egg mixture.

If you use frozen ravioli directly, the cooking time may be longer and the coating may not stick as evenly.

Always check the center before serving to make sure the ravioli is heated through.

What to Serve With Crispy Ravioli

Marinara sauce is the traditional choice, but there are several ways to serve this appetizer.

Try the ravioli with:

  • Warm marinara sauce
  • Garlic Parmesan dip
  • Ranch dressing
  • Creamy Alfredo sauce
  • Spicy tomato sauce
  • Pesto
  • Whipped ricotta

For a complete appetizer spread, serve the crispy ravioli alongside mozzarella sticks, garlic bread, salad, or other finger foods.

Easy Flavor Variations

You can change the coating to create different versions of this recipe.

Spicy Crispy Ravioli

Add a pinch of crushed red pepper flakes or cayenne pepper to the breadcrumb mixture for extra heat.

Garlic Parmesan Ravioli

Increase the garlic powder and Parmesan for a stronger savory flavor.

Italian Herb Ravioli

Add dried basil, oregano, and parsley to the coating for a more herb-forward taste.

Extra-Cheesy Ravioli

Use a blend of Parmesan and finely shredded Romano cheese in the breadcrumb mixture.

How to Store Leftovers

Allow leftover ravioli to cool before placing it in an airtight container.

Store it in the refrigerator for up to 3 days.

For the best texture, reheat the pieces in the air fryer at 350°F for 3 to 5 minutes. This helps bring back some of the original crispness.

Avoid reheating them in the microwave if you want to keep the breadcrumb coating crunchy.

Frequently Asked Questions

Can I make crispy ravioli without deep frying?

Yes. An air fryer creates a crunchy breadcrumb coating with only a light amount of cooking spray instead of deep-frying the ravioli.

What type of ravioli works best?

Refrigerated cheese ravioli is an easy choice because it cooks quickly and has a firm enough surface for breading.

How long should ravioli cook in the air fryer?

Breaded ravioli usually takes about 6 to 8 minutes at 400°F, with a flip halfway through cooking.

Why is my ravioli coating not crispy?

Overcrowding, excess moisture, or too little oil spray can prevent the breadcrumbs from browning properly.

Can I use panko breadcrumbs?

Yes. Panko breadcrumbs are an excellent option when you want a lighter and crunchier crust.

What is the best sauce for crispy ravioli?

Warm marinara is the classic pairing, but ranch, pesto, Alfredo sauce, and garlic Parmesan dip also work well.

Can I prepare the ravioli ahead of time?

Yes. You can bread the cooked ravioli several hours ahead and refrigerate it until you are ready to air fry.

How do I reheat leftover crispy ravioli?

Reheat refrigerated ravioli in a 350°F air fryer for about 3 to 5 minutes until warmed and crisp.

Final Thoughts

Air Fryer Crispy Ravioli is an easy way to turn a simple package of cheese ravioli into a crunchy appetizer everyone can enjoy. The combination of golden breadcrumbs, Parmesan, Italian seasoning, and a warm cheesy center makes each bite satisfying.

The recipe is especially useful when you need a quick party snack or an easy appetizer without deep frying. Keep the ravioli in a single layer, use a light coating of oil spray, and serve it with warm marinara for the best results.

Once you try this version, you can easily customize the coating with different herbs, spices, cheeses, and dipping sauces. It is a simple air fryer recipe that can fit almost any casual gathering or snack craving.

Air Fryer Crispy Cheeseburger Bites

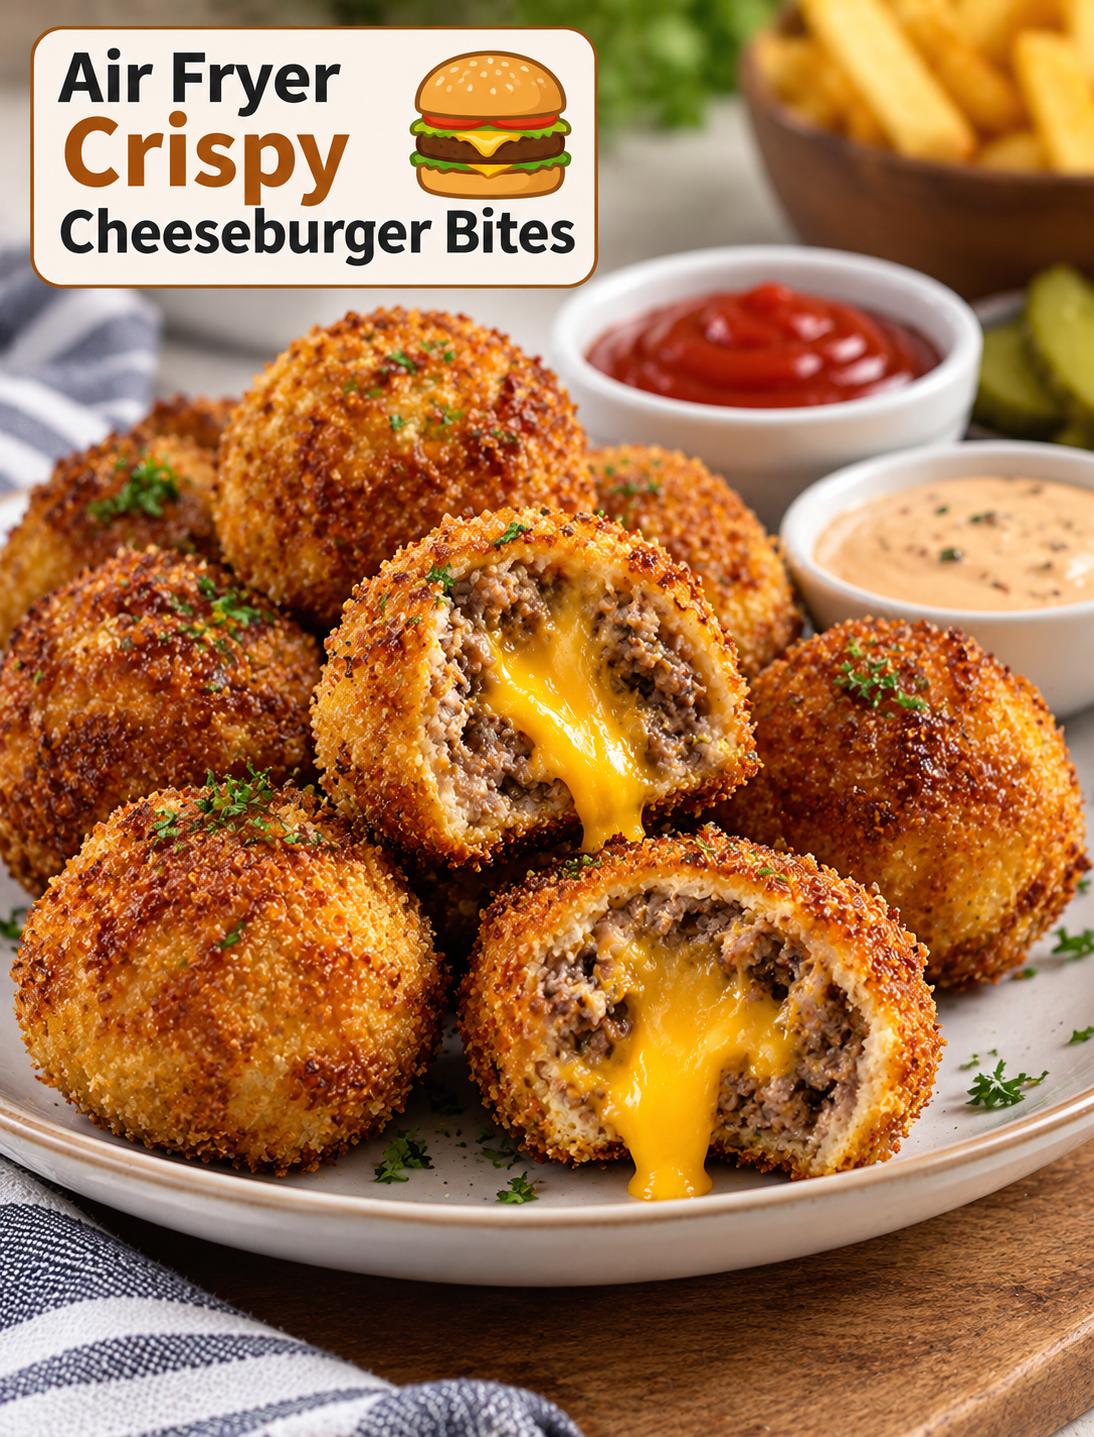
Crispy air fryer cheeseburger bites filled with melted cheddar cheese and served with ketchup and burger dipping sauce

Air Fryer Crispy Cheeseburger Bites

Air Fryer Crispy Cheeseburger Bites bring the flavor of a classic American cheeseburger into small, crispy portions that are easy to eat and share. Seasoned ground beef, melted cheese, and a golden outer layer come together in every bite.

These bite-sized cheeseburger snacks are a great choice for game day, family gatherings, parties, quick lunches, or easy weeknight dinners. The air fryer gives them a crisp outside without the need for deep frying.

The filling can be prepared with simple ingredients you may already have in your kitchen. Ground beef provides the classic burger flavor, while shredded or cubed cheese melts into the center. Pickles, onions, ketchup, mustard, and burger seasoning can be added to create the familiar taste of a cheeseburger.

Why You’ll Love These Cheeseburger Bites

These crispy cheeseburger bites are easy to prepare and cook in small portions. Their size makes them convenient for appetizers, snacks, or casual meals.

The air fryer helps create a browned and crunchy exterior while keeping the beef filling juicy. You can also customize the filling based on the flavors your family enjoys.

Unlike traditional burgers, these bites do not require buns, plates, or a grill. They are easy to serve with dipping sauces and can be enjoyed warm straight from the air fryer.

They are also useful for entertaining because you can prepare the bites before guests arrive and cook them in batches.

Ingredients You’ll Need

Ground Beef

Use lean or moderately lean ground beef for the filling. Ground beef with some fat provides better flavor and helps keep the center moist during cooking.

Cheese

Cheddar cheese gives the bites a classic cheeseburger taste. American cheese, Monterey Jack, Colby Jack, or mozzarella can also be used.

Breadcrumbs

Breadcrumbs help bind the beef mixture and give the outside a firmer texture. Plain or seasoned breadcrumbs both work well.

Egg

An egg helps hold the filling together and makes the mixture easier to shape.

Onion

Finely diced onion adds moisture and savory flavor. Dice the onion very small so it cooks evenly inside each bite.

Pickles

Finely chopped dill pickles add the tangy flavor associated with a classic cheeseburger. Drain excess pickle liquid before mixing them into the filling.

Seasonings

Use salt, black pepper, garlic powder, onion powder, and a small amount of paprika for a balanced burger-style seasoning.

Cooking Spray

A light coating of cooking spray helps the bites brown evenly and reduces sticking in the air fryer basket.

How to Make Air Fryer Crispy Cheeseburger Bites

Prepare the Beef Mixture

Place the ground beef in a large mixing bowl. Add breadcrumbs, egg, finely diced onion, chopped pickles, salt, pepper, garlic powder, onion powder, and paprika.

Mix the ingredients gently until they are evenly combined. Avoid overmixing because compacting the beef can make the finished bites dense.

Add the Cheese

Cut the cheese into small cubes if you want a melted center. Small cheese pieces are easier to cover completely with the beef mixture.

Take a small portion of the seasoned beef and flatten it slightly in your hand. Place a piece of cheese in the center and gently wrap the beef around it.

Seal the edges completely so the cheese stays inside during cooking. Roll the mixture gently between your hands to create a compact bite.

Air Fry the Bites

Preheat the air fryer if your model recommends preheating. Lightly spray the basket with cooking spray.

Arrange the cheeseburger bites in a single layer. Leave space between each piece so hot air can circulate around the entire surface.

Cook until the outside is golden brown and the beef is fully cooked. Turn the bites partway through cooking if your air fryer produces uneven browning.

Ground beef should reach a safe internal temperature of 160°F. Use an instant-read food thermometer to check the center of the largest bite.

Let the bites rest briefly before serving. The melted cheese inside will be extremely hot immediately after cooking.

Tips for Extra Crispy Cheeseburger Bites

Keep the beef portions similar in size so they cook at the same rate. Uneven pieces can leave some bites overcooked while others need more time.

Do not use excessive filling. A thin, even layer of beef around the cheese cooks more reliably and creates a better balance between the crispy exterior and cheesy center.

Make sure the cheese is completely covered. Any exposed cheese can melt into the basket during cooking.

Avoid overcrowding the air fryer. Cooking in batches gives the hot air enough room to circulate and helps the outside become crisp.

For a deeper golden crust, lightly spray the shaped bites with cooking spray before placing them in the basket.

Check the first batch carefully because air fryers vary in size, heating power, and airflow. Adjust the cooking time as needed for your specific appliance.

Best Dipping Sauces

The right dipping sauce can make these cheeseburger bites even more flavorful.

Classic ketchup provides a familiar sweet and tangy flavor. Yellow mustard adds sharpness and works especially well with cheddar cheese.

For a creamy option, combine mayonnaise with ketchup and a little pickle juice. A burger sauce made with mayonnaise, mustard, ketchup, and finely chopped pickles is another easy choice.

Ranch dressing works well for guests who prefer a creamy dip. Barbecue sauce adds smoky sweetness and pairs nicely with seasoned beef.

Serve two or three sauces together so everyone can choose a favorite.

Easy Recipe Variations

Bacon Cheeseburger Bites

Add finely cooked and crumbled bacon to the beef mixture for a smoky, savory flavor. Use small pieces so the bites remain easy to shape.

Jalapeño Cheeseburger Bites

Mix finely chopped jalapeño into the filling for a spicy version. Remove the seeds and membranes for a milder heat level.

Mushroom Swiss Bites

Finely chop cooked mushrooms and pair them with Swiss cheese. Cook the mushrooms first to remove excess moisture before adding them to the beef mixture.

BBQ Cheeseburger Bites

Add a small amount of barbecue sauce to the cooked bites or serve it as a dipping sauce. Avoid adding too much sauce to the raw mixture because excess moisture can affect the texture.

Pizza Cheeseburger Bites

Use mozzarella cheese and add a small amount of Italian seasoning. Serve with warm marinara sauce for dipping.

What to Serve With Cheeseburger Bites

These bite-sized burgers pair well with simple sides and party foods.

Serve them with crispy potato wedges, French fries, onion rings, coleslaw, or a fresh garden salad for a complete meal.

For a game-day spread, place the bites on a large serving platter with ketchup, mustard, ranch, and burger sauce. Add pickle spears and fresh vegetable sticks for extra variety.

For a family dinner, serve them with roasted potatoes and steamed vegetables. Their small size also makes them convenient for kids who prefer finger foods.

How to Store and Reheat

Allow leftover bites to cool before placing them in an airtight container. Refrigerate them promptly and use them within a few days for the best quality.

The air fryer is the best way to reheat them because it helps restore the crisp exterior. Heat the bites until they are warmed through.

Avoid reheating them for too long because the beef can become dry and the cheese can become overly firm.

If freezing, arrange fully cooked and cooled bites in a single layer before transferring them to a freezer-safe container. Reheat them from frozen in the air fryer until hot throughout.

Common Mistakes to Avoid

Overmixing the beef can create a tough texture. Combine the ingredients only until they are evenly distributed.

Using large cheese cubes can make sealing difficult. Choose small pieces that can be completely surrounded by the beef.

Skipping the spacing between bites can reduce crispiness. Always leave enough room for air to move around each piece.

Adding wet ingredients directly to the raw mixture can make the bites difficult to shape. Drain pickles and cooked vegetables well before using them.

Do not rely only on the outside color to determine whether ground beef is cooked safely. Check the internal temperature with a food thermometer.

Frequently Asked Questions

Can I use frozen ground beef?

Thaw the ground beef completely in the refrigerator before mixing and shaping the bites for even cooking.

What cheese works best?

Cheddar and American cheese provide a classic cheeseburger flavor, while Monterey Jack and Colby Jack offer a smooth, melty texture.

How do I keep the cheese from leaking out?

Seal the beef completely around each cheese piece and avoid using oversized cheese cubes.

Can I make these ahead of time?

Yes, shape the bites ahead of time and refrigerate them until you are ready to cook them.

Can I freeze cheeseburger bites?

Yes, cooked bites can be frozen in an airtight container and reheated in the air fryer when needed.

How do I make them crispy?

Cook the bites in a single layer, avoid overcrowding, and lightly coat the outside with cooking spray.

What dipping sauce goes with cheeseburger bites?

Ketchup, mustard, ranch, barbecue sauce, and homemade burger sauce all pair well with the savory beef and melted cheese.

What temperature should ground beef reach?

Ground beef should reach an internal temperature of 160°F for safe consumption.

Final Thoughts

Air Fryer Crispy Cheeseburger Bites offer all the familiar flavors of a cheeseburger in a convenient, shareable format. The seasoned beef, melted cheese, and crisp exterior make them suitable for appetizers, snacks, family dinners, and parties.

Keep the portions small and even, seal the cheese inside, and avoid overcrowding the basket for the best results. Serve the finished bites with your favorite burger sauces and simple sides for an easy meal everyone can enjoy.

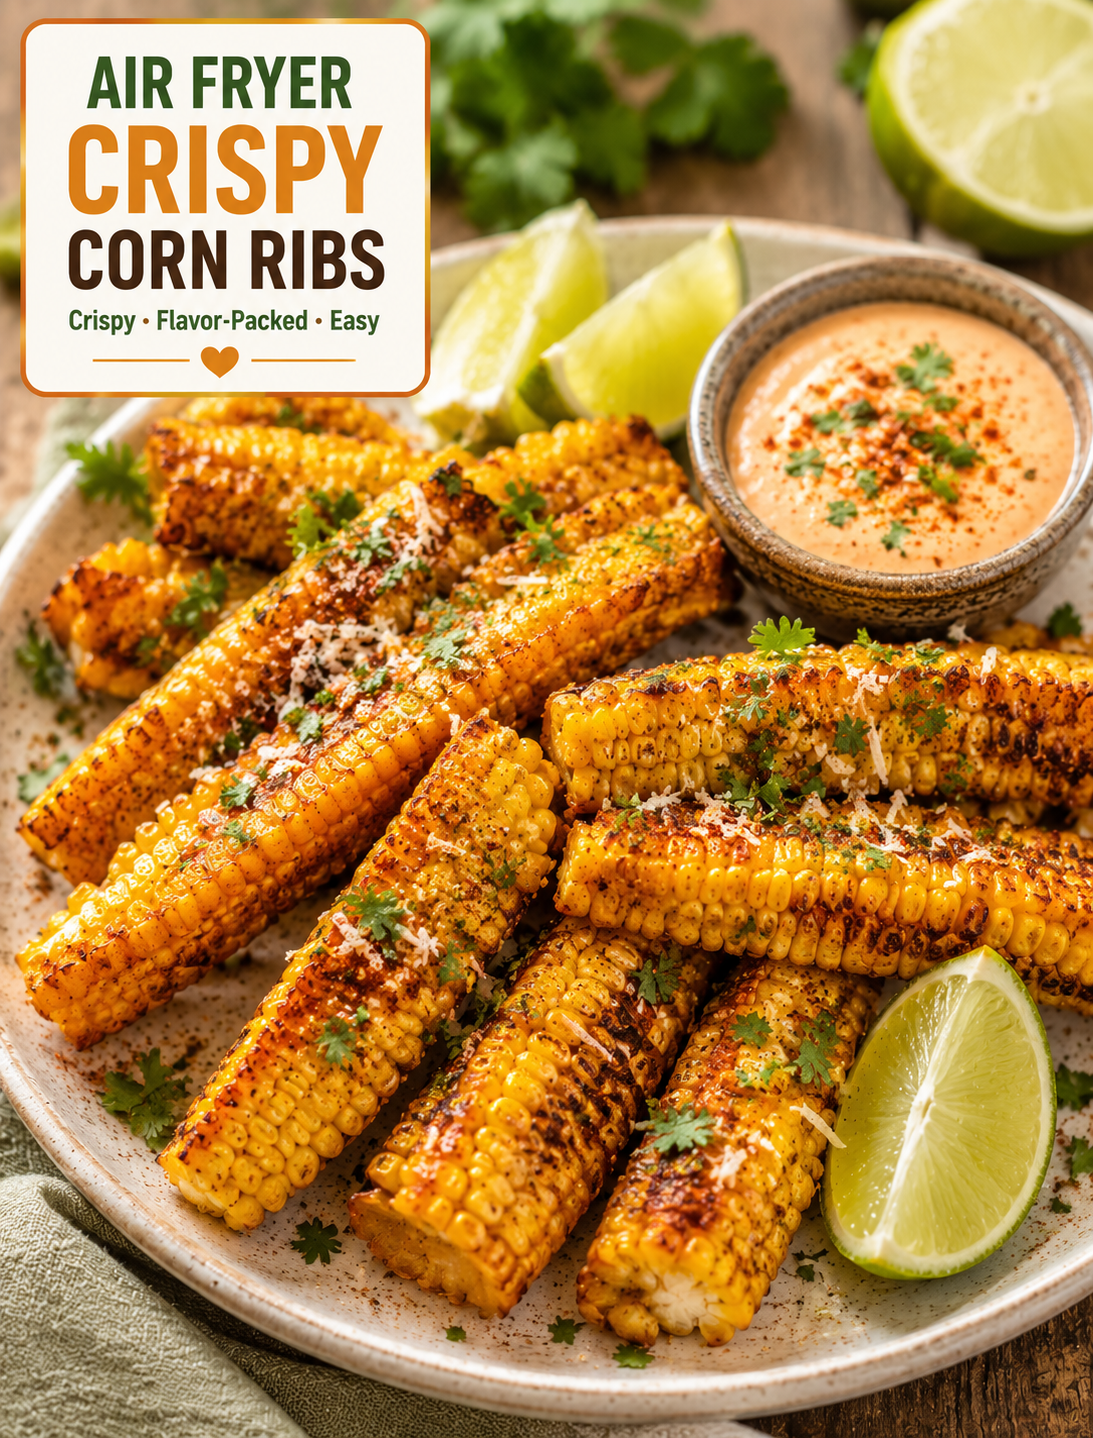
Air Fryer Crispy Corn Ribs

Crispy air fryer corn ribs seasoned with paprika and garlic, garnished with cilantro and lime on a rustic serving plate

Air Fryer Crispy Corn Ribs

If you love crispy snacks with big flavor, these Air Fryer Crispy Corn Ribs are worth trying. Fresh corn on the cob is cut into rib-style pieces, coated with a simple savory seasoning, and air-fried until the edges become golden and crisp.

The result is sweet, smoky, buttery, and slightly crunchy. The corn stays tender inside while the seasoned edges develop a delicious roasted texture.

This recipe is a fun alternative to traditional corn on the cob. It works as a quick appetizer, summer side dish, game-day snack, or easy addition to a family dinner.

Best of all, the air fryer gives the corn a roasted finish without requiring a large amount of oil. You can serve the finished corn with lime wedges, fresh herbs, ranch dip, chipotle mayo, or your favorite dipping sauce.

Why You’ll Love These Corn Ribs

These corn ribs are easy to customize and take only a few basic ingredients.

Fresh corn provides natural sweetness, while paprika, garlic, chili powder, and black pepper add savory depth. A little olive oil helps the seasoning stick and encourages browning in the air fryer.

The rib shape also makes the corn fun to eat. Each piece can be picked up like a small snack, making it especially useful for parties and casual gatherings.

Compared with deep-fried appetizers, air frying uses much less oil. That makes this recipe a practical option when you want something crispy without preparing a pot of frying oil.

You can also change the seasoning based on your taste. Make the ribs smoky, spicy, cheesy, buttery, or fresh with herbs and lime.

Ingredients You’ll Need

  • 4 fresh ears of corn
  • 2 tablespoons olive oil or melted butter
  • 1 teaspoon smoked paprika
  • 1 teaspoon garlic powder
  • ½ teaspoon chili powder
  • ½ teaspoon onion powder
  • ½ teaspoon black pepper
  • ½ teaspoon salt
  • ½ teaspoon dried oregano
  • 1 tablespoon grated Parmesan cheese, optional
  • 1 tablespoon chopped fresh parsley or cilantro
  • 1 lime, cut into wedges

For a milder version, leave out the chili powder. For extra heat, add a pinch of cayenne pepper or crushed red pepper flakes.

Fresh corn works best because it has a naturally juicy texture and firm structure. Choose ears with bright green husks and plump kernels when available.

How to Cut Corn Into Ribs Safely

Cutting whole corn cobs lengthwise requires care because the cob is hard and can cause a knife to slip.

Place the corn on a stable cutting board and use a sharp chef’s knife. Never hold the cob in your hand while trying to cut through it.

Trim the ends so the cob sits more securely. Stand the cob upright on the flat end and carefully cut downward through the center.

Once the cob is divided into two long sections, place the flat side down and carefully cut each section lengthwise again to create four rib-style pieces.

If the corn feels too hard to cut, do not force the knife. You can microwave the whole ears briefly for about 2–3 minutes to soften them slightly, then allow them to cool enough to handle safely before cutting.

Another option is to ask your grocery store produce department if they can cut the corn for you.

How to Make Air Fryer Crispy Corn Ribs

1. Prepare the Corn

Remove the husks and silk from each ear of corn.

Rinse the corn and pat it dry with a clean kitchen towel.

Cut each ear into four long rib-style pieces using the safe cutting method above.

Set the pieces aside while you prepare the seasoning.

2. Make the Seasoning

Add olive oil or melted butter to a small bowl.

Mix in smoked paprika, garlic powder, chili powder, onion powder, black pepper, salt, and oregano.

Stir until the mixture forms a smooth seasoned oil.

For a cheesy version, save the Parmesan for the end instead of mixing it into the coating.

3. Coat the Corn

Place the corn ribs in a large bowl.

Pour the seasoned oil over the pieces and toss gently until the kernels are evenly coated.

Try to spread the seasoning across the entire surface without soaking the corn in excess oil.

A light coating is enough because too much oil can make the finished ribs greasy rather than crisp.

4. Air Fry the Corn

Preheat your air fryer to 380°F if your model requires preheating.

Arrange the corn ribs in the basket with the kernels facing upward or positioned so the pieces have room for air to circulate.

Air fry for about 10–14 minutes, turning the pieces halfway through.

The exact cooking time depends on the size of the corn and your air fryer model.

The ribs are ready when the kernels are tender and the edges are lightly browned and crisp.

For deeper browning, add another 1–2 minutes of cooking time while watching them closely.

5. Finish and Serve

Transfer the hot corn ribs to a serving plate.

Sprinkle with Parmesan, fresh parsley, or cilantro if desired.

Finish with fresh lime juice just before serving.

Serve immediately while the edges are warm and crisp.

How to Get Extra Crispy Corn Ribs

Start with dry corn. Excess moisture can slow browning and make the exterior less crisp.

Avoid overcrowding the air fryer basket. The hot air needs room to circulate around each piece.

Use a light layer of oil rather than soaking the corn.

Turn the ribs halfway through cooking so both sides receive even heat.

For the crispiest finish, serve the ribs immediately after air frying.

If you are cooking several batches, keep finished pieces on a wire rack rather than stacking them because trapped steam can soften the crispy edges.

Best Seasonings for Corn Ribs

The classic garlic-paprika combination gives these corn ribs a savory and slightly smoky flavor.

For a Mexican-inspired version, use chili powder, cumin, lime, cilantro, and a little cotija or Parmesan cheese.

For spicy corn ribs, add cayenne pepper, smoked paprika, and crushed red pepper.

For a ranch-style version, toss the finished ribs with ranch seasoning and fresh parsley.

For a garlic butter version, brush the hot corn with melted butter mixed with minced garlic and parsley.

You can also add Parmesan, nutritional yeast, lemon pepper, or Cajun seasoning for a different flavor profile.

What to Serve With Corn Ribs

These crispy corn ribs work well with many meals.

Serve them alongside grilled chicken, burgers, steak, sandwiches, or tacos for a colorful side dish.

They also make a fun appetizer for backyard cookouts, summer parties, movie nights, and game-day gatherings.

For dipping, try ranch dressing, chipotle mayo, garlic aioli, cilantro-lime sauce, or a simple Greek yogurt dip.

A fresh cucumber salad or tomato salad can balance the smoky flavor of the corn.

For a larger meal, serve the ribs with grilled protein, beans, rice, or a fresh green salad.

Can You Use Frozen Corn?

Fresh corn is the easiest option for this recipe because whole ears hold their shape well.

Frozen corn kernels are not a direct substitute because they cannot be cut into rib-style pieces. If you only have frozen corn, you can air fry the kernels separately as a seasoned side dish.

Canned corn can also be roasted in the air fryer, but it will not create the same rib shape or eating experience.

For authentic corn ribs, use fresh ears of corn.

Can You Make Corn Ribs Ahead of Time?

These ribs taste best immediately after cooking because the edges are crispest when hot.

You can prepare the seasoning and cut the corn several hours ahead of time. Store the prepared corn covered in the refrigerator until you are ready to cook it.

For leftovers, place the cooked ribs in an airtight container and refrigerate them promptly.

Reheat them in the air fryer at about 350°F for 3–5 minutes until warmed through.

Avoid reheating them in the microwave if crispiness is important because microwave steam can make the exterior soft.

Tips for the Best Results

Choose fresh, firm ears of corn for easier cutting and better texture.

Use a sharp knife and a stable cutting board when preparing the cob.

Never try to cut a corn cob while holding it in your hand.

Keep the seasoning coating light so the corn can brown properly.

Leave space between pieces in the air fryer basket.

Turn the ribs halfway through cooking for even browning.

Add fresh lime juice after cooking instead of before air frying for a brighter flavor.

Serve immediately for the best crispy texture.

Storage and Food Safety

Store leftover corn ribs in a covered container in the refrigerator.

Refrigerate cooked corn promptly instead of leaving it at room temperature for an extended period.

When reheating, heat the ribs thoroughly and use the air fryer if you want to restore some of the crisp texture.

Discard leftovers if they develop an unusual smell, appearance, or texture.

Always wash fresh produce before preparation and use clean utensils and surfaces when handling food.

The Bottom Line

Air Fryer Crispy Corn Ribs turn simple fresh corn into a fun, flavorful snack with golden edges and tender kernels.

The combination of garlic, paprika, chili, herbs, and lime gives the sweet corn a bold finish without requiring complicated ingredients. The air fryer makes the process quick and helps create a roasted texture with a modest amount of oil.

These corn ribs are perfect for summer cookouts, family dinners, parties, appetizers, and casual snacking. You can also change the seasoning to create spicy, cheesy, smoky, or herb-filled versions.

For the best results, cut the corn carefully, avoid overcrowding the air fryer, and serve the ribs immediately after cooking.

Frequently Asked Questions

1. How long do corn ribs take in the air fryer?

Corn ribs usually take about 10–14 minutes at 380°F, with the pieces turned halfway through cooking.

2. Can I make corn ribs without oil?

Yes, but a small amount of oil helps the seasoning stick and promotes better browning and crispness.

3. Why are my corn ribs not crispy?

Overcrowding, excess moisture, or too much oil can reduce browning; leave space between pieces and cook until the edges are golden.

4. Can I use frozen corn for corn ribs?

Frozen corn kernels cannot create the rib shape, so fresh corn on the cob is the best choice for this recipe.

5. Are corn ribs vegetarian?

Yes, this recipe is vegetarian when prepared with olive oil and without Parmesan or other dairy-based toppings.

6. What sauce goes well with corn ribs?

Ranch, chipotle mayo, garlic aioli, cilantro-lime sauce, and Greek yogurt dips all pair well with crispy seasoned corn.

7. Can I reheat leftover corn ribs?

Yes, reheat them in an air fryer at about 350°F for 3–5 minutes to help restore their crisp texture.

8. Can I make spicy corn ribs?

Yes, add cayenne pepper, crushed red pepper, or extra chili powder to the seasoning for a hotter version.

Final Thoughts

Air Fryer Crispy Corn Ribs are proof that a simple ingredient can become something completely different with the right preparation. Sweet corn, smoky spices, garlic, and fresh lime create a snack that is colorful, crispy, and full of flavor.

The recipe is flexible enough for family dinners, weekend cookouts, parties, and quick snacks. Change the seasoning, add your favorite dipping sauce, or finish the ribs with cheese and fresh herbs to create your own version.

Most importantly, take care when cutting the corn and give each rib enough room in the air fryer to brown properly.

Serve them hot, squeeze over fresh lime, and enjoy them while those crispy edges are at their best.

Air Fryer Crispy Loaded Potato Bites

Air Fryer Crispy Loaded Potato Bites with melted cheddar, bacon, and golden breadcrumb coating

Air Fryer Crispy Loaded Potato Bites

Air Fryer Crispy Loaded Potato Bites are a crunchy, cheesy snack made with tender potatoes, crispy chicken, melted cheese, and simple seasonings. Each bite has a golden outside and a soft, flavorful center that makes it hard to stop at one.

This easy air fryer appetizer is great for game days, family gatherings, parties, after-school snacks, or a quick side dish. The air fryer gives the potato bites a crisp finish without deep frying them in oil.

The best part is how easy they are to customize. Add green onions, jalapeños, ranch seasoning, or extra cheese to match your favorite loaded potato flavors. Serve them hot with sour cream, ranch dressing, or your favorite dipping sauce.

Why You’ll Love This Recipe

  • Crispy texture: Air frying creates a golden crust while keeping the center soft.
  • Loaded flavor: Cheese, chicken, potatoes, and seasonings create a classic combination.
  • Easy ingredients: You can find everything at most U.S. grocery stores.
  • Quick cooking: The bites take about 10–15 minutes in the air fryer once prepared.
  • Great for sharing: Their small size makes them easy to serve at parties.
  • Easy to customize: Add your favorite toppings or adjust the seasoning.
  • Less oil: Air frying uses much less oil than traditional deep frying.

Ingredients

The Potato Bites

  • 2 cups cooked mashed potatoes
  • 1 cup shredded sharp cheddar cheese
  • 4 slices cooked chicken, finely chopped
  • 1 large egg
  • 1/3 cup all-purpose flour
  • 2 tablespoons chopped green onions
  • 1/2 teaspoon garlic powder
  • 1/2 teaspoon onion powder
  • 1/4 teaspoon smoked paprika
  • 1/2 teaspoon salt
  • 1/4 teaspoon black pepper

For the Crispy Coating

  • 1/2 cup plain breadcrumbs
  • 1 tablespoon grated Parmesan cheese
  • 1/2 teaspoon smoked paprika
  • Cooking spray or a small amount of olive oil

Serving

  • Sour cream
  • Ranch dressing
  • Chopped green onions
  • Extra shredded cheddar cheese
  • Sliced jalapeños, optional

How to Make Air Fryer Crispy Loaded Potato Bites

Step 1: Prepare the Potato Mixture

Place the cooked mashed potatoes in a large mixing bowl.

Add the shredded cheddar cheese, chopped chicken, egg, flour, green onions, garlic powder, onion powder, smoked paprika, salt, and black pepper.

Mix until everything is evenly combined and the mixture becomes thick enough to shape.

  • Use cooled mashed potatoes for easier handling.
  • Avoid adding extra milk or butter because a loose mixture will be difficult to shape.
  • Taste the mixture before shaping and adjust the seasoning if needed.

Step 2: Shape the Potato Bites

Scoop about 1 tablespoon of the potato mixture and roll it between your hands to form a small ball.

Place each formed bite on a clean plate or parchment-lined tray.

Continue until all of the mixture has been used.

Keep the bites similar in size so they cook at the same rate. If the mixture feels sticky, lightly grease your hands or chill it for 10–15 minutes.

Step 3: Make the Crispy Coating

Add the breadcrumbs, Parmesan cheese, and smoked paprika to a shallow bowl.

Roll each potato ball in the breadcrumb mixture until the outside is evenly coated.

Press the coating gently onto the surface so it stays attached during air frying.

The breadcrumbs provide the crisp exterior, while Parmesan adds extra savory flavor.

Step 4: Preheat the Air Fryer

Preheat your air fryer to 400°F for about 3 minutes.

A short preheat helps the potato bites begin crisping as soon as they enter the basket.

If your air fryer does not require preheating, you can start cooking immediately, but the total cooking time may vary.

Step 5: Arrange the Potato Bites

Lightly spray the air fryer basket with cooking spray.

Place the coated bites in a single layer, leaving a little space between each one.

Do not overcrowd the basket because hot air needs room to circulate around the bites.

If you are making a large batch, cook them in multiple rounds instead of stacking them.

Step 6: Air Fry Until Crispy

Lightly spray the tops of the potato bites with cooking spray or brush them with a small amount of olive oil.

Air fry at 400°F for 10–15 minutes, turning them gently halfway through cooking.

Cook until the outside is golden brown and crisp.

Keep an eye on the bites during the final few minutes because air fryer models can vary in heat and cooking speed.

Step 7: Add the Final Toppings

Remove the crispy potato bites from the air fryer and let them rest for 2–3 minutes.

Top them with chopped green onions and a small amount of shredded cheddar if desired.

Serve immediately with sour cream or ranch dressing.

Tips for Extra Crispy Potato Bites

Getting a crisp outside starts with the right potato mixture and proper air circulation.

  • Use cold mashed potatoes: Chilled potatoes are firmer and easier to shape.
  • Keep the mixture thick: Avoid adding liquids that can make the bites fall apart.
  • Use fine breadcrumbs: They create an even coating around each bite.
  • Do not overcrowd: Space between the bites helps hot air reach every surface.
  • Spray lightly: A small amount of oil helps the coating brown evenly.
  • Turn halfway: Rotating the bites helps both sides become crisp.
  • Cook in batches: Several smaller batches usually give better results than one crowded basket.
  • Let them rest briefly: A few minutes of cooling helps the crust firm up.

Best Potatoes to Use

Russet and Yukon Gold potatoes both work well for this recipe.

Russet potatoes have a fluffy texture that creates a light potato center. Yukon Gold potatoes are naturally creamy and give the bites a richer texture.

Leftover mashed potatoes are also a great option. If your mashed potatoes already contain a lot of milk or butter, add the flour gradually until the mixture is firm enough to shape.

Avoid very watery mashed potatoes because excess moisture can make the bites soft instead of crispy.

Easy Variations

These potato bites are easy to change based on what you have in the kitchen.

Jalapeño Cheddar

Add finely chopped jalapeños and use extra sharp cheddar for a spicy version.

Ranch Chicken

Mix 1–2 teaspoons of ranch seasoning into the potato mixture for a creamy ranch-style flavor.

Loaded Nacho

Add diced jalapeños, extra cheddar, and a pinch of chili powder before shaping the bites.

Green Onion and Sour Cream

Mix extra green onions into the potatoes and serve the finished bites with sour cream.

Extra Cheesy

Place a small cube of cheddar in the center of each potato ball before coating it. The cheese will melt inside during cooking.

What to Serve With Potato Bites

These crispy potato snacks work well with a variety of dips and sides.

Serve them with ranch dressing, sour cream, barbecue sauce, honey mustard, or a spicy dipping sauce.

For a party platter, arrange the bites around small bowls of different dips. Add fresh green onions and sliced jalapeños for color and extra flavor.

They also make a tasty side dish with grilled chicken, burgers, sandwiches, or steak.

Storage and Reheating

Allow leftover potato bites to cool completely before storing them.

Place them in an airtight container and refrigerate for up to 3–4 days.

For the best texture, reheat them in the air fryer rather than the microwave.

Heat at 375°F for 4–6 minutes, turning once if needed. Reheating this way helps restore the crispy coating.

You can also freeze the cooked bites. Place them on a tray until frozen, then transfer them to a freezer-safe container or bag.

Frozen bites can be reheated directly in the air fryer at 375°F for about 8–12 minutes, depending on their size.

Make-Ahead Instructions

You can prepare the potato bites several hours before cooking.

Shape and coat them, then place them in a covered container in the refrigerator until you are ready to air fry.

For the best results, bring them out of the refrigerator while the air fryer preheats. Avoid leaving them at room temperature for extended periods.

This make-ahead option is useful when preparing appetizers for game-day parties or family gatherings.

Common Mistakes to Avoid

A few simple mistakes can affect the final texture.

  • Using warm, loose potatoes: They are harder to shape and may spread during cooking.
  • Skipping the coating: The breadcrumb layer provides much of the crispy texture.
  • Overcrowding the basket: Crowded bites can steam instead of crisp.
  • Using too much oil: Excess oil can make the coating greasy.
  • Overcooking: Too much heat can dry the potato center.
  • Moving them too early: Let the coating firm up before turning the bites.

Nutrition Facts

Approximate nutrition per serving will vary based on the ingredients and brands used.

  • Calories: 185
  • Protein: 7g
  • Carbohydrates: 20g
  • Fat: 9g
  • Saturated Fat: 4g
  • Fiber: 2g
  • Sugar: 1g
  • Sodium: 330mg

These values are estimates and should be adjusted based on the exact ingredients used.

Frequently Asked Questions

Can I use leftover mashed potatoes?

Yes, leftover mashed potatoes work especially well because they are already chilled and easy to shape.

How do I keep potato bites from falling apart?

Use firm, cooled potatoes and enough flour to create a mixture that holds its shape when rolled.

What temperature should I use?

Cook the bites at 400°F for 10–15 minutes, turning them halfway through cooking.

Can I make these without chicken?

Yes, simply leave out the bacon or replace it with chopped cooked sausage, turkey bacon, or extra green onions.

Can I freeze potato bites?

Yes, freeze cooked bites in a sealed container and reheat them directly in the air fryer when needed.

Why are my potato bites not crispy?

Overcrowding, excess moisture, or too little coating can prevent the outside from becoming crisp.

Can I use different cheese?

Yes, cheddar, Monterey Jack, Colby Jack, or Pepper Jack can be used for different flavors and levels of heat.

What is the best dipping sauce?

Ranch dressing and sour cream are classic choices, but barbecue sauce, honey mustard, and spicy sauces also pair well.

Final Thoughts

Air Fryer Crispy Loaded Potato Bites are an easy way to turn simple mashed potatoes into a fun, crunchy appetizer. The combination of golden breadcrumbs, melted cheddar, savory bacon, and creamy potato makes every bite satisfying.

For the best results, start with firm mashed potatoes, avoid overfilling the air fryer basket, and turn the bites halfway through cooking. Serve them hot with your favorite dipping sauce for an easy appetizer that works for weeknight snacks, parties, and game-day gatherings.

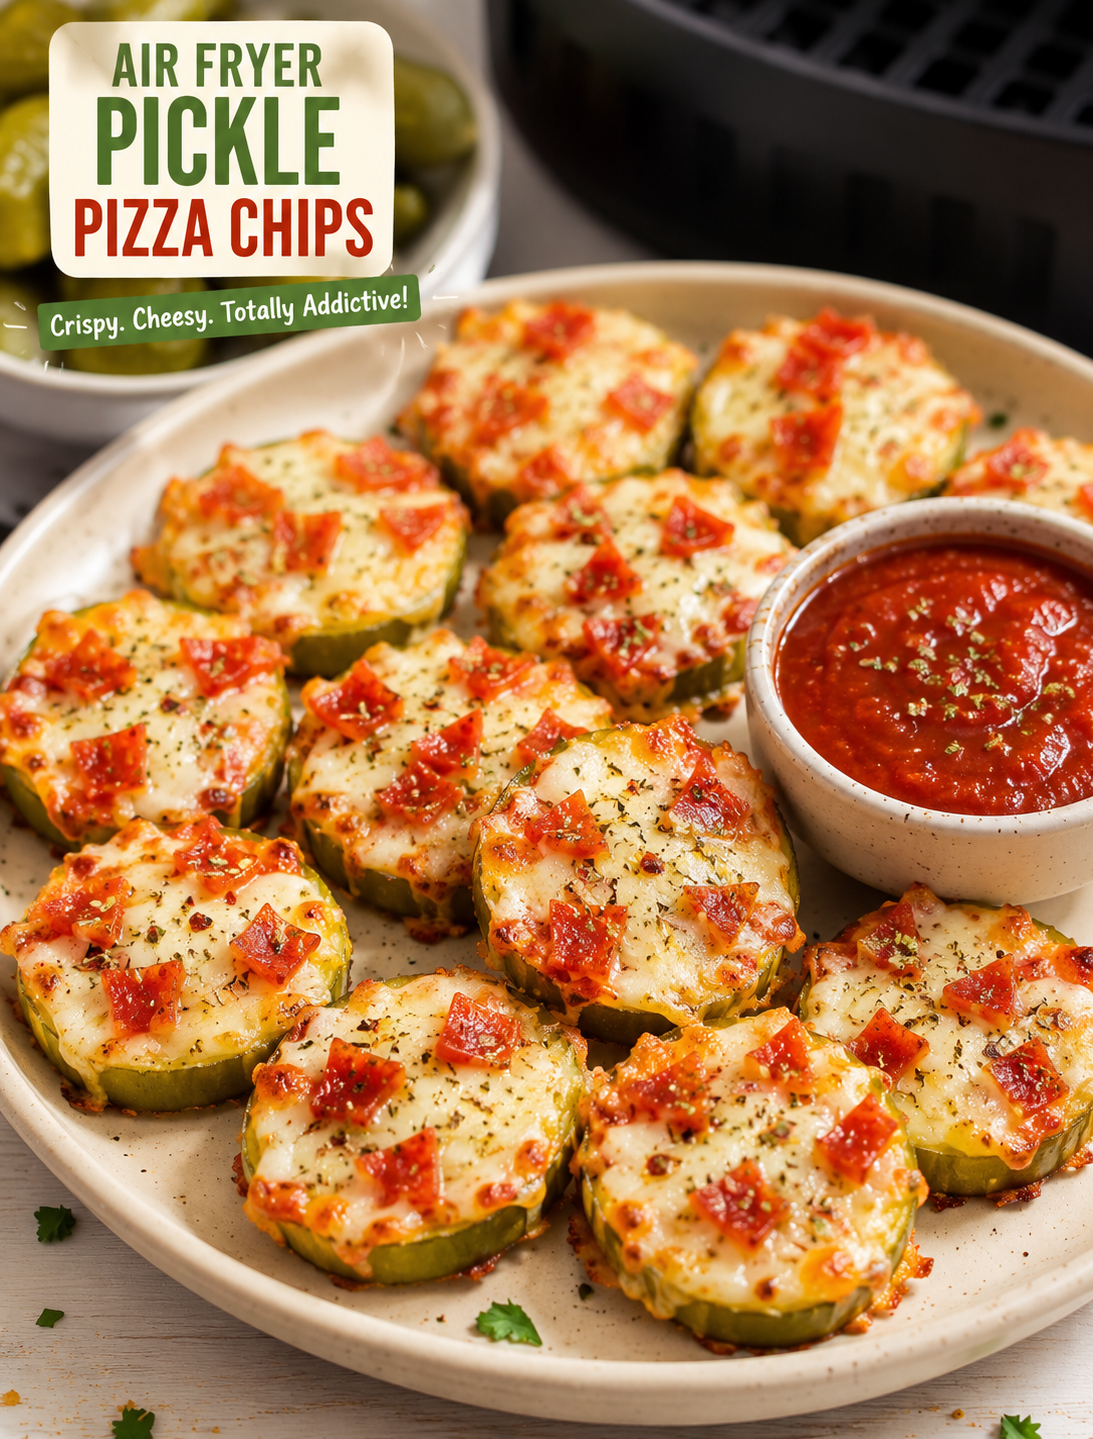
Air Fryer Pickle Pizza Chips

Crispy Air Fryer Pickle Pizza Chips topped with melted mozzarella and pepperoni, served with marinara dipping sauce.

Air Fryer Pickle Pizza Chips

Air Fryer Pickle Pizza Chips combine tangy dill pickles, melted mozzarella, savory pepperoni, and Italian seasoning in one quick snack. The pickle slices become lightly crisp around the edges while the cheese melts into a golden, bubbly topping.

This recipe is a simple way to turn everyday ingredients into a fun appetizer. It takes only a few minutes to prepare and works well for game days, movie nights, parties, or an easy afternoon snack.

The key to good pickle pizza chips is removing as much moisture as possible from the pickles before cooking. Dry pickle slices crisp better and help the cheese stay on top instead of sliding off.

Why You’ll Love This Recipe

  • Quick to make: Preparation takes about 10 minutes.
  • Crispy and cheesy: The air fryer creates browned edges and melted cheese.
  • Big flavor: Dill pickles add a bright, tangy contrast to rich cheese and pepperoni.
  • Easy ingredients: Most items are common grocery-store staples.
  • Great for sharing: The small portions make them easy to serve at parties.
  • Customizable: You can change the cheese, toppings, and dipping sauce.

Ingredients

For about 10–12 pickle pizza chips, you’ll need:

  • 10–12 thick dill pickle slices
  • ½ cup shredded mozzarella cheese
  • ¼ cup mini pepperoni, chopped
  • 2 tablespoons pizza sauce
  • ¼ teaspoon Italian seasoning
  • ¼ teaspoon garlic powder
  • A small amount of black pepper
  • Olive oil spray

Use thick pickle slices rather than very thin chips because they hold their shape better during cooking. Low-moisture mozzarella is also useful because it melts well without adding too much liquid.

You can use turkey pepperoni if you prefer a lighter topping. For a meat-free version, leave out the pepperoni and add finely diced bell pepper, mushrooms, or olives.

How to Make Air Fryer Pickle Pizza Chips

1. Dry the Pickle Slices

Place the pickle slices between paper towels and gently press them to remove excess brine. This step is important because wet pickles can stay soft instead of becoming crisp.

Let the slices sit on a dry paper towel for a minute or two while you prepare the toppings.

2. Prepare the Air Fryer

Preheat the air fryer to 390°F if your model recommends preheating. A hot cooking basket helps the pickle edges begin crisping quickly.

Lightly spray the basket with olive oil to reduce sticking.

3. Add the Pizza Toppings

Arrange the pickle slices in a single layer with a little space between each piece. Add a small amount of pizza sauce to each slice.

Top with shredded mozzarella and chopped mini pepperoni. Finish with Italian seasoning, garlic powder, and a light sprinkle of black pepper.

Avoid adding too much sauce because extra moisture can make the pickle chips softer.

4. Air Fry Until Golden

Cook the pickle pizza chips at 390°F for about 6–8 minutes. Cooking time can vary slightly between air fryer models.

Check them around the six-minute mark. They are ready when the cheese is melted and bubbly and the pickle edges have become lightly browned.

5. Cool and Serve

Carefully remove the chips and let them rest for 1–2 minutes before serving. The cheese will firm slightly as it cools.

Serve them warm with marinara sauce, ranch dressing, or another favorite dipping sauce.

Tips for Crispy Pickle Pizza Chips

Dry the pickles well. Excess brine is the biggest obstacle to crisp pickle pizza chips.

Use thick slices. Thick-cut pickles provide a sturdy base for cheese and toppings.

Keep the toppings light. A thin layer of sauce and cheese helps the chips cook evenly.

Do not overcrowd the basket. Arrange the slices in one layer so hot air can circulate around them.

Watch the final minutes. Cheese can go from melted to overly browned quickly in a hot air fryer.

Serve immediately. These snacks have their best texture while warm and freshly cooked.

Best Toppings and Variations

The classic combination of mozzarella and pepperoni gives these chips a pizza-inspired flavor, but you can easily create different versions.

For extra heat, add crushed red pepper flakes or a few finely chopped jalapeños. For a richer flavor, replace some mozzarella with shredded Parmesan or sharp cheddar.

A veggie version can include finely diced mushrooms, bell peppers, or black olives. Keep vegetable pieces small so they cook properly during the short air-frying time.

You can also make a buffalo-style version by using cooked shredded chicken, a small amount of buffalo sauce, and mozzarella. Serve it with ranch for a familiar game-day flavor.

For a simpler snack, skip the pizza sauce and use mozzarella, Parmesan, garlic powder, and Italian seasoning. This creates a cheesy garlic pickle bite with fewer toppings.

What to Serve With Them

These crispy pickle bites work well with simple dipping sauces. Marinara gives them a classic pizza flavor, while ranch adds a creamy contrast to the tangy pickles.

Garlic aioli works well when you want a richer dip. Spicy mayo adds heat without requiring extra toppings.

For a party, place several sauces in small bowls and let guests choose their favorite. The variety can make the appetizer more interactive without adding much preparation time.

How to Store and Reheat

Pickle pizza chips are best served fresh because the pickle contains moisture and the cheese can soften after refrigeration.

If you have leftovers, place them in an airtight container and refrigerate them promptly. Reheat them in the air fryer at 350°F for 2–4 minutes, checking frequently.

Avoid microwaving when possible because it can make the pickle base softer and the cheese less crisp.

For the best texture, make only the amount you expect to serve.

Common Mistakes to Avoid

The most common mistake is skipping the drying step. Pickles contain a lot of brine, so moisture can prevent the edges from becoming crisp.

Another mistake is using too much pizza sauce. The sauce adds flavor, but a heavy layer can make the base soggy.

Overloading each pickle slice with cheese and toppings can also cause uneven cooking. Small amounts create a better balance between the pickle, cheese, and toppings.

Finally, avoid stacking the chips in the air fryer basket. Hot air needs room to move around each piece.

Frequently Asked Questions

Can I use pickle chips instead of pickle slices?

Yes, but thick-cut pickle slices are better because they provide a stronger base for the cheese and toppings.

How do I make pickle pizza chips crispy?

Pat the pickles very dry, avoid excess sauce, and cook them in a single layer with good air circulation.

What temperature should I use?

Cook them at 390°F for approximately 6–8 minutes, checking early because air fryer models vary.

Can I make them without pepperoni?

Yes. Leave out the pepperoni or replace it with finely chopped vegetables, olives, mushrooms, or jalapeños.

What cheese works best?

Mozzarella is ideal for its melt and mild flavor, while Parmesan or cheddar can be added for extra flavor.

Can I prepare them ahead of time?

You can prepare the toppings ahead, but assemble and air fry the chips close to serving time for the best texture.

Why are my pickle pizza chips soggy?

Excess pickle brine, too much pizza sauce, overcrowding, or insufficient cooking time can keep the chips from crisping properly.

What is the best dipping sauce?

Marinara and ranch are excellent choices, but garlic aioli and spicy mayo also pair well with the tangy pickle flavor.

Final Thoughts

Air Fryer Pickle Pizza Chips are an easy appetizer for anyone who enjoys bold, salty, cheesy flavors. The recipe uses a short ingredient list and a quick cooking process, making it practical for busy days and casual entertaining.

For the crispiest result, focus on three things: dry the pickles well, keep the toppings light, and cook them in a single layer. Once you have the basic method down, you can experiment with different cheeses, vegetables, meats, and dipping sauces to create your own version.