Chicken Salad with Grapes and Pecans Recipe

Chicken salad with grapes, pecans, celery, and creamy dressing served in a bowl

Chicken Salad with Grapes and Pecans Recipe

This Chicken Salad with Grapes and Pecans Recipe combines tender chicken, juicy grapes, crisp celery, and toasted pecans in a creamy, lightly tangy dressing. The mix of sweet, savory, and crunchy textures makes it a great choice for lunch, picnics, meal prep, or an easy family meal.

You can serve this creamy chicken salad in lettuce cups, croissants, wraps, or on toasted bread. It also works well as a quick no-cook meal when you use leftover or rotisserie chicken.

Why You’ll Love This Chicken Salad

This recipe is simple, flexible, and easy to prepare with everyday ingredients.

  • Sweet and savory flavor: Grapes add natural sweetness while Dijon mustard and lemon juice add a mild tang.
  • Great texture: Celery and toasted pecans provide a fresh crunch against the tender chicken.
  • Quick preparation: Cooked chicken makes this recipe ready in about 15 minutes.
  • Easy to customize: You can add apples, dried cranberries, fresh herbs, or curry powder.
  • Meal-prep friendly: Store the finished salad in the refrigerator and enjoy it for up to 3 days.
  • Multiple serving options: Serve it over greens, in lettuce cups, inside croissants, or as a sandwich filling.

Ingredients You’ll Need For:

Chicken Salad

  • 2 cups cooked chicken breast, shredded or cut into bite-sized cubes
  • 1 cup red or green grapes, halved
  • 1/2 cup celery, finely chopped
  • 1/2 cup pecans, toasted and roughly chopped
  • 2 tablespoons red onion, finely diced, optional
  • Lettuce leaves, croissants, wraps, or bread for serving

Creamy Dressing

  • 1/2 cup mayonnaise
  • 1 tablespoon Dijon mustard
  • 1 teaspoon honey or maple syrup, optional
  • 1 teaspoon fresh lemon juice or apple cider vinegar
  • Salt, to taste
  • Freshly ground black pepper, to taste

For a lighter dressing, replace half of the mayonnaise with plain Greek yogurt. This keeps the salad creamy while reducing some of the fat and calories.

How to Make Chicken Salad with Grapes and Pecans

Step 1: Cook the Chicken

If you are starting with raw chicken, poach or bake the chicken breasts until they reach an internal temperature of 165°F (74°C). Let the chicken cool completely before shredding or cutting it.

For a faster option, use leftover cooked chicken or skinless rotisserie chicken. Remove the skin and bones, then shred or cube the meat into small pieces.

Step 2: Toast the Pecans

Place the pecans in a dry skillet over medium heat. Toast them for about 2–3 minutes, stirring often so they do not burn.

Remove the pecans from the skillet as soon as they smell fragrant. Let them cool before roughly chopping them.

Toasted pecans add a deeper nutty flavor and a crisp texture to the finished salad.

Step 3: Prepare the Dressing

Add mayonnaise, Dijon mustard, lemon juice or apple cider vinegar, and honey or maple syrup to a small bowl.

Whisk until the dressing is smooth and evenly combined. Season with salt and freshly ground black pepper.

Taste the dressing before adding it to the salad. Add a little more lemon juice for brightness or a small amount of honey for extra sweetness.

Step 4: Combine the Ingredients

Place the cooked chicken, halved grapes, chopped celery, toasted pecans, and diced red onion in a large mixing bowl.

Pour the dressing over the ingredients. Use a large spoon or spatula to gently mix everything until evenly coated.

Avoid overmixing because it can crush the grapes and make the salad less appealing.

Step 5: Chill the Salad

Cover the bowl and refrigerate the chicken salad for at least 30 minutes.

Chilling gives the dressing time to blend with the chicken, grapes, celery, and pecans. The salad can also be prepared several hours ahead for lunch, gatherings, or picnics.

Step 6: Serve

Spoon the chilled salad into lettuce leaves for a lighter option. For a classic lunch, serve it inside a buttery croissant or between slices of toasted bread.

You can also place it inside a tortilla wrap or serve it over a bed of mixed greens. For a simple low-carb option, enjoy the salad on its own with fresh vegetables.

Tips for the Best Chicken Salad

Use fully cooled chicken before mixing it with the dressing. Warm chicken can make the mayonnaise-based mixture loose and less creamy.

Choose firm, seedless grapes and cut them in half so each bite has a balanced amount of fruit. Red grapes provide a slightly sweeter flavor, while green grapes give the salad a brighter, tangier taste.

Toast the pecans just until fragrant. Over-toasting can make them bitter and overpower the other ingredients.

For a lighter chicken salad, use half mayonnaise and half plain Greek yogurt. You can also reduce the amount of pecans or serve the salad in lettuce cups instead of bread.

If you prefer more texture, add finely diced apples or a small amount of dried cranberries. Fresh parsley or dill can add a bright herbal note without changing the basic recipe.

Make-Ahead and Storage

This recipe is convenient for meal prep because it can be prepared ahead of time. Keep the finished salad in an airtight container in the refrigerator and use it within 3 days.

For the best texture, add extra toasted pecans just before serving if you plan to store the salad overnight. The nuts can soften slightly after sitting in the creamy dressing.

Freezing is not recommended. Mayonnaise-based dressing can separate after thawing, while grapes may lose their firm texture and become watery.

Serving Ideas

There are several easy ways to turn this salad into a complete lunch.

  • Croissant sandwich: Fill a fresh croissant with the chilled chicken mixture.
  • Lettuce cups: Spoon the salad into crisp lettuce leaves for a lighter serving.
  • Wrap: Add the chicken salad to a flour tortilla with leafy greens.
  • Open-faced toast: Spread the mixture over toasted whole-grain bread.
  • Green salad: Serve a scoop over mixed greens for a fresh lunch.
  • Snack plate: Pair a small serving with sliced cucumbers, carrots, and crackers.

Nutrition Information

The approximate nutrition per serving is based on the mayonnaise-based version and a four-serving yield.

  • Calories: 380 kcal
  • Protein: 26 g
  • Carbohydrates: 11 g
  • Sugars: 8 g
  • Fat: 26 g
  • Saturated Fat: 3.5 g
  • Fiber: 2 g
  • Sodium: 400 mg

Nutrition values can vary depending on the chicken, mayonnaise, pecans, grapes, and serving size used.

Frequently Asked Questions

Can I use rotisserie chicken for this recipe?

Yes. Remove the skin and bones from a rotisserie chicken, then shred or cube the meat before adding it to the salad.

What can I use instead of mayonnaise?

Plain Greek yogurt, sour cream, or a mixture of Greek yogurt and mayonnaise can replace some or all of the mayonnaise.

Can I make chicken salad ahead of time?

Yes. Refrigerate it in an airtight container for up to 3 days, and chill it for at least 30 minutes before serving for the best flavor.

Can I freeze chicken salad with grapes?

Freezing is not recommended because the mayonnaise may separate and the grapes can become soft and watery after thawing.

What grapes work best in chicken salad?

Seedless red or green grapes both work well; red grapes add more sweetness, while green grapes provide a slightly sharper flavor.

Can I add apples to chicken salad?

Yes. Diced crisp apples add extra sweetness and crunch and pair especially well with the pecans and creamy dressing.

How can I make this chicken salad healthier?

Use Greek yogurt for part of the mayonnaise, reduce the pecans if needed, and serve the salad in lettuce cups instead of bread.

What is the best way to serve this chicken salad?

Serve it chilled in lettuce cups, croissants, wraps, toasted bread, or over mixed greens for a simple lunch.
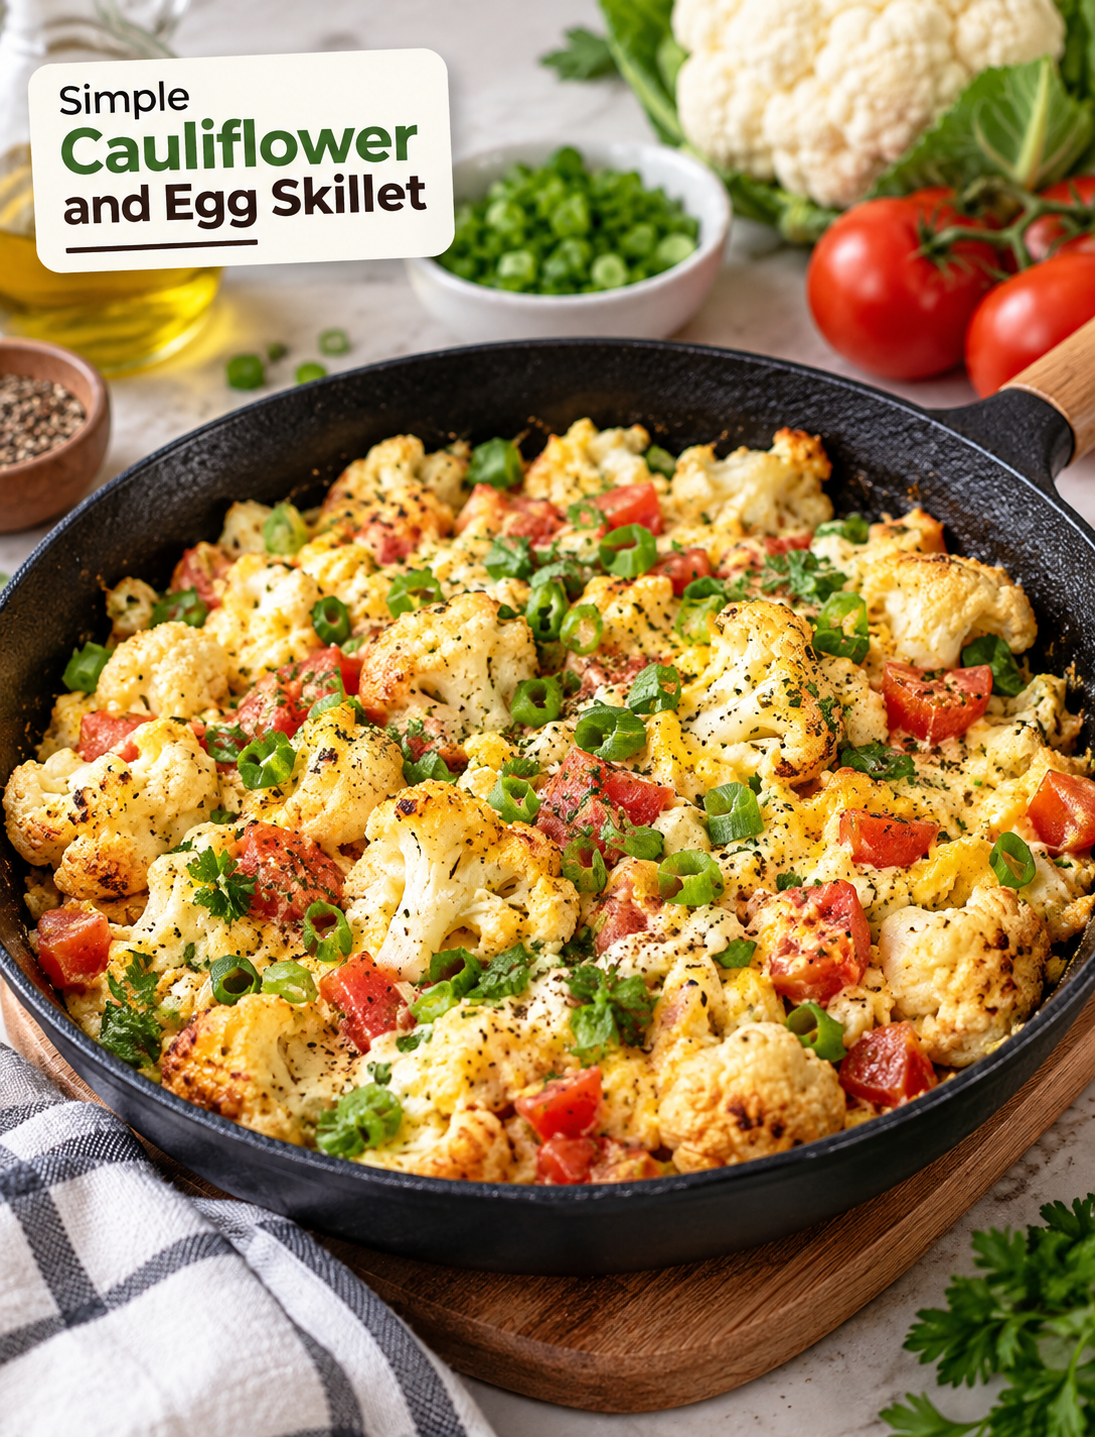
Simple Cauliflower and Egg Skillet

Simple cauliflower and egg skillet with tomatoes, spring onions, and creamy sour cream sauce

Simple Cauliflower and Egg Skillet

If you need a quick, filling meal made with simple ingredients, this Simple Cauliflower and Egg Skillet is a great choice. Tender cauliflower, fresh tomatoes, eggs, spring onions, and a creamy sour cream mixture come together in one pan for a comforting homemade dish.

This skillet works well for breakfast, lunch, or a light dinner. The cauliflower gives the dish a hearty texture, while the eggs add protein and help bring the ingredients together. A short simmer allows the garlic, black pepper, and sour cream to coat every bite.

The recipe takes about 35 minutes from start to finish, including preparation and cooking. It serves four people and is easy enough for a busy weekday meal.

Why You’ll Love This Cauliflower and Egg Skillet

  • Simple ingredients: Most of the ingredients are easy to find at a regular grocery store.
  • One-pan cooking: After boiling the cauliflower, the main dish comes together in one skillet.
  • Creamy and savory: Sour cream, garlic, and black pepper create a rich sauce without complicated steps.
  • Family-friendly: Mild flavors and tender vegetables make this a practical meal for the whole family.
  • Flexible serving option: Enjoy it on its own or pair it with toast, a green salad, or roasted vegetables.

Ingredients You’ll Need

  • 1 medium cauliflower: Choose a firm cauliflower with compact, white florets.
  • 3 large eggs: Eggs add protein and help make the skillet more satisfying.
  • 2 medium tomatoes: Fresh tomatoes add moisture, acidity, and a bright flavor.
  • Spring onions: Chop them finely so they spread evenly through the dish.
  • 3 tablespoons sour cream: Sour cream creates the creamy base for the skillet.
  • Black pepper: Add it to taste for gentle heat.
  • Dried garlic: Use according to your preferred garlic flavor.
  • Salt: Season the cauliflower water and sour cream mixture.
  • Olive oil: Use enough to lightly coat the skillet for browning.

How to Make Simple Cauliflower and Egg Skillet

Step 1: Prepare the Cauliflower

  • Remove the leaves and thick stem from the cauliflower.
  • Cut the cauliflower into small, evenly sized florets.
  • Rinse the florets under cool running water.
  • Bring a large pot of water to a boil.
  • Add about 1 teaspoon of salt to the boiling water.
  • Add the cauliflower and boil for 5 minutes.
  • Drain the florets thoroughly and allow excess water to evaporate.

Parboiling softens the cauliflower before it reaches the skillet. Draining it well is important because excess water can prevent the florets from browning properly.

Step 2: Prepare the Eggs and Vegetables

  • Crack the 3 eggs into a medium bowl.
  • Beat the eggs until the yolks and whites are fully combined.
  • Dice the tomatoes into small cubes.
  • Wash and finely chop the spring onions.
  • Set the prepared vegetables aside while you make the creamy mixture.

Keep the tomato pieces fairly small so they soften quickly during cooking without overpowering the cauliflower.

Step 3: Brown the Cauliflower

  • Place a large skillet over medium heat.
  • Add a small amount of olive oil.
  • Once the oil is warm, add the drained cauliflower florets.
  • Spread the florets into an even layer.
  • Cook for about 3–5 minutes, turning as needed.
  • Continue until the cauliflower develops light golden-brown edges.

Browning adds extra flavor and gives the cauliflower a more appealing texture. Avoid overcrowding the skillet if you want better browning.

Step 4: Make the Sour Cream Mixture

  • Add 3 tablespoons of sour cream to a small bowl.
  • Season with black pepper, dried garlic, and a little salt.
  • Stir until the mixture is smooth and evenly seasoned.

The sour cream mixture provides the creamy element of the dish. Adjust the garlic and pepper to suit your taste.

Step 5: Combine the Ingredients

  • Lower the heat after the cauliflower has browned.
  • Spoon or pour the sour cream mixture over the cauliflower.
  • Add the diced tomatoes.
  • Sprinkle the chopped spring onions over the top.
  • Stir gently to distribute the ingredients without breaking the cauliflower florets.

The tomatoes release moisture as they cook, helping create a light sauce with the sour cream.

Step 6: Cook the Skillet

  • Cover the skillet if you have a suitable lid.
  • Cook over low heat for about 15 minutes.
  • Stir gently once or twice during cooking.
  • Check that the cauliflower is tender and the tomatoes have softened.
  • Keep the heat low so the sour cream mixture does not cook too aggressively.

The slow simmer gives the vegetables time to absorb the savory flavors of garlic, pepper, and sour cream.

Step 7: Add and Cook the Eggs

  • Pour the beaten eggs evenly over the cauliflower mixture.
  • Gently stir or move the ingredients so the eggs spread throughout the skillet.
  • Cook until the eggs are fully set and no longer look runny.
  • Remove the skillet from the heat as soon as the eggs are cooked through.

Cooking the eggs at the end keeps them tender while allowing them to bind with the creamy vegetable mixture.

Step 8: Garnish and Serve

  • Taste the skillet and adjust the salt or black pepper if needed.
  • Sprinkle fresh herbs or additional spring onions over the top.
  • Serve the dish hot.
  • Divide into four portions for a simple family meal.

For a complete breakfast, serve it with whole-grain toast. For lunch or dinner, pair it with a crisp green salad or another vegetable side.

Tips for the Best Results

Use fresh cauliflower for the best texture and flavor. Cut the florets into similar sizes so they cook evenly.

Do not skip the draining step after boiling. Wet cauliflower can release too much water into the skillet and make browning difficult.

Keep the skillet at medium heat while browning, then reduce the temperature before adding the creamy mixture. Gentle heat helps prevent the sour cream from becoming overly thin or separating.

Add the eggs near the end of cooking. This prevents them from becoming dry while the cauliflower and tomatoes finish simmering.

You can also add a small amount of paprika, fresh parsley, or shredded cheese if you want to change the flavor while keeping the basic recipe intact.

Storage and Reheating

Allow leftovers to cool before placing them in an airtight container. Refrigerate within two hours of cooking and use within 3–4 days.

Reheat individual portions in a skillet over low heat or in the microwave until heated through. Add a small splash of water if the mixture seems dry during reheating.

Nutrition Information

This recipe makes approximately 4 servings, with about 150 calories per serving based on the provided recipe information. Actual nutrition can vary depending on the amount of olive oil, sour cream, and other ingredients used.

Frequently Asked Questions

Can I use frozen cauliflower?

Yes. Thaw frozen cauliflower first and drain it well before adding it to the skillet to reduce excess moisture.

Can I make this recipe without sour cream?

Yes. Plain Greek yogurt can be used as an alternative, although it may give the dish a slightly tangier flavor.

How do I prevent watery cauliflower?

Drain the boiled cauliflower thoroughly and let it steam-dry briefly before placing it in the hot skillet.

Can I add cheese to this skillet?

Yes. Sprinkle shredded cheddar, mozzarella, or Parmesan over the skillet near the end and allow it to melt before serving.

Can I prepare this recipe ahead of time?

You can chop the vegetables and prepare the sour cream mixture ahead, then cook the skillet when you are ready to serve it.

What can I serve with cauliflower and eggs?

Serve it with whole-grain toast, avocado, a fresh green salad, or roasted vegetables for a more complete meal.

Can I add other vegetables?

Yes. Bell peppers, spinach, mushrooms, or zucchini can be added, but cook vegetables that need more time before adding the eggs.

Is this recipe suitable for breakfast?

Yes. The combination of cauliflower, eggs, tomatoes, and creamy seasoning makes it a satisfying savory breakfast or brunch option.

Final Thoughts

This Simple Cauliflower and Egg Skillet turns everyday vegetables and eggs into a warm, creamy meal with very little fuss. Parboiling the cauliflower first helps create tender florets, while browning adds a deeper savory flavor. Fresh tomatoes bring brightness, spring onions add freshness, and the sour cream mixture ties everything together.

With straightforward preparation and about 35 minutes of total cooking time, this recipe is practical for busy mornings, relaxed weekend brunches, or an easy family dinner.

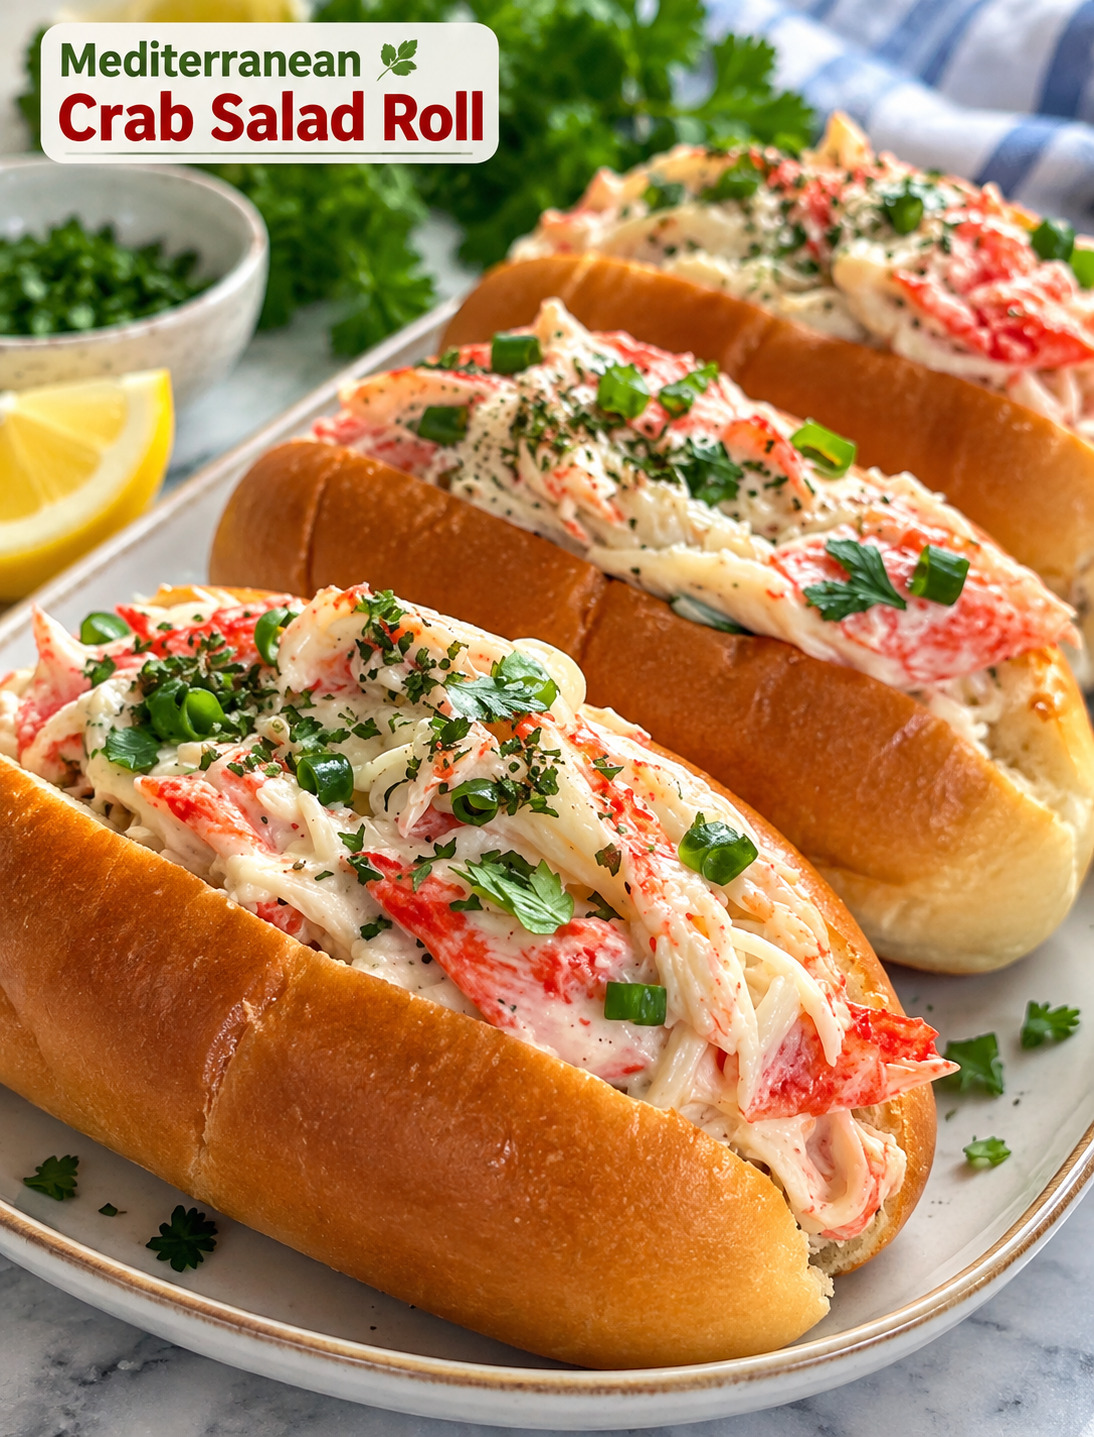
Mediterranean Crab Salad Roll

Mediterranean crab salad roll with creamy crab filling, lettuce, cucumber, cherry tomatoes, and red onion in a whole wheat tortilla

Mediterranean Crab Salad Roll

If you want a light seafood meal that feels fresh, creamy, and satisfying, this Mediterranean Crab Salad Roll is an easy choice. Tender crab meat is mixed with Greek yogurt, tahini, lemon juice, fresh herbs, and simple spices to create a bright and flavorful filling. Crisp lettuce, cucumber, cherry tomatoes, and red onion add fresh texture to every bite.

This crab salad wrap takes only a few simple steps to prepare and works well for lunch, a quick dinner, or a light meal on a warm day. The combination of seafood, vegetables, herbs, and whole wheat tortillas gives this recipe a balanced Mediterranean-inspired flavor without making it heavy.

Why You’ll Love This Mediterranean Crab Salad Roll

  • Fresh and flavorful: Lemon, dill, parsley, and vegetables add a bright Mediterranean taste.
  • Quick to prepare: The crab filling comes together in one bowl with minimal cooking.
  • Creamy without being too heavy: Greek yogurt and tahini create a smooth dressing for the crab.
  • Great for lunch: The rolls are easy to wrap, slice, and take with you.
  • Easy to customize: You can adjust the vegetables, herbs, and seasonings to suit your taste.
  • Perfect for warm weather: The chilled crab mixture and fresh vegetables make this a refreshing meal.

Ingredients for Mediterranean Crab Salad Roll

For the Crab Salad

  • 8 oz fresh crab meat, shredded: Use fresh lump crab meat when available and check carefully for any shell pieces.
  • 1/2 cup plain Greek yogurt: This creates a creamy base while keeping the filling fresh and tangy.
  • 2 tablespoons tahini: Tahini adds a mild nutty flavor that pairs well with crab and lemon.
  • 1 tablespoon lemon juice: Fresh lemon juice brightens the seafood mixture.
  • 1 tablespoon fresh dill, chopped: Dill adds a classic fresh herb flavor.
  • 1 tablespoon fresh parsley, chopped: Parsley brings freshness and color to the filling.
  • 1/2 teaspoon garlic powder: Garlic adds savory flavor without overpowering the crab.
  • 1/2 teaspoon paprika: Paprika gives the mixture gentle warmth and extra color.
  • Salt and black pepper: Season according to your taste.

For the Rolls

  • 4 whole wheat or low-carb tortillas: Choose tortillas that are flexible enough to roll without tearing.
  • 1 cup shredded lettuce: Lettuce provides a crisp texture.
  • 1 cup diced cucumber: Cucumber adds coolness and crunch.
  • 1 cup cherry tomatoes, halved: Tomatoes provide juicy texture and mild sweetness.
  • 1/4 cup thinly sliced red onion: Red onion adds a sharp, fresh bite.

How to Make Mediterranean Crab Salad Roll

Step 1: Prepare the Crab

Place the shredded crab meat in a large mixing bowl. Gently check the meat for any remaining shell pieces before adding the other ingredients.

Step 2: Make the Creamy Dressing

Add Greek yogurt, tahini, lemon juice, chopped dill, chopped parsley, garlic powder, paprika, salt, and black pepper to the bowl.

Step 3: Mix the Crab Salad

Stir the ingredients gently until the crab is evenly coated and the herbs and seasonings are well distributed. Avoid overmixing because gentle stirring helps keep the crab meat in larger pieces.

Step 4: Prepare the Vegetables

Shred the lettuce, dice the cucumber, halve the cherry tomatoes, and thinly slice the red onion. Keep the vegetables as dry as possible so the tortillas do not become soggy.

Step 5: Fill the Tortillas

Place one tortilla on a clean, flat surface. Leave a small border around the edges and spoon an even portion of the crab salad into the center.

Step 6: Add Fresh Vegetables

Top the crab mixture with shredded lettuce, cucumber, cherry tomatoes, and red onion. Spread the ingredients in a narrow line rather than covering the entire tortilla.

Step 7: Roll the Tortilla

Fold the sides of the tortilla inward, then roll it firmly from the bottom toward the top. Keep the filling tucked inside as you roll to create a neat wrap.

Step 8: Slice and Serve

Place the finished roll seam-side down and cut it diagonally in half. Serve immediately for the freshest texture, or wrap the rolls and refrigerate them until ready to eat.

Tips for the Best Crab Salad Roll

  • Use quality crab meat: Fresh or good-quality refrigerated crab gives the filling the best seafood flavor.
  • Drain excess moisture: Wet vegetables or watery crab can make the tortilla soggy.
  • Do not overpower the crab: Keep the seasoning balanced so the natural sweetness of the seafood remains noticeable.
  • Use fresh lemon: Freshly squeezed lemon juice gives the dressing a brighter flavor.
  • Chill before serving: A short rest in the refrigerator can make the crab salad more refreshing.
  • Roll tightly: A firm roll makes the wrap easier to slice and eat.
  • Serve soon after assembling: Fresh vegetables stay crisp when the rolls are served shortly after preparation.

Easy Variations

You can make this Mediterranean-inspired seafood wrap your own with a few simple changes. Add finely chopped bell pepper for extra crunch or use baby spinach instead of lettuce for a softer texture.

For a stronger Mediterranean flavor, add a small amount of chopped Kalamata olives or crumbled feta cheese. If you prefer more citrus flavor, increase the lemon juice slightly while keeping the mixture creamy.

For a lower-carbohydrate option, use low-carb tortillas or serve the crab salad over lettuce as a bowl. You can also use large lettuce leaves as wraps for a lighter presentation.

How to Store

Keep leftover crab salad in an airtight container in the refrigerator and use it within a short period for the best quality. If possible, store the crab mixture and vegetables separately from the tortillas and assemble the rolls just before serving.

Prepared rolls can lose their crisp texture as the vegetables release moisture, so fresh assembly gives the best result.

Serving Ideas

Serve these crab salad rolls with fresh fruit, a simple green salad, roasted vegetables, or a light soup. They also make a convenient lunch when cut into smaller pieces for serving.

For a casual gathering, slice each wrap into several bite-size pieces and arrange them on a platter. A little fresh dill and lemon on the side can add an attractive finishing touch.

Frequently Asked Questions

Can I use canned crab meat?

Yes, canned crab meat can work, but drain it thoroughly and check for shell pieces before mixing it with the dressing.

Can I make the crab salad ahead of time?

Yes, prepare the crab mixture ahead and refrigerate it in an airtight container until you are ready to assemble the rolls.

Can I use regular yogurt instead of Greek yogurt?

Yes, but Greek yogurt is thicker and creates a creamier filling with less excess moisture.

What tortillas work best for this recipe?

Whole wheat, flour, or flexible low-carb tortillas all work well as long as they are large enough to hold the filling.

How can I prevent the tortilla from becoming soggy?

Drain the crab and vegetables well, avoid overfilling, and assemble the wraps shortly before serving.

Can I make this recipe without tahini?

Yes, you can leave out the tahini, although the finished crab salad will have a slightly different flavor and texture.

Is this crab salad served hot or cold?

It is best served chilled or at cool room temperature because the fresh vegetables and creamy crab mixture are designed for a refreshing bite.

What can I serve with crab salad rolls?

Pair them with a green salad, fresh fruit, roasted vegetables, or a light soup for a simple and balanced meal

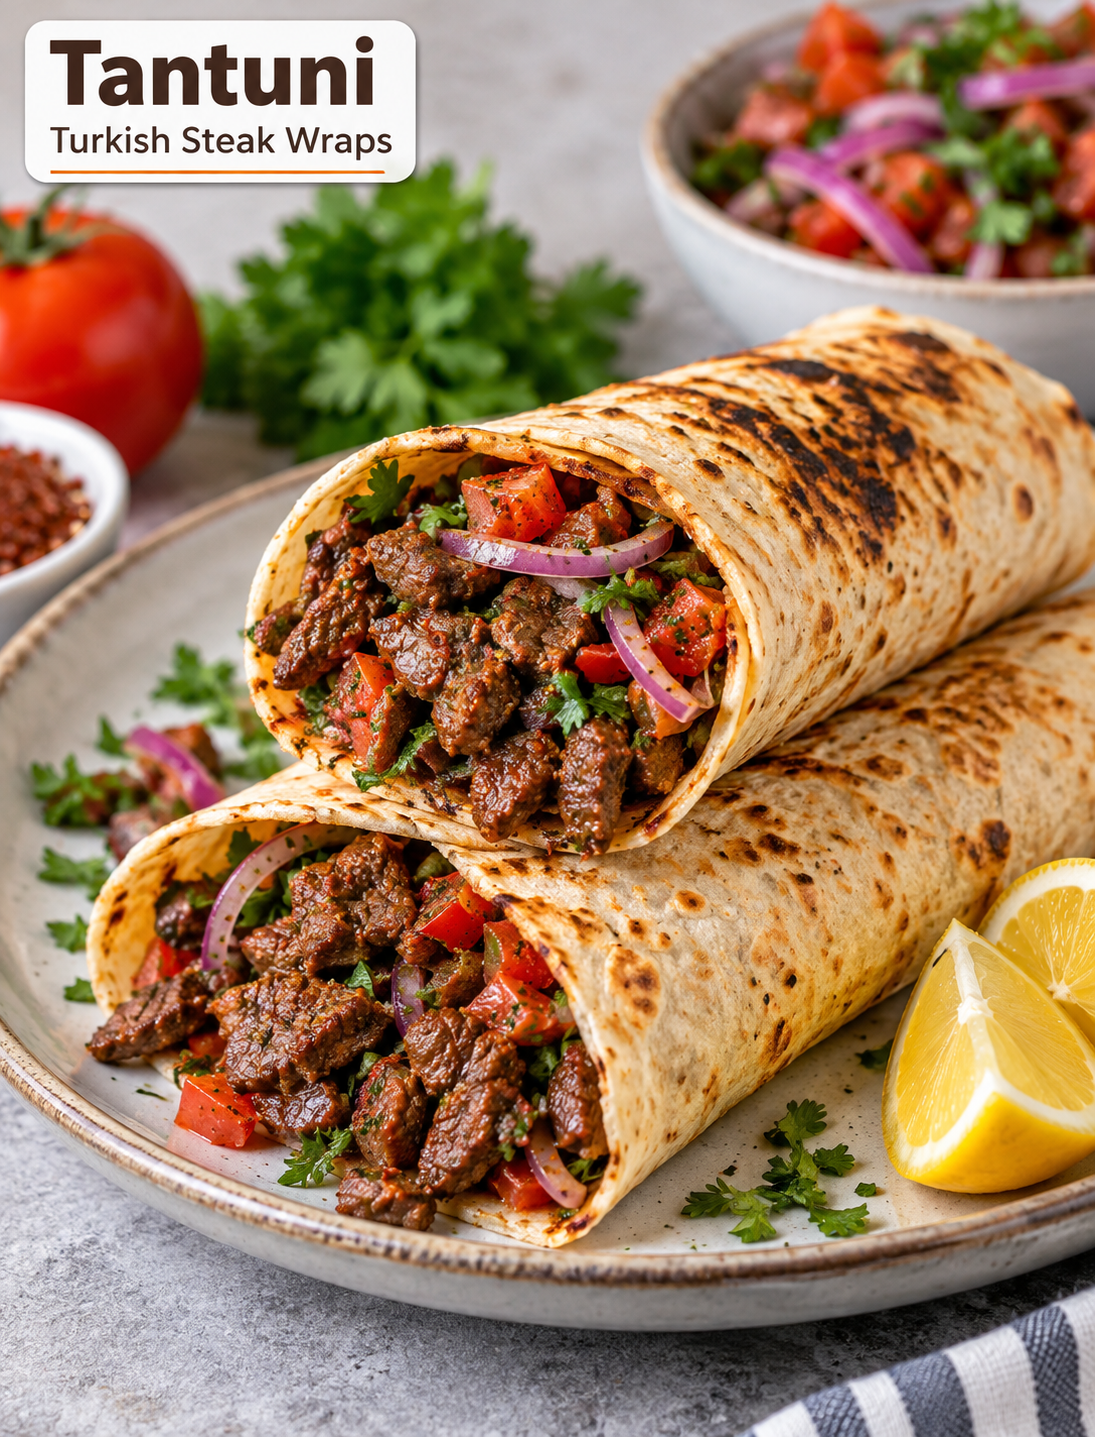
Tantuni (Turkish Steak Wraps)

Tantuni Turkish steak wraps with seasoned beef, tomatoes, parsley, sumac onions, and lemon in soft lavash bread

Tantuni (Turkish Steak Wraps)

Tantuni is a flavorful Turkish street-food wrap made with small pieces of seared steak, seasoned oil, tomatoes, parsley, and tangy sumac onions. The meat is cooked quickly in a hot pan, then finished with paprika and hot water to create a rich, savory mixture that soaks into the flatbread.

This Tantuni recipe is easy to make at home and works well for a quick lunch, weeknight dinner, or casual family meal. Traditional tantuni is served in thin lavash bread, but large flour tortillas are a practical option when lavash is hard to find.

The combination of tender beef, fresh vegetables, lemon, and warm spices gives every bite a bright and satisfying flavor.

Why You’ll Love This Tantuni Recipe

  • Quick cooking: Small steak pieces cook in about 8 minutes.
  • Bold flavor: Paprika, sumac, lemon, and Aleppo pepper add depth.
  • Fresh topping: Tomato, parsley, and onion balance the rich beef.
  • Easy ingredients: Most items are available at regular U.S. grocery stores.
  • Flexible bread: Use lavash or large flour tortillas.
  • Great for sharing: Make several wraps for lunch, dinner, or gatherings.

Ingredients for Tantuni

For the Steak Wraps

  • 1½ pounds flank steak
  • ¼ cup extra virgin olive oil
  • 2 teaspoons paprika
  • ¾ cup hot water
  • 1 teaspoon Aleppo pepper, optional
  • 6 sheets homemade lavash or burrito-size flour tortillas
  • Kosher salt, to taste

For the Fresh Topping

  • 1 small red onion, thinly sliced into half moons
  • 2 teaspoons sumac
  • 3 Roma tomatoes, finely chopped
  • 1 bunch flat-leaf parsley, finely chopped
  • 2 lemons
  • Kosher salt, to taste

Step 1: Prepare the Sumac Onions

Place the thinly sliced red onion in a medium bowl. Add the sumac and a small pinch of kosher salt.

Use clean hands to gently massage the seasoning into the onions for about 1 minute. This softens the onion and helps the sumac spread through every slice.

Tip: Thin onion slices work best because they blend easily with the tomato and steak.

Step 2: Make the Fresh Salad

Add the chopped Roma tomatoes and parsley to the seasoned onions.

Add ½ teaspoon of Aleppo pepper if you want a mild, fruity heat. Squeeze the juice from one lemon over the mixture and season with additional salt.

Toss everything gently until the vegetables are evenly coated.

Cut the second lemon into wedges and set them aside for serving.

Tip: Prepare the salad before cooking the steak so the lemon and sumac have time to flavor the vegetables.

Step 3: Cut the Steak

Trim away any large pieces of excess fat from the flank steak.

Cut the beef into very small pieces, roughly the size of a sugar cube. Small pieces are important because traditional tantuni uses finely chopped beef that cooks quickly.

Tip: Place the steak in the freezer for about 15–20 minutes before cutting if you want firmer slices and easier chopping.

Step 4: Sear the Beef

Heat the olive oil in a medium skillet over medium-high heat.

When the oil starts to shimmer but is not smoking, add the chopped steak.

Cook the beef for about 8 minutes, stirring often. The pieces should become browned and release some of their juices before the liquid cooks back into the meat.

Important: Avoid overcrowding the pan because too much meat at once can cause steaming instead of browning.

Step 5: Season and Finish the Steak

Add the paprika, remaining Aleppo pepper if using, and about 1 teaspoon of kosher salt.

Stir well so the spices coat the beef evenly.

Pour in the hot water and reduce the heat to medium.

Let the steak mixture simmer for about 5 minutes. The liquid should reduce slightly while keeping the beef moist and flavorful.

Tip: The seasoned liquid is an important part of the wrap because it adds moisture and flavor to the bread.

Step 6: Warm and Soak the Lavash

Keep the beef in the skillet and reduce the heat to low.

Place one sheet of lavash over the meat.

Gently press the bread down with a spatula or your hands so it absorbs some of the hot, seasoned liquid. Let it warm for at least 30 seconds.

The bread should become soft, flexible, and lightly golden.

Note: If your lavash is too delicate to form the traditional U-shape, do not force it. A regular folded wrap works just as well.

Step 7: Fill the Wrap

Transfer the warm lavash to a serving plate with the moistened side facing upward.

Spoon a small amount of the seasoned liquid over the steak.

Place a thin line of the cooked beef near one edge of the lavash.

Add a line of the tomato, parsley, and onion salad beside the steak. Do not overfill the bread because too much filling makes rolling difficult.

Step 8: Roll the Tantuni

Pull the edge of the lavash toward you and roll it tightly around the beef and salad.

The finished wrap should be long and narrow, similar to a thin burrito.

If your lavash is flexible enough, gently curve the wrap into a U-shape.

Serve immediately with fresh lemon wedges.

Squeeze lemon juice into the open end as you eat so the citrus mixes with the warm steak and seasoned juices.

Step 9: Repeat and Serve

Repeat the filling and rolling process with the remaining lavash and steak.

Serve the tantuni while it is hot and fresh.

For a complete meal, pair the wraps with extra tomato salad, lemon wedges, pickled vegetables, or a simple side salad.

Tips for Making the Best Tantuni

  • Use flank steak: It cooks quickly and has a rich beef flavor.
  • Cut the beef small: Small pieces give the wrap its traditional texture.
  • Keep the pan hot: Proper heat helps the steak brown instead of becoming watery.
  • Do not skip the lemon: Fresh lemon cuts through the richness of the beef.
  • Use sumac: It gives the onion topping a bright, tangy flavor.
  • Do not overfill: A thin filling makes the wrap easier to roll.
  • Warm the bread: Soft lavash holds the filling better and absorbs the seasoned juices.
  • Serve immediately: Tantuni tastes best while the beef and bread are still warm.

What Can You Use Instead of Lavash?

Large flour tortillas are the easiest substitute for lavash in the United States. Choose burrito-size tortillas that are soft and flexible enough to fold without cracking.

The shape may not look exactly like traditional Turkish tantuni, but the combination of seasoned beef, fresh salad, and lemon will still deliver the same style of meal.

How to Store Leftover Tantuni

For the best texture, store the cooked steak and fresh salad separately in airtight containers in the refrigerator.

Reheat the beef in a skillet over medium heat until hot, then warm the lavash separately. Assemble the wrap just before serving.

Avoid storing a fully assembled wrap for too long because the bread can become soggy from the meat juices and tomato salad.

Frequently Asked Questions

What is Tantuni?

Tantuni is a popular Turkish street-food dish made with finely chopped beef, seasoned oil, spices, fresh vegetables, and lemon wrapped in lavash bread.

What cut of beef is best for Tantuni?

Flank steak works very well because it has good beef flavor and can be cut into small pieces for quick cooking.

Can I make Tantuni with flour tortillas?

Yes. Large burrito-size flour tortillas are a convenient substitute for lavash and are widely available in U.S. grocery stores.

Is Tantuni spicy?

Tantuni is usually mildly spiced, but Aleppo pepper can be increased or reduced depending on your preferred level of heat.

What does sumac add to Tantuni?

Sumac gives the onion topping a bright, tangy flavor that balances the richness of the seasoned beef.

Can I prepare Tantuni ahead of time?

You can prepare the steak and vegetable topping ahead, but assemble the wraps just before serving for the best texture.

What should I serve with Tantuni?

Serve Tantuni with lemon wedges, extra fresh salad, pickled vegetables, or a simple green salad for a balanced meal.

How do I keep the wrap from breaking?

Use soft lavash or flour tortillas, avoid overfilling them, and gently warm the bread before rolling.

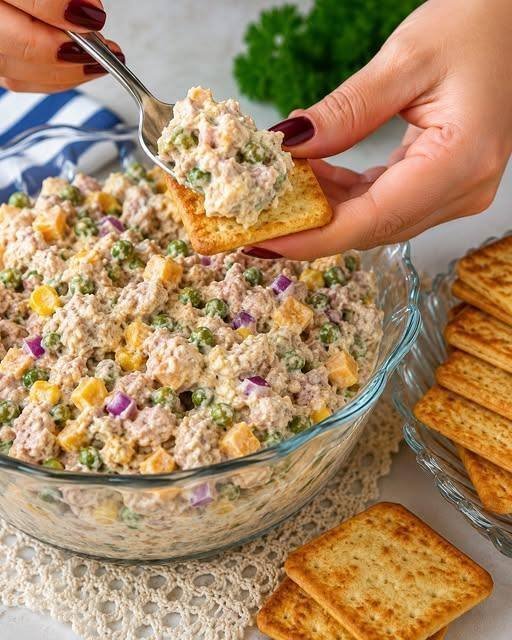
Creamy Tuna & Veggie Salad Dip 

Creamy Tuna & Veggie Salad Dip 

Creamy Tuna & Veggie Salad Dip 

Description

This Creamy Tuna & Veggie Salad Dip is a chilled, protein-packed spread combining flaky tuna with sweet corn, peas, red onion, and creamy mayonnaise dressing. It has a soft yet chunky texture that pairs perfectly with crackers, toast, or sandwiches. It’s ideal for parties, quick lunches, or make-ahead snacks.

Ingredients

  • 2 cans tuna in water or oil, drained
  • ½ cup mayonnaise
  • 2 tablespoons Greek yogurt (optional for lighter texture)
  • ½ cup sweet corn (boiled or canned)
  • ½ cup green peas (boiled or thawed frozen)
  • ¼ cup red onion, finely chopped
  • ¼ cup cheddar cheese cubes (optional)
  • 1–2 tablespoons pickle relish or chopped pickles (optional)
  • 1 teaspoon mustard
  • Salt and black pepper to taste
  • 1 teaspoon lemon juice
  • Optional garnish: parsley or paprika

Instructions

Step 1: Prepare Ingredients

Drain tuna well and fluff it with a fork.

Boil or thaw peas if needed.

Step 2: Mix Dressing

In a bowl, combine mayonnaise, Greek yogurt, mustard, lemon juice, salt, and pepper.

Mix until smooth and creamy.

Step 3: Combine Salad

Add tuna, corn, peas, onion, and optional cheddar cheese and pickles.

Fold everything gently until well coated.

Step 4: Chill

Refrigerate for at least 30 minutes for best flavor.

Step 5: Serve

Serve chilled with crackers, toast, or bread.

Notes

  • Draining tuna well prevents watery texture.
  • Fresh vegetables add crunch and color.
  • Greek yogurt makes it lighter and tangier.
  • Chilling improves flavor and texture.

Tips

  • Add boiled egg for extra protein.
  • Use sweet corn for better flavor balance.
  • Don’t overmix to keep texture chunky.
  • Add paprika or chili flakes for spice.
  • Serve in a glass bowl for a party presentation.

Servings

  • Serves: 4–6 people

Nutritional Information (Approximate Per Serving)

  • Calories: 280
  • Protein: 22g
  • Carbohydrates: 10g
  • Fat: 18g
  • Fiber: 2g
  • Sugar: 3g
  • Sodium: 520mg

Benefits

High in Protein

Tuna supports muscle health and keeps you full longer.

Quick No-Cook Recipe

Perfect for fast meals and snacks.

Budget Friendly

Uses simple pantry ingredients.

Great for Meal Prep

Stores well for several days.

Versatile Dish

Works as dip, sandwich filling, or salad.

Storage

Refrigerator

Store in airtight container for up to 3 days.

Freezer

Not recommended due to mayonnaise texture changes.

Q&A

Can I use chicken instead of tuna?

Yes, shredded chicken works perfectly.

Can I make it healthier?

Use light mayo or replace half with Greek yogurt.

What can I serve it with?

Crackers, toast, lettuce wraps, or sandwiches.

Can I make it spicy?

Yes, add chili flakes, hot sauce, or jalapeños.

Why is my salad watery?

Vegetables or tuna may not be drained properly.

Can I prepare it ahead?

Yes, it tastes even better after chilling.

Is this kid-friendly?

Yes, just reduce onion or spice if needed.

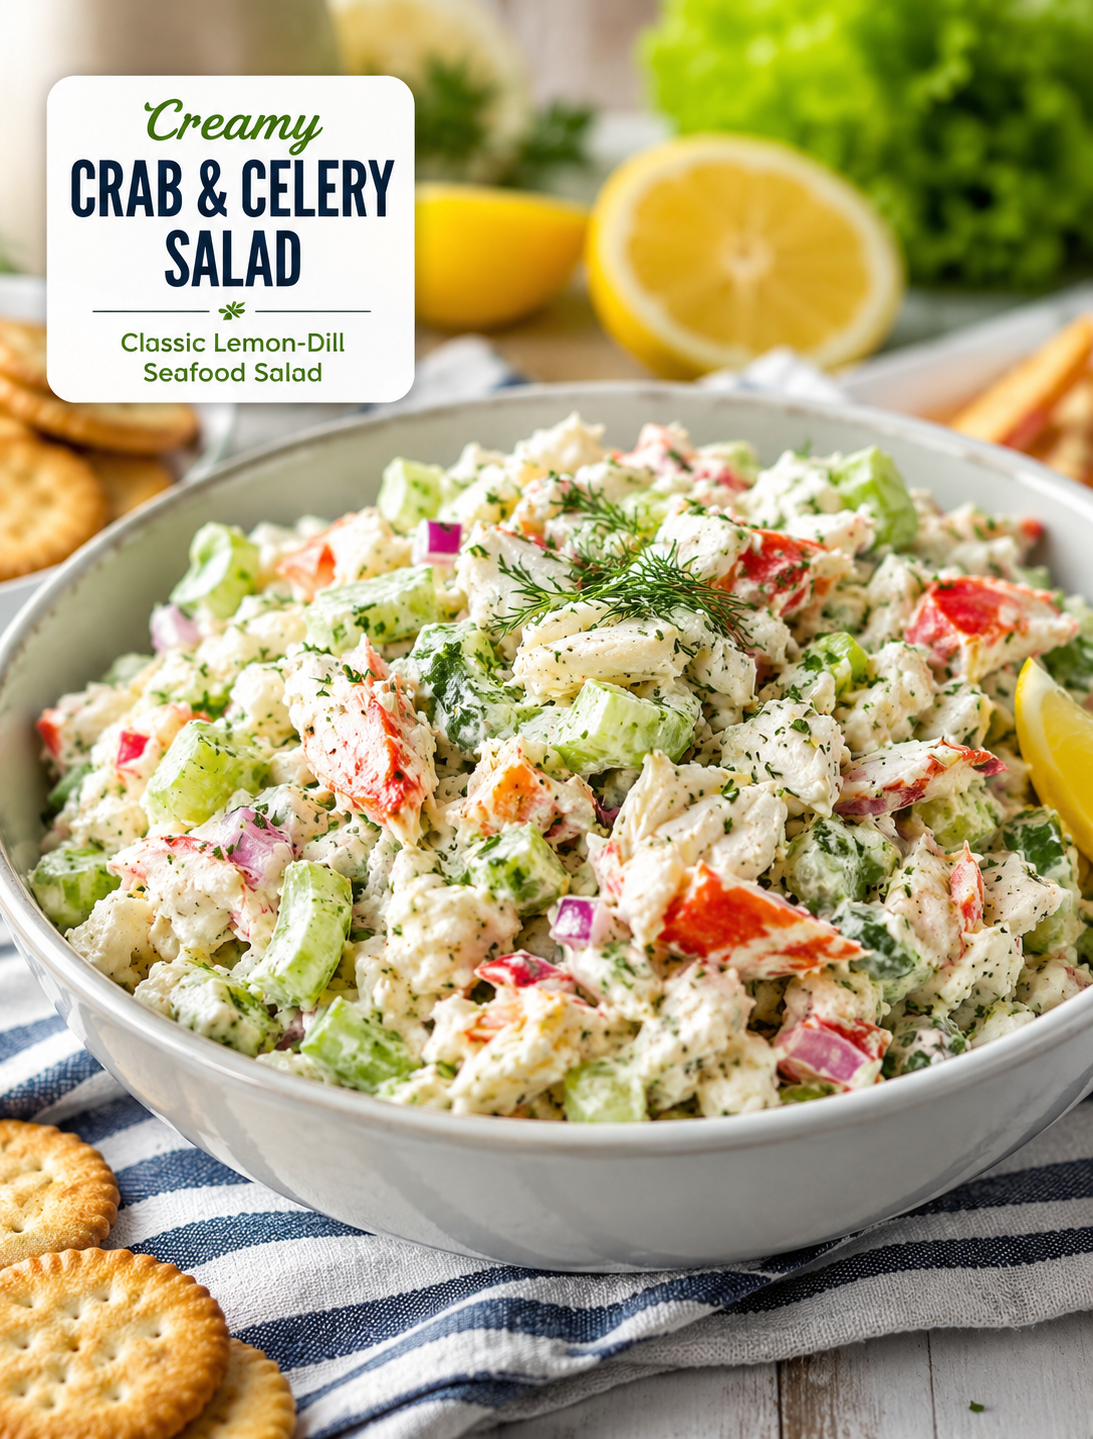
Creamy Crab & Celery Salad (Classic Lemon-Dill Seafood Salad)

Creamy Crab & Celery Salad (Classic Lemon-Dill Seafood Salad)

Creamy Crab & Celery Salad

(Classic Lemon-Dill Seafood Salad)

Creamy Crab & Celery Salad is a fresh, chilled seafood dish made with tender crab meat, crisp celery, red or green onion, and a creamy lemon-dill dressing. It combines a rich, creamy texture with bright citrus flavor and fresh herbs.

This easy seafood salad takes only a few minutes to prepare and requires no cooking when using ready-to-eat crab meat. It is a great choice for a quick lunch, summer meal, light dinner, picnic, or casual gathering.

The combination of crab and celery gives every bite a pleasant contrast. The crab adds mild seafood flavor and protein, while celery provides a crisp crunch. Lemon juice adds freshness, and dill gives the salad a classic seafood flavor.

You can serve this salad in many ways. Spoon it over lettuce, tuck it into a croissant, serve it with crackers, or enjoy it with toasted bread. For a lower-carb option, use cucumber slices, lettuce cups, or avocado halves.

Description

This classic crab salad is made with simple ingredients that are easy to find at most U.S. grocery stores. Real lump crab meat gives the best seafood flavor, but imitation crab is a convenient and budget-friendly option.

The dressing uses mayonnaise, sour cream or Greek yogurt, lemon juice, Dijon mustard, garlic powder, and paprika. These ingredients create a smooth dressing that coats the crab and vegetables without overpowering their natural flavors.

Fresh dill is especially useful in this recipe because it pairs well with crab, lemon, and creamy sauces. A small amount of fresh parsley can also add color and a mild herbal flavor.

Chilling the finished salad for at least 30 minutes allows the flavors to blend. The result is a cool, creamy, crunchy seafood salad that works well for both everyday meals and entertaining.

Ingredients For the Salad

  • 1 lb crab meat, real or imitation, chopped if needed
  • 2 celery stalks, finely sliced
  • ¼ cup red onion or green onions, finely chopped
  • 2 tablespoons fresh dill, chopped
  • 1 tablespoon fresh parsley, chopped, optional

Use well-drained crab meat to prevent excess liquid from thinning the dressing. If using canned crab, drain it thoroughly and gently pat it dry with paper towels.

Choose firm celery stalks for the best crunch. Slice them thinly so they mix evenly with the crab.

Red onion provides a stronger flavor, while green onions offer a milder taste. Choose the option that best fits your preference.

For the Dressing

  • ½ cup mayonnaise
  • 2 tablespoons sour cream or plain Greek yogurt
  • 1 tablespoon fresh lemon juice
  • 1 teaspoon Dijon mustard
  • ½ teaspoon garlic powder
  • ¼ teaspoon paprika
  • Salt and black pepper to taste

The dressing should be creamy but not overly thick. Greek yogurt can replace sour cream for a slightly tangier and lighter texture.

Fresh lemon juice gives the dressing a brighter flavor than bottled lemon juice. Dijon mustard adds mild sharpness without making the dressing taste strongly of mustard.

Season gradually with salt and pepper because crab meat can already contain some sodium.

Optional Add-ins

You can customize this seafood salad with a few simple additions.

  • Chopped cucumber adds extra crunch and freshness.
  • Avocado chunks create a creamy texture and make the salad more filling.
  • Chopped hard-boiled eggs add extra protein and richness.
  • Lettuce leaves turn the salad into easy lettuce wraps.
  • A little lemon zest adds a stronger citrus aroma.

Avoid adding too many ingredients at once because they can hide the delicate crab flavor.

Instructions

Step 1: Prepare Ingredients

Thinly slice the celery and finely chop the onion, dill, and parsley.

Drain the crab meat well and gently separate large pieces with your fingers or a fork. Avoid shredding it too much because larger pieces give the salad a better texture.

If using cucumber or other watery vegetables, remove excess moisture before adding them.

Step 2: Make Dressing

Add mayonnaise, sour cream or Greek yogurt, lemon juice, Dijon mustard, garlic powder, paprika, salt, and black pepper to a small bowl.

Whisk until the mixture becomes smooth and evenly combined.

Taste the dressing before adding it to the crab. Add a little more lemon juice for brightness or a small amount of pepper for extra flavor.

Step 3: Combine Salad

Place crab meat, celery, onion, dill, and parsley in a large mixing bowl.

Pour the prepared dressing over the ingredients.

Use a spatula or large spoon to gently fold everything together. Mix just until the crab and vegetables are evenly coated.

Do not stir aggressively because delicate crab pieces can break apart.

Step 4: Chill

Cover the bowl and refrigerate the salad for at least 30 minutes.

A longer chilling time of one to several hours can give the flavors more time to blend.

Keep the salad refrigerated until you are ready to serve it.

Step 5: Serve

Serve the chilled crab and celery salad with crackers, toasted bread, croissants, cucumber slices, or lettuce leaves.

For a simple lunch, spoon the salad into a toasted croissant with crisp lettuce.

For a lighter presentation, serve it in lettuce cups or avocado halves.

A sprinkle of fresh dill and a little lemon zest can make the finished dish look more appealing.

Notes

Fresh lump crab meat provides the most natural flavor and a tender texture. Jumbo lump crab can also be used when you want larger pieces in the salad.

Imitation crab is a practical alternative when fresh crab is expensive or difficult to find. It has a sweeter flavor and a firmer texture.

Celery is important because its crisp texture balances the creamy dressing. Slice it thinly for a better mix of flavors in every bite.

Fresh dill gives the salad its classic lemon-herb character. If you only have dried dill, it can still work well.

For the best texture, avoid preparing the salad with warm ingredients. All ingredients should be cool before mixing.

Tips

Drain the crab thoroughly before adding it to the bowl. Excess liquid can make the dressing watery.

Pat celery and other fresh vegetables dry after washing them. Extra surface moisture can also loosen the dressing.

Fold the ingredients gently to keep the crab pieces intact.

Taste the salad after chilling because the flavors can change slightly as the dressing rests.

Add lemon zest if you want a stronger citrus flavor without making the dressing much thinner.

Use Greek yogurt in place of sour cream for a tangier dressing with a lighter texture.

For an elegant appetizer, serve small portions in lettuce cups, cucumber rounds, or avocado halves.

Keep the salad cold during serving, especially during outdoor meals or warm-weather gatherings.

Servings

This recipe serves 4–6 people as a light meal, side dish, or appetizer.

For sandwiches or croissant fillings, the recipe provides approximately four generous servings.

For party appetizers, smaller portions can stretch the recipe to six servings or more.

Nutritional Information (Approximate Per Serving)

  • Calories: 240
  • Protein: 18g
  • Carbohydrates: 4g
  • Fat: 17g
  • Fiber: 1g
  • Sugar: 2g
  • Sodium: 520mg

Nutritional values can vary based on the type of crab, mayonnaise, yogurt, and other ingredients used. Imitation crab may have a different carbohydrate and sodium profile than real crab meat.

Benefits

High in Protein

Crab meat provides a good source of protein that can help make a light meal more satisfying. The exact protein amount depends on the type and brand of crab used.

Low Carb Friendly

With only a small amount of carbohydrates in the basic recipe, this creamy seafood salad can fit into many lower-carb meal plans. Check ingredient labels when using imitation crab because some varieties contain added carbohydrates.

Quick No-Cook Recipe

This recipe is convenient because the salad comes together without cooking when ready-to-eat crab is used. It is useful for busy weekdays, quick lunches, and warm days when you prefer a cold meal.

Refreshing & Light

Crunchy celery, fresh lemon juice, and dill keep the salad tasting bright. The chilled texture makes it especially appealing during spring and summer.

Rich in Flavor

Mayonnaise creates a creamy base, while lemon and Dijon mustard add brightness and mild tang. Dill brings a fresh herb flavor that complements the crab.

Storage

Refrigerator

Place leftover crab salad in an airtight container and refrigerate promptly.

For the best quality, enjoy it within 2 days. Keep the salad properly chilled and do not leave it at room temperature for extended periods.

Freezing

Freezing is not recommended for this mayonnaise-based salad.

The dressing can separate after thawing, while celery can lose its crisp texture. Fresh preparation provides a much better result.

Q&A

Can I use imitation crab?

Yes. Imitation crab is an affordable option and works well in this creamy seafood salad.

What can I serve with this salad?

Serve it with crackers, toasted bread, croissants, lettuce wraps, cucumber slices, or avocado halves.

Can I make it ahead of time?

Yes. Prepare it several hours ahead and refrigerate it until serving so the flavors have time to blend.

Is this recipe keto-friendly?

The basic salad is low in carbohydrates, but check imitation crab labels because some products contain added sugars or starches.

Can I add shrimp?

Yes. Chopped cooked shrimp pairs well with crab and adds another layer of seafood flavor and protein.

Why is my salad watery?

Watery salad usually comes from poorly drained crab or vegetables. Drain the crab well and pat fresh vegetables dry before mixing.

Can I use dried dill instead of fresh?

Yes. Use about 1 teaspoon of dried dill instead of 2 tablespoons of fresh dill, then adjust to taste.

How can I make the salad less creamy?

Reduce the mayonnaise slightly and add more Greek yogurt or finely chopped vegetables to create a lighter texture.