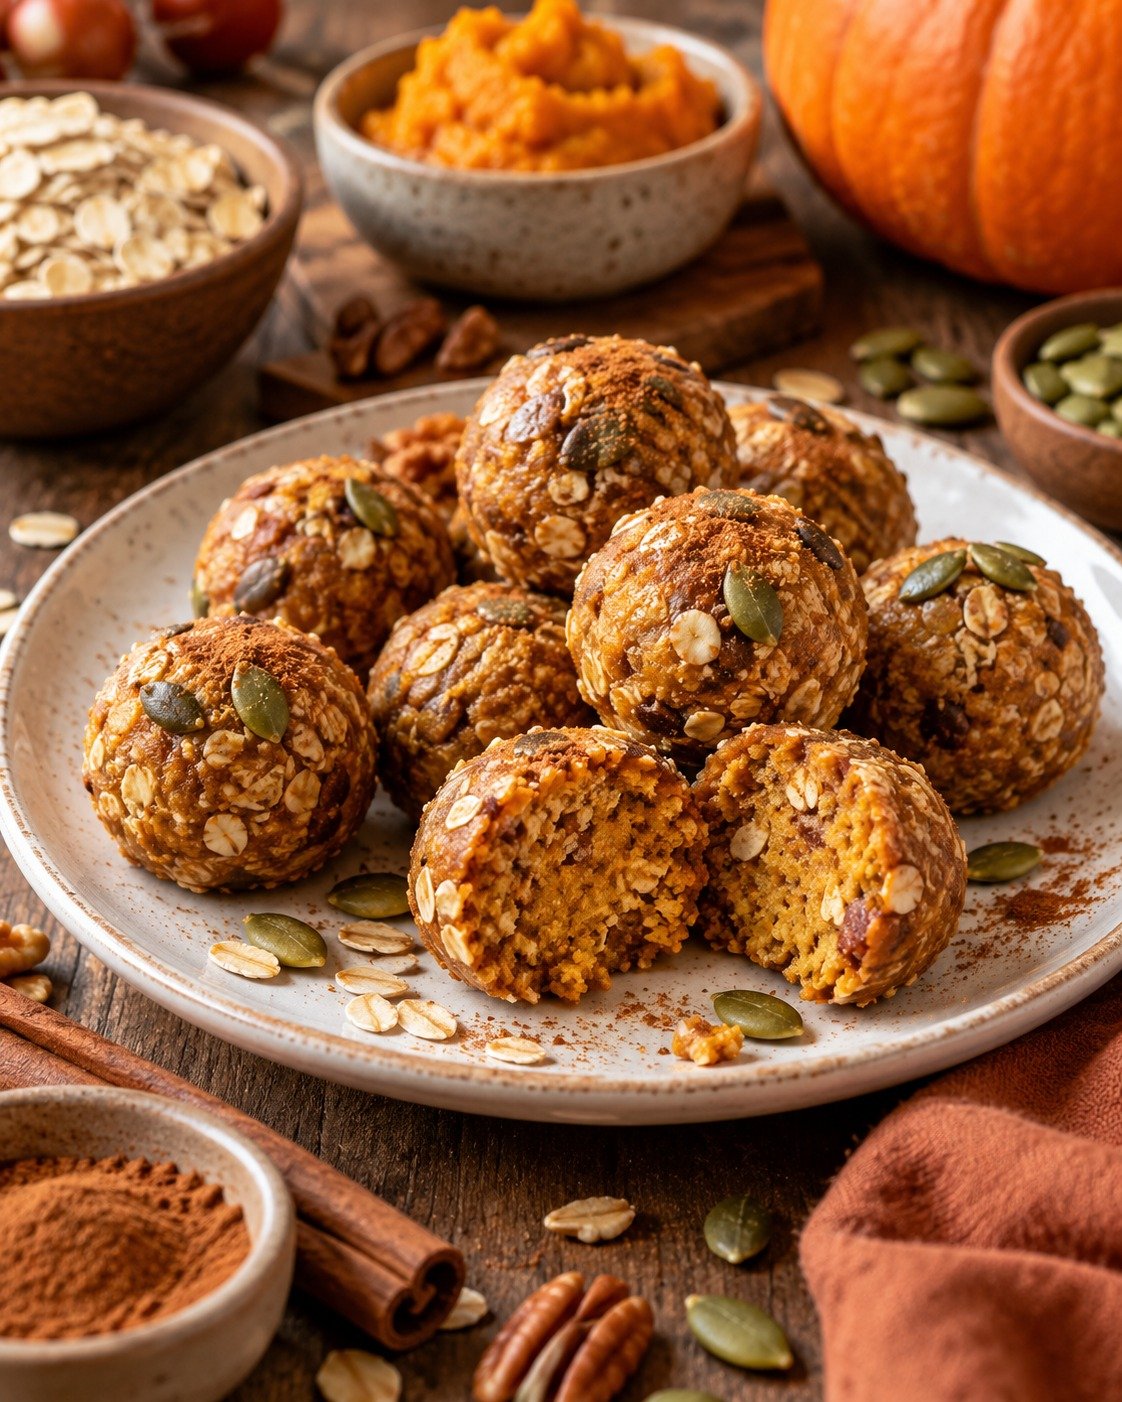
Pumpkin Protein Balls

Pumpkin Protein Balls with pumpkin puree, oats, nut butter, vanilla protein powder, flaxseed, cinnamon, and chocolate chips

Pumpkin Protein Balls

Pumpkin Protein Balls are soft, chewy, no-bake bites made with pumpkin puree, oats, nut butter, vanilla protein powder, warm spices, and a touch of maple syrup. They are easy to prepare, naturally flavored with pumpkin and cinnamon, and perfect for breakfast prep, afternoon snacks, lunchboxes, or a quick post-workout bite.

These Pumpkin Protein Balls come together in one bowl and require no oven. The texture is tender but firm enough to hold its shape, while the pumpkin pie spice gives them a cozy seasonal flavor. Keep a batch in the refrigerator for busy days when you want something homemade, portable, and satisfying.

Prep Time: 15 minutes
Chill Time: 30 minutes
Total Time: 45 minutes
Servings: 16 balls

Ingredients

For the Protein Balls

  • 1 cup pumpkin puree
  • 1 1/2 cups rolled oats
  • 3/4 cup vanilla protein powder
  • 1/2 cup almond butter or peanut butter
  • 1/3 cup maple syrup or honey
  • 1/3 cup ground flaxseed
  • 1 teaspoon vanilla extract
  • 1 1/2 teaspoons pumpkin pie spice
  • 1/2 teaspoon ground cinnamon
  • 1/4 teaspoon salt
  • 1/3 cup mini dark chocolate chips, optional
  • 2 tablespoons chia seeds, optional

For Rolling, Optional

  • Finely chopped pecans
  • Unsweetened shredded coconut
  • Extra ground cinnamon

Why You’ll Love This Recipe

Pumpkin Protein Balls are simple, practical, and easy to customize. They give you the warm flavor of pumpkin spice without requiring baking, and the combination of oats, nut butter, flaxseed, and protein powder makes them more filling than a typical sweet snack.

Another reason to love Pumpkin Protein Balls is how well they work for meal prep. You can make them ahead, keep them chilled, and grab one or two whenever you need something quick. They are also easy to portion, easy to pack, and easy to adjust with different nut butters, seeds, or mix-ins.

How to Make Pumpkin Protein Balls

Step 1: Prepare the Mixing Bowl

Choose a large bowl with enough room to mix the ingredients comfortably. Because the mixture becomes thick, using a sturdy spoon or silicone spatula will make the process easier.

Step 2: Mix the Wet Ingredients

Add pumpkin puree, almond butter, maple syrup, and vanilla extract to the bowl.

Stir until smooth and evenly combined.

This creamy base gives Pumpkin Protein Balls their soft texture and helps bind the dry ingredients together.

Step 3: Add the Dry Ingredients

Add rolled oats, vanilla protein powder, ground flaxseed, pumpkin pie spice, cinnamon, and salt.

Stir slowly at first so the protein powder does not puff out of the bowl.

Continue mixing until a thick, sticky dough forms.

Step 4: Adjust the Texture

The exact texture can vary depending on the protein powder and pumpkin puree you use.

If the mixture feels too wet to shape, add a few tablespoons of oats or a little extra protein powder.

If it feels too dry, add a spoonful of pumpkin puree or nut butter.

Pumpkin Protein Balls should feel soft but should hold together when pressed.

Step 5: Add the Mix-Ins

Fold in mini chocolate chips and chia seeds if using.

You can also add chopped pecans, walnuts, dried cranberries, or shredded coconut.

Mix only until the add-ins are evenly distributed.

Step 6: Chill the Mixture

Cover the bowl and refrigerate for about 30 minutes.

Chilling helps the oats absorb moisture and makes Pumpkin Protein Balls easier to roll without sticking heavily to your hands.

Step 7: Portion the Dough

Use a small cookie scoop or tablespoon to portion the mixture.

Aim for roughly 1 1/2 tablespoons per ball.

Keeping the portions similar in size helps with serving and makes the nutrition estimate more consistent.

Step 8: Roll into Balls

Roll each portion gently between your palms until smooth.

If the mixture sticks, lightly dampen your hands with water.

For a decorative finish, roll some Pumpkin Protein Balls in chopped pecans, coconut, or a light dusting of cinnamon.

Step 9: Chill Again

Place the finished balls on a parchment-lined tray or plate.

Refrigerate for another 15 to 20 minutes so they become firmer.

This second chill helps them hold their shape during storage.

Step 10: Serve

Enjoy Pumpkin Protein Balls cold or let them sit at room temperature for 5 minutes before eating if you prefer a softer texture.

They pair well with coffee, tea, milk, yogurt, or fresh fruit.

Serving Suggestions

Pumpkin Protein Balls are convenient enough for many different occasions.

Serve one or two with Greek yogurt and berries for a quick breakfast. Add them to a lunchbox with fruit and cheese, or keep a few ready in the refrigerator for an afternoon snack.

For a post-workout snack, pair Pumpkin Protein Balls with milk, a smoothie, or extra yogurt for a more substantial protein boost.

They also work nicely on a fall snack board with apple slices, grapes, nuts, dark chocolate, and cinnamon yogurt dip.

For a fresh and colorful side, try our Mediterranean Chickpea Cucumber Feta Salad with crisp vegetables, creamy feta, chickpeas, herbs, and lemon dressing.

Recipe Tips

Use pure pumpkin puree, not pumpkin pie filling, so you control the sweetness and spices.

Choose a vanilla protein powder you already enjoy because its flavor will be noticeable.

Use thick nut butter for the easiest shaping.

If the mixture is sticky, chill it longer before rolling.

For firmer bites, add a little extra oats or ground flaxseed.

For softer bites, increase the pumpkin puree slightly.

Do not add too much liquid sweetener at once because it can make the dough difficult to shape.

Mini chocolate chips distribute more evenly than full-size chips.

Easy Variations

Pumpkin Protein Balls can be changed easily depending on your preferences.

For a chocolate version, replace some of the vanilla protein powder with chocolate protein powder and add a teaspoon of cocoa powder.

For extra crunch, add chopped pecans or walnuts.

A coconut version works well with shredded coconut mixed into the dough and rolled around the outside.

For more spice, add extra cinnamon, ginger, nutmeg, or cloves.

You can also make them with peanut butter instead of almond butter for a stronger nutty flavor.

For a fruitier version, mix in finely chopped dried cranberries or raisins.

If you enjoy easy high-protein meal prep recipes, you may also like our High-Protein Sausage, Cheddar & Cottage Cheese Breakfast Biscuits.

Make-Ahead Instructions

These protein bites are ideal for preparing ahead.

Mix, chill, roll, and store them in an airtight container so they are ready whenever you need a quick snack.

You can prepare them several days before serving, which makes them useful for weekly meal prep.

If you plan to roll them in coconut or nuts, you can do that at the same time you shape them or just before serving.

Storage and Freezing

Store the finished bites in an airtight container in the refrigerator for up to 5 days.

Place parchment paper between layers if stacking them.

For longer storage, freeze them for up to 2 months. Arrange the balls on a tray until firm, then transfer them to a freezer-safe container or bag.

Thaw overnight in the refrigerator or let a frozen ball sit at room temperature for about 15 minutes before eating.

Nutrition Information

Approximate nutrition per ball:

Calories: 145
Protein: 7 g
Carbohydrates: 16 g
Fat: 7 g
Saturated Fat: 1.5 g
Fiber: 3 g
Sugar: 6 g
Sodium: 95 mg

Nutrition values are estimates and will vary depending on the protein powder, nut butter, sweetener, and optional mix-ins used.

Frequently Asked Questions

Can I use quick oats?

Yes. Quick oats work, although the finished texture may be softer and more uniform than when using rolled oats.

Can I use canned pumpkin?

Yes. Plain canned pumpkin puree works perfectly. Avoid pumpkin pie filling because it already contains sugar and spices.

Can I make these without protein powder?

Yes, but you will need to replace it with additional oats, oat flour, or ground nuts. The protein content will also be lower.

Why are my balls too sticky?

The mixture may contain too much pumpkin or sweetener. Add extra oats or protein powder and chill longer before rolling.

Can I use sunflower seed butter?

Yes. Sunflower seed butter is a good nut-free option and works well in Pumpkin Protein Balls.

Can I freeze them?

Yes. Freeze them in a sealed container for up to 2 months and thaw before serving.

Are they good for meal prep?

Yes. Pumpkin Protein Balls are especially convenient for meal prep because they store well and require no reheating.

Final Thoughts

Pumpkin Protein Balls are an easy no-bake snack that combines pumpkin, oats, nut butter, protein powder, flaxseed, and warm fall spices in one portable bite.

Because Pumpkin Protein Balls can be prepared ahead, customized with different mix-ins, refrigerated, or frozen, they are practical for breakfast prep, busy afternoons, and grab-and-go snacks.

Keep this Pumpkin Protein Balls recipe handy whenever you want a soft, flavorful snack with cozy pumpkin spice flavor and simple everyday ingredients.

With a creamy pumpkin base, warm cinnamon, and a satisfying chewy texture, Pumpkin Protein Balls are a simple seasonal recipe worth making again and again.
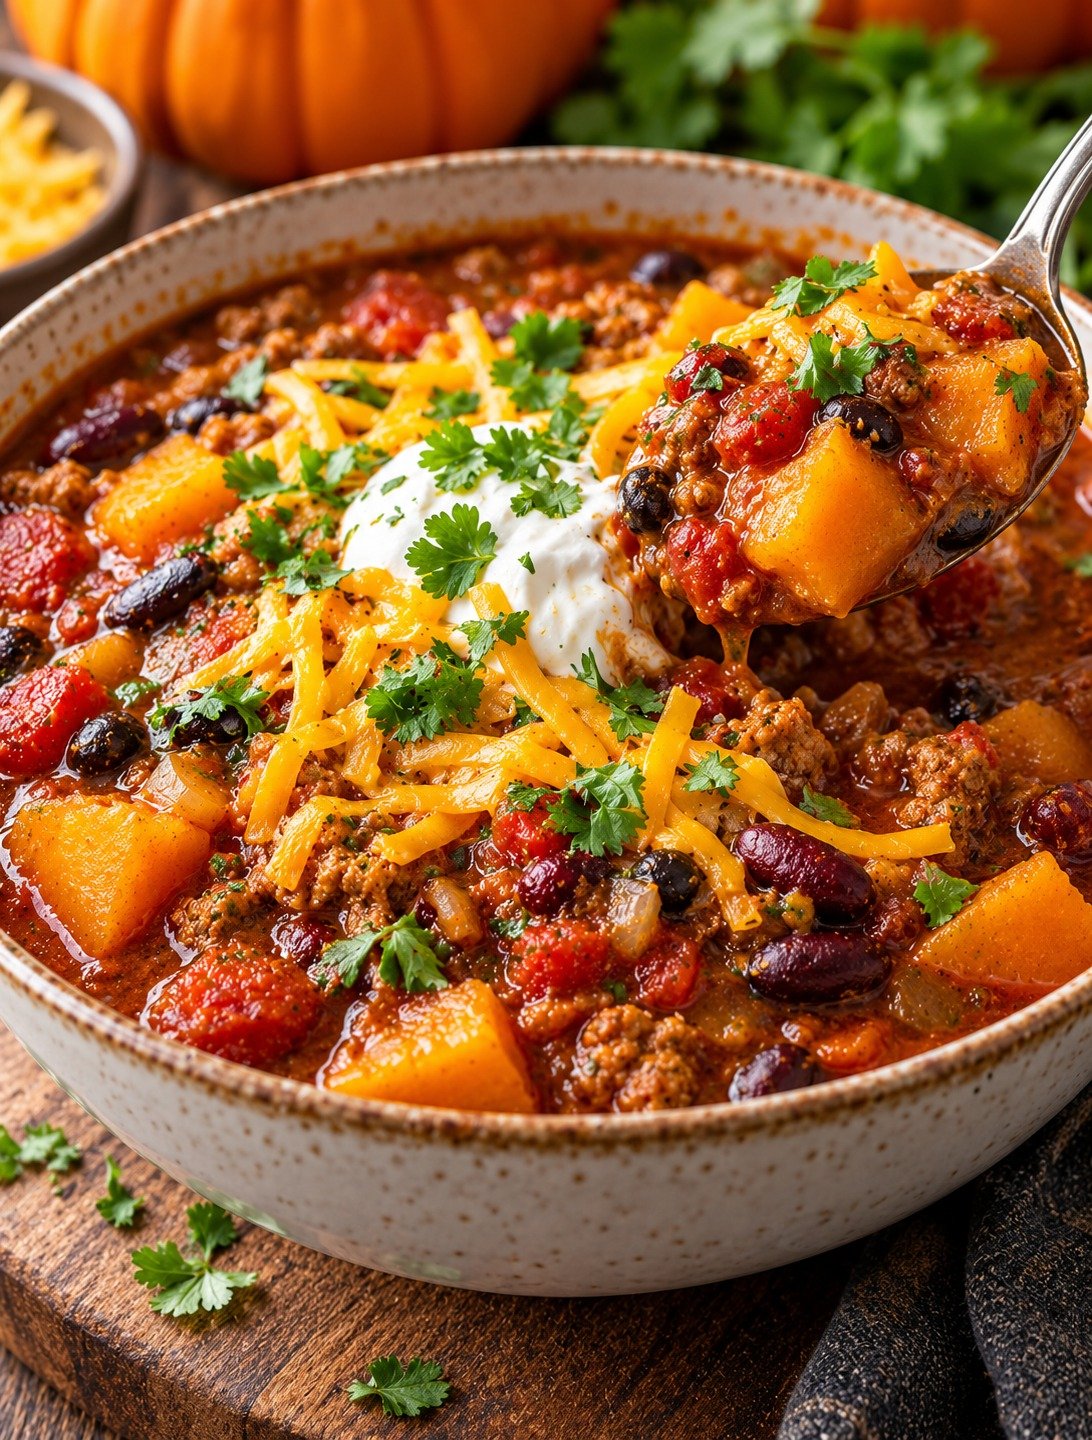
Pumpkin Pie

Pumpkin Pie with creamy spiced pumpkin filling, flaky golden crust, whipped cream, and a sprinkle of cinnamon

Pumpkin Pie

Pumpkin Pie is a classic fall dessert with a smooth, warmly spiced pumpkin filling baked inside a flaky pie crust. It is rich without being heavy, gently sweet, and full of cozy cinnamon, ginger, nutmeg, and clove flavor. Whether you serve it for Thanksgiving, a weekend dinner, or a seasonal gathering, this recipe gives you a dependable homemade dessert with a creamy center and crisp crust.

It uses simple pantry ingredients, including pumpkin puree, eggs, evaporated milk, brown sugar, and traditional spices. Make it ahead, chill overnight, and serve with whipped cream.

Prep Time: 20 minutes
Bake Time: 50–60 minutes
Cooling Time: 2 hours
Total Time: About 3 hours 20 minutes
Servings: 8 slices

Ingredients

For the Pie Crust

  • 1 unbaked 9-inch pie crust, homemade or store-bought
  • 1 egg white, lightly beaten, optional for brushing

Ingredients For the Pumpkin Filling

  • 1 can (15 ounces) pumpkin puree
  • 3 large eggs
  • 3/4 cup packed brown sugar
  • 1/4 cup granulated sugar
  • 1 can (12 ounces) evaporated milk
  • 1 teaspoon pure vanilla extract
  • 1 1/2 teaspoons ground cinnamon
  • 1 teaspoon ground ginger
  • 1/2 teaspoon ground nutmeg
  • 1/4 teaspoon ground cloves
  • 1/2 teaspoon salt
  • 1 tablespoon all-purpose flour or cornstarch

For Serving

  • Whipped cream
  • Ground cinnamon
  • Chopped pecans, optional
  • Caramel sauce, optional

Why You’ll Love This Recipe

Pumpkin Pie has the perfect balance of creamy texture, warm spices, and buttery pastry. The filling is smooth and custard-like, while the crust adds a crisp contrast that makes every slice satisfying.

Another reason to love Pumpkin Pie is how practical it is for entertaining. Bake it a day ahead, refrigerate, and add whipped cream before serving. The filling also comes together in one bowl, so cleanup stays simple.

How to Make Pumpkin Pie

Step 1: Preheat the Oven

Preheat the oven to 425°F or 220°C.

Place a rack in the lower third of the oven. This helps the bottom crust bake more evenly and reduces the chance of a soggy base.

Step 2: Prepare the Pie Crust

Fit the unbaked pie crust into a 9-inch pie dish.

Trim any excess dough and crimp the edges.

Refrigerate the prepared crust while you make the filling.

Step 3: Mix the Pumpkin and Sugars

Add pumpkin puree, brown sugar, and granulated sugar to a large mixing bowl.

Whisk until smooth.

Using pure pumpkin puree rather than pre-sweetened filling gives you full control over the sweetness and spice level.

Step 4: Add the Eggs

Crack the eggs into the pumpkin mixture one at a time, whisking after each addition.

Mix until the filling looks smooth and evenly blended.

The eggs help the custard set while keeping the center soft and creamy.

Step 5: Add the Milk and Vanilla

Pour in the evaporated milk and vanilla extract.

Whisk gently until combined.

Avoid beating too much air into the mixture because excess bubbles can affect the surface of Pumpkin Pie as it bakes.

Step 6: Add the Spices

Sprinkle in cinnamon, ginger, nutmeg, cloves, salt, and flour or cornstarch.

Whisk until there are no visible dry streaks.

The small amount of flour or cornstarch helps stabilize the filling and makes each slice cleaner after cooling.

Step 7: Fill the Crust

Remove the chilled crust from the refrigerator.

Pour the pumpkin filling slowly into the pie shell.

Do not overfill. If you have a little extra filling, bake it separately in a small ramekin.

Step 8: Start at High Heat

Place the pie in the oven and bake at 425°F for 15 minutes.

The initial high heat helps the crust begin to set and gives it a better texture.

Step 9: Lower the Temperature

Without opening the oven for too long, reduce the temperature to 350°F or 175°C.

Continue baking for 35 to 45 minutes.

Pumpkin Pie is ready when the edges look set but the center still has a slight wobble when the dish is gently moved.

Step 10: Protect the Crust if Needed

Check the pie after about 30 minutes of total baking time.

If the crust edges are browning too quickly, cover them loosely with strips of foil or a pie shield.

This keeps the pastry golden without letting it become too dark.

Step 11: Cool Completely

Remove Pumpkin Pie from the oven and place it on a wire rack.

Let it cool at room temperature for at least 2 hours.

The filling continues to set as it cools, so cutting it too early can make the center look loose.

Step 12: Chill Before Serving

For the cleanest slices, refrigerate the cooled pie for at least 1 hour before cutting.

Use a sharp knife and wipe the blade between slices.

Top with whipped cream and a light dusting of cinnamon before serving.

Serving Suggestions

Pumpkin Pie is delicious served chilled, at room temperature, or slightly cool.

A generous spoonful of whipped cream is the most traditional topping. You can also add chopped toasted pecans, a drizzle of caramel, or a sprinkle of cinnamon.

For a holiday dessert table, serve Pumpkin Pie beside apple crisp, pecan pie, or vanilla ice cream. Coffee, chai, black tea, or warm apple cider also pair beautifully with the warm spices.

For a warm and hearty main dish, try our Homestyle Beef and Tender Cabbage Roll Soup with tender beef, cabbage, tomatoes, rice, and savory herbs.

Recipe Tips

Use pure pumpkin puree, not pre-sweetened pumpkin pie filling.

Do not overmix the filling after adding the eggs.

Bake the pie on a lower oven rack to help the crust cook thoroughly.

If the crust browns too quickly, shield the edges with foil.

Do not bake until the center is completely firm. Pumpkin Pie should have a small wobble in the middle when it comes out of the oven.

Cool completely before slicing.

For the best flavor, make the pie one day ahead and refrigerate overnight.

Easy Variations

Pumpkin Pie is easy to customize while keeping the classic texture.

For a maple version, replace part of the granulated sugar with pure maple syrup.

For a deeper spice flavor, add a small pinch of cardamom or allspice.

You can also make a gingerbread-inspired version by adding a little molasses and extra ginger.

For a nutty finish, sprinkle chopped pecans around the edge before serving.

A chocolate variation can include a thin layer of melted dark chocolate spread over the cooled crust before adding the filling.

If you want a quick no-bake snack or dessert, you may also like our Viral High-Protein Dunkaroo Dip Made with Only 4 Ingredients.

Make-Ahead Instructions

Pumpkin Pie is one of the best desserts to prepare ahead.

Bake it the day before serving, cool it completely, cover loosely, and refrigerate overnight.

The pie dough can be made up to 2 days ahead and refrigerated. The filling can also be mixed several hours ahead, covered, and chilled; whisk gently before using.

Storage and Freezing

Store Pumpkin Pie in the refrigerator after it has cooled.

Cover the pie loosely with foil or plastic wrap and refrigerate for up to 4 days.

For longer storage, wrap individual slices or the whole cooled pie well and freeze for up to 1 month. Thaw overnight in the refrigerator before serving.

Nutrition Information

Approximate nutrition per slice:

Calories: 315
Protein: 6 g
Carbohydrates: 45 g
Fat: 13 g
Saturated Fat: 6 g
Fiber: 3 g
Sugar: 28 g
Sodium: 320 mg

Nutrition values are estimates and may vary depending on the crust, milk, sugar, and toppings used.

Frequently Asked Questions

Can I use fresh pumpkin puree?

Yes. Make sure it is thick and well drained so the filling does not become watery.

Why did my pie crack?

Cracks usually happen when the pie is overbaked or cooled too quickly. Remove it while the center still has a slight wobble.

Can I use heavy cream instead of evaporated milk?

Yes. Heavy cream creates a richer filling, although the texture may be slightly softer.

Can I make this without a crust?

Yes. Pour the filling into a greased pie dish and bake it as a crustless custard.

How do I know when it is done?

The outer 2 to 3 inches of Pumpkin Pie should look set, while the center should jiggle slightly.

Can I make it gluten-free?

Yes. Use a gluten-free pie crust and cornstarch instead of flour.

Should I refrigerate leftovers?

Yes. Because the filling contains eggs and milk, leftovers should be refrigerated.

Final Thoughts

Pumpkin Pie is a timeless dessert that combines creamy pumpkin custard, warm spices, and flaky pastry in one simple recipe.

Because Pumpkin Pie can be made ahead, refrigerated overnight, and served with minimal finishing work, it is especially useful for Thanksgiving, fall gatherings, and family dinners.

Keep this Pumpkin Pie recipe handy whenever you want a classic seasonal dessert with a smooth filling, warm spice flavor, and dependable results.

A homemade Pumpkin Pie may look impressive on the table, but the method is straightforward enough for beginner bakers and reliable enough for special occasions.

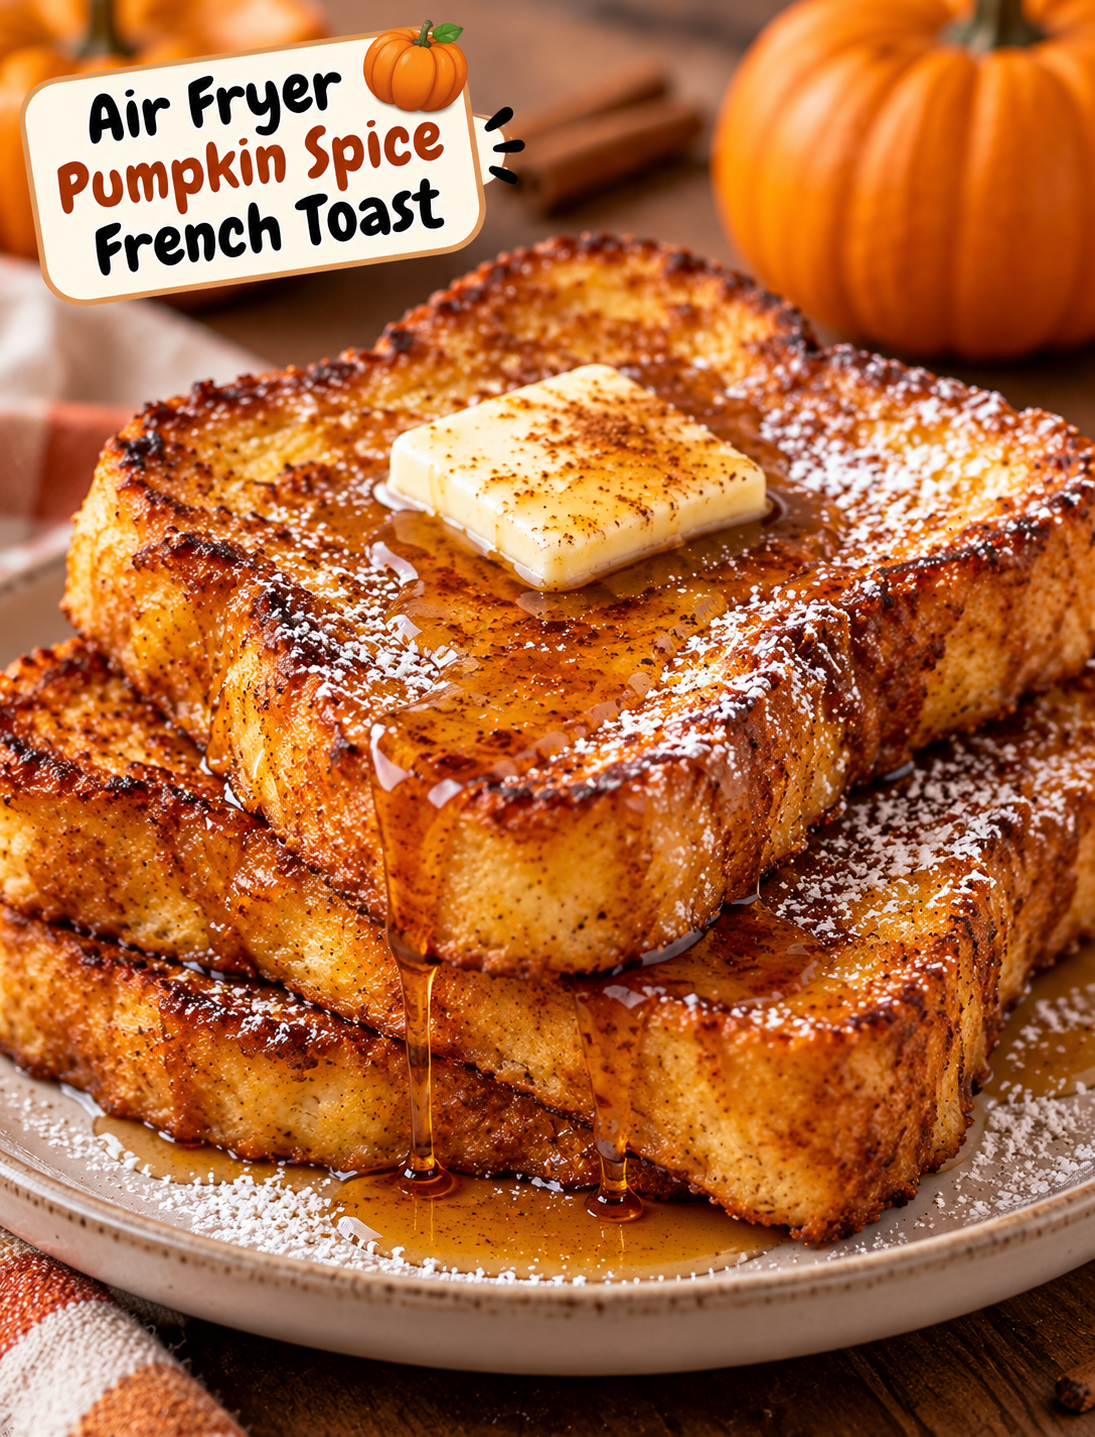
Air Fryer Pumpkin Spice French Toast

Air Fryer Pumpkin Spice French Toast with golden edges, pumpkin spice, maple syrup, and powdered sugar

Air Fryer Pumpkin Spice French Toast

Air Fryer Pumpkin Spice French Toast is a cozy fall breakfast with crisp golden edges, a soft custardy center, and warm pumpkin spice flavor in every bite. It is easy to make, uses simple ingredients, and takes less time than making a full skillet of French toast.

The pumpkin adds moisture and a gentle earthy sweetness, while cinnamon, ginger, and nutmeg give the bread that classic autumn flavor. Cooking the slices in the air fryer also helps create lightly crisp edges without needing much butter or oil.

Serve this pumpkin French toast with maple syrup, powdered sugar, whipped cream, chopped pecans, or fresh fruit for a breakfast that feels special enough for a weekend morning but is simple enough for a weekday.

Why You’ll Love This Recipe

  • Quick breakfast: The air fryer cooks the French toast in about 8–10 minutes.
  • Crispy edges: Hot circulating air helps brown the outside while keeping the middle soft.
  • Fall flavor: Pumpkin puree and pumpkin pie spice create a warm seasonal taste.
  • Simple ingredients: Most ingredients are easy to find at any U.S. grocery store.
  • Small-batch friendly: The recipe makes six slices, making it useful for a small family.
  • Easy to customize: Add pecans, chocolate chips, cinnamon sugar, or your favorite toppings.
  • Less mess: There is no need to stand over a hot skillet flipping bread one slice at a time.

Ingredients You’ll Need

For the French Toast

  • 6 thick slices of brioche, challah, or Texas toast
  • 2 large eggs
  • ½ cup pumpkin puree
  • ½ cup whole milk
  • 2 tablespoons packed brown sugar
  • 1 teaspoon vanilla extract
  • 1½ teaspoons pumpkin pie spice
  • ½ teaspoon ground cinnamon
  • ¼ teaspoon salt
  • Cooking spray

For Serving

  • Pure maple syrup
  • Powdered sugar
  • Whipped cream
  • Chopped pecans
  • Extra pumpkin pie spice

Ingredient note: Use plain pumpkin puree rather than canned pumpkin pie filling. Pumpkin pie filling already contains sugar and spices, which can change the flavor and texture of the recipe.

How to Make Air Fryer Pumpkin Spice French Toast

Step 1: Prepare the Bread

Use thick slices of slightly stale brioche, challah, or Texas toast. Fresh bread can work, but bread that has dried slightly absorbs the pumpkin custard without becoming too soggy.

If your bread is very fresh, place the slices on a baking sheet and leave them uncovered for 30–60 minutes before cooking.

Step 2: Make the Pumpkin Custard

Add the eggs, pumpkin puree, milk, brown sugar, vanilla extract, pumpkin pie spice, cinnamon, and salt to a shallow bowl.

Whisk until the mixture is smooth and evenly combined.

Make sure there are no large streaks of egg white because an even mixture helps each slice cook consistently.

Step 3: Dip the Bread

Dip one slice of bread into the pumpkin mixture.

Coat both sides evenly, but do not leave the bread soaking in the custard for too long. Thick bread usually needs only a few seconds per side.

Let excess mixture drip back into the bowl before transferring the bread to a plate.

Repeat with the remaining slices.

Step 4: Preheat the Air Fryer

Preheat the air fryer to 350°F for about 3 minutes.

Lightly spray the basket with cooking spray to reduce sticking.

If your air fryer does not require preheating, you can still cook the French toast directly, but the first batch may need an extra minute or two.

Step 5: Arrange the French Toast

Place the coated bread slices in the air fryer basket in a single layer.

Leave a little space between each slice so hot air can move around the bread.

Do not stack the slices because overlapping bread can prevent the edges from becoming crisp.

Depending on the size of your air fryer, you may need to cook the French toast in two batches.

Step 6: Air Fry

Cook at 350°F for 4–5 minutes.

Carefully flip each slice.

Continue cooking for another 4–5 minutes, or until the outside is golden brown and the center is cooked through.

The exact cooking time can vary slightly between air fryer models and the thickness of the bread.

Step 7: Check the Texture

The finished French toast should have lightly crisp edges and a soft, set center.

If the slices look pale after 8 minutes, continue cooking for another 1–2 minutes.

Avoid cooking for too long because pumpkin custard can become dry when overcooked.

Step 8: Add Your Favorite Toppings

Transfer the warm slices to plates.

Drizzle with pure maple syrup and dust lightly with powdered sugar.

For a richer fall breakfast, add whipped cream, chopped pecans, and a small sprinkle of pumpkin pie spice.

Serve immediately while the edges are warm and crisp.

Tips for the Best Pumpkin French Toast

Use thick bread. Brioche, challah, and Texas toast are excellent choices because they have enough structure to absorb the custard without falling apart.

Do not oversoak the bread. A quick dip gives you a soft center without making the slices too wet.

Leave space in the basket. Good airflow is important for creating browned, crisp edges.

Use real pumpkin puree. Canned pumpkin puree gives consistent results and adds natural pumpkin flavor.

Adjust the sweetness. If you plan to use plenty of maple syrup, you can reduce the brown sugar slightly.

Watch the second batch. A fully heated air fryer may cook the next batch faster than the first.

Use parchment carefully. If you use air-fryer parchment, make sure it is weighed down by food and is appropriate for your air fryer. Never place loose parchment inside a preheating air fryer.

Easy Topping Ideas

This recipe works well with both classic and creative toppings.

  • Classic: Maple syrup and powdered sugar
  • Crunchy: Chopped pecans or walnuts
  • Creamy: Whipped cream
  • Sweet: Cinnamon sugar and caramel drizzle
  • Fresh: Sliced bananas or apples
  • Extra pumpkin: A spoonful of pumpkin butter
  • Chocolate: Mini chocolate chips or a light chocolate drizzle

For a brunch spread, serve the French toast with scrambled eggs, turkey sausage, fresh berries, or yogurt.

Recipe Variations

Apple Pumpkin French Toast

Add a thin layer of finely diced apple to the top of each slice after dipping. Use a firm apple such as Honeycrisp or Granny Smith for a sweet-tart contrast.

Pecan Pumpkin French Toast

Mix finely chopped pecans into the pumpkin custard or sprinkle them over the bread before air frying. Press them gently into the surface so they stay in place.

Chocolate Pumpkin French Toast

Add a few mini chocolate chips to each slice after dipping. Use a modest amount so the chocolate does not overpower the pumpkin spice flavor.

Dairy-Free Version

Use an unsweetened plant-based milk such as oat or almond milk. Choose a bread that does not contain dairy if you need the entire recipe to be dairy-free.

How to Store Leftovers

Allow leftover French toast to cool completely before storing it.

Place the slices in an airtight container and refrigerate for up to 3 days.

For the best texture, reheat them in the air fryer at 350°F for 2–4 minutes. This helps bring back some of the crispness that can be lost during refrigeration.

You can also freeze cooked slices. Place parchment between the slices and store them in a freezer-safe container for up to 2 months.

Reheat frozen slices in the air fryer at 350°F for about 5–7 minutes, checking them near the end of the cooking time.

Frequently Asked Questions

Can I use regular sandwich bread for pumpkin French toast?

Yes, but thick-cut bread works better because it absorbs the pumpkin custard without becoming too soft.

Can I use pumpkin pie filling instead of pumpkin puree?

It is better to use plain pumpkin puree because pumpkin pie filling already contains sugar and spices.

What temperature should I use for air fryer French toast?

Cook the slices at 350°F for about 8–10 minutes, flipping halfway through.

Why is my French toast soggy?

Soggy French toast usually comes from oversoaking the bread or overcrowding the air fryer basket.

Can I make this recipe without pumpkin pie spice?

Yes. Use a blend of cinnamon, ginger, and nutmeg to create a similar warm spice profile.

Can I prepare the pumpkin custard ahead of time?

Yes. Cover the prepared custard and refrigerate it for up to 24 hours before using.

Can I freeze Air Fryer Pumpkin Spice French Toast?

Yes. Freeze cooled slices with parchment between them and reheat directly in the air fryer when needed.

What is the best bread for this recipe?

Brioche and challah are excellent choices because their thick, soft texture creates a rich center with golden edges.

Final Thoughts

This Air Fryer Pumpkin Spice French Toast is an easy way to bring classic fall flavors to the breakfast table without using a skillet. The pumpkin custard gives each slice a warm seasonal flavor, while the air fryer creates lightly crisp edges and a tender center.

For the best results, use thick bread, avoid oversoaking, cook the slices in a single layer, and serve them warm with maple syrup and your favorite toppings.

Whether you are making a quiet weekend breakfast or preparing a cozy fall brunch, this recipe delivers comforting pumpkin spice flavor with very little effort.

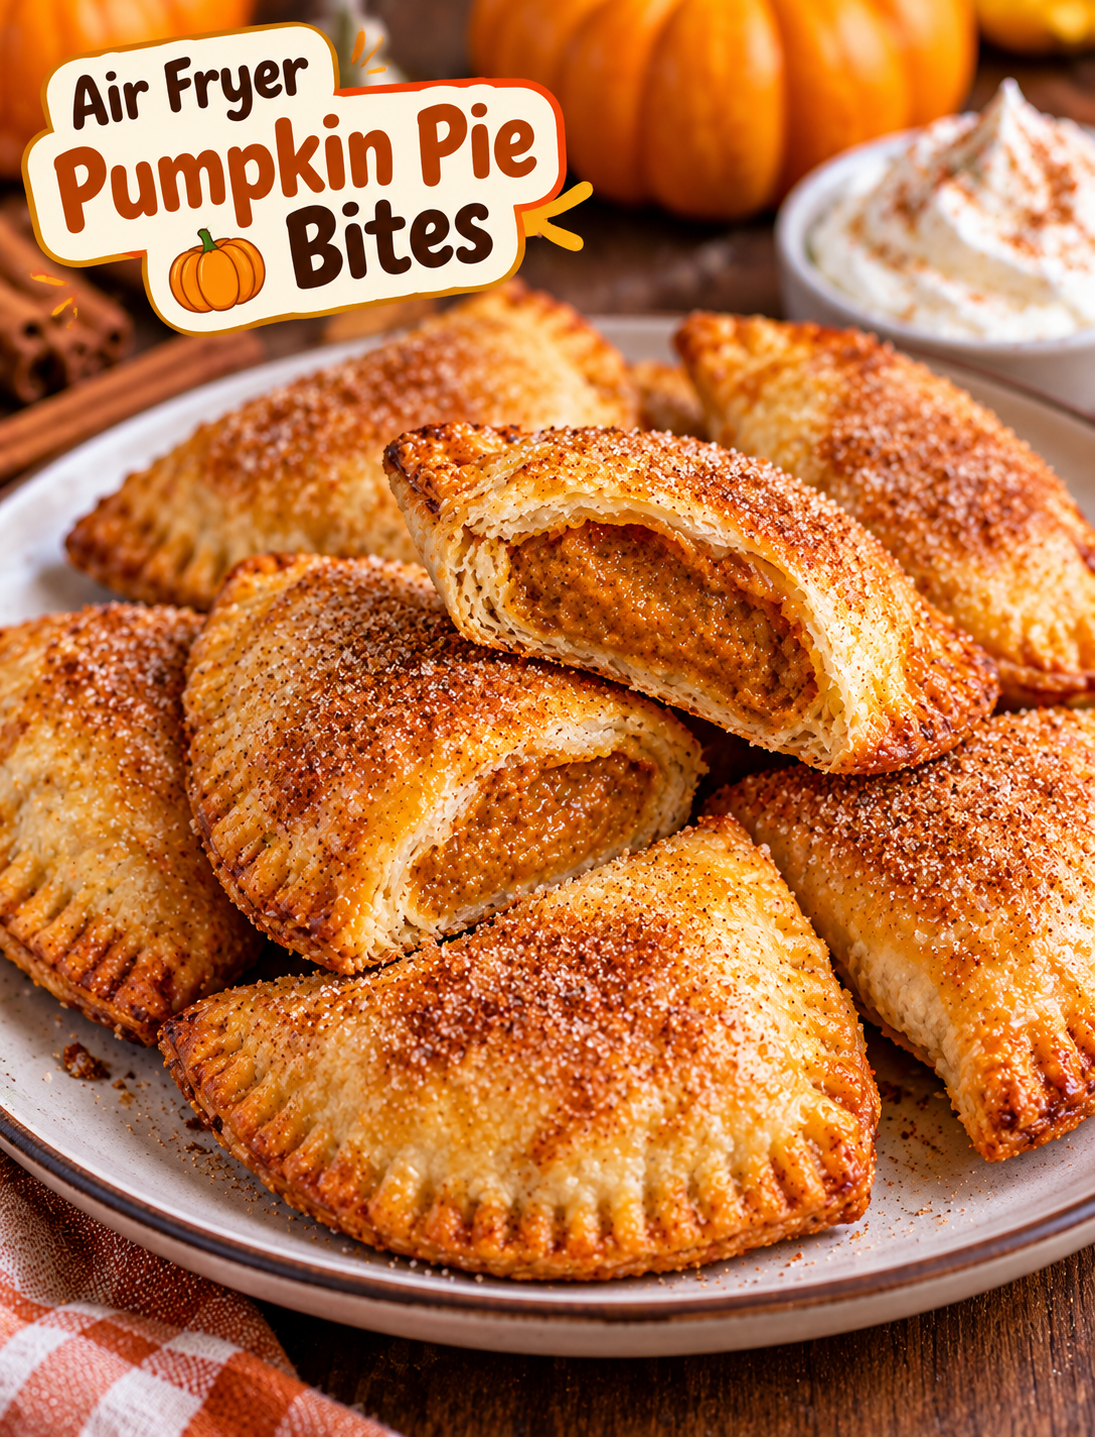
Air Fryer Pumpkin Pie Bites

Air fryer pumpkin pie bites with golden flaky crust, spiced pumpkin filling, cinnamon sugar, and whipped cream

Air Fryer Pumpkin Pie Bites

These Air Fryer Pumpkin Pie Bites bring the cozy flavor of classic pumpkin pie into small, golden pastry bites. Each piece has a flaky crust, creamy pumpkin filling, and warm fall spices.

The air fryer helps the pastry turn crisp and golden without needing a full-size pie. These little treats are easy to prepare, simple to serve, and perfect for fall gatherings, Thanksgiving, holiday parties, or an afternoon dessert.

The filling uses pumpkin puree, brown sugar, pumpkin pie spice, vanilla, and a few simple ingredients. The bites cook quickly and can be finished with powdered sugar, whipped cream, or a drizzle of caramel.

Why You’ll Love These Pumpkin Pie Bites

  • Quick dessert: Small pastry bites cook much faster than a traditional pie.
  • Classic fall flavor: Pumpkin, cinnamon, nutmeg, and vanilla create a familiar pumpkin pie taste.
  • Easy portions: Each bite is ready to serve without slicing a whole pie.
  • Air fryer friendly: The pastry becomes golden and crisp with a light coating of egg wash.
  • Great for gatherings: They are easy to arrange on a dessert tray.
  • Make-ahead friendly: Prepare the filling and pastry pieces ahead of time.
  • Easy to customize: Add nuts, caramel, chocolate, or extra spices to change the flavor.

Ingredients You’ll Need

 Pumpkin Filling

  • ½ cup pumpkin puree
  • ¼ cup packed brown sugar
  • 1 large egg yolk
  • 2 tablespoons evaporated milk or heavy cream
  • 1 teaspoon vanilla extract
  • 1 teaspoon pumpkin pie spice
  • ½ teaspoon ground cinnamon
  • ⅛ teaspoon ground nutmeg
  • Pinch of salt

For the Pastry

  • 1 package refrigerated pie crusts, about 14–16 ounces
  • 1 large egg
  • 1 tablespoon water
  • 1 tablespoon granulated sugar
  • ½ teaspoon ground cinnamon

Serving

  • Powdered sugar
  • Whipped cream
  • Caramel sauce
  • Chopped pecans, optional
  • Extra cinnamon, optional

Step-by-Step Instructions

1. Prepare the Pumpkin Filling

Add the pumpkin puree, brown sugar, egg yolk, evaporated milk, vanilla, pumpkin pie spice, cinnamon, nutmeg, and salt to a bowl.

Whisk until the mixture is smooth and evenly combined.

The filling should be thick enough to sit on the pastry without spreading too much.

2. Chill the Filling

Cover the bowl and refrigerate the pumpkin mixture for about 15–20 minutes.

Chilling makes the filling easier to portion and helps prevent it from spreading during assembly.

3. Prepare the Pie Crust

Remove the refrigerated pie crust from its package and place it on a lightly floured surface.

If the crust feels very cold or stiff, let it sit for a few minutes so it becomes easier to work with.

4. Cut the Pastry

Use a 3-inch round cookie cutter or the rim of a small glass to cut circles from the pie crust.

Gather the scraps, gently press them together, and roll them again to cut additional circles.

Avoid overworking the dough because too much handling can make the crust less tender.

5. Add the Pumpkin Filling

Place about 1 teaspoon of chilled pumpkin filling in the center of each pastry circle.

Do not overfill the dough.

Leaving a clean border around the filling gives you enough space to seal each bite securely.

6. Fold and Seal

Fold each pastry circle in half over the filling to create a small half-moon.

Press the edges together with your fingers.

Then use a fork to crimp the edges firmly.

Make sure there are no open gaps where the filling could escape.

7. Prepare the Egg Wash

Whisk the egg with 1 tablespoon of water.

Lightly brush the tops of the pumpkin pie bites with the egg wash.

The egg wash helps the pastry develop a glossy golden-brown finish.

8. Add Cinnamon Sugar

Mix the granulated sugar and cinnamon in a small bowl.

Sprinkle a light amount over the egg-washed pastry.

This adds a subtle crunchy topping and extra cinnamon flavor.

9. Preheat the Air Fryer

Preheat your air fryer to 350°F (175°C) for about 3 minutes.

A preheated basket helps the pastry begin cooking immediately and promotes even browning.

10. Arrange the Bites

Lightly spray the air fryer basket with cooking spray if needed.

Place the pumpkin pie bites in a single layer.

Leave a little space between each piece so hot air can circulate around the pastry.

Avoid stacking the bites.

11. Air Fry Until Golden

Air fry at 350°F for 7–10 minutes.

Check the bites around the 7-minute mark.

They are ready when the pastry is puffed and golden brown and the edges are firmly sealed.

Cooking time can vary slightly between air fryer models.

12. Cool Before Serving

Carefully remove the bites from the basket and place them on a cooling rack or plate.

Let them cool for about 5 minutes.

The pumpkin filling will be very hot immediately after cooking, so allow enough time before serving.

13. Add Your Favorite Toppings

Dust the cooled bites with powdered sugar.

For a richer dessert, serve them with whipped cream and a small drizzle of caramel sauce.

Chopped pecans also add a pleasant crunch and pair well with the pumpkin filling.

Tips for Crispy Pumpkin Pie Bites

  • Keep the filling chilled: Cold filling is easier to control during assembly.
  • Don’t overfill: Too much pumpkin mixture can leak through the pastry.
  • Seal the edges well: Firm crimping keeps the filling inside.
  • Use a light egg wash: Too much can make the surface overly wet.
  • Don’t overcrowd the basket: Proper airflow helps the pastry crisp.
  • Check early: Small pastry bites can brown quickly.
  • Cool before topping: Powdered sugar stays cleaner when the pastry is not piping hot.

How to Keep the Filling From Leaking

The most important step is controlling the amount of filling.

Use about 1 teaspoon per pastry circle and keep the filling away from the outer edge.

Press the pastry together firmly before crimping with a fork.

If the dough becomes too warm or soft while assembling, place the prepared bites in the refrigerator for 10 minutes before air frying.

Easy Variations

Caramel Pumpkin Pie Bites

Add a tiny drizzle of caramel sauce over the finished bites.

Use only a small amount so the pastry remains crisp.

Pecan Pumpkin Pie Bites

Add finely chopped pecans to the pumpkin filling for a nutty texture.

Keep the pieces small so they do not interfere with sealing the pastry.

Maple Pumpkin Pie Bites

Replace half of the brown sugar with pure maple syrup.

Reduce the evaporated milk slightly if the filling becomes too loose.

Chocolate Pumpkin Pie Bites

Add a few mini chocolate chips to the center before sealing the pastry.

Dark or semi-sweet chocolate works especially well with pumpkin spices.

Extra-Spiced Pumpkin Bites

Add a small pinch of ground ginger and cloves to the filling for a stronger warm-spice flavor.

What to Serve With Pumpkin Pie Bites

These small desserts pair well with simple toppings and warm drinks.

Try serving them with:

  • Vanilla ice cream
  • Whipped cream
  • Caramel sauce
  • Powdered sugar
  • Chopped pecans
  • Cinnamon whipped cream
  • Hot coffee
  • Chai tea
  • Apple cider

For Thanksgiving or holiday gatherings, arrange the bites on a large platter with small bowls of caramel and whipped cream for dipping.

How to Store Leftovers

Allow the pumpkin pie bites to cool completely before storing them.

Place them in an airtight container and refrigerate for up to 3 days.

For the best texture, reheat them in the air fryer at 325°F for 2–4 minutes.

Avoid reheating them for too long because the pastry can become dry.

If you are serving them at a gathering, warm only the amount you plan to eat.

Can You Make Them Ahead?

Yes. You can assemble the unbaked bites several hours ahead and keep them covered in the refrigerator.

When ready to cook, brush them with egg wash, add cinnamon sugar, and place them directly into the preheated air fryer.

For the best pastry texture, avoid keeping unbaked assembled bites refrigerated for more than one day.

Frequently Asked Questions

Can I use canned pumpkin pie filling?

Use plain pumpkin puree rather than prepared pumpkin pie filling because the recipe already includes sugar and spices.

How long do pumpkin pie bites take in an air fryer?

They usually take about 7–10 minutes at 350°F, depending on their size and your air fryer model.

Can I use homemade pie crust?

Yes. Homemade pie crust works well as long as it is rolled thin enough to fold and seal easily.

Why did my pumpkin filling leak out?

Overfilling, weakly sealed edges, or overly warm pastry can cause the filling to escape during cooking.

Can I freeze pumpkin pie bites?

Yes. Freeze fully cooled baked bites in an airtight freezer-safe container for up to 2 months.

Can I make these without egg wash?

Yes. The egg wash can be replaced with a light brushing of milk, although the pastry may not become as glossy.

What pumpkin puree should I use?

Use plain canned pumpkin puree rather than pumpkin pie mix for better control over the sweetness and spices.

Can I reheat pumpkin pie bites in the air fryer?

Yes. Reheat them at 325°F for 2–4 minutes until warm and crisp.

Final Thoughts

These Air Fryer Pumpkin Pie Bites are a simple way to enjoy classic pumpkin pie flavor without making a full-size dessert. The flaky pastry, creamy spiced pumpkin filling, and cinnamon-sugar finish make each bite warm, crisp, and satisfying.

They are especially useful when you want an easy fall dessert for Thanksgiving, holiday parties, family gatherings, or a weekend treat. Serve them warm with whipped cream, vanilla ice cream, or caramel sauce for an extra special finish.