Air Fryer Crispy Chicken Parmesan Wrap

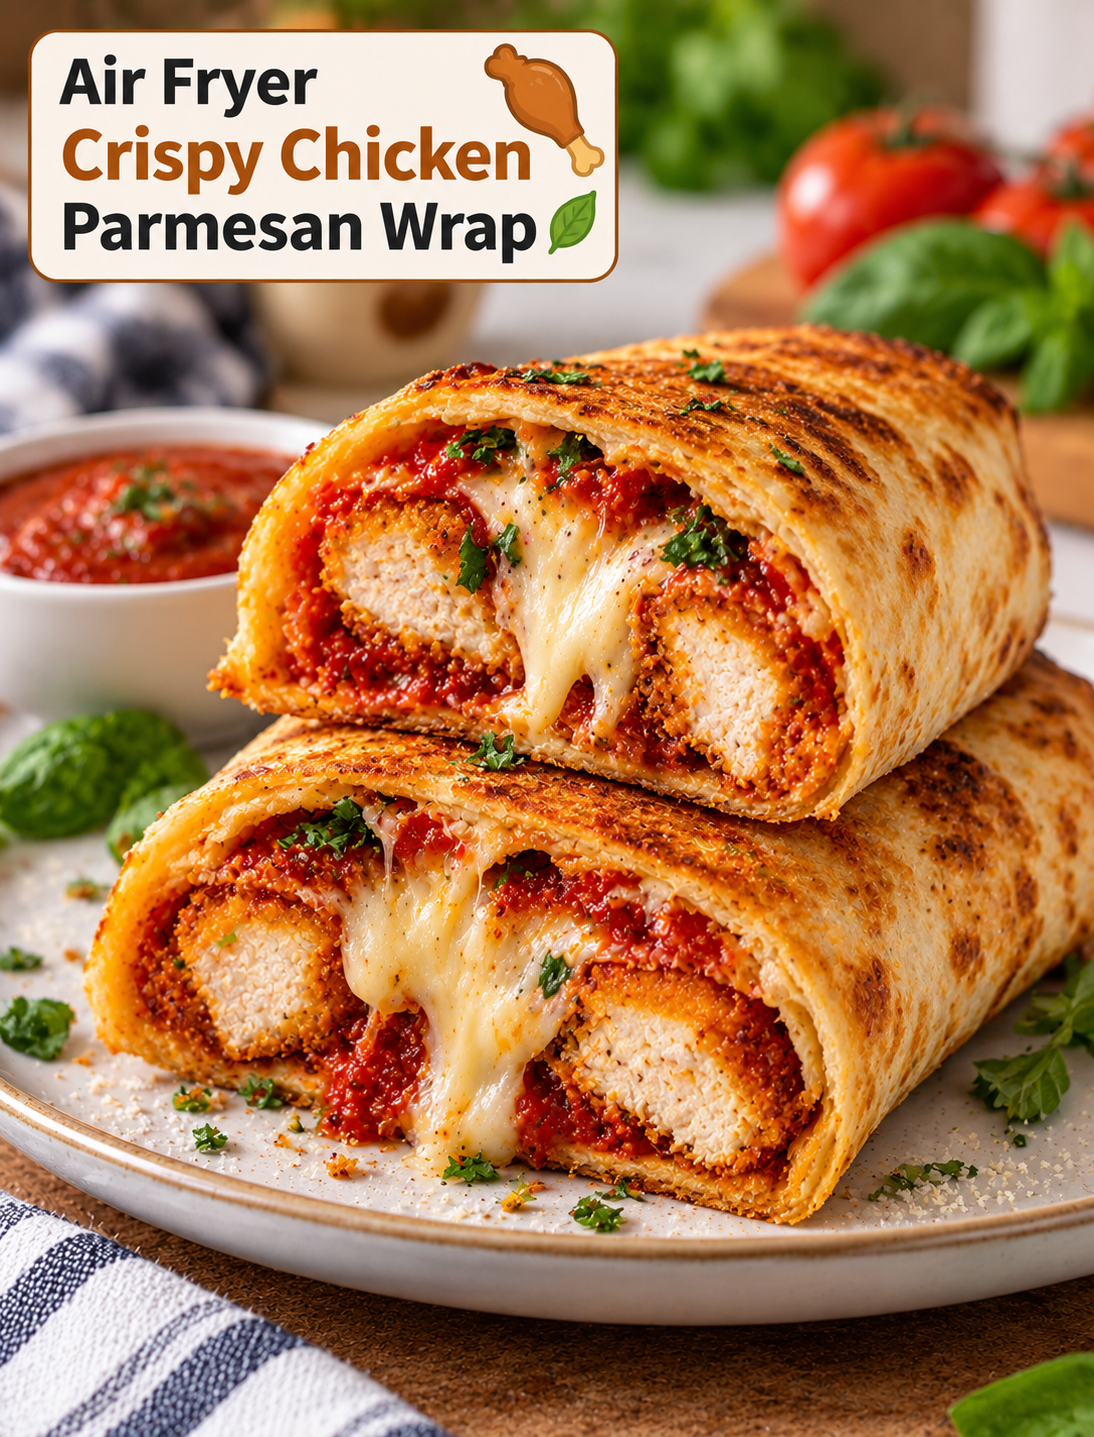
Crispy chicken Parmesan wrap with melted mozzarella, marinara sauce, Parmesan cheese, and fresh basil served on a plate

Air Fryer Crispy Chicken Parmesan Wrap

An Air Fryer Crispy Chicken Parmesan Wrap combines crunchy chicken, melted mozzarella, marinara sauce, and Parmesan cheese inside a warm tortilla. It brings the flavor of classic chicken Parmesan into an easy handheld meal.

The chicken is cooked in the air fryer until golden and crisp, then layered with rich tomato sauce and cheese. The assembled wrap goes back into the air fryer for a short finish, allowing the cheese to melt while the tortilla becomes lightly crisp.

This recipe is a practical choice for busy weeknights, quick lunches, casual dinners, or game-day meals. It uses familiar ingredients and takes less effort than making a traditional chicken Parmesan dinner with pasta.

Why You’ll Love This Chicken Parmesan Wrap

This wrap has several textures in one bite. The crispy chicken provides a crunchy coating, the mozzarella becomes soft and melty, and the tortilla adds a lightly toasted finish.

The recipe also gives you the classic flavors of chicken Parmesan without requiring a deep fryer. Air frying uses circulating hot air to brown the chicken and tortilla while keeping the cooking process simple.

It is easy to customize as well. You can use homemade or store-bought marinara, switch the cheese, add fresh basil, or make the chicken spicy with red pepper flakes.

The handheld format makes serving easy. You can cut each wrap in half and serve it with a small bowl of marinara for dipping.

Ingredients You’ll Need

Chicken

Use boneless, skinless chicken breasts or chicken tenders. Chicken breasts should be sliced or pounded to an even thickness so they cook at the same rate.

Breadcrumbs

Panko breadcrumbs create a crisp coating with plenty of crunch. Regular breadcrumbs can be used for a finer crust.

Parmesan Cheese

Grated Parmesan adds a salty, savory flavor to the chicken coating. Freshly grated Parmesan can provide a stronger flavor and better texture.

Mozzarella

Low-moisture mozzarella melts well without adding too much liquid to the wrap. Shredded mozzarella is convenient, while thin slices create a richer cheese layer.

Marinara Sauce

Use your favorite marinara or tomato pasta sauce. Choose a thick sauce because excess liquid can make the tortilla soggy.

Tortillas

Large flour tortillas are flexible enough to hold the chicken, sauce, and cheese without tearing. Burrito-size tortillas work especially well.

Egg

A beaten egg helps the breadcrumb mixture stick to the chicken and creates a more even crust.

Seasonings

Garlic powder, Italian seasoning, black pepper, and a small amount of salt give the chicken a classic Italian-inspired flavor.

Cooking Spray

A light coating of cooking spray helps the breadcrumb crust brown and crisp in the air fryer.

How to Make Air Fryer Crispy Chicken Parmesan Wrap

Prepare the Chicken

Pat the chicken dry with paper towels. If using chicken breasts, slice them horizontally or gently pound them until they are evenly thick.

Season both sides with garlic powder, Italian seasoning, black pepper, and a small amount of salt.

Dip each piece into beaten egg, allowing excess egg to drip back into the bowl. Press the chicken into the seasoned breadcrumbs and Parmesan until both sides are evenly coated.

Avoid pressing the coating too aggressively because a loose, even layer can become crispier during air frying.

Air Fry the Chicken

Preheat the air fryer according to your model’s instructions. Lightly spray the basket and place the breaded chicken pieces in a single layer.

Leave space between the pieces so hot air can circulate around the chicken. Lightly spray the top of the breading to encourage even browning.

Cook until the coating is crisp and the chicken reaches an internal temperature of 165°F. Cooking time depends on the thickness of the chicken and the air fryer model, so use an instant-read thermometer for accuracy.

Allow the chicken to rest for a few minutes before assembling the wraps.

Assemble the Wraps

Place a large flour tortilla on a clean surface. Spread a thin layer of marinara sauce over the center, leaving room around the edges for folding.

Add the crispy chicken, followed by shredded mozzarella and a sprinkle of Parmesan cheese.

For extra flavor, add a small amount of fresh basil or Italian seasoning. Do not add too much sauce because excess moisture can soften the tortilla.

Fold the sides toward the center, then roll the tortilla tightly from the bottom to create a secure wrap.

Crisp the Finished Wrap

Place the assembled wraps seam-side down in the air fryer basket. Cook until the tortilla becomes lightly golden and the cheese inside is melted.

Turn the wrap carefully if your air fryer browns more strongly on one side. Remove it when the outside is crisp and the filling is hot.

Let the wrap rest briefly before cutting. This helps the melted cheese settle and makes the wrap easier to handle.

Tips for the Crispiest Chicken

Use panko breadcrumbs when you want a lighter and crunchier coating. Their larger flakes create more surface texture than fine breadcrumbs.

Keep the chicken pieces similar in thickness. Even pieces cook more consistently and are less likely to become dry.

Do not overcrowd the air fryer basket. Crowded chicken traps moisture and can prevent the breading from becoming crisp.

A light coating of cooking spray helps the breadcrumbs brown without requiring a large amount of oil.

For the best texture, assemble the wrap shortly after the chicken finishes cooking. A long wait can allow steam to soften the crust.

How to Keep the Wrap From Getting Soggy

The amount and placement of sauce make a big difference. Use a moderate amount of thick marinara rather than soaking the tortilla.

Keep the sauce away from the outer edges of the tortilla. This gives you a clean surface for folding and helps prevent leaks.

Make sure the chicken is crisp before assembling the wrap. A soft coating can become even softer when combined with warm sauce and cheese.

A short final air-fryer step is also important. It helps remove surface moisture and gives the tortilla a toasted finish.

Easy Variations to Try

Spicy Chicken Parmesan Wrap

Add crushed red pepper flakes to the breadcrumb mixture or drizzle hot sauce over the chicken before wrapping. Pepper jack can also replace some of the mozzarella for extra heat.

Garlic Parmesan Wrap

Add extra garlic powder and Parmesan to the breading. Finish the cooked wrap with a small sprinkle of Parmesan and fresh parsley.

Pesto Chicken Parmesan Wrap

Spread a thin layer of basil pesto inside the tortilla along with the marinara. Use a small amount because pesto has a strong flavor.

Chicken Parmesan Caesar Wrap

Replace some of the marinara with Caesar dressing and add chopped romaine lettuce after the chicken has cooled slightly. This version should be served soon after assembly.

Extra-Cheesy Version

Use mozzarella and a little provolone for a richer cheese layer. Keep the filling balanced so the wrap remains easy to roll.

What to Serve With Chicken Parmesan Wraps

A simple side salad adds freshness to the rich chicken and cheese. Use mixed greens, tomatoes, cucumbers, and a light Italian dressing.

For a heartier meal, serve the wrap with air-fried potato wedges or roasted vegetables. Garlic bread also pairs well with the marinara flavor.

For dipping, warm extra marinara sauce in a small bowl. Ranch dressing can also work if you enjoy creamy dipping sauces with crispy chicken.

For lunch, serve the wrap with fresh fruit or a simple vegetable salad to keep the meal lighter.

How to Store and Reheat

Store leftover wraps in an airtight container and refrigerate them promptly. Keep the wraps separate from dipping sauce to protect the tortilla texture.

For the best reheating results, use the air fryer rather than the microwave. Air frying helps restore crispness to the tortilla and chicken coating.

Reheat until the center is hot and the cheese is melted. Avoid excessive reheating because the chicken can become dry.

If you plan to prepare the recipe ahead, keep the crispy chicken and tortillas separate from the sauce until you are ready to assemble and cook the wraps.

Common Mistakes to Avoid

Using chicken pieces with different thicknesses can lead to uneven cooking. Pound or slice the chicken so the pieces are similar in size.

Adding too much marinara can make the wrap difficult to roll and cause the tortilla to become soggy.

Overfilling the tortilla can cause the wrap to split during cooking. Keep the filling centered and leave enough space around the edges.

Skipping the final air-fryer step can leave the tortilla soft instead of lightly crisp.

Do not judge chicken doneness by color alone. Always check the thickest part with a food thermometer and make sure it reaches 165°F.

Frequently Asked Questions

Can I use chicken tenders?

Yes, chicken tenders are convenient because they are already small and cook evenly when arranged in a single layer.

Can I use frozen breaded chicken?

Yes, frozen breaded chicken can work, but cook it fully according to its package directions before assembling the wrap.

What cheese is best for chicken Parmesan wraps?

Low-moisture mozzarella melts smoothly, while Parmesan adds a savory flavor and crisp texture.

Can I make these wraps ahead of time?

Prepare the crispy chicken ahead, but assemble the wraps close to serving time to prevent the tortillas from becoming soggy.

How do I keep the tortilla crispy?

Use a moderate amount of thick marinara and air fry the assembled wrap briefly until the outside is lightly golden.

Can I use whole-wheat tortillas?

Yes, whole-wheat tortillas work well, although they may have a slightly firmer texture than regular flour tortillas.

Can I freeze chicken Parmesan wraps?

Freezing is possible, but the tortilla and breading may lose some crispness after thawing; reheating in an air fryer helps restore texture.

What sauce goes well with this wrap?

Marinara is the classic choice, but spicy tomato sauce, garlic sauce, or a small amount of pesto can also work well.

Final Thoughts

Air Fryer Crispy Chicken Parmesan Wraps make a classic comfort-food combination easier to enjoy on a busy day. Crispy seasoned chicken, tomato sauce, Parmesan, and melted mozzarella come together inside a toasted flour tortilla.

For the best results, focus on evenly cooked chicken, a crisp breadcrumb coating, moderate sauce, and a short final air-fryer step. Serve the wraps warm with extra marinara, a fresh salad, or your favorite side for a simple meal that delivers classic chicken Parmesan flavor in every bite.

Air Fryer Crispy Chicken Caprese Sandwich

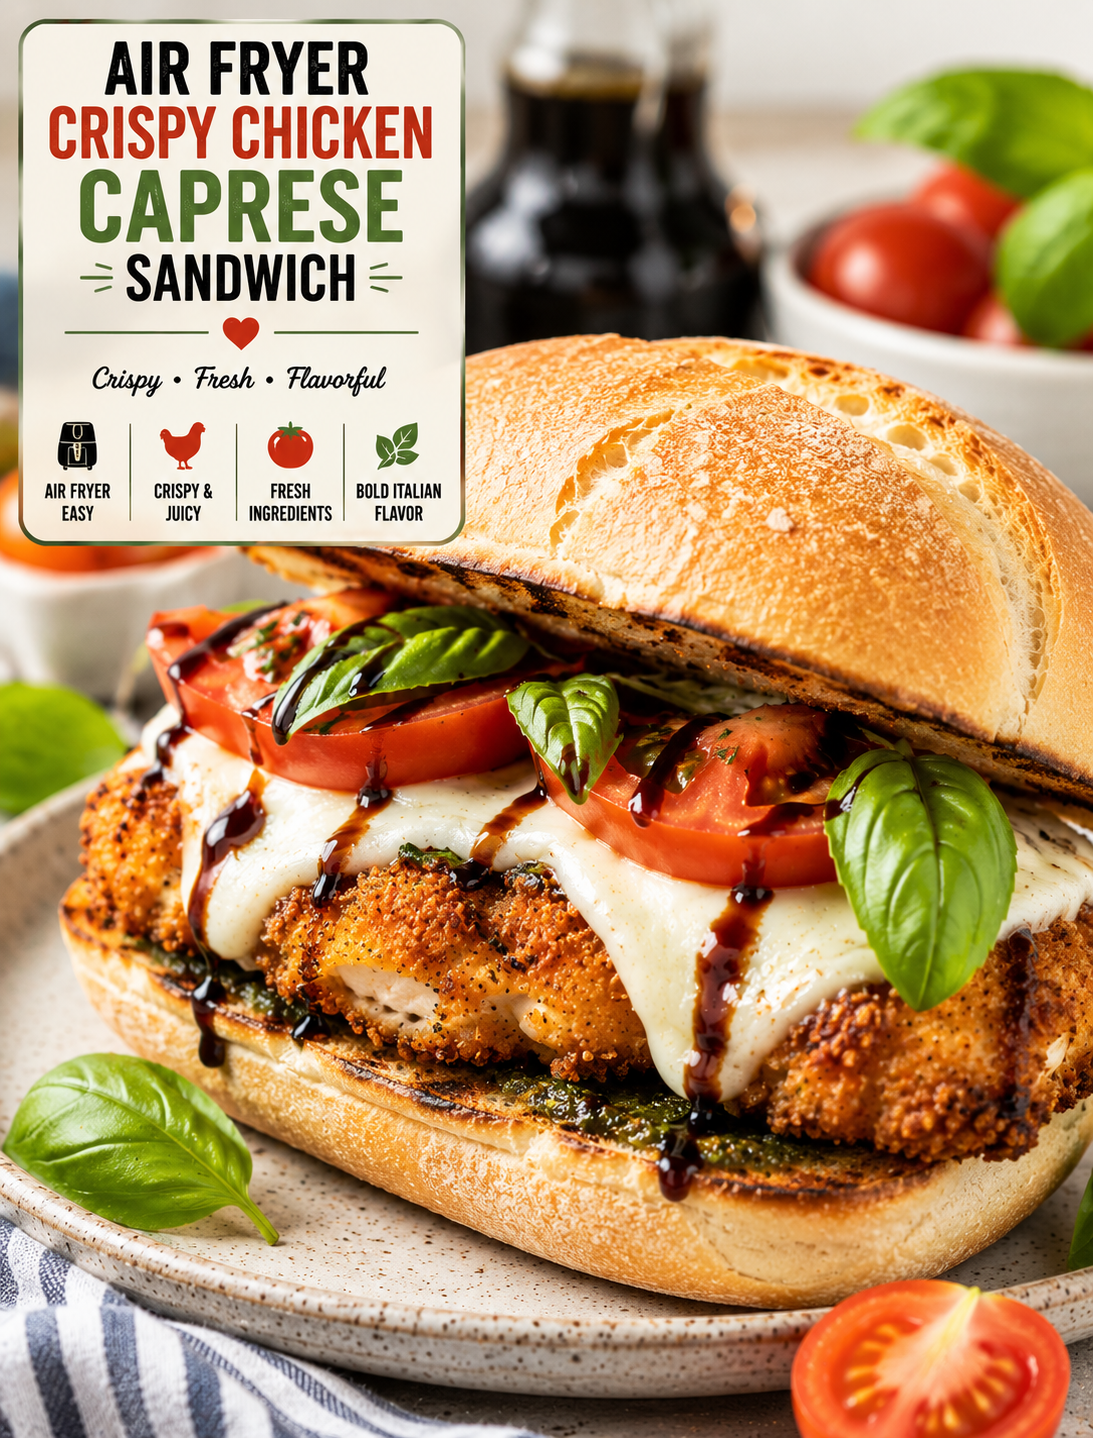
Crispy air fryer chicken Caprese sandwich with golden chicken, melted mozzarella, fresh tomato, basil, and balsamic glaze on toasted ciabatta

Air Fryer Crispy Chicken Caprese Sandwich

If you love crispy chicken and fresh Italian-inspired flavors, this Air Fryer Crispy Chicken Caprese Sandwich is an easy meal to add to your menu. It combines golden air-fried chicken with creamy mozzarella, juicy tomatoes, fresh basil, and a simple balsamic glaze.

The chicken develops a crisp coating in the air fryer while staying tender inside. Fresh tomato adds juicy sweetness, mozzarella brings a creamy texture, and basil gives the sandwich a bright herbal flavor.

A toasted ciabatta roll or crusty sandwich bun provides the perfect base for all the ingredients. A drizzle of balsamic glaze adds a sweet and tangy finish that ties everything together.

This sandwich is great for lunch, dinner, weekend meals, or casual entertaining. It feels like a restaurant-style sandwich but can be prepared in your own kitchen with simple ingredients.

Why You’ll Love This Caprese Chicken Sandwich

This sandwich brings together crispy, creamy, fresh, and tangy flavors in every bite.

The air-fried chicken gives the sandwich a crunchy texture without requiring a deep fryer. A light coating of breadcrumbs helps create a golden crust while hot air cooks the chicken evenly.

Fresh mozzarella melts slightly when placed on the hot chicken. The warm cheese pairs beautifully with cool, juicy tomato slices.

Fresh basil adds a fragrant flavor that makes the sandwich taste bright rather than heavy.

The balsamic glaze provides a sweet and tangy contrast to the savory chicken and creamy cheese.

Another benefit is how easy the sandwich is to customize. You can use chicken breasts or cutlets, swap the bread, add pesto, or increase the vegetables.

Ingredients You’ll Need

For the Crispy Chicken

  • 2 boneless, skinless chicken breasts
  • ½ cup all-purpose flour
  • 1 large egg
  • 1 cup panko breadcrumbs
  • ½ teaspoon garlic powder
  • ½ teaspoon Italian seasoning
  • ½ teaspoon paprika
  • ¼ teaspoon black pepper
  • ½ teaspoon salt
  • 1 tablespoon grated Parmesan cheese
  • Cooking spray
  • 1 tablespoon olive oil, optional

For the Sandwich

  • 2 ciabatta rolls or crusty sandwich buns
  • 4 slices fresh mozzarella
  • 1 large ripe tomato
  • ½ cup fresh basil leaves
  • 2 tablespoons balsamic glaze
  • 2 tablespoons pesto, optional
  • 1 tablespoon mayonnaise, optional
  • Freshly ground black pepper

Panko breadcrumbs create a light and crunchy coating. Regular breadcrumbs can also be used if that is what you have available.

Fresh mozzarella gives the sandwich a soft, creamy texture. Tomato and basil should be as fresh as possible because they provide much of the sandwich’s flavor.

How to Make Air Fryer Crispy Chicken Caprese Sandwich

1. Prepare the Chicken

If the chicken breasts are thick, slice them horizontally to create thinner cutlets.

You can also place the chicken between two sheets of plastic wrap and gently pound it to an even thickness.

An even thickness helps the chicken cook at the same rate.

Pat the chicken dry with paper towels before seasoning.

2. Set Up the Coating

Place flour in one shallow bowl.

Beat the egg in a second bowl.

In a third bowl, combine panko breadcrumbs, Parmesan, garlic powder, Italian seasoning, paprika, black pepper, and salt.

Mix the breadcrumb mixture until the seasonings are evenly distributed.

3. Coat the Chicken

Dip each chicken cutlet into the flour and shake off the excess.

Next, dip it into the beaten egg.

Finally, press it into the seasoned panko mixture.

Make sure both sides are completely coated.

Press the breadcrumbs gently onto the chicken so they stay attached during cooking.

4. Preheat the Air Fryer

Preheat your air fryer to 390°F if your model requires preheating.

Lightly spray the basket with cooking spray.

Place the coated chicken in a single layer.

Leave space between the pieces so hot air can circulate properly.

Avoid stacking the chicken because overcrowding can lead to uneven browning.

5. Air Fry the Chicken

Lightly spray the top of the breaded chicken with cooking spray.

Air fry at 390°F for approximately 10–14 minutes, turning halfway through cooking.

The exact cooking time depends on the thickness of the chicken.

Use a food thermometer to check the thickest part. Chicken should reach an internal temperature of 165°F for safe consumption.

Once cooked, allow the chicken to rest for a few minutes.

6. Prepare the Caprese Ingredients

While the chicken cooks, slice the tomato and fresh mozzarella.

Wash and dry the basil leaves.

If using pesto, prepare it or measure the amount you need.

Slice the ciabatta rolls in half.

Keep the tomato slices fairly thick so they do not make the bread soggy.

7. Toast the Bread

Place the cut rolls in the air fryer for about 1–2 minutes at 350°F.

Watch them carefully because bread can toast quickly.

A lightly crisped interior gives the sandwich more structure and helps prevent the bread from becoming soggy.

8. Melt the Mozzarella

Place fresh mozzarella slices over the hot chicken.

Return the chicken to the air fryer for about 1 minute, just until the cheese begins to soften.

You can skip this step if you prefer fresh mozzarella at room temperature.

9. Assemble the Sandwich

Spread pesto or mayonnaise over the toasted bread if desired.

Place the crispy chicken on the bottom half of each roll.

Add tomato slices and fresh basil.

Drizzle balsamic glaze over the top.

Season lightly with black pepper.

Place the second half of the roll on top.

Serve immediately while the chicken and mozzarella are still warm.

How to Make the Chicken Extra Crispy

The coating is important for creating a crunchy exterior.

Pat the chicken dry before coating it.

Use panko breadcrumbs for a lighter, crispier crust.

Press the breadcrumbs firmly onto the chicken.

Lightly spray the coating with cooking spray before air frying.

Avoid overcrowding the basket.

Turn the chicken halfway through cooking so both sides brown evenly.

For the best texture, assemble the sandwich shortly after the chicken finishes cooking.

Adding wet ingredients too early can soften the crispy coating.

Choosing the Best Bread

Ciabatta is an excellent choice because it has a crisp exterior and sturdy crumb.

A crusty Italian roll also works well.

Sourdough provides a slightly tangy flavor that pairs nicely with mozzarella and balsamic glaze.

A French-style baguette can be used for a longer sandwich.

Avoid very thin or soft bread if you plan to add plenty of filling because it may become difficult to hold.

Toasting the inside of the bread also gives it more structure.

Fresh Mozzarella vs. Low-Moisture Mozzarella

Fresh mozzarella has a soft texture and mild flavor.

It works especially well when paired with fresh tomatoes and basil.

Low-moisture mozzarella melts more easily and creates a stretchier cheese layer.

If using fresh mozzarella, pat it gently with paper towels before adding it to the sandwich.

Removing excess moisture helps prevent the bread from becoming soggy.

Both varieties work well, so choose based on the texture you prefer.

The Best Tomatoes for This Sandwich

Use ripe tomatoes with firm flesh.

Roma tomatoes have less moisture and are a good choice when you want to reduce sogginess.

Beefsteak tomatoes create larger slices and a juicy texture.

Heirloom tomatoes provide a colorful presentation and rich fresh flavor.

Slice the tomatoes just before assembling the sandwich.

If the tomato is very juicy, lightly pat the slices with a paper towel before adding them.

Easy Sauce Options

Balsamic glaze is the classic finishing touch for this sandwich.

Its sweet and tangy flavor balances the crispy chicken and creamy mozzarella.

Pesto adds basil, garlic, olive oil, and Parmesan flavor.

A thin layer of garlic aioli provides a creamy option.

Marinara sauce can be used for a more traditional Italian-inspired sandwich.

You can also combine pesto with a small amount of mayonnaise for a creamy basil spread.

Use sauces sparingly so the crispy chicken remains crunchy.

Easy Variations

Pesto Chicken Caprese Sandwich

Spread pesto over both sides of the toasted bread before adding the chicken.

Spicy Caprese Chicken Sandwich

Add crushed red pepper flakes or sliced Calabrian peppers for extra heat.

Garlic Parmesan Version

Add extra Parmesan and garlic powder to the breadcrumb coating.

Avocado Caprese Chicken Sandwich

Add thin slices of ripe avocado for a creamy texture.

Arugula Caprese Sandwich

Add fresh arugula for a peppery bite and extra greens.

Sun-Dried Tomato Version

Add chopped sun-dried tomatoes for a deeper tomato flavor.

Keep the added ingredients balanced so the sandwich remains easy to eat.

What to Serve With This Sandwich

This crispy chicken sandwich works well with simple sides.

Serve it with a green salad for a lighter meal.

Crispy air-fried potatoes make a hearty side.

A tomato and cucumber salad complements the fresh Caprese flavors.

Roasted vegetables provide another easy option.

For a casual lunch, serve the sandwich with fresh fruit and sparkling water.

For a game-day meal, cut the sandwiches into smaller portions and serve them with dipping sauces.

Meal Prep Tips

You can prepare several components ahead of time.

Bread the chicken and keep it refrigerated until you are ready to cook it.

Slice the mozzarella and prepare the sauce in advance.

Keep tomatoes and basil refrigerated until assembly.

For the best texture, cook the chicken shortly before serving.

Do not fully assemble the sandwiches too far ahead because tomato juice and sauces can soften the bread and coating.

If preparing lunches in advance, store the chicken, bread, vegetables, cheese, and sauce separately and assemble when ready to eat.

Storage and Reheating

Store leftover cooked chicken in an airtight container in the refrigerator.

Reheat the chicken in the air fryer at 350°F for about 3–5 minutes, or until heated through.

Avoid reheating the complete sandwich because the tomato and basil can become soft.

Toast fresh bread separately and assemble the sandwich after reheating the chicken.

For food safety, refrigerate perishable ingredients promptly and discard food that develops an unusual smell, appearance, or texture.

Tips for the Best Results

Use evenly sized chicken cutlets.

Pat the chicken dry before breading.

Use panko for extra crunch.

Press the coating firmly onto the chicken.

Do not overcrowd the air fryer.

Turn the chicken halfway through cooking.

Check the chicken with a food thermometer.

Pat fresh mozzarella dry if it contains excess moisture.

Use thick tomato slices.

Toast the bread lightly before assembly.

Add balsamic glaze just before serving.

Serve the sandwich while the chicken is warm and crisp.

The Bottom Line

Air Fryer Crispy Chicken Caprese Sandwich combines crispy seasoned chicken with fresh mozzarella, ripe tomatoes, basil, and balsamic glaze.

The air fryer makes the chicken golden and crunchy while keeping the cooking process simple.

Fresh Caprese ingredients bring brightness to the sandwich, while toasted ciabatta provides a sturdy base.

For the best result, keep wet ingredients controlled, toast the bread, and assemble the sandwich shortly before serving.

You can also customize it with pesto, arugula, avocado, spicy peppers, or sun-dried tomatoes.

Frequently Asked Questions

1. How long should chicken cook in the air fryer?

Chicken cutlets usually take about 10–14 minutes at 390°F, but cooking time depends on thickness; the center should reach 165°F.

2. Can I use chicken thighs?

Yes. Boneless, skinless chicken thighs work well, although their cooking time may differ from chicken breast cutlets.

3. What bread works best?

Ciabatta, crusty Italian rolls, sourdough, and other sturdy breads work well because they hold the filling without becoming too soft.

4. Can I use regular breadcrumbs?

Yes. Panko creates a crunchier coating, while regular breadcrumbs produce a finer, more compact crust.

5. Can I make this sandwich with pesto?

Yes. Pesto adds basil, garlic, Parmesan, and olive oil flavors that pair naturally with the Caprese ingredients.

6. How do I keep the sandwich from becoming soggy?

Pat wet ingredients dry, toast the bread, use sauces sparingly, and assemble the sandwich immediately before serving.

7. Can I use shredded mozzarella?

Yes. Shredded mozzarella melts quickly, although fresh mozzarella provides a more traditional Caprese texture.

8. Can I prepare the chicken ahead?

Yes. Cook the chicken ahead and refrigerate it, then reheat it in the air fryer before assembling the sandwich.

Final Thoughts

Air Fryer Crispy Chicken Caprese Sandwich is an easy way to turn simple ingredients into a meal that feels fresh and restaurant-worthy.

The crispy chicken provides a savory crunch, while fresh mozzarella, juicy tomato, and basil create the classic Caprese combination.

Balsamic glaze adds a sweet-tangy finish, and toasted ciabatta holds everything together with a satisfying bite.

For the crispiest chicken, use panko, avoid overcrowding the air fryer, and assemble the sandwich right before serving.

Crispy chicken, creamy mozzarella, fresh tomatoes, fragrant basil, and balsamic glaze make this sandwich a delicious choice for an easy lunch or dinner.

Air Fryer Buffalo Chicken Melt Wrap

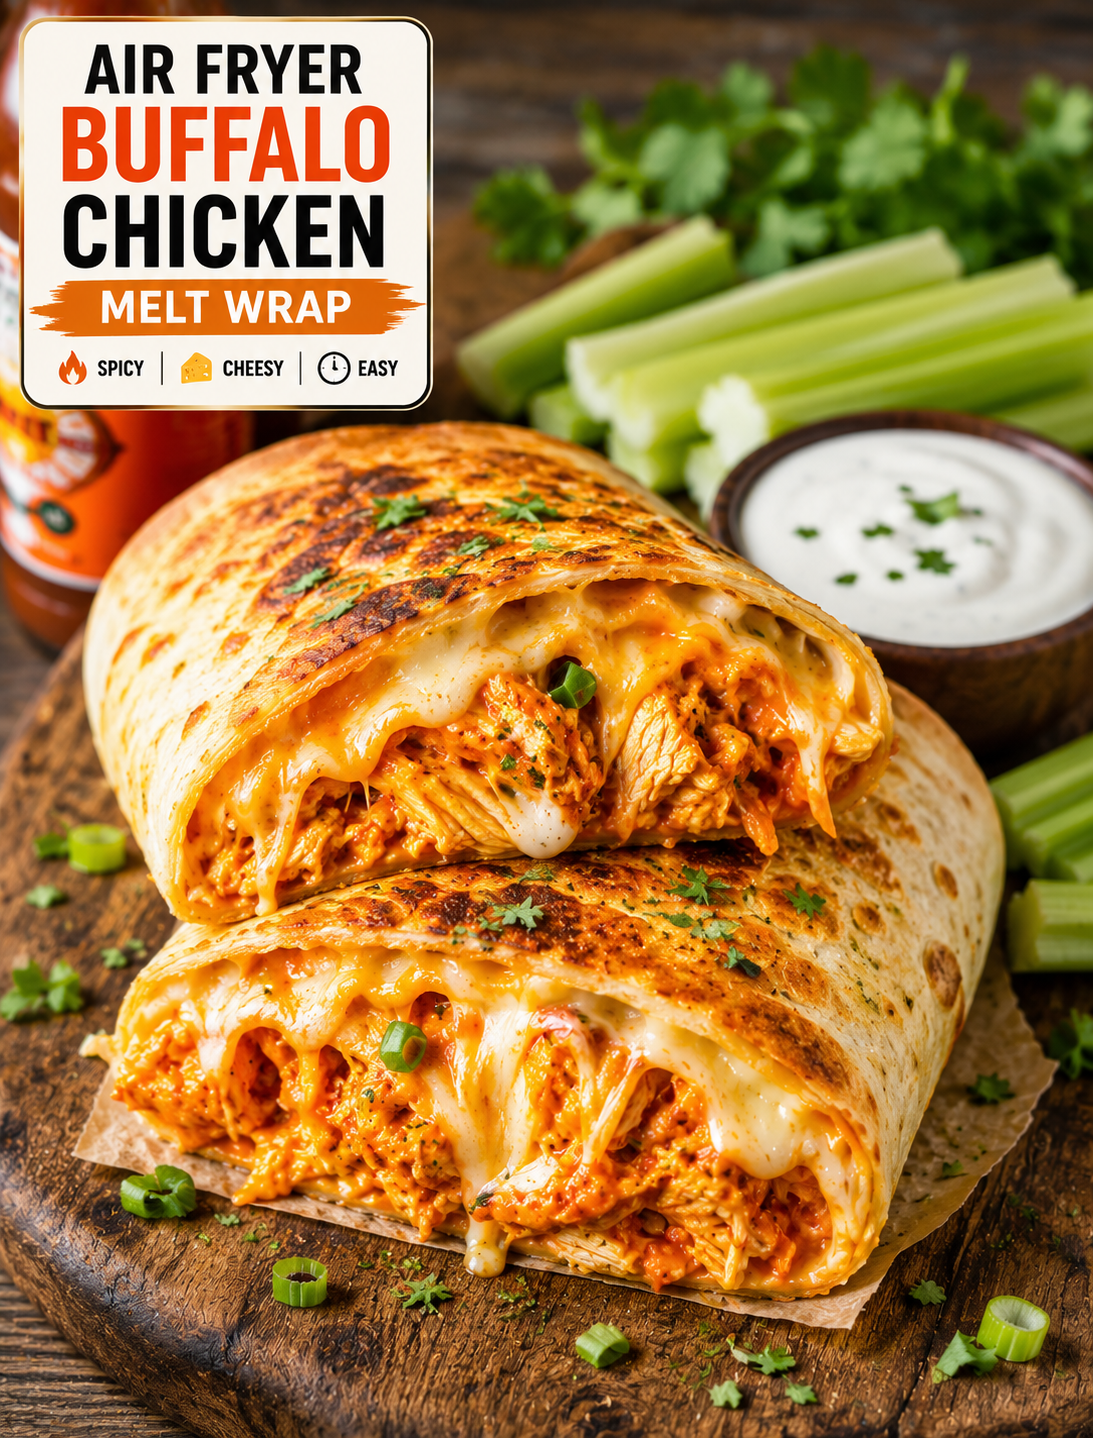
Crispy air fryer buffalo chicken melt wrap sliced open with juicy buffalo chicken, melted cheese, ranch dip, and fresh vegetables

Air Fryer Buffalo Chicken Melt Wrap

Craving something crispy, cheesy, spicy, and easy enough for a busy weeknight? This Air Fryer Buffalo Chicken Melt Wrap brings all those flavors together in one golden, satisfying meal.

Tender shredded chicken is tossed with tangy buffalo sauce, wrapped with melted cheese and fresh toppings, then cooked in the air fryer until the tortilla turns crisp and golden. The cheese melts into the chicken while the outside develops a crunchy texture that makes every bite satisfying.

This recipe is perfect for lunch, dinner, game day, or a quick snack when you want something more exciting than a plain sandwich. It uses simple ingredients and takes only a few minutes to assemble.

Serve it with ranch dressing, blue cheese dip, celery sticks, or a fresh side salad for a complete meal.

Why You’ll Love This Buffalo Chicken Wrap

This wrap combines several textures in one easy recipe. The chicken stays tender, the cheese becomes gooey, and the tortilla turns crisp in the air fryer.

Buffalo sauce gives the filling a bold combination of heat, tang, and buttery flavor. You can use mild, medium, or hot buffalo sauce depending on how spicy you like your food.

The recipe is also a great way to use leftover cooked chicken. Rotisserie chicken works especially well because it is already seasoned and easy to shred.

Unlike a deep-fried wrap, the air fryer requires only a light coating of oil or cooking spray. The circulating hot air helps crisp the tortilla without needing a pot of frying oil.

You can also customize the filling with different cheeses, vegetables, and sauces to create your own version.

Ingredients You’ll Need

  • 2 cups cooked shredded chicken
  • ½ cup buffalo wing sauce
  • 4 large flour tortillas
  • 1 cup shredded Monterey Jack cheese
  • ½ cup shredded cheddar cheese
  • ¼ cup finely diced red onion
  • ½ cup shredded lettuce
  • ¼ cup chopped green onions
  • 2 tablespoons ranch dressing
  • 1 tablespoon melted butter
  • ½ teaspoon garlic powder
  • ½ teaspoon smoked paprika
  • ¼ teaspoon black pepper
  • Cooking spray
  • Fresh parsley or green onions for garnish, optional

For a stronger buffalo flavor, add a little more wing sauce to the chicken. For a milder wrap, reduce the sauce and increase the ranch dressing.

Flour tortillas work best because they are flexible and easy to fold. Choose burrito-size tortillas when you want larger wraps with plenty of filling.

How to Make Air Fryer Buffalo Chicken Melt Wrap

1. Prepare the Chicken

Place the cooked shredded chicken in a medium bowl.

Add buffalo sauce, melted butter, garlic powder, smoked paprika, and black pepper.

Stir until the chicken is evenly coated.

If the chicken seems dry, add another tablespoon of buffalo sauce. The filling should be moist but not watery because excess sauce can make the tortilla difficult to crisp.

2. Warm the Tortillas

Warm the tortillas for about 10–15 seconds in the microwave.

This small step makes them softer and easier to fold without cracking.

Keep the tortillas covered with a clean kitchen towel while assembling the wraps so they stay flexible.

3. Add the Filling

Place one tortilla on a flat surface.

Add a portion of buffalo chicken slightly below the center of the tortilla.

Sprinkle Monterey Jack and cheddar cheese over the chicken.

Add a small amount of diced red onion for crunch and extra flavor.

Do not overfill the tortilla because too much filling can make it difficult to seal.

4. Fold the Wrap

Fold the bottom edge of the tortilla over the filling.

Fold both sides inward, then roll the tortilla tightly upward until you have a sealed wrap.

Place the wrap seam-side down while preparing the remaining tortillas.

Keeping the seam underneath helps prevent the wrap from opening during air frying.

5. Air Fry Until Golden

Preheat the air fryer to 375°F if your model requires preheating.

Lightly spray the air fryer basket with cooking spray.

Place the wraps seam-side down in the basket, leaving space between them for air circulation.

Lightly spray or brush the tops with a small amount of oil or melted butter.

Air fry for approximately 6–9 minutes, turning halfway through cooking.

The wraps are ready when the tortillas are golden and crisp and the cheese inside is melted.

Cooking time can vary between air fryer models, so watch the wraps closely during the final few minutes.

6. Slice and Serve

Carefully remove the hot wraps from the air fryer.

Allow them to rest for 1–2 minutes before cutting.

Slice each wrap diagonally and arrange the pieces on a serving plate.

Drizzle with ranch or serve the dressing on the side.

Add chopped green onions or fresh parsley for a bright finishing touch.

Best Chicken for This Recipe

Cooked shredded chicken is the easiest choice for these wraps.

Rotisserie chicken saves time and provides tender meat with plenty of flavor. You can also use leftover roasted or baked chicken.

Chicken breast creates a leaner filling, while chicken thighs provide a richer texture and more moisture.

If using freshly cooked chicken, allow it to cool slightly before shredding. Pull the meat apart with two forks or use clean hands once it is safe to handle.

Avoid using chicken that is overly wet because excess moisture can prevent the tortilla from becoming crisp.

Choosing the Best Cheese

Monterey Jack is an excellent choice because it melts smoothly and has a mild flavor.

Cheddar adds a sharper taste and gives the filling a classic cheesy finish.

You can also use pepper Jack for extra heat or mozzarella for a milder, stretchy texture.

For the best melt, shred cheese from a block rather than using large chunks.

A combination of two cheeses gives the wrap more flavor without overpowering the buffalo chicken.

How to Control the Spice Level

Buffalo sauce can range from mild to very hot, so the heat level is easy to adjust.

For a mild wrap, choose mild buffalo sauce and add extra ranch dressing.

For medium heat, use a traditional buffalo wing sauce with the recipe measurements.

For a spicy version, add cayenne pepper, crushed red pepper flakes, or sliced jalapeños to the chicken mixture.

You can also serve hot sauce on the side so each person can control the heat.

What to Serve With Buffalo Chicken Wraps

These crispy wraps pair well with classic buffalo-style sides.

Serve them with celery and carrot sticks for a fresh, crunchy contrast.

Ranch dressing or blue cheese dressing makes a creamy dip for the spicy chicken.

A simple green salad can balance the richness of the melted cheese.

For game day, serve the wraps with sweet potato fries, potato wedges, or air fryer onion rings.

You can also cut the wraps into smaller pieces and serve them as party appetizers.

Tips for Crispy Air Fryer Wraps

Do not overfill the tortillas because a thin, even filling cooks more evenly.

Warm the tortillas before rolling so they do not crack.

Keep the seam facing downward when placing the wraps in the air fryer.

Leave space between the wraps so hot air can circulate around them.

Use only a light amount of oil because too much can make the tortilla greasy.

Turn the wraps halfway through cooking for even browning.

Allow the finished wraps to rest briefly before slicing so the melted cheese does not spill out immediately.

Serve them soon after cooking for the best crispy texture.

Can You Make These Wraps Ahead of Time?

Yes. You can prepare the chicken filling several hours ahead and refrigerate it until you are ready to assemble the wraps.

For meal prep, keep the chicken mixture in a sealed container and assemble the tortillas shortly before air frying.

You can also assemble the wraps in advance and refrigerate them covered for a short period.

For the best texture, air fry the wraps just before serving rather than cooking them far ahead of time.

If you have leftovers, refrigerate them in an airtight container and reheat them in the air fryer until hot and crisp.

Easy Variations to Try

There are many ways to change this recipe without changing the basic cooking method.

Add chopped celery to the chicken for classic buffalo-style crunch.

Mix in finely diced jalapeños for extra heat.

Add sliced avocado after cooking for a creamy contrast.

Use pepper Jack instead of cheddar for a spicy cheese version.

Add shredded cabbage for extra crunch.

Replace ranch with blue cheese dressing for a stronger buffalo flavor.

For a smoky version, add extra smoked paprika to the chicken.

You can also make mini wraps with smaller tortillas for parties and appetizers.

Storage and Reheating

Place leftover wraps in an airtight container and refrigerate them promptly.

For the best texture, reheat them in the air fryer at about 350°F for 3–5 minutes or until heated through.

Avoid relying on the microwave when crispiness matters because microwave heating can soften the tortilla.

If the filling contains chicken that has been stored for several days, check its freshness before reheating.

Always discard leftovers that have an unusual smell, appearance, or texture.

The Bottom Line

Air Fryer Buffalo Chicken Melt Wraps are an easy way to turn simple chicken and tortillas into a crispy, cheesy meal with bold buffalo flavor.

The air fryer creates a golden tortilla while keeping the inside warm and melty. Buffalo sauce adds tangy heat, while ranch, fresh vegetables, and cheese help balance the flavor.

The recipe is flexible enough for lunch, dinner, game-day gatherings, or quick snacks. You can adjust the spice level, change the cheese, or add your favorite crunchy vegetables.

For the crispiest result, avoid overfilling the tortillas, keep them seam-side down, and serve them soon after air frying.

Frequently Asked Questions

1. How long do buffalo chicken wraps take in the air fryer?

Cook them at 375°F for about 6–9 minutes, turning halfway, until the tortilla is golden and the cheese is melted.

2. Can I use rotisserie chicken?

Yes. Shredded rotisserie chicken is one of the easiest and most flavorful options for this recipe.

3. What cheese melts best in buffalo chicken wraps?

Monterey Jack, cheddar, pepper Jack, and mozzarella all melt well and pair nicely with buffalo chicken.

4. How do I keep the wrap from opening?

Roll it tightly and place it seam-side down in the air fryer basket before cooking.

5. Can I make these wraps spicy?

Yes. Use hot buffalo sauce or add cayenne, jalapeños, or crushed red pepper for extra heat.

6. Can I make buffalo chicken wraps ahead of time?

Yes. Prepare the filling ahead, refrigerate it, and assemble and air fry the wraps shortly before serving.

7. What dipping sauce goes with buffalo chicken wraps?

Ranch and blue cheese dressing are classic choices that balance the spicy buffalo flavor.

8. Can I reheat leftover buffalo chicken wraps?

Yes. Reheat them in an air fryer at about 350°F for 3–5 minutes to restore some of the crispy texture.

Final Thoughts

Air Fryer Buffalo Chicken Melt Wraps are the kind of easy meal that delivers big flavor without complicated preparation. Tender buffalo chicken, gooey melted cheese, and a crispy golden tortilla make every bite satisfying.

They are especially useful when you have leftover chicken and want to turn it into something completely different. Add your favorite toppings, adjust the heat, and serve with ranch, blue cheese, or crunchy vegetables.

For the best results, keep the filling balanced, roll the tortillas tightly, and air fry until golden and crisp.

Spicy, cheesy, crispy, and easy—this is one wrap you’ll want to make again.

Air Fryer Crispy Chicken Ranch Wraps

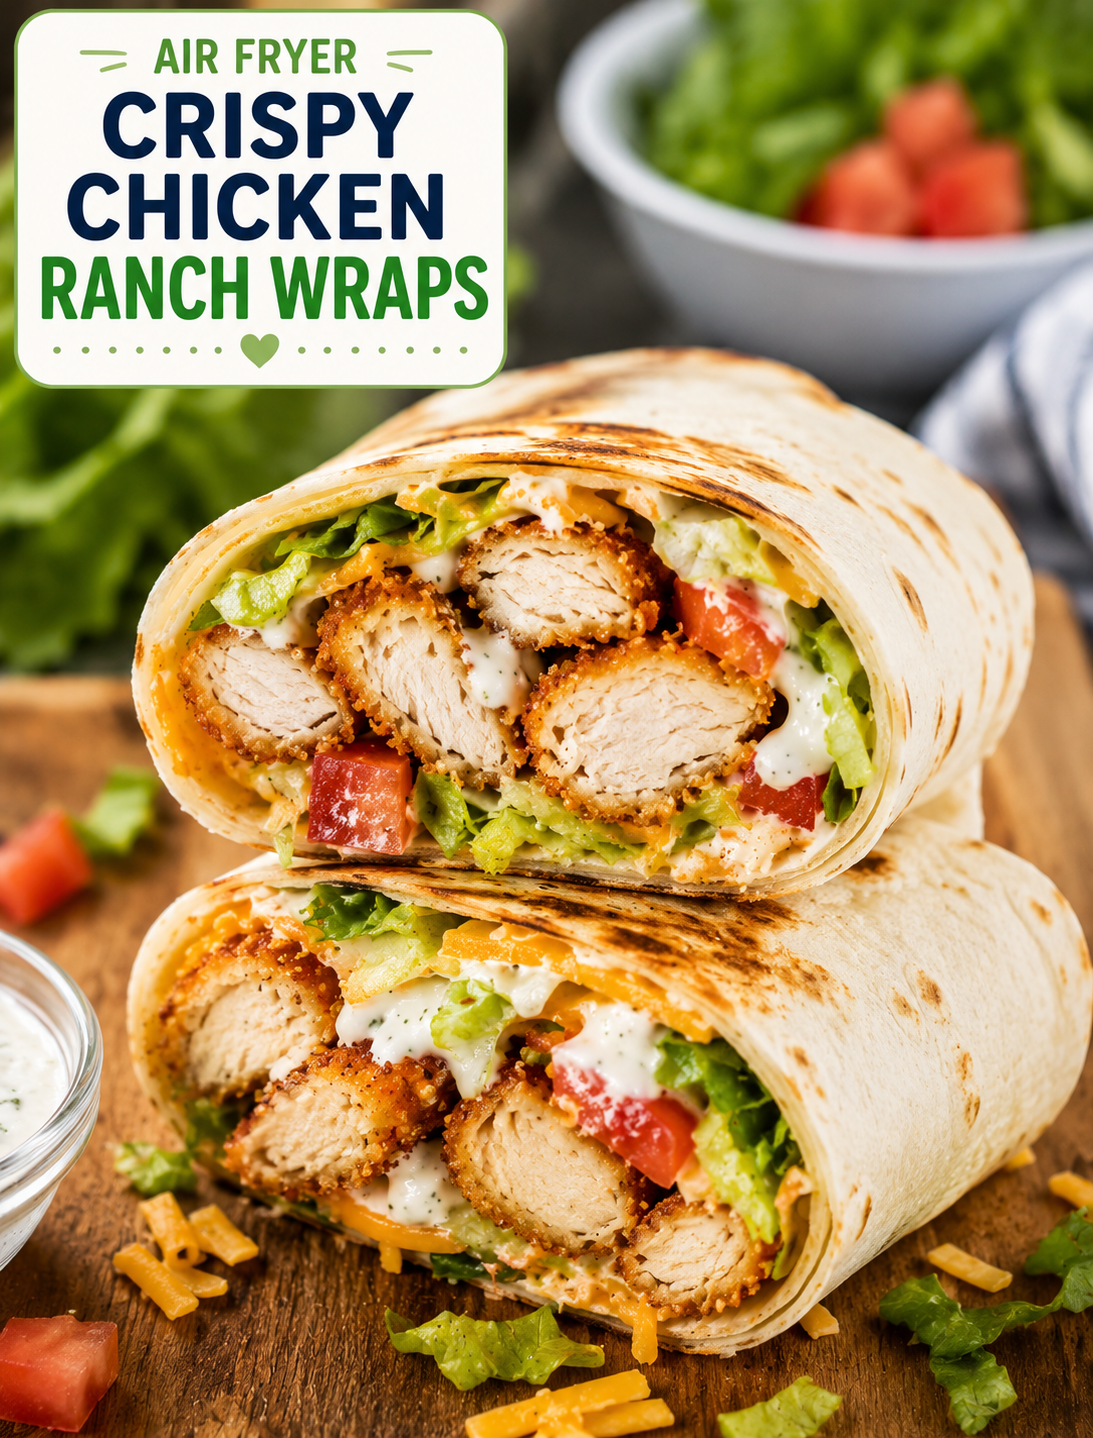
Air Fryer Crispy Chicken Ranch Wrap filled with crunchy chicken, ranch dressing, cheddar cheese, lettuce, and tomatoes

Air Fryer Crispy Chicken Ranch Wraps

Air Fryer Crispy Chicken Ranch Wraps are an easy lunch or dinner made with crunchy chicken, creamy ranch, fresh vegetables, and melted cheese. The chicken gets a golden, crisp coating in the air fryer while the inside stays juicy and tender.

These wraps are perfect for busy weeknights because the chicken cooks quickly and the filling comes together with simple ingredients. They also make a convenient meal for families, game-day gatherings, or an easy packed lunch.

The combination of crispy chicken and cool ranch dressing gives these wraps a familiar flavor that both kids and adults enjoy. You can add lettuce, tomatoes, onions, avocado, or your favorite hot sauce to make each wrap your own.

Why You’ll Love These Chicken Ranch Wraps

  • Crispy without deep frying: The air fryer creates a crunchy coating with only a light spray of oil.
  • Quick weeknight meal: The chicken cooks in about 10–14 minutes.
  • Easy to customize: Add vegetables, cheese, or spicy toppings based on your taste.
  • Family-friendly: Ranch dressing and crispy chicken make an easy combination for picky eaters.
  • Great for meal prep: Cook the chicken ahead and assemble fresh wraps when needed.
  • Simple ingredients: Most ingredients are easy to find at American grocery stores.
  • Easy cleanup: Air frying keeps the cooking process simple and contained.

Ingredients

For the Crispy Chicken

  • 1 pound boneless, skinless chicken breasts
  • 1/2 cup all-purpose flour
  • 1 large egg
  • 1 tablespoon milk
  • 1 cup seasoned breadcrumbs
  • 1/2 teaspoon garlic powder
  • 1/2 teaspoon onion powder
  • 1/2 teaspoon smoked paprika
  • 1/2 teaspoon salt
  • 1/4 teaspoon black pepper
  • Cooking spray

For the Wraps

  • 4 large flour tortillas
  • 1/2 cup ranch dressing
  • 1 cup shredded cheddar cheese
  • 2 cups shredded lettuce
  • 1 medium tomato, diced
  • 1/4 cup thinly sliced red onion
  • 1/4 cup chopped green onions

Optional Toppings

  • Sliced avocado
  • Pickled jalapeños
  • Buffalo sauce
  • Hot sauce
  • Extra ranch dressing

How to Make Air Fryer Crispy Chicken Ranch Wraps

Step 1: Prepare the Chicken

Pat the chicken breasts dry with paper towels.

Slice each breast into thin strips of similar size. Keeping the pieces close in thickness helps them cook evenly.

If the chicken breasts are very thick, gently pound them to an even thickness before slicing.

Step 2: Set Up the Coating

Place the flour in one shallow bowl.

Whisk the egg and milk together in a second bowl.

In a third bowl, combine the breadcrumbs, garlic powder, onion powder, smoked paprika, salt, and black pepper.

This three-step coating gives the chicken a crisp, flavorful crust.

Step 3: Coat the Chicken

Dip each chicken strip into the flour and shake off the excess.

Next, dip it into the egg mixture and allow the extra egg to drip back into the bowl.

Finally, press the chicken into the seasoned breadcrumbs until completely coated.

Place the coated strips on a clean plate while you finish the remaining chicken.

For a thicker crust, press the breadcrumbs firmly onto the chicken instead of simply rolling the pieces through them.

Step 4: Preheat the Air Fryer

Preheat the air fryer to 400°F for about 3 minutes.

A preheated basket helps the breading start crisping quickly and can improve the final texture.

Air fryer temperatures can vary, so check the chicken early during the first batch.

Step 5: Air Fry the Chicken

Lightly spray the air fryer basket with cooking spray.

Arrange the chicken strips in a single layer with space between each piece.

Lightly spray the tops of the chicken with cooking spray.

Air fry at 400°F for 10–14 minutes, turning the pieces halfway through cooking.

The chicken is ready when the coating is golden and the thickest part reaches 165°F on an instant-read thermometer.

Do not overcrowd the basket. Cook the chicken in batches if necessary.

Step 6: Prepare the Wrap Ingredients

While the chicken cooks, shred the lettuce and dice the tomato.

Slice the red onion and chop the green onions.

Warm the flour tortillas for about 10–15 seconds in the microwave or briefly heat them in a dry skillet.

Warm tortillas are softer and easier to fold without tearing.

Step 7: Build the Wraps

Place one warm tortilla on a flat surface.

Spread about 2 tablespoons of ranch dressing down the center.

Add shredded lettuce, diced tomato, red onion, and shredded cheddar cheese.

Place several pieces of crispy chicken over the vegetables.

Add green onions and any optional toppings you like.

Drizzle with additional ranch or hot sauce for extra flavor.

Step 8: Fold and Toast the Wraps

Fold the left and right sides of the tortilla toward the center.

Fold the bottom edge over the filling, then roll the wrap tightly toward the top.

For an extra-crispy finish, place the assembled wraps seam-side down in the air fryer.

Air fry at 375°F for 2–3 minutes until the tortilla is lightly toasted.

Let the wraps rest for about 1 minute before slicing.

Tips for Extra Crispy Chicken

Use dry chicken before starting the breading process because excess moisture can weaken the coating.

Choose seasoned breadcrumbs for a more flavorful crust, or use panko breadcrumbs when you want a lighter, crunchier texture.

Leave space around each chicken strip so hot air can circulate properly.

A light coating of cooking spray helps the breadcrumbs brown without making the chicken greasy.

Always check the internal temperature before serving because cooking time depends on the thickness of the chicken.

Best Tortillas to Use

Large flour tortillas are the easiest choice because they are flexible and provide enough space for the filling.

Whole-wheat tortillas can be used for a heartier option, while low-carb tortillas work if they hold their shape well.

Avoid overfilling the tortilla because too much filling makes the wrap difficult to roll and can cause it to split.

Easy Variations

Buffalo Chicken Ranch Wrap

Toss the cooked crispy chicken with a small amount of buffalo sauce before adding it to the tortilla. Finish with ranch dressing and cheddar cheese.

Spicy Ranch Wrap

Mix a little hot sauce or cayenne pepper into the ranch dressing for a spicy creamy sauce.

Bacon Ranch Chicken Wrap

Add cooked, crumbled bacon with the chicken and cheddar for a richer loaded wrap.

Avocado Ranch Wrap

Add sliced avocado for a creamy texture that balances the crunchy chicken.

Southwest Chicken Wrap

Add corn, black beans, diced jalapeños, and a little salsa for a Southwest-style filling.

What to Serve With Chicken Wraps

These wraps pair well with crispy air fryer potatoes, sweet potato fries, coleslaw, or a simple green salad.

For a party or casual gathering, cut each wrap into smaller pieces and serve them with ranch, buffalo sauce, or barbecue sauce for dipping.

A cold lemonade or iced tea also pairs well with the savory chicken and creamy ranch flavor.

Storage and Reheating

Store cooked chicken separately from the vegetables and tortillas whenever possible.

Place leftover chicken in an airtight container and refrigerate it for up to 3–4 days.

Reheat the chicken in the air fryer at 375°F for 3–5 minutes until hot and crisp.

Assemble fresh wraps after reheating to keep the lettuce and tortilla from becoming soggy.

Avoid microwaving the fully assembled wrap if you want to preserve the crispy chicken coating.

Make-Ahead Instructions

The crispy chicken can be prepared up to a few days ahead and refrigerated after cooking.

Keep the ranch, vegetables, cheese, tortillas, and chicken stored separately until serving.

When ready to eat, reheat the chicken in the air fryer and assemble the wrap with fresh ingredients.

This method works especially well for quick weekday lunches and family meal prep.

Common Mistakes to Avoid

  • Overcrowding the basket: Crowded chicken pieces can steam instead of becoming crisp.
  • Skipping the egg coating: The egg helps the breadcrumbs stick to the chicken.
  • Using wet chicken: Excess moisture can make the breading fall off.
  • Overfilling the wrap: Too much filling makes rolling difficult.
  • Overcooking the chicken: Cook until the center reaches 165°F, then remove it promptly.
  • Adding vegetables too early: Fresh lettuce and tomatoes are best added after the chicken is cooked.

Frequently Asked Questions

Can I use chicken thighs?

Yes, boneless skinless chicken thighs work well and provide a slightly richer, juicier texture.

What temperature should chicken reach?

Cooked chicken should reach an internal temperature of 165°F in the thickest part.

Can I use panko breadcrumbs?

Yes, panko creates a lighter and crunchier coating than standard breadcrumbs.

Can I make these wraps spicy?

Yes, add buffalo sauce, hot sauce, jalapeños, or spicy ranch to increase the heat.

Can I prepare the chicken ahead of time?

Yes, refrigerate cooked chicken for up to 3–4 days and reheat it in the air fryer before assembling.

How do I keep the wraps from getting soggy?

Keep the chicken and wet ingredients separate until serving, then assemble the wraps just before eating.

Can I use store-bought ranch dressing?

Yes, your favorite bottled ranch dressing works perfectly for this recipe.

Can I make these without cheese?

Yes, simply leave out the cheese or replace it with avocado for a creamy texture.

Final Thoughts

Air Fryer Crispy Chicken Ranch Wraps turn simple ingredients into a crunchy, creamy, satisfying meal. The seasoned chicken develops a golden crust in the air fryer, while ranch dressing, fresh vegetables, and cheddar create a flavorful filling.

For the best result, keep the chicken pieces evenly sized, avoid overcrowding the air fryer, and assemble the wraps shortly before serving. With a few simple toppings, this recipe can easily become a regular weeknight favorite.

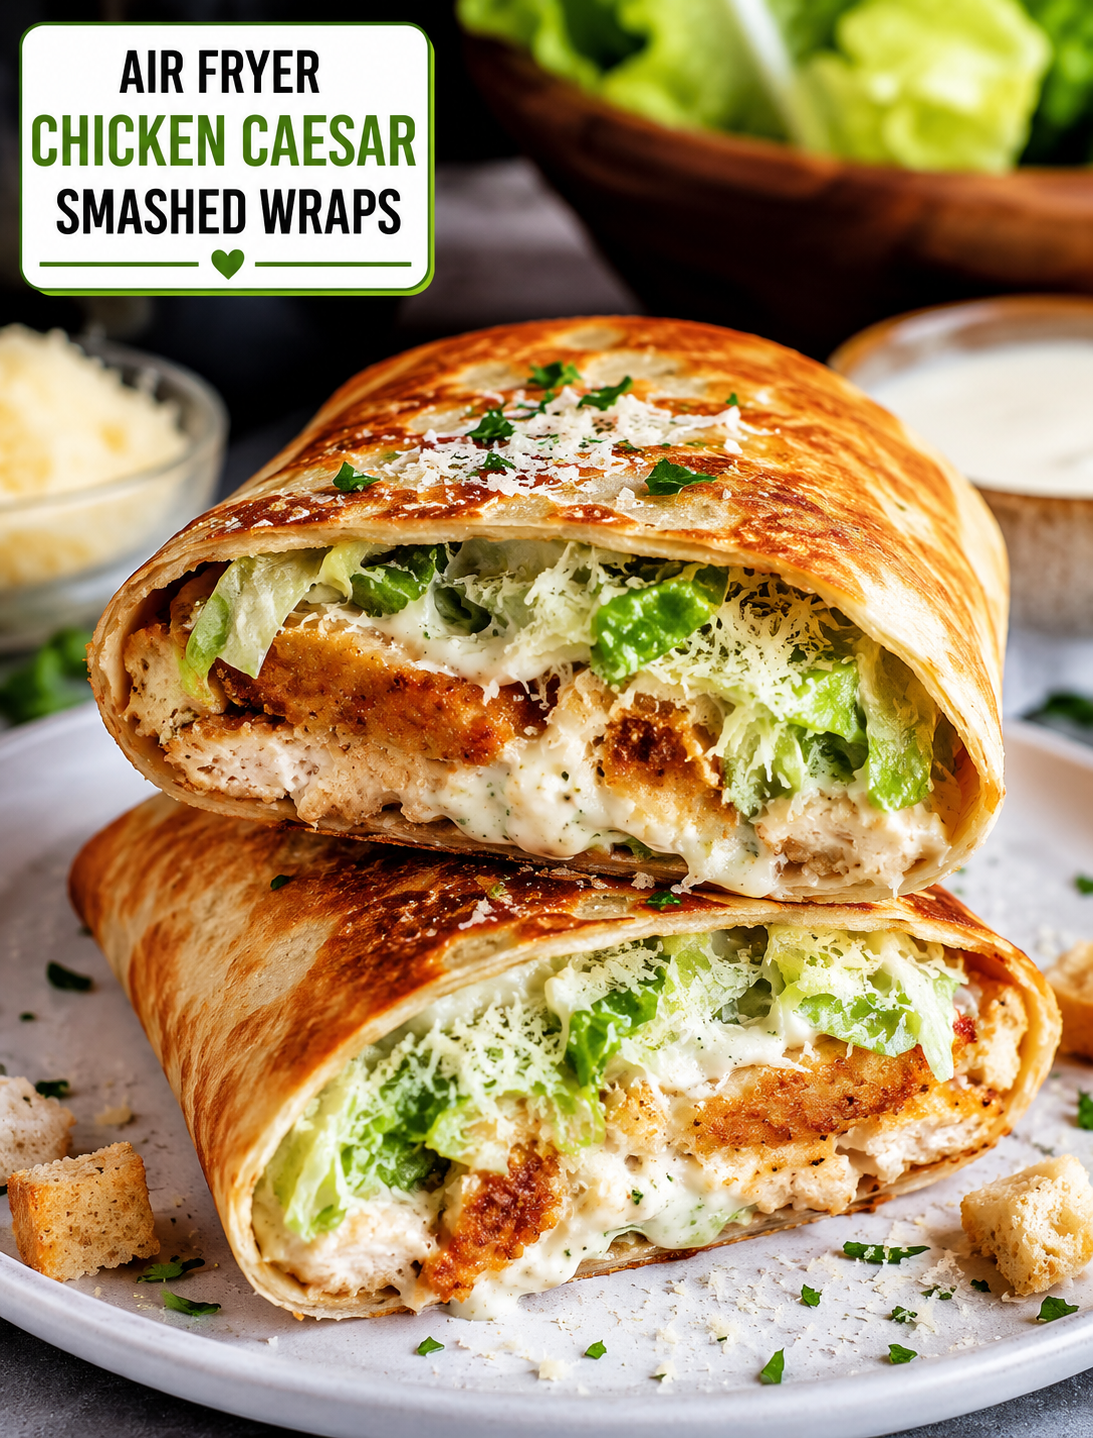
Air Fryer Crispy Chicken Caesar Smashed Wraps

Crispy air fryer chicken Caesar smashed wrap with romaine lettuce, Parmesan cheese and creamy Caesar dressing

Air Fryer Crispy Chicken Caesar Smashed Wraps

If you love crispy chicken Caesar salads but want something more filling, these Air Fryer Crispy Chicken Caesar Smashed Wraps are worth trying. Thinly pressed seasoned chicken cooks directly against a flour tortilla, creating a crisp, golden layer that holds creamy Caesar dressing, crunchy romaine, and melted cheese. The result is a quick dinner that feels like a mix of a chicken wrap and a classic Caesar salad.

This recipe is especially useful for busy weeknights because the ingredients are simple and the air fryer handles most of the cooking. You also get a satisfying contrast between the crisp tortilla, savory chicken, cool lettuce, and creamy dressing.

Why You’ll Love These Crispy Chicken Caesar Wraps

These wraps turn familiar Caesar salad ingredients into a handheld meal with more texture and flavor. The thin chicken layer spreads across the tortilla, so each bite includes seasoned meat instead of large pieces that can fall out.

The air fryer gives the outside a toasted finish without deep frying. A small amount of oil is enough to help the tortilla brown and crisp.

Caesar dressing adds tangy, savory flavor, while Parmesan brings a salty finish. Fresh romaine provides crunch and keeps the wrap from feeling too heavy.

For a family dinner, you can prepare the chicken mixture ahead of time and assemble the wraps when everyone is ready to eat. You can also leave out bacon or spicy toppings for younger eaters.

Ingredients

  • 1 pound ground chicken
  • 4 large flour tortillas
  • 1 cup finely shredded romaine lettuce
  • ½ cup Caesar dressing
  • ½ cup shredded mozzarella cheese
  • ¼ cup grated Parmesan cheese
  • ½ teaspoon garlic powder
  • ½ teaspoon smoked paprika
  • ½ teaspoon Italian seasoning
  • ½ teaspoon kosher salt
  • ¼ teaspoon black pepper
  • 1 tablespoon olive oil
  • 2 tablespoons cooked, crumbled bacon, optional
  • Extra Parmesan for serving, optional

Choose tortillas that are large enough to fold securely around the filling. Regular flour tortillas work well because they become crisp without cracking too easily.

For the best texture, use fresh romaine and grate the Parmesan shortly before assembling the wraps.

How to Make Air Fryer Crispy Chicken Caesar Smashed Wraps

Prepare the Chicken Mixture

Place the ground chicken in a bowl and add garlic powder, smoked paprika, Italian seasoning, salt, and black pepper. Mix gently until the seasonings are evenly distributed.

Do not overwork the chicken because a compact mixture can become firm after cooking. A light, even mixture spreads more easily over the tortilla.

Build the Smashed Wraps

Place each tortilla on a clean surface. Spread a thin, even layer of seasoned ground chicken over most of one side of the tortilla.

Keep the chicken layer fairly thin so it cooks evenly and does not make the tortilla difficult to fold. Press the mixture firmly enough to stay attached during cooking.

Lightly brush the chicken side with olive oil. This helps the meat brown while also adding flavor.

Air Fry Until Crisp

Preheat your air fryer according to its instructions. Place the tortilla chicken-side down in the basket without overlapping the wraps.

Cook at 375°F for about 7–9 minutes, then carefully flip the wrap. Add mozzarella and Parmesan to the cooked chicken side.

Continue cooking for about 2–3 minutes, or until the cheese melts and the tortilla becomes golden and crisp.

Cooking time can vary between air fryer models, so check the chicken with a food thermometer. Ground chicken should reach 165°F internally before serving.

Add the Caesar Filling

Spread Caesar dressing over the crispy chicken surface. Add shredded romaine and optional bacon.

Fold the tortilla around the filling and return it to the air fryer for about 1 minute if you want an extra-crisp finish.

Cut each wrap in half and serve immediately while the tortilla is still crunchy.

Tips for the Best Results

Keep the chicken layer thin and even because thick spots can take longer to cook. Avoid overcrowding the air fryer basket because hot air needs space to circulate around each wrap.

Add the romaine after cooking to preserve its fresh crunch. Putting lettuce in the air fryer can make it wilt and lose its texture.

Use Caesar dressing sparingly at first because too much sauce can soften the crispy tortilla. You can always serve extra dressing on the side.

If your tortilla is very large, fold the edges inward before rolling to keep the filling contained. Letting the finished wrap rest for one minute before cutting can also make it easier to handle.

For extra flavor, add a pinch of crushed red pepper, sliced green onions, or a little lemon zest to the finished wrap.

Easy Variations

You can replace ground chicken with finely chopped cooked chicken if you already have leftovers. Ground turkey also works well when you want a leaner alternative.

For a spicy version, mix a little hot sauce into the Caesar dressing. Buffalo-style sauce also pairs well with the Parmesan and romaine.

If you want extra crunch, add toasted breadcrumbs or crispy bacon just before folding the wrap. For a lighter option, use a lighter Caesar dressing and add extra romaine.

A small amount of avocado can add creaminess, while sliced tomatoes bring freshness and acidity.

What to Serve With Chicken Caesar Wraps

These wraps are filling enough to serve as a complete dinner, but they also pair well with simple sides.

Serve them with fresh fruit, a small green salad, roasted vegetables, or air-fried potato wedges. For a casual family meal, offer extra Caesar dressing and Parmesan at the table.

They also make a practical lunch when wrapped tightly and eaten soon after preparation. For the best texture, keep the lettuce and dressing separate until serving if preparing them ahead.

Storage and Reheating

Store leftover cooked wraps in an airtight container in the refrigerator for up to 3 days. Keep fresh lettuce and extra dressing separate when possible.

Reheat the wrap in the air fryer at 350°F for about 3–5 minutes until warmed and crisp. Avoid microwaving when possible because the tortilla can become soft.

Always refrigerate leftovers promptly and reheat only the portion you plan to eat.

Frequently Asked Questions

Can I use chicken breast instead of ground chicken?

Yes. Finely chop cooked chicken breast and season it before adding it to the tortilla for a similar wrap-style dinner.

What temperature should ground chicken reach?

Ground chicken should reach an internal temperature of 165°F for safe consumption.

Can I make these wraps without cheese?

Yes. Parmesan can be skipped, while mozzarella can be replaced with another melting cheese or omitted entirely.

How do I keep the tortilla crispy?

Use a thin chicken layer, avoid excess dressing, and serve the wraps soon after air frying.

Can I prepare these wraps ahead of time?

You can season the chicken and prepare the toppings ahead, but assemble the wraps shortly before air frying for the best texture.

Can I use store-bought Caesar dressing?

Yes. A refrigerated Caesar dressing works well and makes this recipe faster for busy weeknights.

Can I make these wraps spicy?

Yes. Add hot sauce, crushed red pepper, or a spicy Caesar dressing for extra heat.

What lettuce works best?

Fresh romaine is the best choice because its firm leaves provide the crisp texture associated with a classic Caesar salad.

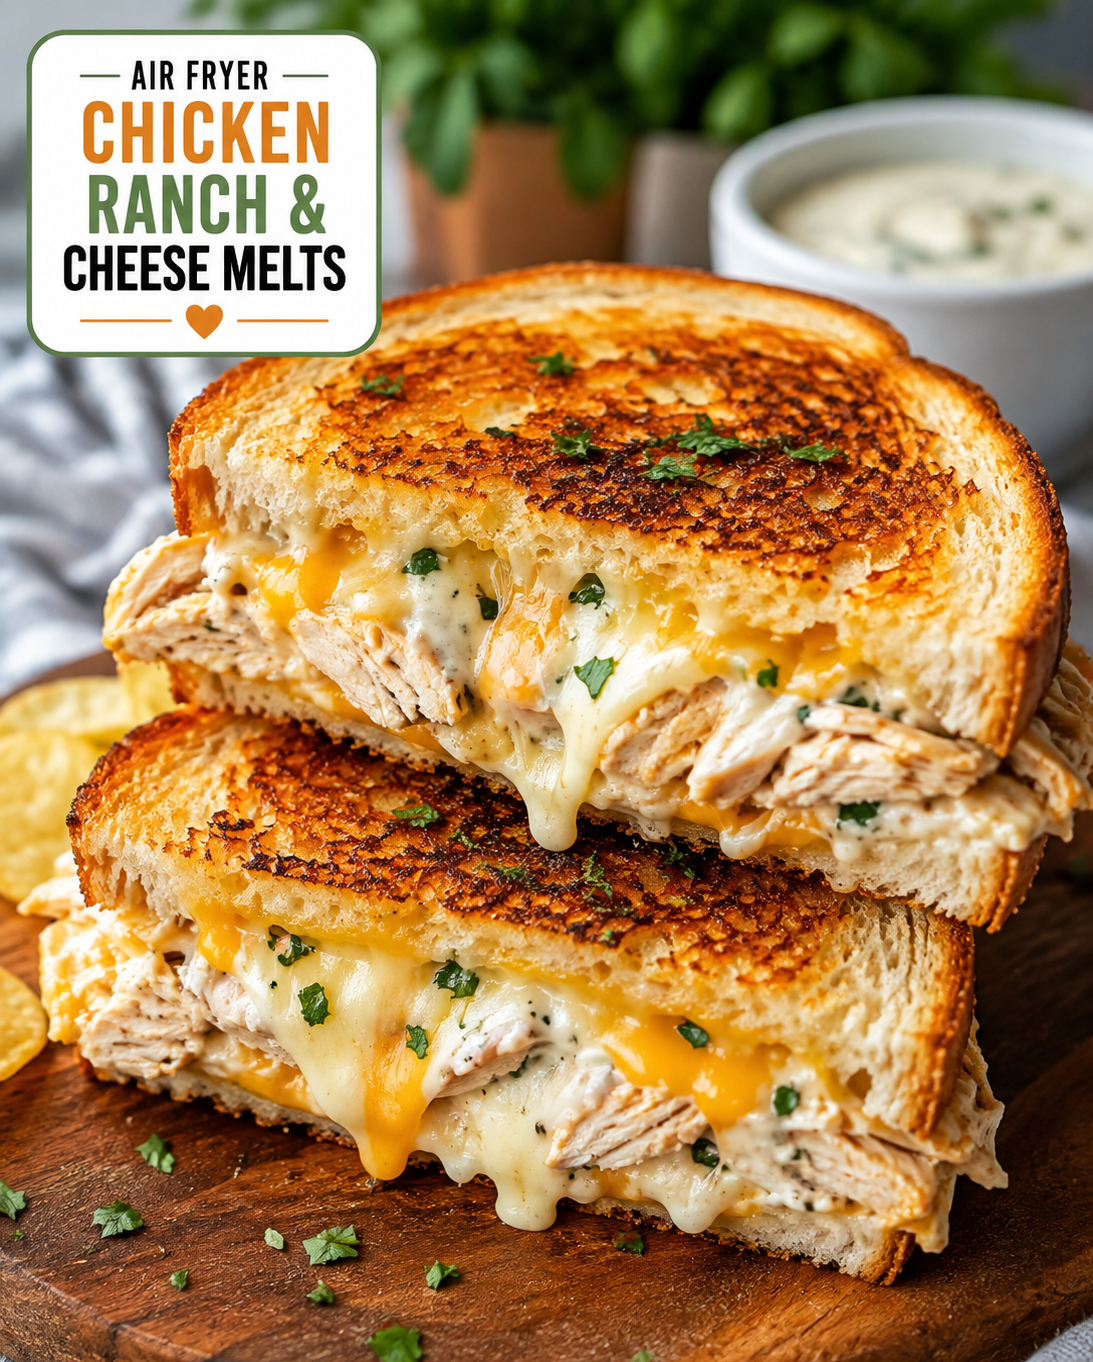
Air Fryer Chicken Ranch & Cheese Melts

Air Fryer Chicken Ranch & Cheese Melts with crispy golden bread, tender chicken, ranch dressing, and melted cheese

Air Fryer Chicken Ranch & Cheese Melts

If you want a quick lunch that feels crispy, cheesy, and satisfying, these Air Fryer Chicken Ranch & Cheese Melts are an easy choice. Tender chicken, creamy ranch, and melted cheese come together inside golden, toasted bread for a meal that tastes far more special than the effort required.

The air fryer gives the bread a crisp outside while keeping the chicken and cheese filling warm and flavorful. This recipe works well for a weekday lunch, a quick dinner, or an easy meal when you have cooked chicken left in the refrigerator.

Unlike a traditional grilled sandwich, you do not need a skillet full of butter or oil. The air fryer handles the crisping while the cheese melts into the chicken and ranch mixture.

The recipe also gives you plenty of room to adjust the flavors. Use cheddar for a sharper taste, Monterey Jack for a smooth melt, or a combination of cheeses for extra flavor.

Why You’ll Love These Chicken Ranch & Cheese Melts

These melts are built around simple ingredients that are easy to find at most U.S. grocery stores. The combination of chicken, ranch, and cheese creates a rich filling without requiring a long list of seasonings.

The air fryer also makes the texture stand out. The bread becomes crisp and lightly golden, while the cheese turns soft and gooey.

Another benefit is the short cooking time. If your chicken is already cooked, you can have the filling ready in minutes and finish the sandwiches in the air fryer.

They are also easy to customize. Add sliced jalapeños for heat, chopped green onions for freshness, or a few thin tomato slices for extra moisture.

Ingredients You’ll Need

  • 2 cups cooked boneless, skinless chicken, shredded or finely chopped
  • 4 slices sandwich bread or sturdy sourdough
  • ½ cup shredded cheddar cheese
  • ¼ cup shredded Monterey Jack cheese
  • 3 tablespoons ranch dressing
  • 1 tablespoon softened butter
  • ½ teaspoon garlic powder
  • ¼ teaspoon black pepper
  • 2 tablespoons chopped green onions, optional
  • 1 tablespoon chopped jalapeños, optional

Choose bread that can hold the filling without becoming soggy. Sourdough, Texas toast, and thick-cut white bread all work well.

For the chicken, leftover roasted chicken, rotisserie chicken, or freshly cooked chicken breast can be used. Make sure the chicken is fully cooked before adding it to the sandwich.

How to Make Air Fryer Chicken Ranch & Cheese Melts

Prepare the Chicken Filling

Place the cooked chicken in a bowl and add the ranch dressing, garlic powder, black pepper, and chopped green onions if using.

Mix until the ranch coats the chicken evenly. Do not add too much dressing because a wet filling can make the bread soft during cooking.

Assemble the Melts

Spread a thin layer of softened butter on one side of each bread slice. Place two slices butter-side down.

Divide the chicken mixture between the slices, then add the cheddar and Monterey Jack cheese.

Top with the remaining bread slices, keeping the buttered sides facing up.

Press the sandwiches gently so the filling stays inside during air frying. Avoid overfilling because melted cheese and chicken can spill from the edges.

Air Fry Until Golden and Cheesy

Preheat your air fryer to 375°F if your model recommends preheating.

Place the sandwiches in the basket in a single layer. Leave a little space around each one so hot air can circulate.

Air fry for about 4–6 minutes, then carefully flip the sandwiches. Continue cooking for another 2–4 minutes, or until the bread is golden and the cheese is fully melted.

Cooking time can vary between air fryer models, so check the sandwiches early during the first batch.

Remove the melts carefully and let them rest for about one minute before slicing. The short rest helps the melted cheese settle inside the sandwich.

Tips for the Best Chicken Ranch Melts

Use cold or room-temperature cooked chicken when preparing the filling. Very hot chicken can make the ranch mixture thin and harder to manage.

Do not overload the bread with ranch dressing. A small amount provides plenty of flavor while keeping the sandwich crisp.

Use freshly shredded cheese when possible. It usually melts more smoothly and gives the sandwich a better texture.

For extra crunch, choose thick bread and avoid pressing the sandwich too flat before cooking.

If your air fryer has a strong fan, secure the top bread slice with a toothpick during the first few minutes. Remove the toothpick before serving.

Check the sandwich frequently near the end of cooking. Bread can go from golden to overly dark quickly in some air fryers.

For food safety, chicken should reach 165°F when reheated. A food thermometer is the most reliable way to check the internal temperature.

Easy Variations to Try

You can change these melts without changing the basic cooking method.

For a spicy version, mix chopped jalapeños or a small amount of hot sauce into the chicken.

For a BBQ-style melt, replace part of the ranch dressing with your favorite BBQ sauce.

For a buffalo version, toss the chicken with buffalo sauce before adding the ranch and cheese.

For a veggie-packed option, add finely chopped bell peppers, spinach, or green onions. Keep added vegetables fairly dry so they do not make the bread soggy.

You can also switch the cheese. Pepper Jack adds heat, mozzarella creates a mild stretchy melt, and sharp cheddar gives the sandwich a stronger flavor.

What to Serve With Chicken Ranch & Cheese Melts

These melts are filling on their own, but a simple side can turn them into a complete lunch.

Serve them with a crisp green salad for a lighter meal. Air-fried potato wedges or sweet potato fries make the meal more hearty.

Fresh cucumber slices, cherry tomatoes, or carrot sticks also pair well with the creamy ranch flavor.

For a casual family lunch, cut each sandwich into halves and serve them with extra ranch for dipping.

How to Store and Reheat Leftovers

Store leftover melts in an airtight container in the refrigerator and use them within 3–4 days.

For the best texture, reheat them in the air fryer rather than the microwave. Air fry at about 350°F until the center is hot and the bread is crisp again.

Avoid reheating the sandwich repeatedly. Reheat only the portion you plan to eat.

If you are preparing the chicken mixture ahead of time, keep it refrigerated in a covered container and assemble the sandwiches when you are ready to cook.

Frequently Asked Questions

Can I use rotisserie chicken for these melts?

Yes. Shredded rotisserie chicken is a convenient option and works especially well when you need a fast lunch.

What cheese melts best with chicken and ranch?

Cheddar, Monterey Jack, mozzarella, and Pepper Jack all melt well and pair nicely with chicken and ranch.

Can I make these melts without butter?

Yes. You can lightly spray the bread with cooking spray, although butter gives the bread a richer flavor and deeper browning.

How long do chicken melts take in the air fryer?

They usually take about 6–10 minutes at 375°F, depending on the bread thickness and your air fryer model.

Can I use leftover chicken breast?

Yes. Leftover cooked chicken breast is ideal as long as it has been stored safely and is still within its recommended refrigerator storage time.

How do I keep the bread from getting soggy?

Use a moderate amount of ranch, avoid watery fillings, and cook the sandwiches in a single layer until the bread is crisp.

Can I make these melts spicy?

Yes. Add sliced jalapeños, Pepper Jack cheese, hot sauce, or buffalo sauce for extra heat.

Can I freeze chicken ranch melts?

It is better to freeze the cooked chicken separately and assemble fresh sandwiches when possible because freezing can affect the texture of the bread and ranch dressing.

Final Thoughts

Air Fryer Chicken Ranch & Cheese Melts are a simple way to turn cooked chicken into a hot, crispy, cheesy lunch. The air fryer creates golden bread without the need for a skillet, while ranch and melted cheese add plenty of flavor.

Keep the filling balanced, choose sturdy bread, and watch the sandwiches closely during the final minutes of cooking. With a few simple swaps, the same recipe can become spicy, smoky, or extra cheesy.

For busy weekdays, leftover chicken, a few slices of bread, and ingredients already in your refrigerator can become a satisfying meal in minutes.