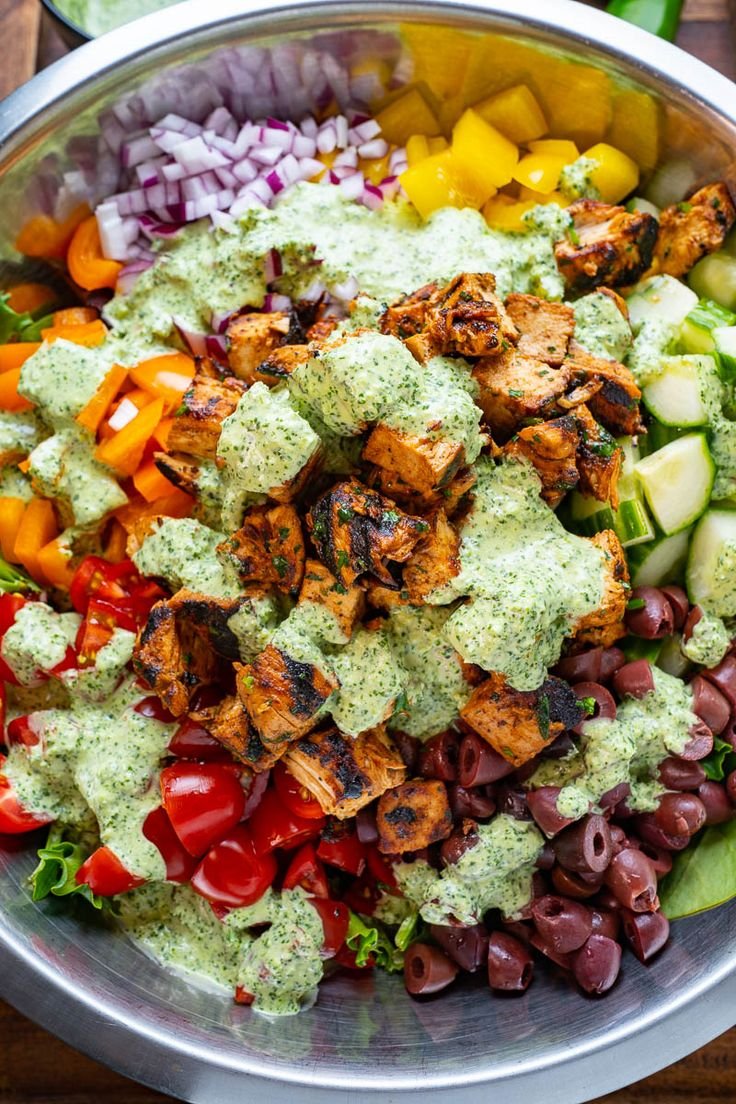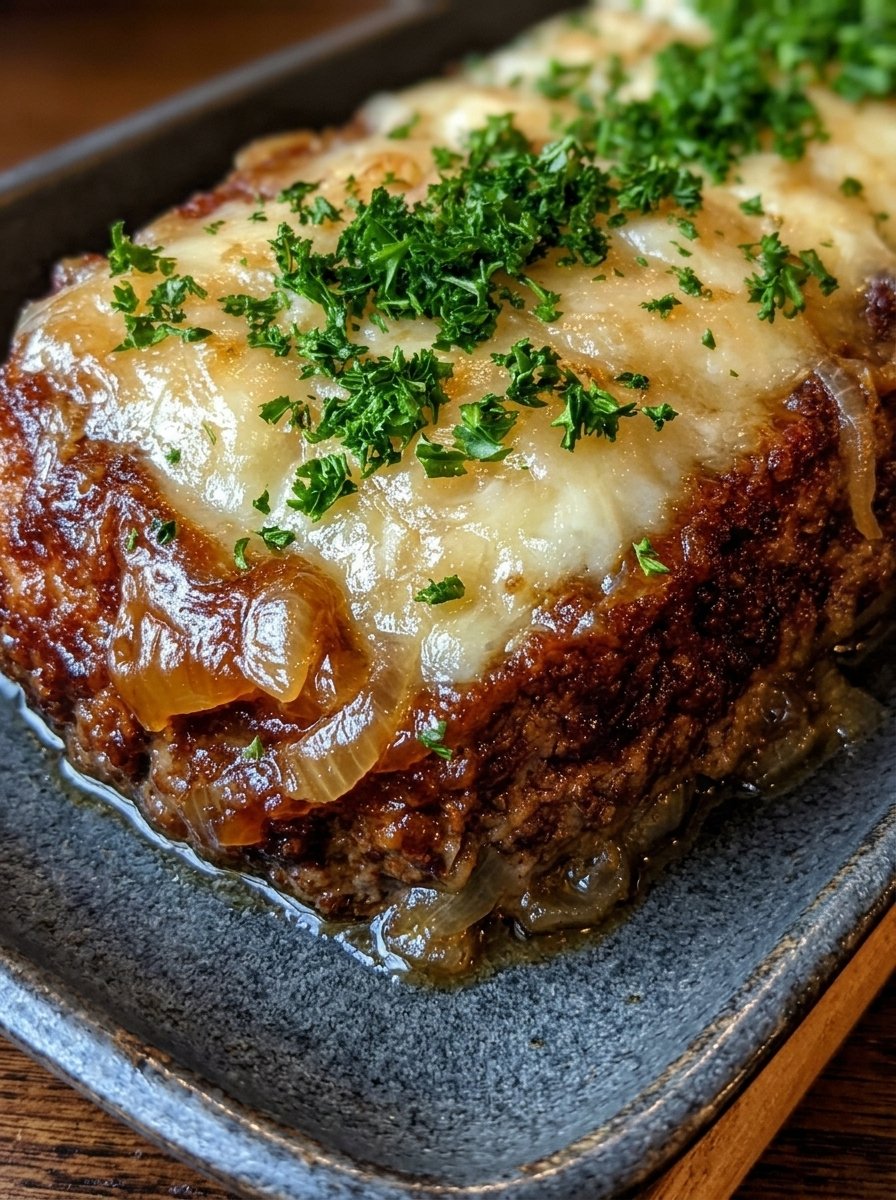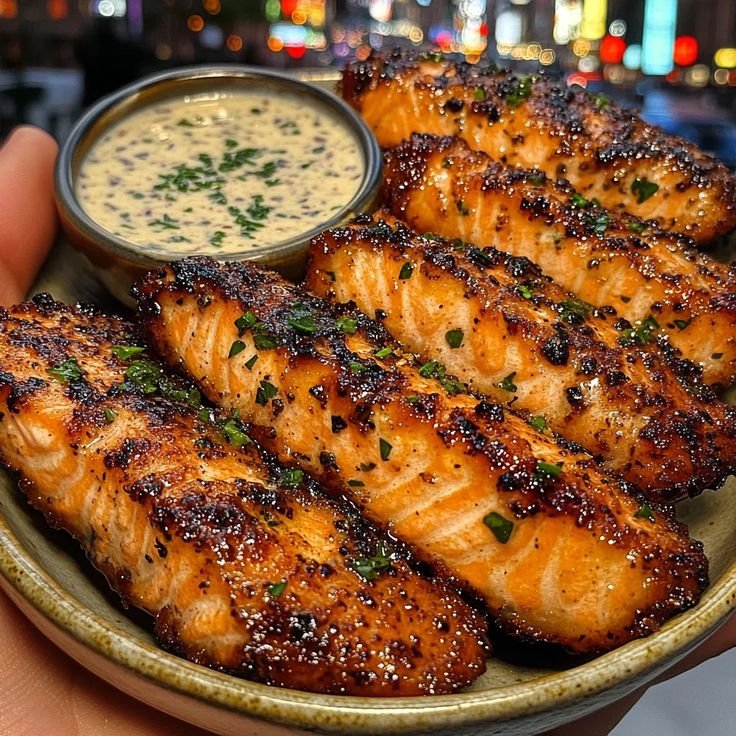
Crispy Salmon Strips with Herb Tartar Dip

Crispy Salmon Strips with Herb Tartar Dip


🥗 Necessary Ingredients

For the Salmon:

  • 🐟 1 lb Fresh salmon fillet, sliced into even strips.

  • 🧂 1 tsp Garlic powder.

  • 🧂 1 tsp Onion powder.

  • 🧂 1/2 tsp Smoked paprika.

  • 🧂 1/4 tsp Black pepper.

  • 🥑 1 tbsp Avocado oil for searing.

For the Herb Tartar Dip:

  • 🥣 1/2 cup Greek yogurt (a high-protein, Mediterranean-friendly base).

  • 🥒 1 tbsp Finely minced pickles.

  • 🌿 1 tbsp Fresh chives or parsley, minced.

  • 🍋 1 tsp Fresh lemon juice (often used in the user’s preferred infusions).


👩‍🍳 Step-by-Step Instructions

  • 🔪 Prepare: Slice the salmon into strips approximately 1 inch wide.

  • ➡️ 🧂 Season: Mix the spices in a small bowl and coat each salmon strip thoroughly.

  • ➡️ 🔥 Heat: Place a large skillet over medium-high heat and add the avocado oil.

  • ➡️ 🍳 Sear: Place the strips in the pan and cook for 3–4 minutes per side until golden and crisp.

  • ➡️ 🥣 Whisk: While the salmon cooks, combine the dip ingredients in a small bowl.

  • ➡️ ✨ Finish: Remove the salmon from the heat and garnish with fresh herbs before serving.


❓ Q/A Section

Q: Can I prepare this in an air fryer? 🍟 A: Yes! Cook the seasoned strips at 200°C for 8–10 minutes, flipping them halfway through to ensure they are crisp on all sides.

Q: Is this recipe suitable for a sugar-free lifestyle?A: Yes, this recipe contains no added sugars or flour, making it ideal for those prioritizing healthy, sugar-free meals.

Q: How do I store the leftovers? 🧊 A: Store any remaining salmon strips in an airtight container in the refrigerator for up to 2 days. Reheat gently in a pan to maintain the crispy exterior.

Q: What is the best way to ensure the salmon is cooked? 🐟 A: The salmon is ready when it is opaque throughout and flakes easily with a fork, ensuring it remains moist on the inside.

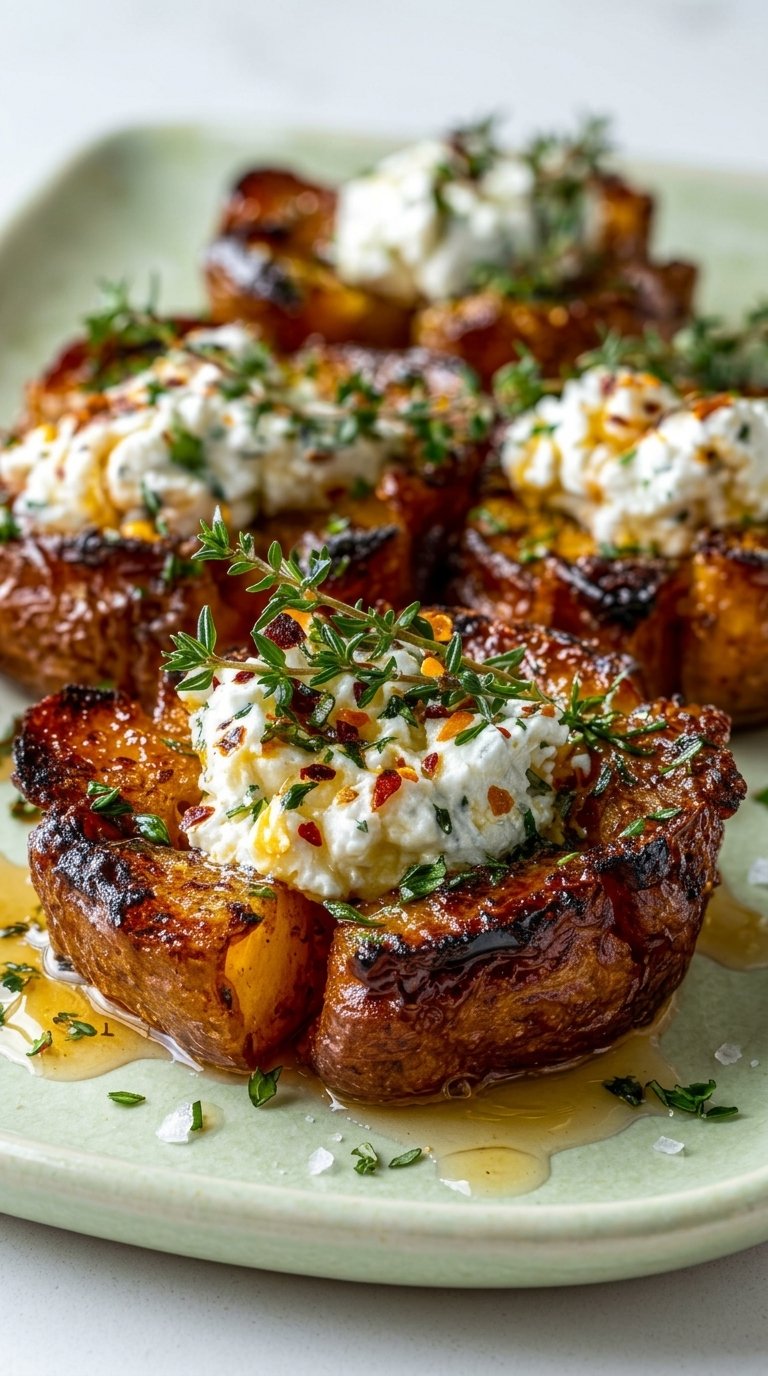
Crispy Smashed Potatoes with Ricotta & Honey

Crispy Smashed Potatoes with Ricotta & Honey

🛒 Ingredients

  • 1.5 lbs Baby potatoes (Yukon Gold or Red potatoes work best) 🥔

  • 3 tbsp Olive oil

  • 1 tsp Garlic powder

  • Salt and Black Pepper to taste 🧂

  • For the Topping:

    • 1 cup Whole milk ricotta cheese 🧀

    • 1 tbsp Fresh thyme or parsley 🌿

    • 2 tbsp Honey 🍯

    • 1 tsp Red chili flakes (to make the “hot honey”) 🌶️

    • Optional: A pinch of lemon zest for the ricotta


🥣 Step-by-Step Instructions

  1. Boil the Potatoes ➡️ Place the whole baby potatoes in a large pot of salted water. Bring to a boil and cook for 15–20 minutes until fork-tender. ➡️ Drain and let them steam dry for 5 minutes. 💨

  2. Prep the Oven ➡️ Preheat your oven to 425°F (220°C). Line a baking sheet with parchment paper.

  3. The Smash ➡️ Place the potatoes on the baking sheet. Use the bottom of a heavy glass or a potato masher to gently press down on each potato until it is flattened but still holds together. ➡️ Aim for about 1/2-inch thickness. 🔨

  4. Season & Crisp ➡️ Drizzle the olive oil over the potatoes. Sprinkle with garlic powder, salt, and pepper. ➡️ Bake for 25–30 minutes, flipping halfway through, until the edges are deep golden brown and very crispy. 🔥

  5. Whip the Ricotta ➡️ While the potatoes bake, place the ricotta cheese in a small bowl. Whisk it vigorously with a spoon or a small hand mixer until it becomes light and airy. ➡️ Mix in a little lemon zest if using. 🧀🌀

  6. Infuse the Honey ➡️ In a tiny microwave-safe bowl, combine the honey and red chili flakes. Heat for 15 seconds to let the flavors meld. 🍯🌶️

  7. Assemble ➡️ Once the potatoes are out of the oven, place a generous dollop of the whipped ricotta onto each hot potato. 🥄

  8. Drizzle ➡️ Pour the warm hot honey over the ricotta. 🍯➡️🥔

  9. Garnish ➡️ Finish with fresh thyme leaves and an extra pinch of flaky salt. 🌿

  10. Serve ➡️ Enjoy immediately while the potatoes are hot and the ricotta is cool! 🍽️


❓ Common Questions (Q&A)

Q: Can I use large potatoes instead? A: Baby potatoes are best because they have a high skin-to-flesh ratio, which makes them extra crispy. If using large ones, cut them into chunks before boiling, but they won’t “smash” as perfectly. 🥔

Q: How do I get them really crispy? A: Make sure the potatoes are dry after boiling before you add the oil. Water creates steam, but oil creates crunch! 🚫💦

Q: Can I make these in an Air Fryer? A: Yes! Air fry the smashed potatoes at 400°F (200°C) for 15–20 minutes, flipping halfway through. ⚡

Q: What can I use instead of ricotta? A: Thick Greek yogurt, labneh, or even a small slice of goat cheese would provide a similar creamy, tangy contrast. 🥛


✨ Pro-Tips for Success

  • Steam Dry: After draining the boiled potatoes, let them sit in the hot pot for a minute to let the excess moisture evaporate. This is the secret to a crunchy skin! 💨

  • High Heat: Don’t be afraid of the high oven temperature; that’s what creates those delicious caramelized edges seen in the image. 📈

Savory Minced Meat & Cheese Pastry Roll

Savory Minced Meat & Cheese Pastry Roll 🧀

A delicious, golden-brown pastry filled with seasoned meat, melty cheese, and a surprise touch of chopped eggs for extra richness.

🛒 Ingredients

  • Puff Pastry: 1 large sheet (thawed) 🥐

  • Minced Meat: 300g (Beef or Chicken work best) 🥩

  • Butter: 1 tbsp (for greasing/brushing) 🧈

  • Aromatics: 1 Onion (finely chopped) & 1 tsp Dried Basil 🌿

  • Protein Boost: 2 Boiled eggs (finely chopped) 🥚

  • Cheese: 100g Grated Mozzarella or Cheddar 🧀

  • Freshness: 1 bunch Parsley (chopped) 🌱

  • Seasoning: Salt and black pepper to taste 🧂


👩‍🍳 Step-by-Step Instructions

  1. Prep the Meat Filling ➡️ In a pan, sauté the chopped onion with a little oil until soft. Add the minced meat and cook until browned. Season with salt, pepper, and dried basil. Drain any excess fat and let it cool slightly. 🍳

  2. Prepare the Dough ➡️ Roll out your puff pastry sheet on a lightly floured surface or parchment paper. 📜

  3. Layer the Flavors ➡️ Spread the cooked minced meat evenly across the pastry, leaving a small border at the edges. Top with the chopped boiled eggs and half of the chopped parsley. 🌿

  4. Add the Cheese ➡️ Sprinkle the grated cheese generously over the meat and egg layer. 🧀

  5. Roll It Up ➡️ Carefully roll the pastry tightly (like a Swiss roll) starting from the long edge. Pinch the ends to seal everything inside. 🌀

  6. Bake to Golden Perfection ➡️ Place the roll on a greased baking tray. Brush the top with melted butter or an egg wash for extra shine. Bake at 200°C for about 20–25 minutes until the pastry is puffed and deep golden brown. 🕒

  7. Final Touch ➡️ Remove from the oven, sprinkle with the remaining fresh parsley, and slice into thick rounds while warm. ✨


❓ Common Questions (Q&A)

Q: Can I use raw meat directly on the pastry? A: It is much safer and tastier to cook the meat first. This prevents the pastry from getting soggy from the meat juices and ensures the onions are perfectly soft. 🥘

Q: My pastry isn’t rising, what happened? A: Make sure your oven is fully preheated before putting the tray in. Puff pastry needs that initial “blast” of heat to create those beautiful, flaky layers! 🔥

Q: Can I make this ahead of time? A: You can roll it up and keep it in the fridge (covered) for a few hours before baking. Just bake it fresh when you’re ready to eat! ❄️

Q: What should I serve this with? A: It pairs perfectly with a crisp green salad or a simple garlic yogurt dip. 🥗

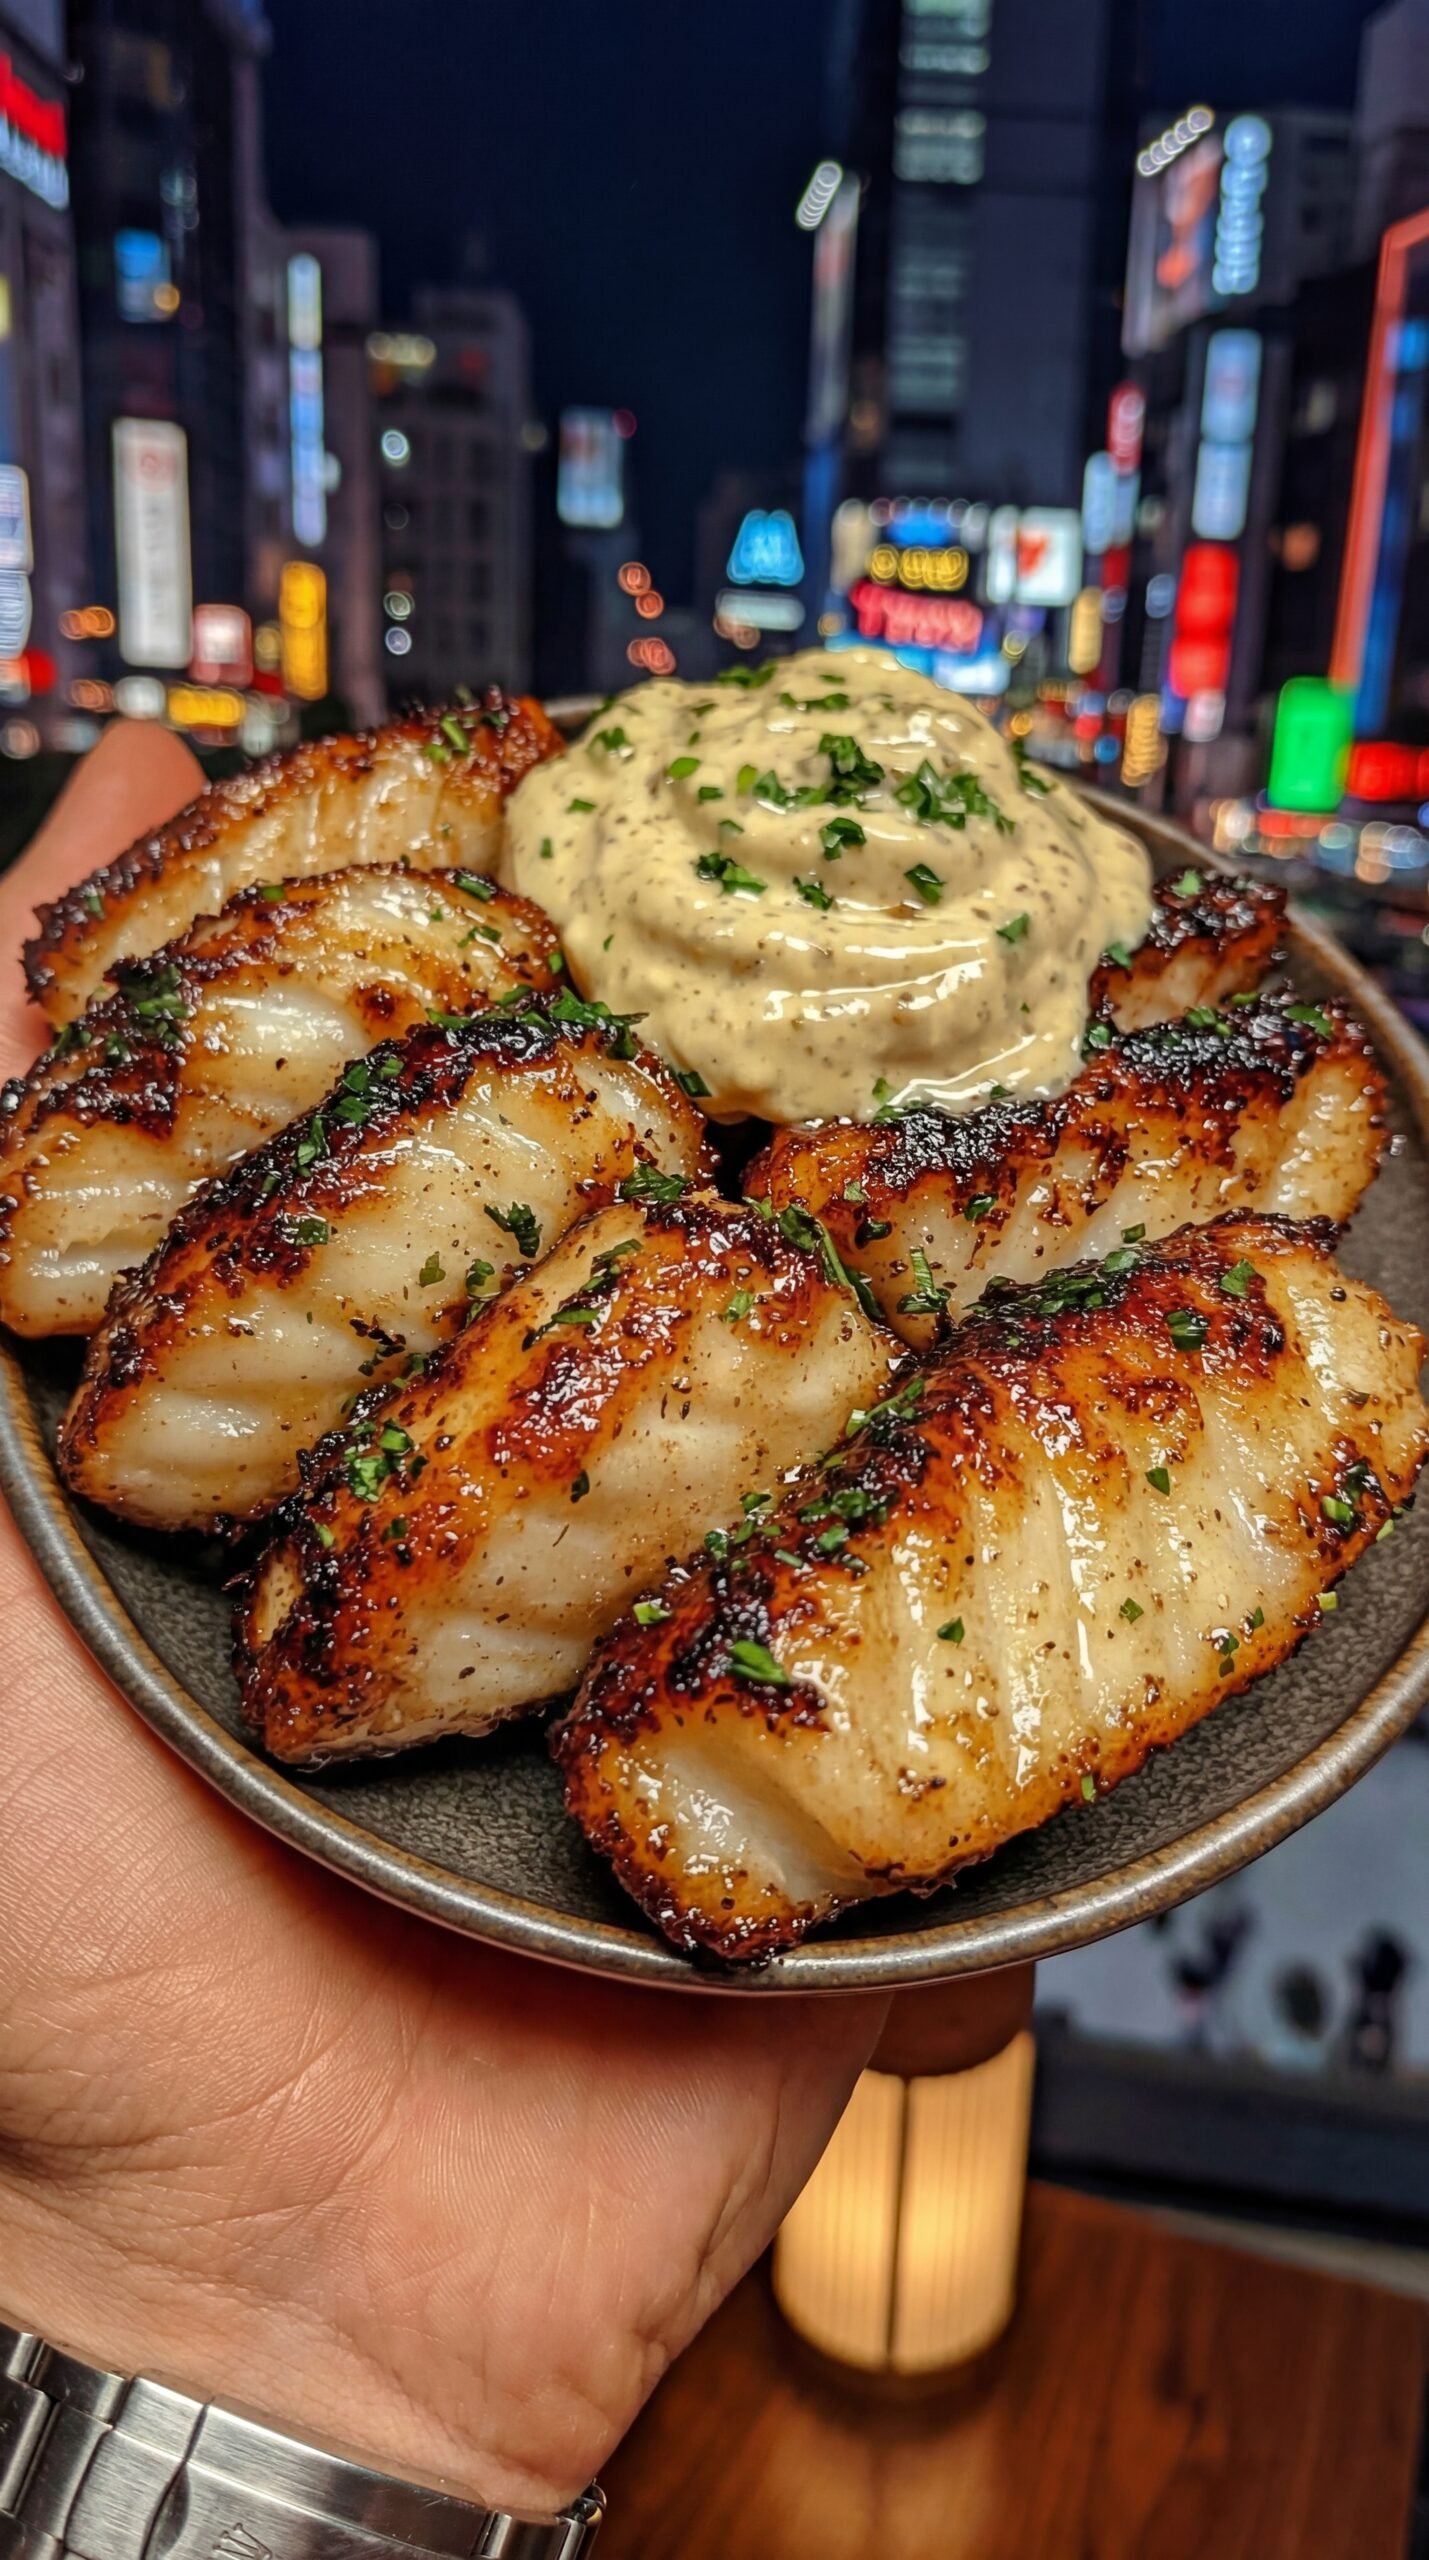
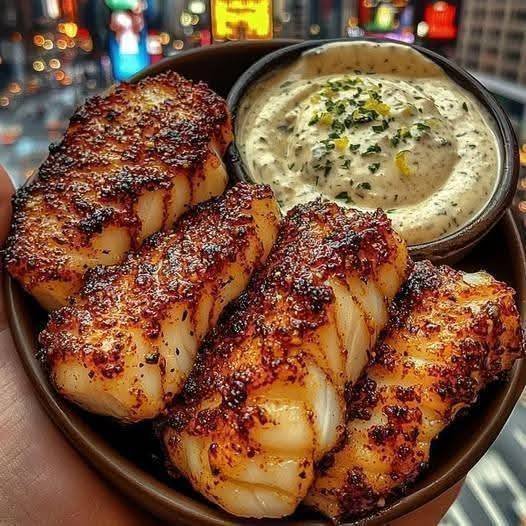
Blackened Sea Bass Bites with Zesty Herb Dip This recipe use

Blackened Sea Bass Bites with Zesty Herb Dip

This recipe uses fresh fish and a blend of aromatic spices to create a perfectly charred exterior while keeping the inside tender and flaky.

🛒 Ingredients

The Fish:

  • 1 lb Sea Bass fillet, cut into bite-sized cubes 🧊 ➔ 🐟

  • 2 tbsp Olive Oil (for searing) 🫒

  • 1 tbsp Smoked Paprika 🌶️

  • 1 tsp Garlic Powder 🧄

  • 1 tsp Onion Powder 🧅

  • 1/2 tsp Dried Thyme & Oregano 🌿

  • Pinch of Salt & Black Pepper 🧂

The Creamy Dip:

  • 1/2 cup Greek Yogurt (healthy alternative to mayo!) 🥣

  • 1 tsp Dijon Mustard 🍯

  • 1 tbsp Fresh Chives, finely chopped 🍃

  • 1/2 Lemon, juiced 🍋

  • 1/2 tsp Cracked Black Pepper 🌑


👨‍🍳 Step-by-Step Instructions

  1. Prep the Fish: Pat the sea bass cubes completely dry with a paper towel. 🧻 ➔ 🐟 (Dry fish sears better!)

  2. Seasoning: In a small bowl, mix all the dry spices together. Toss the fish cubes in the spice blend until every side is well-coated. 🥣 ➔ ✨

  3. The Dip: Whisk together the Greek yogurt, mustard, chives, lemon juice, and pepper in a bowl. Set aside in the fridge to stay cool. 🧊 ➔ 🥣

  4. Heat the Pan: Place a cast-iron skillet or heavy pan over medium-high heat with olive oil. Wait until it’s very hot but not smoking. 🔥 ➔ 🍳

  5. The Sear: Carefully place the fish bites in the pan. Do not crowd them! Sear for 2–3 minutes per side without moving them, allowing that “blackened” crust to form. 🍳 ➔ 🔥

  6. Garnish: Once the fish is flaky and charred, remove from heat. Sprinkle with fresh parsley or chives. 🌿 ➔ 🍽️

  7. Serve: Arrange the hot bites around the cold dip and enjoy the contrast of flavors! 😋 ➔ ❤️


❓ Questions & Answers

Q: Is “blackened” the same as burnt? 🤨 A: Not at all! ➔ 🚫 The dark color comes from the spices (like paprika) caramelizing and charring against the heat, creating a deep flavor without the bitterness of burnt food.

Q: Can I use a different fish? 🐟 A: Yes! ➔ ✅ Cod, Halibut, or even Salmon work beautifully with this spice blend if Sea Bass isn’t available.

Q: How do I get the sauce as thick as the picture? 🥣 A: Use thick Greek Yogurt or even a bit of softened cream cheese mixed in. ➔ 💪 Whisk it thoroughly and keep it chilled until the very second you serve.

Q: What should I serve this with? 🥗 A: These bites are great on their own as an appetizer, but they also taste amazing inside warm corn tortillas or over a bed of quinoa. ➔ 🌮 / 🍚


💡 Pro Tip

For the best results, use Ceylon Cinnamon in your other wellness routines (like the one under the tongue) to help manage blood sugar, which pairs perfectly with this high-protein, low-carb meal! 🪵 ➔ 🩺

Savory Vegetable & Cheese Egg Muffins

Savory Vegetable & Cheese Egg Muffins 🥚

A nutrient-dense, portable breakfast designed for consistent energy and meal-prep efficiency.

Ingredients (Makes 12 Muffins)

  • 6 large Organic eggs

  • 1/2 cup Unsweetened milk (or heavy cream for a denser, richer texture) 🥛

  • 1 cup Shredded cheese (Cheddar, Mozzarella, or a blend) 🧀

  • 1/2 cup Diced bell peppers (Red or green) 🫑

  • 1/4 cup Finely chopped onion 🧅

  • 2–3 tbsp Freshly chopped parsley or green onions 🌿

  • 1/2 tsp Sea salt

  • 1/4 tsp Black pepper

  • Optional: A pinch of paprika or 1/2 tsp baking powder for extra lift.


Detailed Step-by-Step Instructions 📋

  1. Oven Prep ➡️ Preheat your oven to 180°C (350°F).

  2. Pan Preparation ➡️ Grease a standard 12-cup muffin tin thoroughly with cooking spray or light oil. Alternatively, use silicone liners for the easiest removal. 🧼

  3. The Base ➡️ In a large mixing bowl, crack the eggs and add the milk. Whisk vigorously until the mixture is completely smooth and combined.

  4. The Fillings ➡️ Stir in the shredded cheese, diced peppers, onions, herbs, and seasonings. Ensure the vegetables are distributed evenly throughout the liquid. ➡️ Mix well!

  5. Portioning ➡️ Carefully pour the egg mixture into the muffin cups. Fill each cup only 3/4 full to allow room for the muffins to puff up during baking.

  6. The Bake ➡️ Place in the center of the oven and bake for 18–22 minutes. You will know they are ready when the centers are firm to the touch and no longer jiggle.

  7. The Rest ➡️ Allow the muffins to cool in the pan for 5 minutes before removing. They will deflate slightly as they cool; this is a natural process and does not affect the flavor. ❄️


Common Questions & Answers 💡

Q: Can I use egg whites instead of whole eggs? A: Yes. To replace 6 whole eggs, use approximately 1.5 cups of liquid egg whites. This will result in a leaner, lighter muffin. ⚪

Q: My muffins are sticking to the pan. How do I fix this? A: Eggs are very high in protein and tend to bind to metal. For future batches, ensure the pan is very well-greased, or switch to silicone liners, which allow the muffins to pop out effortlessly. ➡️ Use silicone!

Q: Can I add spinach or mushrooms? A: Absolutely. However, since these vegetables have high water content, it is best to sauté them first to remove excess moisture. This prevents the muffins from becoming watery. 🍄

Q: How do I reheat these? A: Simply place 2 muffins on a plate and microwave for 20–30 seconds. They are also delicious when enjoyed cold or at room temperature.


Health Highlights

  • Muscle Support: Provides 14–16g of protein per serving, which supports muscle maintenance and keeps you full.

  • Low Carbohydrate: Excellent for those following a low-carb or ketogenic lifestyle.

  • Vitamin Rich: High in Vitamin B12 and Choline, which are essential for brain health and metabolism. 🧠

Slow Cooker Tender Beef Bites (Flavor-Packed)

🥩 Slow Cooker Tender Beef Bites (Flavor-Packed)

📝 Description

This is a rich, savory slow cooker beef dish where cubed beef becomes incredibly tender after hours of slow cooking in a bold, slightly tangy sauce. It’s simple to prep but tastes like something you cooked all day (because you did 😄).


🛒 Ingredients

Main

  • 2½–3 lbs beef chuck roast, cut into 1–1.5 inch cubes
  • 1 packet onion soup mix
  • 1 cup beef broth

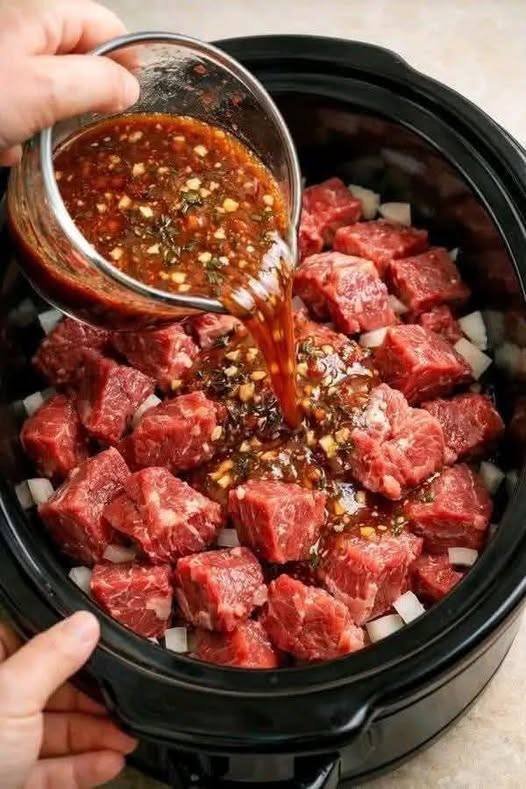
Flavor Sauce (this is likely what’s in your image 👇)

  • ½ cup soy sauce
  • ¼ cup brown sugar
  • 2 tbsp ketchup
  • 2 cloves garlic, minced
  • 1 tsp black pepper

(Optional but recommended)

  • 1 tbsp Worcestershire sauce
  • ½ tsp red pepper flakes (for heat)

🔪 Prep Tips (Important!)

  • Use beef chuck — it becomes tender when slow cooked
  • Trim large excess fat, but leave some for flavor
  • Cut evenly sized cubes so they cook uniformly

👩‍🍳 Step-by-Step Instructions

1. Optional Sear (adds BIG flavor)

  • Heat 1 tbsp oil in a pan over medium-high heat
  • Sear beef cubes for 1–2 minutes per side until browned
    👉 This step is optional but highly recommended for deeper flavor

2. Load the Slow Cooker

  • Place beef cubes into the slow cooker
  • Sprinkle onion soup mix evenly over the meat

3. Make the Sauce

In a bowl, mix:

  • Beef broth
  • Soy sauce
  • Brown sugar
  • Ketchup
  • Garlic
  • Black pepper
  • Worcestershire (if using)

Stir until combined.


4. Pour & Cook

  • Pour the sauce over the beef
  • Stir lightly to coat

Cook:

  • LOW: 7–8 hours (best for tenderness)
  • HIGH: 4–5 hours

5. Final Touch (Optional Thick Sauce)

If you want a thicker, glossy sauce:

  • Mix 1 tbsp cornstarch + 2 tbsp water
  • Stir into slow cooker during last 20–30 minutes
  • Let it thicken

🍽️ Serving Ideas

  • Over mashed potatoes (classic)
  • Over white or brown rice
  • With buttered noodles
  • In toasted sandwich rolls
  • With roasted veggies for a balanced meal

🧊 Storage

  • Fridge: up to 4 days (airtight container)
  • Freezer: up to 2–3 months
  • Reheat gently with a splash of broth

💡 Pro Tips

  • Add carrots & potatoes at the start for a full meal
  • Add mushrooms for extra umami
  • Taste before serving — adjust salt if needed (soy sauce adds saltiness)
  • If too salty, add a splash of water or broth

⚖️ Approx Nutrition (per serving, ~6 servings)

  • Calories: ~320–380
  • Protein: ~30g
  • Fat: ~18g
  • Carbs: ~10–15g

❓ Quick Q&A

Q: Why is my beef tough?
It likely hasn’t cooked long enough — slow cooking needs time to break down connective tissue.

Q: Can I skip soy sauce?
Yes — replace with more beef broth + a little salt, but flavor will be milder.

Q: Can I make it spicy?
Add chili flakes, hot sauce, or sriracha.

Slow-Cooker 3-Ingredient Cranberry Chicken

Slow-Cooker 3-Ingredient Cranberry Chicken

Ingredients

  • 2 lbs Chicken Breasts: Boneless and skinless (you can also use chicken thighs for extra juiciness).

  • 1 Can (14 oz) Cranberry Sauce: Jellied or whole berry both work beautifully.

  • 1 Packet (1 oz) Dry French Onion Soup Mix: This provides the savory, seasoned base for the sauce.

  • Optional: 1/2 cup of French Dressing or BBQ sauce (if you prefer a more “glaze-like” consistency).

  • Optional Garnish: Fresh parsley or sliced green onions.


Detailed Step-by-Step Instructions

  1. Prepare the Slow Cooker: Lightly grease the inside of your slow cooker with cooking spray or use a slow cooker liner for effortless cleanup.

  2. Layer the Chicken: Place the chicken breasts in a single layer at the bottom of the pot. Do not overlap them too much to ensure even cooking.

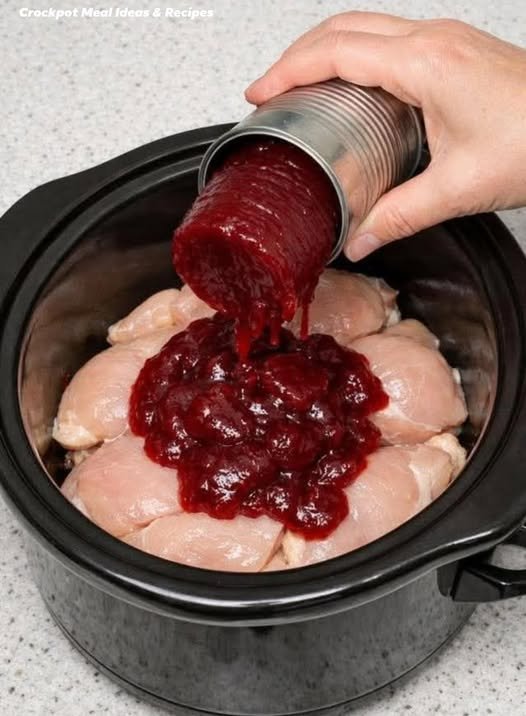
  3. Create the Sauce: In a small bowl, whisk together the canned cranberry sauce and the dry French onion soup mix. Breaking up the cranberry sauce slightly helps it melt more evenly over the chicken.

  4. Top the Chicken: Pour the cranberry mixture directly over the chicken breasts, spreading it out with a spoon so every piece is well-covered.

  5. Cook Time: * Low Setting: Cook for 6 to 8 hours. This is recommended for the most tender, shreddable results.

    • High Setting: Cook for 3 to 4 hours if you are in a bit more of a hurry.

  6. Final Touch: Once the timer is up, check the internal temperature of the chicken (it should reach 75°C or 165°F).

  7. Serve: You can serve the breasts whole with plenty of sauce spooned over the top, or shred the chicken directly in the pot to let it soak up every bit of the glaze.


Frequently Asked Questions (Q&A)

Q: Can I use frozen chicken breasts? A: It is safest to thaw chicken before putting it in the slow cooker to ensure it reaches a safe temperature quickly. If you must use frozen, add an extra 1–2 hours to the cooking time on the Low setting.

Q: The sauce seems a bit thin; how can I thicken it? A: If you prefer a thicker gravy, remove the chicken once it’s done. Whisk 1 tablespoon of cornstarch with 1 tablespoon of cold water, stir it into the liquid in the pot, and cook on High for 10–15 minutes until it bubbles and thickens.

Q: What are the best sides to serve with this? A: This chicken pairs perfectly with fluffy white rice, mashed potatoes, or even a side of roasted green beans. The sauce acts as a delicious gravy for whatever side you choose.

Q: Can I make this in an Instant Pot? A: Yes! Add 1/2 cup of chicken broth or water to ensure the pot reaches pressure. Cook on High Pressure for 10–12 minutes, then allow a 10-minute natural pressure release.

Q: Is there a way to make this lower in sugar? A: You can look for a “No Sugar Added” version of canned cranberry sauce, or make a quick homemade version using fresh cranberries and a sugar substitute.

Golden Crispy Vegetable Fingers

Golden Crispy Vegetable Fingers

Ingredients

  • 2 cups Potatoes: Boiled and grated (cold potatoes work best for a crispy texture).

  • 1 cup Carrots: Finely grated.

  • 1/2 cup Green Onions: Finely chopped.

  • 2 Large Eggs: To bind the mixture.

  • 1/2 cup Mozzarella or Cheddar Cheese: Grated (adds a beautiful melt).

  • 1/4 cup Cornstarch or Breadcrumbs: To help achieve that golden crunch.

  • Seasoning: 1 tsp Salt, 1/2 tsp Black Pepper, 1/2 tsp Garlic Powder, and 1/2 tsp Paprika.

  • Oil: For shallow frying.


Detailed Step-by-Step Instructions

  1. Prepare the Vegetables: Grate the boiled potatoes and fresh carrots into a large mixing bowl. If the carrots seem very watery, squeeze them slightly with a paper towel to remove excess moisture.

  2. Mix the Base: Add the finely chopped green onions, grated cheese, and the two eggs to the bowl. Stir everything together until well combined.

  3. Season and Bind: Sprinkle in the salt, pepper, garlic powder, paprika, and your choice of cornstarch or breadcrumbs. Mix thoroughly until the dough-like mixture holds its shape when pressed.

  4. Shape the Fingers: Take a small portion of the mixture (about 2 tablespoons) and roll it between your palms to form a cylinder shape, roughly 3 to 4 inches long.

  5. Heat the Pan: Pour enough oil into a large non-stick skillet to cover the bottom (about 1/4 inch). Heat over medium heat until the oil is shimmering.

  6. Fry to Perfection: Carefully place the vegetable fingers into the hot oil. Do not overcrowd the pan. Fry for 3–4 minutes per side, turning gently with tongs, until every side is deep golden brown and crispy.

  7. Drain and Serve: Remove the fingers and place them on a plate lined with paper towels to soak up any excess oil. Serve warm with your favorite dipping sauce.


Frequently Asked Questions (Q&A)

Q: Can I bake these instead of frying them? A: Yes! Arrange the fingers on a baking sheet lined with parchment paper. Spray them lightly with olive oil and bake at 200°C (400°F) for 20–25 minutes, flipping halfway through until they are golden and firm.

Q: My mixture is too soft to shape. What should I do? A: If the mixture feels too wet, add another tablespoon of cornstarch or breadcrumbs. Letting the mixture chill in the fridge for 15 minutes before shaping also helps it firm up significantly.

Q: Can I freeze these for later? A: Absolutely. Shape the fingers and place them on a tray in the freezer for an hour. Once they are firm, transfer them to a freezer bag. You can fry or bake them straight from frozen—just add 2 extra minutes to the cooking time.

Q: What other vegetables can I add? A: Finely chopped spinach, steamed broccoli florets, or corn kernels work wonderfully in this recipe. Just ensure any extra vegetables are chopped very small so the fingers stay together.

Q: How do I keep them crispy if I am making a large batch? A: Keep the finished fingers on a wire rack over a baking sheet in a warm oven (about 90°C) while you finish frying the rest. This prevents them from becoming soggy on the bottom.

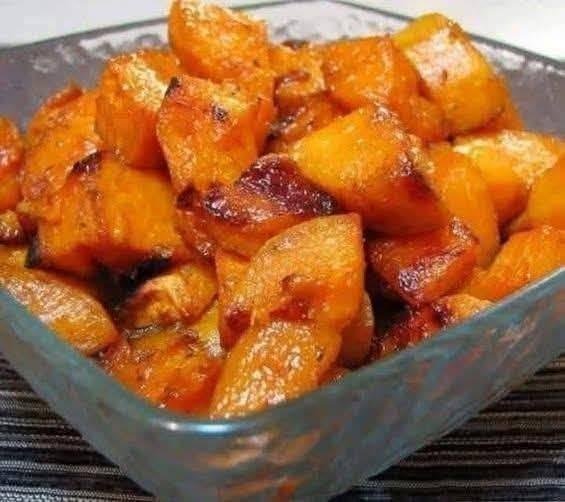
Healthy Roasted Pumpkin (Blood-Sugar Friendly)

Healthy Roasted Pumpkin (Blood-Sugar Friendly)

Ingredients

  • 2 cups pumpkin or winter squash (peeled and cubed into 1-inch pieces)

  • 1 tablespoon olive oil

  • ½ teaspoon cinnamon (adds natural sweetness without sugar)

  • ¼ teaspoon black pepper

  • ¼ teaspoon salt

  • Optional: Garlic powder or fresh herbs (like rosemary or thyme)

Instructions

  1. Prep: Preheat your oven to 200°C (400°F).

  2. Season: In a large bowl, toss the pumpkin cubes with the olive oil, salt, pepper, and cinnamon until evenly coated.

  3. Arrange: Spread the cubes in a single layer on a baking tray lined with parchment paper.

  4. Roast: Bake for 25–30 minutes, turning the cubes once halfway through to ensure they get golden and caramelized on all sides.

  5. Serve: Enjoy warm as a side dish.


🥗 How to Make it a Balanced Meal

To keep your blood sugar stable, the “Golden Rule” is to never eat carbohydrates alone.

  • Pair with Protein: Serve alongside grilled chicken, baked tofu, or a couple of poached eggs.

  • Add Healthy Fats: Top with a dollop of Greek yogurt or a sprinkle of toasted pumpkin seeds (pepitas) for extra crunch and fiber.

  • Legume Boost: Toss the roasted cubes into a bowl of lentils or chickpeas.

You said

where is Q/A

Gemini said

Q & A

Q: Does pumpkin cure diabetes? A: No. No food can cure diabetes.

Q: Can people with diabetes eat pumpkin? A: Yes, in moderate portions and without added sugar.

Q: Is pumpkin better than potatoes? A: Often yes, because it has more fiber and a lower glycemic impact.

Q: Can teenagers eat this safely? A: Yes, as part of a balanced diet.

Q: Why do people say it “eats sugar”? A: That is false marketing language, not science.

💡 Why This Works

Unlike boiling, roasting intensifies the flavor without adding water, and the olive oil helps your body absorb the fat-soluble Vitamin A (beta-carotene) found in the pumpkin. At only 12g of carbs per serving and a good hit of fiber, it’s a much lighter alternative to roasted potatoes.

🥯 Classic Cream Puffs Recipe

🥯 Classic Cream Puffs Recipe

1. The Pastry (Choux)

  • 1/2 cup Unsalted butter

  • 1 cup Water

  • 1/4 tsp Salt

  • 1 cup All-purpose flour

  • 4 Large eggs (room temperature)

2. The Filling (Pastry Cream)

  • 2 cups Whole milk

  • 1/2 cup Sugar

  • 1/4 cup Cornstarch

  • 4 Egg yolks

  • 2 tbsp Butter

  • 1 tsp Vanilla extract


👩‍🍳 Instructions

Make the Filling First

  1. Whisk: In a bowl, whisk egg yolks, sugar, and cornstarch until smooth.

  2. Heat: In a saucepan, bring milk to a simmer. Slowly pour half of the hot milk into the egg mixture while whisking constantly (to temper the eggs).

  3. Thicken: Pour everything back into the saucepan. Cook over medium heat, whisking constantly until it thickens into a pudding-like consistency.

  4. Finish: Remove from heat; stir in butter and vanilla. Cover with plastic wrap (touching the surface so a skin doesn’t form) and chill in the fridge for at least 2 hours.

Make the Shells

  1. Boil: Preheat oven to 200°C (400°F). In a pot, combine water, butter, and salt. Bring to a rolling boil.

  2. Stir: Remove from heat and dump in all the flour at once. Stir vigorously with a wooden spoon until a ball forms and pulls away from the sides.

  3. Cool & Eggs: Let the dough cool for 5 minutes. Add eggs one at a time, beating thoroughly after each egg until the dough is glossy and “v-shaped” when you lift the spoon.

  4. Bake: Pipe or spoon rounds onto a parchment-lined tray. Bake for 20-25 minutes until golden brown and firm.

    • Pro Tip: Poke a small hole in the side of each puff after baking to let steam escape—this keeps them from getting soggy!

Assembly

Once the shells are completely cool, either slice the tops off or use a piping bag to inject the chilled pastry cream into the center.


Fun Fact: If you freeze these after filling them and dip them in chocolate sauce, you’ve officially made Profiteroles!

Golden Crispy Cabbage Fritters

Golden Crispy Cabbage Fritters

  • Prep time: 15 minutes

  • Cook time: 15 minutes

  • Servings: 4 (makes approx. 10–12 fritters)

Ingredients

The Fritter Base

  • 500g Cabbage, finely shredded

  • 2 Onions, finely chopped

  • 3 cloves Garlic, minced

  • 3 large Eggs

  • 4 tbsp All-purpose flour (or almond flour for a lower-carb option)

  • 1 tsp Baking powder

  • To taste: Salt and black pepper

  • Optional: 1/2 cup shredded mozzarella or cheddar cheese, or fresh chopped dill

For Frying

  • 3–4 tbsp Olive oil or avocado oil

The Garlic-Yogurt Dip

  • 1 cup Greek yogurt (plain)

  • 1 clove Garlic, minced

  • 1 tbsp Fresh herbs (parsley or dill), finely chopped

  • 1 squeeze Fresh lemon juice

Instructions

  1. Soften the Cabbage: Place the shredded cabbage in a large bowl and sprinkle with a pinch of salt. Massage the cabbage with your hands for 1–2 minutes. This breaks down the fibers and draws out excess moisture. Let it sit for 5 minutes, then squeeze the cabbage firmly to remove as much water as possible. Discard the liquid.

  2. Sauté Aromatics: In a small skillet with a teaspoon of oil, sauté the chopped onions and garlic over medium heat until soft and translucent (about 3–5 minutes). Set aside to cool slightly.

  3. Prepare the Batter: In a large mixing bowl, whisk the 3 eggs. Add the sautéed onion and garlic mixture, the squeezed cabbage, and any optional cheese or herbs.

  4. Bind the Mixture: Fold in the flour and baking powder. Season generously with salt and pepper. Stir until the cabbage is thoroughly coated and the mixture holds together like a thick batter.

  5. Fry until Golden: Heat the oil in a large non-stick skillet over medium heat. Using a large spoon, drop scoops of the mixture into the pan. Use the back of the spoon to flatten them into discs about 1/2 inch thick.

  6. Cook and Flip: Fry for 3–4 minutes on the first side until deep golden brown. Carefully flip and cook for another 3–4 minutes. Ensure the heat isn’t too high so the middle cooks through without burning the outside.

  7. Drain and Serve: Move the fritters to a plate lined with paper towels to drain. Whisk the dip ingredients together in a small bowl and serve immediately while the fritters are hot and crisp.


Common Questions & Answers

Q: My fritters are falling apart in the pan. What should I do? A: This usually happens if the cabbage was too wet. Make sure to squeeze out as much liquid as possible in Step 1. If the batter still feels loose, add an extra tablespoon of flour to help bind the ingredients together.

Q: Can I bake these instead of frying them? A: Yes. Preheat your oven to 400°F (200°C). Place scoops of the mixture on a parchment-lined baking sheet and flatten them. Lightly spray with oil and bake for 15–20 minutes, flipping halfway through, until golden and firm.

Q: How do I keep the fritters crispy if I’m making a large batch? A: Keep the finished fritters on a wire rack set over a baking sheet in a warm oven (200°F or 90°C) while you fry the remaining batches. The wire rack allows air to circulate so the bottoms don’t get soggy.

Q: Can I add other vegetables to this recipe? A: Definitely. Grated carrots, zucchini (squeezed dry), or even finely chopped broccoli work beautifully. Just keep the total weight of the vegetables around 500g–600g so the egg and flour can still bind them.

Q: How long do these stay fresh? A: They are best served fresh, but you can store leftovers in the refrigerator for up to 3 days. Reheat them in an air fryer or dry skillet to regain the crispiness.

Zesty Lemon Butter Fish Fillet

Zesty Lemon Butter Fish Fillet

A quick, flavorful meal that brings together bright citrus and savory garlic butter. Perfect for a busy weeknight!


Ingredients

For the Fish:

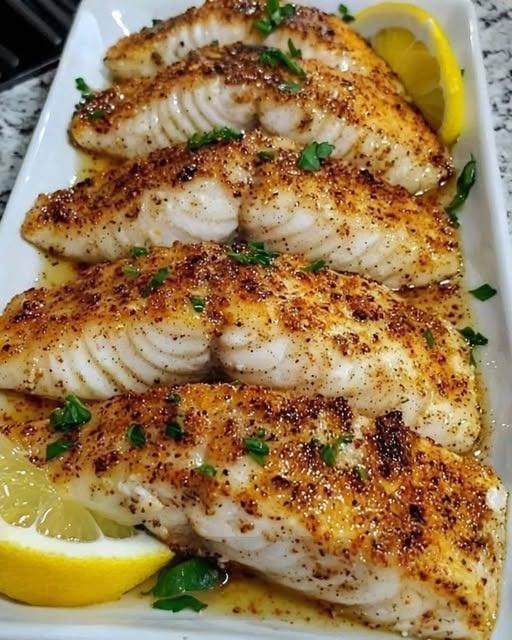
  • 4 white fish fillets (cod, tilapia, or haddock)

  • 1 teaspoon Paprika

  • 1 teaspoon Garlic powder

  • 1 teaspoon Onion powder

  • 2 tablespoons Olive oil

  • Salt and pepper, to taste

For the Lemon Butter Sauce:

  • 3 tablespoons Unsalted butter

  • 2 cloves Garlic, minced

  • 1 tablespoon Fresh lemon juice

  • 1 teaspoon Lemon zest

  • Fresh parsley, chopped (for garnish)


Instructions

1. Season the Fillets

  • Pat the fish fillets completely dry with paper towels.

  • In a small bowl, mix the paprika, garlic powder, onion powder, salt, and pepper.

  • Sprinkle the seasoning evenly over both sides of each fillet.

2. Sear the Fish

  • Heat the olive oil in a large skillet over medium-high heat.

  • Once the pan is hot, add the fillets. Cook for 3–4 minutes on the first side until a golden-brown crust forms.

  • Carefully flip the fillets and cook for another 2–3 minutes until the fish is opaque and flakes easily with a fork. Remove the fish from the pan and set aside on a plate.

3. Make the Sauce

  • In the same skillet, reduce the heat to medium and add the butter.

  • Once melted, add the minced garlic and cook for about 1 minute until fragrant (be careful not to burn it).

  • Stir in the lemon juice and lemon zest. Whisk for 30 seconds to combine.

4. Finish and Serve

  • Spoon the lemon butter sauce generously over the cooked fillets.

  • Garnish with fresh parsley and extra lemon slices if desired.


A Note on the Wellness Tonic

The first image you shared mentions a tonic for “bone pain, nerve pain, and anxiety.” While ingredients like ginger and turmeric (which we’ve looked at before!) are great for general wellness and inflammation, it’s important to remember that a drink can’t “cure” conditions like depression or chronic rheumatism on its own. It’s always a good idea to keep using these as a supplement to the advice your doctor gives you!

Perfect Air Fryer Cod

Perfect Air Fryer Cod 

I picked up fresh cod from ALDI and decided to test it in the air fryer — and honestly, this method makes it crispy on the outside, flaky and tender on the inside every single time. It’s quick, healthy, and packed with flavor.

📝 Ingredients

  • 2–4 fresh cod fillets
  • 1½ tablespoons olive oil
  • 1 teaspoon garlic powder
  • 1 teaspoon smoked paprika
  • ½ teaspoon onion powder
  • ½ teaspoon salt (adjust to taste)
  • ½ teaspoon black pepper
  • ½ teaspoon dried oregano (optional)
  • Lemon wedges, for serving

Optional Creamy Dip:

  • ½ cup Greek yogurt or mayonnaise
  • 1 tablespoon lemon juice
  • 1 teaspoon Dijon mustard
  • Pinch of salt and pepper
  • Fresh parsley, chopped

👩‍🍳 Instructions

1. Prep the Fish
Pat the cod fillets dry with paper towels. Removing excess moisture helps create a better crust. Lightly brush both sides with olive oil.

2. Season Well
In a small bowl, combine garlic powder, smoked paprika, onion powder, salt, pepper, and oregano. Sprinkle evenly over both sides of the fillets, gently pressing the seasoning in.

3. Air Fry
Preheat the air fryer to 400°F (200°C) for 3 minutes.
Place the cod in the basket in a single layer, leaving space between pieces.

Cook for 8–10 minutes, depending on thickness. The fish is done when it flakes easily with a fork and reaches an internal temperature of 145°F (63°C). No flipping is usually needed.

4. Make the Dip (Optional)
Mix yogurt (or mayo), lemon juice, Dijon, salt, pepper, and parsley until smooth.

See also  Air Fryer Whole Chicken

Serve immediately with a squeeze of fresh lemon. It’s crispy, juicy, and honestly one of the easiest fish recipes you’ll ever make!

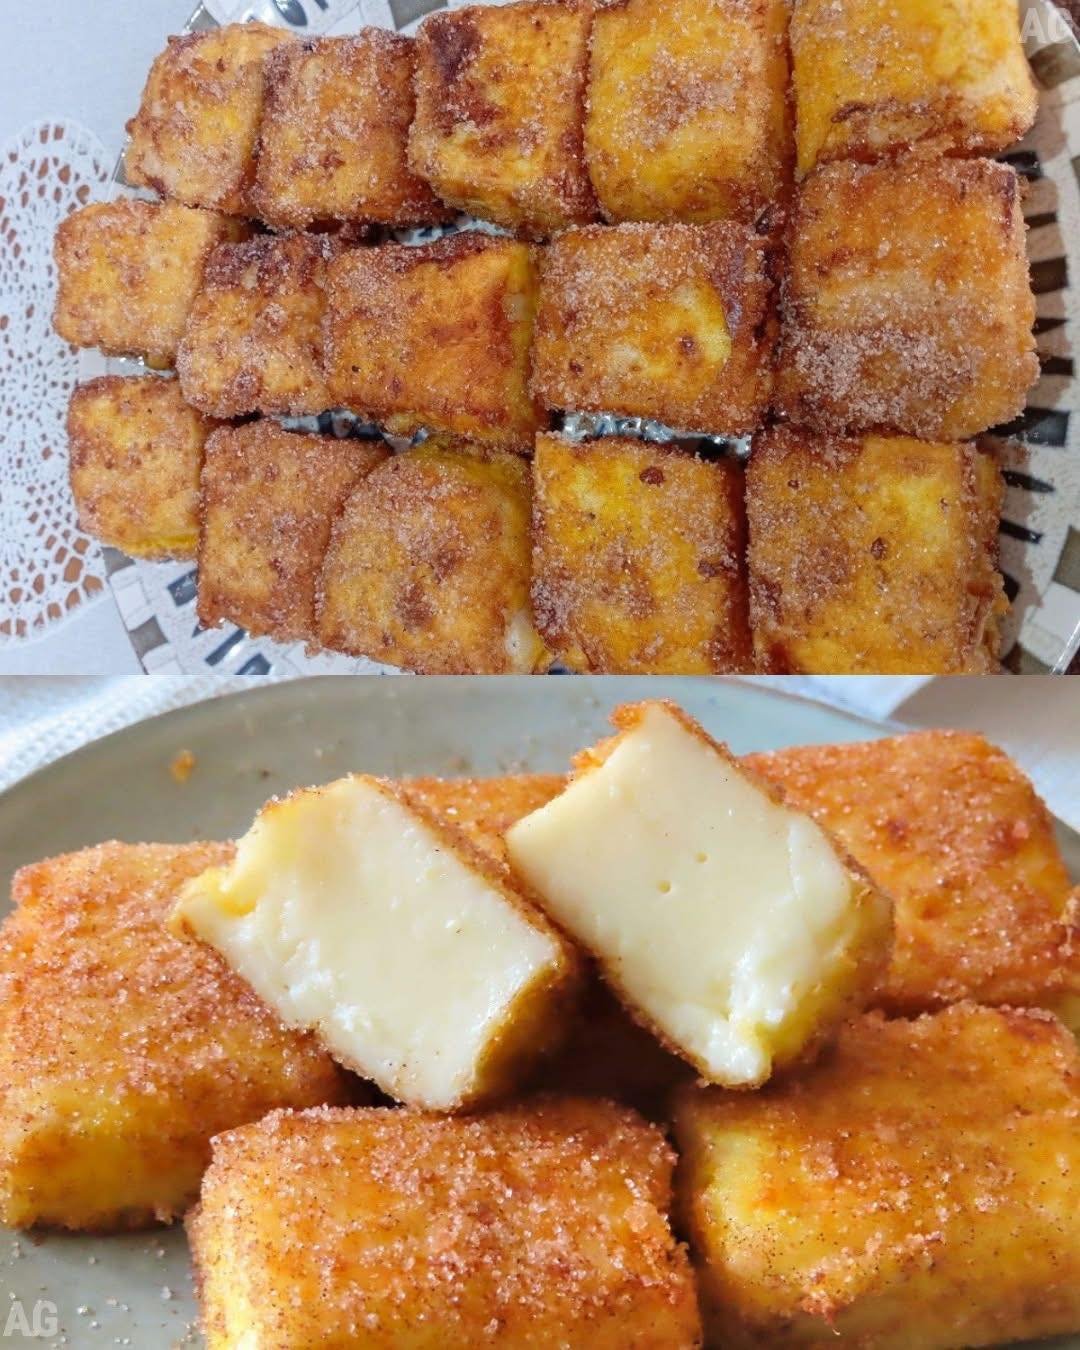
Creamy Fried Milk Cubes

Creamy Fried Milk Cubes

Ingredients

  • The Custard: 2 cups whole milk, 1/2 cup cornstarch, 1/2 cup sugar, 1 cinnamon stick, and a small piece of lemon peel.

  • The Coating: 2 large eggs (beaten), 1/2 cup all-purpose flour, 1/2 cup sugar mixed with 1 tablespoon ground cinnamon.

  • Oil for frying (neutral oil like sunflower or vegetable oil).

Step-by-Step Instructions

  1. Infuse the Milk: In a saucepan, combine 1.5 cups of the milk with the sugar, cinnamon stick, and lemon peel. Heat over medium until it starts to simmer, then remove from heat and let it sit for 10 minutes to infuse.

  2. Dissolve Cornstarch: In a small bowl, whisk the remaining 1/2 cup of cold milk with the cornstarch until completely smooth with no lumps.

  3. Thicken the Custard: Remove the cinnamon stick and lemon peel from the warm milk. Return the pan to low heat and slowly pour in the cornstarch mixture. Stir constantly with a whisk until the mixture becomes very thick and glossy (about 5 minutes).

  4. Set the Dough: Grease a square glass dish and pour the hot custard into it, smoothing the top. Cover with plastic wrap (touching the surface to prevent a skin from forming) and refrigerate for at least 3–4 hours (or overnight) until firm.

  5. Cut and Coat: Once set, turn the custard out onto a board and cut into equal squares or rectangles. Dredge each piece first in flour, then dip in the beaten eggs.

  6. Fry: Heat oil in a pan over medium-high heat. Fry the squares for about 2 minutes per side until they are golden brown and crispy.

  7. Sweet Finish: Immediately toss the hot fried milk in the cinnamon-sugar mixture until evenly coated. Serve warm or at room temperature.


Recipe Q&A: Fried Milk

Q: Why is my custard too soft to cut? A: This usually happens if the custard wasn’t cooked long enough on the stove or if it didn’t chill long enough in the fridge. It needs to reach a very thick, paste-like consistency before you take it off the heat.

Q: Can I make this without eggs? A: For an egg-free version, you can dip the custard squares in a thin slurry of flour and water before coating them in breadcrumbs or just flour, though the traditional texture comes from the egg wash.

Q: How do I get a smoother custard? A: Always dissolve the cornstarch in cold milk first. If you add it directly to hot milk, it will clump instantly. If you still see lumps, you can pass the mixture through a fine-mesh sieve before chilling.

Q: Can I air fry these? A: While frying gives the best traditional results, you can air fry them at 200°C for about 8–10 minutes. Spray them generously with oil first so the flour and cinnamon sugar can crisp up properly.

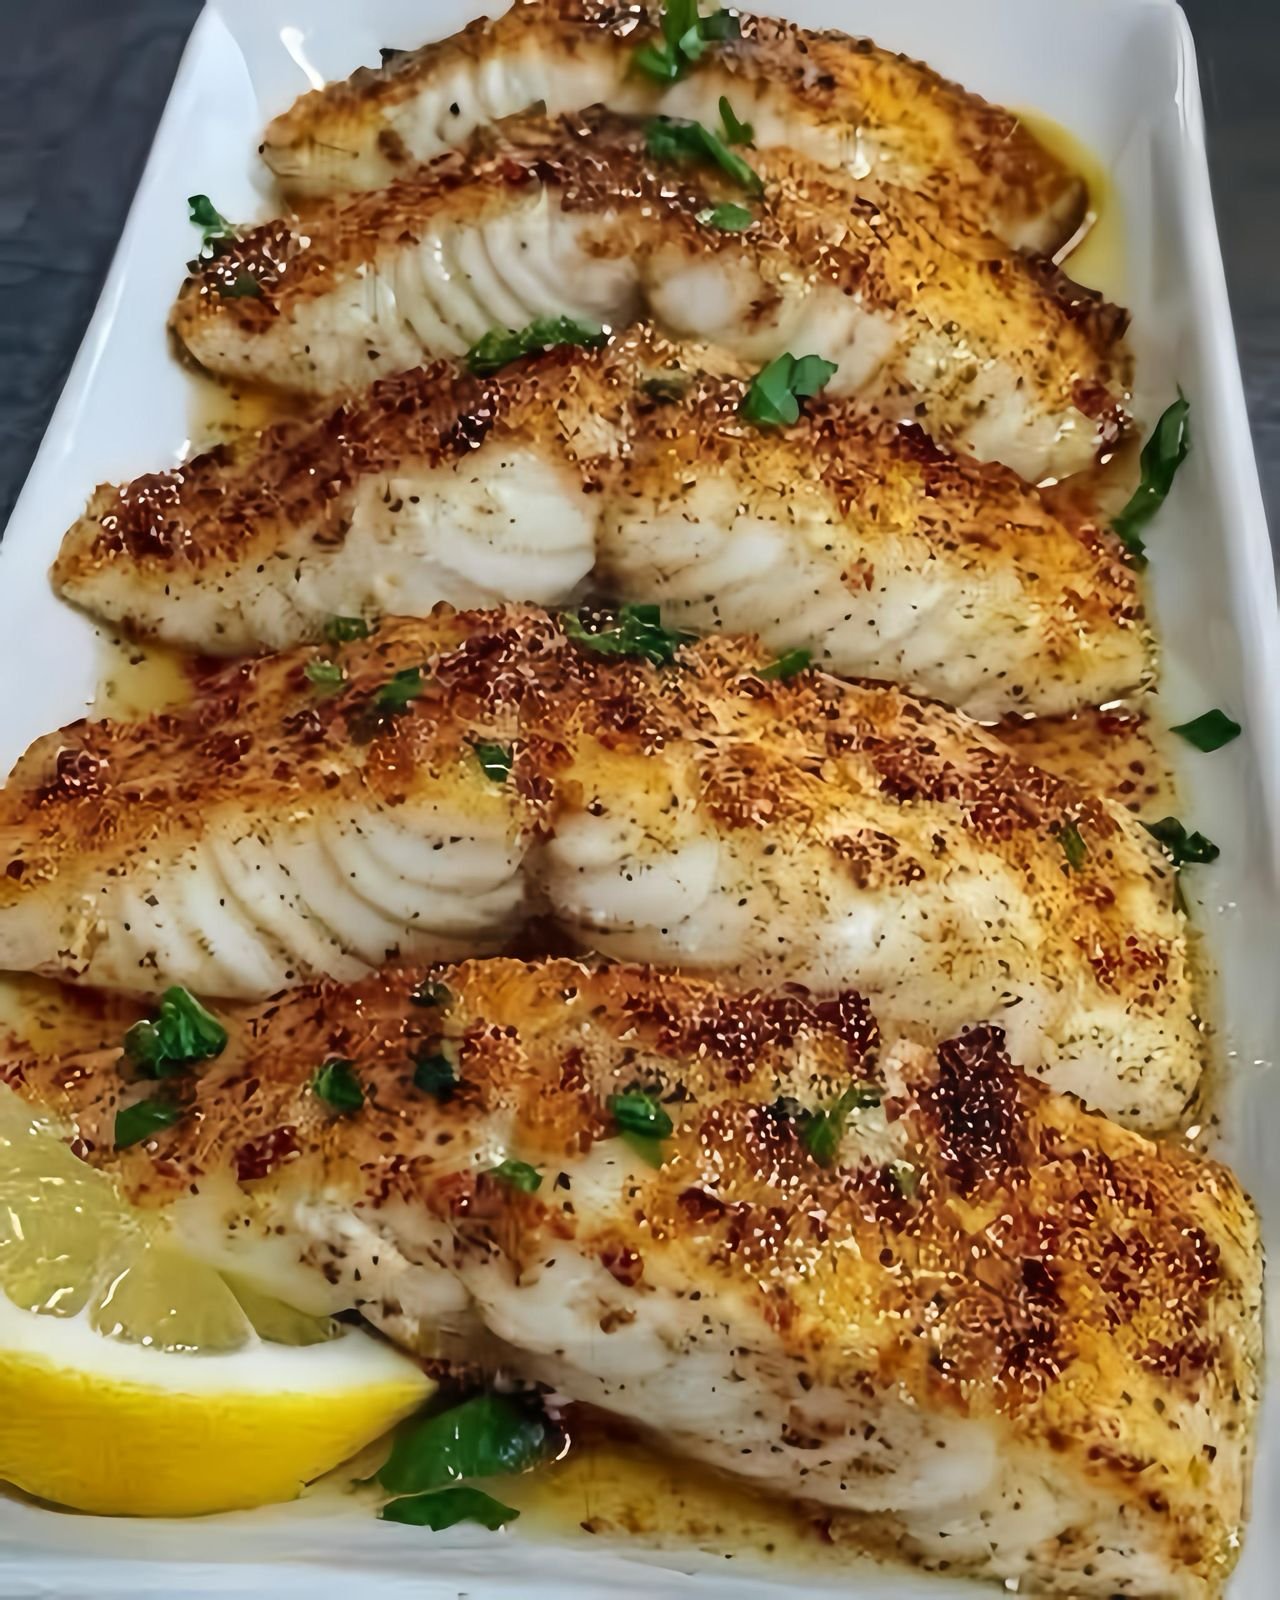
Lemon Garlic Butter Baked Fish

Lemon Garlic Butter Baked Fish

This recipe features flaky white fish fillets (like Cod, Tilapia, or Snapper) with a golden, seasoned crust.

Ingredients

  • 4 White Fish Fillets: Patted dry with a paper towel.

  • 3 tbsp Butter: Melted.

  • 2 tbsp Olive Oil.

  • 3 cloves Garlic: Minced finely.

  • 1 tsp Paprika: For that beautiful golden-red color.

  • 1 tsp Onion Powder.

  • Fresh Parsley: Chopped, for garnish.

  • 1 Fresh Lemon: Half for juice, half sliced for the tray.

  • Salt and Black Pepper: To taste.

Step-by-Step Instructions

  1. Preheat & Prep: Heat your oven to 200°C (400°F). Lightly grease a baking dish.

  2. Make the Seasoning: In a small bowl, mix the melted butter, olive oil, minced garlic, lemon juice, paprika, onion powder, salt, and pepper.

  3. Coat the Fish: Place the dry fish fillets in the baking dish. Pour the garlic butter mixture over the fish, ensuring each piece is fully coated.

  4. Add Lemon: Place lemon slices around and between the fillets to infuse more flavor as they bake.

  5. Bake: Place in the oven for 12–15 minutes. The fish is done when it is opaque and flakes easily with a fork.

  6. Garnish: Sprinkle fresh parsley over the top and serve immediately while hot.

    For the Fish:

    Q: Can I cook this in an Air Fryer? A: Yes! Place the seasoned fillets in the air fryer basket at 190°C (375°F) for 8–10 minutes. It creates an even crispier golden crust!

    Q: How do I know when the fish is perfectly cooked? A: Use a fork to gently pull at the thickest part of the fillet. If the meat separates into easy “flakes” and is no longer translucent, it is ready.

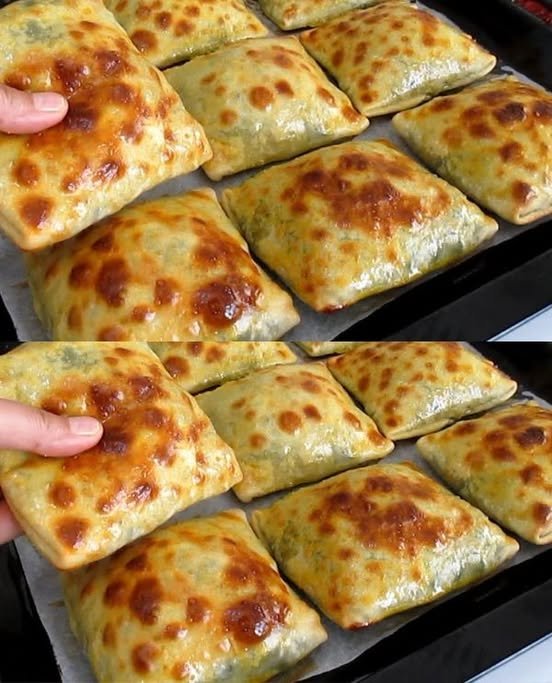
Golden Kefir & Spinach Stuffed Pastries

Golden Kefir & Spinach Stuffed Pastries

Ingredients

For the Filling:

  • 500g Fresh Spinach, chopped

  • 2 Onions, finely chopped

  • 1 handful Green onion leaves, chopped

  • 1 handful Fresh parsley, chopped

  • Optional: You can add crumbled feta or red pepper flakes for extra flavor.

For the Dough:

  • 3.5 cups (420g) Wheat Flour

  • 1 glass (200ml) Kefir

  • 1 tea glass (90ml) Water

  • 1 Egg white (save the yolk for brushing)

  • 1 tsp (8g) Salt


Detailed Step-by-Step Instructions

  1. Prepare the Dough: In a large mixing bowl, combine the kefir, water, egg white, and salt. Gradually add the flour while stirring. Knead the mixture for about 5–7 minutes until you have a smooth, elastic dough that doesn’t stick to your hands. Cover it and let it rest for 20 minutes.

  2. Make the Filling: While the dough rests, sauté the chopped onions in a little olive oil until soft. Add the chopped spinach, green onions, and parsley. Cook just until the spinach wilts. Season with salt and pepper, then drain any excess liquid so the pastry doesn’t get soggy.

  3. Divide the Dough: Turn the rested dough onto a lightly floured surface. Divide it into equal-sized balls (about the size of a lemon).

  4. Roll and Fill: Roll each ball into a thin circle or square. Place a generous spoonful of the spinach mixture in the center. Fold the edges over the filling to create a square or rectangular parcel, pressing the edges firmly to seal.

  5. Prep for Baking: Preheat your oven to 180°C (350°F). Place the pastries on a baking sheet lined with parchment paper.

  6. The Golden Finish: Whisk the reserved egg yolk with a teaspoon of milk or oil. Brush the tops of each pastry generously. This creates that beautiful, addictive golden-brown crust.

  7. Bake: Bake for 25–30 minutes or until the pastries are puffed up and deep golden brown.


Pro Tips

  • Squeeze the Spinach: If you aren’t sautéing the filling, make sure to salt the raw spinach, let it sit for 5 minutes, and squeeze out all the water before mixing with the onions.

  • Storage: These stay delicious for 2 days at room temperature in an airtight container, or you can freeze them after baking for a quick snack later.

Crispy Shredded Potato & Egg Breakfast Muffins

Crispy Shredded Potato & Egg Breakfast Muffins

Ingredients

  • Potatoes: 2 medium, peeled and grated

  • Eggs: 2 large

  • Bacon: 6 strips, cooked and crumbled

  • Cheddar Cheese: 1 cup, shredded

  • Parmesan Cheese: ¼ cup, grated

  • Milk: ½ cup

  • Butter: 2 tablespoons, melted

  • Dry Ingredients: ¼ cup all-purpose flour + 1 teaspoon baking powder

  • Seasoning: ½ teaspoon salt, ½ teaspoon black pepper

  • Optional: 2 tablespoons chopped green onions or chives


Detailed Step-by-Step Instructions

  1. Prepare the Oven and Tin: Preheat your oven to 200°C (400°F). Generously grease a 12-cup muffin tin with butter or non-stick spray to ensure the potatoes don’t stick.

  2. Squeeze the Potatoes: After grating the potatoes, place them in a clean kitchen towel or fine mesh strainer and squeeze out as much liquid as possible. This is the secret to getting them crispy rather than soggy.

  3. Mix the Base: In a large bowl, whisk together the 2 eggs, milk, melted butter, salt, and pepper.

  4. Combine Ingredients: Stir the grated potatoes, crumbled bacon, shredded cheddar, and Parmesan into the egg mixture. Gradually fold in the flour and baking powder until everything is evenly coated.

  5. Fill the Muffin Tin: Divide the mixture evenly among the 12 muffin cups. Press down slightly so they are packed firmly.

  6. Bake: Place in the oven and bake for 25–30 minutes, or until the tops are golden brown and the edges look crispy.

  7. Garnish and Serve: Let them cool in the pan for 5 minutes before removing. Sprinkle with fresh chives or green onions if desired.


Pro Tips

  • High Protein Version: You can swap the all-purpose flour for almond flour or oat flour for a different texture.

  • Vegetarian Option: Replace the bacon with sautéed mushrooms or diced bell peppers for a fresh twist.

  • Make Ahead: These freeze beautifully! Just wrap them individually and pop them in the microwave for 45 seconds on busy mornings.

Creamy Garlic & Herb Cheese Spread

Creamy Garlic & Herb Cheese Spread

Ingredients

  • 8 oz Cream cheese, softened to room temperature

  • 1/2 cup Shredded carrots, finely grated

  • 1/2 cup Sharp cheddar cheese, finely shredded

  • 2-3 cloves Garlic, minced or pressed

  • 2 tbsp Fresh parsley, finely chopped

  • 1 tbsp Fresh chives or green onions, chopped

  • 1/4 tsp Smoked paprika

  • Salt and black pepper, to taste

  • Optional: A dash of hot sauce or a squeeze of lemon juice for brightness.


Step-by-Step Instructions

  1. Prep the Vegetables: Grate the carrots and cheddar cheese using the finest side of your grater. This ensures the texture remains creamy and easy to spread. Finely chop the parsley and chives.

  2. Soften the Base: In a medium mixing bowl, beat the softened cream cheese with a spatula or hand mixer until it is smooth and light.

  3. Combine Ingredients: Add the minced garlic, shredded carrots, shredded cheddar, parsley, and chives to the cream cheese.

  4. Season: Stir in the smoked paprika, salt, and pepper. If you want a little extra zest, add the lemon juice or hot sauce at this stage.

  5. Mix Thoroughly: Fold everything together until the herbs and vegetables are evenly distributed throughout the cheese.

  6. Chill and Serve: While you can serve this immediately, letting it sit in the refrigerator for at least 30 minutes allows the garlic and herb flavors to meld together beautifully.

  7. Pairing: Serve this spread on your favorite flourless flatbread, cucumber slices, or celery sticks for a high-protein, low-carb snack.

Soft Flourless Pan-Fried Flatbread

Soft Flourless Pan-Fried Flatbread

Ingredients

  • 3 large Eggs, separated

  • 3 oz Cream cheese, softened to room temperature

  • 1/4 tsp Cream of tartar (helps stabilize the egg whites)

  • A pinch of salt

  • Optional: Garlic powder or dried herbs for extra flavor


Step-by-Step Instructions

  1. Prepare the Oven and Pans: Preheat your oven to 300°F (150°C). While these are finished in a pan to get that golden look, they start in the oven to set the structure. Line a baking sheet with parchment paper.

  2. Separate the Eggs: Carefully separate the egg whites from the yolks into two clean bowls. It is important that no yolk gets into the whites, or they won’t whip properly.

  3. Mix the Yolks: In the bowl with the yolks, add the softened cream cheese and a pinch of salt. Use a whisk or hand mixer to blend until the mixture is completely smooth with no lumps.

  4. Whip the Whites: In the other bowl, add the cream of tartar to the egg whites. Using a clean whisk or hand mixer, beat the whites on high speed until stiff peaks form. The whites should be thick and stand up straight when you lift the beaters.

  5. Fold Gently: Very slowly and gently fold the yolk mixture into the whipped whites using a spatula. Do not over-mix; you want to keep as much air in the batter as possible to keep the bread light.

  6. Bake to Set: Spoon the mixture onto the parchment-lined baking sheet in 6 to 8 even circles. Bake for 15 to 20 minutes until they are just set.

  7. Pan-Fry for Color: Heat a non-stick skillet over medium heat with a light spray of oil. Place the baked flatbreads in the pan for 30 to 60 seconds per side until they develop those beautiful golden-brown “pita” spots seen in the image.

  8. Cool and Serve: Let them cool for a few minutes. They will soften as they sit, becoming perfectly pliable for folding.

Air Fryer Salmon Bites with Hot Honey

Air Fryer Salmon Bites with Hot Honey

Ingredients

  • 1 lb salmon fillet, skin removed, cut into 1-inch bite-sized cubes

  • 2 tbsp olive oil

  • 1 tsp smoked paprika

  • 1 tsp garlic powder

  • 1/2 tsp onion powder

  • 1/2 tsp salt

  • 1/2 tsp black pepper

  • 1/4 tsp cayenne pepper (optional)

  • 1/4 cup honey

  • 1-2 tsp hot sauce (adjust to your heat preference)

  • Fresh parsley, chopped for garnish

  • Lemon wedges, for serving


Step-by-Step Instructions

  1. Prep the Salmon: Pat the salmon cubes dry with a paper towel. This is a crucial step to ensure the seasoning sticks and the salmon gets a nice sear in the air fryer rather than steaming.

  2. Season the Bites: In a large mixing bowl, toss the salmon cubes with the olive oil, smoked paprika, garlic powder, onion powder, salt, black pepper, and cayenne. Ensure every piece is evenly coated with the spices.

  3. Prepare the Glaze: In a small separate bowl, whisk together the honey and the hot sauce. Set this aside to use after the initial cook.

  4. Air Fry: Preheat your air fryer to 400°F (200°C). Place the salmon bites in the air fryer basket in a single layer, making sure they aren’t touching so the air can circulate. Cook for 7 to 9 minutes, shaking the basket halfway through.

  5. Glaze and Finish: Once the salmon is cooked and slightly crispy on the edges, remove the basket. Drizzle about half of the hot honey mixture over the bites and toss gently. Air fry for an additional 1 to 2 minutes to allow the glaze to caramelize and become sticky.

  6. Garnish and Serve: Transfer the salmon bites to a serving plate. Drizzle with the remaining hot honey, sprinkle with fresh chopped parsley, and serve immediately with fresh lemon wedges on the side.

Cheesy Garlic Bread

Cheesy Garlic Bread

Ingredients

•1 large French bread / baguette loaf

•4 tablespoons butter (softened)

•3–4 cloves garlic (finely minced)

•1 cup mozzarella cheese (shredded)

•2 tablespoons parmesan cheese (optional)

•1 tablespoon fresh parsley (chopped)

•½ teaspoon black pepper

•½ teaspoon salt

•1 tablespoon olive oil

Instructions

1.Preheat oven to 180°C (350°F).

2.Place the bread on a cutting board and cut deep diagonal slices across the loaf, but do not cut all the way through.

3.In a bowl, mix butter, garlic, olive oil, salt, and black pepper to make garlic butter.

4.Spread the garlic butter mixture inside each bread slice so the flavor goes into every cut.

5.Stuff mozzarella cheese between the slices and sprinkle parmesan cheese on top.

6.Wrap the bread loosely in foil and bake for 10–12 minutes.

7.Open the foil and bake another 5 minutes until the cheese melts and the top becomes golden and crispy.

8.Sprinkle fresh parsley on top and serve warm.

✨ Tip: Add chili flakes or oregano for extra flavor.

Golden Lentil Patties

Golden Lentil Patties

These protein-packed red lentil patties are crispy on the outside and tender on the inside. They are a fantastic plant-based alternative to traditional meat patties and are perfect for meal prepping or a quick lunch.

Ingredients

  • 1.5 cups (300g) Dried red lentils

  • 1 Large shallot, finely chopped

  • 1 Small carrot, finely grated

  • 2 cloves Garlic, minced

  • 1/2 cup Breadcrumbs (or almond flour for a low-carb version)

  • 1 tsp Cumin

  • 1 tsp Smoked paprika

  • Salt and black pepper to taste

  • Fresh parsley, chopped

  • Oil for pan-frying


Instructions

  1. Prepare the Lentils: Rinse the red lentils thoroughly under cold water. Place them in a pot with 3 cups of water and bring to a boil. Reduce heat and simmer for about 10–12 minutes until soft but not mushy. Drain any excess water very well and let them cool.

  2. Sauté the Aromatics: In a small pan, heat a teaspoon of oil and sauté the chopped shallot and grated carrot for 3–4 minutes until softened. Add the minced garlic for the last minute of cooking.

  3. Mix the Dough: In a large bowl, mash the cooked lentils slightly with a fork. Add the sautéed vegetables, breadcrumbs (or almond flour), cumin, paprika, salt, pepper, and fresh parsley.

  4. Shape the Patties: Mix everything until well combined and the mixture holds its shape. If it feels too wet, add a tablespoon more of your dry base. Form the mixture into equal-sized round patties.

  5. Cook until Golden: Heat a thin layer of oil in a non-stick skillet over medium heat. Place the patties in the pan and cook for 4–5 minutes on each side. They should be deeply golden and crispy.

  6. Serve: These are delicious served hot with a side of garlic yogurt sauce or tucked into a fresh salad.

Savory Zucchini & Oat Rolls

Savory Zucchini & Oat Rolls

These zucchini rolls are a fantastic way to enjoy a wholesome, satisfying meal that feels indulgent without the heavy crust. They are packed with flavor, easy to shape, and develop a beautiful golden exterior that makes them a family favorite for any time of day.

Ingredients

  • 1 medium zucchini, grated

  • 3–4 tbsp oatmeal (finely ground works best)

  • 100g (1 cup) grated cheese (mozzarella or cheddar)

  • 2 eggs

  • Chopped chives, to taste

  • Salt and pepper, to taste


Step-by-Step Instructions

  1. Prepare the Zucchini: Place the grated zucchini in a bowl and sprinkle with a little salt. Let it sit for about 5–10 minutes to draw out the moisture. This is a vital step to ensure your rolls aren’t soggy.

  2. Squeeze Dry: Using a clean kitchen towel or your hands, squeeze the zucchini as hard as you can to remove all the excess water. Place the dry zucchini shreds into a fresh mixing bowl.

  3. Mix the Batter: To the zucchini, add the 2 eggs, 3–4 tbsp oatmeal, 100g grated cheese, and chopped chives. Season with pepper and a small pinch of salt (remember the zucchini was already salted).

  4. Let it Rest: Allow the mixture to sit for about 5 minutes. This gives the oats time to absorb the moisture from the eggs, which helps bind the rolls together.

  5. Shape: Take a small handful of the mixture and roll it between your palms to form a log or sausage shape.

  6. Cook: * In a Pan: Heat a lightly oiled non-stick skillet over medium heat. Fry the rolls for 3–4 minutes per side until they are golden brown and crispy all the way around.

    • In the Oven: Arrange on a lined baking tray and bake at 200°C for 15–20 minutes, turning halfway through.

  7. Serve: Enjoy them warm! They are delicious on their own or served with a side of Greek yogurt for dipping.


Quick Tip

If the mixture feels a bit too wet to shape, add one extra tablespoon of oatmeal to help firm it up.

Crunchy Potato & Tuna Pockets

Crunchy Potato & Tuna Pockets

These golden, crispy pockets are a fantastic way to turn a simple potato into a satisfying 10-minute dinner. The creamy filling paired with the crunchy exterior makes for a delightful contrast that the whole family will enjoy.

Ingredients

For the Filling:

  • 1 large potato, boiled and mashed

  • 1 tbsp cream cheese

  • 1 can of tuna, drained

  • 1 hard-boiled egg, finely chopped

  • 2–3 tbsp canned corn, drained

  • 1 tbsp chopped olives and gherkins

  • Fresh parsley, chopped

  • Salt and pepper to taste

For the Assembly:

  • Golden Flatbreads (or small tortillas)

  • 1 egg, beaten (for sealing)

  • Grated cheese (mozzarella or cheddar)

  • Dried oregano or paprika (for the crust)


Step-by-Step Instructions

  1. Prepare the Filling: In a medium bowl, combine the mashed potato and cream cheese until smooth. Add the tuna, chopped egg, corn, olives, gherkins, and parsley. Mix everything together well and season with a pinch of salt and pepper.

  2. Fill the Flatbreads: Lay your Golden Flatbreads flat on a clean surface. Place a generous spoonful of the potato mixture onto one half of each flatbread.

  3. Seal: Lightly brush the edges of the flatbread with the beaten egg. Fold the empty half over the filling to create a half-moon shape. Press the edges firmly with your fingers or a fork to seal them shut.

  4. Add the Topping: Brush the top of each pocket with a little more beaten egg. Sprinkle a layer of grated cheese over the top, along with a pinch of oregano or paprika for extra flavor and color.

  5. Cook to Perfection: * In the Oven: Bake at 200°C for about 8–10 minutes until the cheese is bubbly and the edges are golden brown.

    • In the Air Fryer: Cook at 190°C for 5–6 minutes for an extra-crunchy finish.

  6. Serve: Garnish with a little more fresh parsley and serve hot. These are wonderful on their own or dipped into a little Greek yogurt or garlic sauce.


Cooking Tip

If you want an even crispier “breading” effect, you can dip the sealed pockets into breadcrumbs before baking or air-frying.

Golden Crispy Potato Pancakes

Golden Crispy Potato Pancakes

These classic Polish-style pancakes are thin, crunchy on the edges, and tender in the middle. The secret to the perfect texture is removing as much moisture as possible from the potatoes before frying.

Ingredients

  • 2 lbs starchy potatoes (like Russets), peeled

  • 1 medium onion

  • 2 large eggs, lightly beaten

  • 3 tbsp all-purpose flour

  • 1 tsp salt

  • 1/2 tsp black pepper

  • Vegetable oil for frying (such as canola or sunflower oil)


Preparation Steps

  1. Grate the Vegetables: Using the fine side of a box grater, grate the potatoes and the onion into a large bowl.

  2. Drain the Moisture: This is the most important step. Place the grated mixture into a clean kitchen towel or fine-mesh sieve. Squeeze out as much liquid as you possibly can into a separate bowl. Let that liquid sit for a minute, then pour it off, keeping the white potato starch that has settled at the bottom.

  3. Combine the Batter: Add the squeezed-dry potato and onion mixture back into the bowl with the saved starch. Stir in the beaten eggs, flour, salt, and pepper until everything is well combined.

  4. Heat the Oil: Pour enough oil into a large heavy skillet to generously coat the bottom (about 1/4 inch deep). Heat over medium-high until the oil is shimmering.

  5. Fry the Pancakes: Drop a large spoonful of the mixture into the hot oil and flatten it with the back of the spoon to create a thin circle. Do not overcrowd the pan.

  6. Achieve the Crunch: Fry for about 3–5 minutes per side until the edges are deep golden brown and crispy.

  7. Drain and Serve: Place the finished pancakes on a plate lined with paper towels to remove any excess oil. Serve immediately while hot and crunchy.