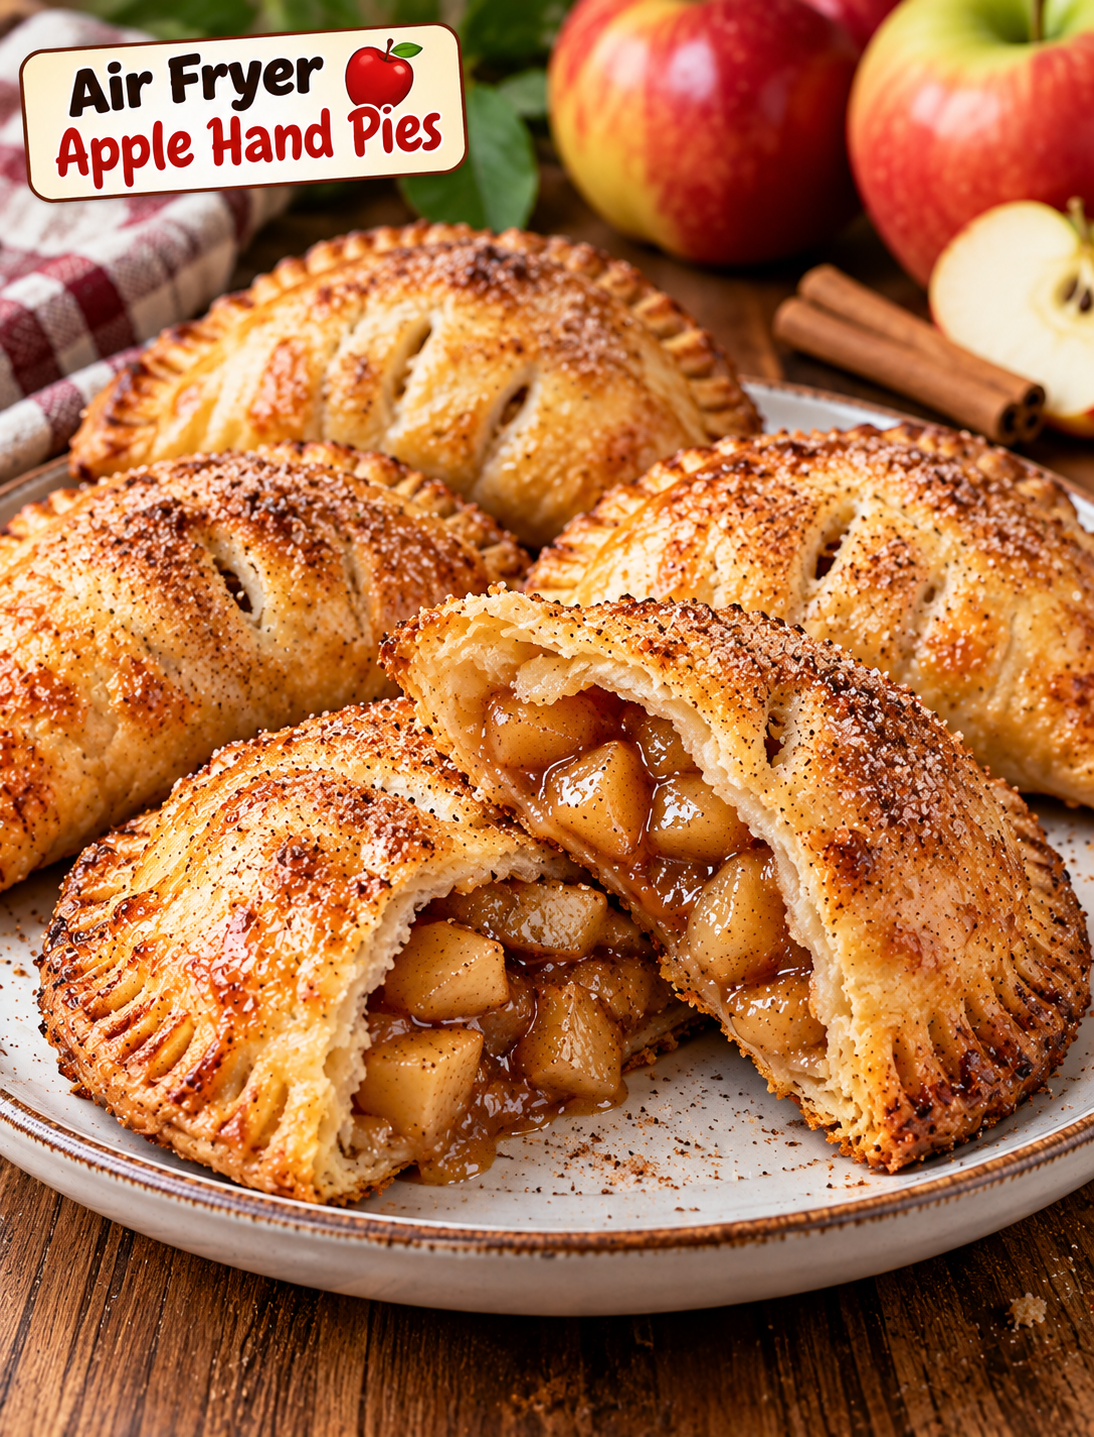
Air Fryer Apple Hand Pies
There is something special about a warm apple dessert with a crisp golden crust and a sweet cinnamon filling. These Air Fryer Apple Hand Pies give you that classic apple-pie flavor in a small, easy-to-eat package.
Each hand pie has a flaky pastry outside and a warm apple filling inside. The air fryer creates a lightly crisp crust without the need for deep frying. A simple cinnamon-sugar topping adds even more flavor and gives the pies a beautiful finish.
This recipe is perfect for fall gatherings, weekend baking, holiday dessert tables, or a quick treat when you want homemade apple pie without making a full pie.
Why You’ll Love These Apple Hand Pies
These individual apple pies are simple to prepare and easy to customize.
- Quick cooking: The air fryer cooks the pies in about 10 minutes.
- Small portions: Each pie is easy to serve and enjoy without slicing a whole dessert.
- Crispy crust: Hot circulating air gives the pastry a golden, flaky texture.
- Warm apple filling: Cinnamon, brown sugar, and apples create a classic fall flavor.
- Easy ingredients: You can find everything at most U.S. grocery stores.
- Make-ahead friendly: Assemble the pies ahead of time and refrigerate them until ready to cook.
- Great for gatherings: Their individual size makes them convenient for parties and family dinners.
Ingredients You’ll Need
For the Apple Filling
- 2 medium apples, peeled, cored, and finely diced
- 2 tablespoons brown sugar
- 1 tablespoon granulated sugar
- 1 tablespoon unsalted butter
- 1 teaspoon lemon juice
- 1 teaspoon ground cinnamon
- ¼ teaspoon ground nutmeg
- 1 teaspoon cornstarch
- 1 tablespoon water
- ½ teaspoon vanilla extract
Use firm apples that hold their shape during cooking. Honeycrisp, Granny Smith, Pink Lady, or Fuji apples all work well.
For the Hand Pies
- 1 package refrigerated pie crusts, usually 2 crusts
- 1 large egg
- 1 tablespoon water
- 1 tablespoon granulated sugar
- ½ teaspoon ground cinnamon
- Cooking spray
The refrigerated pie dough keeps the preparation simple. You can also use homemade pie dough if you prefer a fully homemade crust.
How to Make Air Fryer Apple Hand Pies
Step 1: Prepare the Apple Filling
Peel and core the apples, then cut them into small pieces.
Small apple pieces are important because they soften faster and fit neatly inside the pastry.
Place the diced apples in a small saucepan over medium heat. Add the brown sugar, granulated sugar, butter, lemon juice, cinnamon, and nutmeg.
Cook for about 4 to 5 minutes, stirring often, until the apples begin to soften.
In a small bowl, mix the cornstarch with water until smooth. Pour this mixture into the apples and stir well.
Cook for another 1 to 2 minutes until the filling thickens.
Remove the saucepan from the heat and stir in the vanilla extract.
Let the apple mixture cool completely before filling the pastry.
Step 2: Prepare the Pie Dough
Place the refrigerated pie crusts on a lightly floured surface.
Use a round cookie cutter or a small bowl to cut circles about 4 to 5 inches wide.
You should get several dough circles from the two crusts. Gather the leftover dough, gently roll it again, and cut additional circles if needed.
Avoid rolling the dough too thin because a thin crust can tear while you fill or seal the pies.
Step 3: Add the Apple Filling
Place about 1 to 1½ tablespoons of cooled apple filling in the center of each dough circle.
Do not overfill the pastry.
Too much filling can prevent the edges from sealing properly and may cause the mixture to leak during cooking.
Leave about ½ inch of space around the edges.
Step 4: Seal the Hand Pies
Fold each dough circle in half over the apple filling.
Press the edges together gently with your fingers.
Use a fork to crimp around the entire edge. This creates a decorative border and helps seal the filling inside.
If the edges feel dry, lightly brush them with a little water before sealing.
Step 5: Prepare the Egg Wash
Whisk one egg with one tablespoon of water.
Brush a thin layer of egg wash over the top of each hand pie.
The egg wash helps the pastry turn golden brown while cooking.
For extra flavor, mix the granulated sugar and cinnamon together and sprinkle a small amount over each pie.
Step 6: Add Small Vents
Use a sharp knife to make two or three small cuts on the top of each hand pie.
These vents allow steam to escape while the apple filling heats.
Without vents, pressure can build inside the pastry and cause the edges to open.
Step 7: Air Fry
Preheat the air fryer to 350°F (175°C) for about 3 minutes.
Lightly spray the basket with cooking spray.
Place the hand pies in the basket in a single layer. Leave space between each one so hot air can circulate properly.
Cook for 8 to 11 minutes, or until the pastry is puffed and golden brown.
Depending on your air fryer model and the size of the pies, cooking time may vary slightly.
Check the pies around the 8-minute mark to prevent over-browning.
Step 8: Cool and Serve
Carefully remove the hand pies from the basket and place them on a cooling rack.
Let them cool for at least 5 minutes before serving.
The apple filling becomes extremely hot during cooking, so allowing the pies to cool slightly makes them easier and safer to eat.
Tips for Crispy Apple Hand Pies
A few simple techniques can make a big difference in the final texture.
- Cool the filling first: Hot filling can soften the pastry and make sealing difficult.
- Avoid overfilling: A moderate amount of filling helps the crust stay closed.
- Do not overcrowd the basket: Air needs room to move around each pie.
- Use an egg wash: It creates a deeper golden color and slightly crisp surface.
- Vent the pastry: Small cuts allow steam to escape.
- Watch the final minutes: Pie crust can brown quickly in an air fryer.
- Use firm apples: Softer apples can turn mushy during cooking.
- Let them rest: A few minutes of cooling allows the filling to thicken slightly.
Best Apples for Hand Pies
Different apples create slightly different flavors.
Granny Smith apples provide a bright tart flavor that balances the sweetness of the filling.
Honeycrisp apples offer a sweet, crisp flavor and hold their texture well.
Pink Lady apples have a pleasant balance of sweet and tart flavors.
Fuji apples are naturally sweet and work well if you prefer a sweeter filling.
You can also combine two varieties for a more complex apple flavor.
Easy Topping Ideas
These individual apple pies taste delicious on their own, but simple toppings can turn them into a special dessert.
- Dust with powdered sugar.
- Drizzle with vanilla glaze.
- Add a thin caramel drizzle.
- Serve with vanilla ice cream.
- Sprinkle with extra cinnamon sugar.
- Add chopped toasted pecans for crunch.
- Serve with warm caramel sauce for a classic fall combination.
For a simple glaze, mix ½ cup powdered sugar with 1 to 2 teaspoons of milk and a small splash of vanilla extract. Drizzle it over the cooled pies.
How to Store Leftovers
Allow the hand pies to cool completely before storing them.
Place them in an airtight container and refrigerate for up to 3 days.
To reheat, place one or two pies in the air fryer at 325°F (165°C) for about 3 to 5 minutes.
Avoid microwaving them if you want to keep the crust crisp. The microwave can make the pastry soft.
Can You Freeze Apple Hand Pies?
Yes, these pies can be frozen before or after cooking.
For the best texture, assemble the pies, seal them, and place them on a parchment-lined tray. Freeze until firm, then transfer them to a freezer-safe container or bag.
When ready to cook, you can air fry them from frozen. Add a few extra minutes to the cooking time and check that the pastry is fully golden and the filling is hot.
If freezing cooked pies, let them cool completely before wrapping and freezing.
Common Mistakes to Avoid
The most common problem is using too much apple filling. A generous-looking amount can actually make the pastry difficult to close.
Another mistake is placing too many pies in the air fryer at once. Crowding blocks airflow and can result in uneven browning.
Do not skip the cooling time for the filling. Warm filling can make the dough soft and difficult to handle.
Finally, avoid cooking at an excessively high temperature. The outside can brown before the pastry and filling have heated properly.
Serving Suggestions
These apple hand pies are excellent for breakfast, dessert, afternoon snacks, and holiday gatherings.
Serve them warm with vanilla ice cream for an easy dessert. For a fall party, arrange them on a platter with caramel sauce for dipping.
They also pair well with coffee, hot chocolate, apple cider, or a warm cup of tea.
For Thanksgiving or other holiday gatherings, make smaller pies and serve them as individual desserts after dinner.
Frequently Asked Questions
Can I use store-bought pie crust for apple hand pies?
Yes. Refrigerated pie crust is an easy option and creates a flaky crust with less preparation.
What apples are best for apple hand pies?
Granny Smith, Honeycrisp, Pink Lady, and Fuji apples all work well because they provide good flavor and hold their shape during cooking.
Why are my hand pies leaking?
Overfilling, weak sealing, or skipping the steam vents can cause the apple filling to escape during cooking.
Can I make these hand pies without eggs?
Yes. Brush the pastry with a little milk or cream instead, although the crust may not become as deeply golden.
Can I make apple hand pies ahead of time?
Yes. Assemble the pies several hours ahead and refrigerate them until you are ready to air fry them.
How do I keep the pastry crispy?
Let cooked pies cool on a wire rack instead of placing them directly in a sealed container while they are still hot.
Can I freeze these apple hand pies?
Yes. Freeze assembled unbaked pies or fully cooled cooked pies in an airtight freezer-safe container.
How long do apple hand pies last?
Refrigerated cooked pies are best enjoyed within 3 days when stored properly in an airtight container.
Final Thoughts
These Air Fryer Apple Hand Pies are a simple way to enjoy the flavors of homemade apple pie without preparing a full-size pie. The combination of flaky pastry, cinnamon-spiced apples, and a golden finish makes them especially appealing during the fall season.
The recipe is easy to adjust with different apples, toppings, and spices. Serve them warm with caramel sauce or vanilla ice cream, or enjoy one on its own with a cup of coffee.
Once you try this smaller version of a classic apple dessert, it may become a regular treat for family weekends, fall gatherings, and holiday celebrations.