Why Do Your Clothes Still Smell After Washing? 7 Simple Fixes

Fresh laundry, washing machine, towels, and clothing showing simple ways to prevent musty smells after washing

Why Do Your Clothes Still Smell After Washing? 7 Simple Fixes

Freshly washed clothes should smell clean, but sometimes laundry comes out of the washer with a musty, sour, or damp odor. This can be frustrating, especially when the clothes look clean.

The good news is that the problem is often linked to simple laundry habits rather than the fabric itself. Leaving wet clothes in the washer, using too much detergent, or allowing the washing machine to stay damp can all contribute to unpleasant smells.

Here are 7 practical laundry fixes you can try to help your clothes smell fresher after washing.

1. Take Wet Clothes Out of the Washer Quickly

One of the easiest mistakes to fix is leaving clean laundry inside the washer for too long.

Wet clothing creates a warm, damp environment where unwanted odors can develop.

Try this:

  1. Move clothes to the dryer or drying rack soon after the cycle ends.
  2. Do not leave a finished load sitting overnight.
  3. If you forget a load for several hours, consider running another rinse or wash cycle before drying it.
  4. Dry the clothes completely before folding or storing them.

Tip: Set a phone reminder if you often forget laundry in the washer.

2. Stop Using More Detergent Than You Need

More detergent does not always mean cleaner clothes. Excess soap can remain on fabric, especially when the washer cannot rinse it away completely.

Over time, detergent residue can trap body oils, dirt, and odors in clothing.

A better approach:

  • Follow the detergent label for your load size.
  • Use the correct amount for heavily soiled versus lightly soiled laundry.
  • Avoid filling the washer with too many clothes.
  • Consider an extra rinse if residue is a recurring problem.

High-efficiency washers may require less detergent than older machines, so always follow the instructions for your specific appliance and detergent.

3. Clean Your Washing Machine

Sometimes the smell is coming from the washer rather than the clothes.

Moisture, detergent residue, lint, and grime can collect around the door seal, detergent drawer, and other damp areas.

Simple washer-cleaning routine:

  1. Check the manufacturer’s cleaning instructions.
  2. Wipe the door seal and remove visible debris.
  3. Clean the detergent dispenser regularly.
  4. Run the machine’s cleaning cycle if it has one.
  5. Leave the door or lid open after washing so the interior can dry.

Important: Never mix bleach with vinegar or other cleaning products.

4. Give Clothes Enough Room to Rinse

An overloaded washing machine may not clean or rinse clothing properly.

When the drum is packed tightly, water and detergent cannot move freely through the fabrics. Dirt and residue can remain trapped in towels, shirts, workout clothes, and other items.

For better results:

  • Follow your washer’s load-size recommendations.
  • Avoid stuffing clothes into the drum.
  • Separate very bulky items from smaller garments when appropriate.
  • Wash heavily soiled items according to their care instructions.

A properly sized load gives clothing more room to move during the wash and rinse cycles.

5. Check How You Dry Your Laundry

Clothes can develop a musty smell if they stay damp for too long after washing.

This can happen when a dryer cycle is too short or when air-dried clothing is placed in a closet before it is completely dry.

Follow these steps:

  1. Check thicker areas such as waistbands, pockets, and towel centers.
  2. Make sure laundry is completely dry before folding.
  3. Avoid packing wet clothes tightly together on a drying rack.
  4. Give air-dried items enough ventilation.
  5. Clean the dryer’s lint filter after each load.

If clothing smells fine when dry but develops an odor after being stored, make sure it is truly dry before putting it away.

6. Don’t Let Towels and Workout Clothes Sit Damp

Some fabrics hold moisture and body oils more readily than others.

Towels, gym clothes, socks, and synthetic athletic fabrics can develop persistent odors when they remain damp in a hamper.

Change the routine:

  • Hang damp towels instead of dropping them into a closed hamper.
  • Let sweaty workout clothes air out before washing when practical.
  • Avoid leaving wet swimwear in a sealed bag.
  • Wash odor-prone clothing according to its care label.
  • Do not store damp laundry with dry clothing.

This small habit can make a noticeable difference in how your laundry smells.

7. Keep Your Laundry Area Dry and Ventilated

The environment around your washer and dryer can also affect laundry odors.

A humid laundry room with poor airflow can make it harder for wet fabrics and the washer itself to dry properly.

Improve airflow by:

  • Keeping the washer area uncluttered.
  • Allowing damp surfaces to dry.
  • Using appropriate ventilation in humid rooms.
  • Checking for leaks around water connections.
  • Keeping laundry hampers clean and dry.

If you notice a strong persistent odor, visible mold, standing water, or a possible plumbing leak, investigate the source instead of masking the smell with fragrance.

A Simple Laundry Reset You Can Try Today

If your clothes already smell musty, don’t simply add more detergent to the next load.

Try this basic reset:

  1. Check the washer for visible residue or trapped debris.
  2. Clean the machine according to the manufacturer’s instructions.
  3. Rewash the affected clothes using the recommended detergent amount.
  4. Avoid overloading the washer.
  5. Dry everything completely.
  6. Air out towels and workout clothes instead of leaving them damp.
  7. Keep the washer and laundry area dry between loads.

If the odor continues after these steps, check the care label and consider whether the fabric itself has retained the smell.

When a Persistent Laundry Smell Needs More Attention

A mild musty odor can often be connected to laundry habits, but a strong or unusual smell may have another source.

Pay attention if you notice:

  • A sewage-like smell from the washer or drain
  • Standing water around the appliance
  • A persistent moldy odor in the laundry room
  • Visible mold or heavy buildup
  • A leak around hoses or plumbing
  • The same odor returning after proper washing and drying

In these situations, the issue may involve the appliance, drainage, plumbing, or moisture in the room. Follow the washer manufacturer’s guidance or contact a qualified appliance or plumbing professional when needed.

Frequently Asked Questions

1. Why do my clothes smell bad immediately after washing?

Wet clothes can develop odors when they sit in the washer too long or when the machine contains moisture and residue.

2. Can too much detergent make clothes smell?

Yes. Excess detergent can leave residue on fabrics and may trap dirt, oils, and odors instead of rinsing away completely.

3. How often should I clean my washing machine?

Follow your manufacturer’s instructions, but regularly cleaning the drum, dispenser, and door seal helps prevent residue and unwanted odors.

4. Why do my towels smell even after washing?

Towels can retain moisture, body oils, and detergent residue, especially when they stay damp or are packed tightly into a hamper.

5. Should I leave my washing machine door open?

Leaving the door or lid open after a wash can help the interior dry, but follow your appliance manufacturer’s safety and care instructions.

6. Why do clothes smell fine when dry but bad later?

The fabric may not have dried completely, or moisture and residue may be trapped in thicker areas such as towels, pockets, or waistbands.

7. Does adding more detergent make laundry cleaner?

Not necessarily. Using the recommended amount gives the washer a better chance to rinse away detergent and soil effectively.

8. What should I do if my laundry still smells after rewashing?

Check the washer, detergent amount, load size, drying method, and laundry-area moisture before looking for an appliance, drain, or plumbing issue.

Final Thoughts

When clean clothes still smell, the solution may be simpler than changing your entire laundry routine. Start by removing wet clothes promptly, using the right amount of detergent, cleaning the washer, avoiding overloaded loads, and drying fabrics completely.

Small changes can make laundry easier to manage and help prevent that frustrating musty smell from coming back.

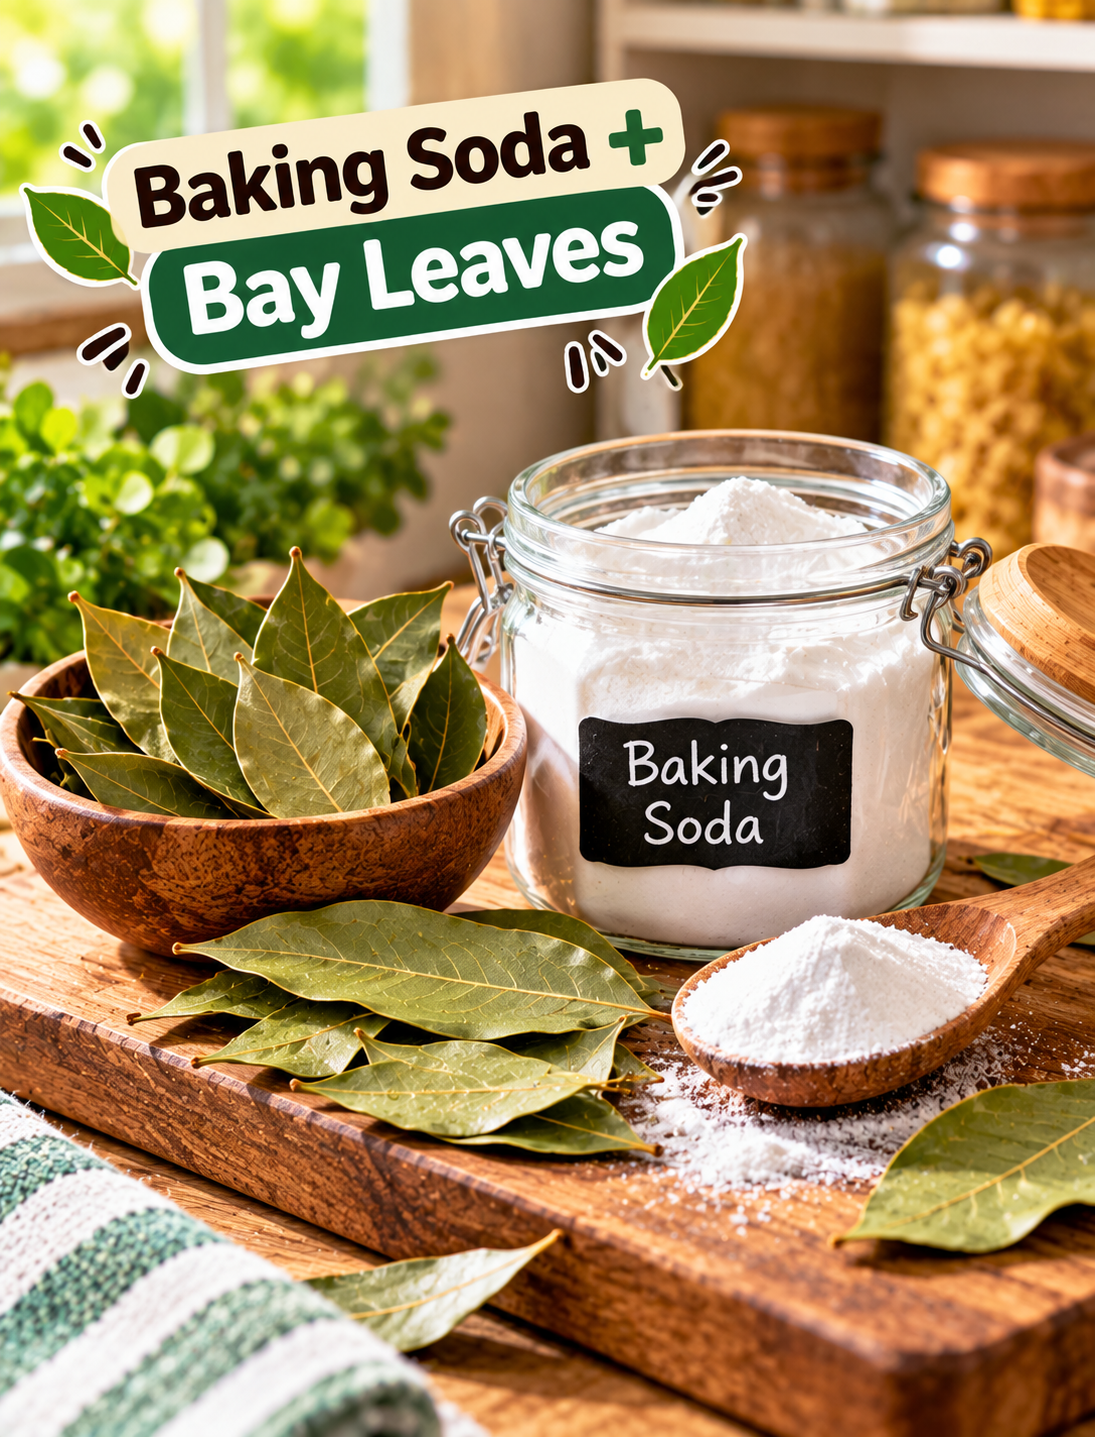
10 Simple Ways to Freshen Everyday Household Items

Simple household items being refreshed with natural cleaning ingredients like baking soda, lemon, and vinegar

10 Simple Ways to Freshen Everyday Household Items

DON’T REPLACE IT YET! Try These Simple Freshness Tricks First. Everyday household items collect dust, odors, moisture, and bacteria over time. Before throwing things away or buying replacements, try simple cleaning and refreshing methods that can bring them back to life. Many items around your home only need a little care to look cleaner, smell better, and feel fresh again.

From kitchen tools to soft fabrics and everyday essentials, these easy household freshening tips use simple ingredients and practical steps. These methods can help you maintain a cleaner home while saving money and reducing waste.

If you want your home to feel more comfortable and inviting, these simple tricks are worth trying.

1. Refresh Your Mattress With Baking Soda

Your mattress absorbs sweat, body oils, and dust while you sleep. Even with regular sheet changes, it can develop a stale smell over time.

Step-by-Step Method:

  1. Remove all bedding, including sheets and pillow covers.
  2. Sprinkle a thin layer of baking soda across the mattress surface.
  3. Leave it for 30 minutes to absorb odors and moisture.
  4. Vacuum the mattress completely to remove the baking soda.
  5. Add a few drops of essential oil to baking soda for a light natural scent.

This simple method helps freshen your sleeping area without using strong chemical sprays.

2. Make Old Towels Feel Fresh Again

Towels can become rough and develop a musty smell when detergent and fabric softener build up in the fibers.

Step-by-Step Method:

  1. Place towels in the washing machine.
  2. Add one cup of white vinegar instead of detergent for the first wash.
  3. Run a hot water cycle if the fabric label allows it.
  4. Wash again with regular detergent.
  5. Dry towels completely before storing them.

This process helps remove residue and restores a cleaner feel to everyday towels.

3. Remove Odors From Shoes

Shoes trap sweat and moisture, creating unpleasant smells. A quick refresh can make them feel cleaner.

Step-by-Step Method:

  1. Remove shoe inserts if possible.
  2. Sprinkle baking soda inside each shoe.
  3. Leave overnight for odor absorption.
  4. Shake out the powder before wearing.
  5. Allow shoes to air out regularly.

Keeping shoes dry and clean helps prevent repeated odor problems.

4. Freshen Kitchen Sponges and Scrubbers

Kitchen sponges collect food particles and moisture, which can create unwanted smells.

Step-by-Step Method:

  1. Rinse the sponge after every use.
  2. Remove leftover food pieces.
  3. Place it in hot water for several minutes.
  4. Allow it to dry completely between uses.
  5. Replace damaged sponges regularly.

A clean sponge supports better kitchen hygiene and reduces unpleasant smells.

5. Refresh Your Refrigerator Naturally

The refrigerator can develop strong odors from stored foods, spills, and expired items.

Step-by-Step Method:

  1. Remove expired products and old leftovers.
  2. Wipe shelves with warm water and mild soap.
  3. Clean small spills immediately.
  4. Place an open box of baking soda inside.
  5. Replace the baking soda every few months.

A fresh refrigerator helps keep food storage cleaner and more pleasant.

6. Bring Freshness Back to Curtains

Curtains collect dust, cooking smells, and airborne particles that can make rooms feel less fresh.

Step-by-Step Method:

  1. Check the care label before washing.
  2. Vacuum curtains using a soft brush attachment.
  3. Wash removable curtains when needed.
  4. Let them dry completely.
  5. Open windows regularly for fresh airflow.

Clean curtains can improve the overall feeling of a room.

7. Remove Smells From Wooden Cutting Boards

Wooden cutting boards absorb food odors from ingredients like garlic, onions, and meat.

Step-by-Step Method:

  1. Sprinkle coarse salt over the cutting board.
  2. Rub half a lemon across the surface.
  3. Let it sit for several minutes.
  4. Rinse with warm water.
  5. Dry the board completely before storing.

This natural cleaning method helps maintain the board’s surface and freshness.

8. Freshen Upholstered Furniture

Sofas, chairs, and fabric furniture collect dust, pet smells, and everyday odors.

Step-by-Step Method:

  1. Vacuum cushions and fabric surfaces.
  2. Sprinkle baking soda lightly over upholstery.
  3. Wait 20–30 minutes.
  4. Vacuum again thoroughly.
  5. Use washable covers when possible.

Regular maintenance keeps furniture looking cleaner and smelling better.

9. Refresh Your Garbage Disposal

Food particles inside garbage disposals can create strong kitchen odors.

Step-by-Step Method:

  1. Run cold water through the disposal.
  2. Add small lemon pieces.
  3. Turn on the disposal briefly.
  4. Flush with water afterward.
  5. Clean the surrounding sink area.

Citrus fruits provide a natural fresh scent while helping remove leftover smells.

10. Restore Freshness to Blankets and Pillows

Blankets and pillows absorb sweat, dust, and household odors over time.

Step-by-Step Method:

  1. Check washing instructions on the label.
  2. Wash items according to fabric requirements.
  3. Add vinegar during the rinse cycle if suitable.
  4. Dry completely to prevent moisture buildup.
  5. Air them outside occasionally when weather allows.

Fresh bedding creates a cleaner and more comfortable home environment.

Simple Habits That Keep Household Items Fresh Longer

Small daily habits can prevent odors and buildup before they become bigger problems.

  • Open windows for better air circulation.
  • Clean spills immediately.
  • Avoid storing damp items in closed spaces.
  • Wash frequently used fabrics regularly.
  • Allow kitchen tools to dry completely.
  • Use natural odor absorbers like baking soda.

Consistent care reduces the need for frequent replacements and helps everyday items last longer.

Why Freshening Household Items Is Worth It

Refreshing household products is an affordable way to maintain a cleaner living space. Many common items do not need replacement; they simply need proper cleaning and care.

Using simple methods like deodorizing, washing, airing out, and removing buildup can improve freshness throughout your home. These steps are easy, budget-friendly, and suitable for busy households.

A cleaner home does not always require expensive products. Sometimes, basic ingredients and regular maintenance are enough to make everyday items feel new again.

Frequently Asked Questions

1. How often should I freshen household items?

Most household items should be refreshed monthly, while frequently used items may need weekly care.

2. Can baking soda remove household odors?

Yes, baking soda naturally absorbs many unwanted smells from fabrics, furniture, and surfaces.

3. How can I make towels smell fresh again?

Wash towels with vinegar occasionally to remove detergent buildup and trapped odors.

4. What is the easiest way to freshen a mattress?

Sprinkling baking soda and vacuuming after 30 minutes is a simple mattress refresh method.

5. How do I keep my refrigerator smelling clean?

Regular cleaning and an open box of baking soda help control refrigerator odors.

6. Can natural ingredients freshen household items?

Yes, ingredients like baking soda, lemon, and vinegar can help clean and deodorize many items.

7. How can I prevent musty smells at home?

Improve airflow, reduce moisture, and clean fabrics regularly to prevent stale odors.

8. Should I replace items instead of cleaning them?

Many household items can be refreshed and reused with proper cleaning methods.

Which household item needs freshening the most? Share your answer and try these simple freshness tricks before replacing it!

What Can You Actually Do With Cloves?

Six everyday uses for cloves including clove tea, cooking, baking, citrus infusion, and cozy home aroma

What Can You Actually Do With Cloves?

Most people reach for this warm, fragrant spice when making holiday cookies or baked goods. But uses for cloves goes far beyond the baking shelf.

Whole cloves can add depth to drinks, rice, sauces, fruit, and slow-cooked dishes. Ground cloves work especially well in muffins, cookies, quick breads, and spice blends. You can also use the aromatic buds in simple homemade preparations for a cozy kitchen or home scent.

The best part is that you do not need complicated ingredients or special equipment.

This guide shows you 6 practical uses for cloves, along with simple preparation ideas and tips for choosing between whole and ground forms.

1. Make a Simple Clove Tea

One of the easiest ways to use whole cloves is to steep them in hot water.

What You Need

  • 3–4 whole cloves
  • 1 cup hot water
  • Honey, optional
  • Orange or lemon, optional

How to Make It

  1. Place the whole buds in a mug.
  2. Pour in 1 cup of hot water.
  3. Cover and steep for 5–7 minutes.
  4. Remove the cloves before drinking.
  5. Add a small amount of honey or citrus if you like.

The result is a warm, aromatic drink with a naturally strong spice flavor.

This is best viewed as a traditional beverage idea rather than a treatment for a health condition.

2. Add Flavor to Warm Drinks

You can also use whole cloves to give everyday drinks a deeper, warmer flavor.

Try adding one or two buds to:

  • Warm apple cider
  • Spiced tea
  • Homemade fruit punch
  • Hot cranberry drinks
  • Orange-based beverages

For a simple fall-inspired drink, combine apple cider with a cinnamon stick and one or two whole cloves. Warm the mixture gently, then remove the spices before serving.

Whole cloves are useful here because they can be removed easily after they release their flavor.

3. Use Them in Rice and Savory Cooking

Cloves can add a warm, slightly sweet aroma to savory dishes when used in small amounts.

Try them with:

  • Rice
  • Lentil dishes
  • Slow-cooked meats
  • Stews
  • Broths
  • Tomato-based sauces

For rice, add one or two whole cloves while the rice cooks, then remove them before serving. This gives the dish a subtle background flavor without making every bite taste strongly of spice.

They also pair well with cinnamon, bay leaves, black pepper, cardamom, and cumin in many savory spice combinations.

The key is moderation because the flavor is strong.

4. Add Ground Cloves to Baked Goods

Ground cloves are especially convenient for baking because they blend evenly into dough and batter.

Use a small amount in:

  • Muffins
  • Cookies
  • Banana bread
  • Pumpkin bread
  • Gingerbread
  • Spice cakes
  • Oatmeal-based baked goods

A little can make a noticeable difference.

For a balanced flavor, combine ground cloves with cinnamon, nutmeg, or ginger. These spices work well together in classic American fall and holiday recipes.

When a recipe already contains a strong spice blend, start with a small amount rather than adding extra cloves.

5. Create a Citrus and Spice Infusion

For a simple homemade preparation, combine citrus with aromatic spices.

Simple Ingredients

  • Orange slices or orange peel
  • 2–3 whole cloves
  • 1 cinnamon stick
  • 2 cups water

Preparation

  1. Add the orange, cloves, and cinnamon to a small saucepan.
  2. Cover with water.
  3. Bring the mixture to a gentle simmer.
  4. Let it warm for about 15–20 minutes.
  5. Add more water if needed.

The combination creates a warm citrus-and-spice aroma that can make the kitchen feel especially inviting.

If you use orange peel, wash the fruit well before preparing it.

6. Use Cloves for a Cozy Home Aroma

Cloves can also be part of a simple homemade fragrance idea.

Combine whole cloves with orange slices, cinnamon sticks, and star anise in a bowl or saucepan. The combination creates a naturally warm, spicy scent.

For a stovetop version, add the ingredients to water and keep the mixture at a gentle simmer. Check the water regularly and never leave a heated pan unattended.

This is a simple alternative to reaching for a heavily scented product when you want your kitchen to smell warm and seasonal.

Whole Cloves vs. Ground Cloves: Which Should You Use?

Choosing the right form depends on what you are making.

Choose whole cloves when:

  • You want to flavor a drink.
  • You are cooking rice or a stew.
  • You want to remove the spice before serving.
  • You are making a citrus-spice infusion.
  • You want a stronger visual presentation.

Choose ground cloves when:

  • You are baking.
  • You are mixing a spice blend.
  • You want the spice distributed evenly.
  • The recipe calls for a powdered spice.

Whole buds are easier to remove, while ground cloves blend directly into the food.

Easy Ways to Start Using This Spice

You do not need to completely change your cooking routine.

Start with one simple idea.

Add a couple of whole cloves to apple cider, use a small amount of ground spice in muffins, or add one or two buds to rice while it cooks.

Because the flavor is powerful, start small and adjust according to taste.

Keeping both whole and ground forms in your pantry also gives you more options for cooking, baking, and simple homemade preparations.

A Simple Safety Note

Cloves are commonly used as a food spice, but concentrated clove oil is much stronger than the amount normally used in cooking. Large amounts of eugenol-containing clove oil can cause serious poisoning, so clove oil should not be treated like a regular food ingredient.

If you take prescription medicines, are pregnant or breastfeeding, or are considering concentrated herbal products, speak with a qualified healthcare professional before using them regularly. Herbal products can have safety concerns and potential interactions with medicines.

For everyday cooking, keep the focus on normal culinary amounts and follow the recipe.

Frequently Asked Questions

1. What are the most common uses for cloves?

They are commonly used to flavor drinks, rice, savory dishes, baked goods, spice blends, and homemade aromatic preparations.

2. Can I make tea with whole cloves?

Yes. Steep 3–4 whole cloves in 1 cup of hot water for about 5–7 minutes, then remove them before drinking.

3. Are whole cloves better than ground cloves?

Neither is universally better; whole buds are easier to remove, while ground cloves blend more easily into recipes.

4. Can I use cloves in baking?

Yes. Ground cloves work well in muffins, cookies, quick breads, gingerbread, and other warmly spiced baked goods.

5. Can cloves be added to apple cider?

Yes. One or two whole cloves can add a warm, aromatic flavor to heated apple cider.

6. How many whole cloves should I use in a drink?

Start with 3–4 whole cloves per cup of hot water and adjust the strength to your taste.

7. Can cloves be used with orange and cinnamon?

Yes. Orange, cinnamon, and whole cloves make a classic warm combination for drinks and homemade aromatic preparations.

8. Is clove oil the same as using whole cloves?

No. Clove oil is highly concentrated and should not be consumed like a normal culinary spice.

Final Thoughts

Cloves are much more versatile than a spice reserved for holiday baking.

You can use whole buds in drinks, rice, savory dishes, and citrus infusions, while ground cloves are convenient for muffins, cookies, breads, and spice blends.

Start with small amounts, pair them with familiar ingredients, and let their warm aroma add something special to everyday cooking.

Which use would you try first: clove tea, cooking, baking, or a citrus-spice infusion? 🌿☕

Unlock the Secret How Dates Can Help You Manage Weight

Unlock the Secret How Dates Can Help You Manage Weight

Unlock the Secret How Dates Can Help You Manage Weight

Managing weight does not always mean giving up sweet foods. The better approach is often to choose foods that satisfy your sweet tooth while also providing useful nutrients. Dates are one option worth considering because they contain natural carbohydrates, fiber, potassium, and other nutrients.

However, dates are also calorie-dense and naturally sweet, so portion size matters. Adding a few dates to a balanced eating plan may help you replace highly processed sweets without making your diet feel restrictive.

How Dates May Support Weight Management

Dates can fit into a weight-conscious diet when you use them in reasonable portions. Their nutritional profile makes them different from many candy and dessert choices.

1. Start With a Small Portion

A simple first step is to control how many dates you eat at one time.

  • Start with 2–3 dates as a snack.
  • Pair them with a source of protein or healthy fat.
  • Avoid eating large handfuls straight from the package.
  • Check serving sizes because dates vary considerably in size.

Portion control is important because dates contain natural sugar and calories even though they also provide fiber and nutrients.

2. Use Dates to Replace Refined Sweets

Dates can add sweetness to foods without relying entirely on table sugar.

You can:

  • Blend dates into a smoothie.
  • Mash softened dates into oatmeal.
  • Make a date paste for homemade energy bites.
  • Add chopped dates to plain yogurt.
  • Use date paste in selected baking recipes.

This approach can help reduce reliance on heavily processed sweets while adding fiber and minerals to your meals.

3. Combine Dates With Protein

Dates provide carbohydrates, while protein can make a snack more filling and balanced.

Try combining 2 dates with:

  • Greek yogurt
  • A small handful of almonds
  • Natural peanut butter
  • Cottage cheese
  • Unsweetened nut butter

This combination can be useful when you want something sweet but do not want a snack based only on carbohydrates.

4. Choose Dates Before Processed Snacks

When hunger strikes between meals, it is easy to reach for cookies, candy, or other packaged foods. Dates can provide a naturally sweet alternative.

Keep a measured portion available at home or work so you can make an intentional snack choice. Pairing dates with protein or another nutrient-rich food can create a more satisfying snack.

The Role of Fiber in Dates

Fiber is one reason dates can be useful in a balanced weight-management diet. Dietary fiber can support digestive health and contributes to feelings of fullness.

A diet that includes enough fiber may make it easier to stay satisfied between meals. Dates can contribute to daily fiber intake, but they should not be your only source.

Build your meals around other high-fiber foods such as:

  • Vegetables
  • Beans and lentils
  • Berries and other whole fruits
  • Oats
  • Whole grains
  • Nuts and seeds

A variety of fiber-rich foods provides a broader range of nutrients.

Dates and Natural Energy

Dates contain naturally occurring carbohydrates, making them a convenient source of quick energy. This can make them useful around physical activity.

For example, you can eat a small serving before a walk, workout, or other activity when you need a convenient source of carbohydrates.

After exercise, dates can also be paired with protein-rich foods as part of a balanced recovery snack. Dates alone do not provide everything your body needs after demanding exercise, so combining them with protein is a smarter approach.

Step-by-Step Ways to Add Dates to Your Diet

Adding dates does not require a major change to your eating routine. Follow these simple steps.

Step 1: Pick the Right Type

Medjool dates are large, soft, and naturally sweet, while smaller varieties can provide a more modest serving. Check the package because nutritional values can differ by variety and size.

Step 2: Measure Your Serving

Place your planned portion in a bowl instead of eating directly from the container. This simple habit makes it easier to keep your intake consistent.

Step 3: Pair Them With Nutrient-Dense Foods

Combine dates with Greek yogurt, nuts, seeds, or another protein-rich food when you want a more balanced snack.

Step 4: Replace Rather Than Add

If you use dates to make a snack, consider replacing another sweet food instead of adding dates on top of your usual calorie intake.

Step 5: Watch Added Ingredients

Choose plain dates when possible. Some packaged date products contain added sugar, syrups, chocolate, or other ingredients that can significantly change the nutritional profile.

Step 6: Track How They Fit Your Day

Your overall eating pattern matters more than one food. Consider your total portions, meals, snacks, activity level, and personal calorie needs.

Healthy Date Snack Ideas for Weight Management

Dates can be used in simple snacks without complicated recipes.

Try these combinations:

  • Dates + Greek yogurt: Add chopped dates to unsweetened Greek yogurt.
  • Dates + almonds: Enjoy a couple of dates with a small portion of almonds.
  • Date oatmeal: Stir chopped dates into cooked oats with cinnamon.
  • Date smoothie: Blend one or two dates with unsweetened milk, Greek yogurt, and fruit.
  • Date energy bites: Blend dates with oats and nuts, then form small portions.
  • Stuffed dates: Fill a date with a small amount of natural nut butter.

These options provide sweetness while allowing you to control portions and ingredients.

What to Avoid When Using Dates for Weight Management

Dates can be nutritious, but more is not always better. Their concentrated sweetness means portions can add up quickly.

Avoid treating dates as a “free” food that you can eat without limits. Also be careful with date-based desserts that contain large amounts of chocolate, butter, syrup, or added sugar.

Another common mistake is replacing a balanced meal with dates alone. A healthy weight-management plan still needs vegetables, fruits, whole grains, protein foods, and healthy fats.

Building a Balanced Diet With Dates

Dates work best when they are part of a broader eating pattern.

Aim to include:

  • Protein: Eggs, poultry, fish, beans, lentils, yogurt, or tofu.
  • Vegetables: Include different colors and varieties throughout the week.
  • Whole grains: Choose oats, brown rice, quinoa, and whole-grain breads.
  • Healthy fats: Include nuts, seeds, avocado, and appropriate cooking oils.
  • Whole fruits: Rotate dates with berries, apples, oranges, and other fruits.

Regular physical activity also supports healthy weight management. Walking, cycling, strength training, and other enjoyable activities can help you stay active consistently.

Can Dates Actually Help You Lose Weight?

Dates do not directly burn body fat, and no single food guarantees weight loss. Their potential value comes from how they can fit into a balanced eating pattern.

If dates help you replace candy, pastries, or other highly processed sweets, they may be a more nutrient-dense choice. But eating large amounts of dates can still increase your overall calorie intake.

For weight loss, focus on your overall food choices, portion sizes, activity, sleep, and long-term consistency.

Frequently Asked Questions

Are dates good for weight management?

Dates can fit into a weight-management diet because they provide fiber and nutrients, but their natural sugar and calorie content make portion control important.

How many dates should I eat for weight management?

A small serving, such as 2–3 dates, can be a practical starting point, especially when paired with protein or healthy fats.

Do dates make you gain weight?

Dates do not automatically cause weight gain, but eating more calories than your body needs can contribute to weight gain, including from calorie-dense foods such as dates.

Are dates better than candy?

Plain dates provide fiber and nutrients that most candy does not, making them a more nutrient-dense choice when you want something naturally sweet.

Can I eat dates every day?

Yes, dates can be included daily if the portion fits your overall calorie and carbohydrate needs and your diet contains a variety of nutritious foods.

Are dates good before exercise?

Dates provide carbohydrates that can supply quick energy, making a small serving a convenient pre-workout option for many people.

Can dates reduce hunger?

Their fiber content may contribute to fullness, but dates are best combined with protein or healthy fats when you want a more satisfying snack.

Should I eat dates at night?

You can eat dates at night if they fit your overall eating plan, but portion size still matters because dates contain concentrated natural sugars and calories.

Final Thoughts

Dates can be a useful addition to a weight-conscious eating plan when you use them thoughtfully. Their natural sweetness, fiber, carbohydrates, and minerals make them a convenient alternative to some highly processed sweets.

The key is simple: use dates to replace less nutritious choices, control your portions, and pair them with a balanced diet. No single food can manage weight on its own, but smart food choices can make healthy habits easier to maintain over time.

Blueberry Vanilla Relaxation Latte

Creamy blueberry vanilla latte in a glass mug, topped with milk foam, fresh blueberries, and a light sprinkle of cinnamon

Blueberry Vanilla Relaxation Latte

A warm, creamy drink can make an ordinary evening feel a little more special. This Blueberry Vanilla Relaxation Latte combines juicy blueberries, smooth milk, vanilla, and gentle spices into a cozy drink with a beautiful purple color and a naturally sweet berry flavor.

The recipe is simple enough for a quiet evening at home and can be served warm or lightly chilled. Blueberries bring fruity flavor and color, while vanilla adds a soft, dessert-like aroma.

Unlike a traditional coffee latte, this recipe is naturally caffeine-free when prepared without coffee or tea. That makes it a useful option for people who want a warm evening beverage without adding caffeine.

A small amount of honey or maple syrup can be used for extra sweetness. Cinnamon adds warmth, while a pinch of salt helps balance the flavors.

This latte is best enjoyed as part of a relaxing evening routine, such as reading, listening to music, or winding down after dinner.

Why You’ll Love This Blueberry Latte

This homemade latte is creamy, colorful, and easy to customize.

The blueberries provide a bright fruit flavor that pairs surprisingly well with vanilla. When warmed with milk, the berries soften and release their natural color into the drink.

Vanilla rounds out the berry flavor and gives the latte a smooth aroma. Cinnamon adds a subtle warm note without overpowering the fruit.

The recipe also requires only a handful of ingredients. You can prepare it on the stovetop in about 10 minutes without any special equipment.

Another advantage is that you control the sweetness. Start with a small amount of honey or maple syrup, taste the drink, and add more only if needed.

You can use dairy milk or a plant-based alternative such as oat, almond, or coconut milk.

Ingredients You’ll Need

  • 1 cup fresh or frozen blueberries
  • 2 cups milk
  • 1 teaspoon pure vanilla extract
  • 1–2 tablespoons honey or maple syrup
  • ½ teaspoon ground cinnamon
  • ¼ teaspoon ground ginger, optional
  • 1 tablespoon water
  • Small pinch of salt
  • Fresh blueberries for garnish, optional
  • Cinnamon for topping, optional

Fresh blueberries provide excellent flavor during berry season, while frozen blueberries make this recipe convenient throughout the year.

Whole milk creates the richest texture, while oat milk provides a naturally creamy consistency. Almond milk creates a lighter drink with a mild nutty flavor.

Use pure vanilla extract when available because it gives the latte a clean vanilla aroma.

The sweetener is optional because blueberries can provide enough natural sweetness for some tastes.

How to Make Blueberry Vanilla Relaxation Latte

1. Cook the Blueberries

Add the blueberries and water to a small saucepan.

Cook over medium-low heat for about 4–5 minutes.

Stir occasionally as the berries soften.

Gently press a few berries with the back of a spoon to release their juice and color.

Do not boil the berries aggressively because gentle heating helps preserve their fresh flavor.

2. Add the Spices

Add cinnamon, ginger if using, and a small pinch of salt.

Stir the mixture for about 30 seconds.

The warm spices should blend into the blueberry mixture without overpowering it.

If you prefer a simple berry and vanilla flavor, leave out the ginger.

3. Blend or Strain the Berry Mixture

For a smooth latte, transfer the warm blueberry mixture to a blender and blend carefully until smooth.

If using a countertop blender, allow the mixture to cool slightly before blending and follow the blender manufacturer’s instructions for hot liquids.

For an even smoother drink, strain the blended berries through a fine-mesh sieve.

If you enjoy some fruit texture, skip the straining step.

4. Warm the Milk

Pour the milk into a clean saucepan.

Warm it over medium-low heat until steaming but not boiling.

Add the vanilla extract and honey or maple syrup.

Whisk gently to combine.

Avoid boiling the milk because high heat can cause it to scorch or develop an unpleasant texture.

5. Combine the Latte

Pour the blueberry mixture into the warm milk.

Whisk until the color becomes evenly blended.

Taste the latte and adjust the sweetness if needed.

For a café-style foam, use a milk frother or handheld whisk for several seconds.

6. Serve Warm

Pour the latte into two mugs.

Top with a light sprinkle of cinnamon.

Add a few fresh blueberries if desired.

Serve immediately while warm.

For a decorative finish, add a small amount of milk foam and place a few blueberries on top.

How to Make the Latte Extra Creamy

The type of milk has a major effect on texture.

Whole milk provides a rich and creamy result.

Oat milk is another excellent choice because its natural texture works well in warm drinks.

Coconut milk adds a subtle tropical note that pairs nicely with blueberries and vanilla.

Almond milk creates a lighter drink with a mild nutty flavor.

For an extra creamy texture, use a small amount of half-and-half with your preferred milk.

Keep the heat low while warming the milk to reduce the chance of scorching.

A milk frother can also create a smoother, café-style finish without adding extra ingredients.

How to Adjust the Sweetness

Blueberries vary in sweetness depending on their ripeness.

Start with one tablespoon of honey or maple syrup and taste before adding more.

If you prefer a less sweet drink, skip the added sweetener entirely.

Maple syrup adds a deeper flavor that works well with cinnamon.

Honey provides a softer sweetness and blends easily into warm milk.

You can also use a small amount of your preferred sweetener.

The goal is to complement the blueberries rather than cover their natural flavor.

Fresh or Frozen Blueberries?

Both options work well.

Fresh blueberries are ideal when they are ripe and in season.

Frozen blueberries are convenient because they are available year-round and soften quickly when heated.

There is no need to thaw frozen berries before cooking them.

Frozen berries may release more liquid, so you can reduce the added water slightly if the mixture becomes too thin.

Choose berries that have a rich color and fresh appearance for the best flavor.

Dairy-Free Options

This latte is easy to make without dairy.

Oat milk provides a creamy texture and mild flavor.

Almond milk creates a lighter berry drink.

Coconut milk gives the latte a richer texture and subtle coconut flavor.

Cashew milk is another smooth option.

When using a plant-based milk, choose an unsweetened variety if you want full control over the sweetness.

Always check the milk label if you need to avoid specific allergens or ingredients.

Flavor Variations to Try

This recipe can be changed with a few simple ingredients.

Blueberry Lemon Latte

Add a small amount of fresh lemon zest for a bright citrus note.

Blueberry Cinnamon Latte

Increase the cinnamon slightly for a warmer spice flavor.

Blueberry Coconut Latte

Use coconut milk and add a small amount of unsweetened shredded coconut as a garnish.

Blueberry Maple Latte

Replace honey with pure maple syrup for a deeper, richer sweetness.

Blueberry Vanilla Almond Latte

Use almond milk and add a little extra vanilla for a soft nutty flavor.

Blueberry Chocolate Latte

Add a teaspoon of unsweetened cocoa powder for a berry-and-chocolate combination.

Keep additional ingredients balanced so the blueberry and vanilla flavors remain noticeable.

How to Create a Café-Style Presentation

Presentation can make a homemade drink feel extra special.

Use clear glass mugs if you want to showcase the purple color.

Pour the milk slowly over the blueberry mixture for a layered appearance before stirring.

Top with a small amount of milk foam.

Add three or four fresh blueberries in the center.

Finish with a light dusting of cinnamon.

For a special occasion, serve the latte with a small bowl of berries or a simple vanilla biscuit.

The drink looks best when served immediately after preparation.

When to Enjoy This Latte

This beverage works well as an evening drink because it can be prepared without coffee or caffeinated tea.

It can also be served during a weekend brunch or as a cozy afternoon beverage.

Enjoy it while reading, watching a movie, chatting with family, or taking a quiet break.

If you are sensitive to caffeine, check any additional ingredients before adding them to the recipe.

The latte is best viewed as a comforting food-and-drink choice rather than a medical treatment or sleep remedy.

Tips for the Best Results

Use ripe blueberries for stronger berry flavor.

Cook the berries gently rather than boiling them hard.

Blend carefully if working with hot ingredients.

Strain the berry mixture if you prefer a smooth drink.

Warm the milk slowly.

Do not boil the milk.

Add sweetener gradually.

Use fresh vanilla for the best aroma.

Froth the milk before serving if you want a café-style texture.

Serve the latte immediately for the best flavor and appearance.

Can You Make It Ahead?

You can prepare the blueberry mixture ahead of time.

Cook and blend the berries, then allow the mixture to cool.

Store it in a covered container in the refrigerator.

When ready to serve, warm the blueberry mixture gently and prepare the milk separately.

Combine the two just before serving.

This approach makes the recipe faster when you want a warm drink without starting from scratch.

For the freshest flavor and best texture, prepare the complete latte shortly before drinking.

Storage and Reheating

If you have leftover latte, place it in a covered container and refrigerate it promptly.

Reheat it gently in a saucepan over low to medium-low heat.

Stir frequently while warming.

Avoid bringing the drink to a full boil because the milk can scorch or separate.

For the best texture, use a milk frother after reheating.

If the drink develops an unusual smell, appearance, or flavor, discard it.

The Bottom Line

Blueberry Vanilla Relaxation Latte is a simple homemade beverage that combines warm milk, blueberries, vanilla, and gentle spices into a cozy drink.

The blueberry mixture creates a naturally beautiful color, while vanilla and cinnamon add warmth and depth.

You can make it with dairy or plant-based milk and adjust the sweetness to your preference.

Because it contains no coffee or caffeinated tea when made as written, it can fit nicely into an evening beverage routine for people who prefer caffeine-free options.

Serve it warm with fresh blueberries and a little cinnamon for an inviting homemade café experience.

Frequently Asked Questions

1. Is Blueberry Vanilla Latte caffeine-free?

Yes, this recipe is caffeine-free when prepared as written because it contains no coffee, black tea, or green tea.

2. Can I use frozen blueberries?

Yes. Frozen blueberries work well and can be added directly to the saucepan without thawing first.

3. What milk works best?

Whole milk and oat milk provide a creamy texture, while almond milk creates a lighter version.

4. Can I make this latte dairy-free?

Yes. Use oat, almond, coconut, cashew, or another suitable plant-based milk.

5. Can I make the blueberry mixture ahead?

Yes. Prepare the berry mixture in advance, refrigerate it in a covered container, and warm it before combining with milk.

6. How do I make it less sweet?

Start with no sweetener or use only one teaspoon of honey or maple syrup, then adjust after tasting.

7. Can I use blueberry jam?

Yes, but reduce the added sweetener because jam usually contains added sugar and can make the latte much sweeter.

8. Can I serve this latte cold?

Yes. Chill the prepared mixture, pour it over ice, and add cold milk for a refreshing iced version.

Final Thoughts

Blueberry Vanilla Relaxation Latte is a cozy drink that turns simple ingredients into something colorful and comforting.

The combination of sweet-tart blueberries, creamy milk, fragrant vanilla, and warm cinnamon creates a balanced flavor that feels both familiar and unique.

The recipe is easy to adjust, so you can use your favorite milk, change the sweetness, or add lemon, coconut, chocolate, or extra cinnamon.

For the smoothest result, blend and strain the blueberries, warm the milk gently, and combine everything just before serving.

Warm, creamy, fruity, and naturally caffeine-free, this blueberry latte is a simple homemade treat for a quiet moment at the end of the day.

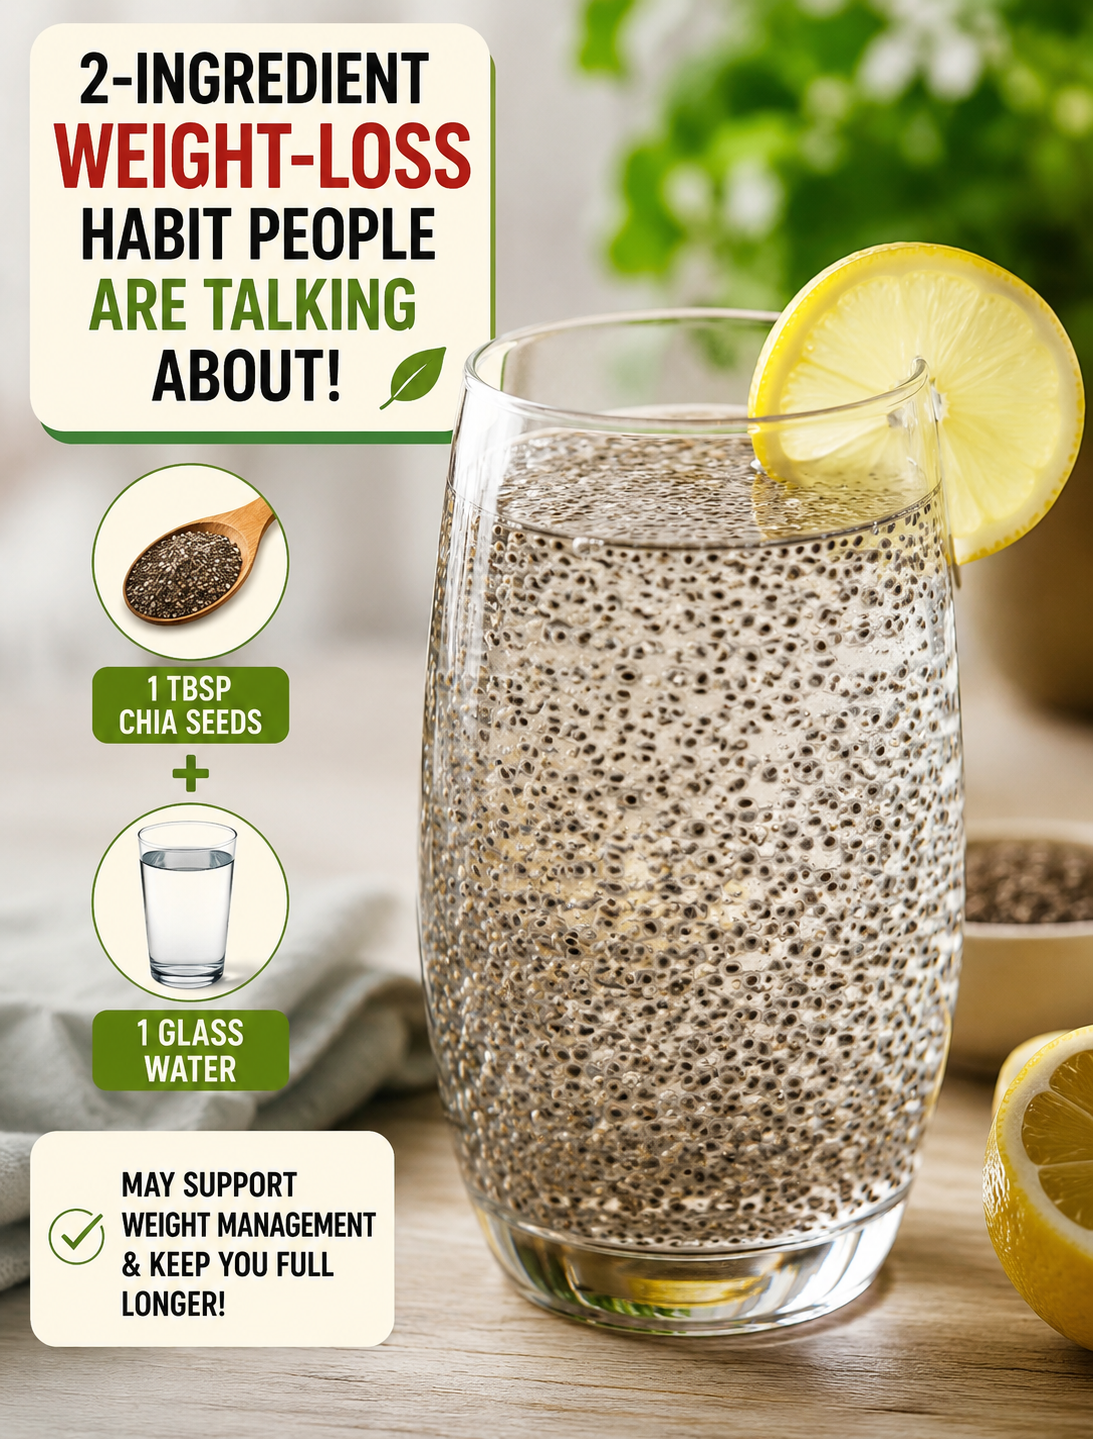
2-INGREDIENT WEIGHT-LOSS HABIT PEOPLE ARE TALKING ABOUT

Glass of chia seed water made with chia seeds and water for a healthy weight-management routine

2-INGREDIENT WEIGHT-LOSS HABIT PEOPLE ARE TALKING ABOUT

If you are trying to build healthier eating habits, you may have seen chia seed water making the rounds online. It uses only two basic ingredients: chia seeds and water. The appeal is simple—no complicated recipe, no special equipment, and no long ingredient list.

Chia seeds are a nutrient-dense food that provides dietary fiber, protein, and healthy fats. Research reviews consistently describe chia as a rich source of fiber and alpha-linolenic acid, a plant-based omega-3 fat. (PubMed)

Still, chia seed water should not be viewed as a magic weight-loss drink. There is no single food or drink that can make body fat disappear. Instead, this simple combination can fit into a balanced routine that includes nutritious meals, regular movement, adequate sleep, and sensible portions.

What Is Chia Seed Water?

Chia seed water is simply water mixed with chia seeds and allowed to sit until the seeds develop a soft, gel-like coating.

That texture comes from the soluble fiber in chia seeds. Fiber absorbs water and expands, which is why the drink becomes thicker after several minutes.

For a basic serving, combine:

  • 1 tablespoon chia seeds
  • 10–12 ounces of water

Stir the mixture well and let it stand for about 10–15 minutes. Stir again before drinking.

If you prefer more flavor, you can add a small amount of lime juice, but lime is optional and is not part of the two-ingredient recipe.

Why Chia Seeds Fit a Weight-Management Routine

The biggest reason chia seeds attract attention in weight-management discussions is their fiber content.

Fiber can help you feel fuller after eating, which may make it easier to manage hunger between meals. USDA nutrition research has also highlighted dietary fiber as an important part of strategies designed to support healthy body weight. (ARS)

One tablespoon of dried chia seeds contains about 4 grams of dietary fiber according to the Dietary Guidelines scientific report. (ODS)

Chia also provides protein and unsaturated fats, making it more nutritionally useful than a drink made mainly from added sugar.

However, eating chia does not automatically cause weight loss. A systematic review of clinical trials found that evidence for chia’s effects on body weight and other health outcomes remains limited, so it should be treated as a nutritious food rather than a proven weight-loss treatment. (PubMed)

How to Make the 2-Ingredient Drink

Making chia seed water takes only a few minutes.

Step 1: Pour 10–12 ounces of water into a glass.

Step 2: Add 1 tablespoon of chia seeds.

Step 3: Stir immediately so the seeds do not clump together.

Step 4: Let the mixture sit for 10–15 minutes.

Step 5: Stir once more and drink slowly.

If you are new to high-fiber foods, starting with a smaller amount may be more comfortable. Increase your intake gradually as your body adjusts.

When Is the Best Time to Drink It?

There is no scientifically established “best time” to drink chia seed water for weight loss.

Some people prefer it in the morning because it is easy to add to a daily routine. Others may enjoy it before or alongside a meal.

The more useful approach is choosing a time you can maintain consistently. A healthy habit works best when it fits naturally into your schedule.

You also do not need to drink chia water every day to eat well. Chia seeds can be added to oatmeal, yogurt, smoothies, overnight oats, or other balanced foods.

Can Chia Seed Water Help You Feel Fuller?

It may help because chia seeds contain a substantial amount of dietary fiber.

Fiber-rich foods can contribute to feelings of fullness, which can be useful when building a meal pattern that supports weight management. USDA guidance notes that fiber can help people feel full and satisfied after eating. (AgLab)

However, fullness varies from person to person. Your overall meal composition, protein intake, hydration, eating speed, sleep, and activity level also influence hunger.

For better results, pair fiber-rich foods with protein-rich foods and minimally processed meals instead of relying on one drink.

How to Make This Habit More Effective

Chia seed water works best as one small part of a larger healthy lifestyle.

Build meals around vegetables, fruits, whole grains, beans, lean proteins, nuts, seeds, and other nutrient-rich foods. Choose water or other low-calorie drinks instead of sugary beverages when possible.

Pay attention to portions without making meals unnecessarily restrictive. Extreme diets can be difficult to maintain, while realistic habits are easier to continue.

Regular physical activity also matters. Walking, strength training, cycling, swimming, or another activity you enjoy can help support an active lifestyle.

Sleep deserves attention too. A consistent sleep schedule can make it easier to maintain healthy eating and activity habits.

The goal is not to find one perfect weight-loss trick. The goal is to create several simple habits that work together.

Important Tips Before Trying Chia Seed Water

Always allow chia seeds to absorb enough liquid before drinking them.

Avoid swallowing dry chia seeds by themselves because they expand when exposed to liquid.

Start with a modest serving if your usual diet is low in fiber. Increasing fiber too quickly can cause bloating or digestive discomfort.

Drink enough fluids throughout the day because hydration supports normal digestion and helps your body handle increased fiber intake.

If you have difficulty swallowing, digestive problems, or a medical condition affected by dietary changes, ask a healthcare professional before adding large amounts of chia seeds to your diet.

Remember that chia seeds contain calories, so adding large amounts to your usual meals without considering your overall intake may not support your goals.

The Bottom Line

Chia seed water is an easy two-ingredient habit that can add fiber and nutrients to your day. Its simple preparation makes it convenient for people who want a practical addition to a healthy routine.

But it is not a shortcut for losing body fat.

For sustainable weight management, focus on the complete picture: balanced meals, adequate protein and fiber, reasonable portions, regular movement, hydration, sleep, and consistency.

Think of chia seed water as one useful food habit—not a miracle remedy.

Frequently Asked Questions

1. Does chia seed water burn belly fat?

No. Chia seed water does not specifically burn belly fat, and targeted fat loss from one food or drink is not supported by good evidence.

2. How much chia seed should I use in water?

Start with about 1 tablespoon of chia seeds in 10–12 ounces of water and adjust based on your tolerance and overall diet.

3. Should chia seeds be soaked before drinking?

Yes. Soaking them allows the seeds to absorb water and develop their gel-like texture before consumption.

4. Can I drink chia seed water every day?

It can fit into a balanced diet, but daily use is not required for healthy weight management or adequate fiber intake.

5. Is chia seed water better than plain water?

No. Plain water remains an excellent hydration choice; chia seed water simply adds nutrients and fiber from the seeds.

6. Can chia seeds help control hunger?

Their fiber content may contribute to fullness, but hunger control also depends on the rest of your diet, sleep, activity, and individual needs. (AgLab)

7. Can I drink chia seed water before a meal?

Yes, if you tolerate it well, but there is no proven timing that makes chia seed water a special weight-loss treatment.

8. Will chia seed water make me lose weight?

Not by itself. Weight change depends on your overall eating pattern, energy intake, physical activity, and other lifestyle factors.

Sources: USDA nutrition guidance and peer-reviewed research on chia seeds and dietary fiber. (PubMed)

5 Healthy Food Swaps That Actually Taste Good

Five healthy food swaps including Greek yogurt, oatmeal with berries, air-popped popcorn, fresh fruit, and sparkling water.

5 Healthy Food Swaps That Actually Taste Good

Making healthier food choices does not mean giving up the foods you enjoy. Small changes in everyday meals can help you build better eating habits without making food feel boring or restrictive. The best healthy food swaps keep the flavor, texture, and comfort you like while adding more nutritious ingredients.

If you are trying to eat better, start with familiar foods instead of changing your entire diet at once. A creamy sandwich spread can be replaced with a lighter option, a sugary breakfast can become more balanced, and a salty snack can be switched for something crunchy and satisfying.

These five simple swaps are easy to use in an American kitchen and work well for breakfast, lunch, dinner, and snacks. Try one at a time and choose the changes that fit your routine.

1. Swap Mayonnaise for Plain Greek Yogurt

Mayonnaise adds a rich, creamy texture to sandwiches, wraps, dips, and salads. Plain Greek yogurt can provide a similar creamy feel while also adding protein to your meal.

Choose unsweetened plain Greek yogurt rather than flavored yogurt. Its mild tang works especially well with chicken salad, tuna salad, coleslaw, and homemade dips.

Step-by-step swap

  1. Start with the same amount of plain Greek yogurt you would normally use for mayonnaise.
  2. Add a small squeeze of lemon juice for extra brightness.
  3. Mix in garlic powder, black pepper, or fresh herbs if you want more flavor.
  4. Taste the mixture before adding additional salt.
  5. Use it immediately or refrigerate it until your meal is ready.

Easy ways to use it

  • Spread it on a turkey sandwich.
  • Mix it into chicken salad.
  • Use it as a veggie dip.
  • Add it to a wrap with grilled chicken and vegetables.
  • Stir it into a simple homemade dressing.

This swap is useful when you want a creamy ingredient without making a major change to the meal.

2. Swap Sugary Cereal for Oatmeal With Fresh Berries

A quick bowl of cereal is a common breakfast choice, but some cereals can contain a lot of added sugar. Oatmeal with fresh fruit is a simple alternative that can make breakfast more filling.

Use old-fashioned oats or quick oats based on the texture and cooking time you prefer. Add strawberries, blueberries, raspberries, or sliced banana for natural sweetness and extra flavor.

Step-by-step swap

  1. Cook oats with water or your preferred milk.
  2. Add fresh or frozen berries after cooking.
  3. Sprinkle in cinnamon for extra flavor.
  4. Add chopped nuts or seeds for crunch.
  5. If needed, use a small amount of honey instead of several spoonfuls of sugar.

Simple topping combinations

  • Blueberries + walnuts + cinnamon
  • Strawberries + sliced almonds
  • Banana + peanut butter
  • Raspberries + chia seeds
  • Apple + cinnamon + chopped pecans

The goal is not to make breakfast complicated. A few simple toppings can turn basic oatmeal into a flavorful meal that is easy to prepare on busy mornings.

3. Swap Potato Chips for Air-Popped Popcorn

If you enjoy crunchy snacks, you do not have to eliminate them to make a healthier choice. Air-popped popcorn can satisfy the desire for something crisp while giving you a whole-grain snack option.

The key is how you prepare and season it. Heavy amounts of butter, salt, or sugary coatings can quickly change the nutrition of the snack.

Step-by-step swap

  1. Prepare plain air-popped popcorn.
  2. Place it in a large bowl while it is still warm.
  3. Add a light amount of seasoning.
  4. Toss the popcorn well so the flavor spreads evenly.
  5. Store extra popcorn in an airtight container for later.

Flavor ideas

  • Garlic powder + black pepper
  • Cinnamon + a small amount of honey
  • Smoked paprika + light seasoning
  • Nutritional yeast + garlic powder
  • Italian herbs + black pepper

This swap works well for movie nights, afternoon snacks, or when you want something crunchy between meals.

4. Swap Sour Cream for Plain Greek Yogurt

Sour cream is a popular topping for baked potatoes, tacos, chili, and Mexican-inspired dishes. Plain Greek yogurt has a similar creamy consistency and tangy taste, making it an easy substitution.

You can use it directly from the container or season it to match your meal.

Step-by-step swap

  1. Spoon plain Greek yogurt into a small bowl.
  2. Add lime juice for tacos or burrito bowls.
  3. Mix in cilantro, garlic, or green onions if desired.
  4. Add black pepper or a small amount of seasoning.
  5. Use it as a topping just as you would sour cream.

Try it with

  • Baked potatoes
  • Tacos
  • Burrito bowls
  • Chili
  • Roasted vegetables
  • Homemade dips

This simple change can make familiar comfort foods fit more easily into a balanced eating routine.

5. Swap Sugary Soda for Sparkling Water With Fresh Fruit

Soda can be an easy drink to reach for, especially with lunch or dinner. If you enjoy carbonation, sparkling water can provide the fizz without the added sugar found in regular sugary soda.

Choose plain or unsweetened sparkling water and add fruit for flavor. Lemon, lime, orange, berries, cucumber, and mint can all make the drink more interesting.

Step-by-step swap

  1. Fill a glass with ice.
  2. Add a few slices of fresh fruit.
  3. Pour in chilled sparkling water.
  4. Add fresh mint or a squeeze of citrus if desired.
  5. Serve immediately for the best fizz.

Refreshing combinations

  • Lemon + mint
  • Lime + cucumber
  • Strawberry + lemon
  • Orange + lime
  • Blueberry + lemon

If you usually drink several sugary beverages each day, replacing even one with an unsweetened option is a simple place to begin.

How to Make Healthy Food Swaps Stick

The easiest way to build better eating habits is to make changes that feel realistic. You do not need to replace everything in your pantry or completely redesign your meals.

Step 1: Choose one swap

Pick the food you eat most often and start there. A small change is easier to repeat than a strict plan that feels difficult to maintain.

Step 2: Keep the replacement available

Buy Greek yogurt, oats, berries, popcorn, sparkling water, and other alternatives during your regular grocery trip. Having them ready makes the healthier choice more convenient.

Step 3: Keep your favorite flavors

Use herbs, spices, citrus, garlic, and fresh produce to make simple ingredients more enjoyable. Healthy eating should still taste good.

Step 4: Adjust portions and ingredients

A healthier ingredient can still contribute calories, sugar, sodium, or saturated fat depending on the product and serving size. Check nutrition labels when comparing packaged foods.

Step 5: Build variety

Do not rely on the same foods every day. Rotate fruits, vegetables, whole grains, protein foods, and healthy toppings to keep meals interesting.

Why Small Food Changes Matter

Healthy eating is often easier when you focus on what you can add or replace rather than what you must completely avoid. Adding fruit to breakfast, choosing whole grains more often, and replacing sugary drinks are practical steps that can fit into everyday life.

You can also use these swaps as a starting point for other meals. Once you find a replacement that works, look for another small change. Over time, several simple choices can create a more balanced kitchen routine.

Remember that food needs vary from person to person. If you have a medical condition, food allergy, or specific dietary requirement, choose substitutions that fit your individual needs and ask a qualified healthcare professional for personalized guidance.

Frequently Asked Questions

1. What are the easiest healthy food swaps to start with?

Start with one familiar change, such as Greek yogurt instead of sour cream or sparkling water instead of sugary soda.

2. Is Greek yogurt healthier than mayonnaise?

Plain Greek yogurt can provide protein and may contain less saturated fat than mayonnaise, but nutrition varies by product, so compare labels.

3. Is oatmeal a healthy breakfast choice?

Oatmeal can be a nutritious breakfast, especially when paired with fruit, nuts, seeds, or another protein-rich food.

4. Is air-popped popcorn a healthy snack?

Plain air-popped popcorn is a whole-grain snack, but large amounts of butter, salt, or sweet toppings can add significant calories and sodium.

5. Can I use Greek yogurt instead of sour cream?

Yes, plain Greek yogurt works well as a topping for tacos, baked potatoes, chili, dips, and many other dishes.

6. Is sparkling water better than soda?

Unsweetened sparkling water does not contain the added sugar found in regular soda, making it a useful beverage swap.

7. Do healthy food swaps have to be expensive?

Not necessarily; affordable staples such as oats, beans, popcorn, seasonal produce, and plain yogurt can support budget-friendly meals.

8. How many food swaps should I make at once?

Start with one or two swaps that fit your routine, then add more as they become easy and familiar.

Lavender Vanilla Bedtime Milk

Warm lavender vanilla milk in a glass mug with dried lavender, vanilla, cinnamon, and flowers on a cozy wooden table

Lavender Vanilla Bedtime Milk

A warm drink before bed can turn an ordinary evening into a relaxing ritual. This Lavender Vanilla Bedtime Milk combines creamy milk, culinary lavender, vanilla, and a touch of natural sweetness for a smooth and comforting nighttime beverage.

The recipe is simple enough for busy weeknights and cozy enough for a quiet weekend evening. The floral taste of lavender blends with sweet vanilla, while warm milk gives the drink a creamy texture.

Many people enjoy a warm beverage as part of their bedtime routine because it can create a calming transition between a busy day and nighttime rest. This recipe does not act as a sleep medicine, but it can be a pleasant addition to healthy evening habits.

Use culinary-grade lavender rather than decorative lavender because culinary varieties are intended for food and beverages. Keep the lavender amount small so the flavor stays delicate instead of becoming overly floral.

Why Try Lavender Vanilla Bedtime Milk?

A simple bedtime routine can make the evening feel more intentional. Turning off bright screens, lowering the lights, and enjoying a warm drink can help create a consistent signal that the day is winding down.

This recipe focuses on familiar ingredients and gentle flavors. Milk provides protein and calcium, while vanilla and lavender add aroma without requiring a complicated ingredient list.

If you prefer a dairy-free drink, fortified plant-based milk can be used instead. Unsweetened options are especially useful when you want to control the amount of added sugar.

The recipe can also be adjusted to match your taste. You can make it sweeter, reduce the lavender, or add a small amount of cinnamon for extra warmth.

Ingredients You’ll Need

  • 2 cups milk
  • 1 teaspoon dried culinary lavender
  • 1 teaspoon pure vanilla extract
  • 1 teaspoon honey or maple syrup, optional
  • ¼ teaspoon ground cinnamon, optional
  • Tiny pinch of salt
  • Edible lavender buds for garnish, optional

Whole milk creates the creamiest texture, while 2% or low-fat milk produces a lighter drink.

For a dairy-free version, use unsweetened fortified soy, almond, oat, or another plant-based milk. Check the label if you want a beverage that provides calcium and vitamin D.

Use pure vanilla extract for a clean vanilla flavor. Culinary lavender should have a fresh floral aroma without a dusty or musty smell.

Honey is optional because the vanilla and lavender already provide plenty of flavor. If you use honey, add a small amount and adjust it after tasting.

How to Make Lavender Vanilla Bedtime Milk

1. Warm the Milk

Pour the milk into a small saucepan and place it over low heat.

Warm it slowly for about 4–5 minutes, stirring occasionally. Do not let the milk reach a rapid boil because gentle heating helps prevent scorching.

2. Add the Lavender

Add the dried culinary lavender to the warm milk.

Let it steep over low heat for about 3–5 minutes. Stir occasionally so the lavender distributes evenly.

Keep the steeping time short because too much lavender can make the drink taste bitter or strongly floral.

3. Strain the Milk

Remove the saucepan from the heat.

Pour the milk through a fine-mesh strainer into a clean mug to remove the lavender buds.

Straining creates a smoother drink and prevents small pieces of lavender from settling at the bottom.

4. Add Vanilla and Sweetener

Stir in the vanilla extract, optional honey or maple syrup, cinnamon, and tiny pinch of salt.

Taste carefully and add a little more sweetness if needed.

Serve warm and garnish with a few edible lavender buds if desired.

What Does Lavender Add to the Drink?

Lavender gives this bedtime beverage its signature floral aroma and delicate herbal flavor.

Culinary lavender is commonly used in teas, baked goods, syrups, and other recipes. Its flavor can be strong, so a small amount is usually enough.

Lavender is often associated with relaxation because of its pleasant scent. Some research has explored lavender and relaxation or sleep-related outcomes, but evidence is not strong enough to treat this drink as a remedy for insomnia or other sleep disorders.

In this recipe, lavender is primarily a flavor ingredient that makes the warm milk feel special.

Why Add Vanilla?

Vanilla softens the floral notes of lavender and gives the milk a naturally sweet aroma.

Pure vanilla extract works especially well because you only need a small amount to create a noticeable flavor. Vanilla also pairs naturally with cinnamon, honey, and warm milk.

If you prefer a stronger vanilla taste, increase the extract slightly after tasting the finished drink.

Avoid adding too much because excessive vanilla can overpower the delicate lavender flavor.

Is Warm Milk Good Before Bed?

Warm milk is a traditional bedtime drink in many households. Milk contains nutrients such as protein and calcium, making it more substantial than a simple herbal beverage.

Some people find that a warm drink feels comforting as part of their nighttime routine. The relaxing effect may come partly from the routine itself rather than from milk acting as a sleep treatment.

There is no need to drink milk before bed if it does not suit your diet. A warm, unsweetened plant-based beverage can provide a similar comforting experience.

If you are sensitive to lactose, choose lactose-free milk or an appropriate dairy-free alternative.

Can Lavender Vanilla Milk Help You Sleep?

This drink may help create a relaxing bedtime routine, but it should not be described as a guaranteed sleep aid.

Lavender has been studied for its possible effects on relaxation and sleep, but research findings vary. A recipe containing lavender is not the same as a standardized supplement or clinical treatment.

For better nighttime habits, combine the drink with a consistent sleep schedule, a comfortable bedroom, reduced evening screen exposure, and other habits that support good sleep.

If you regularly have trouble falling asleep or staying asleep, talk with a healthcare professional instead of relying on a food or beverage alone.

How to Make It Dairy-Free

Making this recipe dairy-free is easy.

Replace cow’s milk with an unsweetened fortified plant-based milk. Soy milk provides a creamy texture and can offer useful protein, while oat milk creates a naturally smooth and slightly sweet flavor.

Almond milk produces a lighter drink with a subtle nutty taste.

When choosing a plant-based milk, check the nutrition label for added sugar, calcium, vitamin D, and protein. Fortification varies between brands.

Warm the plant milk gently because some varieties can separate or develop a different texture when overheated.

How Sweet Should Bedtime Milk Be?

The ideal sweetness depends on your personal preference.

Start with no added sweetener and taste the drink after adding vanilla. If you want more sweetness, stir in about one teaspoon of honey or maple syrup.

Using less added sugar can keep the beverage lighter and allow the lavender and vanilla flavors to stand out.

You can also use a naturally sweeter plant-based milk, but check the label for added sugars.

The goal is a smooth, balanced drink rather than a dessert-like beverage.

Easy Flavor Variations

There are several simple ways to customize this warm drink.

Add a small pinch of cinnamon for a cozy spice flavor.

A tiny amount of ground cardamom creates a more aromatic version with a subtle citrus-like note.

For a chocolate variation, stir in a small amount of unsweetened cocoa powder.

You can also add a few drops of almond extract, but use it sparingly because almond flavor can quickly become strong.

For a refreshing summer version, allow the milk to cool completely and serve it over ice, although the warm version is better suited to a traditional bedtime routine.

Tips for the Best Lavender Vanilla Milk

Use culinary-grade lavender intended for food preparation.

Start with a small amount because lavender becomes stronger as it steeps.

Heat the milk gently and avoid boiling it.

Strain the lavender before serving for a smooth texture.

Add vanilla after removing the milk from high heat.

Use a small amount of sweetener and adjust after tasting.

Serve the drink warm rather than extremely hot.

Use clean ingredients and equipment each time you prepare the recipe.

These small details help keep the flavor balanced and prevent the lavender from becoming overpowering.

When to Enjoy This Drink

There is no required time to drink lavender vanilla milk.

For a bedtime routine, enjoy a small mug about 30–60 minutes before you plan to sleep. This gives you time to slow down without making the drink part of a rushed routine.

You can pair it with quiet activities such as reading, journaling, stretching, or listening to calm music.

Avoid turning the drink into a large late-night snack if you find that heavy food or large amounts of liquid interfere with your sleep.

Your ideal portion depends on your appetite, dietary needs, and evening routine.

Storage and Food Safety

This recipe is best enjoyed fresh while warm.

If you prepare extra, transfer the remaining milk to a clean covered container and refrigerate it promptly.

Use refrigerated leftovers within a few days and reheat gently on the stovetop.

Do not leave milk sitting at room temperature for an extended period.

Always discard leftovers that develop an unusual smell, flavor, or appearance.

If you add honey, remember that honey should not be given to children under 12 months of age.

The Bottom Line

Lavender Vanilla Bedtime Milk is a simple, comforting beverage that combines warm milk with delicate floral and vanilla flavors.

It can become part of a relaxing nighttime ritual without requiring expensive ingredients, special powders, or complicated preparation. Milk contributes nutrients such as protein and calcium, while lavender and vanilla provide most of the drink’s distinctive aroma and flavor.

Although lavender is often linked with relaxation, this recipe should not be considered a treatment for insomnia or other sleep conditions. Its biggest practical value may be the calming routine it creates around the end of the day.

Keep the lavender light, choose quality ingredients, and adjust the sweetness to your preference. Then enjoy a warm mug as you slow down and prepare for a peaceful evening.

Frequently Asked Questions

1. Can I drink lavender vanilla milk every night?

Yes, it can be part of a regular evening routine if it fits your diet and you tolerate all of the ingredients.

2. Does lavender milk help with sleep?

Lavender may promote a relaxing experience for some people, but this drink is not a proven treatment for insomnia or sleep disorders.

3. What type of lavender should I use?

Always use culinary-grade lavender intended for food preparation rather than decorative or scented lavender products.

4. Can I make this recipe dairy-free?

Yes, replace regular milk with an unsweetened fortified plant-based milk such as soy, almond, or oat milk.

5. Can I use fresh lavender instead of dried lavender?

Yes, but use culinary-grade fresh lavender and start with a small amount because its flavor can be strong.

6. Can I make lavender milk without honey?

Yes. Honey is optional, and the drink can be prepared without added sweetener.

7. How long should I steep the lavender?

Steep dried lavender for about 3–5 minutes to develop a gentle floral flavor without making the milk overly bitter.

8. Can children drink lavender vanilla milk?

Older children may enjoy it, but use food-grade lavender, keep the amount small, and consider allergies or dietary restrictions before serving.

Final Thoughts

Lavender Vanilla Bedtime Milk is a simple way to make your evening routine feel warmer and more relaxing. The creamy milk, gentle lavender, and sweet vanilla create a smooth drink that is easy to prepare at home.

Enjoy it as part of a consistent bedtime routine rather than relying on it as a sleep treatment. Pairing this cozy drink with calming habits, such as reading or reducing screen time, can make your evenings feel more peaceful.

For the best flavor, use culinary-grade lavender, keep the amount light, and sweeten the milk only as much as you prefer. A few simple ingredients can turn an ordinary evening into a comforting daily ritual.

Oatmeal Skin Remedy: A Simple Traditional Way to Soothe Dry, Irritated Skin

Homemade oatmeal skin remedy with finely ground oats for soothing dry and irritated skin

Oatmeal Skin Remedy: A Simple Traditional Way to Soothe Dry, Irritated Skin

For generations, plain oats have been used as a simple home ingredient for caring for dry and uncomfortable skin. Today, oatmeal is still popular because it is gentle, affordable, and easy to use at home.

An oatmeal skin remedy can be especially useful when your skin feels dry, tight, rough, or mildly irritated. Finely ground oatmeal, known as colloidal oatmeal, can help soothe the skin and support a more comfortable skin barrier. The U.S. Food and Drug Administration recognizes colloidal oatmeal as an active skin-protectant ingredient, including for temporary relief of minor irritation and itching.

This traditional oatmeal remedy is simple enough for a basic home skincare routine. It does not require expensive ingredients, strong fragrances, or complicated steps.

Why Oatmeal Can Be Good for Your Skin

Oatmeal contains naturally occurring compounds that can make it useful for gentle skin care. When oats are finely ground, they can spread over the skin more evenly and mix with water to form a soft, milky mixture.

Colloidal oatmeal is commonly used to help soothe dry, itchy, or irritated skin. Dermatologists also list colloidal oatmeal among ingredients that may help calm irritated skin, especially for people with dry or sensitive skin.

Potential Benefits of an Oatmeal Skin Remedy

  • Helps soothe dry-feeling skin.
  • May temporarily reduce mild itching and irritation.
  • Helps make rough skin feel softer.
  • Provides a gentle option for sensitive skin.
  • Can be used as part of a simple moisturizing routine.
  • Works well as a traditional bath treatment.
  • Uses an inexpensive and easy-to-find ingredient.

The goal is comfort and moisture support, not an instant transformation. Oatmeal is not a cure for chronic skin conditions, severe rashes, or infections.

Simple Oatmeal Skin Remedy Recipe

This easy oatmeal mask is best kept basic. Avoid adding lemon juice, baking soda, essential oils, or strong fragrances because these ingredients may irritate sensitive skin.

Ingredients

  • 2 tablespoons plain, finely ground oats
  • 2–3 tablespoons lukewarm water
  • 1 teaspoon plain fragrance-free moisturizer, optional

Choose plain oats without added sugar, flavoring, spices, or artificial ingredients.

Step-by-Step Instructions

Step 1: Grind the oats

Place plain oats in a clean blender or food processor. Blend until they become a very fine powder.

Step 2: Test the texture

Add a small amount of lukewarm water and stir. The mixture should become smooth and soft rather than thick or gritty.

Step 3: Clean your skin

Wash the area gently with lukewarm water and a mild cleanser. Do not scrub the skin before applying the oatmeal mixture.

Step 4: Apply the oatmeal

Spread a thin layer over the desired area using clean fingertips. Avoid the eyes, lips, and any open or infected skin.

Step 5: Let it sit

Leave the mixture on the skin for about 10 minutes. Do not allow it to become completely dry and crack on the skin.

Step 6: Rinse gently

Use lukewarm water to remove the oatmeal. Avoid rubbing because friction can increase irritation.

Step 7: Moisturize

Pat the skin gently with a clean towel and apply a fragrance-free moisturizer while the skin is still slightly damp.

Moisturizing after washing is important because it helps retain water in the skin. Dermatologists commonly recommend applying moisturizer while the skin remains damp.

Oatmeal Bath for Dry and Itchy Skin

If you want to treat a larger area, an oatmeal bath may be easier than a face or body mask.

How to Make an Oatmeal Bath

  1. Fill your bathtub with lukewarm water.
  2. Add finely ground colloidal oatmeal to the running water.
  3. Stir the water so the oatmeal spreads evenly.
  4. Soak for about 10–15 minutes.
  5. Avoid using very hot water because heat can worsen dryness.
  6. Gently pat your skin dry after bathing.
  7. Apply a fragrance-free moisturizer while your skin is still damp.

The American Academy of Dermatology recommends colloidal oatmeal baths as an option for relieving dry, itchy skin, with moisturizer applied soon after bathing.

Tips for Better Results

A few simple habits can make this traditional remedy more skin-friendly.

Use Plain Oats

Choose unflavored oats without added sugar, cinnamon, chocolate, or other ingredients. Simple ingredients are easier to control when your skin is sensitive.

Keep the Water Lukewarm

Hot water can leave dry skin feeling even tighter. Lukewarm water is a better choice for a gentle routine.

Do Not Scrub

Oatmeal should be used as a soothing treatment, not as a harsh physical exfoliant. Scrubbing can increase redness and irritation.

Moisturize Afterward

Apply a fragrance-free cream or ointment soon after rinsing. This helps lock in moisture and supports the skin barrier.

Patch Test First

Apply a small amount to a limited area before using the remedy more widely. Stop if you develop burning, swelling, worsening redness, or another unexpected reaction.

Who May Benefit From This Remedy?

An oatmeal skin remedy may be useful for people dealing with temporarily dry, rough, or mildly irritated skin. It can also be a comforting addition to a gentle skincare routine.

People with eczema may use colloidal oatmeal as one way to soothe symptoms, but it should not replace treatment recommended by a dermatologist. The American Academy of Dermatology notes that oatmeal baths can provide temporary relief while eczema is being managed.

For persistent itching, spreading rashes, painful skin, open sores, swelling, or signs of infection, professional medical advice is more appropriate than relying on a home remedy.

What to Avoid With an Oatmeal Skin Remedy

Natural does not always mean irritation-free. Avoid turning this simple treatment into a mixture of many kitchen ingredients.

Do not add lemon juice, undiluted vinegar, baking soda, toothpaste, or essential oils to an oatmeal mask. These ingredients can be irritating, especially when the skin barrier is already dry or damaged.

Also avoid using rough oatmeal particles as a scrub. The purpose of this remedy is to soothe the skin, not aggressively remove the outer layer.

Oatmeal Skin Remedy vs. Regular Oats

Regular oats can be blended into a fine powder for a simple homemade treatment, but commercially prepared colloidal oatmeal is specifically processed into a very fine form for skin use.

Colloidal oatmeal is also an FDA-recognized skin-protectant ingredient. FDA labeling allows products containing colloidal oatmeal to claim temporary protection and relief of minor skin irritation and itching associated with conditions such as rashes and eczema.

For sensitive skin, a fragrance-free product containing colloidal oatmeal may therefore be a more predictable option than a homemade mixture.

Frequently Asked Questions

1. Is oatmeal good for dry skin?

Yes. Colloidal oatmeal can help soothe dry, irritated skin and is commonly used in products designed for sensitive skin.

2. Can I use an oatmeal mask on my face?

Yes, but use finely ground plain oats, avoid the eye area, and rinse gently without scrubbing.

3. How long should I leave oatmeal on my skin?

For a simple homemade mask, about 10 minutes is enough; longer application is not necessary.

4. Can oatmeal help itchy skin?

Colloidal oatmeal can provide temporary relief from minor itching and irritation, including dry-skin discomfort.

5. Can I use an oatmeal bath for sensitive skin?

Yes. A lukewarm colloidal oatmeal bath can help soothe dry, itchy skin.

6. Should I moisturize after an oatmeal treatment?

Yes. Apply a fragrance-free moisturizer while your skin is still slightly damp to help retain moisture.

7. Can oatmeal cure eczema?

No. Oatmeal may temporarily soothe symptoms, but eczema requires appropriate long-term skin care and medical treatment when needed.

8. How often can I use an oatmeal skin remedy?

Start once or twice a week and adjust based on how your skin responds; stop if irritation develops.

Final Thoughts

The best traditional remedies are often the simplest ones. An oatmeal skin remedy uses a familiar ingredient and a gentle application method to help dry or irritated skin feel more comfortable.

For a homemade option, finely ground plain oats, lukewarm water, gentle application, and a fragrance-free moisturizer are enough. For a larger area, a colloidal oatmeal bath can be an easy alternative.

Remember that the purpose of this remedy is to soothe and support the skin, not to promise instant results. If irritation continues, becomes severe, or comes with pain, swelling, open sores, or infection, consult a dermatologist for proper care.

5 Quiet Signs You’re More Stressed Than You Think

5 quiet signs of stress including fatigue, irritability, poor concentration, low interest, and muscle tension

5 Quiet Signs You’re More Stressed Than You Think

Stress does not always feel like panic or obvious anxiety. Sometimes, it shows up in small changes that are easy to dismiss. You may sleep poorly, lose patience, forget simple things, or feel tired even after a normal night of rest. These signs can happen when your mind and body have been dealing with pressure for too long.

Everyday demands can build stress slowly. Work deadlines, family responsibilities, money concerns, relationship problems, and constant notifications can all make it harder to fully relax. Learning to notice the quieter warning signs can help you make healthy changes before stress starts affecting your daily life.

What Does Stress Feel Like?

Stress is the body’s response to demands, challenges, or situations that feel difficult to manage. A short period of stress can help you stay focused and respond to a problem. Ongoing stress, however, can leave you feeling physically and mentally drained.

Not everyone experiences stress in the same way. One person may become restless, while another may feel unusually tired or withdrawn. Some signs can look like normal parts of a busy lifestyle, which makes them easy to overlook.

The key is to notice changes from your usual mood, energy, sleep, behavior, or concentration.

1. You Feel Tired Even After Sleeping

Feeling tired after a poor night is normal, but regular fatigue can be a sign that your body is not getting enough recovery. Ongoing stress can make it harder to relax at bedtime and may lead to restless or interrupted sleep.

You might spend the night in bed but wake up feeling as if your mind never switched off. Racing thoughts, worrying about tomorrow, or checking your phone late at night can make the problem worse.

Pay attention if tiredness becomes a regular pattern rather than an occasional problem.

A simple evening routine may help. Keep a consistent bedtime, reduce bright screens before sleep, and give yourself quiet time to wind down. Morning daylight and regular daytime movement can also support a healthier sleep schedule.

2. Small Things Start Irritating You

Have you noticed yourself becoming annoyed by things that normally would not bother you?

A shorter temper can be a quiet sign of mental overload. When you are under ongoing pressure, you may have less patience for delays, noise, interruptions, or minor mistakes.

You might snap at someone, feel frustrated in traffic, or become irritated by a simple request. Afterward, you may wonder why your reaction was stronger than expected.

Instead of judging yourself, look for the pattern. Frequent irritability may be a signal that you need a break.

When tension rises, pause before responding. Take several slow breaths, step away for a few minutes, or take a short walk. Creating small breaks during the day can give your mind time to reset.

3. You Have Trouble Focusing

Stress can make it difficult to concentrate on even simple tasks. You may read the same paragraph several times, forget why you entered a room, or struggle to finish work without switching between tasks.

Mental overload can make your attention feel scattered. Constant emails, messages, social media updates, and competing responsibilities can add to that feeling.

Try reducing unnecessary distractions when you need to focus. Choose one task, silence nonessential notifications, and work for a short period before taking a brief break.

Writing down important tasks can also reduce the amount of information you are trying to hold in your mind.

If concentration problems are new, severe, or continue despite getting adequate rest, consider discussing them with a healthcare professional.

4. You Stop Enjoying Your Usual Activities

Another quiet warning sign is losing interest in activities that normally help you feel good.

You may stop meeting friends, skip hobbies, avoid exercise, or spend more time alone because everything feels like extra work. Sometimes, people assume they are simply busy when they are actually feeling emotionally drained.

Regular enjoyable activities can provide valuable mental breaks. They do not need to be complicated or expensive.

Take a walk around your neighborhood, cook a favorite meal, listen to music, read a few pages, spend time with someone you trust, or sit outside without your phone.

If loss of interest lasts for weeks or comes with persistent sadness, hopelessness, or other concerning changes, seek professional support rather than assuming it is only everyday stress.

5. Your Body Feels Constantly Tense

Stress is not only a mental experience. It can also affect how your body feels.

You may notice tight shoulders, a clenched jaw, headaches, muscle tension, stomach discomfort, or a general feeling that you cannot fully relax. Some people unconsciously tighten their muscles while working, driving, or thinking about problems.

Start checking your body during the day. Are your shoulders raised? Is your jaw tight? Are you holding your breath?

Gentle stretching, slow breathing, regular movement, and short relaxation breaks can help release physical tension.

Do not automatically blame physical symptoms on stress. New, severe, persistent, or unexplained symptoms should be evaluated by a qualified healthcare professional.

How to Manage Everyday Stress

You do not need to change your entire life to create more calm. Small habits can make daily pressure easier to manage.

Start by identifying what is causing the most stress. Separate problems you can control from situations you cannot change immediately. Focus your energy on practical actions rather than trying to solve everything at once.

Build short recovery periods into your day. A five-minute breathing break, a short walk, or a few minutes away from your screen can create space between responsibilities.

Protect your sleep schedule, eat regular balanced meals, stay physically active, and maintain supportive relationships. These basic habits can give your body and mind a stronger foundation for handling daily challenges.

It can also help to set boundaries. You do not have to answer every message immediately or accept every request. Saying no to unnecessary demands can protect time for rest and important priorities.

If stress begins interfering with sleep, work, relationships, or your ability to manage everyday responsibilities, talking with a healthcare professional or mental health professional can be a useful next step.

When Should You Take Stress Seriously?

Occasional stress is part of life, but persistent symptoms deserve attention. Take your symptoms seriously when they continue, become stronger, or interfere with normal activities.

Do not ignore severe emotional distress or thoughts of harming yourself. In the United States, you can call or text 988 to reach the Suicide & Crisis Lifeline for immediate crisis support.

For physical symptoms such as chest pain, severe shortness of breath, fainting, or other emergency warning signs, seek emergency medical care.

Frequently Asked Questions

What are the quiet signs of stress?

Common subtle signs include ongoing tiredness, irritability, poor concentration, reduced interest in activities, and persistent muscle tension.

Can stress make you tired all the time?

Yes, ongoing stress can interfere with relaxation and sleep, which may contribute to daytime fatigue and low energy.

Can stress affect concentration?

Yes. Mental pressure and constant worry can make it harder to focus, remember details, and complete everyday tasks.

Why does stress make me irritated?

Ongoing pressure can reduce your emotional patience, making ordinary interruptions or minor problems feel more frustrating than usual.

Can stress cause muscle tension?

Yes. Stress can cause your muscles to stay tense, especially around the shoulders, neck, jaw, and back.

How can I calm stress quickly?

Slow breathing, a short walk, gentle stretching, stepping away from screens, and a few minutes of quiet time may help reduce immediate tension.

When should I talk to a doctor about stress?

Consider professional help when stress symptoms persist, worsen, disrupt daily life, or are difficult to manage on your own.

Is all stress harmful?

No. Short-term stress can help you respond to challenges, but prolonged or overwhelming stress can affect sleep, mood, concentration, and overall well-being.