Fall Herbal Guide: 11 Traditional Herbs & What to Know Before Using Them

Fall herbal guide featuring 11 traditional herbs including cinnamon, fennel, rosehip, lemon balm, nettle, and licorice root

Fall Herbal Guide: 11 Traditional Herbs & What to Know Before Using Them


Introduction

As the weather turns cooler, many people reach for warm teas, comforting spices, and traditional herbal preparations. Fall is also a good time to look at herbs with a little more care—not just what they are traditionally used for, but what modern research actually tells us.

This Fall Herbal Guide covers 11 herbs and plants commonly found in teas, extracts, and traditional wellness practices:

  • Ashwagandha
  • Nettle
  • Cinnamon
  • Lemon balm
  • Passionflower
  • Black currant leaf
  • Fennel
  • Rosehip
  • Marshmallow root
  • Licorice root
  • Oat straw

Some have centuries of traditional use, while others have been studied in clinical research. The evidence is different for each herb, so a traditional use should not automatically be treated as a proven medical benefit.

1. Ashwagandha

Ashwagandha (Withania somnifera) is a traditional Ayurvedic herb that has been used for centuries. Modern supplements commonly contain root or root-and-leaf extracts.

Traditional use

Ashwagandha has traditionally been used to support general vitality, stress management, and sleep.

What research says

Some studies suggest that certain ashwagandha preparations may help with stress and insomnia, but studies vary in size, formulation, and quality. Evidence for several other claimed benefits remains insufficient. (NCCIH)

Safety

Ashwagandha may cause drowsiness or digestive upset. Rare cases of liver injury have also been reported. It should be avoided during pregnancy and breastfeeding and may interact with thyroid, blood-pressure, diabetes, sedative, and immune-related medicines. (NCCIH)

2. Nettle

Nettle (Urtica dioica and related species) is another traditional plant used in teas and herbal preparations.

Traditional use

Nettle leaf has traditionally been used in preparations associated with urinary health and general herbal wellness.

What research says

The European Medicines Agency recognizes traditional use of nettle leaf preparations in certain urinary-tract-related herbal products, but traditional-use recognition is not the same as strong clinical proof. (European Medicines Agency (EMA))

Safety

Only use properly prepared nettle products. Fresh stinging nettle can irritate the skin because of its tiny stinging hairs. People taking medication should check for possible herb-drug interactions before using concentrated products.

3. Cinnamon

Cinnamon is probably the easiest herb on this list to recognize. It is both a food spice and a traditional herbal ingredient.

Traditional use

Cinnamon has been used traditionally in foods and preparations for digestive and respiratory complaints, among other purposes.

What research says

Research has examined cinnamon supplements for blood sugar and other conditions, but results are inconsistent, and there is not enough evidence to recommend cinnamon as a treatment for a specific health condition. (NCCIH)

Safety

Normal culinary amounts are generally considered safe. Large or prolonged amounts may cause digestive problems, and cassia cinnamon contains coumarin, which can be a concern for people with liver disease when consumed in high amounts. (NCCIH)

4. Lemon Balm

Lemon balm (Melissa officinalis) has a mild lemon scent and is commonly prepared as tea.

Traditional use

It has traditionally been used for mild stress, occasional sleep problems, and minor digestive discomfort such as bloating.

What research says

The European Medicines Agency recognizes these uses based mainly on long-standing traditional use rather than strong clinical evidence. Some small studies have explored sleep and anxiety-related effects, but they are not enough for firm conclusions. (European Medicines Agency (EMA))

How people use it

Lemon balm is commonly found as dried tea leaves, teas, extracts, and combination herbal products.

5. Passionflower

Passionflower (Passiflora incarnata) is often associated with relaxing evening herbal teas.

Traditional use

It has traditionally been used for relaxation and sleep support.

What research says

A small amount of research suggests passionflower may increase total sleep time in some adults with insomnia, but findings for other sleep measures are mixed. (NCCIH)

Safety

Possible side effects include drowsiness, dizziness, and confusion. Passionflower may interact with anesthesia and other medicines that affect the nervous system. It should not be used during pregnancy unless specifically advised by a healthcare professional. (NCCIH)

6. Black Currant Leaf

Black currant leaf comes from Ribes nigrum, the same plant known for its dark berries.

Traditional use

The leaves have been used in traditional European herbal preparations, including preparations associated with urinary health and minor inflammation.

What research says

The European Medicines Agency has evaluated black currant leaf as a traditional herbal ingredient for certain urinary and inflammatory uses. (European Medicines Agency (EMA))

This does not mean black currant leaf has been proven to treat a medical condition. Evidence and approved uses can differ between countries.

7. Fennel

Fennel (Foeniculum vulgare) is both a culinary ingredient and a traditional herbal plant.

Traditional use

Fennel fruit has traditionally been used in herbal preparations for mild digestive discomfort and as an aromatic ingredient.

What research says

European herbal assessments recognize traditional preparations of fennel fruit for certain digestive and respiratory uses. These conclusions are based largely on traditional use rather than strong modern clinical trials. (European Medicines Agency (EMA))

How to use it

Fennel seeds can be used in cooking or prepared as a tea. Concentrated fennel oils are much stronger than culinary amounts and should not be treated like ordinary food.

8. Rosehip

Rosehip is the small fruit that develops after certain roses finish flowering.

Traditional use

Rosehips have traditionally been prepared as teas, syrups, preserves, and other foods. They are naturally rich in plant compounds, including vitamin C, although the amount can vary depending on the preparation.

Why it is popular in fall

Its tart flavor works well in warm teas and seasonal blends. Rosehip can also add variety to a caffeine-free beverage routine.

What research says

Some research has explored rosehip preparations for joint-related symptoms and other areas, but results depend on the specific preparation and study design. It should not be presented as a treatment for arthritis or another disease.

9. Marshmallow Root

Despite its name, marshmallow root (Althaea officinalis) is not the main ingredient in modern marshmallow candy.

Traditional use

The root has traditionally been used in herbal preparations for the mouth, throat, coughs, colds, and digestive discomfort.

What research says

The European Medicines Agency has assessed marshmallow root for traditional use in mouth and throat irritation, cough and cold symptoms, and mild gastrointestinal complaints. (European Medicines Agency (EMA))

Important point

Traditional-use evidence is different from proof that an herb can cure an illness. Persistent cough, severe throat pain, or digestive symptoms should be evaluated appropriately.

10. Licorice Root

Licorice root (Glycyrrhiza species) has a long history in traditional medicine and is also used as a flavoring.

Traditional use

Historically, licorice root has been used in preparations for respiratory, digestive, and other complaints.

What research says

Some small studies have explored licorice preparations for specific uses, but there is not enough high-quality evidence to support licorice as a treatment for most health conditions. (NCCIH)

⚠️ Why extra caution matters

Licorice contains glycyrrhizin, which can cause serious problems when consumed in large amounts or for long periods. It can affect blood pressure, potassium levels, and heart rhythm. The risk is especially important for people with hypertension or heart or kidney conditions. (NCCIH)

11. Oat Straw

Oat straw refers to the above-ground parts of Avena sativa harvested before flowering.

Traditional use

It has been used in traditional herbal preparations associated with relaxation, stress, and sleep.

What research says

The European Medicines Agency has assessed oat herb preparations for traditional use related to mild mental stress and temporary sleep problems. (European Medicines Agency (EMA))

How it is found

Oat herb may appear in teas, liquid extracts, and other herbal preparations. Always check the product label because oat straw products can differ considerably in strength and formulation.

How to Choose Herbal Products More Safely

Before adding a new herb to your fall routine, follow these simple steps:

  1. Identify the exact herb. Common names can refer to different plants.
  2. Check the plant part. Root, leaf, seed, bark, and extract can have different properties.
  3. Choose reputable products. Look for clear labeling and ingredient information.
  4. Start with the intended use. Do not assume an herb works for every condition associated with it.
  5. Read the medication warnings. Some herbs can interact with prescription and over-the-counter medicines.
  6. Avoid replacing medical treatment. Herbal products should not replace prescribed care.
  7. Be especially cautious with concentrated extracts. A tea and a high-strength supplement are not equivalent.
  8. Ask a healthcare professional when needed. This is particularly important during pregnancy, breastfeeding, before surgery, or when managing a chronic condition.

Frequently Asked Questions

1. What is the best herb for fall wellness?

There is no single best herb; the appropriate choice depends on the purpose, preparation, evidence, medications, and individual safety factors.

2. Can herbal teas replace medicine?

No. Herbal teas may complement a healthy routine, but they should not replace prescribed medication or professional medical care.

3. Are all traditional herbs safe?

No. “Natural” does not automatically mean safe, and some herbs can cause side effects or interact with medications.

4. Can I use several herbs together?

Yes, but combining herbs can increase uncertainty about safety and interactions, so avoid complex blends unless the ingredients and doses are well understood.

5. Which herbs require extra caution?

Licorice, ashwagandha, and concentrated herbal extracts deserve particular attention because of potential side effects and medication interactions. (NCCIH)

6. Can I drink herbal tea every day?

It depends on the herb, amount, preparation, and your health situation; regular use is not automatically appropriate for every herbal product.

7. Should I ask my doctor before using herbs?

Yes, especially if you take medication, have a chronic condition, are pregnant or breastfeeding, or have an upcoming surgery.

Final Takeaway

Fall is a natural time to enjoy warm teas, seasonal spices, and traditional herbal ingredients. Ashwagandha, nettle, cinnamon, lemon balm, passionflower, black currant leaf, fennel, rosehip, marshmallow root, licorice root, and oat straw all have different histories and levels of scientific evidence.

The most useful approach is simple: learn what the plant is, understand its traditional use, check what research actually shows, and consider safety before using concentrated products.

That keeps herbal wellness practical without turning traditional remedies into unsupported medical promises.
Avocado Seed Benefits: Powder, Tea, Uses & Safety Facts

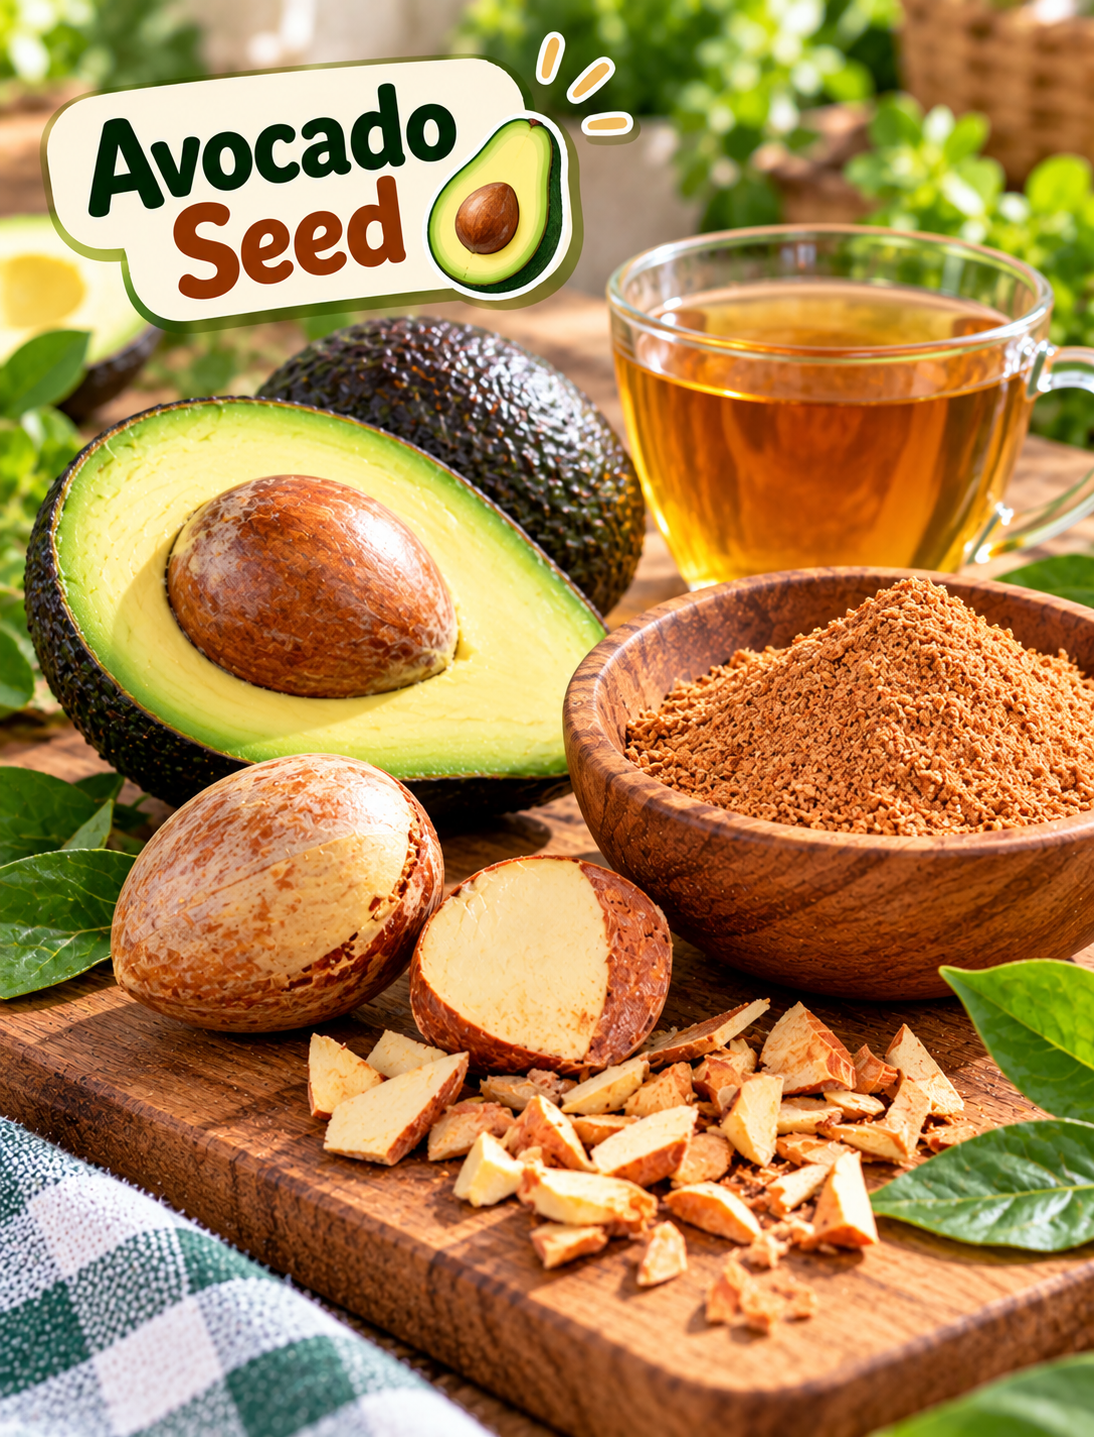
Avocado seed with fresh avocado, seed powder, and tea explaining traditional uses and safety

Avocado Seed: Traditional Uses, Powder, Tea & What We Actually Know

That avocado pit you usually throw away is getting a lot of attention online. 🥑👀 But is avocado seed powder or tea actually good for you, or is the hype ahead of the evidence?

Avocado seeds are often discarded after the edible flesh is removed, but they have attracted interest because they contain starch, fiber-related components, phenolic compounds, and other plant chemicals. Researchers have studied avocado seed extracts for antioxidant and other biological activity, but most of this work is still early-stage rather than strong human clinical evidence.

This matters because social media often turns laboratory findings into claims about weight loss, cholesterol, blood sugar, inflammation, or “detoxing.” Those claims should not be treated as established health benefits.

What Is an Avocado Seed?

The avocado seed, also called the avocado pit, is the large hard seed found in the center of the fruit.

It contains several types of compounds that have attracted scientific interest, including:

  • Starch and carbohydrates
  • Plant phenolic compounds
  • Fiber-related components
  • Lipids and proteins
  • Other phytochemicals

Researchers are investigating ways to use avocado seeds as food ingredients, functional materials, and sources of plant compounds. However, the scientific literature describes the seed as an underused by-product, and its safety and usefulness as a regular human food still need more research.

Why Are People Using Avocado Seed?

Interest in avocado seed has grown because people have seen recipes for:

  • Avocado-seed powder
  • Avocado-seed tea
  • Ground avocado seed
  • Smoothie additions
  • Homemade herbal drinks

Online claims sometimes suggest that the seed can support digestion, lower cholesterol, control blood sugar, reduce inflammation, promote weight loss, or “clean the body.”

The problem is that potential biological activity is not the same as a proven health effect in humans.

A 2022 review noted that research into food and cosmetic applications of avocado seed is developing, while also highlighting questions about safety and the need for further investigation.

What Does the Research Actually Say?

Research on avocado seed is interesting, but it is still limited compared with research on the edible avocado flesh.

Laboratory and experimental studies have identified phenolic compounds and antioxidant activity in seed extracts. Researchers have also investigated possible antimicrobial, anti-inflammatory, glucose-related, and cholesterol-related effects.

However, these findings do not prove that eating avocado-seed powder or drinking avocado-seed tea produces the same effects in people.

A major limitation is the lack of strong human clinical evidence using standardized amounts of avocado seed.

The evidence can be understood this way:

  1. Plant compounds have been identified.
  2. Laboratory activity has been observed.
  3. Some animal or experimental research exists.
  4. Reliable human evidence is still limited.
  5. There is no established dose for using the seed as a health remedy.

That distinction is important when evaluating natural-health claims online.

Can Avocado Seed Help Lower Cholesterol?

This is one of the more common claims surrounding avocado pits.

Some experimental research has investigated avocado-seed extracts for cholesterol-related effects. However, these studies do not establish that homemade avocado-seed powder or tea lowers cholesterol in people.

There is considerably more human research on eating avocado flesh than consuming the seed. Reviews of avocado consumption have examined cardiovascular and metabolic outcomes in human studies, but those findings should not be transferred to the pit.

So:

Avocado may be part of a healthy eating pattern, but that does not mean avocado seed has the same proven benefits.

Can Avocado Seed Help With Weight Loss?

There is no good evidence showing that avocado-seed tea or powder directly causes weight loss.

Weight management depends on overall food intake, physical activity, sleep, dietary patterns, and other individual factors.

A plant extract should not be described as a fat burner, metabolism booster, or belly-fat remedy without strong human evidence.

If you enjoy avocado, the edible flesh provides unsaturated fats, fiber, and other nutrients and has been studied much more extensively in humans.

What About Avocado Seed Tea?

Avocado-seed tea is usually made by drying or preparing the seed and then using pieces or powder in hot water.

This sounds simple, but there is an important problem: there is no well-established medicinal preparation or standard dose for avocado-seed tea.

Different homemade recipes can vary greatly in:

  • Seed size
  • Variety of avocado
  • Drying method
  • Amount used
  • Preparation time
  • Concentration of the drink

Because these factors can change the final preparation, one internet recipe cannot be assumed to be medically appropriate for everyone.

For that reason, avocado-seed tea should not be presented as a proven treatment for any disease.

What About Avocado-Seed Powder?

Powdering the seed makes it easier to add to foods or drinks, but grinding does not automatically make the ingredient safer.

The powder can also make it easier to consume a larger amount than intended.

Before using a homemade powder, consider:

  • How the seed was cleaned
  • Whether it was dried properly
  • How it was processed
  • How much was consumed
  • Whether the preparation contains other ingredients
  • Whether you take medications or have a medical condition

A University of California Agriculture and Natural Resources article notes that there is not enough research to support eating avocado seeds and that their potential benefits and risks remain poorly characterized.

Is Avocado Seed Safe to Eat?

This is where caution is especially important.

The California Avocado Commission has stated that it does not recommend eating avocado seeds because research is insufficient to establish their safety and benefits for human consumption.

Scientific reviews also point out that avocado seeds contain phytochemicals and antinutritional compounds and that more work is needed to understand safety, bioavailability, and appropriate use.

Some research has detected persin in raw avocado fruit components, including the pit, but information about how processing changes exposure and what this means for routine human consumption remains incomplete.

This is why “natural” should not automatically be interpreted as “safe to consume regularly.”

How Should You Handle an Avocado Seed?

If your goal is simply to reduce kitchen waste, the safest practical approach is not to turn the pit into a homemade medicine.

Instead:

  1. Remove the seed after eating the avocado.
  2. Rinse it if you plan to use it for a non-food project.
  3. Allow it to dry if using it for crafts or gardening.
  4. Keep it away from young children and pets.
  5. If you want to experiment with growing an avocado plant, use the seed for propagation rather than consumption.

Avocado seeds can be used for growing plants, although seed-grown avocado trees may not produce fruit identical to the parent variety.

Are There Traditional Uses for Avocado Seed?

Avocado seeds have a history of traditional and ethnobotanical interest, particularly in regions where avocados originated or have long been cultivated.

Historical uses have included preparations made from the seed and other parts of the plant. Researchers continue to investigate these practices and the compounds involved.

Traditional use can provide useful clues for research, but it does not automatically establish effectiveness or safety.

A traditional preparation should therefore be described as a traditional practice, not as a clinically proven remedy.

What Are the Potential Benefits?

Avocado seed contains plant compounds that researchers are studying for their potential biological properties.

Potential areas of research include:

  • Antioxidant activity
  • Phenolic compounds
  • Food-ingredient applications
  • Fiber-related uses
  • Natural colorants
  • Cosmetic applications
  • Agricultural and industrial uses

Some experimental studies have reported promising biological activity, but these findings do not establish that consuming avocado seed provides those same benefits.

The strongest current takeaway is that avocado seed is scientifically interesting, but its health benefits for routine human consumption remain uncertain.

Avocado Flesh vs. Avocado Seed

It is important not to confuse the evidence for the whole fruit with evidence for the pit.

Avocado flesh

Human studies have examined avocado consumption in relation to:

  • Cardiometabolic health
  • Blood lipids
  • Dietary patterns
  • Nutrient intake
  • Body composition

A 2025 evidence map identified dozens of human studies on avocado consumption and health outcomes.

Avocado seed

Research is much more preliminary and often focuses on:

  • Extracts
  • Laboratory experiments
  • Chemical composition
  • Antioxidant activity
  • Potential food applications

Therefore, evidence about eating avocado does not automatically apply to eating the seed.

Who Should Be Especially Careful?

Avoid experimenting with avocado-seed preparations if you:

  • Are pregnant or breastfeeding
  • Have a chronic medical condition
  • Take prescription medications
  • Have known food allergies
  • Are preparing the product for a child
  • Are unsure about the amount or preparation

There is not enough standardized human safety information to establish a reliable medicinal dose.

If you have a health condition and are considering an herbal or plant-based preparation, discuss it with a healthcare professional before using it regularly.

What Is the Best Practice?

If you see a viral post claiming that avocado seed can cure or prevent a disease, use this simple checklist.

Step 1: Look for Human Studies

Check whether the claim comes from actual human trials rather than cell or animal research.

Step 2: Check the Dose

A laboratory extract may be far more concentrated than a homemade tea or powder.

Step 3: Look for Safety Information

A substance can show interesting biological activity while still having uncertain safety for regular consumption.

Step 4: Separate the Fruit From the Seed

Do not assume research on avocado flesh proves the same effect from the pit.

Step 5: Avoid Miracle Claims

Be skeptical of claims involving:

  • Rapid weight loss
  • “Kidney detox”
  • Cancer treatment
  • Diabetes cures
  • Guaranteed cholesterol reduction
  • Permanent inflammation relief

These claims require strong clinical evidence.

The Bottom Line

Avocado seed is more than just kitchen waste from a research perspective. It contains interesting plant compounds and is being studied for potential food, cosmetic, and functional applications.

But avocado-seed powder and tea are not established treatments for common health conditions, and there is not enough human evidence to recommend routine consumption as a health remedy.

For now, the better-supported choice is to enjoy the edible avocado flesh as part of a balanced diet while treating avocado-seed health claims with caution.

If you are considering avocado seed because of a specific medical problem, address the underlying condition with appropriate professional care rather than relying on an unproven homemade preparation.

Frequently Asked Questions

Is avocado seed safe to eat?

Safety for routine human consumption has not been established well enough to recommend eating the seed regularly.

Can avocado-seed tea lower cholesterol?

There is experimental research, but no strong human evidence showing that homemade avocado-seed tea reliably lowers cholesterol.

Does avocado seed help with weight loss?

There is no reliable human evidence that avocado-seed powder or tea directly causes weight loss.

Can I add avocado-seed powder to smoothies?

Although this is promoted online, routine human consumption has not been adequately studied, so it should not be treated as a proven supplement.

Does avocado seed contain antioxidants?

Yes, avocado seeds contain phenolic compounds and have shown antioxidant activity in experimental research.

Is avocado seed better than avocado flesh?

No such conclusion is supported; avocado flesh has substantially more human research behind its nutritional and health effects.

Can avocado seed cure diabetes?

No. Experimental findings do not establish avocado seed as a diabetes treatment.

What is the safest use for an avocado seed?

Using the pit for gardening or composting avoids making an unproven food or medicinal preparation from it.

Goose Grass for Kidney Health: Myth or Fact

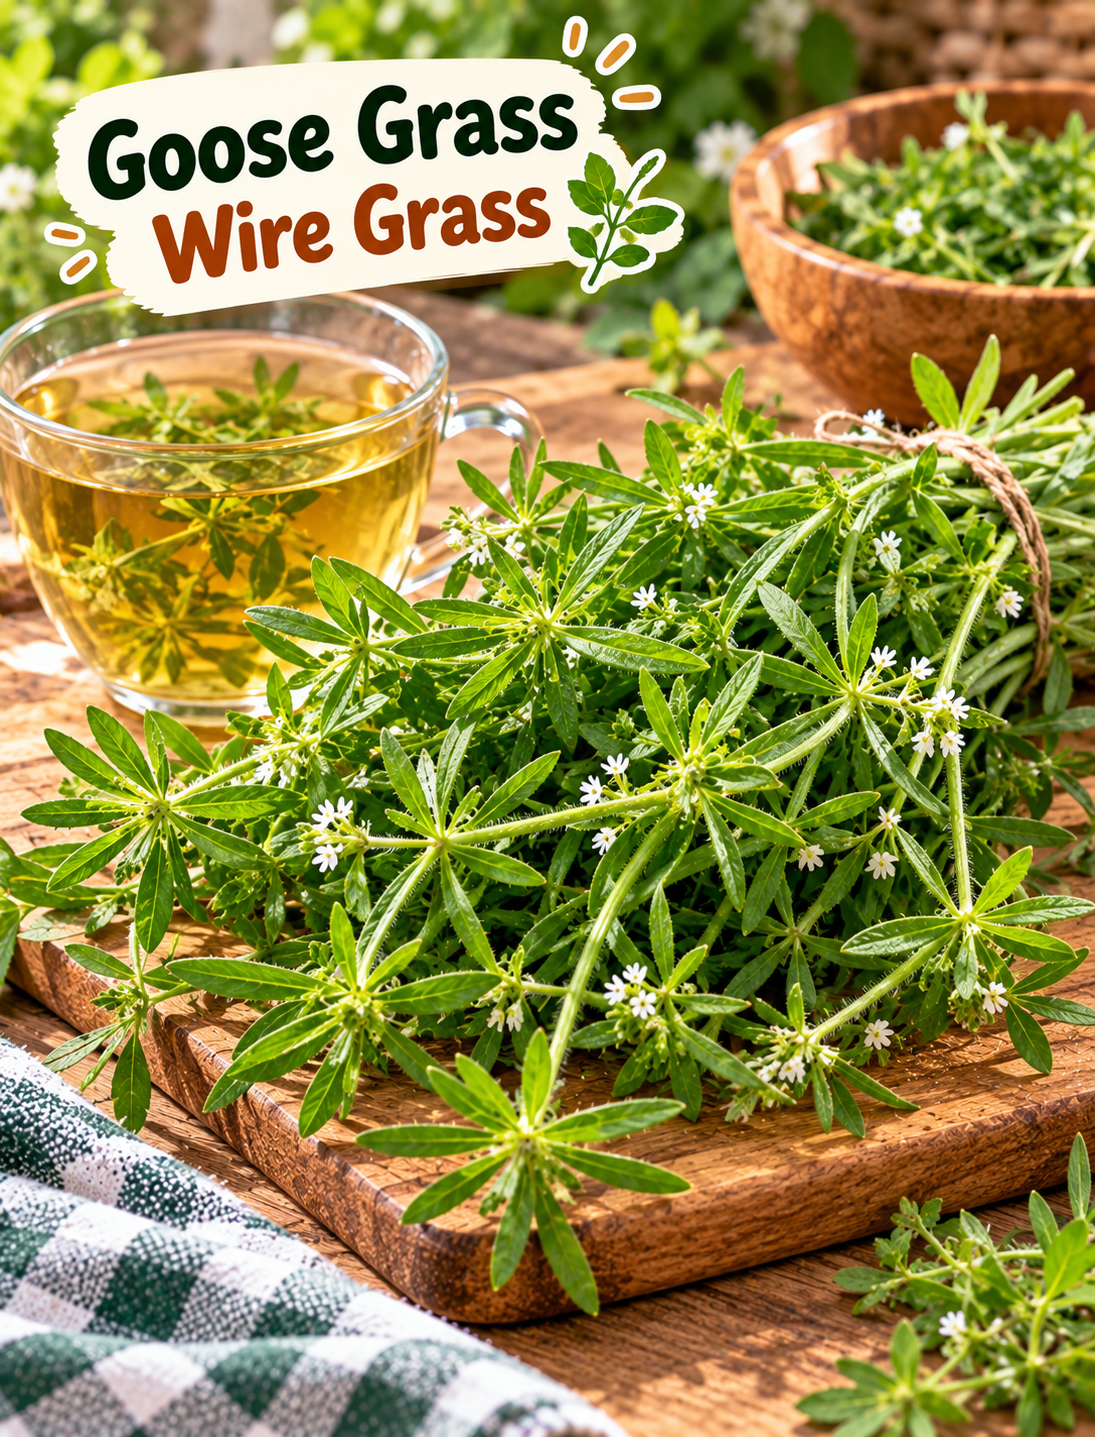
Goose grass cleavers herb with traditional urinary and kidney health information

Goose Grass / Wire Grass for Kidney & Urinary Complaints — Myth or Fact?

“Goose grass is sometimes called a traditional ‘kidney-cleansing’ herb—but can it really help urinary problems? 🌿👀 Let’s separate the old remedy from what modern evidence actually shows.”

Goose grass, often called cleavers or Galium aparine, is a climbing plant found in many regions. Traditional herbal practices have used it for urinary and other health complaints, which is why you may see it described online as a natural kidney remedy.

But traditional use is not the same as proven treatment. Current evidence does not establish goose grass as a reliable treatment for kidney stones, urinary tract infections, or kidney disease. Research on plants used traditionally for urinary problems is still limited, and clinical effectiveness and safety can be uncertain.

What Is Goose Grass / Wire Grass?

Goose grass (Galium aparine) is an annual herb that is also known by names such as cleavers, catchweed, bedstraw, and goosegrass.

It typically has:

  • Long, weak, scrambling stems
  • Small leaves arranged around the stem
  • Tiny white flowers
  • Tiny hooked hairs that allow the plant to cling to clothing and other plants
  • A preference for disturbed areas, gardens, fields, and partially shaded locations

One important point is that common plant names can vary by region. “Wire grass” can refer to different plants, so never consume a wild plant based only on a common name or a social-media photo.

Why Is Goose Grass Associated With Kidney Health?

The kidney connection comes mainly from traditional herbal practice.

Historical and ethnobotanical records describe Galium aparine being used as a diuretic and for urinary complaints. Some traditional systems used preparations of the plant with the goal of increasing urine flow or supporting urinary elimination.

Traditional use does not prove that the plant can:

  • Dissolve kidney stones
  • Remove kidney stones
  • Cure a UTI
  • Clean or “detox” the kidneys
  • Repair damaged kidneys
  • Prevent kidney disease

Those claims require reliable human clinical evidence, and that evidence is not currently established for goose grass.

Goose Grass for Kidney Problems: Myth or Fact?

The Traditional Claim

The traditional claim is that goose grass may support urinary flow and help the body eliminate unwanted substances through urine.

There is a historical basis for this use, including ethnobotanical reports describing Galium aparine for urinary complaints.

What Modern Evidence Says

The evidence is much more limited than many online posts suggest.

Laboratory research has investigated extracts of Galium aparine for antioxidant and other biological activity, but laboratory findings do not automatically mean that drinking the plant treats a human urinary condition.

Bottom line: Goose grass has a traditional history, but it should not be presented as a proven kidney or urinary treatment.

Can Goose Grass Dissolve Kidney Stones?

There is not enough reliable clinical evidence to say that goose grass dissolves kidney stones.

Kidney stones form from minerals in urine, and their treatment depends on factors such as the stone’s size, location, and composition. Some small stones can pass naturally, while larger or obstructing stones may require medical treatment.

If you suspect a kidney stone, don’t delay evaluation while trying an herbal preparation.

Common Kidney Stone Symptoms

Watch for:

  • Sharp pain in the back or side
  • Pain that moves toward the lower abdomen or groin
  • Blood in the urine
  • Painful urination
  • Frequent urination
  • Cloudy or bad-smelling urine
  • Nausea or vomiting

Severe pain, blood in the urine, difficulty urinating, fever, or chills deserves prompt medical attention.

Can Goose Grass Treat a Urinary Tract Infection?

This is another claim that needs caution.

A urinary tract infection is commonly caused by bacteria. Symptoms can include burning during urination, frequent or urgent urination, lower abdominal discomfort, and cloudy, bloody, or strong-smelling urine.

Goose grass should not replace medical evaluation or prescribed treatment for a suspected UTI.

An untreated infection can move from the bladder to the kidneys and become much more serious. Kidney infection symptoms can include fever, chills, painful urination, nausea, vomiting, and pain in the back, side, or groin.

How Was Goose Grass Traditionally Prepared?

Traditional preparations have included infusions or decoctions made from the aerial parts of the plant.

Because there is no standardized, well-established medical dose for treating kidney or urinary conditions, it is not appropriate to present a homemade recipe as a proven treatment.

If someone is interested in traditional herbal use, the safer approach is:

  1. Confirm the plant identity.
  2. Make sure it was grown in a clean location.
  3. Avoid plants exposed to pesticides or other chemicals.
  4. Do not use an unknown plant based only on an online photograph.
  5. Ask a qualified healthcare professional before using it medicinally.
  6. Never use it instead of evaluation for urinary symptoms.

What Are the Traditional Uses of Goose Grass?

Beyond urinary traditions, historical herbal practices have associated cleavers with several other uses.

Traditional records have included:

  • Herbal infusions
  • Traditional diuretic preparations
  • Topical herbal applications
  • Traditional skin-care preparations
  • Folk remedies for various minor complaints

Research has also examined Galium aparine extracts for antioxidant and immunomodulatory activity in laboratory settings. However, these findings should not be turned into claims that the plant treats disease in humans.

What Are the Potential Benefits?

When discussing goose grass, it is useful to separate traditional uses from proven health benefits.

Traditional Interest

The plant has historical interest because it was traditionally used in herbal preparations associated with:

  • Urinary support
  • Fluid elimination
  • Skin applications
  • General herbal wellness

What Has Actually Been Demonstrated?

Laboratory studies have identified plant compounds and biological activity in Galium aparine extracts, but this is not enough to establish a clinical treatment for kidney stones, UTIs, or kidney disease.

So the most accurate statement is:

Goose grass has traditional herbal uses, but its medical benefits for kidney and urinary conditions remain unproven.

Safety Precautions Before Using Goose Grass

Natural does not automatically mean risk-free.

Before considering any herbal preparation:

  • Confirm the plant’s identity.
  • Avoid plants collected from roadsides or chemically treated areas.
  • Do not use unknown wild plants.
  • Be especially cautious if you take prescription medications.
  • Ask your healthcare professional if you have kidney disease.
  • Ask before using herbal products during pregnancy or breastfeeding.
  • Stop using the preparation if you develop an unexpected reaction.

Herbal products can vary in strength and composition, and evidence about their interactions and long-term safety may be limited.

What Should You Do If You Have Urinary Symptoms?

Instead of trying to treat the symptom yourself, use this simple step-by-step approach.

Step 1: Identify the Symptom

Notice whether you have:

  • Burning while urinating
  • Frequent urination
  • Blood in urine
  • Cloudy or strong-smelling urine
  • Side or back pain
  • Lower abdominal pain

Step 2: Don’t Assume It’s “Kidney Toxins”

Urinary symptoms can have several causes, including infections and kidney stones. Testing may be needed to determine what is actually happening.

Step 3: Get Medical Advice When Symptoms Persist

A healthcare professional can use urine tests, blood tests, and sometimes imaging to investigate kidney stones or urinary infections.

Step 4: Don’t Delay Care for Red Flags

Seek prompt medical attention for:

  • Severe or worsening pain
  • Fever or chills
  • Blood in the urine
  • Vomiting
  • Difficulty passing urine
  • Pain in the back or side with urinary symptoms

These symptoms can indicate a kidney stone, infection, blockage, or another condition requiring treatment.

Goose Grass vs. Proven Kidney Care

Goose grass can be discussed as a traditional herb, but it should not be confused with evidence-based kidney care.

For people concerned about kidney stones, NIDDK notes that adequate fluid intake, unless restricted by a healthcare professional, can help with prevention, while dietary changes may depend on the type of stone.

For suspected urinary infections, professional evaluation is important because bacterial infections may require appropriate treatment.

The Bottom Line

Goose grass, or Galium aparine, has a genuine history in traditional herbal practices, including traditional use for urinary complaints.

However, that history does not prove that goose grass can dissolve kidney stones, cure UTIs, detox the kidneys, or treat kidney disease.

The safest way to view this plant is as a traditional herbal subject worth learning about—not as a replacement for diagnosis or medical treatment.

If you have persistent urinary symptoms, severe pain, blood in your urine, fever, or difficulty urinating, seek professional care rather than relying on a homemade herbal remedy.

Frequently Asked Questions

Is goose grass the same as cleavers?

Yes. Galium aparine is commonly known as cleavers, goose grass, catchweed, and bedstraw.

Can goose grass dissolve kidney stones?

There is not enough reliable human evidence to show that goose grass dissolves kidney stones.

Can goose grass cure a UTI?

No established evidence shows that goose grass cures urinary tract infections, which can require medical evaluation and treatment.

Why is goose grass associated with the kidneys?

Traditional herbal practices used Galium aparine in preparations associated with urinary flow and elimination.

Can I make goose grass tea at home?

Traditional infusions exist, but there is no established medicinal dose for treating kidney or urinary disease.

Is goose grass safe for everyone?

Not necessarily; plant identity, preparation, medications, medical conditions, pregnancy, and breastfeeding can all affect safety.

When should I see a doctor for urinary symptoms?

Seek care for blood in urine, severe pain, fever, chills, vomiting, or difficulty urinating.

Can natural herbs replace kidney treatment?

No. Traditional herbs may be discussed as complementary practices, but they should not replace diagnosis or evidence-based treatment.

Legs Feel Heavy at Night

Woman resting with elevated legs at night while learning simple ways to manage heavy legs and leg swelling

Legs Feel Heavy at Night: 6 Everyday Habits That May Help

Have your legs ever felt heavy, tired, tight, or unusually uncomfortable at the end of the day? 🦵

For some people, the feeling is linked to spending many hours sitting or standing. In other cases, leg heaviness can occur with swelling, varicose veins, vein problems, certain medicines, or other health conditions.

The good news is that simple habits such as regular movement, changing positions, and elevating your legs may help when everyday inactivity contributes to the problem.

However, persistent or sudden leg heaviness should not automatically be treated as a circulation problem. One-sided swelling, warmth, redness, significant pain, or breathing problems can require prompt medical attention.

Why Do Legs Feel Heavy at Night?

Leg heaviness is a symptom rather than a diagnosis.

It can happen after a long day on your feet, especially when you spend hours standing without changing position. Sitting for long periods can also contribute to swelling and discomfort in the legs.

Other possible contributors include:

  • Varicose veins
  • Fluid buildup or edema
  • Reduced physical activity
  • Certain medicines
  • Pregnancy
  • Higher body weight
  • Vein problems such as chronic venous insufficiency
  • Kidney, liver, heart, or lymphatic conditions
  • Muscle overuse or injury

If the sensation happens occasionally after a busy day and improves with rest or movement, simple lifestyle changes may be reasonable to try.

If it keeps happening or becomes worse, finding the underlying cause is more important than simply trying to relieve the feeling.

Step 1: Break Up Long Periods of Sitting or Standing

One of the simplest changes is to avoid staying in the same position for too long.

When you sit at a desk, watch television, drive, or work at home for several hours, get up regularly and move around.

If your job requires standing, shift positions and take short walking breaks when possible.

Try this simple routine:

  1. Stand up from your chair.
  2. Walk around for a few minutes.
  3. Move your ankles gently.
  4. Stretch your calves if comfortable.
  5. Return to your normal activity.

Regular movement helps the muscles in your lower legs contract, which can help blood move back toward the heart.

You do not need a complicated workout for this basic habit.

Step 2: Take a Short Evening Walk

Walking is a practical way to add movement without requiring special equipment.

A short walk after dinner can help you avoid spending the entire evening sitting.

Start with a comfortable pace and increase your activity gradually if your body tolerates it.

For example:

  • Walk around your neighborhood.
  • Take a gentle walk around your home.
  • Walk while talking on the phone.
  • Take several short walks instead of one long session.

Regular physical activity can support circulation and may help reduce symptoms associated with varicose veins.

If walking causes significant pain, stop and discuss the symptom with a healthcare professional rather than pushing through it.

Step 3: Elevate Your Legs

Leg elevation can be useful when heaviness is related to prolonged standing or fluid buildup.

Try resting your legs on a comfortable footstool or pillows while sitting or lying down.

For people with varicose-vein symptoms, elevating the feet can reduce pressure in the leg veins and help blood return toward the heart.

A simple evening routine can look like this:

  1. Lie down comfortably.
  2. Support your legs with pillows.
  3. Keep the position comfortable rather than forcing your legs into an awkward angle.
  4. Relax for several minutes.
  5. Get up slowly afterward.

Leg elevation may help symptoms, but it does not treat every possible cause of swelling or heaviness.

Step 4: Pay Attention to Swelling

Heavy legs and swollen legs are not exactly the same thing.

Look for changes around your:

  • Ankles
  • Feet
  • Calves
  • Lower legs

Swelling can occur when fluid collects in body tissues. It can be associated with long periods of sitting or standing, varicose veins, certain medicines, pregnancy, and several medical conditions.

You may notice:

  • Socks leaving deeper marks than usual
  • Shoes feeling tighter
  • Puffy ankles
  • Shiny or stretched skin
  • A feeling of fullness or heaviness

If swelling continues for several days, becomes worse, or has no clear explanation, arrange a medical evaluation rather than assuming it is simply from being tired.

Step 5: Look After Your Daily Activity

Your overall activity level matters more than one evening routine.

If most of your day involves sitting, add movement throughout the day instead of trying to compensate with one intense workout at night.

A practical schedule could include:

Morning

  • Walk for a few minutes.
  • Move your ankles while getting ready.

Workday

  • Stand and move regularly.
  • Avoid sitting continuously for several hours.

Afternoon

  • Take another short walk.
  • Change position if you have been standing for a long time.

Evening

  • Take a comfortable walk.
  • Elevate your legs while relaxing if it feels helpful.

NHLBI recommends staying physically active and avoiding long periods of sitting or standing as part of lifestyle management for varicose-vein symptoms.

Step 6: Choose Comfortable Clothing and Shoes

Tight clothing, socks, or shoes can make already uncomfortable legs feel worse.

Choose shoes that allow comfortable movement and avoid footwear that restricts your ankles.

If you spend much of the day standing, comfortable shoes with a low heel may be easier on your legs. The NHS also recommends avoiding clothing, socks, or shoes that are too tight when dealing with leg swelling.

Your goal is not to find a special shoe that “fixes circulation.”

The goal is simply to avoid unnecessary pressure and allow normal movement.

What About Compression Socks?

Compression therapy can help some people with symptoms such as leg swelling, pain, and heaviness, particularly when varicose veins or prolonged sitting or standing are involved.

However, compression is not appropriate for everyone.

The right type and pressure depend on the person’s health and the reason for the swelling or heaviness.

If you regularly have unexplained swelling or have a medical condition affecting your circulation, ask a healthcare professional whether compression garments are appropriate before using them regularly.

A Simple Nighttime Routine

If your legs simply feel tired after a long day, try this practical routine:

1. Move First

Take a gentle walk for several minutes if you feel comfortable.

2. Change Position

Avoid sitting in exactly the same position for the rest of the evening.

3. Elevate Your Legs

Rest your feet on a footstool or pillows while relaxing.

4. Check for Swelling

Look at your ankles and feet and notice whether they appear different from usual.

5. Notice Patterns

Ask yourself whether the heaviness is worse after long periods of standing, sitting, travel, or unusually high activity.

6. Track Repeated Symptoms

If the problem keeps returning, write down when it happens, whether both legs are affected, and whether swelling, pain, warmth, or redness occurs.

This information can make it easier for a healthcare professional to understand the pattern.

When Should Heavy Legs Be Checked?

Occasional tiredness after a long day is different from unexplained or persistent leg symptoms.

Make an appointment with a healthcare professional if:

  • The heaviness keeps returning.
  • Your legs remain swollen.
  • Symptoms are getting worse.
  • You have pain while walking.
  • Both legs become swollen.
  • You develop visible vein changes.
  • Symptoms do not improve after a few days of simple self-care.

Leg swelling can sometimes be connected to vein, kidney, liver, heart, or lymphatic problems, so persistent swelling deserves proper evaluation.

Know the Warning Signs of a Blood Clot

This is especially important because not every heavy leg is simply tiredness.

Seek urgent medical attention if one leg suddenly becomes swollen, painful, warm, or red, especially without an obvious reason. These can be signs of a deep vein thrombosis, although other conditions can cause similar symptoms.

Get emergency help if leg symptoms occur with:

  • Sudden difficulty breathing
  • Chest pain
  • Coughing up blood
  • Fainting or severe dizziness

These symptoms can indicate a potentially serious blood clot that has traveled to the lungs.

Do not try to treat these warning signs with massage, herbal remedies, or home circulation drinks.

The Bottom Line

Legs that feel heavy at night can have simple causes such as a long day of sitting or standing, but the symptom can also occur with swelling, varicose veins, vein problems, medicines, and other health conditions.

Start with practical habits:

  • Move regularly.
  • Avoid sitting or standing in one position for long periods.
  • Take comfortable walks.
  • Elevate your legs when resting.
  • Wear comfortable shoes and clothing.
  • Pay attention to swelling and other changes.

If the problem is persistent, worsening, or accompanied by one-sided swelling, pain, warmth, redness, chest pain, or breathing difficulty, get medical advice instead of relying on home remedies.

Frequently Asked Questions

1. Why do my legs feel heavy at night?

Long periods of sitting or standing can contribute, but varicose veins, swelling, vein problems, medicines, and other conditions can also cause heaviness.

2. Can walking help heavy legs?

Regular walking activates the lower-leg muscles and can support blood return toward the heart.

3. Does elevating your legs help?

Leg elevation can reduce pressure in the leg veins and may ease swelling or heaviness in some people.

4. Can sitting too long cause heavy legs?

Yes, prolonged sitting can contribute to leg swelling and discomfort, particularly when you rarely change position.

5. Should I use compression socks for heavy legs?

Compression can help some people, but the appropriate type depends on the cause, so professional advice is useful for unexplained symptoms.

6. Is one swollen leg a warning sign?

Sudden unexplained swelling in one leg, especially with pain, warmth, or redness, needs prompt medical assessment because a blood clot is one possible cause.

7. When should heavy legs become a concern?

Persistent or worsening symptoms, unexplained swelling, walking-related pain, or symptoms lasting several days should be discussed with a healthcare professional.

8. When is leg heaviness an emergency?

Leg symptoms combined with sudden shortness of breath, chest pain, coughing blood, or fainting require emergency medical attention.

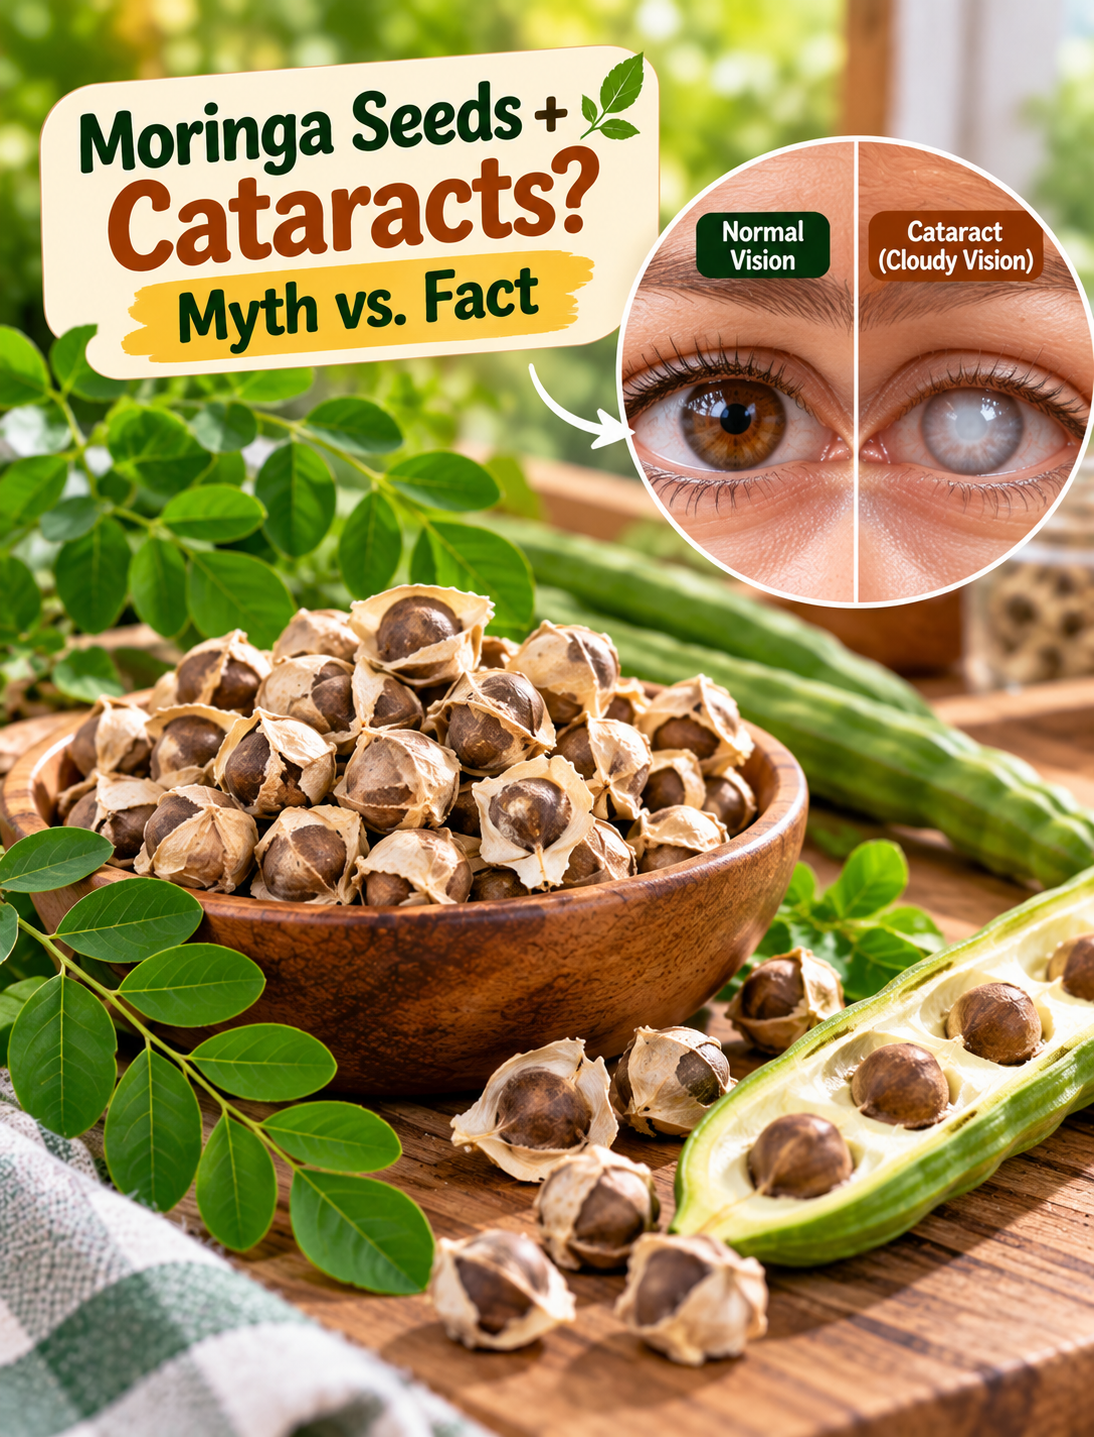
Can Moringa Seeds Treat Cataracts or Cloudy Vision? Myth vs. Fact

Moringa seeds beside an eye-health illustration explaining cataracts, cloudy vision, and the traditional health claim

Can Moringa Seeds Treat Cataracts or Cloudy Vision? Myth vs. Fact

Moringa seeds have been used in traditional wellness practices for generations, but can they actually treat cataracts or cloudy vision?

This question is worth exploring because some online claims connect moringa with eye health. However, traditional use, laboratory research, and proven treatment are three different things.

Moringa (Moringa oleifera) is a plant whose leaves, pods, seeds, and other parts have been used as food and in traditional practices. Research on moringa has explored several possible biological effects, but evidence about moringa seeds specifically and cataract treatment in humans is limited. A review of moringa seeds and oil found that human pharmacological research on the seeds was still lacking.

Most importantly, there is no established evidence that eating moringa seeds can remove cataracts or clear cloudy vision.

What Are Cataracts?

A cataract is a cloudy area that develops in the natural lens of the eye.

The lens normally helps focus light onto the retina. As cataracts develop, proteins in the lens can clump together and make the lens cloudy. This can gradually affect vision.

Common symptoms can include:

  • Cloudy or blurry vision
  • Faded-looking colors
  • Increased sensitivity to light
  • Difficulty seeing at night
  • Halos around lights
  • Double vision in some cases
  • Frequent changes in glasses prescriptions

Cloudy vision does not automatically mean someone has a cataract. Other eye conditions can also cause blurry or hazy vision, so an eye examination is important when vision changes persist.

Why Are Moringa Seeds Linked With Eye Health?

Moringa has a long history of traditional use, and researchers have studied different parts of the plant for their nutritional and biological properties.

Moringa seeds contain protein and fats and have been investigated for possible nutritional applications. However, research on seed-based health effects in humans remains limited.

The confusion often comes from early laboratory research.

One study examined a Moringa oleifera extract on isolated goat eye lenses exposed to high glucose levels. The extract showed changes that suggested a possible protective effect against lens damage in that laboratory model.

That finding is interesting, but it does not demonstrate that eating moringa seeds treats cataracts in people.

Moringa Seeds and Cataracts: Myth vs. Fact

❌ Myth: Moringa seeds can dissolve cataracts

There is no established human evidence showing that eating moringa seeds can dissolve or remove an existing cataract.

✅ Fact: Moringa has been studied for biological effects

Researchers have investigated moringa extracts and different plant parts in laboratory and animal studies, but these findings cannot automatically be applied to cataract treatment in humans.

❌ Myth: Cloudy vision can always be corrected with a food or herb

Cloudy vision has multiple possible causes, and treatment depends on the underlying problem.

✅ Fact: Cataracts are diagnosed through an eye examination

An eye professional can examine the lens and look for cataracts and other conditions that may affect vision.

What Can Moringa Seeds Actually Provide?

Moringa seeds are a food ingredient rather than a proven cataract treatment.

Research reviews describe moringa seeds as containing:

  • Protein
  • Dietary fats
  • Plant compounds
  • Nutrients that may contribute to food value

Moringa seeds and seed-derived products have also been investigated for food applications, including flour and oil.

These nutritional qualities can make moringa interesting as part of a varied diet.

However, nutrition should not be confused with treatment.

Eating a nutritious food does not mean it can reverse a disease that has already developed.

Can Moringa Support Overall Eye-Friendly Nutrition?

A healthy eating pattern can contribute to overall health, including the nutrients needed for normal body function.

The National Eye Institute recommends a diet that includes healthy foods such as fruits and vegetables, leafy greens, nuts, and whole grains as part of healthy-eye habits.

That does not mean one particular food can prevent or cure every eye condition.

A better approach is to think about the overall dietary pattern rather than searching for one special seed or powder.

Try including:

  1. Colorful fruits and vegetables.
  2. Dark leafy greens.
  3. Nuts and seeds in appropriate portions.
  4. Whole grains.
  5. A variety of protein sources.
  6. Adequate fluids.
  7. Foods that fit your individual health needs.

How Should Moringa Seeds Be Used?

If you already eat moringa seeds as a food, treat them as a food rather than as an eye medicine.

A simple approach steps:

1: Choose a reputable food or supplement product.

2: Follow the product’s directions rather than creating a concentrated homemade dose.

3: Avoid combining multiple herbal supplements without checking for possible interactions.

4: Do not use moringa instead of an eye examination.

5: Stop using a product if you develop an unusual reaction and seek appropriate medical advice.

Different moringa products can vary in preparation, concentration, and quality, so the word “moringa” alone does not tell you how strong or standardized a product is. NCCIH notes that dietary supplements can differ from products studied in research and may interact with medicines or medical conditions.

Important Safety Considerations

Natural products still deserve careful use.

Moringa supplements can be more concentrated than the amounts used as ordinary food. People taking prescription medicines should discuss herbal supplements with a healthcare professional because interactions are possible.

Extra caution is appropriate for:

  • Pregnant people
  • Breastfeeding people
  • Children
  • People taking multiple medications
  • People preparing for surgery
  • People with chronic medical conditions

There is also an important recent food-safety lesson. In 2026, the FDA and CDC investigated a multistate Salmonella outbreak associated with certain MOGO-brand moringa leaf powder capsules; the investigation was closed July 17, 2026. This involved moringa leaf powder, not proof that all moringa products are unsafe, but it highlights why product quality and recalls matter when using supplements.

What Actually Helps When You Have Cataracts?

If a cataract is affecting your vision, the most useful step is identifying how much it is affecting your daily life and discussing it with an eye-care professional.

For early cataracts, some people may temporarily manage vision changes with:

  • Brighter lighting
  • Anti-glare sunglasses
  • Magnifying lenses
  • An updated glasses prescription

When cataracts begin interfering with activities such as reading, driving, or watching television, cataract surgery may be recommended. The National Eye Institute states that surgery is the only way to get rid of a cataract. During surgery, the cloudy natural lens is removed and replaced with an artificial lens.

This is very different from claiming that a seed, powder, tea, or homemade remedy can dissolve a cataract.

Simple Eye-Health Habits

You can take practical steps to support long-term eye health.

1. Protect Your Eyes From UV Light

Wear sunglasses that provide appropriate UV protection and consider a hat with a brim when spending time outdoors.

2. Avoid Smoking

Smoking is one of the factors associated with a higher risk of cataracts.

3. Eat a Varied Diet

Include fruits, vegetables, leafy greens, nuts, whole grains, and other nutrient-rich foods.

4. Protect Your Eyes From Injury

Use appropriate protective eyewear during activities that could cause eye trauma.

5. Keep Up With Eye Exams

An eye examination can detect cataracts and other eye problems that may cause changes in vision.

When Should Cloudy Vision Be Checked?

Do not assume that cloudy vision is simply an age-related change.

Make an eye-care appointment if you notice:

  • Persistent blurry or cloudy vision
  • Increasing glare
  • Difficulty seeing at night
  • Faded colors
  • Frequent prescription changes
  • Vision that interferes with reading or driving

Some symptoms can come from conditions other than cataracts, so proper diagnosis matters.

If vision changes suddenly or you develop significant eye pain, a very red eye, or sudden severe vision changes, seek urgent medical evaluation.

The Bottom Line

Can moringa seeds treat cataracts or cloudy vision?

The evidence does not establish moringa seeds as a treatment for cataracts.

Moringa seeds have nutritional value and a history of traditional use, while laboratory research has explored possible biological effects of moringa extracts. But laboratory findings are not the same as proven treatment in humans.

If you enjoy moringa as part of your diet, it can be viewed as one food among many.

But if your vision is cloudy or blurry, the safer approach is to find out why rather than trying to treat the symptom with a homemade remedy.

For diagnosed cataracts that significantly affect daily activities, an eye-care professional can explain the available options, including cataract surgery when appropriate.

Frequently Asked Questions

1. Can moringa seeds remove cataracts?

No established human evidence shows that eating moringa seeds can remove or reverse an existing cataract.

2. Can moringa seeds improve cloudy vision?

There is no good clinical evidence that moringa seeds can reliably clear cloudy or blurry vision.

3. Is moringa good for eye health?

Moringa can be part of a varied diet, but it should not be considered a proven treatment for an eye disease.

4. Can I put moringa powder in my eyes?

No. Do not put moringa powder, seeds, extracts, or homemade mixtures directly into the eyes.

5. What is the proven treatment for cataracts?

When cataracts significantly affect vision, cataract surgery is the established treatment that removes the cloudy lens.

6. Can cloudy vision have causes other than cataracts?

Yes. Several eye conditions can cause blurry or hazy vision, so an eye examination can help identify the cause.

7. Are moringa supplements always safe?

Not necessarily; supplements can vary in quality and may interact with medicines or medical conditions.

8. When should cloudy vision be checked?

Persistent, worsening, or sudden vision changes should be evaluated by an eye-care professional rather than treated with a home remedy.

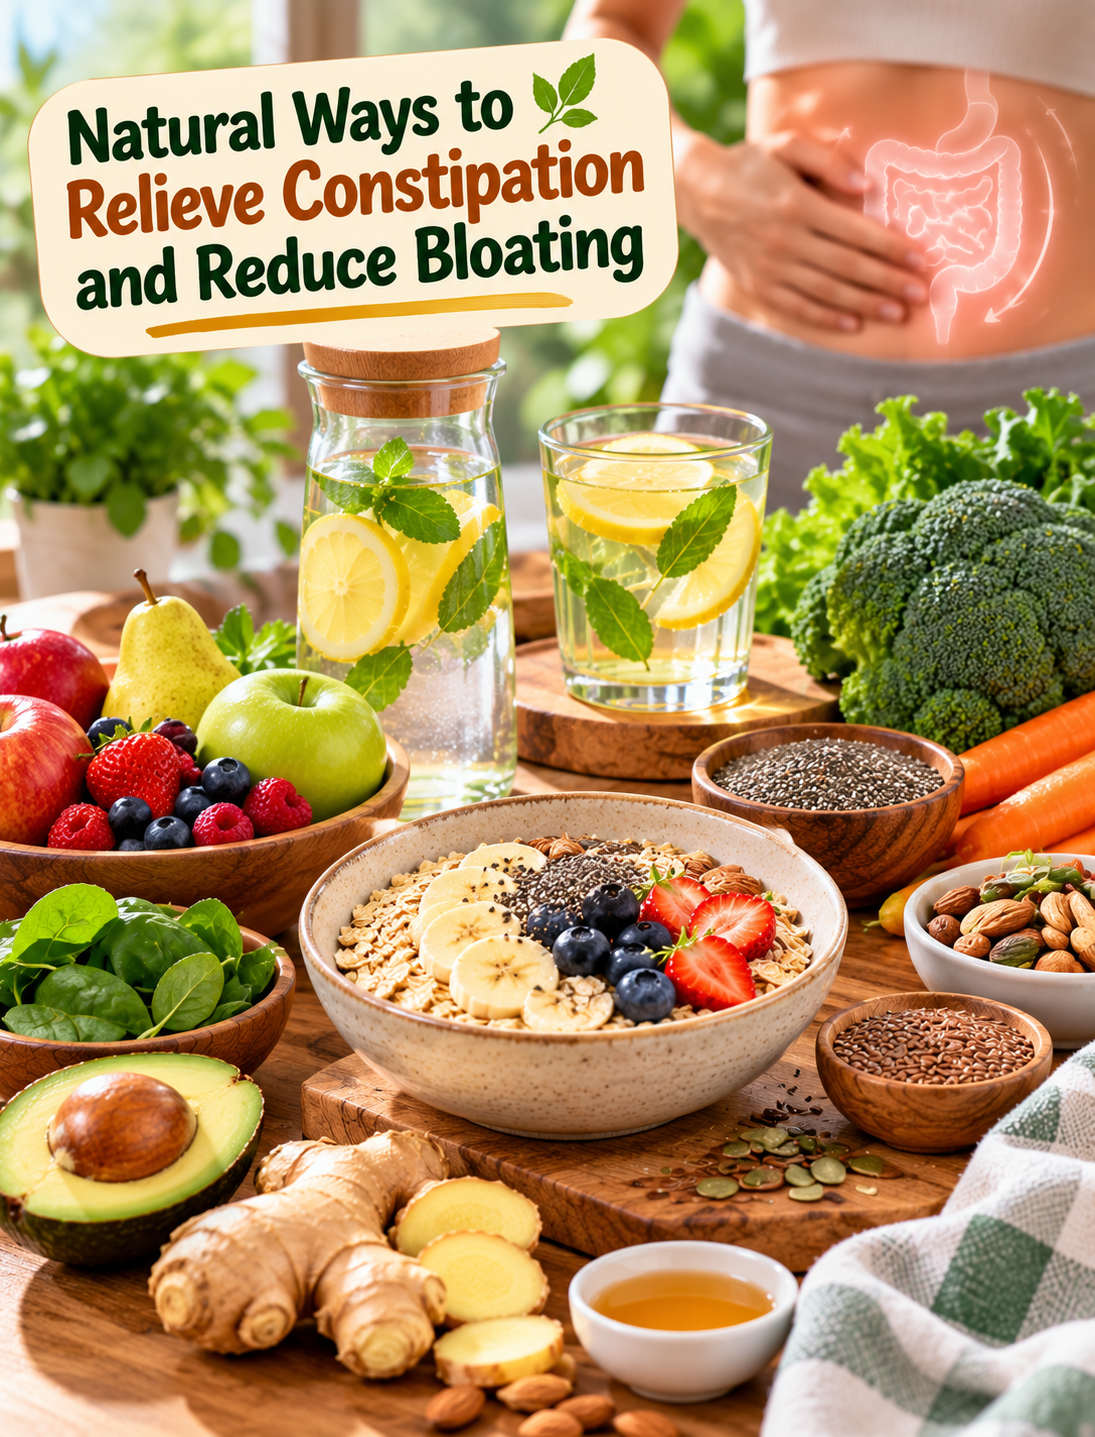
Natural Ways to Relieve Constipation and Reduce Bloating

Natural ways to relieve constipation and reduce bloating with fiber-rich foods, water, walking, and healthy digestion habits

Natural Ways to Relieve Constipation and Reduce Bloating

Constipation and bloating often show up together, leaving you feeling heavy, uncomfortable, and frustrated. The good news is that simple daily habits can often support more regular bowel movements and easier digestion.

Constipation can involve fewer bowel movements than usual, hard or dry stools, straining, or feeling that you have not completely emptied your bowel. Bloating can make your stomach feel full, swollen, or uncomfortable and may be linked to gas, constipation, food intolerance, or digestive conditions.

The goal is not to find a quick “detox” or miracle drink. Instead, focus on fiber, fluids, movement, regular bathroom habits, and identifying foods or routines that may be making your symptoms worse.

What Causes Constipation and Bloating?

Constipation can happen for several reasons, and more than one factor may be involved.

Common contributors include:

  • Not eating enough fiber
  • Not drinking enough fluids
  • Spending long periods sitting
  • Ignoring the urge to use the bathroom
  • Changes in your normal diet or routine
  • Certain medicines or supplements
  • Travel or changes in daily activity
  • Some digestive or metabolic conditions

Bloating can have several causes as well. Gas is common, but constipation, food intolerance, irritable bowel syndrome, and certain digestive conditions can also contribute.

Understanding the possible cause is important because the same food or habit may help one person but make another person’s symptoms worse.

Step 1: Increase Fiber Slowly

Fiber helps add bulk and can make stool easier to pass. Adults generally need about 22–34 grams of fiber per day, depending on age and sex.

Good choices include:

  • Oatmeal
  • Pears
  • Apples with the skin
  • Berries
  • Oranges
  • Beans
  • Lentils
  • Chickpeas
  • Whole-grain bread
  • Broccoli
  • Green peas
  • Almonds and other nuts

Important: Do Not Add Too Much at Once

A sudden increase in fiber can cause extra gas and bloating.

Instead:

  1. Add one high-fiber food to your daily meals.
  2. Keep the portion moderate.
  3. Give your digestive system time to adjust.
  4. Increase gradually if you tolerate it well.

For people with IBS, gradually increasing fiber can be particularly important because adding too much too quickly may increase gas and bloating.

Step 2: Drink Enough Fluids

Fiber works better when you are getting enough fluids.

Water and other suitable liquids can help keep stool softer and easier to pass. Your individual fluid needs depend on factors such as body size, activity level, health, and climate.

A simple routine is:

  • Keep water available during the day.
  • Drink with meals.
  • Drink when you are thirsty.
  • Increase fluids appropriately when increasing dietary fiber.
  • Replace some sugary drinks with water.

Do not force excessive amounts of water simply because you are constipated.

Step 3: Move Your Body Every Day

Regular physical activity can help support bowel regularity and may also help when you feel bloated.

You do not need an intense workout.

Try:

  • A 10–15 minute walk after a meal
  • Walking around the house during long sitting periods
  • Taking the stairs when comfortable
  • Gentle stretching
  • Light daily activities such as gardening or household chores

Consistency matters more than doing one very long workout occasionally.

Step 4: Build a Regular Bathroom Routine

Your body may respond better when you give yourself a consistent opportunity to use the bathroom.

One practical approach is trying to sit on the toilet 15–45 minutes after breakfast, because eating can stimulate movement in the colon.

Try this routine:

  1. Eat breakfast.
  2. Give yourself enough time afterward.
  3. Go to the bathroom when you feel the urge.
  4. Avoid rushing.
  5. Relax instead of repeatedly straining.
  6. Consider using a small footstool to make yourself more comfortable.

Most importantly, do not regularly ignore the urge to go.

Step 5: Choose Foods That Support Easier Digestion

A balanced plate can be more useful than relying on one “constipation remedy.”

Build meals around:

  • A fiber-rich carbohydrate
  • Vegetables or fruit
  • A protein source
  • Healthy fats
  • Adequate fluids

For example, breakfast could include oatmeal topped with berries and nuts.

Another option is plain yogurt with fruit and oats if dairy is well tolerated.

For lunch or dinner, try beans or lentils with vegetables and a whole grain.

The goal is a pattern of eating that supports regular digestion rather than a single food that promises instant results.

Step 6: Watch Your Personal Bloating Triggers

Certain foods and drinks can increase gas or bloating in some people.

Common triggers may include:

  • Fizzy drinks
  • Very large meals
  • Eating too quickly
  • Some beans and lentils
  • Certain vegetables
  • Foods containing ingredients you personally do not tolerate
  • Large amounts of processed or fatty foods

However, you do not need to eliminate every food that can cause gas.

Instead:

  1. Notice what you eat before symptoms appear.
  2. Record repeated patterns.
  3. Change one thing at a time.
  4. See whether symptoms improve.
  5. Discuss persistent symptoms with a healthcare professional.

Eating smaller meals and avoiding large late-night meals may also help some people with bloating.

Step 7: Slow Down When You Eat

Swallowing extra air can contribute to bloating.

Try these simple habits:

  • Eat more slowly.
  • Chew food thoroughly.
  • Avoid talking with food in your mouth.
  • Limit frequent carbonated drinks if they make you feel bloated.
  • Pay attention to portion size.

These small changes can reduce unnecessary air swallowing and make meals more comfortable.

Step 8: Try a Simple Morning Routine

A consistent morning routine can combine several helpful habits.

Try this:

1. Start with fluids
Have a normal glass of water if that suits your routine.

2. Eat a fiber-containing breakfast
Oatmeal, fruit, whole grains, or another tolerated high-fiber option can help.

3. Move for a few minutes
Take a short walk or do gentle movement.

4. Give yourself bathroom time
Try after breakfast rather than waiting until you are rushed.

5. Respond to your body’s signals
Do not repeatedly ignore the urge to have a bowel movement.

This routine does not guarantee immediate results, but consistency can help establish healthier bowel habits.

Step 9: Be Careful With “Natural” Constipation Remedies

Social media often promotes detox drinks, strong herbal mixtures, special powders, or large amounts of certain oils as instant solutions.

Be cautious with these approaches.

“Natural” does not automatically mean safe or appropriate for everyone.

Some supplements can interact with medicines, and some products may cause diarrhea, abdominal cramps, dehydration, or other problems when used incorrectly.

If dietary and lifestyle changes are not enough, a healthcare professional can help determine whether an over-the-counter treatment is appropriate. NIDDK notes that different types of laxatives may be used depending on the situation, with healthcare guidance especially important for ongoing problems.

Step 10: Know When Bloating or Constipation Needs Attention

Occasional constipation or bloating is common, but persistent symptoms should not simply be ignored.

Talk with a healthcare professional if:

  • Constipation keeps returning.
  • Symptoms do not improve with self-care.
  • You regularly experience significant bloating.
  • Your bowel habits suddenly change.
  • You have unexplained weight loss.
  • You notice blood in your stool.
  • You have ongoing abdominal pain.

Seek prompt medical attention for constipation accompanied by symptoms such as vomiting, fever, constant abdominal pain, inability to pass gas, or unexplained weight loss.

Severe or sudden abdominal pain with marked swelling, vomiting blood, or severe breathing difficulty requires urgent medical attention.

A Simple Daily Plan

Here is an easy routine you can save:

Morning

  • Drink fluids normally.
  • Eat a fiber-containing breakfast.
  • Give yourself bathroom time after eating.
  • Take a short walk.

Afternoon

  • Keep drinking fluids according to your needs.
  • Include vegetables, fruit, whole grains, beans, or another fiber source.
  • Break up long periods of sitting.

Evening

  • Choose a comfortable portion rather than a very large meal.
  • Notice foods that repeatedly trigger bloating.
  • Take a gentle walk if comfortable.
  • Avoid ignoring the urge to use the bathroom.

The most useful approach is usually the one you can repeat consistently.

Frequently Asked Questions

1. What is the fastest natural way to relieve constipation?

Increasing fluids, gradually adding fiber, staying active, and responding to the urge to use the bathroom can support regular bowel movements.

2. Can constipation cause bloating?

Yes. Stool buildup can contribute to abdominal fullness and discomfort, and constipation is a recognized cause of bloating.

3. Should I suddenly eat a lot more fiber?

No. Increase fiber gradually because a sudden increase can cause additional gas and bloating.

4. Does walking help constipation?

Regular physical activity may help relieve constipation and support more regular bowel habits.

5. What foods are good sources of fiber?

Oats, berries, pears, apples with skin, beans, lentils, chickpeas, vegetables, whole grains, and nuts provide dietary fiber.

6. Can drinking water help constipation?

Adequate fluids can help fiber work properly and may make stools softer and easier to pass.

7. When should I see a doctor for constipation?

Seek medical advice when constipation persists or returns frequently, especially with bleeding, ongoing abdominal pain, weight loss, vomiting, fever, or inability to pass gas.

8. Why am I bloated even when I am not constipated?

Gas, food intolerance, IBS, certain foods, eating habits, and other digestive conditions can cause bloating even without constipation.

Final Takeaway

You do not need a complicated detox plan to support better digestion.

Start with gradual fiber, adequate fluids, regular movement, a consistent bathroom routine, slower eating, and attention to personal food triggers.

If constipation or bloating becomes persistent, severe, or unusual for you, look beyond home remedies and find the underlying cause with professional guidance.

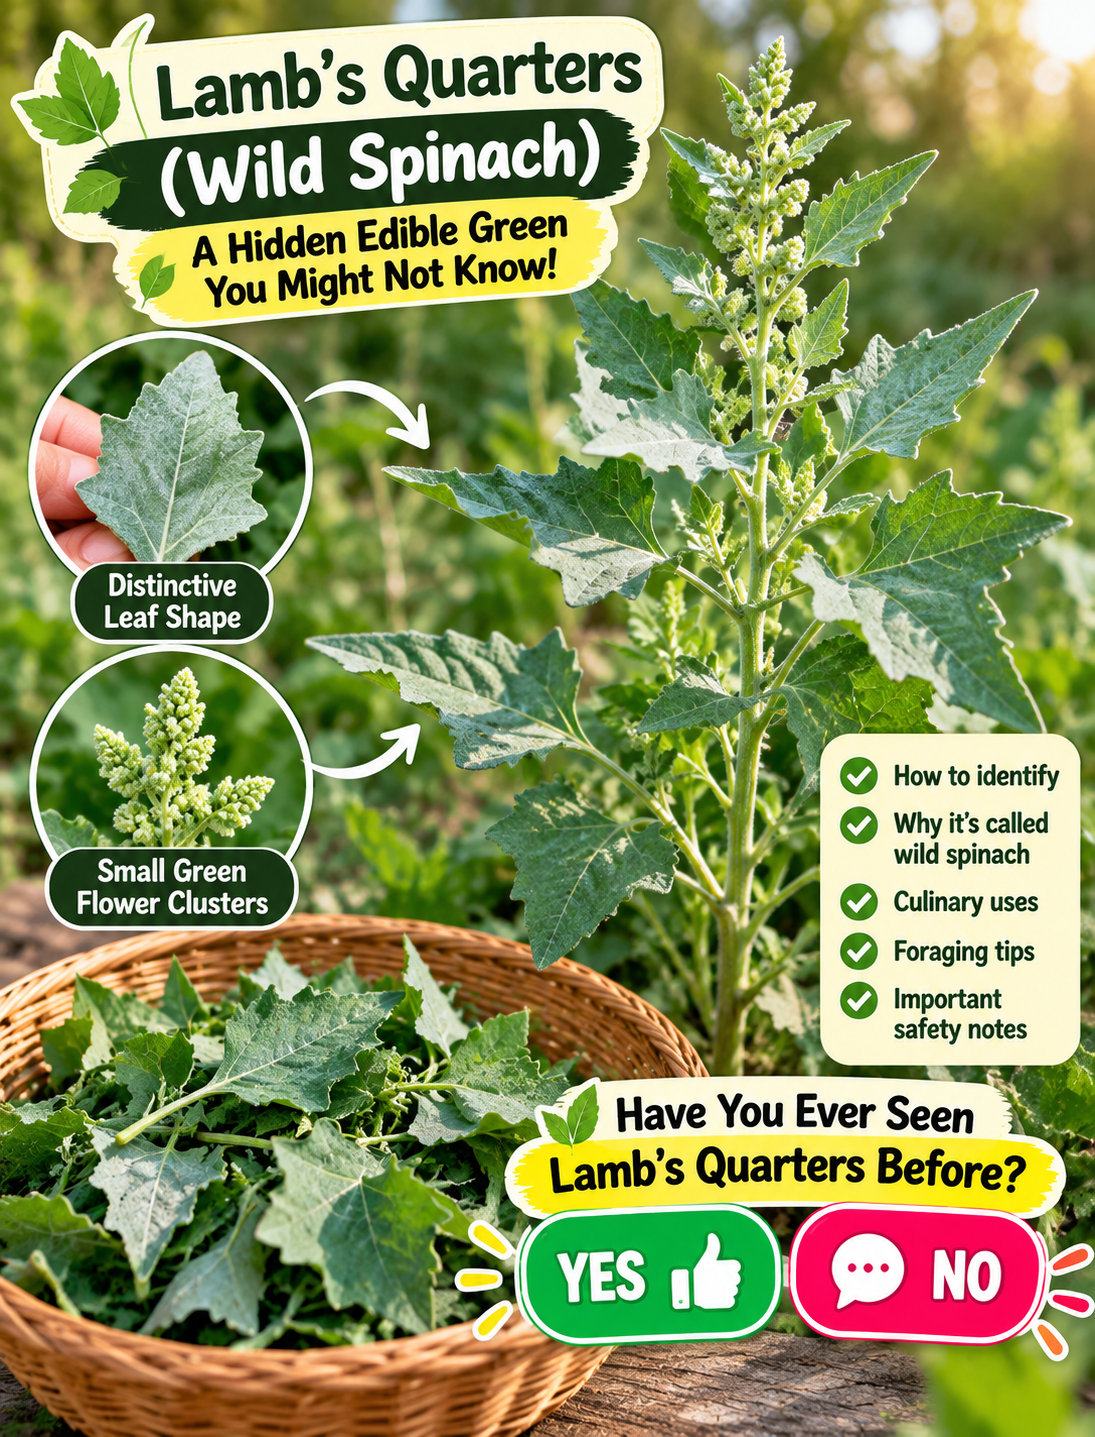
Lamb’s Quarters Identify & Use This Edible Green

Fresh lamb’s quarters wild spinach leaves with identification and safe foraging tips

Lamb’s Quarters / Wild Spinach: What Is This Wild Green?

Have you ever seen this plant growing and didn’t know it could be used as a leafy green? 

If you have ever pulled a leafy weed from a garden and wondered whether it was useful, you may have come across lamb’s quarters.

Common lambsquarters (Chenopodium album) is a widespread annual plant that is sometimes called wild spinach, goosefoot, or pigweed.

Young leaves and tender stems have traditionally been used as cooked greens, and some foragers use the plant in ways similar to spinach. However, identifying a wild plant correctly is essential before eating it.

A plant that looks similar is not automatically the same plant, and growing conditions also matter. Lambsquarters can accumulate nitrates, and wild plants may be exposed to pesticides, fertilizers, animal waste, or other contaminants.

What Are Lamb’s Quarters?

Lamb’s quarters is a leafy annual weed found across much of the United States. It can grow in gardens, cropland, disturbed ground, lawns, and other open areas.

The scientific name most commonly associated with common lambsquarters is Chenopodium album.

You may also hear several different names for this plant, including:

  • Wild spinach
  • Goosefoot
  • Lamb’s quarter
  • Lambsquarters
  • Pigweed

The name “wild spinach” describes how the young leaves can be prepared, rather than meaning the plant is actually a type of cultivated spinach.

Utah State University Extension notes that young lambsquarters can be used similarly to spinach or other green vegetables.

Why Is It Called Wild Spinach?

The comparison comes mainly from the way the young leaves are eaten.

Tender lambsquarters can be used as a leafy green in salads or cooked dishes, although older plants become tougher. University extension resources describe young plants as suitable for salad greens or as a cooked pot herb.

The flavor is generally mild enough to work with familiar ingredients.

You can use properly identified young leaves in:

  • Cooked vegetable dishes
  • Soups
  • Egg dishes
  • Grain bowls
  • Savory pies
  • Mixed greens
  • Simple sautéed greens

Think of it as a wild leafy green, not a miracle plant or medicinal cure.

How Can You Identify Lamb’s Quarters?

Correct identification is the most important part of wild-plant foraging.

Common lambsquarters usually has an upright, branching growth pattern. Its leaves vary in shape, but younger leaves often have a noticeable white or mealy-looking coating, while mature leaves can become more toothed and variable in shape.

The plant also produces small greenish flower clusters that are not showy.

Look for these identifying features:

  1. Upright growth — The plant commonly grows vertically with several branches.
  2. Green leaves — Leaf shape changes as the plant matures.
  3. White mealy appearance — Young leaves often have a distinctive pale or powdery-looking surface.
  4. Toothed leaves — Lower leaves may have noticeable shallow teeth.
  5. Small green flowers — Flowers appear in compact clusters.
  6. Annual growth — Common lambsquarters completes its life cycle in one growing season.

These features can help, but a written description alone is not enough to confirm a wild plant for eating.

Why Proper Identification Matters

Many wild plants can look similar when you first see them.

That makes casual identification risky.

Even experienced gardeners should avoid eating a plant when they are uncertain about its identity.

Follow this basic rule:

If you cannot confidently identify the plant using a reliable field guide or knowledgeable local expert, do not eat it.

Do not identify a plant based only on:

  • A social media photograph
  • A short video
  • A comment from a stranger
  • A general resemblance
  • The fact that animals appear to eat it

Plant appearance can vary with age, growing conditions, and location.

Where Should You NOT Harvest Lamb’s Quarters?

Finding the correct plant is only half of the safety question.

You also need to consider where it grew.

Lambsquarters commonly grows in disturbed areas, agricultural settings, gardens, and other places where the soil may have been exposed to chemicals or contamination.

Avoid harvesting from:

  • Roadsides
  • Areas treated with herbicides or pesticides
  • Recently fertilized areas
  • Industrial or contaminated land
  • Places near chemical runoff
  • Manure piles
  • Areas contaminated by animal feces
  • Locations where you cannot determine the soil history

Oregon State University Extension advises avoiding produce contaminated with animal feces because wildlife and animals can introduce human pathogens.

Wild does not automatically mean clean.

Step-by-Step: How to Handle Lamb’s Quarters Safely

If you have positively identified the plant and know that it grew in a suitable, uncontaminated location, use a careful preparation routine.

Step 1: Confirm the Plant

Compare several features rather than relying on one leaf.

Check the growth pattern, leaf shape, pale mealy coating, stem structure, and flower clusters.

Step 2: Choose Young, Tender Growth

Young leaves and tender tops are generally more suitable for eating because older growth becomes tougher.

Step 3: Inspect the Leaves

Discard leaves that are:

  • Damaged
  • Moldy
  • Diseased-looking
  • Heavily insect-damaged
  • Covered with dirt or animal contamination

Step 4: Wash Thoroughly

Rinse the greens carefully under clean running water.

Remove visible soil, insects, and debris.

Washing cannot make a plant safe if it was harvested from contaminated soil, so location matters before washing.

Step 5: Consider Cooking

Lambsquarters can be prepared similarly to spinach, including steaming or cooking as a pot herb.

Cooking can also reduce some of the oxalic acid present in leafy greens, although it does not make contaminated plants safe.

Step 6: Start With a Modest Portion

Lambsquarters contains oxalic acid, so it is sensible to treat it like a leafy green rather than eating large quantities. Research reviewing wild edible plants identified oxalic acid as an important precaution for common lambsquarters.

People who have been advised to limit dietary oxalates should discuss wild greens with their healthcare professional before adding them regularly.

Simple Ways to Eat Lamb’s Quarters

Once properly identified, cleaned, and prepared, young leaves can fit into familiar meals.

1. Sautéed Greens

  1. Wash the young leaves.
  2. Remove tougher stems.
  3. Heat a small amount of olive oil in a skillet.
  4. Add the greens.
  5. Cook until tender.
  6. Season with garlic, lemon, or black pepper.

2. Egg and Greens Skillet

  1. Lightly cook the greens.
  2. Add chopped tomatoes or onions.
  3. Make small spaces in the mixture.
  4. Add eggs.
  5. Cover and cook until the eggs reach your preferred doneness.

3. Add to Soup

Chop tender leaves and add them toward the end of cooking so they retain some texture.

4. Mix With Other Greens

Combine a small amount with familiar greens such as spinach, kale, or chard.

This can make the flavor more familiar while introducing a different leafy green.

What About the Nutrition?

Lambsquarters contains nutrients and plant compounds, and extension resources describe the foliage as containing vitamin C, carotenoids, and minerals.

However, nutrition can vary with:

  • Plant age
  • Growing conditions
  • Soil
  • Weather
  • Plant part
  • Preparation method

For that reason, it is better to think of lambsquarters as one possible leafy green rather than relying on it as a special source of a particular nutrient.

A varied diet containing many different vegetables and other whole foods remains a more practical approach to nutrition.

Traditional Food Use

Wild greens have been used as food in different cultures for generations.

Lambsquarters has been prepared as a cooked green and used in dishes similar to those made with spinach or other leafy vegetables. University and agricultural sources document its use as a salad green or pot herb.

Traditional food use is different from a medical claim.

You may enjoy lambsquarters as a food, but it should not be promoted as a treatment for disease or as a substitute for medical care.

Important Safety Points Before You Try It

Keep these points in mind before adding any wild green to your meal.

  • Never eat an unidentified wild plant.
  • Use several reliable identification features.
  • Harvest only from areas known to be free from chemical and animal contamination.
  • Wash greens thoroughly.
  • Prefer young, tender leaves.
  • Consider cooking rather than eating large quantities raw.
  • Avoid making large amounts of wild greens a daily habit.
  • Consider oxalate content if you have been told to limit oxalates.
  • Do not assume cooking removes pesticides, heavy metals, or other environmental contaminants.
  • When in doubt, leave the plant where it is.

Lambsquarters can also accumulate nitrates under certain growing conditions, particularly with drought stress or high nitrogen availability.

That is another reason to avoid plants growing in questionable locations or under unknown conditions.

Lamb’s Quarters vs. Regular Spinach

Although lambsquarters is sometimes called wild spinach, the two plants are not the same.

Regular spinach is a cultivated vegetable grown specifically as a food crop.

Lambsquarters is a wild or weedy plant that can be harvested as a leafy green when correctly identified and grown in a suitable location.

The cooking idea is similar, but the safety considerations are different because wild plants have unknown growing histories.

That distinction is especially important for beginners.

A Simple Beginner’s Approach

If you are interested in learning about wild edible plants, start slowly.

Try this approach:

  1. Learn one plant at a time.
  2. Use a reputable regional field guide.
  3. Compare multiple identification characteristics.
  4. Learn the plant’s common look-alikes.
  5. Start with a small culinary use after proper identification.
  6. Keep notes about where and when you found it.
  7. Never eat a plant simply because someone online called it edible.

This approach makes foraging more thoughtful and reduces avoidable mistakes.

Frequently Asked Questions

1. Is lamb’s quarters really edible?

properly identified common lambsquarters has a history of use as a leafy green, particularly when the leaves are young and tender.

2. Why is lamb’s quarters called wild spinach?

Because young leaves can be prepared and cooked in ways similar to spinach.

3. Can you eat lamb’s quarters raw?

Young leaves may be eaten raw, but cooking is another common preparation method and may reduce some oxalic acid.

4. How do you identify lamb’s quarters?

Look for its upright branching form, variable toothed leaves, white mealy appearance on young leaves, and small green flower clusters.

5. Can lamb’s quarters grow near roads?

Grow in disturbed areas and roadsides, but roadside plants should not be harvested because contamination may be difficult to assess.

6. Does lamb’s quarters contain oxalic acid?

Common lambsquarters can contain oxalic acid, which is one reason moderation and appropriate preparation are recommended.

7. Can I eat any plant that looks like lamb’s quarters?

No. Similar-looking plants can be difficult to distinguish, so never eat a wild plant unless its identity is confirmed.

8. Should lamb’s quarters be washed before eating?

Properly identified edible leaves should be washed thoroughly with clean running water before preparation.

Final Takeaway

Lamb’s quarters is more than just a garden weed. 🌿

Common lambsquarters (Chenopodium album) is a widespread wild plant that has been used as a leafy green and is sometimes called wild spinach.

Young leaves can be prepared much like spinach, making this an interesting discovery for people who enjoy learning about traditional foods and wild edibles.

But the most important part of the story is identification and safety.

Never eat an unknown wild plant. Avoid questionable harvesting locations, wash properly identified greens, and remember that cooking does not remove environmental contaminants.

If you are new to foraging, learning one plant carefully is much safer than trying several unfamiliar plants at once.

Red Onion + Olive Oil for Cloudy Vision: Myth or Fact?

Red onion and olive oil beside an eye-health illustration explaining cloudy vision and cataract safety

Red Onion + Olive Oil for Cloudy Vision Myth or Fact?

Cloudy or blurry vision can be unsettling, especially when it develops gradually. You may come across traditional home remedies that combine common kitchen ingredients such as red onion and olive oil and claim to make vision clearer.

But when a remedy involves the eyes, it is important to separate a traditional claim from established eye care.

Red onion and olive oil should not be placed directly into the eyes. Homemade mixtures are not sterile, and products used in the eye need special safety controls because contamination can cause serious harm. The FDA notes that products used in the eyes must be sterile to reduce the risk of infection.

This article looks at where the claim comes from, what cloudy vision can mean, what medical sources say about cataracts, and what you can safely do instead.

What Is the Red Onion + Olive Oil Claim?

The claim suggests that combining red onion with olive oil and using the mixture around or in the eyes may help improve cloudy vision.

The idea is often presented as an old-fashioned natural remedy. Red onion contains plant compounds, while olive oil contains monounsaturated fat and other naturally occurring compounds, so the combination may sound appealing as a wellness idea.

However, a food’s nutritional value does not mean that putting it directly into the eye will improve vision.

There is an important difference between:

  • Eating nutritious foods as part of a balanced diet
  • Using an ingredient on the skin
  • Putting a homemade substance directly into the eye

The third situation requires much greater caution.

There is no established eye-care treatment guidance supporting homemade red onion and olive oil mixtures as a way to clear a cloudy lens or treat cataracts.

Why Can Vision Become Cloudy?

“Cloudy vision” is a symptom rather than a diagnosis.

Several different eye problems can cause blurry, hazy, dim, or distorted vision. Cataracts are one important cause.

A cataract develops when the normally clear lens inside the eye becomes cloudy. As the clouding increases, vision can become blurry or hazy, colors may appear faded, and bright lights may cause more glare.

Other vision problems can also cause blurred or changing vision, so it is not safe to assume that every cloudy-looking view is caused by a cataract.

Common changes that deserve attention include:

  • Blurry or hazy vision
  • Trouble seeing clearly at night
  • Increased glare from headlights or bright lights
  • Faded or less vivid colors
  • Double or ghosted images
  • Frequent changes in your glasses prescription
  • Gradual loss of sharpness

If these changes continue, an eye examination can help identify the actual cause.

Can Red Onion and Olive Oil Clear a Cataract?

No established medical evidence shows that eating or applying a red onion and olive oil mixture can remove a cataract.

A cataract is clouding inside the eye’s natural lens. It is not simply a layer of dirt or dryness that can be wiped away.

The National Eye Institute explains that cataracts form when proteins in the lens break down and clump together, making the lens cloudy.

The treatment that removes a cataract is cataract surgery. During the procedure, the cloudy natural lens is removed and replaced with an artificial lens.

That does not mean everyone with a cataract needs surgery immediately. Early cataracts may cause only mild symptoms, and an eye doctor can help determine when treatment is appropriate.

Why You Should Never Put Onion or Olive Oil Into Your Eyes

This is the most important safety point in this topic.

Do not put raw onion juice, olive oil, onion-and-oil mixtures, or other homemade food mixtures directly into your eyes.

Your eye has delicate tissues that can be irritated or injured by substances that were not designed or prepared for ophthalmic use.

The FDA explains that eye products carry a higher risk because they bypass some of the body’s natural defenses, and products used in the eyes need to be sterile to reduce infection risk.

Avoid these homemade eye applications:

  • Raw onion juice
  • Olive oil drops
  • Onion and oil mixtures
  • Herbal juices
  • Homemade “eye drops”
  • Unsterile food-based mixtures
  • Essential oils near or inside the eye

A natural ingredient is not automatically safe for the eye.

What About Eating Red Onion and Olive Oil?

Eating red onion and using olive oil as normal foods is very different from putting them into your eyes.

Both can fit into a balanced eating pattern.

Red onions can add flavor and plant foods to meals, while olive oil can be used as a source of unsaturated fat. You can include them in salads, roasted vegetables, grain bowls, beans, fish, or other balanced meals.

A simple food idea:

  1. Slice red onion thinly.
  2. Add it to a vegetable or bean salad.
  3. Drizzle with olive oil.
  4. Add herbs, lemon, or vinegar for flavor.
  5. Pair the meal with another source of protein and whole foods.

This can be part of a nutritious diet, but it should not be presented as a treatment for cloudy vision.

What Does the Evidence Say About Cataracts?

The National Eye Institute identifies surgery as the treatment that removes a cataract. It also notes that early cataracts may sometimes be managed with practical changes such as brighter lighting, anti-glare sunglasses, or updated glasses.

Cataracts are common with aging, although other factors can increase risk.

Factors associated with cataract risk include:

  • Getting older
  • Diabetes
  • Smoking
  • Heavy alcohol use
  • Family history
  • Previous eye injury
  • Certain eye surgeries
  • Some steroid use
  • Long-term ultraviolet exposure

These factors do not mean that someone will definitely develop cataracts, but they are recognized risk factors.

Step-by-Step: What to Do If Your Vision Looks Cloudy

If you notice cloudy or blurry vision, focus on finding the cause rather than trying an unproven eye remedy.

Step 1: Do Not Put Homemade Mixtures Into Your Eyes

Avoid onion juice, olive oil, herbal mixtures, and other kitchen ingredients as eye drops.

Step 2: Notice When the Vision Change Happens

Write down whether the problem is:

  • Constant
  • Occasional
  • Worse at night
  • Worse in bright light
  • Present in one eye
  • Present in both eyes
  • Gradually getting worse

This information can be useful during an eye examination.

Step 3: Arrange an Eye Examination

An eye-care professional can examine the lens and other parts of the eye to determine what is causing the vision change.

A dilated eye examination can help detect cataracts and other eye conditions.

Step 4: Protect Your Eyes From UV Exposure

When outdoors, use sunglasses that provide appropriate UV protection and consider a wide-brimmed hat.

The National Eye Institute recommends UV protection as part of reducing cataract risk.

Step 5: Support Overall Eye Health

Build meals around a variety of vegetables, fruits, whole grains, nuts, and other nutrient-rich foods.

Avoid smoking and manage health conditions according to advice from your healthcare team.

Step 6: Follow Professional Treatment Advice

If an eye doctor identifies a cataract or another eye condition, follow the recommended monitoring or treatment plan rather than relying on an unproven home remedy.

Can You Prevent Cataracts Naturally?

There is no guaranteed natural method that completely prevents age-related cataracts.

However, several healthy habits may help protect eye health and reduce certain risk factors.

Practical habits include:

  • Wear UV-protective sunglasses outdoors.
  • Avoid smoking.
  • Eat a varied, nutrient-rich diet.
  • Protect your eyes during activities that could cause injury.
  • Manage diabetes if you have it.
  • Keep regular eye examinations when recommended.
  • Tell your eye doctor about medications and supplements you use.

The National Eye Institute specifically recommends UV protection, quitting smoking, eye protection from injury, and healthy food choices as ways to help protect against cataracts.

When Should Cloudy Vision Be Checked Quickly?

Not every change in vision is an emergency, but some symptoms need prompt medical attention.

Seek urgent eye care if you develop sudden vision loss, sudden blurred vision with eye pain, a painful red eye, new flashes of light, a sudden increase in floaters, or a curtain-like shadow over your vision.

Sudden vision loss should not be treated at home while waiting to see whether a natural remedy works.

Red Onion + Olive Oil: Myth or Fact?

The simplest answer is:

The traditional claim should not be confused with an established eye treatment.

Red onion and olive oil can be nutritious foods, but there is no established medical guidance showing that a homemade mixture can clear cataracts or restore cloudy vision.

Most importantly, do not put the mixture directly into your eyes.

If your vision has become cloudy, the useful next step is to identify the cause through appropriate eye care.

A Safer Way to Think About Natural Eye Health

Natural wellness can have a place in everyday life, but it should not replace diagnosis when a body part as sensitive as the eye develops a new symptom.

A better approach is simple:

  1. Eat a varied, nutrient-rich diet.
  2. Protect your eyes from UV exposure.
  3. Avoid smoking.
  4. Protect your eyes from injury.
  5. Get appropriate eye examinations.
  6. Never use homemade food mixtures as eye drops.
  7. Get urgent care for sudden or severe vision changes.

This approach keeps the useful part of traditional wellness—healthy everyday habits—without turning an unproven remedy into a medical treatment.

Frequently Asked Questions

1. Can red onion and olive oil cure cloudy vision?

There is no established evidence that this mixture clears cataracts or treats the underlying causes of cloudy vision.

2. Can I put red onion juice in my eyes?

No. Raw onion juice is not a sterile ophthalmic product and may irritate or harm the eye.

3. Can olive oil be used as homemade eye drops?

Olive oil should not be used as homemade eye drops because substances placed in the eye need appropriate sterile preparation and safety testing.

4. Does cloudy vision always mean cataracts?

No. Cataracts can cause cloudy or blurry vision, but other eye conditions can produce similar symptoms.

5. What is the treatment for cataracts?

Cataract surgery removes the cloudy natural lens and replaces it with an artificial lens; an eye doctor determines when treatment is appropriate.

6. Can healthy foods support eye health?

A varied diet containing vegetables, fruits, whole grains, nuts, and other nutrient-rich foods can support overall health and is part of healthy eye-care habits.

7. When should blurry vision be treated as an emergency?

Sudden vision loss, painful blurred vision, a painful red eye, flashes, many new floaters, or a curtain-like shadow require urgent medical attention.

8. Should I try a natural remedy before seeing an eye doctor?

If vision is persistently cloudy or changing, do not delay an eye examination while trying an unproven remedy.

Final Takeaway

Red onion + olive oil may be an interesting traditional wellness claim, but it should not be presented as a treatment for cloudy vision.

Red onion and olive oil can be enjoyed as foods, but neither should be placed directly into the eyes. If cloudy or blurry vision continues, an eye examination can help determine whether cataracts or another condition is responsible.

For cataracts, the National Eye Institute states that surgery is the only treatment that removes the cataract itself.

Can Natural Remedies Tighten a Sagging Belly?

Natural ways to support a sagging belly with balanced meals, walking, protein, hydration, and resistance training

Can Natural Remedies Tighten a Sagging Belly?

A sagging belly can happen after weight loss, pregnancy, aging, or changes in body size. It is also normal for skin and body shape to change over time.

Many online remedies promise to “tighten” loose abdominal skin with oils, drinks, herbs, or homemade mixtures. However, there is no proven natural remedy that can simply tighten loose abdominal skin or remove excess skin.

A more realistic approach focuses on healthy weight management, regular movement, resistance training, adequate protein, hydration, sleep, and patience. These habits can improve overall fitness and body composition, but they cannot guarantee that loose skin will disappear.

Can Natural Remedies Really Tighten a Sagging Belly?

Natural ingredients such as aloe vera, coconut oil, coffee, lemon, or herbal mixtures are sometimes promoted as skin-tightening remedies. Applying an oil or homemade mixture may temporarily moisturize the skin and make it feel smoother, but that is different from tightening excess skin.

Loose skin is affected by factors such as:

  • Age
  • Genetics
  • Amount of weight lost
  • How quickly weight was lost
  • Pregnancy
  • Sun exposure
  • Skin elasticity
  • How long the skin was stretched

Because these factors vary from person to person, there is no single home remedy that can predictably tighten abdominal skin.

If your goal is to improve your waistline and overall body composition, sustainable eating and physical activity are much more useful targets. The National Institute of Diabetes and Digestive and Kidney Diseases recommends combining healthy eating with regular physical activity for healthy weight management.

What Can Actually Help?

Instead of searching for one powerful remedy, build a routine that supports your whole body.

1. Focus on Gradual Weight Management

If you have excess body weight, gradual weight management can change your overall body shape and waist size.

The CDC notes that healthy weight management involves healthy eating patterns, regular physical activity, adequate sleep, and stress management. It also recommends gradual, steady weight loss rather than extreme approaches.

A sustainable approach may include:

  • Eating mostly minimally processed foods
  • Including vegetables and fruits regularly
  • Choosing whole grains more often
  • Adding protein-rich foods
  • Watching portions without extreme restriction
  • Limiting excess added sugar
  • Reducing sugary drinks
  • Building habits you can maintain

The goal is not to lose weight as quickly as possible. A routine that you can continue is more useful than a short-term crash diet.

2. Add Resistance Training

Resistance training is one of the most useful forms of exercise for improving muscle strength and maintaining muscle during weight management.

It does not directly shrink loose skin, but building muscle can improve strength and may change the way your body looks underneath the skin.

Useful options include:

  • Squats
  • Lunges
  • Glute bridges
  • Resistance-band exercises
  • Push-ups
  • Rows
  • Planks
  • Light weight training

You do not need an expensive gym membership to begin. Resistance bands, bodyweight exercises, or household items can provide resistance.

NIDDK recommends muscle-strengthening activities at least two days each week and advises working the major muscle groups, including the abdomen, legs, back, arms, chest, and shoulders.

3. Don’t Ignore Walking

Walking is simple, accessible, and easy to add to most routines.

A brisk walk can increase daily physical activity and support healthy weight management when combined with appropriate eating habits.

For generally healthy adults, U.S. physical activity guidance recommends at least 150 minutes of moderate-intensity aerobic activity each week, along with muscle-strengthening activity on at least two days.

You don’t have to complete all your activity in one session.

Try:

  1. A 10-minute walk after breakfast.
  2. Another 10-minute walk after lunch.
  3. A 10-minute evening walk.

Short sessions can add up throughout the day. NIDDK specifically notes that even 10- or 15-minute periods of activity count.

4. Eat Enough Protein

Protein is important for maintaining and building muscle.

Good food sources include:

  • Eggs
  • Greek yogurt
  • Cottage cheese
  • Fish
  • Chicken
  • Turkey
  • Beans
  • Lentils
  • Tofu
  • Tempeh
  • Nuts and seeds

Rather than relying on a protein powder or supplement, start by including a protein source in your regular meals.

For example:

Breakfast: Eggs with whole-grain toast and fruit

Lunch: Chicken or beans with vegetables and brown rice

Snack: Greek yogurt with berries

Dinner: Fish, tofu, or lean meat with vegetables and a whole grain

NIDDK recommends protein foods such as lean meats, poultry, eggs, seafood, beans, peas, lentils, nuts, seeds, and soy products as part of a healthy eating pattern.

5. Stay Hydrated

Water does not tighten loose skin, but staying hydrated is an important part of overall health.

Instead of using sugary drinks as your main source of fluids, make water a regular choice throughout the day.

Simple habits include:

  • Keep a reusable water bottle nearby.
  • Drink water with meals.
  • Have water before or after physical activity.
  • Choose water instead of sugary drinks more often.
  • Eat water-rich foods such as fruits and vegetables.

Hydration should be viewed as a basic healthy habit, not a quick solution for abdominal skin.

6. Build a Balanced Plate

You do not need a complicated diet to support healthy weight management.

A simple meal can include:

  • Protein: chicken, fish, eggs, beans, lentils, tofu, or yogurt
  • Vegetables: leafy greens, broccoli, peppers, tomatoes, carrots, or zucchini
  • Whole-food carbohydrates: oats, brown rice, potatoes, quinoa, or whole-grain bread
  • Healthy fats: avocado, nuts, seeds, or olive oil

NIDDK recommends vegetables, whole fruits, whole grains, protein foods, and appropriate dairy or fortified alternatives as part of a healthy eating plan.

This approach also gives you more flexibility than following a restrictive “belly-fat remedy” diet.

7. Give Your Body Time

One of the biggest mistakes people make is expecting visible changes within a few days.

Body composition changes gradually. Skin elasticity also differs greatly between people.

If you’ve recently lost a significant amount of weight, your skin may need time to adjust to your new body size. Some people see noticeable changes over time, while others continue to have loose skin.

Be careful with products that promise dramatic tightening in a few days or weeks.

A cream, oil, tea, or homemade drink may improve the appearance or feel of the skin temporarily, but that does not mean it has removed excess skin.

8. Don’t Rely on Abdominal Exercises Alone

Crunches, planks, and other core exercises can strengthen abdominal muscles, but they do not specifically remove loose skin from the belly.

A better exercise plan combines different types of movement.

Simple weekly structure

Monday: Strength training + short walk

Tuesday: Brisk walking

Wednesday: Strength training + easy movement

Thursday: Walking or another enjoyable aerobic activity

Friday: Strength training

Saturday: Longer walk or active hobby

Sunday: Rest or gentle movement

Adjust the routine to your fitness level and health needs.

A Simple Step-by-Step Plan

If your goal is to improve your waistline and overall fitness, start with these steps.

Step 1: Set a realistic goal

Focus on stronger muscles, better fitness, healthier eating, and sustainable weight management instead of promising yourself perfectly tight skin.

Step 2: Improve one meal at a time

Add vegetables and a protein source before making drastic dietary changes.

Step 3: Walk every day

Start with 10 minutes if you are currently inactive and gradually increase your activity.

Step 4: Strength train twice a week

Begin with basic movements such as squats, wall push-ups, glute bridges, rows, and modified planks.

Step 5: Drink more water

Replace some sugary drinks with water or another low-calorie beverage.

Step 6: Prioritize protein

Include a protein-rich food at breakfast, lunch, and dinner.

Step 7: Track progress realistically

Instead of checking your stomach every day, monitor habits, strength, walking time, energy, and changes over several weeks.

Step 8: Adjust slowly

If a routine feels impossible to maintain, make it easier rather than quitting completely.

What About Creams, Oils, and Homemade Remedies?

Moisturizing products can make dry skin feel softer and smoother, which may temporarily improve its appearance.

However, that is not the same as removing excess skin.

Be cautious with recipes that recommend applying:

  • Lemon juice
  • Undiluted essential oils
  • Baking soda
  • Strong acids
  • Irritating spice mixtures
  • Concentrated herbal extracts

These ingredients can irritate the skin and may cause burning, redness, or other reactions.

A simple moisturizer is generally a more sensible skin-care option than an aggressive homemade “tightening” mixture.

When Should You Talk With a Professional?

If you have significant loose skin after major weight loss, pregnancy, or another major body change, a healthcare professional can help you understand your options.

If you are considering substantial weight loss, it can also be useful to discuss your goal with a healthcare professional, especially if you have a chronic health condition or take medications.

For some people, loose skin remains even after reaching a stable, healthy weight. Lifestyle habits can support fitness and body composition, but they cannot guarantee that excess skin will disappear.

The Bottom Line

There is no proven natural remedy that can simply tighten a sagging belly.

Oils, herbs, drinks, and homemade mixtures may have a place in normal skin care, but they should not be promoted as solutions for loose abdominal skin.

The more realistic strategy is to build sustainable habits:

  • Eat balanced meals.
  • Get enough protein.
  • Walk regularly.
  • Perform resistance training.
  • Stay hydrated.
  • Get adequate sleep.
  • Manage stress.
  • Give your body time to adapt.

Regular physical activity and healthy eating work together to support healthy weight management, while strength training can help maintain muscle during weight changes.

Most importantly, don’t judge your progress by whether your belly becomes perfectly tight. A healthier body can still have natural skin folds, stretch marks, or loose skin.

FAQs

Can natural remedies tighten loose belly skin?

No single natural remedy has been proven to reliably tighten loose abdominal skin or remove excess skin.

Can drinking more water tighten a sagging belly?

Hydration supports normal body function, but drinking more water does not directly tighten loose abdominal skin.

Does walking help reduce belly fat?

Walking increases physical activity and can support weight management when combined with an appropriate eating pattern.

Can strength training tighten a sagging belly?

Strength training can build and maintain muscle, which may improve body composition, but it cannot directly remove loose skin.

How often should I strength train?

For generally healthy adults, U.S. guidance recommends muscle-strengthening activities on at least two days each week.

Can protein help with a sagging belly?

Adequate protein supports muscle maintenance and is useful as part of a balanced eating pattern, but it does not directly tighten loose skin.

How long does loose skin take to improve?

The timeline varies widely because age, genetics, weight change, skin elasticity, and other factors affect how skin responds.

What if I have a large amount of loose skin?

If substantial loose skin remains after major weight loss or pregnancy, discuss your concerns with a healthcare professional to understand appropriate options.

Aloe Vera: Traditional Skin-Care Uses & Safety Tips

Aloe vera gel for traditional skin care with fresh aloe leaf and safe application tips

Aloe Vera: Traditional Skin-Care Uses & Safety Tips

Aloe vera has been part of traditional skin care for generations. The clear gel inside the aloe leaf is commonly used topically as a simple plant-based skin-care ingredient. Today, aloe is also found in many commercial gels, lotions, and moisturizers.

But “natural” does not automatically mean suitable for every skin type. Aloe can feel soothing and moisturizing for some people, while others may experience burning, itching, redness, rash, or eczema.

This guide explains how aloe vera is traditionally used on the skin, how to use it more carefully, and what to do if your skin reacts.

What Is Aloe Vera Gel?

Aloe vera is a succulent plant that grows in warm, dry climates. The leaf contains different substances, including clear inner-leaf gel and yellowish latex closer to the outer part of the leaf. These are not the same thing.

For traditional skin care, the clear inner gel is the part most commonly discussed.

Aloe has a long history of topical use for skin conditions and minor skin concerns. Modern research has also studied topical aloe, although the amount and quality of evidence varies depending on the specific skin problem and aloe preparation.

The safest way to think about aloe is as a skin-care ingredient, not a universal treatment for every skin problem.

Traditional Skin-Care Uses of Aloe Vera

Aloe gel has traditionally been applied directly to the skin as a simple topical preparation.

People commonly use it as part of routines focused on:

  • Dry or tight-feeling skin
  • A cooling skin-care step
  • Simple plant-based moisturizing
  • General skin comfort
  • Traditional self-care routines

Some clinical research has investigated topical aloe for specific skin concerns, but that does not mean aloe should replace medical treatment. NCCIH reports that topical aloe is generally well tolerated, while also noting occasional reports of burning, itching, rash, and eczema.

For everyday skin care, keep expectations realistic. Aloe may be a pleasant addition to a routine, but it is not a guaranteed solution for wrinkles, loose skin, acne, or other ongoing skin conditions.

Why Patch Testing Matters

Even a plant-based ingredient can cause a skin reaction.

The American Academy of Dermatology recommends testing new skin-care products before applying them more widely because ingredients can sometimes cause irritation or allergic contact dermatitis.

A simple test can help you decide whether your skin tolerates the product.

Step 1: Choose a Small Test Area

Use a small area on the underside of your arm or another convenient area that will not be rubbed or washed frequently.

Step 2: Apply a Small Amount

Use the same amount and thickness you would normally use on your skin.

Step 3: Watch for a Reaction

Look for signs such as:

  • Redness
  • Itching
  • Burning
  • Swelling
  • New irritation
  • Rash

The AAD’s general guidance for testing skin-care products recommends applying the product to a small test area twice daily for seven to 10 days.

If you develop a reaction, gently wash the product off and stop using it.

How to Use Aloe Vera Gel on Your Skin

If your skin tolerates aloe, keep the routine simple.

Step 1: Start With Clean Skin

Wash your hands and gently cleanse the area where you plan to use aloe.

Clean skin reduces the chance of transferring dirt or other substances onto the skin.

Step 2: Choose the Right Aloe Product

If using a commercial product, check the ingredient label and choose a product designed for topical skin use.

If using fresh aloe, make sure the leaf, your hands, utensils, and container are clean.

Step 3: Use the Clear Inner Gel

When preparing fresh aloe, focus on the clear inner gel rather than treating the whole leaf as one ingredient.

Aloe leaves contain different components, including inner gel and latex, so they should not be assumed to have the same properties or safety profile.

Step 4: Apply a Thin Layer

Use a small amount and spread it gently over the intended area.

There is no need to cover the skin with a thick layer.

Step 5: Avoid Sensitive Areas

Keep aloe away from your eyes and avoid applying it to areas that are already irritated unless a healthcare professional has advised you to do so.

Step 6: Stop if Your Skin Reacts

If the area starts burning, itching, swelling, or developing a rash, wash the product off and stop using it.

Topical aloe is generally well tolerated, but skin reactions have been reported.

How to Keep Fresh Aloe Gel Clean

Fresh plant material needs more care than a sealed commercial skin-care product.

If you prepare aloe at home:

  1. Wash your hands before handling the leaf.
  2. Rinse the outside of the leaf.
  3. Use a clean knife and cutting surface.
  4. Remove only the amount you plan to use.
  5. Place unused gel in a clean, covered container if you are storing it.
  6. Avoid repeatedly touching stored gel with your fingers.
  7. Discard it if you notice an unusual smell, color, texture, or visible contamination.

Fresh homemade gel does not contain the same preservation system as many commercial skin-care products. For that reason, avoid treating homemade aloe gel as if it has an unlimited shelf life.

A commercially prepared aloe product may be a more convenient option when you want predictable ingredients and easier storage.

When Should You Use Aloe Vera?

There is no special time of day that you must use aloe.

Some people prefer using it as part of an evening routine because they have more time for skin care.

A simple routine could look like:

Morning

  1. Gentle cleanser
  2. Aloe gel if tolerated
  3. Moisturizer if needed
  4. Broad-spectrum sunscreen

Evening

  1. Gentle cleanser
  2. Aloe gel if tolerated
  3. Moisturizer if needed

Aloe does not need to be the center of your entire skin-care routine. It can simply be one optional step.

Aloe Vera and Moisturized-Looking Skin

One reason aloe remains popular in skin care is its light gel texture and fresh feel.

If your skin tolerates it, aloe can fit into a routine designed to keep skin feeling comfortable and moisturized.

However, avoid confusing temporary hydration with permanent skin tightening or wrinkle removal.

Aloe should not be marketed as a miracle anti-aging treatment.

For long-term skin care, daily sun protection is also important because ultraviolet exposure contributes to visible skin aging. A broad-spectrum sunscreen with SPF 30 or higher is a common recommendation from dermatologists for protecting skin from UV exposure.

Aloe Vera Safety Tips You Should Know

Avoid Broken or Irritated Skin

Do not automatically apply fresh plant gel to cuts, open wounds, or severely irritated skin.

Damaged skin can react differently to ingredients that seem comfortable on healthy skin.

If you have an ongoing rash, open wound, infection, or unexplained skin problem, getting professional advice is more appropriate than experimenting with home remedies.

Keep It Away From Your Eyes

Aloe intended for topical skin use should not be treated as an eye product.

Avoid applying it around the eyes, especially directly onto the eyelids or into the eyes.

If a product accidentally gets into your eyes, rinse according to appropriate first-aid guidance and seek medical advice if significant irritation continues.

Don’t Add Harsh Ingredients

You may see online recipes combining aloe with lemon juice, baking soda, vinegar, essential oils, or other strong ingredients.

Adding more ingredients does not automatically make a skin-care routine better.

For a simple routine, stick with aloe alone or a properly formulated commercial product.

Natural Does Not Mean Risk-Free

Aloe comes from a plant, but that does not guarantee that everyone will tolerate it.

The AAD also points out that skin-care products can trigger irritation or allergic contact dermatitis, which is why testing new products is useful.

When Should You Stop Using Aloe Vera?

Stop using aloe if you notice:

  • Persistent burning
  • Increasing redness
  • Itching
  • Swelling
  • A new rash
  • Blisters
  • Significant discomfort

Gently remove the product rather than applying more in an attempt to “push through” the reaction.

If the reaction is severe, spreading, or does not improve, contact a healthcare professional or dermatologist.

People with recurring unexplained rashes may need professional evaluation because many different substances can cause contact dermatitis.

Fresh Aloe vs. Commercial Aloe Gel

Both options have advantages, but they are not identical.

Fresh aloe:

  • Comes directly from the plant
  • Requires careful handling
  • Can vary in consistency
  • Needs attention to cleanliness
  • Does not have the same preservation system as many commercial products

Commercial aloe gel:

  • Is usually easier to store
  • Has a labeled ingredient list
  • May contain preservatives and other skin-care ingredients
  • Can provide more consistent texture

If you have sensitive skin, reading the ingredient label and choosing a simple product can make it easier to identify what you are putting on your skin.

A Simple Aloe Vera Skin-Care Routine

If you want to include aloe in your routine, start small.

Morning Routine

Step 1: Cleanse gently.

Step 2: Apply a small amount of aloe if your skin tolerates it.

Step 3: Use moisturizer if your skin needs additional hydration.

Step 4: Finish with broad-spectrum sunscreen.

Evening Routine

Step 1: Remove makeup or sunscreen.

Step 2: Cleanse gently.

Step 3: Apply a small amount of aloe if tolerated.

Step 4: Add moisturizer if needed.

This keeps the routine simple without relying on aloe as a treatment for every skin concern.

The Bottom Line

Aloe vera has a long history in traditional skin care, and topical aloe gel is generally well tolerated by many people. However, some users can experience burning, itching, rash, or eczema.

The safest approach is simple: use a small amount, patch-test first, keep homemade gel clean, avoid broken or irritated skin, keep it away from your eyes, and stop if your skin reacts.

Most importantly, treat aloe as an optional skin-care ingredient rather than a cure-all.

Natural skin care works best when it is simple, gentle, and realistic.

Frequently Asked Questions

1. Can I use fresh aloe vera directly on my skin?

Yes, some people use the clear inner gel topically, but patch-test first and stop if you develop irritation.

2. Is aloe vera safe for sensitive skin?

It may be tolerated, but sensitive skin can react to new ingredients, so test a small area before wider use.

3. Can aloe vera remove wrinkles?

Aloe should not be considered a proven wrinkle remover or permanent skin-tightening treatment.

4. Can I apply aloe to irritated skin?

Avoid experimenting on significantly irritated or broken skin because the area may react more easily.

5. How often can I use aloe vera on my skin?

There is no universal schedule; start with occasional use and continue only if your skin remains comfortable.

6. Should I patch-test aloe vera?

Yes. Dermatologists recommend testing new skin-care products on a small area before using them more widely.

7. What should I do if aloe causes itching or redness?

Wash it off gently and stop using it; seek professional advice if the reaction is severe or persistent.

8. Is fresh aloe better than commercial aloe gel?

Not necessarily; commercial gels can offer more consistent ingredients and preservation, while fresh aloe requires careful handling and cleanliness.

Natural Ways to Support Healthy Weight Management

Natural ways to support healthy weight management with balanced meals, protein, fiber, walking, portions, and healthy daily habits

Natural Ways to Support Healthy Weight Management

“Forget extreme diets — start with these simple everyday habits.”

Healthy weight management does not require a drastic diet, expensive supplements, or a single “magic” food. A better approach is to build everyday habits that you can maintain for months and years.

For many adults, that means eating balanced meals, choosing filling foods, watching portions, moving regularly, drinking fewer sugary beverages, getting enough sleep, and creating routines that fit real life. The CDC also notes that healthy weight management involves nutrition, physical activity, sleep, and stress management rather than one isolated strategy.

This step-by-step guide focuses on practical changes you can start at home without following an extreme plan.

1. Build Balanced Meals Instead of Cutting Out Entire Food Groups

A balanced meal gives your body a mix of nutrients while helping you feel satisfied.

Try building most meals around:

  • Vegetables: spinach, broccoli, peppers, carrots, tomatoes, or leafy greens.
  • Protein: eggs, chicken, fish, Greek yogurt, beans, lentils, tofu, or cottage cheese.
  • High-fiber carbohydrates: oats, beans, potatoes, brown rice, quinoa, or whole-grain bread.
  • Healthy fats: avocado, nuts, seeds, or a small amount of olive oil.
  • Fruit: berries, apples, oranges, bananas, or other whole fruits.

NIDDK recommends a healthy eating pattern that includes vegetables, whole fruits, whole grains, dairy or suitable alternatives, and a variety of protein foods.

Simple example:
Instead of eating a large plate of pasta alone, add grilled chicken, vegetables, and a smaller portion of pasta. You get protein, fiber, and other nutrients in the same meal.

2. Add Protein and Fiber to Keep Meals More Satisfying

Protein and fiber are useful building blocks for meals because they can make food more filling and help you create a balanced eating pattern.

Good protein choices include:

  • Eggs
  • Greek yogurt
  • Chicken
  • Fish
  • Cottage cheese
  • Beans
  • Lentils
  • Tofu
  • Nuts and seeds

Fiber-rich choices include:

  • Oatmeal
  • Berries
  • Apples
  • Beans
  • Lentils
  • Vegetables
  • Chia seeds
  • Whole grains

Easy meal idea:
Try oatmeal topped with berries, chia seeds, and Greek yogurt instead of plain oatmeal with added sugar.

Another simple option is a chicken-and-vegetable bowl with brown rice or another whole grain.

The goal is not to make every meal perfect. The goal is to make your usual meals more nutritious and satisfying.

3. Pay Attention to Portions Without Obsessing Over Calories

Healthy foods can still contribute more calories than you need when portions become very large.

Start by checking how much food you normally put on your plate.

Try this simple portion strategy:

  1. Put vegetables or fruit on a large part of the plate.
  2. Add a reasonable serving of protein.
  3. Add a moderate portion of whole grains or another carbohydrate.
  4. Include a small amount of healthy fat.
  5. Eat slowly enough to notice when you are comfortably satisfied.

NIDDK explains that portion size matters because the amount you eat affects total calorie intake. It also recommends paying attention to serving information on Nutrition Facts labels.

Helpful habit:
Instead of eating snacks directly from a large bag, place one portion in a bowl and put the package away.

This small change can make it easier to notice how much you are actually eating.

4. Make Water Your Default Drink

Sugary drinks can add substantial amounts of sugar and calories without making you feel as full as a solid meal.

Common examples include:

  • Regular soda
  • Sweetened iced tea
  • Sugary coffee drinks
  • Energy drinks
  • Sweetened fruit drinks

Try replacing one sugary drink each day with:

  • Plain water
  • Sparkling water
  • Unsweetened tea
  • Water with lemon or lime

The CDC notes that replacing sugary drinks with plain water can reduce calorie intake because water contains no calories.

You do not have to eliminate every favorite drink overnight. Start with the drink you have most often and make one practical change.

5. Walk More During the Day

You do not need to begin with an intense workout program.

Walking is a simple way to add more movement to your routine.

Start with weeks plan:

1: Walk for 10 minutes after one meal.

2: Increase the walk to 15–20 minutes when comfortable.

3: Add another short walk during the day.

Over time, work toward regular moderate physical activity. U.S. guidance recommends adults aim for at least 150 minutes of moderate-intensity aerobic activity each week, along with muscle-strengthening activity on at least two days a week.

If you are currently inactive, starting with shorter sessions is reasonable. Even 10- or 15-minute periods of activity can count toward your weekly movement.

6. Create a Consistent Sleep Routine

Sleep is often overlooked when people think about weight management.

Instead of focusing only on food and exercise, create a regular nighttime routine.

Try these simple steps:

  • Go to bed around the same time most nights.
  • Keep your bedroom comfortable and dark.
  • Reduce unnecessary screen time before bed.
  • Avoid making late-night snacking an automatic habit.
  • Give yourself enough time to sleep.

The CDC includes adequate sleep as part of a healthy lifestyle for weight management.

Better sleep will not replace healthy eating or physical activity, but it can support a healthier daily routine.

7. Make Your Habits Easier to Repeat

The biggest problem with extreme diets is that they can be difficult to maintain.

Instead of changing everything on Monday, choose one or two habits first.

A practical 7-day starting plan:

1: Replace one sugary drink with water.

2: Add a vegetable to lunch or dinner.

3: Add a protein source to breakfast.

4: Take a 10–15 minute walk.

5: Check the portion size of one regular snack.

6: Prepare a simple balanced meal at home.

7: Review what worked and repeat your easiest habits.

After that, add another small change.

This approach turns weight-related goals into daily behaviors instead of a short-term challenge.

8. Focus on Progress, Not Perfection

One restaurant meal, dessert, birthday party, or missed workout does not erase your progress.

If you eat more than planned, simply return to your normal routine at the next meal.

NIDDK notes that people do not have to completely eliminate favorite foods; smaller amounts can fit within an overall healthy eating plan.

A sustainable routine might look like:

  • Mostly nutritious meals
  • Regular movement
  • Reasonable portions
  • Occasional treats
  • Consistent sleep
  • Enough flexibility to enjoy social occasions

The goal is to create habits you can realistically continue.

9. Track the Habits That Matter

Tracking can help you identify patterns instead of relying only on the scale.

For one week, write down:

  • What you eat and drink
  • Your daily walking or activity
  • Your sleep schedule
  • How often you drink sugary beverages
  • Your usual snack portions
  • How consistently you follow your routine

The CDC recommends tracking nutrition, physical activity, and sleep as part of creating a practical weight-management plan.

After seven days, look for one habit that could be improved.

For example, if you notice that you regularly drink soda with dinner, replacing that one drink may be a more useful first step than trying to completely change your diet.

10. Avoid “Natural” Weight-Loss Shortcuts

The word natural does not automatically mean safe or effective.

Be cautious with products or social-media claims promising:

  • Rapid fat burning
  • Guaranteed belly-fat loss
  • Effortless weight loss
  • Detox drinks
  • “Fat-burning” teas
  • Extreme fasting plans
  • Unregulated weight-loss supplements

Healthy weight management is usually built from eating patterns, physical activity, sleep, and other lifestyle factors rather than one ingredient or home remedy.

If you have a medical condition, take medications, are pregnant, or are considering a major change in diet or exercise, talk with your healthcare professional about an approach that fits your situation.

A Simple Daily Routine to Start Today

You can put the ideas above into one simple routine:

Morning

  • Drink water.
  • Eat a protein-rich breakfast.
  • Add fruit or another fiber-rich food.

Lunch

  • Include vegetables.
  • Add protein.
  • Choose a reasonable portion of whole grains or another carbohydrate.

Afternoon

  • Choose fruit, yogurt, nuts, or another satisfying snack if hungry.
  • Take a short walk or movement break.

Dinner

  • Build another balanced plate.
  • Choose water or an unsweetened drink.
  • Eat slowly and pay attention to portions.

Evening

  • Avoid automatic snacking in front of the TV.
  • Prepare for tomorrow.
  • Follow a consistent bedtime routine.

Small habits become more useful when you repeat them consistently.

Frequently Asked Questions

1. What is the best natural way to manage weight?

A combination of balanced eating, reasonable portions, regular physical activity, adequate sleep, and sustainable daily habits is more useful than relying on one remedy.

2. Can walking help with healthy weight management?

Yes. Regular walking increases physical activity and can support maintaining a healthy weight when combined with an appropriate eating pattern.

3. Should I completely stop eating carbohydrates?

No. Whole grains, potatoes, beans, fruits, and other carbohydrate foods can be part of a balanced eating pattern; portion size and overall food quality matter.

4. Can drinking water help with weight management?

Replacing sugary drinks with plain water can reduce calorie intake because water contains no calories.

5. Is skipping meals a good way to manage weight?

Skipping meals is not necessary and may make some people overly hungry later, which can make portion control harder.

6. Do I need an extreme diet to lose weight?

No. Healthy weight-management plans focus on sustainable eating, activity, sleep, and behavior changes rather than extreme restrictions.

7. How much exercise should adults get each week?

A common U.S. guideline is at least 150 minutes of moderate aerobic activity weekly, plus muscle-strengthening activities on two or more days.

8. What if I cannot lose weight despite healthy habits?

Medications, medical conditions, hormones, genetics, stress, age, and environment can affect weight, so persistent concerns are worth discussing with a healthcare professional

What Can You Actually Do With Cloves?

Six everyday uses for cloves including clove tea, cooking, baking, citrus infusion, and cozy home aroma

What Can You Actually Do With Cloves?

Most people reach for this warm, fragrant spice when making holiday cookies or baked goods. But uses for cloves goes far beyond the baking shelf.

Whole cloves can add depth to drinks, rice, sauces, fruit, and slow-cooked dishes. Ground cloves work especially well in muffins, cookies, quick breads, and spice blends. You can also use the aromatic buds in simple homemade preparations for a cozy kitchen or home scent.

The best part is that you do not need complicated ingredients or special equipment.

This guide shows you 6 practical uses for cloves, along with simple preparation ideas and tips for choosing between whole and ground forms.

1. Make a Simple Clove Tea

One of the easiest ways to use whole cloves is to steep them in hot water.

What You Need

  • 3–4 whole cloves
  • 1 cup hot water
  • Honey, optional
  • Orange or lemon, optional

How to Make It

  1. Place the whole buds in a mug.
  2. Pour in 1 cup of hot water.
  3. Cover and steep for 5–7 minutes.
  4. Remove the cloves before drinking.
  5. Add a small amount of honey or citrus if you like.

The result is a warm, aromatic drink with a naturally strong spice flavor.

This is best viewed as a traditional beverage idea rather than a treatment for a health condition.

2. Add Flavor to Warm Drinks

You can also use whole cloves to give everyday drinks a deeper, warmer flavor.

Try adding one or two buds to:

  • Warm apple cider
  • Spiced tea
  • Homemade fruit punch
  • Hot cranberry drinks
  • Orange-based beverages

For a simple fall-inspired drink, combine apple cider with a cinnamon stick and one or two whole cloves. Warm the mixture gently, then remove the spices before serving.

Whole cloves are useful here because they can be removed easily after they release their flavor.

3. Use Them in Rice and Savory Cooking

Cloves can add a warm, slightly sweet aroma to savory dishes when used in small amounts.

Try them with:

  • Rice
  • Lentil dishes
  • Slow-cooked meats
  • Stews
  • Broths
  • Tomato-based sauces

For rice, add one or two whole cloves while the rice cooks, then remove them before serving. This gives the dish a subtle background flavor without making every bite taste strongly of spice.

They also pair well with cinnamon, bay leaves, black pepper, cardamom, and cumin in many savory spice combinations.

The key is moderation because the flavor is strong.

4. Add Ground Cloves to Baked Goods

Ground cloves are especially convenient for baking because they blend evenly into dough and batter.

Use a small amount in:

  • Muffins
  • Cookies
  • Banana bread
  • Pumpkin bread
  • Gingerbread
  • Spice cakes
  • Oatmeal-based baked goods

A little can make a noticeable difference.

For a balanced flavor, combine ground cloves with cinnamon, nutmeg, or ginger. These spices work well together in classic American fall and holiday recipes.

When a recipe already contains a strong spice blend, start with a small amount rather than adding extra cloves.

5. Create a Citrus and Spice Infusion

For a simple homemade preparation, combine citrus with aromatic spices.

Simple Ingredients

  • Orange slices or orange peel
  • 2–3 whole cloves
  • 1 cinnamon stick
  • 2 cups water

Preparation

  1. Add the orange, cloves, and cinnamon to a small saucepan.
  2. Cover with water.
  3. Bring the mixture to a gentle simmer.
  4. Let it warm for about 15–20 minutes.
  5. Add more water if needed.

The combination creates a warm citrus-and-spice aroma that can make the kitchen feel especially inviting.

If you use orange peel, wash the fruit well before preparing it.

6. Use Cloves for a Cozy Home Aroma

Cloves can also be part of a simple homemade fragrance idea.

Combine whole cloves with orange slices, cinnamon sticks, and star anise in a bowl or saucepan. The combination creates a naturally warm, spicy scent.

For a stovetop version, add the ingredients to water and keep the mixture at a gentle simmer. Check the water regularly and never leave a heated pan unattended.

This is a simple alternative to reaching for a heavily scented product when you want your kitchen to smell warm and seasonal.

Whole Cloves vs. Ground Cloves: Which Should You Use?

Choosing the right form depends on what you are making.

Choose whole cloves when:

  • You want to flavor a drink.
  • You are cooking rice or a stew.
  • You want to remove the spice before serving.
  • You are making a citrus-spice infusion.
  • You want a stronger visual presentation.

Choose ground cloves when:

  • You are baking.
  • You are mixing a spice blend.
  • You want the spice distributed evenly.
  • The recipe calls for a powdered spice.

Whole buds are easier to remove, while ground cloves blend directly into the food.

Easy Ways to Start Using This Spice

You do not need to completely change your cooking routine.

Start with one simple idea.

Add a couple of whole cloves to apple cider, use a small amount of ground spice in muffins, or add one or two buds to rice while it cooks.

Because the flavor is powerful, start small and adjust according to taste.

Keeping both whole and ground forms in your pantry also gives you more options for cooking, baking, and simple homemade preparations.

A Simple Safety Note

Cloves are commonly used as a food spice, but concentrated clove oil is much stronger than the amount normally used in cooking. Large amounts of eugenol-containing clove oil can cause serious poisoning, so clove oil should not be treated like a regular food ingredient.

If you take prescription medicines, are pregnant or breastfeeding, or are considering concentrated herbal products, speak with a qualified healthcare professional before using them regularly. Herbal products can have safety concerns and potential interactions with medicines.

For everyday cooking, keep the focus on normal culinary amounts and follow the recipe.

Frequently Asked Questions

1. What are the most common uses for cloves?

They are commonly used to flavor drinks, rice, savory dishes, baked goods, spice blends, and homemade aromatic preparations.

2. Can I make tea with whole cloves?

Yes. Steep 3–4 whole cloves in 1 cup of hot water for about 5–7 minutes, then remove them before drinking.

3. Are whole cloves better than ground cloves?

Neither is universally better; whole buds are easier to remove, while ground cloves blend more easily into recipes.

4. Can I use cloves in baking?

Yes. Ground cloves work well in muffins, cookies, quick breads, gingerbread, and other warmly spiced baked goods.

5. Can cloves be added to apple cider?

Yes. One or two whole cloves can add a warm, aromatic flavor to heated apple cider.

6. How many whole cloves should I use in a drink?

Start with 3–4 whole cloves per cup of hot water and adjust the strength to your taste.

7. Can cloves be used with orange and cinnamon?

Yes. Orange, cinnamon, and whole cloves make a classic warm combination for drinks and homemade aromatic preparations.

8. Is clove oil the same as using whole cloves?

No. Clove oil is highly concentrated and should not be consumed like a normal culinary spice.

Final Thoughts

Cloves are much more versatile than a spice reserved for holiday baking.

You can use whole buds in drinks, rice, savory dishes, and citrus infusions, while ground cloves are convenient for muffins, cookies, breads, and spice blends.

Start with small amounts, pair them with familiar ingredients, and let their warm aroma add something special to everyday cooking.

Which use would you try first: clove tea, cooking, baking, or a citrus-spice infusion? 🌿☕

Discover the Secret to Youthful Vitality

Fresh cucumber avocado green apple ginger and lemon youthful vitality wellness drink in a glass

Discover the Secret to Youthful Vitality

There is no single drink that can turn back aging, cleanse the liver, or make the intestines decades younger. However, a balanced diet built around whole foods can support hydration, digestion, heart health, and overall wellness. This cucumber, avocado, green apple, ginger, and lemon drink is a simple way to add several nutrient-rich foods to your daily routine.

The recipe combines fresh produce, healthy fats, fiber, vitamin C, and a small amount of ginger. Each ingredient offers useful nutrients, while water helps create a smooth and refreshing drink. Instead of treating it as a “miracle elixir,” think of it as one practical part of a healthy lifestyle.

For readers looking for youthful vitality, the real secret is consistency: nutritious food, enough fluids, regular movement, quality sleep, and healthy daily habits.

Why This Fresh Wellness Drink Is Worth Trying

This homemade drink brings several whole-food ingredients together in one easy recipe.

  • Cucumber provides water and a refreshing texture.
  • Avocado supplies monounsaturated fat and makes the drink creamy.
  • Green apple adds natural sweetness and dietary fiber.
  • Ginger provides a warm flavor and contains naturally occurring plant compounds.
  • Lemon juice adds brightness and vitamin C.
  • Water helps keep the beverage hydrating and easy to blend.

The combination can be especially appealing when you want something fresh instead of a heavily processed beverage.

Step 1: Gather Fresh Ingredients

For one serving, prepare:

  • ½ cucumber
  • ½ ripe avocado
  • 1 small green apple
  • ½-inch piece of fresh ginger
  • 1 tablespoon fresh lemon juice
  • ¾ to 1 cup cold water
  • Ice, optional

Wash the produce well before cutting. Keep the apple peel on if you enjoy its texture and want additional fiber.

Step 2: Prepare the Produce

Cut the cucumber and apple into small pieces so they blend easily. Remove the avocado skin and pit, then scoop the flesh into a blender.

Peel the ginger before adding it. Start with a small amount because fresh ginger has a strong, spicy flavor.

Squeeze fresh lemon juice rather than using a sweetened bottled lemon drink.

Step 3: Blend Until Smooth

Add the cucumber, avocado, apple, ginger, lemon juice, and water to a high-speed blender.

Blend for about 30 to 60 seconds, or until the mixture reaches your preferred consistency. Add more water if the drink is too thick.

For a colder beverage, add a few ice cubes before blending.

Step 4: Adjust the Flavor Naturally

Taste the drink after blending and make small adjustments.

  • Add more water for a lighter texture.
  • Add a little extra lemon for more brightness.
  • Add another small piece of ginger for a stronger flavor.
  • Use a sweeter apple if the green apple tastes too tart.

Avoid adding large amounts of sugar if your goal is to keep the drink nutrient-focused.

Step 5: Enjoy It Fresh

Pour the blended drink into a glass and enjoy it soon after preparation. Freshly blended produce can change in texture and flavor when stored for too long.

If you prepare it ahead, keep it refrigerated in a sealed container and consume it promptly.

How the Ingredients Support Everyday Wellness

The value of this drink comes from the nutrients in its individual ingredients rather than from a special detox effect.

Cucumber has a high water content, making it useful for a refreshing beverage. It also contributes small amounts of vitamins and minerals.

Avocado provides healthy unsaturated fats along with fiber. Its creamy texture also makes smoothies more satisfying without requiring dairy or added cream.

Green apple contributes fiber and naturally occurring plant compounds. Keeping the peel can increase the fiber content when the apple is washed properly.

Ginger contains bioactive compounds such as gingerols. It gives the recipe its distinctive flavor and can make a simple fruit-and-vegetable drink more interesting.

Lemon juice adds a sharp citrus flavor and vitamin C. Its acidity can also balance the creamy avocado and mild cucumber.

Together, these ingredients create a nutrient-rich smoothie that can fit into a varied eating pattern.

Can This Drink Really Make You Younger?

Claims that a particular recipe can make your liver or intestines “decades younger” are not supported by strong clinical evidence. Aging is influenced by genetics, nutrition, physical activity, sleep, stress, environmental factors, and many other parts of daily life.

A healthier approach is to focus on habits that have broader evidence behind them. Eating plenty of vegetables and fruit, choosing healthy fats, getting enough fiber, staying active, drinking enough fluids, and avoiding tobacco can all contribute to long-term health.

This recipe can support those habits, but it should not replace medical care or prescribed treatment.

Best Ways to Make This Recipe Part of a Healthy Routine

Use this drink as a convenient addition to a balanced diet rather than relying on it as a detox remedy.

  1. Choose fresh ingredients: Fresh produce gives the recipe its flavor and nutrient variety.
  2. Keep added sugar low: The apple provides natural sweetness.
  3. Include whole foods throughout the day: One smoothie cannot provide everything your body needs.
  4. Stay hydrated: Water should remain your main source of daily hydration.
  5. Eat enough fiber: Whole fruits, vegetables, beans, lentils, nuts, and whole grains can help meet your fiber needs.
  6. Stay physically active: Regular movement is an important part of healthy aging.
  7. Prioritize sleep: Consistent, quality sleep supports overall physical and mental well-being.
  8. Talk with a healthcare professional: Seek personalized advice if you have a medical condition or specific dietary needs.

A Simple Daily Wellness Ritual

A healthy routine does not need to be complicated. Preparing a fresh smoothie can be an easy reminder to include more produce in your diet.

The cucumber and water make the drink refreshing, while avocado gives it a creamy body. Green apple adds sweetness and fiber, ginger brings a warming note, and lemon provides a bright finish.

Most importantly, sustainable wellness comes from what you do regularly. A nutrient-rich drink can be one small habit within a much larger approach to healthy living.

If you enjoy the flavor, prepare it as part of a varied breakfast or snack routine. Pair it with other nutritious foods when you need a more complete meal.

Frequently Asked Questions

1. What is the youthful vitality drink made from?
It combines cucumber, avocado, green apple, ginger, lemon juice, and water for a fresh, nutrient-rich smoothie.

2. Can this drink make the liver younger?
There is no strong evidence that this drink can reverse liver aging or make the liver decades younger.

3. Is this smoothie good for digestion?
Its fruits and vegetables provide fiber, while ginger adds naturally occurring plant compounds that complement a balanced diet.

4. Can I drink this smoothie every day?
For most healthy adults, it can fit into a varied diet, provided the overall eating pattern remains balanced.

5. Should I add sugar to this recipe?
Usually, added sugar is unnecessary because the apple provides natural sweetness.

6. Can I prepare this drink ahead of time?
It is best enjoyed fresh, but you can refrigerate a sealed serving and consume it promptly.

7. Is this drink a liver detox?
No specific drink is proven to “detox” the liver; your liver naturally performs important processing and metabolic functions.

8. What is the real secret to youthful vitality?
Long-term healthy habits—including nutritious food, regular activity, adequate sleep, hydration, and preventive healthcare—matter more than any single recipe.

Cloves and Flaxseeds: A Natural Remedy for Parasites

Ground cloves and flaxseeds in bowls as a traditional natural digestive wellness remedy

Cloves and Flaxseeds: A Natural Remedy for Parasites

Both are common kitchen ingredients that have been used in traditional wellness practices for generations.  Cloves contain naturally occurring plant compounds, while flaxseeds provide fiber, healthy fats, and other nutrients. Because of these properties, some people use a mixture of ground cloves and flaxseeds as part of a digestive wellness routine.

However, it is important to understand the difference between a traditional remedy and a medically proven treatment. There is not enough reliable human evidence to show that eating cloves and flaxseeds can eliminate intestinal parasites. If you suspect a parasitic infection, proper testing and treatment from a healthcare professional should come first.

That does not mean these foods have no nutritional value. Flaxseeds can support regular bowel movements because they contain dietary fiber, while cloves can add flavor and naturally occurring plant compounds to the diet. Used sensibly, they can be included in a balanced eating pattern.

Why Do You Use Cloves and Flaxseeds?

Cloves and flaxseeds are combined in some traditional wellness routines because each ingredient offers different nutritional properties.

Cloves contain eugenol, a naturally occurring compound that has been studied for its antioxidant and antimicrobial properties. Laboratory research has explored cloves and their compounds, but laboratory findings do not prove that eating cloves can treat parasites in people.

Flaxseeds are especially valued for their fiber content. Ground flaxseed contains soluble and insoluble fiber, which can support normal digestion and bowel regularity when consumed with enough fluid.

The combination may therefore be useful as a nutritional digestive routine, but it should not replace an antiparasitic medicine prescribed for a confirmed infection.

If you have symptoms such as persistent diarrhea, unexplained weight loss, abdominal discomfort, nausea, or visible worms in stool, speak with a healthcare professional rather than relying on a home remedy alone.

What You Will Require:

For a simple traditional mixture, you can use:

  • 1 part ground cloves
  • 10 parts ground flaxseeds
  • A clean, airtight container for storage
  • Water or another food you normally eat with ground flaxseed

For example, you could combine 1 tablespoon of ground cloves with 10 tablespoons of ground flaxseed.

Using ground flaxseed is generally more practical than using whole seeds because the ground form is easier to mix into foods. Freshly grinding the ingredients can also help maintain their flavor and quality.

There is no medically established dosage of this mixture for treating parasites. Avoid increasing the amount simply because you believe more will produce faster results.

Step-by-Step Instructions:

Step 1: Choose fresh ingredients.
Select food-grade cloves and flaxseeds from a reputable source. Check the packaging for freshness and avoid ingredients that smell stale or show signs of moisture or spoilage.

Step 2: Grind the ingredients.
If using whole cloves or whole flaxseeds, grind them separately using a clean spice grinder or food processor. A fine or medium grind makes the mixture easier to combine with food.

Step 3: Measure the ingredients.
Use a ratio of approximately 1 part ground cloves to 10 parts ground flaxseed for this traditional preparation.

Step 4: Mix thoroughly.
Place both ingredients in a clean, dry bowl and stir until they are evenly distributed.

Step 5: Store the mixture properly.
Transfer the mixture to an airtight container and keep it in a cool, dry place. Ground flaxseed can become rancid over time because it contains delicate oils, so refrigeration can help preserve freshness.

Step 6: Add it to food if desired.
Instead of taking a large spoonful on an empty stomach, consider adding a small food-appropriate amount of ground flaxseed to oatmeal, yogurt, smoothies, or another meal.

Step 7: Drink enough fluid.
Fiber absorbs water, so adequate fluid intake is important when increasing flaxseed in your diet.

Step 8: Pay attention to your body.
Stop using the mixture if it causes significant stomach discomfort, diarrhea, constipation, or another unwanted reaction.

Keeping Good Storage:

Proper storage helps protect the flavor and quality of ground flaxseed.

Keep the mixture in a tightly sealed container away from heat, sunlight, and moisture. Because ground flaxseed contains oils that can spoil, refrigeration is a useful option for maintaining freshness.

Check the mixture before use. A bitter, paint-like, or unusually strong smell can indicate that the flaxseed has gone rancid.

Keep the container away from children and do not store it next to sources of heat such as a stove or oven.

Daily Consumption:

There is no established medical dose of cloves and flaxseeds for eliminating parasites. The common traditional practice of taking a large spoonful on an empty stomach has not been proven to treat intestinal infections.

If you want to include ground flaxseed in your diet, start with a modest amount and increase gradually as tolerated. Mix it into foods such as:

  • Oatmeal
  • Plain yogurt
  • Smoothies
  • Whole-grain cereal
  • Soups or other prepared foods

Cloves have a strong flavor, so a small culinary amount may be easier to tolerate than a concentrated mixture.

People taking medications should ask a healthcare professional before regularly consuming concentrated amounts of herbs or seeds. This is especially important if you have a medical condition or follow a restricted diet.

How Long Does the Treatment Last?

The traditional three-days-on and three-days-off routine is sometimes promoted online, but there is no strong clinical evidence establishing this schedule as a treatment for parasites.

A suspected parasitic infection should not be managed by repeatedly cycling a homemade mixture. Different parasites require different medicines, doses, and treatment durations.

If testing confirms an infection, follow the treatment plan recommended by your healthcare provider. Do not delay appropriate care while trying a home remedy.

For general nutrition, flaxseed can be part of a balanced diet when tolerated. Its fiber content may support regular bowel function, but that benefit is different from treating a parasitic infection.

Take Pleasure in the Advantages It Offers

Cloves and flaxseeds can be useful kitchen ingredients, but their benefits should be described realistically.

Flaxseed provides dietary fiber, plant-based omega-3 fatty acid ALA, protein, and other nutrients. Regular fiber intake can support digestive health and bowel regularity.

Cloves provide flavor and naturally occurring plant compounds, including eugenol. They can be used in small culinary amounts in foods and beverages.

The most important point is that natural does not automatically mean proven or risk-free. A food-based mixture should be viewed as a dietary option, not a substitute for medical treatment.

If you think you have intestinal parasites, contact a qualified healthcare professional. Depending on your symptoms and travel or exposure history, a provider may recommend stool testing or another appropriate evaluation.

Seek medical advice promptly if symptoms are severe, persistent, or accompanied by dehydration, blood in the stool, significant weight loss, severe abdominal pain, or other concerning changes.

A balanced diet, safe food preparation, clean drinking water, regular handwashing, and appropriate medical care are more reliable ways to protect digestive health than relying on an unproven parasite cleanse.

Frequently Asked Questions

Can cloves and flaxseeds get rid of parasites?

There is not enough reliable human evidence to show that this mixture eliminates intestinal parasites or cures a parasitic infection.

Is the cloves and flaxseeds remedy scientifically proven?

No. Cloves and their compounds have been studied in laboratory research, but that evidence does not establish the mixture as an effective human parasite treatment.

Can I take cloves and flaxseeds every morning?

Ground flaxseed can be included in a balanced diet, but concentrated cloves should not be taken routinely as a medical treatment without professional guidance.

Should I take this mixture on an empty stomach?

An empty stomach is not medically required, and taking concentrated ingredients this way may cause digestive discomfort in some people.

What is the best way to use ground flaxseed?

Ground flaxseed can be mixed into foods such as oatmeal, yogurt, smoothies, and cereal while drinking enough fluid to support its fiber content.

How do I know if I have intestinal parasites?

Symptoms can vary, so suspected infections should be evaluated by a healthcare professional rather than diagnosed from symptoms alone.

Can this mixture replace parasite medicine?

No. If a parasitic infection is confirmed, use the treatment recommended by your healthcare professional instead of replacing it with a homemade remedy.

Who should avoid this remedy?

Anyone with a medical condition, medication use, pregnancy, or concerns about digestive reactions should consult a healthcare professional before using concentrated amounts of cloves or flaxseed.

Grandma’s Simple Warm Ginger Compress for Achy Muscles

Warm ginger compress made with fresh ginger and a clean cloth for a traditional achy muscle comfort routine

GRANDMA’S SIMPLE TRICK FOR ACHY MUSCLES!

A Warm Ginger Compress Takes Just 10 Minutes to Prepare

Sometimes your back feels tight after a long day at the desk. Other times, your shoulders, neck, or legs simply feel worn out after chores, exercise, or too much time on your feet. Before reaching for a complicated routine, there is an old-fashioned home comfort idea worth knowing: a warm ginger compress.

This simple method combines the soothing feeling of gentle warmth with fresh ginger, an ingredient that has been used in traditional wellness practices for generations. Ginger has a long history of use in folk medicine, although modern research is still unclear about whether ginger itself provides meaningful relief for muscle or joint pain.

The main appeal of this remedy is its simplicity. You need only fresh ginger, water, a small saucepan, and a clean washcloth. Preparation takes about 10 minutes, making it an easy addition to a relaxing evening routine.

What Is a Warm Ginger Compress?

A warm ginger compress is a cloth soaked in warm ginger-infused water and placed over an area that feels tight or achy.

Unlike a ginger supplement, this method does not require you to eat or drink ginger. It is a traditional topical comfort practice. The warmth is an important part of the routine because heat is commonly used as a home-care option for back discomfort and muscle stiffness.

Think of it as a cozy self-care ritual rather than a medical treatment.

Why People Like This Traditional Home Remedy

Fresh ginger has a warm, spicy aroma that can make a simple home routine feel special. When combined with a comfortably warm cloth, it can be a relaxing way to slow down at the end of the day.

There are also a few practical reasons this remedy is popular:

  • It uses inexpensive kitchen ingredients.
  • It takes only a few minutes to prepare.
  • You control the temperature and application time.
  • It does not require special equipment.
  • It can fit easily into an evening self-care routine.
  • The warm compress can feel comforting on areas affected by everyday muscle tension.

It is important to keep expectations realistic. Research does not currently establish topical ginger as an effective treatment for muscle or joint pain.

Ingredients You’ll Need

You only need a few basic ingredients and supplies.

  • 2–3 inches of fresh ginger
  • 3 cups of water
  • 1 clean cotton washcloth
  • Small saucepan
  • Clean bowl or plate
  • Optional kitchen tongs for handling the hot cloth

Fresh ginger works well because you can slice it directly into the water.

How to Make a Warm Ginger Compress Step by Step

Step 1: Wash the Ginger

Rinse the fresh ginger under cool running water to remove dirt from the surface.

You can peel it if you prefer, but peeling is not required when the ginger is washed well.

Step 2: Slice the Ginger

Cut about 2–3 inches of ginger into thin slices.

Thin pieces allow the ginger to infuse into the water more easily during simmering.

Step 3: Heat the Water

Pour 3 cups of water into a small saucepan and add the sliced ginger.

Bring the mixture to a gentle boil.

Step 4: Simmer for 10 Minutes

Reduce the heat and let the ginger simmer gently for about 10 minutes.

This creates a warm, fragrant ginger-infused liquid without requiring a complicated preparation.

Step 5: Let It Cool Slightly

Remove the saucepan from the heat and allow the liquid to cool until it is comfortably warm.

This step matters because the cloth will be placed directly against your skin.

The compress should feel pleasantly warm, never painfully hot.

Step 6: Soak the Washcloth

Place the clean washcloth into the warm ginger water.

Let it soak thoroughly, then carefully remove it.

Wring out excess liquid so the cloth is damp rather than dripping.

Step 7: Apply the Compress

Place the warm cloth over the area that feels tight or achy.

A common choice is the lower back, upper back, shoulders, or another area of everyday muscle tension.

Keep the compress in place for approximately 10–15 minutes.

Step 8: Re-Warm if Needed

If the cloth becomes cool before you finish, soak it again in the warm liquid.

Always check the temperature with your hand before putting it back on your skin.

Step 9: Finish With Gentle Movement

After removing the compress, stand up slowly and move comfortably.

A short, easy walk can be a better choice than staying in bed for a long period when dealing with uncomplicated back discomfort. MedlinePlus advises staying as active as possible when there are no warning signs of a serious problem.

When to Try This Comfort Routine

A warm ginger compress may fit well into a relaxing evening after ordinary activities such as:

  • Sitting at a computer for several hours
  • Spending the day doing household chores
  • Gardening
  • Walking or exercising
  • Standing for long periods
  • Feeling generally tight after a busy day

The goal is comfort, not forcing the body to relax.

If the warmth feels unpleasant, remove the compress and stop.

Important Safety Tips

Natural ingredients still require sensible precautions.

Never place a very hot compress directly against your skin. Excessive heat can cause burns.

Do not apply the compress over cuts, irritated skin, rashes, or areas with reduced sensation.

Do not sleep with a heating compress on your body.

If you have a condition that affects your ability to feel temperature, ask a healthcare professional whether heat-based self-care is appropriate for you.

Ginger can also cause skin irritation in some people. If you notice burning, redness, itching, or discomfort, remove the compress and wash the area with clean water. NCCIH notes that ginger products may be safe for topical use, but research on topical ginger is limited.

When Back Pain Needs Medical Attention

A home comfort remedy should never delay medical care when symptoms suggest something more serious.

Contact a healthcare professional if your back pain is severe, follows an injury, or does not improve. MedlinePlus also recommends prompt medical attention for symptoms such as weakness, numbness, loss of bladder or bowel control, fever, severe pain, or pain traveling down the leg.

If the pain is sudden and severe or accompanied by serious symptoms, seek urgent medical care instead of relying on a home remedy.

The Bottom Line

Grandma’s warm ginger compress is a simple traditional wellness idea that requires very little preparation. Fresh ginger, warm water, and a clean washcloth are enough to create a comforting routine in about 10 minutes.

The warmth may feel soothing when ordinary muscle tightness or back discomfort has left you feeling stiff after a busy day. However, ginger itself has not been proven to treat back pain or muscle pain when applied to the skin.

Use this idea as a gentle self-care practice, listen to your body, and seek professional advice when pain is severe, persistent, or accompanied by warning signs.

Frequently Asked Questions

1. How long does it take to prepare a warm ginger compress?

It takes about 10 minutes to simmer the sliced ginger and prepare the warm infusion.

2. How long should I leave the compress on?

Keep it on the affected area for about 10–15 minutes while making sure the temperature remains comfortably warm.

3. Can I use a ginger compress for lower back discomfort?

You can use gentle warmth as a comfort measure for ordinary muscle tightness, but persistent or severe back pain should be evaluated by a healthcare professional.

4. Does ginger actually treat muscle pain?

Current evidence is not strong enough to show that topical ginger treats muscle or joint pain.

5. Can I use powdered ginger instead of fresh ginger?

Fresh ginger is the simplest choice for this compress because it can be sliced and simmered directly in water.

6. How hot should the ginger water be?

The water should be comfortably warm rather than very hot, because excessive heat can burn the skin.

7. Can I use the compress every day?

If your skin tolerates it, occasional use as a comfort routine may be reasonable, but ongoing or worsening pain should not be managed only with home remedies.

8. When should I see a doctor for back pain?

Seek medical care for severe pain, pain after an injury, weakness or numbness, bowel or bladder changes, fever, or pain that does not improve.

5-Minute Fall “Grandma’s Cozy Wellness” Ritual

5-minute fall wellness ritual with ginger, lemon, honey, cinnamon, and warm water in a cozy mug

5-Minute Fall “Grandma’s Cozy Wellness” Ritual

As the weather turns cooler, simple home rituals can make fall mornings and evenings feel more comforting. This 5-minute fall wellness ritual combines warm water, fresh ginger, lemon, honey, and optional cinnamon in one easy drink inspired by traditional kitchen habits.

The idea is simple: warm a mug, add a few familiar ingredients, and take a few quiet minutes to enjoy it. It is not meant to replace medical care or treat illness. Instead, it can be a comforting addition to a balanced fall routine.

For many families, warm drinks have long been part of everyday home care. Ginger, lemon, honey, and cinnamon are common pantry ingredients that bring warmth, flavor, and aroma to a simple cup. This version keeps the preparation quick enough for busy mornings while also working well as a relaxing evening ritual.

Why You’ll Love This Fall Wellness Ritual

This homemade wellness drink takes about five minutes and needs only a handful of ingredients. There is no special equipment, complicated preparation, or long cooking time.

The warm liquid makes the drink especially appealing on cool fall days. Fresh ginger adds a mild spicy flavor, lemon brings brightness, and honey adds natural sweetness. A cinnamon stick can provide a gentle, warming aroma.

Another benefit is flexibility. You can adjust the ginger, lemon, and honey to match your taste. You can also leave out cinnamon if you prefer a cleaner citrus-and-ginger flavor.

The ritual itself can be just as useful as the drink. Sitting down with a warm mug gives you a small pause during a busy day. Pairing it with a few minutes of quiet can turn a basic kitchen drink into a simple self-care habit.

Ingredients You’ll Need

For one serving, gather:

  • 1 cup water
  • 3 to 4 thin slices of fresh ginger
  • 1 to 2 teaspoons fresh lemon juice
  • 1 teaspoon honey
  • 1 small cinnamon stick, optional

Fresh ginger works well because it gives the drink a clean, bright flavor. Ground ginger can be used when fresh ginger is not available, but start with a small amount because its flavor can be stronger.

Use fresh lemon juice when possible for a brighter taste. Honey can be adjusted according to your preferred sweetness.

If you are making this drink for a child under 1 year old, do not use honey. Honey should not be given to infants younger than 12 months.

How to Make Grandma’s Cozy Wellness Ritual

Start by bringing 1 cup of water to a gentle simmer. You do not need a rolling boil.

Add the ginger slices to a mug or small heat-safe pitcher. Pour the hot water over the ginger and let it steep for about 3 minutes.

Add the lemon juice after steeping. This keeps the lemon flavor fresh and prevents the drink from becoming overly bitter.

Allow the drink to cool slightly, then stir in the honey. Adding honey after the liquid has cooled a little makes it easier to control the sweetness and enjoy the drink at a comfortable temperature.

Add the cinnamon stick if you want a warmer spice note. Let it sit in the mug for another minute before drinking.

The entire process takes about five minutes, making it easy to fit into a morning routine, afternoon break, or quiet evening.

Best Time to Enjoy This Ritual

There is no required time to drink it. Choose a moment that fits naturally into your schedule.

Morning, it can become a gentle alternative to another caffeinated beverage. In the

Afternoon, it can provide a warm break during a busy workday.

Evening, the simple preparation can become part of a relaxing wind-down routine.

Fall is especially suitable because cooler temperatures naturally make warm drinks more appealing. Keeping ginger, lemons, and honey available in the kitchen also makes the ritual easy to repeat.

Traditional Wellness Ideas Behind the Ingredients

Ginger has been used in food and traditional wellness practices for generations. Its naturally spicy flavor makes it a popular ingredient in warm drinks.

Lemon is valued for its bright citrus taste and is an easy way to add flavor to warm water.

Honey has traditionally been used as a sweetener in homemade drinks. Its smooth texture also pairs well with ginger and lemon.

Cinnamon is commonly used in fall beverages because of its warm aroma and familiar spice flavor.

These ingredients can make a flavorful drink, but they should not be presented as a cure for allergies, colds, flu, or other health conditions. A traditional home remedy can be comforting without being a substitute for appropriate medical treatment.

Simple Ways to Personalize Your Cup

You can make this recipe your own without changing the basic method.

For a stronger ginger flavor, use an extra slice or two and allow it to steep slightly longer. For a lighter flavor, reduce the ginger and add more warm water.

If you prefer a sweeter drink, add another small amount of honey. If you enjoy a sharper citrus flavor, increase the lemon gradually.

For a cozy fall version, keep the cinnamon stick in the mug while you sip. You can also serve the drink with a simple breakfast such as oatmeal, whole-grain toast, or fresh fruit.

Avoid adding too many ingredients at once. Keeping the recipe simple lets the ginger, lemon, honey, and cinnamon flavors remain distinct.

Helpful Tips for Making It at Home

Use thin ginger slices so the flavor releases quickly. A clean teaspoon works well for measuring honey and lemon juice.

Do not drink the beverage while it is extremely hot. Give it enough time to reach a comfortable drinking temperature.

If you prepare several servings, make only what you expect to use soon and store leftovers safely according to standard food-storage practices.

People with food allergies should check every ingredient before preparing the drink. Anyone managing a medical condition or taking medication should ask a healthcare professional if they have concerns about using concentrated herbs or dietary ingredients regularly.

Most importantly, think of this as a simple comfort ritual rather than a medical treatment.

When to Skip or Modify This Drink

This recipe is not suitable for infants under 1 year because it contains honey.

People who are sensitive to ginger, citrus, cinnamon, or honey should leave out the ingredient that causes problems or choose another beverage.

If you have been advised to limit certain foods or ingredients because of a medical condition, follow your healthcare professional’s guidance rather than relying on a traditional wellness recipe.

Persistent or severe symptoms should not be managed with homemade drinks alone. Seek appropriate medical advice when symptoms require professional attention.

Make It Part of Your Fall Routine

A wellness routine does not have to be complicated. Five quiet minutes with a warm drink can create a useful pause between busy parts of the day.

Keep fresh ginger in the refrigerator, lemons nearby, and honey in the pantry so the ingredients are ready when you want them. A small cinnamon jar can complete the setup.

You can also make the ritual more enjoyable by putting your phone away, sitting somewhere comfortable, and taking a few slow breaths while the drink cools.

The goal is not to create a perfect routine. It is to create a small habit that feels easy enough to repeat.

That is what makes this grandma-inspired home ritual practical for modern fall living: simple ingredients, quick preparation, and a few peaceful minutes for yourself.

Frequently Asked Questions

1. What is the 5-Minute Fall “Grandma’s Cozy Wellness” Ritual?

It is a warm drink made with ginger, lemon, honey, and optional cinnamon that can be prepared in about five minutes.

2. Can I drink this every day?

For most people, an occasional or regular serving can fit into a balanced routine, but individual dietary or medical needs may differ.

3. Can I use ground ginger instead of fresh ginger?

Yes, but use a small amount because ground ginger has a stronger and more concentrated flavor than fresh slices.

4. Can I make this drink without honey?

Yes. Simply leave out the honey or use another sweetener that fits your dietary preferences.

5. Is this drink a treatment for a cold or flu?

No. It is a traditional wellness drink for comfort and flavor and should not be considered a treatment or cure for illness.

6. Can children drink this recipe?

Children should not receive honey before age 1; for older children, consider their individual dietary needs and ask a pediatric professional when unsure.

7. Can I prepare it before bedtime?

Yes, but choose a caffeine-free version and allow the drink to cool to a comfortable temperature before drinking.

8. Why is this a good fall wellness idea?

The warm ginger-and-lemon drink is easy to prepare and fits naturally into cozy morning, afternoon, or evening routines during cooler weather.

Final Thoughts

This 5-minute fall wellness ritual brings a traditional kitchen idea into a simple modern routine. Warm water, ginger, lemon, honey, and optional cinnamon create a comforting combination without complicated preparation.

The best part is how easy it is to make. You can prepare one cup when you need a quiet break, enjoy it during a cool fall morning, or make it part of your evening routine.

Traditional wellness ideas do not need to be complicated to be enjoyable. Sometimes, a warm mug and five peaceful minutes are enough to make an ordinary fall day feel a little more comforting.

Guava Leaf Tea for Water Retention: Easy Morning Wellness Drink

Homemade guava leaf tea in a glass cup with fresh guava leaves for a healthy morning routine

Guava Leaf Tea for Water Retention

Guava leaf tea is a simple herbal drink that can fit into a healthy morning routine. Made by steeping fresh or dried guava leaves in hot water, this caffeine-free tea has a mild herbal flavor and contains naturally occurring plant compounds such as flavonoids and other antioxidants.

Many people explore guava leaf tea when they want a soothing drink to support hydration, digestion, and a balanced daily routine. It is also commonly discussed as a natural option for occasional bloating and fluid retention. However, water retention can have many causes, so tea should not be viewed as a treatment for persistent swelling.

A healthy morning routine works best when it includes enough water, nutritious foods, regular movement, and reasonable sodium intake. Guava leaf tea can be one small part of those habits.

Why Guava Leaf Tea Is Used for Water Retention

Water retention happens when extra fluid collects in body tissues. It may temporarily occur after eating salty foods, sitting for long periods, traveling, or experiencing normal changes in the body.

Guava leaves contain plant compounds with antioxidant properties, which is one reason they have been used traditionally in herbal preparations. Some people also use guava leaf tea as a light, warm beverage when they feel bloated or want an alternative to sugary drinks.

There is limited human evidence specifically showing that guava leaf tea reduces water retention. Any effect on fluid balance should therefore be considered possible rather than guaranteed.

If swelling is frequent, severe, painful, or unexplained, it is better to speak with a healthcare professional instead of relying on an herbal drink.

Guava Leaf Tea as a Morning Routine Hack

Starting the morning with a warm, unsweetened drink can make hydration easier for people who do not enjoy plain water. Guava leaf tea can be prepared in advance and enjoyed warm or allowed to cool for a refreshing alternative to sweet beverages.

A simple morning routine can include one cup of guava leaf tea, a glass of plain water, a balanced breakfast, and a few minutes of light movement. Walking or stretching after waking may also help you avoid spending the first hours of the day sitting still.

The goal is not to force your body to lose water. Instead, focus on consistent habits that support normal fluid balance.

For a lower-sugar option, drink the tea without honey. A small amount of lemon juice can add flavor, but lemon does not create a special “detox” effect. Your liver and kidneys already perform the body’s natural waste-processing functions.

How to Make Guava Leaf Tea

This homemade herbal tea requires only guava leaves and water. Fresh leaves should be cleaned carefully before preparation.

Ingredients

  • 10 fresh guava leaves or 5 dried guava leaves
  • 2 cups filtered water
  • ½ teaspoon lemon juice, optional
  • 1 teaspoon honey, optional

Instructions

  1. Rinse fresh guava leaves thoroughly under cool running water.
  2. Bring 2 cups of filtered water to a boil in a small saucepan.
  3. Add the guava leaves and reduce the heat.
  4. Simmer the leaves gently for 10 to 15 minutes.
  5. Remove the pot from the heat and strain the tea into a cup.
  6. Add a small amount of lemon juice or honey if desired.
  7. Enjoy the tea warm.

One batch makes roughly one to two servings, depending on how much liquid is used per cup.

Best Time to Drink Guava Leaf Tea

There is no established medical rule that guava leaf tea must be consumed at a particular time. Drinking it in the morning can simply make it easier to include in a consistent daily routine.

If you prefer it between meals, one cup can be a practical option. Avoid adding large amounts of honey or other sweeteners if you are trying to reduce added sugar.

Some people may prefer drinking herbal tea earlier in the day because fluids consumed close to bedtime can increase nighttime bathroom trips.

Do not assume that drinking more tea will produce better results. More fluid loss is not the same as better health.

Healthy Habits That May Help With Fluid Balance

Your overall lifestyle matters more than any single herbal drink. Several everyday habits can support normal fluid balance.

Stay Hydrated

Drinking enough water throughout the day helps your body maintain normal fluid balance. Keep water available and drink regularly instead of waiting until you feel very thirsty.

Watch Sodium Intake

High-sodium meals can contribute to temporary fluid retention in some people. Restaurant meals, packaged foods, processed meats, canned soups, and salty snacks can contain substantial amounts of sodium.

Add More Movement

Long periods of sitting may make your legs and feet feel puffy. Short walks, gentle stretching, and regular movement can help you avoid staying in one position for too long.

Choose Whole Foods

Fruits, vegetables, beans, whole grains, lean proteins, and other minimally processed foods can support a balanced eating pattern. Potassium-rich foods such as bananas, potatoes, beans, spinach, and yogurt can also be part of a healthy diet.

Tips and Safety Notes

Use clean, food-safe guava leaves and wash fresh leaves thoroughly before making tea. Store dried leaves in an airtight container away from heat, moisture, and direct sunlight.

The supplied recipe suggests limiting intake to two cups daily unless a healthcare professional advises otherwise. Because research on concentrated guava leaf preparations is limited, regular high-dose use is not recommended.

People who take prescription medicines should check with a healthcare professional before using guava leaf tea regularly. Extra caution is appropriate for people taking medicines that affect blood sugar, blood pressure, or fluid balance.

Pregnant or breastfeeding individuals should ask their healthcare provider before using guava leaf preparations.

Guava leaf tea should not replace prescribed treatment for swelling, kidney problems, heart conditions, liver disease, or other medical concerns.

Seek medical advice for sudden swelling, swelling on only one side of the body, shortness of breath, chest pain, severe pain, or rapidly worsening symptoms.

Guava Leaf Tea Nutrition

Plain guava leaf tea is naturally very low in calories because the leaves are strained out before drinking. A cup made from the recipe above may contain only a few calories.

Adding honey increases the carbohydrate and calorie content. Lemon juice adds very little energy but can provide a brighter flavor.

Nutrition values can vary depending on the amount of leaves used, preparation method, and optional ingredients.

Frequently Asked Questions

Does guava leaf tea reduce water retention?

There is not enough strong human evidence to confirm that it directly reduces water retention. It can be enjoyed as a low-calorie herbal beverage as part of healthy habits.

How often can I drink guava leaf tea?

The provided recipe recommends no more than two cups daily unless a healthcare professional recommends otherwise.

Can I drink guava leaf tea in the morning?

Yes. A morning cup can be a simple way to add a warm, unsweetened beverage to your daily hydration routine.

Does guava leaf tea have caffeine?

Plain guava leaf tea is naturally caffeine-free because it is made from guava leaves rather than traditional tea leaves such as black or green tea.

Can I add lemon to guava leaf tea?

Yes. Lemon can improve the flavor, but it should not be considered a special detox ingredient or treatment for fluid retention.

Can honey be added to guava leaf tea?

Yes, but honey adds sugar and calories. Use a small amount if you are limiting added sugars.

Who should avoid guava leaf tea?

People who are pregnant, breastfeeding, taking medicines that affect blood sugar or fluid balance, or managing a medical condition should ask a healthcare professional before using it regularly.

When should swelling be checked by a doctor?

Persistent, severe, sudden, painful, or unexplained swelling should be evaluated by a healthcare professional, especially when it occurs with breathing problems or chest pain.

Final Thoughts

Guava leaf tea can be a pleasant addition to a simple morning wellness routine. Its low-calorie, caffeine-free nature makes it an easy alternative to sugary beverages, while the leaves provide naturally occurring plant compounds.

For occasional bloating or concerns about fluid balance, focus on the bigger picture: drink enough water, moderate sodium, eat a varied diet, and stay physically active.

Most importantly, do not use herbal tea to mask ongoing or unexplained swelling. Persistent fluid retention can sometimes signal an underlying health issue that needs proper evaluation.

Cinnamon for Sleep & Digestion: A Warm Nighttime Wellness Drink

Warm cinnamon tea in a glass cup with cinnamon sticks for a relaxing nighttime wellness routine

Cinnamon The Sleep & Digestion Superhero

Cinnamon The Sleep & Digestion Superhero warm, fragrant, and naturally sweet, cinnamon is one of the most popular spices in American kitchens. It adds flavor to oatmeal, coffee, baked goods, smoothies, and warm drinks without needing much added sugar.

Cinnamon has also been used in traditional wellness practices for centuries. Today, many people enjoy cinnamon tea as part of a relaxing evening routine or after a meal.

But there is an important difference between traditional use and proven health effects. Cinnamon is not a sleeping pill, and there is not enough strong evidence to say that it treats insomnia or directly prevents bloating. Research on cinnamon and health is still developing, and results vary between studies.

That does not mean cinnamon has no value. Used as a flavorful food ingredient, it can be part of a balanced diet and a calming nighttime routine.

How Cinnamon May Support Better Sleep

Cinnamon does not directly make you fall asleep. However, a warm cinnamon drink can become part of a relaxing bedtime habit, especially when it replaces sugary drinks or late-night caffeine.

A consistent nighttime routine can help your body prepare for sleep. Drinking a warm, caffeine-free beverage, dimming bright lights, and stepping away from screens may create a calmer environment before bed.

1. Cinnamon and Blood Sugar

Cinnamon has been studied for its possible effect on blood glucose, but the findings are not strong enough to recommend it as a treatment for diabetes or blood sugar problems.

Some clinical studies have reported improvements in certain blood sugar measures, while other research has produced conflicting results. The National Center for Complementary and Integrative Health notes that more research is needed before firm conclusions can be made.

For everyday use, think of cinnamon as a spice rather than a replacement for prescribed diabetes treatment.

2. A Warm Bedtime Ritual

A cup of caffeine-free cinnamon tea can make a simple evening routine feel more comforting.

The benefit may come less from cinnamon acting as a sedative and more from creating a predictable signal that the day is winding down.

Try drinking your tea while reading, stretching gently, or preparing for bed instead of scrolling through your phone.

3. Antioxidant Compounds

Cinnamon contains naturally occurring plant compounds with antioxidant activity.

Antioxidants help protect cells from oxidative stress, but this does not mean cinnamon can treat inflammation, insomnia, or another medical condition.

Adding a small amount of cinnamon to nutritious foods is a simple way to increase flavor while keeping meals interesting.

How Cinnamon May Support Digestion

Cinnamon has traditionally been used after meals, and its warm flavor makes it a popular ingredient in digestive teas.

However, strong human evidence showing that cinnamon directly treats gas, bloating, or digestive disorders is limited. Claims that cinnamon can eliminate bloating should therefore be treated cautiously.

Supports a Comfortable After-Meal Routine

A warm, caffeine-free cinnamon drink may be a pleasant alternative to heavy desserts or sugary beverages after dinner.

Keeping evening meals moderate, eating slowly, and staying hydrated are more reliable habits for supporting comfortable digestion.

May Complement a Balanced Diet

Cinnamon can add strong flavor without requiring much sugar.

Try it with plain oatmeal, unsweetened yogurt, apples, roasted sweet potatoes, or whole-grain toast for a simple addition to a balanced meal.

Cinnamon and Gut Health

Cinnamon contains plant compounds that have shown antimicrobial activity in laboratory research, but laboratory findings do not prove that cinnamon can balance human gut bacteria or treat digestive conditions.

More human research is needed before cinnamon can be recommended for specific gut health problems.

Simple Cinnamon Sleep Tea Recipe

8-Hour Rest Cinnamon Drink

This caffeine-free drink is designed as a relaxing evening beverage, not as a treatment for insomnia.

Ingredients:

  • 1 cup hot water
  • 1 cinnamon stick or a small amount of ground cinnamon
  • 1 teaspoon honey, optional
  • Small squeeze of lemon, optional

Instructions:

  1. Heat one cup of water until hot.
  2. Add a cinnamon stick and let it steep for about 10 minutes.
  3. Remove the cinnamon stick before drinking.
  4. Add honey or lemon if desired.
  5. Enjoy the drink as part of your evening wind-down routine.

If using ground cinnamon, stir well and expect some spice particles to settle at the bottom of the cup.

For a gentler flavor, combine cinnamon with caffeine-free herbal tea such as chamomile.

Important Tips

Choose food-grade cinnamon and use it as a spice rather than taking large amounts as a supplement.

There are two common types of cinnamon: Ceylon and cassia. Cassia cinnamon, which is common in the United States, contains varying amounts of coumarin. Large or prolonged amounts of coumarin can be a concern for people who are sensitive to it, particularly those with liver disease.

Cinnamon used in normal food amounts is generally considered safe for most people. Larger amounts may cause digestive discomfort or allergic reactions in some individuals.

If you take diabetes medication, blood-thinning medication, or other prescription drugs, talk with your healthcare professional before using concentrated cinnamon supplements.

Pregnant or breastfeeding individuals should also ask a healthcare professional before using cinnamon in amounts greater than those normally found in food.

Do not use cinnamon tea as a replacement for treatment prescribed for diabetes, chronic digestive symptoms, or sleep disorders.

Final Thoughts

Cinnamon is best viewed as a flavorful food and a comforting addition to an evening routine rather than a miracle remedy.

A warm cinnamon drink may help make bedtime feel more relaxing, while cinnamon can also add flavor to nutritious foods without relying on large amounts of sugar.

For better sleep, pair your evening drink with habits that have a stronger foundation, such as keeping a consistent sleep schedule, reducing bright screens before bed, and creating a quiet, comfortable bedroom.

For digestion, focus on regular meals, adequate fluids, slower eating, and a balanced diet.

If frequent bloating, abdominal pain, or ongoing sleep problems continue, speak with a healthcare professional rather than relying on home remedies.

Frequently Asked Questions

Can cinnamon help you sleep?

Cinnamon has not been proven to treat insomnia, but caffeine-free cinnamon tea can be included in a relaxing bedtime routine.

Does cinnamon reduce bloating?

There is not enough strong human evidence to confirm that cinnamon directly reduces bloating or treats digestive disorders.

Is cinnamon tea good before bed?

Caffeine-free cinnamon tea can be a comforting nighttime beverage, especially when included in a consistent wind-down routine.

Which cinnamon is best for regular use?

Ceylon cinnamon contains much less coumarin than cassia, making it an option for people concerned about frequent cinnamon intake.

Can cinnamon lower blood sugar?

Some studies suggest cinnamon may affect certain blood sugar measures, but the evidence is inconsistent and it should not replace diabetes treatment.

Is cinnamon safe every day?

Cinnamon is generally safe in normal food amounts, while large or prolonged amounts may increase the risk of side effects, particularly with cassia cinnamon.

Can I drink cinnamon tea every night?

A modest food-level amount may be reasonable for many healthy adults, but people with liver disease or those taking medications should seek professional advice first.

Does cinnamon burn belly fat?

There is no reliable evidence that drinking cinnamon tea alone burns belly fat or produces meaningful weight loss.

Take Honey With Turmeric Every Morning

Take Honey With Turmeric Every Morning

If you are looking for a simple morning ritual that takes just a few minutes to prepare, this Honey With Turmeric recipe is a wonderful option. Made with just a handful of pantry ingredients, this golden mixture combines the natural sweetness of honey with earthy turmeric, a little lemon, and a pinch of black pepper.Many people enjoy turmeric as part of their daily diet because it contains curcumin, a naturally occurring plant compound that has been widely studied. Honey adds sweetness and makes the earthy flavor of turmeric much easier to enjoy.This isn’t a complicated recipe or a substitute for medical treatment. Instead, think of it as a small, comforting addition to a balanced morning routine.

Why You’ll Love This Recipe

There are plenty of reasons to add this simple turmeric and honey mixture to your morning routine.

First, it requires no cooking and only a few ingredients. You can prepare a small batch in minutes and keep it ready in the refrigerator.

The combination of honey, turmeric, lemon, and black pepper creates a pleasant balance of sweet, tangy, earthy, and slightly spicy flavors.

It is also incredibly versatile. You can take a small spoonful on its own, mix it into warm water, or use it as a flavorful addition to tea.

Most importantly, this recipe encourages a simple habit: starting your day with something homemade and mindful.

Ingredients For Take Honey With Turmeric

For One Serving

1 teaspoon raw or regular honey

¼ teaspoon ground turmeric

1 small pinch of freshly ground black pepper

½ teaspoon fresh lemon juice

1–2 teaspoons warm water, optional

A tiny pinch of ground cinnamon, optional

A small pinch of freshly grated ginger, optional

For a Small Batch

¼ cup honey

2 teaspoons ground turmeric

¼ teaspoon freshly ground black pepper

1 tablespoon fresh lemon juice

½ teaspoon ground cinnamon, optional

1 teaspoon finely grated fresh ginger, optional

Instructions For Take Honey With Turmeric

Prepare the Ingredients

Measure the honey and place it in a small clean bowl. Add the ground turmeric and freshly ground black pepper.

If you are using fresh ginger or cinnamon, add them now.

Add Lemon Juice

Add the fresh lemon juice and stir everything together.

The lemon adds a bright, refreshing flavor that helps balance the sweetness of the honey and the earthy taste of turmeric.

Mix Thoroughly

Stir with a small spoon until the turmeric is evenly distributed throughout the honey.

Turmeric can settle at the bottom, so make sure the mixture is well combined.

Adjust the Consistency

For a thicker spoonable mixture, leave it as it is.

If you prefer a lighter drink, add 1–2 teaspoons of warm water and stir until smooth.

Avoid very hot water, especially if you simply want to preserve the pleasant flavor and texture of the honey.

Enjoy

Take a small spoonful as part of your breakfast or morning routine, or stir it into warm water or tea.

If making a larger batch, transfer it to a clean airtight container and refrigerate.

Tips for the Best Honey With Turmeric

Use good-quality turmeric: Fresh, fragrant ground turmeric will provide the best flavor and color.

Don’t overdo the turmeric: A little goes a long way. Too much can make the mixture bitter and unpleasant.

Use freshly ground black pepper: Black pepper provides a sharper flavor than pre-ground pepper.

Choose the honey you enjoy: Raw honey, wildflower honey, or regular honey can all work. The most important thing is choosing a honey you enjoy eating.

Use fresh lemon: Freshly squeezed lemon generally gives the mixture a brighter flavor than bottled lemon juice.

Start small: If you have never tried turmeric and honey together, begin with a small amount to see how you like the flavor.

Stir before serving: Turmeric naturally settles, particularly in a larger batch, so give the mixture a good stir before each serving.

Potential Benefits For Take Honey With Turmeric

Honey and turmeric can both be part of a nutritious, balanced diet.

Contains Plant Compounds

Turmeric contains curcumin and other naturally occurring compounds. Curcumin has been studied for its antioxidant and anti-inflammatory properties, although the amount obtained from a small kitchen serving is not equivalent to doses used in research.

Easy Way to Add Turmeric to Your Diet

If you rarely use turmeric, this recipe provides an easy way to incorporate a small amount into your daily meals.

Naturally Sweet

Honey provides sweetness without requiring refined table sugar in the recipe. However, honey is still an added sugar and should be enjoyed in moderation.

Refreshing Morning Option

Adding lemon and warm water creates a light, refreshing drink that many people find enjoyable first thing in the morning.

Simple Homemade Routine

One of the biggest advantages is convenience. Preparing this recipe takes only a few minutes, making it easy to fit into a busy schedule.

Serving Suggestions For Take Honey With Turmeric

There are several delicious ways to enjoy this recipe.

Warm Turmeric Honey Drink

Mix one serving with a cup of warm water. Stir well and enjoy slowly.

Morning Tea

Add a small amount to warm herbal tea for a naturally sweet, golden drink.

Yogurt Topping

Swirl a small amount into plain Greek yogurt and top with berries, walnuts, or chia seeds.

Oatmeal

Add a little turmeric honey to oatmeal along with banana, cinnamon, and nuts.

Smoothie

Blend a small amount into a fruit or yogurt smoothie for extra flavor.

Nutrition Facts For Take Honey With Turmeric

Approximate nutrition per 1-teaspoon serving:

Calories: 22–25

Carbohydrates: 6 g

Total Sugar: 5–6 g

Protein: 0 g

Fat: 0 g

Fiber: Less than 1 g

Sodium: 0–1 mg

Frequently Asked Questions

Can I take honey with turmeric every morning?

For most healthy adults, small culinary amounts of honey and turmeric can generally be included as part of a balanced diet. However, there is no need to consume it daily to obtain the benefits of a healthy diet.

Should I take it on an empty stomach?

You don’t have to. Some people enjoy it before breakfast, while others prefer taking it with breakfast or adding it to a warm drink. Choose whichever feels most comfortable for you.

Why is black pepper added?

Black pepper contains piperine, a compound that can increase the absorption of curcumin. A small pinch is enough for this recipe.

Can I make it ahead?

Yes. Prepare a small batch, place it in a clean airtight container, and refrigerate it. Stir before using. For best quality, make small batches rather than storing it for a long time.

Can I use fresh turmeric?

Absolutely. Fresh turmeric can be finely grated and used instead of ground turmeric. Start with a small amount because fresh turmeric can have a strong flavor.

Can children have this recipe?

Honey should never be given to babies under 12 months because of the risk of infant botulism. For older children, ask their pediatrician if you have questions about introducing honey or turmeric.

Can I use this instead of medicine?

No. Honey with turmeric is a food, not a medication. It should not replace prescribed medicines or professional medical care.

Are there any precautions?

Large amounts of turmeric or concentrated turmeric supplements may not be appropriate for everyone. People who take certain medications, have gallbladder problems, bleeding disorders, or other medical conditions should consult a healthcare professional before regularly using concentrated turmeric products.

Final Thoughts For Take Honey With Turmeric

This Honey With Turmeric recipe is proof that a simple morning habit doesn’t need to involve complicated ingredients or lengthy preparation. Honey brings natural sweetness, turmeric adds its distinctive golden color and earthy flavor, while lemon and black pepper give the mixture a fresh and balanced finish.Enjoy it as a small part of a healthy breakfast, mix it into warm water, or add it to yogurt and oatmeal. The key is moderation and variety: no single food or drink can provide everything your body needs.If you enjoy simple homemade wellness recipes, this golden honey-turmeric mixture is an easy one to keep in your morning rotation.