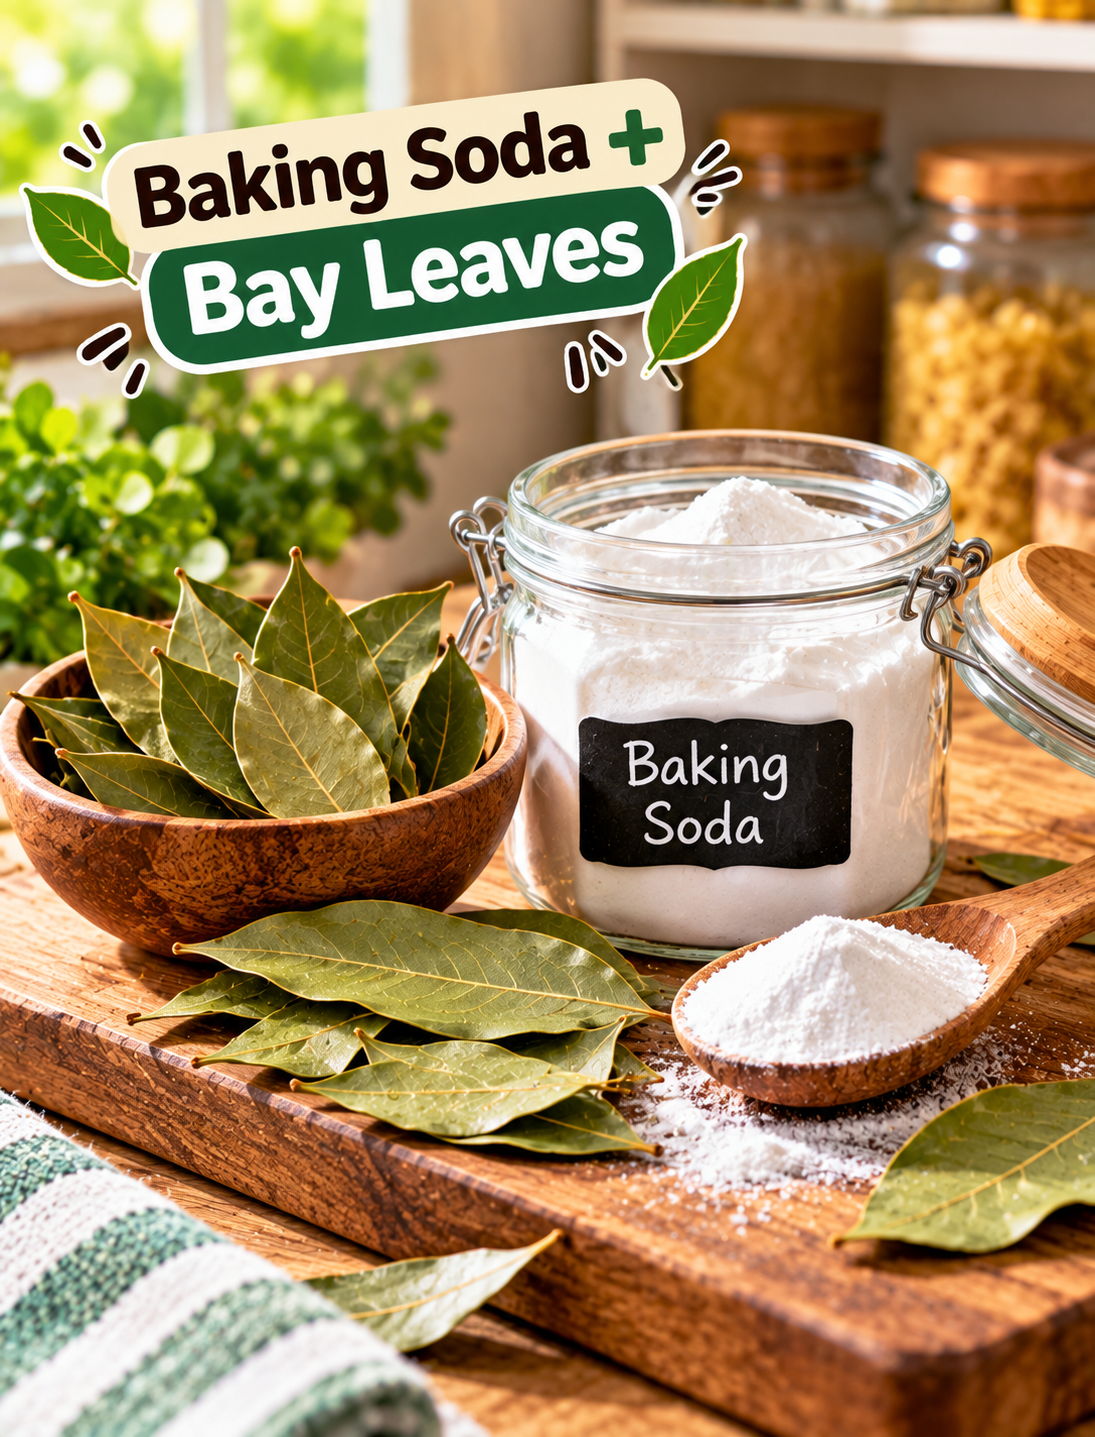
Baking Soda + Bay Leaves: Traditional Home Uses & What to Know

Baking soda and bay leaves for traditional home freshness and natural odor control

Baking Soda + Bay Leaves: Traditional Home Uses & What to Know

Both are two familiar pantry items that have long been used in everyday home routines. Baking soda is commonly used for odor control and light household cleaning, while bay leaves are valued for their distinctive natural aroma and culinary use.

Together, they can be part of a simple, old-fashioned approach to keeping certain areas of the home smelling fresher. However, they should be viewed as household ingredients, not miracle cleaners or proven pest treatments.

This guide explains practical ways to use them, how to handle them safely, and which cleaning combinations to avoid.

Why Baking Soda and Bay Leaves Are Used Around the Home

Baking soda, also called sodium bicarbonate, is a mild alkaline powder. One of its familiar household uses is helping control unpleasant odors, including in refrigerators.

Bay leaves are aromatic culinary leaves commonly used in soups, sauces, rice dishes, beans, and stews. Their pleasant herbal scent also makes them popular in traditional home-freshness routines.

The two ingredients serve different purposes:

  • Baking soda: mainly useful for odor control and gentle household cleaning.
  • Bay leaves: mainly provide a natural herbal aroma.
  • Together: they can create a simple pantry-style freshness setup.
  • Neither ingredient: should be presented as a guaranteed disinfectant, mold remover, or pest-control treatment.

This distinction is important because a pleasant smell does not necessarily mean an area has been cleaned or disinfected.

Traditional Home Uses for Baking Soda + Bay Leaves

A simple baking soda and bay leaf setup can be used in several low-risk areas of the home.

1. Freshen a Refrigerator

Baking soda is commonly used to help absorb refrigerator odors.

Simple method:

  1. Place a small open container of baking soda toward the back of the refrigerator.
  2. Keep it away from spills and moisture.
  3. Add one or two clean, dry bay leaves nearby if you enjoy their aroma.
  4. Replace the baking soda according to the product instructions or when it becomes noticeably less effective.
  5. Clean the refrigerator regularly rather than relying on odor control alone.

Bay leaves do not replace refrigerator cleaning, and they should not be placed where they can fall into food.

2. Add Freshness to a Pantry

A pantry can develop stale smells from stored grains, spices, cardboard packaging, or forgotten food.

For a simple traditional approach:

  1. Clean the shelf first.
  2. Remove expired or spoiled food.
  3. Wipe away crumbs and spills.
  4. Place a small dish of baking soda in a safe corner.
  5. Add a few dry bay leaves nearby for their natural aroma.
  6. Keep both ingredients away from direct contact with food.

A stale or unusual smell can sometimes signal spoiled food, moisture, mold, or another household problem, so masking the odor should not be the only step.

3. Freshen a Small Cabinet

Kitchen and bathroom cabinets can sometimes hold odors from moisture, cleaning products, or stored items.

Try this simple routine:

  • Empty the cabinet.
  • Wipe the interior with an appropriate cleaner.
  • Allow the surface to dry completely.
  • Place a small container of baking soda inside.
  • Add one or two dry bay leaves for aroma.
  • Keep the cabinet ventilated when possible.

Do not place loose baking soda directly onto finished wood or other surfaces where powder could collect in seams.

4. Use Bay Leaves as a Natural Aroma

Bay leaves can add a warm herbal scent to a kitchen or pantry.

Place a few dry culinary bay leaves in a small breathable sachet or dish rather than scattering them around the room.

This is mainly an aromatic use. There is not enough evidence to treat bay leaves as a reliable substitute for professional pest control.

5. Create a Simple Home-Freshness Bowl

For a basic traditional home routine, use:

  • 2–3 tablespoons baking soda
  • 2–3 dry bay leaves
  • A small shallow bowl

Steps:

  1. Pour the baking soda into the bowl.
  2. Break the bay leaves into a few large pieces if desired.
  3. Place them on top of or beside the baking soda.
  4. Set the bowl somewhere dry and out of reach of children and pets.
  5. Replace the mixture when it becomes damp, dirty, or loses its usefulness.

The baking soda provides the odor-control component, while the bay leaves contribute their characteristic aroma.

How to Use It Safely

A few simple habits make homemade freshness methods much safer.

Step 1: Start With a Clean Area

Do not use baking soda and bay leaves to hide odors caused by spoiled food, mold, sewage, dampness, or a leaking appliance.

Find and remove the source first.

Step 2: Use Small Amounts

More powder does not automatically mean better odor control.

A small open container is usually easier to manage and reduces unnecessary dust.

Step 3: Keep the Ingredients Dry

Moisture can cause baking soda to clump and can make stored bay leaves lose their quality.

Use clean, dry containers and replace damp ingredients.

Step 4: Keep Them Away From Food Contact

Although baking soda can be a food ingredient, a household deodorizing container should not be treated like a cooking ingredient.

Keep it clearly separated from food preparation areas.

Step 5: Label Homemade Mixtures

If you prepare a bowl or sachet for household use, label it clearly as “Do Not Eat.”

This is especially useful in homes with children or visitors.

What Baking Soda Can and Cannot Do

Baking soda has legitimate household uses, particularly for odor control and some gentle cleaning tasks. Poison Control identifies sodium bicarbonate as a mild alkali used in household cleaning products and notes that it is generally not caustic when used appropriately.

However, it has limits.

Baking soda can:

  • Help control some household odors.
  • Provide mild abrasive action for certain cleaning tasks.
  • Be useful around refrigerators and other household areas.
  • Serve as a simple pantry ingredient for traditional cleaning routines.

Baking soda cannot:

  • Replace a disinfectant when disinfection is required.
  • Remove the source of mold or water damage.
  • Guarantee pest elimination.
  • Make spoiled food safe.
  • Correct plumbing or drainage problems.

If an odor keeps returning, look for the underlying source instead of repeatedly adding more baking soda.

What Bay Leaves Can and Cannot Do

Bay leaves are useful primarily for cooking and aroma.

They can:

  • Add a warm herbal scent.
  • Be included in traditional pantry-freshness routines.
  • Make a simple sachet for drawers or cabinets.
  • Add flavor to soups, stews, beans, and sauces.

They should not be presented as a guaranteed solution for cockroaches, ants, fleas, mold, or other household pests.

If you have a genuine pest infestation, identify the pest and use an appropriate control method rather than depending on bay leaves alone.

What NOT to Mix With Baking Soda

This is one of the most important parts of any homemade cleaning routine.

Do not randomly combine household cleaning products.

Poison Control specifically warns that mixing household cleaners can create dangerous chemical reactions or irritating fumes.

Avoid DIY combinations with:

  • Bleach
  • Ammonia-based cleaners
  • Unknown commercial cleaners
  • Strong toilet cleaners
  • Drain cleaners
  • Other chemicals unless the product label specifically allows the combination

Never mix bleach with vinegar or other acidic cleaners because the reaction can produce chlorine gas.

Baking soda and vinegar are often shown together in homemade cleaning videos because they fizz. The fizzing reaction is not proof that the combination is a stronger cleaner, and it is better to use products according to their intended instructions.

Safe Handling Tips for Baking Soda

Baking soda is familiar and relatively mild for many household applications, but it should still be handled responsibly.

  • Keep it in its original container when possible.
  • Store it where children cannot easily access it.
  • Avoid creating clouds of powder.
  • Wash your hands after household cleaning.
  • Do not deliberately swallow large amounts.
  • Never use household baking soda as a homemade medical treatment.

Poison Control notes that excessive ingestion of sodium bicarbonate can cause serious toxicity, so household and culinary uses should not be confused with medical use.

A Simple Weekly Home-Freshness Routine

You can turn these ingredients into a small maintenance habit without making your cleaning routine complicated.

Once a week:

  1. Check the refrigerator for expired food.
  2. Wipe obvious spills.
  3. Check pantry shelves for crumbs or moisture.
  4. Inspect cabinets for unusual smells.
  5. Refresh your baking soda container when needed.
  6. Replace old or damp bay leaves.
  7. Open doors or windows when appropriate to improve ventilation.
  8. Investigate any odor that returns quickly.

This approach focuses on removing the source rather than simply covering it.

When a Bad Smell Needs More Attention

A persistent odor can be a useful warning sign.

Look for:

  • Spoiled food
  • Damp walls or cabinets
  • Mold growth
  • Dirty drains
  • Pet odors
  • Garbage buildup
  • Leaking pipes
  • Appliance problems
  • Electrical or burning smells

Poison Control notes that unpleasant household odors can come from spoiled food, mold, drains, pets, chemicals, and other sources. A burning or unusual chemical smell can require more immediate attention.

If you smell strong chemical fumes after mixing cleaning products, leave the area and get into fresh air. Breathing difficulty, significant coughing, chest discomfort, or other serious symptoms require prompt medical attention.

Baking Soda + Bay Leaves: The Simple Takeaway

Baking soda and bay leaves fit naturally into old-fashioned household routines because both are inexpensive, familiar, and easy to keep in a kitchen.

The most practical approach is simple:

  • Use baking soda for basic odor control.
  • Use bay leaves for their natural aroma and traditional household appeal.
  • Keep both dry and away from food contamination.
  • Clean the actual source of unpleasant smells.
  • Do not rely on bay leaves as proven pest control.
  • Never mix household cleaning chemicals casually.
  • Follow product labels whenever commercial cleaners are involved.

The goal is not to turn two pantry ingredients into a miracle cleaner. Instead, they can be useful parts of a simple, sensible home-maintenance routine.

FAQs

Can baking soda and bay leaves remove bad smells?

Baking soda can help control some odors, while bay leaves mainly add aroma; neither should replace cleaning the source of a persistent smell.

Can I put baking soda and bay leaves in my refrigerator?

Yes, you can keep a small container of baking soda in the refrigerator for odor control and place dry bay leaves nearby for aroma.

Do bay leaves really keep insects away?

Bay leaves are traditionally used for this purpose, but they should not be considered a proven or reliable replacement for proper pest control.

Can I mix baking soda with vinegar?

Baking soda and vinegar react and fizz; the reaction does not automatically make them a stronger cleaner, so use each product appropriately.

Can baking soda be mixed with bleach?

Do not create homemade mixtures with bleach; household chemicals can produce harmful reactions when combined incorrectly.

How often should I replace baking soda used for odors?

Replace it when it becomes damp, dirty, or no longer seems effective, and follow any storage guidance on the product packaging.

Are bay leaves safe to leave around food?

Keep loose bay leaves separate from food unless they are being used as a culinary ingredient, and remove whole leaves from cooked dishes before serving.

What should I do if a household odor keeps coming back?

Find the source first by checking food, moisture, drains, garbage, pets, and appliances instead of repeatedly masking the odor.

Source note for the article: Household safety guidance above is based primarily on Poison Control’s current information about baking soda, cleaning-product mixtures, and household fumes.
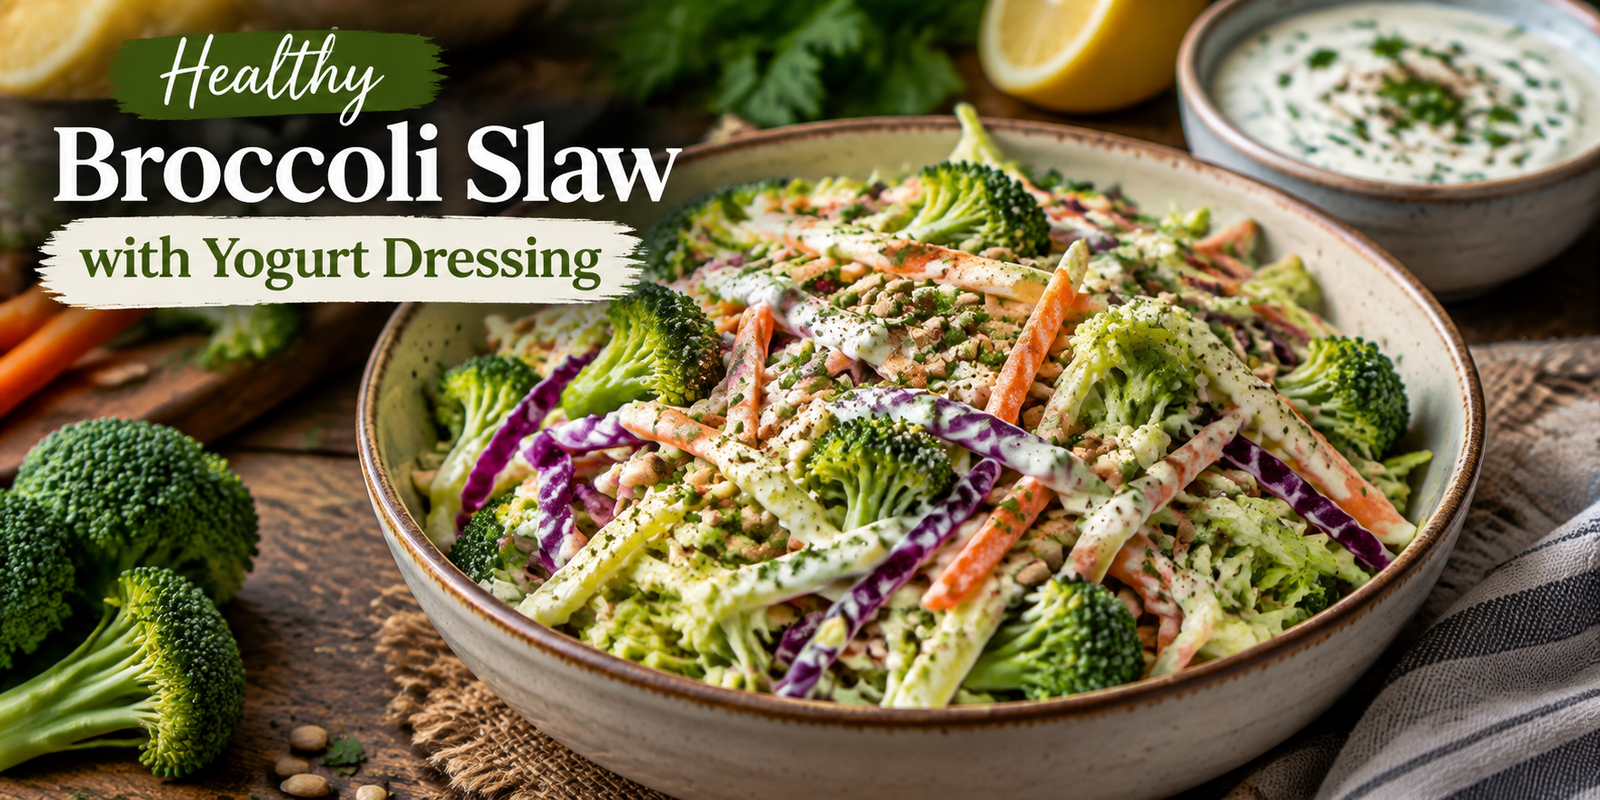

Healthy Broccoli Slaw with Yogurt Dressing

Healthy Broccoli Slaw with Yogurt Dressing made with fresh broccoli carrots cabbage and creamy yogurt sauce

Healthy Broccoli Slaw with Yogurt Dressing

(Creamy & Nutritious Salad)

Introduction

Broccoli Slaw with Yogurt Dressing is a fresh, crunchy, and healthy salad that combines colorful vegetables with a creamy homemade yogurt dressing. It is a lighter alternative to traditional creamy slaws because it uses Greek yogurt instead of heavy mayonnaise while still delivering a rich and satisfying flavor.

This easy recipe is perfect for lunch, meal prep, family dinners, picnics, or as a healthy side dish. Packed with fiber-rich broccoli, carrots, cabbage, and fresh herbs, this slaw provides a delicious way to add more vegetables to your daily meals.

The creamy yogurt dressing brings together tangy, sweet, and savory flavors, making this salad both nutritious and enjoyable. Whether you are following a healthy lifestyle or simply looking for a quick vegetable recipe, this Broccoli Slaw with Yogurt Dressing is a perfect choice.

Why You’ll Love This Healthy Broccoli Slaw

Light Yet Creamy

The Greek yogurt dressing creates a creamy texture without making the salad feel heavy.

Full of Fresh Vegetables

Broccoli, cabbage, and carrots provide crunch, color, and important nutrients.

Easy Meal Prep Recipe

Prepare it ahead of time and enjoy a ready-to-eat healthy meal.

Quick to Make

This recipe requires minimal cooking and can be prepared in less than 20 minutes.

Perfect for Any Occasion

Serve it with grilled chicken, sandwiches, wraps, or enjoy it as a refreshing snack.

Ingredients for Broccoli Slaw with Yogurt Dressing

For the Slaw

  • 4 cups broccoli slaw mix (shredded broccoli stems, carrots, and cabbage)
  • 1 cup purple cabbage, thinly sliced
  • 1 large carrot, shredded
  • ½ cup red bell pepper, thinly sliced
  • ¼ cup green onions, chopped
  • 2 tablespoons fresh parsley, chopped
  • 2 tablespoons sunflower seeds or almonds (optional)

For the Yogurt Dressing

  • 1 cup Greek yogurt
  • 2 tablespoons lemon juice
  • 1 tablespoon honey
  • 1 teaspoon Dijon mustard
  • 1 garlic clove, minced
  • ½ teaspoon salt
  • ½ teaspoon black pepper
  • 1 tablespoon olive oil

Step-by-Step Instructions

1. Prepare the Vegetables

Wash all vegetables thoroughly.

Shred the broccoli stems, carrots, and cabbage if you are not using a pre-made broccoli slaw mix.

Slice the bell pepper and chop the green onions and parsley.

Place all vegetables in a large mixing bowl.

2. Make the Yogurt Dressing

In a small bowl, combine:

  • Greek yogurt
  • Lemon juice
  • Honey
  • Dijon mustard
  • Garlic
  • Olive oil
  • Salt
  • Black pepper

Whisk everything together until smooth and creamy.

Taste the dressing and adjust seasoning if needed.

For a sweeter flavor, add a little extra honey. For more freshness, add extra lemon juice.

3. Combine the Slaw and Dressing

Pour the yogurt dressing over the prepared vegetables.

Mix gently until all ingredients are evenly coated.

Add sunflower seeds or almonds for extra crunch.

4. Chill Before Serving

For the best flavor, refrigerate the slaw for 30 minutes before serving.

This allows the vegetables to absorb the creamy dressing while maintaining their crunch.

Tips for the Best Broccoli Slaw

Keep It Crunchy

Do not add the dressing too early if you want maximum crunch. Add it shortly before serving.

Use Fresh Vegetables

Fresh broccoli and cabbage provide the best texture and flavor.

Adjust the Dressing

You can make the dressing:

  • More tangy with extra lemon
  • Sweeter with more honey
  • Thicker with extra yogurt

Add More Protein

Turn this salad into a complete meal by adding:

  • Grilled chicken
  • Boiled eggs
  • Chickpeas
  • Tuna
  • Grilled salmon

Healthy Variations

Mediterranean Broccoli Slaw

Add:

  • Feta cheese
  • Olives
  • Cucumber
  • Fresh herbs

for a Mediterranean-inspired version.

Apple Broccoli Slaw

Add:

  • Thinly sliced apples
  • Raisins
  • Walnuts

for a sweet and crunchy flavor.

Spicy Yogurt Slaw

Add:

  • Chili flakes
  • Jalapeños
  • Extra black pepper

for a spicy twist.

Storage and Meal Prep Tips

Store leftover Broccoli Slaw with Yogurt Dressing in an airtight container.

Refrigerator:

Keeps fresh for up to 3 days.

Meal Prep:

Prepare the vegetables and dressing separately, then combine before eating for the freshest texture.

Avoid freezing because yogurt dressing can change texture after thawing.

Prepare your chicken in advance using our 7 Easy Chicken Marinades to Freeze Ahead for Quick Dinners for quick and delicious wraps throughout the week.

What to Serve With Broccoli Slaw

This healthy slaw pairs well with:

  • Grilled chicken
  • Turkey sandwiches
  • Fish dishes
  • Wraps
  • Burgers
  • Mediterranean bowls
  • Roasted vegetables

It is a refreshing side dish that balances heavier meals.

Nutritional Information (Approximate)

Serving Size: 1 cup
Servings: 6

Calories: 120 kcal
Protein: 6g
Carbohydrates: 12g
Fat: 6g
Fiber: 4g

(Nutrition values may vary depending on ingredients used.)

Frequently Asked Questions

Can I make broccoli slaw ahead of time?

Yes. You can prepare it several hours before serving. Keep it refrigerated for the best taste.

Can I use regular yogurt instead of Greek yogurt?

Yes, but Greek yogurt provides a thicker and creamier dressing.

Is broccoli slaw good for weight management?

This recipe is high in vegetables and fiber while using a lighter yogurt dressing, making it a nutritious option.

Can I add chicken to this recipe?

Yes. Adding grilled chicken makes it a complete high-protein meal.

If you enjoy comforting Mediterranean meals, try our Mediterranean Creamy Baked Gnocchi for a creamy and flavorful dinner option.

Final Thoughts

Broccoli Slaw with Yogurt Dressing is a simple, healthy, and flavorful recipe that makes eating vegetables more enjoyable. With crunchy broccoli, fresh vegetables, and a creamy homemade yogurt dressing, this salad is perfect for busy days, meal prep, and family meals.

Whether served as a side dish or upgraded with protein for a complete meal, this refreshing slaw is an easy way to enjoy a nutritious recipe full of flavor and texture.

Aloe Vera: Traditional Skin-Care Uses & Safety Tips

Aloe vera gel for traditional skin care with fresh aloe leaf and safe application tips

Aloe Vera: Traditional Skin-Care Uses & Safety Tips

Aloe vera has been part of traditional skin care for generations. The clear gel inside the aloe leaf is commonly used topically as a simple plant-based skin-care ingredient. Today, aloe is also found in many commercial gels, lotions, and moisturizers.

But “natural” does not automatically mean suitable for every skin type. Aloe can feel soothing and moisturizing for some people, while others may experience burning, itching, redness, rash, or eczema.

This guide explains how aloe vera is traditionally used on the skin, how to use it more carefully, and what to do if your skin reacts.

What Is Aloe Vera Gel?

Aloe vera is a succulent plant that grows in warm, dry climates. The leaf contains different substances, including clear inner-leaf gel and yellowish latex closer to the outer part of the leaf. These are not the same thing.

For traditional skin care, the clear inner gel is the part most commonly discussed.

Aloe has a long history of topical use for skin conditions and minor skin concerns. Modern research has also studied topical aloe, although the amount and quality of evidence varies depending on the specific skin problem and aloe preparation.

The safest way to think about aloe is as a skin-care ingredient, not a universal treatment for every skin problem.

Traditional Skin-Care Uses of Aloe Vera

Aloe gel has traditionally been applied directly to the skin as a simple topical preparation.

People commonly use it as part of routines focused on:

  • Dry or tight-feeling skin
  • A cooling skin-care step
  • Simple plant-based moisturizing
  • General skin comfort
  • Traditional self-care routines

Some clinical research has investigated topical aloe for specific skin concerns, but that does not mean aloe should replace medical treatment. NCCIH reports that topical aloe is generally well tolerated, while also noting occasional reports of burning, itching, rash, and eczema.

For everyday skin care, keep expectations realistic. Aloe may be a pleasant addition to a routine, but it is not a guaranteed solution for wrinkles, loose skin, acne, or other ongoing skin conditions.

Why Patch Testing Matters

Even a plant-based ingredient can cause a skin reaction.

The American Academy of Dermatology recommends testing new skin-care products before applying them more widely because ingredients can sometimes cause irritation or allergic contact dermatitis.

A simple test can help you decide whether your skin tolerates the product.

Step 1: Choose a Small Test Area

Use a small area on the underside of your arm or another convenient area that will not be rubbed or washed frequently.

Step 2: Apply a Small Amount

Use the same amount and thickness you would normally use on your skin.

Step 3: Watch for a Reaction

Look for signs such as:

  • Redness
  • Itching
  • Burning
  • Swelling
  • New irritation
  • Rash

The AAD’s general guidance for testing skin-care products recommends applying the product to a small test area twice daily for seven to 10 days.

If you develop a reaction, gently wash the product off and stop using it.

How to Use Aloe Vera Gel on Your Skin

If your skin tolerates aloe, keep the routine simple.

Step 1: Start With Clean Skin

Wash your hands and gently cleanse the area where you plan to use aloe.

Clean skin reduces the chance of transferring dirt or other substances onto the skin.

Step 2: Choose the Right Aloe Product

If using a commercial product, check the ingredient label and choose a product designed for topical skin use.

If using fresh aloe, make sure the leaf, your hands, utensils, and container are clean.

Step 3: Use the Clear Inner Gel

When preparing fresh aloe, focus on the clear inner gel rather than treating the whole leaf as one ingredient.

Aloe leaves contain different components, including inner gel and latex, so they should not be assumed to have the same properties or safety profile.

Step 4: Apply a Thin Layer

Use a small amount and spread it gently over the intended area.

There is no need to cover the skin with a thick layer.

Step 5: Avoid Sensitive Areas

Keep aloe away from your eyes and avoid applying it to areas that are already irritated unless a healthcare professional has advised you to do so.

Step 6: Stop if Your Skin Reacts

If the area starts burning, itching, swelling, or developing a rash, wash the product off and stop using it.

Topical aloe is generally well tolerated, but skin reactions have been reported.

How to Keep Fresh Aloe Gel Clean

Fresh plant material needs more care than a sealed commercial skin-care product.

If you prepare aloe at home:

  1. Wash your hands before handling the leaf.
  2. Rinse the outside of the leaf.
  3. Use a clean knife and cutting surface.
  4. Remove only the amount you plan to use.
  5. Place unused gel in a clean, covered container if you are storing it.
  6. Avoid repeatedly touching stored gel with your fingers.
  7. Discard it if you notice an unusual smell, color, texture, or visible contamination.

Fresh homemade gel does not contain the same preservation system as many commercial skin-care products. For that reason, avoid treating homemade aloe gel as if it has an unlimited shelf life.

A commercially prepared aloe product may be a more convenient option when you want predictable ingredients and easier storage.

When Should You Use Aloe Vera?

There is no special time of day that you must use aloe.

Some people prefer using it as part of an evening routine because they have more time for skin care.

A simple routine could look like:

Morning

  1. Gentle cleanser
  2. Aloe gel if tolerated
  3. Moisturizer if needed
  4. Broad-spectrum sunscreen

Evening

  1. Gentle cleanser
  2. Aloe gel if tolerated
  3. Moisturizer if needed

Aloe does not need to be the center of your entire skin-care routine. It can simply be one optional step.

Aloe Vera and Moisturized-Looking Skin

One reason aloe remains popular in skin care is its light gel texture and fresh feel.

If your skin tolerates it, aloe can fit into a routine designed to keep skin feeling comfortable and moisturized.

However, avoid confusing temporary hydration with permanent skin tightening or wrinkle removal.

Aloe should not be marketed as a miracle anti-aging treatment.

For long-term skin care, daily sun protection is also important because ultraviolet exposure contributes to visible skin aging. A broad-spectrum sunscreen with SPF 30 or higher is a common recommendation from dermatologists for protecting skin from UV exposure.

Aloe Vera Safety Tips You Should Know

Avoid Broken or Irritated Skin

Do not automatically apply fresh plant gel to cuts, open wounds, or severely irritated skin.

Damaged skin can react differently to ingredients that seem comfortable on healthy skin.

If you have an ongoing rash, open wound, infection, or unexplained skin problem, getting professional advice is more appropriate than experimenting with home remedies.

Keep It Away From Your Eyes

Aloe intended for topical skin use should not be treated as an eye product.

Avoid applying it around the eyes, especially directly onto the eyelids or into the eyes.

If a product accidentally gets into your eyes, rinse according to appropriate first-aid guidance and seek medical advice if significant irritation continues.

Don’t Add Harsh Ingredients

You may see online recipes combining aloe with lemon juice, baking soda, vinegar, essential oils, or other strong ingredients.

Adding more ingredients does not automatically make a skin-care routine better.

For a simple routine, stick with aloe alone or a properly formulated commercial product.

Natural Does Not Mean Risk-Free

Aloe comes from a plant, but that does not guarantee that everyone will tolerate it.

The AAD also points out that skin-care products can trigger irritation or allergic contact dermatitis, which is why testing new products is useful.

When Should You Stop Using Aloe Vera?

Stop using aloe if you notice:

  • Persistent burning
  • Increasing redness
  • Itching
  • Swelling
  • A new rash
  • Blisters
  • Significant discomfort

Gently remove the product rather than applying more in an attempt to “push through” the reaction.

If the reaction is severe, spreading, or does not improve, contact a healthcare professional or dermatologist.

People with recurring unexplained rashes may need professional evaluation because many different substances can cause contact dermatitis.

Fresh Aloe vs. Commercial Aloe Gel

Both options have advantages, but they are not identical.

Fresh aloe:

  • Comes directly from the plant
  • Requires careful handling
  • Can vary in consistency
  • Needs attention to cleanliness
  • Does not have the same preservation system as many commercial products

Commercial aloe gel:

  • Is usually easier to store
  • Has a labeled ingredient list
  • May contain preservatives and other skin-care ingredients
  • Can provide more consistent texture

If you have sensitive skin, reading the ingredient label and choosing a simple product can make it easier to identify what you are putting on your skin.

A Simple Aloe Vera Skin-Care Routine

If you want to include aloe in your routine, start small.

Morning Routine

Step 1: Cleanse gently.

Step 2: Apply a small amount of aloe if your skin tolerates it.

Step 3: Use moisturizer if your skin needs additional hydration.

Step 4: Finish with broad-spectrum sunscreen.

Evening Routine

Step 1: Remove makeup or sunscreen.

Step 2: Cleanse gently.

Step 3: Apply a small amount of aloe if tolerated.

Step 4: Add moisturizer if needed.

This keeps the routine simple without relying on aloe as a treatment for every skin concern.

The Bottom Line

Aloe vera has a long history in traditional skin care, and topical aloe gel is generally well tolerated by many people. However, some users can experience burning, itching, rash, or eczema.

The safest approach is simple: use a small amount, patch-test first, keep homemade gel clean, avoid broken or irritated skin, keep it away from your eyes, and stop if your skin reacts.

Most importantly, treat aloe as an optional skin-care ingredient rather than a cure-all.

Natural skin care works best when it is simple, gentle, and realistic.

Frequently Asked Questions

1. Can I use fresh aloe vera directly on my skin?

Yes, some people use the clear inner gel topically, but patch-test first and stop if you develop irritation.

2. Is aloe vera safe for sensitive skin?

It may be tolerated, but sensitive skin can react to new ingredients, so test a small area before wider use.

3. Can aloe vera remove wrinkles?

Aloe should not be considered a proven wrinkle remover or permanent skin-tightening treatment.

4. Can I apply aloe to irritated skin?

Avoid experimenting on significantly irritated or broken skin because the area may react more easily.

5. How often can I use aloe vera on my skin?

There is no universal schedule; start with occasional use and continue only if your skin remains comfortable.

6. Should I patch-test aloe vera?

Yes. Dermatologists recommend testing new skin-care products on a small area before using them more widely.

7. What should I do if aloe causes itching or redness?

Wash it off gently and stop using it; seek professional advice if the reaction is severe or persistent.

8. Is fresh aloe better than commercial aloe gel?

Not necessarily; commercial gels can offer more consistent ingredients and preservation, while fresh aloe requires careful handling and cleanliness.

Mediterranean Creamy Baked Gnocchi

Mediterranean Creamy Baked Gnocchi with spinach tomatoes and melted cheese

Mediterranean Creamy Baked Gnocchi

Creamy Mediterranean Baked Gnocchi with Spinach, Tomatoes & Cheese

This Mediterranean Creamy Baked Gnocchi is the perfect combination of comfort food and fresh Mediterranean flavors. Soft potato gnocchi are baked in a rich, creamy sauce with colorful vegetables, herbs, garlic, spinach, and melted cheese to create a warm, satisfying meal that feels restaurant-quality but is simple enough for a weeknight dinner.

Gnocchi are small Italian dumplings traditionally made with potatoes, flour, and sometimes eggs. They are known for their soft, pillowy texture and ability to absorb delicious sauces.  This Mediterranean-inspired version adds fresh vegetables, herbs, and creamy ingredients for a flavorful baked dish.

Why You’ll Love This Mediterranean Creamy Baked Gnocchi

  • Easy one-pan comfort meal
  • Ready in under an hour
  • Packed with Mediterranean flavors
  • Creamy but balanced with fresh vegetables
  • Perfect for family dinners
  • Great vegetarian dinner option

Ingredients

For the Gnocchi Bake

  • 1 pound (450g) potato gnocchi
  • 2 tablespoons olive oil
  • 4 cloves garlic, minced
  • 1 small onion, finely chopped
  • 1 cup cherry tomatoes, halved
  • 2 cups fresh spinach
  • 1 small zucchini, diced
  • ½ cup roasted red peppers, sliced
  • ½ cup olives, sliced
  • 1 teaspoon dried oregano
  • 1 teaspoon Italian seasoning
  • ½ teaspoon paprika
  • Salt and black pepper to taste

Creamy Sauce

  • 1 cup heavy cream
  • ½ cup cream cheese or Greek yogurt
  • ½ cup vegetable broth
  • ½ cup grated Parmesan cheese
  • 1 cup shredded mozzarella cheese
  • Fresh basil leaves for garnish

Step-by-Step Instructions

1. Prepare the Oven and Ingredients

Preheat your oven to 375°F (190°C).

Lightly grease a baking dish with olive oil.

Wash and prepare all vegetables before starting to make cooking easier.

2. Cook the Mediterranean Vegetable Base

Heat olive oil in a large skillet over medium heat. Add chopped onion and cook for 2–3 minutes until soft, garlic and cook for another 30 seconds until fragrant and then

  • Cherry tomatoes
  • Zucchini
  • Roasted peppers
  • Olives

Cook for 5–6 minutes until vegetables begin to soften.

Season with oregano, Italian seasoning, paprika, salt, and black pepper.

3. Make the Creamy Sauce

Reduce heat and add vegetable broth, cream cheese, and heavy cream.

Stir gently until the sauce becomes smooth and creamy.

Add Parmesan cheese and mix until melted.

The sauce should be rich but not too thick because the gnocchi will absorb some of the flavor while baking.

4. Add Gnocchi and Spinach

Add uncooked gnocchi directly into the creamy sauce.

Mix well so every piece is coated.

Add fresh spinach and stir until slightly wilted.

Transfer everything into the prepared baking dish.

5. Bake Until Golden

Top with shredded mozzarella cheese.

Bake uncovered for 25–30 minutes until:

  • Cheese is melted
  • Top becomes golden
  • Sauce is bubbling

Allow it to rest for 5 minutes before serving.

Tips for the Best Mediterranean Creamy Baked Gnocchi

Use Fresh Herbs

Fresh basil or parsley adds brightness and balances the creamy sauce.

Add Protein

For a higher-protein meal, add:

  • Grilled chicken
  • Shrimp
  • Chickpeas

Avoid Overcooking Gnocchi

Gnocchi becomes soft quickly, so avoid boiling it too long before baking.

Make It Lighter

Replace heavy cream with:

  • Greek yogurt
  • Light cream
  • More vegetable broth

Storage & Reheating

Refrigerator:

Store leftovers in an airtight container for up to 3 days.

Reheating:

Warm gently in the oven or microwave. Add a splash of milk or broth if the sauce becomes too thick.

Freezing:

Freeze before baking for up to 2 months. Thaw overnight and bake until heated through.

Serving Ideas

Serve this creamy Mediterranean gnocchi with:

  • Fresh green salad
  • Garlic bread
  • Roasted vegetables
  • Mediterranean cucumber salad

A sprinkle of fresh basil and Parmesan on top makes it even more delicious.

Looking for another comforting Mediterranean-inspired meal? Try our Mediterranean Rotisserie Chicken Mushroom Soup for a warm, flavorful, and easy dinner option.

Nutritional Information (Approximate Per Serving)

Servings: 6

Calories: 420 kcal
Protein: 15g
Carbohydrates: 48g
Fat: 20g
Fiber: 5g

(Nutrition values may vary depending on ingredients used.)

Health Benefits

Rich in Vegetables

Spinach, tomatoes, zucchini, and peppers provide vitamins, minerals, and antioxidants.

Provides Energy

Gnocchi offers carbohydrates that provide fuel for daily activities.

Healthy Mediterranean Ingredients

Olive oil, vegetables, herbs, and balanced ingredients are common parts of Mediterranean-style cooking.

Frequently Asked Questions

Can I use frozen gnocchi?

Yes. Frozen gnocchi works well; simply add a few extra baking minutes.

Can I make this recipe gluten-free?

Yes, use gluten-free gnocchi and check all packaged ingredients.

Can I prepare this ahead of time?

Yes. Assemble the dish, cover, and refrigerate for up to 24 hours before baking.

What cheese works best?

Mozzarella gives a stretchy topping, while Parmesan adds a salty, savory flavor.

If you enjoy fresh Mediterranean-inspired meals, you can also try our Mediterranean Salmon Bowl with Avocado & Fresh Herbs for a healthy and flavorful seafood option.

Final Thoughts

This Mediterranean Creamy Baked Gnocchi is a delicious way to enjoy a comforting meal with fresh Mediterranean ingredients. The creamy sauce, soft gnocchi, colorful vegetables, and melted cheese create a dish that is perfect for busy weeknights, family dinners, or weekend gatherings.

Simple ingredients come together to create a flavorful meal that brings Mediterranean-inspired comfort straight to your table.


Spinach Quiche Muffin

Spinach Quiche Muffins with spinach eggs cheese and fresh herbs

Spinach Quiche Muffins: A Wholesome Snack for Busy Days

Spinach Quiche Muffins are a delicious, healthy, and convenient snack option for busy mornings, quick lunches, or meal prep days. These bite-sized savory muffins combine fresh spinach, eggs, cheese, and flavorful herbs to create a protein-rich recipe that is easy to prepare and perfect for the whole family.

Unlike traditional quiche, which requires a crust and longer preparation time, these mini quiche muffins are simple, portable, and freezer-friendly. They are a great choice for anyone looking for a nutritious breakfast, a low-carb snack, or an easy meal that can be prepared ahead of time.

Packed with vegetables and satisfying flavors, these muffins prove that healthy food can also be comforting and delicious.

Why You’ll Love These Spinach Quiche Muffins

There are many reasons to add this recipe to your weekly meal plan:

Easy Meal Prep Recipe

These muffins can be prepared in advance and stored for busy mornings. Simply warm them up when needed and enjoy a homemade breakfast without spending extra time cooking.

High in Protein

Eggs provide high-quality protein, making these muffins filling and satisfying. They can help you stay energized throughout the day.

Perfect Portable Snack

Their small size makes them ideal for:

  • School lunches
  • Office snacks
  • Travel meals
  • Post-workout snacks

Customizable Ingredients

You can easily change the ingredients based on your preferences. Add more vegetables, different cheeses, or herbs to create your own version.

Ingredients for Spinach Quiche Muffins

Main Ingredients

  • 8 large eggs
  • 2 cups fresh spinach, chopped
  • ½ cup shredded mozzarella cheese
  • ¼ cup grated Parmesan cheese
  • ½ cup milk or Greek yogurt
  • 1 small onion, finely chopped
  • 2 cloves garlic, minced
  • ½ cup bell peppers, diced
  • ½ teaspoon salt
  • ½ teaspoon black pepper
  • ½ teaspoon dried oregano
  • ¼ teaspoon paprika
  • 1 tablespoon olive oil

Step-by-Step Instructions

1. Prepare the Ingredients

Preheat your oven to 375°F (190°C).

Lightly grease a muffin tin with olive oil or cooking spray to prevent sticking.

Wash and chop the spinach into smaller pieces. Prepare all vegetables before mixing the ingredients.

2. Cook the Vegetables

Heat olive oil in a pan over medium heat.

Add chopped onion and cook for 2–3 minutes until softened, garlic and cook for another 30 seconds, spinach and bell peppers. Cook until the spinach becomes slightly wilted.

Remove from heat and allow the mixture to cool slightly.

3. Prepare the Egg Mixture

In a large bowl, whisk together:

  • Eggs
  • Milk or Greek yogurt
  • Salt
  • Pepper
  • Oregano
  • Paprika

Mix until smooth and well combined.

Add mozzarella and Parmesan cheese, then stir gently.

4. Fill the Muffin Cups

Add the cooked spinach mixture evenly into each muffin cup.

Pour the egg mixture over the vegetables until each cup is about ¾ full.

Do not overfill because the muffins will expand while baking.

5. Bake the Quiche Muffins

Place the muffin tray in the oven and bake for:

20–25 minutes

The muffins are ready when:

  • The tops are golden
  • The center is firm
  • A toothpick inserted comes out clean

Allow them to cool for a few minutes before removing.

Tips for Perfect Spinach Quiche Muffins

Remove Extra Water From Spinach

Spinach contains a lot of moisture. If using frozen spinach, squeeze out excess water before adding it.

This helps prevent watery muffins.

Use Fresh Herbs

Fresh herbs can improve the flavor. Try adding:

  • Basil
  • Parsley
  • Chives
  • Dill

Do Not Overbake

Overbaking can make the muffins dry and rubbery. Remove them once they are just set.

Grease the Muffin Pan Well

Egg-based recipes can stick easily, so properly grease the muffin cups.

Healthy Variations

Mediterranean Spinach Quiche Muffins

Add:

  • Cherry tomatoes
  • Feta cheese
  • Olives
  • Fresh basil

for a Mediterranean-inspired flavor.

High Protein Version

Increase protein by adding:

  • Cottage cheese
  • Extra egg whites
  • Chicken pieces

Low Carb Version

Replace milk with heavy cream or Greek yogurt and add more vegetables.

For another protein-rich breakfast option, try our Mediterranean Honey Lime Chicken & Avocado Egg Muffins, packed with delicious flavors and healthy ingredients.

Storage and Meal Prep

These Spinach Quiche Muffins are excellent for meal preparation.

Refrigerator Storage

Store in an airtight container for up to 4 days.

Freezer Storage

Freeze individually wrapped muffins for up to 3 months.

Reheating

Warm in the microwave for 30–60 seconds or heat in the oven until warm.

Serving Ideas

Enjoy these muffins with:

  • Fresh fruit
  • Green salad
  • Greek yogurt
  • Avocado slices
  • Whole grain toast

They work perfectly as breakfast, brunch, or a light snack.

If you enjoy healthy homemade snacks, you can also try our Mediterranean Almond Raisin Muffins for a naturally sweet and nutritious treat.

Nutritional Information (Approximate)

Serving Size: 2 muffins

Calories: 180 kcal
Protein: 12g
Carbohydrates: 5g
Fat: 12g
Fiber: 2g

Nutrition values may vary depending on ingredients used.

Frequently Asked Questions

Can I use frozen spinach?

Yes, frozen spinach works well. Make sure to remove extra water before adding it.

Can I make these without cheese?

Yes. You can replace cheese with extra vegetables or nutritional yeast.

Are spinach quiche muffins good for meal prep?

Yes. They store well in the refrigerator and freezer, making them perfect for busy schedules.

Can children eat these muffins?

Yes, they are a great way to add vegetables and protein to children’s meals.

Final Thoughts

Spinach Quiche Muffins are a simple yet nutritious recipe that combines convenience, flavor, and healthy ingredients. Whether you need a quick breakfast, an easy snack, or a meal-prep option, these mini quiches are a practical choice.

With spinach, eggs, cheese, and herbs, you get a balanced recipe that is satisfying, versatile, and easy to customize. Prepare a batch today and enjoy a wholesome homemade snack throughout the week.

7 Easy Chicken Marinades Quick Dinners

7 Easy Chicken Marinades to Freeze Ahead for quick healthy dinners

7 Easy Chicken Marinades to Freeze Ahead for Quick Dinners

Focus Keyword: Chicken Marinades

Introduction

Chicken Marinades are one of the easiest ways to save time, reduce cooking stress, and prepare delicious homemade meals in advance. By preparing a few freezer-friendly marinades ahead of time, you can transform simple chicken into flavorful dinners whenever you need them.

Freezing chicken with marinade allows the flavors to slowly develop while saving valuable time during busy weekdays. Instead of spending 30 minutes preparing ingredients after a long day, you can simply thaw the marinated chicken and cook it fresh.

These 7 easy chicken marinades are perfect for meal prep, family dinners, and anyone who wants convenient freezer meals without sacrificing flavor.

Why Make Chicken Marinades Ahead?

Preparing chicken marinades in advance offers many benefits:

Saves Time

Meal preparation becomes easier because the seasoning and flavor work is already done.

Reduces Food Waste

You can buy chicken in bulk, divide it into portions, and freeze it with different flavors.

Creates Better Flavor

Marinating chicken before freezing allows herbs, spices, and sauces to absorb deeply into the meat.

Makes Weeknight Cooking Easier

Simply thaw, cook, and serve with your favorite sides.

How to Freeze Chicken Marinades Correctly

Follow these simple steps for the best results:

1. Use Fresh Chicken

Start with fresh chicken breasts, thighs, or tenders.

2. Add Marinade and Chicken Together

Place chicken and marinade in a freezer-safe bag or container.

3. Remove Extra Air

If using freezer bags, remove as much air as possible before sealing.

4. Label the Bags

Write:

  • Marinade name
  • Date prepared
  • Cooking instructions

5. Freeze Properly

Store frozen chicken marinades for up to 3 months for the best quality.

1. Mediterranean Garlic Herb Chicken Marinade

This fresh Mediterranean-inspired marinade creates juicy and flavorful chicken perfect for salads, bowls, wraps, or grilled dinners.

Ingredients:

  • ¼ cup olive oil
  • 3 garlic cloves, minced
  • 2 tablespoons lemon juice
  • 1 teaspoon dried oregano
  • 1 teaspoon basil
  • ½ teaspoon paprika
  • Salt and black pepper
  • 1 tablespoon chopped parsley

Best For:

Chicken breast, thighs, grilled chicken bowls

2. Honey Lemon Chicken Marinade

A perfect balance of sweet and tangy flavors, this marinade creates tender chicken with a beautiful golden finish.

Ingredients:

  • ¼ cup olive oil
  • 2 tablespoons honey
  • 3 tablespoons lemon juice
  • 2 garlic cloves
  • 1 teaspoon Dijon mustard
  • Salt and pepper

Best For:

Roasted chicken, rice bowls, meal prep lunches

3. Garlic Butter Herb Chicken Marinade

This rich and comforting marinade adds classic garlic and herb flavors to chicken.

Ingredients:

  • 3 tablespoons melted butter
  • 2 tablespoons olive oil
  • 3 garlic cloves
  • 1 teaspoon Italian seasoning
  • ½ teaspoon paprika
  • Salt and pepper

Best For:

Oven-baked chicken and family dinners

4. Yogurt Tandoori Chicken Marinade

This creamy yogurt marinade makes chicken tender, flavorful, and full of spices.

Ingredients:

  • ½ cup Greek yogurt
  • 1 tablespoon lemon juice
  • 1 teaspoon paprika
  • 1 teaspoon cumin
  • 1 teaspoon coriander powder
  • ½ teaspoon turmeric
  • Garlic and ginger paste
  • Salt

Best For:

Grilled chicken, wraps, and healthy meal bowls

5. Spicy BBQ Chicken Marinade

Perfect for barbecue lovers, this marinade creates smoky and flavorful chicken.

Ingredients:

  • ½ cup BBQ sauce
  • 1 tablespoon olive oil
  • 1 tablespoon honey
  • 1 teaspoon smoked paprika
  • ½ teaspoon garlic powder
  • Black pepper

Best For:

Grilling, sandwiches, burgers

6. Teriyaki Chicken Marinade

This sweet and savory Asian-inspired marinade is perfect for quick dinners.

Ingredients:

  • ¼ cup soy sauce
  • 2 tablespoons honey
  • 1 tablespoon sesame oil
  • 2 garlic cloves
  • 1 teaspoon ginger
  • 1 tablespoon rice vinegar

Best For:

Rice bowls and stir-fry meals

7. Mexican Lime Chicken Marinade

Fresh lime and spices create a delicious marinade for tacos, wraps, and salads.

Ingredients:

  • ¼ cup lime juice
  • 2 tablespoons olive oil
  • 2 garlic cloves
  • 1 teaspoon cumin
  • 1 teaspoon chili powder
  • Fresh cilantro
  • Salt and pepper

Best For:

Tacos, burrito bowls, and salads

How to Cook Frozen Marinated Chicken

Before cooking:

  1. Move chicken from freezer to refrigerator.
  2. Allow it to thaw overnight.
  3. Cook using your preferred method:
  • Grill
  • Bake
  • Air fryer
  • Pan cook

Always make sure chicken reaches a safe internal temperature before serving.

Tips for Better Chicken Marinades

Avoid Too Much Acid

Too much lemon juice or vinegar can change the texture of chicken.

Use Quality Ingredients

Fresh herbs, olive oil, and spices create better flavor.

Portion Before Freezing

Freeze chicken in meal-sized portions for easier cooking.

Mix Different Flavors

Preparing multiple marinades keeps meals interesting throughout the week.

Meal Ideas Using Marinated Chicken

Use your prepared chicken for:

  • Mediterranean chicken bowls
  • Healthy wraps
  • Salads
  • Rice meals
  • Sandwiches
  • Pasta dishes
  • Grilled plates

Frequently Asked Questions

How long can chicken marinades stay frozen?

Frozen marinated chicken is best used within 3 months.

Can I freeze chicken in a marinade?

Yes, freezing chicken with marinade is a convenient meal prep method.

Should I thaw chicken before cooking?

Yes, thawing in the refrigerator provides the best texture and even cooking.

Can I reuse leftover marinade?

No, do not reuse marinade that has touched raw chicken unless it is properly cooked.

For more healthy meal prep inspiration, explore our Mediterranean Lentil Vegetable Soup (High Fiber Healthy Dinner) that is perfect for make-ahead lunches and dinners.

Final Thoughts

Chicken Marinades are a simple meal prep solution for busy days. With a few basic ingredients and a little preparation, you can create flavorful chicken meals that save time and make cooking easier.

These 7 freezer-friendly marinades help you enjoy homemade dinners without daily preparation. Whether you prefer Mediterranean herbs, sweet honey flavors, spicy BBQ, or creamy yogurt seasoning, there is an option for every taste.

Prepare your freezer bags today and make your future dinners faster, easier, and more delicious.

If you enjoy healthy spinach-based meals, try our Low-Carb Chicken, Spinach & Mushroom Bake for a creamy, protein-rich dinner option.