How to Keep Your Kitchen From Becoming Overwhelming

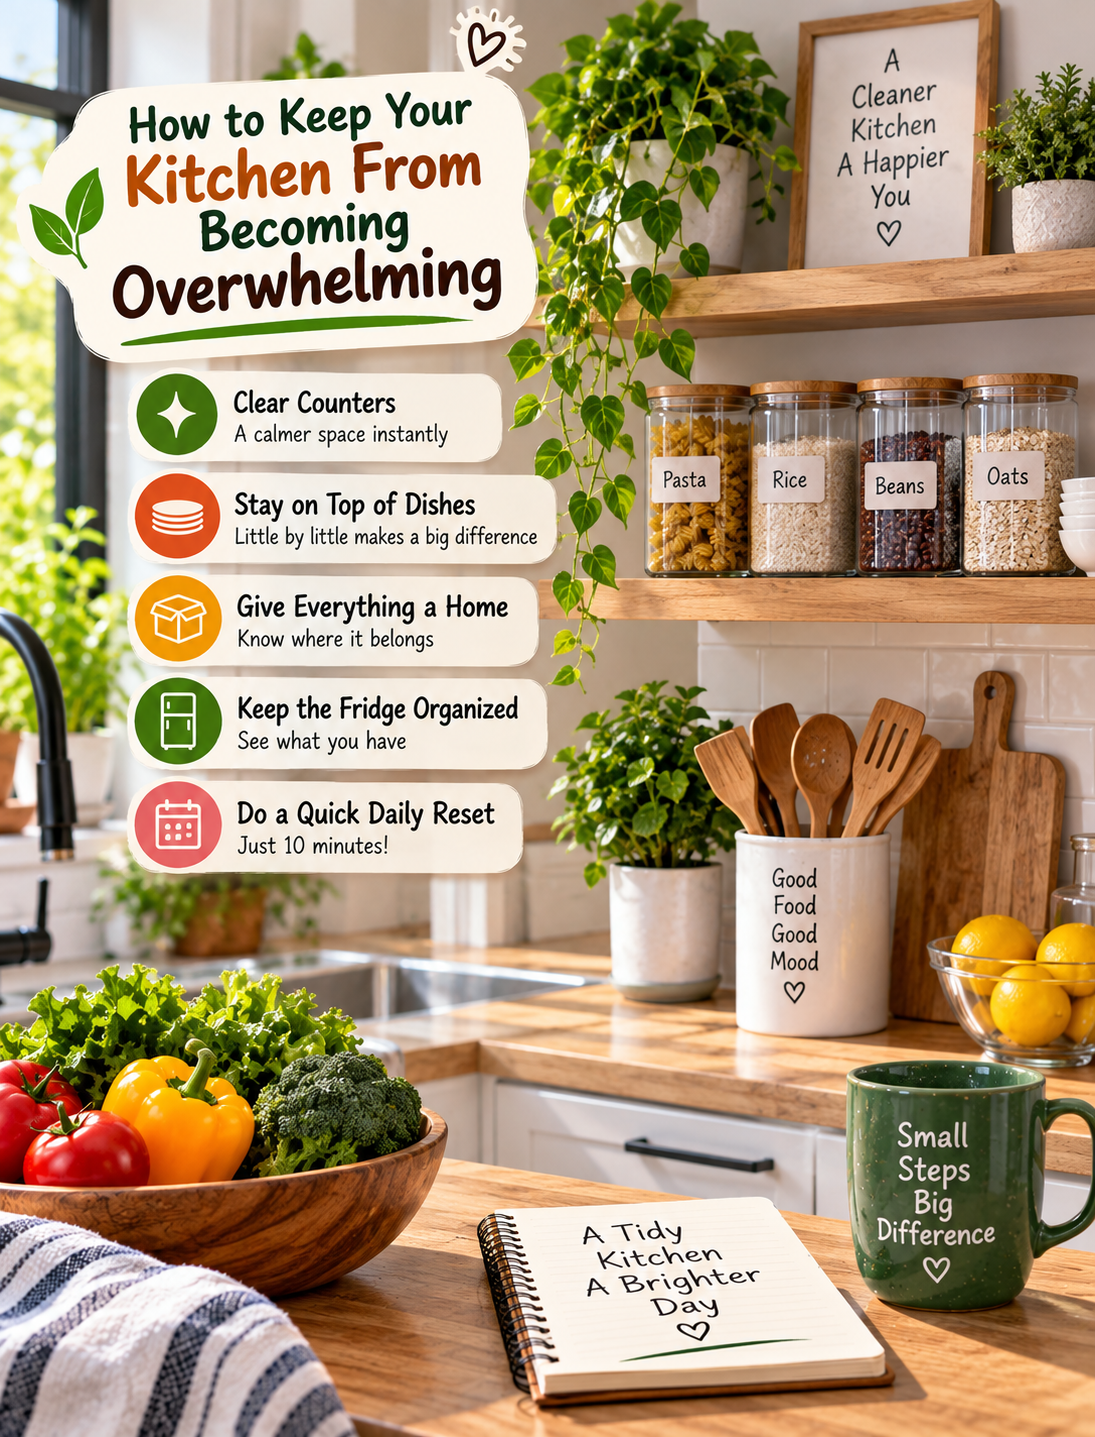
Organized kitchen with clear countertops, labeled storage, clean dishes, and simple home organization system

How to Keep Your Kitchen From Becoming Overwhelming

A kitchen can become messy faster than almost any other room in the house.

A few dirty dishes, an overflowing counter, an open package, and groceries that have not been put away can quickly make the whole space feel difficult to manage.

The solution is not to clean everything at once.

A better approach is to create a simple kitchen routine that prevents small messes from becoming large ones. When every item has a place and the most-used areas stay clear, daily cleanup becomes much easier.

This guide explains how to keep your kitchen organized, manageable, and easier to clean without spending hours on it.

Why Kitchens Become Overwhelming

Most kitchen clutter comes from small tasks being delayed.

A plate stays in the sink because you are busy. A grocery bag remains on the counter because there is no clear place for one item. Spices collect beside the stove because putting them away feels like another task.

Over several days, these small problems add up.

Common causes include:

  • Too many items on the countertops
  • Dishes left in the sink
  • Food packages without a storage place
  • Crowded cabinets
  • An overflowing refrigerator
  • Appliances rarely used but always left out
  • Grocery items that never get put away
  • No simple daily reset
  • Cleaning tasks saved until the kitchen becomes difficult to manage

The goal is not to create a picture-perfect kitchen.

The goal is to make the room easy to use and easy to reset.

Step 1: Clear the Kitchen Countertops

Start with the most visible area.

A crowded countertop can make the entire kitchen feel messy, even when the cabinets and drawers are organized.

Remove Everything That Does Not Belong

Pick up items such as:

  • Mail
  • Empty packages
  • Dirty dishes
  • Grocery bags
  • Random containers
  • Unused appliances
  • Food that belongs in the pantry or refrigerator

Put each item where it belongs instead of creating another temporary pile.

Keep Only Frequently Used Items Out

If you use your coffee maker every morning, keeping it on the counter may make sense.

If you use a small appliance once every few months, consider storing it in a cabinet.

A simple rule is:

The more often you use something, the easier it should be to access.

This keeps your kitchen practical instead of simply making it look organized.

Step 2: Give Every Frequently Used Item a Home

A kitchen becomes difficult to manage when items constantly move from one place to another.

Choose a permanent location for the things you use most.

For example:

  • Cooking utensils near the stove
  • Plates near the dishwasher or serving area
  • Coffee supplies together
  • Cutting boards near your food-preparation area
  • Spices near the cooking zone
  • Food-storage containers together

You do not need expensive organizers.

A consistent location is often more useful than a complicated storage system.

Use the “One Home” Rule

Choose one main storage area for each category.

Instead of keeping food containers in three different cabinets, keep them together.

Instead of spreading baking supplies throughout the pantry, create one baking section.

This makes putting things away faster because you always know where they belong.

Step 3: Deal With the Sink Before Bed

A full sink can make the kitchen feel unfinished.

You do not need to deep-clean the entire room every night, but try to avoid leaving a large pile of dishes behind.

Use a Simple Evening Reset

Before going to bed:

  1. Load the dishwasher or wash the dishes.
  2. Clear food from the counter.
  3. Wipe the main work surface.
  4. Put ingredients away.
  5. Take out trash if necessary.
  6. Leave the sink ready for the next morning.

This routine can take only a few minutes when the kitchen is already under control.

The benefit is that you start the next day with a usable workspace instead of yesterday’s mess.

Step 4: Stop Letting the Refrigerator Become a Storage Problem

An overloaded refrigerator makes food harder to find.

When containers are pushed toward the back, leftovers can easily be forgotten.

Create a “Use First” Area

Choose one visible section for foods that should be used soon.

Place items such as:

  • Open leftovers
  • Cut vegetables
  • Ripe fruit
  • Open dairy products
  • Partially used ingredients

When you can see these foods, you are more likely to use them.

This approach can also help you build meals around ingredients you already have before buying more groceries.

Step 5: Organize Your Pantry by Category

You do not need a perfectly styled pantry.

You need to know where things are.

Group similar foods together.

Try These Simple Categories

Breakfast:
Oats, cereal, pancake mix, coffee, tea.

Baking:
Flour, sugar, baking powder, spices, chocolate chips.

Dry staples:
Rice, pasta, beans, grains.

Snacks:
Crackers, nuts, popcorn, dried fruit.

Cooking ingredients:
Broth, canned tomatoes, sauces, oils.

Grouping similar items makes grocery shopping easier because you can quickly see what you already have.

Step 6: Use a 10-Minute Kitchen Reset

When the kitchen starts feeling overwhelming, do not try to clean everything at once.

Set a timer for 10 minutes.

Minute 1–2: Collect Trash

Throw away obvious trash and empty packaging.

Minute 3–4: Clear the Counters

Return appliances, dishes, food, and miscellaneous items to their proper locations.

Minute 5–6: Handle the Dishes

Load the dishwasher or wash the most important dishes.

Minute 7–8: Wipe Main Surfaces

Focus on the countertop, cooking area, and dining surface.

Minute 9–10: Finish the Small Things

Put away remaining items and sweep obvious crumbs from the floor.

When the timer ends, stop if the important work is finished.

You do not need to turn every 10-minute reset into a full cleaning session.

Step 7: Make Cleanup Easier While You Cook

One of the easiest ways to prevent kitchen clutter is to clean as you go.

Instead of waiting until dinner is finished, handle small tasks during cooking.

Try This System

While water heats:

  • Put ingredients away.

While food cooks:

  • Wash a utensil.
  • Wipe a small surface.
  • Put empty packages in the trash.

After transferring food to a plate:

  • Rinse the pan before residue dries.

These small actions reduce the amount of work waiting for you after the meal.

Step 8: Reduce Duplicate Kitchen Items

Too many items can make even a clean kitchen feel crowded.

Open one drawer or cabinet at a time.

Look for:

  • Duplicate utensils
  • Chipped dishes
  • Containers without matching lids
  • Appliances you never use
  • Expired pantry items
  • Gadgets you forgot you owned

Do not remove something simply because you have not used it recently.

Instead, ask:

“Does this item have a useful purpose in my kitchen?”

If the answer is no and it is safe and appropriate to remove it, consider donating, recycling, or discarding it according to local guidelines.

Step 9: Create Simple Kitchen Zones

Kitchen organization becomes easier when different activities have their own areas.

Cooking Zone

Keep frequently used pans, utensils, oils, and seasonings close to the stove.

Food Preparation Zone

Keep cutting boards, knives, mixing bowls, and prep tools near the main counter space.

Cleaning Zone

Keep dish soap, sponges, brushes, and cleaning supplies together and safely stored.

Breakfast Zone

Keep coffee, tea, cereal, oats, and breakfast supplies together if that fits your kitchen layout.

Zones reduce unnecessary movement and make everyday tasks faster.

Step 10: Build a Weekly Kitchen Reset

A daily reset handles the small messes.

A weekly reset handles the areas that slowly become cluttered.

Choose one day each week for a quick check.

Weekly Checklist

  • Check the refrigerator
  • Review leftovers
  • Check produce
  • Wipe refrigerator spills
  • Review pantry items
  • Restock basic supplies
  • Clear one cluttered drawer
  • Clean frequently touched surfaces
  • Check the trash and recycling area
  • Create your grocery list

You do not need to complete a deep clean every week.

Focus on the areas that affect your daily routine.

Step 11: Make Your Kitchen Easier to Maintain

The best organization system is one you can actually maintain.

If putting something away requires opening three cabinets, you are less likely to do it consistently.

Keep frequently used items accessible.

Store rarely used items farther away.

Avoid creating complicated systems with too many labels, containers, and rules.

Follow the “Easy to Put Away” Test

For every major storage area, ask:

“Can I put this away in a few seconds?”

If the answer is no, the storage system may need to be simplified.

A kitchen should support your routine rather than create additional work.

A Simple Daily Kitchen Routine

You can keep the system very simple.

Morning

  • Put away clean dishes.
  • Clear the main counter.
  • Return breakfast items to storage.

During the Day

  • Clean small spills quickly.
  • Put ingredients away after using them.
  • Wash or load dishes as you go.

Evening

  • Clear the sink.
  • Wipe the main work surface.
  • Put food away.
  • Check the refrigerator for anything that needs attention.

This routine prevents small problems from building into a major cleanup.

What to Do When Your Kitchen Already Feels Overwhelming

If your kitchen is already messy, do not start by organizing every cabinet.

Use this order:

1. Trash
Remove obvious garbage.

2. Dishes
Wash them or load the dishwasher.

3. Food
Return food to the refrigerator or pantry.

4. Counters
Clear your main work surfaces.

5. Floors
Sweep visible crumbs and debris.

6. Storage
Only after the kitchen is usable should you organize drawers and cabinets.

This order gives you a usable kitchen quickly without creating more piles.

Frequently Asked Questions

How do I keep my kitchen from getting messy every day?

Use a short daily reset that focuses on dishes, countertops, food storage, and obvious trash.

How often should I organize my kitchen?

Do a small daily reset and a focused weekly check; save deeper organizing for areas that actually become difficult to use.

What should I remove from my kitchen counters?

Remove items you rarely use, food that belongs elsewhere, paperwork, empty packaging, and appliances that can be stored.

How can I organize a small kitchen?

Use vertical storage where practical, group similar items, and keep frequently used tools in the easiest-to-reach locations.

How long should a kitchen reset take?

A 10–15 minute reset is enough for basic daily maintenance when larger cleaning tasks are handled separately.

How can I make cleaning the kitchen easier?

Clean small messes while cooking, keep storage locations consistent, and avoid allowing dishes and food containers to accumulate.

What should I do first when my kitchen is extremely messy?

Start with trash, dishes, food, and countertops before attempting detailed organization.

How can I stop my kitchen from feeling cluttered?

Reduce unnecessary items, keep counters mostly clear, and give frequently used categories a consistent storage location.

Final Thoughts

A manageable kitchen does not require perfect organization.

It needs a simple system that makes everyday tasks easier.

Clear the counters, give frequently used items a home, stay on top of dishes, organize food by category, and use a short reset before small messes become large ones.

Most importantly, do not wait until the kitchen is overwhelming before doing something about it.

A few minutes each day can be much easier than one exhausting cleaning session at the end of the week.

Start with one area today.

Clear the main counter, handle the dishes, and put everything that does not belong there back in its place.

Then repeat the process tomorrow.

Weekend Kitchen Reset Tips That Save Food, Time & Money

Weekend kitchen reset with organized fresh produce, leftovers, bread, freezer foods, and simple meal prep for saving food, time, and money

Weekend Kitchen Reset Tips That Save Food, Time & Money

A weekend kitchen reset is a simple way to use food before it goes bad, clear crowded shelves, and make the week ahead easier. You do not need a full day or a complicated meal plan. With a few practical steps, you can organize your refrigerator, pantry, freezer, and leftovers in one focused routine.

The best time to reset your kitchen is before your next grocery trip. You can see what you already have, decide what needs to be eaten soon, and avoid buying duplicates. This small habit can also reduce food waste and help you save money over time.

How to Organize Foods Before They Go Bad

Start by checking your refrigerator, freezer, and pantry. Look for foods that are already open, close to their use-by date, or beginning to lose freshness.

Step-by-Step

  1. Check older foods first. Move items that need to be used soon toward the front.
  2. Group similar foods together. Keep dairy, produce, leftovers, sauces, and ready-to-eat foods in clear sections.
  3. Check opened packages. Seal bags, jars, and containers tightly after use.
  4. Create a “eat first” area. Put foods that need attention in one easy-to-see spot.
  5. Plan one meal around those foods. Turn leftover vegetables, cooked meat, grains, or sauces into an easy meal.

A simple “eat first” section makes forgotten food easier to notice before it becomes waste.

What to Freeze

Freezing is useful when you know you will not eat something soon. It can protect many foods from spoilage and give you more flexibility during busy weekdays.

Consider freezing:

  • Sliced bread and rolls
  • Cooked meat and poultry
  • Extra cooked rice or grains
  • Berries and other suitable fruit
  • Chopped vegetables intended for cooking
  • Homemade soups and stews
  • Extra portions of cooked meals

Before freezing, divide large amounts into meal-sized portions. Use freezer-safe bags or containers and remove as much excess air as practical. Label each package with the food name and date so older items are easier to use first.

Do not freeze food simply because it is old or questionable. Freezing does not make spoiled food safe.

How to Store Fresh Produce

Fresh produce lasts longer when each item gets the storage conditions it needs. Avoid treating every fruit and vegetable the same way.

Use these simple guidelines:

  • Keep potatoes, onions, and garlic in a cool, dry, well-ventilated area.
  • Refrigerate leafy greens when appropriate and keep excess moisture under control.
  • Store berries in the refrigerator and check them regularly for damaged fruit.
  • Keep whole tomatoes at room temperature for better texture, then refrigerate cut tomatoes.
  • Separate produce that produces a lot of ethylene gas from sensitive items when practical.
  • Remove spoiled pieces quickly so they do not affect nearby produce.

Do not wash every fruit or vegetable immediately if extra moisture could shorten its storage life. Wash produce when appropriate and dry it well before storing.

Leftover Organization

Leftovers are easy to forget when several containers are stacked together. A simple system can turn them into convenient meals instead of forgotten food.

Use clear, covered containers whenever possible. Label leftovers with the date and place newer containers behind older ones.

Try this routine:

  1. Put leftovers into shallow containers for quicker cooling.
  2. Label each container with the food and date.
  3. Keep older leftovers where you can see them easily.
  4. Plan a leftover meal before cooking something completely new.
  5. Discard leftovers that have been stored longer than recommended or that look or smell unsafe.

A small amount of organization can make weekday meals much easier.

Bread Storage

Bread storage depends on how quickly you plan to use it. If you expect to finish a loaf soon, keep it sealed at room temperature in a cool, dry area.

For longer storage, freezing is usually more useful than refrigeration because the refrigerator can make bread become stale faster.

For a simple freezer method:

  • Slice the loaf before freezing.
  • Place slices in a freezer-safe bag.
  • Remove excess air.
  • Freeze in portions that match your normal use.
  • Toast or thaw individual slices when needed.

If bread develops visible mold, discard the entire loaf rather than cutting away the affected area.

Simple Fridge Reset

You do not need to remove every item from the refrigerator every weekend. Focus on the areas that create the most clutter.

Start by removing expired or spoiled food. Wipe spills from shelves and drawers, then return foods to practical sections.

Keep frequently used items easy to reach. Place foods that need to be eaten soon where they are visible.

Check these areas:

  • Refrigerator door shelves
  • Produce drawers
  • Leftover containers
  • Open sauces and condiments
  • Dairy section
  • Ready-to-eat foods

A clean refrigerator is easier to shop from because you can quickly see what you already have.

Food-Waste Prevention

The easiest way to reduce food waste is to notice food before it becomes a problem.

Before shopping, take a quick inventory of your kitchen. Write down foods that need to be used and build one or two meals around them.

Other useful habits include:

  • Buy realistic quantities.
  • Freeze extras before they become unusable.
  • Save suitable leftovers for another meal.
  • Store foods according to their needs.
  • Keep a short shopping list based on what is already available.
  • Avoid buying duplicates simply because an item is hidden behind something else.

Food waste often starts with poor visibility, not a lack of good intentions.

Weekend Meal Prep

Weekend meal prep does not have to mean preparing every meal for the entire week. Instead, prepare a few basic ingredients that can be mixed into different meals.

For example, you can:

  1. Wash and prepare suitable vegetables.
  2. Cook a batch of rice, grains, or another staple.
  3. Prepare a protein for several meals.
  4. Portion snacks into convenient containers.
  5. Freeze anything you will not use soon.
  6. Keep ingredients for the first few weekday meals together.

Choose foods that match your actual schedule. Preparing too much can create more leftovers than you can comfortably use.

Quick Kitchen Cleanup

Finish your weekend reset with a short cleanup. Start with the areas that affect food preparation most.

Wipe counters, clean visible spills, wash dishes, empty the garbage if needed, and clean frequently used kitchen tools.

A quick checklist can help:

  • Clear the counters.
  • Wash or load dishes.
  • Wipe food-preparation surfaces.
  • Clean obvious refrigerator spills.
  • Empty the garbage when full.
  • Return ingredients to their proper storage areas.

A 10- to 15-minute cleanup can make Monday morning feel much easier.

Frequently Asked Questions

What is a weekend kitchen reset?

A weekend kitchen reset is a short routine for organizing food, checking leftovers, cleaning storage areas, and preparing ingredients before the new week begins.

How often should I organize my refrigerator?

A quick check each weekend works well, while a deeper refrigerator cleaning can be done when shelves, drawers, or spills need attention.

What foods are best to freeze?

Bread, cooked meals, soups, cooked meats, and many suitable fruits and vegetables can be frozen when properly packaged and stored.

Is it better to refrigerate bread?

For short-term storage, bread is usually better kept sealed at room temperature; freezing is a better option for longer storage.

How can I stop wasting fresh produce?

Store each type of produce appropriately, keep older items visible, and plan meals around produce that needs to be used first.

How should I organize leftovers?

Use covered containers, label them with dates, and keep older leftovers toward the front so they are used before newer foods.

Does meal prep save money?

Meal prep can reduce impulse purchases and food waste when you prepare realistic portions based on foods you already have.

How long does a kitchen reset take?

A practical weekend reset can take about 20 to 30 minutes when you focus only on food organization, leftovers, storage, and essential cleaning.

Final Thoughts

A weekend kitchen reset is less about having a perfect kitchen and more about making food easier to see, use, and enjoy. By checking what you already have, freezing suitable extras, organizing leftovers, storing produce correctly, and preparing a few ingredients, you can start the week with less clutter and fewer unnecessary grocery purchases.

The most useful routine is the one you can repeat every weekend. Start small, focus on food that needs attention first, and build your kitchen reset around the way your household actually eats.

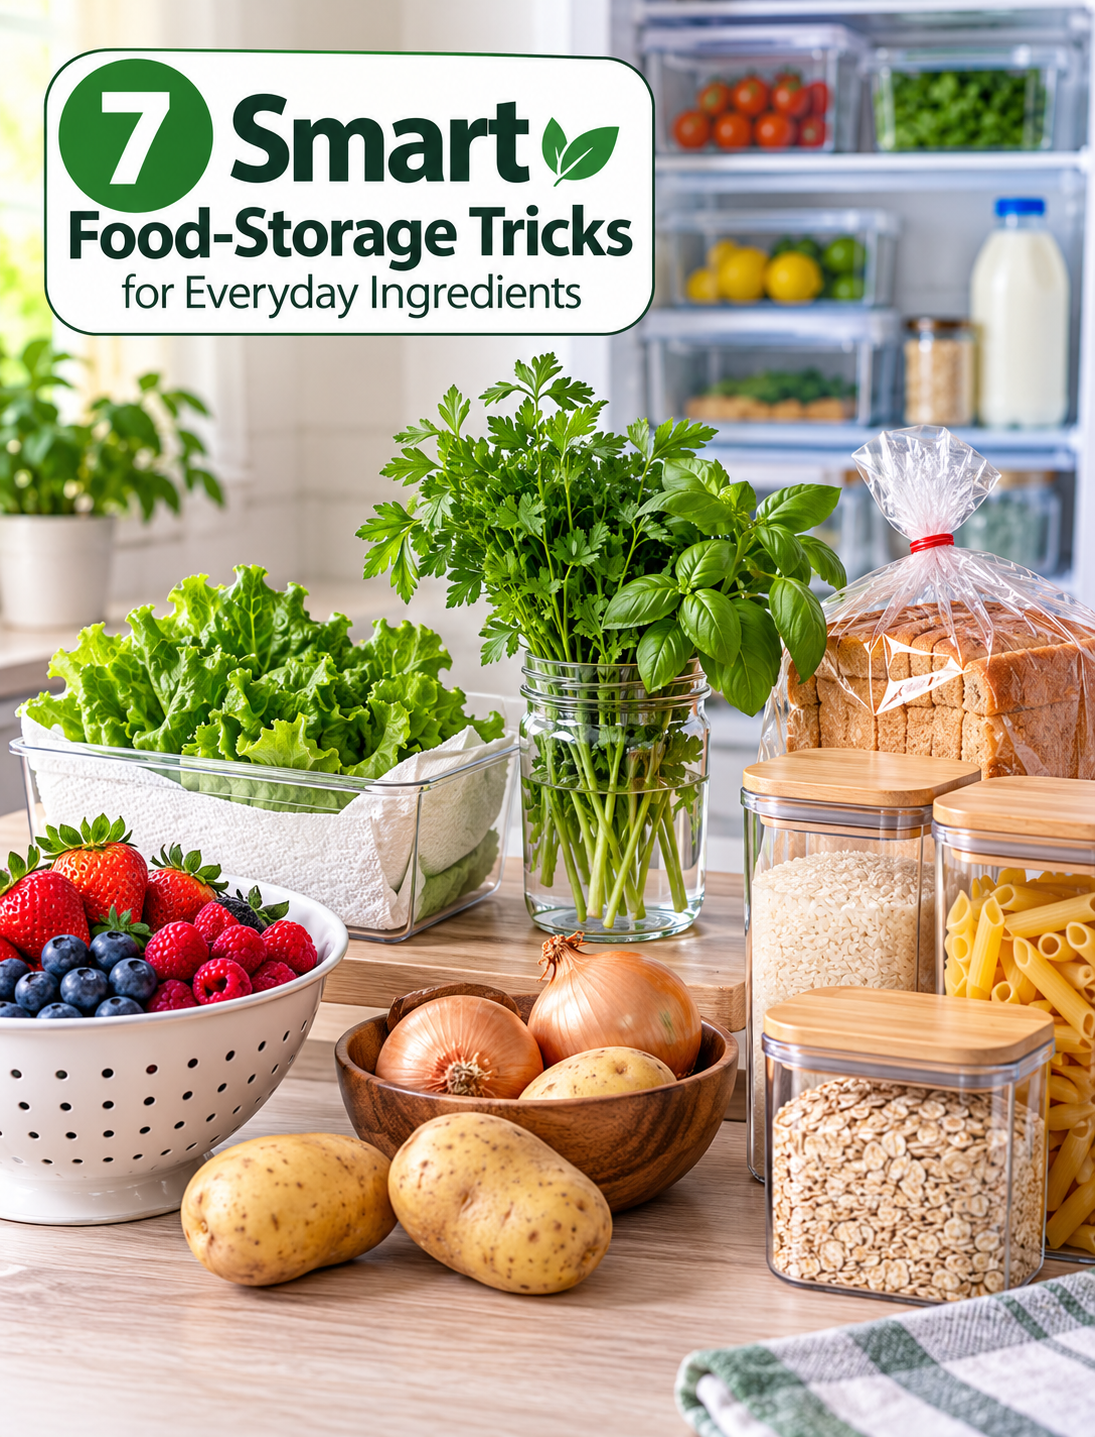
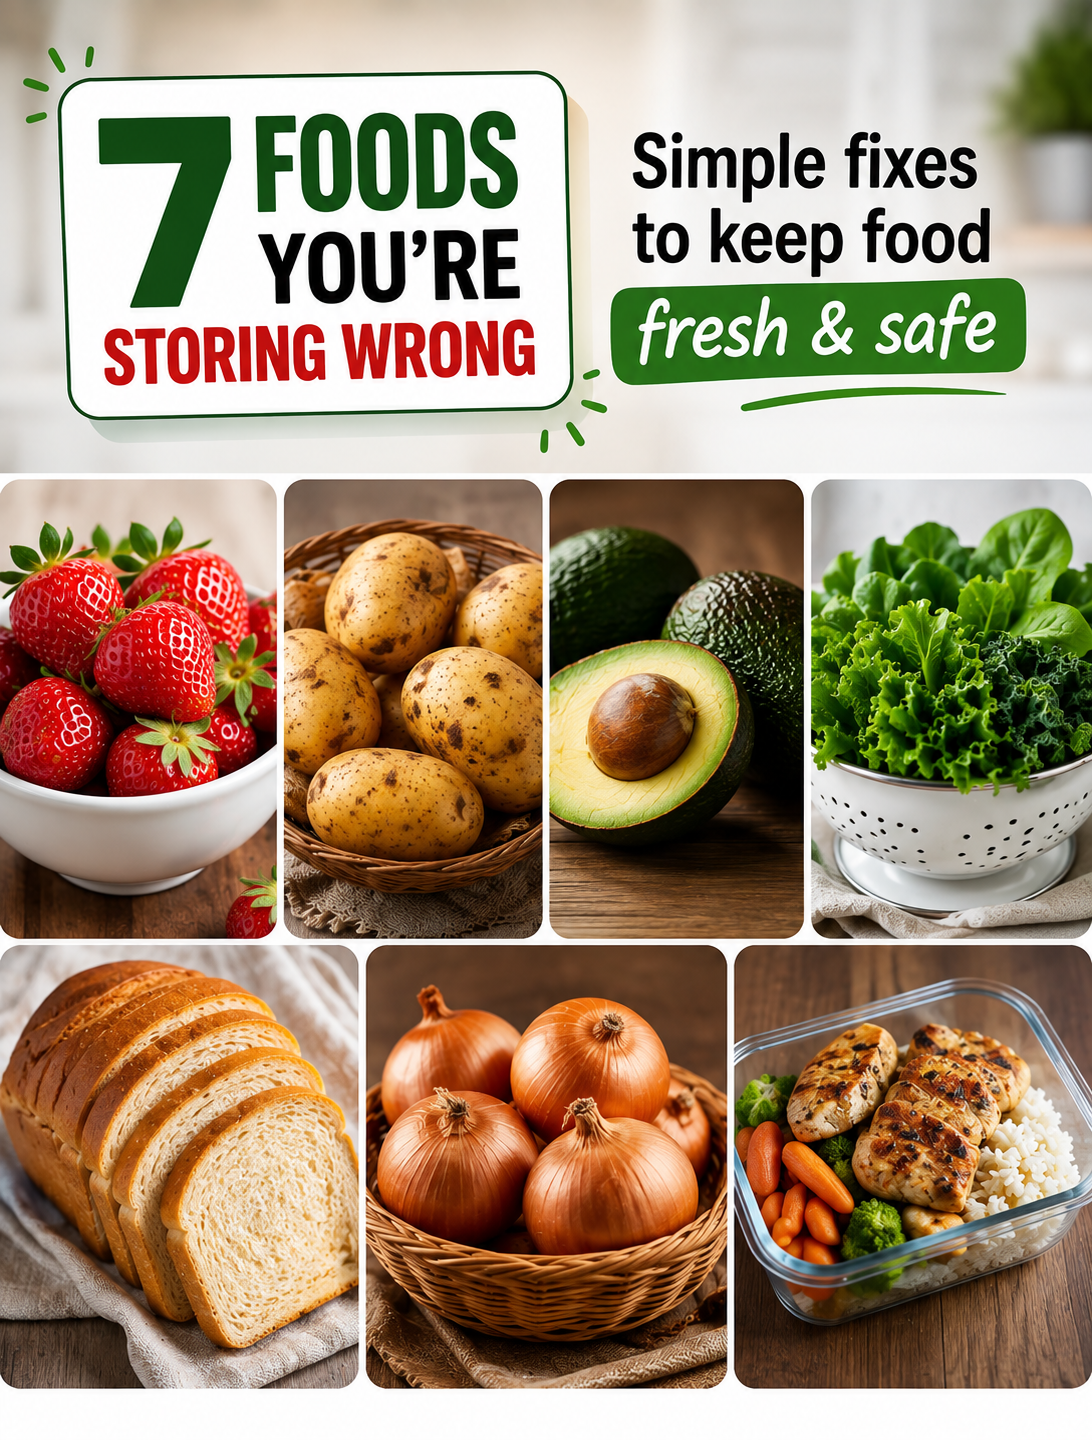
7 Smart Food-Storage Tricks for Everyday Ingredients Full Guide

7 smart food-storage tricks for keeping berries, leafy greens, herbs, bread, potatoes, onions, and pantry staples fresh

7 Smart Food-Storage Tricks for Everyday Ingredients Full Guide

Keeping everyday ingredients fresh does not have to be complicated. The right storage method can help reduce food waste, protect flavor, and make meal prep easier. Many foods spoil faster because they are stored at the wrong temperature, left uncovered, or placed in the wrong part of the refrigerator.

These simple food-storage tricks work well for common kitchen staples such as berries, leafy greens, bread, herbs, onions, potatoes, and dairy products. Each method uses basic items you may already have at home, including airtight containers, paper towels, storage bags, and clean jars.

Follow these seven practical steps to help your groceries stay fresh longer.

1. Keep Berries Dry Before Refrigerating

Fresh strawberries, blueberries, raspberries, and blackberries can spoil quickly when moisture remains on their surface. Washing berries too early can also shorten their shelf life.

Step-by-step:

  1. Check the berries and remove any soft, moldy, or damaged pieces.
  2. Do not wash the entire batch unless you plan to eat it soon.
  3. Place dry berries in a clean container lined with a paper towel.
  4. Leave a little space for air to move around the fruit.
  5. Refrigerate them promptly after bringing them home.
  6. Wash only the portion you are ready to eat.

The paper towel helps absorb excess moisture that can encourage mold. If berries become wet, gently dry them before returning them to the refrigerator.

2. Wrap Leafy Greens in Paper Towels

Lettuce, spinach, kale, and other leafy greens can become slimy when excess moisture collects inside a storage container. A simple layer of paper towel can help control that moisture.

Step-by-step:

  1. Remove damaged or wilted leaves.
  2. If you wash the greens, dry them thoroughly.
  3. Place a paper towel inside a food-storage container or reusable bag.
  4. Add the greens without tightly compressing them.
  5. Add another paper towel on top if the greens are very moist.
  6. Replace the towel when it becomes damp.

Store leafy vegetables in the refrigerator rather than leaving them on the counter. Keeping them cool and reasonably dry helps maintain their texture and freshness.

3. Store Fresh Herbs Like Flowers

Soft herbs such as cilantro, parsley, and mint often wilt before you have a chance to use them. Treating them more like flowers can help them stay crisp.

Step-by-step:

  1. Trim a small amount from the herb stems.
  2. Place the stems in a clean jar with a small amount of water.
  3. Keep the leaves above the water line.
  4. Loosely cover the herbs with a food-safe bag.
  5. Refrigerate herbs that benefit from cool storage.
  6. Change the water when it becomes cloudy.

For basil, room-temperature storage is often better because cold temperatures can cause the leaves to darken. Keep basil upright in a jar with water and away from direct sunlight.

4. Keep Bread Away From Refrigerator Moisture

The refrigerator may seem like the best place for bread, but cold storage can make bread stale faster. For most everyday bread, room-temperature storage is a better short-term option.

Step-by-step:

  1. Keep bread in its original packaging if it closes securely.
  2. Store it in a cool, dry area away from direct sunlight.
  3. Keep the package sealed to limit moisture loss.
  4. Avoid storing bread next to the stove or other heat sources.
  5. Freeze extra bread if you will not use it within several days.
  6. Remove only the amount you need from the freezer.

Freezing is especially useful for sliced bread because individual slices can be taken out as needed. This can prevent unnecessary waste when you buy larger packages.

5. Store Potatoes and Onions Separately

Potatoes and onions are common pantry staples, but storing them together can cause problems. Both need airflow, and onions can release gases that may affect nearby produce.

Step-by-step:

  1. Inspect potatoes and remove any damaged ones.
  2. Keep potatoes in a cool, dark, well-ventilated place.
  3. Store onions separately in a dry, ventilated area.
  4. Avoid sealed plastic bags for long-term storage.
  5. Keep both foods away from direct sunlight.
  6. Check them regularly and remove spoiled pieces.

Do not wash potatoes before long-term storage because added moisture can encourage spoilage. Wash them shortly before cooking instead.

6. Use Airtight Containers for Dry Ingredients

Flour, rice, pasta, cereal, oats, sugar, and other pantry staples can lose quality when exposed to moisture, air, or pests. Airtight containers provide a simple layer of protection.

Step-by-step:

  1. Check the package for signs of moisture or pests.
  2. Transfer dry ingredients into clean, dry containers when practical.
  3. Choose containers with tight-fitting lids.
  4. Label each container with the ingredient name and date.
  5. Store containers in a cool, dry pantry.
  6. Use older ingredients before opening newer packages.

Clear containers can also make it easier to see how much food you have. This simple system helps with grocery planning and reduces the chance of buying items you already have.

7. Organize Your Refrigerator by Food Type

A crowded refrigerator can make it difficult to find food and may lead to forgotten leftovers. Organizing food by type makes daily cooking easier and helps you use ingredients before they spoil.

Step-by-step:

  1. Keep ready-to-eat foods in clean, covered containers.
  2. Store raw meat and seafood securely to prevent leaks.
  3. Keep raw animal products separated from foods that will be eaten without cooking.
  4. Place foods that need to be used soon where you can see them.
  5. Label leftovers with the date.
  6. Clean spills as soon as possible.
  7. Check older foods before preparing a new meal.

Use the refrigerator door mainly for items that are less sensitive to temperature changes, such as many condiments. Keep foods that require consistent cold temperatures in the main refrigerator area.

A Simple Food-Storage Routine for Every Week

Good storage works best when it becomes part of your normal kitchen routine. You do not need a complicated system to keep groceries organized.

Try this weekly routine:

  • Check the refrigerator before grocery shopping.
  • Move older foods toward the front.
  • Remove spoiled food promptly.
  • Dry produce before storing it when appropriate.
  • Check leftovers and use them before cooking new meals.
  • Clean storage containers regularly.
  • Freeze foods you will not use soon.
  • Keep pantry staples sealed and labeled.

This routine can help you save money because fewer groceries end up in the trash. It can also make meal planning faster because you know what ingredients are available.

Final Tips for Safer Food Storage

Freshness and food safety are not the same thing. An ingredient can look normal but still require proper handling. Always follow the storage instructions on packaged foods and refrigerate foods that require refrigeration.

Keep your refrigerator at 40°F (4°C) or below and your freezer at 0°F (-18°C) for proper cold storage. Refrigerate perishable foods promptly instead of leaving them at room temperature for long periods.

When in doubt about a food’s safety, do not taste it to determine whether it is still good. When storing leftovers, use clean containers, label dates, and follow recommended storage times.

Small storage changes can make a big difference. Keeping berries dry, greens protected from excess moisture, herbs properly hydrated, and pantry foods sealed can help everyday ingredients stay useful for longer.

FAQs

How should fresh berries be stored?

Keep unwashed berries dry in the refrigerator and remove damaged fruit before storage. Wash only the portion you plan to eat soon.

Should leafy greens be washed before storage?

They can be washed first if they are dried thoroughly, but excess moisture should be removed before refrigeration to reduce spoilage.

What is the best way to store fresh herbs?

Store soft herbs upright in a jar with a small amount of water and loosely cover them. Basil is usually better kept at room temperature.

Should bread be stored in the refrigerator?

For most bread, room-temperature storage is better for short-term use, while freezing is useful for longer storage.

Can potatoes and onions be stored together?

It is better to store potatoes and onions separately in cool, dry, well-ventilated areas to help reduce premature spoilage.

Are airtight containers good for pantry foods?

Yes, airtight containers help protect dry ingredients from moisture, air, and pantry pests while keeping them easier to organize.

How can I reduce food waste at home?

Use older ingredients first, label leftovers, freeze extra food, and check your refrigerator before buying more groceries.

What temperature should a refrigerator be?

Keep your refrigerator at 40°F (4°C) or below to help keep perishable foods safely chilled.

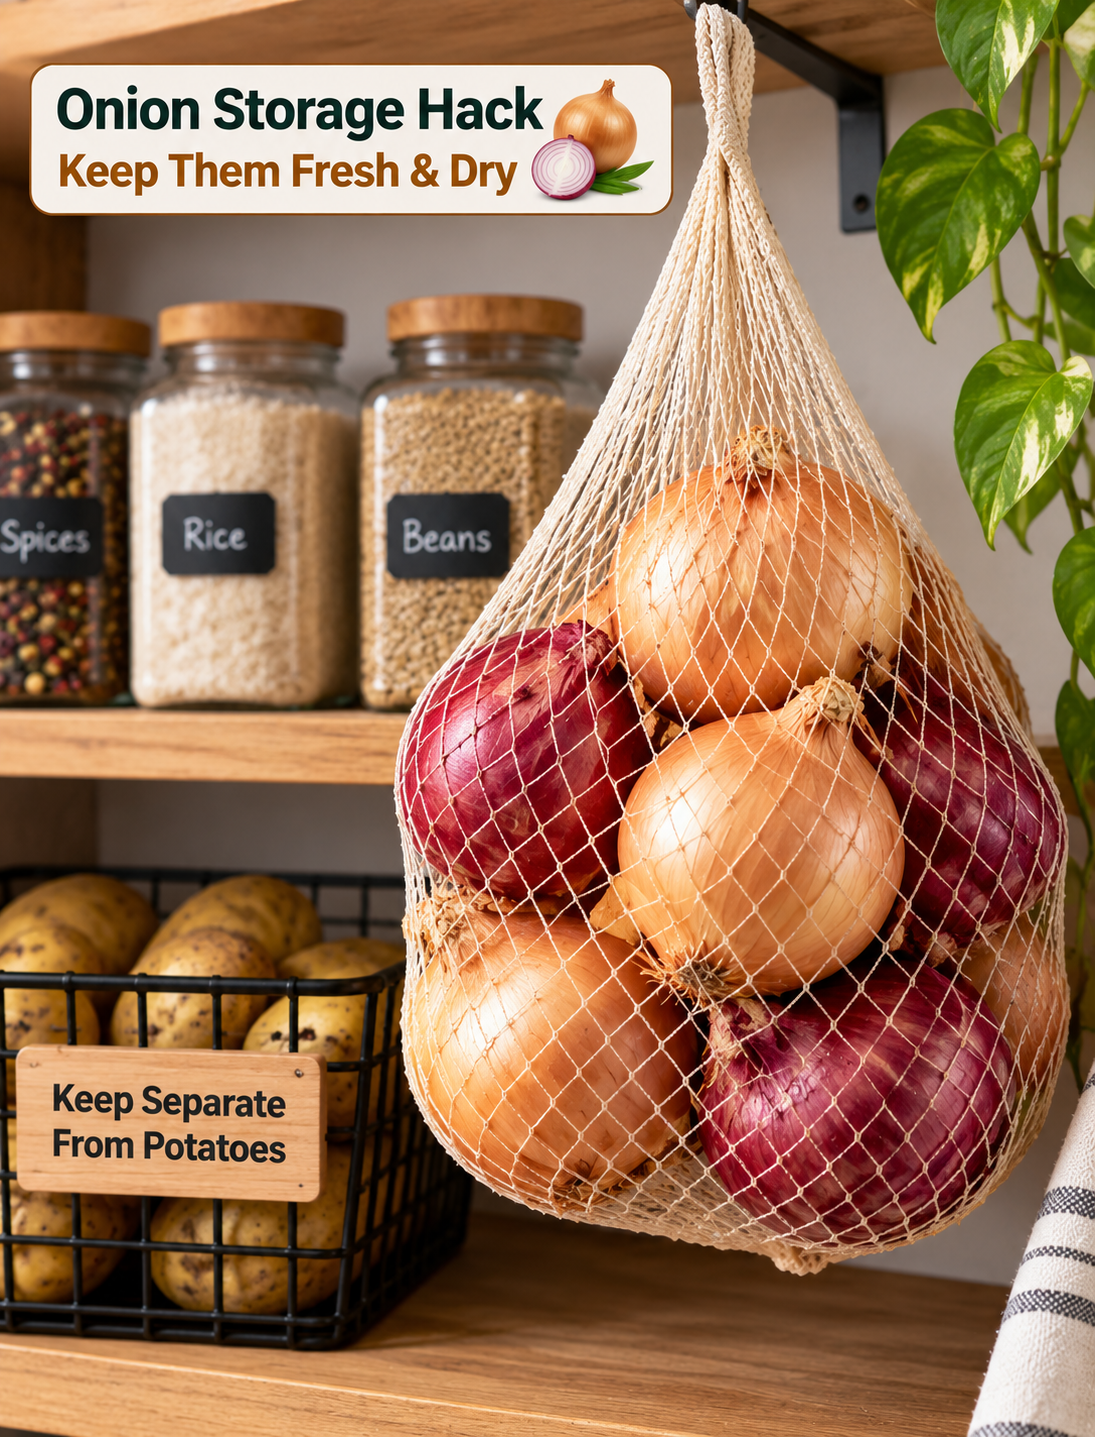
Onion Storage Hack — Keep Them Fresh & Dry

Fresh whole onions stored in a breathable mesh bag in a cool, dry pantry with proper airflow

Onion Storage Hack — Keep Them Fresh & Dry

The right onion storage method can help keep onions firm, dry, and usable for much longer. The biggest mistake is trapping moisture around whole onions, which can lead to soft spots, mold, and sprouting.

Whole onions need a cool, dry, dark, and well-ventilated place. A pantry, basement storage area, or other suitable kitchen storage space can work when temperatures and humidity are moderate.

Good airflow is just as important as keeping onions dry. Instead of sealing whole onions in plastic bags, store them in a mesh bag, wire basket, or open container that allows air to move around them.

This simple storage hack helps reduce moisture buildup and keeps onions from touching each other too closely. Proper storage can also reduce food waste because you have more time to use your onions before they spoil.

Why Proper Onion Storage Matters

Onions naturally contain moisture, and trapped humidity can speed up spoilage. When air cannot circulate, the outer layers may become damp and soft.

Keeping onions dry helps protect the papery outer skin. That dry outer layer acts as a natural barrier and helps the onion stay in better condition.

Light also matters during storage. Direct sunlight can encourage sprouting and create warmer conditions that are not ideal for long-term storage.

Onions should also be kept away from foods that produce moisture or need different storage conditions. Separating onions from potatoes is especially useful because storing them together can shorten their shelf life.

A few simple changes in how you store onions can make a noticeable difference. You do not need expensive containers or special equipment to create better storage conditions.

The Best Place to Store Whole Onions

Choose a location that is cool, dry, dark, and well ventilated. A pantry or dry cabinet can work well if it does not become warm or humid.

Avoid placing whole onions beside the stove, dishwasher, sink, or other areas where heat and moisture are common.

Do not store whole onions in a sealed plastic bag. Plastic can trap moisture and reduce airflow around the onions.

A mesh produce bag is a simple option because it allows air to circulate. A wire basket, ventilated bin, or open cardboard box can also work.

Keep onions in a single layer when possible. If you need to stack them, avoid creating a deep, tightly packed pile that restricts airflow.

How to Store Onions in a Mesh Bag

A mesh bag is one of the easiest ways to improve airflow around whole onions. The open design allows moisture to escape instead of collecting around the skins.

Place the onions loosely inside the bag. Do not pack the bag tightly because crowded onions have less airflow.

Hang the bag in a cool, dry storage area if possible. Keep it away from direct sunlight and sources of heat.

Check the onions regularly. Remove any onion that develops soft areas, mold, leaking liquid, or a strong unpleasant odor.

One spoiled onion can affect nearby produce, so regular inspection is an important part of long-term storage.

Why You Shouldn’t Store Whole Onions in Plastic

Plastic bags can trap moisture around the onion’s outer skin. That moisture can create conditions that encourage mold and decay.

The problem becomes worse when onions are stored tightly together. Limited airflow allows dampness to remain around the produce.

If your onions come home from the grocery store in a plastic produce bag, remove them from the bag when you get home if you plan to store them as whole onions.

Transfer them to a breathable container instead. A mesh bag or open basket is usually a better choice for maintaining airflow.

Plastic containers can still be useful for cut onions, but whole onions need a different storage setup.

Keep Onions Away From Potatoes

Storing onions and potatoes together may seem convenient, but it is better to keep them separate.

Both foods need airflow, but they release and respond to different moisture and gas conditions during storage. Keeping them apart can help reduce premature spoilage.

Potatoes also need a dark, cool storage environment, but their storage needs are not exactly the same as onions.

Use separate baskets or storage areas for each food. Keeping a little space between them can also improve air circulation.

This small change is an easy way to organize a pantry while protecting the quality of both foods.

How to Store Different Types of Onions

Not every onion has the same storage life. Dry storage onions generally keep longer than varieties with higher moisture content.

Yellow onions are a popular choice for longer storage when they are properly cured and kept in suitable conditions.

White onions can also be stored in a cool, dry location, although storage life depends on the variety and condition of the onion.

Red onions should also be kept dry and well ventilated. Their storage life varies based on freshness and variety.

Sweet onions often contain more moisture and may not keep as long as stronger dry-storage varieties. Check them more often for soft spots or spoilage.

Always inspect onions before storing them. Choose firm onions with dry, intact skins for the best storage results.

How to Store Cut Onions

Once an onion has been cut, its storage needs change. Place cut onion pieces in a clean, airtight container and refrigerate them promptly.

Keeping cut onions covered helps protect them from drying out and prevents their strong odor from spreading to other foods.

Use a clean knife and cutting board when preparing onions for storage. Avoid leaving cut onions at room temperature for extended periods.

For best quality, use refrigerated cut onions within several days. Labeling the container with the date can make it easier to track freshness.

If the onion develops an unusual smell, slimy texture, mold, or other signs of spoilage, discard it.

How to Prevent Onions From Sprouting

Sprouting is more common when onions are exposed to warm, humid, or unsuitable storage conditions.

Store whole onions in a cool, dry, dark location with good ventilation. Avoid placing them near windows, appliances, or areas with temperature changes.

Inspect stored onions regularly and use onions that are beginning to sprout sooner rather than later.

A small green shoot does not automatically mean the entire onion is spoiled. However, check the onion carefully for softness, mold, or an unpleasant odor before using it.

If the onion is firm and otherwise in good condition, remove the sprout and use the onion promptly.

How to Tell if an Onion Has Gone Bad

A fresh storage onion should feel firm when gently pressed. The skin should be mostly dry and papery.

Soft or mushy areas are a warning sign that the onion may be breaking down. Dark, wet, or moldy patches are also signs of spoilage.

A strong rotten odor indicates that the onion should be discarded.

Check nearby onions when you find one that has spoiled. Remove any affected onion and clean the storage area if necessary.

Do not try to save an onion with significant mold or widespread soft decay by cutting away only one small section. When in doubt, discard it.

Best Containers for Onion Storage

A mesh produce bag is inexpensive and provides excellent airflow. It is especially useful when you need to store several onions together.

A wire basket provides another breathable option. Choose one that gives the onions enough room instead of forcing them into a tightly packed pile.

An open cardboard box can also work if it is clean, dry, and has enough ventilation.

Avoid sealed plastic containers for whole onions. These containers are better suited to refrigerated cut onions.

Whatever container you choose, clean it regularly and keep it completely dry before adding fresh onions.

How to Make Onions Last Longer

Start with onions that are firm and free from cuts, bruises, wet spots, or visible mold. Damaged onions are more likely to spoil quickly.

Keep the onions dry from the moment you bring them home. Do not wash whole onions before storage because added moisture can encourage decay.

Maintain good airflow around the onions. Avoid deep piles and crowded containers.

Check your storage area regularly for humidity and temperature changes. Move the onions if the location becomes warm or damp.

Use older onions first. This simple rotation method prevents good onions from sitting unused while newer ones are being opened.

Common Onion Storage Mistakes

Storing Whole Onions in the Refrigerator

Whole dry onions generally keep better in a cool, dry, ventilated storage area rather than a humid refrigerator environment. Refrigeration is more appropriate for cut onions.

Keeping Onions in a Sealed Bag

A sealed plastic bag can trap moisture and reduce airflow. Use a breathable bag or open container for whole onions.

Washing Onions Before Storage

Do not wash whole onions before long-term storage. Extra moisture can increase the chance of spoilage.

Storing Onions Beside the Sink

Frequent moisture and temperature changes near a sink can create poor storage conditions. Choose a dry pantry or similar area instead.

Ignoring Soft Onions

A soft onion can deteriorate quickly and affect nearby produce. Remove questionable onions as soon as you notice them.

Overcrowding the Storage Container

Packing too many onions into one container reduces airflow. Give the onions enough room to stay dry and ventilated.

Frequently Asked Questions

Should onions be stored in the refrigerator?

Whole dry onions are generally best stored in a cool, dry, dark, well-ventilated area, while cut onions should be refrigerated.

What is the best container for onions?

A mesh bag, wire basket, or other breathable container allows airflow and helps prevent moisture buildup around whole onions.

Can I store onions in a plastic bag?

Avoid sealed plastic bags for whole onions because they can trap moisture; use a breathable bag or open container instead.

Should onions and potatoes be stored together?

No, keeping onions and potatoes in separate storage areas can help both foods maintain better quality.

How should I store a cut onion?

Place cut onion in a clean airtight container and refrigerate it promptly to maintain quality and limit odor transfer.

Why do my onions keep getting soft?

Excess moisture, poor airflow, heat, or damaged onions can cause softening and spoilage during storage.

Can I use an onion that has started sprouting?

A firm onion with a small sprout may still be usable after removing the sprout, but discard it if it is moldy, slimy, or soft.

Should whole onions be washed before storage?

No, keep whole onions dry and unwashed during storage because added moisture can encourage spoilage.

Final Thoughts

The best onion storage hack is simple: keep whole onions cool, dry, dark, and well ventilated. A breathable mesh bag, wire basket, or open container can provide better conditions than a sealed plastic bag.

Choose firm onions with dry skins, keep them away from moisture and potatoes, and check them regularly for soft spots or mold. These small habits can help maintain onion quality and reduce unnecessary food waste.

Once an onion is cut, move it to a clean airtight container and refrigerate it promptly. Keeping whole and cut onions under the right conditions makes it easier to enjoy fresh onions while getting more use from every grocery trip.

Air Fryer Crispy Cheese Taco Shell Hack

Crispy cheese taco shells filled with seasoned beef, lettuce, tomatoes, avocado, and salsa made in an air fryer

Air Fryer Crispy Cheese Taco Shell Hack

Air Fryer Crispy Cheese Taco Shell Hack is a simple way to turn shredded cheese into a crunchy, low-carb taco shell. The cheese melts, bubbles, and browns in the air fryer before becoming firm enough to hold your favorite taco fillings.

This easy taco shell idea uses just a few basic ingredients and does not require traditional corn or flour tortillas. The result is a crisp, savory shell with rich cheese flavor in every bite.

You can fill these homemade cheese shells with seasoned ground beef, shredded chicken, lettuce, tomatoes, avocado, salsa, sour cream, or your favorite taco toppings. They are also useful when you want a quick dinner with fewer ingredients.

Why You’ll Love This Cheese Taco Shell Hack

This recipe is fast, simple, and easy to customize. The air fryer melts the cheese evenly while helping the edges become golden and crisp.

The shells have a naturally savory flavor, so they can make even simple taco fillings taste more exciting. You can use cheddar, Monterey Jack, Colby Jack, or another cheese that melts and crisps well.

Another benefit is the texture. Traditional tortillas can become soft when loaded with juicy taco filling, but a properly cooked cheese shell stays crisp around the edges.

The shells are also naturally low in carbohydrates because the main ingredient is cheese. This makes them a useful option for people looking for a tortilla alternative.

Ingredients You’ll Need

Shredded Cheese

Use a cheese that melts evenly and develops a crisp edge. Cheddar, Monterey Jack, Colby Jack, and Mexican cheese blends are good choices.

Pre-shredded cheese is convenient, while freshly shredded cheese can melt more smoothly depending on the brand.

Seasonings

Seasonings are optional but can add extra flavor. Try taco seasoning, smoked paprika, garlic powder, onion powder, chili powder, or dried oregano.

Use a light amount because cheese already contains salt.

Taco Fillings

Choose cooked ground beef, chicken, turkey, beans, or another filling you enjoy. Keep the filling relatively dry so it does not soften the crispy shell too quickly.

Toppings

Lettuce, diced tomatoes, avocado, jalapeños, cilantro, salsa, sour cream, shredded cheese, and lime are easy toppings.

Use fresh toppings in moderate amounts so the shell remains sturdy.

How to Make Air Fryer Crispy Cheese Taco Shells

Prepare the Cheese

Preheat the air fryer according to your model’s instructions if preheating is recommended.

Line the air fryer basket or tray with a suitable piece of parchment designed for air-fryer use. Make sure the parchment does not extend beyond the food area or touch the heating element.

Place small piles of shredded cheese in the basket. Shape each pile into a thin, roughly circular layer.

Leave space between each cheese circle. The cheese will spread as it melts, so crowded pieces can join together.

Keep the cheese layer fairly even. A layer that is too thick may stay soft in the center, while an extremely thin layer can become brittle.

Cook Until Golden and Crisp

Air fry the cheese until it melts completely and the edges become golden brown.

Cooking time depends on the cheese type, thickness, and air fryer model. Start checking early because cheese can go from lightly browned to burnt quickly.

The cheese should look melted and bubbly with a firm, browned edge before you remove it.

Allow each piece to cool for a short time. The melted cheese will become firmer as it cools.

Shape the Taco Shells

While the cheese is still warm and flexible, carefully lift each round using a silicone spatula.

Drape the melted cheese over a wooden spoon, taco mold, or another heat-safe rounded surface to create the classic taco shape.

Hold it in place briefly while it cools and firms up. Do not wait too long because completely cooled cheese becomes difficult to shape without cracking.

Once firm, gently remove the shell from the mold and place it on a plate.

Tips for Extra Crispy Cheese Shells

Use a moderate amount of cheese for each shell. An overly thick layer can remain chewy instead of crisp.

Spread the cheese evenly so the center and edges cook at a similar rate.

Do not overcrowd the air fryer basket. Space allows hot air to move around each cheese round.

Watch the cheese closely near the end of cooking. The final stage can happen quickly.

Allow the cheese to cool enough to firm before adding filling. A warm shell may bend or break when loaded.

For maximum crunch, cook until the edges are deeply golden but stop before they become dark brown or bitter.

Best Cheeses for Crispy Taco Shells

Cheddar is one of the easiest options because it melts well and develops a strong savory flavor.

Monterey Jack has a mild taste and melts smoothly. It can create a slightly softer shell if not cooked long enough.

Colby Jack offers a balance of mild flavor and good browning. It also gives the shells an attractive marbled appearance.

A Mexican-style shredded cheese blend can provide a familiar taco flavor. Check the blend because different brands contain different cheese combinations.

For a stronger flavor, combine cheddar with Monterey Jack. A mixed cheese approach can provide both flavor and meltability.

How to Make the Taco Filling

While the cheese shells cook, prepare your preferred taco filling.

For ground beef tacos, brown lean ground beef in a skillet and drain excess grease if needed. Add taco seasoning and a small amount of water, then simmer until the seasoning coats the meat.

For chicken tacos, use cooked shredded chicken and season it with taco seasoning, cumin, garlic powder, and lime juice.

Black beans or pinto beans can provide a simple meat-free filling. Drain and season the beans before adding them to the shells.

Keep the filling warm but avoid adding large amounts of liquid. Juicy fillings can soften the cheese shell quickly.

Best Toppings for Cheese Taco Shells

Shredded lettuce adds crunch and helps separate the warm filling from the shell.

Diced tomatoes provide freshness and mild acidity. Drain excess tomato juice before adding them.

Avocado adds creamy texture and balances the salty cheese.

Fresh cilantro and lime juice provide a bright finish. Jalapeños can be added for heat.

Sour cream, salsa, or taco sauce can be served on the side. Adding too much sauce directly inside the shell can reduce its crispness.

For extra crunch, add diced onions, radishes, or crushed tortilla chips.

Easy Variations to Try

Spicy Cheese Taco Shells

Add a small amount of chili powder, cayenne, or crushed red pepper to the shredded cheese before air frying.

Taco Ranch Shells

Mix a small amount of dry ranch seasoning with the cheese for a creamy, tangy flavor that works well with chicken or beef filling.

Chicken Fajita Tacos

Fill the crispy shells with seasoned chicken, sautéed bell peppers, onions, avocado, and fresh lime.

Breakfast Taco Shells

Use scrambled eggs, cooked breakfast sausage, avocado, and a small amount of salsa for a crispy breakfast taco.

Buffalo Chicken Tacos

Fill the shells with shredded buffalo chicken, lettuce, and a small drizzle of ranch or blue cheese dressing.

Vegetarian Taco Shells

Use seasoned black beans, corn, avocado, tomatoes, lettuce, and salsa for a satisfying meat-free version.

How to Keep Cheese Taco Shells Crispy

Moisture is the biggest enemy of a crispy cheese shell. Keep wet ingredients such as salsa, sour cream, and juicy tomatoes under control.

Prepare the shells just before serving whenever possible. Freshly cooked shells provide the best crunch.

If preparing the components ahead, store the shells separately from the filling and toppings.

Add the filling immediately before eating. This keeps the cheese from absorbing moisture for too long.

For a party, serve the toppings separately so guests can build their own tacos. This also helps everyone control the amount of moisture inside each shell.

What to Serve With Cheese Tacos

A fresh tomato and avocado salad makes a light side for these crunchy tacos.

Mexican-style rice provides a hearty option for dinner. Black beans or pinto beans can also be served on the side.

For a casual gathering, serve the tacos with guacamole, salsa, pico de gallo, and a simple corn salad.

A squeeze of fresh lime over the finished tacos adds brightness and balances the richness of the cheese.

How to Store and Reheat

Cheese shells are best enjoyed immediately after cooking because their crisp texture can soften during storage.

If you have leftovers, allow them to cool completely before placing them in an airtight container. Separate individual shells with parchment paper to reduce sticking.

Store the shells away from moist taco fillings and sauces.

To restore some crispness, place the shells back into the air fryer for a short time. Watch them closely because cheese can brown quickly.

Avoid microwaving the shells because microwave heat can make melted cheese soft and chewy instead of crisp.

Common Mistakes to Avoid

Do not use too much cheese because a thick layer can stay soft in the middle.

Avoid placing cheese directly on an unprotected air fryer surface if your model requires a liner for this type of cooking. Follow your appliance instructions.

Do not leave parchment loose in the basket during preheating because circulating air can move it toward the heating element.

Avoid cooking at an excessively high temperature because the cheese can burn before becoming evenly crisp.

Do not shape the cheese after it has fully cooled. Warm cheese is flexible, while cold cheese becomes firm and more likely to crack.

Avoid adding wet toppings too early. Moisture can quickly turn a crunchy shell soft.

Frequently Asked Questions

What cheese is best for crispy taco shells?

Cheddar, Monterey Jack, Colby Jack, and Mexican cheese blends all work well when melted into thin, evenly shaped rounds.

Can I make cheese taco shells without an air fryer?

Yes, you can use an oven, but cooking time and temperature will vary depending on your oven and cheese thickness.

Why are my cheese shells not crispy?

The cheese layer may be too thick, undercooked, or exposed to excess moisture from the filling and toppings.

Can I use pre-shredded cheese?

Yes, pre-shredded cheese is convenient and works well, although freshly shredded cheese may melt more smoothly.

How do I shape the shells?

Shape the warm melted cheese over a taco mold, wooden spoon, or rounded heat-safe surface until it cools and becomes firm.

Can I make these shells ahead of time?

Yes, but store them separately from wet ingredients and keep them in an airtight container to help preserve their texture.

Are cheese taco shells low carb?

They can be a low-carbohydrate alternative to traditional tortilla shells because the shell is made primarily from cheese.

What fillings work best?

Seasoned beef, chicken, turkey, beans, scrambled eggs, lettuce, avocado, tomatoes, and fresh salsa all pair well with crispy cheese shells.

Final Thoughts

Air Fryer Crispy Cheese Taco Shell Hack is an easy way to create crunchy taco shells with a rich, cheesy flavor. A thin layer of melted cheese becomes firm and crisp as it cools, creating a sturdy base for your favorite fillings.

The key is controlling the cheese thickness, watching the browning closely, and shaping the rounds while they are still warm. Keeping wet toppings separate until serving also helps protect the crunch.

Try cheddar for a bold flavor, Monterey Jack for a mild shell, or a Mexican cheese blend for a taco-inspired finish. Add seasoned beef, chicken, beans, fresh vegetables, and your favorite toppings for a quick meal that is easy to customize.

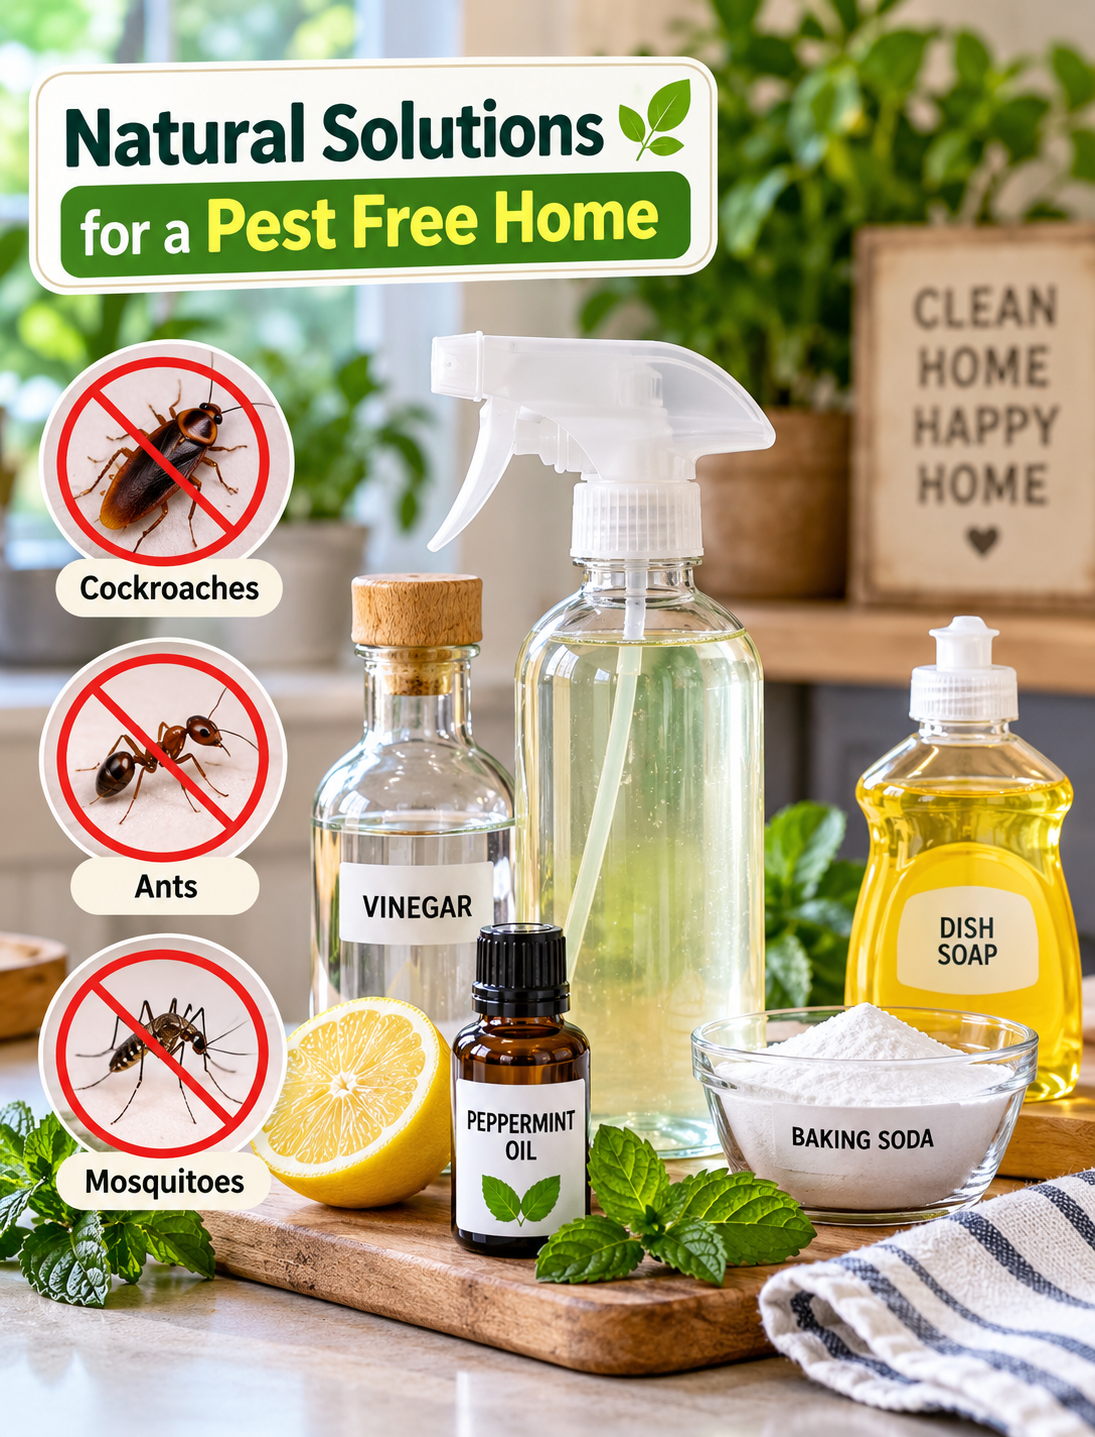
Natural Solutions for a Pest Free Home

Natural pest control spray with vinegar, peppermint oil, and household ingredients for a pest-free home

Natural Solutions for a Pest Free Home

Pests such as ants, cockroaches, mosquitoes, and flies can quickly make a home uncomfortable.Natural Solutions for a Pest Free Home Many homeowners want effective ways to manage these unwanted visitors without relying heavily on strong chemical products.

Natural pest control can be a useful part of a home-care routine when combined with good sanitation, moisture control, and simple prevention steps. Common household items such as vinegar, baking soda, and certain essential oils may help discourage some insects from entering or staying in problem areas.

The key is to focus on prevention first. A clean, dry, well-sealed home gives pests fewer places to find food, water, and shelter.

Why Opt for Natural Approaches?

Natural methods can reduce the need for frequent use of conventional pesticides inside living spaces. They can also be simple, inexpensive, and convenient for routine household maintenance.

However, natural does not always mean risk-free. Essential oils can irritate skin, and some ingredients may be harmful to pets if used incorrectly. Always follow product labels and keep homemade mixtures away from children, pets, food, and food-preparation surfaces.

For a lasting solution, combine natural deterrents with practical pest prevention. Removing crumbs, fixing leaks, sealing gaps, and reducing standing water can address the conditions that attract insects.

Natural Ingredients for Pest Control

Several common household ingredients are often used as insect deterrents. Their effectiveness can vary depending on the pest, location, and severity of the problem.

1. Vinegar

Vinegar has a strong smell that can help discourage ants from traveling across treated surfaces. A diluted vinegar solution can also be useful for cleaning areas where food residue may attract insects.

How to use it:

  • Mix equal parts water and white vinegar.
  • Place the solution in a labeled spray bottle.
  • Wipe suitable hard surfaces where ants commonly travel.
  • Avoid using vinegar on surfaces that can be damaged by acidic cleaners.

2. Baking Soda

Baking soda is commonly included in DIY pest-control recipes. It is sometimes combined with sugar as a homemade cockroach bait, but results are inconsistent and it should not be considered a reliable replacement for professional treatment during a serious infestation.

Keep any bait completely inaccessible to children and pets.

3. Peppermint Oil

Peppermint oil has a strong scent that some insects may avoid. It can be used as a scent-based deterrent around selected entry points.

Always dilute essential oils before household use and avoid applying them directly to skin, pets, or food-contact surfaces.

4. Lavender and Eucalyptus

Lavender and eucalyptus oils are also commonly used in natural insect-repellent routines. Their strong aromas may help make certain areas less attractive to some flying insects.

Essential oils should be stored safely and used according to their labels.

Recipe for Natural Insecticide Made at Home

A simple vinegar-based spray can be used as a household cleaning and deterrent solution for appropriate hard surfaces.

Ingredients:

  • ½ cup white vinegar
  • ½ cup water
  • 10 drops peppermint essential oil
  • 1 teaspoon mild dish soap

Important: Do not mix this solution with bleach or other cleaning chemicals.

Step-by-Step Instructions

Step 1: Prepare the Spray Bottle

Use a clean spray bottle that has not previously contained bleach or another chemical cleaner. Label the bottle clearly after preparing the mixture.

Step 2: Add Water and Vinegar

Pour ½ cup of water and ½ cup of white vinegar into the bottle. This creates the basic solution without making the mixture unnecessarily concentrated.

Step 3: Add Peppermint Oil

Add about 10 drops of peppermint essential oil. Close the bottle before gently mixing the ingredients.

Step 4: Add Dish Soap

Add 1 teaspoon of mild dish soap. Avoid excessive soap because too much can leave a sticky residue on surfaces.

Step 5: Shake Gently

Close the bottle securely and shake it gently before each use. Natural mixtures can separate during storage.

Step 6: Apply Carefully

Spray appropriate hard surfaces, cracks, or entry areas where insects are commonly noticed. Do not spray near food, pet bowls, electrical outlets, or sensitive materials.

Step 7: Clean the Area

After treating the area, remove crumbs, food residue, standing water, and other conditions that may attract pests. Prevention makes any deterrent strategy more useful.

Extra Advice for a House Free of Pests

Natural sprays work best when they are part of a broader prevention routine. Follow these practical steps to make your home less attractive to common household insects.

Keep Food Sealed

Store cereal, flour, sugar, snacks, and pet food in tightly closed containers. Wipe counters and dining areas after meals to remove crumbs and spills.

Take Out the Trash

Use bins with secure lids and remove household garbage regularly. Clean the inside of trash containers if food residue or liquid accumulates.

Seal Cracks and Gaps

Inspect areas around doors, windows, pipes, cabinets, and utility openings. Use suitable caulk or weatherstripping to close small entry points.

Fix Water Leaks

Leaking faucets and pipes can create moisture that attracts insects. Repair plumbing problems and dry wet areas as soon as possible.

Remove Standing Water

Mosquitoes can breed in small amounts of stagnant water. Empty water from buckets, plant saucers, outdoor containers, and other items that collect rain.

Keep Bathrooms Dry

Use ventilation after showers and wipe excess moisture from surfaces. Check under sinks for leaks or damp areas.

Maintain Outdoor Areas

Keep vegetation trimmed away from exterior walls and remove piles of leaves or debris near the foundation. These areas can provide shelter for insects.

When Natural Methods Are Not Enough

DIY solutions may help with minor pest activity, but they are not guaranteed to eliminate an established infestation. A large number of cockroaches, recurring ant trails, mosquito problems, or signs of pests inside walls may require professional evaluation.

Look for warning signs such as repeated sightings, droppings, damaged food packaging, nests, unusual odors, or pest activity that continues despite cleaning and prevention.

Professional pest control can identify the source of the problem and recommend an appropriate treatment plan. If you use any pesticide, read the label carefully and follow all directions for application, storage, ventilation, and re-entry.

A Simple Pest Prevention Routine

Use this step-by-step routine each week:

  1. Inspect: Check kitchens, bathrooms, basements, garages, and entry points.
  2. Clean: Remove crumbs, grease, food residue, and trash.
  3. Dry: Address leaks and wipe away standing moisture.
  4. Seal: Close small cracks and gaps around potential entry points.
  5. Declutter: Reduce cardboard, paper piles, and unused items where pests can hide.
  6. Monitor: Pay attention to recurring insect activity and possible sources.
  7. Act Early: Address signs of infestation before the problem becomes widespread.

FAQs About Natural Solutions for a Pest Free Home

Are natural pest control methods effective?

They can help deter some insects and support prevention, but their results vary by pest and infestation level.

Does vinegar kill cockroaches?

Vinegar is mainly useful as a cleaner and odor-based deterrent; it should not be relied on to eliminate a cockroach infestation.

Can peppermint oil keep ants away?

Peppermint oil may discourage some ants because of its strong scent, but it does not remove the colony or solve the underlying infestation.

What naturally keeps mosquitoes away from a home?

Removing standing water, using screens, reducing outdoor breeding areas, and keeping doors closed can help reduce mosquito activity.

How can I prevent cockroaches naturally?

Keep food sealed, remove garbage, fix moisture problems, clean regularly, and seal cracks around doors, pipes, cabinets, and walls.

Is baking soda safe for pest control?

Baking soda should be used carefully and kept away from children and pets, especially when combined with other ingredients as bait.

How often should I clean areas where pests appear?

Clean kitchens, bathrooms, and food-preparation areas regularly, while immediately removing spills, crumbs, food waste, and excess moisture.

When should I call a pest control professional?

Contact a professional when pest activity is persistent, widespread, or returns after cleaning and basic prevention measures.

Final Thoughts

A pest-resistant home starts with simple daily habits. Keeping food sealed, controlling moisture, removing standing water, cleaning regularly, and closing entry points can make your home less appealing to unwanted insects.

Natural ingredients such as vinegar and peppermint oil may complement these habits, but they should not be treated as a guaranteed cure for infestations. When pest activity continues or becomes extensive, professional assessment is the safer and more dependable next step.

For more practical home-care ideas and helpful household solutions, visit DoorDraz and make simple prevention part of your regular home routine.

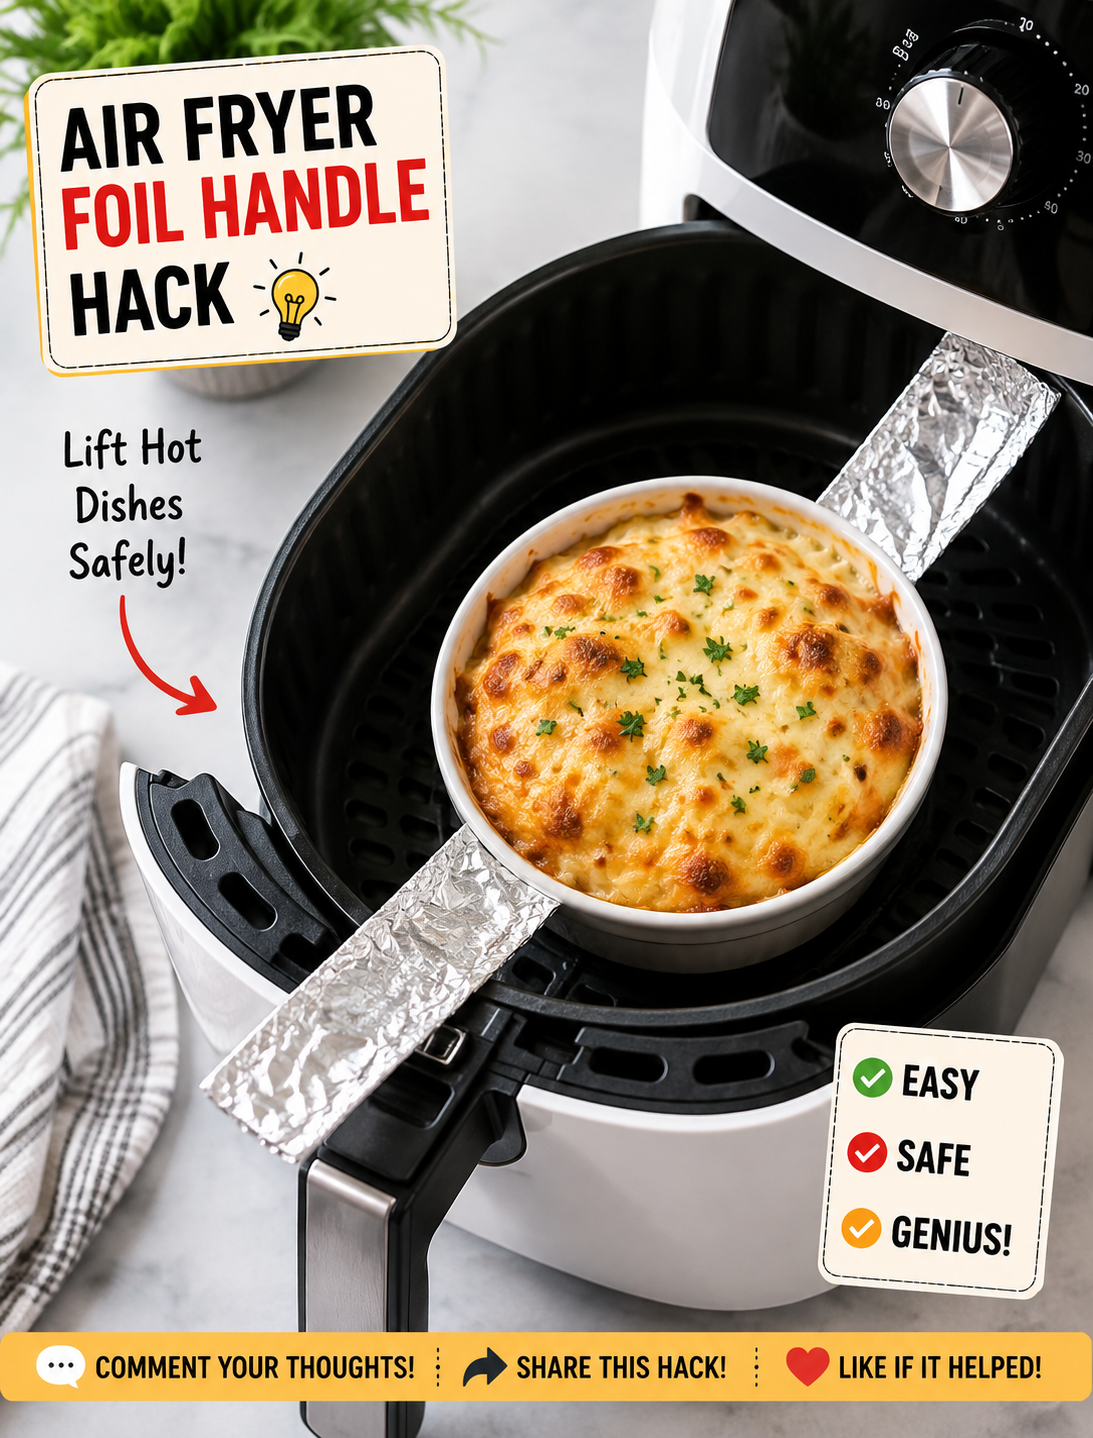
Air Fryer Foil Handle Hack

Air fryer foil handle hack showing folded aluminum foil used to lift food from a hot air fryer basket

Air Fryer Foil Handle Hack

An air fryer foil handle hack is a simple kitchen trick that can make certain air fryer recipes easier to lift, turn, and remove. By folding a small strip of aluminum foil into a sturdy handle, you can create a temporary lifting aid for foods that sit in a pan, dish, or liner inside the basket.

This trick is especially useful when cooking delicate foods that are difficult to grab with tongs. It can also help when you need to lift a small baking dish or food container from a hot air fryer basket.

The key is to use foil correctly. A foil handle should stay secure, avoid loose edges, and never interfere with the air fryer’s heating element or airflow. When used carefully, this kitchen shortcut can make everyday air frying more convenient.

What Is the Air Fryer Foil Handle Hack?

The air fryer foil handle hack uses folded aluminum foil to create a temporary handle that helps you lift food or a suitable oven-safe container from the basket.

Instead of reaching into a hot basket with your hands, you can use the folded strip as a grip point. This can be helpful for foods such as baked dips, casseroles, stuffed peppers, small cakes, and other recipes prepared in an oven-safe dish.

The method is simple, inexpensive, and does not require a special accessory. Most kitchens already have a roll of aluminum foil available.

However, foil should not be treated as a universal replacement for an air fryer basket, rack, or approved accessory. The foil must remain stable during cooking and should never be allowed to touch the heating element.

How to Make an Air Fryer Foil Handle

Making a foil handle takes only a few steps, but the strip should be folded firmly enough to support the food or container.

Step 1: Cut a Foil Strip

Tear off a long strip of heavy-duty aluminum foil. The strip should be long enough to extend under the food or dish while leaving two ends available for lifting.

A wider strip provides better support than a very narrow piece of foil.

Step 2: Fold the Foil

Fold the foil lengthwise several times to create a thick, sturdy band. Press the folds firmly so the strip does not unfold while you are handling the food.

Avoid leaving sharp foil points that could scratch a nonstick surface or catch on the basket.

Step 3: Position the Handle

Place the folded strip underneath the food or oven-safe container before cooking. Keep the two ends positioned where they can be reached easily after cooking.

Do not cover the entire basket with foil because air circulation is essential for proper air frying.

Step 4: Lift Carefully

Once the food is finished, allow the basket and food to cool enough for safe handling. Use heat-resistant gloves or silicone mitts when lifting anything hot.

Hold both ends of the foil evenly and lift slowly. If the food feels too heavy or unstable, stop and use a suitable heat-safe utensil instead.

Why This Air Fryer Hack Is Useful

The main benefit of this trick is easier handling. Some foods are fragile, deep, or difficult to grip without breaking.

A foil lifting strap can make it easier to remove items such as small baked dishes and delicate desserts. It may also reduce the need to reach deep into a hot air fryer basket.

This method can be particularly useful for recipes that use a small oven-safe pan. The foil strip acts as a temporary lifting aid, allowing you to raise the pan without touching its hot sides.

Another benefit is convenience. You do not need to purchase a separate lifting tool for occasional recipes.

Best Foods to Use With a Foil Handle

This method works best with foods or containers that have a stable shape and can safely be lifted from underneath.

Good examples include baked pasta, mini casseroles, stuffed vegetables, brownies, cakes, baked dips, and small oven-safe dishes.

A foil handle can also help with recipes prepared in silicone or metal baking containers, provided the container is rated for the air fryer’s temperature and fits properly inside the basket.

Avoid using the trick for very heavy foods. A thin foil strip can tear if it is carrying more weight than it can safely support.

Air Fryer Foil Safety Tips

Aluminum foil can be used in many air fryers, but incorrect placement can create problems. Always check your air fryer’s manufacturer’s instructions before using foil.

Never place loose foil directly against the heating element. A lightweight sheet can move because of the powerful airflow inside some air fryers.

Keep foil secured under food or inside an appropriate oven-safe container. Do not allow foil to cover the basket’s ventilation openings more than necessary.

Do not preheat an air fryer with loose foil inside unless the manufacturer specifically permits it. The airflow can move unsecured foil before food is added.

Foil should also never be used to completely seal the cooking basket. Air fryers depend on circulating hot air to cook food evenly and create crisp surfaces.

Use fresh foil that is free from tears when creating a lifting strap. If the foil becomes damaged, replace it before attempting to move hot food.

Common Mistakes to Avoid

One common mistake is using too little foil. A narrow or thin strip may tear when you lift a heavy dish.

Another mistake is placing the handle where it blocks too much airflow. Air needs room to circulate around the food for even cooking and browning.

Do not let the foil handle extend close to the heating element. Keep the material contained within the basket and away from exposed heating components.

Avoid pulling quickly when the food is hot. A slow, balanced lift gives you better control and reduces the chance of spilling.

Finally, do not assume every air fryer has the same design. Basket depth, heating element position, and manufacturer instructions vary between models.

Air Fryer Foil Handle Hack vs. Parchment Liners

Foil and parchment serve different purposes in an air fryer.

A foil handle is mainly a lifting aid. It can help remove food or a small cooking container from the basket.

Parchment liners are designed to help reduce sticking and make cleanup easier. Perforated air fryer parchment is often designed to support airflow around the food.

Neither material should completely block the basket’s airflow. For crisp results, the hot air needs enough space to move around the food.

If you use parchment, choose a product intended for cooking and follow its temperature and placement instructions. Do not use parchment as a substitute for a lifting handle unless the product specifically supports that use.

Tips for Getting Better Air Fryer Results

Use the foil handle only when it solves a real handling problem. Many foods can be removed safely with silicone-tipped tongs or a heat-resistant spatula.

Keep food arranged in a single layer when the recipe calls for maximum crispness. Overcrowding can prevent hot air from reaching all surfaces evenly.

Shake or turn food when the recipe requires it. A foil handle should never interfere with the movement needed during cooking.

Use an oven-safe container that fits comfortably inside the basket. Leave enough room around the container for hot air to circulate.

Always follow the temperature and cooking instructions for your specific recipe and air fryer model.

Is the Foil Handle Hack Worth Trying?

The air fryer foil handle hack is worth trying when you regularly cook foods that are difficult to lift. It is inexpensive, quick to prepare, and useful for certain baked recipes.

The biggest advantage is better control when removing hot food or a small cooking dish. The trick can also make some air fryer recipes less messy because you have a designated lifting point.

Still, it is not necessary for every recipe. If food can be removed easily with a safe utensil, there is no reason to add foil.

Think of this as a simple air fryer shortcut rather than a required cooking technique. Used properly, it can make your air fryer routine easier without adding another kitchen gadget.

Frequently Asked Questions

Can I use aluminum foil in an air fryer?

Yes, aluminum foil can be suitable for many air fryers when used correctly, but always follow the manufacturer’s instructions and keep foil away from the heating element.

Does foil affect air fryer cooking?

Foil can affect airflow if it covers too much of the basket, so use only the amount needed and keep ventilation areas as open as possible.

How thick should a foil handle be?

Fold the foil several times into a firm, wide strip so it can support the intended food or container without tearing.

Can I use the foil handle for heavy food?

A foil handle is best for light or moderately sized foods and small containers; use a proper heat-resistant utensil for heavy or unstable dishes.

Can the foil handle stay in the air fryer while cooking?

Yes, if your air fryer manufacturer allows foil and the handle is securely positioned away from the heating element and does not obstruct necessary airflow.

Can I use parchment paper instead of foil?

Parchment can help with sticking and cleanup, but it is not automatically a replacement for a foil lifting handle and should be used according to its product instructions.

Is this hack safe for every air fryer?

No air fryer is identical, so check your model’s manual before using foil and never allow loose material to contact the heating element.

What can I use instead of a foil handle?

Heat-resistant silicone tongs, a spatula, or an approved air fryer accessory can provide a safer and more durable lifting option for many recipes.

Final Thoughts

The air fryer foil handle hack is a simple way to make lifting certain foods and small baking dishes easier. It works best when you need extra control without buying another kitchen tool.

For the best results, fold the foil into a strong strip, keep it away from the heating element, and avoid blocking the air fryer’s airflow. Always check your model’s instructions before using aluminum foil.

Used carefully, this easy air fryer trick can make baked dishes, casseroles, desserts, and other delicate foods much easier to remove. It is a small kitchen shortcut that can save time and make air frying more convenient.

Air Fryer Crispy Cheese Wrap Hack

Golden crispy air fryer cheese wrap sliced open to reveal gooey melted cheese, served with dipping sauce and fresh herbs

Air Fryer Crispy Cheese Wrap Hack

Want a quick snack that turns a few simple ingredients into something crispy, cheesy, and seriously satisfying? This Air Fryer Crispy Cheese Wrap Hack is an easy recipe for busy days, quick lunches, after-school snacks, and casual gatherings.

A soft flour tortilla is filled with shredded cheese and simple seasonings, folded into a compact wrap, and cooked in the air fryer until the outside becomes golden and crisp. Inside, the cheese melts into a warm, gooey filling.

The recipe is easy to change based on what you already have in the refrigerator. Add cooked chicken, turkey, vegetables, jalapeños, or leftover taco meat for a more filling version.

The air fryer is the key to getting a crisp finish without deep frying. A light coating of oil or cooking spray is enough to help the tortilla brown evenly.

Why You’ll Love This Crispy Cheese Wrap

This recipe is fast, simple, and made with everyday ingredients.

The tortilla becomes crisp around the edges while the cheese melts inside. That combination gives the wrap a texture similar to a crispy quesadilla but with a tighter, snack-friendly shape.

You can prepare one wrap when you are hungry or make several for a family snack.

The recipe is also budget-friendly because it does not require expensive ingredients. Basic flour tortillas, shredded cheese, and seasonings are enough to make a tasty snack.

Another advantage is flexibility. Use cheddar for a sharp flavor, Monterey Jack for a smooth melt, or pepper Jack for extra heat.

You can also use small tortillas for snack-size wraps or larger tortillas when you want a more filling meal.

Ingredients You’ll Need

  • 4 large flour tortillas
  • 1½ cups shredded cheddar cheese
  • 1 cup shredded Monterey Jack cheese
  • Melted butter or olive oil 1 tablespoon
  • Garlic powder ½ teaspoon
  • Smoked paprika ½ teaspoon
  • ¼ teaspoon black pepper
  • Dried oregano ¼ teaspoon
  • 2 tablespoons chopped green onions
  • 1 small jalapeño, finely sliced, optional
  • Cooking spray

Optional Add-Ins

  • 1 cup cooked shredded chicken
  • Cooked taco meat ½ cup
  • Diced bell peppers ½ cup
  • ½ cup cooked corn
  • ¼ cup chopped black olives
  • 2 tablespoons chopped fresh cilantro
  • Sliced turkey

For the best texture, avoid adding too many wet ingredients. Excess moisture can make the tortilla soft instead of crisp.

Freshly shredded cheese usually melts smoothly and evenly. You can also use a pre-shredded blend when convenience matters.

How to Make the Air Fryer Cheese Wrap

1. Prepare the Cheese Filling

Add the cheddar and Monterey Jack cheese to a bowl.

Mix in garlic powder, smoked paprika, black pepper, oregano, and chopped green onions.

If you want extra heat, add finely sliced jalapeño.

Stir everything together so the seasonings are distributed throughout the cheese.

If you are adding chicken or taco meat, make sure it is already cooked and not overly wet.

2. Warm the Tortillas

Place the tortillas on a microwave-safe plate.

Warm them for about 10–15 seconds.

This makes the tortillas more flexible and helps prevent cracking when you fold them.

Keep the remaining tortillas covered with a clean kitchen towel while working.

3. Fill the Tortilla

Place one tortilla on a clean work surface.

Add about ¾ cup of the cheese mixture near the center.

Leave a border around the edges so the cheese does not spill out during cooking.

If adding chicken, vegetables, or meat, use a small amount so the wrap remains easy to fold.

Do not overfill the tortilla because a thick wrap takes longer to crisp and may open during cooking.

4. Fold the Wrap

Left side fold and right sides of the tortilla toward the center.

Fold the bottom edge over the filling.

Roll the tortilla upward tightly until the filling is enclosed.

Place the finished wrap seam-side down while you prepare the remaining wraps.

Keeping the seam underneath helps prevent the tortilla from opening in the air fryer.

5. Brush With Oil

Lightly brush the outside of each wrap with melted butter or olive oil.

You can also use cooking spray.

A thin coating is enough. Too much oil can make the tortilla greasy instead of crisp.

For extra flavor, mix a pinch of garlic powder and smoked paprika into the melted butter before brushing.

6. Air Fry Until Golden

Preheat your air fryer to 375°F if your model requires preheating.

Place the wraps seam-side down in the basket.

Leave space between each wrap so hot air can circulate properly.

Air fry for about 6–9 minutes, turning carefully halfway through.

The wraps are ready when the tortillas are golden brown and crisp and the cheese is fully melted.

Air fryer models vary, so begin checking around the six-minute mark.

7. Rest and Slice

Carefully remove the hot wraps from the basket.

Let them rest for about 1–2 minutes.

This gives the melted cheese time to settle slightly.

Slice each wrap diagonally and serve immediately.

The contrast between the crisp tortilla and warm melted cheese is best when the wraps are fresh.

The Best Cheese for Crispy Wraps

Cheese choice can change the texture and flavor of the finished wrap.

Cheddar provides a rich, slightly sharp flavor and melts well.

Monterey Jack has a mild taste and creates a smooth, creamy filling.

Pepper Jack adds both creaminess and a noticeable spicy kick.

Mozzarella creates a stretchy cheese center with a mild flavor.

Colby Jack is another good option because it melts easily and has a balanced taste.

For the best result, combine two cheeses. A sharp cheese paired with a mild melting cheese creates more flavor without becoming overpowering.

How to Make the Wrap Extra Crispy

The biggest mistake is adding too much filling.

A thinner layer of cheese allows the tortilla to cook evenly and become crisp.

Keep the outside of the tortilla relatively dry before adding the light oil coating.

Do not overcrowd the air fryer basket.

Leave enough space around each wrap for hot air to circulate.

Turn the wraps halfway through cooking to brown both sides.

For an even crunchier finish, add another 1–2 minutes of cooking time, but watch closely because tortillas can brown quickly.

Serve the wraps soon after cooking because steam from the hot filling can soften the exterior if they sit too long.

Easy Add-Ins to Try

This recipe is a great way to use small amounts of leftovers.

Add cooked shredded chicken for a simple chicken cheese wrap.

Use leftover taco meat with cheddar and jalapeño for a Tex-Mex version.

Add cooked bell peppers and onions for extra flavor and texture.

Corn adds a mild sweetness that works well with pepper Jack.

Chopped spinach can add color without changing the recipe very much.

For a breakfast version, add scrambled eggs, cooked bacon, and cheddar.

Deli-style wrap, use sliced turkey, Swiss cheese, and a little mustard.

Keep add-ins fairly dry so the tortilla can still become crisp.

Dipping Sauces for Cheese Wraps

A crispy cheese wrap becomes even better with the right dipping sauce.

Ranch dressing provides a cool and creamy contrast.

Salsa adds fresh tomato flavor and a little acidity.

Guacamole works well with Tex-Mex versions.

Quest creates an extra-cheesy combination for serious cheese lovers.

Hot sauce is an easy choice when you want more heat.

Chipotle mayo adds smoky spice and creaminess.

For kids, ketchup or a mild creamy dip can be served on the side.

Place several sauces on the table when serving a group so everyone can choose a favorite.

What to Serve With Crispy Cheese Wraps

These wraps can be served as a snack or as part of a larger meal.

Pair them with a fresh green salad for a simple lunch.

Serve them with tomato soup for a comforting combination.

For a Tex-Mex meal, add black beans, corn salsa, guacamole, and fresh pico de gallo.

Air fryer potato wedges also make a great side.

For breakfast, serve a cheese and egg version with fresh fruit.

For game day, cut the wraps into smaller pieces and serve them with several dipping sauces.

Can You Make These Wraps Ahead?

Yes, you can prepare the wraps ahead of time.

Assemble them and place them in the refrigerator in a covered container.

For the best texture, air fry them shortly before serving.

Avoid leaving assembled wraps at room temperature for long periods when they contain cooked meat or other perishable ingredients.

If you are preparing several wraps for a gathering, make the filling ahead and assemble the tortillas closer to cooking time.

This helps prevent moisture from softening the tortillas.

Storage and Reheating

Store leftover cooked wraps in an airtight container in the refrigerator.

For the best texture, reheat them in the air fryer at 350°F for about 3–5 minutes.

The air fryer helps bring back some of the crisp texture while warming the cheese.

Avoid using the microwave when possible because microwave heating can make the tortilla soft.

If you are reheating a wrap containing chicken or other cooked meat, make sure the filling is heated thoroughly before serving.

Discard leftovers that have an unusual smell, appearance, or texture.

Simple Variations

Spicy Jalapeño Cheese Wrap

Add sliced jalapeños, pepper Jack cheese, and a pinch of crushed red pepper.

Chicken Ranch Wrap

Add shredded cooked chicken, cheddar cheese, and ranch seasoning.

Taco Cheese Wrap

Combine cooked taco meat, cheddar, Monterey Jack, and a little salsa.

Breakfast Cheese Wrap

Fill the tortilla with scrambled eggs, cheddar, and cooked bacon.

Pizza Cheese Wrap

Add mozzarella, a small amount of pizza sauce, and Italian seasoning.

BBQ Chicken Wrap

Combine shredded chicken, cheddar, and a small amount of barbecue sauce.

These variations allow you to use the same basic air fryer method while creating completely different flavors.

Tips for the Best Results

Use soft flour tortillas that fold without cracking.

Warm the tortillas briefly before filling them.

Do not overfill the wraps.

Keep wet ingredients to a minimum.

Use a light layer of oil or cooking spray.

Place the wraps seam-side down in the basket.

Leave space between the wraps.

Turn them halfway through cooking.

Watch carefully during the final minutes because tortillas can brown quickly.

Allow the wraps to rest briefly before slicing.

Serve them while warm for the best crisp texture.

The Bottom Line

Air Fryer Crispy Cheese Wraps are an easy solution when you want something quick, cheesy, and crunchy without complicated preparation.

A few basic ingredients turn into a golden snack with a crisp tortilla and warm, melted cheese. The recipe is flexible enough to include chicken, taco meat, vegetables, eggs, or whatever leftovers you have available.

The air fryer makes the process especially simple. A light coating of oil, enough space in the basket, and a short cooking time are all you need for a delicious result.

Serve these wraps with ranch, salsa, guacamole, hot sauce, or your favorite dip.

Frequently Asked Questions

1. How long do cheese wraps take in the air fryer?

Cook them at 375°F for about 6–9 minutes, turning halfway, until the tortilla is golden and the cheese has melted.

2. What tortillas work best for this recipe?

Soft flour tortillas are ideal because they fold easily and become crisp without breaking.

3. How do I stop the cheese from leaking out?

Avoid overfilling the tortilla, leave a border around the filling, and roll the wrap tightly with the seam underneath.

4. Can I add chicken to the cheese wrap?

Yes. Add a small amount of fully cooked shredded chicken for a more filling chicken and cheese version.

5. Can I make these wraps spicy?

Yes. Use pepper Jack cheese, jalapeños, hot sauce, or crushed red pepper for extra heat.

6. Can I prepare cheese wraps ahead of time?

Yes. Assemble them ahead and refrigerate them, then air fry shortly before serving for the best crisp texture.

7. What dipping sauce goes with crispy cheese wraps?

Ranch, salsa, guacamole, quest, chipotle mayo, and hot sauce are all excellent choices.

8. Can I reheat leftover cheese wraps?

Yes. Reheat them in the air fryer at about 350°F for 3–5 minutes to restore some of the crisp texture.

Final Thoughts

This Air Fryer Crispy Cheese Wrap Hack proves that you do not need a complicated recipe to make something seriously satisfying.

The tortilla turns golden and crunchy while the cheese melts into a warm, gooey center. With a few simple add-ins, the same recipe can become a chicken wrap, taco wrap, breakfast wrap, or spicy snack.

For the crispiest result, keep the filling light, use a small amount of oil, and give each wrap enough room in the air fryer.

Crispy outside, melty inside, and ready in minutes—this is an easy recipe to keep in your back pocket for those cheesy cravings.

Crispiest Air Fryer Potatoes Hack

Crispy golden air fryer potatoes with crunchy edges and fluffy centers served on a white plate

Crispiest Air Fryer Potatoes Hack

If you want golden potatoes with a crunchy outside and fluffy center, this Crispiest Air Fryer Potatoes Hack is worth trying. The secret is not adding more oil. It is about preparing the potatoes correctly before they hit the air fryer.

A few simple steps can help remove excess starch, improve browning, and create a crispier surface. This method works well with baby potatoes, Yukon Gold potatoes, red potatoes, and other all-purpose varieties.

The best part is that you can make these crispy potatoes with basic ingredients you probably already have. They are quick enough for a weeknight dinner and tasty enough to serve with burgers, grilled chicken, steak, eggs, or sandwiches.

Ingredients for Crispy Air Fryer Potatoes

You only need a handful of ingredients to make this easy potato side dish.

  • 1 ½ pounds baby potatoes or Yukon Gold potatoes
  • 1 ½ tablespoons olive oil
  • 1 teaspoon garlic powder
  • 1 teaspoon paprika
  • ½ teaspoon onion powder
  • ½ teaspoon kosher salt
  • ¼ teaspoon black pepper
  • 1 tablespoon cornstarch
  • Fresh parsley for serving, optional

Baby potatoes are especially convenient because they have a creamy center and can be cut into even pieces. Yukon Gold potatoes also work well because their naturally buttery texture stays soft inside while the edges become crisp.

Cornstarch is the key ingredient in this method. A light coating helps create a dry, crisp outer layer as the potatoes cook.

How to Make the Crispiest Air Fryer Potatoes

1. Cut the Potatoes Evenly

Wash the potatoes well and dry them with a clean kitchen towel. Cut larger potatoes into 1-inch pieces so they cook at the same rate.

Keeping the pieces close in size is important. Small pieces can burn before larger pieces become tender, while uneven pieces may cook inconsistently.

2. Soak Away Excess Starch

Place the cut potatoes in a bowl of cold water and let them soak for about 20 to 30 minutes.

This simple step removes some of the surface starch. Less surface starch helps the potatoes develop a cleaner, crunchier exterior during air frying.

Drain the potatoes completely after soaking. Pat them very dry with paper towels or a clean kitchen towel.

Do not skip the drying step. Wet potatoes create steam, and excess moisture can prevent the outside from becoming properly crisp.

3. Add a Light Crispy Coating

Put the dry potatoes into a large bowl. Add olive oil, garlic powder, paprika, onion powder, salt, and black pepper.

Sprinkle the cornstarch over the potatoes and toss until every piece has a thin coating.

Use only a light amount of cornstarch. A heavy coating can make the potatoes taste powdery instead of crisp and golden.

4. Preheat the Air Fryer

Preheat your air fryer to 400°F for about 3 to 5 minutes if your model recommends preheating.

A hot cooking basket helps the potatoes start browning as soon as they are added.

If your air fryer does not require preheating, you can still make the potatoes successfully. Simply allow a little extra cooking time if needed.

5. Arrange the Potatoes in One Layer

Place the seasoned potatoes in the air fryer basket in a single layer.

Avoid packing the basket too tightly. Hot air needs room to move around each piece, especially around the cut surfaces.

If you are cooking a large batch, cook the potatoes in two batches instead of overcrowding the basket.

6. Air Fry Until Golden and Crisp

Cook the potatoes at 400°F for approximately 18 to 24 minutes.

Shake the basket after about 10 minutes to help the potatoes brown evenly. Continue cooking until the edges are deeply golden and crisp and the centers are fork-tender.

Cooking time can vary depending on the potato size, air fryer model, and basket design. Check the potatoes a few minutes early if your air fryer tends to cook quickly.

For extra browning, give the potatoes another 2 to 4 minutes at the end.

Why This Air Fryer Potato Hack Works

The trick works because several small preparation steps solve common problems that make potatoes soft.

First, soaking helps remove excess surface starch. Second, drying removes moisture that could create steam. Third, cornstarch adds a thin layer that becomes crisp under high heat.

The final piece is airflow. An air fryer cooks by circulating hot air around the food, so potatoes need enough space for that air to reach their surfaces.

That is why a crowded basket often produces softer potatoes even when the cooking temperature is correct.

You also do not need to drown the potatoes in oil. A small amount is enough to help the seasonings stick and support browning.

Best Potatoes for Air Frying

Different potato varieties produce slightly different results.

Baby potatoes: These are easy to prepare and have a creamy middle with crisp edges.

Yukon Gold potatoes: Their naturally buttery texture makes them excellent for roasting and air frying.

Red potatoes: These hold their shape well and develop a crisp skin when cooked properly.

Russet potatoes: Russets can become very crisp because they contain more starch, although their centers have a lighter, fluffier texture.

For the best balance of crispness and creaminess, baby potatoes and Yukon Golds are excellent choices.

Tips for Extra-Crispy Potatoes

For the crispiest results, focus on moisture, space, and heat.

Dry the potatoes thoroughly. Even a little excess water can slow browning.

Do not skip the soak. A short cold-water soak can help reduce surface starch.

Use a light oil coating. Too much oil can make the exterior greasy instead of crisp.

Add cornstarch sparingly. A thin coating gives the potatoes a crunchy finish without creating a thick crust.

Avoid overcrowding. Cook in batches when necessary.

Shake the basket. Moving the potatoes exposes more surfaces to circulating hot air.

Serve immediately. Air-fried potatoes are crispiest right after cooking.

If the potatoes soften after sitting, place them back in the air fryer at 375°F to 400°F for a few minutes to refresh the crunch.

Easy Seasoning Variations

The basic seasoning can be changed to match almost any meal.

For a smoky version, add smoked paprika and a pinch of chili powder.

For cheesy potatoes, sprinkle grated Parmesan over the cooked potatoes during the final few minutes.

For a ranch-style flavor, toss the finished potatoes with ranch seasoning.

For spicy potatoes, add cayenne pepper, chili powder, or crushed red pepper flakes.

For a breakfast-style version, use garlic powder, paprika, black pepper, and a little dried rosemary.

You can also finish the potatoes with fresh parsley, green onions, or a small squeeze of lemon juice.

What to Serve With Crispy Air Fryer Potatoes

These potatoes are flexible enough to fit breakfast, lunch, or dinner.

Serve them alongside scrambled or fried eggs for a quick breakfast. They also pair well with grilled chicken, steak, burgers, pork chops, or roasted vegetables.

For a casual meal, serve the potatoes with ketchup, garlic aioli, ranch dressing, or a spicy dipping sauce.

They also make an excellent side dish for weekend gatherings because most of the preparation can be done before cooking.

Common Mistakes to Avoid

The biggest mistake is overcrowding the air fryer basket. When potatoes are piled together, trapped moisture turns into steam and reduces browning.

Another common mistake is skipping the drying step after soaking. Potatoes should be as dry as possible before seasoning.

Using too much oil is another problem. Air frying needs much less oil than traditional deep frying, so a light coating is usually enough.

Finally, avoid cutting some pieces much larger than others. Uniform pieces cook more evenly and reduce the chance of having burnt edges with undercooked centers.

How to Store and Reheat Leftover Potatoes

Store leftover potatoes in an airtight container and refrigerate them for up to 3 to 4 days.

For the best texture, reheat them in the air fryer instead of the microwave. Heat them at 375°F for about 4 to 7 minutes, shaking once halfway through.

The microwave is convenient, but it can make the crispy exterior soft.

If you are preparing potatoes ahead of time, keep them refrigerated and reheat them shortly before serving for the best texture.

Frequently Asked Questions

Can I make crispy air fryer potatoes without soaking them?

Yes, but soaking can help remove surface starch and improve the final crispness. Always dry the potatoes thoroughly before cooking.

What temperature is best for crispy potatoes in an air fryer?

400°F works well because the high heat encourages fast browning while the centers become tender.

Why are my air fryer potatoes not crispy?

The most common causes are excess moisture, overcrowding, too much oil, or insufficient cooking time.

Should I boil potatoes before air frying?

Boiling is optional and not required for this method. A short cold-water soak is enough to help improve the texture.

Can I use frozen potatoes for this hack?

Yes, but frozen potatoes usually need different cooking times and may not need the same soaking process as fresh potatoes.

Can I use Russet potatoes instead of baby potatoes?

Yes. Russet potatoes can become very crisp, although they will have a fluffier center than waxier potato varieties.

How do I keep air fryer potatoes crispy?

Serve them immediately and avoid covering them tightly while hot because trapped steam can soften the crust.

Can I make these potatoes without cornstarch?

Yes. The potatoes can still become crispy, especially when they are dry, lightly oiled, properly spaced, and cooked at high heat.

Final Thoughts

This Crispiest Air Fryer Potatoes Hack proves that great texture often comes down to simple preparation. Soaking the potatoes, drying them well, adding a light cornstarch coating, and giving them enough space can make a noticeable difference.

The 400°F cooking temperature helps create golden edges while keeping the centers tender and fluffy. You can also change the seasonings to match breakfast, dinner, game day, or a family-style meal.

Once you try this method, keep the basic technique and make it your own. With a few simple ingredients and the right cooking steps, you can turn everyday potatoes into a crispy, flavorful side dish that belongs on almost any dinner table.

7 FOODS YOU’RE STORING WRONG

7 foods you’re storing wrong with fresh strawberries, potatoes, avocado, leafy greens, bread, onions, and leftovers

7 FOODS YOU’RE STORING WRONG

You may be storing some of your favorite foods the wrong way without even realizing it. The way you place food in your refrigerator, pantry, or freezer can affect freshness, texture, food quality, and safety.

A crowded fridge, warm leftovers, or poorly stored produce can also lead to unnecessary food waste. The good news is that most storage mistakes are easy to fix.

Here are seven common foods that many people store incorrectly, plus simple ways to keep them fresher and safer at home.

1. Strawberries

Fresh strawberries can spoil quickly when moisture gets trapped around the berries. Washing them too early can also shorten their shelf life because extra moisture encourages mold.

For better storage, keep strawberries refrigerated at 40°F or below. Store them unwashed until you are ready to eat them, then rinse them under cool running water.

Place the berries in a clean container that allows some airflow. Remove any damaged or moldy berries as soon as you notice them because mold can spread to nearby fruit.

Pre-cut or packaged produce should also be refrigerated promptly.

Simple tip: Buy only the amount of berries you expect to use within a few days, especially during warm weather.

2. Bread

Bread is often stored in the refrigerator because people assume cold temperatures keep it fresh. However, refrigeration can make bread become stale faster.

For most everyday bread, a cool, dry pantry or bread box is a better short-term option. Keep the package sealed to protect the bread from moisture and air.

If you have more bread than you can eat soon, freezing is a better choice. Wrap it tightly and freeze individual portions so you can take out only what you need.

Simple tip: Freeze extra bread instead of keeping it in the refrigerator for weeks.

3. Potatoes

Potatoes do not belong in the refrigerator for routine storage. Cold temperatures can affect their quality and may cause unwanted changes in flavor and texture when cooked.

Store potatoes in a cool, dry, dark place with good ventilation. Keep them away from direct sunlight and excessive moisture.

Do not store potatoes in a sealed plastic bag if it traps moisture. A breathable bag or open container works better.

USDA produce-storage guidance lists potatoes, sweet potatoes, and dry onions among produce that should be kept in dry storage rather than refrigerated.

Simple tip: Store potatoes away from light, heat, and moisture.

4. Avocados

Avocados can be tricky because their storage needs change as they ripen.

An unripe avocado usually does not need to be refrigerated. Keep it at room temperature until it becomes slightly soft when gently pressed.

Once an avocado is ripe, refrigeration can slow further ripening and help you keep it longer. For a cut avocado, cover the exposed flesh tightly and refrigerate it.

Remember that browning does not always mean an avocado is unsafe. It is often a quality issue caused by exposure to air.

Simple tip: Let hard avocados ripen on the counter, then move ripe ones to the refrigerator.

5. Leafy Greens

Lettuce, spinach, kale, and other leafy greens can quickly become limp when stored with too much moisture.

Keep fresh leafy greens refrigerated and remove damaged leaves before storage. If the greens are wet, gently dry them before placing them in the refrigerator.

A clean container or storage bag with a paper towel can help manage excess moisture. Avoid crushing the greens under heavy food.

Fresh produce such as lettuce, herbs, and strawberries should be stored in a clean refrigerator at 40°F or below.

Simple tip: Keep leafy greens cool, dry, and protected from excess moisture.

6. Cooked Leftovers

One of the most important storage mistakes involves leftovers.

Cooked food should not sit on the counter for hours before being refrigerated. FDA guidance recommends refrigerating or freezing perishable foods and leftovers within two hours, or within one hour when temperatures are above 90°F.

Large amounts of food should be divided into shallow containers. This allows the food to cool more quickly in the refrigerator.

Keep leftovers covered in sealed containers and label them with the date when helpful. Most cooked leftovers should be used within a few days; FDA storage guidance commonly recommends 3–4 days for many cooked foods.

Your refrigerator should stay at 40°F or below, while the freezer should be at 0°F. A refrigerator thermometer can help confirm that your appliance is actually holding the correct temperature.

Simple tip: Refrigerate leftovers promptly and use shallow containers for faster cooling.

7. Onions

Dry onions are another food that often ends up in the refrigerator unnecessarily.

Whole dry onions generally keep best in a cool, dry, well-ventilated place. Avoid storing them in a damp area because moisture can encourage spoilage.

Keep whole onions away from foods that may be affected by their strong odor. Once an onion has been cut, place it in a covered container and refrigerate it.

Proper storage helps protect both the onion’s quality and the rest of your kitchen from strong odors.

USDA produce guidance recommends dry storage for dry onions rather than routine refrigeration.

Simple tip: Keep whole dry onions in a cool, dry, ventilated area and refrigerate cut onions.

The One Refrigerator Rule Everyone Should Know

Correct food placement matters, but refrigerator temperature matters even more.

Set your refrigerator to 40°F or below and your freezer to 0°F. Cold air needs room to circulate, so avoid packing the refrigerator so tightly that air cannot move around the food.

Keep raw meat, poultry, and seafood separated from foods that will be eaten without cooking. Place raw items in a way that prevents their juices from dripping onto other foods.

Clean spills quickly, especially spills from raw meat or seafood. This helps reduce the chance of cross-contamination inside the refrigerator.

Also remember that refrigeration slows bacterial growth but does not make old food safe indefinitely. When you are unsure about a food’s safety, use reliable storage guidance rather than relying only on smell or appearance.

Quick Food Storage Checklist

Use these simple habits to improve food storage at home:

  • Keep your refrigerator at 40°F or below.
  • Keep your freezer at 0°F.
  • Refrigerate perishable foods within two hours.
  • Use shallow containers for large amounts of leftovers.
  • Keep refrigerated foods covered or sealed.
  • Store potatoes and dry onions in a cool, dry place.
  • Keep ripe avocados refrigerated if you are not using them soon.
  • Store fresh berries and leafy greens properly in the refrigerator.
  • Keep raw meat away from ready-to-eat foods.
  • Clean refrigerator spills as soon as they happen.
  • Freeze extra food when you will not use it soon.

These small changes can help reduce food waste while keeping your kitchen more organized.

Frequently Asked Questions

1. What temperature should a refrigerator be?

Keep your refrigerator at 40°F or below to slow the growth of harmful bacteria.

2. Should strawberries be refrigerated?

Yes. Keep fresh strawberries refrigerated at 40°F or below, and wash them shortly before eating.

3. Should potatoes go in the refrigerator?

No. Store whole potatoes in a cool, dry, dark, well-ventilated area rather than routinely refrigerating them.

4. How long can leftovers stay out?

Perishable leftovers should be refrigerated within two hours, or within one hour when temperatures exceed 90°F.

5. Should ripe avocados be refrigerated?

Yes. Refrigerating ripe avocados can slow further ripening and help extend their usable quality.

6. Should leafy greens be refrigerated?

Yes. Keep leafy greens refrigerated and manage excess moisture to help maintain freshness.

7. Can you freeze bread?

Yes. Freezing bread is a practical way to preserve extra loaves and reduce food waste.

8. Should whole onions be refrigerated?

Generally, no. Store dry onions in a cool, dry, ventilated area and refrigerate them after cutting.

Final Thoughts

Food storage does not have to be complicated. A few simple changes can help you protect freshness, reduce waste, and keep your kitchen safer.

Start with the foods you buy most often. Move potatoes and onions to a suitable dry-storage area, keep berries and greens properly chilled, refrigerate ripe avocados, and handle leftovers promptly.

Most importantly, check your refrigerator temperature. Keeping it at 40°F or below is one of the simplest steps you can take for safer food storage at home.

The next time you organize your kitchen, ask yourself one question: Am I storing this food because it is convenient, or because it is actually the best way to keep it fresh and safe?

How to Grow Tons of Fresh Mint in Containers: 7 Easy Secrets

Fresh green mint growing lush and bushy in a container on a sunny home patio

How to Grow TONS of Fresh Mint in Containers Using These Secrets

Growing fresh mint in containers is one of the easiest ways to keep a steady supply of this fragrant herb at home. Mint grows quickly, produces plenty of leaves, and does well on patios, balconies, porches, and sunny windowsills.

The biggest challenge is controlling its fast-growing roots. When planted in garden beds, mint can spread quickly and become difficult to remove. A container keeps the plant contained while giving you easy access to fresh leaves for tea, desserts, salads, sauces, and summer drinks.

With the right container, soil, light, water, and harvesting routine, you can grow a thick, healthy mint plant from a small starter plant.

Choosing the Right Container

Choose a container that is at least 12 inches deep and 12 inches wide for a healthy mint plant. A larger pot gives the roots enough room to develop while allowing the plant to produce more stems and leaves.

Drainage is just as important as container size. Select a pot with several drainage holes so excess water can escape after watering. Standing water can keep the roots too wet and increase the risk of root problems.

Clay, ceramic, plastic, and fabric containers can all work well. Plastic pots hold moisture longer, while unglazed clay pots dry out faster and may need more frequent watering.

If you want to grow several mint plants, use separate containers rather than placing many plants in one small pot. This gives each plant enough space and makes watering easier.

Selecting the Ideal Location

Mint grows best with 4 to 6 hours of sunlight each day. Morning sunlight is especially useful because it provides strong light without the intense afternoon heat found in many parts of the USA.

A patio, balcony, kitchen window, or porch can work well if it receives enough light. In very hot regions, give mint some afternoon shade to protect the leaves from heat stress.

Indoor mint should be placed near a bright window. A south- or east-facing window can provide useful natural light, but rotate the pot every few days so the plant grows evenly.

If the stems become long and weak or the leaves remain small, the plant may need more light.

Using Quality Soil Mix

Use a well-draining potting mix made for containers rather than ordinary garden soil. Garden soil can become dense inside a pot and may restrict root growth and drainage.

A quality container mix should hold enough moisture for mint while still allowing excess water to drain. Adding compost can improve the soil structure and provide a gentle source of nutrients.

Avoid filling the container with heavy soil that stays wet for long periods. Mint likes moisture, but its roots still need access to air.

Before planting, loosen the potting mix and leave about an inch of space below the container rim. This makes watering easier and reduces soil runoff.

Watering Wisely

Mint prefers soil that stays evenly moist but not soggy. Check the top inch of soil with your finger before watering.

If the surface feels dry, water slowly until a little water drains through the bottom holes. This helps moisten the entire root zone instead of only wetting the surface.

During hot summer weather, container mint may dry out faster than plants growing in the ground. Check the soil more often during heat waves, especially when the pot receives direct afternoon sunlight.

Avoid keeping the container sitting in a saucer full of water. Empty excess water after watering to reduce the chance of root problems.

Fertilizing Sparingly

Mint does not require heavy feeding to produce healthy leaves. Too much fertilizer can encourage rapid, soft growth and may reduce the herb’s strong flavor.

During active growth, apply a balanced liquid fertilizer according to the product label every 4 to 6 weeks. Reduce feeding when growth slows during cooler weather.

You can also add a thin layer of compost to the surface of the potting mix. Water afterward so nutrients can gradually move into the root zone.

Healthy soil and regular harvesting are often more important than frequent fertilizer applications.

Controlling Growth

Mint is known for spreading aggressively through underground stems called runners. This is why containers are especially useful for home gardeners.

Keep the entire plant inside its container and avoid letting stems root in nearby pots or garden beds. If mint runners reach the soil around the container, remove them before they become established.

When roots completely fill the pot, move the plant into a larger container or divide the root ball. Repotting every couple of years can help maintain vigorous growth.

Pruning also keeps the plant compact. Remove weak, damaged, or overly long stems to encourage fresh shoots from the center of the plant.

Harvesting for Abundance

Regular harvesting is one of the best ways to encourage a fuller mint plant. Begin harvesting when the plant is established and has several healthy stems.

Use clean scissors to cut stems just above a pair of leaves. Avoid removing more than about one-third of the plant at one time, especially if the plant is still small.

Frequent trimming encourages new branches and helps prevent the plant from becoming tall and sparse. Harvesting before flowering usually provides tender leaves with a strong, fresh flavor.

For the best flavor, pick mint in the morning after the leaves have dried from overnight moisture. Use fresh leaves immediately or store them in the refrigerator for later use.

You can also dry extra mint for tea, seasoning, or homemade herb blends. Harvesting regularly can turn one healthy container plant into a long-lasting source of fresh leaves.

Troubleshooting Common Issues

Yellow leaves often indicate excess moisture, poor drainage, or another root-related problem. Check the drainage holes and allow the surface soil to dry slightly before watering again.

Small leaves and stretched stems can indicate insufficient sunlight. Move the container to a brighter location and monitor new growth.

Aphids, spider mites, and whiteflies may occasionally attack mint. Check the undersides of leaves and young stems for insects or sticky residue.

For a mild infestation, wash the foliage with a gentle stream of water or use insecticidal soap according to its label. Test any treatment on a small area first and follow the product directions.

Powdery mildew can appear as a white coating on leaves, especially when plants have poor airflow. Give containers more space, remove badly affected leaves, and water the soil rather than repeatedly wetting the foliage.

Frequently Asked Questions

Can mint grow well in containers?

Yes. Mint grows very well in containers because pots provide good root control while giving the plant enough space to produce fresh stems and leaves.

How much sunlight does container mint need?

Mint generally performs well with 4 to 6 hours of sunlight daily, while afternoon shade can protect it from excessive heat in hot climates.

How often should I water mint in a pot?

Water when the top inch of potting mix feels dry, then water thoroughly until excess moisture drains from the bottom.

What size pot is best for mint?

A container at least 12 inches deep and wide provides useful space for roots and helps support strong, bushy growth.

Can I grow mint indoors?

Yes. Place mint near a bright window that receives several hours of sunlight and rotate the pot regularly for balanced growth.

How do I make my mint plant bushier?

Harvest the growing tips regularly by cutting stems just above a pair of leaves to encourage new side shoots.

Why is my container mint turning yellow?

Yellow leaves can result from overwatering, poor drainage, or stressed roots, so check soil moisture and make sure the pot drains freely.

Can mint survive winter in a container?

Mint can become dormant during cold weather, but winter survival depends on the variety, container exposure, and local climate; protect the roots from severe freezing.