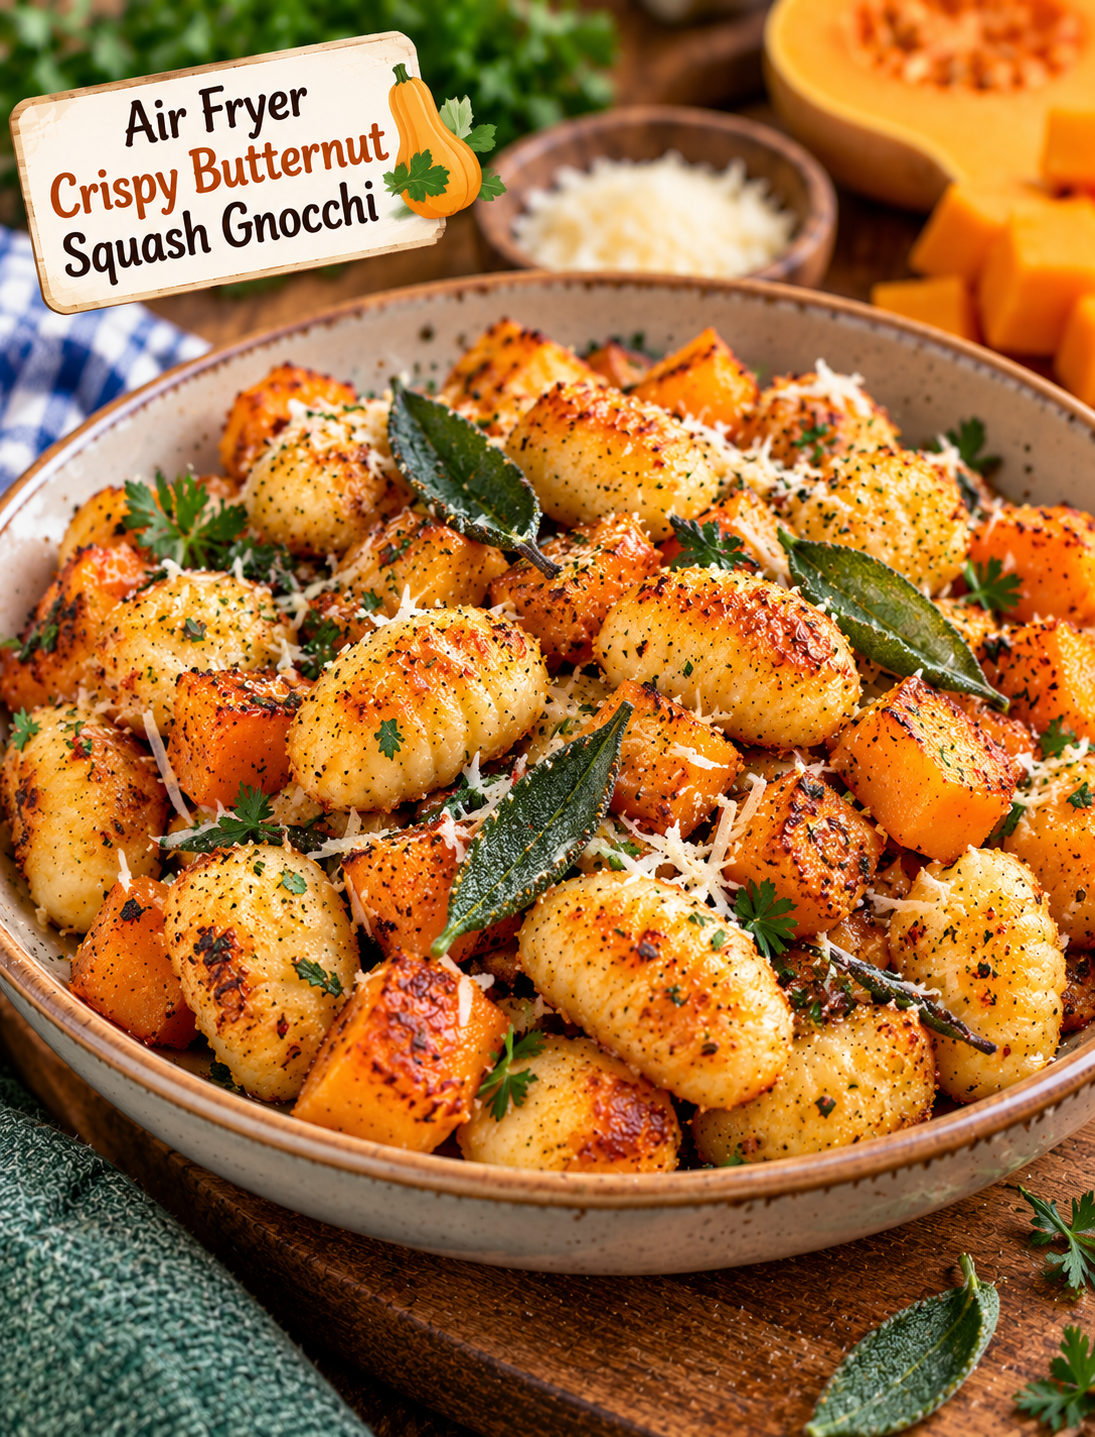
Air Fryer Crispy Butternut Squash Gnocchi
When you want a cozy fall dinner without spending a lot of time in the kitchen, Air Fryer Crispy Butternut Squash Gnocchi is an easy recipe to keep on hand. Soft potato gnocchi turns golden and crisp in the air fryer, while roasted butternut squash adds a sweet, tender bite.
The combination of savory garlic, fresh herbs, Parmesan, and naturally sweet squash makes this dish comforting without feeling heavy. It works as a quick weeknight meal, a seasonal side dish, or an easy vegetarian lunch.
Unlike boiled gnocchi, this method skips the large pot of water. The gnocchi goes straight into the air fryer with a little oil and seasoning, which helps create crisp edges while keeping the inside tender.
Why You’ll Love This Recipe
- Crispy texture: Air frying gives the gnocchi golden edges without deep frying.
- Easy preparation: Most of the work involves tossing the ingredients with simple seasonings.
- Fall-friendly flavor: Butternut squash, sage, garlic, and Parmesan create a classic seasonal combination.
- Vegetarian: The recipe is naturally meat-free and works well as a hearty side or main dish.
- Quick cleanup: Everything cooks in the air fryer with minimal kitchen mess.
- Flexible ingredients: You can use fresh or shelf-stable gnocchi and adjust the herbs to your taste.
- Family-friendly: The mild sweetness of squash balances the savory seasoning and cheese.
Ingredients You’ll Need
Main Ingredients
- 1 pound shelf-stable or refrigerated potato gnocchi
- 2 cups peeled butternut squash, cut into small ½-inch cubes
- 1½ tablespoons olive oil
- 2 cloves garlic, finely minced
- ½ teaspoon Italian seasoning
- ½ teaspoon smoked paprika
- ¼ teaspoon black pepper
- ¼ teaspoon salt
- ½ teaspoon fresh or dried sage
- ⅓ cup grated Parmesan cheese
- 1 tablespoon chopped fresh parsley
Optional Finishing Ingredients
- 1 tablespoon melted butter
- Extra Parmesan
- Fresh sage leaves
- A small drizzle of maple syrup
- Pinch of red pepper flakes
- Toasted pumpkin seeds
Cutting the squash into small, even pieces is important because it allows the vegetables to cook at nearly the same rate as the gnocchi.
How to Make Air Fryer Crispy Butternut Squash Gnocchi
Step 1: Prepare the Butternut Squash
Peel the butternut squash and remove the seeds.
Cut the squash into small cubes that are roughly ½ inch in size.
Try to keep the pieces similar in size so they cook evenly.
Place the cubes in a large bowl.
Add 1 tablespoon of olive oil, salt, black pepper, smoked paprika, and sage.
Toss until every piece is lightly coated.
Step 2: Season the Gnocchi
Add the gnocchi to a separate bowl.
Do not boil the gnocchi first. Using it directly from the package helps the pieces develop a crisp exterior in the air fryer.
Add the remaining olive oil, minced garlic, and Italian seasoning.
Toss gently until the gnocchi is evenly coated.
Step 3: Preheat the Air Fryer
Preheat your air fryer to 400°F (200°C) for about 3 minutes.
A preheated basket helps the gnocchi begin browning quickly and promotes better crisping.
Lightly spray the basket if your air fryer tends to stick.
Step 4: Cook the Butternut Squash
Place the seasoned squash in the air fryer basket.
Spread it into as close to a single layer as possible.
Air fry at 400°F for 8 minutes.
Shake the basket once halfway through cooking.
The squash should begin to soften and develop lightly browned edges.
Step 5: Add the Gnocchi
Add the seasoned gnocchi to the basket with the partially cooked squash.
Toss or shake the basket carefully so the ingredients are distributed evenly.
Continue air frying at 400°F for another 7–10 minutes.
Shake the basket every 3–4 minutes to encourage even browning.
The gnocchi should look golden and crisp on the outside, while the squash should be tender when pierced with a fork.
Step 6: Add Parmesan
Transfer the hot gnocchi and squash to a large bowl.
Immediately sprinkle the Parmesan cheese over the top.
Toss gently so the cheese sticks to the warm ingredients.
For a richer finish, add 1 tablespoon of melted butter before tossing.
Step 7: Finish and Serve
Add fresh parsley and a few thinly sliced sage leaves.
For a sweet-savory fall flavor, add a very small drizzle of maple syrup.
If you enjoy heat, finish with a pinch of red pepper flakes.
Serve immediately while the gnocchi is crisp and the squash is warm.
Tips for Extra-Crispy Gnocchi
Do not boil the gnocchi first.
Shelf-stable and refrigerated gnocchi can cook directly in the air fryer, which helps the outside become crisp.
Avoid overcrowding.
Spread the ingredients into a loose layer so hot air can circulate around each piece.
Cut the squash small.
Large cubes take longer to become tender and may finish after the gnocchi.
Use enough oil to coat.
A light coating helps the surfaces brown without making the dish greasy.
Shake during cooking.
Moving the ingredients exposes different sides to the hot air and improves browning.
Add Parmesan at the end.
Adding it too early can cause the cheese to burn before the squash is tender.
How to Choose the Right Gnocchi
Shelf-stable potato gnocchi is convenient because it can be stored in the pantry and added directly to the air fryer.
Refrigerated gnocchi also works well and may have a softer texture before cooking.
Frozen gnocchi can be used, but it may require a few additional minutes of cooking time. Check the package and watch the texture closely during the final minutes.
For this recipe, potato gnocchi gives the best contrast between a crisp exterior and tender center.
Easy Flavor Variations
Garlic Butter Parmesan
Replace some of the olive oil with melted butter and add extra garlic. Finish with Parmesan and chopped parsley.
Maple Sage
Add 1 teaspoon of pure maple syrup after cooking and toss with fresh sage. The maple complements the natural sweetness of the squash.
Spicy Parmesan
Add ¼ teaspoon of red pepper flakes with the seasoning for a gentle kick.
Cranberry Pecan
After cooking, toss in a small handful of dried cranberries and toasted chopped pecans for a festive fall side dish.
Mediterranean Style
Skip the sage and add oregano, feta cheese, sun-dried tomatoes, and fresh parsley for a brighter flavor profile.
What to Serve With Crispy Butternut Squash Gnocchi
This dish can be served as a vegetarian main course or paired with a protein for a larger meal.
Good pairings include:
- Roasted chicken breast
- Air fryer turkey meatballs
- Grilled salmon
- Garlic green beans
- Simple arugula salad
- Roasted Brussels sprouts
- Steamed broccoli
- Cranberry walnut salad
For a complete fall dinner, serve the gnocchi alongside roasted chicken and a simple green salad.
How to Store Leftovers
Allow leftovers to cool before transferring them to an airtight container.
Refrigerate for up to 3 days.
For the best texture, reheat the leftovers in the air fryer at 375°F for 3–5 minutes.
Avoid reheating them in the microwave if you want to keep the gnocchi crisp.
If the leftovers seem dry, add a small amount of olive oil before reheating.
Can You Make This Recipe Ahead?
You can prepare the squash in advance by peeling and cutting it up to one day before cooking.
Store the prepared squash in an airtight container in the refrigerator.
The gnocchi can remain sealed until you are ready to cook.
For the best texture, season and air fry the ingredients shortly before serving rather than fully cooking them hours ahead.
Common Mistakes to Avoid
Using large squash cubes: They may remain firm while the gnocchi becomes too dark.
Overloading the basket: Crowding traps moisture and reduces crisping.
Using too much oil: Excess oil can make the gnocchi heavy instead of crisp.
Adding Parmesan too early: The cheese can brown too quickly.
Skipping the shake: Ingredients can cook unevenly if they stay in the same position.
Overcooking the gnocchi: Check it during the final few minutes because air fryer models vary.
Frequently Asked Questions
Can you air fry gnocchi without boiling it?
Yes. Shelf-stable and refrigerated potato gnocchi can be seasoned and cooked directly in the air fryer for a crisp exterior.
Do I need to peel butternut squash?
Yes, removing the tough outer skin gives the squash a tender texture and helps the seasoning coat the flesh evenly.
What temperature is best for crispy gnocchi?
Cooking at 400°F (200°C) provides enough heat to brown the gnocchi and roast the squash efficiently.
Can I use frozen butternut squash?
Yes. Frozen cubes can be used, but they may release more moisture and require a few extra minutes to brown.
Can I use frozen gnocchi?
Yes, although frozen gnocchi may need additional cooking time; check it frequently near the end.
Is this recipe vegetarian?
Yes, the recipe is vegetarian when prepared with Parmesan made without animal rennet; check the cheese label if this matters to you.
How do I make the gnocchi crispier?
Avoid overcrowding the basket, use a light coating of oil, and shake the basket several times during cooking.
Can I make this recipe without Parmesan?
Yes. You can replace Parmesan with nutritional yeast, crumbled feta, or another hard cheese depending on the flavor you want.
Final Thoughts
Air Fryer Crispy Butternut Squash Gnocchi is an easy way to turn a few simple ingredients into a cozy fall dish. The potato gnocchi develops crisp, golden edges while the butternut squash becomes tender and lightly caramelized.
Garlic, sage, Italian seasoning, and Parmesan bring savory flavor, while the natural sweetness of the squash adds balance. A small maple drizzle makes the dish even more seasonal without overpowering the other ingredients.
Because the recipe takes little prep and uses the air fryer instead of several pans, it is especially useful for busy weeknight dinners. Serve it as a vegetarian main dish, a holiday side, or a warm addition to a fall family meal.