Air Fryer Foil Handle Hack

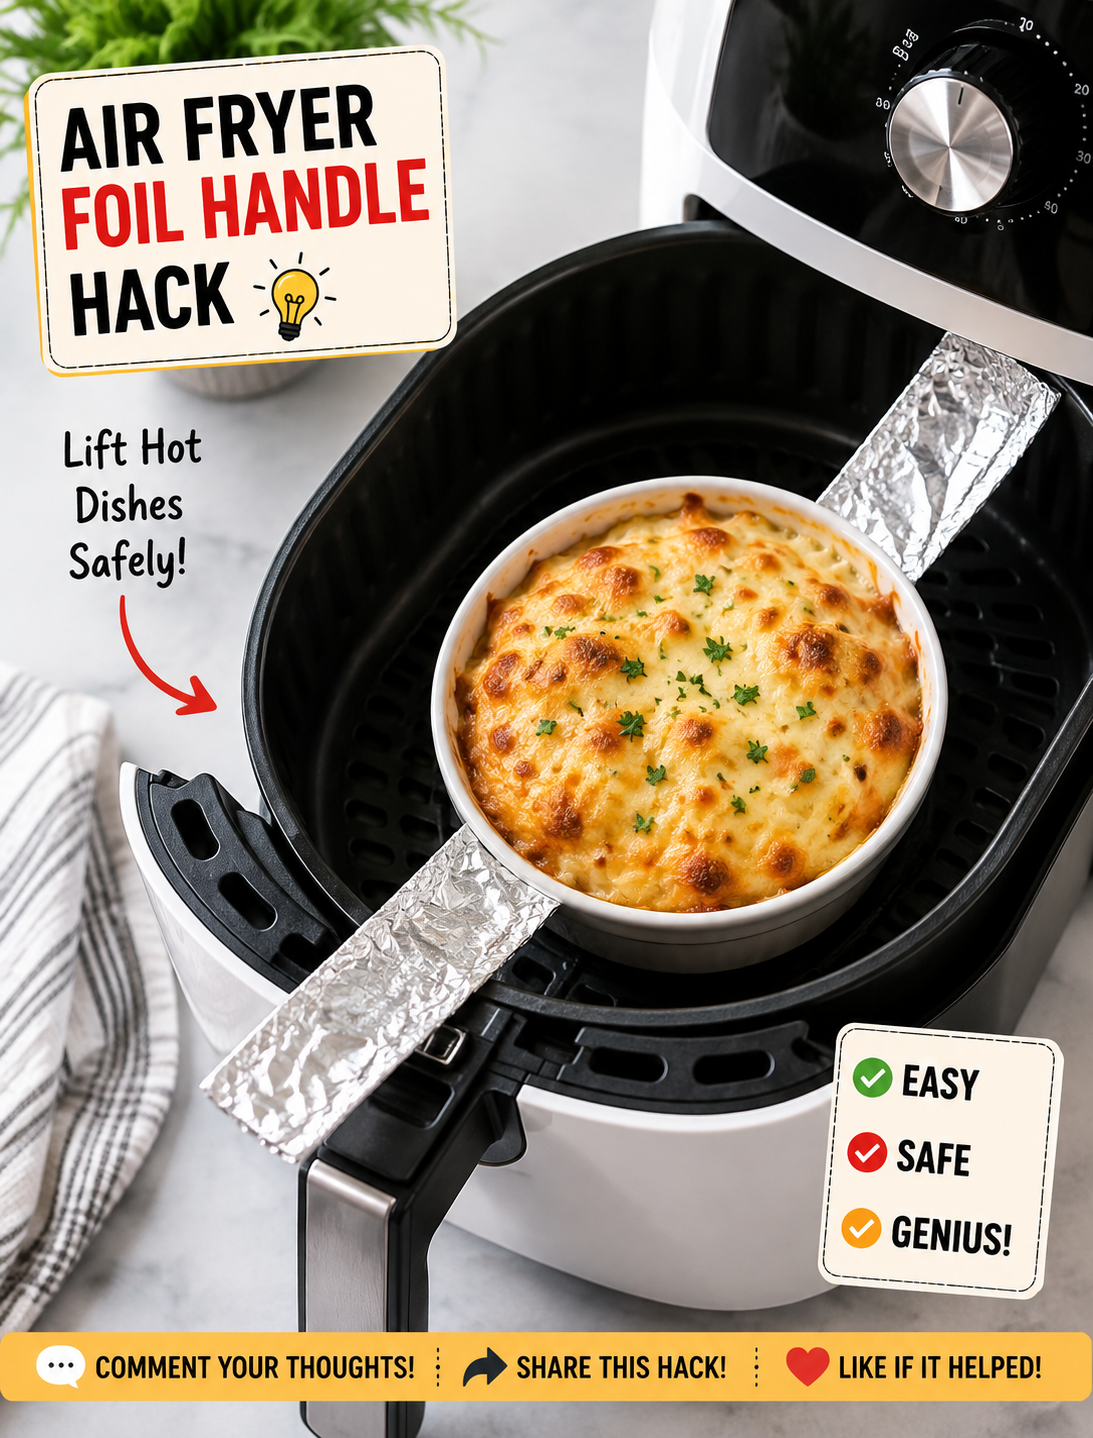
Air fryer foil handle hack showing folded aluminum foil used to lift food from a hot air fryer basket

Air Fryer Foil Handle Hack

An air fryer foil handle hack is a simple kitchen trick that can make certain air fryer recipes easier to lift, turn, and remove. By folding a small strip of aluminum foil into a sturdy handle, you can create a temporary lifting aid for foods that sit in a pan, dish, or liner inside the basket.

This trick is especially useful when cooking delicate foods that are difficult to grab with tongs. It can also help when you need to lift a small baking dish or food container from a hot air fryer basket.

The key is to use foil correctly. A foil handle should stay secure, avoid loose edges, and never interfere with the air fryer’s heating element or airflow. When used carefully, this kitchen shortcut can make everyday air frying more convenient.

What Is the Air Fryer Foil Handle Hack?

The air fryer foil handle hack uses folded aluminum foil to create a temporary handle that helps you lift food or a suitable oven-safe container from the basket.

Instead of reaching into a hot basket with your hands, you can use the folded strip as a grip point. This can be helpful for foods such as baked dips, casseroles, stuffed peppers, small cakes, and other recipes prepared in an oven-safe dish.

The method is simple, inexpensive, and does not require a special accessory. Most kitchens already have a roll of aluminum foil available.

However, foil should not be treated as a universal replacement for an air fryer basket, rack, or approved accessory. The foil must remain stable during cooking and should never be allowed to touch the heating element.

How to Make an Air Fryer Foil Handle

Making a foil handle takes only a few steps, but the strip should be folded firmly enough to support the food or container.

Step 1: Cut a Foil Strip

Tear off a long strip of heavy-duty aluminum foil. The strip should be long enough to extend under the food or dish while leaving two ends available for lifting.

A wider strip provides better support than a very narrow piece of foil.

Step 2: Fold the Foil

Fold the foil lengthwise several times to create a thick, sturdy band. Press the folds firmly so the strip does not unfold while you are handling the food.

Avoid leaving sharp foil points that could scratch a nonstick surface or catch on the basket.

Step 3: Position the Handle

Place the folded strip underneath the food or oven-safe container before cooking. Keep the two ends positioned where they can be reached easily after cooking.

Do not cover the entire basket with foil because air circulation is essential for proper air frying.

Step 4: Lift Carefully

Once the food is finished, allow the basket and food to cool enough for safe handling. Use heat-resistant gloves or silicone mitts when lifting anything hot.

Hold both ends of the foil evenly and lift slowly. If the food feels too heavy or unstable, stop and use a suitable heat-safe utensil instead.

Why This Air Fryer Hack Is Useful

The main benefit of this trick is easier handling. Some foods are fragile, deep, or difficult to grip without breaking.

A foil lifting strap can make it easier to remove items such as small baked dishes and delicate desserts. It may also reduce the need to reach deep into a hot air fryer basket.

This method can be particularly useful for recipes that use a small oven-safe pan. The foil strip acts as a temporary lifting aid, allowing you to raise the pan without touching its hot sides.

Another benefit is convenience. You do not need to purchase a separate lifting tool for occasional recipes.

Best Foods to Use With a Foil Handle

This method works best with foods or containers that have a stable shape and can safely be lifted from underneath.

Good examples include baked pasta, mini casseroles, stuffed vegetables, brownies, cakes, baked dips, and small oven-safe dishes.

A foil handle can also help with recipes prepared in silicone or metal baking containers, provided the container is rated for the air fryer’s temperature and fits properly inside the basket.

Avoid using the trick for very heavy foods. A thin foil strip can tear if it is carrying more weight than it can safely support.

Air Fryer Foil Safety Tips

Aluminum foil can be used in many air fryers, but incorrect placement can create problems. Always check your air fryer’s manufacturer’s instructions before using foil.

Never place loose foil directly against the heating element. A lightweight sheet can move because of the powerful airflow inside some air fryers.

Keep foil secured under food or inside an appropriate oven-safe container. Do not allow foil to cover the basket’s ventilation openings more than necessary.

Do not preheat an air fryer with loose foil inside unless the manufacturer specifically permits it. The airflow can move unsecured foil before food is added.

Foil should also never be used to completely seal the cooking basket. Air fryers depend on circulating hot air to cook food evenly and create crisp surfaces.

Use fresh foil that is free from tears when creating a lifting strap. If the foil becomes damaged, replace it before attempting to move hot food.

Common Mistakes to Avoid

One common mistake is using too little foil. A narrow or thin strip may tear when you lift a heavy dish.

Another mistake is placing the handle where it blocks too much airflow. Air needs room to circulate around the food for even cooking and browning.

Do not let the foil handle extend close to the heating element. Keep the material contained within the basket and away from exposed heating components.

Avoid pulling quickly when the food is hot. A slow, balanced lift gives you better control and reduces the chance of spilling.

Finally, do not assume every air fryer has the same design. Basket depth, heating element position, and manufacturer instructions vary between models.

Air Fryer Foil Handle Hack vs. Parchment Liners

Foil and parchment serve different purposes in an air fryer.

A foil handle is mainly a lifting aid. It can help remove food or a small cooking container from the basket.

Parchment liners are designed to help reduce sticking and make cleanup easier. Perforated air fryer parchment is often designed to support airflow around the food.

Neither material should completely block the basket’s airflow. For crisp results, the hot air needs enough space to move around the food.

If you use parchment, choose a product intended for cooking and follow its temperature and placement instructions. Do not use parchment as a substitute for a lifting handle unless the product specifically supports that use.

Tips for Getting Better Air Fryer Results

Use the foil handle only when it solves a real handling problem. Many foods can be removed safely with silicone-tipped tongs or a heat-resistant spatula.

Keep food arranged in a single layer when the recipe calls for maximum crispness. Overcrowding can prevent hot air from reaching all surfaces evenly.

Shake or turn food when the recipe requires it. A foil handle should never interfere with the movement needed during cooking.

Use an oven-safe container that fits comfortably inside the basket. Leave enough room around the container for hot air to circulate.

Always follow the temperature and cooking instructions for your specific recipe and air fryer model.

Is the Foil Handle Hack Worth Trying?

The air fryer foil handle hack is worth trying when you regularly cook foods that are difficult to lift. It is inexpensive, quick to prepare, and useful for certain baked recipes.

The biggest advantage is better control when removing hot food or a small cooking dish. The trick can also make some air fryer recipes less messy because you have a designated lifting point.

Still, it is not necessary for every recipe. If food can be removed easily with a safe utensil, there is no reason to add foil.

Think of this as a simple air fryer shortcut rather than a required cooking technique. Used properly, it can make your air fryer routine easier without adding another kitchen gadget.

Frequently Asked Questions

Can I use aluminum foil in an air fryer?

Yes, aluminum foil can be suitable for many air fryers when used correctly, but always follow the manufacturer’s instructions and keep foil away from the heating element.

Does foil affect air fryer cooking?

Foil can affect airflow if it covers too much of the basket, so use only the amount needed and keep ventilation areas as open as possible.

How thick should a foil handle be?

Fold the foil several times into a firm, wide strip so it can support the intended food or container without tearing.

Can I use the foil handle for heavy food?

A foil handle is best for light or moderately sized foods and small containers; use a proper heat-resistant utensil for heavy or unstable dishes.

Can the foil handle stay in the air fryer while cooking?

Yes, if your air fryer manufacturer allows foil and the handle is securely positioned away from the heating element and does not obstruct necessary airflow.

Can I use parchment paper instead of foil?

Parchment can help with sticking and cleanup, but it is not automatically a replacement for a foil lifting handle and should be used according to its product instructions.

Is this hack safe for every air fryer?

No air fryer is identical, so check your model’s manual before using foil and never allow loose material to contact the heating element.

What can I use instead of a foil handle?

Heat-resistant silicone tongs, a spatula, or an approved air fryer accessory can provide a safer and more durable lifting option for many recipes.

Final Thoughts

The air fryer foil handle hack is a simple way to make lifting certain foods and small baking dishes easier. It works best when you need extra control without buying another kitchen tool.

For the best results, fold the foil into a strong strip, keep it away from the heating element, and avoid blocking the air fryer’s airflow. Always check your model’s instructions before using aluminum foil.

Used carefully, this easy air fryer trick can make baked dishes, casseroles, desserts, and other delicate foods much easier to remove. It is a small kitchen shortcut that can save time and make air frying more convenient.

Air Fryer Buffalo Chicken Melt Wrap

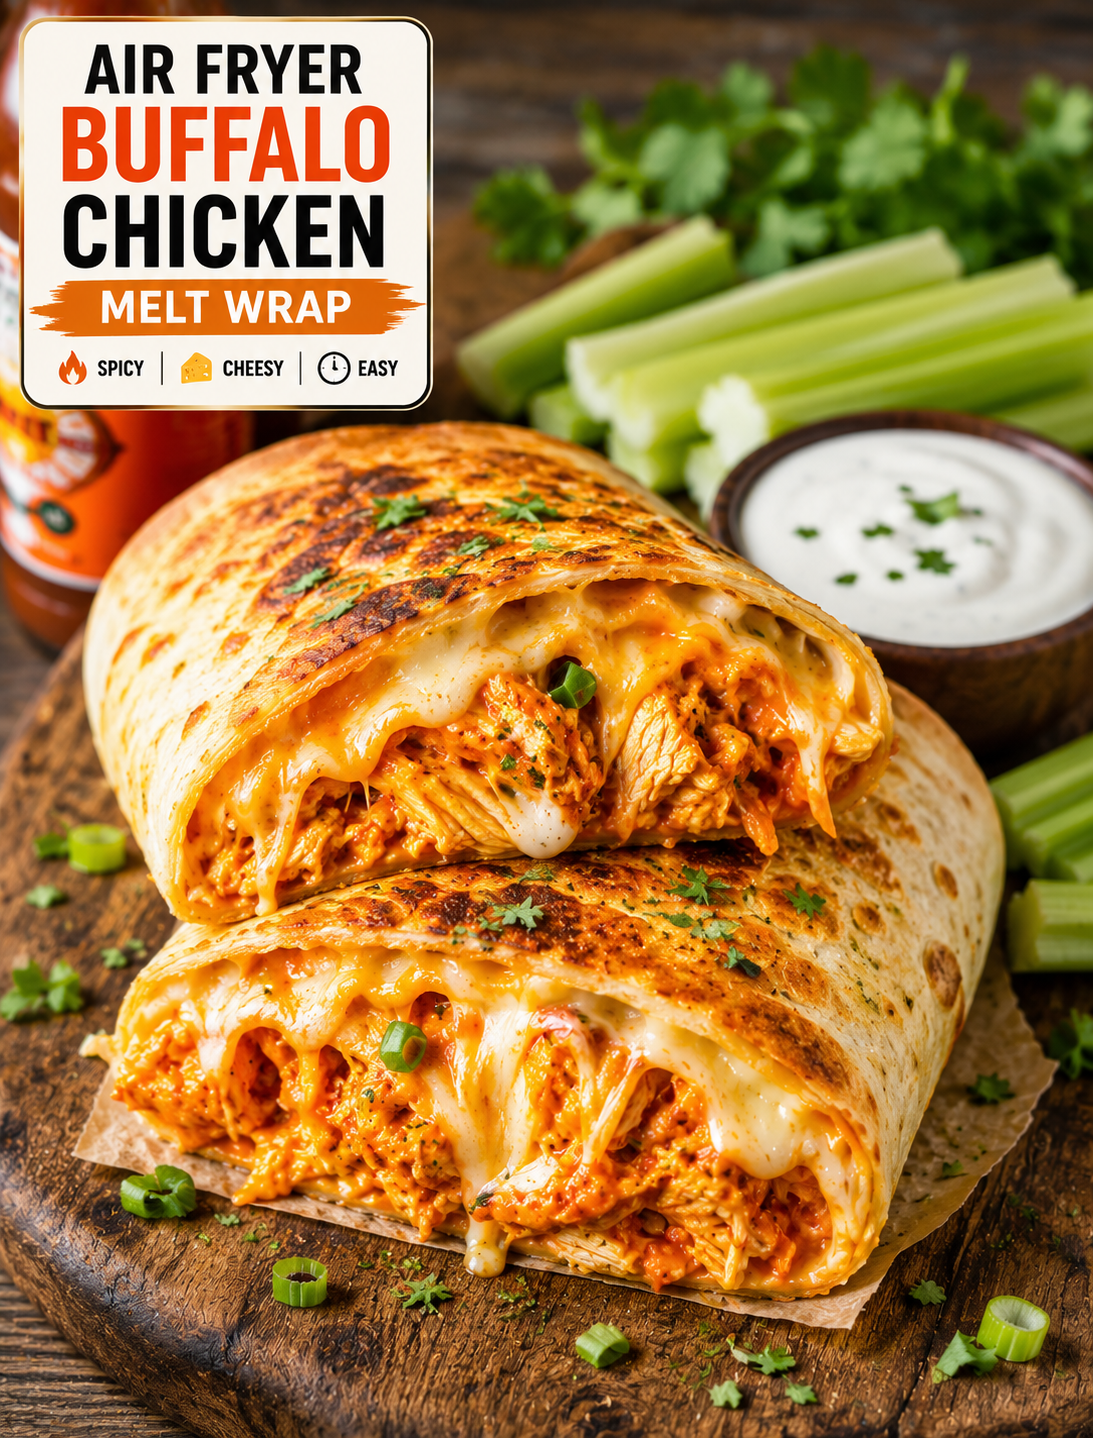
Crispy air fryer buffalo chicken melt wrap sliced open with juicy buffalo chicken, melted cheese, ranch dip, and fresh vegetables

Air Fryer Buffalo Chicken Melt Wrap

Craving something crispy, cheesy, spicy, and easy enough for a busy weeknight? This Air Fryer Buffalo Chicken Melt Wrap brings all those flavors together in one golden, satisfying meal.

Tender shredded chicken is tossed with tangy buffalo sauce, wrapped with melted cheese and fresh toppings, then cooked in the air fryer until the tortilla turns crisp and golden. The cheese melts into the chicken while the outside develops a crunchy texture that makes every bite satisfying.

This recipe is perfect for lunch, dinner, game day, or a quick snack when you want something more exciting than a plain sandwich. It uses simple ingredients and takes only a few minutes to assemble.

Serve it with ranch dressing, blue cheese dip, celery sticks, or a fresh side salad for a complete meal.

Why You’ll Love This Buffalo Chicken Wrap

This wrap combines several textures in one easy recipe. The chicken stays tender, the cheese becomes gooey, and the tortilla turns crisp in the air fryer.

Buffalo sauce gives the filling a bold combination of heat, tang, and buttery flavor. You can use mild, medium, or hot buffalo sauce depending on how spicy you like your food.

The recipe is also a great way to use leftover cooked chicken. Rotisserie chicken works especially well because it is already seasoned and easy to shred.

Unlike a deep-fried wrap, the air fryer requires only a light coating of oil or cooking spray. The circulating hot air helps crisp the tortilla without needing a pot of frying oil.

You can also customize the filling with different cheeses, vegetables, and sauces to create your own version.

Ingredients You’ll Need

  • 2 cups cooked shredded chicken
  • ½ cup buffalo wing sauce
  • 4 large flour tortillas
  • 1 cup shredded Monterey Jack cheese
  • ½ cup shredded cheddar cheese
  • ¼ cup finely diced red onion
  • ½ cup shredded lettuce
  • ¼ cup chopped green onions
  • 2 tablespoons ranch dressing
  • 1 tablespoon melted butter
  • ½ teaspoon garlic powder
  • ½ teaspoon smoked paprika
  • ¼ teaspoon black pepper
  • Cooking spray
  • Fresh parsley or green onions for garnish, optional

For a stronger buffalo flavor, add a little more wing sauce to the chicken. For a milder wrap, reduce the sauce and increase the ranch dressing.

Flour tortillas work best because they are flexible and easy to fold. Choose burrito-size tortillas when you want larger wraps with plenty of filling.

How to Make Air Fryer Buffalo Chicken Melt Wrap

1. Prepare the Chicken

Place the cooked shredded chicken in a medium bowl.

Add buffalo sauce, melted butter, garlic powder, smoked paprika, and black pepper.

Stir until the chicken is evenly coated.

If the chicken seems dry, add another tablespoon of buffalo sauce. The filling should be moist but not watery because excess sauce can make the tortilla difficult to crisp.

2. Warm the Tortillas

Warm the tortillas for about 10–15 seconds in the microwave.

This small step makes them softer and easier to fold without cracking.

Keep the tortillas covered with a clean kitchen towel while assembling the wraps so they stay flexible.

3. Add the Filling

Place one tortilla on a flat surface.

Add a portion of buffalo chicken slightly below the center of the tortilla.

Sprinkle Monterey Jack and cheddar cheese over the chicken.

Add a small amount of diced red onion for crunch and extra flavor.

Do not overfill the tortilla because too much filling can make it difficult to seal.

4. Fold the Wrap

Fold the bottom edge of the tortilla over the filling.

Fold both sides inward, then roll the tortilla tightly upward until you have a sealed wrap.

Place the wrap seam-side down while preparing the remaining tortillas.

Keeping the seam underneath helps prevent the wrap from opening during air frying.

5. Air Fry Until Golden

Preheat the air fryer to 375°F if your model requires preheating.

Lightly spray the air fryer basket with cooking spray.

Place the wraps seam-side down in the basket, leaving space between them for air circulation.

Lightly spray or brush the tops with a small amount of oil or melted butter.

Air fry for approximately 6–9 minutes, turning halfway through cooking.

The wraps are ready when the tortillas are golden and crisp and the cheese inside is melted.

Cooking time can vary between air fryer models, so watch the wraps closely during the final few minutes.

6. Slice and Serve

Carefully remove the hot wraps from the air fryer.

Allow them to rest for 1–2 minutes before cutting.

Slice each wrap diagonally and arrange the pieces on a serving plate.

Drizzle with ranch or serve the dressing on the side.

Add chopped green onions or fresh parsley for a bright finishing touch.

Best Chicken for This Recipe

Cooked shredded chicken is the easiest choice for these wraps.

Rotisserie chicken saves time and provides tender meat with plenty of flavor. You can also use leftover roasted or baked chicken.

Chicken breast creates a leaner filling, while chicken thighs provide a richer texture and more moisture.

If using freshly cooked chicken, allow it to cool slightly before shredding. Pull the meat apart with two forks or use clean hands once it is safe to handle.

Avoid using chicken that is overly wet because excess moisture can prevent the tortilla from becoming crisp.

Choosing the Best Cheese

Monterey Jack is an excellent choice because it melts smoothly and has a mild flavor.

Cheddar adds a sharper taste and gives the filling a classic cheesy finish.

You can also use pepper Jack for extra heat or mozzarella for a milder, stretchy texture.

For the best melt, shred cheese from a block rather than using large chunks.

A combination of two cheeses gives the wrap more flavor without overpowering the buffalo chicken.

How to Control the Spice Level

Buffalo sauce can range from mild to very hot, so the heat level is easy to adjust.

For a mild wrap, choose mild buffalo sauce and add extra ranch dressing.

For medium heat, use a traditional buffalo wing sauce with the recipe measurements.

For a spicy version, add cayenne pepper, crushed red pepper flakes, or sliced jalapeños to the chicken mixture.

You can also serve hot sauce on the side so each person can control the heat.

What to Serve With Buffalo Chicken Wraps

These crispy wraps pair well with classic buffalo-style sides.

Serve them with celery and carrot sticks for a fresh, crunchy contrast.

Ranch dressing or blue cheese dressing makes a creamy dip for the spicy chicken.

A simple green salad can balance the richness of the melted cheese.

For game day, serve the wraps with sweet potato fries, potato wedges, or air fryer onion rings.

You can also cut the wraps into smaller pieces and serve them as party appetizers.

Tips for Crispy Air Fryer Wraps

Do not overfill the tortillas because a thin, even filling cooks more evenly.

Warm the tortillas before rolling so they do not crack.

Keep the seam facing downward when placing the wraps in the air fryer.

Leave space between the wraps so hot air can circulate around them.

Use only a light amount of oil because too much can make the tortilla greasy.

Turn the wraps halfway through cooking for even browning.

Allow the finished wraps to rest briefly before slicing so the melted cheese does not spill out immediately.

Serve them soon after cooking for the best crispy texture.

Can You Make These Wraps Ahead of Time?

Yes. You can prepare the chicken filling several hours ahead and refrigerate it until you are ready to assemble the wraps.

For meal prep, keep the chicken mixture in a sealed container and assemble the tortillas shortly before air frying.

You can also assemble the wraps in advance and refrigerate them covered for a short period.

For the best texture, air fry the wraps just before serving rather than cooking them far ahead of time.

If you have leftovers, refrigerate them in an airtight container and reheat them in the air fryer until hot and crisp.

Easy Variations to Try

There are many ways to change this recipe without changing the basic cooking method.

Add chopped celery to the chicken for classic buffalo-style crunch.

Mix in finely diced jalapeños for extra heat.

Add sliced avocado after cooking for a creamy contrast.

Use pepper Jack instead of cheddar for a spicy cheese version.

Add shredded cabbage for extra crunch.

Replace ranch with blue cheese dressing for a stronger buffalo flavor.

For a smoky version, add extra smoked paprika to the chicken.

You can also make mini wraps with smaller tortillas for parties and appetizers.

Storage and Reheating

Place leftover wraps in an airtight container and refrigerate them promptly.

For the best texture, reheat them in the air fryer at about 350°F for 3–5 minutes or until heated through.

Avoid relying on the microwave when crispiness matters because microwave heating can soften the tortilla.

If the filling contains chicken that has been stored for several days, check its freshness before reheating.

Always discard leftovers that have an unusual smell, appearance, or texture.

The Bottom Line

Air Fryer Buffalo Chicken Melt Wraps are an easy way to turn simple chicken and tortillas into a crispy, cheesy meal with bold buffalo flavor.

The air fryer creates a golden tortilla while keeping the inside warm and melty. Buffalo sauce adds tangy heat, while ranch, fresh vegetables, and cheese help balance the flavor.

The recipe is flexible enough for lunch, dinner, game-day gatherings, or quick snacks. You can adjust the spice level, change the cheese, or add your favorite crunchy vegetables.

For the crispiest result, avoid overfilling the tortillas, keep them seam-side down, and serve them soon after air frying.

Frequently Asked Questions

1. How long do buffalo chicken wraps take in the air fryer?

Cook them at 375°F for about 6–9 minutes, turning halfway, until the tortilla is golden and the cheese is melted.

2. Can I use rotisserie chicken?

Yes. Shredded rotisserie chicken is one of the easiest and most flavorful options for this recipe.

3. What cheese melts best in buffalo chicken wraps?

Monterey Jack, cheddar, pepper Jack, and mozzarella all melt well and pair nicely with buffalo chicken.

4. How do I keep the wrap from opening?

Roll it tightly and place it seam-side down in the air fryer basket before cooking.

5. Can I make these wraps spicy?

Yes. Use hot buffalo sauce or add cayenne, jalapeños, or crushed red pepper for extra heat.

6. Can I make buffalo chicken wraps ahead of time?

Yes. Prepare the filling ahead, refrigerate it, and assemble and air fry the wraps shortly before serving.

7. What dipping sauce goes with buffalo chicken wraps?

Ranch and blue cheese dressing are classic choices that balance the spicy buffalo flavor.

8. Can I reheat leftover buffalo chicken wraps?

Yes. Reheat them in an air fryer at about 350°F for 3–5 minutes to restore some of the crispy texture.

Final Thoughts

Air Fryer Buffalo Chicken Melt Wraps are the kind of easy meal that delivers big flavor without complicated preparation. Tender buffalo chicken, gooey melted cheese, and a crispy golden tortilla make every bite satisfying.

They are especially useful when you have leftover chicken and want to turn it into something completely different. Add your favorite toppings, adjust the heat, and serve with ranch, blue cheese, or crunchy vegetables.

For the best results, keep the filling balanced, roll the tortillas tightly, and air fry until golden and crisp.

Spicy, cheesy, crispy, and easy—this is one wrap you’ll want to make again.

Air Fryer Garlic Butter Steak Bites

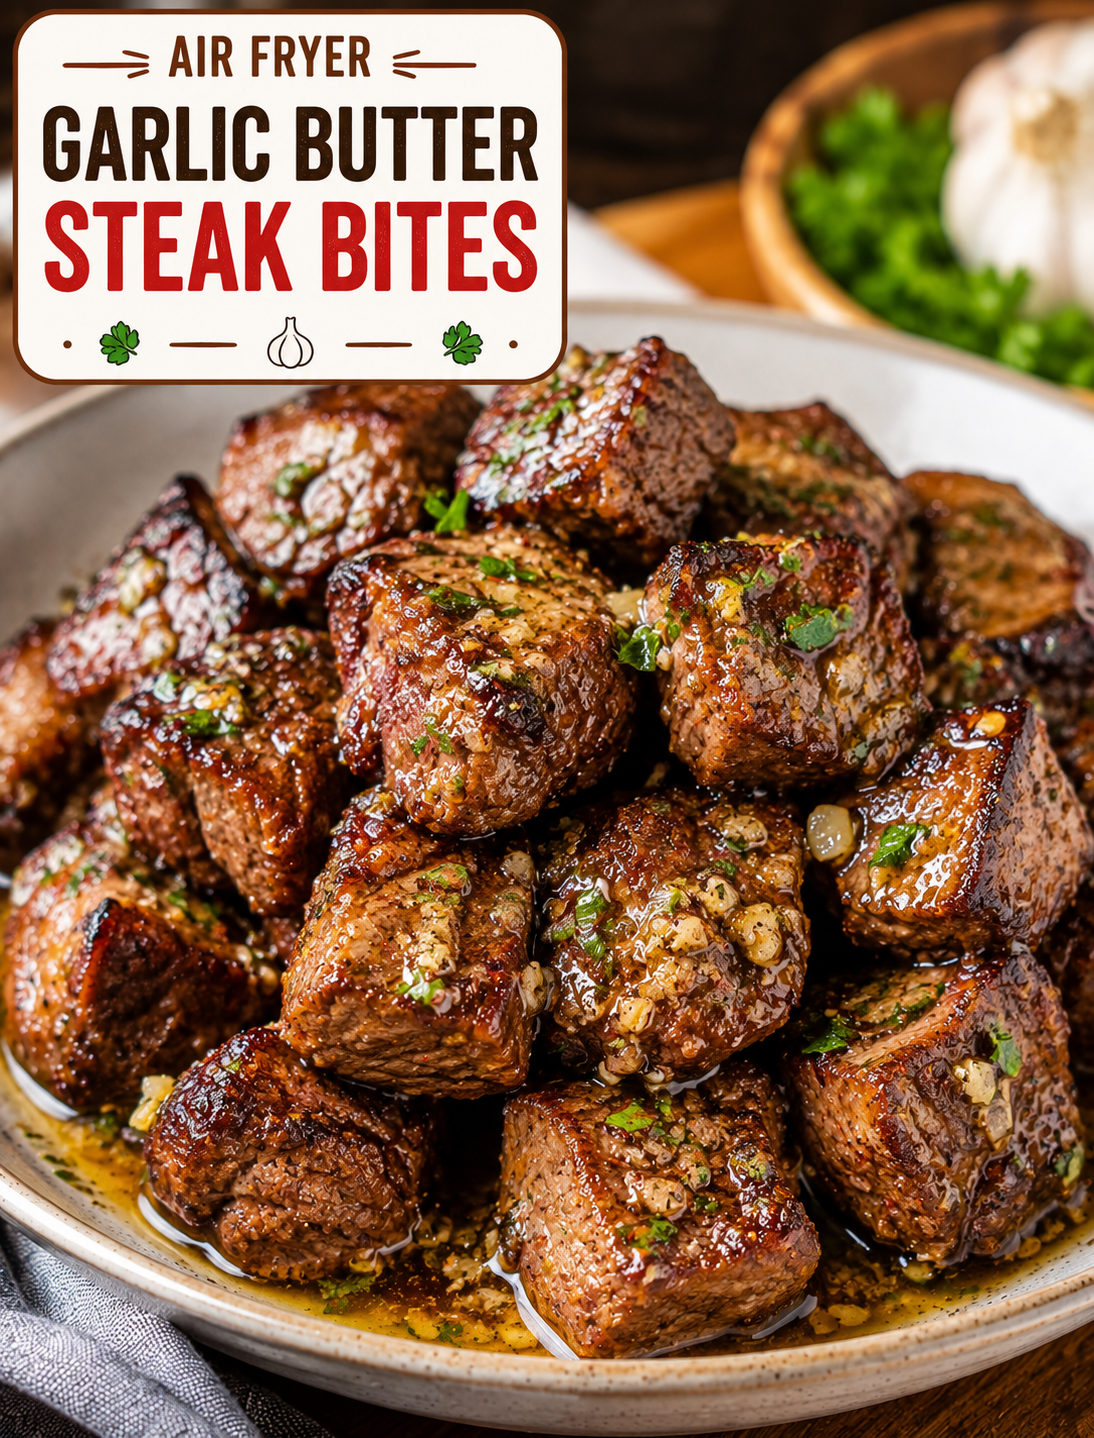
Air Fryer Garlic Butter Steak Bites with browned edges, melted garlic butter, fresh parsley, and herbs

Air Fryer Garlic Butter Steak Bites

Air Fryer Garlic Butter Steak Bites are tender, juicy, and packed with rich garlic butter flavor. Small pieces of steak cook quickly in the air fryer, creating browned edges while keeping the center juicy and flavorful.

This easy steak recipe is perfect for a quick weeknight dinner, game-day snack, party appetizer, or hearty side dish. The garlic butter sauce adds a savory finish without requiring a long list of ingredients.

Using the air fryer also makes this recipe simple and convenient. There is no need to stand over a hot skillet while the steak cooks. Once the steak is seasoned and the air fryer is hot, dinner can be ready in minutes.

Why You’ll Love This Recipe

  • Fast cooking: Small steak pieces cook much faster than a whole steak.
  • Big flavor: Garlic, butter, and herbs create a rich savory coating.
  • Tender texture: High heat quickly browns the outside while the center stays juicy.
  • Easy preparation: The recipe uses simple ingredients and basic kitchen tools.
  • Perfect for sharing: Serve the bites as an appetizer with toothpicks and dipping sauce.
  • Great for dinner: Pair them with potatoes, vegetables, rice, or a fresh salad.
  • Easy to customize: Add chili flakes, Parmesan, fresh herbs, or your favorite steak seasoning.

Ingredients

For the Steak Bites

  • 1 pound sirloin steak or another tender steak
  • 1 tablespoon olive oil
  • 1 teaspoon garlic powder
  • 1/2 teaspoon smoked paprika
  • 1/2 teaspoon onion powder
  • 1/2 teaspoon salt
  • 1/4 teaspoon black pepper

For the Garlic Butter

  • 3 tablespoons unsalted butter
  • 3 cloves fresh garlic, finely minced
  • 1 tablespoon chopped fresh parsley
  • 1/2 teaspoon Italian seasoning
  • 1 teaspoon lemon juice, optional

Optional Garnishes

  • Fresh parsley
  • Grated Parmesan cheese
  • Red pepper flakes
  • Extra black pepper
  • Lemon wedges

How to Make Air Fryer Garlic Butter Steak Bites

Step 1: Choose and Prepare the Steak

Sirloin is an excellent choice because it is tender, flavorful, and widely available in U.S. grocery stores.

Trim away large pieces of excess fat or tough connective tissue.

Cut the steak into bite-sized pieces that are roughly 1 to 1½ inches thick.

Try to keep the pieces similar in size so they cook evenly.

Pat the steak dry with paper towels before seasoning. Removing surface moisture helps the meat brown better in the air fryer.

Step 2: Season the Steak

Place the steak pieces in a large bowl.

Add olive oil, garlic powder, smoked paprika, onion powder, salt, and black pepper.

Toss until every piece is lightly coated with the seasoning mixture.

Do not add the garlic butter yet. The fresh garlic is added after cooking to prevent it from burning during the high-heat air-frying process.

Step 3: Preheat the Air Fryer

Preheat the air fryer to 400°F for about 3–5 minutes.

A hot cooking basket helps the steak begin browning as soon as it is added.

If your air fryer model does not require preheating, you can skip this step, but cooking time may vary slightly.

Step 4: Arrange the Steak

Place the seasoned steak bites in the air fryer basket in a single layer.

Leave some space between the pieces so hot air can circulate around them.

Avoid stacking the steak because crowded pieces can release moisture and steam instead of developing browned edges.

For a large batch, cook the steak in two rounds.

Step 5: Air Fry the Steak Bites

Cook the steak at 400°F for approximately 7–10 minutes, shaking the basket or turning the pieces halfway through.

The exact time depends on the size of the steak pieces and your preferred level of doneness.

Use an instant-read thermometer for the most accurate result. The USDA recommends a minimum internal temperature of 145°F with a three-minute rest for whole cuts of beef.

For steak bites cooked beyond medium, continue cooking for another minute or two and check the temperature again.

Step 6: Make the Garlic Butter

While the steak cooks, melt the butter in a small saucepan over low heat.

Add the minced garlic and Italian seasoning.

Cook for about 30–60 seconds, just until the garlic becomes fragrant.

Remove the pan from the heat and stir in the parsley and optional lemon juice.

Do not brown the garlic heavily because burnt garlic can taste bitter.

Step 7: Toss With Garlic Butter

Transfer the hot steak bites to a clean bowl.

Pour the warm garlic butter over the steak.

Toss gently until every piece is coated.

Let the steak rest for about 2 minutes before serving so the juices can settle.

Finish with fresh parsley, Parmesan, red pepper flakes, or a squeeze of lemon if desired.

Tips for Tender Steak Bites

The quality of the steak and the cooking method both affect the final texture.

  • Choose a tender cut: Sirloin, ribeye, strip steak, and tenderloin can all work well.
  • Cut evenly: Similar-sized pieces cook at the same rate.
  • Dry the steak first: Excess moisture can reduce browning.
  • Do not overcrowd: Space allows hot air to circulate around the meat.
  • Preheat the basket: Starting with high heat helps create browned edges.
  • Avoid overcooking: Small pieces can become dry quickly.
  • Rest briefly: A short rest helps retain moisture.
  • Add garlic butter after cooking: This protects the fresh garlic from burning.

Best Steak Cuts to Use

Sirloin is one of the best choices for this recipe because it offers a good balance of tenderness, flavor, and price.

Ribeye gives the bites a richer flavor because of its higher fat content.

New York strip provides a firm, beefy texture with enough marbling to stay flavorful.

Tenderloin creates very tender bites but is usually more expensive than sirloin.

Avoid very tough cuts unless they are properly prepared for a longer cooking method. Quick air frying works best with naturally tender cuts.

Easy Flavor Variations

Spicy Garlic Butter

Add 1/4 teaspoon of red pepper flakes or a small amount of cayenne pepper to the seasoning.

Parmesan Steak Bites

Sprinkle grated Parmesan over the hot steak immediately after tossing it with garlic butter.

Herb Butter Steak Bites

Add fresh rosemary, thyme, or parsley to the melted butter for a fresh herb flavor.

Cajun Steak Bites

Replace the regular seasoning with your favorite Cajun seasoning for a spicy Southern-style version.

Lemon Garlic Steak Bites

Add fresh lemon juice and a little lemon zest to the finished garlic butter for a brighter flavor.

What to Serve With Steak Bites

These flavorful bites pair well with classic American side dishes.

Serve them with mashed potatoes, roasted vegetables, baked potatoes, air fryer fries, rice, or a crisp green salad.

For an appetizer, place the steak bites on a serving platter with toothpicks and a small bowl of garlic butter, ranch dressing, or creamy horseradish sauce.

For a low-carb meal, serve them with steamed broccoli, asparagus, cauliflower, or a simple cucumber salad.

Storage and Reheating

Allow leftover steak bites to cool before placing them in an airtight container.

Refrigerate leftovers for up to 3–4 days.

To reheat, place the steak in the air fryer at 350°F for 2–4 minutes. Check frequently because reheating for too long can make the meat tough.

You can also reheat the bites in a skillet over medium-low heat with a small amount of butter.

For the best texture, avoid repeatedly reheating the same portion.

Make-Ahead Instructions

You can season and cut the steak several hours before cooking.

Keep the prepared steak covered in the refrigerator until you are ready to air fry it.

Prepare the garlic butter shortly before serving for the freshest garlic flavor.

Do not leave raw steak at room temperature for extended periods before cooking.

Common Mistakes to Avoid

  • Cutting the steak too small: Tiny pieces can overcook quickly.
  • Using wet steak: Surface moisture can prevent proper browning.
  • Overcrowding the basket: Crowding reduces airflow and can lead to steaming.
  • Adding fresh garlic too early: Garlic can burn at high air fryer temperatures.
  • Ignoring internal temperature: Cooking time alone does not guarantee the desired doneness.
  • Overcooking: Small steak pieces lose moisture quickly.
  • Skipping the rest: A brief rest helps the meat remain juicy.

Nutrition Facts

Approximate nutrition per serving will vary according to the steak cut, butter, and serving size.

  • Calories: 365
  • Protein: 30g
  • Carbohydrates: 3g
  • Fat: 27g
  • Saturated Fat: 11g
  • Fiber: 0g
  • Sugar: 1g
  • Sodium: 520mg

These values are estimates and can change based on the exact ingredients and brands used.

Frequently Asked Questions

What is the best steak for air fryer steak bites?

Sirloin is a great choice because it is tender, flavorful, and affordable, while ribeye provides a richer result.

How long should steak bites cook in an air fryer?

At 400°F, bite-sized pieces usually take about 7–10 minutes, depending on their size and desired doneness.

Should I marinate the steak first?

Marinating is optional because the seasoning and garlic butter provide plenty of flavor without a long marinade.

Why are my steak bites tough?

Overcooking, very small pieces, or using a tough cut can make the meat chewy or dry.

Can I use frozen steak?

Fresh or fully thawed steak is best because it cooks more evenly and develops better browning.

When should I add the garlic butter?

Add the garlic butter after air frying so the fresh garlic stays fragrant instead of burning.

Can I use garlic powder instead of fresh garlic?

Yes, but fresh minced garlic gives the butter sauce a stronger and more aromatic flavor.

How should I reheat leftover steak bites?

Reheat them at 350°F in the air fryer for about 2–4 minutes, checking often to prevent overcooking.

Final Thoughts

Air Fryer Garlic Butter Steak Bites are a simple way to enjoy tender, flavorful beef without spending a long time in the kitchen. The air fryer creates browned edges quickly, while homemade garlic butter adds a rich finish.

For the best results, use a tender steak, cut the pieces evenly, avoid overcrowding the basket, and check the internal temperature before serving. Pair the finished bites with potatoes, vegetables, rice, or your favorite dipping sauce for an easy meal or crowd-pleasing appetizer.