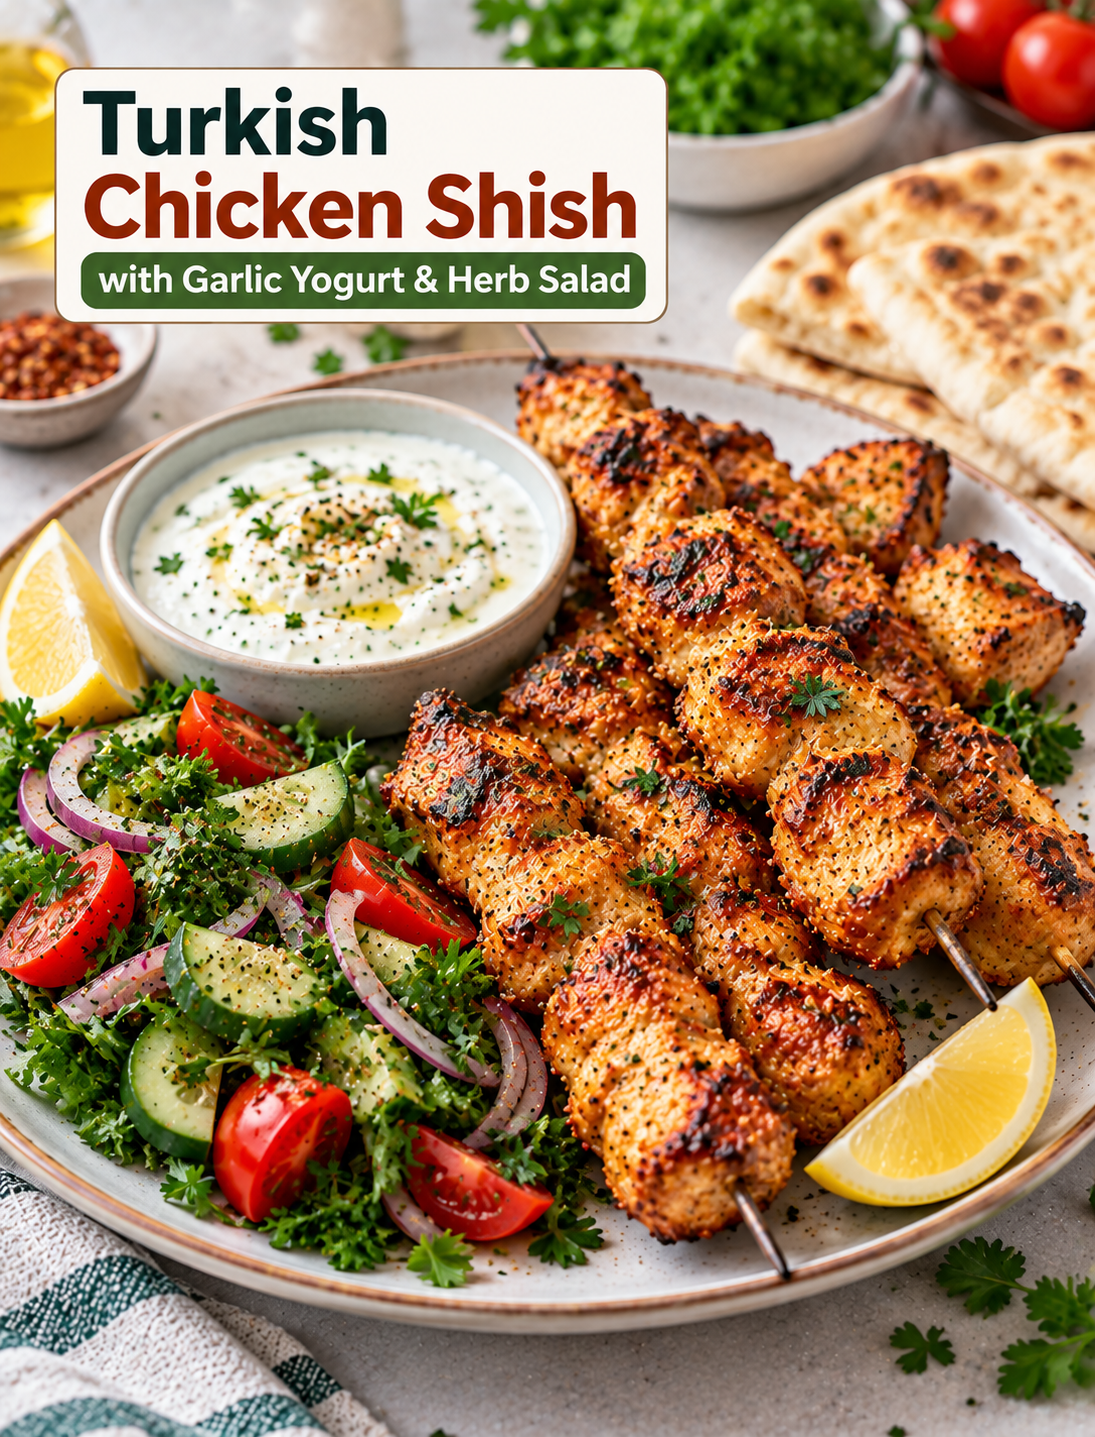
Turkish Chicken Shish with Garlic Yogurt & Herb Salad

Grilled Turkish chicken shish skewers served with garlic yogurt sauce, fresh herb salad, lemon, and warm pita

Turkish Chicken Shish with Garlic Yogurt & Herb Salad

Turkish Chicken Shish with Garlic Yogurt & Herb Salad is a fresh, flavorful meal that brings together juicy grilled chicken, cool garlic yogurt, and a crisp herb-filled salad. The chicken is marinated with olive oil, lemon, garlic, and warm spices before being threaded onto skewers and cooked until lightly charred.

This Turkish-inspired chicken dinner is simple enough for a weeknight but flavorful enough for a weekend gathering. The creamy yogurt balances the smoky chicken, while fresh parsley, mint, cucumber, and tomatoes add brightness to every bite.

Serve the chicken with warm pita, flatbread, rice, or roasted vegetables for a complete meal. You can also build a simple platter and let everyone add their favorite toppings and sauces.

Why You’ll Love This Turkish Chicken Shish

This recipe uses everyday ingredients but creates layers of flavor without complicated cooking techniques.

  • Juicy chicken: A yogurt-free lemon and olive oil marinade helps season the chicken throughout.
  • Bold Turkish flavors: Garlic, paprika, cumin, oregano, and lemon create a warm and savory spice blend.
  • Fresh side salad: Parsley, mint, cucumber, and tomatoes add crunch and freshness.
  • Creamy garlic yogurt: Cool yogurt provides a rich contrast to the grilled chicken.
  • Easy grilling: Skewers make the chicken quick to turn and easy to serve.
  • Flexible meal: Serve it in pita, over rice, or as part of a Mediterranean-style platter.

Ingredients You’ll Need

For the best results, use boneless, skinless chicken thighs because they stay juicy on the grill. Chicken breast can also be used if you prefer a leaner option.

For the Chicken Shish

  • 1½ pounds boneless, skinless chicken thighs, cut into 1½-inch pieces
  • 2 tablespoons extra-virgin olive oil
  • 2 tablespoons fresh lemon juice
  • 3 garlic cloves, finely minced
  • 1 teaspoon paprika
  • 1 teaspoon ground cumin
  • 1 teaspoon dried oregano
  • ½ teaspoon ground black pepper
  • ¾ teaspoon salt
  • ½ teaspoon red pepper flakes, optional

Garlic Yogurt

  • 1 cup plain Greek yogurt
  • 1 garlic clove, finely grated
  • 1 tablespoon fresh lemon juice
  • 1 tablespoon extra-virgin olive oil
  • ¼ teaspoon salt
  • 1 tablespoon chopped fresh parsley

Herb Salad

  • 1 cup chopped fresh parsley
  • ½ cup fresh mint leaves, chopped
  • 1 cucumber, diced
  • 1 cup cherry tomatoes, halved
  • ¼ small red onion, thinly sliced
  • 1 tablespoon fresh lemon juice
  • 1 tablespoon extra-virgin olive oil
  • Salt and black pepper to taste

For Serving

  • Warm pita or flatbread
  • Lemon wedges
  • Fresh parsley or mint
  • Extra garlic yogurt

How to Make Turkish Chicken Shish

Step 1: Cut the Chicken

Trim excess fat from the chicken thighs and cut them into evenly sized pieces.

Aim for pieces around 1½ inches thick. Similar-sized pieces cook more evenly and make the skewers easier to handle.

Tip: Do not cut the chicken into very small pieces because they can dry out quickly over high heat.

Step 2: Make the Marinade

Add olive oil, lemon juice, minced garlic, paprika, cumin, oregano, black pepper, salt, and red pepper flakes to a large bowl.

Whisk until the ingredients are well combined.

The olive oil helps coat the chicken, while lemon, garlic, and spices add a bright and savory flavor.

Step 3: Marinate the Chicken

Add the chicken pieces to the marinade and toss until every piece is evenly coated.

Cover the bowl and refrigerate for at least 30 minutes. For deeper flavor, marinate the chicken for up to 4 hours.

Avoid leaving the chicken in the lemon-heavy marinade for too long because the acidic ingredients can affect the texture.

Step 4: Prepare the Garlic Yogurt

While the chicken marinates, combine Greek yogurt, grated garlic, lemon juice, olive oil, salt, and parsley in a small bowl.

Stir until smooth and creamy.

Cover and refrigerate until ready to serve. Chilling the sauce allows the garlic flavor to blend into the yogurt.

Step 5: Make the Herb Salad

Add parsley, mint, cucumber, cherry tomatoes, and red onion to a medium bowl.

Drizzle with lemon juice and olive oil. Season lightly with salt and black pepper.

Toss gently so the herbs and vegetables stay fresh and crisp.

Tip: Make the salad close to serving time for the best texture.

Step 6: Prepare the Skewers

If using wooden skewers, soak them in water for at least 20–30 minutes to reduce the chance of burning.

Thread the marinated chicken pieces onto the skewers, leaving small spaces between the pieces.

Do not pack the chicken too tightly because the heat needs to circulate around each piece.

Step 7: Heat the Grill

Preheat an outdoor grill or indoor grill pan over medium-high heat.

Lightly oil the cooking surface to reduce sticking.

The grill should be hot before the chicken goes on so the exterior can develop a flavorful browned crust.

Step 8: Grill the Chicken

Place the chicken skewers on the hot grill.

Cook for approximately 10–14 minutes, turning every few minutes so the chicken browns evenly on all sides.

Cooking time will vary depending on the size of the chicken pieces and the heat of your grill.

The chicken should reach an internal temperature of 165°F in the thickest piece before serving.

Step 9: Rest the Chicken

Transfer the cooked skewers to a clean plate and let them rest for about 3–5 minutes.

Resting allows the juices to settle and helps keep the chicken moist when served.

Squeeze fresh lemon juice over the chicken just before serving for an extra burst of flavor.

Step 10: Build Your Plate

Spread a spoonful of garlic yogurt onto a serving plate.

Add the grilled chicken shish and spoon the fresh herb salad alongside it.

Serve with warm pita, flatbread, rice, or roasted vegetables.

For a family-style meal, place the chicken, yogurt, salad, lemon wedges, and bread on a large platter and let everyone build their own plate.

Tips for Juicy Chicken Shish

Choose the Right Chicken

Chicken thighs are especially forgiving on the grill and tend to remain juicy when cooked properly. Chicken breast works well too, but it should not be overcooked.

Keep the Pieces Even

Uniform chicken pieces cook at a similar rate. Large pieces may remain undercooked inside while smaller pieces become dry.

Don’t Skip the Marinade

Even a short 30-minute marinade gives the chicken time to absorb the garlic, lemon, herbs, and spices.

Use High Heat Carefully

A hot grill creates attractive browning, but excessive heat can burn the outside before the center is cooked. Adjust the heat if the chicken is browning too quickly.

Check the Temperature

A food thermometer is the most reliable way to confirm that chicken is fully cooked. Check the thickest piece rather than relying only on color.

Easy Ways to Customize the Recipe

You can easily adjust this meal to suit your taste or what you have in the kitchen.

For more heat, add extra red pepper flakes or a pinch of Aleppo pepper. For a smokier flavor, use smoked paprika in place of regular paprika.

You can add diced bell peppers or chunks of red onion to the skewers for extra color and texture. Keep the vegetable pieces similar in size to the chicken so they cook evenly.

For a lighter meal, serve the chicken over a large herb salad instead of pita or rice.

For a heartier dinner, add warm pita, hummus, roasted potatoes, or seasoned rice to the plate.

What to Serve With Turkish Chicken Shish

The combination of grilled chicken, garlic yogurt, and herb salad is already satisfying, but a few simple sides can turn it into a larger Mediterranean-inspired spread.

Warm pita is ideal for wrapping the chicken with yogurt and salad. Fluffy rice or bulgur makes a filling base for the grilled meat.

Hummus, roasted vegetables, olives, pickled onions, and a simple cucumber salad also pair well with the smoky chicken.

For a summer meal, serve the skewers with grilled vegetables and extra lemon wedges for a fresh outdoor dinner.

Frequently Asked Questions

What is Turkish chicken shish?

Turkish chicken shish is seasoned chicken cut into pieces, threaded onto skewers, and grilled until tender with lightly charred edges.

Can I use chicken breast instead of thighs?

Yes, chicken breast works well, but cut it evenly and avoid overcooking it because it can dry out faster than thighs.

How long should I marinate chicken shish?

Marinate the chicken for at least 30 minutes and up to about 4 hours for good flavor and texture.

What temperature should chicken shish reach?

Chicken should reach an internal temperature of 165°F in the thickest piece for safe serving.

Can I cook Turkish chicken shish without a grill?

Yes, you can use a grill pan or broiler, although the cooking time and browning may vary by appliance.

What yogurt is best for garlic yogurt sauce?

Plain Greek yogurt creates a thick, creamy sauce, but regular plain yogurt can also be used for a lighter consistency.

Can I prepare the chicken shish ahead of time?

Yes, you can marinate the raw chicken several hours ahead and refrigerate it until you are ready to cook.

What should I serve with chicken shish?

Serve it with garlic yogurt, herb salad, warm pita, rice, hummus, roasted vegetables, or fresh lemon wedges.

Final Thoughts

Turkish Chicken Shish with Garlic Yogurt & Herb Salad is an easy way to make a flavorful grilled chicken dinner at home. The seasoned chicken develops delicious charred edges while staying tender inside, and the cool garlic yogurt adds a creamy contrast.

The fresh herb salad keeps the meal bright with parsley, mint, cucumber, tomatoes, and lemon. Add warm pita or rice, and you have a balanced dinner that works equally well for a casual family meal or a relaxed gathering with friends.

For the best results, use evenly cut chicken pieces, give the meat enough time to marinate, keep the grill hot, and check the chicken with a thermometer before serving.

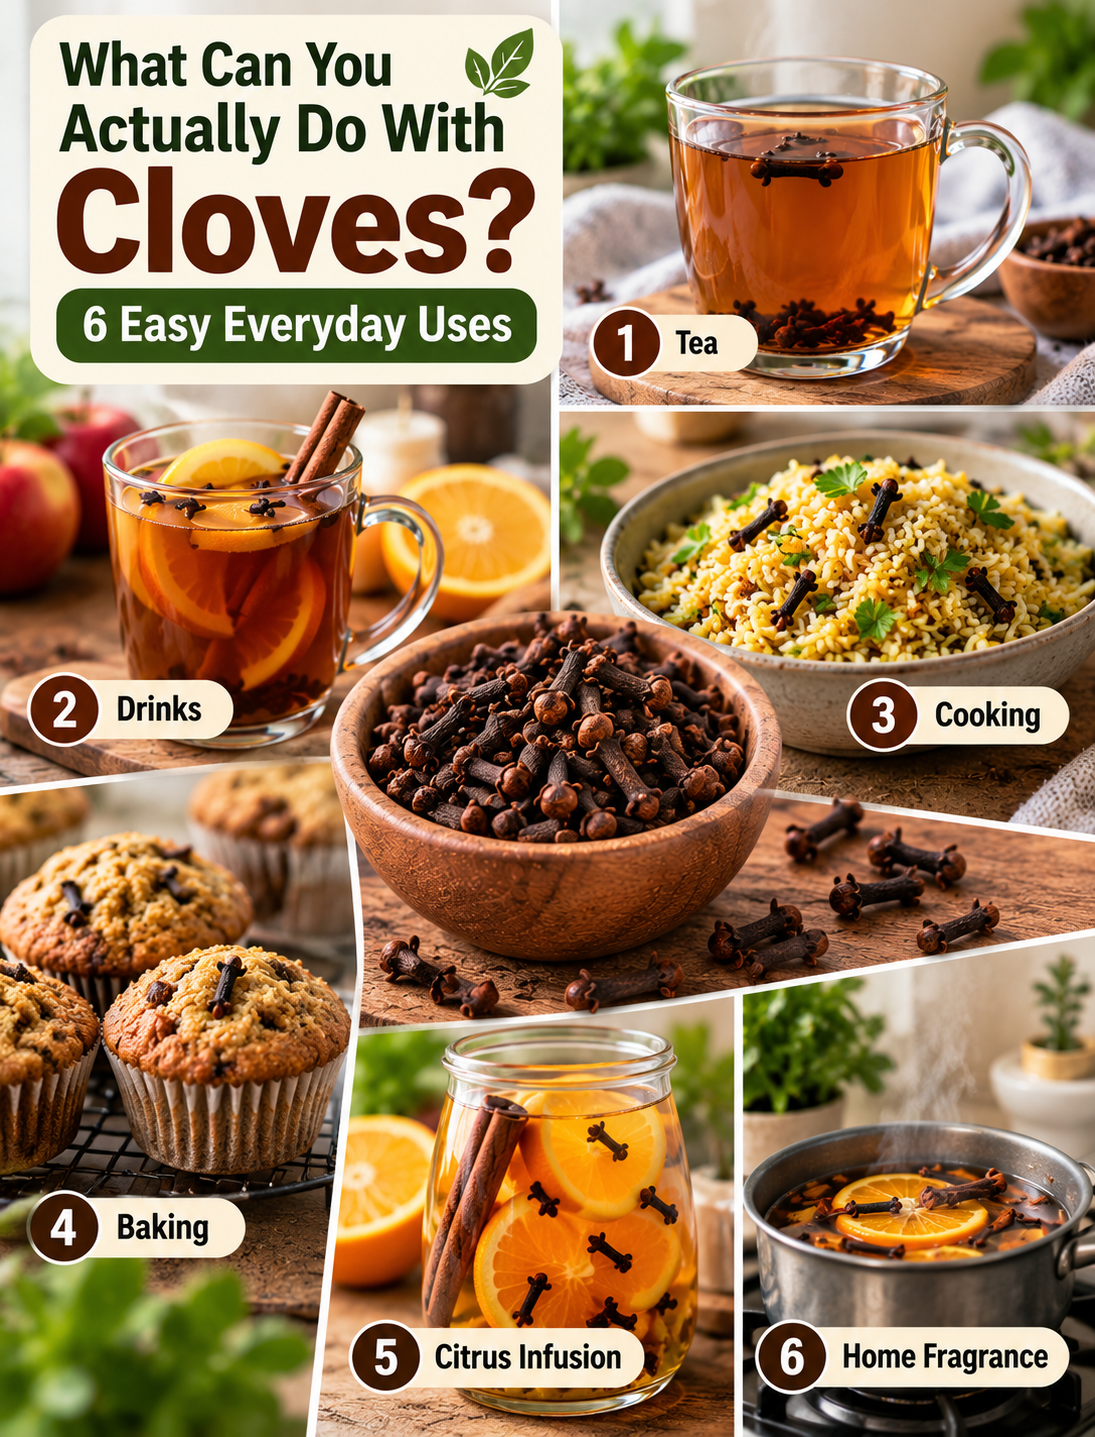
What Can You Actually Do With Cloves?

Six everyday uses for cloves including clove tea, cooking, baking, citrus infusion, and cozy home aroma

What Can You Actually Do With Cloves?

Most people reach for this warm, fragrant spice when making holiday cookies or baked goods. But uses for cloves goes far beyond the baking shelf.

Whole cloves can add depth to drinks, rice, sauces, fruit, and slow-cooked dishes. Ground cloves work especially well in muffins, cookies, quick breads, and spice blends. You can also use the aromatic buds in simple homemade preparations for a cozy kitchen or home scent.

The best part is that you do not need complicated ingredients or special equipment.

This guide shows you 6 practical uses for cloves, along with simple preparation ideas and tips for choosing between whole and ground forms.

1. Make a Simple Clove Tea

One of the easiest ways to use whole cloves is to steep them in hot water.

What You Need

  • 3–4 whole cloves
  • 1 cup hot water
  • Honey, optional
  • Orange or lemon, optional

How to Make It

  1. Place the whole buds in a mug.
  2. Pour in 1 cup of hot water.
  3. Cover and steep for 5–7 minutes.
  4. Remove the cloves before drinking.
  5. Add a small amount of honey or citrus if you like.

The result is a warm, aromatic drink with a naturally strong spice flavor.

This is best viewed as a traditional beverage idea rather than a treatment for a health condition.

2. Add Flavor to Warm Drinks

You can also use whole cloves to give everyday drinks a deeper, warmer flavor.

Try adding one or two buds to:

  • Warm apple cider
  • Spiced tea
  • Homemade fruit punch
  • Hot cranberry drinks
  • Orange-based beverages

For a simple fall-inspired drink, combine apple cider with a cinnamon stick and one or two whole cloves. Warm the mixture gently, then remove the spices before serving.

Whole cloves are useful here because they can be removed easily after they release their flavor.

3. Use Them in Rice and Savory Cooking

Cloves can add a warm, slightly sweet aroma to savory dishes when used in small amounts.

Try them with:

  • Rice
  • Lentil dishes
  • Slow-cooked meats
  • Stews
  • Broths
  • Tomato-based sauces

For rice, add one or two whole cloves while the rice cooks, then remove them before serving. This gives the dish a subtle background flavor without making every bite taste strongly of spice.

They also pair well with cinnamon, bay leaves, black pepper, cardamom, and cumin in many savory spice combinations.

The key is moderation because the flavor is strong.

4. Add Ground Cloves to Baked Goods

Ground cloves are especially convenient for baking because they blend evenly into dough and batter.

Use a small amount in:

  • Muffins
  • Cookies
  • Banana bread
  • Pumpkin bread
  • Gingerbread
  • Spice cakes
  • Oatmeal-based baked goods

A little can make a noticeable difference.

For a balanced flavor, combine ground cloves with cinnamon, nutmeg, or ginger. These spices work well together in classic American fall and holiday recipes.

When a recipe already contains a strong spice blend, start with a small amount rather than adding extra cloves.

5. Create a Citrus and Spice Infusion

For a simple homemade preparation, combine citrus with aromatic spices.

Simple Ingredients

  • Orange slices or orange peel
  • 2–3 whole cloves
  • 1 cinnamon stick
  • 2 cups water

Preparation

  1. Add the orange, cloves, and cinnamon to a small saucepan.
  2. Cover with water.
  3. Bring the mixture to a gentle simmer.
  4. Let it warm for about 15–20 minutes.
  5. Add more water if needed.

The combination creates a warm citrus-and-spice aroma that can make the kitchen feel especially inviting.

If you use orange peel, wash the fruit well before preparing it.

6. Use Cloves for a Cozy Home Aroma

Cloves can also be part of a simple homemade fragrance idea.

Combine whole cloves with orange slices, cinnamon sticks, and star anise in a bowl or saucepan. The combination creates a naturally warm, spicy scent.

For a stovetop version, add the ingredients to water and keep the mixture at a gentle simmer. Check the water regularly and never leave a heated pan unattended.

This is a simple alternative to reaching for a heavily scented product when you want your kitchen to smell warm and seasonal.

Whole Cloves vs. Ground Cloves: Which Should You Use?

Choosing the right form depends on what you are making.

Choose whole cloves when:

  • You want to flavor a drink.
  • You are cooking rice or a stew.
  • You want to remove the spice before serving.
  • You are making a citrus-spice infusion.
  • You want a stronger visual presentation.

Choose ground cloves when:

  • You are baking.
  • You are mixing a spice blend.
  • You want the spice distributed evenly.
  • The recipe calls for a powdered spice.

Whole buds are easier to remove, while ground cloves blend directly into the food.

Easy Ways to Start Using This Spice

You do not need to completely change your cooking routine.

Start with one simple idea.

Add a couple of whole cloves to apple cider, use a small amount of ground spice in muffins, or add one or two buds to rice while it cooks.

Because the flavor is powerful, start small and adjust according to taste.

Keeping both whole and ground forms in your pantry also gives you more options for cooking, baking, and simple homemade preparations.

A Simple Safety Note

Cloves are commonly used as a food spice, but concentrated clove oil is much stronger than the amount normally used in cooking. Large amounts of eugenol-containing clove oil can cause serious poisoning, so clove oil should not be treated like a regular food ingredient.

If you take prescription medicines, are pregnant or breastfeeding, or are considering concentrated herbal products, speak with a qualified healthcare professional before using them regularly. Herbal products can have safety concerns and potential interactions with medicines.

For everyday cooking, keep the focus on normal culinary amounts and follow the recipe.

Frequently Asked Questions

1. What are the most common uses for cloves?

They are commonly used to flavor drinks, rice, savory dishes, baked goods, spice blends, and homemade aromatic preparations.

2. Can I make tea with whole cloves?

Yes. Steep 3–4 whole cloves in 1 cup of hot water for about 5–7 minutes, then remove them before drinking.

3. Are whole cloves better than ground cloves?

Neither is universally better; whole buds are easier to remove, while ground cloves blend more easily into recipes.

4. Can I use cloves in baking?

Yes. Ground cloves work well in muffins, cookies, quick breads, gingerbread, and other warmly spiced baked goods.

5. Can cloves be added to apple cider?

Yes. One or two whole cloves can add a warm, aromatic flavor to heated apple cider.

6. How many whole cloves should I use in a drink?

Start with 3–4 whole cloves per cup of hot water and adjust the strength to your taste.

7. Can cloves be used with orange and cinnamon?

Yes. Orange, cinnamon, and whole cloves make a classic warm combination for drinks and homemade aromatic preparations.

8. Is clove oil the same as using whole cloves?

No. Clove oil is highly concentrated and should not be consumed like a normal culinary spice.

Final Thoughts

Cloves are much more versatile than a spice reserved for holiday baking.

You can use whole buds in drinks, rice, savory dishes, and citrus infusions, while ground cloves are convenient for muffins, cookies, breads, and spice blends.

Start with small amounts, pair them with familiar ingredients, and let their warm aroma add something special to everyday cooking.

Which use would you try first: clove tea, cooking, baking, or a citrus-spice infusion? 🌿☕

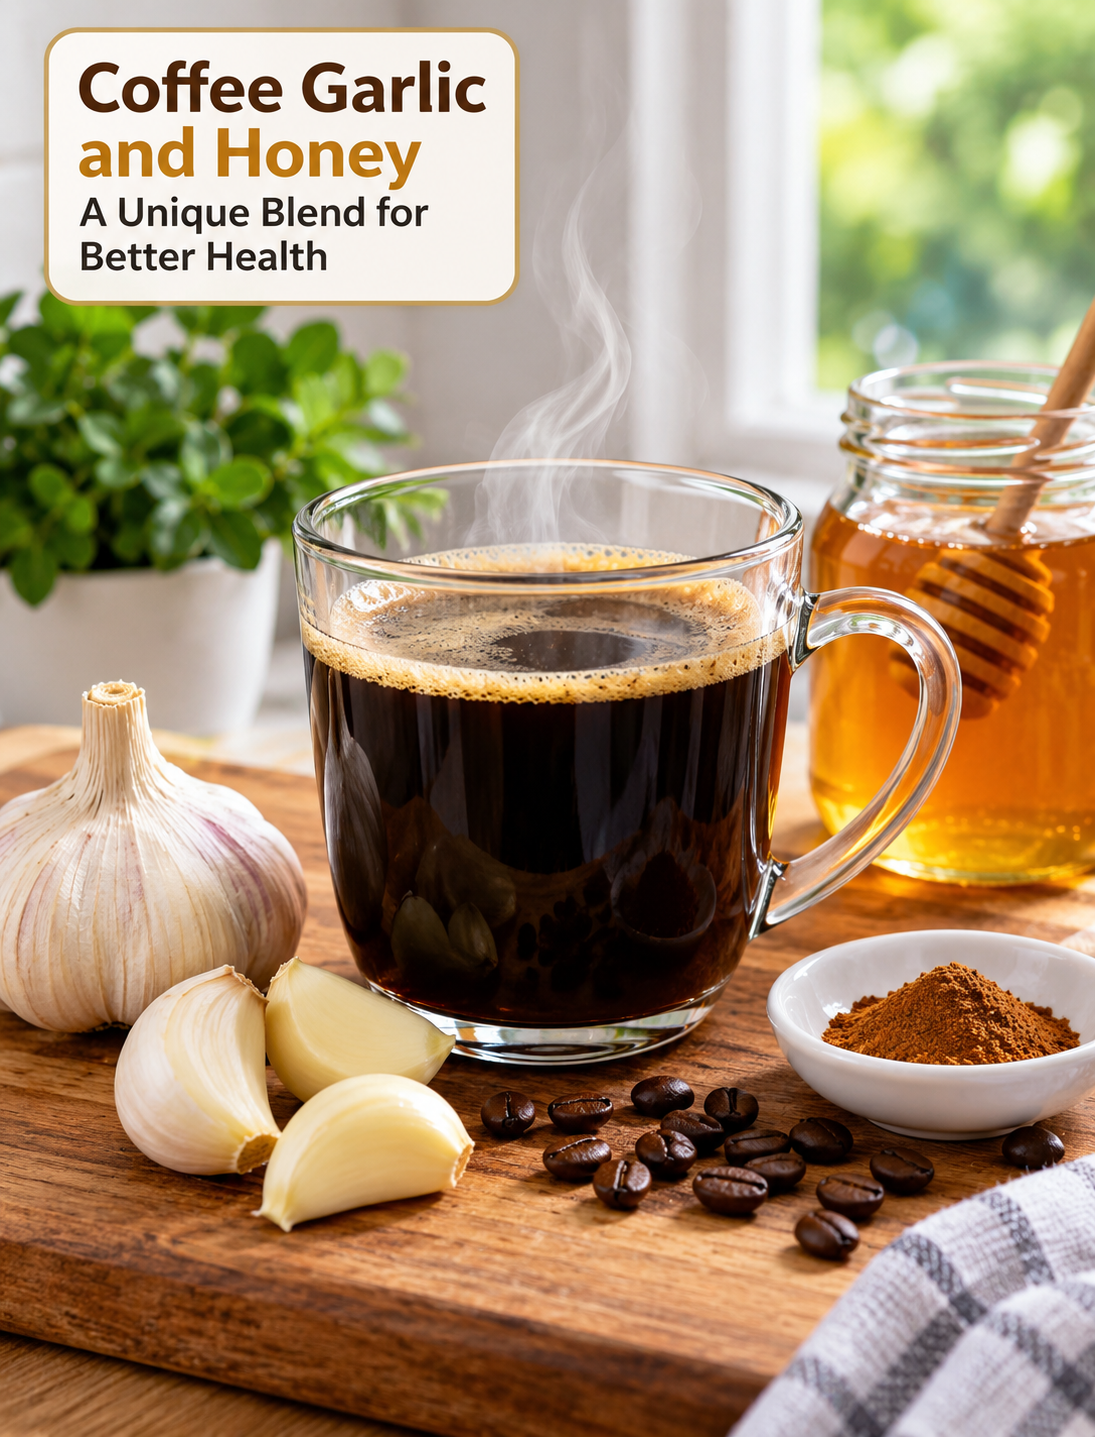
Coffee Garlic and Honey: A Unique Blend for Better Health

Cup of coffee with garlic and honey, a unique homemade morning wellness drink

Coffee Garlic and Honey: A Unique Blend for Better Health

Coffee is a favorite morning drink for millions of Americans, but some people enjoy experimenting with simple ingredients to create something different. Coffee, garlic, and honey may sound like an unusual combination, yet each ingredient has a distinct flavor and nutritional profile.

This homemade drink combines the bold taste of brewed coffee with the sharp flavor of fresh garlic and the natural sweetness of honey. A small amount of cinnamon can also add warmth and make the flavor easier to enjoy.

It is important to view this drink as a flavorful home recipe rather than a cure or treatment. Garlic, honey, and coffee have each been studied for different health-related properties, but adding them together does not guarantee specific medical benefits.

Ingredients

For one serving, you will need:

  • 1 cup freshly brewed coffee
  • 1 small garlic clove
  • 1 tablespoon honey
  • A small pinch of cinnamon, optional

Use fresh garlic for the strongest flavor and freshly brewed coffee for a smoother aroma. If you are sensitive to strong garlic flavors, start with half a clove instead.

How to Make Coffee Garlic and Honey

Step 1: Brew the Coffee

Prepare one cup of your preferred coffee using your usual brewing method. Medium or light roast coffee can work well because its flavor may be easier to balance with garlic and honey.

Step 2: Prepare the Garlic

Peel one small garlic clove and crush or mince it. Crushing garlic helps release sulfur-containing compounds that contribute to its strong aroma and flavor.

Step 3: Add the Garlic

Place the prepared garlic into a heat-safe cup. Pour the freshly brewed coffee over it and allow the mixture to sit for about 2–3 minutes.

Step 4: Add Honey

Stir in one tablespoon of honey after the coffee has cooled slightly. Honey adds sweetness and helps soften the sharp taste of raw garlic.

Step 5: Add Cinnamon

Sprinkle in a small pinch of cinnamon if desired. Cinnamon gives the drink a warmer flavor without adding much sweetness.

Step 6: Strain and Serve

Strain the drink if you do not want garlic pieces in your cup. Serve it warm and drink it slowly to see how your body and taste buds respond.

Potential Benefits of the Ingredients

1. Coffee Provides Caffeine

Coffee naturally contains caffeine, a stimulant that can increase alertness and help you feel more awake. The caffeine content varies depending on the coffee beans, serving size, and brewing method.

For most healthy adults, moderate coffee consumption can fit into a balanced diet. However, people who are sensitive to caffeine may experience nervousness, a faster heartbeat, or difficulty sleeping.

2. Garlic Adds Plant Compounds

Garlic contains sulfur compounds, including allicin, which forms when fresh garlic is crushed or chopped. Garlic has been widely studied as part of a healthy eating pattern.

Adding garlic to a drink does not make it a medicine. Its value is best considered alongside a diet that includes vegetables, fruits, whole grains, legumes, and other nutrient-rich foods.

3. Honey Provides Natural Sweetness

Honey contains naturally occurring sugars and small amounts of other compounds. It can make bitter coffee and pungent garlic more pleasant without using refined table sugar.

Honey is still an added sugar, so portion size matters. One tablespoon contains a meaningful amount of sugar and calories, especially when consumed every day.

4. Cinnamon Adds Flavor

Cinnamon can provide a naturally warm and slightly sweet flavor. A small pinch is enough to complement coffee and honey without overpowering the drink.

Cinnamon should be treated primarily as a flavor ingredient rather than a replacement for medical treatment or prescribed medication.

Important Things to Keep in Mind

This unusual coffee recipe is not suitable for everyone. Consider these points before making it part of your routine:

  • Watch your caffeine intake: Too much caffeine can cause jitters, headaches, or sleep problems in sensitive people.
  • Start with less garlic: Raw garlic has a strong taste and may cause stomach discomfort in some people.
  • Use honey in moderation: Honey is still a source of added sugar.
  • Consider medication interactions: Garlic supplements can interact with certain medicines, so ask a healthcare professional if you take regular medication.
  • Pay attention to your stomach: Coffee and raw garlic may both bother people with sensitive digestion.
  • Do not treat it as medicine: This beverage should complement healthy habits rather than replace professional medical care.

When Is the Best Time to Drink It?

Morning may be the most practical time because coffee contains caffeine that can promote alertness. Drinking it late in the day may interfere with sleep if you are sensitive to caffeine.

If you normally drink coffee on an empty stomach, try having this recipe with breakfast instead. Food may make the combination easier to tolerate for people who experience stomach irritation from coffee or raw garlic.

How to Make the Flavor More Enjoyable

The original recipe has a strong garlic flavor, so small adjustments can make it easier to drink.

Try using half a garlic clove for a milder version. You can also reduce the honey slightly if you prefer less sweetness. Cinnamon can add warmth, while choosing a smoother coffee roast can reduce the bitter taste.

Avoid adding large amounts of garlic or honey simply because you want stronger effects. More of an ingredient does not automatically mean greater health benefits.

Frequently Asked Questions

Can I drink coffee with garlic and honey every day?

There is no proven need to drink this combination daily for health benefits. If you enjoy it, keep portions moderate and stop if it causes stomach discomfort.

Does garlic in coffee boost immunity?

Garlic contains compounds studied for immune-related effects, but this drink has not been proven to prevent infections or directly strengthen immunity.

Can this drink help with weight loss?

The drink itself is not a proven weight-loss treatment. Weight management depends mainly on overall calorie intake, nutrition, physical activity, sleep, and other lifestyle factors.

Is coffee with garlic safe?

It can be safe for many healthy adults in small amounts, but raw garlic and caffeine may cause digestive discomfort or other side effects in sensitive people.

Can I use garlic powder instead of fresh garlic?

Yes, but fresh garlic provides a different flavor and contains compounds formed after crushing that may differ from processed garlic powder.

Should I drink it on an empty stomach?

Not necessarily. If coffee or raw garlic irritates your stomach, drinking it with or after breakfast may be more comfortable.

Can honey make garlic coffee taste better?

Yes. Honey adds sweetness that can soften garlic’s sharp flavor and balance the bitterness of coffee.

Who should avoid this drink?

People with caffeine sensitivity, digestive problems triggered by coffee or garlic, or medication-related concerns should check with a healthcare professional before making it a regular drink.

Final Thoughts

Coffee, garlic, and honey create an unusual combination that may appeal to people who enjoy experimenting with homemade wellness drinks. Coffee contributes caffeine, garlic provides distinctive plant compounds, and honey adds sweetness, while cinnamon can improve the overall flavor.

The best way to enjoy this recipe is to keep expectations realistic. It is a creative beverage, not a miracle health remedy. A balanced diet, regular physical activity, adequate sleep, and appropriate medical care remain much more important for long-term health.

If you enjoy bold flavors, start with a small amount of garlic and adjust the recipe gradually. That simple approach lets you discover whether this unusual coffee blend fits your taste and daily routine.

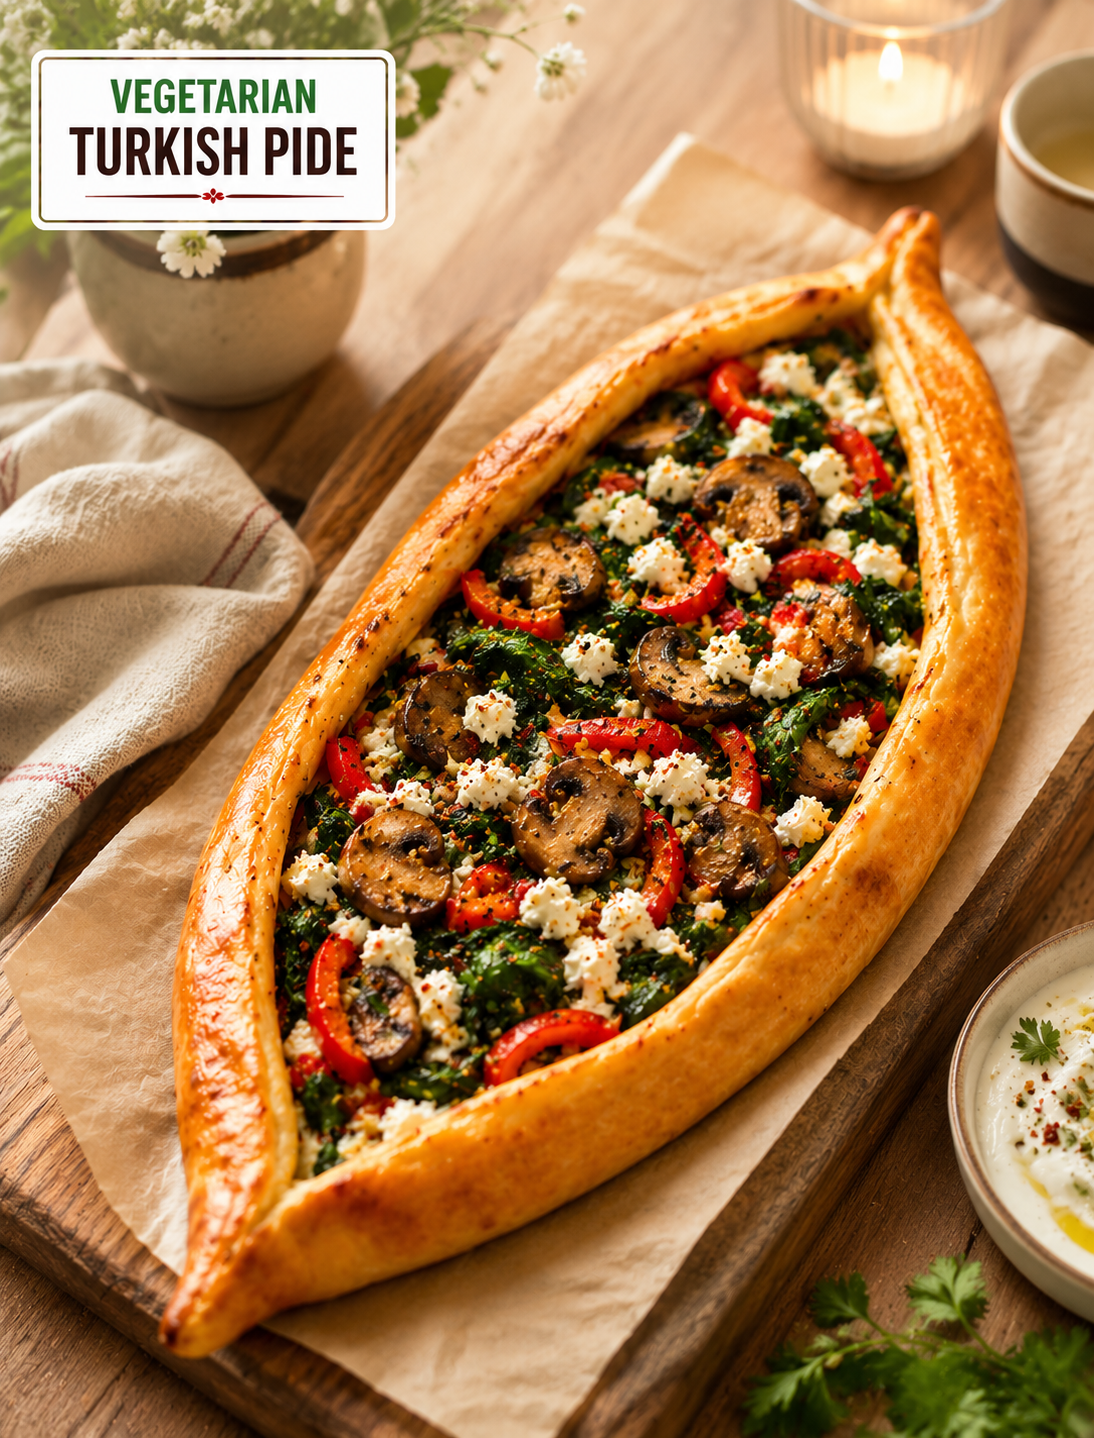
Vegetarian Turkish Pide

Vegetarian Turkish pide with spinach, mushrooms, red peppers, feta cheese, and golden crispy homemade flatbread

Vegetarian Turkish Pide

Vegetarian Turkish Pide is a golden, oval-shaped flatbread filled with sautéed vegetables, spinach, mushrooms, feta cheese, and mild Turkish spices. It has crisp edges, a soft center, and a savory filling that makes it satisfying enough for lunch, dinner, or a casual weekend meal.

This Turkish-inspired flatbread is a great meatless option when you want something hearty without making a complicated dish. The vegetables are cooked before they go into the dough, which gives the filling a rich flavor and prevents the pide from becoming watery while baking.

The recipe uses simple ingredients that are easy to find in most U.S. grocery stores. Serve the finished pide warm, cut it into slices, and enjoy it with a fresh salad, yogurt sauce, or your favorite Mediterranean side.

Why You’ll Love This Vegetarian Turkish Pide

This homemade Turkish pide combines homemade yeast dough with a flavorful vegetable filling and salty feta cheese. The dough becomes lightly crisp around the edges while staying tender in the middle.

Mushrooms provide a meaty texture, while red bell pepper adds natural sweetness and color. Spinach brings freshness, and feta gives the filling a creamy, tangy finish.

Another advantage is that the dough can be prepared ahead of time. Once the vegetables are cooked, assembling the pide is simple, making this recipe useful for busy weeknight dinners or relaxed family meals.

Ingredients For:

Dough

  • 1 cup warm water, about 90–110°F
  • 2 ¼ teaspoons instant dry yeast
  • 1 teaspoon granulated sugar
  • 2 ¼ cups all-purpose flour, about 300 g
  • 1 teaspoon sea salt or kosher salt
  • 3 tablespoons olive oil, divided

Vegetable Filling

  • 2 tablespoons olive oil, divided
  • 1 medium onion, finely chopped
  • 4 garlic cloves, minced
  • 8 ounces cremini or white button mushrooms, sliced
  • 1 large red bell pepper, thinly sliced
  • 5 ounces fresh spinach, washed and patted dry
  • ¾ cup crumbled feta cheese
  • 1 teaspoon Aleppo pepper
  • Salt and freshly ground black pepper, to taste

Egg Wash

  • 1 large egg, beaten
  • 1 tablespoon olive oil

How to Make Vegetarian Turkish Pide

Prepare the Dough

Preheat your oven to 400°F and line two baking sheets with parchment paper.

Mix the warm water, instant yeast, and sugar in a medium bowl. Stir gently and let the mixture stand for 5–8 minutes until it becomes slightly foamy.

In a large bowl, whisk together the flour and salt. Make a well in the center and add the yeast mixture and 2 tablespoons of olive oil.

Mix with a wooden spoon or spatula until a sticky, shaggy dough forms. Transfer the dough to a lightly floured surface and knead for 3–4 minutes until smooth and soft.

Add the remaining tablespoon of olive oil and continue kneading. If the dough feels overly wet, add flour one tablespoon at a time rather than adding too much at once.

Place the dough in a lightly oiled bowl and turn it once to coat the surface. Cover it with plastic wrap and let it rise in a warm place for about 1 hour, or until doubled in size.

Cook the Vegetable Filling

Heat 1 tablespoon of olive oil in a large skillet over medium heat. Add the chopped onion, garlic, mushrooms, and red bell pepper.

Cook for about 10 minutes, stirring occasionally. The onions should become translucent, the mushrooms should soften, and the peppers should lose their raw texture.

Turn off the heat and stir in the spinach, feta cheese, and Aleppo pepper. Season with salt and freshly ground black pepper.

Let the filling cool before assembling the flatbreads. Cooling the mixture helps prevent excess moisture from weakening the dough.

Shape the Pide

Transfer the risen dough to a lightly floured surface and knead it for 1–2 minutes to release some of the air.

Divide the dough into two equal portions and shape each portion into a smooth ball.

Stretch each dough ball into an oval approximately 8 x 16 inches. Use a rolling pin for an even shape, or gently stretch the dough with your hands.

Place one oval on a prepared baking sheet. Spread half of the vegetable mixture down the center while leaving about a 1-inch border around the edges.

Fold the long sides inward slightly to create a raised border. Pinch and twist both ends so the pide has its classic pointed shape.

Repeat with the second dough portion and remaining filling.

Add the Egg Wash and Bake

Whisk the beaten egg with 1 tablespoon of olive oil. Brush the mixture over the exposed dough edges.

Bake the two pides at 400°F for 23–25 minutes, or until the crust is golden brown and the edges look crisp.

Let the pide rest for a few minutes before slicing. Serve warm for the best texture and flavor.

Tips for the Best Turkish Pide

Use warm rather than hot water for the yeast. Water that is too hot can interfere with proper yeast activity.

Avoid adding too much flour while kneading. A slightly soft dough produces a more tender crust.

Cook the vegetables until their excess moisture has evaporated. This keeps the center of the pide from becoming soggy.

Do not overload the dough with filling. A moderate layer allows the crust to bake evenly and remain crisp.

For extra browning, brush the dough border evenly with egg wash before baking.

If you prefer a richer cheese flavor, add a small amount of shredded mozzarella alongside the feta.

Serving Suggestions

Slice the baked pide into strips or smaller portions and serve it while warm. A simple cucumber and tomato salad adds freshness and balances the savory filling.

For a creamy side, serve the pide with plain Greek yogurt mixed with lemon juice, garlic, and a pinch of salt.

It also works well with hummus, olives, roasted vegetables, or a light Mediterranean salad. For a casual gathering, cut the pide into small pieces and serve it as a vegetarian appetizer.

Storage and Reheating

Store leftover Turkish pide in an airtight container in the refrigerator for up to 3 days.

Reheat slices in a 350°F oven or air fryer until warmed through and crisp around the edges. Avoid microwaving for too long because it can make the crust soft.

You can also prepare the dough ahead of time and refrigerate it overnight. Let it come closer to room temperature before shaping.

Nutrition Information

Nutrition values vary based on ingredient brands, portion size, and the amount of filling used. An approximate serving may provide carbohydrates from the flour, protein from the feta and egg, fiber from the vegetables, and healthy fats from olive oil.

For a more balanced meal, serve one portion with a large vegetable salad or another fiber-rich side.

Frequently Asked Questions

What is Turkish pide?

Turkish pide is an oval-shaped flatbread traditionally baked with different savory toppings, including vegetables, cheese, meat, or eggs.

Is Vegetarian Turkish Pide healthy?

It can be part of a balanced diet because it combines vegetables, spinach, mushrooms, feta, and olive oil in one meal.

Can I make pide without eggs?

Yes. You can skip the egg wash and brush the edges with olive oil for a simple vegetarian finish.

Can I use whole wheat flour?

Yes, but replacing all the flour may produce a denser crust; start by replacing part of the all-purpose flour with whole wheat flour.

Can I make the dough ahead of time?

Yes. Refrigerate the covered dough overnight and allow it to warm slightly before shaping and baking.

What vegetables can I use in Turkish pide?

You can add zucchini, tomatoes, roasted peppers, broccoli, or other vegetables, but cook watery vegetables first to reduce excess moisture.

How do I keep pide crispy?

Cook the filling until excess moisture is gone, avoid overfilling the dough, and bake until the edges are deeply golden.

What should I serve with Turkish pide?

Serve it with Greek yogurt sauce, hummus, cucumber salad, tomatoes, olives, or a fresh Mediterranean-style salad.

Final Thoughts

Vegetarian Turkish Pide is an easy way to bring Turkish-inspired flavors to your home kitchen. The combination of crisp homemade dough, tender vegetables, spinach, mushrooms, feta, and Aleppo pepper creates a flavorful meatless meal without complicated cooking techniques.

Bake it for a family dinner, weekend lunch, or casual gathering and serve it warm with your favorite Mediterranean sides. Once you master the dough and shaping technique, you can experiment with different vegetable and cheese combinations to create your own version.

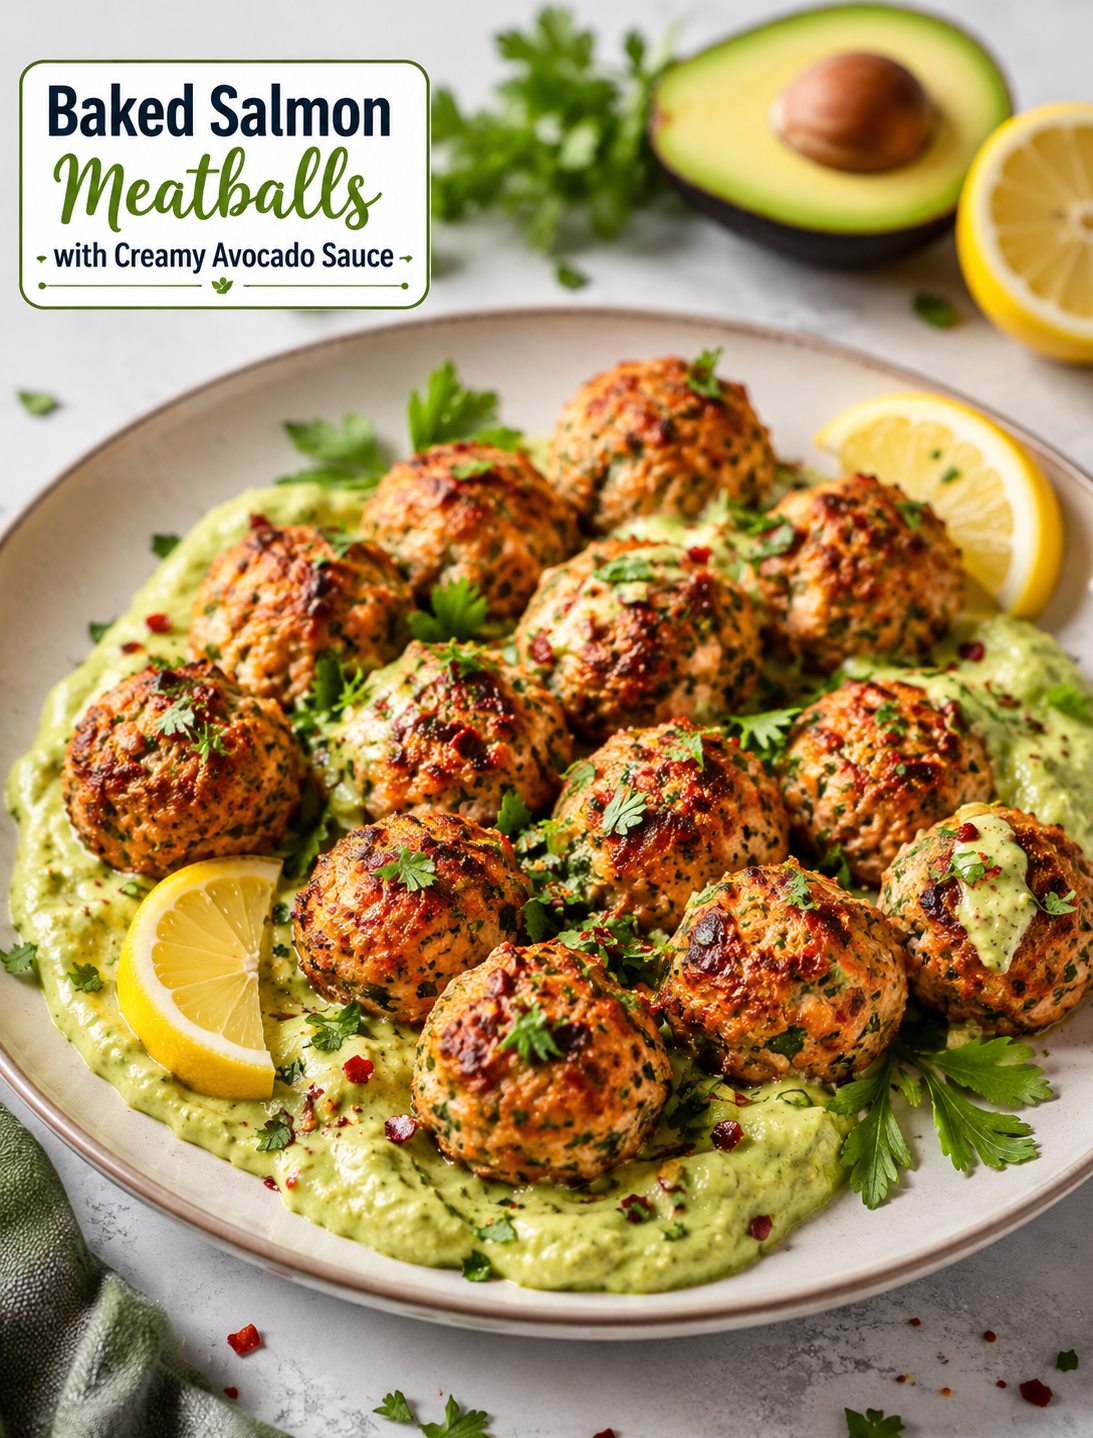
Baked Salmon Meatballs with Creamy Avocado Sauce

Baked Salmon Meatballs with Creamy Avocado Sauce

Baked Salmon Meatballs with Creamy Avocado Sauce

Baked Salmon Meatballs with Creamy Avocado Sauce are a fresh and flavorful way to enjoy salmon without making the usual fillet. Finely chopped salmon is mixed with breadcrumbs, egg, parsley, garlic, onion powder, paprika, lemon juice, and olive oil. The mixture is shaped into small meatballs and baked until lightly golden and fully cooked.

The creamy avocado sauce brings a cool, tangy finish to every bite. Ripe avocado is blended with Greek yogurt, citrus juice, garlic, and fresh herbs for a smooth sauce that pairs well with the warm salmon.

This easy salmon recipe works for a weeknight dinner, family lunch, party appetizer, or meal-prep meal. Serve the meatballs with rice, quinoa, salad, roasted vegetables, or crisp lettuce cups for a complete meal.

Ingredients

For the Salmon Meatballs

  • 1 lb (450 g) salmon fillet, skin removed and finely chopped
  • ½ cup breadcrumbs
  • 1 large egg, lightly beaten
  • 2 tbsp fresh parsley, chopped
  • 1 tsp garlic powder
  • ½ tsp onion powder
  • ½ tsp paprika
  • ½ tsp salt
  • ¼ tsp freshly ground black pepper
  • 1 tbsp fresh lemon juice
  • 1 tbsp olive oil

The salmon should be fresh and free of visible bones. Finely chopping the fish helps the ingredients hold together while leaving the meatballs with a pleasant texture. Regular breadcrumbs work well, while panko can create a lighter and slightly crispier outside.

For the Creamy Avocado Sauce

  • 1 large ripe avocado
  • ½ cup plain Greek yogurt
  • 1½ tbsp fresh lime or lemon juice
  • 1 small garlic clove, minced
  • 2 tbsp fresh cilantro or parsley
  • 2–3 tbsp water, as needed
  • ¼ tsp salt
  • ⅛ tsp black pepper

Choose an avocado that feels slightly soft when gently pressed. A ripe avocado blends more easily and creates a smoother sauce.

Optional Garnishes

  • Fresh parsley or cilantro
  • Lime or lemon wedges
  • Red pepper flakes
  • Diced green onion
  • Sesame seeds
  • Fresh dill

These toppings add color, freshness, and extra flavor without making the recipe complicated.

Servings

This recipe makes 4 servings and produces approximately 16–18 salmon meatballs, depending on their size.

For an appetizer, make smaller portions and adjust the baking time based on their size.

Preparation Time

Prep Time: 20 minutes
Cook Time: 15–18 minutes
Total Time: Approximately 40 minutes

The short cooking time makes this recipe practical for busy weeknights.

Instructions

1. Prepare the Oven

Preheat the oven to 400°F (200°C).

Line a baking sheet with parchment paper or lightly grease it with olive oil. Parchment helps prevent sticking and makes cleanup easier.

2. Prepare the Salmon

Remove the skin and check the salmon carefully for visible bones. Pat the fillet dry with paper towels.

Finely chop the salmon with a sharp knife. Aim for very small pieces rather than large chunks. Do not turn the fish into a completely smooth paste because small pieces give the meatballs a better texture.

3. Make the Meatball Mixture

Place the chopped salmon in a large bowl. Add the breadcrumbs, beaten egg, parsley, garlic powder, onion powder, paprika, salt, black pepper, lemon juice, and olive oil.

Gently mix the ingredients until they are evenly combined. Avoid overmixing because it can make the finished meatballs dense.

4. Chill the Mixture

Refrigerate the mixture for about 10–15 minutes.

Chilling is optional, but it makes a soft mixture easier to handle. It is especially useful when the salmon mixture feels difficult to shape.

5. Shape the Meatballs

Use clean hands or a small cookie scoop to divide the mixture into 16–18 equal portions.

Gently roll each portion into a ball. Place the meatballs on the prepared baking sheet with a little space between them.

Keeping the portions similar in size helps them cook evenly.

6. Bake

Bake the meatballs for approximately 15–18 minutes, depending on their size.

The outside should be lightly golden, and the center should be fully cooked. For food safety, salmon should reach an internal temperature of 145°F (63°C).

Avoid baking the meatballs longer than necessary because salmon can become dry when overcooked.

7. Prepare the Avocado Sauce

While the salmon cooks, prepare the sauce.

Add the avocado, Greek yogurt, lime or lemon juice, garlic, parsley or cilantro, salt, and black pepper to a blender or food processor.

Blend until smooth and creamy. Add water one tablespoon at a time until the sauce reaches the texture you prefer.

Keep the sauce thick if you plan to use it as a dip. Add a little more water when you want a thinner sauce for drizzling.

8. Taste and Adjust

Taste the avocado sauce before serving.

Add a little more lemon or lime juice for extra brightness. Add another pinch of salt if needed.

For a spicy version, blend in a small amount of jalapeño or add red pepper flakes.

9. Serve

Remove the baked meatballs from the oven and let them rest for a couple of minutes.

Arrange them on a serving plate and drizzle with the creamy avocado sauce. You can also serve the sauce on the side for dipping.

Finish with fresh herbs, citrus wedges, or a light sprinkle of red pepper flakes. Serve warm.

Serving Ideas

These salmon meatballs are easy to pair with different sides, so you can change the meal based on what you have available.

With Rice

Serve the meatballs over fluffy white or brown rice and drizzle the avocado sauce over the top.

With Quinoa

Quinoa makes a hearty base and pairs well with the savory salmon and creamy citrus sauce.

With Salad

Build a fresh salad with mixed greens, cucumber, tomatoes, and red onion. Use the avocado sauce as a flavorful dressing.

In Lettuce Cups

Place the cooked meatballs inside crisp lettuce leaves and add avocado sauce for a fresh, lighter meal.

With Roasted Vegetables

Serve with roasted broccoli, asparagus, zucchini, bell peppers, or carrots for an easy dinner plate.

As an Appetizer

Make smaller meatballs and serve them with toothpicks and avocado dipping sauce at parties or casual gatherings.

Recipe Notes

Use Fresh Salmon

Fresh salmon gives the meatballs excellent flavor and texture. If using previously frozen salmon, thaw it completely and pat it dry before chopping.

Keep the Salmon Cold

Cold salmon is easier to chop and shape. If the mixture becomes too soft, refrigerate it briefly before forming the meatballs.

Don’t Overmix

Mix only until the ingredients are combined. Excessive mixing can make the texture firm and dense.

Don’t Overbake

Salmon cooks quickly, so watch the cooking time carefully. An instant-read thermometer makes it easier to check for doneness.

Choose a Ripe Avocado

A slightly soft avocado blends into a smoother sauce. An underripe avocado may leave the sauce thick and uneven.

Helpful Tips

Make Them Extra Crispy

Lightly brush or spray the meatballs with olive oil before baking. For additional browning, place them under the broiler for 1–2 minutes, watching them closely.

Add More Herbs

Fresh dill, cilantro, parsley, and chives all complement the flavor of salmon.

Add a Little Heat

Add cayenne pepper, chili flakes, or finely diced jalapeño to the meatball mixture. Hot sauce can also add heat to the avocado sauce.

Use Panko.

Panko breadcrumbs can give the meatballs a lighter texture and a slightly crispier exterior than standard breadcrumbs.

Make Smaller Meatballs

For parties or appetizers, shape the mixture into bite-sized portions. Reduce the cooking time as needed and always check that the center is fully cooked.

Storage

Store cooked salmon meatballs in an airtight container in the refrigerator for up to 3 days.

Keep the avocado sauce in a separate airtight container. It is best eaten fresh but can be refrigerated for approximately 1 day.

Press plastic wrap directly against the surface of the sauce to help reduce browning.

Freezing

The baked salmon meatballs can be frozen for 2–3 months.

Allow them to cool completely before placing them in a freezer-safe container or bag. Thaw them overnight in the refrigerator, then reheat gently in the oven or air fryer.

The creamy avocado sauce is best made fresh because its texture and color can change after freezing.

Approximate Nutritional Information

Per serving, assuming four servings and approximately one-quarter of the avocado sauce:

  • Calories: 420
  • Protein: 32 g
  • Carbohydrates: 20 g
  • Fat: 25 g
  • Fiber: 5 g
  • Sugar: 2 g
  • Sodium: Approximately 500 mg

Nutrition values are estimates and can vary based on the salmon, breadcrumbs, Greek yogurt, avocado, portion sizes, and other ingredients used.

Potential Benefits

Rich in Protein

Salmon and Greek yogurt provide protein that can make a meal more satisfying. This combination works well for a filling lunch or dinner.

Source of Omega-3 Fatty Acids

Salmon provides omega-3 fatty acids, including EPA and DHA. These fats are part of a balanced eating pattern and support normal body functions.

Avocado Provides Healthy Fats

Avocado adds monounsaturated fats, fiber, and several vitamins and minerals to the sauce.

Provides Fiber

Avocado, herbs, and vegetables served with the meatballs can contribute dietary fiber. For more fiber, pair the dish with quinoa, beans, vegetables, or a large salad.

Nutrient-Dense Meal

Salmon, avocado, Greek yogurt, herbs, and vegetables provide a range of nutrients in one flavorful meal. The recipe can also be adjusted with different sides to fit your meal plan.

Frequently Asked Questions

Can I use canned salmon?

Yes. Drain canned salmon well and remove bones or skin if preferred; the finished texture will differ from fresh salmon.

Can I use frozen salmon?

Yes. Thaw the salmon completely in the refrigerator and pat it very dry before chopping.

Can I use almond flour instead of breadcrumbs?

Yes. Almond flour can replace breadcrumbs, although it may slightly change the texture of the meatballs.

Can I make these gluten-free?

Yes. Use certified gluten-free breadcrumbs or another gluten-free binder suitable for the recipe.

Can I make them without eggs?

Yes, but the egg helps bind the mixture, so an egg substitute may produce a softer and more fragile texture.

Why are my salmon meatballs falling apart?

Excess moisture can weaken the mixture; add a tablespoon of breadcrumbs and chill it for about 15 minutes before shaping.

Can I air fry the meatballs?

Yes. Air fry at about 375°F (190°C) for 10–14 minutes, turning halfway, and check that the center reaches 145°F (63°C).

Can I make the avocado sauce without Greek yogurt?

Yes. Blend avocado with citrus juice, garlic, herbs, a little olive oil, and water for a dairy-free alternative.

Final Thoughts

Baked Salmon Meatballs with Creamy Avocado Sauce offer a simple twist on traditional meatballs. The salmon stays tender when cooked carefully, while garlic, herbs, paprika, and lemon add balanced savory flavor.

The avocado sauce adds creamy texture and bright citrus flavor without requiring a complicated preparation. Serve these meatballs with rice, quinoa, roasted vegetables, or a crisp salad for an easy family dinner.

For entertaining, make smaller portions and serve them with toothpicks and avocado dipping sauce. For meal prep, store the cooked meatballs and sauce separately so each serving stays fresh and flavorful.