Air Fryer Peanut Butter Molten Chocolate Cakes

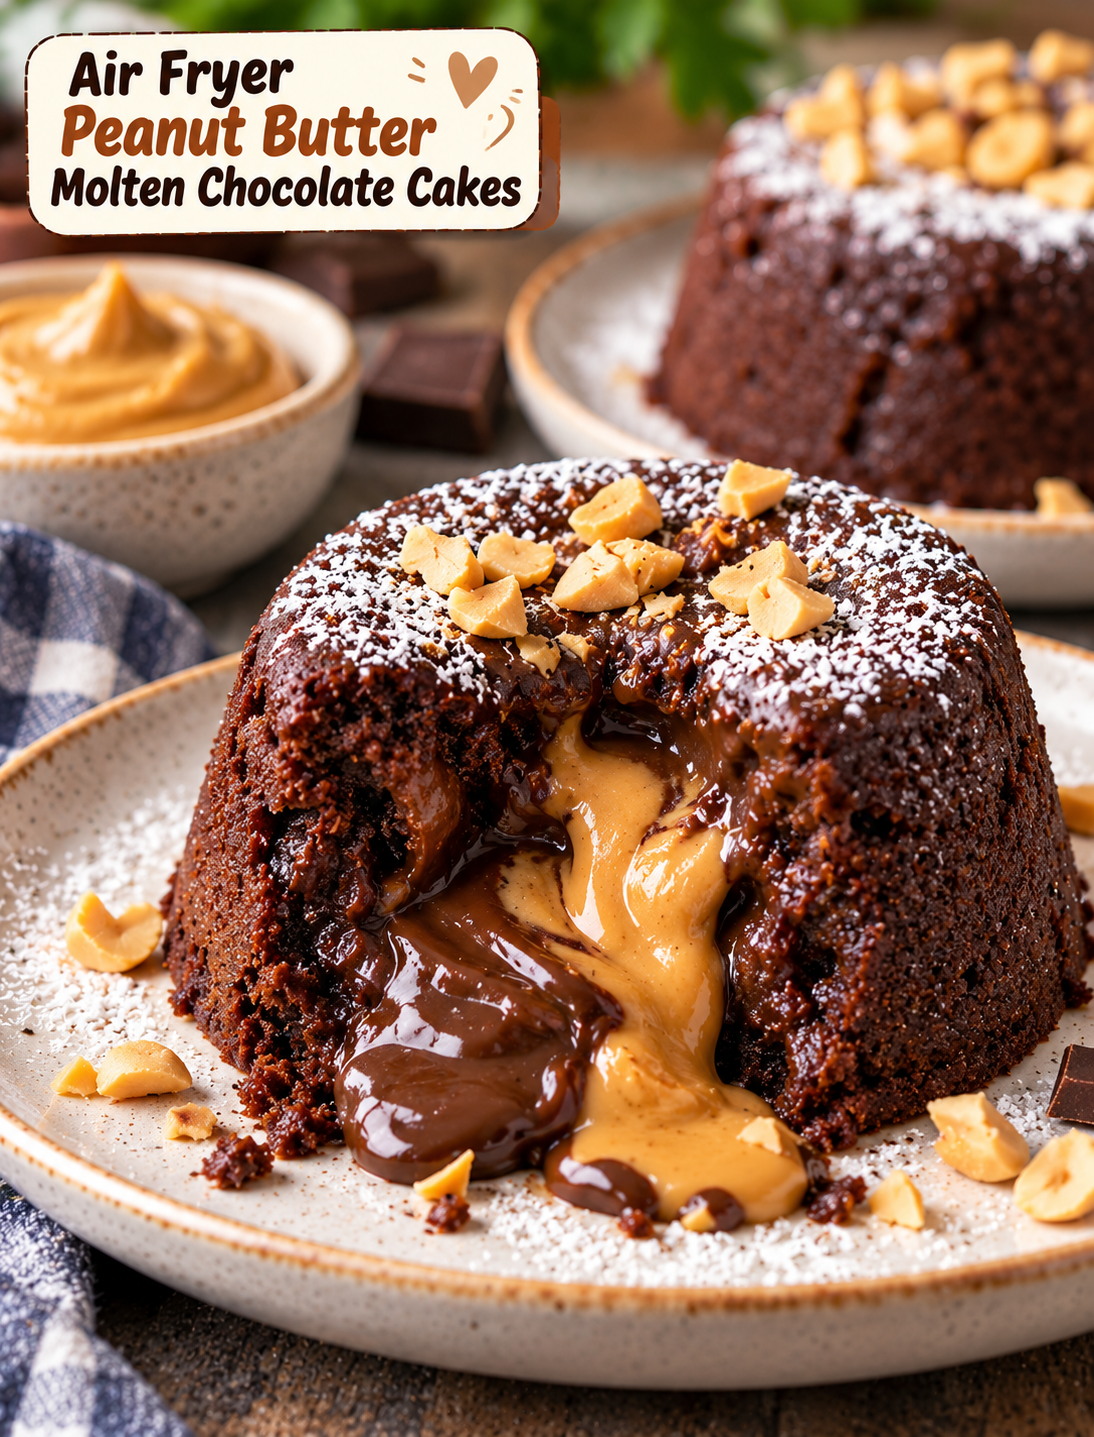
Air fryer peanut butter molten chocolate cake with a warm gooey center and powdered sugar

Air Fryer Peanut Butter Molten Chocolate Cakes

Craving a rich chocolate dessert without turning on the oven? These Air Fryer Peanut Butter Molten Chocolate Cakes are made for those moments when you want something warm, gooey, and chocolatey in a short amount of time.

Each little cake has a soft chocolate exterior with a warm peanut butter center that slowly melts when you cut into it. The combination of dark chocolate, cocoa, and creamy peanut butter gives every bite a rich flavor without making the recipe complicated.

The air fryer cooks these individual cakes quickly and gives the edges a lightly firm texture while keeping the centers soft. Serve them warm with powdered sugar, berries, whipped cream, or a scoop of vanilla ice cream for an easy dessert that feels special.

Why You’ll Love This Recipe

  • Quick dessert: The cakes cook in the air fryer in just a few minutes.
  • Gooey center: Peanut butter creates a warm, creamy filling inside the chocolate cake.
  • Small-batch recipe: This recipe makes four individual desserts, so there is no large cake to prepare.
  • Simple ingredients: Most ingredients are easy to find at any U.S. grocery store.
  • No oven needed: The air fryer handles the baking while keeping the cooking time short.
  • Easy to customize: You can use dark chocolate, semi-sweet chocolate, or milk chocolate based on your preference.

Ingredients You’ll Need

For the Chocolate Cakes

  • 4 ounces semi-sweet or dark chocolate, chopped
  • 4 tablespoons unsalted butter
  • ¼ cup granulated sugar
  • 2 large eggs
  • 1 large egg yolk
  • 1 teaspoon vanilla extract
  • ¼ cup all-purpose flour
  • 2 tablespoons unsweetened cocoa powder
  • ¼ teaspoon salt

Peanut Butter Center

  • 4 tablespoons creamy peanut butter
  • 1 tablespoon powdered sugar
  • 1 teaspoon melted butter

For Greasing

  • 1 teaspoon softened butter
  • 1 teaspoon unsweetened cocoa powder

Optional Toppings

  • Powdered sugar
  • Fresh strawberries or raspberries
  • Whipped cream
  • Vanilla ice cream
  • Chocolate shavings
  • Chopped peanuts
  • Extra peanut butter, slightly warmed

How to Make Air Fryer Peanut Butter Molten Chocolate Cakes

1. Prepare the Peanut Butter Filling

Add the creamy peanut butter, powdered sugar, and melted butter to a small bowl.

Stir until the mixture becomes smooth and thick.

Divide the mixture into four small portions and place them on a parchment-lined plate.

Freeze the portions for about 15–20 minutes.

Chilling the filling helps it stay in the center while the chocolate cakes cook.

2. Prepare the Ramekins

Use four small oven-safe ramekins that fit comfortably inside your air fryer basket.

Lightly coat the inside of each ramekin with softened butter.

Dust the buttered surfaces with a thin layer of cocoa powder and shake out any excess.

The cocoa helps prevent the chocolate cakes from sticking while keeping the outside chocolate-colored.

3. Melt the Chocolate and Butter

Place the chopped chocolate and butter in a microwave-safe bowl.

Heat for about 20 seconds at a time, stirring between each interval.

Continue until the chocolate is almost completely melted.

Stir until smooth and glossy.

Do not overheat the chocolate because excessive heat can make it thick or grainy.

4. Mix the Cake Batter

Add the granulated sugar, eggs, egg yolk, and vanilla to a separate bowl.

Whisk for about 30–45 seconds until the mixture is smooth.

Pour in the melted chocolate and butter mixture.

Stir gently until combined.

Add the flour, cocoa powder, and salt.

Fold everything together just until no dry streaks remain.

Avoid overmixing because too much mixing can make the cakes heavier.

5. Fill the Ramekins

Spoon about half of the chocolate batter into the prepared ramekins.

Place one chilled peanut butter portion in the center of each ramekin.

Keep the peanut butter filling away from the sides.

Cover each filling with the remaining chocolate batter.

The peanut butter should be completely surrounded by batter.

6. Preheat the Air Fryer

Preheat your air fryer to 350°F (175°C) for about 3 minutes if your model requires preheating.

A properly heated air fryer helps the cakes begin cooking evenly as soon as they enter the basket.

7. Air Fry the Cakes

Carefully place the filled ramekins into the air fryer basket.

Leave a little space between them so hot air can circulate.

Air fry at 350°F for about 7–9 minutes.

The edges should look set while the centers should still have a slight softness.

Cooking time can vary between air fryer models and ramekin sizes, so start checking around the 7-minute mark.

For a softer, more molten center, avoid adding extra cooking time once the edges are set.

8. Rest Before Serving

Carefully remove the ramekins from the air fryer.

Let the cakes rest for 1–2 minutes.

Run a thin knife around the edge if you want to transfer them onto plates.

Place a small plate over each ramekin and carefully turn it upside down.

Lift the ramekin slowly.

You can also serve the cakes directly in their ramekins for an easier presentation.

9. Add Your Favorite Toppings

Dust the warm cakes with powdered sugar.

Add fresh berries for a bright contrast to the rich chocolate.

For an extra-indulgent dessert, add a small scoop of vanilla ice cream.

You can also drizzle slightly warmed peanut butter over the top and finish with chopped peanuts.

When you cut into the cake, the warm peanut butter center should soften and spread into the chocolate cake.

Tips for a Perfect Molten Center

  • Do not overbake: Extra cooking time can turn the soft center into a fully baked cake.
  • Chill the filling: Cold peanut butter stays in the center longer during cooking.
  • Use small ramekins: Large ramekins can change the cooking time and make the cakes harder to cook evenly.
  • Check early: Start checking the cakes at 7 minutes because air fryers cook differently.
  • Do not overcrowd: Leave enough space around the ramekins for proper air circulation.
  • Serve immediately: The center becomes firmer as the cake cools.
  • Use good chocolate: Semi-sweet or dark chocolate gives the dessert a deeper flavor.
  • Measure flour carefully: Too much flour can make the cakes dense and reduce the molten texture.

How to Get an Extra-Gooey Center

The most important part of a molten cake is timing.

The outside should be firm enough to hold its shape, but the center should remain soft. Start with the shorter cooking time and add another 30–60 seconds only if the cakes look too loose.

Using chilled peanut butter also helps create a distinct center.

If you prefer a stronger peanut butter flavor, use natural creamy peanut butter with a pinch of powdered sugar to thicken it before chilling.

For a richer chocolate flavor, use dark chocolate with a cocoa percentage around 60–70%.

Easy Variations to Try

Chocolate Peanut Butter Cup Cakes

Add a few small pieces of peanut butter cups to the center along with the peanut butter filling.

Dark Chocolate Version

Use 70% dark chocolate and reduce the sugar slightly if you prefer a less sweet dessert.

Milk Chocolate Version

Use milk chocolate for a sweeter and creamier flavor that pairs well with children and family-friendly dessert plates.

Crunchy Peanut Butter Version

Use crunchy peanut butter for small pieces of peanuts throughout the molten center.

Salted Chocolate Version

Add a tiny pinch of flaky sea salt over the finished cakes to balance the sweetness.

Banana Peanut Butter Version

Serve each warm cake with thin banana slices and a small drizzle of peanut butter.

What to Serve With These Chocolate Cakes

These individual cakes are rich, so a cool or fresh topping works especially well.

Try serving them with:

  • Vanilla ice cream
  • Fresh strawberries
  • Raspberries
  • Blueberries
  • Whipped cream
  • Greek yogurt
  • Chopped roasted peanuts
  • Chocolate shavings
  • Powdered sugar
  • A light drizzle of maple syrup

For a restaurant-style presentation, place the cake in the center of a white plate and add a small scoop of vanilla ice cream beside it. Finish with berries and a light dusting of powdered sugar.

Storage and Reheating

These cakes are best served immediately because the center is designed to stay warm and soft.

If you have leftovers, allow them to cool completely and store them in an airtight container in the refrigerator for up to 2 days.

To reheat, place one cake in the air fryer at 300°F for 2–4 minutes.

Check it early because reheating for too long can cook the center completely.

The texture will not be exactly the same as freshly cooked cakes, but gentle reheating can bring back some of the warmth and softness.

Common Mistakes to Avoid

Overbaking the Cakes

The most common mistake is cooking the cakes too long. A few extra minutes can change the center from molten to fully set.

Using Too Much Flour

Extra flour creates a thicker batter and can make the finished cakes heavy.

Skipping the Chilled Filling

Room-temperature peanut butter can spread into the batter before the outside has enough time to set.

Overcrowding the Air Fryer

Too many ramekins can restrict airflow and cause uneven cooking.

Cutting Immediately

Allow the cakes to rest for a minute or two so the structure can settle before serving.

Frequently Asked Questions

1. Can I make these cakes without ramekins?

Yes, but use small oven-safe molds or baking cups that are rated for the air fryer’s temperature.

2. How long should I air fry molten chocolate cakes?

Start with 7 minutes at 350°F, then check the edges and add time only if needed.

3. Can I use crunchy peanut butter?

Yes, crunchy peanut butter works well and adds small pieces of peanuts to the center.

4. Can I prepare the cakes ahead of time?

Yes, assemble the ramekins several hours ahead and refrigerate them until you are ready to cook.

5. Can I use milk chocolate?

Yes, milk chocolate creates a sweeter and milder chocolate flavor than dark or semi-sweet chocolate.

6. Why did my molten center disappear?

The cakes were likely overbaked; reduce the cooking time and check them earlier during the next batch.

7. Can I freeze these chocolate cakes?

Yes, you can freeze assembled uncooked cakes, but you may need to add a few minutes to the air-frying time.

8. Can I use almond butter instead of peanut butter?

Yes, creamy almond butter can replace peanut butter for a similar soft center with a different nutty flavor.

Final Thoughts

These Air Fryer Peanut Butter Molten Chocolate Cakes are an easy way to make an impressive dessert without preparing a full-size cake.

The chocolate batter creates a rich, tender exterior while the chilled peanut butter filling melts into a creamy center during air frying.

The key is to watch the cooking time closely. Start checking the cakes early and remove them when the edges are set but the centers still look soft.

Serve them warm with vanilla ice cream, fresh berries, powdered sugar, or a drizzle of peanut butter for a dessert that feels much more complicated than it really is.

For the best texture, enjoy the cakes shortly after cooking while the chocolate and peanut butter center is still warm and gooey.
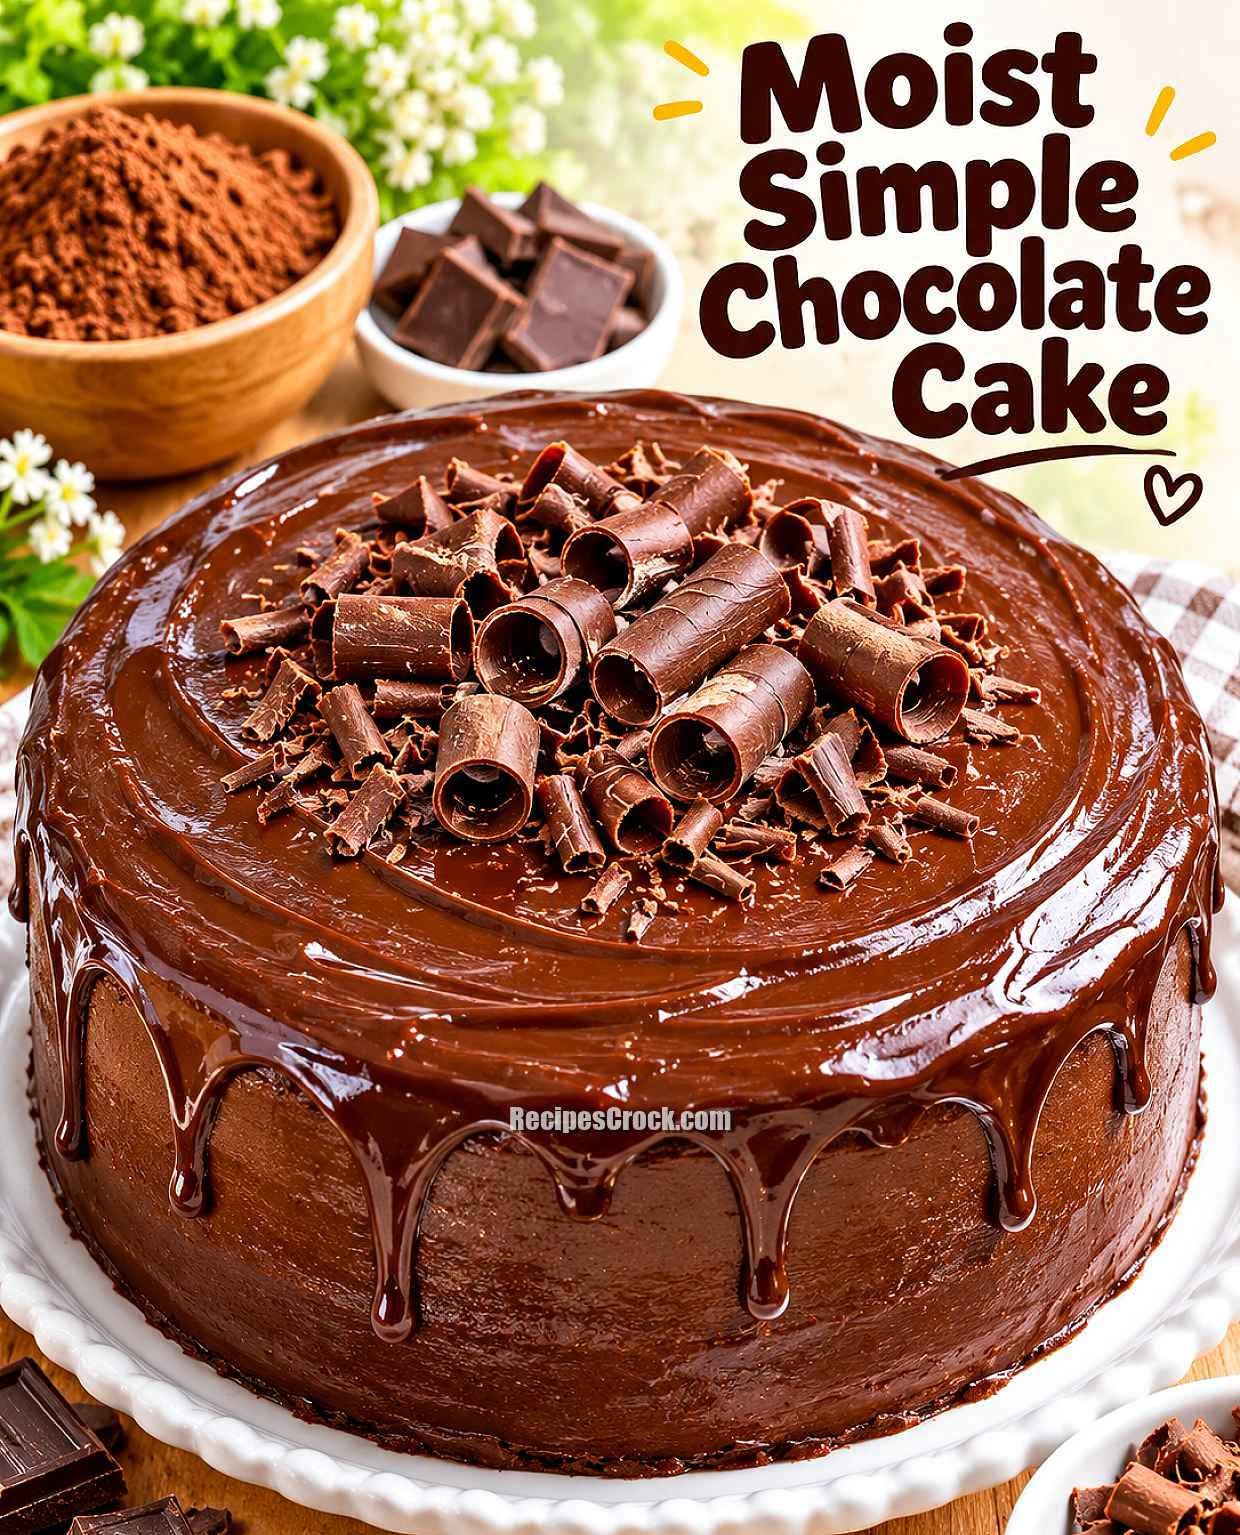
Moist Simple Chocolate Cake* with the glossy drip

 *Moist Simple Chocolate Cake* with the glossy drip 


*Yields: 1 x 8-inch cake*


*For the Moist Chocolate Cake:*


– 1 & 3/4 cups all-purpose flour / maida (220g)

– 3/4 cup unsweetened cocoa powder (75g) – use good quality .

– 2 cups granulated sugar (400g)

– 1 & 1/2 tsp baking soda

– 1 & 1/2 tsp baking powder

– 1 tsp salt

– 2 large eggs, room temp

– 1 cup buttermilk – 1 cup milk + 1 tbsp vinegar, rest 5 mins

– 1/2 cup vegetable oil

– 2 tsp vanilla extract

– 1 cup hot coffee OR hot water – coffee makes it extra moist and dark


*For the Chocolate Ganache Frosting (that shiny drip):*


– 300g dark chocolate, chopped

– 1 & 1/2 cups heavy cream / fresh cream (360ml)

– 2 tbsp butter, soft

– 1 tbsp corn syrup / honey – optional,


*For Topping:*


– Chocolate curls / shavings


*Method:*


*1. Make the cake:*

Preheat oven to 175°C / 350°F. Grease and line two 8-inch pans.


In a large bowl, whisk flour, cocoa, sugar, baking soda, baking powder, salt.


Add eggs, buttermilk, oil, vanilla. Beat 2 minutes. Then add hot coffee/water and mix – batter will be thin, that’s correct. This thin batter is the secret for moist cake.


Divide into pans. Bake 30-35 mins until toothpick comes out with a few moist crumbs. Don’t overbake.


Cool completely. This cake gets more moist the next day.


*2. Make the ganache

Heat cream until just simmering. Pour over chopped chocolate. Let sit 2 mins. Stir until smooth. Add butter and honey/corn syrup for shine. Let it cool 15-20 mins until thick but still pourable


*3. Asemble

Place one cake layer, spread ganache. Add second layer. Pour remaining ganache on top and spread with back of spoon in swirls. Let it drip down sides naturally – use a spoon to guide the drips


*4. Top:* Pile chocolate curls and shavings in the center while ganache is still wet.


Chill 30 mins to set.


*Tip for extra moist:* Wrap warm cake layers in cling wrap and freeze 1 hour before frosting – locks in all moisture.

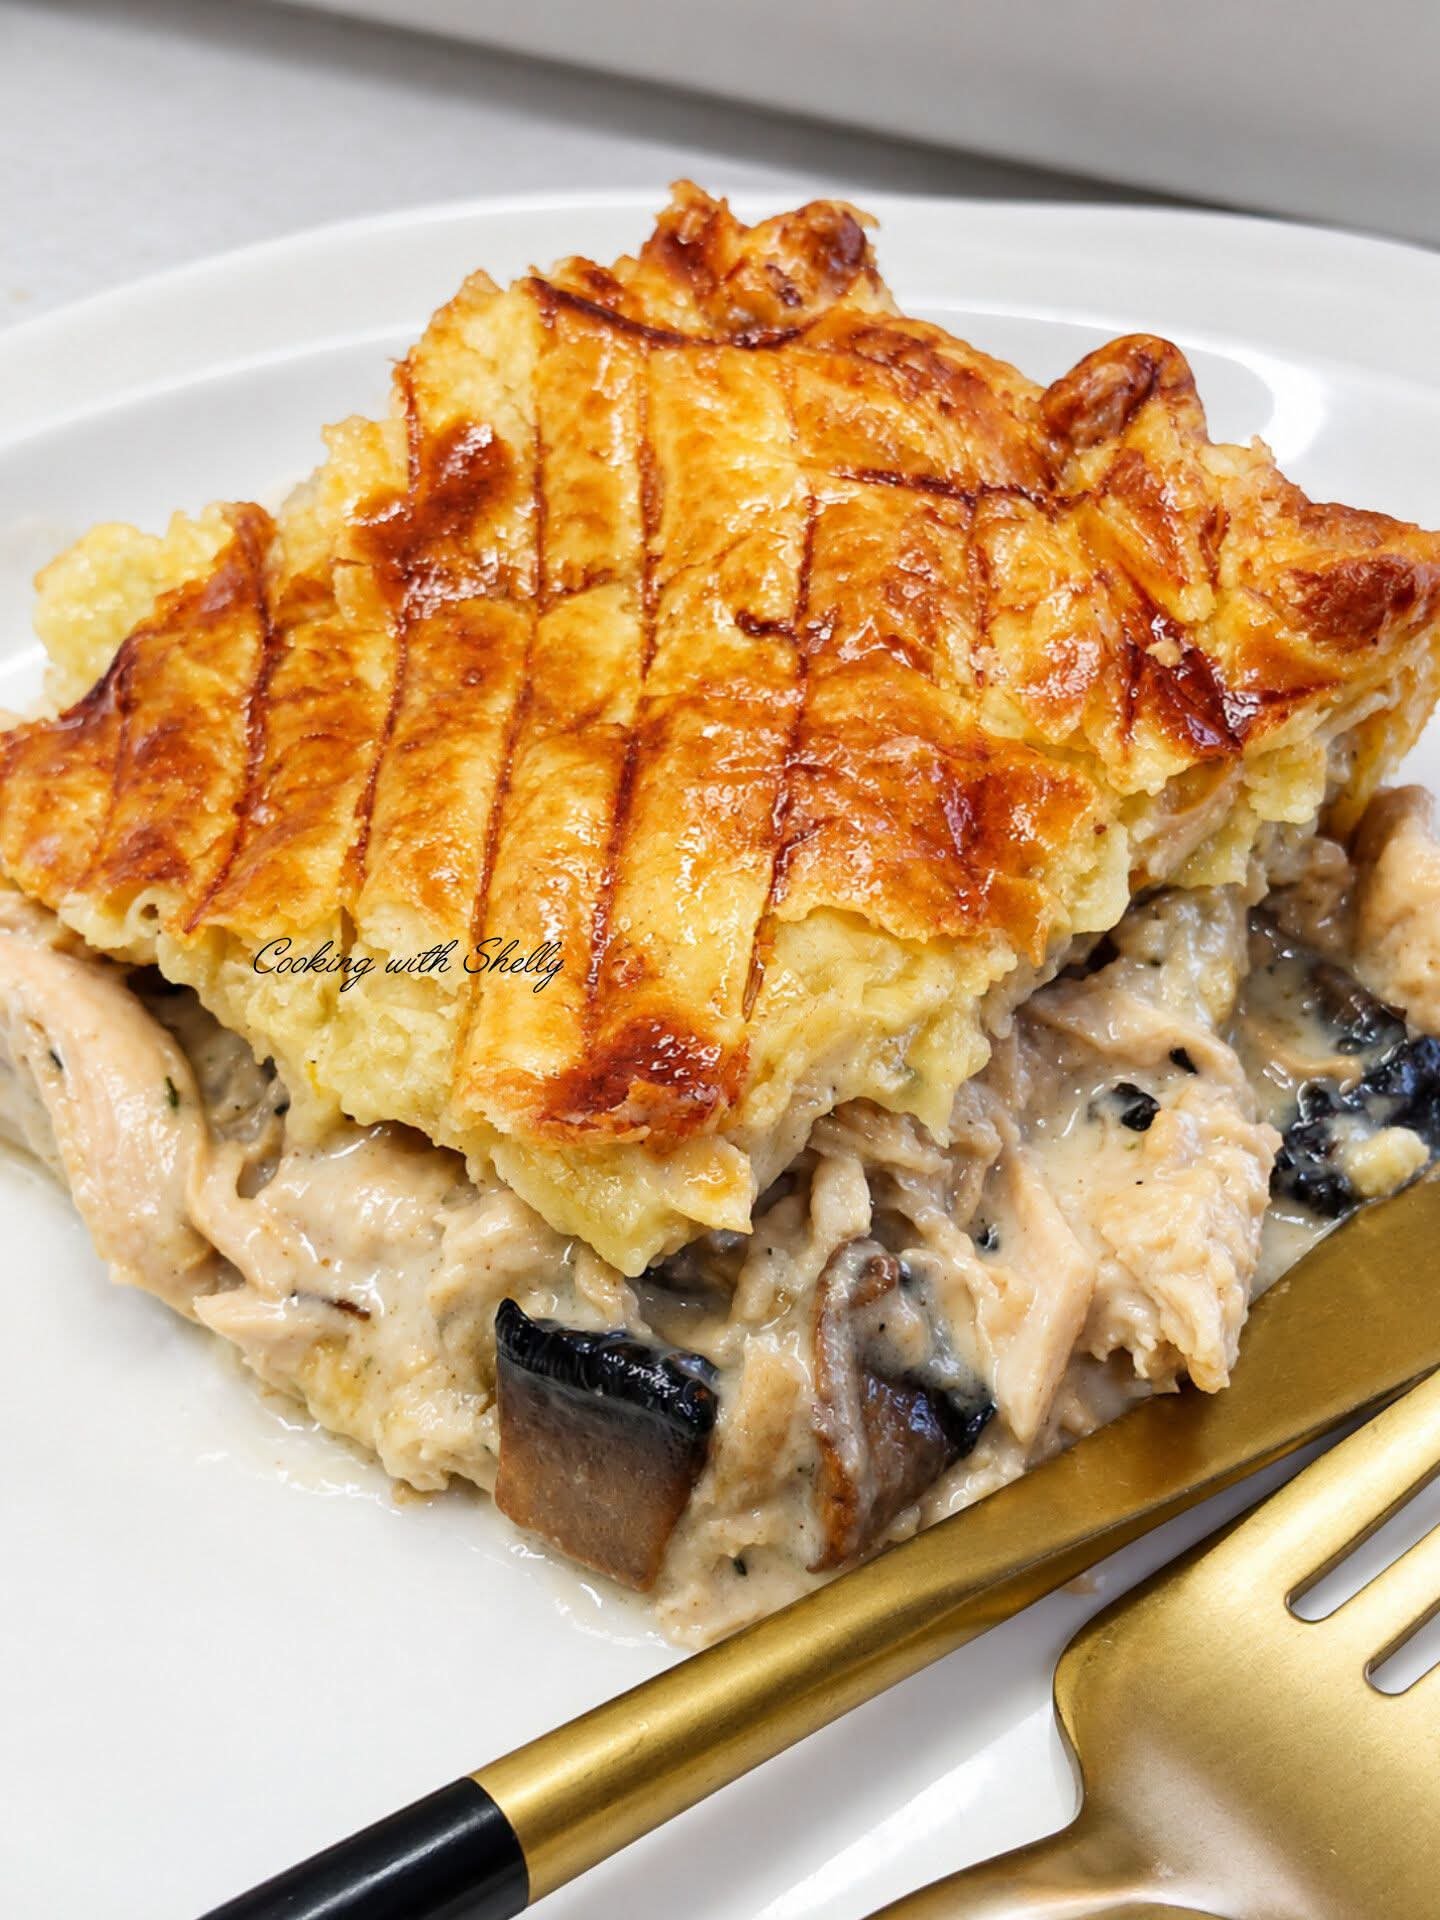
Creamy Chicken & Mushroom Puff Pie

Creamy Chicken & Mushroom Puff Pie


*Serves: 4-6*

*Ingredients:*

*For the filling:*

– 500g boneless chicken, boiled and shredded

– 200g mushrooms, sliced – button or any

– 1 medium onion, finely chopped

– 2 cloves garlic, minced

– 2 tbsp butter

– 1 tbsp oil

– 2 tbsp flour / maida

– 1 cup milk

– 1/2 cup chicken stock – or 1/2 cup water + 1/2 chicken cube

– 1/2 cup fresh cream / cooking cream – optional but makes it creamy

– 1/2 tsp black pepper

– 1/2 tsp white pepper

– 1/2 tsp dried thyme / oregano

– Salt to taste


*For the top:*

– 1 sheet puff pastry, thawed

– 1 egg yolk + 1 tbsp milk for egg wash


*Method:*


*1. Make filling:* Heat butter + oil. Add onion, garlic, saute until soft. Add mushrooms, cook on high heat 3-4 mins until golden brown .


*2. Add flour:* Sprinkle flour, stir for 1 minute. This will thicken it.


*3. Make it creamy:* Slowly add milk and chicken stock while stirring so no lumps form. It will become thick creamy sauce.


*4. Add chicken:* Add shredded chicken, black pepper, thyme, salt. Add cream if using. Mix. Cook 2-3 mins until thick – not runny. Let it cool completely. This is very important or pastry will get soggy.


*5. Assemble:* Pour cooled filling into a baking dish. Roll out puff pastry slightly. Cover the dish with pastry. Press edges. Cut off extra. Make small cuts / score lines on top  for steam to escape.


*6. Egg wash:* Mix egg yolk + milk, brush generously on top. That’s what gives that shiny golden brown color .


*7. Bake:* Bake at 200°C / 400°F for 20-25 mins until puffed up and deep golden and crispy.


Let it sit 10 mins before serving – filling will set and won’t run everywhere when you slice.


Tastes exactly like a restaurant chicken pot pie – crispy flaky top, creamy chicken mushroom inside.

*1. Cool the filling 100%:* This is the #1 rule. Hot filling = soggy pastry that won’t puff. Make filling first, put it in fridge for 30 mins.


*2. Thick filling:* Your filling  is thick and creamy, not watery. If it looks thin, add 1 more tbsp flour. It should not be soupy.


*3. High heat for mushrooms:* Don’t overcrowd mushrooms or they will become watery. Cook them on high flame until dark golden  – that adds so much flavor.


*4. Egg wash trick:* 1 egg yolk + 1 tbsp milk, not whole egg. Yolk gives that deep shiny golden brown color you see. Brush twice for extra shine.


*5. Those lines on top:* Use a sharp knife to lightly score the top (don’t cut all the way through). It lets steam out so the pastry stays crispy and doesn’t get wet from inside.


*6. Don’t roll puff too thin:* If it’s too thin, it won’t flake. Just roll slightly to fit your dish.


*7. Bake hot and high:* 200°C is needed. Low temp = pastry absorbs cream and becomes oily. High temp = instant puff.


*8. Bottom rack last 5 mins:* If top is golden but you want extra crispy bottom, move dish to lowest rack for last 5 mins.


This pie reheats beautifully in air fryer for 4 mins – stays crispy.

Roasted Tomato Soup

Roasted Tomato Soup

Description

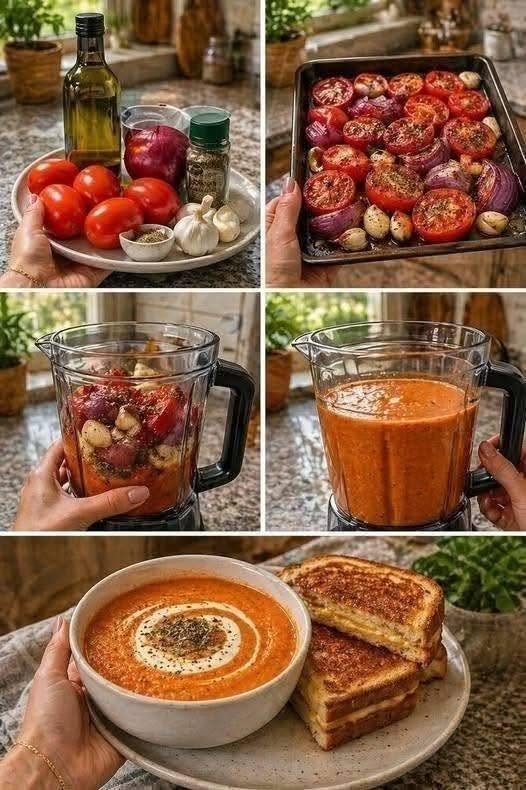
Roasted Tomato Soup is a rich, comforting, and flavorful homemade soup made with ripe tomatoes, garlic, onion, olive oil, and fresh herbs. Roasting the vegetables before blending brings out their natural sweetness and creates a deeper, more concentrated flavor than traditional stovetop tomato soup.

The tomatoes become slightly caramelized around the edges while the garlic and onion soften and develop a delicious roasted aroma. Everything is then blended into a smooth, velvety soup that is perfect for lunch, dinner, or a cozy weekend meal.

This recipe is naturally simple and can be adjusted to suit your taste. You can make it completely smooth or leave a little texture, add cream for extra richness, or keep it dairy-free. A sprinkle of fresh basil and a drizzle of olive oil make the perfect finishing touch.

Serve it with crusty bread, grilled cheese, garlic toast, or a fresh salad for a satisfying meal.

Servings and Timing

Servings: 6

Prep Time: 15 minutes

Roasting Time: 35–40 minutes

Blending & Finishing: 10 minutes

Total Time: Approximately 1 hour

Difficulty: Easy

Ingredients

For the Roasted Vegetables

  • 2½ pounds ripe tomatoes, halved
  • 1 large yellow onion, quartered
  • 6 garlic cloves, peeled
  • 3 tablespoons extra-virgin olive oil
  • 1 teaspoon dried oregano
  • ½ teaspoon dried thyme
  • 1 teaspoon salt
  • ½ teaspoon black pepper
  • ½ teaspoon paprika
  • 1 tablespoon balsamic vinegar, optional

For the Soup

  • 3 cups vegetable broth or chicken broth
  • 2 tablespoons tomato paste
  • ½ teaspoon sugar, optional
  • ¼ teaspoon red pepper flakes, optional
  • ¼ cup fresh basil leaves
  • ½ cup heavy cream, optional

For Garnishing

  • Fresh basil leaves
  • Extra-virgin olive oil
  • Freshly cracked black pepper
  • Croutons
  • Grated Parmesan cheese, optional
  • Heavy cream, optional

Instructions

1. Preheat the Oven

Preheat your oven to 425°F (220°C).

Line a large rimmed baking sheet with parchment paper or lightly grease it with olive oil.

Using a large baking sheet gives the tomatoes enough room to roast properly. Avoid piling the vegetables too closely together because overcrowding can cause them to steam instead of caramelize.

2. Prepare the Tomatoes

Wash the tomatoes thoroughly and pat them dry.

Cut each tomato in half. If you’re using very large tomatoes, cut them into quarters.

Arrange the tomatoes cut-side up on the baking sheet.

Add the quartered onion and peeled garlic cloves around the tomatoes.

Drizzle everything with olive oil.

Sprinkle with oregano, thyme, salt, black pepper, and paprika.

For an extra layer of flavor, drizzle the vegetables with balsamic vinegar.

3. Roast the Vegetables

Place the baking sheet in the preheated oven.

Roast for approximately 35–40 minutes, or until the tomatoes are very soft and beginning to caramelize around the edges.

The onion should be tender and lightly browned, while the garlic should become soft and fragrant.

Keep an eye on the garlic toward the end of cooking. If it begins browning too quickly, move it closer to the center of the pan or cover it loosely with foil.

The roasted vegetables should smell sweet, savory, and intensely tomato-rich.

4. Prepare the Soup Base

While the vegetables are roasting, heat a large pot over medium heat.

Add the vegetable broth and tomato paste.

Whisk until the tomato paste is fully incorporated.

Bring the mixture to a gentle simmer.

If you like a slightly sweeter tomato soup, add ½ teaspoon sugar. This is optional and usually unnecessary when using very ripe tomatoes.

Add red pepper flakes if you want a subtle spicy kick.

5. Add the Roasted Vegetables

When the vegetables are finished roasting, carefully transfer the tomatoes, onion, and garlic to the pot with the broth.

Make sure to scrape any flavorful juices and browned bits from the baking sheet and add them to the pot.

These roasted juices contain concentrated flavor and can make a noticeable difference in the finished soup.

Bring everything to a gentle simmer and cook for approximately 5–10 minutes.

This allows the roasted flavors to combine with the broth.

6. Blend the Soup

Remove the pot from the heat.

Add the fresh basil leaves.

Using an immersion blender, carefully blend the soup directly in the pot until smooth and creamy.

If you don’t have an immersion blender, transfer the soup to a regular blender in small batches.

Be extremely careful when blending hot liquids. Do not overfill the blender, and allow steam to escape according to the blender manufacturer’s instructions.

Blend until the soup reaches your preferred consistency.

For an ultra-smooth soup, blend for an additional minute or pass it through a fine-mesh strainer.

7. Add Cream

Return the blended soup to low heat if necessary.

For a richer, creamier soup, stir in ½ cup heavy cream.

Do not boil the soup after adding the cream. Warm it gently until heated through.

If you prefer a lighter or dairy-free soup, simply leave the cream out. The roasted tomatoes and blended vegetables create a naturally thick and silky texture.

Taste the soup and adjust the seasoning with additional salt, pepper, or herbs as needed.

8. Serve

Ladle the hot soup into bowls.

Garnish with fresh basil leaves, a drizzle of olive oil, and freshly cracked black pepper.

For extra richness, add a small swirl of cream.

You can also sprinkle Parmesan cheese over the top or add crispy croutons for texture.

Serve immediately with warm crusty bread.

Recipe Notes

Choose Flavorful Tomatoes

The quality of the tomatoes makes a major difference.

Use ripe, flavorful tomatoes whenever possible. Roma tomatoes, vine-ripened tomatoes, beefsteak tomatoes, or a mixture of varieties can all work.

If fresh tomatoes are not at their best, roasting helps concentrate their flavor, but high-quality tomatoes will always produce the best soup.

Don’t Skip the Roasting

Roasting is the key step that gives this soup its distinctive flavor.

The heat caramelizes the natural sugars in the tomatoes and onions, producing deeper flavor and reducing some of their moisture.

Use Good Olive Oil

Since olive oil is an important part of the recipe, a flavorful extra-virgin olive oil can make the finished soup taste even better.

Adjust the Consistency

For thicker soup, use slightly less broth.

For a thinner soup, add additional broth until you reach your preferred consistency.

Helpful Tips

Tip 1: Roast Until Caramelized

Don’t remove the vegetables as soon as they become soft. A little browning around the edges adds tremendous flavor.

Tip 2: Add Fresh Basil

Fresh basil provides a bright contrast to the sweet roasted tomatoes.

If fresh basil isn’t available, use a smaller amount of dried basil.

Tip 3: Balance the Acidity

Tomatoes can sometimes taste acidic. A tiny amount of sugar can balance the flavor, but don’t add too much.

Balsamic vinegar also provides a pleasant sweet-tart balance.

Tip 4: Blend Carefully

Hot soup expands when blended. If using a countertop blender, work in small batches and allow steam to escape safely.

Tip 5: Taste at the End

Always taste after blending and adjust the salt, pepper, acidity, and sweetness.

Roasting can intensify flavors, so the final seasoning should be adjusted only after all ingredients have been combined.

Variations

Creamy Roasted Tomato Soup

Add ½–1 cup heavy cream at the end for an extra smooth and luxurious texture.

For an even richer version, add a tablespoon of butter.

Vegan Roasted Tomato Soup

Use vegetable broth and leave out the heavy cream and Parmesan.

For creaminess, add a splash of unsweetened coconut milk or blend in a small amount of soaked cashews.

Spicy Roasted Tomato Soup

Add red pepper flakes before roasting or blend in a small amount of chili pepper.

You can also add smoked paprika for a deeper, smoky flavor.

Roasted Tomato and Red Pepper Soup

Add one large red bell pepper to the roasting pan.

Roast it alongside the tomatoes and blend everything together for a sweeter, more complex soup.

Tomato Basil Soup

Increase the amount of fresh basil and finish the soup with additional basil leaves.

A drizzle of basil pesto makes a delicious garnish.

Roasted Garlic Tomato Soup

Increase the roasted garlic to 8–10 cloves for a stronger garlic flavor.

The roasting process makes garlic sweet and mellow rather than harsh.

Mediterranean Tomato Soup

Add roasted red peppers, oregano, basil, and a few Kalamata olives before blending.

Finish with feta cheese and fresh parsley.

Serving Suggestions

Roasted Tomato Soup pairs beautifully with many simple sides.

Grilled Cheese

A crispy grilled cheese sandwich is a classic pairing. The creamy soup and crunchy, cheesy sandwich complement each other perfectly.

Crusty Bread

Serve with sourdough, French bread, ciabatta, or whole-grain bread for dipping.

Garlic Toast

Brush bread with olive oil, garlic, and herbs before toasting until crisp.

Fresh Salad

A simple green salad with cucumber, lettuce, and a lemon vinaigrette provides a fresh contrast.

Croutons

Homemade croutons add a satisfying crunchy texture to the silky soup.

Make-Ahead Instructions

Roasted Tomato Soup is an excellent make-ahead meal.

Prepare the soup completely, allow it to cool slightly, and transfer it to an airtight container.

Refrigerate for up to 4 days.

When ready to serve, reheat gently over medium-low heat, stirring occasionally.

If the soup becomes too thick in the refrigerator, add a splash of broth or water while reheating.

If you plan to add cream, you can add it during the original preparation or stir it into individual portions when serving.

Freezing Instructions

This soup can be frozen, especially when prepared without cream.

Allow the soup to cool completely before transferring it to freezer-safe containers.

Leave a little space at the top because liquids expand when frozen.

Freeze for up to approximately 3 months for best quality.

Thaw overnight in the refrigerator and reheat gently on the stovetop.

If using cream, consider adding it after thawing and reheating rather than before freezing. This can help maintain a smoother texture.

Nutritional Information

Approximate nutrition per serving, without optional toppings:

  • Calories: 220
  • Protein: 5g
  • Carbohydrates: 20g
  • Fat: 14g
  • Fiber: 4g
  • Sugar: 11g
  • Sodium: 520mg

Values will vary depending on the type of tomatoes, broth, olive oil, and whether cream is included.

Adding Parmesan, croutons, or extra cream will increase the nutritional values.

Benefits of Roasted Tomato Soup

1. Provides Vegetables

Tomatoes, onions, garlic, and fresh herbs contribute a variety of nutrients and plant compounds.

2. Contains Lycopene

Tomatoes are a notable source of lycopene, a naturally occurring carotenoid. Cooking tomatoes with a source of fat such as olive oil can make lycopene more bioavailable.

3. Provides Vitamin C

Tomatoes contribute vitamin C along with other nutrients.

4. Includes Healthy Fats

Extra-virgin olive oil contributes monounsaturated fat and helps carry the flavors of the herbs and roasted vegetables.

5. Comforting and Satisfying

The warm, smooth texture makes this soup a satisfying option for lunch or dinner, especially during cooler weather.

6. Easy to Customize

You can easily adjust the recipe to suit different dietary needs by leaving out cream, using vegetable broth, or adding extra vegetables.

Frequently Asked Questions

Can I use canned tomatoes?

Yes. High-quality canned tomatoes can be used, especially when fresh tomatoes are out of season.

For a roasted flavor, you can still roast canned tomatoes briefly with garlic and onion, although the texture will be softer.

Do I have to peel the tomatoes?

No. The tomato skins soften during roasting and can be blended directly into the soup.

Can I use cherry tomatoes?

Absolutely. Cherry or grape tomatoes become wonderfully sweet when roasted and can create an especially flavorful soup.

Can I make this soup dairy-free?

Yes. Simply leave out the cream and Parmesan.

Use vegetable broth if you want the entire soup to be vegetarian or vegan.

Why does my tomato soup taste sour?

Some tomatoes naturally have more acidity. A small amount of sugar can help balance the flavor. You can also add a little more olive oil or cream.

Can I make the soup thicker?

Yes. Use less broth or simmer the blended soup uncovered for several minutes to reduce excess liquid.

Can I make it thinner?

Add more vegetable broth or water until the desired consistency is reached.

Can I add carrots?

Yes. Roasted carrots add natural sweetness and body to the soup.

Can I add cheese?

Parmesan, mozzarella, feta, or goat cheese can all work well as toppings.

Can I use an ordinary blender?

Yes, but always use caution with hot liquids. Blend in small batches and allow steam to escape safely.

Can I prepare it ahead?

Yes. The flavor often becomes even better after resting. Refrigerate it in an airtight container and reheat gently before serving.

How long does it last in the refrigerator?

Properly stored, it can generally be enjoyed within 3–4 days.

Pan-Seared Fish with Cherry Tomatoes and Herbs

Pan-Seared Fish with Cherry Tomatoes and Herbs

Servings: 4
Prep Time: 10 minutes
Cook Time: 20 minutes
Total Time: 30 minutes

Description

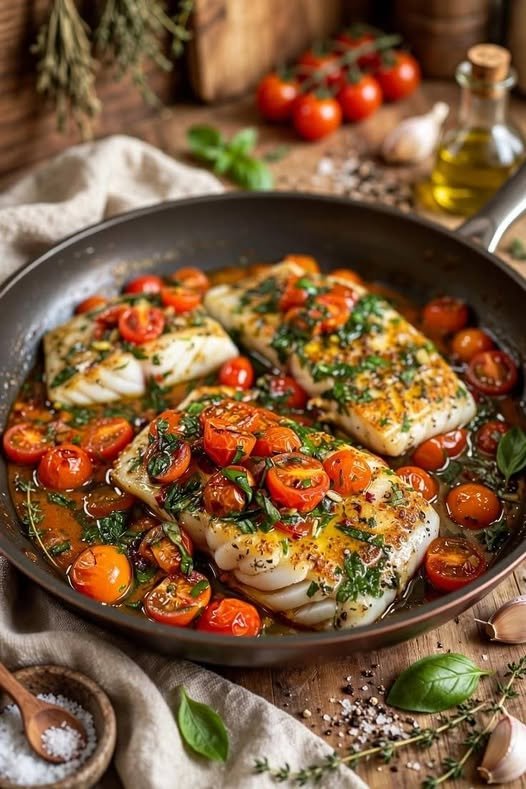
Pan-Seared Fish with Cherry Tomatoes and Herbs is a light, flavorful Mediterranean-inspired dinner made with tender white fish, juicy cherry tomatoes, fresh herbs, garlic, lemon, and olive oil. The fish is quickly seared until golden on the outside while staying moist and flaky inside. The tomatoes are then cooked in the same pan until they become soft and juicy, creating a simple sauce that coats every bite.

This easy one-pan recipe is perfect for a quick weeknight dinner and pairs beautifully with rice, couscous, roasted potatoes, or crusty bread.

Ingredients

  • 4 white fish fillets, such as cod, haddock, halibut, or tilapia
  • 2 tablespoons olive oil
  • 3 cloves garlic, minced
  • 2 cups cherry tomatoes, halved
  • ½ teaspoon salt
  • ¼ teaspoon black pepper
  • ½ teaspoon paprika
  • ½ teaspoon dried oregano
  • ¼ cup vegetable or chicken broth
  • 1 tablespoon fresh lemon juice
  • 1 teaspoon lemon zest
  • 2 tablespoons fresh parsley, chopped
  • 1 tablespoon fresh basil, chopped
  • 1 tablespoon fresh dill, chopped
  • Lemon wedges, for serving
  • Optional: red pepper flakes

Instructions

1. Prepare the Fish

Pat the fish fillets dry with paper towels. This helps them develop a beautiful golden crust when seared.

Season both sides with salt, black pepper, paprika, and dried oregano. Set aside while you prepare the skillet.

2. Sear the Fish

Heat the olive oil in a large skillet over medium-high heat.

Once the oil is hot, carefully place the fish fillets into the pan. Cook for approximately 3–4 minutes per side, depending on their thickness.

Avoid moving the fish too much while it cooks. Allowing it to remain undisturbed helps create a golden crust.

Once the fish is golden and nearly cooked through, transfer it to a clean plate.

3. Cook the Tomatoes

Reduce the heat to medium. Add the minced garlic to the same skillet and cook for approximately 30 seconds, just until fragrant.

Add the halved cherry tomatoes and a small pinch of salt. Cook for 4–5 minutes, stirring occasionally, until the tomatoes soften and begin releasing their juices.

Add the vegetable or chicken broth and scrape the bottom of the skillet with a wooden spoon to loosen the flavorful browned bits.

Simmer for another 2–3 minutes.

4. Finish the Sauce

Stir in the lemon juice, lemon zest, fresh parsley, basil, and dill. Add a pinch of red pepper flakes if you enjoy a little heat.

Taste the sauce and adjust the seasoning if needed.

5. Return the Fish

Carefully place the seared fish back into the skillet, nestling the fillets among the tomatoes.

Spoon some of the tomato and herb sauce over the fish. Cover loosely and cook for another 2–3 minutes, or until the fish is completely cooked through and flakes easily with a fork.

For food safety, fish should reach an internal temperature of 145°F (63°C) at the thickest part.

Serving Suggestions

Transfer the fish to serving plates and spoon plenty of the warm cherry tomato sauce over each fillet.

Garnish with additional fresh parsley and basil, then serve with lemon wedges.

This dish pairs wonderfully with:

  • Steamed rice
  • Couscous
  • Quinoa
  • Roasted potatoes
  • Crusty bread
  • Sautéed spinach
  • Greek salad
  • Steamed vegetables

The crusty bread is especially useful for soaking up the garlicky tomato juices.

Tips

Choose firm, fresh fish fillets that are similar in thickness so they cook evenly. Patting the fish dry before seasoning is important because excess moisture can prevent proper browning.

Do not overcrowd the skillet. If your pan is small, cook the fish in batches.

For additional Mediterranean flavor, add sliced Kalamata olives, capers, or a small amount of crumbled feta before serving.

You can also replace the fresh herbs with whatever you have available. Parsley, basil, dill, cilantro, and oregano all work beautifully.

If using frozen fish, thaw it completely and pat it very dry before cooking.

Nutrition

Approximate nutrition per serving:

  • Calories: 310
  • Protein: 36g
  • Carbohydrates: 9g
  • Fat: 15g
  • Fiber: 2g
  • Sodium: 430mg

Values vary depending on the type of fish and amount of olive oil used.

 Honey, Cranberry & Walnut Baked Brie in Puff

 Honey, Cranberry & Walnut Baked Brie in Puff

Ingredients

1 sheet puff pastry, thawed
1 round Brie cheese, about 8 oz
⅓ cup dried cranberries
⅓ cup walnuts, roughly chopped
2 tablespoons honey
1 tablespoon brown sugar
1 egg, beaten
1 tablespoon all-purpose flour, for dusting
½ teaspoon fresh rosemary, finely chopped
¼ teaspoon cinnamon
Pinch of salt
Crackers, apple slices, or toasted baguette, for serving

Instructions

Preheat your oven to 400°F (200°C). Line a baking sheet with parchment paper.
Lightly flour your work surface and gently roll out the puff pastry into a square large enough to completely wrap the Brie.
Place the Brie in the center of the pastry. Spread the honey over the top, then sprinkle with dried cranberries, chopped walnuts, brown sugar, rosemary, cinnamon, and a small pinch of salt.
Fold the puff pastry up and over the Brie, gently pressing the edges together to seal. Trim away any excess pastry if needed. Turn the wrapped Brie seam-side down onto the prepared baking sheet.
Brush the entire pastry with beaten egg. For a decorative finish, use leftover pastry scraps to create small leaves or other shapes and place them on top before brushing with egg.
Bake for 25–30 minutes, or until the puff pastry is deeply golden and crisp. Remove from the oven and allow it to rest for 10–15 minutes before serving. This gives the melted Brie time to settle while remaining wonderfully gooey inside.
Drizzle with an additional teaspoon of honey just before serving, if desired.