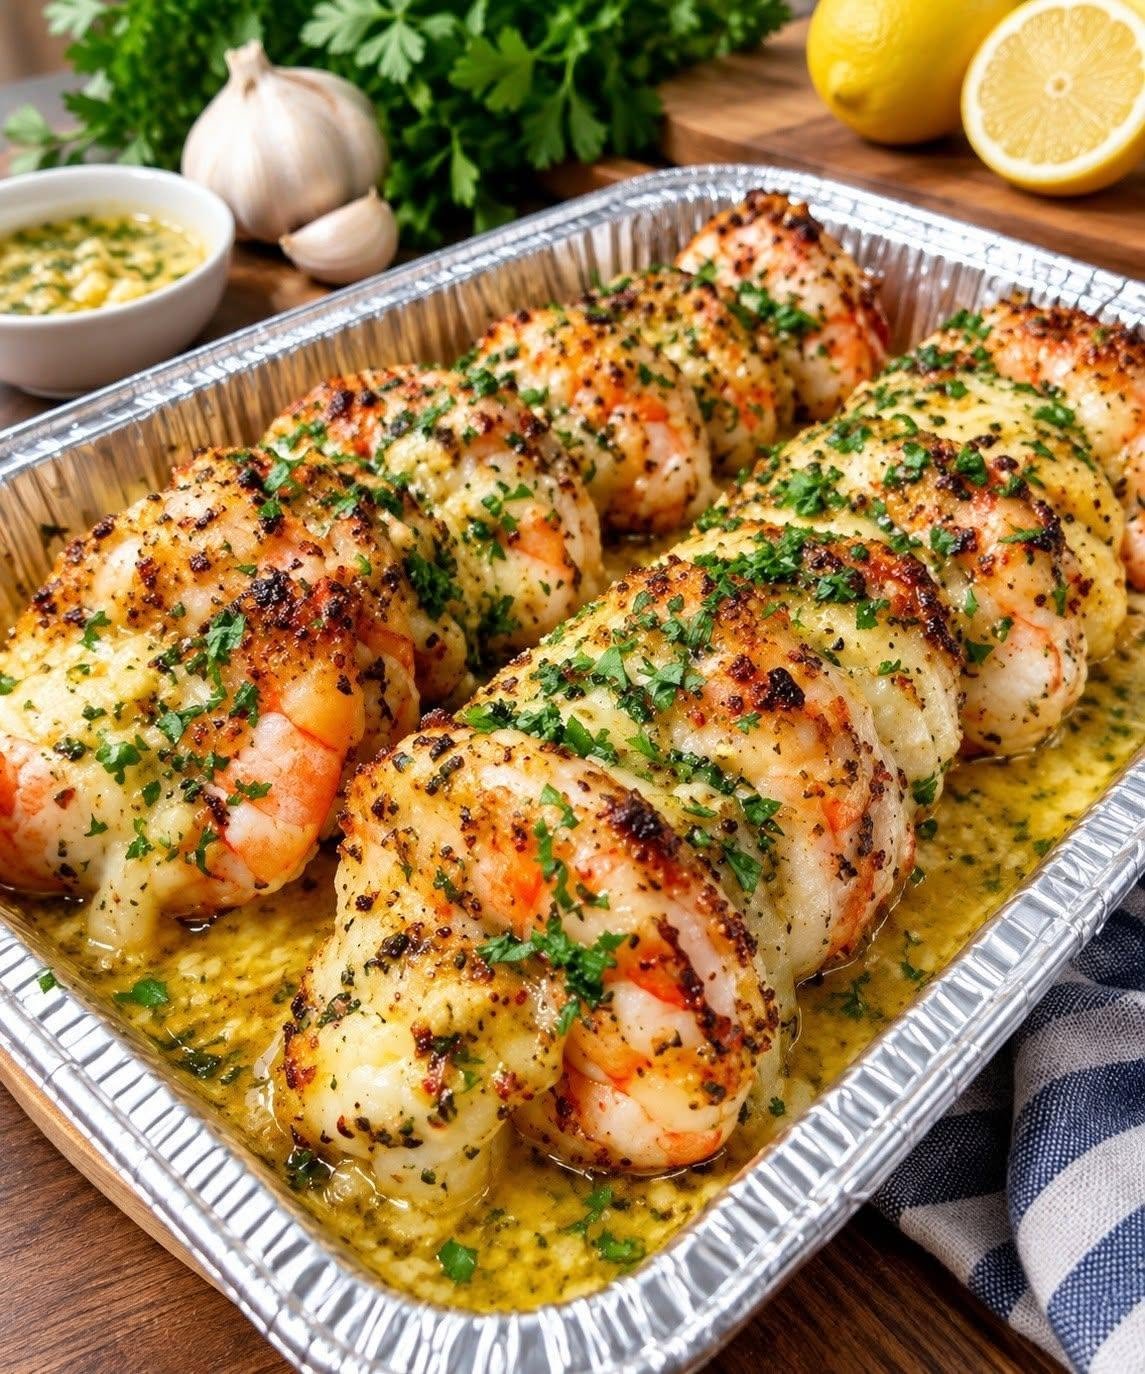
Baked Garlic Butter Butterflied Shrimp

Baked Garlic Butter Butterflied Shrimp

Description

Baked Garlic Butter Butterflied Shrimp is an impressive yet surprisingly simple seafood dish that turns ordinary shrimp into a beautiful restaurant-style meal. The shrimp are carefully butterflied so they open slightly during baking, creating more surface area for a rich garlic butter sauce to coat every bite. They are seasoned with fresh garlic, lemon, herbs, paprika, and a touch of red pepper flakes before being baked until juicy, tender, and perfectly cooked.

The combination of sweet, succulent shrimp and fragrant garlic butter creates an irresistible aroma while the lemon adds brightness and freshness. Because the shrimp cook quickly, this recipe is ideal for busy weeknights, dinner parties, date-night meals, or whenever you want something special without spending hours in the kitchen.

The finished shrimp can be served with crusty bread for soaking up the buttery sauce, over fluffy rice, alongside pasta, or with roasted vegetables and a fresh salad. It is naturally low in carbohydrates and can easily be adapted to suit different dietary preferences.

Ingredients

For the Shrimp

  • 2 pounds large or jumbo shrimp, shell removed
  • 5 tablespoons unsalted butter, melted
  • 6 cloves fresh garlic, finely minced
  • 2 tablespoons extra-virgin olive oil
  • 1 tablespoon fresh lemon juice
  • 1 teaspoon lemon zest
  • 1 teaspoon smoked paprika
  • 1 teaspoon Italian seasoning
  • ½ teaspoon dried oregano
  • ½ teaspoon salt
  • ¼ teaspoon freshly ground black pepper
  • ¼ teaspoon red pepper flakes, optional
  • ¼ cup fresh parsley, finely chopped
  • 2 tablespoons grated Parmesan cheese, optional
  • Lemon wedges, for serving

Optional Garnish

  • Extra chopped parsley
  • Thin lemon slices
  • A sprinkle of Parmesan
  • Crushed red pepper flakes
  • Freshly cracked black pepper

Choosing the Best Shrimp

For this recipe, large or jumbo shrimp work particularly well because they remain juicy during baking and are large enough to butterfly easily. Fresh shrimp are excellent, but high-quality frozen shrimp can also produce wonderful results.

If using frozen shrimp, thaw them completely in the refrigerator or under cold running water. Drain them well and pat them thoroughly dry with paper towels. Removing excess moisture is important because wet shrimp can release water during baking and dilute the garlic butter sauce.

Look for shrimp that have a fresh, mild smell and firm texture. If buying peeled shrimp, make sure they are deveined. You can leave the tails attached for a more attractive presentation if desired.

How to Butterfly the Shrimp

Butterflying shrimp is simple and makes this dish especially attractive.

Start with peeled and deveined shrimp. Using a small sharp knife, carefully make a deeper cut along the back of each shrimp, following the natural curve. Do not cut completely through the shrimp. Instead, open it gently so the two sides spread apart slightly while remaining connected.

The shrimp should resemble a small butterfly when opened. This shape allows the garlic butter mixture to reach more of the shrimp and creates a beautiful presentation after baking.

Take your time when cutting the shrimp, especially if you are new to butterflying. Keeping the shrimp cold before preparation can make them easier to handle.

Step-by-Step Instructions

1. Preheat the Oven

Preheat your oven to 425°F (220°C).

Lightly grease a large baking dish or rimmed baking sheet with olive oil or nonstick cooking spray. Arrange the butterflied shrimp in a single layer with the cut side facing upward.

Avoid stacking or overcrowding the shrimp. Giving each shrimp some space helps the heat circulate evenly and allows the garlic butter to coat each piece properly.

2. Prepare the Garlic Butter Sauce

In a medium bowl, combine the melted butter, olive oil, minced garlic, lemon juice, and lemon zest.

Add the smoked paprika, Italian seasoning, oregano, salt, black pepper, and red pepper flakes if using. Stir thoroughly until all the ingredients are evenly combined.

The garlic should be finely minced so it distributes throughout the butter rather than forming large pieces on individual shrimp.

For an even richer flavor, you can prepare the garlic butter 10–15 minutes ahead of time and allow it to sit at room temperature. This gives the garlic and herbs a little extra time to infuse the butter.

3. Coat the Shrimp

Using a spoon or pastry brush, generously coat each butterflied shrimp with the garlic butter mixture.

Make sure the sauce gets into the butterfly cut. This is where the shrimp can absorb plenty of the delicious garlic, lemon, and herb flavor.

If you have a little sauce remaining, drizzle it evenly over the entire baking dish.

4. Add Parmesan

If using Parmesan cheese, sprinkle it lightly over the shrimp.

Parmesan is optional, but it adds a savory, slightly nutty flavor and creates a delicious golden finish. For a stronger cheese flavor, you can add a little more during the final few minutes of baking.

5. Bake the Shrimp

Place the baking dish in the preheated oven.

Bake for approximately 8–12 minutes, depending on the size of the shrimp.

Jumbo shrimp may need closer to 12 minutes, while smaller large shrimp may be finished sooner. The shrimp should become pink and opaque with a firm but tender texture.

Avoid baking them for too long. Overcooked shrimp can become tough, dry, and rubbery.

For an especially attractive golden top, you can switch the oven to broil for the final 1–2 minutes. Watch carefully because garlic and Parmesan can brown quickly.

6. Finish with Fresh Herbs

Remove the shrimp from the oven and immediately sprinkle fresh chopped parsley over the top.

Allow the shrimp to rest for about 2 minutes. Spoon some of the warm garlic butter from the bottom of the baking dish over the shrimp before serving.

Finish with fresh lemon wedges for squeezing over each portion.

Tips for Perfect Butterflied Shrimp

Use Large Shrimp

Large or jumbo shrimp are easier to butterfly and less likely to overcook. They also make the dish look more impressive when served.

Dry the Shrimp

Always pat shrimp dry before seasoning. Excess moisture can prevent the butter sauce from coating the shrimp properly.

Don’t Overcook

Shrimp cook very quickly. Start checking them around 8 minutes. They should be opaque and firm but still juicy.

Use Fresh Garlic

Freshly minced garlic provides a much stronger and more fragrant flavor than garlic powder. Six cloves may sound like a lot, but it creates the signature garlic-butter taste of this dish.

Balance the Richness

The butter provides richness while lemon juice adds acidity and freshness. Don’t skip the lemon—it helps balance the entire dish.

Add Heat

For spicy garlic butter shrimp, increase the red pepper flakes or add a small amount of cayenne pepper.

Make It Cheesy

Parmesan works beautifully with garlic butter. For a more indulgent version, sprinkle a combination of Parmesan and mozzarella over the shrimp during the final few minutes.

Serving Suggestions

Baked Garlic Butter Butterflied Shrimp can be served in many different ways.

For a simple dinner, serve it with warm crusty bread. The bread is perfect for soaking up the buttery garlic sauce left in the baking dish.

For a more substantial meal, serve the shrimp over steamed white rice, brown rice, quinoa, or couscous. The rice absorbs the lemon-garlic butter and turns the sauce into part of the meal.

Pasta is another excellent option. Toss cooked linguine or spaghetti with some of the leftover garlic butter and lemon sauce, then arrange the shrimp on top.

For a lighter meal, pair the shrimp with roasted asparagus, zucchini, broccoli, green beans, or a crisp Mediterranean salad.

You can also serve the shrimp with roasted baby potatoes and a simple cucumber-tomato salad for a complete family dinner.

Storage and Reheating

Leftover shrimp should be placed in an airtight container and refrigerated within two hours of cooking.

They can generally be refrigerated for up to 3 days.

To reheat, place the shrimp in a covered skillet over low to medium heat with a small splash of water or a little butter. Warm them gently until heated through.

Avoid prolonged reheating because shrimp can quickly become tough.

Microwaving is possible, but use short intervals and moderate power to help prevent overcooking.

Make-Ahead Tips

You can prepare the shrimp several hours ahead of time.

Butterfly and season the shrimp, prepare the garlic butter mixture, and refrigerate everything separately until you are ready to cook.

For best texture, don’t leave raw shrimp sitting in lemon juice for a long period because the acidity can begin changing the texture of the seafood.

When ready to cook, arrange the shrimp in the baking dish, coat them with the garlic butter, and bake immediately.

Nutritional Information

Approximate nutrition per serving will vary depending on shrimp size and the amount of butter and Parmesan used.

One serving may provide approximately:

  • 330–380 calories
  • 40–45g protein
  • 3–5g carbohydrates
  • 16–20g fat
  • 2–3g saturated fat

Shrimp are naturally high in protein and provide nutrients such as selenium and vitamin B12. Butter and olive oil contribute fat and flavor, while garlic, lemon, parsley, and herbs add freshness.

Benefits

This recipe is particularly useful when you want a high-protein meal that cooks quickly. Shrimp provide substantial protein without requiring a long cooking time. They also contain selenium and vitamin B12.

Garlic contributes strong flavor, while lemon juice and fresh herbs brighten the dish. Using herbs, spices, garlic, and lemon allows the recipe to develop plenty of flavor without relying on a heavy sauce.

For a balanced meal, serve the shrimp with vegetables and a moderate portion of rice, potatoes, or whole grains.

Frequently Asked Questions

Can I use frozen shrimp?

Yes. Frozen shrimp work very well. Thaw them completely before cooking and pat them dry with paper towels.

Should I leave the tails on?

The tails can be left on for presentation, but removing them makes the shrimp easier to eat. Either option works.

Can I use smaller shrimp?

Yes, but reduce the cooking time. Smaller shrimp can become overcooked quickly, so start checking them after about 6–8 minutes.

Can I make this recipe spicy?

Absolutely. Add red pepper flakes, cayenne pepper, or a little hot sauce to the garlic butter mixture.

Can I use salted butter?

Yes, but reduce the added salt in the recipe. Taste the sauce before adding additional seasoning.

What can I serve with garlic butter shrimp?

Rice, pasta, couscous, quinoa, roasted vegetables, potatoes, crusty bread, or a fresh green salad all pair beautifully with the shrimp.

How do I know when shrimp are done?

Cooked shrimp should be opaque and pink with a firm, tender texture. Avoid cooking until they form a very tight circle, as this can indicate overcooking.
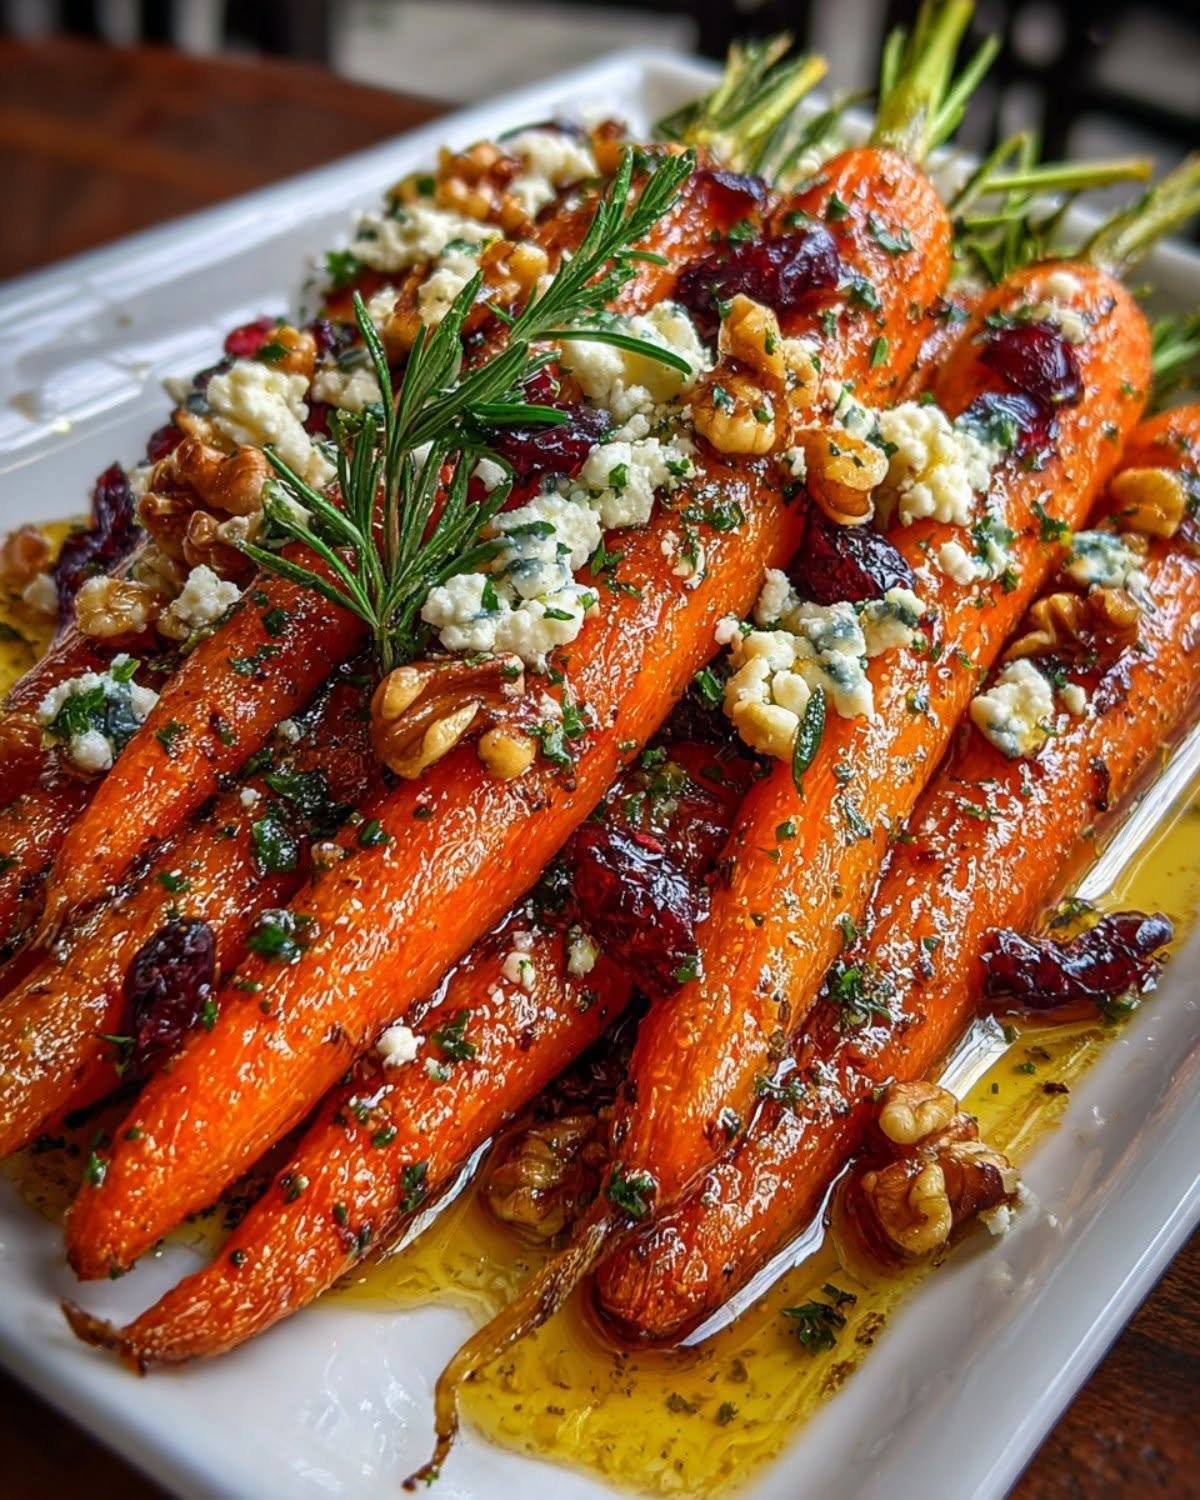

Caramelized Carrots with Feta & Toasted Walnuts and Cranberry-Honey Glaze

Caramelized Carrots with Feta & Toasted Walnuts and Cranberry-Honey Glaze

Ingredients

For the Carrots
1 ½ lbs carrots, peeled and cut into thick diagonal slices
2 tbsp olive oil
1 tbsp butter, melted
1 tbsp honey
½ tsp garlic powder
½ tsp dried thyme
½ tsp salt
¼ tsp black pepper
For the Cranberry-Honey Glaze
¾ cup fresh or frozen cranberries
3 tbsp honey
2 tbsp fresh orange juice
1 tsp orange zest
1 tbsp balsamic vinegar
1 tbsp butter
Pinch of salt
For the Topping
¾ cup walnuts, roughly chopped
4 oz feta cheese, crumbled
1 tbsp fresh thyme leaves
1 tbsp chopped fresh parsley
Extra orange zest, for garnish

Directions

Preheat the oven to 425°F (220°C). Line a large baking sheet with parchment paper.
Place the sliced carrots in a large bowl. Add olive oil, melted butter, honey, garlic powder, thyme, salt, and black pepper. Toss until evenly coated.
Spread the carrots in a single layer on the prepared baking sheet.
Roast for 25–30 minutes, turning halfway through, until the carrots are tender and beautifully caramelized around the edges.
While the carrots roast, prepare the glaze. Add cranberries, honey, orange juice, orange zest, balsamic vinegar, butter, and salt to a small saucepan.
Simmer over medium-low heat for 8–10 minutes, stirring occasionally, until the cranberries soften and the mixture becomes glossy and slightly thickened.
Toast the chopped walnuts in a dry skillet over medium heat for 3–4 minutes, stirring frequently until fragrant. Remove from the heat.
Transfer the roasted carrots to a serving platter.
Drizzle the warm cranberry-honey glaze generously over the carrots.
Sprinkle with crumbled feta and toasted walnuts.
Finish with fresh thyme, parsley, and a little extra orange zest.
Serve warm and enjoy the combination of sweet caramelized carrots, creamy feta, crunchy walnuts, and tangy cranberry glaze.

Nutritional Info

Calories: 285
Protein: 6 g
Carbohydrates: 34 g
Fat: 15 g
Fiber: 6 g
Sugar: 22 g
Sodium: 420 mg

Can Natural Remedies Tighten a Sagging Belly?

Natural ways to support a sagging belly with balanced meals, walking, protein, hydration, and resistance training

Can Natural Remedies Tighten a Sagging Belly?

A sagging belly can happen after weight loss, pregnancy, aging, or changes in body size. It is also normal for skin and body shape to change over time.

Many online remedies promise to “tighten” loose abdominal skin with oils, drinks, herbs, or homemade mixtures. However, there is no proven natural remedy that can simply tighten loose abdominal skin or remove excess skin.

A more realistic approach focuses on healthy weight management, regular movement, resistance training, adequate protein, hydration, sleep, and patience. These habits can improve overall fitness and body composition, but they cannot guarantee that loose skin will disappear.

Can Natural Remedies Really Tighten a Sagging Belly?

Natural ingredients such as aloe vera, coconut oil, coffee, lemon, or herbal mixtures are sometimes promoted as skin-tightening remedies. Applying an oil or homemade mixture may temporarily moisturize the skin and make it feel smoother, but that is different from tightening excess skin.

Loose skin is affected by factors such as:

  • Age
  • Genetics
  • Amount of weight lost
  • How quickly weight was lost
  • Pregnancy
  • Sun exposure
  • Skin elasticity
  • How long the skin was stretched

Because these factors vary from person to person, there is no single home remedy that can predictably tighten abdominal skin.

If your goal is to improve your waistline and overall body composition, sustainable eating and physical activity are much more useful targets. The National Institute of Diabetes and Digestive and Kidney Diseases recommends combining healthy eating with regular physical activity for healthy weight management.

What Can Actually Help?

Instead of searching for one powerful remedy, build a routine that supports your whole body.

1. Focus on Gradual Weight Management

If you have excess body weight, gradual weight management can change your overall body shape and waist size.

The CDC notes that healthy weight management involves healthy eating patterns, regular physical activity, adequate sleep, and stress management. It also recommends gradual, steady weight loss rather than extreme approaches.

A sustainable approach may include:

  • Eating mostly minimally processed foods
  • Including vegetables and fruits regularly
  • Choosing whole grains more often
  • Adding protein-rich foods
  • Watching portions without extreme restriction
  • Limiting excess added sugar
  • Reducing sugary drinks
  • Building habits you can maintain

The goal is not to lose weight as quickly as possible. A routine that you can continue is more useful than a short-term crash diet.

2. Add Resistance Training

Resistance training is one of the most useful forms of exercise for improving muscle strength and maintaining muscle during weight management.

It does not directly shrink loose skin, but building muscle can improve strength and may change the way your body looks underneath the skin.

Useful options include:

  • Squats
  • Lunges
  • Glute bridges
  • Resistance-band exercises
  • Push-ups
  • Rows
  • Planks
  • Light weight training

You do not need an expensive gym membership to begin. Resistance bands, bodyweight exercises, or household items can provide resistance.

NIDDK recommends muscle-strengthening activities at least two days each week and advises working the major muscle groups, including the abdomen, legs, back, arms, chest, and shoulders.

3. Don’t Ignore Walking

Walking is simple, accessible, and easy to add to most routines.

A brisk walk can increase daily physical activity and support healthy weight management when combined with appropriate eating habits.

For generally healthy adults, U.S. physical activity guidance recommends at least 150 minutes of moderate-intensity aerobic activity each week, along with muscle-strengthening activity on at least two days.

You don’t have to complete all your activity in one session.

Try:

  1. A 10-minute walk after breakfast.
  2. Another 10-minute walk after lunch.
  3. A 10-minute evening walk.

Short sessions can add up throughout the day. NIDDK specifically notes that even 10- or 15-minute periods of activity count.

4. Eat Enough Protein

Protein is important for maintaining and building muscle.

Good food sources include:

  • Eggs
  • Greek yogurt
  • Cottage cheese
  • Fish
  • Chicken
  • Turkey
  • Beans
  • Lentils
  • Tofu
  • Tempeh
  • Nuts and seeds

Rather than relying on a protein powder or supplement, start by including a protein source in your regular meals.

For example:

Breakfast: Eggs with whole-grain toast and fruit

Lunch: Chicken or beans with vegetables and brown rice

Snack: Greek yogurt with berries

Dinner: Fish, tofu, or lean meat with vegetables and a whole grain

NIDDK recommends protein foods such as lean meats, poultry, eggs, seafood, beans, peas, lentils, nuts, seeds, and soy products as part of a healthy eating pattern.

5. Stay Hydrated

Water does not tighten loose skin, but staying hydrated is an important part of overall health.

Instead of using sugary drinks as your main source of fluids, make water a regular choice throughout the day.

Simple habits include:

  • Keep a reusable water bottle nearby.
  • Drink water with meals.
  • Have water before or after physical activity.
  • Choose water instead of sugary drinks more often.
  • Eat water-rich foods such as fruits and vegetables.

Hydration should be viewed as a basic healthy habit, not a quick solution for abdominal skin.

6. Build a Balanced Plate

You do not need a complicated diet to support healthy weight management.

A simple meal can include:

  • Protein: chicken, fish, eggs, beans, lentils, tofu, or yogurt
  • Vegetables: leafy greens, broccoli, peppers, tomatoes, carrots, or zucchini
  • Whole-food carbohydrates: oats, brown rice, potatoes, quinoa, or whole-grain bread
  • Healthy fats: avocado, nuts, seeds, or olive oil

NIDDK recommends vegetables, whole fruits, whole grains, protein foods, and appropriate dairy or fortified alternatives as part of a healthy eating plan.

This approach also gives you more flexibility than following a restrictive “belly-fat remedy” diet.

7. Give Your Body Time

One of the biggest mistakes people make is expecting visible changes within a few days.

Body composition changes gradually. Skin elasticity also differs greatly between people.

If you’ve recently lost a significant amount of weight, your skin may need time to adjust to your new body size. Some people see noticeable changes over time, while others continue to have loose skin.

Be careful with products that promise dramatic tightening in a few days or weeks.

A cream, oil, tea, or homemade drink may improve the appearance or feel of the skin temporarily, but that does not mean it has removed excess skin.

8. Don’t Rely on Abdominal Exercises Alone

Crunches, planks, and other core exercises can strengthen abdominal muscles, but they do not specifically remove loose skin from the belly.

A better exercise plan combines different types of movement.

Simple weekly structure

Monday: Strength training + short walk

Tuesday: Brisk walking

Wednesday: Strength training + easy movement

Thursday: Walking or another enjoyable aerobic activity

Friday: Strength training

Saturday: Longer walk or active hobby

Sunday: Rest or gentle movement

Adjust the routine to your fitness level and health needs.

A Simple Step-by-Step Plan

If your goal is to improve your waistline and overall fitness, start with these steps.

Step 1: Set a realistic goal

Focus on stronger muscles, better fitness, healthier eating, and sustainable weight management instead of promising yourself perfectly tight skin.

Step 2: Improve one meal at a time

Add vegetables and a protein source before making drastic dietary changes.

Step 3: Walk every day

Start with 10 minutes if you are currently inactive and gradually increase your activity.

Step 4: Strength train twice a week

Begin with basic movements such as squats, wall push-ups, glute bridges, rows, and modified planks.

Step 5: Drink more water

Replace some sugary drinks with water or another low-calorie beverage.

Step 6: Prioritize protein

Include a protein-rich food at breakfast, lunch, and dinner.

Step 7: Track progress realistically

Instead of checking your stomach every day, monitor habits, strength, walking time, energy, and changes over several weeks.

Step 8: Adjust slowly

If a routine feels impossible to maintain, make it easier rather than quitting completely.

What About Creams, Oils, and Homemade Remedies?

Moisturizing products can make dry skin feel softer and smoother, which may temporarily improve its appearance.

However, that is not the same as removing excess skin.

Be cautious with recipes that recommend applying:

  • Lemon juice
  • Undiluted essential oils
  • Baking soda
  • Strong acids
  • Irritating spice mixtures
  • Concentrated herbal extracts

These ingredients can irritate the skin and may cause burning, redness, or other reactions.

A simple moisturizer is generally a more sensible skin-care option than an aggressive homemade “tightening” mixture.

When Should You Talk With a Professional?

If you have significant loose skin after major weight loss, pregnancy, or another major body change, a healthcare professional can help you understand your options.

If you are considering substantial weight loss, it can also be useful to discuss your goal with a healthcare professional, especially if you have a chronic health condition or take medications.

For some people, loose skin remains even after reaching a stable, healthy weight. Lifestyle habits can support fitness and body composition, but they cannot guarantee that excess skin will disappear.

The Bottom Line

There is no proven natural remedy that can simply tighten a sagging belly.

Oils, herbs, drinks, and homemade mixtures may have a place in normal skin care, but they should not be promoted as solutions for loose abdominal skin.

The more realistic strategy is to build sustainable habits:

  • Eat balanced meals.
  • Get enough protein.
  • Walk regularly.
  • Perform resistance training.
  • Stay hydrated.
  • Get adequate sleep.
  • Manage stress.
  • Give your body time to adapt.

Regular physical activity and healthy eating work together to support healthy weight management, while strength training can help maintain muscle during weight changes.

Most importantly, don’t judge your progress by whether your belly becomes perfectly tight. A healthier body can still have natural skin folds, stretch marks, or loose skin.

FAQs

Can natural remedies tighten loose belly skin?

No single natural remedy has been proven to reliably tighten loose abdominal skin or remove excess skin.

Can drinking more water tighten a sagging belly?

Hydration supports normal body function, but drinking more water does not directly tighten loose abdominal skin.

Does walking help reduce belly fat?

Walking increases physical activity and can support weight management when combined with an appropriate eating pattern.

Can strength training tighten a sagging belly?

Strength training can build and maintain muscle, which may improve body composition, but it cannot directly remove loose skin.

How often should I strength train?

For generally healthy adults, U.S. guidance recommends muscle-strengthening activities on at least two days each week.

Can protein help with a sagging belly?

Adequate protein supports muscle maintenance and is useful as part of a balanced eating pattern, but it does not directly tighten loose skin.

How long does loose skin take to improve?

The timeline varies widely because age, genetics, weight change, skin elasticity, and other factors affect how skin responds.

What if I have a large amount of loose skin?

If substantial loose skin remains after major weight loss or pregnancy, discuss your concerns with a healthcare professional to understand appropriate options.

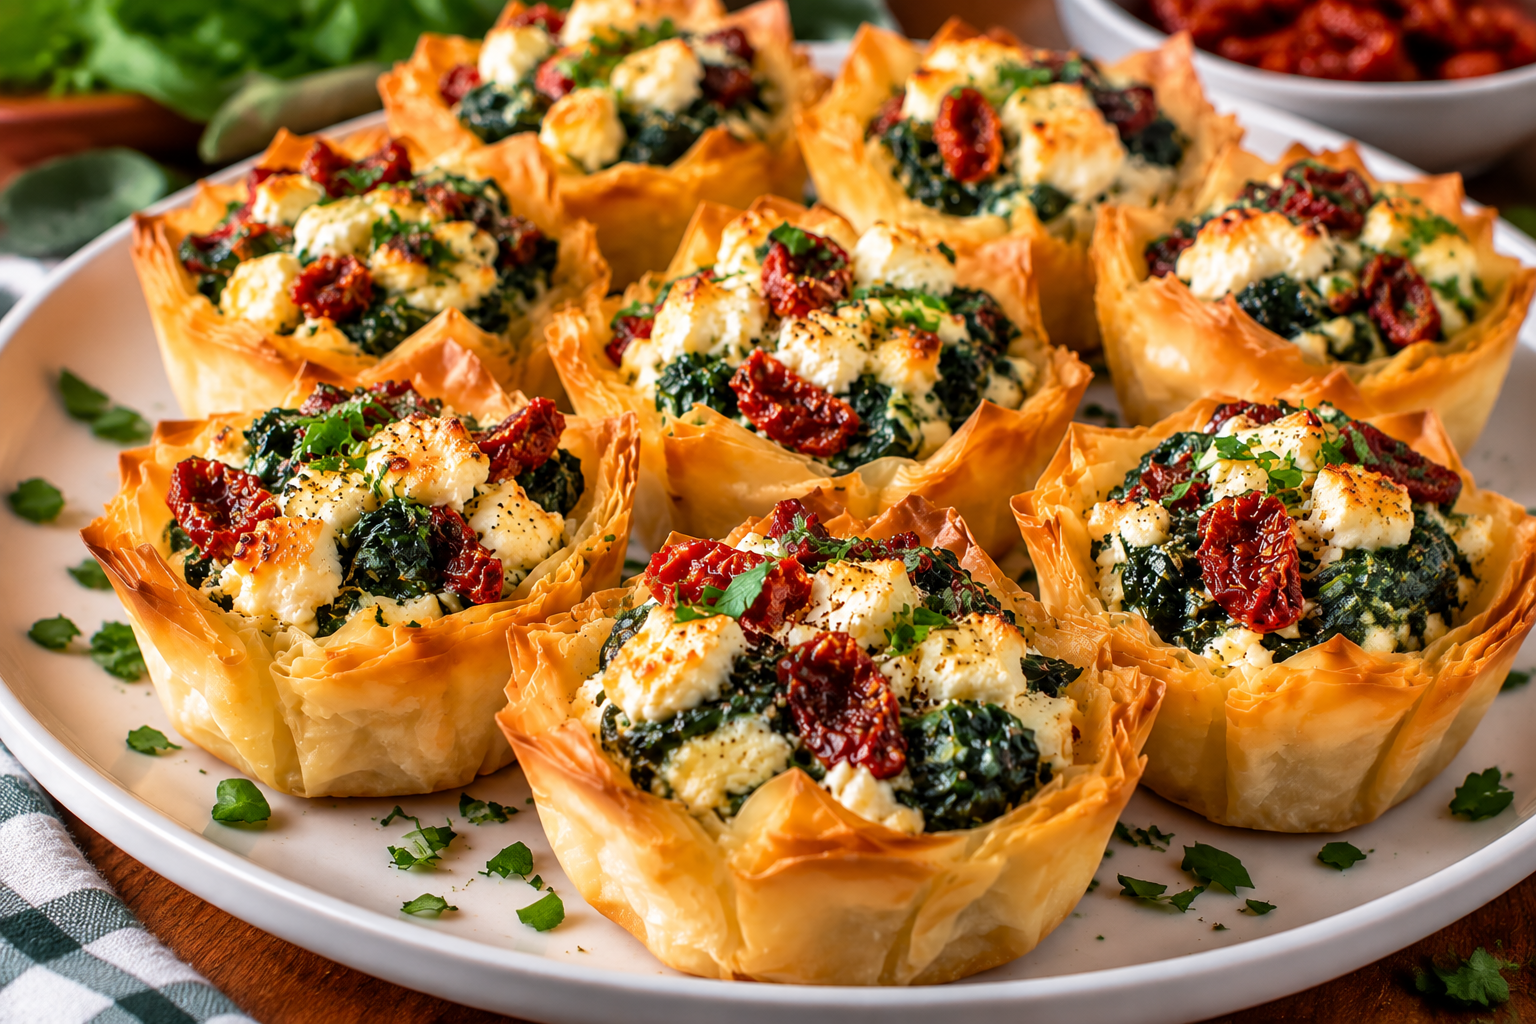
Stuffed Phyllo Cups

Stuffed Phyllo Cups filled with spinach feta cheese and sun-dried tomatoes Mediterranean appetizer

Stuffed Phyllo Cups with Spinach, Feta & Sun-Dried Tomatoes

Description

Stuffed Phyllo Cups with Spinach, Feta & Sun-Dried Tomatoes are a delicious Mediterranean-inspired appetizer featuring crispy, golden layers of delicate phyllo pastry filled with a creamy, flavorful spinach and cheese mixture. Each bite combines the buttery crunch of phyllo dough with the savory richness of feta cheese, the freshness of spinach, and the sweet-tangy flavor of sun-dried tomatoes.

These elegant little cups are perfect for parties, holiday gatherings, brunches, family dinners, or as a beautiful snack. Despite their impressive appearance, they are surprisingly easy to prepare using simple ingredients.

The creamy filling is made with spinach, feta, herbs, and a touch of garlic, creating a balanced flavor that feels both comforting and fresh. The crispy phyllo shells provide the perfect contrast to the soft and creamy filling.

This recipe is a great choice for anyone who loves Mediterranean flavors and wants a dish that looks restaurant-quality but can be made easily at home.

Ingredients For;

The Phyllo Cups

  • 12 sheets of phyllo pastry
  • ¼ cup melted butter or olive oil
  • Cooking spray (optional)

Spinach Feta Filling

  • 3 cups fresh spinach, chopped
  • 1 cup crumbled feta cheese
  • ½ cup cream cheese or ricotta cheese
  • ½ cup sun-dried tomatoes, finely chopped
  • 2 cloves garlic, minced
  • 1 small onion, finely diced
  • 2 tablespoons olive oil
  • 1 large egg
  • 2 tablespoons fresh parsley, chopped
  • 1 tablespoon fresh dill, chopped
  • ½ teaspoon dried oregano
  • ¼ teaspoon black pepper
  • ¼ teaspoon red pepper flakes (optional)
  • Salt to taste

Garnishing

  • Fresh parsley
  • Extra feta cheese
  • Lemon zest
  • Fresh herbs

Instructions

Step 1: Prepare the Oven

Preheat oven to:

375°F (190°C)

Lightly grease a muffin tin or small tart molds.

This helps the phyllo cups hold their shape and become beautifully crisp.

Step 2: Prepare the Phyllo Layers

Carefully unfold the phyllo pastry.

Keep unused sheets covered with a slightly damp kitchen towel because phyllo dries quickly.

Place one phyllo sheet on a clean surface.

Brush lightly with melted butter or olive oil.

Add another phyllo sheet on top and repeat.

Continue layering until you have 3–4 sheets together.

Cut the layered phyllo into squares large enough to fit inside muffin cups.

Gently press each square into the muffin tin to create a cup shape.

Repeat until all cups are prepared.

Step 3: Bake the Phyllo Cups

Bake empty phyllo cups for:

8–10 minutes

until lightly golden.

Remove from the oven and set aside.

Pre-baking helps create a crispy shell that does not become soggy after adding the filling.

Step 4: Prepare the Spinach Filling

Heat olive oil in a skillet over medium heat.

Add diced onion and cook for:

3–4 minutes

until softened.

Add garlic and cook for 30 seconds.

Add chopped spinach.

Cook until spinach wilts and excess moisture evaporates.

Remove from heat and allow it to cool slightly.

Step 5: Mix the Filling

In a large bowl combine:

  • Cooked spinach mixture
  • Feta cheese
  • Cream cheese or ricotta
  • Sun-dried tomatoes
  • Egg
  • Parsley
  • Dill
  • Oregano
  • Black pepper
  • Red pepper flakes

Mix until everything is well combined.

Taste and adjust seasoning.

Remember feta is naturally salty, so add extra salt carefully.

Step 6: Fill the Phyllo Cups

Spoon the spinach feta mixture into each baked phyllo cup.

Fill generously but avoid overfilling.

Top with a little extra feta cheese if desired.

Step 7: Bake the Filled Cups

Return the filled phyllo cups to the oven.

Bake for:

15–20 minutes

until the filling is set and the tops are lightly golden.

The cheese should be warm and creamy.

Step 8: Serve

Allow cups to cool for a few minutes.

Garnish with:

  • Fresh parsley
  • Lemon zest
  • Extra herbs

Serve warm or at room temperature.

Serving Suggestions

These stuffed phyllo cups pair beautifully with:

  • Greek yogurt dip
  • Tzatziki sauce
  • Fresh cucumber salad
  • Mediterranean mezze platter
  • Hummus
  • Roasted vegetables
  • Fresh fruit

They are perfect as

  • Party appetizers
  • Brunch bites
  • Holiday snacks
  • Light vegetarian meals

Tips and Notes

  • Keep phyllo sheets covered while working to prevent drying.
  • Do not add hot spinach mixture directly into phyllo cups because it can soften the pastry.
  • Remove excess moisture from spinach for crispier cups.
  • Use good-quality feta cheese for the best Mediterranean flavor.
  • Sun-dried tomatoes packed in oil add extra richness.
  • Fresh herbs provide a brighter flavor than dried herbs.
  • Bake phyllo cups until golden for the best texture.
  • Prepare the filling ahead of time to save cooking time.
  • For extra crispiness, brush the phyllo edges with olive oil before baking.

Storage Instructions

Refrigerator

Store leftover stuffed phyllo cups in an airtight container for:

3 days

Freezer

Freeze assembled, unbaked cups for up to:

1 month

Bake directly from frozen, adding a few extra minutes.

Reheating

Reheat in the oven or air fryer to restore crispiness.

Avoid microwaving because the phyllo may become soft.

Recipe Variations

Chicken Spinach Feta Phyllo Cups

Add:

  • 1 cup cooked shredded chicken

for a protein-rich version.

Mediterranean Vegetable Version

Add:

  • Roasted peppers
  • Olives
  • Mushrooms

for extra flavor.

Creamy Mushroom Phyllo Cups

Replace some spinach with sautéed mushrooms.

Spicy Version

Add:

  • Chili flakes
  • Jalapeños
  • Hot paprika

for extra heat.

Vegan Phyllo Cups

Use:

  • Vegan feta
  • Plant-based cream cheese
  • Flax egg substitute

for a dairy-free option.

Looking for more healthy vegetable-based recipes? Try our Roasted Sweet Potato Salad with Feta, Pecans & Fresh Herbs for another wholesome meal option.

Benefits of Stuffed Phyllo Cups with Spinach, Feta & Sun-Dried Tomatoes

Rich in Nutrients

Spinach provides vitamins, minerals, antioxidants, and fiber.

Good Source of Protein

Eggs and cheese contribute protein that helps keep you satisfied.

Contains Calcium

Feta cheese and dairy ingredients provide calcium for bone health.

Mediterranean Ingredients

Olive oil, spinach, herbs, and tomatoes are common ingredients in Mediterranean-style eating patterns.

Provides Healthy Fats

Olive oil and sun-dried tomatoes contribute flavorful fats.

Vegetable-Based Appetizer

This recipe is a great way to include more vegetables in a delicious form.

Balanced Flavor and Texture

The combination of crispy pastry, creamy filling, and fresh herbs makes it satisfying and enjoyable.

Q&A

Q: Can I make these phyllo cups ahead of time?

Yes. Prepare the filling and phyllo cups separately, then assemble and bake before serving.

Q: Why did my phyllo cups become soggy?

Usually because the filling contained too much moisture. Cook spinach well and remove excess liquid.

Q: Can I use frozen spinach?

Yes. Thaw completely and squeeze out as much water as possible before using.

Q: Can I replace feta cheese?

Yes. Try goat cheese, ricotta, cottage cheese, or another soft cheese.

Q: Can I make these gluten-free?

Traditional phyllo contains gluten, but gluten-free pastry alternatives can be used.

Q: Can I make these without eggs?

Yes. Replace the egg with a small amount of cream cheese or a flax egg.

Q: Are these good for meal prep?

Yes. They can be prepared ahead and reheated in an oven or air fryer.

Q: Can I serve them cold?

Yes. They taste great at room temperature, making them ideal for parties.

Q: How do I keep phyllo crispy?

Store and reheat using an oven or air fryer instead of a microwave.

Servings

Makes: 12 stuffed phyllo cups

Serving Size: 2 cups per person

Approximate Nutritional Information (Per Serving)

  • Calories: 280
  • Protein: 9 g
  • Carbohydrates: 22 g
  • Fiber: 3 g
  • Fat: 18 g
  • Saturated Fat: 8 g
  • Sugar: 4 g
  • Sodium: 520 mg

Nutritional values may vary depending on brands, portion sizes, and ingredients used.

If you enjoy healthy homemade recipes, explore our Roasted Sweet Potato Salad with Feta, Pecans & Fresh Herbs for a delicious combination of roasted vegetables, greens, and fresh toppings.

Final Thoughts

Stuffed Phyllo Cups with Spinach, Feta & Sun-Dried Tomatoes are a perfect combination of elegance, flavor, and simplicity. The crispy golden pastry, creamy spinach filling, salty feta, and sweet sun-dried tomatoes create a Mediterranean appetizer that everyone will love.

Whether you are hosting guests, preparing a holiday table, or simply craving a delicious savory snack, these little phyllo cups are guaranteed to impress with their beautiful presentation and incredible flavor.

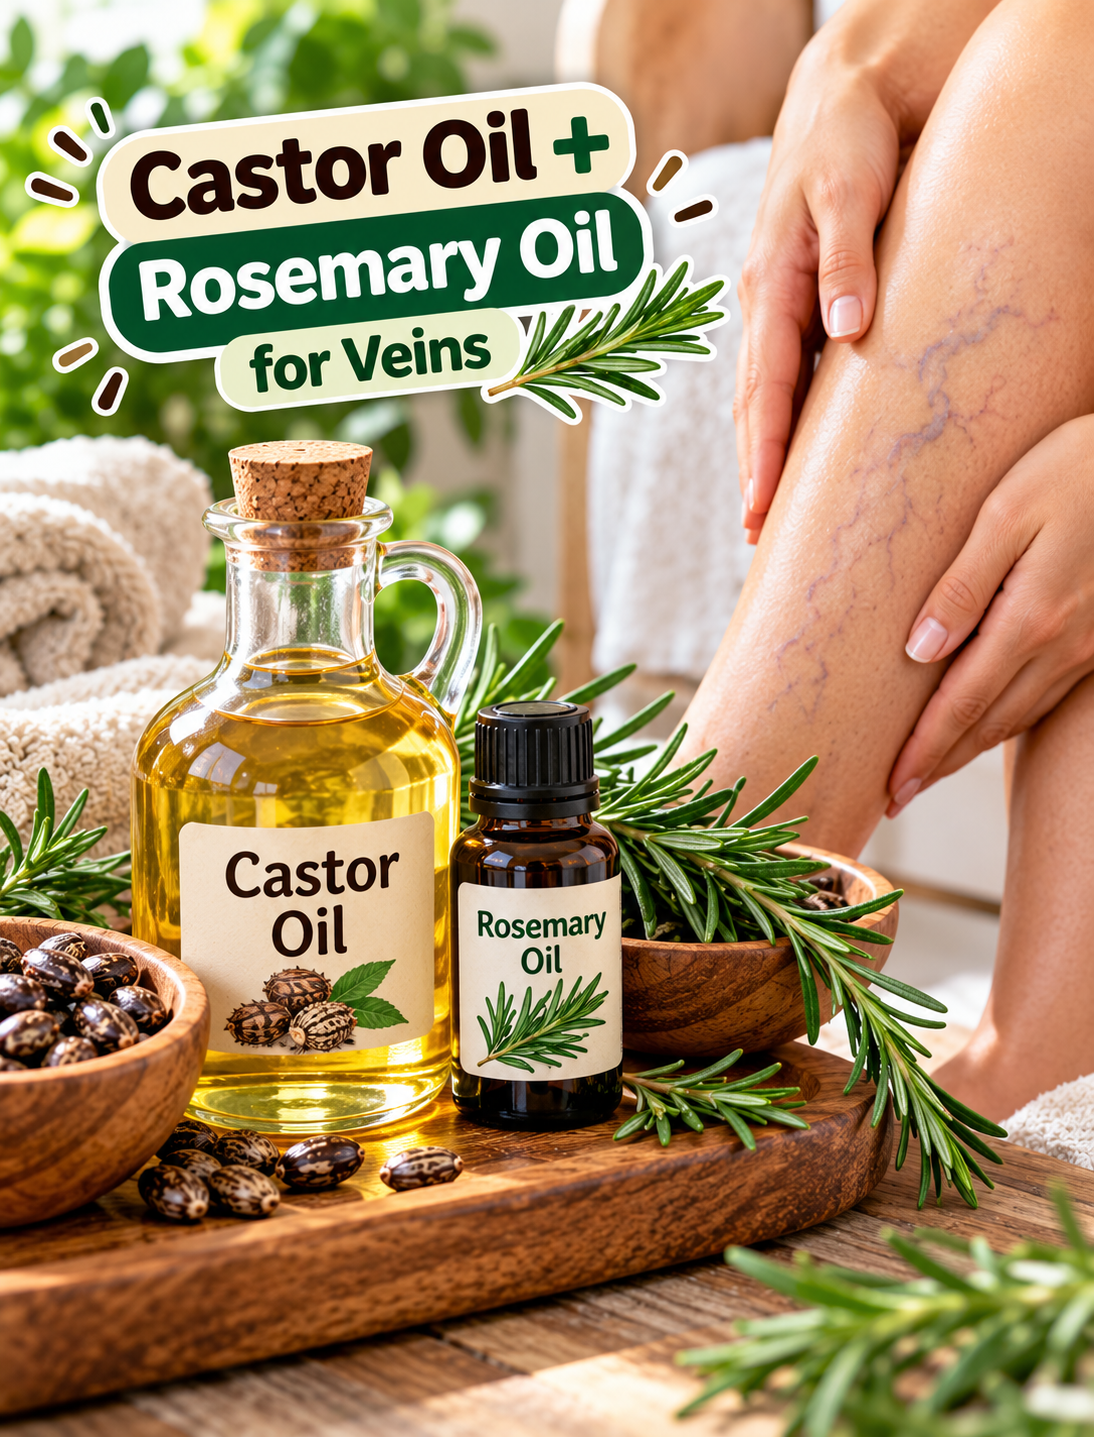
Castor Oil + Rosemary Oil for Veins: What You Should Know

Castor oil and rosemary oil for gentle leg massage with information about vein care and safety

Castor Oil + Rosemary Oil for Veins: What You Should Know

Castor oil and rosemary oil are often discussed online as natural options for leg massage and skin care. Some traditional wellness routines use plant oils to moisturize the skin or make massage feel more comfortable.

However, topical oils should not be presented as a treatment for varicose veins. Varicose veins develop when vein walls or valves become weak or damaged, allowing blood to pool in the veins. Massage oil cannot repair those underlying valves or remove an enlarged vein.

This guide explains what these oils can realistically be used for, how to approach a leg massage safely, and when visible or uncomfortable veins need medical attention.

What Are Varicose Veins?

Varicose veins are enlarged, twisted veins that commonly appear in the legs. They can look blue, purple, or close to the natural color of the skin.

They develop when valves inside the veins do not work properly. Instead of moving blood efficiently back toward the heart, some blood can flow backward and collect inside the vein. This can make the vein stretch and become more visible.

Common symptoms can include:

  • Aching or heaviness in the legs
  • Swelling around the lower legs or ankles
  • Itching or burning around affected veins
  • Muscle cramps
  • Discomfort after prolonged sitting or standing
  • Changes in the skin around a vein

Not every visible vein needs treatment, but painful or worsening symptoms deserve professional evaluation.

Why Do People Use Castor Oil and Rosemary Oil?

Castor oil is a thick plant oil commonly used in cosmetics and skin-care products. Its main fatty acid, ricinoleic acid, can help reduce moisture loss from the skin, but applying pure castor oil can also cause irritation or allergic contact dermatitis in some people.

Rosemary oil is often used as an aromatic ingredient and in massage or personal-care products. Essential oils are concentrated substances, so they should not be treated the same way as ordinary culinary herbs.

People may choose these oils for a leg massage because they:

  • Make the skin feel moisturized
  • Provide a smooth surface for gentle massage
  • Add a pleasant herbal scent
  • Fit into a relaxing self-care routine
  • Can make a simple massage feel more comfortable

These are skin-care and relaxation uses, not proven treatments for varicose veins.

What Can a Leg Massage Actually Do?

A gentle massage can feel relaxing and may temporarily make tired legs feel more comfortable.

The important distinction is that feeling more comfortable does not mean the underlying vein problem has been corrected.

For people with varicose veins, recognized self-care measures include regular physical activity, changing position frequently, elevating the legs, and, when appropriate, compression therapy recommended by a healthcare professional.

Massage oil can therefore be viewed as a personal-care product used during a gentle massage, rather than the active treatment for a vein condition.

How to Use Oils for a Simple Leg Massage

If you simply want to use an oil as part of a skin-care or relaxation routine, keep the approach gentle.

Step 1: Choose the Right Product

Use a product intended for topical use and check its ingredient label.

If using rosemary essential oil, do not apply it directly to the skin in concentrated form. Essential oils are generally used in diluted preparations, and skin irritation or allergic reactions can occur.

Step 2: Patch-Test First

Apply a small amount of the diluted product to a small area of intact skin before using it over a larger area.

Watch for:

  • Redness
  • Burning
  • Itching
  • Swelling
  • Rash

Stop using the product if a reaction develops.

Step 3: Use a Small Amount

Apply only enough oil to reduce friction between your hands and the skin.

A large amount does not provide a greater benefit and can leave the skin excessively greasy.

Step 4: Massage Gently

Use light, comfortable strokes over healthy, intact skin.

Do not press hard directly over a prominent, painful, swollen, or tender vein.

Step 5: Stop if It Hurts

Massage should not cause sharp pain, increasing swelling, burning, or significant discomfort.

If the leg already hurts because of a vein problem, it is better to have the symptoms assessed rather than repeatedly massaging the area.

Can Castor Oil Remove Varicose Veins?

There is no good basis for presenting topical castor oil as a way to remove or repair varicose veins.

Varicose veins are associated with changes in the vein walls and valves, so rubbing an oil onto the skin does not correct the underlying circulation problem. Established treatment options can include lifestyle measures, compression therapy, sclerotherapy, laser treatment, catheter-based procedures, or surgery depending on the person’s condition.

Claims such as “castor oil dissolves varicose veins” or “castor oil repairs damaged vein valves” should therefore be avoided.

Can Rosemary Oil Treat Varicose Veins?

Rosemary essential oil should not be promoted as a treatment that removes varicose veins or repairs damaged vein valves.

A diluted aromatic oil may be used as part of a massage or personal-care routine, but that is different from treating venous disease.

Essential oils can also cause skin irritation or allergic reactions, particularly when used incorrectly or on sensitive skin.

The word “natural” does not automatically mean safe or effective, especially when concentrated plant oils are involved.

What May Actually Help Varicose Vein Symptoms?

If your concern is aching, heaviness, swelling, or tired legs, several evidence-based self-care measures may help.

Keep Your Legs Moving

Walking and regular physical activity encourage the calf muscles to contract, which helps move blood back toward the heart.

Avoid Long Periods in One Position

If your routine requires sitting or standing for long periods, change position regularly and take short movement breaks.

Elevate Your Legs

Raising your legs while sitting or lying down can reduce pressure in the leg veins and may help with swelling and discomfort.

Ask About Compression

Compression stockings can help some people manage symptoms such as swelling, aching, and heaviness. The appropriate level of compression depends on the individual, so professional advice can be useful.

When Should You See a Healthcare Professional?

Don’t rely on oils alone if your leg symptoms are persistent or getting worse.

Make an appointment if you notice:

  • Increasing leg pain
  • Persistent swelling
  • Skin color changes
  • A painful or increasingly prominent vein
  • A sore or ulcer near the ankle
  • Symptoms that interfere with normal activities
  • Varicose veins that suddenly change

NHLBI advises contacting a healthcare provider for varicose veins and seeking prompt care for sudden worsening, sores, or bleeding.

Sudden leg swelling or pain can have causes other than ordinary varicose veins and may require urgent evaluation. A blood clot is one possible concern, particularly when symptoms are new or significant.

Important Safety Tips Before Using These Oils

Keep these points in mind before adding an oil massage to your routine:

  • Never put essential oils directly into an open wound.
  • Avoid applying oils to broken, infected, or irritated skin.
  • Keep essential oils away from the eyes.
  • Dilute essential oils according to appropriate product guidance.
  • Stop immediately if you develop burning, itching, rash, or swelling.
  • Do not use massage oil as a substitute for medical evaluation.
  • Don’t use strong pressure over painful or swollen veins.
  • If you are pregnant, taking medication, or managing a medical condition, ask a healthcare professional before starting a new herbal or essential-oil routine.

Cleveland Clinic notes that topical castor oil can cause irritation and contact dermatitis in some people, while NCCIH notes that essential oils can cause skin irritation or allergic reactions.

A Simple Leg Self-Care Routine

If your goal is simply to relax tired legs, you can keep the routine straightforward:

  1. Take a short walk if comfortable.
  2. Sit down and elevate your legs for a few minutes.
  3. Use a small amount of suitable moisturizer or diluted topical oil if your skin tolerates it.
  4. Massage gently over intact skin, avoiding painful or swollen areas.
  5. Stop if discomfort increases.
  6. Track recurring swelling, pain, or skin changes.
  7. Seek professional advice if symptoms persist or worsen.

This routine supports general self-care without suggesting that an oil can correct a vein disorder.

The Bottom Line

Castor oil and rosemary oil can be part of a simple skin-care or relaxation massage routine, but they should not be described as a cure for varicose veins.

Varicose veins involve changes in the veins themselves, and proven management may include movement, leg elevation, compression therapy, or medical procedures depending on the person’s symptoms and diagnosis.

The safest message is simple: use oils for what they can realistically provide—skin conditioning, aroma, and a comfortable massage—not as a replacement for proper vein care.

FAQs

Can castor oil get rid of varicose veins?

No. There is no good evidence that applying castor oil to the skin removes varicose veins or repairs damaged vein valves.

Can rosemary oil treat spider veins?

Rosemary oil should not be promoted as a treatment for spider veins or varicose veins; topical use is better viewed as a personal-care or aromatic practice.

Can I massage my legs with castor oil?

You can use a suitable topical oil for gentle skin massage if your skin tolerates it, but avoid painful, swollen, or damaged areas.

Should rosemary essential oil be used directly on the skin?

No. Essential oils are concentrated and are generally used in diluted preparations to reduce the risk of irritation or allergic reactions.

What actually helps varicose vein symptoms?

Regular movement, avoiding long periods in one position, leg elevation, and appropriate compression may help symptoms; treatment depends on the individual.

When should varicose veins be checked by a doctor?

Seek professional advice for persistent pain, swelling, skin changes, sores, or veins that suddenly worsen or begin bleeding.

Can oils make varicose veins worse?

They do not fix the underlying vein problem, and topical oils can cause skin irritation or allergic reactions in some people.

Is a natural oil automatically safer than medical treatment?

No. “Natural” does not automatically mean safe or effective, particularly when concentrated essential oils are used.

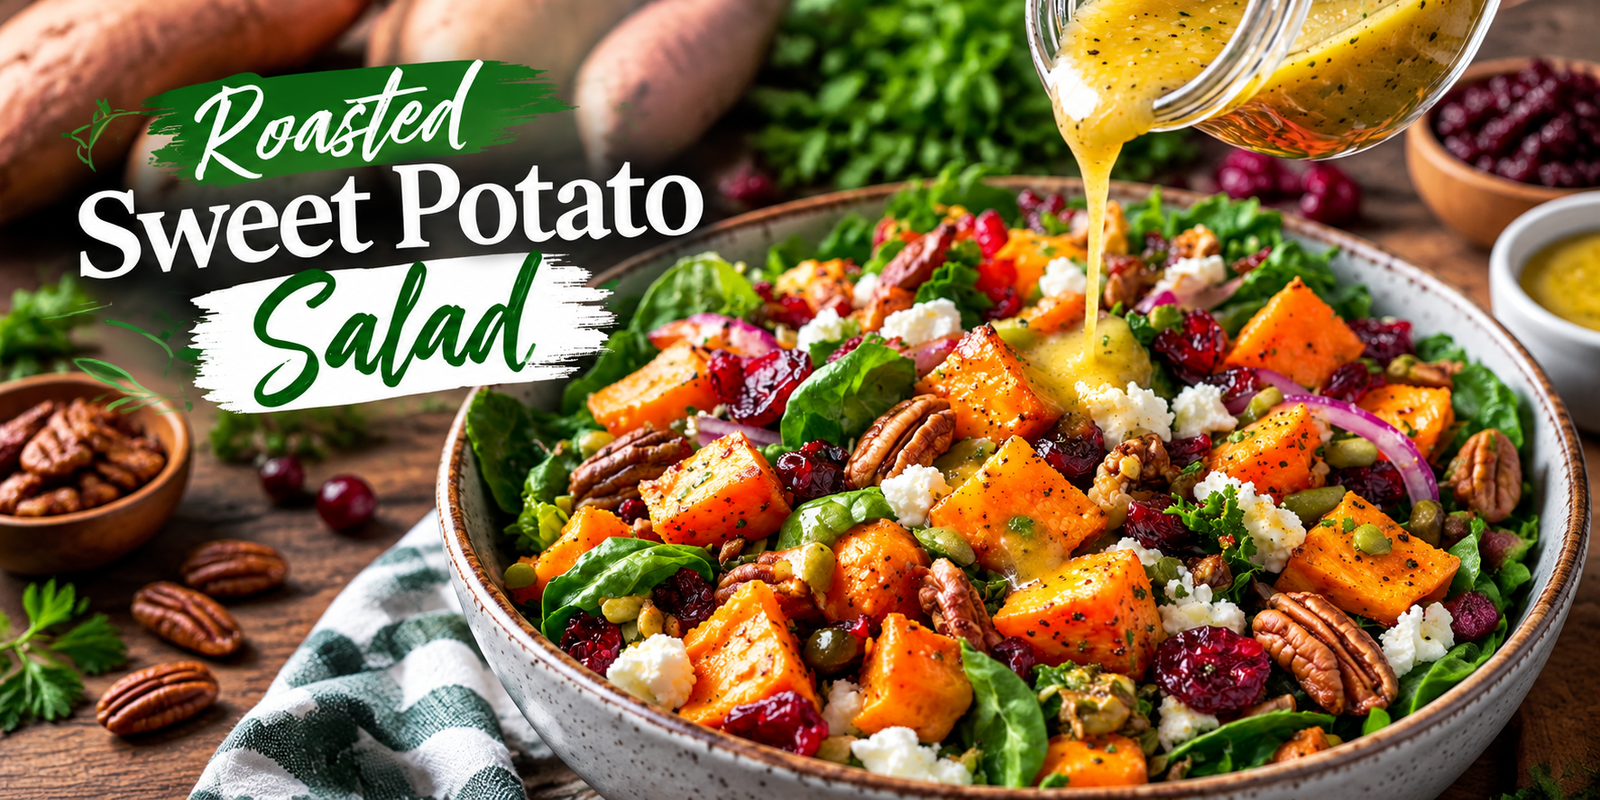
Roasted Sweet Potato Salad

Roasted Sweet Potato Salad with feta cheese pecans cranberries fresh greens and homemade dressing

Roasted Sweet Potato Salad with Feta, Pecans & Fresh Herbs

Introduction

Roasted Sweet Potato Salad is a delicious, colorful, and satisfying recipe that combines naturally sweet roasted sweet potatoes with fresh greens, creamy feta cheese, crunchy pecans, dried cranberries, and a flavorful homemade dressing. This salad is the perfect balance of sweet, savory, and fresh flavors, making it a great choice for lunch, meal prep, family dinners, or holiday gatherings.

Unlike ordinary salads, this recipe is hearty enough to enjoy as a complete meal. The roasted sweet potatoes add warmth and texture, while fresh herbs and a tangy dressing bring brightness to every bite.

Whether you are looking for a healthy fall-inspired recipe or an easy vegetable-packed meal, this Roasted Sweet Potato Salad is a simple and delicious option that everyone will enjoy.

Why You’ll Love This Roasted Sweet Potato Salad

Full of Flavor

The combination of roasted sweet potatoes, feta, nuts, and fresh greens creates a perfect mix of textures and flavors.

Nutritious and Filling

Sweet potatoes provide fiber and essential nutrients, while nuts and cheese add satisfying protein and healthy fats.

Perfect for Meal Prep

Prepare the ingredients ahead and enjoy a ready-to-eat salad throughout the week.

Easy to Customize

You can easily add your favorite vegetables, proteins, or toppings.

Great for Any Season

Although it is perfect for fall, this salad can be enjoyed all year round.

Ingredients for Roasted Sweet Potato Salad

For the Salad

  • 3 medium sweet potatoes, peeled and cubed
  • 2 tablespoons olive oil
  • 1 teaspoon paprika
  • 1 teaspoon garlic powder
  • ½ teaspoon ground cumin
  • Salt and black pepper to taste
  • 5 cups fresh spinach or mixed greens
  • ½ cup crumbled feta cheese
  • ½ cup dried cranberries
  • ½ cup pecans, toasted
  • ¼ red onion, thinly sliced
  • 2 tablespoons fresh parsley, chopped

For the Homemade Dressing

  • ¼ cup olive oil
  • 2 tablespoons lemon juice
  • 1 tablespoon honey
  • 1 teaspoon Dijon mustard
  • 1 garlic clove, minced
  • ½ teaspoon salt
  • ½ teaspoon black pepper

Step-by-Step Instructions

1. Roast the Sweet Potatoes

Preheat your oven to 425°F (220°C).

Place cubed sweet potatoes on a baking sheet lined with parchment paper.

Add olive oil, paprika, garlic powder, cumin, salt, and black pepper. Toss everything together until the sweet potatoes are evenly coated.

Roast for 25–30 minutes, flipping halfway through, until they become golden, crispy on the outside, and tender inside.

Allow them to cool slightly before assembling the salad.

2. Prepare the Salad Base

While the sweet potatoes are roasting, prepare the remaining ingredients.

Wash and dry the spinach or mixed greens.

Slice the red onion, chop the parsley, and toast the pecans if needed.

Place the greens into a large serving bowl.

3. Make the Dressing

In a small bowl or jar, combine:

  • Olive oil
  • Lemon juice
  • Honey
  • Dijon mustard
  • Garlic
  • Salt
  • Pepper

Whisk or shake until the dressing becomes smooth and well combined.

Adjust the taste according to your preference.

4. Assemble the Salad

Add roasted sweet potatoes over the greens.

Top with:

  • Feta cheese
  • Dried cranberries
  • Pecans
  • Red onion
  • Fresh herbs

Drizzle the homemade dressing over the salad and gently toss everything together.

Serve immediately and enjoy.

Tips for the Best Roasted Sweet Potato Salad

Cut Sweet Potatoes Evenly

Keep the cubes similar in size so they cook evenly.

Do Not Overcrowd the Baking Tray

Spread sweet potatoes in a single layer to help them roast instead of steaming.

Add Dressing Before Serving

For the freshest texture, mix the dressing just before eating.

Toast the Nuts

Toasting pecans enhances their flavor and adds extra crunch.

Healthy Variations

Add Protein

Make this salad more filling by adding:

  • Grilled chicken
  • Salmon
  • Chickpeas
  • Boiled eggs

Make It Vegan

Replace feta cheese with:

  • Vegan cheese
  • Avocado
  • Extra nuts and seeds

Add More Vegetables

You can include:

  • Cucumber
  • Roasted peppers
  • Cherry tomatoes
  • Kale

Storage and Meal Prep Tips

This Roasted Sweet Potato Salad is excellent for preparing ahead.

Refrigerator Storage:

Store roasted sweet potatoes and salad ingredients separately for up to 4 days.

Meal Prep:

Prepare individual containers with greens, roasted sweet potatoes, toppings, and dressing separately.

Add dressing just before serving to keep the salad fresh and crunchy.

What to Serve With Roasted Sweet Potato Salad

This salad pairs beautifully with:

  • Grilled chicken
  • Roasted fish
  • Soup recipes
  • Sandwiches
  • Wraps
  • Mediterranean dishes

It can be served as a side dish or enjoyed as a complete healthy meal.

For a protein-rich and flavorful meal, pair your salad with our Lemon Herb Grilled Salmon with Orzo Salad, a fresh seafood recipe packed with Mediterranean flavors.

Nutritional Information (Approximate)

Serving Size: 1 bowl
Servings: 6

Calories: 280 kcal
Protein: 7g
Carbohydrates: 35g
Fat: 14g
Fiber: 6g

(Nutrition values may vary depending on ingredients used.)

Frequently Asked Questions

Can I make roasted sweet potato salad ahead of time?

Yes. Prepare the ingredients ahead and store them separately. Add dressing before serving for the best texture.

Can I use another type of cheese?

Yes. Goat cheese, parmesan, or blue cheese can also work well.

Is this salad good for weight management?

This recipe contains fiber-rich vegetables and balanced ingredients that can help create a satisfying meal.

Can I eat this salad warm?

Yes. Many people enjoy it with warm roasted sweet potatoes mixed with fresh greens.

If you enjoy fresh and colorful salad recipes, try our Apple Walnut Cranberry Salad with Citrus Maple Dressing for another delicious combination of fruits, nuts, and seasonal flavors.

Final Thoughts

Roasted Sweet Potato Salad is a simple yet impressive recipe that brings together sweet roasted vegetables, fresh greens, creamy cheese, crunchy nuts, and a bright homemade dressing. It is healthy, flavorful, and easy enough for everyday meals.

Whether you prepare it for lunch, meal prep, or a special gathering, this salad is a wonderful way to enjoy nutritious ingredients in a delicious way.