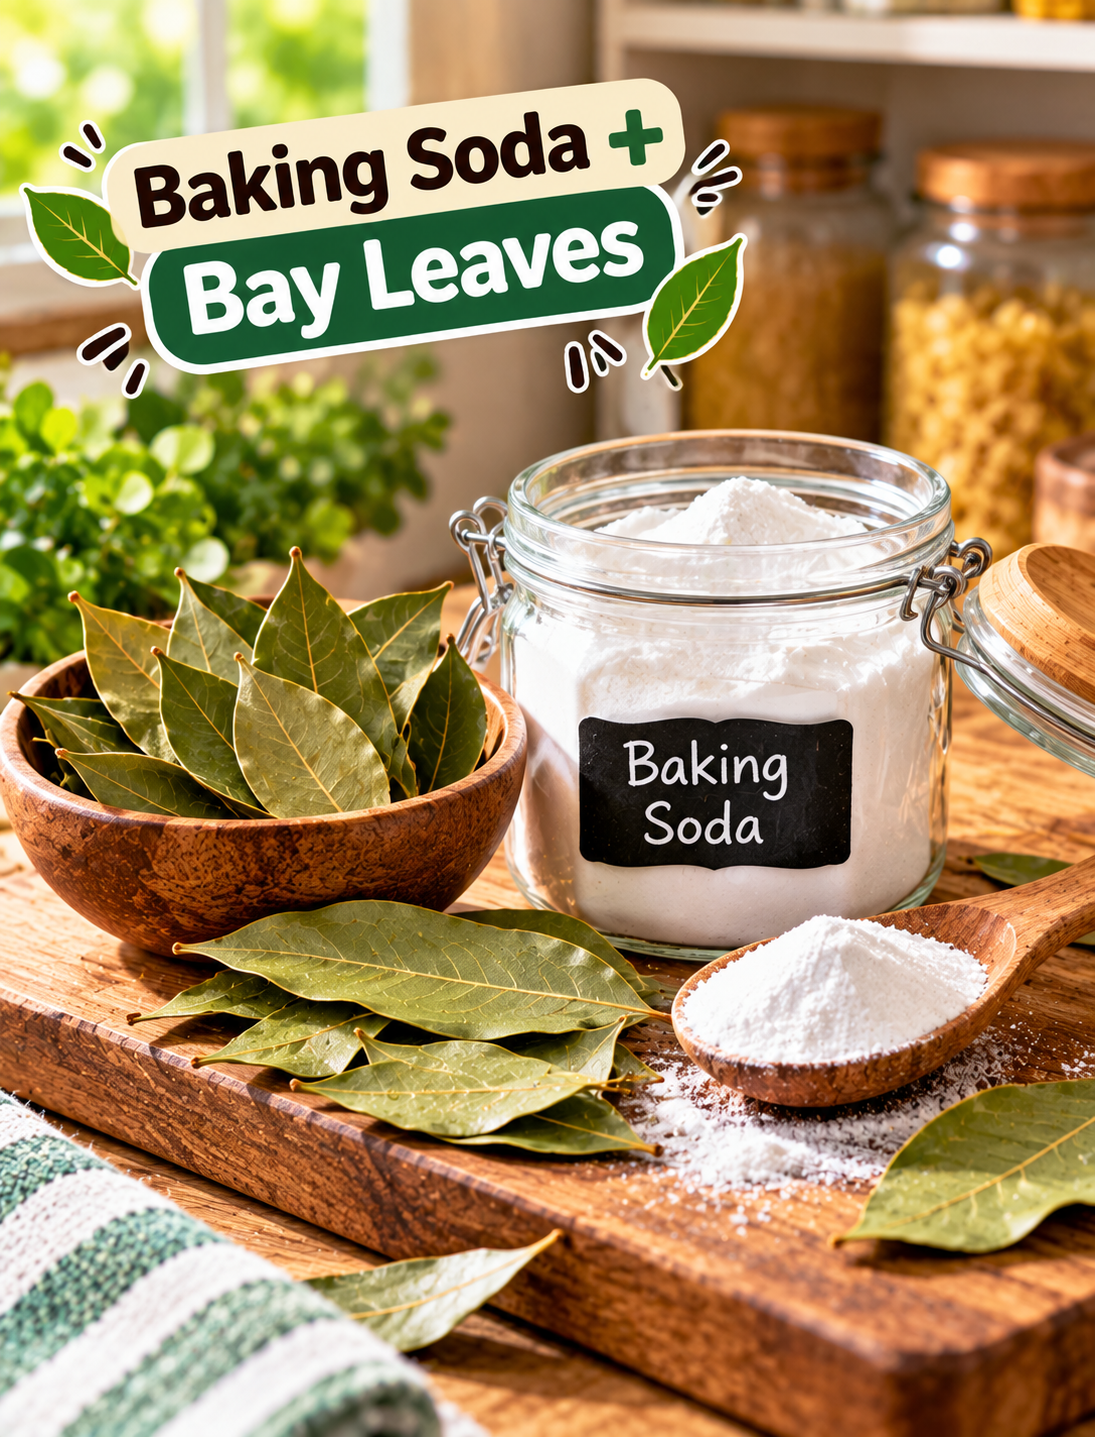
Baking Soda + Bay Leaves: Traditional Home Uses & What to Know

Baking soda and bay leaves for traditional home freshness and natural odor control

Baking Soda + Bay Leaves: Traditional Home Uses & What to Know

Both are two familiar pantry items that have long been used in everyday home routines. Baking soda is commonly used for odor control and light household cleaning, while bay leaves are valued for their distinctive natural aroma and culinary use.

Together, they can be part of a simple, old-fashioned approach to keeping certain areas of the home smelling fresher. However, they should be viewed as household ingredients, not miracle cleaners or proven pest treatments.

This guide explains practical ways to use them, how to handle them safely, and which cleaning combinations to avoid.

Why Baking Soda and Bay Leaves Are Used Around the Home

Baking soda, also called sodium bicarbonate, is a mild alkaline powder. One of its familiar household uses is helping control unpleasant odors, including in refrigerators.

Bay leaves are aromatic culinary leaves commonly used in soups, sauces, rice dishes, beans, and stews. Their pleasant herbal scent also makes them popular in traditional home-freshness routines.

The two ingredients serve different purposes:

  • Baking soda: mainly useful for odor control and gentle household cleaning.
  • Bay leaves: mainly provide a natural herbal aroma.
  • Together: they can create a simple pantry-style freshness setup.
  • Neither ingredient: should be presented as a guaranteed disinfectant, mold remover, or pest-control treatment.

This distinction is important because a pleasant smell does not necessarily mean an area has been cleaned or disinfected.

Traditional Home Uses for Baking Soda + Bay Leaves

A simple baking soda and bay leaf setup can be used in several low-risk areas of the home.

1. Freshen a Refrigerator

Baking soda is commonly used to help absorb refrigerator odors.

Simple method:

  1. Place a small open container of baking soda toward the back of the refrigerator.
  2. Keep it away from spills and moisture.
  3. Add one or two clean, dry bay leaves nearby if you enjoy their aroma.
  4. Replace the baking soda according to the product instructions or when it becomes noticeably less effective.
  5. Clean the refrigerator regularly rather than relying on odor control alone.

Bay leaves do not replace refrigerator cleaning, and they should not be placed where they can fall into food.

2. Add Freshness to a Pantry

A pantry can develop stale smells from stored grains, spices, cardboard packaging, or forgotten food.

For a simple traditional approach:

  1. Clean the shelf first.
  2. Remove expired or spoiled food.
  3. Wipe away crumbs and spills.
  4. Place a small dish of baking soda in a safe corner.
  5. Add a few dry bay leaves nearby for their natural aroma.
  6. Keep both ingredients away from direct contact with food.

A stale or unusual smell can sometimes signal spoiled food, moisture, mold, or another household problem, so masking the odor should not be the only step.

3. Freshen a Small Cabinet

Kitchen and bathroom cabinets can sometimes hold odors from moisture, cleaning products, or stored items.

Try this simple routine:

  • Empty the cabinet.
  • Wipe the interior with an appropriate cleaner.
  • Allow the surface to dry completely.
  • Place a small container of baking soda inside.
  • Add one or two dry bay leaves for aroma.
  • Keep the cabinet ventilated when possible.

Do not place loose baking soda directly onto finished wood or other surfaces where powder could collect in seams.

4. Use Bay Leaves as a Natural Aroma

Bay leaves can add a warm herbal scent to a kitchen or pantry.

Place a few dry culinary bay leaves in a small breathable sachet or dish rather than scattering them around the room.

This is mainly an aromatic use. There is not enough evidence to treat bay leaves as a reliable substitute for professional pest control.

5. Create a Simple Home-Freshness Bowl

For a basic traditional home routine, use:

  • 2–3 tablespoons baking soda
  • 2–3 dry bay leaves
  • A small shallow bowl

Steps:

  1. Pour the baking soda into the bowl.
  2. Break the bay leaves into a few large pieces if desired.
  3. Place them on top of or beside the baking soda.
  4. Set the bowl somewhere dry and out of reach of children and pets.
  5. Replace the mixture when it becomes damp, dirty, or loses its usefulness.

The baking soda provides the odor-control component, while the bay leaves contribute their characteristic aroma.

How to Use It Safely

A few simple habits make homemade freshness methods much safer.

Step 1: Start With a Clean Area

Do not use baking soda and bay leaves to hide odors caused by spoiled food, mold, sewage, dampness, or a leaking appliance.

Find and remove the source first.

Step 2: Use Small Amounts

More powder does not automatically mean better odor control.

A small open container is usually easier to manage and reduces unnecessary dust.

Step 3: Keep the Ingredients Dry

Moisture can cause baking soda to clump and can make stored bay leaves lose their quality.

Use clean, dry containers and replace damp ingredients.

Step 4: Keep Them Away From Food Contact

Although baking soda can be a food ingredient, a household deodorizing container should not be treated like a cooking ingredient.

Keep it clearly separated from food preparation areas.

Step 5: Label Homemade Mixtures

If you prepare a bowl or sachet for household use, label it clearly as “Do Not Eat.”

This is especially useful in homes with children or visitors.

What Baking Soda Can and Cannot Do

Baking soda has legitimate household uses, particularly for odor control and some gentle cleaning tasks. Poison Control identifies sodium bicarbonate as a mild alkali used in household cleaning products and notes that it is generally not caustic when used appropriately.

However, it has limits.

Baking soda can:

  • Help control some household odors.
  • Provide mild abrasive action for certain cleaning tasks.
  • Be useful around refrigerators and other household areas.
  • Serve as a simple pantry ingredient for traditional cleaning routines.

Baking soda cannot:

  • Replace a disinfectant when disinfection is required.
  • Remove the source of mold or water damage.
  • Guarantee pest elimination.
  • Make spoiled food safe.
  • Correct plumbing or drainage problems.

If an odor keeps returning, look for the underlying source instead of repeatedly adding more baking soda.

What Bay Leaves Can and Cannot Do

Bay leaves are useful primarily for cooking and aroma.

They can:

  • Add a warm herbal scent.
  • Be included in traditional pantry-freshness routines.
  • Make a simple sachet for drawers or cabinets.
  • Add flavor to soups, stews, beans, and sauces.

They should not be presented as a guaranteed solution for cockroaches, ants, fleas, mold, or other household pests.

If you have a genuine pest infestation, identify the pest and use an appropriate control method rather than depending on bay leaves alone.

What NOT to Mix With Baking Soda

This is one of the most important parts of any homemade cleaning routine.

Do not randomly combine household cleaning products.

Poison Control specifically warns that mixing household cleaners can create dangerous chemical reactions or irritating fumes.

Avoid DIY combinations with:

  • Bleach
  • Ammonia-based cleaners
  • Unknown commercial cleaners
  • Strong toilet cleaners
  • Drain cleaners
  • Other chemicals unless the product label specifically allows the combination

Never mix bleach with vinegar or other acidic cleaners because the reaction can produce chlorine gas.

Baking soda and vinegar are often shown together in homemade cleaning videos because they fizz. The fizzing reaction is not proof that the combination is a stronger cleaner, and it is better to use products according to their intended instructions.

Safe Handling Tips for Baking Soda

Baking soda is familiar and relatively mild for many household applications, but it should still be handled responsibly.

  • Keep it in its original container when possible.
  • Store it where children cannot easily access it.
  • Avoid creating clouds of powder.
  • Wash your hands after household cleaning.
  • Do not deliberately swallow large amounts.
  • Never use household baking soda as a homemade medical treatment.

Poison Control notes that excessive ingestion of sodium bicarbonate can cause serious toxicity, so household and culinary uses should not be confused with medical use.

A Simple Weekly Home-Freshness Routine

You can turn these ingredients into a small maintenance habit without making your cleaning routine complicated.

Once a week:

  1. Check the refrigerator for expired food.
  2. Wipe obvious spills.
  3. Check pantry shelves for crumbs or moisture.
  4. Inspect cabinets for unusual smells.
  5. Refresh your baking soda container when needed.
  6. Replace old or damp bay leaves.
  7. Open doors or windows when appropriate to improve ventilation.
  8. Investigate any odor that returns quickly.

This approach focuses on removing the source rather than simply covering it.

When a Bad Smell Needs More Attention

A persistent odor can be a useful warning sign.

Look for:

  • Spoiled food
  • Damp walls or cabinets
  • Mold growth
  • Dirty drains
  • Pet odors
  • Garbage buildup
  • Leaking pipes
  • Appliance problems
  • Electrical or burning smells

Poison Control notes that unpleasant household odors can come from spoiled food, mold, drains, pets, chemicals, and other sources. A burning or unusual chemical smell can require more immediate attention.

If you smell strong chemical fumes after mixing cleaning products, leave the area and get into fresh air. Breathing difficulty, significant coughing, chest discomfort, or other serious symptoms require prompt medical attention.

Baking Soda + Bay Leaves: The Simple Takeaway

Baking soda and bay leaves fit naturally into old-fashioned household routines because both are inexpensive, familiar, and easy to keep in a kitchen.

The most practical approach is simple:

  • Use baking soda for basic odor control.
  • Use bay leaves for their natural aroma and traditional household appeal.
  • Keep both dry and away from food contamination.
  • Clean the actual source of unpleasant smells.
  • Do not rely on bay leaves as proven pest control.
  • Never mix household cleaning chemicals casually.
  • Follow product labels whenever commercial cleaners are involved.

The goal is not to turn two pantry ingredients into a miracle cleaner. Instead, they can be useful parts of a simple, sensible home-maintenance routine.

FAQs

Can baking soda and bay leaves remove bad smells?

Baking soda can help control some odors, while bay leaves mainly add aroma; neither should replace cleaning the source of a persistent smell.

Can I put baking soda and bay leaves in my refrigerator?

Yes, you can keep a small container of baking soda in the refrigerator for odor control and place dry bay leaves nearby for aroma.

Do bay leaves really keep insects away?

Bay leaves are traditionally used for this purpose, but they should not be considered a proven or reliable replacement for proper pest control.

Can I mix baking soda with vinegar?

Baking soda and vinegar react and fizz; the reaction does not automatically make them a stronger cleaner, so use each product appropriately.

Can baking soda be mixed with bleach?

Do not create homemade mixtures with bleach; household chemicals can produce harmful reactions when combined incorrectly.

How often should I replace baking soda used for odors?

Replace it when it becomes damp, dirty, or no longer seems effective, and follow any storage guidance on the product packaging.

Are bay leaves safe to leave around food?

Keep loose bay leaves separate from food unless they are being used as a culinary ingredient, and remove whole leaves from cooked dishes before serving.

What should I do if a household odor keeps coming back?

Find the source first by checking food, moisture, drains, garbage, pets, and appliances instead of repeatedly masking the odor.

Source note for the article: Household safety guidance above is based primarily on Poison Control’s current information about baking soda, cleaning-product mixtures, and household fumes.
10 Simple Ways to Freshen Everyday Household Items

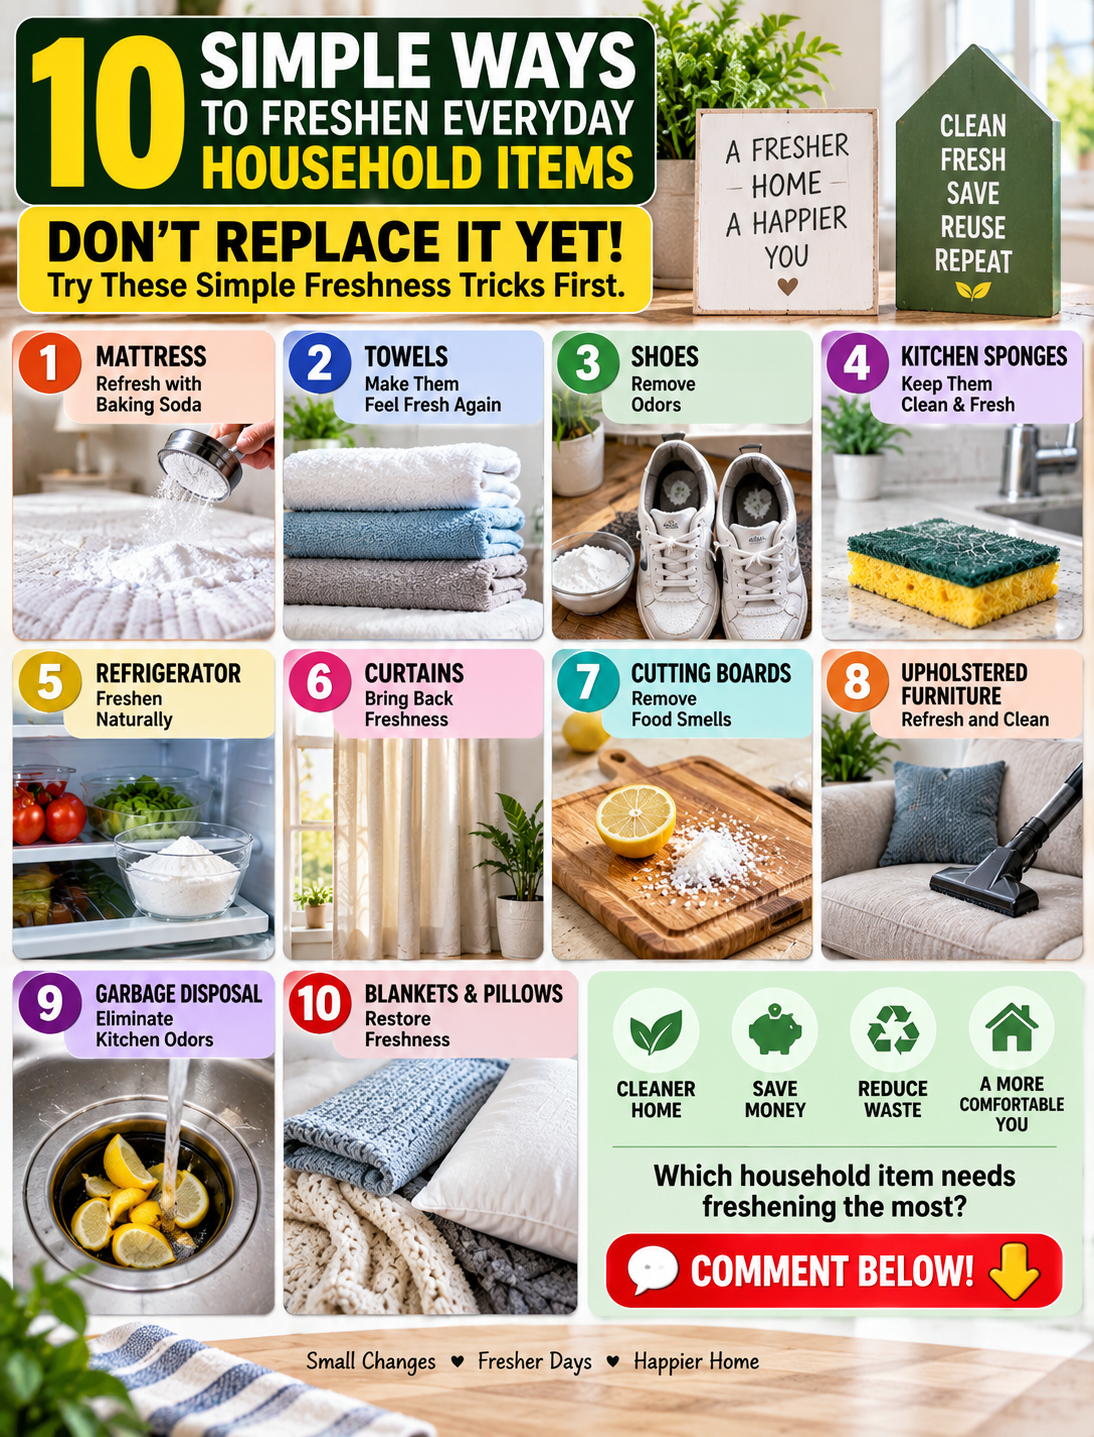
Simple household items being refreshed with natural cleaning ingredients like baking soda, lemon, and vinegar

10 Simple Ways to Freshen Everyday Household Items

DON’T REPLACE IT YET! Try These Simple Freshness Tricks First. Everyday household items collect dust, odors, moisture, and bacteria over time. Before throwing things away or buying replacements, try simple cleaning and refreshing methods that can bring them back to life. Many items around your home only need a little care to look cleaner, smell better, and feel fresh again.

From kitchen tools to soft fabrics and everyday essentials, these easy household freshening tips use simple ingredients and practical steps. These methods can help you maintain a cleaner home while saving money and reducing waste.

If you want your home to feel more comfortable and inviting, these simple tricks are worth trying.

1. Refresh Your Mattress With Baking Soda

Your mattress absorbs sweat, body oils, and dust while you sleep. Even with regular sheet changes, it can develop a stale smell over time.

Step-by-Step Method:

  1. Remove all bedding, including sheets and pillow covers.
  2. Sprinkle a thin layer of baking soda across the mattress surface.
  3. Leave it for 30 minutes to absorb odors and moisture.
  4. Vacuum the mattress completely to remove the baking soda.
  5. Add a few drops of essential oil to baking soda for a light natural scent.

This simple method helps freshen your sleeping area without using strong chemical sprays.

2. Make Old Towels Feel Fresh Again

Towels can become rough and develop a musty smell when detergent and fabric softener build up in the fibers.

Step-by-Step Method:

  1. Place towels in the washing machine.
  2. Add one cup of white vinegar instead of detergent for the first wash.
  3. Run a hot water cycle if the fabric label allows it.
  4. Wash again with regular detergent.
  5. Dry towels completely before storing them.

This process helps remove residue and restores a cleaner feel to everyday towels.

3. Remove Odors From Shoes

Shoes trap sweat and moisture, creating unpleasant smells. A quick refresh can make them feel cleaner.

Step-by-Step Method:

  1. Remove shoe inserts if possible.
  2. Sprinkle baking soda inside each shoe.
  3. Leave overnight for odor absorption.
  4. Shake out the powder before wearing.
  5. Allow shoes to air out regularly.

Keeping shoes dry and clean helps prevent repeated odor problems.

4. Freshen Kitchen Sponges and Scrubbers

Kitchen sponges collect food particles and moisture, which can create unwanted smells.

Step-by-Step Method:

  1. Rinse the sponge after every use.
  2. Remove leftover food pieces.
  3. Place it in hot water for several minutes.
  4. Allow it to dry completely between uses.
  5. Replace damaged sponges regularly.

A clean sponge supports better kitchen hygiene and reduces unpleasant smells.

5. Refresh Your Refrigerator Naturally

The refrigerator can develop strong odors from stored foods, spills, and expired items.

Step-by-Step Method:

  1. Remove expired products and old leftovers.
  2. Wipe shelves with warm water and mild soap.
  3. Clean small spills immediately.
  4. Place an open box of baking soda inside.
  5. Replace the baking soda every few months.

A fresh refrigerator helps keep food storage cleaner and more pleasant.

6. Bring Freshness Back to Curtains

Curtains collect dust, cooking smells, and airborne particles that can make rooms feel less fresh.

Step-by-Step Method:

  1. Check the care label before washing.
  2. Vacuum curtains using a soft brush attachment.
  3. Wash removable curtains when needed.
  4. Let them dry completely.
  5. Open windows regularly for fresh airflow.

Clean curtains can improve the overall feeling of a room.

7. Remove Smells From Wooden Cutting Boards

Wooden cutting boards absorb food odors from ingredients like garlic, onions, and meat.

Step-by-Step Method:

  1. Sprinkle coarse salt over the cutting board.
  2. Rub half a lemon across the surface.
  3. Let it sit for several minutes.
  4. Rinse with warm water.
  5. Dry the board completely before storing.

This natural cleaning method helps maintain the board’s surface and freshness.

8. Freshen Upholstered Furniture

Sofas, chairs, and fabric furniture collect dust, pet smells, and everyday odors.

Step-by-Step Method:

  1. Vacuum cushions and fabric surfaces.
  2. Sprinkle baking soda lightly over upholstery.
  3. Wait 20–30 minutes.
  4. Vacuum again thoroughly.
  5. Use washable covers when possible.

Regular maintenance keeps furniture looking cleaner and smelling better.

9. Refresh Your Garbage Disposal

Food particles inside garbage disposals can create strong kitchen odors.

Step-by-Step Method:

  1. Run cold water through the disposal.
  2. Add small lemon pieces.
  3. Turn on the disposal briefly.
  4. Flush with water afterward.
  5. Clean the surrounding sink area.

Citrus fruits provide a natural fresh scent while helping remove leftover smells.

10. Restore Freshness to Blankets and Pillows

Blankets and pillows absorb sweat, dust, and household odors over time.

Step-by-Step Method:

  1. Check washing instructions on the label.
  2. Wash items according to fabric requirements.
  3. Add vinegar during the rinse cycle if suitable.
  4. Dry completely to prevent moisture buildup.
  5. Air them outside occasionally when weather allows.

Fresh bedding creates a cleaner and more comfortable home environment.

Simple Habits That Keep Household Items Fresh Longer

Small daily habits can prevent odors and buildup before they become bigger problems.

  • Open windows for better air circulation.
  • Clean spills immediately.
  • Avoid storing damp items in closed spaces.
  • Wash frequently used fabrics regularly.
  • Allow kitchen tools to dry completely.
  • Use natural odor absorbers like baking soda.

Consistent care reduces the need for frequent replacements and helps everyday items last longer.

Why Freshening Household Items Is Worth It

Refreshing household products is an affordable way to maintain a cleaner living space. Many common items do not need replacement; they simply need proper cleaning and care.

Using simple methods like deodorizing, washing, airing out, and removing buildup can improve freshness throughout your home. These steps are easy, budget-friendly, and suitable for busy households.

A cleaner home does not always require expensive products. Sometimes, basic ingredients and regular maintenance are enough to make everyday items feel new again.

Frequently Asked Questions

1. How often should I freshen household items?

Most household items should be refreshed monthly, while frequently used items may need weekly care.

2. Can baking soda remove household odors?

Yes, baking soda naturally absorbs many unwanted smells from fabrics, furniture, and surfaces.

3. How can I make towels smell fresh again?

Wash towels with vinegar occasionally to remove detergent buildup and trapped odors.

4. What is the easiest way to freshen a mattress?

Sprinkling baking soda and vacuuming after 30 minutes is a simple mattress refresh method.

5. How do I keep my refrigerator smelling clean?

Regular cleaning and an open box of baking soda help control refrigerator odors.

6. Can natural ingredients freshen household items?

Yes, ingredients like baking soda, lemon, and vinegar can help clean and deodorize many items.

7. How can I prevent musty smells at home?

Improve airflow, reduce moisture, and clean fabrics regularly to prevent stale odors.

8. Should I replace items instead of cleaning them?

Many household items can be refreshed and reused with proper cleaning methods.

Which household item needs freshening the most? Share your answer and try these simple freshness tricks before replacing it!

The Surprising Benefits of Using Garlic for Toilet Cleaning

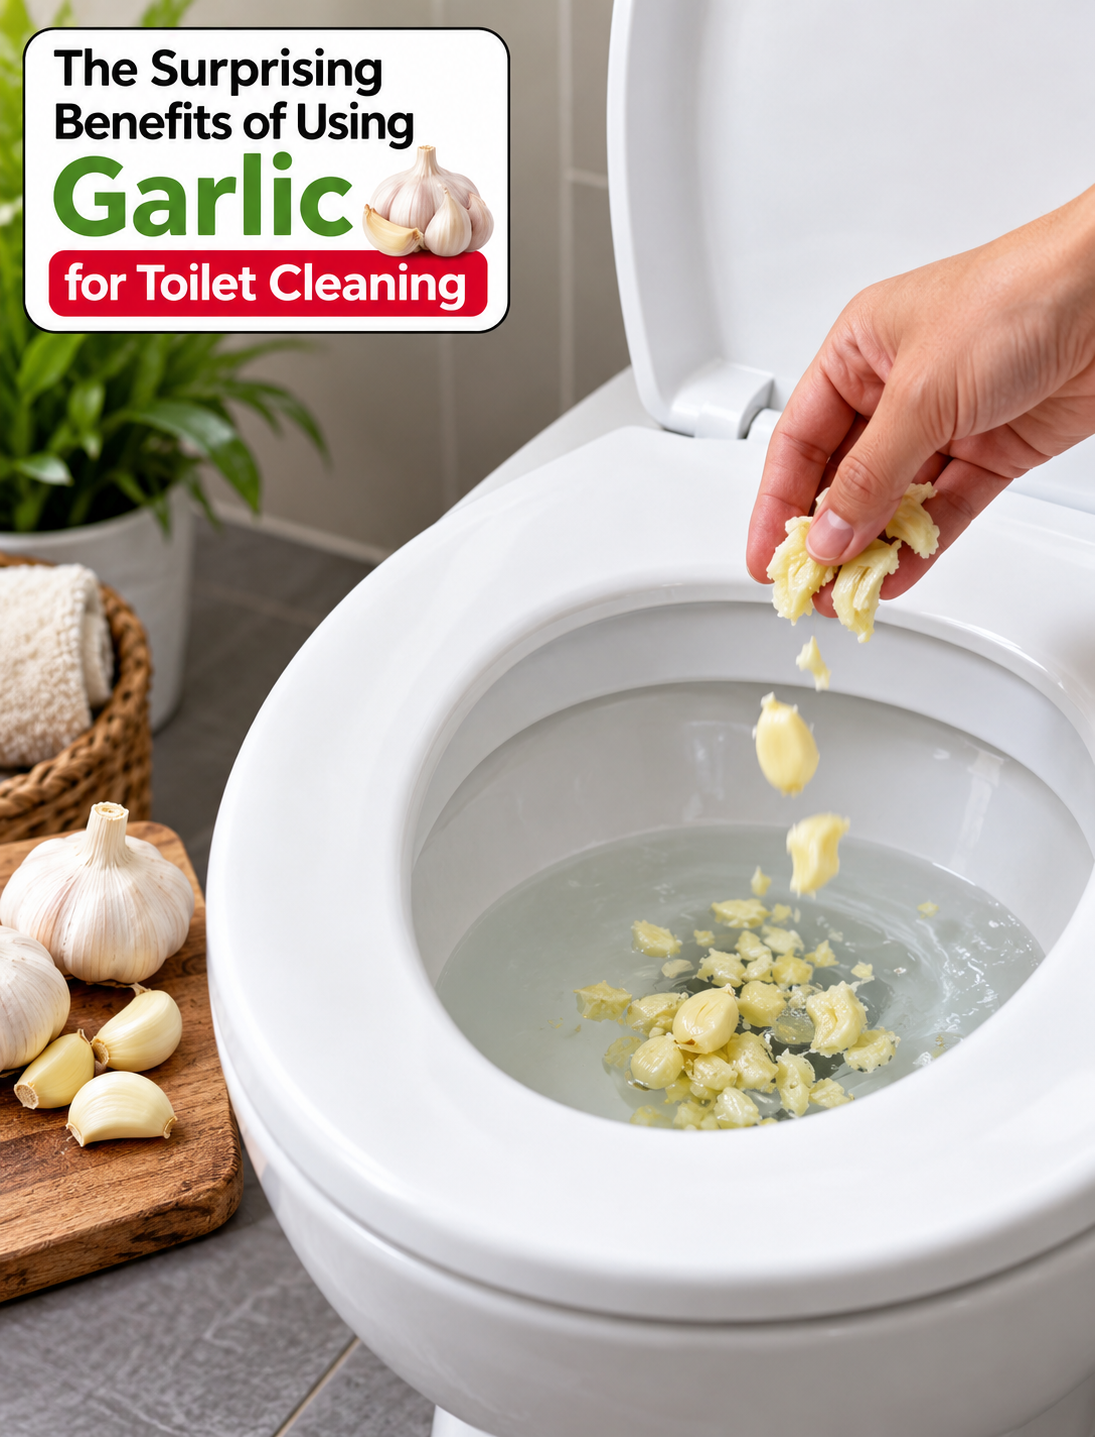
Crushed garlic cloves being used as a natural toilet cleaning method in a clean bathroom

The Surprising Benefits of Using Garlic for Toilet Cleaning

Garlic is usually found in the kitchen, but some homeowners also use it as an unusual natural toilet-cleaning idea. The reason is simple: fresh garlic contains compounds such as allicin that have antimicrobial activity in laboratory settings. The Surprising Benefits of Using Garlic for Toilet Cleaning makes garlic an interesting ingredient to explore for light bathroom cleaning, although it should not replace a proper toilet disinfectant when sanitation is the main goal.

Using garlic in the toilet is best viewed as a simple household experiment rather than a powerful cleaning treatment. It may help freshen a toilet between regular cleanings, while brushing and routine bathroom care remain the most important steps for removing buildup and maintaining hygiene.

Why Garlic?

Fresh garlic produces allicin when its cloves are crushed or cut. Allicin is responsible for much of garlic’s strong smell and has been studied for its antimicrobial properties.

That does not mean garlic can disinfect a toilet as reliably as a product specifically labeled for bathroom sanitation. Toilet bowls can contain bacteria, mineral deposits, stains, and other residues that require proper cleaning.

Still, garlic can be an inexpensive ingredient for people who enjoy trying simple household cleaning methods. It is also biodegradable and does not introduce a conventional chemical cleaner into the toilet bowl.

Important points to remember:

  • Garlic is better suited to light cleaning experiments than deep sanitation.
  • It should not replace a registered bathroom disinfectant when disinfection is needed.
  • Crushing the cloves releases more of their active compounds.
  • Garlic has a strong odor, so good bathroom ventilation is helpful.
  • Never mix garlic with bleach, ammonia, or other cleaning chemicals.

How to Use Garlic for Toilet Cleaning

If you want to try this method, follow these steps carefully. Use fresh garlic and clean the toilet normally before or after the experiment when necessary.

Step 1: Gather Fresh Garlic

Take about four to six fresh garlic cloves and remove their papery skins. Fresh cloves are preferable because crushing them helps release their natural compounds.

You will also need a toilet brush, disposable gloves, and access to clean water.

Step 2: Crush the Garlic

Place the peeled cloves on a clean surface and crush them with the flat side of a knife or a garlic press.

Crushing the garlic helps form allicin from compounds naturally present in the clove. Use the crushed garlic soon after preparing it rather than storing it for later.

Step 3: Add the Garlic to the Bowl

Flush the toilet first so the bowl is relatively clean and wet. Drop the crushed garlic into the toilet water and spread the pieces around the bowl if possible.

Avoid pushing large pieces into the drain because solid food waste can create an unnecessary plumbing problem.

Step 4: Let It Sit

Leave the crushed garlic in the bowl for about 30 minutes.

This waiting period gives the garlic compounds time to remain in contact with the bowl surface. Keep the bathroom ventilated because the odor can become noticeable.

Step 5: Scrub the Bowl

Put on gloves and use a toilet brush to scrub the inside of the bowl.

Focus on areas where light residue or surface marks are visible. Scrubbing provides the main physical cleaning action and is more important for stain removal than the garlic itself.

Step 6: Flush Thoroughly

Flush the toilet to remove the garlic and loosened residue.

Check the bowl afterward and repeat normal toilet cleaning if stains or buildup remain. Do not assume the absence of visible dirt means the toilet has been disinfected.

Step 7: Clean the Brush and Surrounding Area

Rinse the toilet brush properly and clean any surface that may have been splashed during the process.

Wash your hands thoroughly after removing your gloves. Regular hand hygiene remains an important part of bathroom sanitation.

Potential Benefits of Garlic for Toilet Cleaning

The main appeal of this method is its simplicity. Garlic is inexpensive, widely available, and easy to prepare.

Its naturally occurring sulfur compounds have antimicrobial properties that have been studied in controlled settings. However, household toilet conditions are different from laboratory conditions, so these properties should not be treated as proof that garlic disinfects a toilet.

Garlic may also appeal to people who prefer experimenting with biodegradable household ingredients. It does not contain the strong cleaning chemicals found in many commercial toilet products.

Some potential advantages include:

  • Easy access to an everyday kitchen ingredient.
  • Low cost compared with specialty cleaning products.
  • A biodegradable ingredient that can be disposed of with normal organic waste.
  • An interesting option for light cleaning between routine toilet washes.
  • No need to create a complicated homemade cleaning mixture.

The biggest benefit may simply be encouraging regular cleaning. A toilet that is brushed and maintained often is easier to keep fresh than one that is cleaned only after heavy buildup develops.

What Garlic Cannot Replace

Garlic should not be treated as a complete toilet disinfectant. Commercial bathroom products are formulated and tested for specific cleaning or disinfecting purposes, while the effectiveness of crushed garlic in a household toilet has not been established as an equivalent sanitation method.

For visible mineral scale, hard-water rings, heavy stains, or significant buildup, use a suitable toilet cleaner according to its label.

For situations where disinfection is important, choose a product specifically labeled for toilet or bathroom disinfection and follow its contact-time instructions.

Avoid these mistakes:

  • Do not mix garlic with bleach or other chemical cleaners.
  • Do not pour large amounts of food into the toilet.
  • Do not rely on garlic alone to control harmful germs.
  • Do not leave garlic in the bowl for an extended period.
  • Do not use this method as a substitute for regular bathroom sanitation.

Additional Tips for Better Toilet Care

Good toilet maintenance involves more than the bowl itself. Clean the seat, lid, handle, base, and nearby high-touch surfaces regularly.

Ventilate the bathroom during and after cleaning to reduce strong odors and moisture. Moisture control can also help make the bathroom less inviting to mold and mildew.

If your toilet has a persistent ring or discoloration, identify the cause before choosing a cleaner. Hard water can leave mineral deposits that require a product designed to dissolve scale.

For everyday maintenance, a toilet brush and an appropriate bathroom cleaner are usually more dependable than unusual household ingredients.

How Often Should You Clean Your Toilet?

For a busy household, regular toilet cleaning can help prevent stains and buildup from becoming difficult to remove. A weekly cleaning routine is a practical starting point for many homes, while frequently used bathrooms may need attention more often.

Garlic can be an occasional experiment within that routine, but it should not replace established cleaning practices.

A simple routine is more useful than relying on one unusual ingredient. Flush regularly, keep the bowl clean, wipe high-touch surfaces, and address stains before they become heavy deposits.

Final Thoughts

Using garlic for toilet cleaning is an unusual home-cleaning idea that may be worth trying for light maintenance. Crushed garlic releases allicin and other sulfur compounds with antimicrobial activity, but that does not make garlic a proven replacement for a toilet disinfectant.

The safest approach is to treat garlic as an optional natural cleaning experiment rather than a sanitation solution. Regular scrubbing, appropriate bathroom products, good ventilation, and proper hand hygiene remain the foundation of a clean toilet.

If you try this method, use a small amount of crushed garlic, allow brief contact, scrub the bowl, flush thoroughly, and continue with your normal cleaning routine.

Frequently Asked Questions

Can garlic really clean a toilet?

Garlic contains compounds with antimicrobial activity, but there is not enough evidence to consider crushed garlic a reliable toilet disinfectant. Scrubbing remains the key cleaning step.

How much garlic should I use for a toilet?

Four to six fresh cloves are enough for this household experiment. Crush them first and avoid putting large pieces into the toilet drain.

How long should garlic stay in the toilet?

About 30 minutes is sufficient for this method. Leaving food in the bowl longer does not make garlic a proven or stronger disinfectant.

Does garlic remove hard-water stains?

Garlic is not a dependable treatment for hard-water scale. Mineral deposits usually require a suitable cleaner designed to dissolve limescale.

Can garlic replace bleach for toilet cleaning?

No. Garlic should not replace a disinfectant when sanitation is required. Use a toilet product labeled for the specific cleaning or disinfecting task.

Is garlic safe for toilet plumbing?

Small crushed pieces are unlikely to be an issue when flushed promptly, but large food pieces should never be put into a toilet. Dispose of leftover garlic in household waste instead.

Will garlic remove toilet odors?

Garlic has a very strong natural odor, so it may temporarily make the bathroom smell more like garlic rather than fresher. Ventilation is recommended during use.

How often should I clean my toilet?

A weekly cleaning routine works well for many households, while heavily used bathrooms may need more frequent cleaning. Regular maintenance helps prevent stubborn buildup.