Sweet Potato Veggie Egg Bake

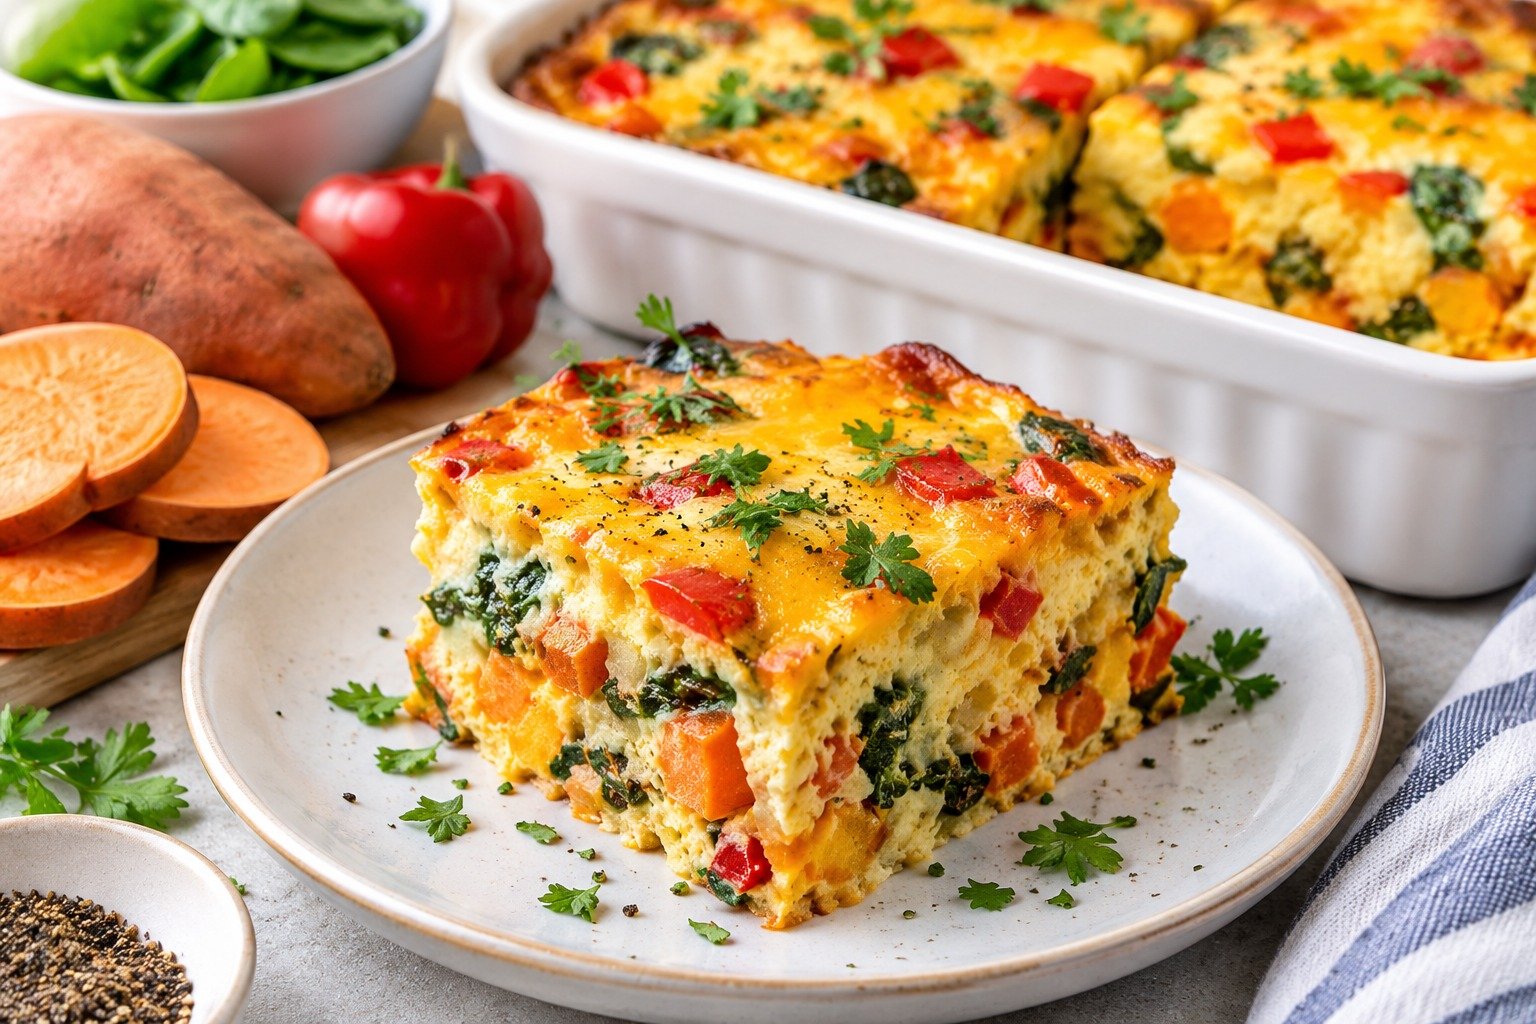
Sweet Potato Egg Bake with eggs, sweet potatoes, spinach, bell peppers, tomatoes, herbs, and melted cheese

Sweet Potato Veggie Egg Bake

Sweet Potato Egg Bake is a colorful, protein-rich breakfast casserole made with tender sweet potatoes, eggs, spinach, bell peppers, onion, tomatoes, herbs, and cheese. It has a soft, savory center with lightly golden edges and works well for breakfast, brunch, meal prep, or a simple family dinner.

This Sweet Potato Egg Bake is easy to prepare ahead, flexible enough for seasonal vegetables, and satisfying without requiring complicated ingredients. Serve it warm on its own or pair it with fruit, toast, avocado, or a fresh salad.

Prep Time: 20 minutes
Cook Time: 35–40 minutes
Total Time: About 1 hour
Servings: 6

Ingredients

For the Sweet Potatoes and Vegetables

  • 2 medium sweet potatoes, peeled and diced into small cubes
  • 1 tablespoon extra virgin olive oil
  • 1 small yellow onion, diced
  • 1 red bell pepper, diced
  • 2 cups baby spinach
  • 1 cup cherry tomatoes, halved
  • 1/2 teaspoon smoked paprika
  • 1/2 teaspoon garlic powder
  • 1/2 teaspoon dried oregano
  • 1/2 teaspoon salt
  • 1/4 teaspoon black pepper

Ingredients For the Egg Mixture

  • 8 large eggs
  • 1/2 cup milk
  • 1/2 cup shredded cheddar or mozzarella
  • 1/4 cup crumbled feta, optional
  • 2 tablespoons chopped fresh parsley
  • 1 tablespoon chopped fresh chives
  • 1/4 teaspoon salt
  • 1/4 teaspoon black pepper

For Serving

  • Sliced avocado
  • Fresh herbs
  • Hot sauce
  • Greek yogurt
  • Whole-grain toast

Why You’ll Love This Recipe

Sweet Potato Egg Bake combines vegetables, eggs, and cheese in one simple casserole, making it a practical choice when you want a complete breakfast without cooking several separate dishes.

Another reason to love Sweet Potato Egg Bake is the contrast between naturally sweet potatoes and savory eggs, herbs, and cheese. The flavors are balanced, the texture is hearty, and the leftovers reheat well for busy mornings.

You can also change the vegetables, cheese, or seasonings based on what you already have in the refrigerator.

How to Make Sweet Potato Egg Bake

Step 1: Preheat the Oven

Preheat the oven to 375°F or 190°C.

Lightly grease a 9 x 13-inch baking dish with olive oil or cooking spray.

Step 2: Prepare the Sweet Potatoes

Peel the sweet potatoes and cut them into small, even cubes.

Small cubes cook faster and more evenly, which helps Sweet Potato Egg Bake develop a tender texture without leaving firm pieces in the center.

Step 3: Cook the Sweet Potatoes

Heat olive oil in a large skillet over medium heat.

Add the diced sweet potatoes and cook for 8 to 10 minutes, stirring occasionally, until they begin to soften and develop light golden edges.

Add a tablespoon of water and cover the skillet for 2 minutes if the potatoes need extra help softening.

Step 4: Add the Vegetables

Add the onion and bell pepper to the skillet.

Cook for 4 to 5 minutes until the onion softens.

Stir in the spinach and cook for 1 to 2 minutes, just until wilted.

Season with smoked paprika, garlic powder, oregano, salt, and black pepper.

Step 5: Transfer to the Baking Dish

Spread the cooked sweet potato and vegetable mixture evenly in the prepared baking dish.

Scatter the halved cherry tomatoes over the top.

This creates an even vegetable layer so every portion of Sweet Potato Egg Bake contains a good mix of sweet potato, greens, peppers, and tomatoes.

Step 6: Whisk the Eggs

In a large bowl, whisk the eggs with milk, salt, and black pepper until fully combined.

Stir in the shredded cheese, feta if using, parsley, and chives.

Whisking the eggs thoroughly helps Sweet Potato Egg Bake cook evenly and gives the finished casserole a softer texture.

Step 7: Pour the Egg Mixture

Slowly pour the egg mixture over the vegetables.

Use a spatula to gently move the vegetables if necessary so the eggs settle into the spaces between them.

Do not stir aggressively because you want the vegetables distributed throughout the casserole.

Step 8: Bake Until Set

Bake uncovered for 30 to 35 minutes, or until the center is set and the edges are lightly golden.

A knife inserted near the center should come out mostly clean.

Sweet Potato Egg Bake will continue to firm slightly as it rests, so avoid overbaking.

Step 9: Rest Before Slicing

Remove the baking dish from the oven and let it rest for 10 minutes.

This resting time helps the egg mixture settle and makes the casserole easier to slice into neat portions.

Step 10: Garnish and Serve

Top Sweet Potato Egg Bake with fresh herbs, sliced avocado, hot sauce, or a spoonful of Greek yogurt.

Serve warm.

Serving Suggestions

Sweet Potato Egg Bake is filling enough to enjoy on its own, but simple sides can make breakfast or brunch feel more complete.

Serve it with fresh berries, orange slices, melon, or another seasonal fruit.

For a heartier brunch, add whole-grain toast, turkey sausage, or a simple green salad.

You can also serve Sweet Potato Egg Bake with avocado, tomato salsa, or Greek yogurt for extra creaminess and freshness.

For another easy and flavorful breakfast idea, try our Greek Baked Feta Eggs Recipe – Viral Breakfast with creamy feta, eggs, tomatoes, and Mediterranean herbs.

Recipe Tips

Cut the sweet potatoes into small, even cubes so they cook through before baking.

Partially cook the sweet potatoes in a skillet before assembling the casserole.

Do not add raw watery vegetables in large amounts because they can release moisture into the eggs.

Use room-temperature eggs if possible for more even mixing.

Shred your own cheese if you want smoother melting.

Let Sweet Potato Egg Bake rest before slicing so it holds its shape.

For meal prep, cool the casserole completely before refrigerating individual portions.

Easy Variations

Sweet Potato Egg Bake is easy to customize with different vegetables and cheeses.

Add mushrooms, zucchini, broccoli, kale, or roasted red peppers.

For extra protein, add cooked turkey sausage, chicken sausage, shredded chicken, or black beans.

Swap cheddar for mozzarella, pepper jack, goat cheese, or feta.

For a spicy variation, add jalapeño, chili flakes, or a few dashes of hot sauce.

You can also add fresh rosemary, thyme, basil, or dill for a different herb profile.

If you enjoy warm and nourishing meals, you may also like our Ginger Chicken & Vegetable Soup with tender chicken, fresh ginger, and colorful vegetables.

Make-Ahead Instructions

Sweet Potato Egg Bake is an excellent make-ahead breakfast.

Cook the sweet potatoes and vegetables one day ahead and refrigerate them in an airtight container.

You can also assemble the entire casserole, cover it tightly, and refrigerate it overnight before baking.

If baking directly from the refrigerator, add about 5 minutes to the cooking time.

Storage and Reheating

Store leftover Sweet Potato Egg Bake in an airtight container in the refrigerator for up to 4 days.

Reheat individual slices in the microwave for 45 to 90 seconds, depending on thickness.

You can also warm portions in a 325°F or 165°C oven for about 10 minutes.

For longer storage, freeze individual slices for up to 2 months. Wrap them well and thaw overnight in the refrigerator before reheating.

Nutrition Information

Approximate nutrition per serving:

Calories: 310
Protein: 17 g
Carbohydrates: 28 g
Fat: 15 g
Saturated Fat: 6 g
Fiber: 5 g
Sugar: 7 g
Sodium: 480 mg

Nutrition values are estimates and may vary depending on the cheese, milk, vegetables, and serving size.

Frequently Asked Questions

Can I use frozen sweet potatoes?

Yes. Thaw them first and pat away excess moisture before cooking.

Can I use regular potatoes instead?

Yes. Yukon Gold or red potatoes work well, although the flavor will be less sweet.

Can I make this dairy-free?

Yes. Use unsweetened dairy-free milk and omit the cheese or use a dairy-free alternative.

Can I add meat?

Yes. Cooked turkey sausage, chicken sausage, bacon, or shredded chicken can be added before baking.

How do I know when the egg bake is done?

The center should look set rather than wet, and a knife inserted near the middle should come out mostly clean.

Can I make it ahead for brunch?

Yes. Sweet Potato Egg Bake can be assembled the night before and baked the next morning.

Can I freeze individual portions?

Yes. Cool completely, wrap individual slices, and freeze for easy breakfasts later.

Final Thoughts

Sweet Potato Egg Bake is a simple way to combine eggs, vegetables, sweet potatoes, herbs, and cheese in one colorful and satisfying dish.

Because Sweet Potato Egg Bake can be prepared ahead and customized with different vegetables, proteins, and cheeses, it works well for busy mornings, weekend brunch, or meal prep.

Keep this Sweet Potato Egg Bake recipe handy whenever you want an easy breakfast casserole that is filling, flexible, and packed with colorful vegetables.
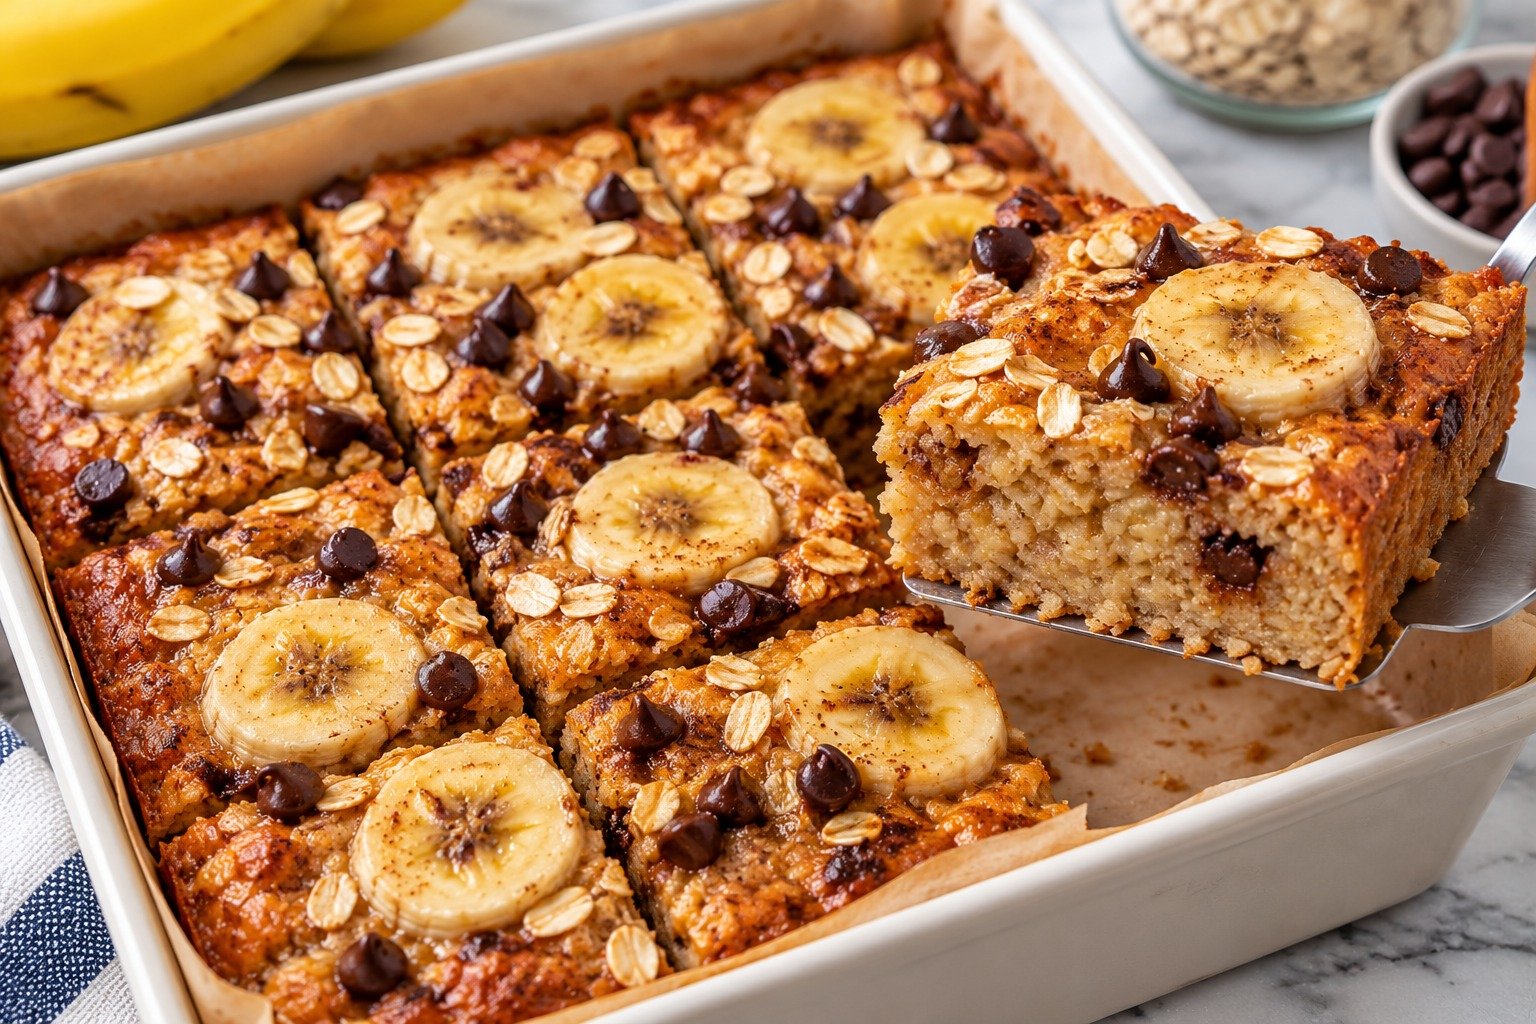
Banana Oat Pan Snack

Banana Oat Pan Snack with ripe bananas, rolled oats, cinnamon, berries, nuts, and a soft golden pan-cooked texture

Banana Oat Pan Snack

Banana Oat Pan Snack is a soft, naturally sweet, and easy stovetop treat made with ripe bananas, rolled oats, eggs, cinnamon, and simple pantry ingredients. It cooks in one pan and works well for breakfast, an afternoon snack, or a quick homemade treat without turning on the oven.

This Banana Oat Pan Snack has a tender center, lightly golden edges, and plenty of cozy banana flavor. Keep it simple or add chocolate chips, nuts, berries, or yogurt on top.

Prep Time: 10 minutes
Cook Time: 12–15 minutes
Total Time: 25 minutes
Servings: 4

Ingredients

For the Pan Snack

  • 2 large ripe bananas
  • 1 1/2 cups rolled oats
  • 2 large eggs
  • 1/2 cup milk of choice
  • 1 teaspoon vanilla extract
  • 1 teaspoon ground cinnamon
  • 1/2 teaspoon baking powder
  • 1 tablespoon honey or maple syrup, optional
  • 1 tablespoon melted butter or neutral oil
  • Pinch of salt

Optional Add-Ins

  • 1/4 cup dark chocolate chips
  • 1/4 cup chopped walnuts or pecans
  • 1/3 cup blueberries
  • 2 tablespoons raisins
  • 1 tablespoon chia seeds
  • 1 tablespoon shredded coconut

For Serving

  • Banana slices
  • Greek yogurt
  • Nut butter
  • Honey or maple syrup
  • Fresh berries
  • Ground cinnamon

Why You’ll Love This Recipe

Banana Oat Pan Snack is quick, filling, and made with ingredients many people already keep at home. Banana provides natural sweetness, while oats give the snack a satisfying texture that feels more substantial than a simple pancake.

Another reason to love Banana Oat Pan Snack is its flexibility. Make it sweeter for dessert, lightly sweet for breakfast, or add nuts and seeds for extra texture. Everything cooks in one skillet, so cleanup is easy.

How to Make Banana Oat Pan Snack

Step 1: Mash the Bananas

Peel the bananas and place them in a large mixing bowl.

Mash thoroughly with a fork until mostly smooth. A few small banana pieces are fine and add extra texture.

Very ripe bananas work best for Banana Oat Pan Snack because they are softer, sweeter, and easier to combine with the other ingredients.

Step 2: Add the Wet Ingredients

Add the eggs, milk, vanilla, honey or maple syrup if using, and melted butter or oil.

Whisk until well combined. The mixture should look smooth and slightly loose.

Step 3: Add the Dry Ingredients

Stir in the rolled oats, cinnamon, baking powder, and salt.

Mix until all the oats are coated.

Let the mixture rest for 5 minutes. This gives the oats time to absorb some liquid and helps Banana Oat Pan Snack cook into a soft, cohesive layer instead of a loose oatmeal mixture.

Step 4: Add Optional Extras

Fold in chocolate chips, nuts, blueberries, raisins, chia seeds, or coconut if desired.

Use one or two add-ins rather than too many so the mixture cooks evenly.

Step 5: Heat the Pan

Place a nonstick or well-seasoned skillet over low to medium-low heat.

Lightly grease the pan with butter or oil.

A 9- or 10-inch skillet works well because it gives Banana Oat Pan Snack enough thickness to stay tender inside while the bottom becomes golden.

Step 6: Add the Batter

Pour the mixture into the skillet and spread it into an even layer with a spatula.

Cover with a lid and cook over low heat for 7 to 9 minutes, or until the edges look set and the bottom is golden.

Keep the heat low because banana and oats can brown quickly.

Step 7: Flip Carefully

Once the bottom is firm, slide the snack onto a large plate.

Place the skillet upside down over the plate, then carefully flip everything so the uncooked side lands back in the pan.

If you prefer not to flip it, continue cooking covered over very low heat until the center sets.

Step 8: Finish Cooking

Cook the second side for 4 to 6 minutes.

Banana Oat Pan Snack is ready when both sides are lightly golden and the center feels set when gently pressed.

Avoid cooking it too long because the oats can become dry.

Step 9: Rest Before Slicing

Transfer the cooked snack to a board or plate.

Let it rest for 5 minutes before slicing.

This allows Banana Oat Pan Snack to firm slightly, making it easier to cut into wedges or squares.

Step 10: Add Toppings and Serve

Top with banana slices, berries, Greek yogurt, peanut butter, or a small drizzle of honey.

Serve warm or at room temperature.

Serving Suggestions

Banana Oat Pan Snack can be served differently depending on whether you want breakfast, a snack, or dessert.

For breakfast, enjoy it with Greek yogurt, fresh berries, and a spoonful of peanut or almond butter.
As an afternoon snack, Banana Oat Pan Snack pairs well with milk, coffee, or tea.
For a sweeter treat, mix in dark chocolate chips and finish with banana slices and a light drizzle of maple syrup.

Once cooled completely, you can also cut it into small squares for lunchboxes or grab-and-go snacks.

For another cozy and flavorful slow-cooker meal, try our Crockpot Apple Cider Pulled Pork with tender meat and warm fall-inspired flavor.

Recipe Tips

Use very ripe bananas with plenty of brown spots for the best sweetness and moisture.

Keep the heat low so the bottom does not burn before the center sets.

Use a lid during the first part of cooking to trap gentle heat.

Let the oat mixture rest before cooking so the oats soften slightly.

If the batter looks too thick, add one or two tablespoons of milk.

For the best Banana Oat Pan Snack texture, avoid overcooking.

If adding berries, use a moderate amount because too much fruit can release excess moisture.

A wide spatula or plate makes flipping much easier.

Easy Variations

Banana Oat Pan Snack can be customized in many simple ways.

For a chocolate version, add 1 tablespoon cocoa powder and a few dark chocolate chips.

For a nutty version, add chopped walnuts, pecans, or almonds with a spoonful of peanut butter.

Make a berry version using blueberries, raspberries, or diced strawberries.

For extra fiber, add chia seeds or ground flaxseed.

For warmer flavor, add a pinch of nutmeg, ginger, or cardamom.

You can also make Banana Oat Pan Snack with dairy-free milk and oil instead of butter.

If you enjoy hearty protein-packed meals, you may also like our Loaded Purple Sweet Potato with Steak & Eggs.

Make-Ahead Instructions

This recipe can be prepared ahead for busy mornings.

Mix the dry ingredients the night before and keep them covered at room temperature. Mash the banana and combine the full batter shortly before cooking for the best texture.

You can also cook the entire snack ahead, cool it completely, and refrigerate it in an airtight container.

Storage and Reheating

Store leftover Banana Oat Pan Snack in an airtight container in the refrigerator for up to 3 days.

Reheat slices in a dry skillet over low heat for a few minutes per side, or microwave them in short intervals until warm.

For longer storage, freeze individual slices between pieces of parchment for up to 2 months. Thaw overnight in the refrigerator or reheat gently from frozen.

Nutrition Information

Approximate nutrition per serving without optional toppings:

Calories: 285
Protein: 9 g
Carbohydrates: 44 g
Fat: 9 g
Saturated Fat: 3 g
Fiber: 5 g
Sugar: 14 g
Sodium: 180 mg

Nutrition values are estimates and may vary depending on the milk, sweetener, toppings, and add-ins used.

Frequently Asked Questions

Can I use quick oats instead of rolled oats?

Yes. Quick oats create a softer, more uniform texture, while rolled oats give a slightly chewier bite.

Can I make this without eggs?

Yes. Flax eggs can work, although the finished snack may be softer and more delicate when flipping.

Can I bake it instead?

Yes. Pour the mixture into a greased baking dish and bake at 350°F or 175°C until set and lightly golden.

Can I make it dairy-free?

Yes. Use unsweetened plant-based milk and replace butter with oil.

How do I stop it from sticking?

Use a good nonstick skillet, grease it lightly, and allow the first side to become fully set before flipping.

Can I make it without added sugar?

Yes. Very ripe bananas may provide enough sweetness without honey or maple syrup.

Is it good for meal prep?

Yes. Banana Oat Pan Snack stores well in the refrigerator and can be reheated in individual portions.

Final Thoughts

Banana Oat Pan Snack is a simple way to turn ripe bananas and oats into a warm homemade breakfast or snack without using the oven. The texture is soft, lightly sweet, and easy to customize with chocolate, nuts, berries, seeds, or spices.

Because it uses basic ingredients and cooks in one skillet, it is especially useful for busy mornings and quick snack preparation.

Keep this Banana Oat Pan Snack recipe handy whenever you want an easy, comforting, and customizable oat-based treat.

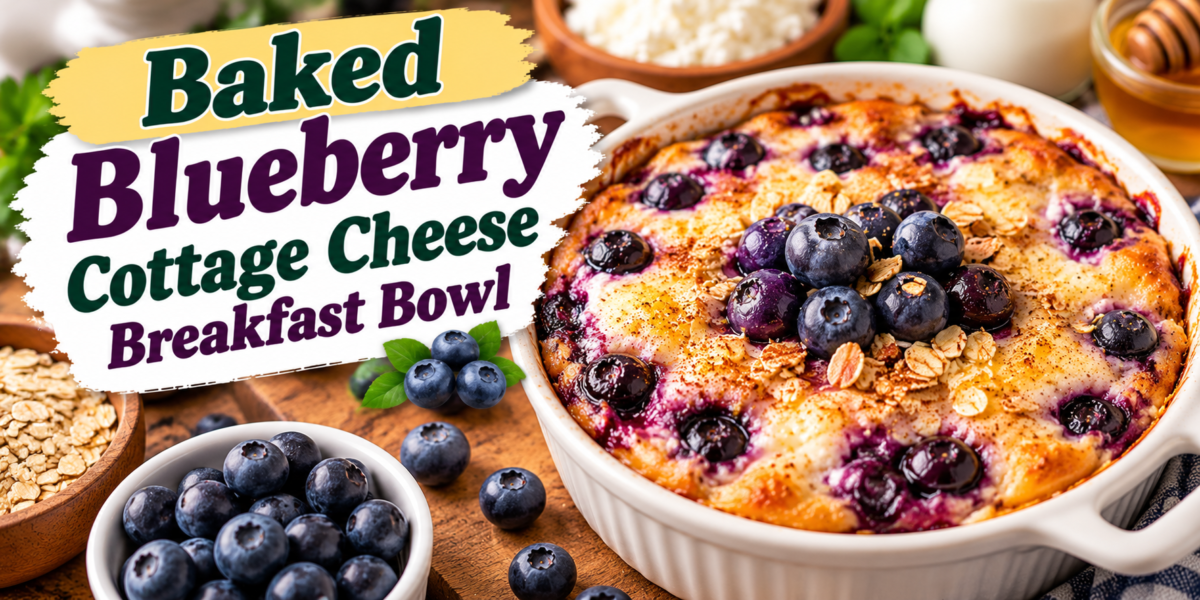
Baked Blueberry Cottage Cheese Breakfast Bowl

Blueberry Cottage Cheese Bowl with cottage cheese, blueberries, oats, eggs, vanilla, cinnamon, and fresh toppings

Baked Blueberry Cottage Cheese Breakfast Bowl

Blueberry Cottage Cheese Bowl is a warm, protein-rich breakfast made with creamy cottage cheese, juicy blueberries, eggs, oats, vanilla, and a touch of honey or maple syrup. It bakes into a soft, lightly custardy breakfast with golden edges and sweet bursts of fruit in every spoonful.

This Blueberry Cottage Cheese Bowl is especially useful on busy mornings because the ingredients are simple, the preparation takes only a few minutes, and the oven does most of the work. It feels comforting like baked oatmeal while offering extra protein from cottage cheese and eggs.

Prep Time: 10 minutes
Cook Time: 25–30 minutes
Total Time: 35–40 minutes
Servings: 

Ingredients

For the Breakfast Bowl

  • 1 cup cottage cheese
  • 2 large eggs
  • 1/2 cup rolled oats
  • 1 cup fresh or frozen blueberries
  • 2 tablespoons honey or maple syrup
  • 1 teaspoon vanilla extract
  • 1/2 teaspoon ground cinnamon
  • 1/2 teaspoon baking powder
  • Pinch of salt
  • 1 teaspoon lemon zest, optional

For Topping

  • 2 tablespoons chopped walnuts or almonds
  • 2 tablespoons Greek yogurt, optional
  • Extra blueberries
  • Small drizzle of honey or maple syrup
  • Ground cinnamon

Why You’ll Love This Recipe

Blueberry Cottage Cheese Bowl is creamy, fruity, filling, and easy to prepare with everyday ingredients. It combines the comfort of a baked breakfast with the convenience of a simple one-bowl recipe.

Another reason to love Blueberry Cottage Cheese Bowl is its balance of protein, fiber, and naturally sweet fruit. Cottage cheese and eggs provide protein, oats add satisfying texture, and blueberries bring freshness and color.

You can also change the fruit, sweetener, spices, or toppings without changing the basic method, which makes it an easy recipe to keep in your regular breakfast rotation.

How to Make Blueberry Cottage Cheese Bowl

Step 1: Preheat the Oven

Preheat the oven to 375°F or 190°C.

Lightly grease a small oven-safe baking dish or two individual ramekins. A little cooking spray or butter will help prevent sticking and make cleanup easier.

Step 2: Blend the Base

Add the cottage cheese, eggs, honey or maple syrup, vanilla, cinnamon, baking powder, and salt to a blender.

Blend until mostly smooth.

Blending gives Blueberry Cottage Cheese Bowl a softer, more custardy texture. If you prefer more cottage cheese texture, blend only briefly or whisk everything by hand.

Step 3: Add the Oats

Pour the blended mixture into a bowl and stir in the rolled oats.

Let the mixture sit for about 2 minutes so the oats begin absorbing some of the liquid.

This helps Blueberry Cottage Cheese Bowl bake with a tender center instead of becoming watery.

Step 4: Fold in the Blueberries

Reserve a small handful of blueberries for the top.

Gently fold the remaining berries into the mixture.

If using frozen blueberries, add them directly from frozen rather than thawing them first. Thawed berries can release extra juice and turn the entire mixture purple.

Step 5: Fill the Baking Dish

Pour the mixture into the prepared baking dish or divide it between two ramekins.

Smooth the top gently with a spoon.

Scatter the reserved blueberries over the surface and add chopped nuts if desired.

Step 6: Bake

Bake for 25 to 30 minutes, or until the center is set and the edges are lightly golden.

Blueberry Cottage Cheese Bowl should look puffed around the edges while remaining soft and tender in the middle.

If using two small ramekins, begin checking around 22 minutes because smaller portions may bake faster.

Step 7: Rest Before Serving

Remove the dish from the oven and let it rest for 5 minutes.

The texture will firm slightly as it cools, making Blueberry Cottage Cheese Bowl easier to spoon and giving the flavors time to settle.

Step 8: Add Toppings

Top with Greek yogurt, extra blueberries, chopped nuts, cinnamon, or a small drizzle of honey or maple syrup.

Serve warm.

Serving Suggestions

Blueberry Cottage Cheese Bowl can be enjoyed by itself because it already contains protein, fruit, and oats, but a few simple additions can turn it into a larger breakfast.

Serve it with sliced banana, strawberries, raspberries, or orange segments for more fresh fruit.

For extra crunch, add toasted walnuts, pecans, almonds, pumpkin seeds, or a spoonful of granola.

A spoonful of Greek yogurt works especially well with Blueberry Cottage Cheese Bowl because it adds cool creaminess next to the warm baked center.

For brunch, serve it alongside scrambled eggs, turkey sausage, whole-grain toast, or a fresh fruit platter.

For a sweet breakfast or brunch option, try our Strawberry Cream Cheese Loaf with a soft, creamy center and fresh strawberry flavor.

Recipe Tips

Use small-curd or smooth cottage cheese if you want the creamiest texture.

Full-fat cottage cheese creates a richer bowl, while low-fat cottage cheese also works well.

Do not overbake the mixture. The center should be set but still soft.

If your cottage cheese is very watery, drain off some excess liquid before blending.

Fresh and frozen blueberries both work.

For frozen berries, add them without thawing.

Rolled oats provide the best texture, but quick oats can be used for a softer result.

Adjust the sweetness to your taste. Some cottage cheese brands are saltier than others, so tasting the mixture before adding extra sweetener can help.

Lemon zest is optional, but it gives Blueberry Cottage Cheese Bowl a bright flavor that complements blueberries particularly well.

Easy Variations

For a strawberry version, replace the blueberries with chopped strawberries.

You can also prepare Blueberry Cottage Cheese Bowl with raspberries, blackberries, diced peaches, or chopped apples.

For a banana-blueberry variation, mash half a ripe banana into the base and slightly reduce the honey or maple syrup.

Add chia seeds or ground flaxseed for extra fiber.

For a chocolate variation, add 1 tablespoon of unsweetened cocoa powder and a few dark chocolate chips.

If you enjoy warm spices, add nutmeg or cardamom along with the cinnamon.

For extra crunch, mix chopped walnuts or almonds into the batter before baking.

You can also add a small spoonful of peanut butter or almond butter on top after baking.

Make-Ahead Instructions

Blueberry Cottage Cheese Bowl can be assembled ahead, making it helpful for busy mornings.

Blend the cottage cheese mixture and refrigerate it overnight in a covered container. Keep the blueberries separate and fold them in just before baking.

You can also bake the entire dish one day ahead, let it cool, cover it, and refrigerate it.

Reheat gently in the morning for a quick breakfast.

Storage and Reheating

Store leftover Blueberry Cottage Cheese Bowl in an airtight container in the refrigerator for up to 3 days.

Reheat individual portions in the microwave for 30 to 60 seconds, depending on the size of the serving.

You can also warm it in a 325°F or 165°C oven for about 8 to 10 minutes.

If the bowl seems dry after refrigeration, add a spoonful of yogurt, a splash of milk, or fresh berries before serving.

Freezing is possible, although the texture may become slightly softer after thawing. For best results, refrigerate and enjoy within a few days.

Nutrition Information

Approximate nutrition per serving:

Calories: 330
Protein: 24 g
Carbohydrates: 37 g
Fat: 11 g
Saturated Fat: 4 g
Fiber: 5 g
Sugar: 19 g
Sodium: 430 mg

Nutrition values are estimates and may vary depending on the cottage cheese, sweetener, toppings, and serving size.

Frequently Asked Questions

Can I use frozen blueberries?

Yes. Add them directly from the freezer. There is no need to thaw them first.

Can I make this without oats?

Yes. The texture will be softer and more custard-like. You can also substitute almond flour or a small amount of ground flaxseed.

Can I make it without a blender?

Yes. Whisk the ingredients together thoroughly. The finished texture will have more visible cottage cheese curds but will still taste delicious.

Can I use another sweetener?

Yes. Maple syrup, honey, date syrup, or your preferred granulated sweetener can work.

How do I know when it is fully baked?

The edges should look lightly golden and the center should no longer appear liquid. A slight softness in the middle is fine because it continues setting while resting.

Can I add protein powder?

Yes. Add a small scoop and include a splash of milk if the mixture becomes too thick.

Is this good for meal prep?

Yes. Blueberry Cottage Cheese Bowl reheats well and can be divided into individual portions for quick breakfasts.

Final Thoughts

Blueberry Cottage Cheese Bowl is an easy way to turn a few everyday breakfast ingredients into something warm, filling, and comforting. Cottage cheese, eggs, oats, blueberries, vanilla, and cinnamon create a soft baked breakfast with plenty of flavor and satisfying texture.

Because Blueberry Cottage Cheese Bowl is simple to customize, it works well for weekday breakfasts, weekend brunch, or meal prep.

Keep this Blueberry Cottage Cheese Bowl recipe handy whenever you want a protein-rich breakfast that feels cozy, tastes naturally sweet, and requires very little hands-on preparation.

If you enjoy hearty make-ahead meals, you may also like our Crockpot Red Beans and Chicken Sausage.

Spinach Quiche Muffin

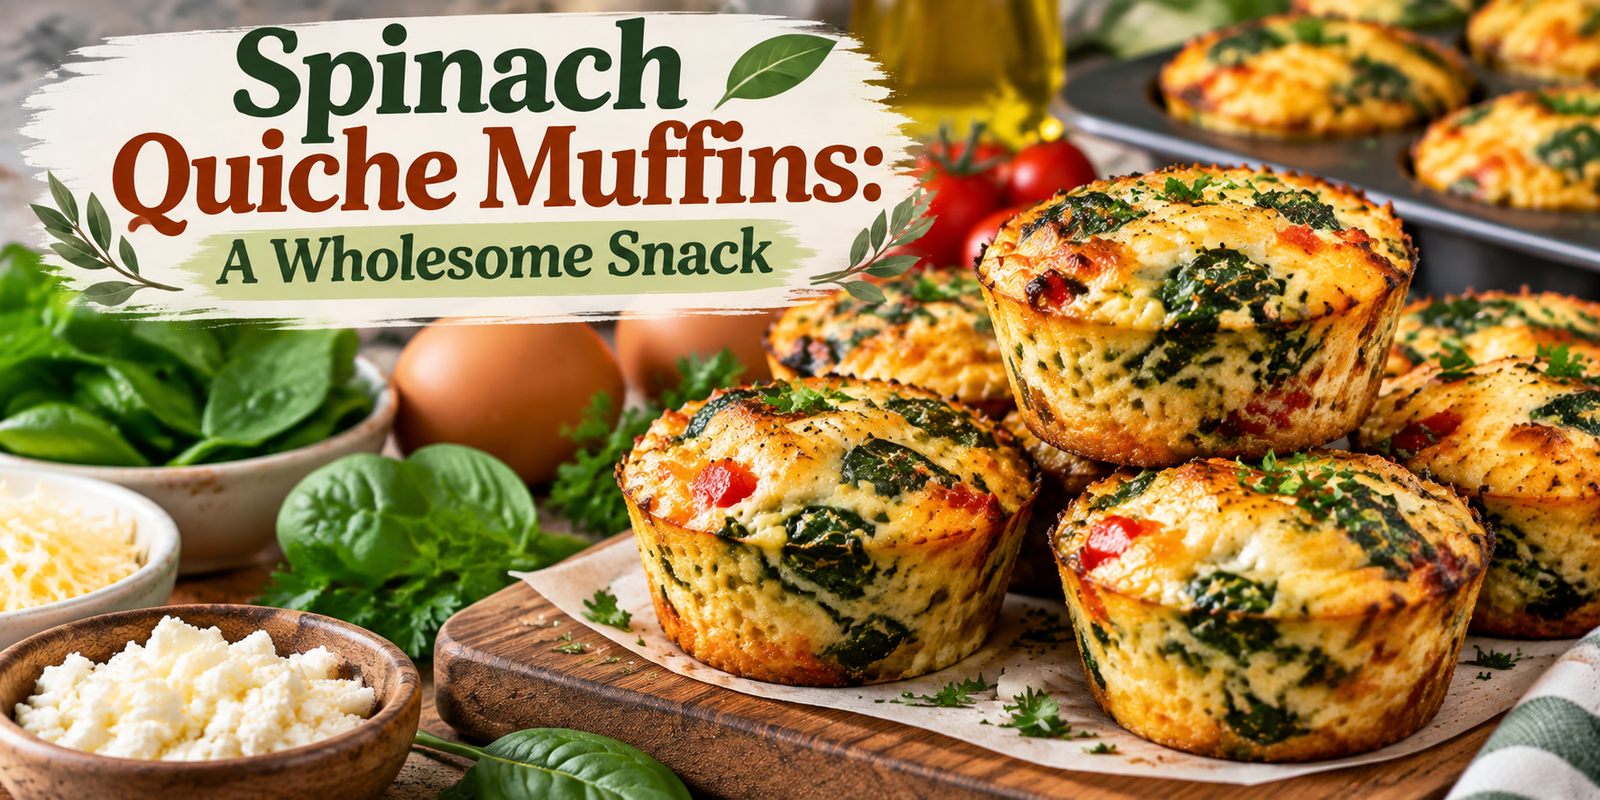
Spinach Quiche Muffins with spinach eggs cheese and fresh herbs

Spinach Quiche Muffins: A Wholesome Snack for Busy Days

Spinach Quiche Muffins are a delicious, healthy, and convenient snack option for busy mornings, quick lunches, or meal prep days. These bite-sized savory muffins combine fresh spinach, eggs, cheese, and flavorful herbs to create a protein-rich recipe that is easy to prepare and perfect for the whole family.

Unlike traditional quiche, which requires a crust and longer preparation time, these mini quiche muffins are simple, portable, and freezer-friendly. They are a great choice for anyone looking for a nutritious breakfast, a low-carb snack, or an easy meal that can be prepared ahead of time.

Packed with vegetables and satisfying flavors, these muffins prove that healthy food can also be comforting and delicious.

Why You’ll Love These Spinach Quiche Muffins

There are many reasons to add this recipe to your weekly meal plan:

Easy Meal Prep Recipe

These muffins can be prepared in advance and stored for busy mornings. Simply warm them up when needed and enjoy a homemade breakfast without spending extra time cooking.

High in Protein

Eggs provide high-quality protein, making these muffins filling and satisfying. They can help you stay energized throughout the day.

Perfect Portable Snack

Their small size makes them ideal for:

  • School lunches
  • Office snacks
  • Travel meals
  • Post-workout snacks

Customizable Ingredients

You can easily change the ingredients based on your preferences. Add more vegetables, different cheeses, or herbs to create your own version.

Ingredients for Spinach Quiche Muffins

Main Ingredients

  • 8 large eggs
  • 2 cups fresh spinach, chopped
  • ½ cup shredded mozzarella cheese
  • ¼ cup grated Parmesan cheese
  • ½ cup milk or Greek yogurt
  • 1 small onion, finely chopped
  • 2 cloves garlic, minced
  • ½ cup bell peppers, diced
  • ½ teaspoon salt
  • ½ teaspoon black pepper
  • ½ teaspoon dried oregano
  • ¼ teaspoon paprika
  • 1 tablespoon olive oil

Step-by-Step Instructions

1. Prepare the Ingredients

Preheat your oven to 375°F (190°C).

Lightly grease a muffin tin with olive oil or cooking spray to prevent sticking.

Wash and chop the spinach into smaller pieces. Prepare all vegetables before mixing the ingredients.

2. Cook the Vegetables

Heat olive oil in a pan over medium heat.

Add chopped onion and cook for 2–3 minutes until softened, garlic and cook for another 30 seconds, spinach and bell peppers. Cook until the spinach becomes slightly wilted.

Remove from heat and allow the mixture to cool slightly.

3. Prepare the Egg Mixture

In a large bowl, whisk together:

  • Eggs
  • Milk or Greek yogurt
  • Salt
  • Pepper
  • Oregano
  • Paprika

Mix until smooth and well combined.

Add mozzarella and Parmesan cheese, then stir gently.

4. Fill the Muffin Cups

Add the cooked spinach mixture evenly into each muffin cup.

Pour the egg mixture over the vegetables until each cup is about ¾ full.

Do not overfill because the muffins will expand while baking.

5. Bake the Quiche Muffins

Place the muffin tray in the oven and bake for:

20–25 minutes

The muffins are ready when:

  • The tops are golden
  • The center is firm
  • A toothpick inserted comes out clean

Allow them to cool for a few minutes before removing.

Tips for Perfect Spinach Quiche Muffins

Remove Extra Water From Spinach

Spinach contains a lot of moisture. If using frozen spinach, squeeze out excess water before adding it.

This helps prevent watery muffins.

Use Fresh Herbs

Fresh herbs can improve the flavor. Try adding:

  • Basil
  • Parsley
  • Chives
  • Dill

Do Not Overbake

Overbaking can make the muffins dry and rubbery. Remove them once they are just set.

Grease the Muffin Pan Well

Egg-based recipes can stick easily, so properly grease the muffin cups.

Healthy Variations

Mediterranean Spinach Quiche Muffins

Add:

  • Cherry tomatoes
  • Feta cheese
  • Olives
  • Fresh basil

for a Mediterranean-inspired flavor.

High Protein Version

Increase protein by adding:

  • Cottage cheese
  • Extra egg whites
  • Chicken pieces

Low Carb Version

Replace milk with heavy cream or Greek yogurt and add more vegetables.

For another protein-rich breakfast option, try our Mediterranean Honey Lime Chicken & Avocado Egg Muffins, packed with delicious flavors and healthy ingredients.

Storage and Meal Prep

These Spinach Quiche Muffins are excellent for meal preparation.

Refrigerator Storage

Store in an airtight container for up to 4 days.

Freezer Storage

Freeze individually wrapped muffins for up to 3 months.

Reheating

Warm in the microwave for 30–60 seconds or heat in the oven until warm.

Serving Ideas

Enjoy these muffins with:

  • Fresh fruit
  • Green salad
  • Greek yogurt
  • Avocado slices
  • Whole grain toast

They work perfectly as breakfast, brunch, or a light snack.

If you enjoy healthy homemade snacks, you can also try our Mediterranean Almond Raisin Muffins for a naturally sweet and nutritious treat.

Nutritional Information (Approximate)

Serving Size: 2 muffins

Calories: 180 kcal
Protein: 12g
Carbohydrates: 5g
Fat: 12g
Fiber: 2g

Nutrition values may vary depending on ingredients used.

Frequently Asked Questions

Can I use frozen spinach?

Yes, frozen spinach works well. Make sure to remove extra water before adding it.

Can I make these without cheese?

Yes. You can replace cheese with extra vegetables or nutritional yeast.

Are spinach quiche muffins good for meal prep?

Yes. They store well in the refrigerator and freezer, making them perfect for busy schedules.

Can children eat these muffins?

Yes, they are a great way to add vegetables and protein to children’s meals.

Final Thoughts

Spinach Quiche Muffins are a simple yet nutritious recipe that combines convenience, flavor, and healthy ingredients. Whether you need a quick breakfast, an easy snack, or a meal-prep option, these mini quiches are a practical choice.

With spinach, eggs, cheese, and herbs, you get a balanced recipe that is satisfying, versatile, and easy to customize. Prepare a batch today and enjoy a wholesome homemade snack throughout the week.

Apple Pie Overnight Oats with Chia

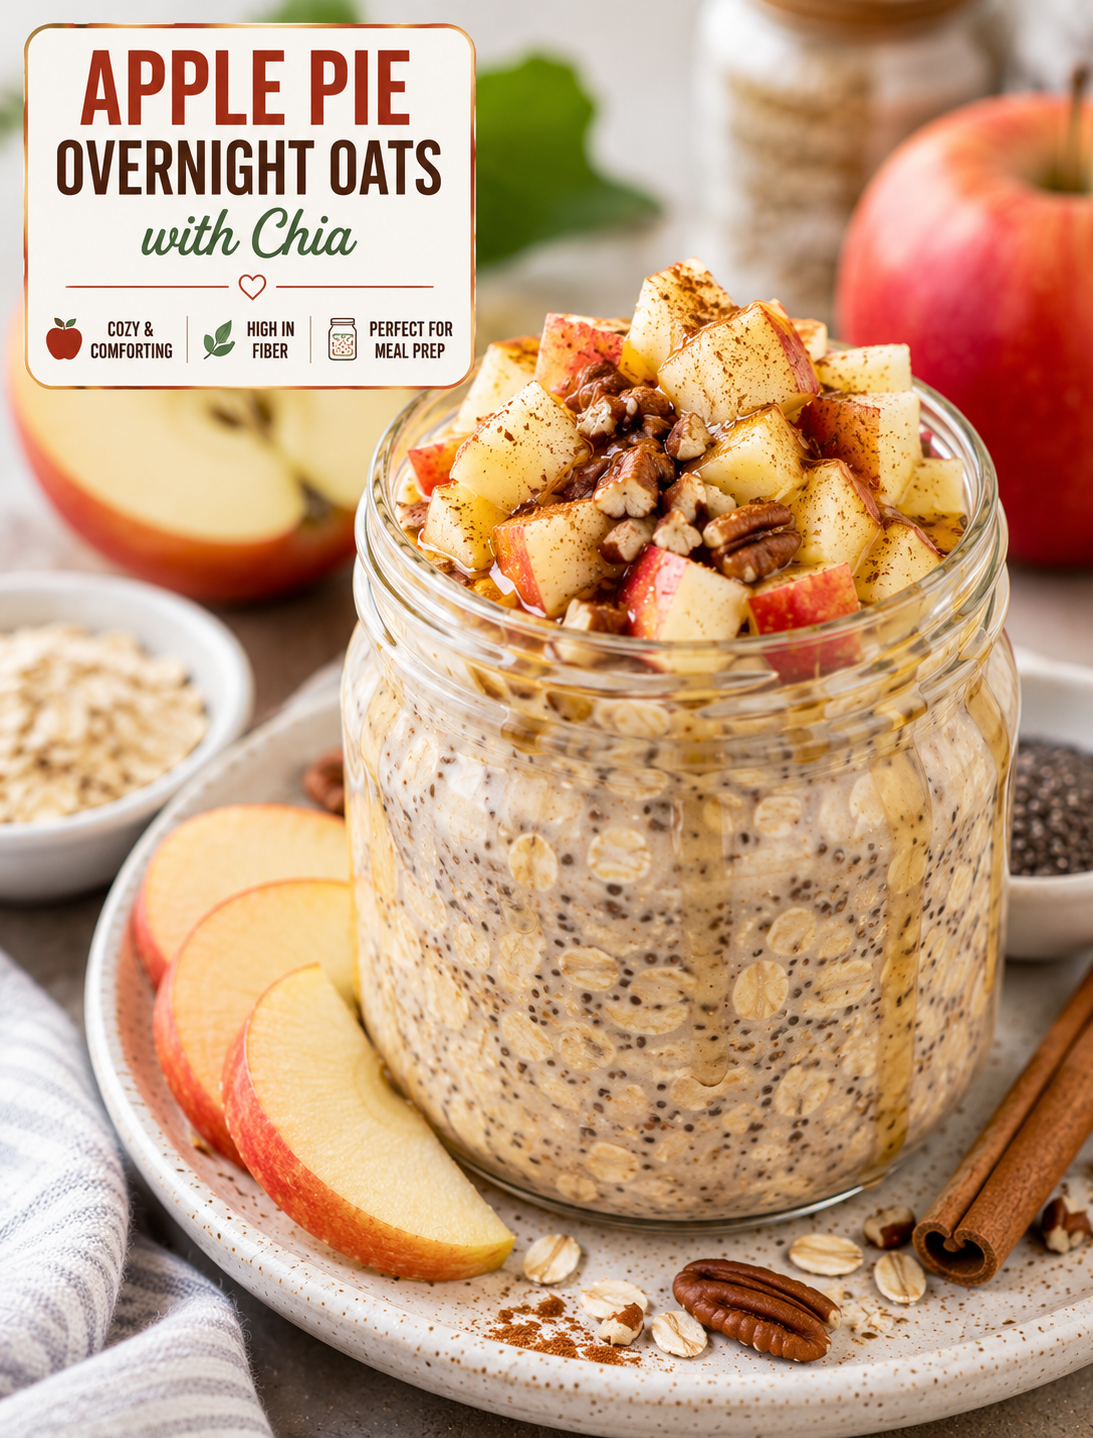
Apple pie overnight oats with chia topped with diced apples, cinnamon, chopped pecans, and maple syrup in a glass jar

Apple Pie Overnight Oats with Chia

If you love the warm flavor of homemade apple pie but need a quick breakfast, these Apple Pie Overnight Oats with Chia are a simple choice. Creamy oats, sweet apples, chia seeds, cinnamon, and vanilla come together in a make-ahead breakfast that tastes like a cozy fall dessert.

The recipe needs no cooking. Simply mix the ingredients in a jar or container, refrigerate overnight, and enjoy it cold the next morning. You can also warm the oats before serving if you prefer a hot breakfast.

Fresh apples add natural sweetness and a crisp texture, while cinnamon and nutmeg create the familiar flavor of apple pie. Chia seeds help thicken the mixture and give the oats a soft, creamy texture.

This breakfast is useful for busy weekdays because you can prepare several servings at once. Add your favorite toppings before serving for extra crunch and flavor.

Why You’ll Love These Apple Pie Overnight Oats

This recipe brings the comforting taste of apple pie into an easy breakfast bowl.

The oats soften as they absorb the milk, creating a creamy texture without cooking. Chia seeds also absorb liquid and help the mixture become thicker overnight.

Apples provide a fresh fruit flavor that pairs naturally with cinnamon, vanilla, and maple syrup. A small amount of nutmeg adds warmth without overpowering the apple.

The recipe is easy to customize. Use dairy milk, oat milk, almond milk, or another milk you enjoy. You can also adjust the sweetness, change the apple variety, or add nuts and raisins.

Another advantage is meal prep. You can make multiple jars at once and keep them refrigerated for convenient breakfasts during the week.

Ingredients You’ll Need

  • 1 cup old-fashioned rolled oats
  • 1 tablespoon chia seeds
  • 1 medium apple, finely diced
  • 1 cup milk of your choice
  • ½ cup plain Greek yogurt
  • 1 tablespoon maple syrup
  • 1 teaspoon pure vanilla extract
  • 1 teaspoon ground cinnamon
  • ¼ teaspoon ground nutmeg
  • ¼ teaspoon ground ginger, optional
  • Pinch of salt

Optional Toppings

  • Chopped pecans
  • Chopped walnuts
  • Apple slices
  • Cinnamon
  • Maple syrup
  • Greek yogurt
  • Raisins
  • Unsweetened shredded coconut
  • Granola
  • Pumpkin seeds

Old-fashioned rolled oats work best because they soften overnight while maintaining a pleasant texture. Quick oats can become too soft, while steel-cut oats require a different preparation method.

Choose a firm, fresh apple that holds its shape after being diced. Honeycrisp, Gala, Fuji, Pink Lady, and Granny Smith are all good options.

How to Make Apple Pie Overnight Oats with Chia

1. Prepare the Apple

Wash the apple thoroughly and remove the core.

Dice the apple into small pieces so it mixes evenly throughout the oats.

You can leave the peel on for extra texture, or peel the apple if you prefer a softer consistency.

If you like a stronger apple-pie flavor, lightly sauté the diced apple with a pinch of cinnamon for 2–3 minutes before adding it to the oats.

Allow cooked apples to cool before mixing them with the other ingredients.

2. Combine the Dry Ingredients

Add rolled oats, chia seeds, cinnamon, nutmeg, ginger, and salt to a medium bowl or large jar.

Stir until the spices are evenly distributed.

Mixing the dry ingredients first helps prevent the chia seeds and spices from collecting in one area.

3. Add the Wet Ingredients

Pour in the milk and add Greek yogurt, maple syrup, and vanilla extract.

Stir thoroughly until the oats and chia seeds are evenly coated with the liquid.

Make sure there are no dry pockets at the bottom of the container.

If the mixture looks very thick before refrigeration, add another tablespoon or two of milk.

4. Add the Apples

Fold the diced apple into the oat mixture.

Reserve a few apple pieces for topping if desired.

Stir gently so the apples remain evenly distributed.

If using sautéed apples, make sure they have cooled before adding them.

5. Refrigerate Overnight

Cover the jar or container tightly.

Refrigerate for at least 6 hours, although leaving the oats overnight gives the best texture.

During this time, the oats and chia seeds absorb the milk and create a thick, creamy mixture.

Give the oats a quick stir in the morning before serving.

6. Add Your Favorite Toppings

Top the chilled oats with fresh apple slices, chopped pecans, cinnamon, and a small drizzle of maple syrup.

For extra creaminess, add a spoonful of Greek yogurt.

If you enjoy crunch, sprinkle granola or chopped walnuts over the top immediately before eating.

How to Get the Best Texture

The ratio of oats, chia seeds, and liquid affects the final consistency.

If you prefer thick overnight oats, use the recipe measurements as written and allow the mixture to chill overnight.

For softer oats, add a little extra milk before refrigerating.

For a thicker mixture, add another teaspoon of chia seeds, but avoid adding too many because the texture can become overly gel-like.

Stir the oats well before refrigeration and again before serving.

Using old-fashioned rolled oats also helps create a creamy texture without becoming completely mushy.

Best Apples for Overnight Oats

Different apples create different flavor profiles.

Honeycrisp adds sweetness and a crisp texture.

Granny Smith provides a tart contrast to maple syrup and cinnamon.

Gala apples are mild and naturally sweet.

Fuji apples are crisp and juicy.

Pink Lady apples offer a balanced sweet-tart flavor.

You can also combine two apple varieties for more depth.

For a softer apple-pie texture, briefly cook the diced apples with cinnamon before adding them to the oats.

Cold or Warm Overnight Oats?

Overnight oats are traditionally served chilled, but they can also be warmed.

For a cold breakfast, stir the refrigerated oats and add your toppings directly.

For a warm version, transfer the prepared oats to a microwave-safe bowl and heat them gently until warm, stirring as needed.

You may need to add a splash of milk after heating because the oats can become thicker when warm.

If you enjoy the taste of baked apple pie, warming the oats can make the cinnamon and apple flavors feel even more comforting.

How to Make Them Dairy-Free

These oats are easy to make without dairy.

Replace regular milk with unsweetened almond milk, oat milk, soy milk, or another plant-based option.

Use a dairy-free yogurt instead of Greek yogurt.

Choose maple syrup as the sweetener if you want a fully plant-based version.

Oat milk creates a particularly creamy texture, while almond milk gives the recipe a lighter consistency.

Always check product labels if you need to avoid specific allergens or ingredients.

Easy Flavor Variations

There are several simple ways to change this breakfast.

Apple Cinnamon Pecan Oats

Add chopped toasted pecans and extra cinnamon for a classic combination.

Caramel Apple Oats

Add a small drizzle of caramel sauce before serving for a dessert-inspired finish.

Apple Raisin Oats

Mix in a tablespoon of raisins for extra sweetness and chewy texture.

Apple Peanut Butter Oats

Add one tablespoon of creamy peanut butter for a nutty flavor.

Apple Walnut Oats

Use chopped walnuts and a little maple syrup for a richer topping.

Apple Pie Protein Oats

Add extra Greek yogurt or your preferred protein-rich ingredient while keeping the mixture balanced.

Cranberry Apple Oats

Add a tablespoon of dried cranberries for a sweet-tart flavor.

Keep additional ingredients moderate so the oats remain creamy rather than overloaded.

How to Make Overnight Oats for Meal Prep

This recipe works well for weekly breakfast preparation.

Prepare three or four servings at the same time using separate jars or containers.

Mix the ingredients evenly in each container and refrigerate them covered.

Keep toppings such as nuts, granola, and fresh apple slices separate until serving.

This prevents crunchy ingredients from becoming soft overnight.

For the freshest texture, prepare only as many servings as you expect to eat within several days.

Labeling the containers with the preparation date can make meal prep easier to manage.

How Long Do Overnight Oats Last?

Keep prepared oats refrigerated in sealed containers.

For the best texture and flavor, enjoy them within a few days.

Fresh apples can soften as they sit in the mixture, so toppings can be added shortly before eating.

If the oats develop an unusual smell, appearance, or flavor, discard them.

Do not leave prepared oats at room temperature for an extended period.

Tips for the Best Apple Pie Flavor

Use fresh cinnamon for a stronger spice aroma.

Add a small amount of nutmeg for warmth.

Use vanilla extract to round out the flavors.

Choose naturally sweet apples if you want to reduce added sweetener.

Sauté the apples briefly if you prefer a cooked apple-pie taste.

Toast pecans or walnuts before using them as a topping for extra flavor.

Add maple syrup gradually and taste before adding more.

Allow the oats to chill for at least six hours so the chia seeds and oats fully absorb the liquid.

Common Mistakes to Avoid

Do not use too much chia seed because it can make the oats overly thick.

Avoid adding too little liquid because the oats need enough moisture to soften.

Do not cut the apples into very large pieces because they can make the mixture difficult to eat.

Avoid adding granola before refrigeration because it will lose its crunch.

Do not skip stirring because dry ingredients can settle at the bottom.

Avoid using steel-cut oats without changing the preparation method because they remain much firmer than rolled oats.

What to Serve With Apple Pie Overnight Oats

These oats can be enjoyed on their own, but simple toppings can make breakfast more satisfying.

Fresh berries add color and a bright fruit flavor.

Greek yogurt adds extra creaminess.

Chopped nuts provide crunch.

A small amount of granola adds texture.

Nut butter creates a rich, savory contrast to the sweet apple mixture.

You can also serve the oats with a hot cup of coffee or tea for a simple breakfast combination.

The Bottom Line

Apple Pie Overnight Oats with Chia combine creamy rolled oats, fresh apples, warm spices, vanilla, and chia seeds into an easy make-ahead breakfast.

The recipe requires no cooking and can be prepared the night before, making it useful for busy mornings.

You can enjoy it cold straight from the refrigerator or warm it gently for a cozy breakfast. Add pecans, walnuts, granola, Greek yogurt, or a little maple syrup to create your favorite version.

For the best results, use old-fashioned rolled oats, firm apples, enough liquid, and plenty of time for the mixture to chill.

Frequently Asked Questions

1. How long should apple overnight oats sit?

Refrigerate the mixture for at least 6 hours, with overnight chilling providing the best texture.

2. Can I use any type of apple?

Yes, but firm varieties such as Honeycrisp, Granny Smith, Gala, Fuji, and Pink Lady work especially well.

3. Can I eat these oats warm?

Yes. Transfer the prepared oats to a microwave-safe bowl and heat gently, adding a splash of milk if needed.

4. Do chia seeds need to be soaked?

Yes. Chia seeds absorb liquid during refrigeration, which helps create the thick texture of overnight oats.

5. Can I make these overnight oats dairy-free?

Yes. Use plant-based milk and dairy-free yogurt for an easy dairy-free version.

6. Can I prepare several servings at once?

Yes. Divide the ingredients among individual jars or containers and refrigerate them for convenient breakfasts.

7. Can I use quick oats?

Yes, but quick oats become softer than rolled oats, so reduce the soaking time or adjust the liquid if needed.

8. Can I add peanut butter to apple pie oats?

Yes. A spoonful of peanut butter adds a creamy, nutty flavor that pairs well with apples and cinnamon.

Final Thoughts

Apple Pie Overnight Oats with Chia are a simple way to enjoy classic apple pie flavors in a convenient breakfast.

The creamy oats, soft apples, cinnamon, vanilla, and chia seeds create a comforting combination that is easy to prepare the night before.

Make the recipe your own with pecans, walnuts, raisins, berries, nut butter, or a drizzle of maple syrup.

For a cozy breakfast, warm the oats before serving and add sautéed cinnamon apples on top.

Prepare it tonight, refrigerate it overnight, and wake up to an apple-pie-inspired breakfast that is ready when you are.

Egg Wrap Breakfast Burritos

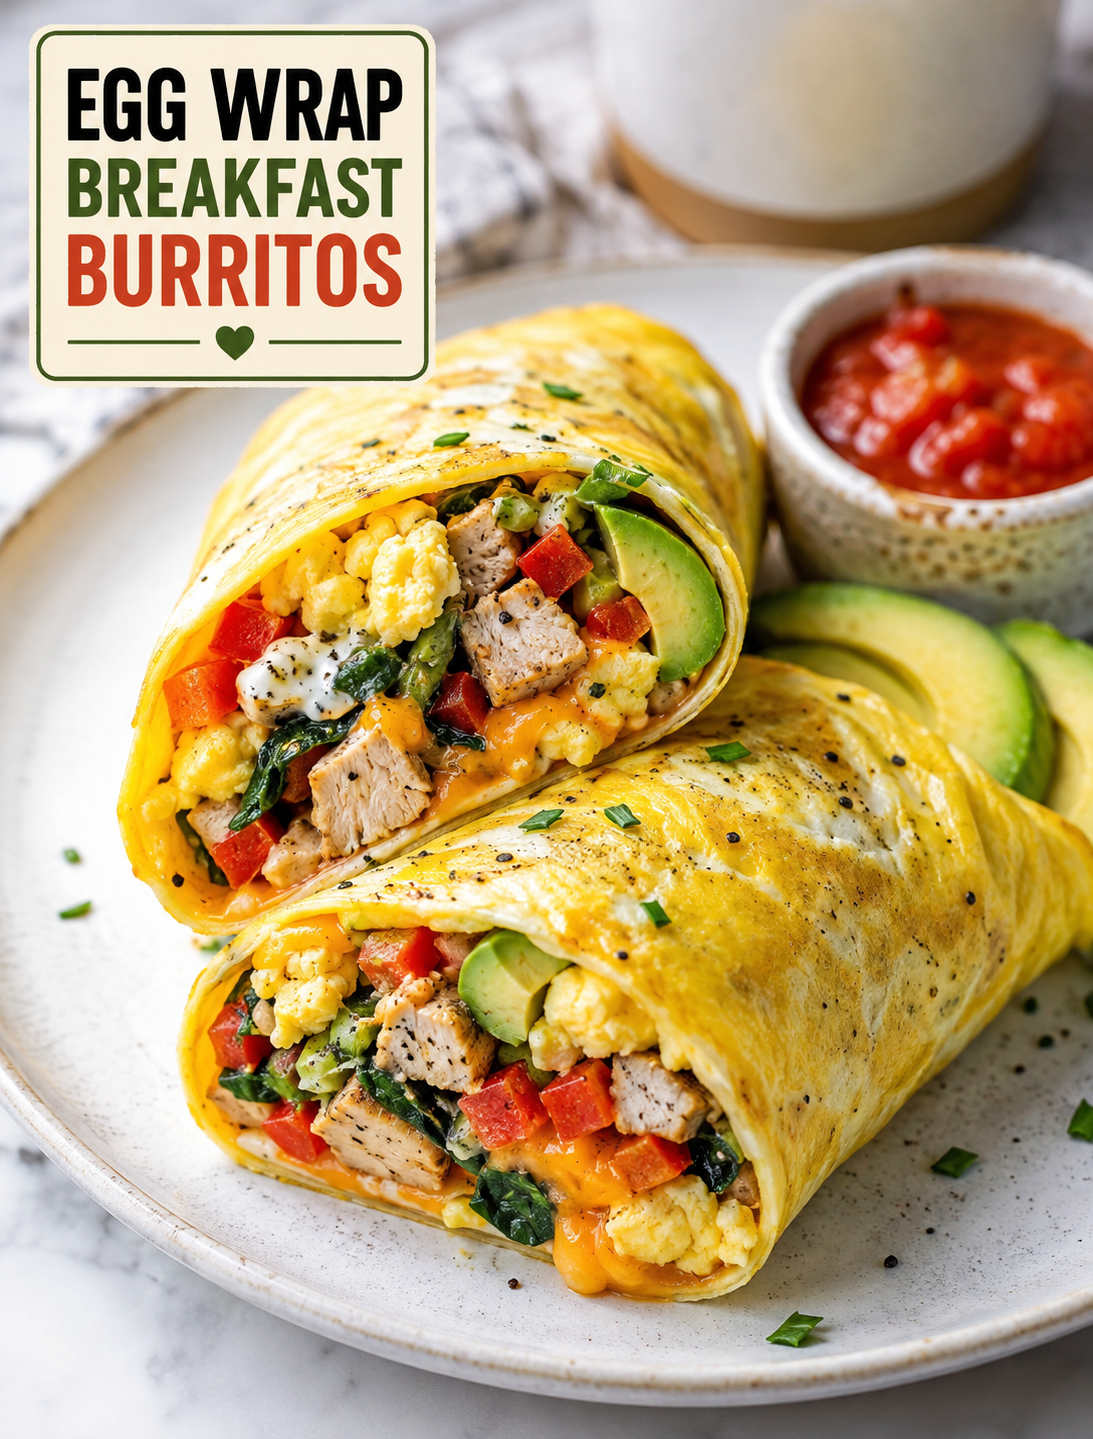
Egg Wrap Breakfast Burritos – High-Protein Low-Carb Breakfast

Egg Wrap Breakfast Burritos

Egg Wrap Breakfast Burritos are a simple way to enjoy a filling breakfast without using a traditional flour tortilla. A thin egg wrap holds seasoned protein, colorful vegetables, cheese, avocado, and a creamy or spicy sauce for a balanced meal.

These breakfast burritos are high in protein and lower in carbohydrates than many tortilla-based versions. They are also flexible enough to fit different tastes and meal plans. Use cooked chicken, turkey, or lean beef for a hearty filling, or choose beans and tofu for a vegetarian option.

The egg wraps cook in minutes and have a soft, crepe-like texture that makes them easy to fold around the filling. You can serve the burritos right away or prepare them ahead for busy mornings. A quick toast in a skillet adds a lightly crisp outside while keeping the center warm and tender.

Ingredients

Egg Wraps

  • 4 large eggs
  • 2 tablespoons milk
  • Pinch of salt
  • Pinch of black pepper
  • Light cooking spray or oil for the pan

Eggs form the base of the wrap and provide protein while keeping the recipe naturally gluten-free when all other ingredients are gluten-free. Milk helps create a smooth egg mixture that spreads easily in the pan.

Filling Options

  • 1 cup cooked chicken, turkey, or lean beef
  • ½ cup sautéed bell peppers
  • ½ cup fresh spinach
  • ¼ avocado, sliced
  • ¼ cup shredded cheese
  • Optional: cooked beans or diced potatoes

Use leftover cooked chicken or turkey to save preparation time. Bell peppers add sweetness and crunch, while spinach adds color and nutrients without making the filling heavy.

Cheddar, Monterey Jack, or Mexican-style shredded cheese works well in these burritos. If you want more fiber and a heartier texture, add black beans or pinto beans.

Sauce

  • ¼ cup plain Greek yogurt or salsa
  • 1 teaspoon hot sauce
  • 1 teaspoon fresh lemon or lime juice

Greek yogurt creates a creamy sauce with extra protein, while salsa gives the burrito a fresh tomato and pepper flavor. Hot sauce can be adjusted to match your preferred spice level.

Instructions

1. Make Egg Wraps

Whisk the eggs, milk, salt, and black pepper in a bowl until the mixture is smooth. Heat a non-stick skillet over medium-low heat and lightly grease the surface.

Pour enough egg mixture into the pan to create a thin layer. Quickly tilt and swirl the skillet so the egg spreads evenly, similar to making a thin crepe.

Cook for about 1–2 minutes, or until the egg is mostly set. Carefully flip the wrap and cook for another 30 seconds. Transfer it to a plate and repeat with the remaining egg mixture.

Keep the heat moderate to prevent the egg from becoming dry or rubbery. A non-stick skillet makes flipping the delicate wraps much easier.

2. Prepare Filling

If your protein is not already cooked, cook it completely before assembling the burritos. Chop chicken, turkey, or beef into small pieces so it distributes evenly inside each wrap.

Sauté the bell peppers until they are tender but still slightly crisp. Add the spinach near the end and cook just until it wilts.

Warm the beans or potatoes if you are using them. Keeping the filling warm helps the cheese melt when the burritos are assembled.

3. Assemble Burritos

Place one egg wrap on a clean surface or plate. Add a portion of the cooked protein to the center, leaving enough space around the edges for folding.

Add the sautéed vegetables, shredded cheese, avocado, and your preferred sauce. Avoid overfilling the wrap because too much filling can make it difficult to roll without tearing.

For a balanced bite, spread the ingredients in a narrow line across the center rather than creating a large mound.

4. Wrap

Fold the bottom edge of the egg wrap over the filling. Fold both sides toward the center, then roll the burrito forward tightly.

Use gentle pressure while rolling because the egg wrap is more delicate than a flour tortilla. If a wrap develops a small tear, place the seam underneath when serving or toasting.

5. Serve

Serve the burritos warm immediately after assembly. For a crispier finish, place them seam-side down in a lightly greased skillet and toast for 1–2 minutes per side.

Serve with extra salsa, Greek yogurt, hot sauce, or fresh lime on the side. These burritos also pair well with fresh fruit or a simple side salad for a more complete breakfast.

Frequently Asked Questions

Are these low-carb?

Yes, egg wraps contain far fewer carbohydrates than most flour tortillas, although the final carb count depends on fillings such as beans, potatoes, and sauces.

Can I meal prep them?

Yes, assemble the burritos without avocado or other ingredients that become watery, then refrigerate them in an airtight container for up to 2–3 days.

Can I freeze them?

Yes, freeze fully cooled burritos without avocado or other fresh vegetables, wrap them individually, and reheat thoroughly before serving.

Can I make them vegetarian?

Yes, replace the meat with black beans, pinto beans, tofu, mushrooms, or extra sautéed vegetables for a satisfying vegetarian breakfast.

Can I use dairy-free milk?

Yes, unsweetened dairy-free milk can replace regular milk in the egg mixture without changing the basic cooking method.

How do I keep egg wraps from tearing?

Cook the egg over medium-low heat and let it set before flipping; a good non-stick skillet also helps prevent sticking and tearing.

What protein works best?

Cooked chicken, turkey, lean beef, beans, and tofu all work well because they can be seasoned and chopped into small pieces for even distribution.

How should I reheat the burritos?

Reheat refrigerated burritos in a skillet, microwave, or oven until the center is hot, then briefly toast them in a skillet for a crisp exterior.

Nutritional Information

The estimated nutrition for one serving is about 220 calories, 18–22 grams of protein, 6–10 grams of carbohydrates, 12 grams of fat, and 2 grams of fiber.

Actual nutrition can vary based on the type and amount of meat, cheese, avocado, beans, potatoes, and sauce used. For the most accurate nutrition information, calculate the recipe using the exact brands and quantities in your kitchen.

These egg-based breakfast burritos are especially useful when you want a protein-rich meal without relying on a standard tortilla. The combination of eggs, lean protein, vegetables, and optional avocado creates a filling breakfast that can be adjusted to suit different dietary preferences.

For a lighter version, use lean turkey or chicken, reduce the cheese, and choose salsa instead of a creamy sauce. For a higher-fiber version, add black beans, spinach, and extra vegetables. If you need more calories for a busy morning, cooked potatoes and additional avocado make the burrito more substantial.

With a short ingredient list and several easy filling options, Egg Wrap Breakfast Burritos can become a practical breakfast for weekdays, meal prep, or a quick post-workout meal. The recipe is also easy to customize with different vegetables, seasonings, cheeses, and sauces while keeping the egg wrap as the main base.