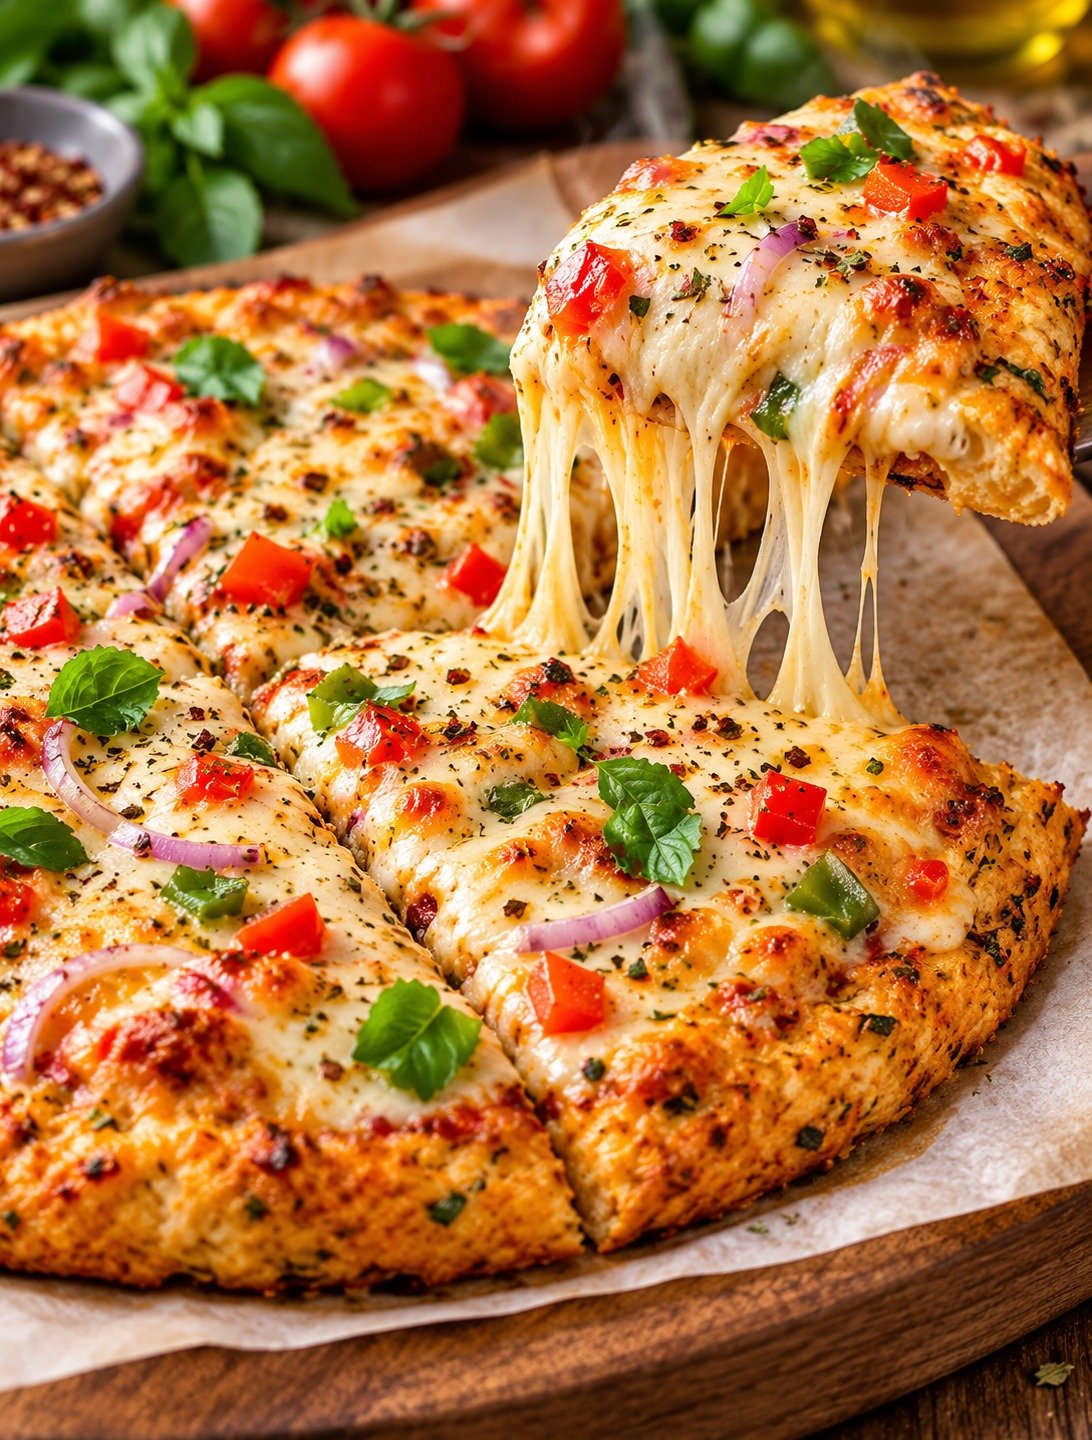
Chicken Pizza Crust

Chicken Pizza Crust topped with tomato sauce, mozzarella, vegetables, herbs, and a golden high-protein chicken base

Chicken Pizza Crust

Chicken Pizza Crust is a high-protein, low-carb pizza base made with finely shredded chicken, eggs, Parmesan, mozzarella, and simple seasonings. It bakes into a sturdy, savory crust that can hold tomato sauce, melted cheese, vegetables, and your favorite pizza toppings without traditional flour or yeast.

This Chicken Pizza Crust is perfect when you want pizza flavor with extra protein and fewer refined carbohydrates. The mixture comes together quickly, requires no kneading or rising, and can be prepared ahead for an easy lunch, family dinner, or meal-prep option.

Prep Time: 15 minutes
Bake Time: 25–30 minutes
Total Time: 45 minutes
Servings: 4

Ingredients

For the Crust

  • 2 cups finely shredded cooked chicken or well-drained canned chicken
  • 1 large egg
  • 1/2 cup shredded mozzarella cheese
  • 1/3 cup finely grated Parmesan cheese
  • 1 teaspoon Italian seasoning
  • 1/2 teaspoon garlic powder
  • 1/2 teaspoon onion powder
  • 1/4 teaspoon black pepper
  • Pinch of salt, if needed

For the Pizza Topping

  • 1/3 cup pizza sauce or marinara sauce
  • 1 cup shredded mozzarella cheese
  • 1/4 cup thinly sliced bell peppers
  • 1/4 cup sliced mushrooms
  • 2 tablespoons sliced black olives
  • 2 tablespoons thinly sliced red onion
  • Fresh basil or parsley for garnish
  • Red pepper flakes, optional

Why You’ll Love This Recipe

Chicken Pizza Crust gives you the comfort and flavor of pizza with a protein-rich base instead of traditional dough. The combination of chicken, egg, mozzarella, and Parmesan creates a crust that becomes golden around the edges while remaining sturdy enough to pick up.

Another reason to love Chicken Pizza Crust is how quickly it comes together. There is no yeast, flour, kneading, proofing, or complicated shaping. Once the ingredients are mixed, you simply press the mixture into a thin layer and bake.

It is also easy to customize. Keep it classic with mozzarella and tomato sauce, or add vegetables, pepperoni, cooked sausage, olives, herbs, or any toppings your family enjoys.

How to Make Chicken Pizza Crust

Step 1: Preheat the Oven

Preheat your oven to 425°F or 220°C.

Line a large baking sheet or pizza pan with parchment paper. Lightly spray the parchment with cooking spray if desired.

A hot oven helps the edges become golden while allowing the center to firm properly.

Step 2: Prepare the Chicken

If using freshly cooked chicken, shred it very finely. You can also pulse it several times in a food processor until it has a fine texture.

When using canned chicken, drain it extremely well. Press the chicken between paper towels to remove as much liquid as possible.

Removing excess moisture is important because wet chicken can prevent Chicken Pizza Crust from becoming firm enough to hold toppings.

Step 3: Make the Crust Mixture

Place the prepared chicken in a large mixing bowl.

Add the egg, mozzarella, Parmesan, Italian seasoning, garlic powder, onion powder, black pepper, and a small pinch of salt.

Mix thoroughly until all the ingredients are evenly distributed.

The mixture should hold together when pressed. It will not feel like traditional pizza dough, but it should be moist enough to shape without falling apart.

Step 4: Shape the Crust

Transfer the chicken mixture onto the prepared baking sheet.

Place another piece of parchment paper over the mixture and gently press it into a round or rectangle approximately 1/4 inch thick.

Remove the top parchment carefully.

Keeping Chicken Pizza Crust evenly thick helps prevent thin areas from burning before thicker sections have finished baking.

Step 5: Bake the Crust

Place the pan in the preheated oven.

Bake for approximately 18 to 20 minutes, or until the surface looks dry and the edges are beginning to turn golden brown.

The center should feel firm when gently touched.

For an especially crisp crust, carefully flip it using another piece of parchment and bake the second side for an additional 4 to 5 minutes.

Step 6: Add the Sauce

Remove the baked crust from the oven and let it rest for about 3 minutes.

Spread a thin layer of pizza sauce or marinara over the surface, leaving a small border around the outside.

Avoid using too much sauce because excessive moisture can soften Chicken Pizza Crust and make slices harder to pick up.

Step 7: Add the Cheese and Toppings

Sprinkle shredded mozzarella evenly over the sauce.

Add bell peppers, mushrooms, olives, red onion, or any other toppings you enjoy.

Keep the topping layer relatively light. Heavy or watery toppings can make the finished pizza softer.

If using vegetables that release a lot of liquid, such as mushrooms or zucchini, cooking them briefly before adding them can produce better results.

Step 8: Bake Again

Return the pizza to the oven.

Bake for another 7 to 10 minutes, or until the mozzarella has completely melted and begins to bubble.

For a more golden cheese topping, turn on the broiler during the final 1 to 2 minutes. Watch carefully because cheese can brown quickly.

Step 9: Let It Rest

Remove the finished pizza from the oven.

Allow it to rest on the baking sheet for 5 minutes before slicing.

This resting time helps Chicken Pizza Crust become firmer and makes it easier to cut into neat slices without losing the toppings.

Step 10: Garnish and Serve

Sprinkle fresh basil, parsley, red pepper flakes, or extra Parmesan over the top.

Slice with a sharp knife or pizza cutter and serve warm.

Serving Suggestions

Chicken Pizza Crust can easily become a complete meal when topped with vegetables, cheese, and your favorite pizza ingredients.

Serve it with a crisp green salad, cucumber and tomato salad, roasted broccoli, grilled zucchini, or steamed vegetables for a fresh contrast.

For a heartier dinner, pair Chicken Pizza Crust with a bowl of vegetable soup, tomato soup, or a simple bean salad.

You can also cut it into smaller squares and serve it as an appetizer for parties, family gatherings, or game nights. Provide warm marinara on the side for dipping.

For a hearty Mediterranean-style main dish, try our Mediterranean Baked Feta & Veggie Pasta with creamy feta, roasted vegetables, herbs, and tender pasta.

Recipe Tips

Drain canned chicken thoroughly before using it.

Finely shredded chicken creates a smoother and more stable crust than large pieces.

Use freshly grated Parmesan when possible because it blends easily with the other ingredients.

Parchment paper makes shaping easier and prevents sticking.

Press the mixture into an even layer so every section cooks at approximately the same rate.

Always pre-bake the crust before adding pizza sauce.

For crispier Chicken Pizza Crust, flip it after the first baking stage and cook the second side for several minutes.

Avoid very heavy layers of toppings.

Let the finished pizza rest before slicing so it holds together better.

Easy Variations

Chicken Pizza Crust works with many different pizza flavor combinations, so you can easily change it according to what you have available.

For a Margherita-style pizza, top the baked crust with tomato sauce, mozzarella, sliced tomatoes, and fresh basil.

For a barbecue version, replace the tomato sauce with a thin layer of barbecue sauce. Add mozzarella, sliced red onion, and a little chopped cilantro after baking.

A Mediterranean version is delicious with spinach, olives, roasted peppers, feta cheese, tomatoes, and oregano.

For extra heat, add sliced jalapeños, red pepper flakes, pepper jack cheese, or a drizzle of spicy sauce.

You can also make a garlic-Parmesan version by skipping tomato sauce and brushing the crust lightly with garlic-infused olive oil before adding mozzarella and Parmesan.

If you want a classic dessert to finish the meal, you may also like our Pumpkin Pie with creamy spiced filling and a flaky golden crust.

Make-Ahead Instructions

Chicken Pizza Crust is an excellent recipe for preparing ahead when you know you will have a busy evening.

Bake the plain crust through the first baking stage and allow it to cool completely.

Wrap it tightly in plastic wrap or store it in a covered container in the refrigerator for up to 3 days.

When ready to eat, place the crust on a baking sheet, add sauce, cheese, and toppings, and bake until everything is hot and melted.

You can also prepare the raw chicken mixture several hours ahead and refrigerate it until you are ready to shape and bake the crust.

Storage and Reheating

Store leftover Chicken Pizza Crust pizza in an airtight container in the refrigerator for up to 3 days.

For the best texture, reheat slices in a 375°F or 190°C oven for approximately 8 to 10 minutes.

You can also reheat slices in an air fryer for several minutes until hot and lightly crisp.

The microwave works when you are short on time, although the crust will become softer.

For longer storage, wrap individual portions and freeze them for up to 1 month. Thaw overnight in the refrigerator before reheating.

Nutrition Information

Approximate nutrition per serving before additional pizza toppings:

Calories: 285
Protein: 38 g
Carbohydrates: 4 g
Fat: 13 g
Saturated Fat: 6 g
Fiber: 0 g
Sugar: 1 g
Sodium: 620 mg

Nutrition values are estimates. Actual values will depend on the chicken, cheese, pizza sauce, portion size, and toppings you choose.

Frequently Asked Questions

Can I use canned chicken?

Yes. Canned chicken is convenient and works very well. Drain it thoroughly and press away as much moisture as possible before mixing.

Can I use ground chicken?

Yes. Cook the ground chicken completely first, drain any excess moisture, let it cool, and then combine it with the remaining crust ingredients.

Why did my crust turn out soft?

Excess moisture is usually responsible. Make sure the chicken is dry, pre-bake the crust until firm, and avoid adding too much pizza sauce or watery vegetables.

Can I leave out the Parmesan?

Yes. You can replace it with additional mozzarella or another finely shredded cheese, although Parmesan helps provide flavor and structure.

Can I freeze it?

Yes. Chicken Pizza Crust can be baked, completely cooled, wrapped tightly, and frozen for up to one month.

Does it taste like regular pizza dough?

Not exactly. The base has a savory chicken and cheese flavor rather than the yeasty flavor of traditional bread dough. However, it provides a sturdy surface for classic pizza toppings.

Can I make mini pizzas?

Yes. Divide the mixture into several small rounds. Because smaller crusts cook more quickly, begin checking them several minutes earlier.

Final Thoughts

Chicken Pizza Crust is an easy way to enjoy pizza with a protein-rich base made from chicken, eggs, mozzarella, and Parmesan instead of traditional flour dough.

Because Chicken Pizza Crust requires no yeast, kneading, or rising time, it is especially convenient for busy weeknight dinners, meal prep, or quick lunches.

Keep this Chicken Pizza Crust recipe handy whenever you want a savory homemade pizza alternative that can be customized with different sauces, vegetables, cheeses, and proteins.

With crisp golden edges, plenty of cheesy flavor, and a sturdy center, this easy pizza base gives you a satisfying way to enjoy your favorite toppings while adding extra protein to the meal.
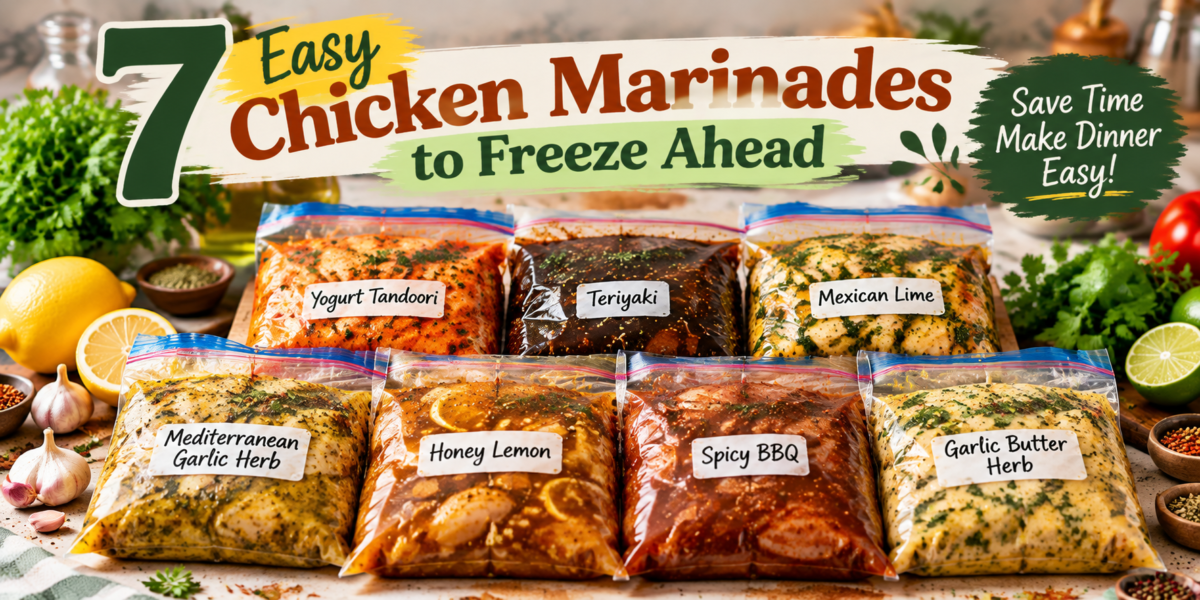
7 Easy Chicken Marinades Quick Dinners

7 Easy Chicken Marinades to Freeze Ahead for quick healthy dinners

7 Easy Chicken Marinades to Freeze Ahead for Quick Dinners

Focus Keyword: Chicken Marinades

Introduction

Chicken Marinades are one of the easiest ways to save time, reduce cooking stress, and prepare delicious homemade meals in advance. By preparing a few freezer-friendly marinades ahead of time, you can transform simple chicken into flavorful dinners whenever you need them.

Freezing chicken with marinade allows the flavors to slowly develop while saving valuable time during busy weekdays. Instead of spending 30 minutes preparing ingredients after a long day, you can simply thaw the marinated chicken and cook it fresh.

These 7 easy chicken marinades are perfect for meal prep, family dinners, and anyone who wants convenient freezer meals without sacrificing flavor.

Why Make Chicken Marinades Ahead?

Preparing chicken marinades in advance offers many benefits:

Saves Time

Meal preparation becomes easier because the seasoning and flavor work is already done.

Reduces Food Waste

You can buy chicken in bulk, divide it into portions, and freeze it with different flavors.

Creates Better Flavor

Marinating chicken before freezing allows herbs, spices, and sauces to absorb deeply into the meat.

Makes Weeknight Cooking Easier

Simply thaw, cook, and serve with your favorite sides.

How to Freeze Chicken Marinades Correctly

Follow these simple steps for the best results:

1. Use Fresh Chicken

Start with fresh chicken breasts, thighs, or tenders.

2. Add Marinade and Chicken Together

Place chicken and marinade in a freezer-safe bag or container.

3. Remove Extra Air

If using freezer bags, remove as much air as possible before sealing.

4. Label the Bags

Write:

  • Marinade name
  • Date prepared
  • Cooking instructions

5. Freeze Properly

Store frozen chicken marinades for up to 3 months for the best quality.

1. Mediterranean Garlic Herb Chicken Marinade

This fresh Mediterranean-inspired marinade creates juicy and flavorful chicken perfect for salads, bowls, wraps, or grilled dinners.

Ingredients:

  • ¼ cup olive oil
  • 3 garlic cloves, minced
  • 2 tablespoons lemon juice
  • 1 teaspoon dried oregano
  • 1 teaspoon basil
  • ½ teaspoon paprika
  • Salt and black pepper
  • 1 tablespoon chopped parsley

Best For:

Chicken breast, thighs, grilled chicken bowls

2. Honey Lemon Chicken Marinade

A perfect balance of sweet and tangy flavors, this marinade creates tender chicken with a beautiful golden finish.

Ingredients:

  • ¼ cup olive oil
  • 2 tablespoons honey
  • 3 tablespoons lemon juice
  • 2 garlic cloves
  • 1 teaspoon Dijon mustard
  • Salt and pepper

Best For:

Roasted chicken, rice bowls, meal prep lunches

3. Garlic Butter Herb Chicken Marinade

This rich and comforting marinade adds classic garlic and herb flavors to chicken.

Ingredients:

  • 3 tablespoons melted butter
  • 2 tablespoons olive oil
  • 3 garlic cloves
  • 1 teaspoon Italian seasoning
  • ½ teaspoon paprika
  • Salt and pepper

Best For:

Oven-baked chicken and family dinners

4. Yogurt Tandoori Chicken Marinade

This creamy yogurt marinade makes chicken tender, flavorful, and full of spices.

Ingredients:

  • ½ cup Greek yogurt
  • 1 tablespoon lemon juice
  • 1 teaspoon paprika
  • 1 teaspoon cumin
  • 1 teaspoon coriander powder
  • ½ teaspoon turmeric
  • Garlic and ginger paste
  • Salt

Best For:

Grilled chicken, wraps, and healthy meal bowls

5. Spicy BBQ Chicken Marinade

Perfect for barbecue lovers, this marinade creates smoky and flavorful chicken.

Ingredients:

  • ½ cup BBQ sauce
  • 1 tablespoon olive oil
  • 1 tablespoon honey
  • 1 teaspoon smoked paprika
  • ½ teaspoon garlic powder
  • Black pepper

Best For:

Grilling, sandwiches, burgers

6. Teriyaki Chicken Marinade

This sweet and savory Asian-inspired marinade is perfect for quick dinners.

Ingredients:

  • ¼ cup soy sauce
  • 2 tablespoons honey
  • 1 tablespoon sesame oil
  • 2 garlic cloves
  • 1 teaspoon ginger
  • 1 tablespoon rice vinegar

Best For:

Rice bowls and stir-fry meals

7. Mexican Lime Chicken Marinade

Fresh lime and spices create a delicious marinade for tacos, wraps, and salads.

Ingredients:

  • ¼ cup lime juice
  • 2 tablespoons olive oil
  • 2 garlic cloves
  • 1 teaspoon cumin
  • 1 teaspoon chili powder
  • Fresh cilantro
  • Salt and pepper

Best For:

Tacos, burrito bowls, and salads

How to Cook Frozen Marinated Chicken

Before cooking:

  1. Move chicken from freezer to refrigerator.
  2. Allow it to thaw overnight.
  3. Cook using your preferred method:
  • Grill
  • Bake
  • Air fryer
  • Pan cook

Always make sure chicken reaches a safe internal temperature before serving.

Tips for Better Chicken Marinades

Avoid Too Much Acid

Too much lemon juice or vinegar can change the texture of chicken.

Use Quality Ingredients

Fresh herbs, olive oil, and spices create better flavor.

Portion Before Freezing

Freeze chicken in meal-sized portions for easier cooking.

Mix Different Flavors

Preparing multiple marinades keeps meals interesting throughout the week.

Meal Ideas Using Marinated Chicken

Use your prepared chicken for:

  • Mediterranean chicken bowls
  • Healthy wraps
  • Salads
  • Rice meals
  • Sandwiches
  • Pasta dishes
  • Grilled plates

Frequently Asked Questions

How long can chicken marinades stay frozen?

Frozen marinated chicken is best used within 3 months.

Can I freeze chicken in a marinade?

Yes, freezing chicken with marinade is a convenient meal prep method.

Should I thaw chicken before cooking?

Yes, thawing in the refrigerator provides the best texture and even cooking.

Can I reuse leftover marinade?

No, do not reuse marinade that has touched raw chicken unless it is properly cooked.

For more healthy meal prep inspiration, explore our Mediterranean Lentil Vegetable Soup (High Fiber Healthy Dinner) that is perfect for make-ahead lunches and dinners.

Final Thoughts

Chicken Marinades are a simple meal prep solution for busy days. With a few basic ingredients and a little preparation, you can create flavorful chicken meals that save time and make cooking easier.

These 7 freezer-friendly marinades help you enjoy homemade dinners without daily preparation. Whether you prefer Mediterranean herbs, sweet honey flavors, spicy BBQ, or creamy yogurt seasoning, there is an option for every taste.

Prepare your freezer bags today and make your future dinners faster, easier, and more delicious.

If you enjoy healthy spinach-based meals, try our Low-Carb Chicken, Spinach & Mushroom Bake for a creamy, protein-rich dinner option.

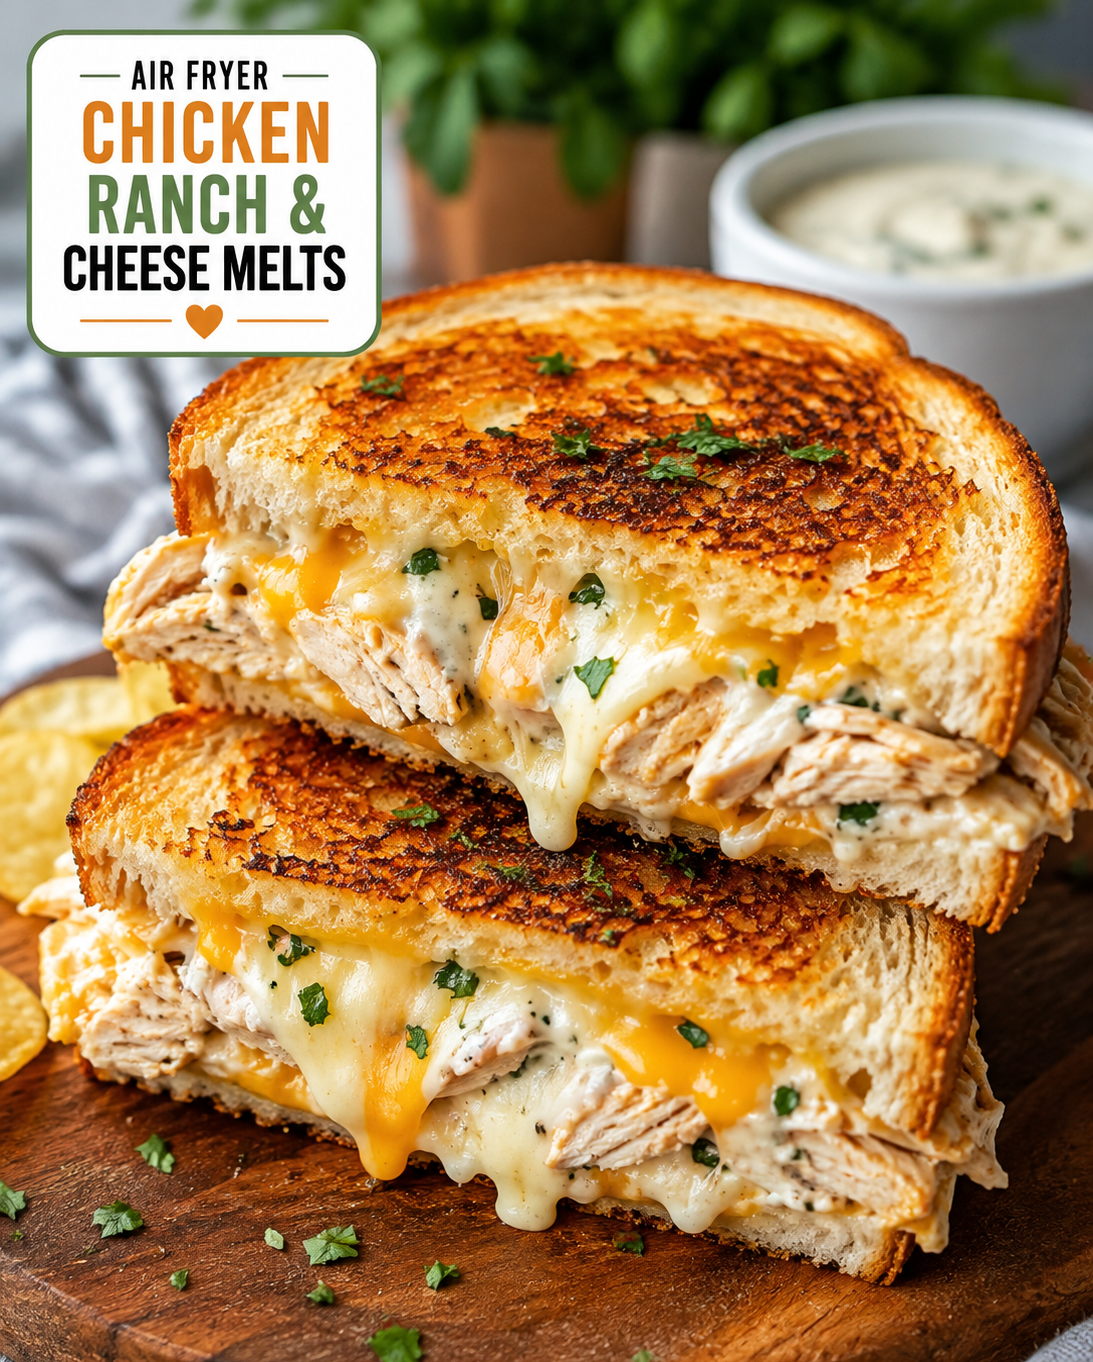
Air Fryer Chicken Ranch & Cheese Melts

Air Fryer Chicken Ranch & Cheese Melts with crispy golden bread, tender chicken, ranch dressing, and melted cheese

Air Fryer Chicken Ranch & Cheese Melts

If you want a quick lunch that feels crispy, cheesy, and satisfying, these Air Fryer Chicken Ranch & Cheese Melts are an easy choice. Tender chicken, creamy ranch, and melted cheese come together inside golden, toasted bread for a meal that tastes far more special than the effort required.

The air fryer gives the bread a crisp outside while keeping the chicken and cheese filling warm and flavorful. This recipe works well for a weekday lunch, a quick dinner, or an easy meal when you have cooked chicken left in the refrigerator.

Unlike a traditional grilled sandwich, you do not need a skillet full of butter or oil. The air fryer handles the crisping while the cheese melts into the chicken and ranch mixture.

The recipe also gives you plenty of room to adjust the flavors. Use cheddar for a sharper taste, Monterey Jack for a smooth melt, or a combination of cheeses for extra flavor.

Why You’ll Love These Chicken Ranch & Cheese Melts

These melts are built around simple ingredients that are easy to find at most U.S. grocery stores. The combination of chicken, ranch, and cheese creates a rich filling without requiring a long list of seasonings.

The air fryer also makes the texture stand out. The bread becomes crisp and lightly golden, while the cheese turns soft and gooey.

Another benefit is the short cooking time. If your chicken is already cooked, you can have the filling ready in minutes and finish the sandwiches in the air fryer.

They are also easy to customize. Add sliced jalapeños for heat, chopped green onions for freshness, or a few thin tomato slices for extra moisture.

Ingredients You’ll Need

  • 2 cups cooked boneless, skinless chicken, shredded or finely chopped
  • 4 slices sandwich bread or sturdy sourdough
  • ½ cup shredded cheddar cheese
  • ¼ cup shredded Monterey Jack cheese
  • 3 tablespoons ranch dressing
  • 1 tablespoon softened butter
  • ½ teaspoon garlic powder
  • ¼ teaspoon black pepper
  • 2 tablespoons chopped green onions, optional
  • 1 tablespoon chopped jalapeños, optional

Choose bread that can hold the filling without becoming soggy. Sourdough, Texas toast, and thick-cut white bread all work well.

For the chicken, leftover roasted chicken, rotisserie chicken, or freshly cooked chicken breast can be used. Make sure the chicken is fully cooked before adding it to the sandwich.

How to Make Air Fryer Chicken Ranch & Cheese Melts

Prepare the Chicken Filling

Place the cooked chicken in a bowl and add the ranch dressing, garlic powder, black pepper, and chopped green onions if using.

Mix until the ranch coats the chicken evenly. Do not add too much dressing because a wet filling can make the bread soft during cooking.

Assemble the Melts

Spread a thin layer of softened butter on one side of each bread slice. Place two slices butter-side down.

Divide the chicken mixture between the slices, then add the cheddar and Monterey Jack cheese.

Top with the remaining bread slices, keeping the buttered sides facing up.

Press the sandwiches gently so the filling stays inside during air frying. Avoid overfilling because melted cheese and chicken can spill from the edges.

Air Fry Until Golden and Cheesy

Preheat your air fryer to 375°F if your model recommends preheating.

Place the sandwiches in the basket in a single layer. Leave a little space around each one so hot air can circulate.

Air fry for about 4–6 minutes, then carefully flip the sandwiches. Continue cooking for another 2–4 minutes, or until the bread is golden and the cheese is fully melted.

Cooking time can vary between air fryer models, so check the sandwiches early during the first batch.

Remove the melts carefully and let them rest for about one minute before slicing. The short rest helps the melted cheese settle inside the sandwich.

Tips for the Best Chicken Ranch Melts

Use cold or room-temperature cooked chicken when preparing the filling. Very hot chicken can make the ranch mixture thin and harder to manage.

Do not overload the bread with ranch dressing. A small amount provides plenty of flavor while keeping the sandwich crisp.

Use freshly shredded cheese when possible. It usually melts more smoothly and gives the sandwich a better texture.

For extra crunch, choose thick bread and avoid pressing the sandwich too flat before cooking.

If your air fryer has a strong fan, secure the top bread slice with a toothpick during the first few minutes. Remove the toothpick before serving.

Check the sandwich frequently near the end of cooking. Bread can go from golden to overly dark quickly in some air fryers.

For food safety, chicken should reach 165°F when reheated. A food thermometer is the most reliable way to check the internal temperature.

Easy Variations to Try

You can change these melts without changing the basic cooking method.

For a spicy version, mix chopped jalapeños or a small amount of hot sauce into the chicken.

For a BBQ-style melt, replace part of the ranch dressing with your favorite BBQ sauce.

For a buffalo version, toss the chicken with buffalo sauce before adding the ranch and cheese.

For a veggie-packed option, add finely chopped bell peppers, spinach, or green onions. Keep added vegetables fairly dry so they do not make the bread soggy.

You can also switch the cheese. Pepper Jack adds heat, mozzarella creates a mild stretchy melt, and sharp cheddar gives the sandwich a stronger flavor.

What to Serve With Chicken Ranch & Cheese Melts

These melts are filling on their own, but a simple side can turn them into a complete lunch.

Serve them with a crisp green salad for a lighter meal. Air-fried potato wedges or sweet potato fries make the meal more hearty.

Fresh cucumber slices, cherry tomatoes, or carrot sticks also pair well with the creamy ranch flavor.

For a casual family lunch, cut each sandwich into halves and serve them with extra ranch for dipping.

How to Store and Reheat Leftovers

Store leftover melts in an airtight container in the refrigerator and use them within 3–4 days.

For the best texture, reheat them in the air fryer rather than the microwave. Air fry at about 350°F until the center is hot and the bread is crisp again.

Avoid reheating the sandwich repeatedly. Reheat only the portion you plan to eat.

If you are preparing the chicken mixture ahead of time, keep it refrigerated in a covered container and assemble the sandwiches when you are ready to cook.

Frequently Asked Questions

Can I use rotisserie chicken for these melts?

Yes. Shredded rotisserie chicken is a convenient option and works especially well when you need a fast lunch.

What cheese melts best with chicken and ranch?

Cheddar, Monterey Jack, mozzarella, and Pepper Jack all melt well and pair nicely with chicken and ranch.

Can I make these melts without butter?

Yes. You can lightly spray the bread with cooking spray, although butter gives the bread a richer flavor and deeper browning.

How long do chicken melts take in the air fryer?

They usually take about 6–10 minutes at 375°F, depending on the bread thickness and your air fryer model.

Can I use leftover chicken breast?

Yes. Leftover cooked chicken breast is ideal as long as it has been stored safely and is still within its recommended refrigerator storage time.

How do I keep the bread from getting soggy?

Use a moderate amount of ranch, avoid watery fillings, and cook the sandwiches in a single layer until the bread is crisp.

Can I make these melts spicy?

Yes. Add sliced jalapeños, Pepper Jack cheese, hot sauce, or buffalo sauce for extra heat.

Can I freeze chicken ranch melts?

It is better to freeze the cooked chicken separately and assemble fresh sandwiches when possible because freezing can affect the texture of the bread and ranch dressing.

Final Thoughts

Air Fryer Chicken Ranch & Cheese Melts are a simple way to turn cooked chicken into a hot, crispy, cheesy lunch. The air fryer creates golden bread without the need for a skillet, while ranch and melted cheese add plenty of flavor.

Keep the filling balanced, choose sturdy bread, and watch the sandwiches closely during the final minutes of cooking. With a few simple swaps, the same recipe can become spicy, smoky, or extra cheesy.

For busy weekdays, leftover chicken, a few slices of bread, and ingredients already in your refrigerator can become a satisfying meal in minutes.