Thai Crunch Salad with Crispy Chickpeas, Cucumber, Carrots & Creamy Peanut Dressing

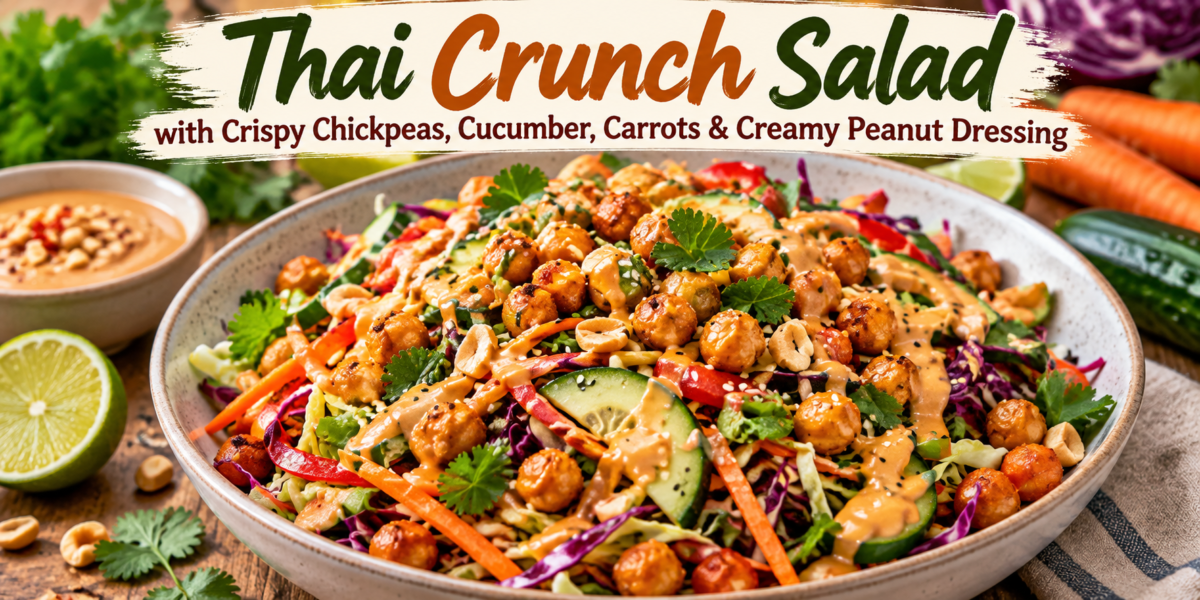
Thai Crunch Salad with crispy chickpeas, cucumber, carrots, cabbage, peanuts, and creamy peanut dressing

Thai Crunch Salad with Crispy Chickpeas, Cucumber, Carrots & Creamy Peanut Dressing

Thai Crunch Salad is a colorful, fresh, and satisfying recipe packed with crisp vegetables, golden crispy chickpeas, herbs, and a creamy peanut dressing. Cabbage gives the salad a hearty crunch, cucumber adds freshness, carrots bring natural sweetness, and roasted chickpeas provide a warm, crispy contrast. The peanut dressing combines peanut butter, lime juice, soy sauce, ginger, garlic, and a touch of maple syrup for a balanced sweet, salty, tangy flavor.

This Thai Crunch Salad works beautifully as a light lunch, side dish, meal-prep option, or vegetarian dinner. The Thai Crunch Salad can also be served at family gatherings. It is easy to customize with extra herbs, edamame, avocado, or cooked grains. The salad is especially enjoyable when the vegetables are sliced thinly because every bite contains several textures.

Preparation and Cooking Time

Prep Time: 25 minutes
Cook Time: 25–30 minutes
Total Time: About 55 minutes
Servings: 6
Category: Salad
Cuisine: Thai-Inspired

Ingredients

Crispy Chickpeas

  • 2 cans chickpeas, drained and rinsed
  • 1 tablespoon olive oil
  • ½ teaspoon smoked paprika
  • ½ teaspoon garlic powder
  • ¼ teaspoon ground cumin
  • ¼ teaspoon chili flakes
  • ½ teaspoon sea salt
  • ¼ teaspoon black pepper

Fresh Salad Vegetables

  • 4 cups finely shredded green cabbage
  • 2 cups finely shredded red cabbage
  • 1 large cucumber, thinly sliced
  • 2 medium carrots, julienned or grated
  • 1 red bell pepper, thinly sliced
  • ½ cup chopped fresh cilantro
  • ¼ cup chopped fresh mint
  • 3 green onions, thinly sliced
  • ½ cup roasted peanuts, roughly chopped
  • ½ cup edamame, cooked and cooled
  • 1 tablespoon sesame seeds
  • 1 small avocado, sliced, optional

 Creamy Peanut Dressing

  • ½ cup smooth natural peanut butter
  • 3 tablespoons fresh lime juice
  • 2 tablespoons soy sauce or tamari
  • 1 tablespoon maple syrup or honey
  • 1 tablespoon rice vinegar
  • 1 teaspoon toasted sesame oil
  • 1 teaspoon freshly grated ginger
  • 1 small garlic clove, finely minced
  • ½ teaspoon chili garlic sauce
  • 3–5 tablespoons warm water
  • Pinch of salt, if needed

Step-by-Step Instructions

1. Prepare the Chickpeas

First, preheat the oven to 425°F (220°C). Line a large baking sheet with parchment paper.

Drain and rinse the chickpeas. Spread them on a clean kitchen towel or several paper towels. Pat them very dry. Removing excess moisture is important because dry chickpeas become much crispier in the oven.

If any loose skins come off while drying, remove them if you like. However, it is not necessary to peel every chickpea.

Place the chickpeas in a bowl. Add olive oil, smoked paprika, garlic powder, cumin, chili flakes, salt, and black pepper. Toss until evenly coated.

Spread the chickpeas in a single layer on the baking sheet. Roast for 20–25 minutes. Shake the pan halfway through cooking so the chickpeas brown evenly.

They are ready when golden and crisp on the outside. Let them cool for several minutes after roasting. They will become slightly crispier as they cool.

2. Prepare the Vegetables

While the chickpeas roast, prepare the vegetables.

Thinly shred the green and red cabbage. Slice the cucumber into thin half-moons. Julienne or grate the carrots. Slice the red bell pepper into thin strips.

Place the cabbage, cucumber, carrots, and bell pepper in a large mixing bowl.

Add chopped cilantro, mint, green onions, edamame, and sesame seeds. If you are using avocado, wait until the salad is almost ready to serve before adding it.

The key to a great Thai Crunch Salad is variety. This Thai Crunch Salad becomes especially appealing when each vegetable is sliced thinly.

3. Make the Peanut Dressing

Add peanut butter, lime juice, soy sauce, maple syrup, rice vinegar, sesame oil, ginger, garlic, and chili garlic sauce to a medium bowl.

Whisk until smooth.

At first, the peanut butter may seem too thick. Add warm water one tablespoon at a time while whisking. Continue until the dressing becomes creamy and pourable.

Taste the dressing. Add more lime juice if you want extra brightness. Add more maple syrup for sweetness, or another small amount of chili garlic sauce for additional heat.

The dressing should taste balanced rather than overly sweet. Lime provides acidity, soy sauce adds savory depth, peanut butter creates richness, and ginger and garlic give the dressing an aromatic finish.

4. Combine the Salad

Once the vegetables are prepared, pour about two-thirds of the peanut dressing over the salad.

Use clean salad tongs to toss everything gently. Make sure the dressing reaches the cabbage and vegetables without crushing them.

A well-balanced Thai Crunch Salad should look colorful and lightly coated, not soaked in dressing. This keeps the Thai Crunch Salad fresh and crisp.

Add more dressing only if needed. Save the remaining dressing for serving.

5. Add the Crispy Chickpeas

Just before serving, scatter the roasted chickpeas over the salad.

Do not mix all of them into the salad too early. The vegetables contain moisture, and that moisture can soften the chickpeas.

For the best texture, keep some crispy chickpeas on top. This gives every serving a crunchy finish.

6. Add the Final Garnishes

Scatter chopped roasted peanuts over the salad. Add fresh cilantro, mint, sesame seeds, and green onions.

If using avocado, gently add the slices at this stage.

Finish with fresh lime wedges and a small drizzle of the remaining peanut dressing.

The finished Thai Crunch Salad should have bright colors, crisp vegetables, creamy dressing, and plenty of crunchy toppings.

Tips for the Best Results

Dry the Chickpeas Well

Moisture is the biggest enemy of crispy chickpeas. Pat them thoroughly before adding the oil and seasonings.

For an even crispier result, allow the drained chickpeas to air-dry for 10–15 minutes before roasting. This extra step makes the Thai Crunch Salad more texturally interesting.

Slice the Vegetables Thinly

Thin vegetables are easier to eat and allow the dressing to coat more evenly. A sharp knife or mandoline can make cabbage and cucumber preparation faster.

Be careful when using a mandoline and always use the safety guard.

Keep the Chickpeas Separate

If you are preparing the salad ahead, store the crispy chickpeas separately. Add them immediately before serving.

This simple step helps preserve their crunchy texture.

Adjust the Dressing

Peanut butter brands vary in thickness. Some require more water than others.

Add warm water slowly. You can always add more, but it is difficult to thicken an overly thin dressing without adding extra peanut butter.

Balance the Flavors

Taste the dressing before combining it with the salad. It should have a clear balance of creamy, salty, sweet, tangy, and spicy notes.

If the dressing tastes heavy, add lime juice. If it tastes too sharp, add a little maple syrup.

Serving Suggestions

Serve Thai Crunch Salad as a light lunch with extra crispy chickpeas and avocado. This Thai Crunch Salad also makes a refreshing side for grilled foods.

For a more filling meal, add cooked quinoa, brown rice, rice noodles, or grilled tofu.

It also works well as a side dish with grilled chicken, shrimp, salmon, or baked tofu.

For a party or gathering, place the salad in a large shallow serving bowl. Keep the peanut dressing in a small bowl on the side if guests will be serving themselves.

You can also serve the salad in lettuce cups for an attractive appetizer. Add a spoonful of the salad to each lettuce leaf and finish with peanuts and a little dressing.

Make-Ahead Instructions

The chickpeas can be roasted several hours ahead. Allow them to cool completely, then store them in a container at room temperature.

The vegetables can also be washed and prepared ahead. Store them in separate airtight containers or one large container lined with a clean paper towel.

The peanut dressing can be made up to three days ahead and refrigerated.

Before serving, whisk the dressing again. If it has thickened in the refrigerator, add warm water one teaspoon at a time until smooth.

For the freshest Thai Crunch Salad, combine the vegetables and dressing shortly before serving. Doing so keeps the Thai Crunch Salad crisp and vibrant.

Add the chickpeas and peanuts at the very end.

Storage Instructions

If the salad has already been dressed, store leftovers in an airtight container in the refrigerator and enjoy within one day for the best texture. This Thai Crunch Salad is best when its crunchy toppings are added fresh.

Undressed vegetables can last for up to three days when refrigerated properly.

Keep crispy chickpeas at room temperature in a loosely covered container. A completely airtight container can trap moisture and soften them.

Store leftover peanut dressing in the refrigerator for up to three days. Stir well before using.

If avocado has been added, it may brown over time. For meal prep, add fresh avocado immediately before eating.

Frequently Asked Questions

Can I make this salad without peanuts?

Yes. This Thai Crunch Salad is easy to adapt when you need a peanut-free option.

Use almond butter, cashew butter, or sunflower seed butter in the dressing. Replace the chopped peanuts with toasted sunflower seeds or pumpkin seeds if needed.

Can I use store-bought crispy chickpeas?

Yes. Store-bought roasted chickpeas can save time. Choose a lightly seasoned variety so the flavor does not overpower the peanut dressing.

Can I make the dressing spicy?

Absolutely. Increase the chili garlic sauce or add a small amount of crushed red pepper. Fresh sliced chili can also be added to the salad.

Can I make the salad vegan?

Yes. Use maple syrup instead of honey and choose a vegan soy sauce or tamari. The remaining ingredients are naturally plant-based.

Can I add protein?

Yes. Grilled tofu, edamame, chickpeas, chicken, shrimp, or salmon can make the salad more filling.

Can I use another cabbage?

Yes. Napa cabbage can replace green cabbage. It has a softer texture and works especially well when you prefer a more delicate crunch.

Why did my crispy chickpeas become soft?

They may have been added too early or were not dry enough before roasting. Store them separately and add them just before serving.

Nutrition Information

Approximate nutrition per serving:

Calories: 390 kcal
Protein: 14g
Carbohydrates: 38g
Fat: 22g
Fiber: 10g
Sugar: 10g
Sodium: 560mg

Nutrition values are estimates and may vary depending on ingredient brands, dressing quantity, and portion sizes.

Flavor Variations

For extra freshness, add Thai basil, extra mint, or cilantro. These herbs create a brighter flavor and pair naturally with lime and peanut dressing.

For more crunch, add shredded radish, snow peas, toasted cashews, or thinly sliced water chestnuts.

For a tropical twist, add small cubes of mango or pineapple. Their natural sweetness works especially well with the tangy dressing.

For a heartier version, add cooked rice noodles or quinoa. The grains absorb some of the dressing and make the salad more substantial.

For more heat, add fresh red chili, chili crisp, or additional chili garlic sauce.

For extra citrus flavor, add a little lime zest to the dressing before serving.

Final Thoughts

Thai Crunch Salad brings together crisp vegetables, creamy peanut dressing, golden chickpeas, fresh herbs, and roasted peanuts in one colorful bowl. Every ingredient contributes something different. Cabbage provides crunch, carrots add sweetness, cucumber brings freshness, and roasted chickpeas create a satisfying contrast.

The peanut dressing ties everything together. Its creamy texture works with the crunchy vegetables, while lime juice keeps the flavor bright. Soy sauce adds savory depth, and ginger, garlic, and chili provide warmth.

Another advantage of this Thai Crunch Salad is its flexibility. You can change the vegetables according to what you have available. Add mango for sweetness, avocado for creaminess, or tofu for extra protein.

For the best texture, prepare the vegetables and dressing ahead but keep the crispy chickpeas separate. Combine everything shortly before serving. This keeps the chickpeas crunchy and prevents the cabbage from becoming overly soft.

Thai Crunch Salad is also an excellent meal-prep option when the components are stored separately. Pack the vegetables, dressing, and crispy chickpeas in separate containers. Combine them when you are ready to eat.

Whether you serve it as a light lunch, colorful side dish, vegetarian dinner, or party salad, Thai Crunch Salad delivers a satisfying combination of textures and flavors. This Thai Crunch Salad is especially good when served immediately after adding the crispy toppings.

The creamy peanut dressing, crunchy vegetables, crisp chickpeas, herbs, and fresh lime make every bite bright and flavorful. This Thai Crunch Salad is a simple way to bring those textures together.
Crunchy Cranberry Apple Slaw with Roasted Pumpkin, Pecans, Feta & Maple Honey Dressing

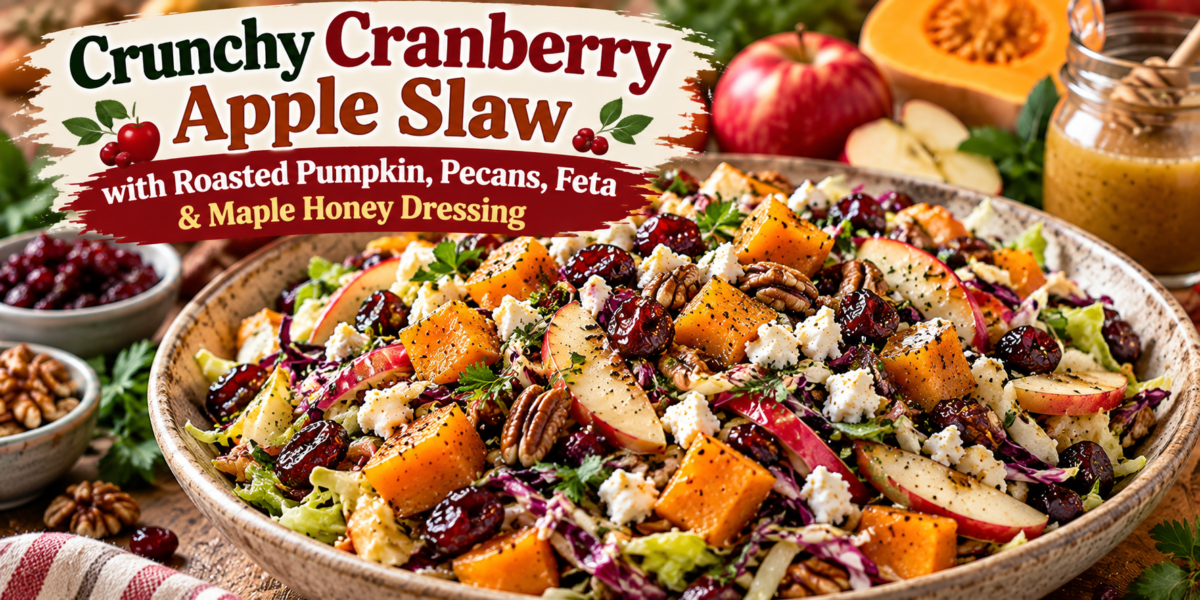
Crunchy Cranberry Apple Slaw with roasted pumpkin, pecans, feta, and maple honey dressing

Crunchy Cranberry Apple Slaw with Roasted Pumpkin, Pecans, Feta & Maple Honey Dressing

This Cranberry Apple Slaw is a colorful, crunchy salad that brings together crisp cabbage, sweet apples, tart dried cranberries, roasted pumpkin, toasted pecans, creamy feta, and a bright maple honey dressing. Every bite offers a satisfying combination of textures and flavors. The cabbage stays crisp, the apples add freshness, cranberries provide chewy bursts of sweetness, roasted pumpkin contributes a warm savory note, and feta balances everything with its salty tang.

This Cranberry Apple Slaw is easy enough for a weekday lunch but attractive enough for a holiday table, family gathering, or weekend brunch. A chilled Cranberry Apple Slaw can be served immediately. The vegetables can be prepared ahead, while the dressing takes only a few minutes to whisk together. Because most of the ingredients can be served cold or at room temperature, this salad, Cranberry Apple Slaw, is convenient when you need a side dish that does not require last-minute cooking.

The roasted pumpkin makes this version more substantial than a traditional slaw. Meanwhile, toasted pecans add richness and crunch, while the maple honey dressing brings together the sweet, tart, and savory elements. A little lemon juice keeps the dressing bright and prevents the apples from tasting overly sweet.

Prep Time: 20 minutes
Roasting Time: 25 minutes
Total Time: 45 minutes
Servings: 6–8

Ingredients

For the Slaw

  • 4 cups finely shredded green cabbage
  • 2 cups finely shredded red cabbage
  • 2 crisp apples, thinly sliced
  • ¾ cup dried cranberries
  • 2 cups pumpkin or butternut squash, peeled and cut into small cubes
  • ¾ cup pecans, roughly chopped
  • ¾ cup crumbled feta cheese
  • ¼ cup fresh parsley, chopped
  • 2 tablespoons very fresh mint, chopped
  • 1 tablespoon extra virgin olive oil
  • ¼ teaspoon sea salt
  • ¼ teaspoon black pepper

For the Maple Honey Dressing

  • 3 tablespoons extra virgin olive oil
  • 2 tablespoons pure maple syrup
  • 1 tablespoon honey
  • 3 tablespoons fresh lemon juice
  • 1 tablespoon apple cider vinegar
  • 1 teaspoon Dijon mustard
  • ½ teaspoon lemon zest
  • ¼ teaspoon garlic powder
  • ¼ teaspoon sea salt
  • ¼ teaspoon black pepper

Optional Garnishes

  • Extra feta
  • Extra toasted pecans
  • Fresh parsley
  • Fresh mint
  • A little lemon zest
  • A light drizzle of honey

Step-by-Step Instructions

1. Prepare the Pumpkin

First, preheat the oven to 425°F (220°C). Line a baking sheet with parchment paper. Cut the pumpkin into small, evenly sized cubes so they roast at the same rate.

Place the cubes in a bowl and toss them with one tablespoon of olive oil, sea salt, and black pepper. Spread them across the baking sheet in a single layer.

Roast for 20–25 minutes, turning once halfway through. The pieces should become tender in the center with lightly browned edges. Allow them to cool for several minutes before adding them to the salad.

For the best Cranberry Apple Slaw, avoid adding the pumpkin while it is extremely hot. Slightly cooled pumpkin keeps the cabbage crisp and prevents the dressing from becoming warm and oily.

2. Toast the Pecans

While the pumpkin roasts, place the chopped pecans in a dry skillet over medium-low heat. Toast them for 3–5 minutes, stirring frequently.

The pecans should smell fragrant and become lightly browned. Transfer them to a plate immediately because they can continue cooking in the hot pan.

Toasted pecans give the Cranberry Apple Slaw a deeper nutty flavor and a pleasant crunch. If you prefer, walnuts, almonds, pumpkin seeds, or sunflower seeds can be used instead.

3. Prepare the Cabbage

Remove any damaged outer leaves from the green and red cabbage. Shred both varieties finely using a sharp knife, mandoline, or food processor.

Place the shredded cabbage in a large mixing bowl. Gently toss it with a small pinch of salt and let it stand for five minutes. This short resting period slightly softens the cabbage while preserving its crunch.

For a particularly crisp Cranberry Apple Slaw, rinse the shredded cabbage with cold water after salting, then drain and dry it thoroughly. Excess water can dilute the dressing.

4. Prepare the Apples

Wash and core the apples. Slice them thinly into bite-sized pieces. There is no need to peel them unless you prefer a softer texture.

Immediately toss the slices with one tablespoon of lemon juice. This helps slow browning while adding a fresh citrus flavor.

Choose crisp apples with a balance of sweetness and acidity. For this Cranberry Apple Slaw, Honeycrisp, Pink Lady, Gala, or Granny Smith can all work well. A slightly tart apple creates an especially nice contrast with the dried cranberries and maple honey dressing.

5. Combine the Salad Ingredients

Add the apples, dried cranberries, roasted pumpkin, chopped parsley, and fresh mint to the cabbage.

Next, add about half of the toasted pecans and half of the feta. Reserve the remaining amounts for the final topping.

Gently toss the ingredients together. Avoid crushing the roasted pumpkin because the cubes should remain visible throughout this salad, Cranberry Apple Slaw.

At this stage, the Cranberry Apple Slaw should already look colorful, with green and purple cabbage, red cranberries, golden pumpkin, pale feta, and green herbs.

6. Make the Maple Honey Dressing

In a small bowl or jar, combine olive oil, maple syrup, honey, lemon juice, apple cider vinegar, Dijon mustard, lemon zest, garlic powder, sea salt, and black pepper.

Whisk vigorously until the dressing becomes smooth and slightly creamy. Alternatively, place everything in a jar, close the lid securely, and shake until combined.

Taste the dressing before adding it to this salad, Cranberry Apple Slaw. If it tastes too sweet, add a little more lemon juice or vinegar. If it tastes too sharp, add a small amount of maple syrup.

The dressing should taste bright, lightly sweet, tangy, and savory. That balance is important because the salad already contains naturally sweet apples, cranberries, and pumpkin.

7. Dress the Slaw

Pour approximately two-thirds of the dressing over this salad, Cranberry Apple Slaw. Use salad tongs or two large spoons to toss everything gently.

Add more dressing only if necessary. The ingredients should be lightly coated rather than swimming in liquid.

Allow the Cranberry Apple Slaw to rest for 10 minutes before serving. This gives the cabbage time to absorb some of the dressing while allowing the flavors to blend.

Just before serving, add the remaining pecans and feta. This keeps the toppings fresh and crunchy.

Tips for the Best Results

Keep the Cabbage Crisp

Dry cabbage thoroughly after washing. A salad spinner works especially well, but you can also spread the cabbage over a clean kitchen towel and pat it dry.

Too much water can make the dressing thin and reduce the overall flavor. Crisp cabbage also provides the texture that makes slaw so enjoyable.

Roast the Pumpkin Properly

Small pumpkin cubes roast more quickly and develop more browned edges. Avoid cutting them into very large pieces because they may remain firm in the center.

Do not overcrowd the baking sheet. Space between the cubes allows hot air to circulate and encourages caramelization.

Balance Sweet and Savory Flavors

The Cranberry Apple Slaw contains several naturally sweet ingredients. Therefore, the dressing should have enough lemon juice and vinegar to keep the salad refreshing.

Feta is particularly useful because its salty flavor balances the fruit and maple. If your feta is very salty, reduce the added salt in the dressing.

Add Pecans at the Right Time

For maximum crunch, reserve some toasted pecans for the final topping. If all the nuts are mixed into the salad too early, they may soften slightly.

The same approach works with seeds. Add pumpkin seeds or sunflower seeds immediately before serving.

Do Not Overdress

Start with two-thirds of the dressing and add more gradually. Different cabbage varieties and apples can vary in size, so the exact amount of dressing needed may change.

An evenly coated salad tastes fresher than one that is saturated with dressing.

Serving Suggestions

Serve this Cranberry Apple Slaw alongside roasted chicken, turkey, grilled salmon, baked fish, or roasted vegetables. The crisp texture provides a refreshing contrast to warm, rich main dishes.

For a vegetarian meal, serve it with lentils, quinoa, chickpeas, roasted sweet potatoes, or a savory grain bowl. The feta and pecans add enough richness to make this salad, Cranberry Apple Slaw, satisfying without meat.

It also works beautifully on a holiday buffet. Arrange the slaw in a wide serving bowl and scatter extra feta, cranberries, pecans, parsley, and pumpkin across the top.

For lunch, serve a generous portion with whole-grain bread or warm pita. You can also spoon it over quinoa or couscous for a more substantial bowl.

Make-Ahead Instructions

Several components can be prepared in advance. Roast the pumpkin and toast the pecans up to one day ahead. Once completely cool, store each separately in airtight containers.

The dressing can also be prepared ahead and refrigerated. Whisk or shake it again before using because the ingredients may separate during storage.

The cabbage can be shredded several hours in advance and stored in the refrigerator. Slice the apples closer to serving time for the freshest appearance.

For the best Cranberry Apple Slaw, combine the ingredients and dressing approximately 10–20 minutes before serving. This allows the flavors to develop while keeping the vegetables pleasantly crisp.

Storage Instructions

Store leftovers in an airtight container in the refrigerator for up to three days. The cabbage will gradually soften as it absorbs the dressing, but the flavor will remain enjoyable.

If you know you will have leftovers, keep some dressing separate and add it only to individual portions. This preserves more crunch.

Keep extra pecans separate whenever possible. Add them just before eating to restore the contrast between creamy feta, tender vegetables, and crunchy nuts.

Do not freeze Cranberry Apple Slaw because cabbage, apples, and herbs can become watery and soft after thawing.

Frequently Asked Questions

Can I use butternut squash instead of pumpkin?

Yes. Butternut squash is an excellent substitute and roasts beautifully. Cut it into small cubes and cook until tender and lightly caramelized.

Can I use only green cabbage?

Absolutely. Red cabbage adds color, but the recipe works with green cabbage alone. You can also use a packaged coleslaw mix to save preparation time.

Can I make the dressing without honey?

Yes. Replace the honey with additional maple syrup. For a vegan dressing, use maple syrup only and choose a suitable plant-based feta if desired.

What apples work best?

Crisp varieties with some acidity work especially well. Granny Smith provides a sharper flavor, while Honeycrisp and Pink Lady offer a sweeter balance.

Can I use another cheese?

Goat cheese is an excellent alternative to feta. Crumbled queso fresco or a mild blue cheese can also work, although each will change the overall flavor.

How long should the slaw rest?

Ten minutes is enough for the flavors to blend while keeping the vegetables crunchy. For a softer slaw, refrigerate it for 30 minutes before serving.

Nutrition Information

Approximate nutrition per serving:

Calories: 320 kcal
Protein: 7g
Carbohydrates: 34g
Fat: 19g
Fiber: 6g
Sugar: 20g
Sodium: 410mg

Nutrition values are estimates and may vary depending on ingredient brands, serving sizes, and substitutions.

Flavor Variations

For a warmer autumn version, add a small pinch of cinnamon to the dressing and a few roasted pumpkin seeds to the topping. The spice complements the apples, cranberries, and roasted pumpkin without overwhelming the fresh cabbage.

For extra citrus flavor, add orange zest to the dressing and a few orange segments to the Cranberry Apple Slaw. Orange pairs especially well with cranberries and maple.

If you enjoy savory heat, add a pinch of red pepper flakes or a little freshly sliced jalapeño. The gentle heat creates a pleasant contrast with the sweet fruit.

For a Mediterranean variation, increase the fresh parsley, add chopped cucumber, and replace some of the pecans with toasted sunflower seeds.

You can also turn the Cranberry Apple Slaw into a complete grain bowl by serving it over cooked quinoa, farro, or bulgur. Add chickpeas or grilled chicken for additional protein.

Final Thoughts

This Cranberry Apple Slaw is a versatile salad that brings together crunchy vegetables, fresh fruit, roasted pumpkin, toasted pecans, feta, herbs, and a bright maple honey dressing. Each component contributes something different, creating a balanced dish with plenty of texture.

The roasted pumpkin makes the salad feel comforting and seasonal, while the apples and cabbage keep it fresh. Dried cranberries provide tart sweetness, feta adds saltiness, and pecans deliver a satisfying crunch. Meanwhile, lemon juice and apple cider vinegar keep the dressing lively.

One of the best features of the Cranberry Apple Slaw is its flexibility. It can be prepared for a holiday meal, packed for lunch, served beside a weeknight dinner, or added to a brunch buffet.

For the best presentation, reserve some cranberries, feta, pecans, and herbs for the top. Then drizzle the final dressing lightly rather than heavily coating the salad.

Whether you serve it immediately or let it rest briefly, this recipe offers a colorful and satisfying combination of sweet, savory, tangy, and crunchy flavors. The result is a side dish that feels special while remaining simple enough for everyday cooking.

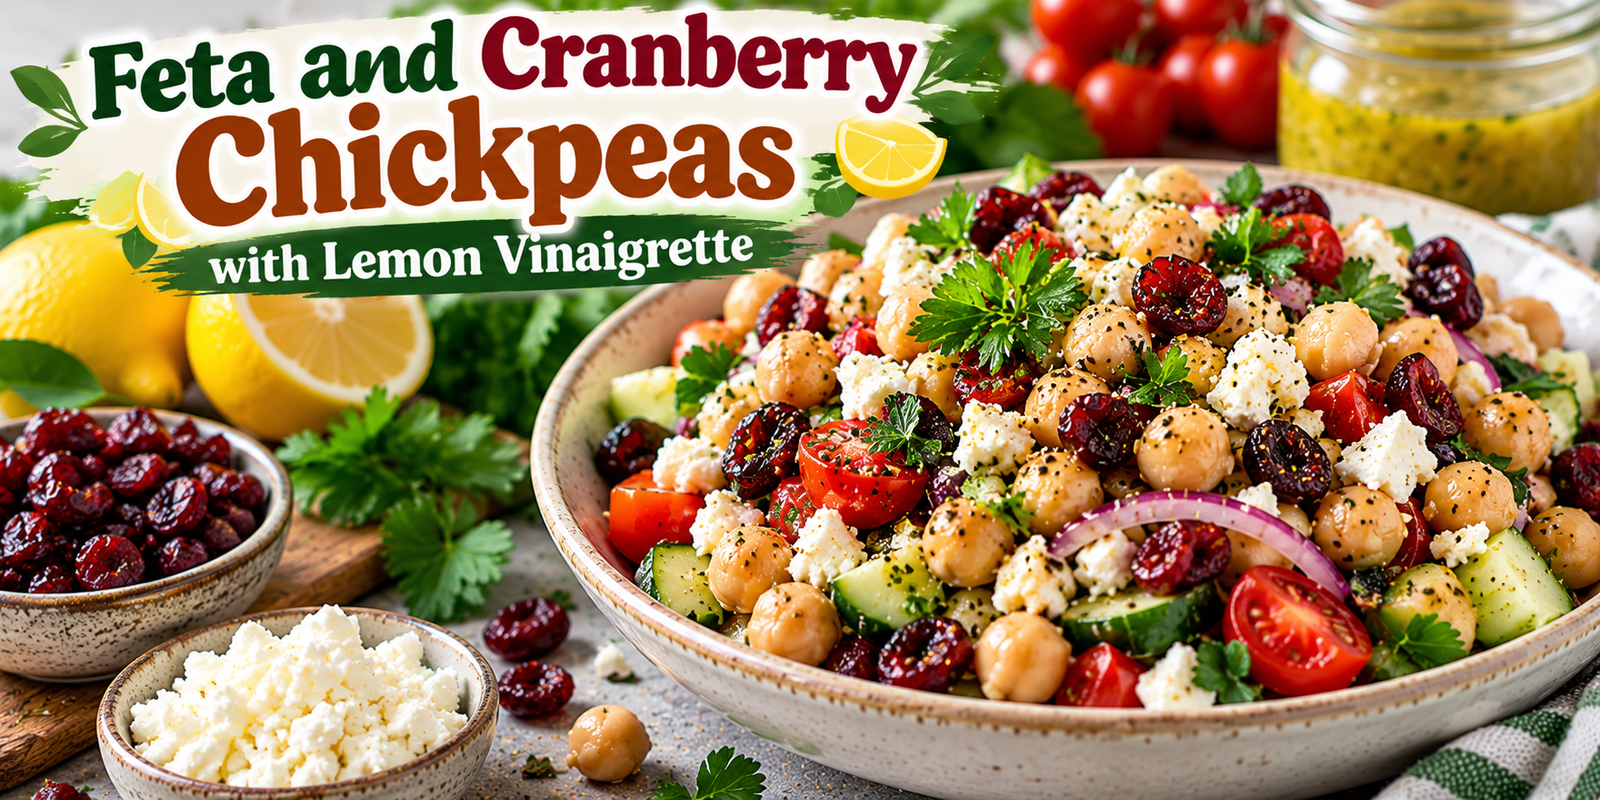
Feta and Cranberry Chickpeas with Lemon Vinaigrette

Feta and Cranberry Chickpeas with lemon vinaigrette, cucumber, tomatoes, fresh herbs, and feta cheese

Feta and Cranberry Chickpeas with Lemon Vinaigrette

These Cranberry Chickpeas combine creamy chickpeas, tangy feta, sweet dried cranberries, fresh herbs, crisp vegetables, and a bright lemon vinaigrette. The result is a colorful Mediterranean-inspired salad that is easy enough for a weekday lunch but attractive enough for a family gathering.

The contrast between savory chickpeas, salty feta, and sweet-tart cranberries makes Cranberry Chickpeas especially satisfying. A simple lemon vinaigrette adds acidity and ties all the ingredients together without making the salad heavy.

This recipe can be served chilled or at room temperature. Cranberry Chickpeas are also convenient for meal preparation because the salad can be assembled ahead of time and stored in the refrigerator.

Prep Time: 15 minutes
Cook Time: 0 minutes
Total Time: 15 minutes
Servings: 6

Ingredients

For the Chickpea Salad

3 cups cooked chickpeas, drained and rinsed

¾ cup dried cranberries

1 cup crumbled feta cheese

1 medium cucumber, diced

1 cup cherry tomatoes, halved

½ small red onion, finely sliced

¼ cup fresh parsley, chopped

2 tablespoons fresh mint, chopped

2 tablespoons toasted pumpkin seeds or sunflower seeds

¼ teaspoon black pepper

¼ teaspoon sea salt, or to taste

For the Lemon Vinaigrette

¼ cup extra virgin olive oil

3 tablespoons fresh lemon juice

1 teaspoon lemon zest

1 tablespoon red wine vinegar

1 teaspoon Dijon mustard

1 teaspoon honey or maple syrup

1 small garlic clove, finely grated

½ teaspoon dried oregano

¼ teaspoon black pepper

Pinch of sea salt

Ingredient Notes

For Cranberry Chickpeas, use chickpeas that are tender but still firm enough to hold their shape. Canned chickpeas are convenient, but freshly cooked chickpeas can also be used.

Choose dried cranberries that are soft and slightly tart. If they feel very dry, soaking them briefly in warm water can improve their texture.

For the feta, a creamy crumbly variety works particularly well. The salty cheese creates a delicious contrast with the sweet cranberries.

Fresh lemon juice is strongly recommended for the vinaigrette because bottled lemon juice may not provide the same bright flavor.

Step-by-Step Instructions

1. Prepare the Chickpeas

Drain the chickpeas thoroughly and rinse them under cool running water. Allow them to drain for a few minutes, then pat them gently with a clean kitchen towel.

Removing excess water helps the vinaigrette cling to the chickpeas instead of becoming diluted. If you are using canned chickpeas, choose plain chickpeas without added flavors and rinse them well.

For Cranberry Chickpeas, you can use either canned chickpeas or chickpeas cooked from dry. If cooking from dry, allow them to cool completely before preparing the salad.

2. Prepare the Vegetables

Dice the cucumber into small, even pieces. Halve the cherry tomatoes and thinly slice the red onion.

Place the vegetables in a large mixing bowl. Add the chopped parsley and fresh mint.

The combination of crisp cucumber, juicy tomatoes, sharp red onion, and fresh herbs gives Cranberry Chickpeas plenty of texture and freshness.

3. Add the Cranberries and Feta

Add the dried cranberries and crumbled feta to the bowl.

Choose soft dried cranberries for the best texture. If your cranberries are especially dry, soak them in warm water for five minutes, then drain and pat them dry before adding them.

Crumble the feta into medium-sized pieces rather than making it too fine. This allows little pockets of salty cheese to stand out in every bite of Cranberry Chickpeas.

4. Make the Lemon Vinaigrette

In a small bowl or jar, combine extra virgin olive oil, fresh lemon juice, lemon zest, red wine vinegar, Dijon mustard, honey or maple syrup, grated garlic, dried oregano, black pepper, and a small pinch of sea salt.

Whisk vigorously until the dressing becomes slightly creamy and well combined.

Taste the vinaigrette. If you prefer a sharper flavor, add a little more lemon juice. For a softer flavor, add another small drizzle of olive oil.

Fresh lemon is especially important because it keeps the Cranberry Chickpeas bright and balanced.

5. Combine Everything

Pour approximately two-thirds of the vinaigrette over the chickpea mixture.

Use a large spoon to gently toss everything together. Make sure the chickpeas, vegetables, cranberries, feta, and herbs are evenly coated.

Add the remaining vinaigrette only if needed. You want the salad to be moist and flavorful without becoming watery.

At this stage, the Cranberry Chickpeas can be served immediately, but allowing the mixture to rest for 10–15 minutes gives the flavors more time to blend.

6. Add the Seeds

Just before serving, sprinkle the toasted pumpkin seeds or sunflower seeds over the salad.

Seeds add a pleasant crunch that contrasts with the creamy feta and tender chickpeas.

For an especially fresh presentation, finish the Cranberry Chickpeas with extra parsley, mint, lemon zest, and a light drizzle of olive oil.

Tips for the Best Results

Use Well-Drained Chickpeas

Excess liquid can dilute the dressing and make the salad watery. Drain and rinse canned chickpeas thoroughly, then allow them to dry for a few minutes.

For the best texture, the chickpeas should be tender but still firm enough to hold their shape when tossed.

Balance Sweet and Savory Flavors

The dried cranberries provide sweetness while feta brings saltiness. The lemon vinaigrette adds acidity to balance both flavors.

If your feta is very salty, reduce the added salt in the dressing. If your cranberries are very sweet, increase the lemon juice slightly.

This balance is what makes Cranberry Chickpeas taste fresh rather than overly sweet.

Cut Vegetables Evenly

Small, similar-sized pieces make the salad easier to eat and help distribute the ingredients evenly.

Try to cut the cucumber and tomatoes into pieces that are similar in size to the chickpeas. Thinly sliced onion also spreads its flavor throughout the salad.

Let the Salad Rest

Although the salad can be eaten immediately, a short resting period improves the flavor.

After tossing, let Cranberry Chickpeas sit for 10–15 minutes at room temperature. The chickpeas absorb some of the lemon vinaigrette while the herbs release their aroma.

Add Crunch at the End

Seeds can soften when they sit in dressing for too long. Add them immediately before serving if you want maximum crunch.

Toasted pumpkin seeds, sunflower seeds, chopped almonds, or walnuts can all work well.

Serving Suggestions

Serve Cranberry Chickpeas as a light lunch with warm pita, whole-grain bread, or a simple vegetable soup.

The salad also makes an excellent side dish for grilled chicken, baked salmon, roasted vegetables, or grilled halloumi.

For a Mediterranean-inspired dinner, place it alongside hummus, olives, cucumber, tomatoes, and warm flatbread.

You can also spoon Cranberry Chickpeas over cooked quinoa, couscous, bulgur, or brown rice. The grains make the meal more substantial while absorbing the lemon dressing.

Recipe Variations

Add Avocado

Diced avocado creates a creamy texture that works beautifully with feta and lemon. Add it immediately before serving so it remains fresh.

Add Roasted Peppers

Chopped roasted red peppers bring sweetness and a mild smoky flavor. They also make Cranberry Chickpeas even more colorful.

Add Greens

Baby spinach, arugula, chopped romaine, or mixed greens can be added to create a larger salad. If using delicate greens, toss them in immediately before serving.

Add Grilled Chicken

For a higher-protein meal, top the salad with sliced grilled chicken seasoned with lemon, garlic, oregano, and black pepper.

Make It Spicy

Add a pinch of crushed red pepper flakes to the vinaigrette. A little chili heat creates a nice contrast with the sweet cranberries.

Change the Cheese

If feta is unavailable, goat cheese can provide a similar creamy and tangy character. For a dairy-free version, omit the cheese and add toasted nuts or seeds.

Make-Ahead Instructions

The chickpeas, vegetables, cranberries, and herbs can be combined several hours ahead of serving.

For the best texture, prepare the vinaigrette separately and toss it with the salad shortly before serving.

If preparing Cranberry Chickpeas the night before, keep the seeds separate and add them just before eating.

The salad can be served cold directly from the refrigerator or allowed to sit at room temperature for about 15 minutes.

Storage Instructions

Store leftovers in an airtight container in the refrigerator for up to three days.

The vegetables may release a little liquid as they sit, so gently stir the salad before serving.

If the flavors seem less bright after refrigeration, add a small squeeze of fresh lemon juice.

For the best texture, Cranberry Chickpeas should not be frozen because cucumber and fresh herbs can become watery and soft after thawing.

Frequently Asked Questions

Can I Use Dried Chickpeas?

Yes. Cook dried chickpeas until tender, drain them well, and allow them to cool completely before using them.

Can I Use Another Dried Fruit?

Yes. Dried cherries, chopped dates, raisins, or golden raisins can replace cranberries. Cranberries provide a particularly nice sweet-tart contrast with feta.

Can I Make the Vinaigrette Without Honey?

Absolutely. Use maple syrup for a plant-based option, or omit the sweetener if you prefer a sharper lemon dressing.

Can I Make This Salad Dairy-Free?

Yes. Omit the feta and add toasted almonds, pumpkin seeds, or sunflower seeds for extra richness and texture.

Is This Recipe Good for Meal Prep?

Yes. Keep the dressing and crunchy toppings separate when possible. This helps Cranberry Chickpeas stay fresh and prevents the seeds from becoming soft.

Can I Serve It Warm?

Yes. Gently warming the chickpeas before combining them with the other ingredients can create a slightly different texture. However, avoid heating the cucumber, feta, and herbs because they are best fresh.

Nutrition Information

Approximate nutrition per serving:

Calories: 330 kcal

Protein: 10g

Carbohydrates: 35g

Fat: 17g

Fiber: 8g

Sugar: 12g

Sodium: 470mg

Nutrition values are estimates and can vary according to ingredient brands, serving sizes, and optional additions.

Final Thoughts

This Cranberry Chickpeas recipe brings together creamy chickpeas, tangy feta, sweet-tart cranberries, crisp vegetables, fresh herbs, crunchy seeds, and a bright lemon vinaigrette.

The recipe is simple enough for everyday lunches but colorful enough for entertaining. It requires no complicated cooking and can be prepared in about 15 minutes when using ready-to-eat chickpeas.

For the freshest result, use firm cucumber, ripe cherry tomatoes, good-quality feta, fresh lemon juice, and extra virgin olive oil. Fresh herbs make a noticeable difference, while toasted seeds provide a satisfying crunch.

You can easily adapt Cranberry Chickpeas with avocado, roasted peppers, leafy greens, grilled chicken, or different nuts and seeds.

The sweet-and-savory combination makes this salad especially versatile. Serve it as a side, pack it for lunch, or turn it into a complete meal by adding quinoa or grilled protein.

With its bright flavors and simple preparation, Cranberry Chickpeas is an easy recipe to keep in your regular meal rotation.

Healthy Broccoli Slaw with Yogurt Dressing

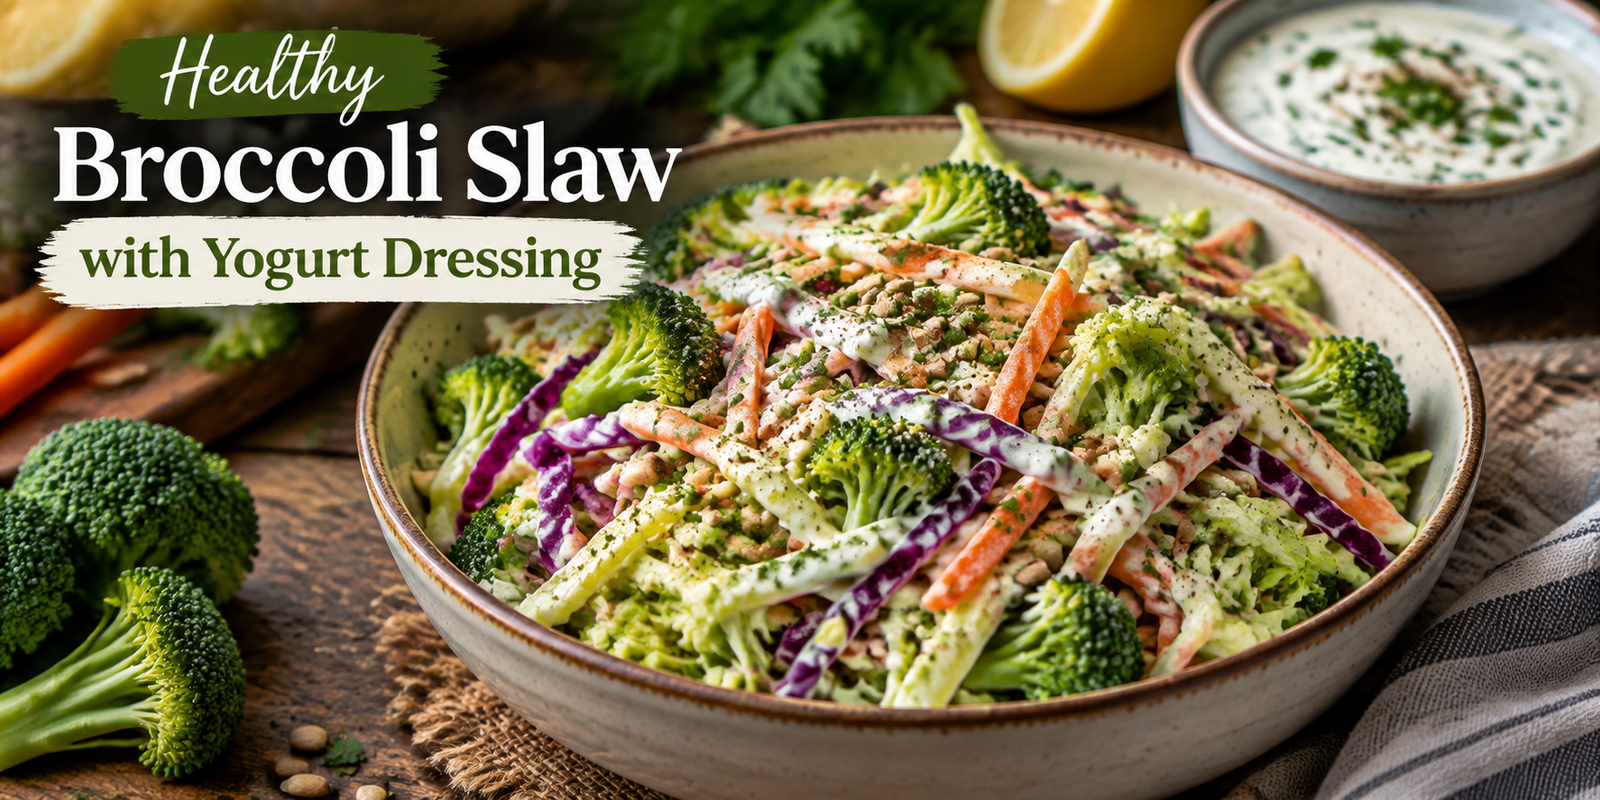
Healthy Broccoli Slaw with Yogurt Dressing made with fresh broccoli carrots cabbage and creamy yogurt sauce

Healthy Broccoli Slaw with Yogurt Dressing

(Creamy & Nutritious Salad)

Introduction

Broccoli Slaw with Yogurt Dressing is a fresh, crunchy, and healthy salad that combines colorful vegetables with a creamy homemade yogurt dressing. It is a lighter alternative to traditional creamy slaws because it uses Greek yogurt instead of heavy mayonnaise while still delivering a rich and satisfying flavor.

This easy recipe is perfect for lunch, meal prep, family dinners, picnics, or as a healthy side dish. Packed with fiber-rich broccoli, carrots, cabbage, and fresh herbs, this slaw provides a delicious way to add more vegetables to your daily meals.

The creamy yogurt dressing brings together tangy, sweet, and savory flavors, making this salad both nutritious and enjoyable. Whether you are following a healthy lifestyle or simply looking for a quick vegetable recipe, this Broccoli Slaw with Yogurt Dressing is a perfect choice.

Why You’ll Love This Healthy Broccoli Slaw

Light Yet Creamy

The Greek yogurt dressing creates a creamy texture without making the salad feel heavy.

Full of Fresh Vegetables

Broccoli, cabbage, and carrots provide crunch, color, and important nutrients.

Easy Meal Prep Recipe

Prepare it ahead of time and enjoy a ready-to-eat healthy meal.

Quick to Make

This recipe requires minimal cooking and can be prepared in less than 20 minutes.

Perfect for Any Occasion

Serve it with grilled chicken, sandwiches, wraps, or enjoy it as a refreshing snack.

Ingredients for Broccoli Slaw with Yogurt Dressing

For the Slaw

  • 4 cups broccoli slaw mix (shredded broccoli stems, carrots, and cabbage)
  • 1 cup purple cabbage, thinly sliced
  • 1 large carrot, shredded
  • ½ cup red bell pepper, thinly sliced
  • ¼ cup green onions, chopped
  • 2 tablespoons fresh parsley, chopped
  • 2 tablespoons sunflower seeds or almonds (optional)

For the Yogurt Dressing

  • 1 cup Greek yogurt
  • 2 tablespoons lemon juice
  • 1 tablespoon honey
  • 1 teaspoon Dijon mustard
  • 1 garlic clove, minced
  • ½ teaspoon salt
  • ½ teaspoon black pepper
  • 1 tablespoon olive oil

Step-by-Step Instructions

1. Prepare the Vegetables

Wash all vegetables thoroughly.

Shred the broccoli stems, carrots, and cabbage if you are not using a pre-made broccoli slaw mix.

Slice the bell pepper and chop the green onions and parsley.

Place all vegetables in a large mixing bowl.

2. Make the Yogurt Dressing

In a small bowl, combine:

  • Greek yogurt
  • Lemon juice
  • Honey
  • Dijon mustard
  • Garlic
  • Olive oil
  • Salt
  • Black pepper

Whisk everything together until smooth and creamy.

Taste the dressing and adjust seasoning if needed.

For a sweeter flavor, add a little extra honey. For more freshness, add extra lemon juice.

3. Combine the Slaw and Dressing

Pour the yogurt dressing over the prepared vegetables.

Mix gently until all ingredients are evenly coated.

Add sunflower seeds or almonds for extra crunch.

4. Chill Before Serving

For the best flavor, refrigerate the slaw for 30 minutes before serving.

This allows the vegetables to absorb the creamy dressing while maintaining their crunch.

Tips for the Best Broccoli Slaw

Keep It Crunchy

Do not add the dressing too early if you want maximum crunch. Add it shortly before serving.

Use Fresh Vegetables

Fresh broccoli and cabbage provide the best texture and flavor.

Adjust the Dressing

You can make the dressing:

  • More tangy with extra lemon
  • Sweeter with more honey
  • Thicker with extra yogurt

Add More Protein

Turn this salad into a complete meal by adding:

  • Grilled chicken
  • Boiled eggs
  • Chickpeas
  • Tuna
  • Grilled salmon

Healthy Variations

Mediterranean Broccoli Slaw

Add:

  • Feta cheese
  • Olives
  • Cucumber
  • Fresh herbs

for a Mediterranean-inspired version.

Apple Broccoli Slaw

Add:

  • Thinly sliced apples
  • Raisins
  • Walnuts

for a sweet and crunchy flavor.

Spicy Yogurt Slaw

Add:

  • Chili flakes
  • Jalapeños
  • Extra black pepper

for a spicy twist.

Storage and Meal Prep Tips

Store leftover Broccoli Slaw with Yogurt Dressing in an airtight container.

Refrigerator:

Keeps fresh for up to 3 days.

Meal Prep:

Prepare the vegetables and dressing separately, then combine before eating for the freshest texture.

Avoid freezing because yogurt dressing can change texture after thawing.

Prepare your chicken in advance using our 7 Easy Chicken Marinades to Freeze Ahead for Quick Dinners for quick and delicious wraps throughout the week.

What to Serve With Broccoli Slaw

This healthy slaw pairs well with:

  • Grilled chicken
  • Turkey sandwiches
  • Fish dishes
  • Wraps
  • Burgers
  • Mediterranean bowls
  • Roasted vegetables

It is a refreshing side dish that balances heavier meals.

Nutritional Information (Approximate)

Serving Size: 1 cup
Servings: 6

Calories: 120 kcal
Protein: 6g
Carbohydrates: 12g
Fat: 6g
Fiber: 4g

(Nutrition values may vary depending on ingredients used.)

Frequently Asked Questions

Can I make broccoli slaw ahead of time?

Yes. You can prepare it several hours before serving. Keep it refrigerated for the best taste.

Can I use regular yogurt instead of Greek yogurt?

Yes, but Greek yogurt provides a thicker and creamier dressing.

Is broccoli slaw good for weight management?

This recipe is high in vegetables and fiber while using a lighter yogurt dressing, making it a nutritious option.

Can I add chicken to this recipe?

Yes. Adding grilled chicken makes it a complete high-protein meal.

If you enjoy comforting Mediterranean meals, try our Mediterranean Creamy Baked Gnocchi for a creamy and flavorful dinner option.

Final Thoughts

Broccoli Slaw with Yogurt Dressing is a simple, healthy, and flavorful recipe that makes eating vegetables more enjoyable. With crunchy broccoli, fresh vegetables, and a creamy homemade yogurt dressing, this salad is perfect for busy days, meal prep, and family meals.

Whether served as a side dish or upgraded with protein for a complete meal, this refreshing slaw is an easy way to enjoy a nutritious recipe full of flavor and texture.

Shrimp Mango Avocado Salad

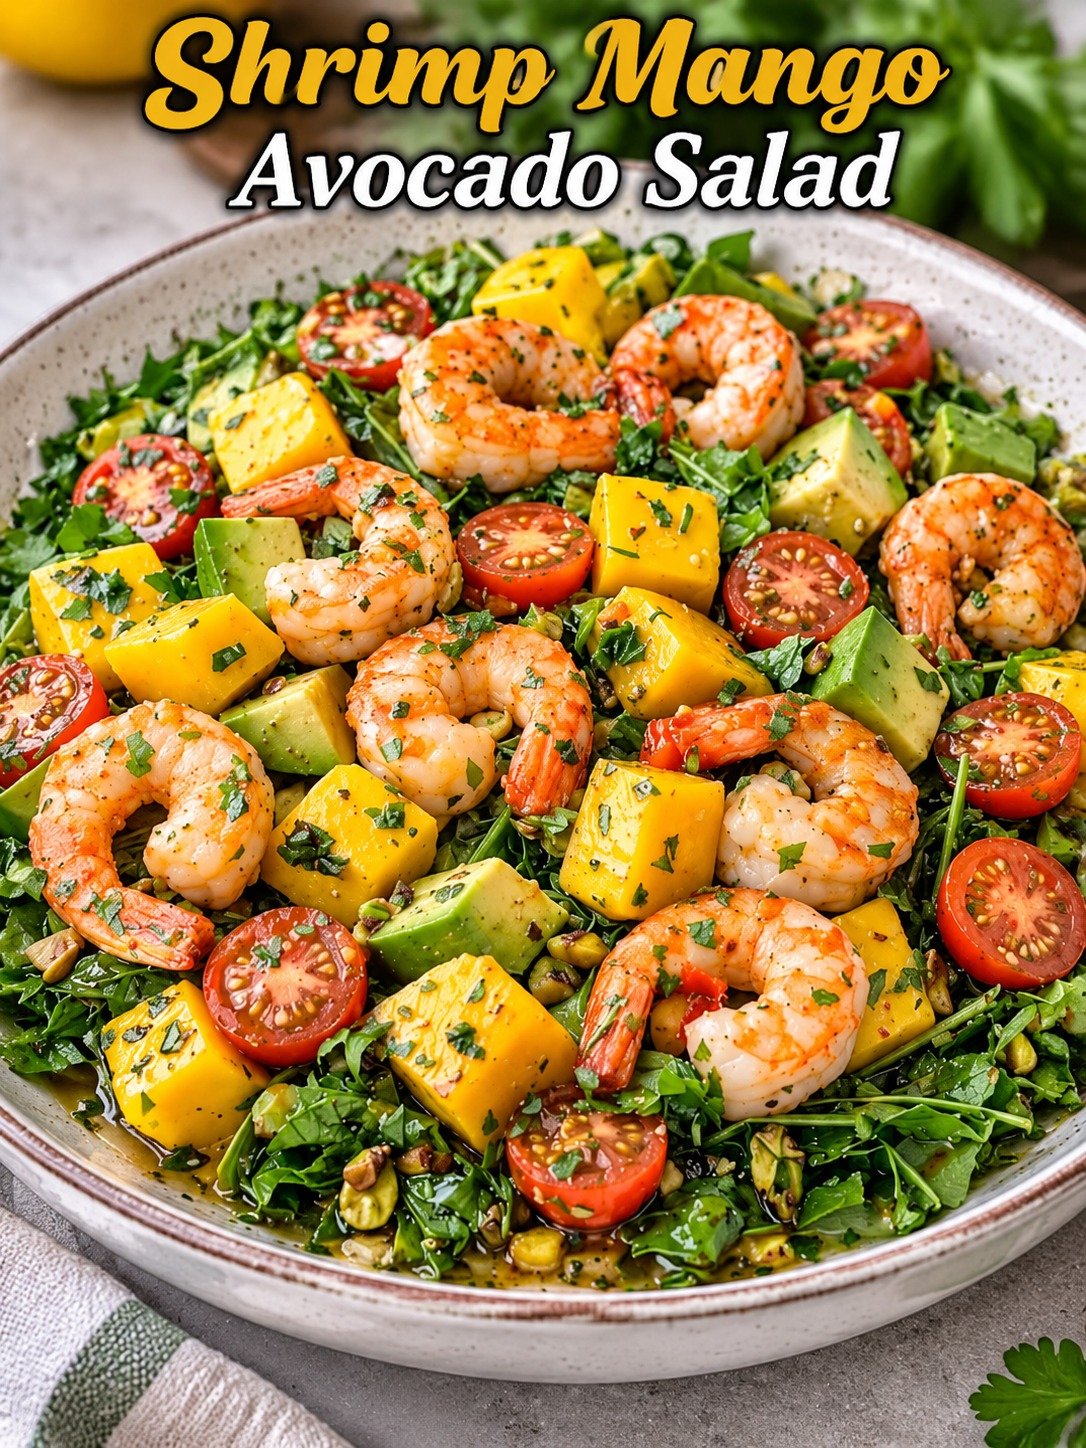
Shrimp Mango Avocado Salad

A Fresh 20-Minute Tropical Salad

Make this easy Shrimp Mango Avocado Salad with juicy shrimp, sweet mango, creamy avocado, crunchy pistachios, and honey-lime dressing in just 20 minutes.

Introduction

If you’re looking for a quick, colorful, and satisfying meal, this Shrimp Mango Avocado Salad is an excellent choice. It combines tender seasoned shrimp with sweet ripe mango, creamy avocado, crisp greens, juicy cherry tomatoes, red onion, and crunchy pistachios.

A fresh honey-lime vinaigrette ties everything together with a bright balance of citrus, sweetness, herbs, and mild seasoning. The recipe takes about 20 minutes from start to finish, making it ideal for a quick lunch, light dinner, summer meal, or casual gathering.

The ingredients also offer a variety of textures and flavors, so every bite feels fresh without being overly heavy.

Prep Time: 15 minutes
Cook Time: 5 minutes
Total Time: 20 minutes
Servings: 4

Why You’ll Love This Shrimp Mango Avocado Salad

Ready in about 20 minutes

Packed with flavorful, pan-seared shrimp

Naturally colorful and refreshing

Combines sweet, creamy, crunchy, and savory ingredients

Easy to customize with your favorite vegetables or nuts

Great as a light lunch or dinner

The honey-lime dressing can be prepared ahead of time

Ingredients

Prep Salad
  • 1 pound raw shrimp, peeled, deveined, and tails removed
  • 1–2 large ripe mangoes, peeled and diced
  • 1–2 large ripe Hass avocados, cubed
  • 1 cup cherry tomatoes, halved
  • 2–4 cups arugula, romaine, or mixed greens
  • ¼ cup thinly sliced or finely diced red onion
  • ⅓ cup shelled pistachios, roughly chopped
Shrimp Prep
  • 1 tablespoon olive oil
  • ½ teaspoon smoked paprika
  • ½ teaspoon garlic powder
  • Pinch of chili powder or cayenne pepper
  • Salt, to taste
  • Freshly ground black pepper, to taste
For the Honey-Lime Dressing
  • ¼ cup extra-virgin olive oil
  • 3 tablespoons fresh lime juice
  • 1 tablespoon honey or maple syrup
  • ¼ cup finely chopped fresh cilantro
  • Pinch of salt
  • Pinch of black pepper

How to Make Shrimp Mango Avocado Salad

1. Prepare the Shrimp

If using frozen shrimp, thaw them completely and drain well. Pat them dry with paper towels. Removing surface moisture helps the shrimp brown more effectively in the skillet.

Place the shrimp in a bowl and add olive oil, smoked paprika, garlic powder, chili powder or cayenne, salt, and black pepper. Toss until evenly coated.

2. Cook the Shrimp

Heat a large skillet over medium-high heat. Add the seasoned shrimp in a single layer.

Cook for approximately 2 minutes, then turn the shrimp and cook for another 1–2 minutes. They should become pink, opaque, and curled into a loose C shape.

Transfer the shrimp to a clean plate and allow them to cool slightly.

Food-safety note: Shrimp should be cooked until opaque and should reach a safe internal temperature of 145°F (63°C) when measured with a food thermometer.

3. Make the Honey-Lime Dressing

Add olive oil, fresh lime juice, honey, cilantro, salt, and black pepper to a small bowl or jar.

Whisk or shake until the dressing is well combined. Taste and adjust the sweetness, acidity, or seasoning if necessary.

4. Prepare the Salad

Wash and thoroughly dry the greens. Add them to a large serving bowl.

Add diced mango, cubed avocado, halved cherry tomatoes, red onion, and chopped pistachios.

5. Assemble and Serve

Arrange the cooked shrimp over the salad. Drizzle with some of the honey-lime vinaigrette.

Gently toss using salad tongs or large spoons. Avoid vigorous mixing because ripe avocado and mango can easily break apart.

Taste and add more dressing, lime juice, salt, or black pepper if desired. Serve immediately.

Tips for the Best Shrimp Mango Avocado Salad

Use ripe but firm mangoes: Choose mangoes that are fragrant and sweet but still firm enough to dice cleanly.

Choose firm-ripe avocados: A slightly firm avocado holds its shape better when tossed into the salad.

Dry shrimp before cooking: Excess moisture can cause shrimp to steam instead of sear.

Avoid overcooking: Shrimp become tough when cooked for too long. Remove them from the heat as soon as they are opaque and properly cooked.

Use fresh lime juice: Freshly squeezed lime gives the dressing a brighter flavor.

Dress just before serving: Adding the vinaigrette at the last minute helps preserve the crispness of the greens.

Toast the pistachios: Briefly toasting them in a dry skillet can enhance their nutty flavor. Let them cool before adding them.

Start with less dressing: Add about half first, toss, then add more according to taste.

Recipe Variations

Spicy Shrimp Mango Salad

Increase the cayenne or chili powder and add thinly sliced jalapeño for extra heat.

Tropical Shrimp Salad

Add diced pineapple or toasted unsweetened coconut for even more tropical flavor.

Shrimp Mango Avocado Salad with Black Beans

Add ½–1 cup rinsed black beans to make the salad more substantial.

Grilled Shrimp Mango Salad

Season the shrimp as directed and grill them instead of cooking them in a skillet for a smoky variation.

Shrimp Salad with Feta

Sprinkle crumbled feta over the finished salad for a salty contrast to the sweet mango.

Grain Bowl Version

Serve the salad over quinoa, brown rice, or couscous when you want a more filling meal.

Storage and Make-Ahead Instructions

For the best quality, assemble this salad shortly before serving. The shrimp, dressing, chopped vegetables, mango, and pistachios can be prepared several hours ahead and refrigerated separately.

For optimal texture, wait to cut the avocado and add the dressing until just before serving.

Leftover dressed salad is best consumed promptly because the greens and avocado can soften and lose their fresh appearance.

Frequently Asked Questions

Can I use frozen shrimp?

Yes. Frozen shrimp are convenient and work well in this recipe. Thaw them completely, drain them, and pat them dry before seasoning.

Can I use cooked shrimp?

Yes. Fully cooked shrimp can be used instead. Skip the cooking step and add them directly to the salad after cooling them if necessary.

Can I make this salad ahead of time?

Yes, but keep the components separate whenever possible. Prepare the shrimp and dressing ahead, then add the avocado and dressing shortly before serving.

What greens are best?

Arugula adds a peppery flavor, romaine provides crunch, and mixed greens offer a milder texture. Any fresh salad greens can work.

Can I replace lime juice with lemon juice?

Yes. Lemon juice works as a substitute, although lime gives the salad a more distinctive tropical flavor.

How do I stop the avocado from browning?

Cut the avocado shortly before serving. The lime juice in the dressing can also help slow browning, although it will not completely prevent it.

Can I make the dressing without honey?

Yes. Maple syrup can replace honey, or you can reduce or omit the sweetener depending on how sweet your mango is.

What can I serve with this salad?

It can be served on its own as a light meal or alongside quinoa, rice, roasted potatoes, grilled vegetables, or crusty bread.

Nutrition Facts

Approximate nutrition per serving:

Calories: 430

Protein: 29g

Carbohydrates: 28g

Fiber: 7g

Sugar: 17g

Total Fat: 27g

Saturated Fat: 4g

Sodium: 470mg

Calcium: 8% DV

Iron: 12% DV

Nutrition values are estimates and can vary depending on ingredient brands, shrimp size, mango and avocado size, dressing quantity, and serving portions.

Final Thoughts:

This Shrimp Mango Avocado Salad brings together juicy seasoned shrimp, sweet mango, creamy avocado, crisp greens, tomatoes, red onion, and crunchy pistachios in one vibrant meal. The fresh honey-lime vinaigrette adds a bright sweet-and-tangy finish that complements every ingredient.

With simple preparation and approximately 20 minutes of cooking time, it is an easy option for busy weekdays, warm-weather lunches, light dinners, and entertaining. For the freshest texture, prepare the ingredients ahead but assemble and dress the salad just before serving.