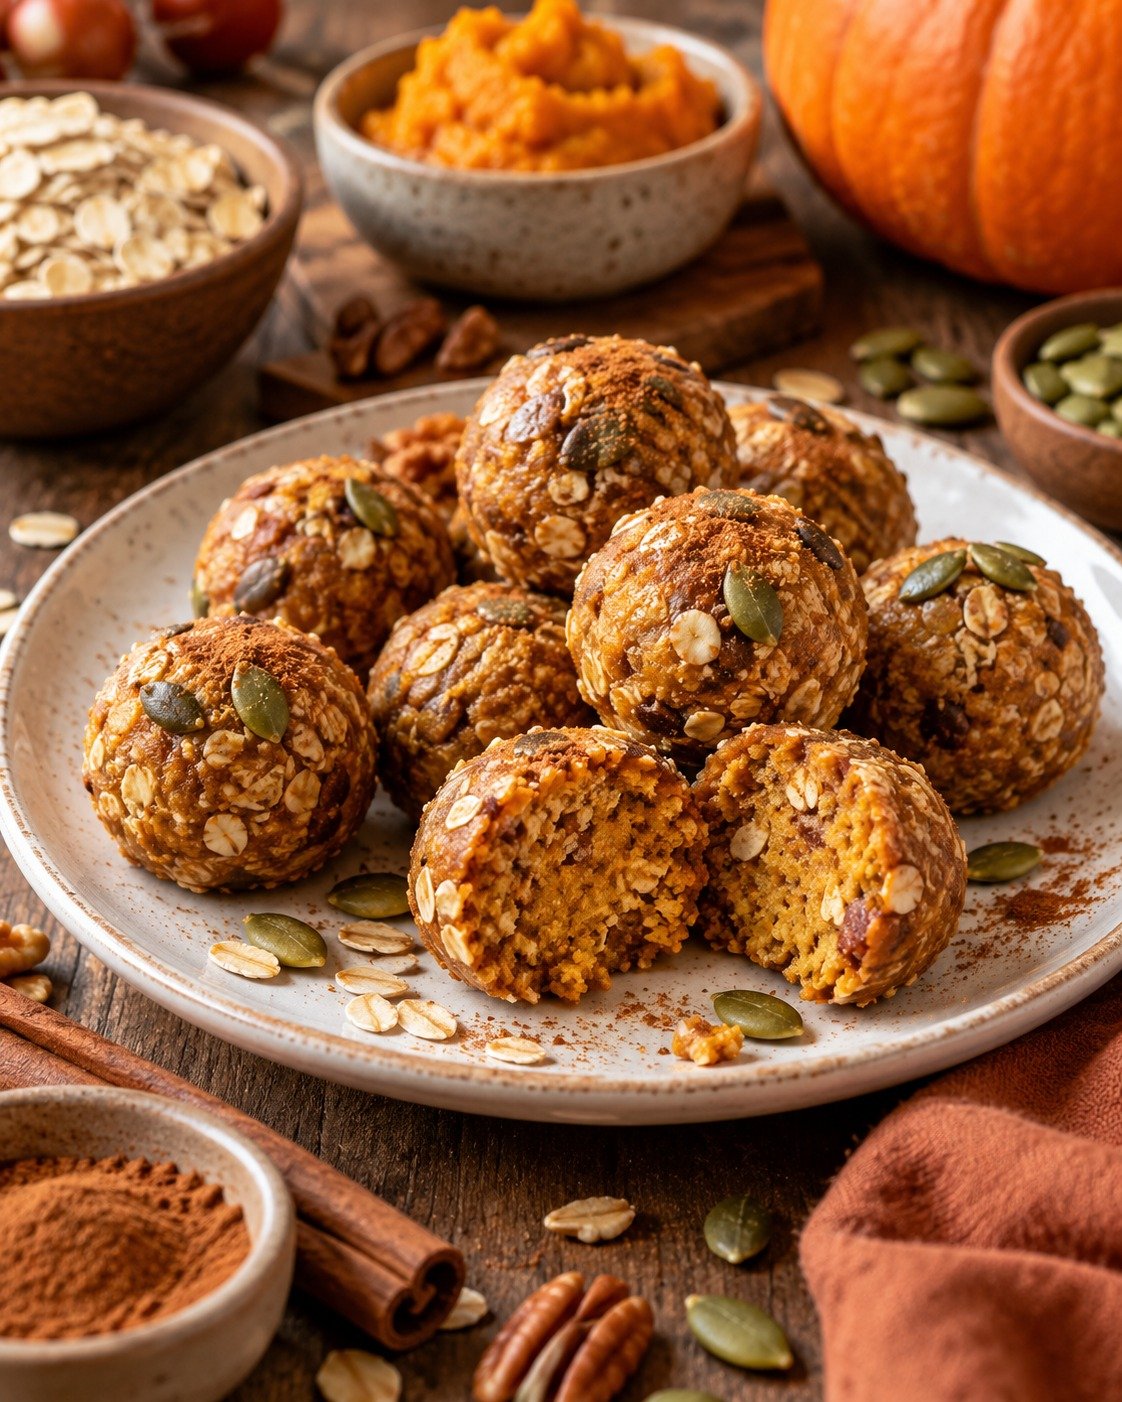
Pumpkin Protein Balls

Pumpkin Protein Balls with pumpkin puree, oats, nut butter, vanilla protein powder, flaxseed, cinnamon, and chocolate chips

Pumpkin Protein Balls

Pumpkin Protein Balls are soft, chewy, no-bake bites made with pumpkin puree, oats, nut butter, vanilla protein powder, warm spices, and a touch of maple syrup. They are easy to prepare, naturally flavored with pumpkin and cinnamon, and perfect for breakfast prep, afternoon snacks, lunchboxes, or a quick post-workout bite.

These Pumpkin Protein Balls come together in one bowl and require no oven. The texture is tender but firm enough to hold its shape, while the pumpkin pie spice gives them a cozy seasonal flavor. Keep a batch in the refrigerator for busy days when you want something homemade, portable, and satisfying.

Prep Time: 15 minutes
Chill Time: 30 minutes
Total Time: 45 minutes
Servings: 16 balls

Ingredients

For the Protein Balls

  • 1 cup pumpkin puree
  • 1 1/2 cups rolled oats
  • 3/4 cup vanilla protein powder
  • 1/2 cup almond butter or peanut butter
  • 1/3 cup maple syrup or honey
  • 1/3 cup ground flaxseed
  • 1 teaspoon vanilla extract
  • 1 1/2 teaspoons pumpkin pie spice
  • 1/2 teaspoon ground cinnamon
  • 1/4 teaspoon salt
  • 1/3 cup mini dark chocolate chips, optional
  • 2 tablespoons chia seeds, optional

For Rolling, Optional

  • Finely chopped pecans
  • Unsweetened shredded coconut
  • Extra ground cinnamon

Why You’ll Love This Recipe

Pumpkin Protein Balls are simple, practical, and easy to customize. They give you the warm flavor of pumpkin spice without requiring baking, and the combination of oats, nut butter, flaxseed, and protein powder makes them more filling than a typical sweet snack.

Another reason to love Pumpkin Protein Balls is how well they work for meal prep. You can make them ahead, keep them chilled, and grab one or two whenever you need something quick. They are also easy to portion, easy to pack, and easy to adjust with different nut butters, seeds, or mix-ins.

How to Make Pumpkin Protein Balls

Step 1: Prepare the Mixing Bowl

Choose a large bowl with enough room to mix the ingredients comfortably. Because the mixture becomes thick, using a sturdy spoon or silicone spatula will make the process easier.

Step 2: Mix the Wet Ingredients

Add pumpkin puree, almond butter, maple syrup, and vanilla extract to the bowl.

Stir until smooth and evenly combined.

This creamy base gives Pumpkin Protein Balls their soft texture and helps bind the dry ingredients together.

Step 3: Add the Dry Ingredients

Add rolled oats, vanilla protein powder, ground flaxseed, pumpkin pie spice, cinnamon, and salt.

Stir slowly at first so the protein powder does not puff out of the bowl.

Continue mixing until a thick, sticky dough forms.

Step 4: Adjust the Texture

The exact texture can vary depending on the protein powder and pumpkin puree you use.

If the mixture feels too wet to shape, add a few tablespoons of oats or a little extra protein powder.

If it feels too dry, add a spoonful of pumpkin puree or nut butter.

Pumpkin Protein Balls should feel soft but should hold together when pressed.

Step 5: Add the Mix-Ins

Fold in mini chocolate chips and chia seeds if using.

You can also add chopped pecans, walnuts, dried cranberries, or shredded coconut.

Mix only until the add-ins are evenly distributed.

Step 6: Chill the Mixture

Cover the bowl and refrigerate for about 30 minutes.

Chilling helps the oats absorb moisture and makes Pumpkin Protein Balls easier to roll without sticking heavily to your hands.

Step 7: Portion the Dough

Use a small cookie scoop or tablespoon to portion the mixture.

Aim for roughly 1 1/2 tablespoons per ball.

Keeping the portions similar in size helps with serving and makes the nutrition estimate more consistent.

Step 8: Roll into Balls

Roll each portion gently between your palms until smooth.

If the mixture sticks, lightly dampen your hands with water.

For a decorative finish, roll some Pumpkin Protein Balls in chopped pecans, coconut, or a light dusting of cinnamon.

Step 9: Chill Again

Place the finished balls on a parchment-lined tray or plate.

Refrigerate for another 15 to 20 minutes so they become firmer.

This second chill helps them hold their shape during storage.

Step 10: Serve

Enjoy Pumpkin Protein Balls cold or let them sit at room temperature for 5 minutes before eating if you prefer a softer texture.

They pair well with coffee, tea, milk, yogurt, or fresh fruit.

Serving Suggestions

Pumpkin Protein Balls are convenient enough for many different occasions.

Serve one or two with Greek yogurt and berries for a quick breakfast. Add them to a lunchbox with fruit and cheese, or keep a few ready in the refrigerator for an afternoon snack.

For a post-workout snack, pair Pumpkin Protein Balls with milk, a smoothie, or extra yogurt for a more substantial protein boost.

They also work nicely on a fall snack board with apple slices, grapes, nuts, dark chocolate, and cinnamon yogurt dip.

For a fresh and colorful side, try our Mediterranean Chickpea Cucumber Feta Salad with crisp vegetables, creamy feta, chickpeas, herbs, and lemon dressing.

Recipe Tips

Use pure pumpkin puree, not pumpkin pie filling, so you control the sweetness and spices.

Choose a vanilla protein powder you already enjoy because its flavor will be noticeable.

Use thick nut butter for the easiest shaping.

If the mixture is sticky, chill it longer before rolling.

For firmer bites, add a little extra oats or ground flaxseed.

For softer bites, increase the pumpkin puree slightly.

Do not add too much liquid sweetener at once because it can make the dough difficult to shape.

Mini chocolate chips distribute more evenly than full-size chips.

Easy Variations

Pumpkin Protein Balls can be changed easily depending on your preferences.

For a chocolate version, replace some of the vanilla protein powder with chocolate protein powder and add a teaspoon of cocoa powder.

For extra crunch, add chopped pecans or walnuts.

A coconut version works well with shredded coconut mixed into the dough and rolled around the outside.

For more spice, add extra cinnamon, ginger, nutmeg, or cloves.

You can also make them with peanut butter instead of almond butter for a stronger nutty flavor.

For a fruitier version, mix in finely chopped dried cranberries or raisins.

If you enjoy easy high-protein meal prep recipes, you may also like our High-Protein Sausage, Cheddar & Cottage Cheese Breakfast Biscuits.

Make-Ahead Instructions

These protein bites are ideal for preparing ahead.

Mix, chill, roll, and store them in an airtight container so they are ready whenever you need a quick snack.

You can prepare them several days before serving, which makes them useful for weekly meal prep.

If you plan to roll them in coconut or nuts, you can do that at the same time you shape them or just before serving.

Storage and Freezing

Store the finished bites in an airtight container in the refrigerator for up to 5 days.

Place parchment paper between layers if stacking them.

For longer storage, freeze them for up to 2 months. Arrange the balls on a tray until firm, then transfer them to a freezer-safe container or bag.

Thaw overnight in the refrigerator or let a frozen ball sit at room temperature for about 15 minutes before eating.

Nutrition Information

Approximate nutrition per ball:

Calories: 145
Protein: 7 g
Carbohydrates: 16 g
Fat: 7 g
Saturated Fat: 1.5 g
Fiber: 3 g
Sugar: 6 g
Sodium: 95 mg

Nutrition values are estimates and will vary depending on the protein powder, nut butter, sweetener, and optional mix-ins used.

Frequently Asked Questions

Can I use quick oats?

Yes. Quick oats work, although the finished texture may be softer and more uniform than when using rolled oats.

Can I use canned pumpkin?

Yes. Plain canned pumpkin puree works perfectly. Avoid pumpkin pie filling because it already contains sugar and spices.

Can I make these without protein powder?

Yes, but you will need to replace it with additional oats, oat flour, or ground nuts. The protein content will also be lower.

Why are my balls too sticky?

The mixture may contain too much pumpkin or sweetener. Add extra oats or protein powder and chill longer before rolling.

Can I use sunflower seed butter?

Yes. Sunflower seed butter is a good nut-free option and works well in Pumpkin Protein Balls.

Can I freeze them?

Yes. Freeze them in a sealed container for up to 2 months and thaw before serving.

Are they good for meal prep?

Yes. Pumpkin Protein Balls are especially convenient for meal prep because they store well and require no reheating.

Final Thoughts

Pumpkin Protein Balls are an easy no-bake snack that combines pumpkin, oats, nut butter, protein powder, flaxseed, and warm fall spices in one portable bite.

Because Pumpkin Protein Balls can be prepared ahead, customized with different mix-ins, refrigerated, or frozen, they are practical for breakfast prep, busy afternoons, and grab-and-go snacks.

Keep this Pumpkin Protein Balls recipe handy whenever you want a soft, flavorful snack with cozy pumpkin spice flavor and simple everyday ingredients.

With a creamy pumpkin base, warm cinnamon, and a satisfying chewy texture, Pumpkin Protein Balls are a simple seasonal recipe worth making again and again.
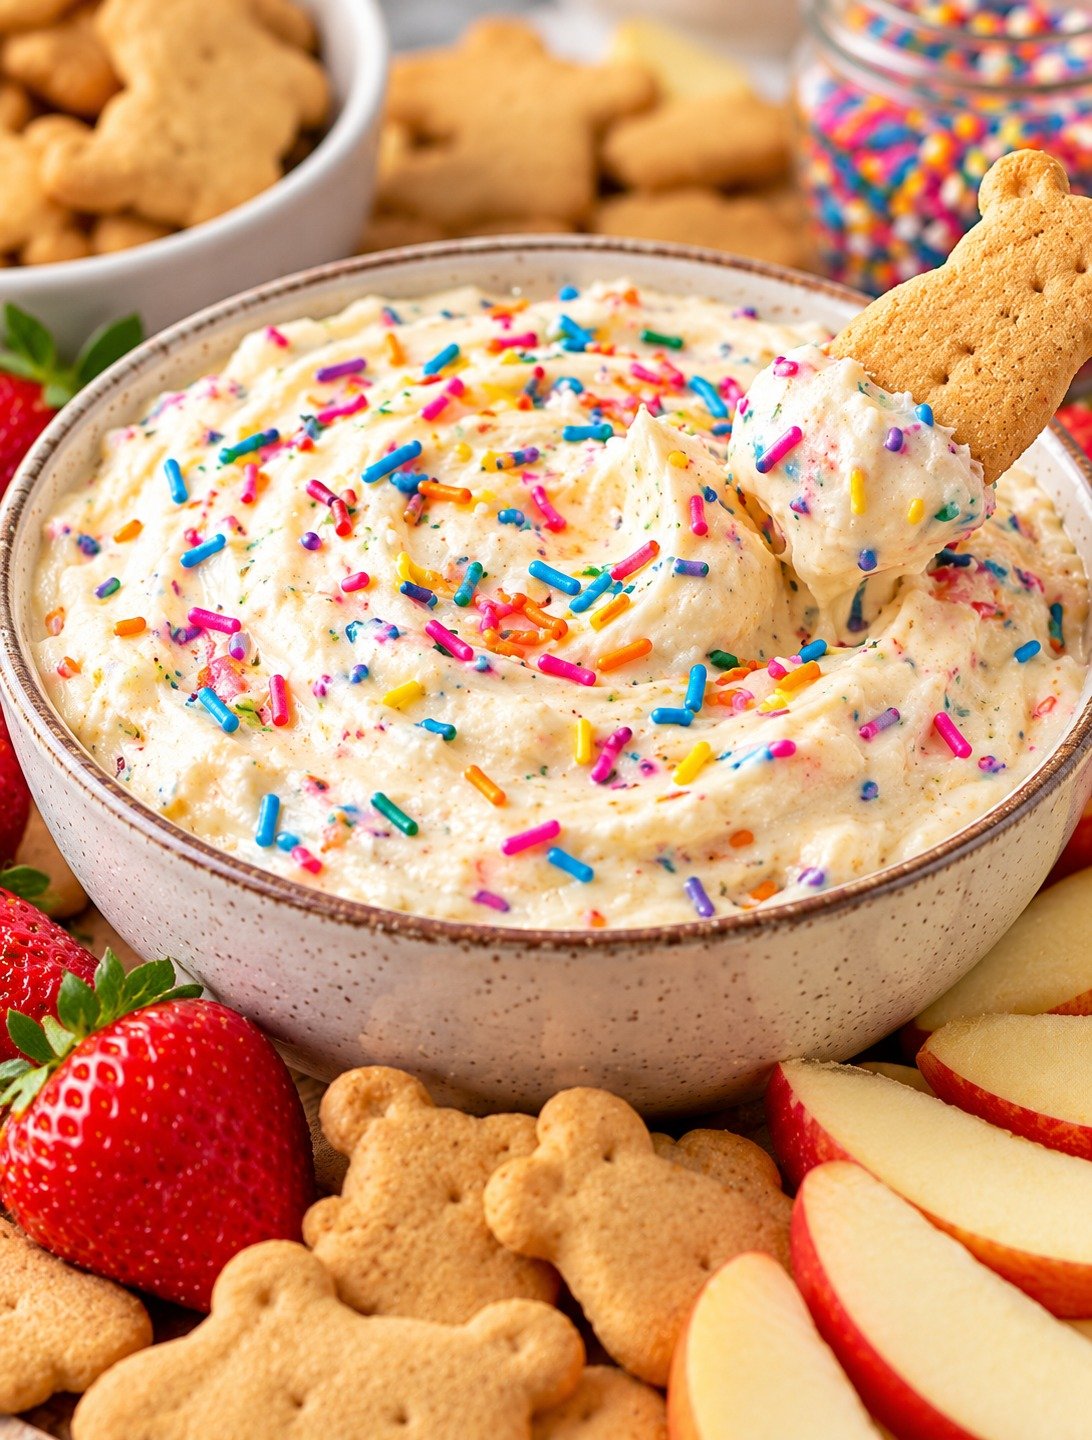

Viral High-Protein Dunkaroo Dip Made with Only 4 Ingredients

Dunkaroo Protein Dip with Greek yogurt, vanilla protein powder, pudding mix, and colorful rainbow sprinkles

Viral High-Protein Dunkaroo Dip Made with Only 4 Ingredients

Dunkaroo Protein Dip is a creamy, sweet, nostalgic snack made with just four simple ingredients: Greek yogurt, vanilla protein powder, sugar-free vanilla pudding mix, and rainbow sprinkles. It has the fun birthday-cake flavor people love in classic Dunkaroo-style dips, but with a higher-protein base that makes it more filling for snacks, meal prep, or dessert.

This Dunkaroo Protein Dip takes only a few minutes to mix, requires no baking, and can be served immediately or chilled for an even thicker texture. Pair it with fruit, graham crackers, pretzels, or mini cookies for a colorful treat that works for both everyday snacking and parties.

Prep Time: 5 minutes
Chill Time: 15 minutes, optional
Total Time: 5–20 minutes
Servings: 4

Ingredients

For the Dip

  • 1 1/2 cups thick plain or vanilla Greek yogurt
  • 1/2 cup vanilla protein powder
  • 2 tablespoons sugar-free vanilla pudding mix
  • 2 tablespoons rainbow sprinkles

That is all you need for this recipe. The yogurt creates the creamy base, the protein powder adds sweetness and extra protein, the pudding mix gives the dip a thick cake-batter texture, and the sprinkles provide the colorful finish.

Why You’ll Love This Recipe

Dunkaroo Protein Dip is one of those recipes that looks playful but is surprisingly practical. It is fast, easy to portion, and made from ingredients that are easy to keep on hand.

The texture is thick enough for dipping but still soft and creamy. Because the recipe uses Greek yogurt, it also has a light tang that balances the sweetness of the vanilla protein powder and pudding mix.

Another reason to love this dip is that it is easy to prepare ahead. Mix it in the morning, refrigerate it, and you have a ready-to-eat snack later in the day.

How to Make Dunkaroo Protein Dip

Step 1: Add the Greek Yogurt

Place the Greek yogurt in a medium mixing bowl.

For the thickest Dunkaroo Protein Dip, use a strained Greek yogurt rather than a thin regular yogurt. A thick base helps the finished dip hold onto fruit, crackers, and pretzels without sliding off.

If you are using vanilla Greek yogurt, the dip will be sweeter. Plain Greek yogurt gives you more control over the final sweetness.

Step 2: Add the Protein Powder

Add the vanilla protein powder to the bowl.

Use a protein powder that you already enjoy because its flavor will be noticeable. Whey, casein, or a blended protein powder can work, but they absorb moisture differently.

Stir slowly at first so the powder does not puff out of the bowl.

Step 3: Add the Pudding Mix

Sprinkle the sugar-free vanilla pudding mix over the yogurt and protein powder.

This ingredient helps Dunkaroo Protein Dip become thicker, smoother, and more like cake batter.

Do not add too much pudding mix. A small amount is enough to thicken the yogurt and improve the vanilla flavor without making the dip overly dense.

Step 4: Mix Until Smooth

Use a spoon, whisk, or silicone spatula to stir everything together.

Mix until there are no dry pockets of protein powder or pudding mix.

If the dip becomes very thick, continue stirring for another 30 seconds before deciding whether it needs adjusting. The yogurt often loosens slightly as everything blends together.

The finished Dunkaroo Protein Dip should be creamy, thick, and easy to scoop.

Step 5: Fold in the Sprinkles

Add most of the rainbow sprinkles and gently fold them into the dip.

Save a small amount for decorating the top.

Avoid aggressive mixing because some sprinkles can release color into the yogurt and create streaks.

Step 6: Taste the Dip

Taste a small spoonful.

Different protein powders vary in sweetness, so the flavor may be slightly different depending on the brand you use.

Because this is a four-ingredient recipe, keeping the ingredient list simple is part of the appeal of Dunkaroo Protein Dip.

Step 7: Chill if Desired

You can serve the dip immediately, but chilling it for 15 to 30 minutes gives it an even thicker texture.

Cover the bowl and place it in the refrigerator.

As the pudding mix and protein powder absorb moisture, Dunkaroo Protein Dip becomes more scoopable and dessert-like.

Step 8: Garnish and Serve

Spoon the dip into a serving bowl and scatter the reserved sprinkles over the top.

Serve it with your favorite dippers and enjoy.

Serving Suggestions

Dunkaroo Protein Dip works with a wide variety of dippers, so you can make the snack as light or indulgent as you like.

For more crunch, serve Dunkaroo Protein Dip with graham crackers, pretzel sticks, animal crackers, vanilla wafers, or mini rice cakes.

You can also pair it with apple slices, strawberries, banana, grapes, or other fresh fruit for a colorful snack plate.

For a savory main dish, try our Lemon & Garlic Chicken Bites with tender chicken, fresh lemon, garlic, herbs, and olive oil.

Recipe Tips

Use thick Greek yogurt for the best consistency.

A vanilla protein powder gives the most classic cake-batter flavor.

Add the protein powder gradually if your brand absorbs a lot of liquid.

Choose rainbow jimmies rather than very small nonpareils if you want less color bleeding.

Do not overmix the sprinkles.

For the smoothest texture, sift protein powder first if it tends to form lumps.

Chill the dip before serving if you prefer a thicker consistency.

If you prepare it ahead, add a few fresh sprinkles on top just before serving for the brightest appearance.

Easy Variations

Dunkaroo Protein Dip can be changed without making the basic method complicated.

For a chocolate version, use chocolate protein powder instead of vanilla while keeping the other ingredients the same.

A birthday-cake protein powder can make the flavor even more dessert-like.

For a cookies-and-cream twist, use cookies-and-cream protein powder and keep the rainbow sprinkles for color.

You can also use strawberry Greek yogurt for a fruity variation.

If you want a slightly tangier Dunkaroo Protein Dip, choose plain Greek yogurt. For a sweeter version, use vanilla Greek yogurt.

Make-Ahead Instructions

Dunkaroo Protein Dip is a convenient make-ahead snack because it actually thickens slightly as it rests.

Prepare the recipe up to one day before serving and keep it covered in the refrigerator.

For the neatest appearance, mix most of the sprinkles into the dip but wait to add the final garnish until serving time.

If the dip becomes thicker than you prefer after refrigeration, stir it well before serving. Usually, that is enough to restore the creamy texture.

Storage

Store leftover Dunkaroo Protein Dip in an airtight container in the refrigerator for up to 3 days.

Give it a quick stir before eating because a small amount of liquid may collect on the surface.

Keep the dip chilled when serving at a party, especially if it will sit out for a longer period.

Freezing is not recommended because Greek yogurt can become grainy or watery after thawing.

Nutrition Information

Approximate nutrition per serving, based on four servings:

Calories: 170
Protein: 22 g
Carbohydrates: 14 g
Fat: 3 g
Saturated Fat: 1 g
Fiber: 1 g
Sugar: 7 g
Sodium: 220 mg

Nutrition values are estimates and will vary depending on the Greek yogurt, protein powder, pudding mix, and sprinkles you choose.

Frequently Asked Questions

Can I use plain Greek yogurt?

Yes. Plain Greek yogurt works very well and gives the recipe a slightly tangier flavor.

What protein powder is best?

Vanilla protein powder is the easiest choice because it creates the classic sweet cake-batter flavor. Birthday-cake protein powder also works well.

Can I make it without pudding mix?

You can, but the texture will be thinner and the flavor will be less like a classic dessert dip.

Why is my dip too thick?

Some protein powders absorb more moisture than others. Stir the mixture thoroughly and let it rest before deciding whether the texture needs adjusting.

Can I make this for meal prep?

Yes. Dunkaroo Protein Dip can be portioned into small containers and refrigerated for quick snacks.

What are the best dippers?

Fruit, graham crackers, pretzels, mini cookies, and rice cakes all work well.

Can children eat this recipe?

It can be served as a snack, but the suitability of a particular protein powder depends on the product and individual dietary needs. For children, check the product label and follow appropriate guidance.

Final Thoughts

Dunkaroo Protein Dip is an easy way to turn four simple ingredients into a creamy, colorful snack with nostalgic birthday-cake flavor.

Because Dunkaroo Protein Dip takes only minutes to prepare, it works well for busy days, meal prep, parties, or a quick dessert when you do not want to bake.

Keep this Dunkaroo Protein Dip recipe handy whenever you want something sweet, creamy, fun, and protein-rich with almost no preparation.

With Greek yogurt, vanilla protein powder, pudding mix, and rainbow sprinkles, Dunkaroo Protein Dip proves that a simple four-ingredient recipe can still feel like a special treat.

If you want an easy no-bake dessert, you may also like our Apple Samoas Recipe with crisp apples, caramel, toasted coconut, and chocolate.

Creamy Turkey Cucumber Roll-Ups with Pepper Jack

Turkey Roll-Ups with cucumber, creamy Pepper Jack filling, turkey slices, fresh herbs, and red bell pepper

Creamy Turkey Cucumber Roll-Ups with Pepper Jack

Turkey Roll-Ups are a creamy, crunchy, and protein-rich snack made with sliced turkey, fresh cucumber, smooth cream cheese, shredded Pepper Jack, and flavorful herbs. Each roll-up is easy to assemble and offers a satisfying combination of savory turkey, cool cucumber, creamy cheese, and a gentle kick from Pepper Jack.

These easy roll-ups work well for lunch, quick snacks, party platters, meal prep, picnics, and casual gatherings. They require no complicated cooking, making them especially useful when you need something fast and filling.

The cucumber adds freshness and crunch, while the turkey provides protein. Pepper Jack gives the filling a little heat without overpowering the other ingredients. You can also customize the filling with herbs, vegetables, or different cheeses.

Prep Time: 20 minutes
Cook Time: None
Chill Time: 15 minutes
Total Time: 35 minutes
Servings: 12 roll-ups
Course: Appetizer, Snack, Lunch
Cuisine: American-inspired

Ingredients

For the Roll-Ups

12 slices deli turkey

1 large cucumber

6 ounces cream cheese, softened

1 cup shredded Pepper Jack cheese

2 tablespoons mayonnaise

1 tablespoon fresh lemon juice

1/2 teaspoon garlic powder

1/2 teaspoon black pepper

1/4 teaspoon smoked paprika

1 tablespoon fresh parsley, chopped

1 tablespoon fresh dill, chopped

1/4 cup finely diced red bell pepper

2 tablespoons finely diced green onions

1/4 teaspoon salt

Optional Additions

Thin avocado slices

Baby spinach

Shredded carrots

Sliced jalapeños

Chopped olives

Fresh chives

Red pepper flakes

Step-by-Step Instructions

Prepare the Creamy Filling

Place the softened cream cheese in a medium mixing bowl.

Add mayonnaise and fresh lemon juice.

Stir until the mixture becomes smooth and creamy.

Add garlic powder, black pepper, smoked paprika, and salt.

Mix well.

Fold in shredded Pepper Jack cheese.

Add chopped parsley and fresh dill.

Stir gently until all ingredients are evenly distributed.

The filling should be creamy but thick enough to spread easily.

If the mixture feels too soft, place it in the refrigerator for about 10 minutes.

A firm filling makes the Turkey Roll-Ups easier to assemble.

Add the Vegetables

Finely dice the red bell pepper.

Slice the green onions into very small pieces.

Add both vegetables to the cream cheese mixture.

Stir gently.

Small vegetable pieces work best because large pieces can make the roll-ups difficult to close.

The peppers add color and a slight sweetness.

Green onions provide a mild savory flavor.

You can also add finely chopped cucumber to the filling, but keep the amount small because excess moisture can make the mixture watery.

Prepare the Cucumber

Wash the cucumber thoroughly.

Pat it dry.

Cut off both ends.

Use a vegetable peeler or mandoline slicer to create long, thin cucumber strips.

The strips should be flexible enough to bend without breaking.

Avoid making them too thick.

Very thick cucumber slices can make rolling difficult.

If the cucumber contains a lot of moisture, gently pat the strips with paper towels.

This helps keep the filling firm.

Fresh cucumber provides a cool, crisp layer that balances the rich cheese mixture in these Turkey Roll-Ups.

Prepare the Turkey

Lay the turkey slices flat on a clean cutting board.

If the slices are very large, cut them into smaller rectangles.

Choose turkey slices that are large enough to wrap around the filling.

Thin deli turkey works well because it bends easily.

Thicker slices provide a heartier bite but may be slightly harder to roll.

Pat the turkey gently with a paper towel if it contains excess moisture.

A dry surface helps the filling stay in place.

Assemble the Roll-Ups

Place one turkey slice on a flat surface.

Spread approximately 1 tablespoon of the creamy Pepper Jack mixture over the turkey.

Leave a small border around the edges.

Place one cucumber strip near one end of the turkey.

Roll the turkey tightly around the cucumber.

Continue rolling until the filling is enclosed.

Place the roll seam-side down.

Repeat with the remaining turkey slices.

Do not add too much filling.

An overloaded roll can split when you try to close it.

A moderate amount creates a neat shape and balanced flavor.

The combination of turkey, creamy cheese, and crisp cucumber makes Turkey Roll-Ups especially satisfying.

Chill the Roll-Ups

Arrange the finished roll-ups on a plate.

Cover them loosely with plastic wrap.

Refrigerate for about 15 minutes.

Chilling helps the cream cheese filling firm up.

It also makes the roll-ups easier to slice and serve.

If you are preparing them for a party, you can chill them for up to a few hours before serving.

Keep them refrigerated until you are ready to place them on the serving platter.

Tips for the Best Results

Use softened cream cheese so the filling mixes smoothly.

Do not melt the cream cheese.

Room-temperature cream cheese is easier to spread.

Choose thin turkey slices with enough surface area for rolling.

Slice the cucumber thinly.

Pat the cucumber dry before adding it.

Avoid adding too much filling.

Keep the filling chilled if your kitchen is warm.

Use freshly shredded Pepper Jack for the best texture.

Add lemon juice gradually.

Too much liquid can make the filling loose.

These simple tips help keep Turkey Roll-Ups neat, creamy, and easy to serve.

Choosing the Best Turkey

Deli turkey works well because it is thin and flexible.

You can use roasted turkey slices for a more homemade flavor.

Smoked turkey adds a deeper savory taste.

Peppered turkey can provide extra spice.

For a milder version, choose plain roasted turkey.

If you prefer a stronger flavor, smoked turkey pairs nicely with Pepper Jack.

The turkey should be sliced thin enough to roll without tearing.

Avoid slices with large holes or uneven edges.

A smooth slice creates a more attractive finished roll.

Choosing the Best Cucumber

English cucumbers are an excellent choice.

They have thin skin and fewer seeds.

Regular cucumbers can also work.

If using a large cucumber with many seeds, remove the watery center before slicing.

The goal is to create firm, flexible strips.

A mandoline slicer can make evenly thin pieces.

Always use caution when working with a mandoline.

You can also use a vegetable peeler to create wide cucumber ribbons.

The thin cucumber layer keeps Turkey Roll-Ups fresh and crunchy without overpowering the turkey and cheese.

Pepper Jack Substitutions

Pepper Jack gives the filling a mild spicy flavor.

If you prefer less heat, use Monterey Jack.

Cheddar provides a stronger, sharper flavor.

Mozzarella creates a mild and stretchy filling.

Colby Jack gives a balanced combination of creamy and savory flavors.

For extra heat, add a small amount of diced jalapeño.

You can also combine Pepper Jack with another cheese.

A mixture of half Pepper Jack and half cheddar creates a richer filling.

These options make Turkey Roll-Ups easy to adapt to different preferences.

Flavor Variations

Ranch Turkey Roll-Ups

Add 1 teaspoon of ranch seasoning to the cream cheese mixture.

The ranch flavor pairs well with cucumber and turkey.

Spicy Turkey Roll-Ups

Add diced jalapeño and red pepper flakes.

Use extra Pepper Jack for a stronger kick.

Mediterranean Version

Add chopped olives, feta, parsley, and a little oregano.

Replace some of the mayonnaise with Greek yogurt.

Avocado Version

Add thin avocado slices before rolling.

A little lemon juice can help prevent the avocado from browning.

Veggie Version

Add shredded carrots, spinach, and finely diced bell peppers.

The extra vegetables create a colorful and crunchy filling.

These variations keep Turkey Roll-Ups interesting when you want to prepare them regularly.

Make-Ahead Instructions

These roll-ups are excellent for preparing ahead.

Make the cream cheese filling earlier in the day.

Store it in a sealed container in the refrigerator.

Prepare the cucumber strips shortly before assembly.

Assemble the roll-ups several hours before serving.

Cover them and keep them refrigerated.

For the best texture, serve them within the same day.

If preparing them for a party, arrange them on a serving tray just before guests arrive.

Keep the platter chilled until serving time.

The make-ahead option makes Turkey Roll-Ups useful for parties, lunch boxes, and busy weekdays.

Meal Prep Instructions

Prepare several roll-ups at once.

Place each roll-up in an airtight container.

Use parchment paper between layers if necessary.

Keep them refrigerated.

Add fresh vegetables only when needed.

For meal prep, you can prepare the cream cheese filling for several days.

However, cucumber releases moisture over time.

For the freshest texture, assemble the roll-ups closer to the day you plan to eat them.

These Turkey Roll-Ups make a convenient grab-and-go snack.

Serving Suggestions

Serve the roll-ups chilled.

Arrange them on a platter with fresh cucumber slices.

Add cherry tomatoes for color.

Olives make a good savory side.

You can also serve them with a small bowl of ranch dressing.

For a larger lunch, add fresh fruit and a simple green salad.

Crackers provide extra crunch.

For parties, cut the roll-ups into smaller pieces and secure each one with a toothpick.

This makes them easy for guests to pick up.

The colorful filling makes Turkey Roll-Ups attractive on appetizer boards.

Party Presentation

Place the finished roll-ups on a large white serving platter.

Arrange them in rows or a circular pattern.

Garnish with fresh parsley and dill.

Add thin cucumber slices around the edges.

A few cherry tomatoes can provide bright color.

For a spicy platter, add sliced jalapeños.

You can also place small bowls of ranch or herb dip nearby.

If serving at a lunch gathering, combine the roll-ups with fruit, cheese cubes, olives, and crackers.

The simple presentation makes Turkey Roll-Ups look polished without requiring much effort.

Storage Instructions

Store leftover roll-ups in an airtight container.

Keep them refrigerated.

For the best quality, eat them within 1 to 2 days.

The cucumber may release moisture as it sits.

If possible, keep extra cucumber separate and assemble additional roll-ups when needed.

Do not leave the finished roll-ups at room temperature for an extended period.

Keep them chilled until serving.

Common Mistakes to Avoid

Do not use wet cucumber strips.

Excess moisture can loosen the filling.

Avoid using very thick cucumber slices.

Do not overfill the turkey.

An excessive amount of filling can cause the roll to open.

Avoid using cream cheese that is too cold.

Cold cream cheese can be difficult to spread.

Do not add too much lemon juice.

Too much liquid can make the filling soft.

Avoid cutting the roll-ups immediately after assembly if the filling is loose.

A short chilling period helps everything hold together.

These simple precautions help keep Turkey Roll-Ups neat and flavorful.

Frequently Asked Questions

Can I use chicken instead of turkey?

Yes. Thinly sliced cooked chicken can be used, although turkey provides the classic flavor for this recipe.

Can I use Greek yogurt instead of mayonnaise?

Yes. Greek yogurt creates a lighter filling with a pleasant tang.

Can I use regular Jack cheese?

Yes. Monterey Jack is a good choice if you want a milder flavor.

Can I make the recipe spicy?

Absolutely. Add jalapeños, red pepper flakes, or extra Pepper Jack.

Can I make these without cream cheese?

You can use thick Greek yogurt mixed with shredded cheese, although the texture will be different.

Can I prepare them the night before?

It is better to prepare them the same day because cucumber can release moisture. If necessary, assemble them the night before and keep them tightly covered and refrigerated.

Can I use cucumber ribbons?

Yes. A vegetable peeler can create wide cucumber ribbons that work very well.

Are these good for lunch boxes?

Yes. Keep them chilled in an insulated lunch bag with an ice pack.

Can I add avocado?

Yes. Thin avocado slices add creaminess and healthy fats.

What vegetables work best?

Bell peppers, spinach, shredded carrots, green onions, and thin cucumber strips are excellent choices.

Nutrition Information

Approximate nutrition per serving:

Calories: 165 kcal
Protein: 12g
Carbohydrates: 4g
Fat: 11g
Fiber: 1g
Sugar: 2g
Sodium: 510mg

Nutrition values are estimates and vary depending on the turkey, cheese, cream cheese, and other ingredients used.

Why You Will Love This Recipe

These Turkey Roll-Ups are quick, creamy, crunchy, and satisfying.

They require no oven.

They can be prepared in advance.

The turkey provides protein.

Cucumber adds freshness.

Cream cheese creates a smooth filling.

Pepper Jack provides a gentle kick.

Fresh herbs add brightness.

Another advantage is versatility.

The cheese can be changed to suit your taste. Different vegetables add extra color and crunch. A little spice makes the filling more flavorful. Children may prefer a milder version. These roll-ups also work well as a quick snack or light lunch.

They can also become part of a party platter.

For meal prep, prepare the filling ahead and assemble the roll-ups when needed.

The simple ingredients make Turkey Roll-Ups convenient for busy days.

Helpful Recipe Notes

Use a sharp knife when slicing the cucumber.

Thin cucumber ribbons are easier to roll.

If you use a mandoline, handle it carefully.

Keep the cream cheese filling thick.

If it becomes too soft, refrigerate it for a few minutes.

Fresh herbs provide the best flavor.

You can use dried herbs if fresh herbs are unavailable.

Adjust the amount of Pepper Jack based on your preferred spice level.

A lighter version works well with reduced-fat cream cheese and lean turkey. Shredded carrots add extra crunch and color. For a Mediterranean twist, mix in olives and feta. Jalapeños bring a spicy kick to the filling.

These adjustments make Turkey Roll-Ups easy to personalize.

Final Thoughts

Creamy Turkey Cucumber Roll-Ups with Pepper Jack are a simple option when you want something fresh, flavorful, and easy to prepare.

The turkey provides a savory protein base.

Cucumber brings a crisp and refreshing texture.

Cream cheese creates a creamy layer.

Pepper Jack adds mild heat.

Fresh parsley and dill brighten the filling.

Red bell pepper and green onion provide extra color and crunch.

The recipe does not require cooking, so assembly is quick.

Prepare the filling first.

Slice the cucumber into thin ribbons.

Lay the turkey flat.

Spread the filling evenly.

Add cucumber.

Roll everything tightly.

Then chill the finished pieces before serving.

For parties, cut each roll into smaller pieces and secure them with toothpicks. At lunchtime, serve larger pieces with fresh fruit and vegetables. During meal prep, keep the roll-ups chilled and enjoy them within one to two days.

You can also customize the recipe with avocado, spinach, carrots, jalapeños, olives, feta, or different cheeses.

The result is a flexible appetizer that can fit many different occasions.

Whether you need a quick snack, a lunch option, or an easy party appetizer, Turkey Roll-Ups offer a delicious combination of creamy, crunchy, savory, and slightly spicy flavors.

The simple preparation makes them especially convenient.

The fresh cucumber keeps every bite light, while Pepper Jack and cream cheese provide satisfying richness.

Serve them chilled with your favorite fresh vegetables, fruit, crackers, or dipping sauce.

With their colorful filling and easy preparation, Turkey Roll-Ups are a practical recipe to keep ready for busy weekdays, family gatherings, and casual entertaining.

Spinach Quiche Muffin

Spinach Quiche Muffins with spinach eggs cheese and fresh herbs

Spinach Quiche Muffins: A Wholesome Snack for Busy Days

Spinach Quiche Muffins are a delicious, healthy, and convenient snack option for busy mornings, quick lunches, or meal prep days. These bite-sized savory muffins combine fresh spinach, eggs, cheese, and flavorful herbs to create a protein-rich recipe that is easy to prepare and perfect for the whole family.

Unlike traditional quiche, which requires a crust and longer preparation time, these mini quiche muffins are simple, portable, and freezer-friendly. They are a great choice for anyone looking for a nutritious breakfast, a low-carb snack, or an easy meal that can be prepared ahead of time.

Packed with vegetables and satisfying flavors, these muffins prove that healthy food can also be comforting and delicious.

Why You’ll Love These Spinach Quiche Muffins

There are many reasons to add this recipe to your weekly meal plan:

Easy Meal Prep Recipe

These muffins can be prepared in advance and stored for busy mornings. Simply warm them up when needed and enjoy a homemade breakfast without spending extra time cooking.

High in Protein

Eggs provide high-quality protein, making these muffins filling and satisfying. They can help you stay energized throughout the day.

Perfect Portable Snack

Their small size makes them ideal for:

  • School lunches
  • Office snacks
  • Travel meals
  • Post-workout snacks

Customizable Ingredients

You can easily change the ingredients based on your preferences. Add more vegetables, different cheeses, or herbs to create your own version.

Ingredients for Spinach Quiche Muffins

Main Ingredients

  • 8 large eggs
  • 2 cups fresh spinach, chopped
  • ½ cup shredded mozzarella cheese
  • ¼ cup grated Parmesan cheese
  • ½ cup milk or Greek yogurt
  • 1 small onion, finely chopped
  • 2 cloves garlic, minced
  • ½ cup bell peppers, diced
  • ½ teaspoon salt
  • ½ teaspoon black pepper
  • ½ teaspoon dried oregano
  • ¼ teaspoon paprika
  • 1 tablespoon olive oil

Step-by-Step Instructions

1. Prepare the Ingredients

Preheat your oven to 375°F (190°C).

Lightly grease a muffin tin with olive oil or cooking spray to prevent sticking.

Wash and chop the spinach into smaller pieces. Prepare all vegetables before mixing the ingredients.

2. Cook the Vegetables

Heat olive oil in a pan over medium heat.

Add chopped onion and cook for 2–3 minutes until softened, garlic and cook for another 30 seconds, spinach and bell peppers. Cook until the spinach becomes slightly wilted.

Remove from heat and allow the mixture to cool slightly.

3. Prepare the Egg Mixture

In a large bowl, whisk together:

  • Eggs
  • Milk or Greek yogurt
  • Salt
  • Pepper
  • Oregano
  • Paprika

Mix until smooth and well combined.

Add mozzarella and Parmesan cheese, then stir gently.

4. Fill the Muffin Cups

Add the cooked spinach mixture evenly into each muffin cup.

Pour the egg mixture over the vegetables until each cup is about ¾ full.

Do not overfill because the muffins will expand while baking.

5. Bake the Quiche Muffins

Place the muffin tray in the oven and bake for:

20–25 minutes

The muffins are ready when:

  • The tops are golden
  • The center is firm
  • A toothpick inserted comes out clean

Allow them to cool for a few minutes before removing.

Tips for Perfect Spinach Quiche Muffins

Remove Extra Water From Spinach

Spinach contains a lot of moisture. If using frozen spinach, squeeze out excess water before adding it.

This helps prevent watery muffins.

Use Fresh Herbs

Fresh herbs can improve the flavor. Try adding:

  • Basil
  • Parsley
  • Chives
  • Dill

Do Not Overbake

Overbaking can make the muffins dry and rubbery. Remove them once they are just set.

Grease the Muffin Pan Well

Egg-based recipes can stick easily, so properly grease the muffin cups.

Healthy Variations

Mediterranean Spinach Quiche Muffins

Add:

  • Cherry tomatoes
  • Feta cheese
  • Olives
  • Fresh basil

for a Mediterranean-inspired flavor.

High Protein Version

Increase protein by adding:

  • Cottage cheese
  • Extra egg whites
  • Chicken pieces

Low Carb Version

Replace milk with heavy cream or Greek yogurt and add more vegetables.

For another protein-rich breakfast option, try our Mediterranean Honey Lime Chicken & Avocado Egg Muffins, packed with delicious flavors and healthy ingredients.

Storage and Meal Prep

These Spinach Quiche Muffins are excellent for meal preparation.

Refrigerator Storage

Store in an airtight container for up to 4 days.

Freezer Storage

Freeze individually wrapped muffins for up to 3 months.

Reheating

Warm in the microwave for 30–60 seconds or heat in the oven until warm.

Serving Ideas

Enjoy these muffins with:

  • Fresh fruit
  • Green salad
  • Greek yogurt
  • Avocado slices
  • Whole grain toast

They work perfectly as breakfast, brunch, or a light snack.

If you enjoy healthy homemade snacks, you can also try our Mediterranean Almond Raisin Muffins for a naturally sweet and nutritious treat.

Nutritional Information (Approximate)

Serving Size: 2 muffins

Calories: 180 kcal
Protein: 12g
Carbohydrates: 5g
Fat: 12g
Fiber: 2g

Nutrition values may vary depending on ingredients used.

Frequently Asked Questions

Can I use frozen spinach?

Yes, frozen spinach works well. Make sure to remove extra water before adding it.

Can I make these without cheese?

Yes. You can replace cheese with extra vegetables or nutritional yeast.

Are spinach quiche muffins good for meal prep?

Yes. They store well in the refrigerator and freezer, making them perfect for busy schedules.

Can children eat these muffins?

Yes, they are a great way to add vegetables and protein to children’s meals.

Final Thoughts

Spinach Quiche Muffins are a simple yet nutritious recipe that combines convenience, flavor, and healthy ingredients. Whether you need a quick breakfast, an easy snack, or a meal-prep option, these mini quiches are a practical choice.

With spinach, eggs, cheese, and herbs, you get a balanced recipe that is satisfying, versatile, and easy to customize. Prepare a batch today and enjoy a wholesome homemade snack throughout the week.