Air Fryer Kabocha Squash Wedges

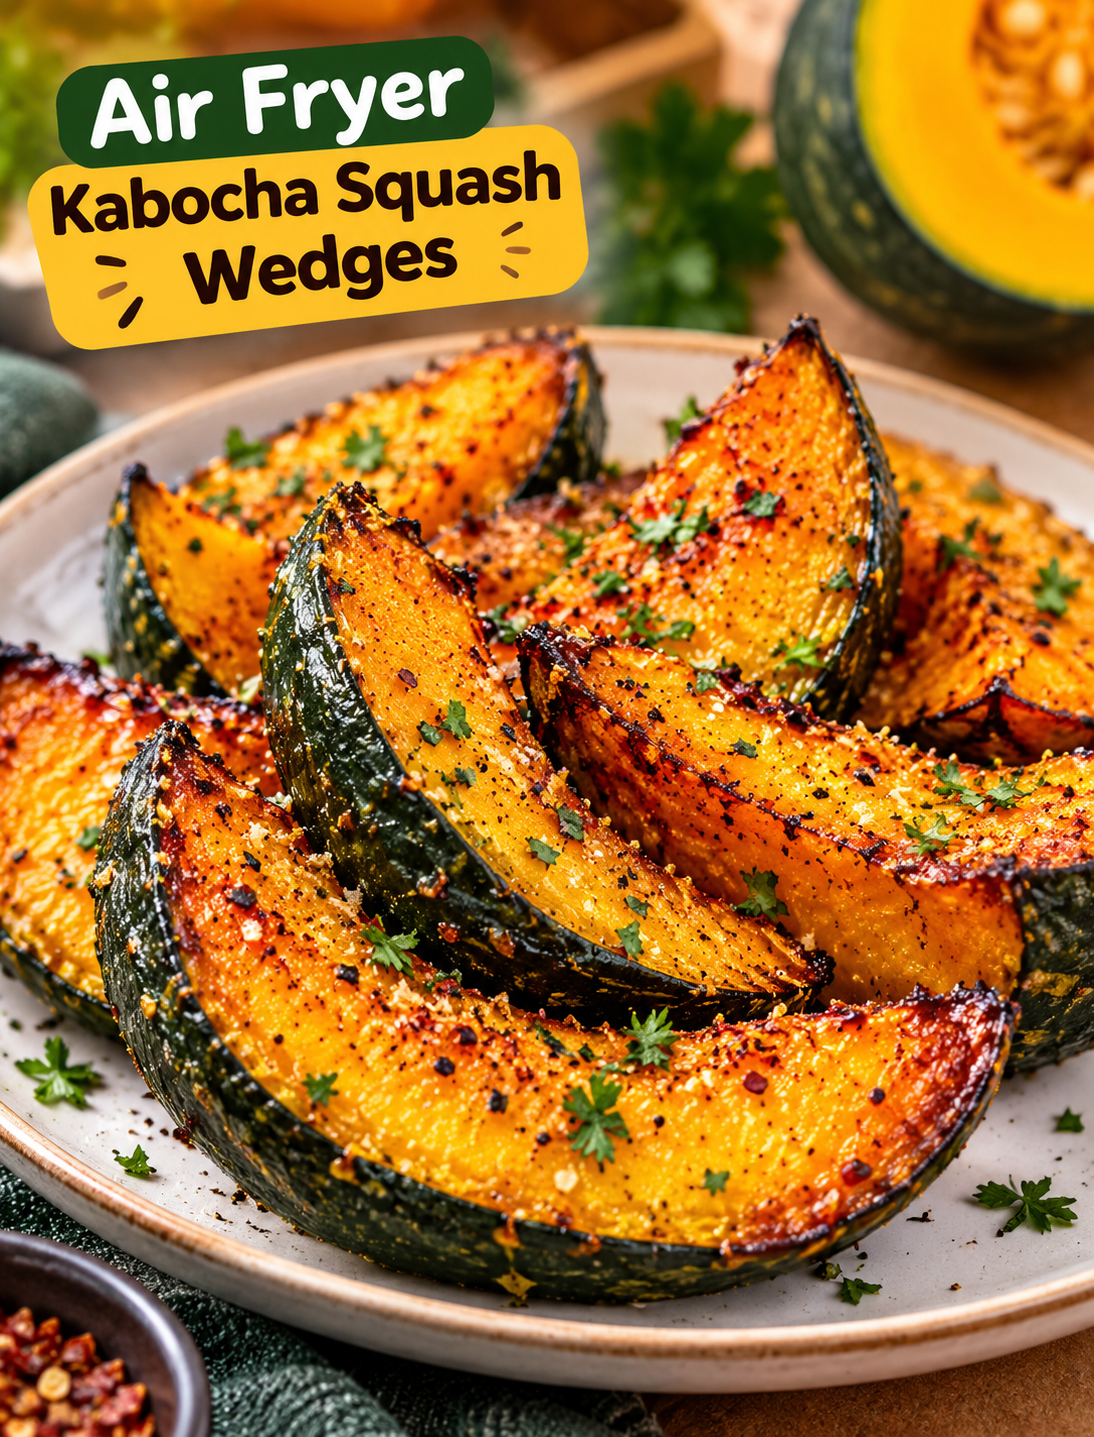
Crispy air fryer kabocha squash wedges with caramelized edges and tender orange centers on a serving plate

Air Fryer Kabocha Squash Wedges

If you love roasted squash with crisp edges and a naturally sweet center, these Air Fryer Kabocha Squash Wedges are worth trying. Kabocha squash becomes tender inside while the outside develops lightly crisp, caramelized edges in the air fryer.

This simple recipe uses olive oil, garlic, paprika, salt, and black pepper to bring out the squash’s rich flavor without covering up its natural sweetness. It is an easy fall side dish that works well with chicken, fish, steak, grain bowls, or a simple weeknight dinner.

Unlike some winter squash recipes that require a long roasting time, the air fryer gives kabocha squash a beautifully browned finish in a relatively short time. You also do not need to peel the squash before cooking because the skin softens as it cooks and can be eaten.

What Is Kabocha Squash?

Kabocha squash is a Japanese winter squash known for its deep green skin and bright orange flesh. It has a firm texture and a flavor that is naturally sweet, slightly nutty, and similar to a cross between pumpkin and sweet potato.

The dense flesh holds its shape well when cooked, making it a great choice for roasting and air frying. The skin is edible after cooking, although you can remove it if you prefer a softer texture.

When shopping, choose a kabocha that feels heavy for its size and has firm, unblemished skin. A ripe squash should feel dense rather than hollow or unusually light.

Why You’ll Love This Recipe

  • Crispy edges: High air-fryer heat creates beautifully browned edges.
  • Creamy center: The thick flesh becomes tender and naturally buttery.
  • Simple ingredients: You only need a few basic seasonings.
  • No peeling required: The skin becomes tender enough to eat.
  • Quick side dish: It cooks faster than many traditional oven-roasted squash recipes.
  • Easy to customize: You can make it savory, spicy, smoky, or slightly sweet.
  • Great for fall: Its warm color and naturally sweet flavor fit perfectly with autumn meals.

Ingredients You’ll Need

  • 1 medium kabocha squash, about 2 pounds
  • 1½ tablespoons olive oil
  • 1 teaspoon garlic powder
  • Smoked paprika ½ teaspoon
  •  kosher salt ½ teaspoon
  • Black pepper ¼ teaspoon
  • onion powder ¼ teaspoon
  • maple syrup 1 teaspoon , optional
  • 1 teaspoon chopped fresh parsley, optional
  • Toasted sesame seeds ½ teaspoon , optional

Use a good-quality olive oil because it helps the seasonings coat the squash evenly and promotes browning during air frying.

For a sweeter version, add a small amount of maple syrup. For a more savory side dish, leave it out.

How to Cut Kabocha Squash Safely

Kabocha squash has very firm flesh, so cutting it requires care. Do not try to force a small knife through the whole squash with a quick downward motion.

  1. Wash and dry the squash thoroughly.
  2. Place it on a stable cutting board.
  3. Use a sturdy chef’s knife.
  4. Carefully cut the squash in half from stem to bottom.
  5. Scoop out the seeds and stringy pulp with a spoon.
  6. Place each half cut-side down for stability.
  7. Cut each half into wedges about ¾-inch thick.

If the squash is extremely difficult to cut, microwave the whole squash for about 2–3 minutes to soften it slightly. Let it cool enough to handle before cutting.

How to Make Air Fryer Kabocha Squash Wedges

Step 1: Prepare the Squash

Wash the kabocha squash and dry it well. Cut it in half, remove the seeds, and slice the flesh into even wedges.

Try to keep the pieces similar in thickness so they cook at the same rate.

Step 2: Make the Seasoning Mixture

Add olive oil, garlic powder, smoked paprika, salt, black pepper, and onion powder to a small bowl.

If you want a lightly sweet roasted flavor, add the maple syrup and stir until combined.

Step 3: Coat the Wedges

Place the squash wedges in a large bowl. Pour the seasoning mixture over them and toss gently until every piece is lightly coated.

Avoid adding too much oil because excess oil can make the wedges greasy instead of crisp.

Step 4: Preheat the Air Fryer

Preheat your air fryer to 380°F for about 3 minutes.

Preheating helps the squash begin browning as soon as it enters the basket.

Step 5: Arrange the Squash

Place the seasoned kabocha wedges in the air fryer basket in a single layer.

Leave a little space between the pieces so hot air can circulate around them. Cook in batches if necessary.

Step 6: Air Fry

Air fry the squash at 380°F for 15–20 minutes, turning the wedges halfway through cooking.

The exact cooking time depends on the thickness of the wedges and your air fryer model.

Step 7: Check for Doneness

The wedges are ready when the edges are browned and the center can be easily pierced with a fork.

For softer squash, cook for another 2–3 minutes. For darker, more caramelized edges, continue cooking briefly while watching closely.

Step 8: Add the Finishing Touches

Transfer the cooked wedges to a serving plate. Sprinkle with fresh parsley and toasted sesame seeds if desired.

Serve immediately while the edges are warm and crisp.

Tips for Crispy Kabocha Squash

Do not overcrowd the basket. Crowding traps steam and can prevent the edges from browning properly.

Cut evenly sized wedges. Similar thickness helps the squash cook at the same rate.

Use a light coating of oil. Too much oil can make the surface heavy and greasy.

Turn halfway through. Flipping exposes both sides to the circulating hot air.

Keep the skin on. The skin becomes tender during cooking and adds texture to the finished wedges.

Watch the final minutes. Natural sugars in kabocha can brown quickly once the squash becomes tender.

Flavor Variations

You can easily change the seasoning depending on the meal.

Spicy version, add ¼ teaspoon of cayenne pepper or a pinch of red pepper flakes.

Maple version, toss the cooked wedges with a small drizzle of maple syrup and a pinch of cinnamon.

Herb version, use dried rosemary or thyme with garlic powder and black pepper.

Japanese-inspired version, finish the squash with toasted sesame seeds and a small drizzle of sesame oil.

Sweet-savory version, combine maple syrup with smoked paprika and a small pinch of chili powder.

What to Serve With Kabocha Squash

Air-fried kabocha squash makes a flexible side dish for many meals.

Serve it alongside roasted chicken, grilled salmon, turkey burgers, or steak for a complete dinner. The natural sweetness also works well with savory grain bowls containing quinoa, brown rice, chickpeas, or leafy greens.

For a vegetarian meal, pair the wedges with lentils, roasted vegetables, hummus, or a fresh salad.

You can also serve them as a simple snack with Greek yogurt, tahini sauce, or a light dipping sauce.

How to Store Leftovers

Allow leftover squash to cool before transferring it to an airtight container.

Store it in the refrigerator for up to 4 days.

To reheat, place the wedges in the air fryer at 350°F for 3–5 minutes. Reheating in the air fryer helps bring back some of the roasted texture better than microwaving.

Avoid reheating the squash for too long because the flesh can become dry.

Can You Freeze Cooked Kabocha Squash?

Yes, cooked kabocha squash can be frozen.

Let the wedges cool completely, then place them in a freezer-safe container or bag with parchment between layers. Freeze for up to about 3 months for the best quality.

Thaw them in the refrigerator before reheating in the air fryer.

Recipe Notes

  • Prep time: 10 minutes
  • Cook time: 15–20 minutes
  • Total time: About 30 minutes
  • Temperature: 380°F
  • Servings: 4
  • Cuisine: Japanese-inspired
  • Category: Side Dish

The cooking time can vary between air fryer models. Start checking the squash around 15 minutes and cook longer if the centers are not fork-tender.

Frequently Asked Questions

Do you peel kabocha squash before air frying?

No. Kabocha skin is edible and becomes tender during cooking, so peeling is optional.

Can you put raw kabocha squash in an air fryer?

Yes. Raw kabocha squash can be seasoned and cooked directly in the air fryer until tender and browned.

How long does kabocha squash take in the air fryer?

At 380°F, wedges usually take about 15–20 minutes, depending on their thickness and the air fryer.

What does kabocha squash taste like?

Kabocha has a naturally sweet, nutty flavor with a dense texture similar to pumpkin and sweet potato.

Do you need to boil kabocha squash before air frying?

No. Pre-boiling is not necessary because the air fryer can cook the wedges directly from raw.

Why is my kabocha squash not crispy?

Overcrowding, excess moisture, or too much oil can prevent browning; cook the wedges in a single layer for better airflow.

Can I make these kabocha squash wedges without oil?

Yes. They can be air fried with little or no oil, although a small amount of oil helps the seasonings stick and improves browning.

How do you know when kabocha squash is done?

The squash is ready when the edges are browned and a fork slides easily into the thickest part of the flesh.

Final Thoughts

These Air Fryer Kabocha Squash Wedges are an easy way to enjoy a flavorful winter squash without turning on the oven. The air fryer creates browned, caramelized edges while keeping the inside tender and naturally sweet.

Keep the seasoning simple for a classic roasted flavor, or adjust the spices to match your main dish. Once you get comfortable cutting kabocha into even wedges, this recipe can become an easy side dish for weeknight dinners, holiday meals, and cozy fall gatherings.
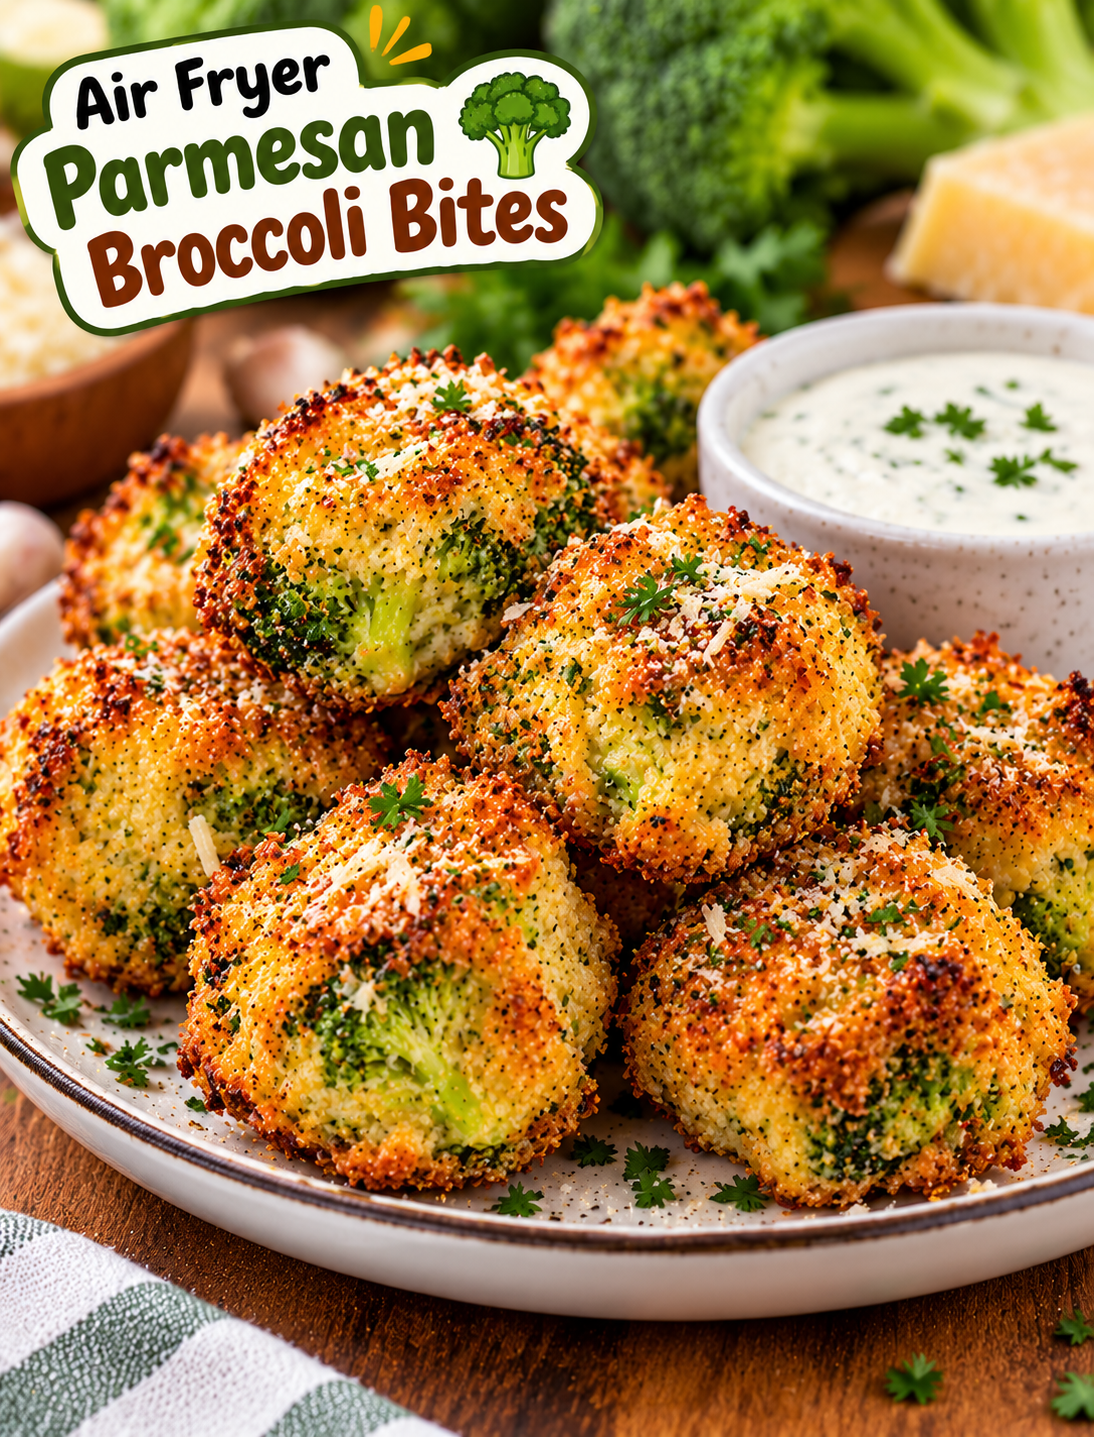
Air Fryer Parmesan Broccoli Bites

Crispy Air Fryer Parmesan Broccoli Bites with golden edges, grated Parmesan, parsley, and dipping sauce

Air Fryer Parmesan Broccoli Bites

These Air Fryer Parmesan Broccoli Bites turn simple broccoli into crispy, cheesy little bites with a tender center. They are easy to prepare, use everyday ingredients, and cook quickly in the air fryer.

Fresh broccoli is chopped into small pieces, mixed with Parmesan, breadcrumbs, egg, and simple seasonings, then shaped into bite-size portions. The air fryer gives them golden edges without the need for deep frying.

Serve these broccoli bites as a vegetable side, snack, appetizer, or easy addition to a family dinner. They also pair well with ranch, marinara, garlic yogurt sauce, or a creamy dipping sauce.

Why You’ll Love This Recipe

  • Crispy outside: The air fryer creates golden edges with a light crunch.
  • Tender inside: Finely chopped broccoli keeps the center soft and flavorful.
  • Cheesy flavor: Parmesan adds a rich, savory taste.
  • Easy ingredients: Most items are common pantry and refrigerator staples.
  • Quick cooking: The bites are ready in less time than many baked vegetable snacks.
  • Kid-friendly: The small shape and cheesy coating make broccoli more approachable.
  • Versatile: Serve them as a side dish, appetizer, snack, or meatless option.
  • Easy to customize: Add herbs, spices, or another cheese to change the flavor.

Ingredients You’ll Need

For the Broccoli Bites

  • 3 cups fresh broccoli florets
  • ½ cup finely grated Parmesan cheese
  • ½ cup plain panko breadcrumbs
  • 1 large egg
  • 2 tablespoons finely chopped onion
  • 1 clove garlic, minced
  • ½ teaspoon garlic powder
  • ½ teaspoon Italian seasoning
  • ¼ teaspoon paprika
  • ¼ teaspoon black pepper
  • ¼ teaspoon salt
  • 1 tablespoon olive oil
  • Cooking spray

For Serving

  • Grated Parmesan, optional
  • Fresh parsley, optional
  • Lemon wedges, optional
  • Ranch dressing
  • Marinara sauce
  • Garlic yogurt dip

Step-by-Step Instructions

1. Prepare the Broccoli

Wash the broccoli florets and pat them dry.

Cut the broccoli into small pieces. You can use a sharp knife or pulse the florets briefly in a food processor.

Do not puree the broccoli. Small pieces give the bites better texture and help them hold their shape.

2. Steam or Blanch the Broccoli

Bring a small pot of water to a boil.

Add the broccoli and cook for about 2 minutes.

Drain immediately and transfer the broccoli to a bowl of cold water.

Drain again and squeeze out as much moisture as possible.

You can also steam the broccoli until just tender.

The broccoli should be softened but not mushy.

3. Remove Excess Moisture

Place the cooked broccoli on a clean kitchen towel or several layers of paper towels.

Press gently to remove excess water.

This step is important because wet broccoli can make the mixture too soft and prevent the bites from becoming crisp.

4. Combine the Ingredients

Add the chopped broccoli to a large mixing bowl.

Add Parmesan, panko breadcrumbs, egg, onion, garlic, garlic powder, Italian seasoning, paprika, black pepper, salt, and olive oil.

Mix until the ingredients are evenly combined.

The mixture should hold together when pressed between your fingers.

5. Adjust the Mixture

If the mixture feels too wet, add another 1–2 tablespoons of panko.

If it feels too dry and does not hold together, add a small amount of beaten egg.

Avoid adding too much liquid because a firm mixture produces better-shaped bites.

6. Shape the Broccoli Bites

Scoop about 1½ tablespoons of the mixture into your hands.

Press and shape it into a small round or oval bite.

Continue until all the mixture has been used.

Keep the pieces similar in size so they cook evenly.

7. Chill the Bites

Place the shaped bites on a plate or small baking sheet.

Refrigerate them for about 15 minutes.

Chilling helps the bites firm up and reduces the chance of them breaking apart during cooking.

8. Preheat the Air Fryer

Preheat the air fryer to 375°F (190°C) for about 3 minutes.

Lightly spray the basket with cooking spray.

A preheated basket helps the outside begin crisping quickly.

9. Arrange the Broccoli Bites

Place the bites in the air fryer basket in a single layer.

Leave space between each piece.

Do not overcrowd the basket because proper airflow helps create crisp, golden edges.

Cook in batches if necessary.

10. Air Fry Until Golden

Lightly spray the tops with cooking spray.

Air fry at 375°F for 10–14 minutes.

Carefully flip the bites around the halfway point.

Continue cooking until both sides are golden brown and the edges look crisp.

11. Check for Doneness

The broccoli bites should feel firm on the outside and hold their shape when lifted.

If you want a deeper golden crust, cook for another 1–2 minutes.

Keep an eye on the Parmesan during the final minutes because it can brown quickly.

12. Finish and Serve

Transfer the cooked bites to a serving plate.

Sprinkle with a little extra Parmesan and fresh parsley if desired.

Serve warm with your favorite dipping sauce.

Tips for Extra Crispy Broccoli Bites

  • Remove excess water: Moisture is one of the main reasons vegetable bites become soft.
  • Use panko: Panko creates a lighter and crunchier coating than fine breadcrumbs.
  • Grate Parmesan finely: Fine cheese distributes more evenly through the mixture.
  • Keep the bites small: Smaller portions cook more evenly and develop better browning.
  • Chill before cooking: A short chill helps the bites maintain their shape.
  • Don’t overcrowd: Air needs room to circulate around each piece.
  • Spray lightly with oil: A small amount helps the exterior turn golden.
  • Flip halfway: This gives both sides an even texture.

How to Make the Bites Without Steaming

You can use raw broccoli if you chop it very finely.

Pulse the florets in a food processor until they resemble small crumbs, then mix them directly with the other ingredients.

Raw broccoli produces a slightly firmer texture, while briefly cooked broccoli creates a softer center.

Easy Variations

Cheddar Broccoli Bites

Replace half of the Parmesan with finely shredded sharp cheddar for a stronger cheesy flavor.

Garlic Herb Broccoli Bites

Add extra minced garlic, dried parsley, and a small amount of dried basil to the mixture.

Spicy Broccoli Bites

Add ¼ teaspoon crushed red pepper flakes or cayenne pepper for extra heat.

Mozzarella Broccoli Bites

Mix a small amount of shredded mozzarella into the mixture for a softer, stretchy cheese texture.

Lemon Parmesan Bites

Add ½ teaspoon fresh lemon zest to the mixture and serve with lemon wedges.

Ranch Broccoli Bites

Add 1 teaspoon ranch seasoning to the mixture and serve with ranch dressing.

What to Serve With Broccoli Bites

These crispy vegetable bites work with many meals and sauces.

Try serving them with:

  • Grilled chicken
  • Air fryer salmon
  • Turkey burgers
  • Baked chicken breast
  • Roasted potatoes
  • Tomato soup
  • Vegetable soup
  • Garden salad
  • Pasta
  • Rice bowls

For a snack or appetizer, serve them with ranch, marinara, garlic aioli, or a lemon yogurt dip.

For dinner, pair them with grilled protein and a fresh salad for a simple balanced plate.

How to Store Leftovers

Allow the cooked bites to cool completely before storing them.

Place them in an airtight container and refrigerate for up to 3 days.

Keep them in a single layer when possible to prevent the crispy coating from becoming too soft.

How to Reheat Broccoli Bites

The air fryer is the best option for reheating these bites.

Preheat the air fryer to 350°F (175°C) and cook the refrigerated bites for about 3–5 minutes.

Turn them once during reheating if needed.

Avoid using the microwave when possible because it can make the breadcrumb coating soft.

Can You Freeze Them?

Yes. Freeze the shaped, uncooked bites on a parchment-lined tray until firm.

Transfer them to a freezer-safe container or bag and freeze for up to 2 months.

You can cook them from frozen, adding a few extra minutes to the cooking time.

Check the center before serving to make sure the bites are fully heated.

Common Mistakes to Avoid

Using wet broccoli: Excess water can make the mixture loose and difficult to shape.

Making large bites: Large portions take longer to cook and may not become crisp before the center is heated.

Skipping the chill: Soft bites can break apart more easily during cooking.

Overcrowding the basket: Too many pieces reduce airflow and can lead to uneven browning.

Adding too much cheese: Excess cheese can melt out before the broccoli mixture becomes firm.

Overcooking: Cooking too long can make the bites dry and overly brown.

Frequently Asked Questions

Can I use frozen broccoli?

Yes. Thaw it completely and squeeze out as much moisture as possible before chopping and mixing.

How long do broccoli bites take in an air fryer?

They usually take 10–14 minutes at 375°F, depending on their size and your air fryer.

Why are my broccoli bites falling apart?

The mixture may contain too much moisture or need more breadcrumbs to hold together properly.

Can I make these without breadcrumbs?

Yes. Use finely ground oats or almond flour as an alternative, adjusting the amount until the mixture holds together.

Can I prepare broccoli bites ahead of time?

Yes. Shape them up to one day ahead and refrigerate them in a covered container until ready to cook.

What dipping sauce goes best with broccoli bites?

Ranch, marinara, garlic aioli, and lemon yogurt sauce all pair well with the Parmesan flavor.

Can I freeze cooked broccoli bites?

Yes. Freeze cooled bites in an airtight freezer-safe container for up to 2 months and reheat them in the air fryer.

Can I use another cheese instead of Parmesan?

Yes. Sharp cheddar, mozzarella, or Pecorino Romano can be used for different flavors and textures.

Final Thoughts

These Air Fryer Parmesan Broccoli Bites are a simple way to turn fresh broccoli into a crispy, cheesy snack or side dish. The combination of Parmesan, panko, garlic, and Italian seasoning gives the bites plenty of flavor without making the recipe complicated.

For the best texture, remove as much moisture as possible from the broccoli, keep the bites evenly sized, and avoid overcrowding the air fryer basket.

Serve them hot with ranch, marinara, or a creamy dipping sauce, or add them beside your favorite chicken, fish, or vegetable dinner.

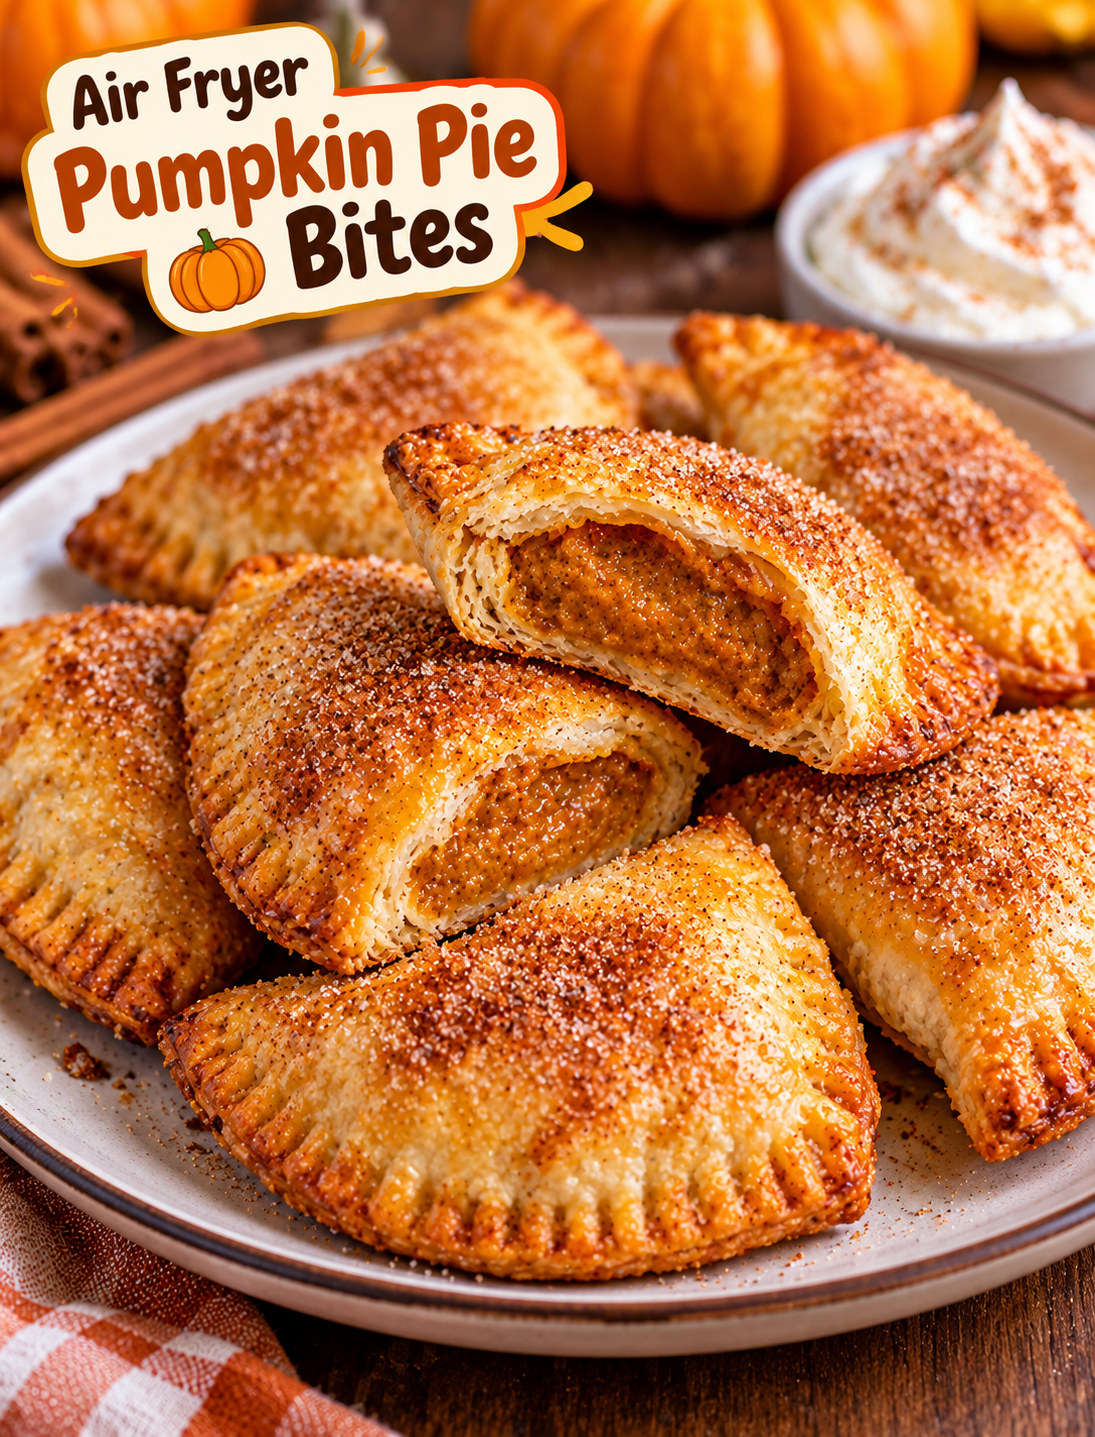
Air Fryer Pumpkin Pie Bites

Air fryer pumpkin pie bites with golden flaky crust, spiced pumpkin filling, cinnamon sugar, and whipped cream

Air Fryer Pumpkin Pie Bites

These Air Fryer Pumpkin Pie Bites bring the cozy flavor of classic pumpkin pie into small, golden pastry bites. Each piece has a flaky crust, creamy pumpkin filling, and warm fall spices.

The air fryer helps the pastry turn crisp and golden without needing a full-size pie. These little treats are easy to prepare, simple to serve, and perfect for fall gatherings, Thanksgiving, holiday parties, or an afternoon dessert.

The filling uses pumpkin puree, brown sugar, pumpkin pie spice, vanilla, and a few simple ingredients. The bites cook quickly and can be finished with powdered sugar, whipped cream, or a drizzle of caramel.

Why You’ll Love These Pumpkin Pie Bites

  • Quick dessert: Small pastry bites cook much faster than a traditional pie.
  • Classic fall flavor: Pumpkin, cinnamon, nutmeg, and vanilla create a familiar pumpkin pie taste.
  • Easy portions: Each bite is ready to serve without slicing a whole pie.
  • Air fryer friendly: The pastry becomes golden and crisp with a light coating of egg wash.
  • Great for gatherings: They are easy to arrange on a dessert tray.
  • Make-ahead friendly: Prepare the filling and pastry pieces ahead of time.
  • Easy to customize: Add nuts, caramel, chocolate, or extra spices to change the flavor.

Ingredients You’ll Need

 Pumpkin Filling

  • ½ cup pumpkin puree
  • ¼ cup packed brown sugar
  • 1 large egg yolk
  • 2 tablespoons evaporated milk or heavy cream
  • 1 teaspoon vanilla extract
  • 1 teaspoon pumpkin pie spice
  • ½ teaspoon ground cinnamon
  • ⅛ teaspoon ground nutmeg
  • Pinch of salt

For the Pastry

  • 1 package refrigerated pie crusts, about 14–16 ounces
  • 1 large egg
  • 1 tablespoon water
  • 1 tablespoon granulated sugar
  • ½ teaspoon ground cinnamon

Serving

  • Powdered sugar
  • Whipped cream
  • Caramel sauce
  • Chopped pecans, optional
  • Extra cinnamon, optional

Step-by-Step Instructions

1. Prepare the Pumpkin Filling

Add the pumpkin puree, brown sugar, egg yolk, evaporated milk, vanilla, pumpkin pie spice, cinnamon, nutmeg, and salt to a bowl.

Whisk until the mixture is smooth and evenly combined.

The filling should be thick enough to sit on the pastry without spreading too much.

2. Chill the Filling

Cover the bowl and refrigerate the pumpkin mixture for about 15–20 minutes.

Chilling makes the filling easier to portion and helps prevent it from spreading during assembly.

3. Prepare the Pie Crust

Remove the refrigerated pie crust from its package and place it on a lightly floured surface.

If the crust feels very cold or stiff, let it sit for a few minutes so it becomes easier to work with.

4. Cut the Pastry

Use a 3-inch round cookie cutter or the rim of a small glass to cut circles from the pie crust.

Gather the scraps, gently press them together, and roll them again to cut additional circles.

Avoid overworking the dough because too much handling can make the crust less tender.

5. Add the Pumpkin Filling

Place about 1 teaspoon of chilled pumpkin filling in the center of each pastry circle.

Do not overfill the dough.

Leaving a clean border around the filling gives you enough space to seal each bite securely.

6. Fold and Seal

Fold each pastry circle in half over the filling to create a small half-moon.

Press the edges together with your fingers.

Then use a fork to crimp the edges firmly.

Make sure there are no open gaps where the filling could escape.

7. Prepare the Egg Wash

Whisk the egg with 1 tablespoon of water.

Lightly brush the tops of the pumpkin pie bites with the egg wash.

The egg wash helps the pastry develop a glossy golden-brown finish.

8. Add Cinnamon Sugar

Mix the granulated sugar and cinnamon in a small bowl.

Sprinkle a light amount over the egg-washed pastry.

This adds a subtle crunchy topping and extra cinnamon flavor.

9. Preheat the Air Fryer

Preheat your air fryer to 350°F (175°C) for about 3 minutes.

A preheated basket helps the pastry begin cooking immediately and promotes even browning.

10. Arrange the Bites

Lightly spray the air fryer basket with cooking spray if needed.

Place the pumpkin pie bites in a single layer.

Leave a little space between each piece so hot air can circulate around the pastry.

Avoid stacking the bites.

11. Air Fry Until Golden

Air fry at 350°F for 7–10 minutes.

Check the bites around the 7-minute mark.

They are ready when the pastry is puffed and golden brown and the edges are firmly sealed.

Cooking time can vary slightly between air fryer models.

12. Cool Before Serving

Carefully remove the bites from the basket and place them on a cooling rack or plate.

Let them cool for about 5 minutes.

The pumpkin filling will be very hot immediately after cooking, so allow enough time before serving.

13. Add Your Favorite Toppings

Dust the cooled bites with powdered sugar.

For a richer dessert, serve them with whipped cream and a small drizzle of caramel sauce.

Chopped pecans also add a pleasant crunch and pair well with the pumpkin filling.

Tips for Crispy Pumpkin Pie Bites

  • Keep the filling chilled: Cold filling is easier to control during assembly.
  • Don’t overfill: Too much pumpkin mixture can leak through the pastry.
  • Seal the edges well: Firm crimping keeps the filling inside.
  • Use a light egg wash: Too much can make the surface overly wet.
  • Don’t overcrowd the basket: Proper airflow helps the pastry crisp.
  • Check early: Small pastry bites can brown quickly.
  • Cool before topping: Powdered sugar stays cleaner when the pastry is not piping hot.

How to Keep the Filling From Leaking

The most important step is controlling the amount of filling.

Use about 1 teaspoon per pastry circle and keep the filling away from the outer edge.

Press the pastry together firmly before crimping with a fork.

If the dough becomes too warm or soft while assembling, place the prepared bites in the refrigerator for 10 minutes before air frying.

Easy Variations

Caramel Pumpkin Pie Bites

Add a tiny drizzle of caramel sauce over the finished bites.

Use only a small amount so the pastry remains crisp.

Pecan Pumpkin Pie Bites

Add finely chopped pecans to the pumpkin filling for a nutty texture.

Keep the pieces small so they do not interfere with sealing the pastry.

Maple Pumpkin Pie Bites

Replace half of the brown sugar with pure maple syrup.

Reduce the evaporated milk slightly if the filling becomes too loose.

Chocolate Pumpkin Pie Bites

Add a few mini chocolate chips to the center before sealing the pastry.

Dark or semi-sweet chocolate works especially well with pumpkin spices.

Extra-Spiced Pumpkin Bites

Add a small pinch of ground ginger and cloves to the filling for a stronger warm-spice flavor.

What to Serve With Pumpkin Pie Bites

These small desserts pair well with simple toppings and warm drinks.

Try serving them with:

  • Vanilla ice cream
  • Whipped cream
  • Caramel sauce
  • Powdered sugar
  • Chopped pecans
  • Cinnamon whipped cream
  • Hot coffee
  • Chai tea
  • Apple cider

For Thanksgiving or holiday gatherings, arrange the bites on a large platter with small bowls of caramel and whipped cream for dipping.

How to Store Leftovers

Allow the pumpkin pie bites to cool completely before storing them.

Place them in an airtight container and refrigerate for up to 3 days.

For the best texture, reheat them in the air fryer at 325°F for 2–4 minutes.

Avoid reheating them for too long because the pastry can become dry.

If you are serving them at a gathering, warm only the amount you plan to eat.

Can You Make Them Ahead?

Yes. You can assemble the unbaked bites several hours ahead and keep them covered in the refrigerator.

When ready to cook, brush them with egg wash, add cinnamon sugar, and place them directly into the preheated air fryer.

For the best pastry texture, avoid keeping unbaked assembled bites refrigerated for more than one day.

Frequently Asked Questions

Can I use canned pumpkin pie filling?

Use plain pumpkin puree rather than prepared pumpkin pie filling because the recipe already includes sugar and spices.

How long do pumpkin pie bites take in an air fryer?

They usually take about 7–10 minutes at 350°F, depending on their size and your air fryer model.

Can I use homemade pie crust?

Yes. Homemade pie crust works well as long as it is rolled thin enough to fold and seal easily.

Why did my pumpkin filling leak out?

Overfilling, weakly sealed edges, or overly warm pastry can cause the filling to escape during cooking.

Can I freeze pumpkin pie bites?

Yes. Freeze fully cooled baked bites in an airtight freezer-safe container for up to 2 months.

Can I make these without egg wash?

Yes. The egg wash can be replaced with a light brushing of milk, although the pastry may not become as glossy.

What pumpkin puree should I use?

Use plain canned pumpkin puree rather than pumpkin pie mix for better control over the sweetness and spices.

Can I reheat pumpkin pie bites in the air fryer?

Yes. Reheat them at 325°F for 2–4 minutes until warm and crisp.

Final Thoughts

These Air Fryer Pumpkin Pie Bites are a simple way to enjoy classic pumpkin pie flavor without making a full-size dessert. The flaky pastry, creamy spiced pumpkin filling, and cinnamon-sugar finish make each bite warm, crisp, and satisfying.

They are especially useful when you want an easy fall dessert for Thanksgiving, holiday parties, family gatherings, or a weekend treat. Serve them warm with whipped cream, vanilla ice cream, or caramel sauce for an extra special finish.

Air Fryer Crispy Tandoori Cauliflower

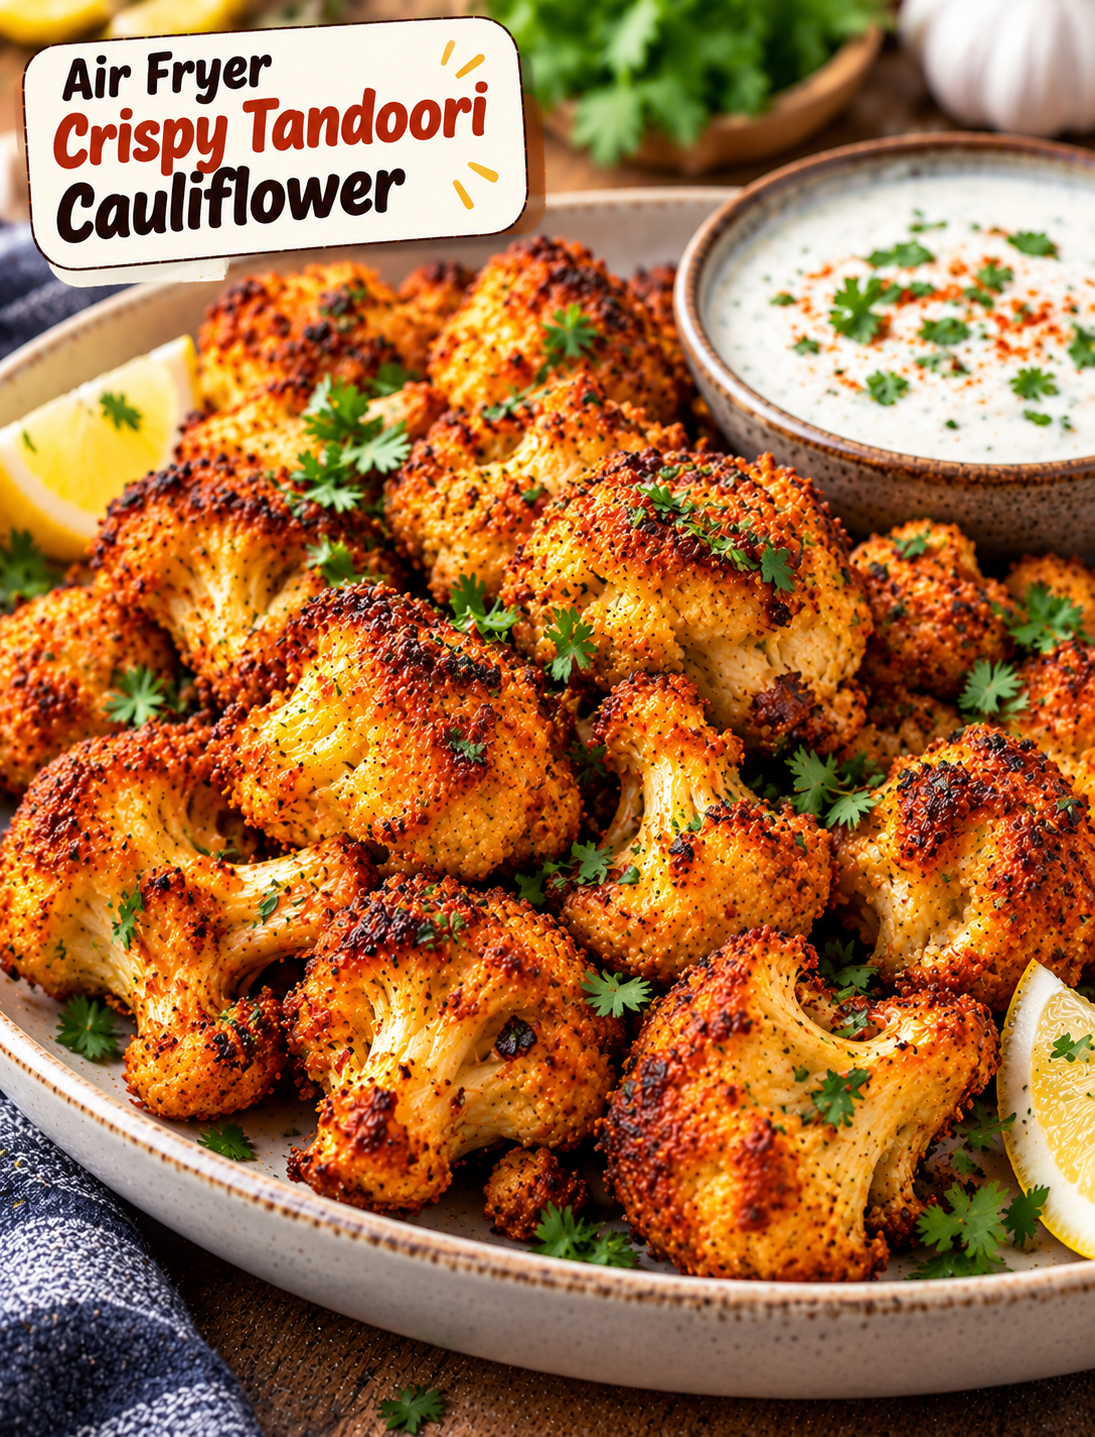
Crispy air fryer tandoori cauliflower with golden spiced edges, cilantro, and lemon wedges

Air Fryer Crispy Tandoori Cauliflower

If you love bold Indian-inspired flavors and crispy vegetables, this Air Fryer Crispy Tandoori Cauliflower is an easy recipe to add to your dinner rotation. Tender cauliflower florets are coated in a spiced yogurt marinade, then air fried until the edges become browned, crisp, and slightly charred.

The air fryer gives this cauliflower a roasted texture without deep frying. It also makes the recipe quick enough for a weeknight meal, snack, appetizer, or side dish.

The marinade combines Greek yogurt, lemon juice, ginger, garlic, paprika, cumin, coriander, and garam masala for a rich tandoori-style flavor. A small amount of cornstarch helps create a crisp coating while the cauliflower stays tender inside.

Why You’ll Love This Recipe

  • Crispy texture: Air frying creates browned and crunchy edges without deep frying.
  • Bold flavor: Tandoori spices add warmth, smokiness, and a mild kick.
  • Easy preparation: The marinade comes together in one bowl.
  • Weeknight friendly: The cauliflower cooks quickly after marinating.
  • Versatile: Serve it as a side dish, appetizer, snack, or meatless meal.
  • Less oil: You only need a light coating of oil for browning.
  • Naturally vegetarian: The recipe works well for vegetarian meals and meat-free gatherings.
  • Easy to customize: Adjust the spice level and toppings to suit your taste.

Ingredients You’ll Need

For the Cauliflower

  • 1 large head cauliflower, cut into bite-size florets
  • ¾ cup plain Greek yogurt
  • 1 tablespoon lemon juice
  • 1 tablespoon olive oil
  • 1 tablespoon cornstarch
  • 1 teaspoon grated fresh ginger
  • 2 cloves garlic, finely minced
  • 1 teaspoon paprika
  • 1 teaspoon ground cumin
  • 1 teaspoon ground coriander
  • 1 teaspoon garam masala
  • ½ teaspoon turmeric
  • ½ teaspoon chili powder
  • ½ teaspoon salt
  • ¼ teaspoon black pepper
  • ¼ teaspoon smoked paprika, optional
  • Cooking spray or a small amount of oil

For Serving

  • Fresh cilantro, chopped
  • Lemon wedges
  • Plain yogurt or raita
  • Sliced red onion, optional
  • Chaat masala, optional

Step-by-Step Instructions

1. Prepare the Cauliflower

Wash the cauliflower and dry it thoroughly with paper towels.

Cut it into small, evenly sized florets so the pieces cook at the same rate.

Patting the cauliflower dry is important because excess moisture can prevent the coating from becoming crisp.

2. Make the Tandoori Marinade

Add the Greek yogurt, lemon juice, olive oil, cornstarch, ginger, garlic, paprika, cumin, coriander, garam masala, turmeric, chili powder, salt, black pepper, and smoked paprika to a large bowl.

Stir until the mixture becomes smooth and evenly combined.

The yogurt adds moisture and tang, while the spices create the signature tandoori-style flavor.

3. Coat the Cauliflower

Add the dry cauliflower florets to the marinade.

Toss gently until every piece is covered with a thin, even layer.

Avoid adding an overly thick coating because too much yogurt mixture can make the cauliflower soft instead of crisp.

4. Marinate the Cauliflower

Cover the bowl and let the cauliflower marinate for at least 20 minutes.

For deeper flavor, refrigerate it for up to 2 hours.

If you are short on time, you can cook it after a short 10-minute rest, but a longer marinade gives the spices more time to flavor the florets.

5. Preheat the Air Fryer

Preheat your air fryer to 380°F (193°C) for about 3–5 minutes.

A preheated basket helps the coating start browning quickly and promotes a crisp exterior.

6. Arrange the Cauliflower

Lightly spray the air fryer basket with cooking spray.

Place the marinated cauliflower florets in a single layer.

Leave some space between the pieces so hot air can circulate around them.

Do not overcrowd the basket. Cook in batches if necessary.

7. Air Fry Until Crispy

Air fry the cauliflower at 380°F for 12–16 minutes.

Shake the basket or turn the florets halfway through cooking.

Continue cooking until the edges are golden brown and slightly charred.

The exact cooking time can vary depending on the size of the florets and your air fryer model.

8. Check for Doneness

The cauliflower should be tender when pierced with a fork, while the outside should have browned edges and a lightly crisp coating.

If you want darker, more roasted edges, air fry for another 2–3 minutes.

Watch closely during the final minutes because the spices can darken quickly.

9. Add Fresh Toppings

Transfer the cooked cauliflower to a serving plate.

Sprinkle with fresh cilantro and a small amount of chaat masala if desired.

Serve with lemon wedges so everyone can add fresh citrus flavor to their portion.

10. Serve Immediately

For the crispiest texture, serve the cauliflower while it is hot.

Pair it with mint yogurt, cucumber raita, or your favorite dipping sauce.

It also works well inside wraps, grain bowls, or naan sandwiches.

Tips for Extra Crispy Tandoori Cauliflower

  • Dry the cauliflower well: Water left on the florets can make the coating less crisp.
  • Use small florets: Smaller pieces cook faster and develop more browned edges.
  • Do not overcrowd: Air circulation is essential for crisping.
  • Use cornstarch: A small amount helps create a lighter, crispier coating.
  • Preheat the air fryer: Starting with a hot basket improves browning.
  • Flip halfway: Turning the pieces helps them cook evenly.
  • Avoid excessive marinade: A thin coating works better than a thick layer.
  • Serve immediately: Air-fried vegetables soften as they sit.

How to Make It Spicier

For a hotter version, increase the chili powder or add a pinch of cayenne pepper to the marinade.

You can also add finely chopped jalapeño or red chili before serving.

For a milder version, reduce the chili powder and use sweet paprika instead.

Easy Variations

Tandoori Cauliflower Bites

Cut the cauliflower into smaller florets and cook until deeply browned. These smaller bites are perfect for appetizers and party snacks.

Cheesy Tandoori Cauliflower

Sprinkle a small amount of shredded cheddar or Monterey Jack cheese over the cooked cauliflower. Return it to the air fryer for 1–2 minutes until the cheese melts.

Tandoori Cauliflower Wrap

Place the crispy cauliflower inside warm naan or a flatbread with lettuce, sliced onion, cucumber, and yogurt sauce.

Tandoori Cauliflower Bowl

Serve the roasted florets over cooked basmati rice or quinoa with cucumber, tomatoes, greens, and a spoonful of raita.

Extra Smoky Version

Add a little smoked paprika to the marinade for a deeper roasted flavor without needing a traditional clay tandoor.

What to Serve With Tandoori Cauliflower

This cauliflower pairs well with many simple sides and sauces.

Try serving it with:

  • Basmati rice
  • Garlic naan
  • Cucumber raita
  • Mint yogurt sauce
  • Fresh green salad
  • Roasted vegetables
  • Lentil soup
  • Chickpea curry
  • Mango chutney
  • Lemon wedges

For a light meal, combine the cauliflower with a fresh salad and yogurt-based dipping sauce.

For a more filling dinner, serve it with rice, naan, and a vegetable or lentil dish.

How to Store Leftovers

Allow the cooked cauliflower to cool before placing it in an airtight container.

Refrigerate leftovers for up to 3 days.

For the best texture, reheat the cauliflower in the air fryer at 350°F for 3–5 minutes.

Avoid reheating it in the microwave if you want to maintain the crisp edges because microwaving can make the coating soft.

Common Mistakes to Avoid

Using wet cauliflower: Extra water prevents the marinade from coating properly and reduces browning.

Overcrowding the basket: Too many florets trap steam and can leave the cauliflower soft.

Adding too much yogurt marinade: A heavy coating takes longer to crisp and can become soggy.

Skipping the preheat: A cold basket can delay browning and change the cooking time.

Cutting uneven florets: Large pieces may remain firm while small pieces become overcooked.

Walking away during the final minutes: The spice coating can brown quickly once the cauliflower is nearly finished.

Frequently Asked Questions

Can I make tandoori cauliflower without yogurt?

Yes. Use an unsweetened dairy-free yogurt or a thick plant-based yogurt as a substitute.

How long does cauliflower take in an air fryer?

At 380°F, bite-size florets usually take about 12–16 minutes, depending on their size and the air fryer.

Why is my cauliflower not crispy?

Excess moisture, too much marinade, overcrowding, or insufficient cooking time can prevent the coating from crisping.

Can I prepare the cauliflower ahead of time?

Yes. Marinate the cauliflower up to 2 hours ahead and keep it refrigerated until ready to air fry.

Can I use frozen cauliflower?

Fresh cauliflower gives the best texture, but frozen florets can work if thawed and dried thoroughly before marinating.

Is tandoori cauliflower spicy?

It can range from mild to hot depending on the chili powder and cayenne used in the marinade.

Can I reheat leftover tandoori cauliflower?

Yes. Reheat it in an air fryer at 350°F for 3–5 minutes to help restore some of the crisp texture.

What dipping sauce goes with tandoori cauliflower?

Mint yogurt, cucumber raita, garlic yogurt sauce, and mango chutney all pair well with the spiced cauliflower.

Final Thoughts

This Air Fryer Crispy Tandoori Cauliflower is an easy way to turn everyday cauliflower into a flavorful, crispy dish. The yogurt-based marinade keeps the florets seasoned and tender, while the air fryer creates browned edges with very little oil.

Serve it as an appetizer, side dish, snack, or meatless dinner with rice, naan, salad, or a cooling yogurt sauce. For the best results, keep the florets dry, avoid overcrowding the basket, and serve the cauliflower while it is hot and crisp.

Air Fryer Peanut Butter Molten Chocolate Cakes

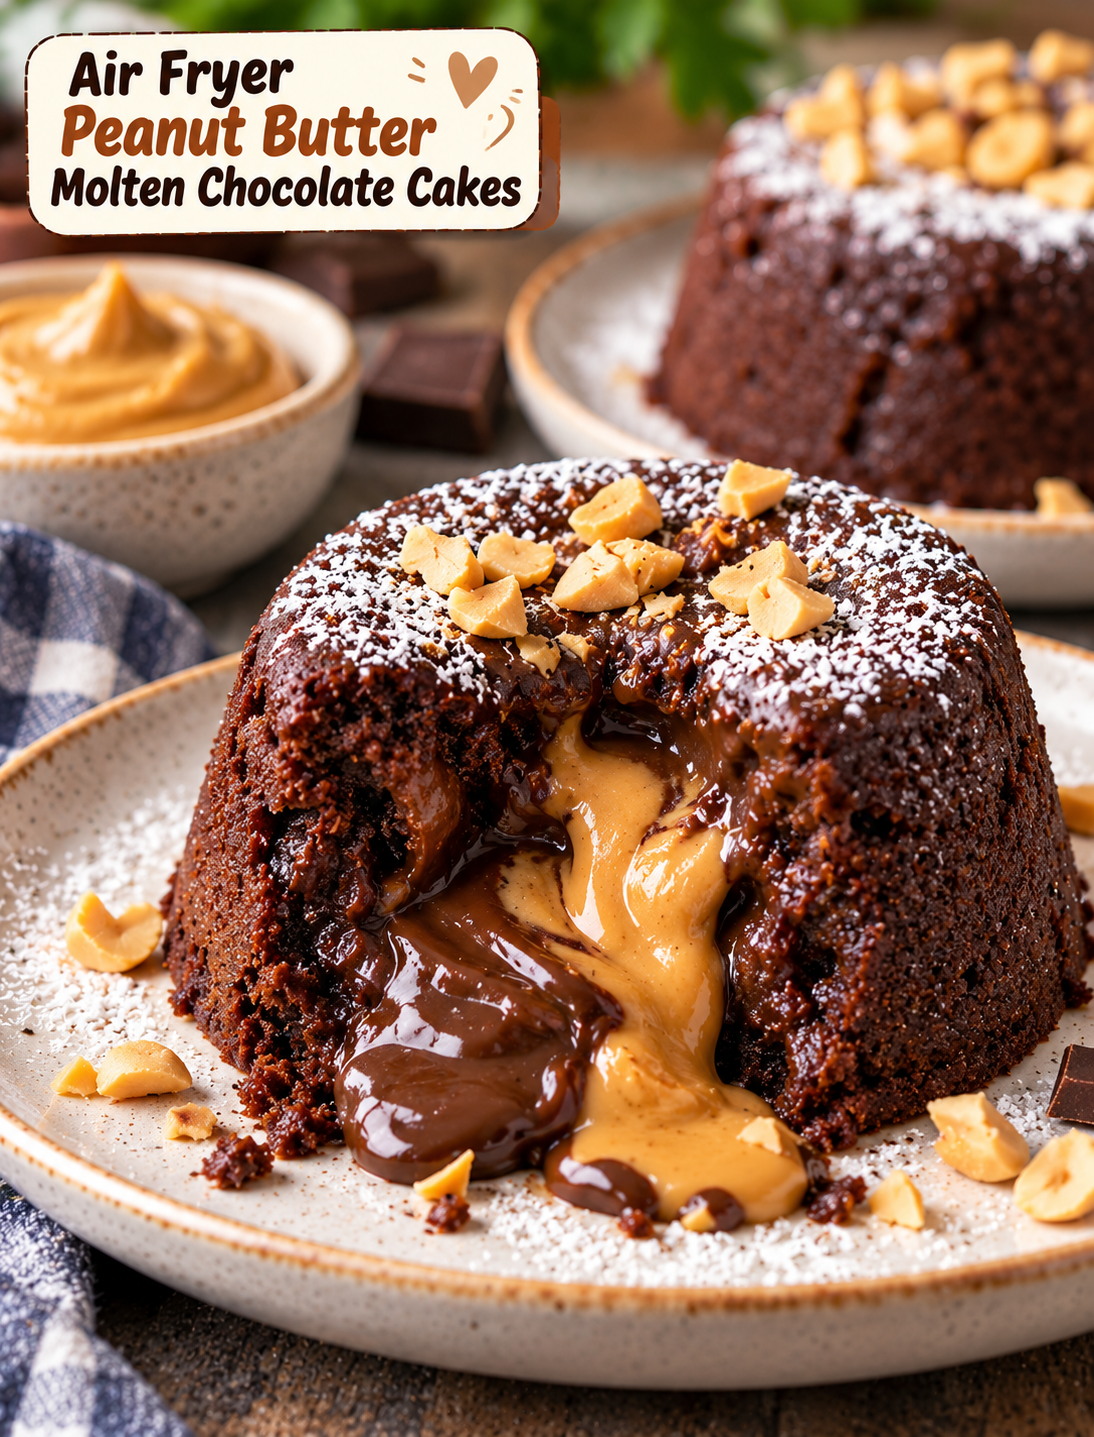
Air fryer peanut butter molten chocolate cake with a warm gooey center and powdered sugar

Air Fryer Peanut Butter Molten Chocolate Cakes

Craving a rich chocolate dessert without turning on the oven? These Air Fryer Peanut Butter Molten Chocolate Cakes are made for those moments when you want something warm, gooey, and chocolatey in a short amount of time.

Each little cake has a soft chocolate exterior with a warm peanut butter center that slowly melts when you cut into it. The combination of dark chocolate, cocoa, and creamy peanut butter gives every bite a rich flavor without making the recipe complicated.

The air fryer cooks these individual cakes quickly and gives the edges a lightly firm texture while keeping the centers soft. Serve them warm with powdered sugar, berries, whipped cream, or a scoop of vanilla ice cream for an easy dessert that feels special.

Why You’ll Love This Recipe

  • Quick dessert: The cakes cook in the air fryer in just a few minutes.
  • Gooey center: Peanut butter creates a warm, creamy filling inside the chocolate cake.
  • Small-batch recipe: This recipe makes four individual desserts, so there is no large cake to prepare.
  • Simple ingredients: Most ingredients are easy to find at any U.S. grocery store.
  • No oven needed: The air fryer handles the baking while keeping the cooking time short.
  • Easy to customize: You can use dark chocolate, semi-sweet chocolate, or milk chocolate based on your preference.

Ingredients You’ll Need

For the Chocolate Cakes

  • 4 ounces semi-sweet or dark chocolate, chopped
  • 4 tablespoons unsalted butter
  • ¼ cup granulated sugar
  • 2 large eggs
  • 1 large egg yolk
  • 1 teaspoon vanilla extract
  • ¼ cup all-purpose flour
  • 2 tablespoons unsweetened cocoa powder
  • ¼ teaspoon salt

Peanut Butter Center

  • 4 tablespoons creamy peanut butter
  • 1 tablespoon powdered sugar
  • 1 teaspoon melted butter

For Greasing

  • 1 teaspoon softened butter
  • 1 teaspoon unsweetened cocoa powder

Optional Toppings

  • Powdered sugar
  • Fresh strawberries or raspberries
  • Whipped cream
  • Vanilla ice cream
  • Chocolate shavings
  • Chopped peanuts
  • Extra peanut butter, slightly warmed

How to Make Air Fryer Peanut Butter Molten Chocolate Cakes

1. Prepare the Peanut Butter Filling

Add the creamy peanut butter, powdered sugar, and melted butter to a small bowl.

Stir until the mixture becomes smooth and thick.

Divide the mixture into four small portions and place them on a parchment-lined plate.

Freeze the portions for about 15–20 minutes.

Chilling the filling helps it stay in the center while the chocolate cakes cook.

2. Prepare the Ramekins

Use four small oven-safe ramekins that fit comfortably inside your air fryer basket.

Lightly coat the inside of each ramekin with softened butter.

Dust the buttered surfaces with a thin layer of cocoa powder and shake out any excess.

The cocoa helps prevent the chocolate cakes from sticking while keeping the outside chocolate-colored.

3. Melt the Chocolate and Butter

Place the chopped chocolate and butter in a microwave-safe bowl.

Heat for about 20 seconds at a time, stirring between each interval.

Continue until the chocolate is almost completely melted.

Stir until smooth and glossy.

Do not overheat the chocolate because excessive heat can make it thick or grainy.

4. Mix the Cake Batter

Add the granulated sugar, eggs, egg yolk, and vanilla to a separate bowl.

Whisk for about 30–45 seconds until the mixture is smooth.

Pour in the melted chocolate and butter mixture.

Stir gently until combined.

Add the flour, cocoa powder, and salt.

Fold everything together just until no dry streaks remain.

Avoid overmixing because too much mixing can make the cakes heavier.

5. Fill the Ramekins

Spoon about half of the chocolate batter into the prepared ramekins.

Place one chilled peanut butter portion in the center of each ramekin.

Keep the peanut butter filling away from the sides.

Cover each filling with the remaining chocolate batter.

The peanut butter should be completely surrounded by batter.

6. Preheat the Air Fryer

Preheat your air fryer to 350°F (175°C) for about 3 minutes if your model requires preheating.

A properly heated air fryer helps the cakes begin cooking evenly as soon as they enter the basket.

7. Air Fry the Cakes

Carefully place the filled ramekins into the air fryer basket.

Leave a little space between them so hot air can circulate.

Air fry at 350°F for about 7–9 minutes.

The edges should look set while the centers should still have a slight softness.

Cooking time can vary between air fryer models and ramekin sizes, so start checking around the 7-minute mark.

For a softer, more molten center, avoid adding extra cooking time once the edges are set.

8. Rest Before Serving

Carefully remove the ramekins from the air fryer.

Let the cakes rest for 1–2 minutes.

Run a thin knife around the edge if you want to transfer them onto plates.

Place a small plate over each ramekin and carefully turn it upside down.

Lift the ramekin slowly.

You can also serve the cakes directly in their ramekins for an easier presentation.

9. Add Your Favorite Toppings

Dust the warm cakes with powdered sugar.

Add fresh berries for a bright contrast to the rich chocolate.

For an extra-indulgent dessert, add a small scoop of vanilla ice cream.

You can also drizzle slightly warmed peanut butter over the top and finish with chopped peanuts.

When you cut into the cake, the warm peanut butter center should soften and spread into the chocolate cake.

Tips for a Perfect Molten Center

  • Do not overbake: Extra cooking time can turn the soft center into a fully baked cake.
  • Chill the filling: Cold peanut butter stays in the center longer during cooking.
  • Use small ramekins: Large ramekins can change the cooking time and make the cakes harder to cook evenly.
  • Check early: Start checking the cakes at 7 minutes because air fryers cook differently.
  • Do not overcrowd: Leave enough space around the ramekins for proper air circulation.
  • Serve immediately: The center becomes firmer as the cake cools.
  • Use good chocolate: Semi-sweet or dark chocolate gives the dessert a deeper flavor.
  • Measure flour carefully: Too much flour can make the cakes dense and reduce the molten texture.

How to Get an Extra-Gooey Center

The most important part of a molten cake is timing.

The outside should be firm enough to hold its shape, but the center should remain soft. Start with the shorter cooking time and add another 30–60 seconds only if the cakes look too loose.

Using chilled peanut butter also helps create a distinct center.

If you prefer a stronger peanut butter flavor, use natural creamy peanut butter with a pinch of powdered sugar to thicken it before chilling.

For a richer chocolate flavor, use dark chocolate with a cocoa percentage around 60–70%.

Easy Variations to Try

Chocolate Peanut Butter Cup Cakes

Add a few small pieces of peanut butter cups to the center along with the peanut butter filling.

Dark Chocolate Version

Use 70% dark chocolate and reduce the sugar slightly if you prefer a less sweet dessert.

Milk Chocolate Version

Use milk chocolate for a sweeter and creamier flavor that pairs well with children and family-friendly dessert plates.

Crunchy Peanut Butter Version

Use crunchy peanut butter for small pieces of peanuts throughout the molten center.

Salted Chocolate Version

Add a tiny pinch of flaky sea salt over the finished cakes to balance the sweetness.

Banana Peanut Butter Version

Serve each warm cake with thin banana slices and a small drizzle of peanut butter.

What to Serve With These Chocolate Cakes

These individual cakes are rich, so a cool or fresh topping works especially well.

Try serving them with:

  • Vanilla ice cream
  • Fresh strawberries
  • Raspberries
  • Blueberries
  • Whipped cream
  • Greek yogurt
  • Chopped roasted peanuts
  • Chocolate shavings
  • Powdered sugar
  • A light drizzle of maple syrup

For a restaurant-style presentation, place the cake in the center of a white plate and add a small scoop of vanilla ice cream beside it. Finish with berries and a light dusting of powdered sugar.

Storage and Reheating

These cakes are best served immediately because the center is designed to stay warm and soft.

If you have leftovers, allow them to cool completely and store them in an airtight container in the refrigerator for up to 2 days.

To reheat, place one cake in the air fryer at 300°F for 2–4 minutes.

Check it early because reheating for too long can cook the center completely.

The texture will not be exactly the same as freshly cooked cakes, but gentle reheating can bring back some of the warmth and softness.

Common Mistakes to Avoid

Overbaking the Cakes

The most common mistake is cooking the cakes too long. A few extra minutes can change the center from molten to fully set.

Using Too Much Flour

Extra flour creates a thicker batter and can make the finished cakes heavy.

Skipping the Chilled Filling

Room-temperature peanut butter can spread into the batter before the outside has enough time to set.

Overcrowding the Air Fryer

Too many ramekins can restrict airflow and cause uneven cooking.

Cutting Immediately

Allow the cakes to rest for a minute or two so the structure can settle before serving.

Frequently Asked Questions

1. Can I make these cakes without ramekins?

Yes, but use small oven-safe molds or baking cups that are rated for the air fryer’s temperature.

2. How long should I air fry molten chocolate cakes?

Start with 7 minutes at 350°F, then check the edges and add time only if needed.

3. Can I use crunchy peanut butter?

Yes, crunchy peanut butter works well and adds small pieces of peanuts to the center.

4. Can I prepare the cakes ahead of time?

Yes, assemble the ramekins several hours ahead and refrigerate them until you are ready to cook.

5. Can I use milk chocolate?

Yes, milk chocolate creates a sweeter and milder chocolate flavor than dark or semi-sweet chocolate.

6. Why did my molten center disappear?

The cakes were likely overbaked; reduce the cooking time and check them earlier during the next batch.

7. Can I freeze these chocolate cakes?

Yes, you can freeze assembled uncooked cakes, but you may need to add a few minutes to the air-frying time.

8. Can I use almond butter instead of peanut butter?

Yes, creamy almond butter can replace peanut butter for a similar soft center with a different nutty flavor.

Final Thoughts

These Air Fryer Peanut Butter Molten Chocolate Cakes are an easy way to make an impressive dessert without preparing a full-size cake.

The chocolate batter creates a rich, tender exterior while the chilled peanut butter filling melts into a creamy center during air frying.

The key is to watch the cooking time closely. Start checking the cakes early and remove them when the edges are set but the centers still look soft.

Serve them warm with vanilla ice cream, fresh berries, powdered sugar, or a drizzle of peanut butter for a dessert that feels much more complicated than it really is.

For the best texture, enjoy the cakes shortly after cooking while the chocolate and peanut butter center is still warm and gooey.

Air Fryer Mini Cheesecakes

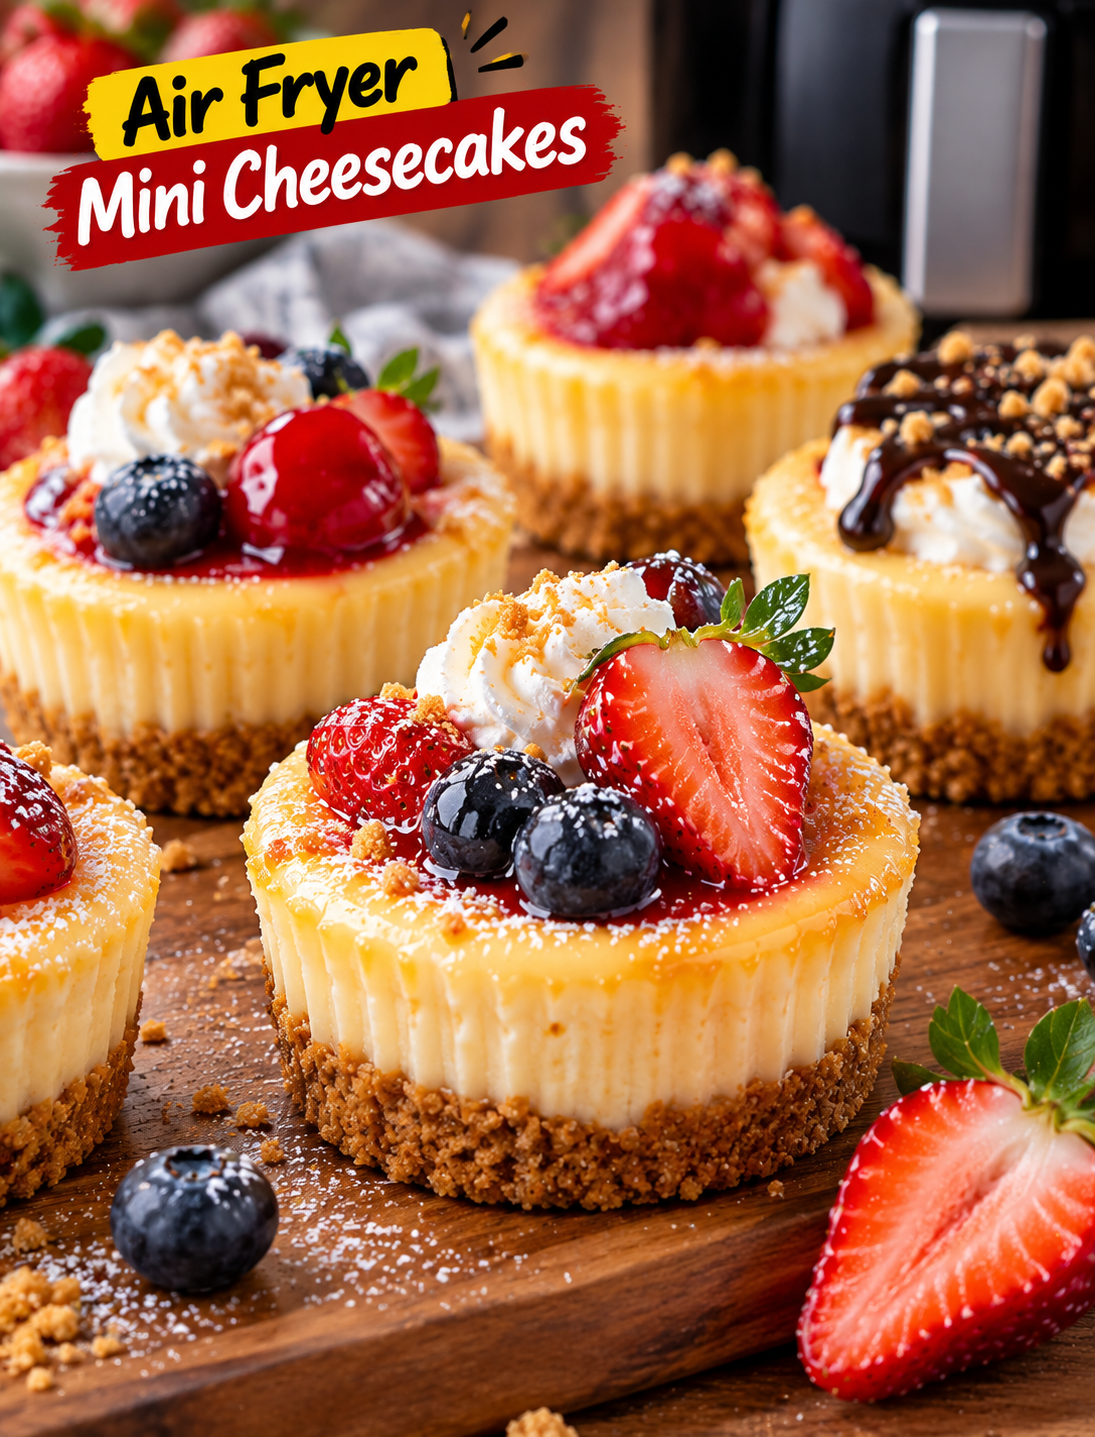
Creamy air fryer mini cheesecakes with graham cracker crust topped with fresh berries and powdered sugar.

Air Fryer Mini Cheesecakes

Air Fryer Mini Cheesecakes are a simple way to make creamy, individual desserts without turning on a large oven. Each little cheesecake has a buttery graham cracker crust, a smooth vanilla cheesecake filling, and a lightly golden top.

These mini cheesecakes are perfect for weeknight desserts, family gatherings, birthdays, holidays, and dinner parties. They also work well when you want cheesecake without making a full-size cake.

The air fryer creates gentle, even heat that helps these small cheesecakes cook quickly. Once chilled, they have a rich, creamy texture that pairs beautifully with fresh berries, chocolate sauce, caramel, or whipped cream.

Why You’ll Love This Recipe

  • Small portions: Each cheesecake is easy to serve and enjoy.
  • Quick cooking: Small cheesecakes cook much faster than a full-size cheesecake.
  • Creamy texture: A low, controlled cooking temperature helps keep the filling smooth.
  • Simple ingredients: Most ingredients are common grocery-store staples.
  • Easy to customize: Add berries, chocolate, caramel, or your favorite topping.
  • No water bath: The air fryer makes the process much simpler.
  • Great for gatherings: Individual portions make serving easy.

Ingredients

For the Graham Cracker Crust

  • 1 cup finely crushed graham crackers
  • 2 tablespoons granulated sugar
  • 4 tablespoons unsalted butter, melted
  • Pinch of salt

For the Cheesecake Filling

  • 8 ounces full-fat cream cheese, softened
  • ¼ cup granulated sugar
  • 1 large egg
  • ½ teaspoon vanilla extract
  • 2 tablespoons sour cream
  • 1 tablespoon all-purpose flour
  • 1 teaspoon fresh lemon juice

Optional Toppings

  • Fresh strawberries
  • Fresh blueberries
  • Raspberries
  • Whipped cream
  • Strawberry sauce
  • Caramel sauce
  • Chocolate sauce
  • Powdered sugar
  • Lemon zest

Equipment

  • Air fryer
  • 6–8 silicone muffin cups or small oven-safe ramekins
  • Mixing bowls
  • Electric hand mixer or whisk
  • Measuring cups and spoons
  • Small spoon or flat-bottomed glass

How to Make Air Fryer Mini Cheesecakes

Step 1: Prepare the Crust

Place the graham crackers in a food processor and pulse until finely crushed.

Transfer the crumbs to a bowl and mix with sugar, melted butter, and a pinch of salt.

The mixture should resemble damp sand and hold together when pressed.

Divide the crust mixture between 6–8 silicone muffin cups.

Press the crumbs firmly into the bottom of each cup using the back of a spoon or a small flat-bottomed glass.

Keep the crust layer even so every cheesecake has a balanced base.

Step 2: Pre-Bake the Crust

Preheat the air fryer to 325°F (165°C) for about 3 minutes.

Place the prepared cups into the air fryer basket.

Cook the crust for approximately 3 minutes.

Remove the cups and allow the crusts to cool slightly while you prepare the filling.

This short pre-bake helps the crust become firm and prevents it from becoming too soft under the cheesecake mixture.

Step 3: Prepare the Cream Cheese

Place softened cream cheese in a mixing bowl.

Beat it on low to medium speed until smooth and creamy.

Avoid beating at high speed because too much air can cause the cheesecakes to puff up during cooking and sink afterward.

Step 4: Add the Sugar and Egg

Add the sugar and mix until combined.

Add the egg and gently mix until the batter is smooth.

Do not overmix once the egg is added.

A smooth batter with minimal air bubbles helps create a dense, creamy cheesecake texture.

Step 5: Add the Flavor

Add vanilla extract, sour cream, flour, and lemon juice.

Mix gently until everything is fully combined.

Scrape the sides and bottom of the bowl to make sure there are no pockets of cream cheese remaining.

The finished batter should be thick, smooth, and creamy.

Step 6: Fill the Cups

Divide the cheesecake batter evenly between the prepared crusts.

Fill each cup about ¾ full.

Gently tap the cups against the counter once or twice to release large air bubbles.

Do not overfill the cups because the filling needs room to expand slightly during cooking.

Step 7: Air Fry

Place the filled cups into the air fryer basket in a single layer.

Cook at 300°F (150°C) for about 10–14 minutes.

The edges should look set while the centers should still have a gentle jiggle.

The cheesecakes will continue to firm up as they cool.

Important: Air fryers vary in power, so begin checking around the 10-minute mark.

Step 8: Cool the Cheesecakes

Carefully remove the cups from the air fryer.

Let the cheesecakes cool at room temperature for about 20–30 minutes.

Do not try to remove them while they are hot because the filling will still be soft.

Step 9: Chill Before Serving

Place the cooled cheesecakes in the refrigerator for at least 2 hours.

For the best texture, chill them overnight.

Cold cheesecake becomes firmer, creamier, and easier to remove from the silicone cups.

Step 10: Add Your Favorite Toppings

Once chilled, gently remove the cheesecakes from the cups.

Top them with fresh berries, whipped cream, chocolate sauce, caramel, or powdered sugar.

For a classic American cheesecake-style dessert, add strawberries and a small drizzle of strawberry sauce.

Serve cold and enjoy.

Tips for Perfect Mini Cheesecakes

Use Softened Cream Cheese

Allow the cream cheese to soften at room temperature before mixing.

Soft cream cheese blends more easily and helps prevent lumps in the filling.

Don’t Overmix

Mix the ingredients only until combined.

Excessive mixing adds air to the batter, which can cause cracks or uneven sinking after cooking.

Don’t Overcook

The center should still jiggle slightly when the cheesecakes are finished.

A completely firm center inside the air fryer usually means the cheesecake has been cooked too long.

Chill Thoroughly

Refrigeration is important because the filling continues to set as it cools.

Give the cheesecakes at least two hours in the refrigerator before serving.

Avoid Overcrowding

Leave enough room around each cup for hot air to circulate.

If your air fryer is small, cook the cheesecakes in batches.

Use Full-Fat Cream Cheese

Full-fat cream cheese gives the filling a richer flavor and smoother texture.

Reduced-fat varieties can produce a softer or less creamy result.

Topping Ideas

Fresh Berry Cheesecakes

Add sliced strawberries, blueberries, or raspberries for a fresh and colorful topping.

Chocolate Cheesecakes

Drizzle melted chocolate or chocolate sauce over the chilled cheesecake.

Add a few chocolate shavings for extra texture.

Caramel Cheesecakes

Top each cheesecake with caramel sauce and a small pinch of flaky sea salt.

Lemon Berry Cheesecakes

Add fresh blueberries with lemon zest and a light dusting of powdered sugar.

Classic Cheesecake

Keep it simple with whipped cream, fresh strawberries, and a small drizzle of strawberry sauce.

How to Store Mini Cheesecakes

Place leftover cheesecakes in an airtight container and refrigerate them for up to 4 days.

Keep toppings such as fruit and sauces separate when possible to prevent the crust from becoming soggy.

These cheesecakes are best served cold, so reheating is not necessary.

Can You Freeze Mini Cheesecakes?

Yes, these individual cheesecakes can be frozen.

Allow them to cool and chill completely before freezing.

Wrap each cheesecake tightly in plastic wrap and place the wrapped portions in a freezer-safe container or bag.

Freeze for up to 2 months for the best quality.

Move them to the refrigerator and allow them to thaw overnight before serving.

Add fresh toppings after thawing.

Common Mistakes to Avoid

  • Using cold cream cheese can leave lumps in the filling.
  • Overmixing can add too much air to the batter.
  • Overfilling the cups can cause the filling to spill over.
  • Cooking at a high temperature can brown the tops too quickly.
  • Overcooking can make the cheesecake dry instead of creamy.
  • Removing the cheesecakes while hot can cause them to break.
  • Skipping the chilling step can leave the filling too soft.

Recipe Details

Prep Time: 15 minutes
Cook Time: 10–14 minutes
Cooling Time: 30 minutes
Chilling Time: 2 hours
Total Time: About 3 hours
Servings: 6–8 mini cheesecakes
Air Fryer Temperature: 300°F (150°C)

Frequently Asked Questions

Can I make mini cheesecakes without graham crackers?

Yes, you can use crushed vanilla wafers, digestive biscuits, or shortbread cookies for the crust.

Why are my mini cheesecakes still soft?

They need more chilling time because cheesecake becomes firmer as it cools; refrigerate them for at least 2 hours.

Can I use silicone molds in an air fryer?

Yes, food-safe silicone muffin cups work well in an air fryer when they are rated for the cooking temperature.

How do I know when the cheesecake is done?

The edges should be set while the center still has a slight jiggle when you gently move the cup.

Can I use low-fat cream cheese?

You can, but full-fat cream cheese generally produces a richer and creamier cheesecake.

Can I make these cheesecakes ahead of time?

Yes, prepare them up to 2 days ahead and keep them covered in the refrigerator until serving.

What toppings go well with mini cheesecakes?

Fresh berries, whipped cream, chocolate, caramel, lemon zest, and fruit sauces all pair well with cheesecake.

Can I freeze these mini cheesecakes?

Yes, wrap chilled cheesecakes individually and freeze them for up to 2 months for the best quality.

Final Thoughts

These mini cheesecakes are an easy way to enjoy a creamy, homemade dessert without making a full-size cheesecake. The buttery graham cracker crust, smooth vanilla filling, and simple toppings make each serving feel special.

For the best results, use softened full-fat cream cheese, avoid overmixing the batter, and watch the cooking time closely. The center should have a slight jiggle when the cheesecakes come out of the air fryer because they will continue to set as they cool.

Give them plenty of time to chill before serving, then finish each one with fresh berries, whipped cream, chocolate, or caramel. Whether you’re making dessert for your family or preparing individual treats for guests, these mini cheesecakes are an easy recipe worth keeping in your dessert rotation.