Air Fryer Orange Chicken

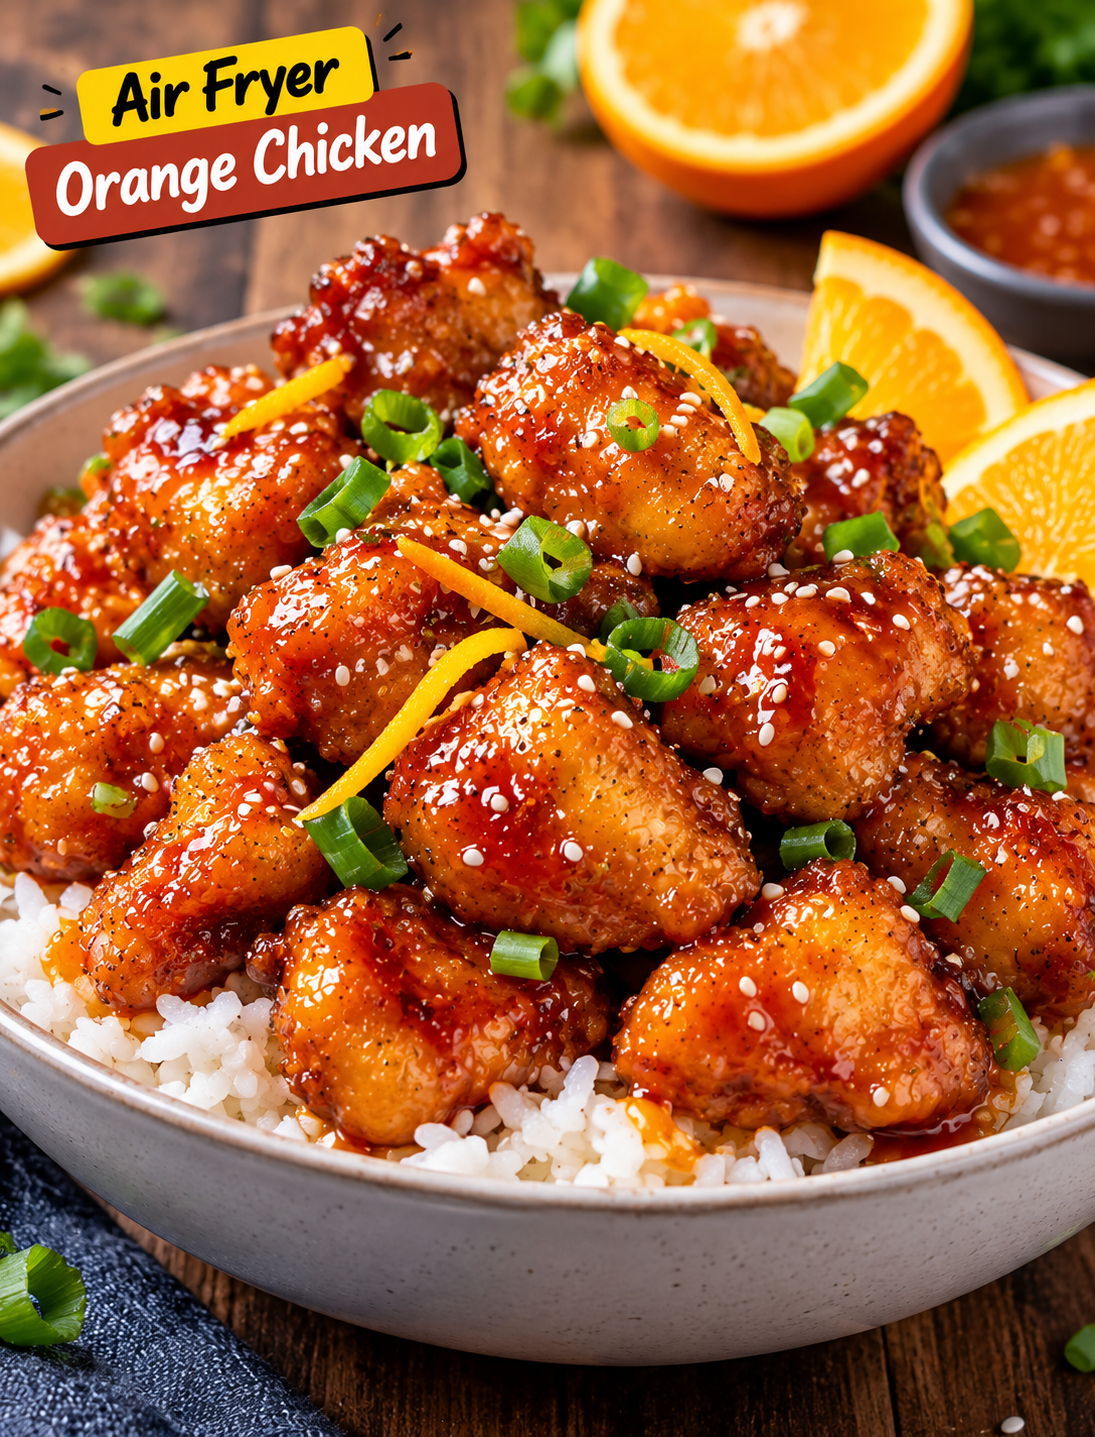
Crispy air fryer orange chicken coated in glossy orange sauce and topped with sesame seeds and green onions.

Air Fryer Orange Chicken

Crispy chicken coated in a sweet, tangy orange sauce makes this Air Fryer Orange Chicken an easy dinner that feels like takeout at home. The chicken gets golden and crunchy in the air fryer, while the homemade orange glaze adds fresh citrus flavor without making the dish heavy.

This recipe is a great choice for busy weeknights because the chicken cooks quickly and the sauce takes only a few minutes to prepare. Serve it with steamed rice, fried rice, or your favorite vegetables for a complete meal.

Why You’ll Love This Recipe

There are several reasons this orange chicken deserves a spot in your weekly dinner rotation.

  • Crispy without deep frying: The air fryer gives the chicken a golden coating with much less oil.
  • Fresh orange flavor: Orange juice and zest create a bright citrus taste.
  • Easy homemade sauce: The glaze comes together in one saucepan.
  • Weeknight friendly: Most of the preparation can be finished in about 15 minutes.
  • Family-friendly: You can adjust the sweetness and spice to suit your taste.
  • Better than takeout: The chicken stays crisp while the sauce adds a fresh homemade finish.

Ingredients

For the Crispy Chicken

  • 1½ pounds boneless, skinless chicken thighs or chicken breasts
  • ½ cup all-purpose flour
  • ½ cup cornstarch
  • 1 teaspoon garlic powder
  • ½ teaspoon paprika
  • ½ teaspoon salt
  • ¼ teaspoon black pepper
  • 1 large egg
  • 2 tablespoons milk
  • Cooking spray

Orange Sauce

  • ½ cup fresh orange juice
  • 1 tablespoon orange zest
  • ¼ cup low-sodium soy sauce
  • 3 tablespoons honey
  • 2 tablespoons rice vinegar
  • 1 tablespoon brown sugar
  • 2 cloves garlic, minced
  • 1 teaspoon freshly grated ginger
  • 1 tablespoon cornstarch
  • 2 tablespoons cold water
  • ½ teaspoon red pepper flakes, optional

For Serving

  • Sliced green onions
  • Sesame seeds
  • Extra orange zest
  • Steamed white or brown rice
  • Steamed broccoli, optional

How to Make Air Fryer Orange Chicken

Step 1: Prepare the Chicken

Pat the chicken dry with paper towels to remove excess moisture.

Cut the chicken into bite-sized pieces that are similar in size. Even pieces cook more evenly and develop a consistent crispy coating.

Step 2: Season the Coating

Add flour, cornstarch, garlic powder, paprika, salt, and black pepper to a shallow bowl.

Stir everything together until the seasonings are evenly distributed.

The combination of flour and cornstarch helps create a crispier crust than flour alone.

Step 3: Prepare the Egg Mixture

Whisk the egg and milk together in a separate bowl.

Dip each piece of chicken into the egg mixture, allowing excess liquid to drip away.

Then place the chicken into the seasoned flour mixture.

Coat each piece thoroughly and gently press the coating onto the chicken.

Step 4: Preheat the Air Fryer

Preheat the air fryer to 400°F (200°C) for about 3 minutes.

Lightly spray the basket with cooking spray.

Arrange the coated chicken pieces in a single layer.

Leave space between the pieces so hot air can circulate around them.

Step 5: Air Fry the Chicken

Lightly spray the tops of the chicken pieces with cooking spray.

Air fry at 400°F for 10–14 minutes, turning the chicken halfway through cooking.

Continue cooking until the coating is golden and crisp and the chicken reaches an internal temperature of 165°F (74°C).

Cooking time can vary slightly depending on the size of the chicken pieces and your air fryer.

Tip: Cook in batches if your basket is small. Overcrowding traps moisture and can make the coating less crispy.

How to Make the Orange Sauce

Step 6: Combine the Sauce Ingredients

While the chicken cooks, add orange juice, orange zest, soy sauce, honey, rice vinegar, brown sugar, garlic, ginger, and red pepper flakes to a small saucepan.

Whisk everything together over medium heat.

Step 7: Thicken the Sauce

In a small bowl, mix cornstarch with cold water until smooth.

Slowly pour the mixture into the simmering orange sauce while whisking continuously.

Cook for about 1–2 minutes, until the sauce becomes glossy and slightly thick.

Do not boil the sauce aggressively because excessive heat can make it too thick.

Step 8: Coat the Crispy Chicken

Transfer the cooked chicken to a large bowl.

Pour the warm orange sauce over the chicken.

Toss gently until every piece is lightly coated.

For the crispiest texture, use just enough sauce to coat the chicken rather than completely soaking it.

Step 9: Serve

Transfer the chicken to a serving plate or bowl.

Sprinkle with sliced green onions and sesame seeds.

Add a little fresh orange zest for extra citrus aroma.

Serve immediately with steamed rice and broccoli.

The contrast between the crispy chicken and glossy orange glaze is best while the chicken is still hot.

Tips for Extra Crispy Chicken

Keep the Chicken Dry

Moisture is one of the biggest enemies of crispiness.

Pat the chicken dry before dipping it into the egg mixture.

Use Cornstarch

Cornstarch helps create a lighter, crunchier coating.

Combining it with flour gives the chicken a crisp exterior without requiring deep frying.

Don’t Overcrowd the Basket

Air needs to move freely around the chicken.

Arrange the pieces in one layer and cook in batches when necessary.

Sauce It Right Before Serving

The longer crispy chicken sits in sauce, the softer the coating becomes.

Toss the chicken with the orange glaze immediately before serving.

Adjust the Flavor

Add more honey for a sweeter glaze or more red pepper flakes for extra heat.

A little additional orange zest can increase the citrus flavor without making the sauce too sweet.

What to Serve With Orange Chicken

This dish pairs well with simple sides that balance the sweet and savory sauce.

  • Steamed jasmine rice
  • Brown rice
  • Vegetable fried rice
  • Steamed broccoli
  • Stir-fried vegetables
  • Snap peas
  • Steamed green beans
  • Asian-style cucumber salad

For a lighter meal, serve the chicken over cauliflower rice with steamed vegetables.

Storage and Reheating

How to Store Leftovers

Allow the chicken to cool before placing it in an airtight container.

Store leftovers in the refrigerator for up to 3 days.

Keep the chicken and extra sauce separate when possible to help preserve the crispy coating.

How to Reheat

For the best texture, reheat the chicken in an air fryer at 375°F (190°C) for about 3–5 minutes.

Warm the sauce separately and toss it with the chicken just before serving.

Avoid microwaving the fully sauced chicken if you want to keep the coating crisp.

Frequently Asked Questions

Can I use chicken breast instead of chicken thighs?

Yes. Chicken breast works well, but avoid overcooking it because it can become dry faster than chicken thighs.

Can I make this recipe without cornstarch?

Yes. You can use additional flour, but the coating will usually be less crisp than a flour-and-cornstarch mixture.

Can I use bottled orange juice?

Yes, but fresh orange juice provides a brighter flavor and pairs especially well with fresh orange zest.

How do I make the sauce less sweet?

Reduce the honey or brown sugar slightly and add a little extra rice vinegar to create a more balanced flavor.

Can I make the chicken spicy?

Yes. Add red pepper flakes, cayenne pepper, or a small amount of hot sauce to the orange glaze.

How do I keep the chicken crispy?

Cook the chicken in a single layer, avoid overcrowding, and toss it with the sauce immediately before serving.

Can I freeze orange chicken?

You can freeze the cooked chicken for up to 2 months, but the coating may lose some crispness after thawing and reheating.

What temperature should the chicken reach?

Chicken should reach an internal temperature of 165°F (74°C) at the thickest piece for safe consumption.

Recipe Card

Prep Time: 15 minutes
Cook Time: 14 minutes
Total Time: About 30 minutes
Servings: 4
Air Fryer Temperature: 400°F (200°C)

Final Serving Tip

For the best homemade takeout experience, serve the crispy chicken immediately after tossing it with the orange glaze. Add steamed rice, broccoli, green onions, sesame seeds, and a little fresh orange zest for a colorful and satisfying dinner.

If you love crispy chicken with sweet and tangy flavors, this recipe is an easy way to bring a restaurant-style favorite into your own kitchen without deep frying.
Air Fryer Crispy Pickle Chips

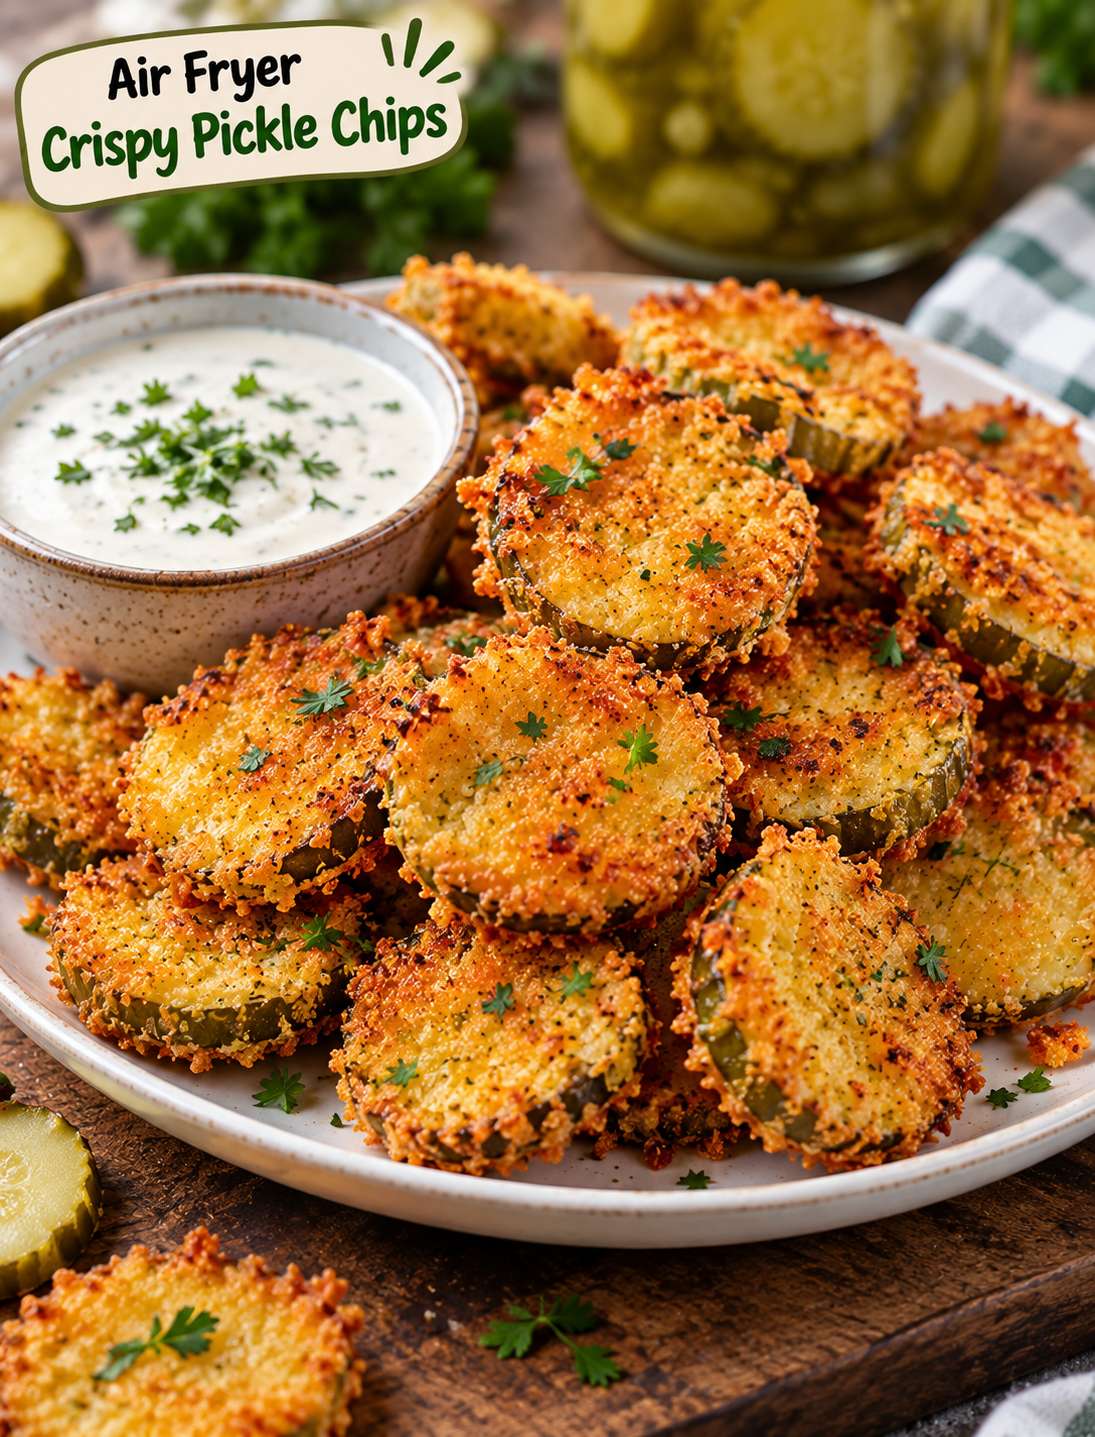
Air Fryer Crispy Pickle Chips served with creamy ranch dipping sauce

Air Fryer Crispy Pickle Chips

If you love crunchy snacks with a tangy bite, these Air Fryer Crispy Pickle Chips are worth making. They have a golden, crunchy coating on the outside while the pickle stays juicy and flavorful inside. Best of all, you can make them in the air fryer with very little oil.

This easy appetizer works well for game days, family movie nights, parties, or a quick afternoon snack. Serve the pickle chips with ranch dressing, spicy mayo, or your favorite dipping sauce for an extra layer of flavor.

The key to getting a crisp coating is simple: dry the pickle slices well before breading them and avoid overcrowding the air fryer basket.

Why You’ll Love These Crispy Pickle Chips

  • Quick to make: They cook in about 10 minutes.
  • Extra crunchy: Panko breadcrumbs create a crisp coating.
  • Less oil: The air fryer needs only a light spray of cooking oil.
  • Easy ingredients: Most of the ingredients are common pantry staples.
  • Great for sharing: They make an excellent party appetizer or snack.
  • Easy to customize: Add spices to make them mild, smoky, or spicy.

Ingredients You’ll Need

For the Pickle Chips

  • 1 jar dill pickle chips, about 16 ounces
  • ½ cup all-purpose flour
  • 2 large eggs
  • 1 cup panko breadcrumbs
  • ½ teaspoon garlic powder
  • ½ teaspoon smoked paprika
  • ½ teaspoon onion powder
  • ¼ teaspoon black pepper
  • ¼ teaspoon salt
  • Cooking spray

For Serving

  • Ranch dressing
  • Spicy ranch
  • Chipotle mayo
  • Buffalo sauce
  • Fresh chopped parsley or dill, optional

Ingredient tip: Use refrigerated dill pickle chips with a firm texture. Very thin or soft pickle slices can become less crisp during cooking.

How to Make Air Fryer Crispy Pickle Chips

Step 1: Drain and Dry the Pickles

Drain the pickle chips in a colander and let the excess liquid run off.

Place them between several layers of paper towels and gently press to remove as much moisture as possible.

This step matters because excess pickle juice can make the breading slide off and prevent it from becoming crisp.

Step 2: Prepare the Breading Stations

Set up three shallow bowls.

Add the flour to the first bowl.

Crack the eggs into the second bowl and whisk until smooth.

In the third bowl, combine the panko breadcrumbs, garlic powder, smoked paprika, onion powder, black pepper, and salt.

Mix the breadcrumb seasoning evenly so every bite gets the same flavor.

Step 3: Coat Each Pickle Slice

Take one dried pickle chip and coat it lightly in flour.

Shake off the excess flour, then dip it into the beaten egg.

Finally, press it gently into the seasoned panko mixture until both sides are covered.

Repeat with the remaining pickle slices.

Tip: Use one hand for the dry ingredients and the other hand for the egg mixture to keep your fingers from becoming coated with breading.

Step 4: Preheat the Air Fryer

Preheat your air fryer to 400°F (200°C) for about 3 minutes.

A properly heated basket helps the coating start crisping as soon as the pickle chips go in.

Lightly spray the basket with cooking spray.

Step 5: Arrange the Pickle Chips

Place the breaded pickle slices in a single layer inside the air fryer basket.

Leave a little space between each piece so hot air can circulate around them.

Do not stack or overcrowd the basket. Cook in batches if necessary.

Lightly spray the tops of the pickle chips with cooking spray.

Step 6: Air Fry Until Golden and Crispy

Air fry at 400°F (200°C) for 8–10 minutes.

After about 5 minutes, carefully flip the pickle chips.

Continue cooking until the coating becomes golden brown and crunchy.

Cooking time can vary slightly depending on the thickness of the pickle slices and the air fryer model.

Step 7: Serve Immediately

Remove the crispy pickle chips from the basket and let them cool for 1–2 minutes.

Serve them while they are still warm with ranch dressing, spicy mayo, Buffalo sauce, or another favorite dip.

For extra flavor, sprinkle a little chopped fresh dill or parsley over the top before serving.

Tips for Extra-Crispy Pickle Chips

Dry the Pickles Really Well

Moisture is the biggest enemy of crispy breading. Pat the pickle slices thoroughly with paper towels before coating them.

Use Panko Breadcrumbs

Panko creates a lighter and crunchier coating than regular fine breadcrumbs. It also holds up well during air frying.

Don’t Skip the Preheat

Starting with a hot air fryer helps the breading crisp quickly instead of slowly absorbing moisture.

Avoid Overcrowding

Air needs to move around every piece. A crowded basket can leave you with soft spots and uneven browning.

Spray Lightly With Oil

A quick mist of cooking spray helps the panko turn golden without requiring deep frying.

Flip Halfway Through

Turning the pickle chips halfway through cooking helps both sides develop an even crunchy texture.

How to Make Spicy Pickle Chips

If you enjoy extra heat, customize the breadcrumb mixture with ¼–½ teaspoon of cayenne pepper.

You can also add crushed red pepper flakes, Cajun seasoning, or a small amount of chili powder.

For a spicy dipping sauce, mix ranch dressing with a little hot sauce and smoked paprika.

What to Serve With Pickle Chips

These crispy bites are delicious on their own, but a good dipping sauce makes them even better.

Try serving them with:

  • Classic ranch dressing
  • Jalapeño ranch
  • Buffalo sauce
  • Spicy mayonnaise
  • Garlic aioli
  • Honey mustard
  • Chipotle sauce

They also pair nicely with burgers, sandwiches, grilled chicken, and other casual party foods.

How to Store Leftovers

Air-fried pickle chips are best when eaten immediately because the coating gradually loses its crunch.

If you have leftovers, place them in an airtight container and refrigerate for up to 2 days.

Avoid sealing them while they are still hot because trapped steam can make the coating soggy.

How to Reheat Pickle Chips

For the best texture, reheat leftover pickle chips in the air fryer.

Place them in a single layer and cook at 375°F (190°C) for about 3–5 minutes, checking frequently.

Avoid reheating them in the microwave because the breading can become soft.

Common Mistakes to Avoid

Using Wet Pickles

If the pickle slices are still covered with liquid, the breading may not stick properly.

Making the Coating Too Thick

A heavy coating can separate from the pickle while cooking. Use an even layer of flour, egg, and breadcrumbs.

Overcrowding the Basket

Too many pieces at once restrict airflow and can prevent proper browning.

Skipping the Flip

Flipping halfway through cooking helps the coating crisp more evenly.

Leaving Them in Too Long

Pickles contain a lot of moisture, so overcooking can make them chewy instead of crisp.

Recipe Summary

Prep Time: 15 minutes
Cook Time: 8–10 minutes
Total Time: About 25 minutes
Servings: 4
Temperature: 400°F (200°C)

These Air Fryer Crispy Pickle Chips are a simple way to turn everyday dill pickles into a crunchy snack. The combination of tangy pickle flavor, seasoned panko, and a creamy dipping sauce makes them perfect for casual gatherings or weekend snacking.

For the best results, remember three things: dry the pickles well, keep the pieces separated, and serve them fresh from the air fryer.

Frequently Asked Questions

Can I use pickle spears instead of pickle chips?

Yes. Cut pickle spears into smaller pieces, dry them well, and add a few extra minutes of cooking time if needed.

Why are my pickle chips not crispy?

The most common causes are excess moisture and overcrowding. Dry the pickles thoroughly and cook them in a single layer.

Can I make these without eggs?

Yes. You can use buttermilk or a thin milk-and-flour mixture to help the breadcrumbs adhere to the pickle slices.

Can I use regular breadcrumbs?

Yes, but panko usually gives a lighter and crunchier coating than traditional breadcrumbs.

Can I make these pickle chips spicy?

Yes. Add cayenne pepper, crushed red pepper flakes, Cajun seasoning, or chili powder to the breadcrumb mixture.

How long should I air fry pickle chips?

At 400°F (200°C), most pickle chips take about 8–10 minutes, with a flip halfway through cooking.

What is the best dipping sauce for pickle chips?

Ranch is a classic choice, but spicy ranch, Buffalo sauce, chipotle mayo, and garlic aioli also pair well with them.

Can I make these ahead of time?

They are best served immediately, but leftovers can be refrigerated and reheated in the air fryer for 3–5 minutes at 375°F.

Sure — add this Final Thoughts section at the end, just before the FAQs:

Final Thoughts

These Air Fryer Crispy Pickle Chips are an easy way to turn simple dill pickles into a crunchy, flavorful snack. The seasoned panko coating adds a satisfying crunch, while the pickle stays tangy and juicy inside.

For the crispiest results, dry the pickles thoroughly, avoid overcrowding the air fryer, and serve them soon after cooking. Pair them with ranch, spicy mayo, or your favorite dipping sauce for a snack that is perfect for game day, parties, or a quick family treat.

Once you try this recipe, you can easily adjust the seasonings to create your own favorite version. A little cayenne adds heat, smoked paprika gives a deeper flavor, and fresh dill adds a bright finish.

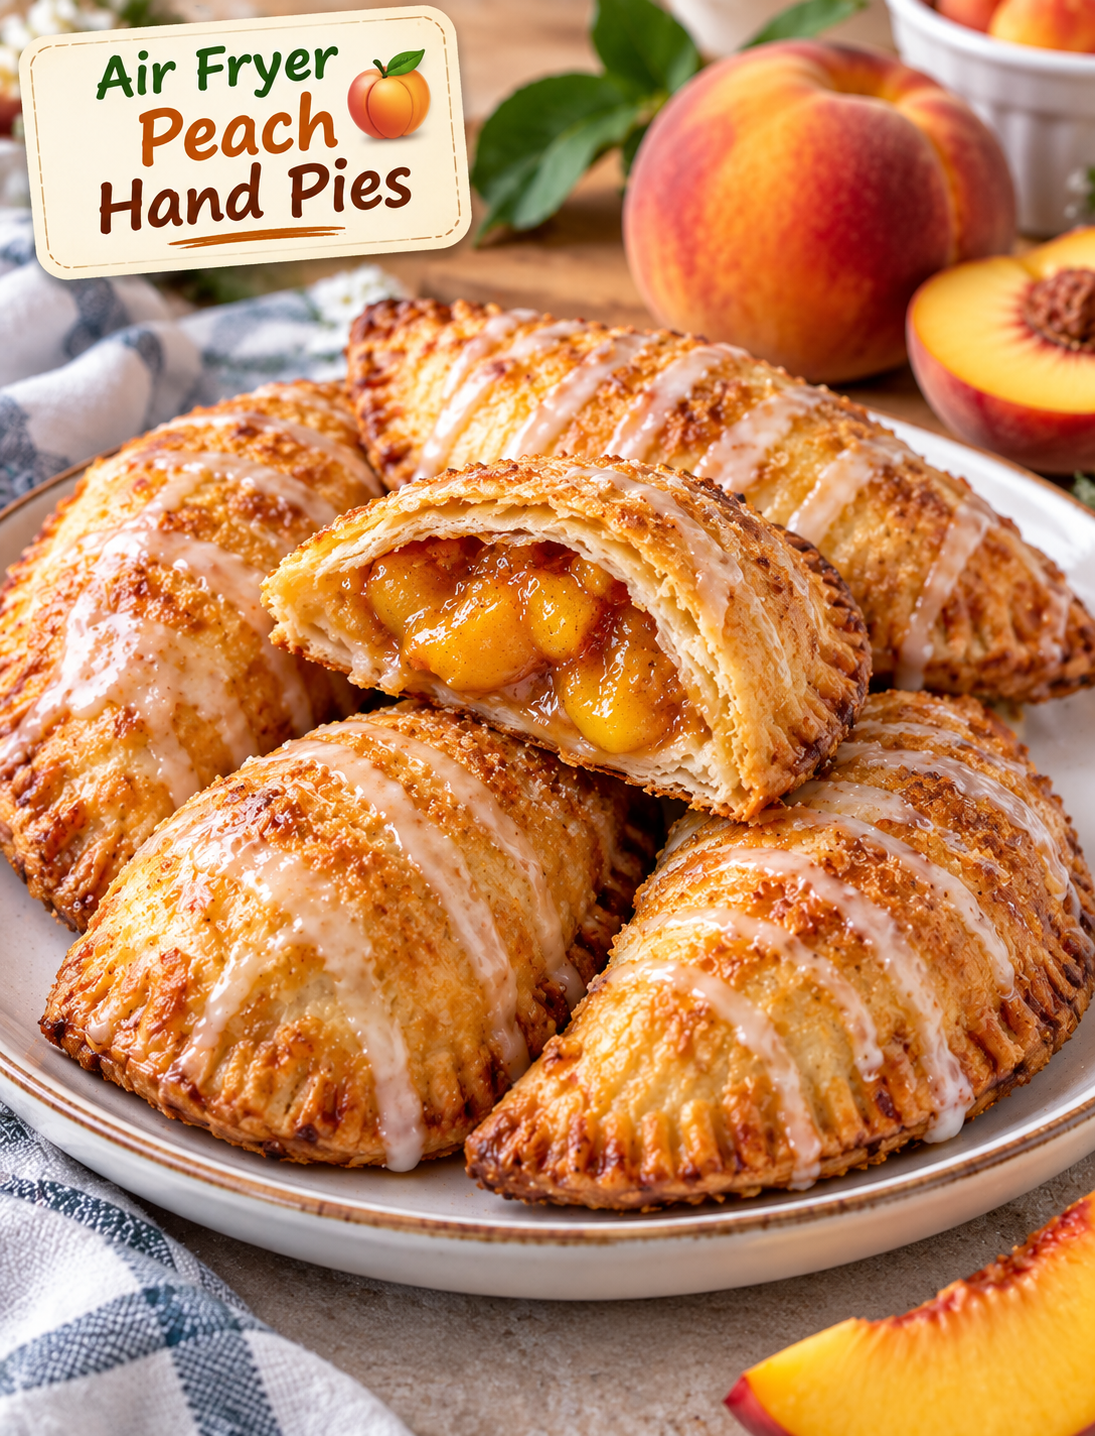
Air Fryer Peach Hand Pies

Golden Air Fryer Peach Hand Pies filled with cinnamon peaches and topped with a light glaze

Air Fryer Peach Hand Pies

These Air Fryer Peach Hand Pies are a simple way to enjoy a warm fruit dessert without making a full pie. Each small pastry has a flaky golden crust filled with sweet peaches, cinnamon, and a hint of vanilla.

The air fryer cooks the hand pies quickly and gives the pastry a crisp, lightly browned finish. They are easy enough for a weeknight dessert but special enough for a summer gathering, brunch, or family treat.

Fresh peaches work beautifully when they are ripe and juicy, while canned or frozen peaches can also be used with a few simple adjustments. The filling should be thick before it goes inside the pastry so the pies stay sealed while cooking.

Why You’ll Love These Peach Hand Pies

  • Quick dessert: The small pies cook much faster than a traditional full-size pie.
  • Crispy crust: Hot circulating air creates a golden, flaky pastry exterior.
  • Easy filling: Peaches, sugar, cinnamon, and vanilla create a classic fruit-pie flavor.
  • Small portions: Individual pies are easy to serve without slicing a whole dessert.
  • Flexible ingredients: Fresh, frozen, or canned peaches can work with the right preparation.
  • Make-ahead friendly: The assembled pastries can be refrigerated before air frying.
  • Great for sharing: They are convenient for parties, picnics, brunches, and family desserts.

Ingredients You’ll Need

For the Peach Filling

  • 2 cups peeled and diced fresh peaches
  • 2 tablespoons granulated sugar
  • 1 tablespoon brown sugar
  • 1 tablespoon cornstarch
  • ½ teaspoon ground cinnamon
  • ¼ teaspoon ground nutmeg
  • 1 teaspoon fresh lemon juice
  • ½ teaspoon vanilla extract
  • Pinch of salt

For the Pastry

  • 1 package refrigerated pie crusts, usually 2 crusts
  • 1 large egg
  • 1 tablespoon water
  • 1 tablespoon coarse sugar, optional

For the Simple Glaze

  • ½ cup powdered sugar
  • 1–2 teaspoons milk
  • ¼ teaspoon vanilla extract

Fresh peaches give the filling the best flavor when they are naturally sweet and ripe. If using canned peaches, drain them very well and pat them dry before dicing.

How to Make Air Fryer Peach Hand Pies

Step 1: Prepare the Peaches

Peel the peaches and cut them into small pieces. Smaller pieces cook more evenly and make the filling easier to spoon into the pastry.

Place the peaches in a saucepan with granulated sugar, brown sugar, cinnamon, nutmeg, lemon juice, salt, and cornstarch.

Stir everything together before turning on the heat. This helps distribute the cornstarch evenly.

Step 2: Cook the Filling

Cook the peach mixture over medium heat for about 4–6 minutes, stirring often.

The peaches should soften slightly while the juices become thick and glossy. Do not cook them until they turn completely mushy.

Remove the pan from the heat and stir in the vanilla extract.

Transfer the filling to a bowl and let it cool completely.

Important: A cool, thick filling is easier to work with and helps prevent the pastry from becoming soggy.

Step 3: Prepare the Pie Crust

Place the refrigerated pie crusts on a lightly floured surface.

Use a round cookie cutter or a small bowl to cut circles about 4–5 inches wide.

You should get several pastry rounds from the two crusts, depending on the size of your cutter.

Gather the scraps, gently press them together, and roll them out once more. Avoid overworking the dough because too much handling can make the crust tough.

Step 4: Fill the Pastry

Place about 1½ tablespoons of cooled peach filling in the center of each pastry circle.

Leave a clear border around the edges. Too much filling can make the pies difficult to seal.

Fold each circle in half to create a half-moon shape.

Press the edges together with your fingers, then use a fork to crimp the entire edge.

Step 5: Seal the Hand Pies

Check each pie carefully for open areas.

If the edges are not sealed, peach juice can leak into the air fryer during cooking.

For extra security, lightly brush the inside edge with water before pressing it closed.

Place the prepared pies on a parchment-lined tray while you finish assembling the remaining pastries.

Step 6: Add the Egg Wash

Whisk the egg with one tablespoon of water.

Lightly brush the top of each pastry with the egg wash.

The egg wash helps the crust develop a shiny, golden-brown finish.

Sprinkle a little coarse sugar over the top if you want extra crunch and sweetness.

Step 7: Preheat the Air Fryer

Preheat your air fryer to 350°F (175°C) for about 3 minutes.

A short preheat helps the pastry begin cooking evenly as soon as it enters the basket.

Step 8: Air Fry the Hand Pies

Lightly spray the air fryer basket with cooking spray.

Place the hand pies in a single layer, leaving space between them.

Air fry at 350°F (175°C) for 8–11 minutes, or until the pastry is puffed and golden brown.

Cooking time can vary between air fryer models, so begin checking around the 8-minute mark.

If your pies are browning too quickly, reduce the temperature slightly and continue cooking until the pastry is fully crisp.

Step 9: Cool Before Glazing

Carefully remove the hot pastries and place them on a wire rack.

Let them cool for about 5–10 minutes.

The peach filling will be extremely hot immediately after cooking, so allow the pies to cool before taking the first bite.

Step 10: Add the Glaze

Whisk powdered sugar, milk, and vanilla until smooth.

Drizzle the glaze over the slightly cooled pastries.

For a thicker glaze, use less milk. For a thinner drizzle, add a few extra drops of milk.

Serve warm or at room temperature.

Tips for Crispy Peach Hand Pies

  • Cool the filling completely: Warm filling can soften the pastry and make sealing difficult.
  • Do not overfill: Too much peach mixture can cause the edges to burst during cooking.
  • Seal the edges well: A fork-crimped border helps keep the fruit filling inside.
  • Avoid overcrowding: Leave room between each pastry so hot air can circulate.
  • Use parchment carefully: Use perforated air fryer parchment when appropriate so airflow is not blocked.
  • Check early: Smaller hand pies can cook faster than larger ones.
  • Keep the pastry cold: Chilled pie dough is easier to handle and usually produces a flakier crust.
  • Let them rest: The filling thickens slightly as the pies cool.

Fresh, Frozen, or Canned Peaches?

Fresh peaches are the easiest choice during peach season because they provide a bright, natural fruit flavor.

Frozen peaches can also work well. Thaw them first, drain excess liquid, and pat them dry before adding them to the filling.

Canned peaches are convenient when fresh peaches are unavailable. Choose peaches packed in juice when possible, drain them thoroughly, and reduce the added sugar if they are already very sweet.

The main goal is to control moisture. Excess liquid can make the pastry soft and may cause the filling to escape during cooking.

How to Store Peach Hand Pies

Let the pastries cool completely before storing them.

Place leftovers in an airtight container and refrigerate for up to 3 days.

For the best texture, reheat them in the air fryer at 325°F (165°C) for 3–5 minutes.

Avoid reheating them in the microwave if you want to maintain a crisp crust because microwave heat can make the pastry soft.

Can You Freeze Them?

Yes. Assemble the unbaked pies, seal the edges, and place them on a parchment-lined tray.

Freeze them until firm, then transfer them to a freezer-safe container or bag.

When ready to cook, air fry the frozen pies at 350°F (175°C) and add a few extra minutes to the cooking time.

Check that the pastry is golden and fully cooked before serving.

Serving Ideas

These little fruit pies are delicious on their own, but a few simple additions can turn them into a special dessert.

Serve them with a scoop of vanilla ice cream for a classic combination.

For a lighter option, add a spoonful of plain Greek yogurt and fresh peach slices.

A dusting of powdered sugar also works well when you want a simple finish without making a glaze.

For summer gatherings, serve the pastries on a platter with fresh berries and mint.

Common Mistakes to Avoid

Using a runny filling: A watery peach mixture can leak and make the pastry soggy.

Overfilling the crust: More filling does not always mean a better pie. Keep the amount controlled so the edges can close properly.

Skipping the egg wash: The pies will still cook without it, but the crust may not develop the same golden appearance.

Crowding the basket: Too many pastries at once can restrict airflow and lead to uneven browning.

Eating them immediately: The filling retains intense heat after cooking, so allow the pies to rest before serving.

Frequently Asked Questions

Can I use canned peaches for these hand pies?

Yes. Drain canned peaches very well, pat them dry, and adjust the sugar based on how sweet they are.

How long do peach hand pies take in an air fryer?

They usually take about 8–11 minutes at 350°F, but the exact time depends on your air fryer and pastry size.

Why did my peach filling leak out?

The pies may have been overfilled, the edges may not have been sealed firmly, or the filling may have been too warm or watery.

Can I make these with frozen peaches?

Yes. Thaw and drain frozen peaches thoroughly before cooking the filling to remove excess moisture.

Can I freeze peach hand pies?

Yes. Freeze the assembled unbaked pies, then cook them directly from frozen with a few additional minutes of air-frying time.

How do I keep the pastry crispy?

Store leftovers in an airtight container and reheat them in the air fryer rather than the microwave.

Can I make the hand pies without glaze?

Yes. They are sweet and flavorful without glaze, especially when finished with coarse sugar before air frying.

What can I serve with peach hand pies?

Vanilla ice cream, Greek yogurt, fresh berries, or a light dusting of powdered sugar all pair well with the warm peach filling.

Final Thoughts

Air Fryer Peach Hand Pies bring the flavor of classic peach pie into a smaller, easier dessert. The combination of tender peach filling, flaky pastry, cinnamon, and golden edges makes each hand pie satisfying without requiring a full-size pie.

For the best results, focus on three things: keep the peach filling thick, seal the pastry firmly, and leave enough space for air to circulate. Once you have those steps right, this recipe becomes an easy dessert you can make throughout peach season and beyond.

Air Fryer Crispy Ravioli

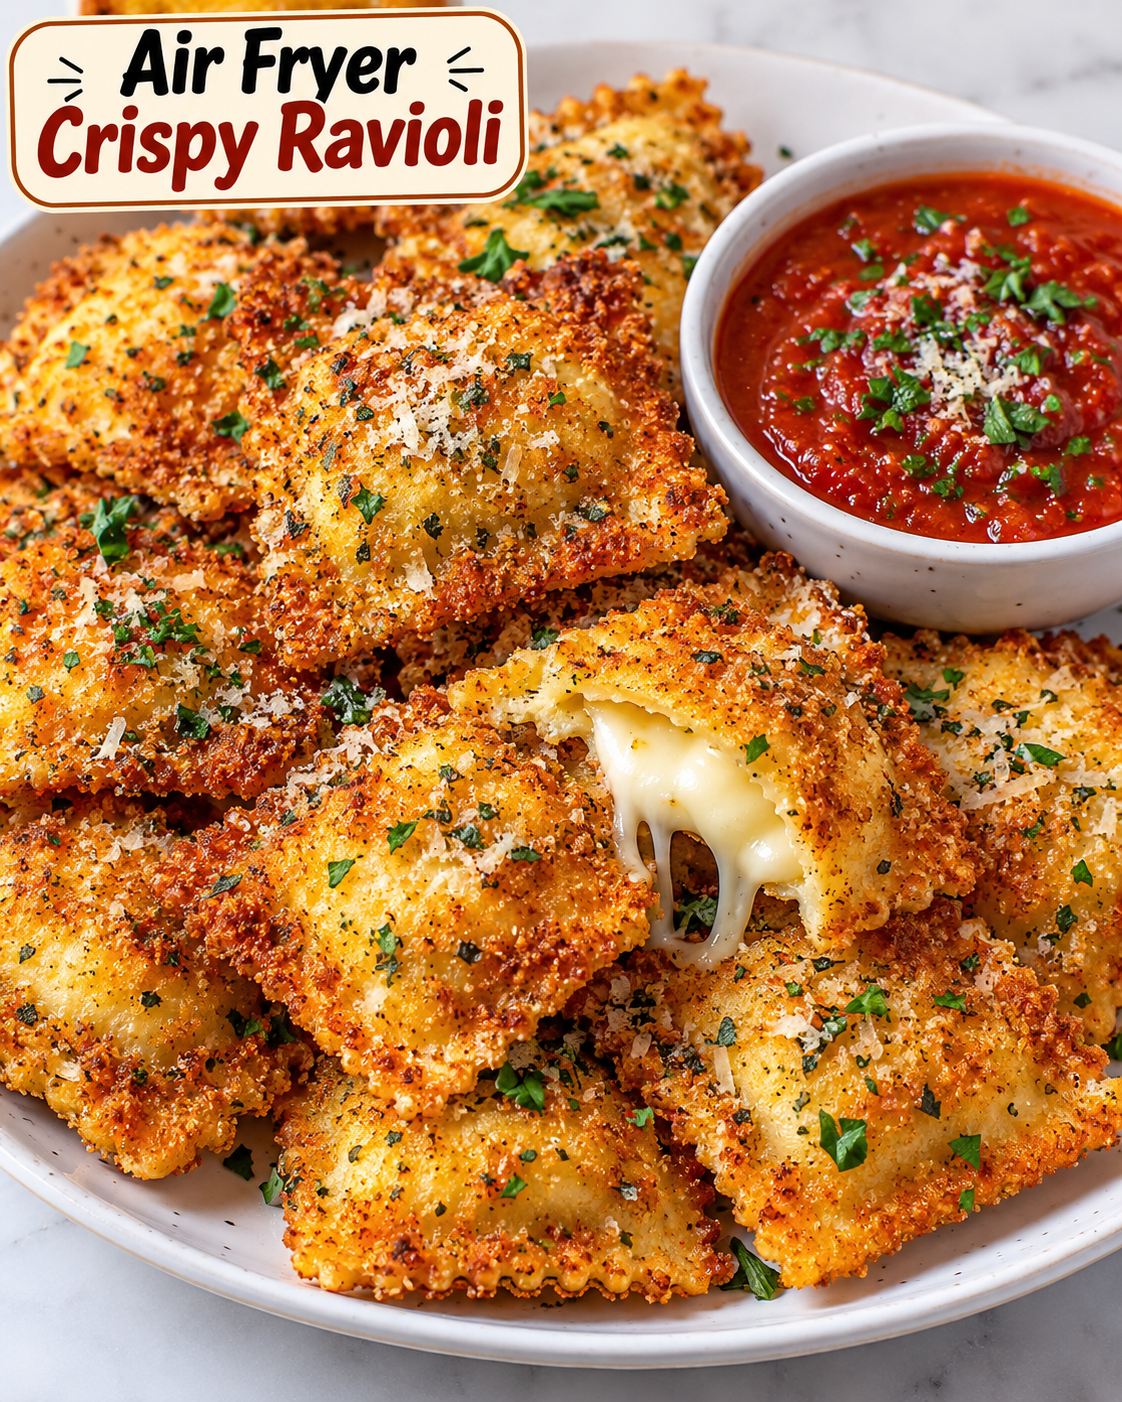
Air Fryer Crispy Ravioli with golden Parmesan breadcrumb coating served with marinara sauce.

Air Fryer Crispy Ravioli

If you love crispy appetizers with a warm, cheesy center, you need to try Air Fryer Crispy Ravioli. This easy snack turns tender cheese ravioli into golden, crunchy bites without deep frying.

Each piece has a crisp breadcrumb coating on the outside and a soft, flavorful filling inside. Serve the ravioli with warm marinara sauce for dipping, and you have an appetizer that works for game day, family movie night, parties, or a quick afternoon snack.

The air fryer makes this recipe simple because it uses hot circulating air to brown the coating evenly. You also need only a small amount of cooking spray instead of a pot full of oil.

Why You’ll Love This Crispy Ravioli Recipe

There are several reasons this appetizer is worth making at home.

  • Crispy texture: The breadcrumb and Parmesan coating becomes golden and crunchy in the air fryer.
  • Cheesy center: Cheese-filled ravioli stays warm and tender inside the crisp coating.
  • Less oil: Air frying requires only a light spray of oil.
  • Quick preparation: The ravioli can be ready in about 20 minutes.
  • Easy ingredients: Most items are available at a regular grocery store.
  • Great for sharing: The bite-sized pieces are easy to serve at parties and gatherings.
  • Simple dipping sauce: Warm marinara adds a bright tomato flavor that pairs well with the crispy coating.

Ingredients You’ll Need

Ravioli

Use refrigerated cheese ravioli for the best texture. Small or medium ravioli work well because they cook quickly and are easy to coat.

You can also use other filled varieties, such as spinach and cheese ravioli, if you want to change the flavor.

Breadcrumbs

Italian-seasoned breadcrumbs give the ravioli a flavorful crust. For a crunchier coating, use panko breadcrumbs or combine regular breadcrumbs with panko.

Parmesan Cheese

Finely grated Parmesan adds a salty, savory flavor to the coating and helps the outside become nicely golden.

Eggs

Beaten eggs help the breadcrumb mixture stick to the ravioli. Make sure each piece is lightly coated before pressing it into the breadcrumbs.

Seasonings

Garlic powder, Italian seasoning, and black pepper add extra flavor without making the coating complicated.

Cooking Spray

A light coating of olive oil or avocado oil spray helps the breading brown and crisp.

Marinara Sauce

Warm marinara sauce is the classic dipping option for toasted ravioli. You can also serve it with ranch, garlic aioli, or another favorite dipping sauce.

How to Make Air Fryer Crispy Ravioli

Step 1: Cook the Ravioli

Bring a pot of water to a gentle boil and cook the refrigerated ravioli according to the package directions.

Cook it until tender but not overly soft. Drain the ravioli carefully and allow it to cool for a few minutes.

Pat the ravioli gently with paper towels if it has excess moisture. A drier surface helps the egg and breadcrumb coating stick better.

Step 2: Prepare the Coating

Add the breadcrumbs, Parmesan cheese, garlic powder, Italian seasoning, and black pepper to a shallow bowl.

Stir everything together until the seasonings and cheese are evenly distributed through the breadcrumbs.

In a second shallow bowl, whisk the eggs until smooth.

Step 3: Coat the Ravioli

Dip one ravioli into the beaten egg and turn it gently so all sides are covered.

Allow excess egg to drip back into the bowl. Then place the ravioli into the breadcrumb mixture.

Press the breadcrumbs gently onto the surface so they stick.

Repeat with the remaining ravioli.

For an extra-crispy crust, dip each piece in the egg and breadcrumbs a second time.

Step 4: Preheat the Air Fryer

Preheat your air fryer to 400°F for about 3 minutes.

Preheating helps the coating begin crisping as soon as the ravioli enters the basket.

Step 5: Arrange the Ravioli

Lightly spray the air fryer basket with cooking spray.

Place the coated ravioli in a single layer with a little space between each piece.

Avoid stacking or overcrowding the basket. Proper airflow is important for an even, crunchy coating.

Lightly spray the tops of the ravioli with cooking spray.

Step 6: Air Fry

Cook the ravioli at 400°F for 6 to 8 minutes.

Flip the pieces halfway through cooking and lightly spray the other side if needed.

Continue cooking until the coating is golden brown and crisp.

Air fryer temperatures can vary, so start checking around the 6-minute mark to prevent over-browning.

Step 7: Serve Immediately

Transfer the crispy ravioli to a serving plate.

Warm your marinara sauce and place it in a small bowl alongside the ravioli.

For extra flavor, sprinkle the finished pieces with grated Parmesan and chopped fresh parsley.

Serve while warm for the best crunchy texture.

Tips for Extra-Crispy Ravioli

A few simple techniques can make a big difference in the final texture.

  • Do not overcrowd the basket. Crowding blocks hot air and can leave the coating soft.
  • Dry the cooked ravioli. Excess water can prevent the breadcrumbs from sticking properly.
  • Use panko for more crunch. Panko creates a lighter and crispier crust than fine breadcrumbs.
  • Add Parmesan to the coating. It gives the crust more flavor and helps it brown.
  • Spray lightly with oil. A small amount helps the breadcrumbs become crisp and golden.
  • Flip halfway through. This helps both sides cook evenly.
  • Serve right away. The coating is crispiest immediately after air frying.

Can You Use Frozen Ravioli?

Yes, frozen ravioli can be used, but the preparation may need a small adjustment.

For the most reliable coating, thaw the ravioli first and pat it dry before dipping it into the egg mixture.

If you use frozen ravioli directly, the cooking time may be longer and the coating may not stick as evenly.

Always check the center before serving to make sure the ravioli is heated through.

What to Serve With Crispy Ravioli

Marinara sauce is the traditional choice, but there are several ways to serve this appetizer.

Try the ravioli with:

  • Warm marinara sauce
  • Garlic Parmesan dip
  • Ranch dressing
  • Creamy Alfredo sauce
  • Spicy tomato sauce
  • Pesto
  • Whipped ricotta

For a complete appetizer spread, serve the crispy ravioli alongside mozzarella sticks, garlic bread, salad, or other finger foods.

Easy Flavor Variations

You can change the coating to create different versions of this recipe.

Spicy Crispy Ravioli

Add a pinch of crushed red pepper flakes or cayenne pepper to the breadcrumb mixture for extra heat.

Garlic Parmesan Ravioli

Increase the garlic powder and Parmesan for a stronger savory flavor.

Italian Herb Ravioli

Add dried basil, oregano, and parsley to the coating for a more herb-forward taste.

Extra-Cheesy Ravioli

Use a blend of Parmesan and finely shredded Romano cheese in the breadcrumb mixture.

How to Store Leftovers

Allow leftover ravioli to cool before placing it in an airtight container.

Store it in the refrigerator for up to 3 days.

For the best texture, reheat the pieces in the air fryer at 350°F for 3 to 5 minutes. This helps bring back some of the original crispness.

Avoid reheating them in the microwave if you want to keep the breadcrumb coating crunchy.

Frequently Asked Questions

Can I make crispy ravioli without deep frying?

Yes. An air fryer creates a crunchy breadcrumb coating with only a light amount of cooking spray instead of deep-frying the ravioli.

What type of ravioli works best?

Refrigerated cheese ravioli is an easy choice because it cooks quickly and has a firm enough surface for breading.

How long should ravioli cook in the air fryer?

Breaded ravioli usually takes about 6 to 8 minutes at 400°F, with a flip halfway through cooking.

Why is my ravioli coating not crispy?

Overcrowding, excess moisture, or too little oil spray can prevent the breadcrumbs from browning properly.

Can I use panko breadcrumbs?

Yes. Panko breadcrumbs are an excellent option when you want a lighter and crunchier crust.

What is the best sauce for crispy ravioli?

Warm marinara is the classic pairing, but ranch, pesto, Alfredo sauce, and garlic Parmesan dip also work well.

Can I prepare the ravioli ahead of time?

Yes. You can bread the cooked ravioli several hours ahead and refrigerate it until you are ready to air fry.

How do I reheat leftover crispy ravioli?

Reheat refrigerated ravioli in a 350°F air fryer for about 3 to 5 minutes until warmed and crisp.

Final Thoughts

Air Fryer Crispy Ravioli is an easy way to turn a simple package of cheese ravioli into a crunchy appetizer everyone can enjoy. The combination of golden breadcrumbs, Parmesan, Italian seasoning, and a warm cheesy center makes each bite satisfying.

The recipe is especially useful when you need a quick party snack or an easy appetizer without deep frying. Keep the ravioli in a single layer, use a light coating of oil spray, and serve it with warm marinara for the best results.

Once you try this version, you can easily customize the coating with different herbs, spices, cheeses, and dipping sauces. It is a simple air fryer recipe that can fit almost any casual gathering or snack craving.

Crispy Air Fryer Parmesan Potato Bites

Crispy air fryer Parmesan potato bites with golden edges, fresh parsley, and grated Parmesan served on a white plate.

Crispy Air Fryer Parmesan Potato Bites

Crispy Air Fryer Parmesan Potato Bites are a simple side dish or snack made with tender potatoes, Parmesan cheese, herbs, and everyday seasonings. The air fryer gives the potatoes a golden, crunchy coating while keeping the inside soft and fluffy.

This recipe is easy enough for a busy weeknight and flavorful enough for a family dinner, game-day snack, or casual gathering. The Parmesan creates a savory crust around each potato piece, while garlic, Italian seasoning, and paprika add extra flavor.

The best part is that you do not need a deep fryer or a large amount of oil. With a few basic ingredients and about 20 minutes in the air fryer, you can have a crispy potato dish ready to serve.

Why You’ll Love This Recipe

  • Quick to prepare: The potatoes take only a few minutes to season before cooking.
  • Crispy texture: High-heat air frying creates golden edges and a crunchy Parmesan coating.
  • Simple ingredients: Most of the ingredients are pantry staples.
  • Less oil: Air frying uses much less oil than traditional deep frying.
  • Family-friendly: The mild seasoning makes these potatoes easy to serve with many meals.
  • Easy to customize: You can change the herbs and spices to match your main dish.

Ingredients You’ll Need

For the Potato Bites

  • 1½ pounds baby potatoes, washed and cut into bite-size pieces
  • 2 tablespoons olive oil
  • ½ cup finely grated Parmesan cheese
  • 1 teaspoon garlic powder
  • 1 teaspoon Italian seasoning
  • ½ teaspoon paprika
  • ½ teaspoon salt
  • ¼ teaspoon black pepper
  • 1 tablespoon fresh parsley, finely chopped

Optional Additions

  • ¼ teaspoon red pepper flakes for heat
  • ½ teaspoon onion powder for extra savory flavor
  • Extra Parmesan for serving
  • Fresh lemon juice for a bright finish
  • Marinara sauce or garlic-herb dip for dipping

Baby potatoes work especially well because their thin skins become crisp while the centers stay tender. You can also use Yukon Gold potatoes if you prefer a creamier texture.

How to Make Crispy Air Fryer Parmesan Potato Bites

Step 1: Prepare the Potatoes

Wash the potatoes thoroughly and remove any dirt from the skins. Cut them into pieces that are similar in size so they cook evenly.

Pat the cut potatoes dry with a clean kitchen towel or paper towel. Removing excess moisture helps the outside become crisp during air frying.

Step 2: Season the Potatoes

Place the dry potato pieces in a large mixing bowl. Add the olive oil, Parmesan cheese, garlic powder, Italian seasoning, paprika, salt, and black pepper.

Toss everything together until the potatoes are evenly coated. Make sure the Parmesan and seasonings stick to as much of the potato surface as possible.

Tip: Finely grated Parmesan tends to coat the potatoes more evenly than large shreds.

Step 3: Preheat the Air Fryer

Preheat your air fryer to 400°F (200°C) for about 3 minutes.

Preheating helps the potatoes begin cooking at a high temperature right away, which can improve browning and crispness.

Step 4: Arrange the Potatoes

Place the seasoned pieces in the air fryer basket in a single layer.

Avoid packing the basket too tightly. Air needs to move around each piece to create an evenly browned exterior.

If you have a smaller air fryer, cook the potatoes in two batches instead of overcrowding the basket.

Step 5: Air Fry

Cook the potatoes at 400°F (200°C) for 15–20 minutes.

Shake the basket or turn the potatoes after about 8–10 minutes. Continue cooking until the edges are golden brown and crisp and the centers are tender when pierced with a fork.

Air fryers vary in power, so start checking the potatoes around the 15-minute mark.

Step 6: Finish and Serve

Transfer the hot potato bites to a serving bowl or plate. Sprinkle them with fresh parsley and a little extra Parmesan if desired.

Serve immediately while the coating is at its crispiest.

For dipping, serve them with marinara sauce, ranch dressing, garlic aioli, or a simple herb yogurt dip.

Tips for Extra-Crispy Potato Bites

Dry the potatoes well. Water left on the surface can create steam and make the potatoes less crisp.

Do not overcrowd the basket. A single layer gives hot air more room to circulate around each piece.

Use finely grated Parmesan. It spreads across the potatoes and helps create a more even crust.

Shake halfway through cooking. This helps expose different sides of the potatoes to the hot air.

Serve right away. Potato bites are at their best immediately after cooking.

Cut evenly. Pieces that are close in size will finish cooking at roughly the same time.

What to Serve with Parmesan Potato Bites

These crispy potatoes are flexible enough to pair with breakfast, lunch, or dinner.

Serve them alongside grilled chicken, burgers, steak, salmon, or roasted vegetables for an easy side dish. They also work well as a snack with a dipping sauce.

For a casual gathering, place the potatoes on a large platter with several dips. A combination of marinara, ranch, and garlic sauce gives guests different flavors to choose from.

You can also add them to a breakfast plate with eggs and fresh fruit for a hearty morning meal.

Easy Variations

Garlic Herb Potato Bites

Add extra garlic powder and fresh parsley before serving. A small amount of rosemary or thyme also works well.

Spicy Parmesan Potatoes

Add red pepper flakes or a pinch of cayenne pepper to the seasoning mixture for a little heat.

Lemon Parmesan Potatoes

After cooking, add a small squeeze of fresh lemon juice and extra parsley. The acidity balances the rich Parmesan flavor.

Cheesy Loaded Potato Bites

Top the cooked potatoes with a small amount of shredded cheese and return them to the air fryer for 1–2 minutes until melted.

How to Store and Reheat

Allow leftover potatoes to cool before placing them in an airtight container. Refrigerate them for up to 3 days.

For the best texture, reheat them in the air fryer at 375°F (190°C) for 4–6 minutes. This helps bring back some of the crispness.

Avoid reheating them in the microwave if you want a crunchy exterior, because microwave heating can make the coating soft.

Frequently Asked Questions

Can I use regular potatoes instead of baby potatoes?

Yes. Yukon Gold or Russet potatoes can be used, but cut them into evenly sized bite-size pieces for consistent cooking.

Do I need to peel the potatoes?

No. Baby potatoes have thin skins that become crisp in the air fryer, so peeling is optional.

Why are my potato bites not crispy?

Excess moisture, an overcrowded basket, or insufficient cooking time can reduce crispness; dry the potatoes and cook them in a single layer.

Can I make these without Parmesan cheese?

Yes. You can omit the Parmesan, although the finished potatoes will not have the same savory cheesy crust.

Can I prepare the potatoes ahead of time?

Yes. Cut and season the potatoes shortly before cooking, then refrigerate them covered until you are ready to air fry.

What temperature is best for air frying potatoes?

400°F (200°C) works well for bite-size pieces because the high heat helps brown the outside while the center becomes tender.

Can I freeze cooked potato bites?

Yes. Freeze cooled potatoes in a single layer before transferring them to a freezer-safe container, then reheat them in the air fryer until hot and crisp.

What sauce goes best with Parmesan potato bites?

Marinara, ranch, garlic aioli, or a creamy herb dip all pair well with the crispy Parmesan coating.

Final Thoughts

Crispy Air Fryer Parmesan Potato Bites are an easy way to turn basic potatoes into a flavorful side dish with very little effort. The combination of golden Parmesan, garlic, herbs, and tender potatoes makes them satisfying enough for a snack and versatile enough for dinner.

For the crispiest result, remember the three key steps: dry the potatoes well, avoid overcrowding the basket, and shake them halfway through cooking. Serve them hot with your favorite dipping sauce and enjoy every crunchy bite.

Crispy Air Fryer Parmesan Potato Wedges

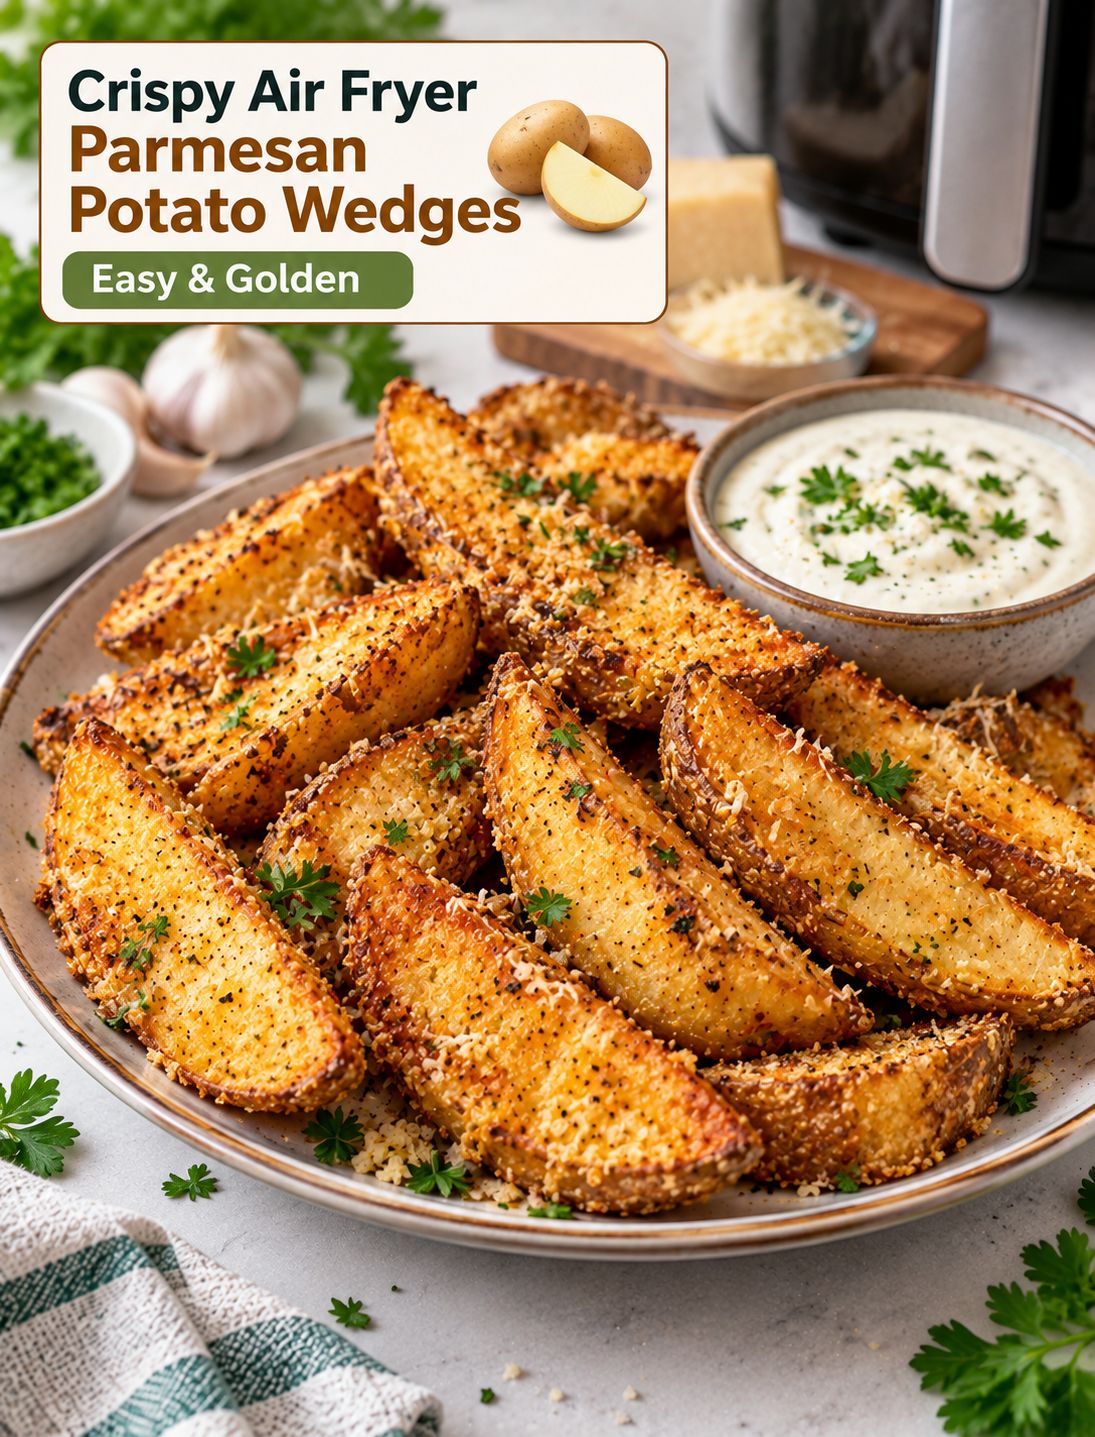
Crispy air fryer Parmesan potato wedges with golden edges, grated cheese, herbs, and dipping sauce

Crispy Air Fryer Parmesan Potato Wedges

Crispy Air Fryer Parmesan Potato Wedges are an easy side dish with golden edges, a tender center, and plenty of savory Parmesan flavor. They take less time than deep-fried potatoes and need only a small amount of oil to become crisp and flavorful.

These potato wedges work well for weeknight dinners, game-day snacks, burgers, sandwiches, or casual family meals. The Parmesan coating adds a delicious cheesy crust while garlic, paprika, and Italian seasoning bring extra flavor to every bite.

Why You’ll Love These Potato Wedges

This recipe uses simple ingredients and a quick air-frying method to create restaurant-style potato wedges at home.

  • Crispy outside: High heat helps the potato edges brown and crisp.
  • Tender inside: The wedges stay soft and fluffy in the center.
  • Cheesy flavor: Grated Parmesan creates a savory crust.
  • Easy preparation: No deep fryer or large amount of oil is needed.
  • Family-friendly: The seasoning can be adjusted for different tastes.
  • Versatile side dish: Serve them with burgers, chicken, sandwiches, or dips.

Ingredients You’ll Need

For the best texture, choose medium-sized Russet potatoes because they have a naturally fluffy center and crisp well in an air fryer.

Main Ingredients

  • 4 medium Russet potatoes
  • 2 tablespoons olive oil
  • ½ cup finely grated Parmesan cheese
  • 1 teaspoon garlic powder
  • 1 teaspoon paprika
  • ½ teaspoon Italian seasoning
  • ½ teaspoon salt
  • ¼ teaspoon black pepper
  • 1 tablespoon chopped fresh parsley, optional

For serving, prepare ranch dressing, garlic aioli, ketchup, or your favorite dipping sauce.

How to Make Crispy Air Fryer Parmesan Potato Wedges

Step 1: Wash and Cut the Potatoes

Wash the potatoes thoroughly and scrub away any dirt from the skin. You can leave the skin on because it adds texture and helps the wedges hold their shape.

Cut each potato in half lengthwise. Cut each half into 3 or 4 evenly sized wedges.

Tip: Try to keep the wedges similar in size so they cook at the same rate.

Step 2: Soak the Potato Wedges

Place the cut potatoes in a large bowl of cold water. Let them soak for about 20–30 minutes.

Soaking helps remove some surface starch, which can help the potatoes develop a crispier exterior during air frying.

After soaking, drain the potatoes and pat them very dry with clean kitchen towels.

Important: Excess water can prevent the seasoning and oil from coating the potatoes properly.

Step 3: Prepare the Parmesan Seasoning

In a small bowl, combine the Parmesan cheese, garlic powder, paprika, Italian seasoning, salt, and black pepper.

Mix everything until the seasoning is evenly distributed.

Finely grated Parmesan works especially well because it sticks to the potato surface and creates a more even coating.

Step 4: Coat the Potatoes

Place the dry potato wedges in a large mixing bowl. Add the olive oil and toss until each wedge has a light coating.

Sprinkle the Parmesan seasoning mixture over the potatoes. Toss gently until the wedges are coated on all sides.

Avoid adding too much oil because excess oil can make the coating heavy instead of crisp.

Step 5: Preheat the Air Fryer

Preheat your air fryer to 400°F for about 3–5 minutes if your model recommends preheating.

A hot cooking basket helps the potatoes begin crisping quickly when they are added.

If your air fryer does not require preheating, you can start cooking immediately.

Step 6: Arrange the Potato Wedges

Place the wedges in the air fryer basket in a single layer.

Leave a little space between the pieces so hot air can circulate around them.

Do not overcrowd the basket. Cooking in two batches is better than stacking the potatoes because crowded wedges tend to steam instead of crisp.

Step 7: Air Fry Until Golden and Crisp

Air fry the potato wedges at 400°F for approximately 15–20 minutes, turning them halfway through cooking.

Cooking time can vary depending on the thickness of the wedges and your air fryer model.

Check them after 15 minutes. They are ready when the edges are golden brown, the Parmesan coating is crisp, and the centers are fork-tender.

If needed, cook for another 2–4 minutes for deeper browning.

Step 8: Finish and Serve

Carefully remove the hot wedges from the basket. Sprinkle with fresh parsley if desired.

Let them rest for 1–2 minutes before serving. This gives the Parmesan coating a moment to firm up.

Serve immediately with your favorite dipping sauce for the best texture.

Tips for Extra Crispy Potato Wedges

Dry the Potatoes Well

After soaking, remove as much moisture as possible. Wet potatoes can interfere with browning and crisping.

Use Finely Grated Parmesan

Fine Parmesan spreads more evenly across the wedges and creates a better crust than large cheese shreds.

Avoid Overcrowding

Keep the potatoes in one layer whenever possible. Good airflow is one of the main reasons an air fryer can create crispy food.

Turn Halfway Through

Flipping the wedges helps both sides cook evenly and encourages consistent browning.

Serve Immediately

Potato wedges gradually soften as they sit. For the crispiest bite, serve them right after cooking.

Easy Variations

You can change the seasoning without changing the basic cooking method.

  • Spicy: Add ¼ teaspoon cayenne pepper or red pepper flakes.
  • Herby: Increase the Italian seasoning and add fresh parsley.
  • Ranch-style: Add a small amount of ranch seasoning to the coating.
  • Smoky: Replace regular paprika with smoked paprika.
  • Extra cheesy: Sprinkle a little additional Parmesan over the hot wedges before serving.

What to Serve With Parmesan Potato Wedges

These crispy wedges pair with many everyday meals.

Serve them alongside grilled chicken, turkey burgers, cheeseburgers, steak, grilled sandwiches, or crispy chicken.

For a casual snack, place the wedges on a platter with several dipping sauces. Ranch, garlic aioli, honey mustard, barbecue sauce, and ketchup all pair nicely with the Parmesan seasoning.

Frequently Asked Questions

Can I make Parmesan potato wedges without soaking them?

Yes. Soaking can improve crispness, but you can skip it when short on time and make sure the cut potatoes are very dry.

Why are my air fryer potato wedges not crispy?

Overcrowding, excess moisture, and too much oil can reduce crispness, so use dry potatoes and cook them in a single layer.

What potatoes are best for potato wedges?

Russet potatoes are an excellent choice because their high-starch texture helps create fluffy centers and crisp edges.

Can I use shredded Parmesan instead of grated Parmesan?

Finely grated Parmesan is preferred because it coats the potatoes more evenly and forms a crispier crust.

Do I need to peel the potatoes?

No. Leaving the skin on adds texture and saves preparation time, but peel them if you prefer a smoother exterior.

How long do potato wedges take in an air fryer?

At 400°F, most wedges take about 15–20 minutes, depending on their size and the specific air fryer.

Can I reheat leftover potato wedges?

Yes. Reheat them in an air fryer at about 375°F for several minutes until hot and crisp again.

What dipping sauce goes best with Parmesan wedges?

Ranch, garlic aioli, ketchup, barbecue sauce, and honey mustard are all flavorful choices for these savory wedges.

Final Thoughts

Crispy Air Fryer Parmesan Potato Wedges are a simple way to turn everyday potatoes into a flavorful side dish. The combination of golden potatoes, Parmesan cheese, garlic, and herbs creates a crispy coating without deep frying.

For the best results, cut the wedges evenly, remove excess moisture, avoid overcrowding the basket, and serve them while they are hot and crisp. Once you have the basic method down, you can easily adjust the seasonings to create your favorite version.