Air Fryer Cinnamon Sugar Doughnut Bites

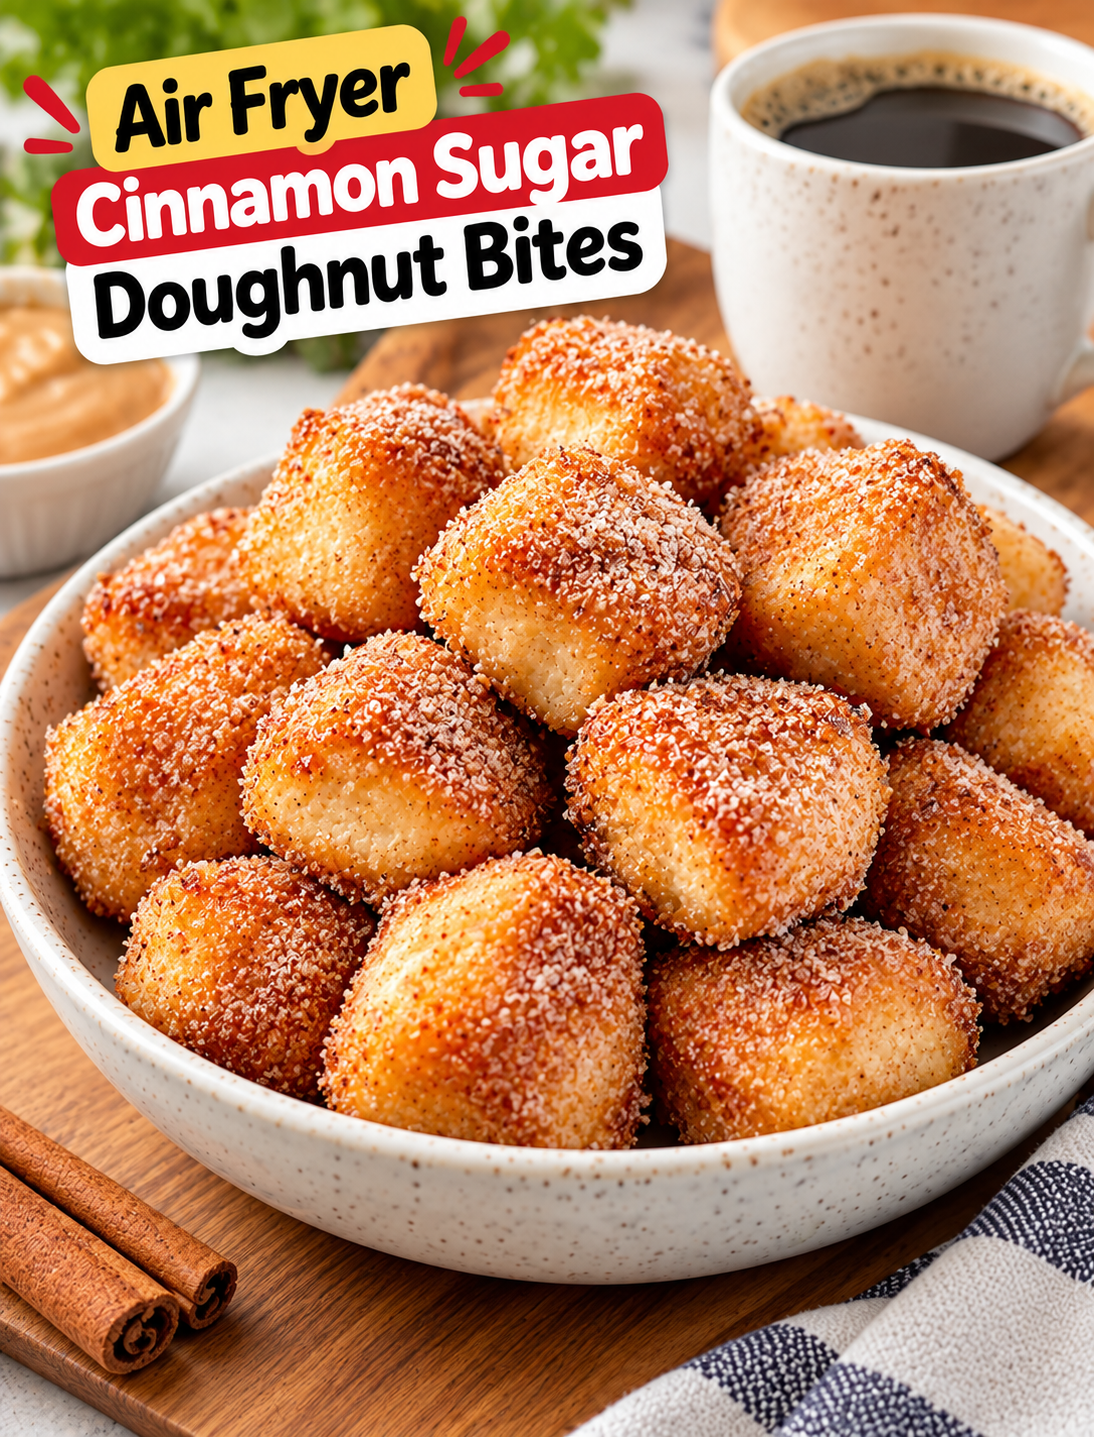
Air Fryer Cinnamon Sugar Doughnut Bites coated with buttery cinnamon sugar

Air Fryer Cinnamon Sugar Doughnut Bites

Craving something sweet without making a full batch of traditional doughnuts? These Air Fryer Cinnamon Sugar Doughnut Bites are a quick and easy treat with a soft center, lightly crisp outside, and a buttery cinnamon-sugar coating.

The bite-sized pieces cook quickly in the air fryer, so you can enjoy warm homemade doughnut bites without deep-frying a large pot of oil. They are perfect for breakfast, brunch, an afternoon snack, or a simple dessert.

This recipe uses refrigerated biscuit dough to keep preparation simple. After cutting the dough into small pieces, the bites are air fried until puffed and golden, then brushed with melted butter and tossed in cinnamon sugar.

Why You’ll Love These Cinnamon Sugar Doughnut Bites

These sweet bites are easy enough for a weekday treat and fun enough to serve at a weekend brunch.

  • Quick preparation: The dough requires very little prep before cooking.
  • Air fryer friendly: You can make a small batch without heating a full oven.
  • No deep frying: Air frying uses much less oil than traditional deep frying.
  • Soft and fluffy: The biscuit dough creates a tender center when cooked properly.
  • Crispy edges: High circulating heat lightly browns the outside.
  • Simple coating: Butter, cinnamon, and sugar create a classic doughnut flavor.
  • Kid-friendly: Small pieces are easy to serve and share.
  • Easy to customize: Add vanilla, nutmeg, chocolate, or a simple glaze for a different finish.

The best texture comes from serving these bites while they are still warm. The cinnamon sugar sticks especially well to the melted butter on freshly cooked dough.

Ingredients You’ll Need

For the Doughnut Bites

  • 1 can refrigerated biscuit dough, preferably flaky or buttermilk style
  • Cooking spray
  • 2 tablespoons unsalted butter, melted

For the Cinnamon Sugar Coating

  • 1/2 cup granulated sugar
  • 1 1/2 teaspoons ground cinnamon
  • 1/4 teaspoon ground nutmeg, optional
  • 1/2 teaspoon vanilla extract, optional

The biscuit dough provides the base, while melted butter helps the cinnamon-sugar mixture adhere to the warm dough.

Use regular granulated sugar for a classic coating. If you prefer a slightly richer flavor, add a small amount of brown sugar to the mixture.

How to Make Air Fryer Cinnamon Sugar Doughnut Bites

Step 1: Prepare the Dough

Open the refrigerated biscuit dough and separate the biscuits.

Place the dough pieces on a clean cutting board. Cut each biscuit into approximately 4 equal pieces.

If the dough feels sticky, lightly flour your hands rather than adding a large amount of flour to the dough.

The pieces do not need to be perfectly shaped. Keeping them close in size is more important because evenly sized pieces cook more consistently.

Step 2: Prepare the Cinnamon Sugar

Add granulated sugar and cinnamon to a shallow bowl.

Stir until the cinnamon is evenly distributed throughout the sugar.

Add the optional nutmeg if you want a warmer spice flavor.

Set the mixture aside while the dough cooks.

Step 3: Preheat the Air Fryer

Preheat your air fryer to 350°F (175°C) for about 3 minutes if your model recommends preheating.

A preheated basket helps the dough begin cooking immediately and promotes more even browning.

Step 4: Arrange the Dough

Lightly spray the air fryer basket with cooking spray.

Place the dough pieces in a single layer with a little space between them.

Do not stack the pieces because they need room for hot air to circulate.

If your basket is small, cook the dough in batches rather than overcrowding it.

Step 5: Air Fry the Doughnut Bites

Cook at 350°F for approximately 5–7 minutes.

Shake the basket gently or turn the pieces halfway through cooking.

The bites should puff up and become lightly golden on the outside.

Cooking time can vary between air fryer models, so begin checking around the 5-minute mark.

Avoid cooking them too long because small pieces can become dry quickly.

Step 6: Melt the Butter

While the dough bites cook, melt the butter in a small microwave-safe bowl or saucepan.

Let it cool slightly so it is easier to handle.

For extra flavor, stir a small amount of vanilla extract into the melted butter.

Step 7: Coat With Butter

Transfer the warm doughnut bites to a large bowl.

Brush or toss them gently with the melted butter.

Use enough butter to lightly coat the surface without soaking the bites.

Step 8: Add the Cinnamon Sugar

Immediately transfer the buttered bites into the cinnamon-sugar mixture.

Toss gently until each piece has a thin, even coating.

The warm butter helps the sugar mixture cling to the surface.

Step 9: Serve Warm

Place the finished doughnut bites on a serving plate.

Serve them warm with coffee, milk, hot chocolate, or your favorite dipping sauce.

For an extra dessert-style presentation, dust them lightly with powdered sugar before serving.

Tips for the Best Air Fryer Doughnut Bites

A few simple details can improve the texture and flavor.

Keep the Pieces Similar in Size

Uniform pieces cook more evenly. Very small pieces may brown quickly while larger pieces are still soft inside.

Don’t Overcrowd the Basket

Hot air needs space to move around the dough. Overcrowding can result in uneven browning and softer surfaces.

Check Early

Air fryers vary in power and basket design. Start checking at about 5 minutes instead of relying only on the listed cooking time.

Coat While Warm

The cinnamon sugar sticks best when the bites are freshly cooked and lightly coated with melted butter.

Avoid Too Much Butter

A thin coating is enough to help the sugar adhere. Excess butter can make the bites greasy.

Serve Fresh

These bites have their best texture shortly after cooking. If left uncovered for too long, they can lose some of their crisp exterior.

Easy Cinnamon Sugar Variations

The classic cinnamon-sugar coating is simple, but you can easily change the flavor.

Vanilla Cinnamon Sugar

Add 1/2 teaspoon vanilla extract to the melted butter before coating the warm bites.

Brown Sugar Cinnamon

Replace 2 tablespoons of the granulated sugar with light brown sugar for a deeper caramel-like flavor.

Apple Pie Doughnut Bites

Add a pinch of ground nutmeg and a small amount of apple pie spice to the cinnamon-sugar mixture.

Chocolate Cinnamon Bites

Drizzle the finished doughnut bites with melted semisweet or milk chocolate.

Maple Cinnamon Bites

Add a small drizzle of maple syrup just before serving for a richer breakfast-style treat.

What to Serve With Doughnut Bites

These warm treats pair well with both drinks and simple dipping sauces.

For breakfast, serve them with hot coffee, a latte, cappuccino, or tea.

For dessert, add vanilla ice cream and a drizzle of caramel sauce.

You can also serve them with:

  • Chocolate dipping sauce
  • Vanilla glaze
  • Cream cheese frosting
  • Caramel sauce
  • Strawberry sauce
  • Whipped cream
  • Fresh berries

A small bowl of dipping sauce makes the bites especially easy to serve at brunch or parties.

How to Make a Simple Vanilla Glaze

If you want a glazed version, mix 1/2 cup powdered sugar with 1–2 tablespoons milk and a small splash of vanilla extract.

Whisk until smooth.

Drizzle the glaze over the warm doughnut bites and let it sit for a few minutes before serving.

Add a little more milk if the glaze is too thick, or more powdered sugar if it becomes too thin.

How to Store Leftovers

These doughnut bites taste best fresh, but leftovers can be stored for a short time.

Allow them to cool completely before placing them in an airtight container.

Keep them at room temperature for up to 1–2 days.

The cinnamon-sugar coating may soften during storage, so reheating can help restore some of the original texture.

How to Reheat Doughnut Bites

Place the leftover bites in the air fryer at 300°F for about 2–3 minutes.

Check them early because small pieces warm quickly.

Avoid overheating them because the dough can become dry.

After reheating, add a small amount of melted butter and fresh cinnamon sugar if you want to refresh the coating.

Frequently Asked Questions

Can I use any refrigerated biscuit dough?

Yes, most refrigerated biscuit dough works, although flaky or buttermilk-style dough produces a soft and tender center.

How long do doughnut bites take in an air fryer?

Most small pieces take about 5–7 minutes at 350°F, but cooking time varies by air fryer and dough size.

Why are my doughnut bites dry?

Overcooking or cutting the pieces too small can make them dry, so begin checking them around the 5-minute mark.

Do I need to flip the doughnut bites?

Turning or shaking them halfway through cooking helps the pieces brown more evenly.

Can I make these without butter?

Yes, but butter helps the cinnamon sugar stick and adds richness, so the coating may not adhere as well without it.

Can I use brown sugar instead of white sugar?

Yes, you can replace part or all of the granulated sugar with brown sugar for a deeper caramel-like flavor.

Can I freeze cinnamon sugar doughnut bites?

You can freeze cooked bites, but their texture is best when freshly made because freezing can soften the exterior.

How do I keep the bites crispy?

Serve them soon after cooking and avoid storing them in a sealed container while they are still warm.

Final Thoughts

These Air Fryer Cinnamon Sugar Doughnut Bites are an easy way to satisfy a doughnut craving without deep frying or spending a long time preparing homemade dough.

The combination of warm biscuit dough, melted butter, cinnamon, and sugar creates a simple treat with familiar bakery-style flavor. The air fryer keeps the cooking process quick and makes small batches easy to prepare.

For the best results, cut the dough into evenly sized pieces, leave room between each bite in the basket, and start checking them early. Coat the cooked pieces while they are warm so the cinnamon sugar sticks to every bite.

Serve them fresh with coffee for breakfast, add a dipping sauce for dessert, or make a larger batch for a weekend brunch. Once you try the basic version, experiment with vanilla, nutmeg, chocolate, caramel, or maple flavors to create your own favorite combination.
Air Fryer Apple Fritter Bites

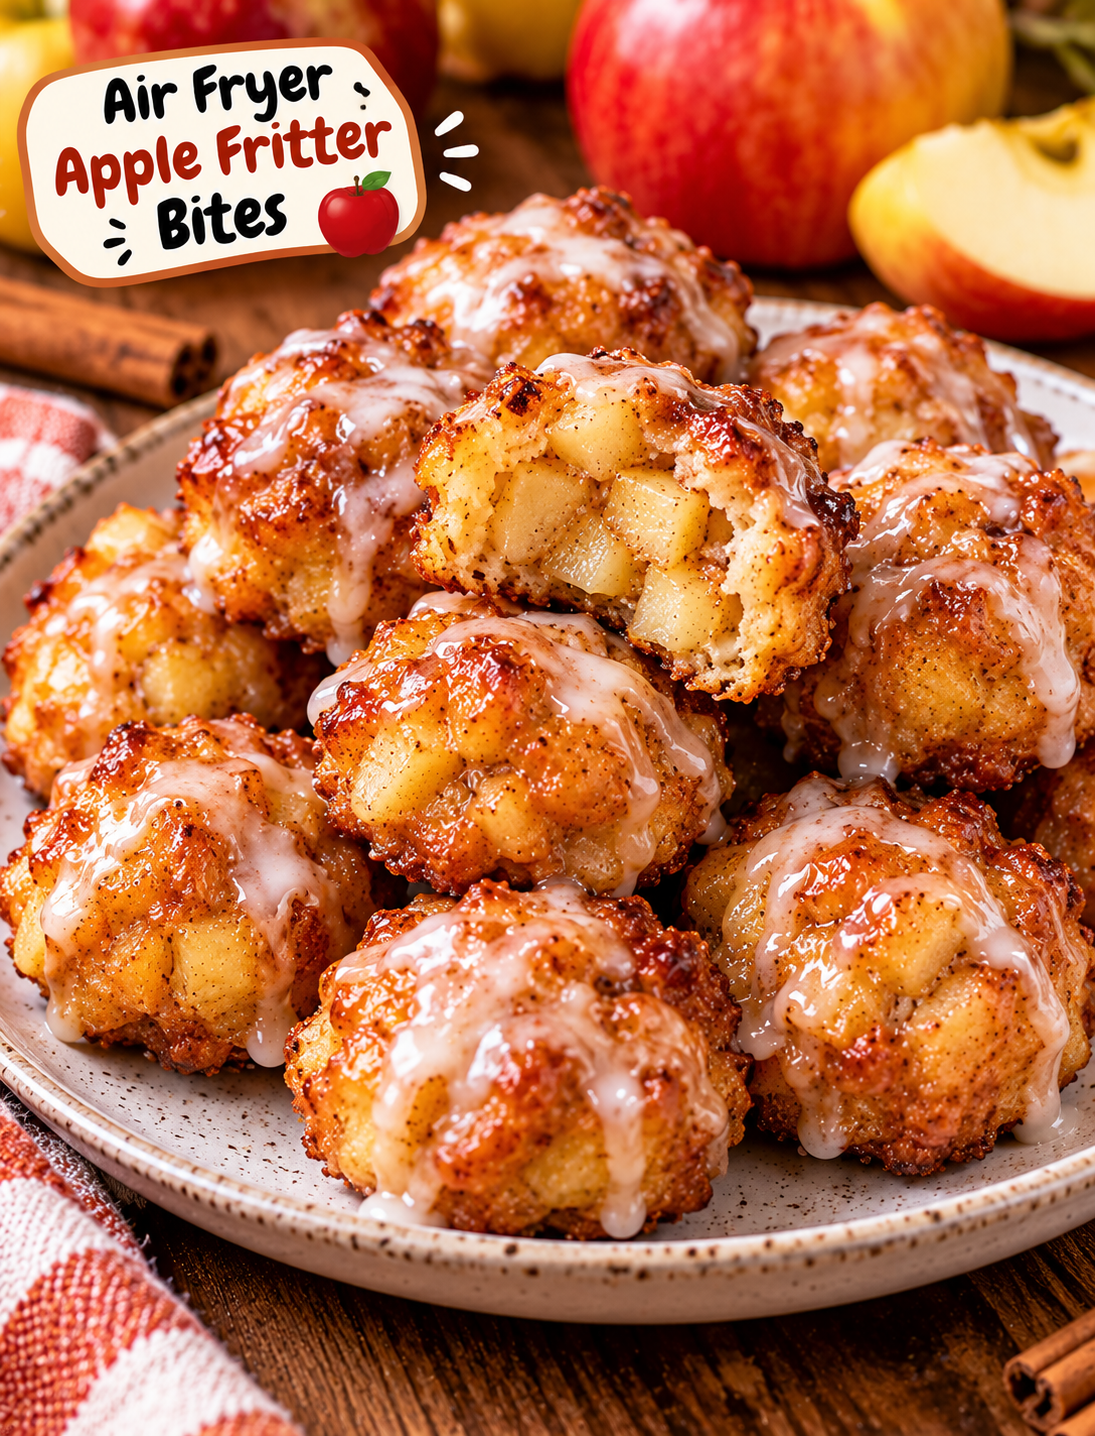
Air Fryer Apple Fritter Bites with cinnamon apples, golden crisp edges, and sweet vanilla glaze

Air Fryer Apple Fritter Bites

These Air Fryer Apple Fritter Bites are a quick way to enjoy the warm flavor of classic apple fritters without deep frying. Each bite has a lightly crisp outside, a soft center, tender apple pieces, and a sweet vanilla glaze.

The recipe uses simple pantry ingredients and fresh apples. Air frying gives the bites a golden finish with much less oil than traditional fried fritters.

They are perfect for a fall breakfast, weekend brunch, afternoon snack, or easy dessert. Serve them warm with coffee, tea, or a cold glass of milk for a cozy treat.

Why You’ll Love This Recipe

  • Easy preparation: The batter comes together in one bowl with basic ingredients.
  • Less oil: Air frying uses only a light coating of cooking spray.
  • Small portions: Bite-sized fritters are easy to serve and share.
  • Fall flavor: Apples, cinnamon, nutmeg, and vanilla create a classic seasonal taste.
  • Quick cooking: The bites cook in about 8–10 minutes.
  • Sweet finish: A simple vanilla glaze adds the familiar apple-fritter flavor.
  • Family-friendly: The small size makes them easy for kids and adults to enjoy.
  • No deep fryer: You can make them without a pot of hot oil.

Ingredients You’ll Need

For the Apple Fritter Bites

  • 1 large crisp apple, peeled and finely diced
  • 1 cup all-purpose flour
  • ¼ cup granulated sugar
  • 1½ teaspoons baking powder
  • 1 teaspoon ground cinnamon
  • ¼ teaspoon ground nutmeg
  • ¼ teaspoon salt
  • 1 large egg
  • ⅓ cup whole milk
  • 1 teaspoon vanilla extract
  • 2 tablespoons unsalted butter, melted
  • Cooking spray

For the Vanilla Glaze

  • 1 cup powdered sugar
  • 1½ tablespoons milk
  • ½ teaspoon vanilla extract
  • ¼ teaspoon cinnamon, optional

Best Apples to Use

Choose an apple that stays slightly firm during cooking. Honeycrisp, Granny Smith, Pink Lady, and Fuji apples all work well.

A sweet-tart apple gives the fritter bites more flavor and balances the sugary glaze. Avoid very soft apples because they can release too much moisture into the batter.

How to Make Air Fryer Apple Fritter Bites

Step 1: Prepare the Apple

Peel the apple and remove the core.

Cut it into very small pieces, about ¼ inch in size.

Small pieces are important because they cook quickly and distribute evenly through the batter.

Pat the diced apple with a paper towel if it looks very wet. Removing excess moisture helps keep the batter thick.

Step 2: Mix the Dry Ingredients

Add the flour, granulated sugar, baking powder, cinnamon, nutmeg, and salt to a medium mixing bowl.

Whisk the ingredients together until the spices are evenly distributed.

This creates a consistent flavor throughout the fritter bites.

Step 3: Mix the Wet Ingredients

In a separate bowl, whisk the egg, milk, vanilla extract, and melted butter.

Make sure the melted butter has cooled slightly before adding it to the egg mixture.

Whisk until the mixture looks smooth.

Step 4: Make the Batter

Pour the wet ingredients into the dry ingredients.

Stir gently with a spatula until just combined.

Fold in the diced apple.

Do not overmix the batter. A few small lumps are fine, and gentle mixing helps keep the fritters tender.

The finished batter should be thick enough to hold its shape when scooped.

Step 5: Preheat the Air Fryer

Preheat your air fryer to 375°F for about 3 minutes.

Lightly spray the basket with cooking spray.

Preheating helps the outside begin browning quickly once the batter enters the basket.

Step 6: Form the Fritter Bites

Use a small cookie scoop or tablespoon to portion the batter.

Place small mounds of batter into the air fryer basket.

Leave space between each piece so hot air can circulate around the fritters.

Do not flatten them too much because a slightly rounded shape helps create a soft center.

Depending on your air fryer size, you may need to cook the bites in batches.

Step 7: Air Fry

Lightly spray the tops of the batter with cooking spray.

Air fry at 375°F for 4–5 minutes.

Carefully turn the bites using tongs or a small spatula.

Continue cooking for another 4–5 minutes, until the outside is golden brown and the center is cooked.

Cooking time can vary depending on the size of the bites and the air fryer model.

If the bites are still pale, cook them for another 1–2 minutes.

Step 8: Prepare the Glaze

While the fritters cook, add powdered sugar, milk, and vanilla extract to a small bowl.

Whisk until smooth.

For a thicker glaze, use slightly less milk. For a thinner drizzle, add a few drops of milk at a time.

Add a pinch of cinnamon if you want a stronger fall flavor.

Step 9: Glaze the Apple Fritter Bites

Let the cooked bites cool for about 2–3 minutes.

Dip the tops into the glaze or drizzle the glaze over the warm fritters.

Allow the glaze to sit for a minute or two before serving.

For an extra sweet finish, add a second thin layer of glaze after the first layer sets.

Step 10: Serve Warm

Serve the apple fritter bites while they are still slightly warm.

The outside should be lightly crisp, while the inside remains soft with tender apple pieces.

Pair them with coffee, hot tea, apple cider, or cold milk.

Tips for the Best Apple Fritter Bites

Dice the apple small. Large apple pieces can make the bites difficult to shape and may leave parts of the batter undercooked.

Keep the batter thick. A loose batter can spread in the air fryer and produce flat fritters.

Do not overcrowd the basket. Proper airflow helps the outside brown evenly.

Use a cookie scoop. Consistent portions cook at the same rate and make the finished batch look more uniform.

Do not overmix. Mixing only until the flour disappears helps prevent dense fritters.

Watch the final minutes. Small fritters can brown quickly once the air fryer is fully heated.

Glaze after cooking. Adding the glaze after air frying keeps the coating sweet and smooth instead of burning it during cooking.

How to Make Them Extra Crispy

For slightly crispier edges, keep the fritter portions small and avoid placing them too close together.

A light coating of cooking spray also helps the surface brown.

Do not add too much oil because excess oil can make the outside greasy instead of crisp.

If your air fryer has a strong heating element, check the fritters after 7 minutes to prevent over-browning.

Easy Recipe Variations

Cinnamon Sugar Apple Bites

Skip the glaze and toss the warm fritters in a mixture of granulated sugar and cinnamon.

This creates a simple coating similar to a cinnamon-sugar donut.

Maple Glazed Apple Bites

Replace part of the milk in the glaze with pure maple syrup.

The maple flavor pairs especially well with tart apples and cinnamon.

Caramel Apple Fritter Bites

Drizzle warm caramel sauce over the glazed fritters before serving.

Add a small amount of chopped pecans for crunch.

Apple Pie Fritter Bites

Add an extra ¼ teaspoon of cinnamon and a small pinch of ground ginger to the batter.

This gives the bites a flavor similar to classic apple pie.

Nutty Apple Bites

Fold 2 tablespoons of finely chopped pecans into the batter.

Keep the pieces small so they do not interfere with the shape of the fritters.

How to Store Leftovers

Let the fritter bites cool completely before storing them.

Place them in an airtight container and refrigerate for up to 3 days.

For the best texture, reheat them in the air fryer at 350°F for 2–3 minutes.

Add fresh glaze after reheating if the original glaze has absorbed into the fritters.

You can also freeze the cooked bites without glaze for up to 2 months.

Reheat frozen fritters in a 350°F air fryer until warmed through, then add the glaze before serving.

Frequently Asked Questions

Can I use different apples for this recipe?

Yes. Honeycrisp, Granny Smith, Fuji, and Pink Lady apples all work well for air fryer fritter bites.

Can I make apple fritter bites without eggs?

Yes, but the texture will change; use a suitable egg substitute designed for baking.

Why are my fritter bites too soft?

Overly wet batter, large apple pieces, or overcrowding the basket can prevent the outside from becoming crisp.

Can I use canned apples?

Fresh apples are preferred because canned apples contain more moisture and can make the batter too wet.

How do I know when the fritters are done?

They should be golden brown outside and fully set in the center when gently opened.

Can I make these ahead of time?

Yes. Cook them up to a day ahead, refrigerate them, and reheat them in the air fryer before serving.

Can I freeze apple fritter bites?

Yes. Freeze unglazed cooked fritters for up to 2 months and add fresh glaze after reheating.

What should I serve with apple fritter bites?

Serve them with maple syrup, caramel sauce, coffee, tea, whipped cream, or vanilla ice cream for dessert.

Final Thoughts

These Air Fryer Apple Fritter Bites are an easy way to enjoy the flavors of a classic apple fritter with less mess and no deep frying. The combination of crisp edges, tender apples, warm cinnamon, and sweet vanilla glaze makes them especially appealing during the fall season.

For the best results, use a firm apple, keep the batter thick, make small portions, and give each fritter enough room for proper airflow. Serve them warm with your favorite topping for a simple homemade treat that works for breakfast, brunch, snacks, or dessert.

Air Fryer Peanut Butter Molten Chocolate Cakes

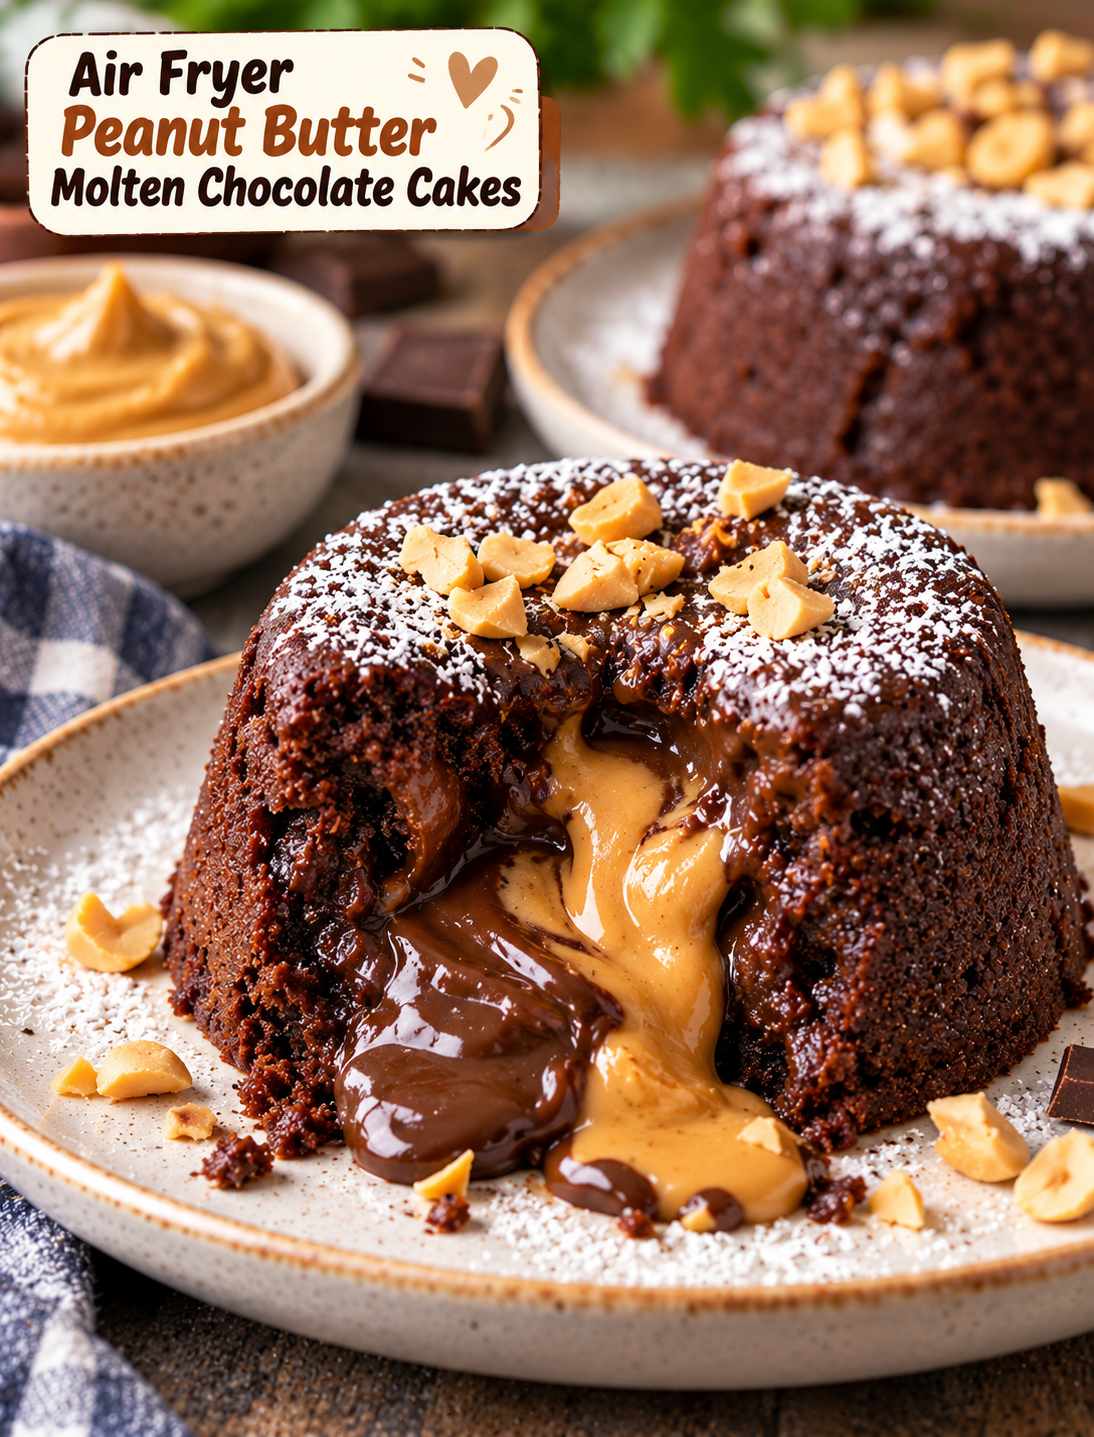
Air fryer peanut butter molten chocolate cake with a warm gooey center and powdered sugar

Air Fryer Peanut Butter Molten Chocolate Cakes

Craving a rich chocolate dessert without turning on the oven? These Air Fryer Peanut Butter Molten Chocolate Cakes are made for those moments when you want something warm, gooey, and chocolatey in a short amount of time.

Each little cake has a soft chocolate exterior with a warm peanut butter center that slowly melts when you cut into it. The combination of dark chocolate, cocoa, and creamy peanut butter gives every bite a rich flavor without making the recipe complicated.

The air fryer cooks these individual cakes quickly and gives the edges a lightly firm texture while keeping the centers soft. Serve them warm with powdered sugar, berries, whipped cream, or a scoop of vanilla ice cream for an easy dessert that feels special.

Why You’ll Love This Recipe

  • Quick dessert: The cakes cook in the air fryer in just a few minutes.
  • Gooey center: Peanut butter creates a warm, creamy filling inside the chocolate cake.
  • Small-batch recipe: This recipe makes four individual desserts, so there is no large cake to prepare.
  • Simple ingredients: Most ingredients are easy to find at any U.S. grocery store.
  • No oven needed: The air fryer handles the baking while keeping the cooking time short.
  • Easy to customize: You can use dark chocolate, semi-sweet chocolate, or milk chocolate based on your preference.

Ingredients You’ll Need

For the Chocolate Cakes

  • 4 ounces semi-sweet or dark chocolate, chopped
  • 4 tablespoons unsalted butter
  • ¼ cup granulated sugar
  • 2 large eggs
  • 1 large egg yolk
  • 1 teaspoon vanilla extract
  • ¼ cup all-purpose flour
  • 2 tablespoons unsweetened cocoa powder
  • ¼ teaspoon salt

Peanut Butter Center

  • 4 tablespoons creamy peanut butter
  • 1 tablespoon powdered sugar
  • 1 teaspoon melted butter

For Greasing

  • 1 teaspoon softened butter
  • 1 teaspoon unsweetened cocoa powder

Optional Toppings

  • Powdered sugar
  • Fresh strawberries or raspberries
  • Whipped cream
  • Vanilla ice cream
  • Chocolate shavings
  • Chopped peanuts
  • Extra peanut butter, slightly warmed

How to Make Air Fryer Peanut Butter Molten Chocolate Cakes

1. Prepare the Peanut Butter Filling

Add the creamy peanut butter, powdered sugar, and melted butter to a small bowl.

Stir until the mixture becomes smooth and thick.

Divide the mixture into four small portions and place them on a parchment-lined plate.

Freeze the portions for about 15–20 minutes.

Chilling the filling helps it stay in the center while the chocolate cakes cook.

2. Prepare the Ramekins

Use four small oven-safe ramekins that fit comfortably inside your air fryer basket.

Lightly coat the inside of each ramekin with softened butter.

Dust the buttered surfaces with a thin layer of cocoa powder and shake out any excess.

The cocoa helps prevent the chocolate cakes from sticking while keeping the outside chocolate-colored.

3. Melt the Chocolate and Butter

Place the chopped chocolate and butter in a microwave-safe bowl.

Heat for about 20 seconds at a time, stirring between each interval.

Continue until the chocolate is almost completely melted.

Stir until smooth and glossy.

Do not overheat the chocolate because excessive heat can make it thick or grainy.

4. Mix the Cake Batter

Add the granulated sugar, eggs, egg yolk, and vanilla to a separate bowl.

Whisk for about 30–45 seconds until the mixture is smooth.

Pour in the melted chocolate and butter mixture.

Stir gently until combined.

Add the flour, cocoa powder, and salt.

Fold everything together just until no dry streaks remain.

Avoid overmixing because too much mixing can make the cakes heavier.

5. Fill the Ramekins

Spoon about half of the chocolate batter into the prepared ramekins.

Place one chilled peanut butter portion in the center of each ramekin.

Keep the peanut butter filling away from the sides.

Cover each filling with the remaining chocolate batter.

The peanut butter should be completely surrounded by batter.

6. Preheat the Air Fryer

Preheat your air fryer to 350°F (175°C) for about 3 minutes if your model requires preheating.

A properly heated air fryer helps the cakes begin cooking evenly as soon as they enter the basket.

7. Air Fry the Cakes

Carefully place the filled ramekins into the air fryer basket.

Leave a little space between them so hot air can circulate.

Air fry at 350°F for about 7–9 minutes.

The edges should look set while the centers should still have a slight softness.

Cooking time can vary between air fryer models and ramekin sizes, so start checking around the 7-minute mark.

For a softer, more molten center, avoid adding extra cooking time once the edges are set.

8. Rest Before Serving

Carefully remove the ramekins from the air fryer.

Let the cakes rest for 1–2 minutes.

Run a thin knife around the edge if you want to transfer them onto plates.

Place a small plate over each ramekin and carefully turn it upside down.

Lift the ramekin slowly.

You can also serve the cakes directly in their ramekins for an easier presentation.

9. Add Your Favorite Toppings

Dust the warm cakes with powdered sugar.

Add fresh berries for a bright contrast to the rich chocolate.

For an extra-indulgent dessert, add a small scoop of vanilla ice cream.

You can also drizzle slightly warmed peanut butter over the top and finish with chopped peanuts.

When you cut into the cake, the warm peanut butter center should soften and spread into the chocolate cake.

Tips for a Perfect Molten Center

  • Do not overbake: Extra cooking time can turn the soft center into a fully baked cake.
  • Chill the filling: Cold peanut butter stays in the center longer during cooking.
  • Use small ramekins: Large ramekins can change the cooking time and make the cakes harder to cook evenly.
  • Check early: Start checking the cakes at 7 minutes because air fryers cook differently.
  • Do not overcrowd: Leave enough space around the ramekins for proper air circulation.
  • Serve immediately: The center becomes firmer as the cake cools.
  • Use good chocolate: Semi-sweet or dark chocolate gives the dessert a deeper flavor.
  • Measure flour carefully: Too much flour can make the cakes dense and reduce the molten texture.

How to Get an Extra-Gooey Center

The most important part of a molten cake is timing.

The outside should be firm enough to hold its shape, but the center should remain soft. Start with the shorter cooking time and add another 30–60 seconds only if the cakes look too loose.

Using chilled peanut butter also helps create a distinct center.

If you prefer a stronger peanut butter flavor, use natural creamy peanut butter with a pinch of powdered sugar to thicken it before chilling.

For a richer chocolate flavor, use dark chocolate with a cocoa percentage around 60–70%.

Easy Variations to Try

Chocolate Peanut Butter Cup Cakes

Add a few small pieces of peanut butter cups to the center along with the peanut butter filling.

Dark Chocolate Version

Use 70% dark chocolate and reduce the sugar slightly if you prefer a less sweet dessert.

Milk Chocolate Version

Use milk chocolate for a sweeter and creamier flavor that pairs well with children and family-friendly dessert plates.

Crunchy Peanut Butter Version

Use crunchy peanut butter for small pieces of peanuts throughout the molten center.

Salted Chocolate Version

Add a tiny pinch of flaky sea salt over the finished cakes to balance the sweetness.

Banana Peanut Butter Version

Serve each warm cake with thin banana slices and a small drizzle of peanut butter.

What to Serve With These Chocolate Cakes

These individual cakes are rich, so a cool or fresh topping works especially well.

Try serving them with:

  • Vanilla ice cream
  • Fresh strawberries
  • Raspberries
  • Blueberries
  • Whipped cream
  • Greek yogurt
  • Chopped roasted peanuts
  • Chocolate shavings
  • Powdered sugar
  • A light drizzle of maple syrup

For a restaurant-style presentation, place the cake in the center of a white plate and add a small scoop of vanilla ice cream beside it. Finish with berries and a light dusting of powdered sugar.

Storage and Reheating

These cakes are best served immediately because the center is designed to stay warm and soft.

If you have leftovers, allow them to cool completely and store them in an airtight container in the refrigerator for up to 2 days.

To reheat, place one cake in the air fryer at 300°F for 2–4 minutes.

Check it early because reheating for too long can cook the center completely.

The texture will not be exactly the same as freshly cooked cakes, but gentle reheating can bring back some of the warmth and softness.

Common Mistakes to Avoid

Overbaking the Cakes

The most common mistake is cooking the cakes too long. A few extra minutes can change the center from molten to fully set.

Using Too Much Flour

Extra flour creates a thicker batter and can make the finished cakes heavy.

Skipping the Chilled Filling

Room-temperature peanut butter can spread into the batter before the outside has enough time to set.

Overcrowding the Air Fryer

Too many ramekins can restrict airflow and cause uneven cooking.

Cutting Immediately

Allow the cakes to rest for a minute or two so the structure can settle before serving.

Frequently Asked Questions

1. Can I make these cakes without ramekins?

Yes, but use small oven-safe molds or baking cups that are rated for the air fryer’s temperature.

2. How long should I air fry molten chocolate cakes?

Start with 7 minutes at 350°F, then check the edges and add time only if needed.

3. Can I use crunchy peanut butter?

Yes, crunchy peanut butter works well and adds small pieces of peanuts to the center.

4. Can I prepare the cakes ahead of time?

Yes, assemble the ramekins several hours ahead and refrigerate them until you are ready to cook.

5. Can I use milk chocolate?

Yes, milk chocolate creates a sweeter and milder chocolate flavor than dark or semi-sweet chocolate.

6. Why did my molten center disappear?

The cakes were likely overbaked; reduce the cooking time and check them earlier during the next batch.

7. Can I freeze these chocolate cakes?

Yes, you can freeze assembled uncooked cakes, but you may need to add a few minutes to the air-frying time.

8. Can I use almond butter instead of peanut butter?

Yes, creamy almond butter can replace peanut butter for a similar soft center with a different nutty flavor.

Final Thoughts

These Air Fryer Peanut Butter Molten Chocolate Cakes are an easy way to make an impressive dessert without preparing a full-size cake.

The chocolate batter creates a rich, tender exterior while the chilled peanut butter filling melts into a creamy center during air frying.

The key is to watch the cooking time closely. Start checking the cakes early and remove them when the edges are set but the centers still look soft.

Serve them warm with vanilla ice cream, fresh berries, powdered sugar, or a drizzle of peanut butter for a dessert that feels much more complicated than it really is.

For the best texture, enjoy the cakes shortly after cooking while the chocolate and peanut butter center is still warm and gooey.