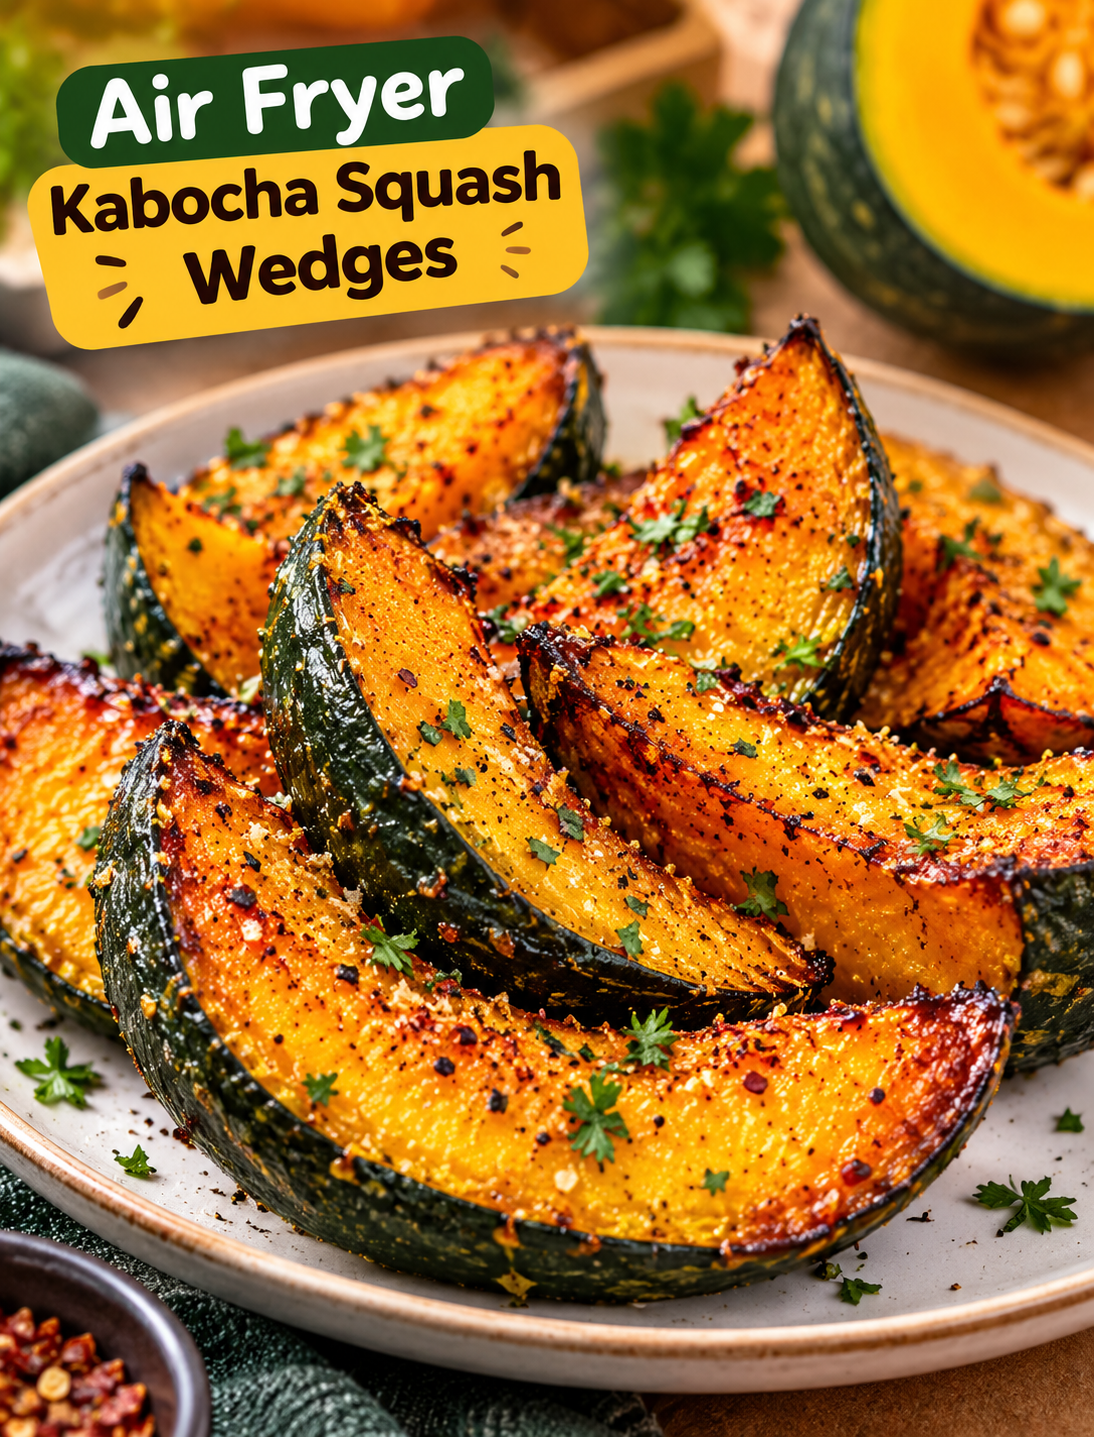
Air Fryer Kabocha Squash Wedges
If you love roasted squash with crisp edges and a naturally sweet center, these Air Fryer Kabocha Squash Wedges are worth trying. Kabocha squash becomes tender inside while the outside develops lightly crisp, caramelized edges in the air fryer.
This simple recipe uses olive oil, garlic, paprika, salt, and black pepper to bring out the squash’s rich flavor without covering up its natural sweetness. It is an easy fall side dish that works well with chicken, fish, steak, grain bowls, or a simple weeknight dinner.
Unlike some winter squash recipes that require a long roasting time, the air fryer gives kabocha squash a beautifully browned finish in a relatively short time. You also do not need to peel the squash before cooking because the skin softens as it cooks and can be eaten.
What Is Kabocha Squash?
Kabocha squash is a Japanese winter squash known for its deep green skin and bright orange flesh. It has a firm texture and a flavor that is naturally sweet, slightly nutty, and similar to a cross between pumpkin and sweet potato.
The dense flesh holds its shape well when cooked, making it a great choice for roasting and air frying. The skin is edible after cooking, although you can remove it if you prefer a softer texture.
When shopping, choose a kabocha that feels heavy for its size and has firm, unblemished skin. A ripe squash should feel dense rather than hollow or unusually light.
Why You’ll Love This Recipe
- Crispy edges: High air-fryer heat creates beautifully browned edges.
- Creamy center: The thick flesh becomes tender and naturally buttery.
- Simple ingredients: You only need a few basic seasonings.
- No peeling required: The skin becomes tender enough to eat.
- Quick side dish: It cooks faster than many traditional oven-roasted squash recipes.
- Easy to customize: You can make it savory, spicy, smoky, or slightly sweet.
- Great for fall: Its warm color and naturally sweet flavor fit perfectly with autumn meals.
Ingredients You’ll Need
- 1 medium kabocha squash, about 2 pounds
- 1½ tablespoons olive oil
- 1 teaspoon garlic powder
- Smoked paprika ½ teaspoon
- kosher salt ½ teaspoon
- Black pepper ¼ teaspoon
- onion powder ¼ teaspoon
- maple syrup 1 teaspoon , optional
- 1 teaspoon chopped fresh parsley, optional
- Toasted sesame seeds ½ teaspoon , optional
Use a good-quality olive oil because it helps the seasonings coat the squash evenly and promotes browning during air frying.
For a sweeter version, add a small amount of maple syrup. For a more savory side dish, leave it out.
How to Cut Kabocha Squash Safely
Kabocha squash has very firm flesh, so cutting it requires care. Do not try to force a small knife through the whole squash with a quick downward motion.
- Wash and dry the squash thoroughly.
- Place it on a stable cutting board.
- Use a sturdy chef’s knife.
- Carefully cut the squash in half from stem to bottom.
- Scoop out the seeds and stringy pulp with a spoon.
- Place each half cut-side down for stability.
- Cut each half into wedges about ¾-inch thick.
If the squash is extremely difficult to cut, microwave the whole squash for about 2–3 minutes to soften it slightly. Let it cool enough to handle before cutting.
How to Make Air Fryer Kabocha Squash Wedges
Step 1: Prepare the Squash
Wash the kabocha squash and dry it well. Cut it in half, remove the seeds, and slice the flesh into even wedges.
Try to keep the pieces similar in thickness so they cook at the same rate.
Step 2: Make the Seasoning Mixture
Add olive oil, garlic powder, smoked paprika, salt, black pepper, and onion powder to a small bowl.
If you want a lightly sweet roasted flavor, add the maple syrup and stir until combined.
Step 3: Coat the Wedges
Place the squash wedges in a large bowl. Pour the seasoning mixture over them and toss gently until every piece is lightly coated.
Avoid adding too much oil because excess oil can make the wedges greasy instead of crisp.
Step 4: Preheat the Air Fryer
Preheat your air fryer to 380°F for about 3 minutes.
Preheating helps the squash begin browning as soon as it enters the basket.
Step 5: Arrange the Squash
Place the seasoned kabocha wedges in the air fryer basket in a single layer.
Leave a little space between the pieces so hot air can circulate around them. Cook in batches if necessary.
Step 6: Air Fry
Air fry the squash at 380°F for 15–20 minutes, turning the wedges halfway through cooking.
The exact cooking time depends on the thickness of the wedges and your air fryer model.
Step 7: Check for Doneness
The wedges are ready when the edges are browned and the center can be easily pierced with a fork.
For softer squash, cook for another 2–3 minutes. For darker, more caramelized edges, continue cooking briefly while watching closely.
Step 8: Add the Finishing Touches
Transfer the cooked wedges to a serving plate. Sprinkle with fresh parsley and toasted sesame seeds if desired.
Serve immediately while the edges are warm and crisp.
Tips for Crispy Kabocha Squash
Do not overcrowd the basket. Crowding traps steam and can prevent the edges from browning properly.
Cut evenly sized wedges. Similar thickness helps the squash cook at the same rate.
Use a light coating of oil. Too much oil can make the surface heavy and greasy.
Turn halfway through. Flipping exposes both sides to the circulating hot air.
Keep the skin on. The skin becomes tender during cooking and adds texture to the finished wedges.
Watch the final minutes. Natural sugars in kabocha can brown quickly once the squash becomes tender.
Flavor Variations
You can easily change the seasoning depending on the meal.
Spicy version, add ¼ teaspoon of cayenne pepper or a pinch of red pepper flakes.
Maple version, toss the cooked wedges with a small drizzle of maple syrup and a pinch of cinnamon.
Herb version, use dried rosemary or thyme with garlic powder and black pepper.
Japanese-inspired version, finish the squash with toasted sesame seeds and a small drizzle of sesame oil.
Sweet-savory version, combine maple syrup with smoked paprika and a small pinch of chili powder.
What to Serve With Kabocha Squash
Air-fried kabocha squash makes a flexible side dish for many meals.
Serve it alongside roasted chicken, grilled salmon, turkey burgers, or steak for a complete dinner. The natural sweetness also works well with savory grain bowls containing quinoa, brown rice, chickpeas, or leafy greens.
For a vegetarian meal, pair the wedges with lentils, roasted vegetables, hummus, or a fresh salad.
You can also serve them as a simple snack with Greek yogurt, tahini sauce, or a light dipping sauce.
How to Store Leftovers
Allow leftover squash to cool before transferring it to an airtight container.
Store it in the refrigerator for up to 4 days.
To reheat, place the wedges in the air fryer at 350°F for 3–5 minutes. Reheating in the air fryer helps bring back some of the roasted texture better than microwaving.
Avoid reheating the squash for too long because the flesh can become dry.
Can You Freeze Cooked Kabocha Squash?
Yes, cooked kabocha squash can be frozen.
Let the wedges cool completely, then place them in a freezer-safe container or bag with parchment between layers. Freeze for up to about 3 months for the best quality.
Thaw them in the refrigerator before reheating in the air fryer.
Recipe Notes
- Prep time: 10 minutes
- Cook time: 15–20 minutes
- Total time: About 30 minutes
- Temperature: 380°F
- Servings: 4
- Cuisine: Japanese-inspired
- Category: Side Dish
The cooking time can vary between air fryer models. Start checking the squash around 15 minutes and cook longer if the centers are not fork-tender.
Frequently Asked Questions
Do you peel kabocha squash before air frying?
No. Kabocha skin is edible and becomes tender during cooking, so peeling is optional.
Can you put raw kabocha squash in an air fryer?
Yes. Raw kabocha squash can be seasoned and cooked directly in the air fryer until tender and browned.
How long does kabocha squash take in the air fryer?
At 380°F, wedges usually take about 15–20 minutes, depending on their thickness and the air fryer.
What does kabocha squash taste like?
Kabocha has a naturally sweet, nutty flavor with a dense texture similar to pumpkin and sweet potato.
Do you need to boil kabocha squash before air frying?
No. Pre-boiling is not necessary because the air fryer can cook the wedges directly from raw.
Why is my kabocha squash not crispy?
Overcrowding, excess moisture, or too much oil can prevent browning; cook the wedges in a single layer for better airflow.
Can I make these kabocha squash wedges without oil?
Yes. They can be air fried with little or no oil, although a small amount of oil helps the seasonings stick and improves browning.
How do you know when kabocha squash is done?
The squash is ready when the edges are browned and a fork slides easily into the thickest part of the flesh.
Final Thoughts
These Air Fryer Kabocha Squash Wedges are an easy way to enjoy a flavorful winter squash without turning on the oven. The air fryer creates browned, caramelized edges while keeping the inside tender and naturally sweet.
Keep the seasoning simple for a classic roasted flavor, or adjust the spices to match your main dish. Once you get comfortable cutting kabocha into even wedges, this recipe can become an easy side dish for weeknight dinners, holiday meals, and cozy fall gatherings.
