Air Fryer Apple Hand Pies

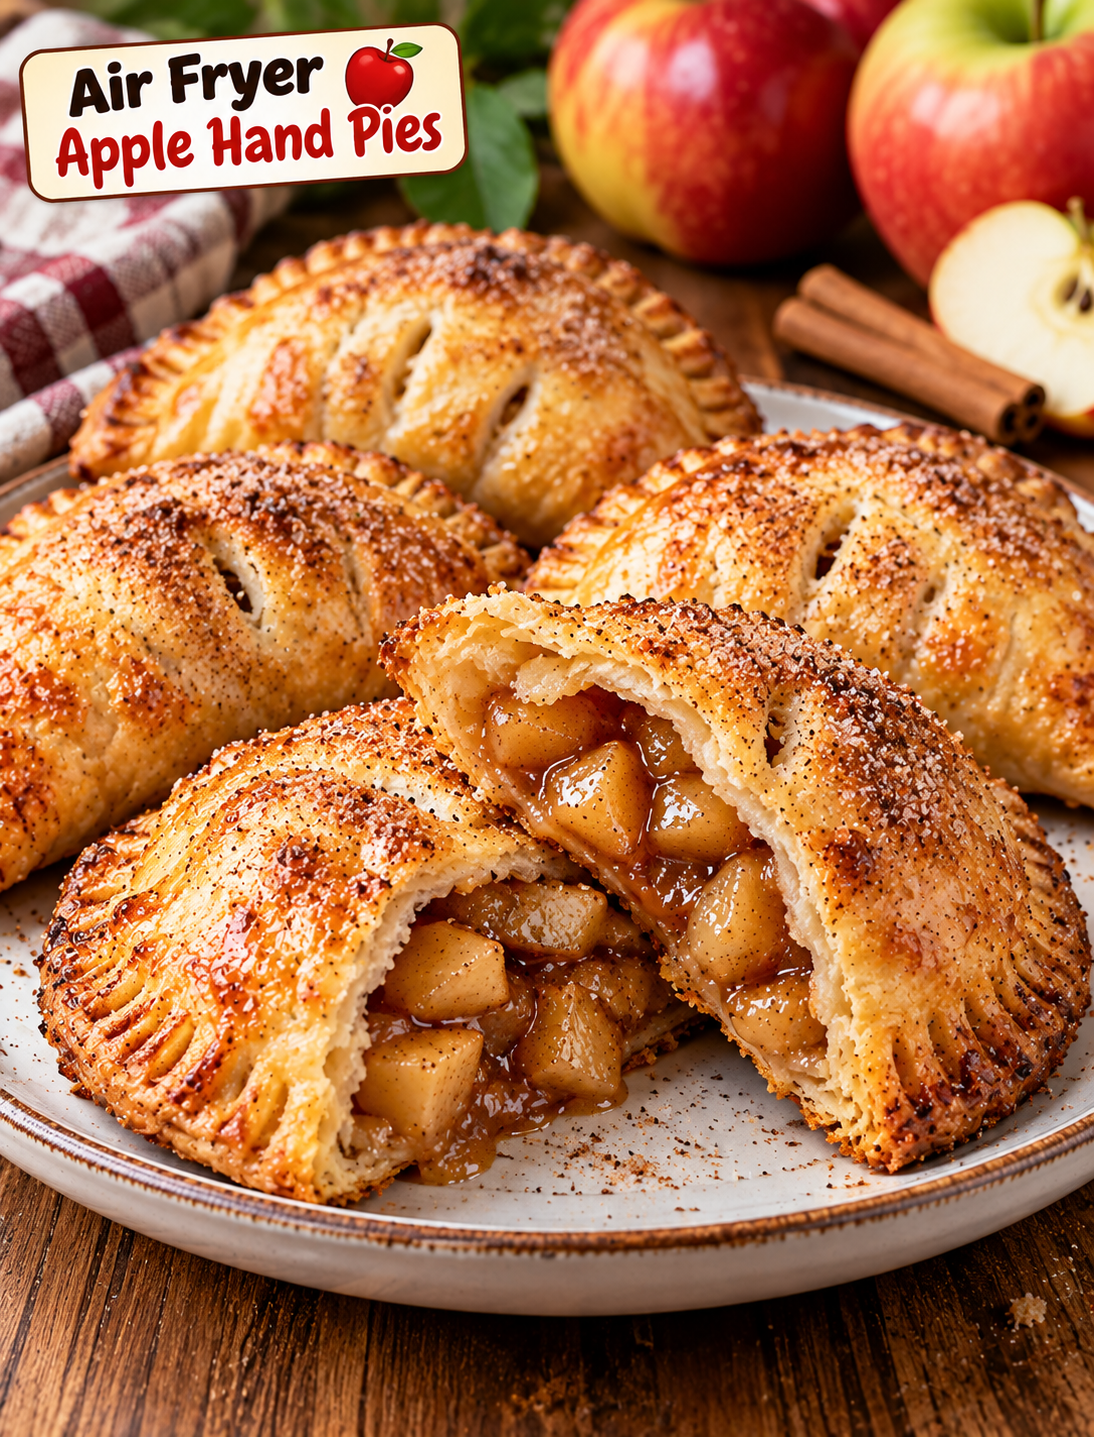
Golden Air Fryer Apple Hand Pies filled with cinnamon-spiced apples and finished with a crisp flaky crust.

Air Fryer Apple Hand Pies

There is something special about a warm apple dessert with a crisp golden crust and a sweet cinnamon filling. These Air Fryer Apple Hand Pies give you that classic apple-pie flavor in a small, easy-to-eat package.

Each hand pie has a flaky pastry outside and a warm apple filling inside. The air fryer creates a lightly crisp crust without the need for deep frying. A simple cinnamon-sugar topping adds even more flavor and gives the pies a beautiful finish.

This recipe is perfect for fall gatherings, weekend baking, holiday dessert tables, or a quick treat when you want homemade apple pie without making a full pie.

Why You’ll Love These Apple Hand Pies

These individual apple pies are simple to prepare and easy to customize.

  • Quick cooking: The air fryer cooks the pies in about 10 minutes.
  • Small portions: Each pie is easy to serve and enjoy without slicing a whole dessert.
  • Crispy crust: Hot circulating air gives the pastry a golden, flaky texture.
  • Warm apple filling: Cinnamon, brown sugar, and apples create a classic fall flavor.
  • Easy ingredients: You can find everything at most U.S. grocery stores.
  • Make-ahead friendly: Assemble the pies ahead of time and refrigerate them until ready to cook.
  • Great for gatherings: Their individual size makes them convenient for parties and family dinners.

Ingredients You’ll Need

For the Apple Filling

  • 2 medium apples, peeled, cored, and finely diced
  • 2 tablespoons brown sugar
  • 1 tablespoon granulated sugar
  • 1 tablespoon unsalted butter
  • 1 teaspoon lemon juice
  • 1 teaspoon ground cinnamon
  • ¼ teaspoon ground nutmeg
  • 1 teaspoon cornstarch
  • 1 tablespoon water
  • ½ teaspoon vanilla extract

Use firm apples that hold their shape during cooking. Honeycrisp, Granny Smith, Pink Lady, or Fuji apples all work well.

For the Hand Pies

  • 1 package refrigerated pie crusts, usually 2 crusts
  • 1 large egg
  • 1 tablespoon water
  • 1 tablespoon granulated sugar
  • ½ teaspoon ground cinnamon
  • Cooking spray

The refrigerated pie dough keeps the preparation simple. You can also use homemade pie dough if you prefer a fully homemade crust.

How to Make Air Fryer Apple Hand Pies

Step 1: Prepare the Apple Filling

Peel and core the apples, then cut them into small pieces.

Small apple pieces are important because they soften faster and fit neatly inside the pastry.

Place the diced apples in a small saucepan over medium heat. Add the brown sugar, granulated sugar, butter, lemon juice, cinnamon, and nutmeg.

Cook for about 4 to 5 minutes, stirring often, until the apples begin to soften.

In a small bowl, mix the cornstarch with water until smooth. Pour this mixture into the apples and stir well.

Cook for another 1 to 2 minutes until the filling thickens.

Remove the saucepan from the heat and stir in the vanilla extract.

Let the apple mixture cool completely before filling the pastry.

Step 2: Prepare the Pie Dough

Place the refrigerated pie crusts on a lightly floured surface.

Use a round cookie cutter or a small bowl to cut circles about 4 to 5 inches wide.

You should get several dough circles from the two crusts. Gather the leftover dough, gently roll it again, and cut additional circles if needed.

Avoid rolling the dough too thin because a thin crust can tear while you fill or seal the pies.

Step 3: Add the Apple Filling

Place about 1 to 1½ tablespoons of cooled apple filling in the center of each dough circle.

Do not overfill the pastry.

Too much filling can prevent the edges from sealing properly and may cause the mixture to leak during cooking.

Leave about ½ inch of space around the edges.

Step 4: Seal the Hand Pies

Fold each dough circle in half over the apple filling.

Press the edges together gently with your fingers.

Use a fork to crimp around the entire edge. This creates a decorative border and helps seal the filling inside.

If the edges feel dry, lightly brush them with a little water before sealing.

Step 5: Prepare the Egg Wash

Whisk one egg with one tablespoon of water.

Brush a thin layer of egg wash over the top of each hand pie.

The egg wash helps the pastry turn golden brown while cooking.

For extra flavor, mix the granulated sugar and cinnamon together and sprinkle a small amount over each pie.

Step 6: Add Small Vents

Use a sharp knife to make two or three small cuts on the top of each hand pie.

These vents allow steam to escape while the apple filling heats.

Without vents, pressure can build inside the pastry and cause the edges to open.

Step 7: Air Fry

Preheat the air fryer to 350°F (175°C) for about 3 minutes.

Lightly spray the basket with cooking spray.

Place the hand pies in the basket in a single layer. Leave space between each one so hot air can circulate properly.

Cook for 8 to 11 minutes, or until the pastry is puffed and golden brown.

Depending on your air fryer model and the size of the pies, cooking time may vary slightly.

Check the pies around the 8-minute mark to prevent over-browning.

Step 8: Cool and Serve

Carefully remove the hand pies from the basket and place them on a cooling rack.

Let them cool for at least 5 minutes before serving.

The apple filling becomes extremely hot during cooking, so allowing the pies to cool slightly makes them easier and safer to eat.

Tips for Crispy Apple Hand Pies

A few simple techniques can make a big difference in the final texture.

  • Cool the filling first: Hot filling can soften the pastry and make sealing difficult.
  • Avoid overfilling: A moderate amount of filling helps the crust stay closed.
  • Do not overcrowd the basket: Air needs room to move around each pie.
  • Use an egg wash: It creates a deeper golden color and slightly crisp surface.
  • Vent the pastry: Small cuts allow steam to escape.
  • Watch the final minutes: Pie crust can brown quickly in an air fryer.
  • Use firm apples: Softer apples can turn mushy during cooking.
  • Let them rest: A few minutes of cooling allows the filling to thicken slightly.

Best Apples for Hand Pies

Different apples create slightly different flavors.

Granny Smith apples provide a bright tart flavor that balances the sweetness of the filling.

Honeycrisp apples offer a sweet, crisp flavor and hold their texture well.

Pink Lady apples have a pleasant balance of sweet and tart flavors.

Fuji apples are naturally sweet and work well if you prefer a sweeter filling.

You can also combine two varieties for a more complex apple flavor.

Easy Topping Ideas

These individual apple pies taste delicious on their own, but simple toppings can turn them into a special dessert.

  • Dust with powdered sugar.
  • Drizzle with vanilla glaze.
  • Add a thin caramel drizzle.
  • Serve with vanilla ice cream.
  • Sprinkle with extra cinnamon sugar.
  • Add chopped toasted pecans for crunch.
  • Serve with warm caramel sauce for a classic fall combination.

For a simple glaze, mix ½ cup powdered sugar with 1 to 2 teaspoons of milk and a small splash of vanilla extract. Drizzle it over the cooled pies.

How to Store Leftovers

Allow the hand pies to cool completely before storing them.

Place them in an airtight container and refrigerate for up to 3 days.

To reheat, place one or two pies in the air fryer at 325°F (165°C) for about 3 to 5 minutes.

Avoid microwaving them if you want to keep the crust crisp. The microwave can make the pastry soft.

Can You Freeze Apple Hand Pies?

Yes, these pies can be frozen before or after cooking.

For the best texture, assemble the pies, seal them, and place them on a parchment-lined tray. Freeze until firm, then transfer them to a freezer-safe container or bag.

When ready to cook, you can air fry them from frozen. Add a few extra minutes to the cooking time and check that the pastry is fully golden and the filling is hot.

If freezing cooked pies, let them cool completely before wrapping and freezing.

Common Mistakes to Avoid

The most common problem is using too much apple filling. A generous-looking amount can actually make the pastry difficult to close.

Another mistake is placing too many pies in the air fryer at once. Crowding blocks airflow and can result in uneven browning.

Do not skip the cooling time for the filling. Warm filling can make the dough soft and difficult to handle.

Finally, avoid cooking at an excessively high temperature. The outside can brown before the pastry and filling have heated properly.

Serving Suggestions

These apple hand pies are excellent for breakfast, dessert, afternoon snacks, and holiday gatherings.

Serve them warm with vanilla ice cream for an easy dessert. For a fall party, arrange them on a platter with caramel sauce for dipping.

They also pair well with coffee, hot chocolate, apple cider, or a warm cup of tea.

For Thanksgiving or other holiday gatherings, make smaller pies and serve them as individual desserts after dinner.

Frequently Asked Questions

Can I use store-bought pie crust for apple hand pies?

Yes. Refrigerated pie crust is an easy option and creates a flaky crust with less preparation.

What apples are best for apple hand pies?

Granny Smith, Honeycrisp, Pink Lady, and Fuji apples all work well because they provide good flavor and hold their shape during cooking.

Why are my hand pies leaking?

Overfilling, weak sealing, or skipping the steam vents can cause the apple filling to escape during cooking.

Can I make these hand pies without eggs?

Yes. Brush the pastry with a little milk or cream instead, although the crust may not become as deeply golden.

Can I make apple hand pies ahead of time?

Yes. Assemble the pies several hours ahead and refrigerate them until you are ready to air fry them.

How do I keep the pastry crispy?

Let cooked pies cool on a wire rack instead of placing them directly in a sealed container while they are still hot.

Can I freeze these apple hand pies?

Yes. Freeze assembled unbaked pies or fully cooled cooked pies in an airtight freezer-safe container.

How long do apple hand pies last?

Refrigerated cooked pies are best enjoyed within 3 days when stored properly in an airtight container.

Final Thoughts

These Air Fryer Apple Hand Pies are a simple way to enjoy the flavors of homemade apple pie without preparing a full-size pie. The combination of flaky pastry, cinnamon-spiced apples, and a golden finish makes them especially appealing during the fall season.

The recipe is easy to adjust with different apples, toppings, and spices. Serve them warm with caramel sauce or vanilla ice cream, or enjoy one on its own with a cup of coffee.

Once you try this smaller version of a classic apple dessert, it may become a regular treat for family weekends, fall gatherings, and holiday celebrations.
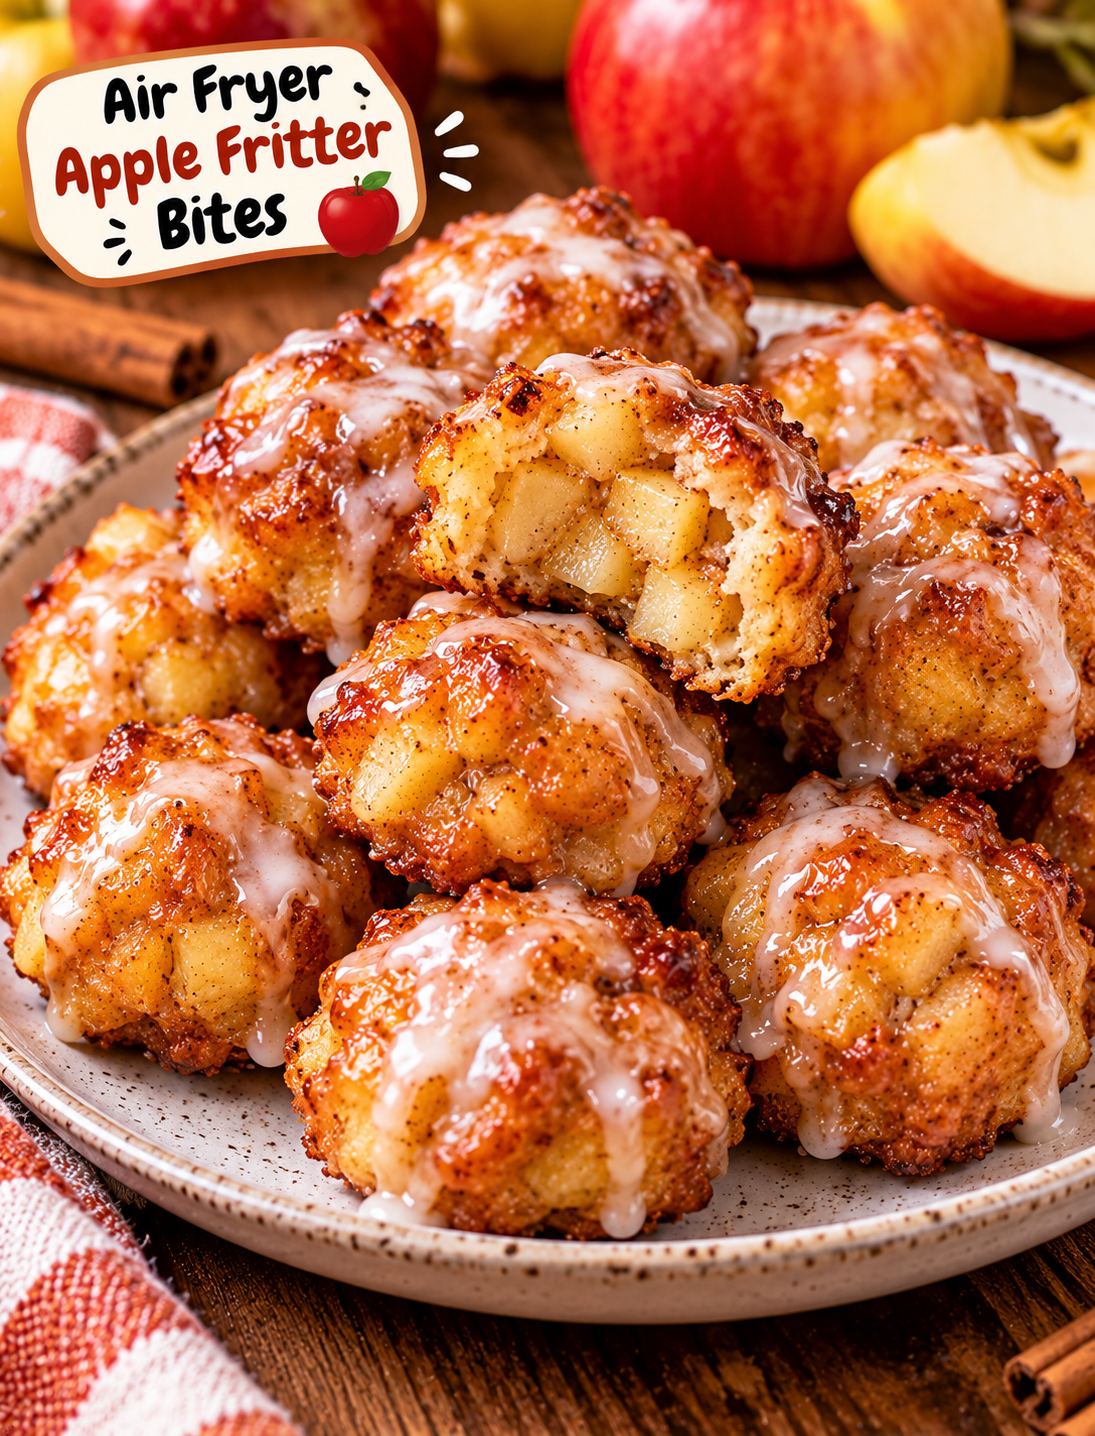
Air Fryer Apple Fritter Bites

Air Fryer Apple Fritter Bites with cinnamon apples, golden crisp edges, and sweet vanilla glaze

Air Fryer Apple Fritter Bites

These Air Fryer Apple Fritter Bites are a quick way to enjoy the warm flavor of classic apple fritters without deep frying. Each bite has a lightly crisp outside, a soft center, tender apple pieces, and a sweet vanilla glaze.

The recipe uses simple pantry ingredients and fresh apples. Air frying gives the bites a golden finish with much less oil than traditional fried fritters.

They are perfect for a fall breakfast, weekend brunch, afternoon snack, or easy dessert. Serve them warm with coffee, tea, or a cold glass of milk for a cozy treat.

Why You’ll Love This Recipe

  • Easy preparation: The batter comes together in one bowl with basic ingredients.
  • Less oil: Air frying uses only a light coating of cooking spray.
  • Small portions: Bite-sized fritters are easy to serve and share.
  • Fall flavor: Apples, cinnamon, nutmeg, and vanilla create a classic seasonal taste.
  • Quick cooking: The bites cook in about 8–10 minutes.
  • Sweet finish: A simple vanilla glaze adds the familiar apple-fritter flavor.
  • Family-friendly: The small size makes them easy for kids and adults to enjoy.
  • No deep fryer: You can make them without a pot of hot oil.

Ingredients You’ll Need

For the Apple Fritter Bites

  • 1 large crisp apple, peeled and finely diced
  • 1 cup all-purpose flour
  • ¼ cup granulated sugar
  • 1½ teaspoons baking powder
  • 1 teaspoon ground cinnamon
  • ¼ teaspoon ground nutmeg
  • ¼ teaspoon salt
  • 1 large egg
  • ⅓ cup whole milk
  • 1 teaspoon vanilla extract
  • 2 tablespoons unsalted butter, melted
  • Cooking spray

For the Vanilla Glaze

  • 1 cup powdered sugar
  • 1½ tablespoons milk
  • ½ teaspoon vanilla extract
  • ¼ teaspoon cinnamon, optional

Best Apples to Use

Choose an apple that stays slightly firm during cooking. Honeycrisp, Granny Smith, Pink Lady, and Fuji apples all work well.

A sweet-tart apple gives the fritter bites more flavor and balances the sugary glaze. Avoid very soft apples because they can release too much moisture into the batter.

How to Make Air Fryer Apple Fritter Bites

Step 1: Prepare the Apple

Peel the apple and remove the core.

Cut it into very small pieces, about ¼ inch in size.

Small pieces are important because they cook quickly and distribute evenly through the batter.

Pat the diced apple with a paper towel if it looks very wet. Removing excess moisture helps keep the batter thick.

Step 2: Mix the Dry Ingredients

Add the flour, granulated sugar, baking powder, cinnamon, nutmeg, and salt to a medium mixing bowl.

Whisk the ingredients together until the spices are evenly distributed.

This creates a consistent flavor throughout the fritter bites.

Step 3: Mix the Wet Ingredients

In a separate bowl, whisk the egg, milk, vanilla extract, and melted butter.

Make sure the melted butter has cooled slightly before adding it to the egg mixture.

Whisk until the mixture looks smooth.

Step 4: Make the Batter

Pour the wet ingredients into the dry ingredients.

Stir gently with a spatula until just combined.

Fold in the diced apple.

Do not overmix the batter. A few small lumps are fine, and gentle mixing helps keep the fritters tender.

The finished batter should be thick enough to hold its shape when scooped.

Step 5: Preheat the Air Fryer

Preheat your air fryer to 375°F for about 3 minutes.

Lightly spray the basket with cooking spray.

Preheating helps the outside begin browning quickly once the batter enters the basket.

Step 6: Form the Fritter Bites

Use a small cookie scoop or tablespoon to portion the batter.

Place small mounds of batter into the air fryer basket.

Leave space between each piece so hot air can circulate around the fritters.

Do not flatten them too much because a slightly rounded shape helps create a soft center.

Depending on your air fryer size, you may need to cook the bites in batches.

Step 7: Air Fry

Lightly spray the tops of the batter with cooking spray.

Air fry at 375°F for 4–5 minutes.

Carefully turn the bites using tongs or a small spatula.

Continue cooking for another 4–5 minutes, until the outside is golden brown and the center is cooked.

Cooking time can vary depending on the size of the bites and the air fryer model.

If the bites are still pale, cook them for another 1–2 minutes.

Step 8: Prepare the Glaze

While the fritters cook, add powdered sugar, milk, and vanilla extract to a small bowl.

Whisk until smooth.

For a thicker glaze, use slightly less milk. For a thinner drizzle, add a few drops of milk at a time.

Add a pinch of cinnamon if you want a stronger fall flavor.

Step 9: Glaze the Apple Fritter Bites

Let the cooked bites cool for about 2–3 minutes.

Dip the tops into the glaze or drizzle the glaze over the warm fritters.

Allow the glaze to sit for a minute or two before serving.

For an extra sweet finish, add a second thin layer of glaze after the first layer sets.

Step 10: Serve Warm

Serve the apple fritter bites while they are still slightly warm.

The outside should be lightly crisp, while the inside remains soft with tender apple pieces.

Pair them with coffee, hot tea, apple cider, or cold milk.

Tips for the Best Apple Fritter Bites

Dice the apple small. Large apple pieces can make the bites difficult to shape and may leave parts of the batter undercooked.

Keep the batter thick. A loose batter can spread in the air fryer and produce flat fritters.

Do not overcrowd the basket. Proper airflow helps the outside brown evenly.

Use a cookie scoop. Consistent portions cook at the same rate and make the finished batch look more uniform.

Do not overmix. Mixing only until the flour disappears helps prevent dense fritters.

Watch the final minutes. Small fritters can brown quickly once the air fryer is fully heated.

Glaze after cooking. Adding the glaze after air frying keeps the coating sweet and smooth instead of burning it during cooking.

How to Make Them Extra Crispy

For slightly crispier edges, keep the fritter portions small and avoid placing them too close together.

A light coating of cooking spray also helps the surface brown.

Do not add too much oil because excess oil can make the outside greasy instead of crisp.

If your air fryer has a strong heating element, check the fritters after 7 minutes to prevent over-browning.

Easy Recipe Variations

Cinnamon Sugar Apple Bites

Skip the glaze and toss the warm fritters in a mixture of granulated sugar and cinnamon.

This creates a simple coating similar to a cinnamon-sugar donut.

Maple Glazed Apple Bites

Replace part of the milk in the glaze with pure maple syrup.

The maple flavor pairs especially well with tart apples and cinnamon.

Caramel Apple Fritter Bites

Drizzle warm caramel sauce over the glazed fritters before serving.

Add a small amount of chopped pecans for crunch.

Apple Pie Fritter Bites

Add an extra ¼ teaspoon of cinnamon and a small pinch of ground ginger to the batter.

This gives the bites a flavor similar to classic apple pie.

Nutty Apple Bites

Fold 2 tablespoons of finely chopped pecans into the batter.

Keep the pieces small so they do not interfere with the shape of the fritters.

How to Store Leftovers

Let the fritter bites cool completely before storing them.

Place them in an airtight container and refrigerate for up to 3 days.

For the best texture, reheat them in the air fryer at 350°F for 2–3 minutes.

Add fresh glaze after reheating if the original glaze has absorbed into the fritters.

You can also freeze the cooked bites without glaze for up to 2 months.

Reheat frozen fritters in a 350°F air fryer until warmed through, then add the glaze before serving.

Frequently Asked Questions

Can I use different apples for this recipe?

Yes. Honeycrisp, Granny Smith, Fuji, and Pink Lady apples all work well for air fryer fritter bites.

Can I make apple fritter bites without eggs?

Yes, but the texture will change; use a suitable egg substitute designed for baking.

Why are my fritter bites too soft?

Overly wet batter, large apple pieces, or overcrowding the basket can prevent the outside from becoming crisp.

Can I use canned apples?

Fresh apples are preferred because canned apples contain more moisture and can make the batter too wet.

How do I know when the fritters are done?

They should be golden brown outside and fully set in the center when gently opened.

Can I make these ahead of time?

Yes. Cook them up to a day ahead, refrigerate them, and reheat them in the air fryer before serving.

Can I freeze apple fritter bites?

Yes. Freeze unglazed cooked fritters for up to 2 months and add fresh glaze after reheating.

What should I serve with apple fritter bites?

Serve them with maple syrup, caramel sauce, coffee, tea, whipped cream, or vanilla ice cream for dessert.

Final Thoughts

These Air Fryer Apple Fritter Bites are an easy way to enjoy the flavors of a classic apple fritter with less mess and no deep frying. The combination of crisp edges, tender apples, warm cinnamon, and sweet vanilla glaze makes them especially appealing during the fall season.

For the best results, use a firm apple, keep the batter thick, make small portions, and give each fritter enough room for proper airflow. Serve them warm with your favorite topping for a simple homemade treat that works for breakfast, brunch, snacks, or dessert.

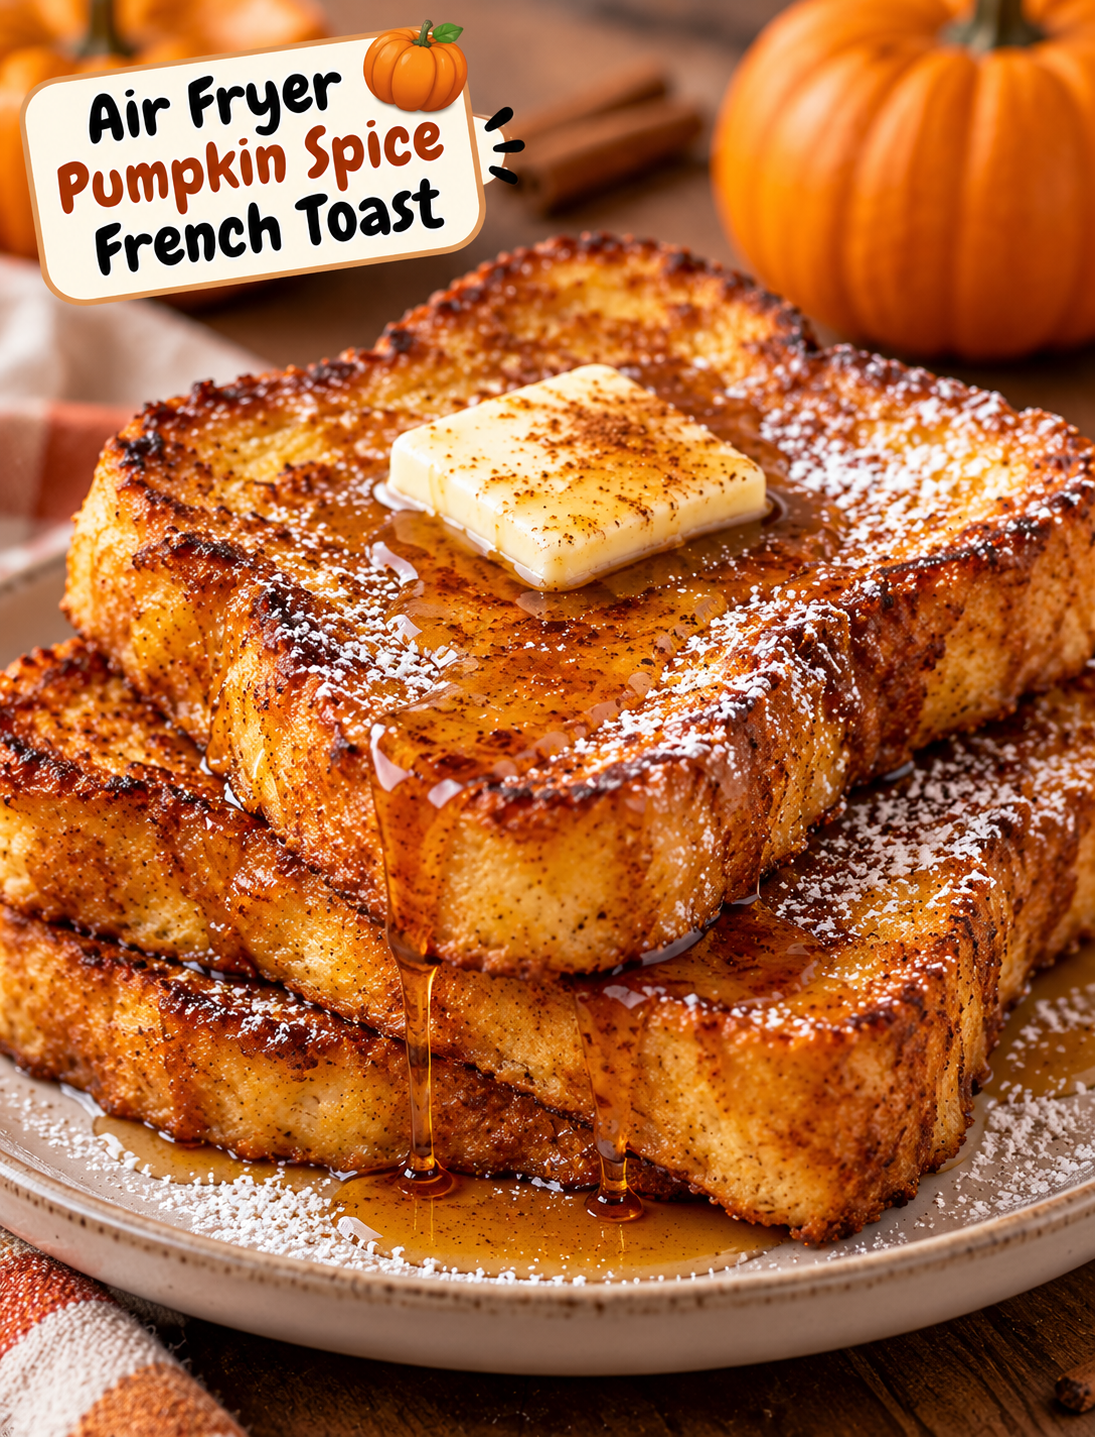
Air Fryer Pumpkin Spice French Toast

Air Fryer Pumpkin Spice French Toast with golden edges, pumpkin spice, maple syrup, and powdered sugar

Air Fryer Pumpkin Spice French Toast

Air Fryer Pumpkin Spice French Toast is a cozy fall breakfast with crisp golden edges, a soft custardy center, and warm pumpkin spice flavor in every bite. It is easy to make, uses simple ingredients, and takes less time than making a full skillet of French toast.

The pumpkin adds moisture and a gentle earthy sweetness, while cinnamon, ginger, and nutmeg give the bread that classic autumn flavor. Cooking the slices in the air fryer also helps create lightly crisp edges without needing much butter or oil.

Serve this pumpkin French toast with maple syrup, powdered sugar, whipped cream, chopped pecans, or fresh fruit for a breakfast that feels special enough for a weekend morning but is simple enough for a weekday.

Why You’ll Love This Recipe

  • Quick breakfast: The air fryer cooks the French toast in about 8–10 minutes.
  • Crispy edges: Hot circulating air helps brown the outside while keeping the middle soft.
  • Fall flavor: Pumpkin puree and pumpkin pie spice create a warm seasonal taste.
  • Simple ingredients: Most ingredients are easy to find at any U.S. grocery store.
  • Small-batch friendly: The recipe makes six slices, making it useful for a small family.
  • Easy to customize: Add pecans, chocolate chips, cinnamon sugar, or your favorite toppings.
  • Less mess: There is no need to stand over a hot skillet flipping bread one slice at a time.

Ingredients You’ll Need

For the French Toast

  • 6 thick slices of brioche, challah, or Texas toast
  • 2 large eggs
  • ½ cup pumpkin puree
  • ½ cup whole milk
  • 2 tablespoons packed brown sugar
  • 1 teaspoon vanilla extract
  • 1½ teaspoons pumpkin pie spice
  • ½ teaspoon ground cinnamon
  • ¼ teaspoon salt
  • Cooking spray

For Serving

  • Pure maple syrup
  • Powdered sugar
  • Whipped cream
  • Chopped pecans
  • Extra pumpkin pie spice

Ingredient note: Use plain pumpkin puree rather than canned pumpkin pie filling. Pumpkin pie filling already contains sugar and spices, which can change the flavor and texture of the recipe.

How to Make Air Fryer Pumpkin Spice French Toast

Step 1: Prepare the Bread

Use thick slices of slightly stale brioche, challah, or Texas toast. Fresh bread can work, but bread that has dried slightly absorbs the pumpkin custard without becoming too soggy.

If your bread is very fresh, place the slices on a baking sheet and leave them uncovered for 30–60 minutes before cooking.

Step 2: Make the Pumpkin Custard

Add the eggs, pumpkin puree, milk, brown sugar, vanilla extract, pumpkin pie spice, cinnamon, and salt to a shallow bowl.

Whisk until the mixture is smooth and evenly combined.

Make sure there are no large streaks of egg white because an even mixture helps each slice cook consistently.

Step 3: Dip the Bread

Dip one slice of bread into the pumpkin mixture.

Coat both sides evenly, but do not leave the bread soaking in the custard for too long. Thick bread usually needs only a few seconds per side.

Let excess mixture drip back into the bowl before transferring the bread to a plate.

Repeat with the remaining slices.

Step 4: Preheat the Air Fryer

Preheat the air fryer to 350°F for about 3 minutes.

Lightly spray the basket with cooking spray to reduce sticking.

If your air fryer does not require preheating, you can still cook the French toast directly, but the first batch may need an extra minute or two.

Step 5: Arrange the French Toast

Place the coated bread slices in the air fryer basket in a single layer.

Leave a little space between each slice so hot air can move around the bread.

Do not stack the slices because overlapping bread can prevent the edges from becoming crisp.

Depending on the size of your air fryer, you may need to cook the French toast in two batches.

Step 6: Air Fry

Cook at 350°F for 4–5 minutes.

Carefully flip each slice.

Continue cooking for another 4–5 minutes, or until the outside is golden brown and the center is cooked through.

The exact cooking time can vary slightly between air fryer models and the thickness of the bread.

Step 7: Check the Texture

The finished French toast should have lightly crisp edges and a soft, set center.

If the slices look pale after 8 minutes, continue cooking for another 1–2 minutes.

Avoid cooking for too long because pumpkin custard can become dry when overcooked.

Step 8: Add Your Favorite Toppings

Transfer the warm slices to plates.

Drizzle with pure maple syrup and dust lightly with powdered sugar.

For a richer fall breakfast, add whipped cream, chopped pecans, and a small sprinkle of pumpkin pie spice.

Serve immediately while the edges are warm and crisp.

Tips for the Best Pumpkin French Toast

Use thick bread. Brioche, challah, and Texas toast are excellent choices because they have enough structure to absorb the custard without falling apart.

Do not oversoak the bread. A quick dip gives you a soft center without making the slices too wet.

Leave space in the basket. Good airflow is important for creating browned, crisp edges.

Use real pumpkin puree. Canned pumpkin puree gives consistent results and adds natural pumpkin flavor.

Adjust the sweetness. If you plan to use plenty of maple syrup, you can reduce the brown sugar slightly.

Watch the second batch. A fully heated air fryer may cook the next batch faster than the first.

Use parchment carefully. If you use air-fryer parchment, make sure it is weighed down by food and is appropriate for your air fryer. Never place loose parchment inside a preheating air fryer.

Easy Topping Ideas

This recipe works well with both classic and creative toppings.

  • Classic: Maple syrup and powdered sugar
  • Crunchy: Chopped pecans or walnuts
  • Creamy: Whipped cream
  • Sweet: Cinnamon sugar and caramel drizzle
  • Fresh: Sliced bananas or apples
  • Extra pumpkin: A spoonful of pumpkin butter
  • Chocolate: Mini chocolate chips or a light chocolate drizzle

For a brunch spread, serve the French toast with scrambled eggs, turkey sausage, fresh berries, or yogurt.

Recipe Variations

Apple Pumpkin French Toast

Add a thin layer of finely diced apple to the top of each slice after dipping. Use a firm apple such as Honeycrisp or Granny Smith for a sweet-tart contrast.

Pecan Pumpkin French Toast

Mix finely chopped pecans into the pumpkin custard or sprinkle them over the bread before air frying. Press them gently into the surface so they stay in place.

Chocolate Pumpkin French Toast

Add a few mini chocolate chips to each slice after dipping. Use a modest amount so the chocolate does not overpower the pumpkin spice flavor.

Dairy-Free Version

Use an unsweetened plant-based milk such as oat or almond milk. Choose a bread that does not contain dairy if you need the entire recipe to be dairy-free.

How to Store Leftovers

Allow leftover French toast to cool completely before storing it.

Place the slices in an airtight container and refrigerate for up to 3 days.

For the best texture, reheat them in the air fryer at 350°F for 2–4 minutes. This helps bring back some of the crispness that can be lost during refrigeration.

You can also freeze cooked slices. Place parchment between the slices and store them in a freezer-safe container for up to 2 months.

Reheat frozen slices in the air fryer at 350°F for about 5–7 minutes, checking them near the end of the cooking time.

Frequently Asked Questions

Can I use regular sandwich bread for pumpkin French toast?

Yes, but thick-cut bread works better because it absorbs the pumpkin custard without becoming too soft.

Can I use pumpkin pie filling instead of pumpkin puree?

It is better to use plain pumpkin puree because pumpkin pie filling already contains sugar and spices.

What temperature should I use for air fryer French toast?

Cook the slices at 350°F for about 8–10 minutes, flipping halfway through.

Why is my French toast soggy?

Soggy French toast usually comes from oversoaking the bread or overcrowding the air fryer basket.

Can I make this recipe without pumpkin pie spice?

Yes. Use a blend of cinnamon, ginger, and nutmeg to create a similar warm spice profile.

Can I prepare the pumpkin custard ahead of time?

Yes. Cover the prepared custard and refrigerate it for up to 24 hours before using.

Can I freeze Air Fryer Pumpkin Spice French Toast?

Yes. Freeze cooled slices with parchment between them and reheat directly in the air fryer when needed.

What is the best bread for this recipe?

Brioche and challah are excellent choices because their thick, soft texture creates a rich center with golden edges.

Final Thoughts

This Air Fryer Pumpkin Spice French Toast is an easy way to bring classic fall flavors to the breakfast table without using a skillet. The pumpkin custard gives each slice a warm seasonal flavor, while the air fryer creates lightly crisp edges and a tender center.

For the best results, use thick bread, avoid oversoaking, cook the slices in a single layer, and serve them warm with maple syrup and your favorite toppings.

Whether you are making a quiet weekend breakfast or preparing a cozy fall brunch, this recipe delivers comforting pumpkin spice flavor with very little effort.

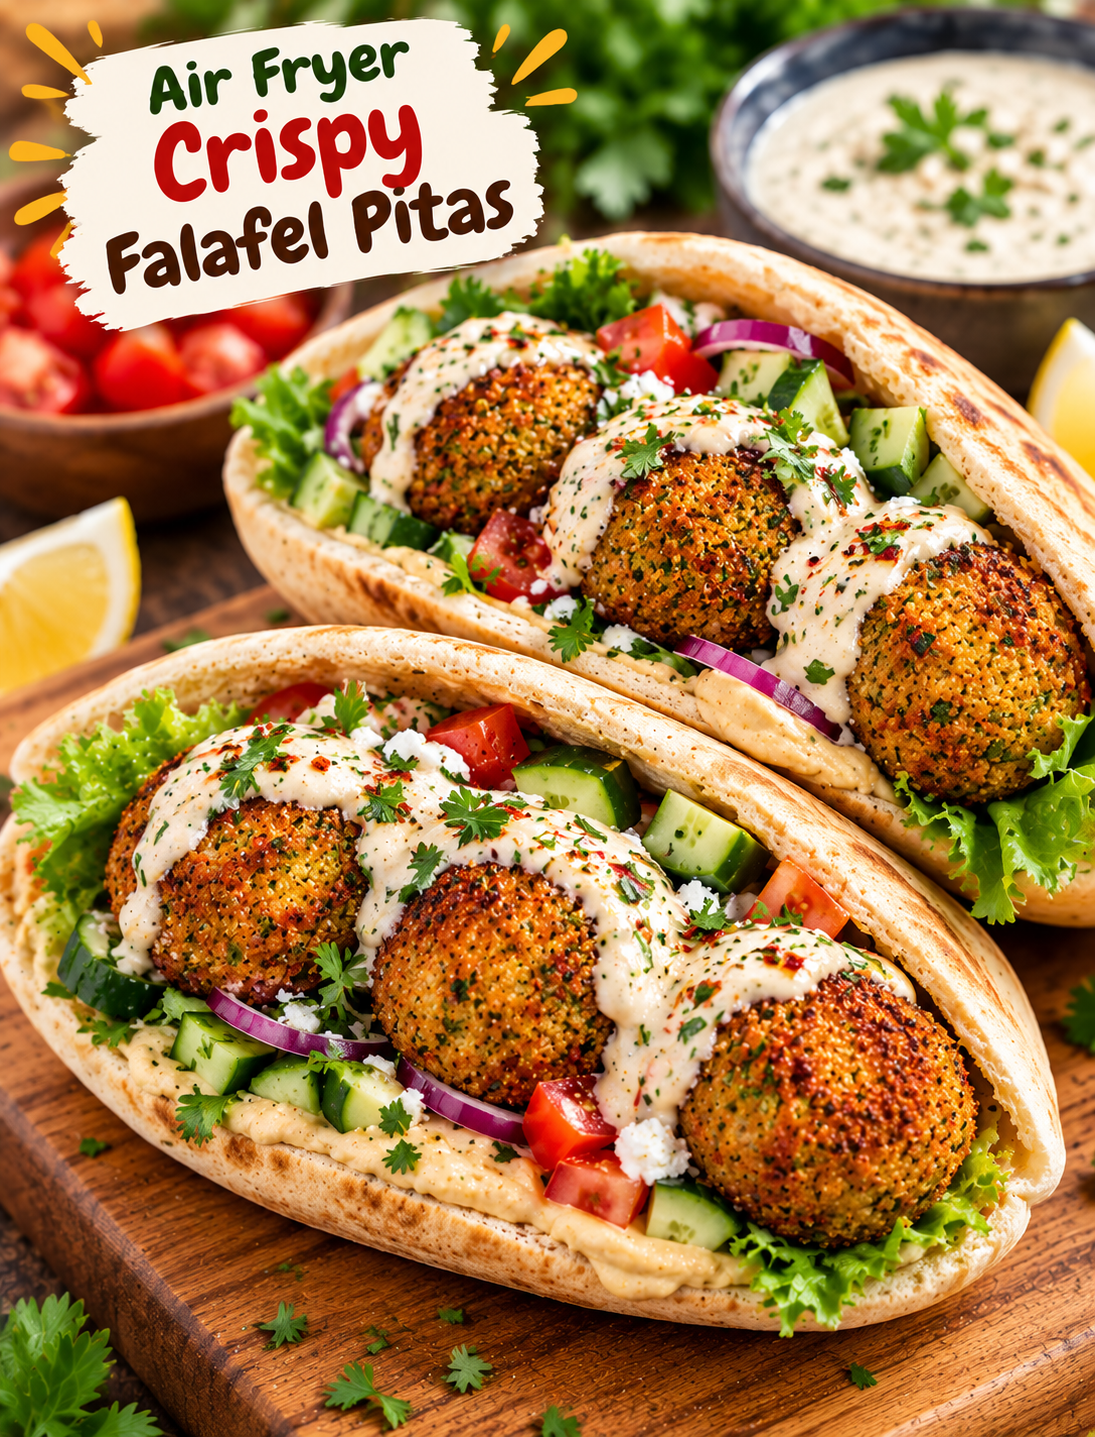
Air Fryer Crispy Falafel Pitas

Crispy air fryer falafel stuffed into warm pita with fresh vegetables and garlic yogurt sauce

Air Fryer Crispy Falafel Pitas

Crispy falafel, fresh vegetables, creamy sauce, and warm pita come together in these easy Air Fryer Crispy Falafel Pitas. The falafel gets golden and crisp outside while staying tender and flavorful inside.

This recipe is a great choice when you want a meat-free lunch or dinner that feels filling without being complicated. The air fryer uses less oil than deep frying and gives the falafel a crisp finish with simple ingredients.

Serve the falafel inside warm pita with crunchy lettuce, tomato, cucumber, red onion, and a quick garlic yogurt sauce. Add hummus, pickles, or fresh herbs for even more flavor.

Why You’ll Love This Recipe

  • Crispy without deep frying: The air fryer creates a golden outside with only a small amount of oil.
  • Easy plant-based meal: Chickpeas provide a hearty base for a satisfying meat-free dinner.
  • Fresh and flavorful: Parsley, cilantro, garlic, cumin, and lemon add bright Mediterranean flavor.
  • Great for meal prep: Prepare the falafel mixture ahead and cook it when needed.
  • Customizable: Add your favorite vegetables, sauces, herbs, and toppings.
  • Family-friendly: Serve the ingredients separately so everyone can build their own pita.
  • Perfect for lunch or dinner: These pitas are filling enough for a main meal but easy enough for a quick weekday lunch.

Ingredients You’ll Need

For the Falafel

  • 1 can (15 ounces) chickpeas, drained and rinsed
  • ½ cup fresh parsley
  • ½ cup fresh cilantro
  • ¼ cup finely chopped red onion
  • 3 garlic cloves
  • 1 teaspoon ground cumin
  • ½ teaspoon ground coriander
  • ½ teaspoon smoked paprika
  • ½ teaspoon salt
  • ¼ teaspoon black pepper
  • 1 tablespoon fresh lemon juice
  • 2 tablespoons all-purpose flour
  • ½ teaspoon baking powder
  • 1 tablespoon olive oil

Garlic Yogurt Sauce

  • ½ cup plain Greek yogurt
  • 1 tablespoon fresh lemon juice
  • 1 small garlic clove, finely grated
  • 1 tablespoon chopped parsley
  • ¼ teaspoon cumin
  • Pinch of salt

For the Pitas

  • 4 small pita breads
  • 1 cup shredded lettuce
  • 1 medium tomato, diced
  • ½ cucumber, diced
  • ¼ red onion, thinly sliced
  • ½ cup hummus
  • Fresh parsley or cilantro
  • Pickled turnips or cucumbers, optional

How to Make Air Fryer Crispy Falafel Pitas

Step 1: Prepare the Chickpeas

Drain and rinse the canned chickpeas well.

Spread them on a clean kitchen towel and gently pat them dry. Removing extra moisture helps the falafel mixture hold together and brown better.

For the best texture, avoid using chickpeas that are still wet.

Step 2: Make the Falafel Mixture

Add the chickpeas, parsley, cilantro, red onion, garlic, cumin, coriander, smoked paprika, salt, black pepper, and lemon juice to a food processor.

Pulse several times until the mixture becomes finely chopped and crumbly.

Do not blend it into a smooth paste. Small pieces should still be visible because they help create a better falafel texture.

Step 3: Add the Dry Ingredients

Transfer the mixture to a bowl.

Add the flour and baking powder. Stir until evenly combined.

The mixture should be moist enough to hold together when pressed but not wet or sticky.

If it feels too loose, add another teaspoon of flour at a time until it becomes easy to shape.

Step 4: Chill the Mixture

Cover the bowl and refrigerate the falafel mixture for 20–30 minutes.

This short resting time helps the ingredients bind together and makes shaping easier.

You can also prepare the mixture several hours ahead and keep it refrigerated until cooking time.

Step 5: Shape the Falafel

Scoop out about 1½ tablespoons of the mixture for each falafel.

Roll each portion gently into a ball, then flatten it slightly into a small thick patty.

Keeping the falafel slightly flat helps the center cook while the outside becomes crisp.

You should get about 12–14 falafel pieces, depending on their size.

Step 6: Preheat the Air Fryer

Preheat your air fryer to 375°F for about 3 minutes.

Lightly spray the basket with olive oil.

Avoid using too much oil because the falafel only needs a light coating to brown properly.

Step 7: Air Fry the Falafel

Place the falafel in the basket in a single layer.

Leave a little space between each piece so hot air can circulate.

Lightly spray the tops with olive oil.

Air fry at 375°F for 10–14 minutes, turning the falafel halfway through cooking.

Continue until the outside is golden brown and crisp.

The exact cooking time can vary depending on the size of the falafel and your air fryer model.

Step 8: Make the Garlic Yogurt Sauce

While the falafel cooks, add Greek yogurt, lemon juice, grated garlic, parsley, cumin, and salt to a small bowl.

Stir until smooth.

Taste and add a little more lemon juice or salt if needed.

Keep the sauce chilled until you’re ready to assemble the pitas.

Step 9: Warm the Pitas

Warm the pita breads in the air fryer at 300°F for about 1–2 minutes, or heat them briefly in a dry skillet.

Do not overheat them because they can become dry and difficult to fold.

Step 10: Build the Crispy Falafel Pitas

Spread hummus inside each warm pita.

Add shredded lettuce, diced tomato, cucumber, and sliced red onion.

Place 3–4 crispy falafel pieces inside each pita.

Drizzle generously with garlic yogurt sauce.

Finish with fresh herbs and optional pickled vegetables.

Serve immediately while the falafel is still warm and crisp.

Tips for Extra Crispy Falafel

Dry the chickpeas well: Excess moisture can make the mixture soft and difficult to crisp.

Do not over-process: A slightly coarse mixture creates better texture than a smooth paste.

Chill before shaping: Refrigeration helps the falafel hold its shape during cooking.

Do not overcrowd the basket: Space between the pieces allows hot air to circulate.

Turn halfway: Flipping helps both sides develop an even golden crust.

Use a light oil coating: A small amount of olive oil helps the outside brown without deep frying.

Serve right away: Falafel loses some crispness as it sits inside the pita.

How to Customize Your Pitas

These falafel pitas are easy to change based on what you have in your kitchen.

Extra creaminess, add hummus or a tahini sauce.

For more crunch, add shredded cabbage, cucumber, or thinly sliced radishes.

More heat, add sliced jalapeños or a drizzle of spicy chili sauce.

Fresh Mediterranean flavor, add chopped parsley, cilantro, mint, or a squeeze of lemon.

Tangy bite, add pickled onions, cucumbers, or turnips.

You can also skip the pita and serve the crispy falafel over a salad or grain bowl.

What to Serve With Falafel Pitas

A simple cucumber and tomato salad pairs well with the warm falafel and creamy sauce.

You can also serve these pitas with hummus, tabbouleh, roasted vegetables, crispy potatoes, or a light lemon salad.

For a larger meal, create a Mediterranean-style platter with falafel, pita, hummus, vegetables, pickles, and several sauces.

How to Store Leftover Falafel

Allow cooked falafel to cool before placing it in an airtight container.

Store it in the refrigerator for up to 4 days.

Keep the falafel separate from the pita, vegetables, and sauce so the bread does not become soggy.

For the best texture, reheat the falafel in the air fryer at 375°F for 3–5 minutes.

Avoid reheating it in the microwave if you want to keep the outside crisp.

Can You Freeze Falafel?

Yes, falafel freezes well.

Allow cooked falafel to cool completely, then place the pieces on a baking sheet and freeze them until firm.

Transfer the frozen falafel to a freezer-safe bag or container.

For the best quality, use within about 2 months.

Reheat directly from frozen in a 375°F air fryer for 6–9 minutes, turning halfway through.

Recipe Notes

  • Use canned chickpeas for a convenient weeknight version.
  • Dry the chickpeas before processing to reduce excess moisture.
  • Keep the mixture slightly coarse for better texture.
  • Chill the mixture before shaping.
  • Make evenly sized falafel so they cook at the same rate.
  • Avoid overcrowding the air fryer basket.
  • Add sauces and vegetables just before serving.
  • Reheat leftovers in the air fryer instead of the microwave for better crispness.
  • Adjust the toppings based on your preferred Mediterranean flavors.

Frequently Asked Questions

Can I use canned chickpeas for falafel?

Yes, canned chickpeas work well for this easy air fryer version when they are thoroughly drained and dried.

Why does my falafel fall apart?

The mixture may contain too much moisture, so chill it longer and add a small amount of flour if needed.

How do I make falafel extra crispy?

Use dry chickpeas, avoid overcrowding the basket, lightly spray with oil, and turn the falafel halfway through cooking.

Can I make these falafel pitas ahead of time?

Yes, prepare and refrigerate the falafel mixture ahead, then shape and air fry it when ready to serve.

What sauce goes best with falafel?

Garlic yogurt sauce, tahini sauce, hummus, and lemon-garlic dressing all pair well with crispy falafel.

Can I freeze cooked falafel?

Yes, freeze cooled falafel in an airtight freezer-safe container and reheat it directly in the air fryer.

Are falafel pitas vegetarian?

Yes, this recipe is vegetarian because the falafel is made with chickpeas, herbs, spices, and plant-based ingredients.

How should I reheat leftover falafel?

Reheat falafel in a 375°F air fryer for 3–5 minutes to restore some of its crisp texture.

Final Thoughts

These Air Fryer Crispy Falafel Pitas turn simple chickpeas and fresh herbs into a flavorful meal with a satisfying crunch. The air fryer makes the falafel golden and crisp without the need for deep frying.

Build each pita with fresh vegetables, hummus, and creamy garlic yogurt sauce for a balanced combination of textures and flavors. For the best result, keep the falafel separate from the wet toppings until you are ready to eat.

Once you have the basic recipe down, you can change the sauces, vegetables, and toppings to create a different pita every time.

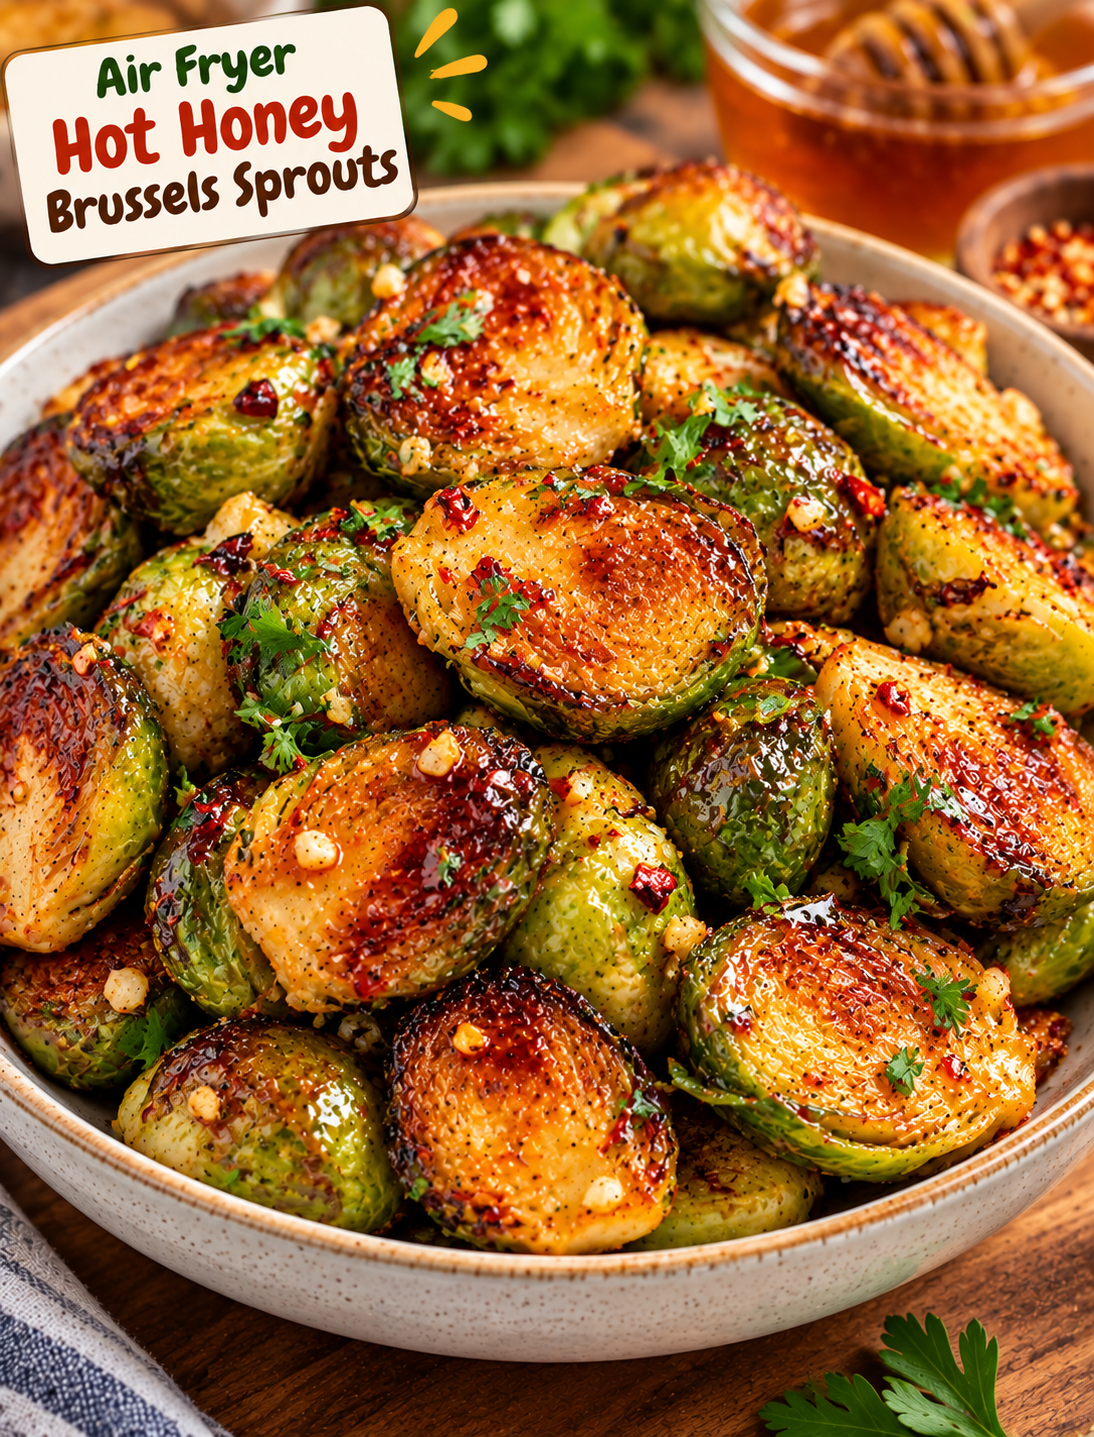
Air Fryer Hot Honey Brussels Sprouts

Crispy Air Fryer Hot Honey Brussels Sprouts with a sweet and spicy honey glaze

Air Fryer Hot Honey Brussels Sprouts

If you think Brussels sprouts are boring, these Air Fryer Hot Honey Brussels Sprouts may change your mind. The sprouts turn golden and crisp in the air fryer, then get tossed with a sweet and spicy hot honey glaze. The result is a simple side dish with crispy edges, tender centers, and plenty of flavor.

This recipe is easy enough for a weeknight dinner but special enough for a holiday table. It also takes less time than roasting Brussels sprouts in the oven. Serve them with chicken, steak, salmon, burgers, or your favorite grain bowl for a quick side that brings both heat and sweetness to the plate.

Why You’ll Love This Recipe

  • Crispy texture: The air fryer creates browned, crispy edges without deep frying.
  • Sweet and spicy flavor: Honey balances the heat from hot sauce and red pepper flakes.
  • Simple ingredients: You only need a few pantry staples and fresh Brussels sprouts.
  • Quick cooking: The sprouts are ready in about 15 minutes after prep.
  • Easy cleanup: Air frying keeps the cooking process simple and contained.
  • Flexible heat level: You can easily adjust the hot honey to make it mild or spicy.
  • Great for any meal: Serve them with everyday dinners or add them to a holiday spread.

Ingredients You’ll Need

For the Brussels Sprouts

  • 1 pound fresh Brussels sprouts
  • 1½ tablespoons olive oil
  • ½ teaspoon garlic powder
  • ½ teaspoon smoked paprika
  • ½ teaspoon kosher salt
  • ¼ teaspoon black pepper

For the Hot Honey Glaze

  • ¼ cup honey
  • 1 tablespoon hot sauce
  • 1 teaspoon apple cider vinegar
  • ½ teaspoon red pepper flakes
  • 1 small garlic clove, finely minced
  • 1 teaspoon melted butter

Optional Toppings

  • 1 tablespoon grated Parmesan
  • 1 tablespoon chopped fresh parsley
  • Extra red pepper flakes
  • Flaky sea salt
  • A small drizzle of hot honey

How to Make Air Fryer Hot Honey Brussels Sprouts

Step 1: Prepare the Brussels Sprouts

Wash the Brussels sprouts and dry them very well with a clean kitchen towel.

Trim off the tough stem ends, then cut each sprout in half from top to bottom. Cut very large Brussels sprouts into quarters so they cook evenly.

Drying the sprouts is important because excess water can prevent the outer leaves from becoming crisp.

Step 2: Season the Sprouts

Place the halved Brussels sprouts in a large bowl.

Add olive oil, garlic powder, smoked paprika, salt, and black pepper. Toss well until the sprouts are evenly coated.

Make sure the cut sides receive some oil because those flat surfaces develop a delicious golden crust during air frying.

Step 3: Preheat the Air Fryer

Preheat your air fryer to 400°F for about 3 minutes.

A hot cooking basket helps the Brussels sprouts begin browning as soon as they go in.

Step 4: Arrange the Brussels Sprouts

Place the seasoned Brussels sprouts in the air fryer basket with the cut sides facing down whenever possible.

Keep them in a single layer and leave some space between the pieces.

Avoid overcrowding the basket because crowded vegetables release steam and may become soft instead of crispy. Cook in two batches if needed.

Step 5: Air Fry Until Crispy

Air fry the Brussels sprouts at 400°F for 10–14 minutes.

Shake the basket or turn the sprouts after about 6 minutes.

Continue cooking until the edges are deeply golden and crisp and the centers are fork-tender.

Cooking time can vary slightly depending on the size of the sprouts and the air fryer model.

Step 6: Make the Hot Honey Glaze

While the Brussels sprouts cook, prepare the glaze.

Add honey, hot sauce, apple cider vinegar, red pepper flakes, minced garlic, and melted butter to a small saucepan.

Warm over low heat for about 2 minutes, stirring until everything is combined.

Do not boil the mixture because honey can burn quickly at high heat.

Step 7: Toss With the Glaze

Transfer the hot, crispy Brussels sprouts to a large bowl.

Pour the hot honey glaze over them and gently toss until the sprouts are coated.

For the crispiest texture, add the glaze right before serving instead of letting the sprouts sit in the sauce for a long time.

Step 8: Add Your Favorite Toppings

Transfer the glazed Brussels sprouts to a serving dish.

Add Parmesan, fresh parsley, a pinch of flaky sea salt, or extra red pepper flakes.

For an even stronger sweet-and-spicy flavor, finish with a very light drizzle of hot honey.

Tips for Extra Crispy Brussels Sprouts

Getting crispy Brussels sprouts in the air fryer is easy when you follow a few simple rules.

Dry them completely: Water creates steam, which can make the sprouts softer.

Do not overcrowd the basket: Hot air needs room to move around every piece.

Cut them evenly: Similar-sized pieces cook at the same rate.

Place cut sides down: The flat surface gets direct heat and develops better browning.

Use enough oil: A light coating helps the outside brown without making the sprouts greasy.

Add the glaze at the end: Honey can burn if exposed to high heat for too long.

Serve immediately: Brussels sprouts are at their crispiest right after cooking.

How to Adjust the Heat

The hot honey glaze is easy to customize.

For a mild version, use only 1 teaspoon of hot sauce and skip the red pepper flakes.

For medium heat, use 1 tablespoon of hot sauce and ½ teaspoon of red pepper flakes.

For a spicy version, add another tablespoon of hot sauce and increase the red pepper flakes.

You can also use a hotter chili sauce if you enjoy a stronger kick.

What to Serve With Hot Honey Brussels Sprouts

These crispy Brussels sprouts work with many main dishes.

Serve them alongside air fryer chicken, grilled chicken breast, roasted turkey, steak, pork-free meatballs, or baked salmon.

They also pair well with mashed potatoes, rice, mac and cheese, quinoa, or a simple green salad.

For a quick vegetarian meal, serve the sprouts over cooked quinoa or rice with chickpeas and a creamy yogurt-based sauce.

How to Store Leftovers

Allow leftover Brussels sprouts to cool before transferring them to an airtight container.

Store them in the refrigerator for up to 3 days.

The sprouts will soften slightly after refrigeration, but you can bring back some of their crisp texture by reheating them in the air fryer at 375°F for 3–5 minutes.

Add a little fresh hot honey after reheating for the best flavor.

Can You Make Them Ahead?

You can prepare the Brussels sprouts ahead of time by trimming, cutting, and seasoning them several hours before cooking.

Keep the prepared sprouts covered in the refrigerator until you are ready to air fry them.

Prepare the hot honey glaze separately and warm it shortly before serving.

For the best texture, cook the sprouts close to mealtime and add the glaze just before serving.

Recipe Notes

  • Choose Brussels sprouts that feel firm and have bright green leaves.
  • Remove any loose yellow or damaged outer leaves before cooking.
  • Smaller sprouts tend to cook faster than large ones.
  • Cut very large sprouts into quarters for more even cooking.
  • Check the sprouts early because air fryer temperatures can vary.
  • Add the glaze after cooking to protect the honey from burning.
  • Adjust the spice level to match your preference.
  • Serve immediately for the best crispy texture.

Frequently Asked Questions

Can I use frozen Brussels sprouts?

Yes, but fresh Brussels sprouts usually produce a better crispy texture; frozen sprouts may need a few extra minutes.

Why are my Brussels sprouts not crispy?

Overcrowding and excess moisture are common causes, so dry the sprouts well and cook them in a single layer.

Can I make this recipe without hot sauce?

Yes, replace the hot sauce with a little extra honey and use a small pinch of red pepper flakes for mild heat.

What temperature should I use for Brussels sprouts in an air fryer?

Cook them at 400°F for about 10–14 minutes, shaking or turning them halfway through.

Can I make the hot honey less spicy?

Yes, reduce the hot sauce and red pepper flakes, then add more honey if you want a sweeter glaze.

How do I keep the Brussels sprouts crispy?

Add the hot honey glaze immediately before serving and avoid letting the cooked sprouts sit in the sauce.

Can I use maple syrup instead of honey?

Yes, maple syrup can replace honey, but the flavor will be slightly deeper and less floral.

How long do leftovers last?

Store cooked Brussels sprouts in an airtight container in the refrigerator for up to 3 days.

Final Thoughts

These Air Fryer Hot Honey Brussels Sprouts are an easy way to turn a simple vegetable into a crave-worthy side dish. The air fryer gives the sprouts browned, crispy edges while the hot honey adds a sweet and spicy finish.

Keep the sprouts dry, avoid overcrowding the basket, and add the glaze at the very end for the best texture. Once you try this combination of crispy Brussels sprouts and hot honey, it may become one of your favorite ways to serve this vegetable.

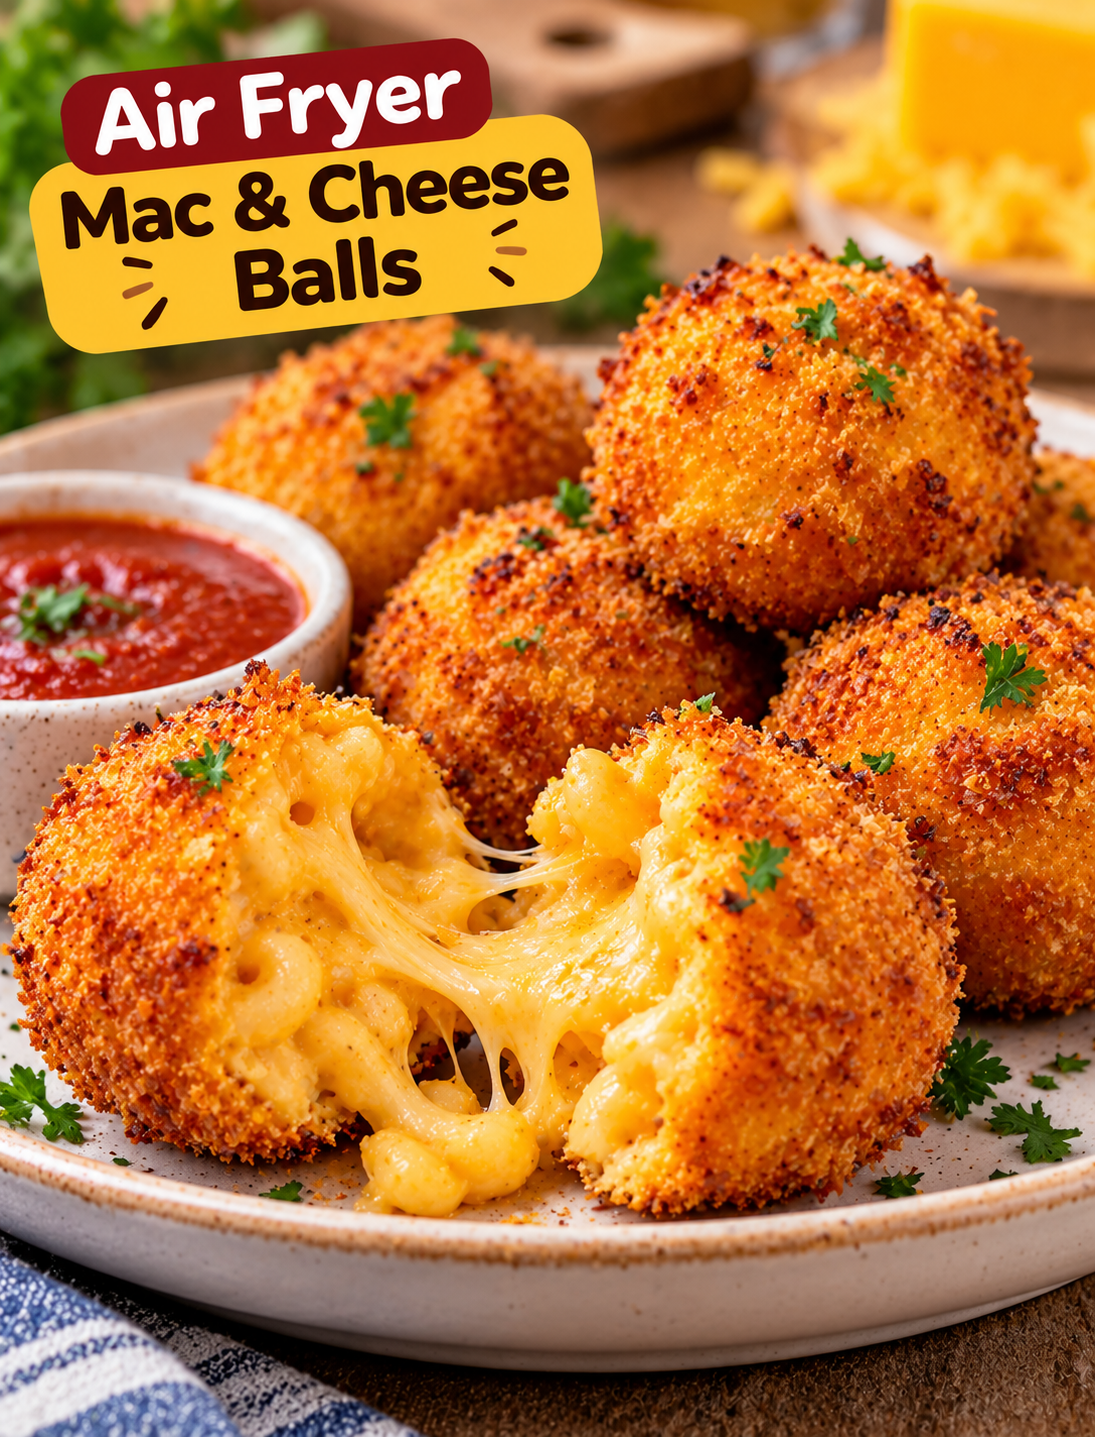
Air Fryer Mac & Cheese Balls

Crispy air fryer mac and cheese balls with golden breadcrumb coating and creamy melted cheese center served with dipping sauce

Air Fryer Mac & Cheese Balls

These Air Fryer Mac & Cheese Balls turn leftover macaroni and cheese into crispy, golden bites with a warm, cheesy center. They are easy to make, use simple ingredients, and need much less oil than deep-fried versions.

The outside becomes crunchy while the inside stays soft and creamy. A quick air-fryer finish gives these cheesy bites the texture people love without filling your kitchen with hot oil.

They are perfect for game-day snacks, party appetizers, family dinners, or a fun way to use leftover mac and cheese. Serve them with marinara sauce, ranch dressing, or your favorite dipping sauce for an extra burst of flavor.

Why You’ll Love These Mac & Cheese Balls

  • Crispy outside: Breadcrumbs create a golden, crunchy coating.
  • Creamy center: Chilled macaroni and cheese keeps the middle rich and cheesy.
  • Air-fryer friendly: You only need a light coating of cooking spray.
  • Great for leftovers: This recipe gives leftover mac and cheese a fresh purpose.
  • Easy party snack: Small portions make them simple to serve and share.
  • Customizable: Add different cheeses or seasonings to change the flavor.
  • Freezer friendly: You can prepare the balls ahead of time and cook them later.

Ingredients You’ll Need

  • 3 cups cooked macaroni and cheese, chilled
  • ½ cup shredded sharp cheddar cheese
  • ½ cup all-purpose flour
  • 2 large eggs
  • 1 tablespoon milk
  • 1 cup seasoned breadcrumbs
  • ½ teaspoon garlic powder
  • ½ teaspoon paprika
  • ¼ teaspoon black pepper
  • ¼ teaspoon salt
  • Cooking spray
  • Fresh parsley, optional for serving

For the best texture, use thick, chilled macaroni and cheese. Very loose or freshly made mac and cheese can be difficult to shape into firm balls.

Sharp cheddar adds a stronger cheese flavor, while mozzarella can make the center extra stretchy. You can also use a blend of cheddar and Monterey Jack.

How to Make Air Fryer Mac & Cheese Balls

Step 1: Chill the Mac and Cheese

Place the cooked macaroni and cheese in the refrigerator for at least 2 hours.

Cold mac and cheese is much easier to shape because the cheese sauce becomes firmer. If you have leftover mac and cheese from the previous day, it works especially well.

Step 2: Add Extra Cheese

Place the chilled mac and cheese in a large bowl.

Add the shredded cheddar cheese and gently mix until the cheese is evenly distributed.

Do not overmix because breaking the pasta too much can make the mixture difficult to shape.

Step 3: Shape the Balls

Scoop about 2 tablespoons of the mixture into your hands.

Press and roll it into a compact ball about the size of a golf ball.

If the mixture feels too soft, refrigerate it for another 30 minutes before shaping. Firming the mixture helps prevent the balls from falling apart during cooking.

Place each shaped ball on a parchment-lined plate or tray.

Step 4: Prepare the Coating

Set up three shallow bowls.

Place the flour in the first bowl.

Whisk the eggs with milk in the second bowl.

Combine breadcrumbs, garlic powder, paprika, black pepper, and salt in the third bowl.

This three-step coating creates a more even and crunchy exterior.

Step 5: Coat Each Ball

Roll one mac and cheese ball in flour and shake off the excess.

Dip it into the egg mixture and coat it completely.

Finally, roll it through the seasoned breadcrumbs, gently pressing the crumbs onto the surface.

Repeat with the remaining balls.

Step 6: Chill Before Air Frying

Place the coated balls in the refrigerator for 15–20 minutes.

This short chilling step helps the coating stick and gives the cheese mixture more structure.

For even easier preparation, you can freeze the coated balls for about 20–30 minutes before cooking.

Step 7: Preheat the Air Fryer

Preheat your air fryer to 375°F for about 3 minutes.

A preheated basket helps the breadcrumb coating start crisping immediately.

Step 8: Arrange the Mac & Cheese Balls

Lightly spray the air fryer basket with cooking spray.

Place the balls in a single layer with space between each one.

Do not stack them or overcrowd the basket because hot air needs room to circulate around each bite.

Step 9: Air Fry

Lightly spray the tops with cooking spray.

Air fry at 375°F for 8–10 minutes, turning them carefully halfway through cooking.

Continue cooking until the coating is golden brown and crisp.

Keep a close eye on them during the final few minutes because the cheese can begin to leak if they become too hot.

Step 10: Rest and Serve

Carefully remove the cooked bites from the air fryer.

Let them rest for about 2–3 minutes before serving.

The center will be extremely hot immediately after cooking, so allowing them to cool slightly makes them easier to eat.

Serve warm with your favorite dipping sauce.

Tips for Crispy Mac & Cheese Balls

Use cold mac and cheese. Chilled pasta and cheese sauce are easier to shape and less likely to fall apart.

Make compact balls. Press each portion firmly before rolling it between your hands.

Do not skip the flour. The flour helps the egg mixture adhere to the surface.

Press in the breadcrumbs. A gentle press creates a thicker coating that becomes crisp in the air fryer.

Avoid overcrowding. Cook in batches if your basket is small.

Use cooking spray. A light coating helps the breadcrumbs brown evenly without deep frying.

Chill before cooking. A short rest in the refrigerator helps the balls maintain their shape.

Turn carefully. Use tongs or a small spatula to prevent the coating from breaking.

Best Cheese for Mac & Cheese Balls

Sharp cheddar is a great choice because it provides a bold cheese flavor that works well with crispy breadcrumbs.

For a stretchier center, mix cheddar with mozzarella.

Monterey Jack gives the filling a smooth, mild flavor, while pepper Jack adds a little heat.

Avoid using only very soft or watery cheese because excess moisture can make the balls harder to shape and crisp.

Easy Flavor Variations

Spicy Mac & Cheese Balls

Add ¼ teaspoon of cayenne pepper or ½ teaspoon of crushed red pepper flakes to the breadcrumb mixture.

Buffalo-Style Bites

Mix a small amount of buffalo sauce into the chilled mac and cheese before shaping. Serve with ranch or blue cheese dressing.

Garlic Parmesan Bites

Add grated Parmesan cheese, garlic powder, and Italian seasoning to the breadcrumbs for a savory coating.

Jalapeño Cheddar Bites

Mix finely chopped pickled jalapeños and extra cheddar into the chilled macaroni and cheese.

Bacon-Free Loaded Bites

Add chopped green onions, extra cheddar, and a little smoked paprika for a loaded flavor without using bacon.

What to Serve With Mac & Cheese Balls

These crispy bites pair well with sauces and simple side dishes.

For dipping, try marinara sauce, ranch dressing, honey mustard, buffalo sauce, garlic aioli, or a creamy cheese dip.

For a party, serve them alongside vegetable sticks, a fresh green salad, chicken wings, or other finger foods.

They also make a fun side dish for burgers, grilled chicken, or sandwiches.

How to Store Leftovers

Let the cooked bites cool completely before storing them.

Place them in an airtight container and refrigerate for up to 3 days.

For the best texture, reheat them in the air fryer at 350°F for 3–5 minutes.

Avoid microwaving when possible because it can make the breadcrumb coating soft.

Can You Freeze Mac & Cheese Balls?

Yes, these bites can be frozen before or after cooking.

For the best results, freeze the breaded, uncooked balls in a single layer until firm. Transfer them to a freezer-safe bag or container and store for up to 2 months.

When ready to cook, air fry them directly from frozen at 375°F, adding a few extra minutes to the cooking time. Check that the center is heated through before serving.

Recipe Notes

  • Prep time: 25 minutes
  • Chilling time: 2 hours
  • Cook time: 8–10 minutes
  • Total active time: About 35 minutes
  • Air fryer temperature: 375°F
  • Servings: About 12–14 bites
  • Category: Appetizer
  • Cuisine: American

Cooking time can vary by air fryer model and the size of the balls. Smaller bites may finish sooner, while larger ones may need additional cooking time.

Frequently Asked Questions

Can I use leftover mac and cheese?

Yes, chilled leftover mac and cheese works especially well because the firmer texture makes the balls easier to shape.

Why are my mac and cheese balls falling apart?

The mixture may be too warm or loose; chill it longer and press each ball firmly before breading.

Can I make these without eggs?

Yes, but the egg helps the breadcrumbs adhere; a suitable egg substitute can be used for the coating.

How long do mac and cheese balls take in an air fryer?

They usually take 8–10 minutes at 375°F, depending on their size and your air fryer.

Can I freeze mac and cheese balls?

Yes, freeze the breaded balls in a single layer and transfer them to a freezer-safe container once firm.

What dipping sauce goes with mac and cheese balls?

Marinara, ranch, buffalo sauce, honey mustard, and garlic aioli all pair well with the crispy cheese bites.

Can I use different types of cheese?

Yes, cheddar, mozzarella, Monterey Jack, and pepper Jack can be combined for different flavors and textures.

How do I make them extra crispy?

Use seasoned breadcrumbs, avoid overcrowding the basket, and lightly spray the coated balls before air frying.

Final Thoughts

These Air Fryer Mac & Cheese Balls are an easy way to turn leftover macaroni and cheese into something completely different. The crunchy breadcrumb coating contrasts with the warm, creamy center, making every bite satisfying.

For the best results, start with cold mac and cheese, make firm balls, chill them before cooking, and leave enough space in the air fryer basket. Serve them hot with a flavorful dipping sauce for an easy appetizer that works for family dinners, parties, game days, and casual gatherings.