Air Fryer Strawberry Cheesecake Wontons

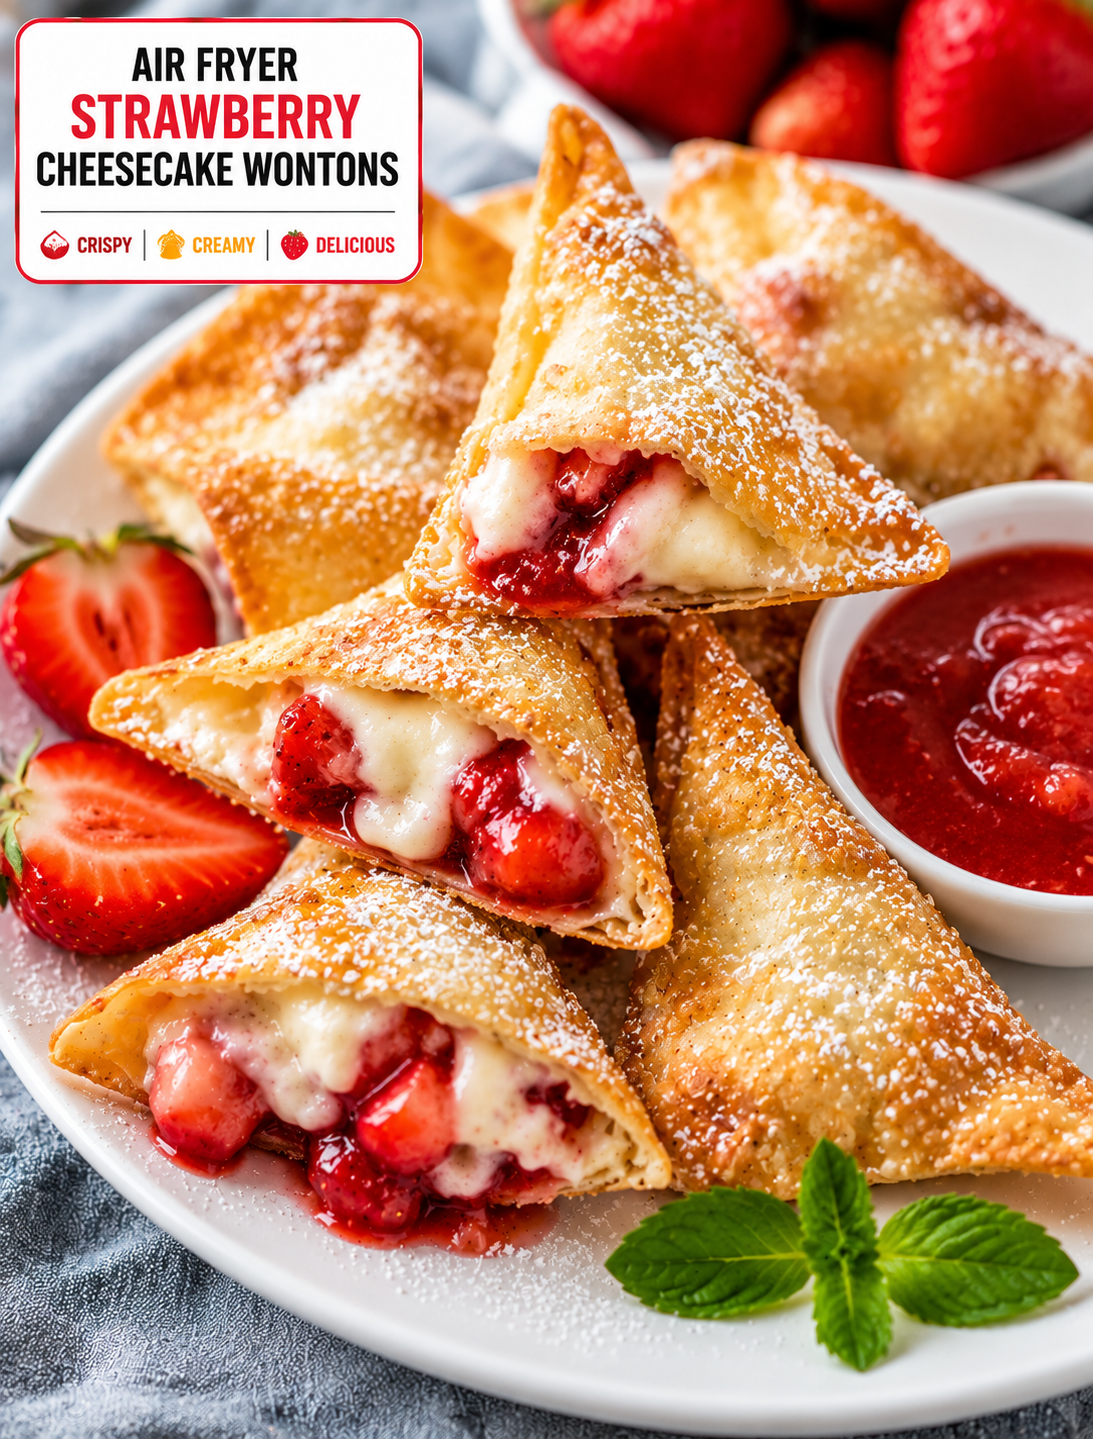
Golden air fryer strawberry cheesecake wontons filled with creamy strawberry cheesecake, dusted with powdered sugar and served with berries

Air Fryer Strawberry Cheesecake Wontons

Crispy on the outside and creamy on the inside, these Air Fryer Strawberry Cheesecake Wontons are an easy dessert that feels special without requiring complicated baking.

Each wonton wrapper holds a sweet cheesecake filling and juicy strawberry pieces. The air fryer cooks the wrappers until golden and crisp while the cream cheese filling becomes smooth and warm.

A light dusting of powdered sugar adds a classic cheesecake finish. You can also serve these dessert wontons with strawberry sauce, chocolate drizzle, or vanilla ice cream.

This recipe is perfect for parties, family desserts, date nights, holiday gatherings, or a quick sweet treat when you want something different from traditional cheesecake.

Why You’ll Love These Strawberry Cheesecake Wontons

These dessert wontons combine the flavor of strawberry cheesecake with the crisp texture of an air-fried wrapper.

The filling uses simple ingredients, including cream cheese, powdered sugar, vanilla, and fresh strawberries. The wonton wrappers create a thin exterior that becomes golden and crunchy during cooking.

Air frying also keeps the preparation simple. You do not need to heat a large pot of oil or spend time making a traditional cheesecake crust.

The small size makes these treats easy to serve. They can be arranged on a platter and enjoyed as finger food, making them especially useful for parties and gatherings.

You can also customize the filling with other berries, chocolate chips, lemon zest, or different toppings.

Ingredients You’ll Need

  • 24 square wonton wrappers
  • 8 ounces cream cheese, softened
  • ⅓ cup powdered sugar
  • 1 teaspoon vanilla extract
  • ½ cup finely diced fresh strawberries
  • 1 tablespoon strawberry jam
  • 1 teaspoon fresh lemon juice
  • 1 tablespoon melted butter
  • Cooking spray
  • Powdered sugar for dusting

Optional Toppings

  • Strawberry sauce
  • Chocolate syrup
  • White chocolate drizzle
  • Fresh sliced strawberries
  • Whipped cream
  • Vanilla ice cream
  • Crushed graham crackers
  • Mint leaves

Use full-fat or reduced-fat cream cheese based on your preference. Full-fat cream cheese usually gives the filling a richer and creamier texture.

Fresh strawberries work best because they provide a bright fruit flavor. Make sure they are finely diced so the filling stays easy to seal inside the wrappers.

How to Make Air Fryer Strawberry Cheesecake Wontons

1. Prepare the Cheesecake Filling

Place the softened cream cheese in a medium bowl.

Add powdered sugar, vanilla extract, strawberry jam, and lemon juice.

Mix until the filling is smooth and creamy.

Gently fold in the finely diced strawberries.

Do not overmix the strawberries because too much liquid can make the filling watery.

If your strawberries are very juicy, pat them dry with a paper towel before adding them.

2. Prepare the Wonton Wrappers

Place the wonton wrappers on a clean work surface.

Keep the unused wrappers covered with a slightly damp kitchen towel so they do not dry out while you work.

Place about 1 tablespoon of cheesecake filling in the center of each wrapper.

Avoid adding too much filling because an overfilled wonton can burst during cooking.

3. Seal the Wontons

Dip your fingertip in water and lightly moisten the edges of the wrapper.

Fold the wrapper diagonally over the filling to create a triangle.

Press the edges firmly together to seal the filling inside.

For an extra-secure seal, gently press around the entire edge with your fingers.

Make sure there are no open gaps.

Repeat with the remaining wrappers and filling.

4. Brush With Butter

Lightly brush the outside of each sealed wonton with melted butter.

You can also use cooking spray if you prefer.

A thin coating is enough to help the wrappers develop a golden color.

Avoid soaking the wrappers because excess butter can make them greasy and may cause uneven browning.

5. Preheat the Air Fryer

Preheat your air fryer to 350°F if your model requires preheating.

Lightly spray the basket with cooking spray.

Arrange the wontons in a single layer.

Leave space between each piece so the hot air can circulate around the wrappers.

Depending on the size of your air fryer, you may need to cook the wontons in several batches.

6. Air Fry Until Golden

Air fry the wontons at 350°F for about 5–7 minutes.

Check them after about 4 minutes because wonton wrappers can brown quickly.

Turn them carefully halfway through cooking if your air fryer model does not brown both sides evenly.

The wontons are ready when the wrappers are golden and crisp.

Do not overcook them because the edges can become hard and the filling may begin to leak.

7. Cool and Add Toppings

Carefully remove the hot wontons from the air fryer.

Allow them to cool for about 2–3 minutes.

Dust them lightly with powdered sugar.

Add fresh strawberry slices, a drizzle of strawberry sauce, or melted white chocolate if desired.

For a restaurant-style dessert, arrange the wontons around a scoop of vanilla ice cream and finish with fresh berries.

How to Keep the Filling From Leaking

The most important step is not overfilling the wonton wrappers.

About one tablespoon of filling is usually enough for a standard wrapper.

Make sure the edges are clean before sealing. Cream cheese filling on the edge can prevent the wrapper from sticking properly.

Moisten the edges lightly with water and press firmly to create a secure seal.

Do not use too much water because overly wet wrappers can become difficult to handle.

Keep the assembled wontons covered until they are ready to cook so the wrappers do not dry out.

If one wrapper develops a tear, replace it rather than trying to cook it with an exposed filling.

How to Make Extra Crispy Wontons

Use a single layer in the air fryer basket.

Do not stack the wontons because the hot air needs to reach the entire surface.

A light butter coating helps the wrappers brown, but too much fat can make them greasy.

Cook the wontons in batches if necessary.

Check them early because different air fryer models can cook at different speeds.

For the crispest texture, serve the wontons soon after cooking.

The wrappers can soften slightly as they sit because the warm cheesecake filling releases moisture.

Best Strawberries to Use

Fresh, ripe strawberries give these wontons their best flavor.

Choose berries that are bright red, firm, and free from soft spots.

Wash the strawberries before preparing them and dry them thoroughly.

Cut the berries into very small pieces so they mix evenly with the cheesecake filling.

Avoid using large strawberry chunks because they can make the filling harder to seal.

Frozen strawberries can release extra moisture as they thaw, so fresh berries are the better choice for this recipe.

Easy Flavor Variations

These strawberry cheesecake wontons can be changed in several ways.

For a chocolate version, add a few mini chocolate chips to the filling.

For a lemon cheesecake flavor, add extra lemon zest and a small amount of lemon juice.

For a mixed berry version, combine finely diced strawberries with blueberries or raspberries.

For a cinnamon cheesecake variation, add a pinch of cinnamon to the cream cheese mixture.

For a chocolate-covered strawberry version, drizzle melted chocolate over the cooked wontons.

You can also sprinkle crushed graham crackers over the top to create a flavor similar to classic cheesecake crust.

What to Serve With Cheesecake Wontons

These crispy dessert bites taste great on their own, but a few simple additions can make them even more special.

Serve them with warm strawberry sauce for extra fruit flavor.

Vanilla ice cream adds a cool and creamy contrast to the warm wontons.

Whipped cream provides a light topping that works well with strawberries.

Melted white chocolate adds sweetness and a smooth finish.

Dark chocolate drizzle creates a richer flavor combination.

Fresh mint leaves can add a bright visual and herbal touch.

For a party, arrange several sauces in small bowls so guests can choose their favorite combination.

Can You Make Them Ahead?

Yes, you can prepare the cheesecake filling ahead of time and keep it refrigerated.

You can also assemble the wontons shortly before cooking.

For the best texture, air fry them close to serving time.

If you assemble them too far in advance, moisture from the filling may soften the wrappers.

Keep prepared uncooked wontons covered and refrigerated until you are ready to cook them.

Do not leave cream cheese-filled wontons at room temperature for an extended period.

Can You Freeze Strawberry Cheesecake Wontons?

Yes, these wontons can be frozen before air frying.

Place the assembled wontons on a parchment-lined tray in a single layer and freeze until firm.

Once frozen, transfer them to a freezer-safe container or bag.

When ready to cook, air fry them from frozen at about 350°F, adding a few extra minutes as needed.

Check the wrappers frequently during cooking because frozen wontons can brown before the filling becomes fully warm.

Avoid thawing them at room temperature before cooking because the wrappers can become soft and sticky.

Storage and Reheating

Store leftover cooked wontons in an airtight container in the refrigerator.

For the best texture, reheat them in the air fryer at 325°F–350°F for 2–4 minutes.

The air fryer helps restore some of the crisp texture.

Avoid using the microwave when possible because it can make the wonton wrappers soft.

Let reheated wontons cool briefly before serving because the cream cheese filling can remain very hot.

Discard leftovers that show signs of spoilage or have an unusual smell, appearance, or texture.

Tips for the Best Results

Soften the cream cheese before mixing the filling.

Dice the strawberries very finely.

Pat juicy strawberries dry before adding them to the filling.

Do not overfill the wrappers.

Keep the edges clean before sealing.

Use only a small amount of water to seal each wonton.

Press the edges firmly to prevent leaks.

Cook in a single layer.

Check the wontons early because they brown quickly.

Serve them shortly after cooking for the best crisp texture.

The Bottom Line

Air Fryer Strawberry Cheesecake Wontons are a simple dessert that turns classic cheesecake flavors into crispy, bite-sized treats.

The creamy strawberry filling pairs beautifully with golden wonton wrappers, while powdered sugar and fresh berries provide a simple finishing touch.

The recipe is easy enough for a weeknight dessert but special enough for parties and celebrations. You can also change the filling and toppings to create chocolate, lemon, mixed berry, or cinnamon versions.

For the best results, keep the filling controlled, seal the wrappers well, and watch the air fryer closely during the final minutes.

Frequently Asked Questions

1. How long do strawberry cheesecake wontons take in the air fryer?

Air fry them at 350°F for about 5–7 minutes, checking early because wonton wrappers brown quickly.

2. Can I use frozen strawberries?

Fresh strawberries work best because frozen berries release more moisture and can make the cheesecake filling difficult to seal.

3. How do I stop cheesecake wontons from leaking?

Avoid overfilling them, keep the wrapper edges clean, and firmly seal the edges with a small amount of water.

4. Can I freeze cheesecake wontons?

Yes. Freeze assembled wontons in a single layer before transferring them to a freezer-safe container for later cooking.

5. Can I use egg roll wrappers?

Yes, but egg roll wrappers are larger and thicker, so the cooking time and filling amount may need adjustment.

6. What temperature should I use for air frying wontons?

A temperature of 350°F works well for creating a crisp, golden wrapper without browning it too quickly.

7. What toppings go well with strawberry cheesecake wontons?

Powdered sugar, strawberry sauce, chocolate drizzle, whipped cream, fresh berries, and vanilla ice cream all pair well with them.

8. Can I make these without butter?

Yes. Lightly spray the wrappers with cooking spray instead of brushing them with melted butter.

Final Thoughts

Air Fryer Strawberry Cheesecake Wontons are a fun twist on traditional cheesecake that delivers a crisp, golden shell and creamy strawberry center in every bite.

They require simple ingredients, short cooking time, and very little preparation. That makes them a practical dessert for busy evenings, family treats, and entertaining.

For the best results, use fresh strawberries, keep the filling portions small, seal the wrappers carefully, and avoid overcrowding the air fryer.

Finish them with powdered sugar, strawberry sauce, or a little chocolate drizzle for an extra-special presentation.

Crispy, creamy, fruity, and easy—these strawberry cheesecake wontons are a dessert everyone will want to grab before they’re gone.
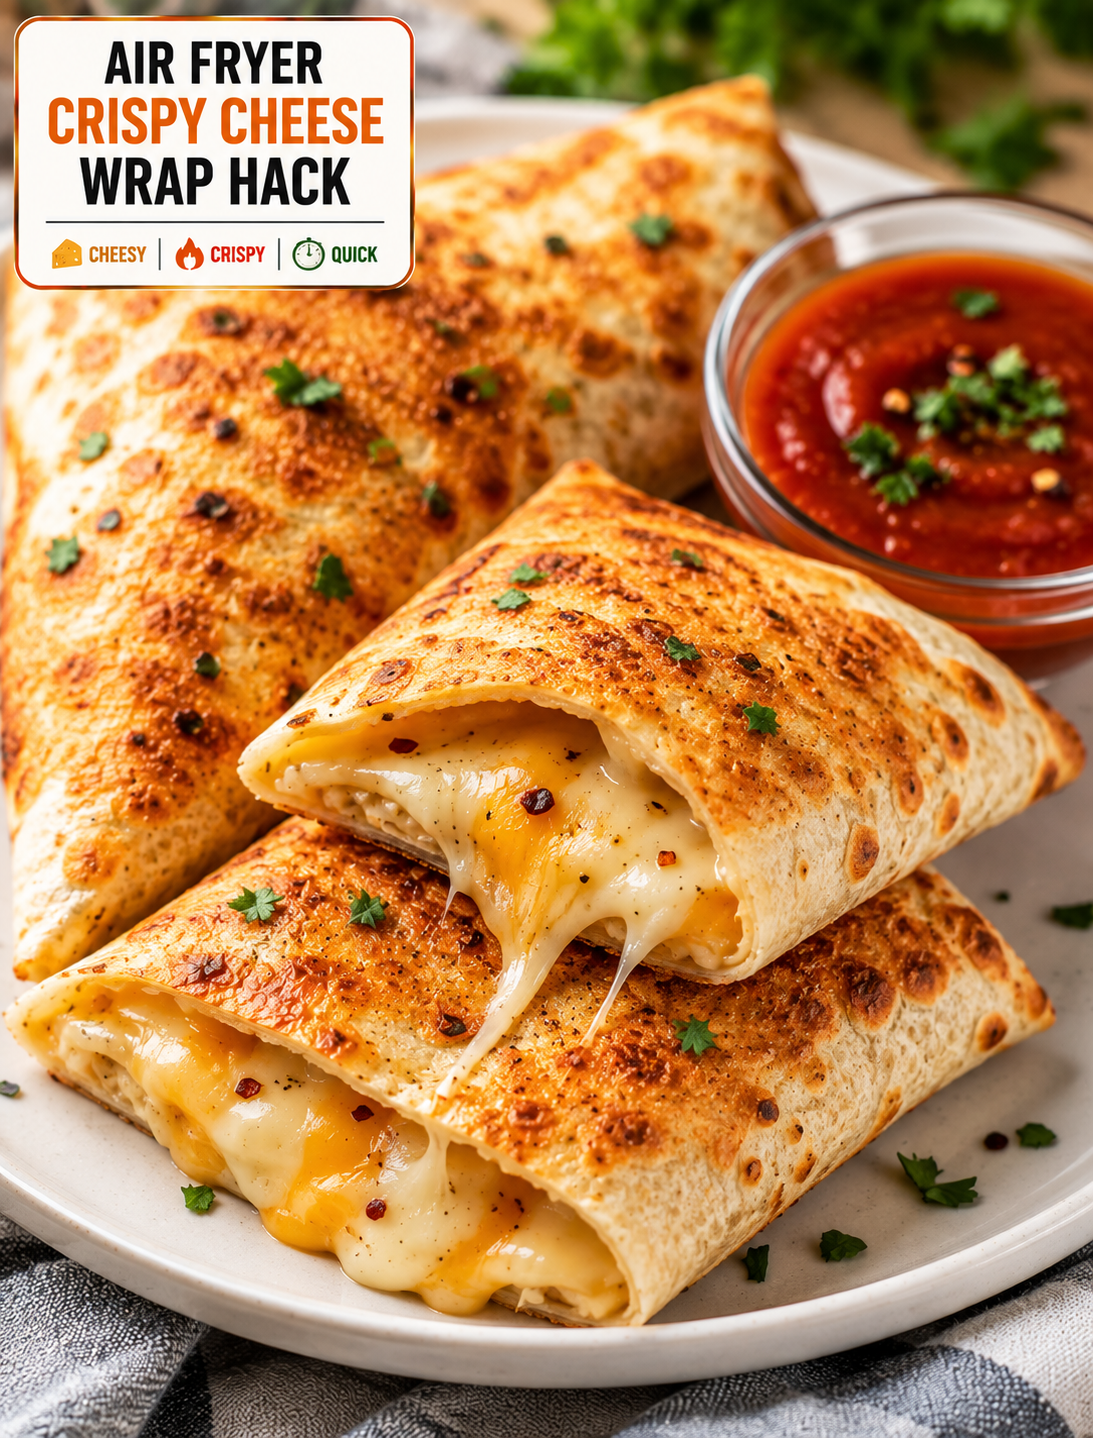

Air Fryer Crispy Cheese Wrap Hack

Golden crispy air fryer cheese wrap sliced open to reveal gooey melted cheese, served with dipping sauce and fresh herbs

Air Fryer Crispy Cheese Wrap Hack

Want a quick snack that turns a few simple ingredients into something crispy, cheesy, and seriously satisfying? This Air Fryer Crispy Cheese Wrap Hack is an easy recipe for busy days, quick lunches, after-school snacks, and casual gatherings.

A soft flour tortilla is filled with shredded cheese and simple seasonings, folded into a compact wrap, and cooked in the air fryer until the outside becomes golden and crisp. Inside, the cheese melts into a warm, gooey filling.

The recipe is easy to change based on what you already have in the refrigerator. Add cooked chicken, turkey, vegetables, jalapeños, or leftover taco meat for a more filling version.

The air fryer is the key to getting a crisp finish without deep frying. A light coating of oil or cooking spray is enough to help the tortilla brown evenly.

Why You’ll Love This Crispy Cheese Wrap

This recipe is fast, simple, and made with everyday ingredients.

The tortilla becomes crisp around the edges while the cheese melts inside. That combination gives the wrap a texture similar to a crispy quesadilla but with a tighter, snack-friendly shape.

You can prepare one wrap when you are hungry or make several for a family snack.

The recipe is also budget-friendly because it does not require expensive ingredients. Basic flour tortillas, shredded cheese, and seasonings are enough to make a tasty snack.

Another advantage is flexibility. Use cheddar for a sharp flavor, Monterey Jack for a smooth melt, or pepper Jack for extra heat.

You can also use small tortillas for snack-size wraps or larger tortillas when you want a more filling meal.

Ingredients You’ll Need

  • 4 large flour tortillas
  • 1½ cups shredded cheddar cheese
  • 1 cup shredded Monterey Jack cheese
  • Melted butter or olive oil 1 tablespoon
  • Garlic powder ½ teaspoon
  • Smoked paprika ½ teaspoon
  • ¼ teaspoon black pepper
  • Dried oregano ¼ teaspoon
  • 2 tablespoons chopped green onions
  • 1 small jalapeño, finely sliced, optional
  • Cooking spray

Optional Add-Ins

  • 1 cup cooked shredded chicken
  • Cooked taco meat ½ cup
  • Diced bell peppers ½ cup
  • ½ cup cooked corn
  • ¼ cup chopped black olives
  • 2 tablespoons chopped fresh cilantro
  • Sliced turkey

For the best texture, avoid adding too many wet ingredients. Excess moisture can make the tortilla soft instead of crisp.

Freshly shredded cheese usually melts smoothly and evenly. You can also use a pre-shredded blend when convenience matters.

How to Make the Air Fryer Cheese Wrap

1. Prepare the Cheese Filling

Add the cheddar and Monterey Jack cheese to a bowl.

Mix in garlic powder, smoked paprika, black pepper, oregano, and chopped green onions.

If you want extra heat, add finely sliced jalapeño.

Stir everything together so the seasonings are distributed throughout the cheese.

If you are adding chicken or taco meat, make sure it is already cooked and not overly wet.

2. Warm the Tortillas

Place the tortillas on a microwave-safe plate.

Warm them for about 10–15 seconds.

This makes the tortillas more flexible and helps prevent cracking when you fold them.

Keep the remaining tortillas covered with a clean kitchen towel while working.

3. Fill the Tortilla

Place one tortilla on a clean work surface.

Add about ¾ cup of the cheese mixture near the center.

Leave a border around the edges so the cheese does not spill out during cooking.

If adding chicken, vegetables, or meat, use a small amount so the wrap remains easy to fold.

Do not overfill the tortilla because a thick wrap takes longer to crisp and may open during cooking.

4. Fold the Wrap

Left side fold and right sides of the tortilla toward the center.

Fold the bottom edge over the filling.

Roll the tortilla upward tightly until the filling is enclosed.

Place the finished wrap seam-side down while you prepare the remaining wraps.

Keeping the seam underneath helps prevent the tortilla from opening in the air fryer.

5. Brush With Oil

Lightly brush the outside of each wrap with melted butter or olive oil.

You can also use cooking spray.

A thin coating is enough. Too much oil can make the tortilla greasy instead of crisp.

For extra flavor, mix a pinch of garlic powder and smoked paprika into the melted butter before brushing.

6. Air Fry Until Golden

Preheat your air fryer to 375°F if your model requires preheating.

Place the wraps seam-side down in the basket.

Leave space between each wrap so hot air can circulate properly.

Air fry for about 6–9 minutes, turning carefully halfway through.

The wraps are ready when the tortillas are golden brown and crisp and the cheese is fully melted.

Air fryer models vary, so begin checking around the six-minute mark.

7. Rest and Slice

Carefully remove the hot wraps from the basket.

Let them rest for about 1–2 minutes.

This gives the melted cheese time to settle slightly.

Slice each wrap diagonally and serve immediately.

The contrast between the crisp tortilla and warm melted cheese is best when the wraps are fresh.

The Best Cheese for Crispy Wraps

Cheese choice can change the texture and flavor of the finished wrap.

Cheddar provides a rich, slightly sharp flavor and melts well.

Monterey Jack has a mild taste and creates a smooth, creamy filling.

Pepper Jack adds both creaminess and a noticeable spicy kick.

Mozzarella creates a stretchy cheese center with a mild flavor.

Colby Jack is another good option because it melts easily and has a balanced taste.

For the best result, combine two cheeses. A sharp cheese paired with a mild melting cheese creates more flavor without becoming overpowering.

How to Make the Wrap Extra Crispy

The biggest mistake is adding too much filling.

A thinner layer of cheese allows the tortilla to cook evenly and become crisp.

Keep the outside of the tortilla relatively dry before adding the light oil coating.

Do not overcrowd the air fryer basket.

Leave enough space around each wrap for hot air to circulate.

Turn the wraps halfway through cooking to brown both sides.

For an even crunchier finish, add another 1–2 minutes of cooking time, but watch closely because tortillas can brown quickly.

Serve the wraps soon after cooking because steam from the hot filling can soften the exterior if they sit too long.

Easy Add-Ins to Try

This recipe is a great way to use small amounts of leftovers.

Add cooked shredded chicken for a simple chicken cheese wrap.

Use leftover taco meat with cheddar and jalapeño for a Tex-Mex version.

Add cooked bell peppers and onions for extra flavor and texture.

Corn adds a mild sweetness that works well with pepper Jack.

Chopped spinach can add color without changing the recipe very much.

For a breakfast version, add scrambled eggs, cooked bacon, and cheddar.

Deli-style wrap, use sliced turkey, Swiss cheese, and a little mustard.

Keep add-ins fairly dry so the tortilla can still become crisp.

Dipping Sauces for Cheese Wraps

A crispy cheese wrap becomes even better with the right dipping sauce.

Ranch dressing provides a cool and creamy contrast.

Salsa adds fresh tomato flavor and a little acidity.

Guacamole works well with Tex-Mex versions.

Quest creates an extra-cheesy combination for serious cheese lovers.

Hot sauce is an easy choice when you want more heat.

Chipotle mayo adds smoky spice and creaminess.

For kids, ketchup or a mild creamy dip can be served on the side.

Place several sauces on the table when serving a group so everyone can choose a favorite.

What to Serve With Crispy Cheese Wraps

These wraps can be served as a snack or as part of a larger meal.

Pair them with a fresh green salad for a simple lunch.

Serve them with tomato soup for a comforting combination.

For a Tex-Mex meal, add black beans, corn salsa, guacamole, and fresh pico de gallo.

Air fryer potato wedges also make a great side.

For breakfast, serve a cheese and egg version with fresh fruit.

For game day, cut the wraps into smaller pieces and serve them with several dipping sauces.

Can You Make These Wraps Ahead?

Yes, you can prepare the wraps ahead of time.

Assemble them and place them in the refrigerator in a covered container.

For the best texture, air fry them shortly before serving.

Avoid leaving assembled wraps at room temperature for long periods when they contain cooked meat or other perishable ingredients.

If you are preparing several wraps for a gathering, make the filling ahead and assemble the tortillas closer to cooking time.

This helps prevent moisture from softening the tortillas.

Storage and Reheating

Store leftover cooked wraps in an airtight container in the refrigerator.

For the best texture, reheat them in the air fryer at 350°F for about 3–5 minutes.

The air fryer helps bring back some of the crisp texture while warming the cheese.

Avoid using the microwave when possible because microwave heating can make the tortilla soft.

If you are reheating a wrap containing chicken or other cooked meat, make sure the filling is heated thoroughly before serving.

Discard leftovers that have an unusual smell, appearance, or texture.

Simple Variations

Spicy Jalapeño Cheese Wrap

Add sliced jalapeños, pepper Jack cheese, and a pinch of crushed red pepper.

Chicken Ranch Wrap

Add shredded cooked chicken, cheddar cheese, and ranch seasoning.

Taco Cheese Wrap

Combine cooked taco meat, cheddar, Monterey Jack, and a little salsa.

Breakfast Cheese Wrap

Fill the tortilla with scrambled eggs, cheddar, and cooked bacon.

Pizza Cheese Wrap

Add mozzarella, a small amount of pizza sauce, and Italian seasoning.

BBQ Chicken Wrap

Combine shredded chicken, cheddar, and a small amount of barbecue sauce.

These variations allow you to use the same basic air fryer method while creating completely different flavors.

Tips for the Best Results

Use soft flour tortillas that fold without cracking.

Warm the tortillas briefly before filling them.

Do not overfill the wraps.

Keep wet ingredients to a minimum.

Use a light layer of oil or cooking spray.

Place the wraps seam-side down in the basket.

Leave space between the wraps.

Turn them halfway through cooking.

Watch carefully during the final minutes because tortillas can brown quickly.

Allow the wraps to rest briefly before slicing.

Serve them while warm for the best crisp texture.

The Bottom Line

Air Fryer Crispy Cheese Wraps are an easy solution when you want something quick, cheesy, and crunchy without complicated preparation.

A few basic ingredients turn into a golden snack with a crisp tortilla and warm, melted cheese. The recipe is flexible enough to include chicken, taco meat, vegetables, eggs, or whatever leftovers you have available.

The air fryer makes the process especially simple. A light coating of oil, enough space in the basket, and a short cooking time are all you need for a delicious result.

Serve these wraps with ranch, salsa, guacamole, hot sauce, or your favorite dip.

Frequently Asked Questions

1. How long do cheese wraps take in the air fryer?

Cook them at 375°F for about 6–9 minutes, turning halfway, until the tortilla is golden and the cheese has melted.

2. What tortillas work best for this recipe?

Soft flour tortillas are ideal because they fold easily and become crisp without breaking.

3. How do I stop the cheese from leaking out?

Avoid overfilling the tortilla, leave a border around the filling, and roll the wrap tightly with the seam underneath.

4. Can I add chicken to the cheese wrap?

Yes. Add a small amount of fully cooked shredded chicken for a more filling chicken and cheese version.

5. Can I make these wraps spicy?

Yes. Use pepper Jack cheese, jalapeños, hot sauce, or crushed red pepper for extra heat.

6. Can I prepare cheese wraps ahead of time?

Yes. Assemble them ahead and refrigerate them, then air fry shortly before serving for the best crisp texture.

7. What dipping sauce goes with crispy cheese wraps?

Ranch, salsa, guacamole, quest, chipotle mayo, and hot sauce are all excellent choices.

8. Can I reheat leftover cheese wraps?

Yes. Reheat them in the air fryer at about 350°F for 3–5 minutes to restore some of the crisp texture.

Final Thoughts

This Air Fryer Crispy Cheese Wrap Hack proves that you do not need a complicated recipe to make something seriously satisfying.

The tortilla turns golden and crunchy while the cheese melts into a warm, gooey center. With a few simple add-ins, the same recipe can become a chicken wrap, taco wrap, breakfast wrap, or spicy snack.

For the crispiest result, keep the filling light, use a small amount of oil, and give each wrap enough room in the air fryer.

Crispy outside, melty inside, and ready in minutes—this is an easy recipe to keep in your back pocket for those cheesy cravings.

FACT or MYTH: Natural Supplements Are Always Safe?

FACT or MYTH natural supplements are always safe, with vitamins, herbs, and dietary supplements shown on a table

FACT or MYTH: Natural Supplements Are Always Safe?

FACT or MYTH? Natural supplements are always safe because they come from plants or other natural sources.

Answer: MYTH.

“Natural” does not automatically mean safe. Vitamins, minerals, herbs, botanicals, amino acids, and other dietary supplements can affect the body in powerful ways. Some can also interact with prescription medicines, over-the-counter drugs, other supplements, or certain medical treatments.

Dietary supplements can be useful for some people when there is a real nutritional need or a specific reason to use them. However, choosing a supplement should be based on evidence, dosage, product quality, and personal health needs—not simply the word “natural” on the label.

Why “Natural” Does Not Always Mean Safe

Many people assume a plant-based product is gentle because it comes from nature. That assumption can be misleading.

Plants contain active compounds that can change how the body works. The same is true for concentrated vitamins, minerals, amino acids, and other ingredients found in supplements.

A supplement may affect blood pressure, blood clotting, blood sugar, heart rate, digestion, or how certain medicines work. The risk depends on the ingredient, dose, product quality, and the person taking it.

The key lesson is simple:

  • Natural does not mean risk-free.
  • More does not always mean better.
  • A supplement can interact with medication.
  • A supplement can cause side effects.
  • A supplement should not automatically replace medical treatment.

Step-by-Step: How to Use Supplements More Safely

Step 1: Know Why You Want the Supplement

Start by identifying your goal.

Are you trying to correct a nutrient deficiency, support your diet, or address a specific health concern?

Avoid buying a product simply because an advertisement promises more energy, rapid weight loss, better immunity, or a quick health fix.

A clear goal makes it easier to decide whether a supplement is appropriate.

Step 2: Check the Ingredients

Read the entire Supplement Facts label before buying or using a product.

Look for:

  • Active ingredients
  • Amount per serving
  • Serving size
  • Other ingredients
  • Suggested use
  • Manufacturer information
  • Warnings and precautions

Do not assume two products are different just because their brand names are different. They may contain the same active ingredients.

Step 3: Check the Dose

Taking more of a nutrient is not automatically better.

Some vitamins and minerals can cause problems when taken in excessive amounts. Combining several products can also increase your total intake without you realizing it.

Check every supplement you take so you can avoid unnecessary duplication.

Step 4: Check for Medication Interactions

This is one of the most important safety steps.

Some dietary supplements can change how medicines are absorbed, broken down, or removed from the body. That can potentially make a medicine less effective or increase its effects.

Before starting a supplement, tell your doctor or pharmacist about:

  • Prescription medicines
  • Over-the-counter medicines
  • Vitamins
  • Herbal products
  • Other dietary supplements

This is especially important if you take medication regularly.

Step 5: Consider Pregnancy, Breastfeeding, and Children

Extra caution is important for children and people who are pregnant or breastfeeding.

A product that is appropriate for one adult may not be appropriate for a child or during pregnancy. FDA recommends discussing supplement use with a healthcare professional in these situations.

Step 6: Think About Surgery

Some supplements can affect bleeding, blood pressure, heart rate, or the effects of medicines used around surgery.

Tell your healthcare team about all supplements you take before a planned procedure. Your healthcare professional may recommend stopping certain products before surgery.

Step 7: Be Careful With Big Health Claims

Be skeptical of products that promise dramatic results.

Watch for claims such as:

  • “Cures everything”
  • “Works instantly”
  • “No side effects”
  • “100% safe”
  • “Melts fat”
  • “Replaces your medication”
  • “Doctors don’t want you to know”

A supplement marketed as a cure or treatment for a disease deserves extra caution. Dietary supplements are not FDA-approved to diagnose, treat, cure, or prevent disease.

Are Dietary Supplements FDA Approved?

This is a common misconception in the United States.

The FDA does not approve dietary supplements for safety and effectiveness before they are sold to consumers. Supplement companies are responsible for meeting applicable safety, quality, and labeling requirements. FDA monitors the market and can take action when products are unsafe or violate federal requirements.

This is different from prescription medicines, which generally go through FDA approval for safety and effectiveness before marketing.

So, seeing a supplement on a store shelf does not mean the FDA has tested and approved it for the health claims shown on its label.

Can Supplements Cause Side Effects?

Yes.

A dietary supplement may cause an unwanted reaction even when it is labeled as natural.

Possible problems can include digestive upset, allergic reactions, changes in blood pressure, abnormal bleeding, or other serious effects depending on the product and person.

Taking multiple supplements at the same time can also increase risk because ingredients may overlap or interact.

If you develop a serious or unexpected reaction after taking a supplement, seek appropriate medical care and discuss the product with a healthcare professional.

What About “Natural” Herbal Supplements?

Herbal products can contain biologically active compounds, so they deserve the same careful approach as other supplements.

Do not assume an herbal product is harmless because it is plant-based.

Before using one, check its ingredients, dose, possible interactions, and known warnings. If you take medication, ask a healthcare professional or pharmacist whether the combination is appropriate.

A Simple Supplement Safety Checklist

Before taking a new dietary supplement, ask yourself these questions:

  1. Why am I taking it?
  2. What are the active ingredients?
  3. What is the recommended serving?
  4. Am I already getting the same nutrient from another product?
  5. Could it interact with my medications?
  6. Do I have a health condition that could change the risk?
  7. Am I pregnant, breastfeeding, or considering a supplement for a child?
  8. Do I have surgery coming up?
  9. Does the product make unrealistic health claims?
  10. Have I discussed it with a healthcare professional when needed?

These simple checks can help you make a more informed decision.

The Bottom Line

MYTH: Natural supplements are always safe.

Natural ingredients can have real effects on the body, and some supplements can cause side effects or interact with medicines. The FDA does not approve dietary supplements for safety and effectiveness before they reach the market, so consumers need to make informed choices.

The safest approach is not to fear supplements or assume they are harmless. Instead, understand the ingredients, follow the label, avoid excessive doses, check for interactions, and ask a qualified healthcare professional when you are unsure.

Natural is a description of the source—not a guarantee of safety.

Frequently Asked Questions

1. Are natural supplements always safe?

No. Natural supplements can cause side effects and may interact with medicines or other supplements.

2. Does the FDA approve dietary supplements before they are sold?

No. FDA does not approve dietary supplements for safety and effectiveness before marketing.

3. Can supplements interact with prescription medicines?

Yes. Some supplements can change how medicines are absorbed, processed, or eliminated.

4. Can you take multiple supplements together?

You should check the ingredients and doses first. Combining products can lead to excessive intake or unwanted interactions.

5. Are herbal supplements safer than prescription medicines?

Not necessarily. Herbal products can contain active compounds that affect the body and interact with medications.

6. Should I tell my doctor about my supplements?

Yes. Tell your doctor or pharmacist about all supplements, vitamins, and herbal products you use.

7. Can supplements replace prescription medicine?

No. Supplements should not be used as a replacement for prescribed treatment without guidance from a healthcare professional.

8. What should I do if I have a bad reaction to a supplement?

Stop using the product and seek appropriate medical advice, especially for a serious reaction. Serious adverse events can also be reported to the FDA.

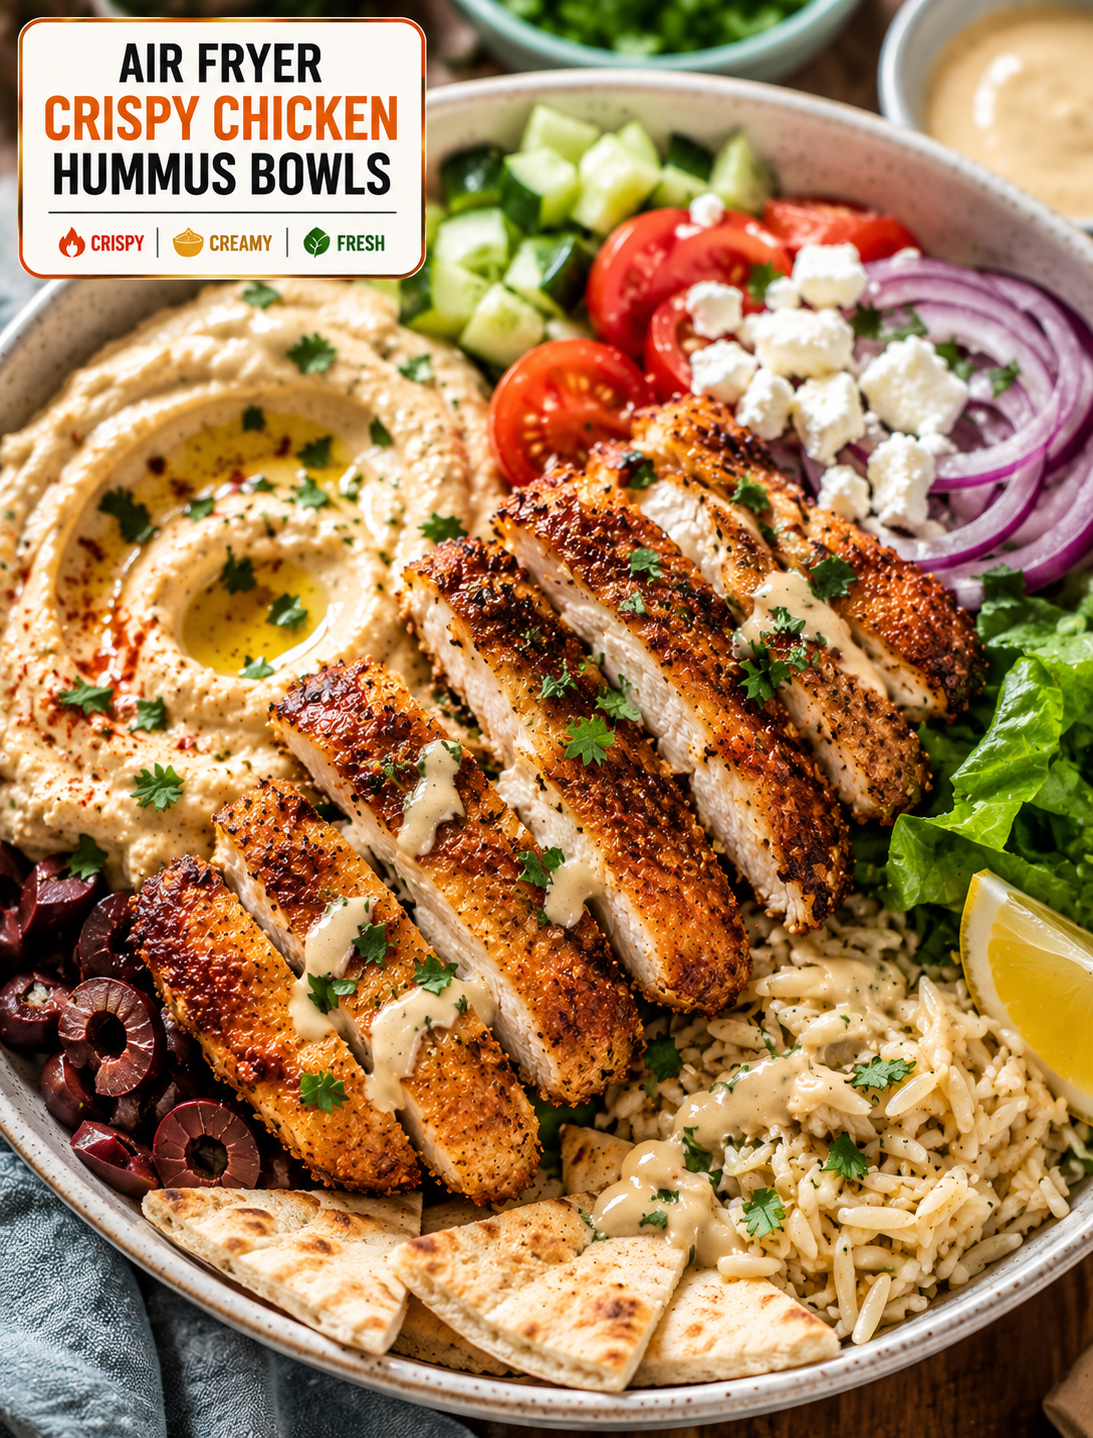
Air Fryer Crispy Chicken Hummus Bowls

Air fryer crispy chicken hummus bowl with golden chicken, creamy hummus, cucumber, tomatoes, feta, greens, herbs, and lemon

Air Fryer Crispy Chicken Hummus Bowls

Looking for a quick meal that is crispy, creamy, fresh, and filling? These Air Fryer Crispy Chicken Hummus Bowls bring together golden chicken, smooth hummus, crunchy vegetables, and warm pita in one easy meal.

The chicken is coated with a simple blend of spices and cooked in the air fryer until the outside is golden and crisp. It stays tender inside while the seasoning adds plenty of savory flavor.

A generous spoonful of creamy hummus forms the base of each bowl. Fresh cucumber, tomatoes, red onion, leafy greens, and herbs add color and crunch. A drizzle of lemon-tahini dressing brings everything together.

This recipe is inspired by Mediterranean-style flavors but uses simple ingredients that are easy to find at most U.S. grocery stores.

It works well for lunch, dinner, meal prep, or a casual weekend meal when you want something satisfying without spending hours in the kitchen.

Why You’ll Love These Hummus Bowls

These bowls offer a great mix of textures in every bite.

The chicken is crisp and seasoned, while the hummus is smooth and creamy. Fresh vegetables add crunch, and lemon gives the bowl a bright finish.

The air fryer also makes the chicken without the need for deep frying. A small amount of oil helps the coating brown while the circulating hot air creates a crisp exterior.

Another benefit is flexibility. You can change the vegetables, add grains, use different seasonings, or adjust the dressing to suit your taste.

The bowls can also be prepared ahead of time. Keep the chicken, hummus, vegetables, and dressing separate until serving to maintain the best texture.

Ingredients You’ll Need

Crispy Chicken

  • 1½ pounds boneless, skinless chicken breasts
  • Olive oil 1 tablespoon
  • 1 teaspoon paprika
  • 1 teaspoon garlic powder
  • ½ teaspoon ground cumin
  • ½ teaspoon onion powder
  • ½ teaspoon dried oregano
  • ½ teaspoon black pepper
  • ½ teaspoon salt
  • 2 tablespoons cornstarch

For the Bowls

  • Hummus 2 cups
  • 2 cups cooked quinoa or rice, optional
  • Cucumber 1 , diced
  • 1 cup cherry tomatoes, halved
  • Red onion ½ small , thinly sliced
  • 2 cups chopped romaine or mixed greens
  • ½ cup crumbled feta cheese
  • ¼ cup fresh parsley, chopped
  • Kalamata olives ¼ cup , optional
  • 2 whole wheat or regular pita breads
  • Lemon wedges for serving

Lemon-Tahini Dressing

  • ¼ cup tahini
  • 2 tablespoons fresh lemon juice
  • 1 tablespoon olive oil
  • Honey 1 teaspoon
  • 1 small garlic clove, finely minced
  • 2–3 tablespoons warm water
  • Pinch of salt
  • Pinch of black pepper

You can use store-bought hummus to save time or make your own if you prefer.

Chicken breasts create lean, tender pieces, while boneless chicken thighs provide a richer texture.

Quinoa or rice is optional, but either one makes the bowl more filling and works well as a meal-prep base.

How to Make Air Fryer Crispy Chicken Hummus Bowls

1. Prepare the Chicken

Pat the chicken dry with paper towels.

Cut it into bite-sized pieces that are similar in size so they cook evenly.

Place the chicken in a large bowl and add olive oil, paprika, garlic powder, cumin, onion powder, oregano, black pepper, salt, and cornstarch.

Toss until each piece is evenly coated.

The cornstarch creates a light coating that helps the chicken develop a crisp exterior in the air fryer.

2. Preheat the Air Fryer

Preheat the air fryer to 400°F if your model requires preheating.

Lightly spray the basket with cooking spray.

Arrange the chicken pieces in a single layer. Avoid stacking or overcrowding them because the hot air needs room to circulate.

Cook in batches if necessary.

3. Air Fry the Chicken

Cook the chicken at 400°F for about 10–14 minutes.

Shake the basket or turn the chicken halfway through cooking.

The outside should become golden and lightly crisp.

Use a food thermometer to check the thickest piece. Chicken should reach an internal temperature of 165°F for food safety.

Cooking time may vary depending on the size of the chicken pieces and your air fryer model.

Allow the chicken to rest for a few minutes before assembling the bowls.

4. Prepare the Vegetables

While the chicken cooks, prepare the vegetables.

Dice the cucumber and tomatoes, slice the red onion, and chop the greens.

Wash and dry the vegetables thoroughly before assembling the bowls.

Fresh parsley adds a bright herbal flavor, while Kalamata olives provide a salty Mediterranean-style touch.

You can remove the onion if you prefer a milder bowl.

5. Make the Lemon-Tahini Dressing

Add tahini, lemon juice, olive oil, honey, garlic, salt, and black pepper to a small bowl.

Whisk until combined.

The tahini will initially become thick when mixed with lemon juice.

Add warm water one tablespoon at a time while whisking until the dressing reaches a smooth, pourable consistency.

Taste and adjust the lemon juice or salt according to your preference.

6. Warm the Pita

Cut the pita into wedges.

Warm the pieces in the air fryer for about 1–2 minutes at 350°F or heat them briefly in a dry skillet.

Keep a close eye on them because pita can become crisp quickly.

You can also skip this step and serve the pita at room temperature.

7. Assemble the Bowls

Spread about ½ cup of hummus into each bowl.

Add cooked quinoa or rice if using.

Arrange the crispy chicken over the hummus.

Add cucumber, tomatoes, red onion, greens, feta, parsley, and olives.

Drizzle with lemon-tahini dressing.

Finish with a squeeze of fresh lemon and serve with warm pita wedges.

How to Make Extra Crispy Chicken

The key to crisp chicken starts with removing excess moisture.

Pat the chicken dry before adding the seasoning.

Cut the chicken into small, even pieces so more surface area can brown.

Use a thin coating of cornstarch rather than a heavy layer.

Do not overcrowd the air fryer basket.

Turn the chicken halfway through cooking so the pieces brown evenly.

For the best texture, assemble the bowl shortly after the chicken finishes cooking.

Adding dressing directly onto the chicken can soften the crispy coating, so drizzle it around the bowl or add it just before eating.

Best Hummus for Chicken Bowls

Classic hummus works well because its mild chickpea and tahini flavor complements the seasoned chicken.

Roasted garlic hummus adds a deeper savory taste.

Red pepper hummus gives the bowl a slightly sweet and smoky flavor.

For a spicy version, use jalapeño or chili hummus.

You can also mix a spoonful of harissa into plain hummus for extra heat.

Choose a hummus with a smooth texture if you want an easy-to-spread bowl base.

What Vegetables Work Best?

Fresh vegetables make these bowls colorful and crunchy.

Cucumber provides a cool, crisp texture.

Cherry tomatoes add juicy sweetness.

Red onion gives a sharp bite that balances the creamy hummus.

Romaine lettuce provides crunch without overpowering the other ingredients.

You can also add shredded carrots, bell peppers, radishes, cabbage, or spinach.

For a roasted version, add air-fried zucchini, bell peppers, or cauliflower.

Using a mix of raw and cooked vegetables gives the bowl more variety.

Easy Bowl Variations

There are many ways to customize this meal.

A spicy bowl, add crushed red pepper, hot sauce, or harissa.

Extra freshness, add mint, parsley, or cilantro.

More crunch, sprinkle roasted chickpeas or pumpkin seeds over the top.

Dairy-free bowl, leave out the feta cheese.

Low-carb option, skip the rice and pita and add extra greens and vegetables.

Heartier meal, add quinoa, brown rice, or roasted potatoes.

You can also replace chicken with air-fried chickpeas if you want a vegetarian version.

How to Make These Bowls for Meal Prep

These bowls are easy to prepare ahead of time.

Cook the chicken and grain base in advance and allow them to cool before storing.

Place the hummus in separate containers or small compartments.

Keep fresh vegetables separate from the warm ingredients when possible.

Store the dressing in a small sealed container and add it just before eating.

Keep pita separate so it does not become soft from moisture.

When ready to eat, reheat the chicken and grains, then add the chilled vegetables, hummus, dressing, and herbs.

This method keeps the different textures fresh and prevents the bowl from becoming soggy.

What to Serve With Hummus Bowls

These bowls are filling on their own, but several simple sides work well.

Serve them with warm pita, roasted vegetables, cucumber salad, or a simple tomato salad.

A small bowl of olives or pickled vegetables adds a salty and tangy contrast.

For a larger meal, add lentil soup or a light vegetable soup.

You can also serve the chicken and hummus separately as a platter for family-style dining.

Tips for the Best Results

Dry the chicken before seasoning it.

Keep chicken pieces similar in size.

Use a light layer of cornstarch for better browning.

Avoid overcrowding the air fryer basket.

Check the chicken with a food thermometer before serving.

Use fresh lemon juice for the dressing.

Thin tahini gradually with warm water.

Keep dressing separate during meal prep.

Add fresh vegetables shortly before eating.

Serve the chicken warm for the best contrast with cool hummus and vegetables.

Storage and Reheating

Store cooked chicken and grains in airtight containers in the refrigerator.

Keep fresh vegetables, hummus, and dressing in separate containers.

Reheat the chicken in the air fryer at about 350°F for 3–5 minutes until hot.

Avoid microwaving the chicken if you want to maintain its crisp texture.

Add fresh hummus and vegetables after reheating.

Use refrigerated leftovers within a safe storage period and discard food that develops an unusual smell, appearance, or texture.

The Bottom Line

Air Fryer Crispy Chicken Hummus Bowls combine golden seasoned chicken, creamy hummus, fresh vegetables, herbs, and a bright lemon-tahini dressing for a satisfying meal.

The air fryer gives the chicken a crisp exterior without deep frying, while hummus provides a creamy base that brings all the ingredients together.

The recipe is flexible enough for weeknight dinners, meal prep, lunches, and casual entertaining. You can add grains for extra substance or keep the bowl lighter with more greens and vegetables.

With simple ingredients and easy preparation, this is a practical way to bring Mediterranean-inspired flavors into your everyday kitchen.

Frequently Asked Questions

1. How long should chicken cook in the air fryer?

Bite-sized chicken pieces usually take about 10–14 minutes at 400°F, depending on their size and your air fryer.

2. What temperature should the chicken reach?

Chicken should reach an internal temperature of 165°F in the thickest piece for safe consumption.

3. Can I use chicken thighs instead of chicken breast?

Yes. Boneless, skinless chicken thighs work well and provide a richer, more tender texture.

4. Can I make these hummus bowls dairy-free?

Yes. Simply leave out the feta or replace it with a dairy-free alternative.

5. What hummus tastes best with crispy chicken?

Classic hummus, roasted garlic hummus, red pepper hummus, and spicy hummus all pair well with seasoned chicken.

6. Can I prepare these bowls ahead of time?

Yes. Prepare the chicken and grains ahead, but keep hummus, vegetables, and dressing separate until serving.

7. How can I make the chicken extra crispy?

Pat the chicken dry, use a light cornstarch coating, avoid overcrowding the basket, and turn the pieces halfway through cooking.

8. What can I use instead of tahini?

You can make a simple lemon dressing with olive oil, lemon juice, garlic, and a little honey if tahini is unavailable.

Final Thoughts

Air Fryer Crispy Chicken Hummus Bowls are a simple combination of bold flavor, fresh ingredients, and satisfying textures.

The crispy seasoned chicken pairs beautifully with creamy hummus, crunchy vegetables, salty feta, and bright lemon-tahini dressing. Every component adds something different without making the recipe complicated.

Make the bowls your own by changing the vegetables, adding grains, increasing the spice, or switching the hummus flavor.

For the best results, keep the chicken crisp, the vegetables fresh, and the dressing separate until the moment you serve.

A colorful bowl, crispy chicken, creamy hummus, and plenty of fresh flavor make this an easy meal worth adding to your weekly rotation.

Air Fryer Cheesy Chicken Ranch Bombs

Crispy air fryer cheesy chicken ranch bombs with melted cheese inside, golden breadcrumbs, ranch dip, and fresh green onions

Air Fryer Cheesy Chicken Ranch Bombs

If you love crispy chicken, melted cheese, and ranch flavor, these Air Fryer Cheesy Chicken Ranch Bombs are about to become a favorite. Each bite has a golden, crispy outside with juicy chicken, creamy ranch seasoning, and gooey cheese inside.

These bite-sized chicken bombs are easy to prepare and cook quickly in the air fryer. They make a fun appetizer for game day, a family-friendly snack, or a simple dinner when you want something different from regular chicken.

The best part is the texture. The outside becomes golden and lightly crisp while the cheese melts into the seasoned chicken filling. A sprinkle of ranch seasoning gives every bite a familiar savory flavor.

Serve them with ranch dressing, buffalo sauce, honey mustard, or your favorite dipping sauce for an extra flavorful finish.

Why You’ll Love These Chicken Ranch Bombs

These cheesy chicken bites combine several flavors that work naturally together.

Chicken provides a hearty protein base, while shredded cheese adds a creamy, melty center. Ranch seasoning brings garlic, herbs, and savory flavor without requiring a long list of spices.

The air fryer makes the cooking process simple. Hot circulating air helps create a crisp exterior while using much less oil than traditional deep frying.

These chicken bombs are also easy to customize. You can make them mild, spicy, extra cheesy, or even add chopped vegetables to the filling.

They are small enough to serve as appetizers but filling enough to become part of a casual meal.

Ingredients You’ll Need

Chicken Filling

  • 2 cups cooked shredded chicken
  • 4 ounces cream cheese, softened
  • 1 cup shredded cheddar cheese
  • ½ cup shredded Monterey Jack cheese
  • 2 tablespoons ranch seasoning mix
  • Green 2 onions, finely sliced
  • Garlic powder ½ teaspoon
  • Smoked paprika ½ teaspoon
  • Black pepper ¼ teaspoon
  • Salt ¼ teaspoon , optional

For the Coating

  • 1 cup all-purpose flour
  • 2 large eggs
  • 1½ cups seasoned breadcrumbs
  • Garlic powder ½ teaspoon
  • Paprika ½ teaspoon
  • Cooking spray

Serving

  • Ranch dressing
  • Buffalo sauce
  • Honey mustard
  • Chopped green onions
  • Fresh parsley, optional

Use freshly shredded cheese when possible because it melts smoothly and creates a creamy center.

If your ranch seasoning mix contains plenty of salt, taste the filling before adding extra salt.

Rotisserie chicken is a convenient choice for this recipe, but leftover baked or roasted chicken also works well.

How to Make Air Fryer Cheesy Chicken Ranch Bombs

1. Prepare the Chicken Filling

Place the shredded cooked chicken in a large mixing bowl.

Add softened cream cheese, cheddar cheese, Monterey Jack cheese, ranch seasoning, green onions, garlic powder, smoked paprika, and black pepper.

Mix until the ingredients are evenly combined.

The cream cheese should be soft enough to blend easily with the chicken. If it is too cold, let it sit at room temperature for several minutes before mixing.

The finished mixture should hold together when pressed between your fingers.

2. Shape the Chicken Bombs

Scoop about 1½ tablespoons of the chicken mixture into your hands.

Roll it into a compact ball, making sure the cheese is enclosed inside the chicken mixture.

Repeat until all the filling has been used.

Place the shaped balls on a parchment-lined plate or tray.

If the mixture feels too soft to shape, refrigerate it for about 15–20 minutes before continuing.

3. Prepare the Coating

Place the flour in one shallow bowl.

Beat the eggs in a second bowl.

Add the seasoned breadcrumbs, garlic powder, and paprika to a third bowl and mix well.

Take each chicken ball and coat it lightly in flour.

Dip it into the beaten egg, allowing excess egg to drip away.

Finally, roll it through the seasoned breadcrumbs until completely coated.

Press the breadcrumbs gently onto the surface so they stay attached during cooking.

4. Chill Before Air Frying

Place the coated chicken bombs in the refrigerator for about 10 minutes.

This short chilling step helps the coating firm up and can make the balls easier to cook without opening.

While they chill, preheat the air fryer to 375°F if your model requires preheating.

5. Air Fry the Chicken Bombs

Lightly spray the air fryer basket with cooking spray.

Arrange the chicken bombs in a single layer, leaving a little space between each piece.

Lightly spray the tops with cooking spray.

Air fry at 375°F for about 10–14 minutes, turning them carefully halfway through cooking.

The outside should be golden brown and crisp.

Because the filling contains cooked chicken, the main goal is to heat the center thoroughly and melt the cheese. For food safety, make sure the center reaches 165°F.

Cooking time can vary depending on the size of the chicken bombs and your air fryer model.

6. Serve Immediately

Carefully remove the chicken bombs from the air fryer.

Allow them to rest for about 2 minutes before serving.

This short resting period lets the melted cheese settle slightly and reduces the chance of burning your mouth.

Transfer them to a serving plate and sprinkle with sliced green onions or fresh parsley.

Serve warm with ranch dressing, buffalo sauce, or honey mustard.

How to Get a Crispy Coating

A good coating makes these chicken bombs especially satisfying.

Start by keeping the chicken mixture compact. Loose balls can crack while cooking and allow the cheese to escape.

Coat each piece evenly with flour, egg, and breadcrumbs.

Do not skip the flour because it gives the egg a surface to cling to.

Shake off excess flour and egg before moving to the next coating.

Use a light spray of oil on the finished coating to encourage even browning.

Most importantly, avoid overcrowding the air fryer basket. Space allows hot air to move around each chicken bomb and helps the coating become crisp.

Best Cheese for Chicken Bombs

Cheddar gives the filling a rich, familiar flavor and melts well.

Monterey Jack creates a softer, creamier texture and pairs naturally with ranch seasoning.

Pepper Jack is an excellent choice if you want a little heat.

Mozzarella can be added for extra stretch, while Colby Jack provides a mild and creamy option.

For the best result, combine two cheeses instead of relying on only one. A sharper cheese and a mild melting cheese create a balanced filling.

How to Make Them Spicy

These chicken bombs are easy to turn into a spicy appetizer.

Add ½ teaspoon of cayenne pepper to the chicken mixture for noticeable heat.

You can also mix in finely chopped jalapeños or a few tablespoons of buffalo sauce.

Pepper Jack cheese works especially well in a spicy version.

For a milder batch, leave out the cayenne and serve buffalo sauce on the side.

This lets everyone choose how much heat they want.

What to Serve With Cheesy Chicken Bombs

Ranch dressing is the classic dipping sauce for this recipe.

Buffalo sauce adds extra heat and gives the chicken bombs a game-day flavor.

Honey mustard provides a sweet and tangy contrast to the savory filling.

For a complete meal, serve them with a crisp green salad, roasted vegetables, coleslaw, or air fryer potato wedges.

For parties, place the chicken bombs on a large platter with several dipping sauces in small bowls.

You can also serve them alongside celery and carrot sticks for a fresh crunchy side.

Can You Use Raw Chicken?

This recipe is designed for cooked shredded chicken because it makes preparation faster and helps the filling cook evenly.

Using raw chicken inside a thick breaded ball can make it harder to determine when the center is safely cooked.

If you want to use raw chicken, the recipe and cooking method should be adjusted so the chicken reaches 165°F throughout without burning the coating.

For the easiest and most consistent results, use fully cooked chicken.

Can You Make These Ahead?

Yes. The chicken filling can be prepared several hours ahead and stored in the refrigerator.

You can also shape and coat the chicken bombs in advance.

Keep them covered and refrigerated until you are ready to air fry them.

For the best texture, cook them shortly before serving.

If preparing them for a party, you can make the filling earlier in the day and complete the coating shortly before guests arrive.

Avoid leaving prepared chicken at room temperature for an extended period.

Storage and Reheating

Place leftover chicken bombs in an airtight container and refrigerate them promptly.

For the best texture, reheat them in the air fryer at 350°F for about 4–6 minutes, or until heated through.

Avoid reheating them in the microwave if you want the coating to remain crisp.

If the cheese has hardened after refrigeration, a short air fryer reheat will help soften the center while restoring some of the exterior crunch.

Discard leftovers that have an unusual smell, appearance, or texture.

Easy Recipe Variations

There are several ways to change the flavor without changing the basic method.

Buffalo chicken bombs, mix buffalo sauce into the filling and serve with ranch.

Jalapeño ranch bombs, add diced jalapeños and use pepper Jack cheese.

Garlic Parmesan bombs, replace some of the cheddar with Parmesan and add extra garlic powder.

Barbecue chicken bombs, mix a small amount of barbecue sauce into the filling and use cheddar cheese.

You can also add finely chopped spinach, bell peppers, or green onions for extra color and flavor.

Tips for the Best Results

Use softened cream cheese so the filling mixes evenly.

Keep the chicken pieces finely shredded so the bombs hold their shape.

Do not overfill each ball with cheese because excess filling can leak during cooking.

Chill the shaped bombs briefly before air frying.

Coat each piece evenly with flour, egg, and breadcrumbs.

Leave space between the chicken bombs in the air fryer.

Turn them halfway through cooking for even browning.

Use a food thermometer to confirm the center reaches 165°F.

Let them rest for a couple of minutes before serving.

Serve with dipping sauces while the coating is still crisp.

The Bottom Line

Air Fryer Cheesy Chicken Ranch Bombs are a fun way to turn simple cooked chicken into crispy, bite-sized comfort food.

The combination of seasoned chicken, creamy cheese, ranch flavor, and crunchy breadcrumbs creates a satisfying appetizer that works for game day, family dinners, parties, and casual snacking.

The air fryer keeps the preparation simple while giving the coating a golden finish. You can also change the cheese, spice level, and dipping sauce to create a version that matches your taste.

For the best results, keep the filling compact, avoid overcrowding the basket, and serve the chicken bombs warm.

Frequently Asked Questions

1. How long do chicken ranch bombs take in the air fryer?

Air fry them at 375°F for about 10–14 minutes, turning halfway, until golden and heated through.

2. What temperature should chicken bombs reach?

The center should reach 165°F for safe consumption when using cooked or raw chicken.

3. Can I use rotisserie chicken?

Yes. Shredded rotisserie chicken is convenient and works very well in the cheesy ranch filling.

4. What cheese is best for these chicken bombs?

Cheddar and Monterey Jack make an excellent combination, while Pepper Jack works well for a spicy version.

5. Why are my chicken bombs opening?

Overfilling, loose shaping, or skipping the chilling step can cause the filling to break open during cooking.

6. Can I freeze cheesy chicken bombs?

Yes. Freeze them in a single layer until firm, then transfer them to a freezer-safe container and reheat thoroughly before serving.

7. What dipping sauce goes with chicken ranch bombs?

Ranch, buffalo sauce, honey mustard, barbecue sauce, and garlic aioli all pair well with the crispy chicken bites.

8. Can I make these chicken bombs spicy?

Yes. Add cayenne, jalapeños, buffalo sauce, or Pepper Jack cheese to increase the heat.

Final Thoughts

Air Fryer Cheesy Chicken Ranch Bombs bring together everything people love about a great snack: crispy texture, juicy chicken, melted cheese, and bold ranch flavor.

They are simple enough for a weeknight meal but fun enough for a party or game-day spread. You can keep them classic with cheddar and ranch or customize them with  jalapeños, buffalo sauce, or your favorite cheese.

For the best bite, serve them hot with a creamy dipping sauce on the side.

Crispy outside, cheesy inside, and loaded with ranch flavor—these little chicken bombs are made for sharing.

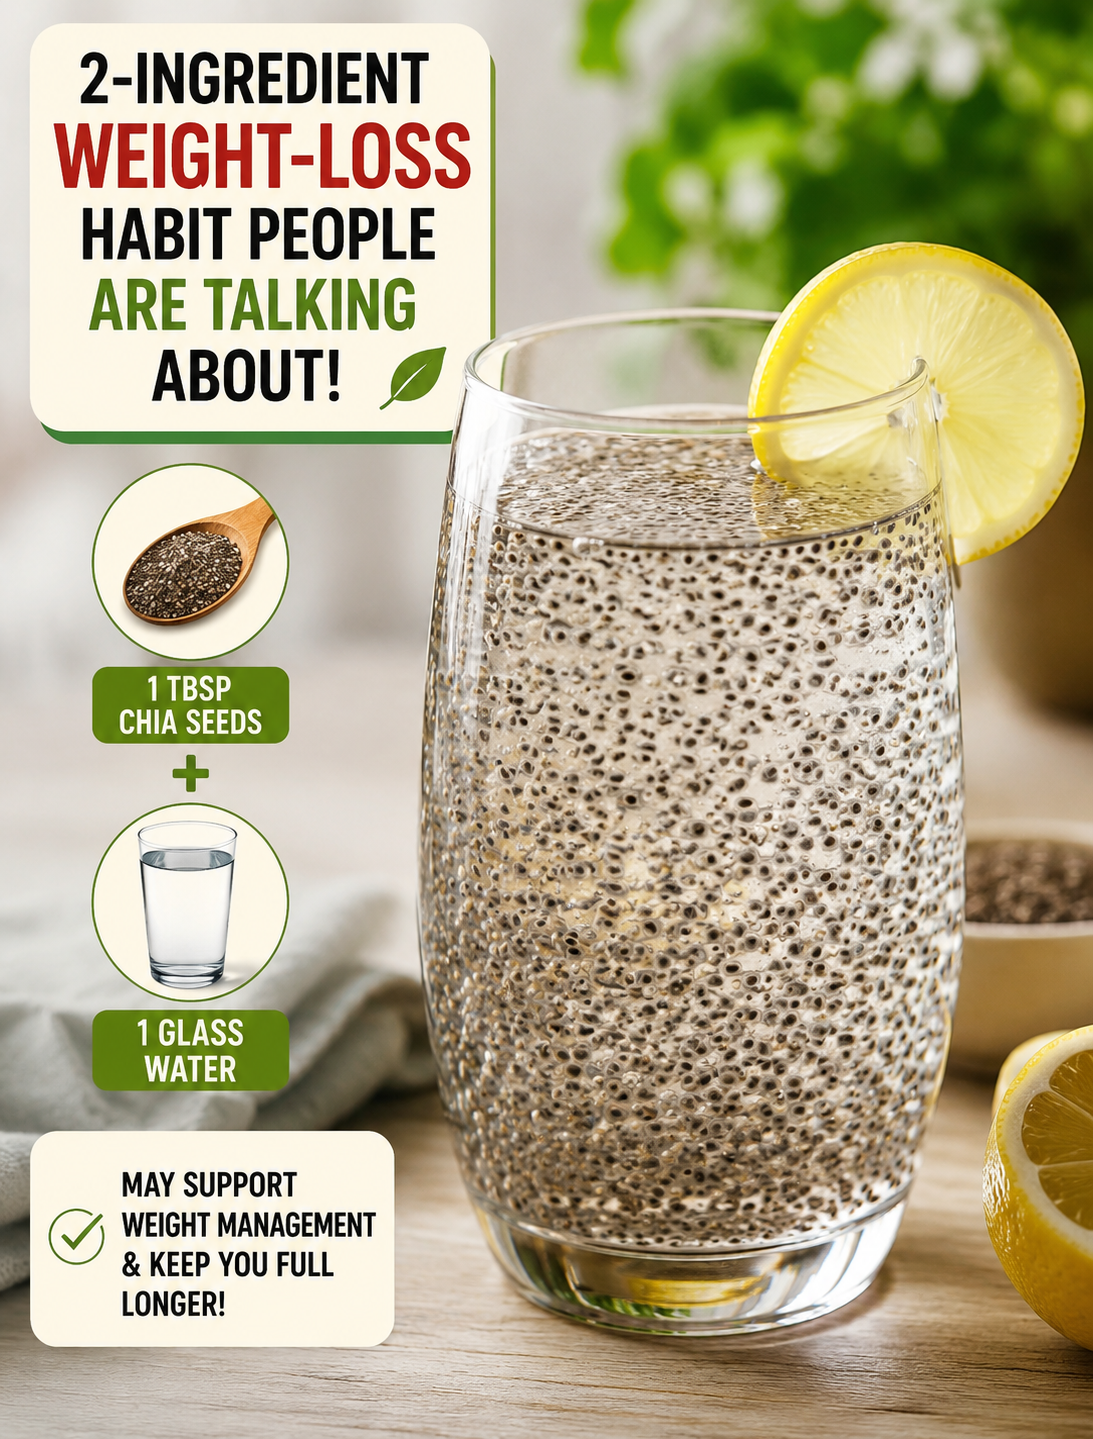
2-INGREDIENT WEIGHT-LOSS HABIT PEOPLE ARE TALKING ABOUT

Glass of chia seed water made with chia seeds and water for a healthy weight-management routine

2-INGREDIENT WEIGHT-LOSS HABIT PEOPLE ARE TALKING ABOUT

If you are trying to build healthier eating habits, you may have seen chia seed water making the rounds online. It uses only two basic ingredients: chia seeds and water. The appeal is simple—no complicated recipe, no special equipment, and no long ingredient list.

Chia seeds are a nutrient-dense food that provides dietary fiber, protein, and healthy fats. Research reviews consistently describe chia as a rich source of fiber and alpha-linolenic acid, a plant-based omega-3 fat. (PubMed)

Still, chia seed water should not be viewed as a magic weight-loss drink. There is no single food or drink that can make body fat disappear. Instead, this simple combination can fit into a balanced routine that includes nutritious meals, regular movement, adequate sleep, and sensible portions.

What Is Chia Seed Water?

Chia seed water is simply water mixed with chia seeds and allowed to sit until the seeds develop a soft, gel-like coating.

That texture comes from the soluble fiber in chia seeds. Fiber absorbs water and expands, which is why the drink becomes thicker after several minutes.

For a basic serving, combine:

  • 1 tablespoon chia seeds
  • 10–12 ounces of water

Stir the mixture well and let it stand for about 10–15 minutes. Stir again before drinking.

If you prefer more flavor, you can add a small amount of lime juice, but lime is optional and is not part of the two-ingredient recipe.

Why Chia Seeds Fit a Weight-Management Routine

The biggest reason chia seeds attract attention in weight-management discussions is their fiber content.

Fiber can help you feel fuller after eating, which may make it easier to manage hunger between meals. USDA nutrition research has also highlighted dietary fiber as an important part of strategies designed to support healthy body weight. (ARS)

One tablespoon of dried chia seeds contains about 4 grams of dietary fiber according to the Dietary Guidelines scientific report. (ODS)

Chia also provides protein and unsaturated fats, making it more nutritionally useful than a drink made mainly from added sugar.

However, eating chia does not automatically cause weight loss. A systematic review of clinical trials found that evidence for chia’s effects on body weight and other health outcomes remains limited, so it should be treated as a nutritious food rather than a proven weight-loss treatment. (PubMed)

How to Make the 2-Ingredient Drink

Making chia seed water takes only a few minutes.

Step 1: Pour 10–12 ounces of water into a glass.

Step 2: Add 1 tablespoon of chia seeds.

Step 3: Stir immediately so the seeds do not clump together.

Step 4: Let the mixture sit for 10–15 minutes.

Step 5: Stir once more and drink slowly.

If you are new to high-fiber foods, starting with a smaller amount may be more comfortable. Increase your intake gradually as your body adjusts.

When Is the Best Time to Drink It?

There is no scientifically established “best time” to drink chia seed water for weight loss.

Some people prefer it in the morning because it is easy to add to a daily routine. Others may enjoy it before or alongside a meal.

The more useful approach is choosing a time you can maintain consistently. A healthy habit works best when it fits naturally into your schedule.

You also do not need to drink chia water every day to eat well. Chia seeds can be added to oatmeal, yogurt, smoothies, overnight oats, or other balanced foods.

Can Chia Seed Water Help You Feel Fuller?

It may help because chia seeds contain a substantial amount of dietary fiber.

Fiber-rich foods can contribute to feelings of fullness, which can be useful when building a meal pattern that supports weight management. USDA guidance notes that fiber can help people feel full and satisfied after eating. (AgLab)

However, fullness varies from person to person. Your overall meal composition, protein intake, hydration, eating speed, sleep, and activity level also influence hunger.

For better results, pair fiber-rich foods with protein-rich foods and minimally processed meals instead of relying on one drink.

How to Make This Habit More Effective

Chia seed water works best as one small part of a larger healthy lifestyle.

Build meals around vegetables, fruits, whole grains, beans, lean proteins, nuts, seeds, and other nutrient-rich foods. Choose water or other low-calorie drinks instead of sugary beverages when possible.

Pay attention to portions without making meals unnecessarily restrictive. Extreme diets can be difficult to maintain, while realistic habits are easier to continue.

Regular physical activity also matters. Walking, strength training, cycling, swimming, or another activity you enjoy can help support an active lifestyle.

Sleep deserves attention too. A consistent sleep schedule can make it easier to maintain healthy eating and activity habits.

The goal is not to find one perfect weight-loss trick. The goal is to create several simple habits that work together.

Important Tips Before Trying Chia Seed Water

Always allow chia seeds to absorb enough liquid before drinking them.

Avoid swallowing dry chia seeds by themselves because they expand when exposed to liquid.

Start with a modest serving if your usual diet is low in fiber. Increasing fiber too quickly can cause bloating or digestive discomfort.

Drink enough fluids throughout the day because hydration supports normal digestion and helps your body handle increased fiber intake.

If you have difficulty swallowing, digestive problems, or a medical condition affected by dietary changes, ask a healthcare professional before adding large amounts of chia seeds to your diet.

Remember that chia seeds contain calories, so adding large amounts to your usual meals without considering your overall intake may not support your goals.

The Bottom Line

Chia seed water is an easy two-ingredient habit that can add fiber and nutrients to your day. Its simple preparation makes it convenient for people who want a practical addition to a healthy routine.

But it is not a shortcut for losing body fat.

For sustainable weight management, focus on the complete picture: balanced meals, adequate protein and fiber, reasonable portions, regular movement, hydration, sleep, and consistency.

Think of chia seed water as one useful food habit—not a miracle remedy.

Frequently Asked Questions

1. Does chia seed water burn belly fat?

No. Chia seed water does not specifically burn belly fat, and targeted fat loss from one food or drink is not supported by good evidence.

2. How much chia seed should I use in water?

Start with about 1 tablespoon of chia seeds in 10–12 ounces of water and adjust based on your tolerance and overall diet.

3. Should chia seeds be soaked before drinking?

Yes. Soaking them allows the seeds to absorb water and develop their gel-like texture before consumption.

4. Can I drink chia seed water every day?

It can fit into a balanced diet, but daily use is not required for healthy weight management or adequate fiber intake.

5. Is chia seed water better than plain water?

No. Plain water remains an excellent hydration choice; chia seed water simply adds nutrients and fiber from the seeds.

6. Can chia seeds help control hunger?

Their fiber content may contribute to fullness, but hunger control also depends on the rest of your diet, sleep, activity, and individual needs. (AgLab)

7. Can I drink chia seed water before a meal?

Yes, if you tolerate it well, but there is no proven timing that makes chia seed water a special weight-loss treatment.

8. Will chia seed water make me lose weight?

Not by itself. Weight change depends on your overall eating pattern, energy intake, physical activity, and other lifestyle factors.

Sources: USDA nutrition guidance and peer-reviewed research on chia seeds and dietary fiber. (PubMed)

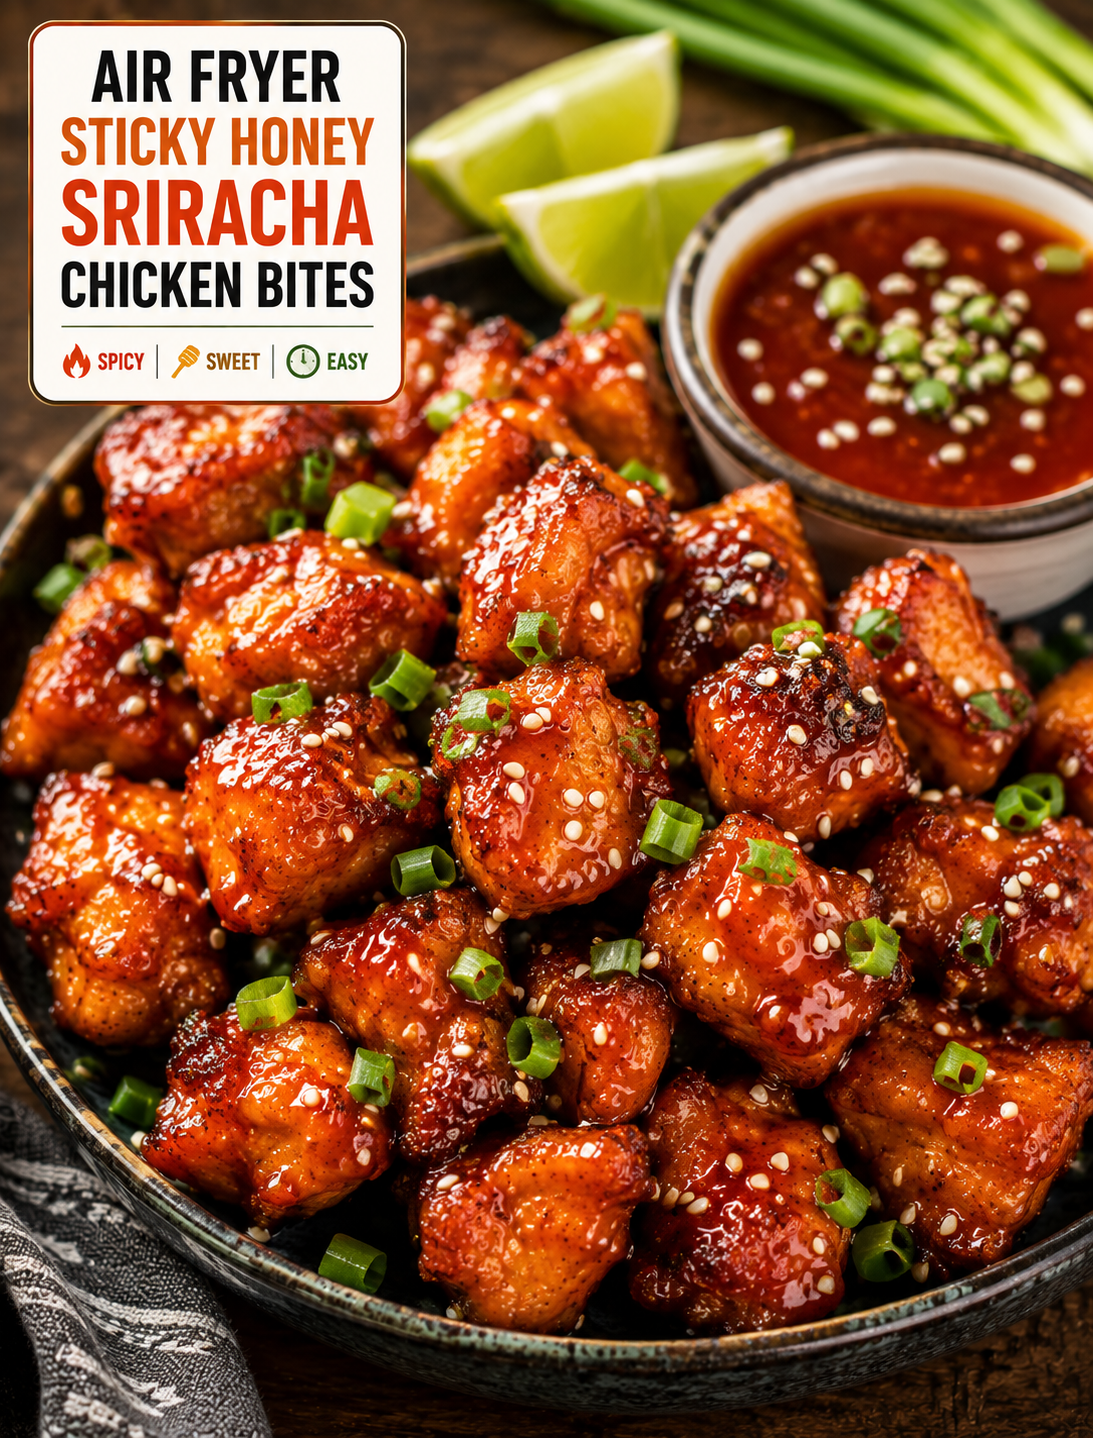
Air Fryer Sticky Honey Sriracha Chicken Bites

Crispy air fryer honey Sriracha chicken bites coated in glossy sauce with sesame seeds, green onions, lime, and dipping sauce

Air Fryer Sticky Honey Sriracha Chicken Bites

Sweet, spicy, sticky, and crispy, these Air Fryer Sticky Honey Sriracha Chicken Bites are an easy way to turn simple chicken into a crowd-pleasing meal or appetizer. Tender chicken pieces are seasoned, air fried until golden, and coated in a glossy honey Sriracha sauce.

The air fryer creates a crisp outside without deep frying. The homemade sauce brings together honey, Sriracha, garlic, and soy sauce for a balanced mix of sweetness, heat, and savory flavor.

These chicken bites are perfect for busy weeknight dinners, game-day parties, family snacks, or casual gatherings. Serve them with rice and vegetables for a complete meal, or place them on a platter with dipping sauces for an easy appetizer.

Why You’ll Love These Chicken Bites

This recipe is all about contrast. The chicken develops lightly crisp edges in the air fryer, while the sticky sauce adds a smooth, glossy coating.

Honey gives the sauce a natural sweetness that helps balance the heat from Sriracha. Garlic adds savory depth, while soy sauce provides a salty umami flavor.

Another reason to love this recipe is its flexibility. You can make the sauce milder for kids, increase the Sriracha for spice lovers, or add extra garlic and lime for a brighter finish.

The chicken bites also cook quickly because they are cut into small, even pieces. Smaller pieces create more seasoned surface area, which means every bite gets plenty of flavor.

Ingredients You’ll Need

 The Chicken

  • 1½ pounds boneless, skinless chicken breasts
  • Olive oil 1 tablespoon
  • Garlic powder 1 teaspoon
  • 1 teaspoon smoked paprika
  • Onion powder ½ teaspoon
  • Black pepper ½ teaspoon
  • Salt ½ teaspoon
  • 2 tablespoons cornstarch
  • Cooking spray

Honey Sriracha Sauce

  • ¼ cup honey
  • 2 tablespoons Sriracha sauce
  • Low-sodium soy sauce 1 tablespoon
  • Cloves 2 garlic , finely minced
  • 1 tablespoon rice vinegar
  • Sesame oil 1 teaspoon
  • Fresh lime juice 1 teaspoon

Serving

  • 1 tablespoon sesame seeds
  • 2 green onions, thinly sliced
  • Fresh cilantro, optional
  • Lime wedges
  • Cooked white or brown rice, optional
  • Steamed broccoli or vegetables, optional

Cornstarch helps create a lightly crisp coating around the chicken. If you prefer a softer exterior, you can reduce the amount or leave it out.

Use low-sodium soy sauce if you want more control over the salt level.

How to Make Air Fryer Sticky Honey Sriracha Chicken Bites

1. Cut the Chicken

Pat the chicken breasts dry with paper towels.

Cut them into bite-sized pieces that are approximately 1 to 1½ inches thick.

Try to keep the pieces similar in size so they cook evenly.

Avoid making some pieces very large and others very small because the smaller pieces may become dry before the larger pieces are fully cooked.

2. Season the Chicken

Place the chicken pieces in a large mixing bowl.

Add olive oil, garlic powder, smoked paprika, onion powder, black pepper, salt, and cornstarch.

Toss everything together until the chicken is evenly coated.

The cornstarch should create a thin layer around the chicken rather than a thick breading.

Let the seasoned chicken rest for about 5–10 minutes while you prepare the sauce.

3. Make the Sticky Sauce

Add honey, Sriracha, soy sauce, minced garlic, rice vinegar, sesame oil, and lime juice to a small saucepan.

Whisk the ingredients together over low heat.

Simmer gently for about 2–3 minutes, stirring often.

The sauce should become slightly thicker and glossy.

Do not cook it over high heat because honey can burn quickly.

Remove the sauce from the heat and set it aside.

4. Air Fry the Chicken

Preheat your air fryer to 400°F if your model requires preheating.

Lightly spray the basket with cooking spray.

Arrange the chicken pieces in a single layer. Leave some space between the pieces so hot air can circulate around them.

Air fry for approximately 10–14 minutes, turning the pieces halfway through.

The chicken should become golden on the outside and reach 165°F internally for food safety.

Cooking time can vary depending on the size of the chicken pieces and the air fryer model.

5. Coat the Chicken

Transfer the hot chicken bites to a large bowl.

Pour the warm honey Sriracha sauce over the chicken.

Toss gently until every piece is covered with the glossy sauce.

For an extra sticky finish, return the coated chicken to the air fryer for about 1–2 minutes at 375°F.

Watch closely during this step because the honey-based sauce can darken quickly.

6. Garnish and Serve

Transfer the finished chicken bites to a serving plate.

Sprinkle with sesame seeds and sliced green onions.

Add fresh cilantro if desired and serve with lime wedges.

The chicken is best served immediately while the outside is still slightly crisp and the sauce is warm and glossy.

How to Adjust the Spice Level

Sriracha provides most of the heat in this recipe, so the spice level is easy to control.

Mild version, reduce the Sriracha to 1 tablespoon and add an extra tablespoon of honey.

Medium heat, use the recommended 2 tablespoons.

A spicy version, increase the Sriracha or add a small pinch of cayenne pepper.

You can also serve extra Sriracha on the side so everyone can customize their own portion.

A little lime juice can help brighten the flavor when the sauce feels especially spicy.

How to Get Crispy Chicken in the Air Fryer

The secret to crisp chicken bites starts with dry chicken.

Pat the chicken thoroughly before seasoning because excess moisture can interfere with browning.

Cut the chicken into evenly sized pieces so they cook at the same rate.

Use a light coating of cornstarch rather than a thick layer.

Avoid overcrowding the air fryer basket because crowded chicken tends to steam instead of crisp.

Cook in batches if necessary.

Turn the pieces halfway through cooking to encourage even browning.

For the crispiest texture, add the sticky sauce after the chicken has already developed a golden exterior.

What Makes the Honey Sriracha Sauce So Good?

The sauce works because each ingredient has a specific role.

Honey adds sweetness and creates the sticky texture.

Sriracha provides heat and a mild garlic-chili flavor.

Soy sauce adds saltiness and savory depth.

Rice vinegar gives the sauce acidity, which prevents the sweetness from becoming too heavy.

Garlic adds a strong savory note.

Sesame oil contributes a toasted aroma, while lime juice provides a fresh finish.

The result is a sauce that is sweet, spicy, tangy, and savory at the same time.

What to Serve With Chicken Bites

These chicken bites can be served in several ways.

For a complete dinner, serve them over steamed white rice, brown rice, or jasmine rice.

Add roasted or steamed broccoli, green beans, carrots, or bell peppers for color and crunch.

For an appetizer, arrange the chicken on a large platter with toothpicks and dipping sauces.

A cool ranch-style dip can provide contrast against the spicy sauce.

For a fresh option, serve the chicken with a simple cabbage slaw made with shredded cabbage, carrots, lime juice, and a light dressing.

You can also turn the chicken into rice bowls by adding avocado, cucumber, shredded carrots, and green onions.

Easy Ways to Customize the Recipe

There are many ways to make this recipe your own.

Use boneless chicken thighs instead of chicken breasts for a richer, more tender bite.

Add grated ginger to the sauce for extra warmth.

Mix in a little orange zest for a sweet citrus note.

Add crushed red pepper if you want additional heat.

Sprinkle chopped peanuts or cashews over the finished chicken for crunch.

For a fresh finish, add cilantro, green onions, or extra lime juice.

You can also place the chicken inside lettuce cups for a lighter serving option.

Can You Make These Chicken Bites Ahead?

Yes. You can prepare the seasoned chicken and sauce separately ahead of time.

Keep the raw seasoned chicken refrigerated until you are ready to cook it.

The sauce can be prepared earlier and stored in a covered container in the refrigerator.

When ready to serve, air fry the chicken until it reaches 165°F, warm the sauce gently, and combine them just before eating.

For the best texture, avoid coating the chicken with sauce too far in advance because the moisture can soften the crispy exterior.

How to Store Leftovers

Place leftover chicken bites in an airtight container and refrigerate them promptly.

For the best texture, reheat them in the air fryer at 350°F for about 3–5 minutes, or until heated through.

You can add a small amount of fresh sauce after reheating to restore some of the sticky flavor.

Avoid repeatedly reheating the same portion because the chicken can become dry.

Discard leftovers that have an unusual smell, appearance, or texture.

Tips for the Best Results

Use chicken pieces that are similar in size for even cooking.

Pat the chicken dry before adding the seasoning.

Do not overcrowd the air fryer basket.

Turn the chicken halfway through cooking.

Cook the sauce gently so the honey does not burn.

Add the sauce after air frying for a crispier coating.

Check the chicken with a food thermometer and make sure it reaches 165°F.

Garnish immediately before serving for the freshest appearance.

Serve the chicken while warm for the best combination of crisp edges and sticky sauce.

The Bottom Line

Air Fryer Sticky Honey Sriracha Chicken Bites combine crispy chicken with a glossy sauce that delivers sweet, spicy, tangy, and savory flavor in every bite.

The air fryer keeps the cooking process simple while helping the chicken develop golden edges. The homemade honey Sriracha sauce takes only a few minutes to prepare and can easily be adjusted to suit different spice preferences.

Serve these chicken bites as an appetizer, game-day snack, lunch, or weeknight dinner. Pair them with rice and vegetables for a filling meal, or serve them with dipping sauces for a party-friendly platter.

For the best results, cook the chicken in a single layer, add the sauce after the chicken is crisp, and serve immediately.

Frequently Asked Questions

1. How long do chicken bites take in the air fryer?

Chicken bites generally take 10–14 minutes at 400°F, depending on their size and your air fryer model.

2. What temperature should chicken bites reach?

Chicken should reach an internal temperature of 165°F in the thickest piece for safe consumption.

3. Can I use chicken thighs instead of chicken breast?

Yes. Boneless, skinless chicken thighs work well and provide a slightly richer, more tender texture.

4. How do I make honey Sriracha chicken less spicy?

Reduce the Sriracha and increase the honey slightly to create a sweeter, milder sauce.

5. Why use cornstarch on the chicken?

A light coating of cornstarch helps create a drier surface that can become crisp in the air fryer.

6. Can I make these chicken bites ahead of time?

Yes. Prepare the chicken and sauce separately, then cook and combine them shortly before serving for the best texture.

7. What can I serve with honey Sriracha chicken?

Rice, broccoli, cucumber, cabbage slaw, roasted vegetables, avocado, and lime all pair well with the sweet-spicy chicken.

8. Can I reheat leftover chicken bites?

Yes. Reheat them in the air fryer at about 350°F for 3–5 minutes until hot, then add a little fresh sauce if desired.

Final Thoughts

Air Fryer Sticky Honey Sriracha Chicken Bites are an easy recipe for anyone who loves the combination of sweet heat and crispy chicken.

The air fryer gives the chicken golden edges, while the homemade honey Sriracha sauce adds a glossy coating packed with bold flavor. The recipe is also easy to adjust, so you can make it mild, spicy, extra garlicky, or citrusy.

Serve these bites with rice and vegetables for dinner, or put them on a platter for your next game-day gathering.

Crispy chicken, sticky sauce, and just the right kick—this is one air fryer recipe that deserves a spot in your regular rotation.

Grandma’s Simple Warm Ginger Compress for Achy Muscles

Warm ginger compress made with fresh ginger and a clean cloth for a traditional achy muscle comfort routine

GRANDMA’S SIMPLE TRICK FOR ACHY MUSCLES!

A Warm Ginger Compress Takes Just 10 Minutes to Prepare

Sometimes your back feels tight after a long day at the desk. Other times, your shoulders, neck, or legs simply feel worn out after chores, exercise, or too much time on your feet. Before reaching for a complicated routine, there is an old-fashioned home comfort idea worth knowing: a warm ginger compress.

This simple method combines the soothing feeling of gentle warmth with fresh ginger, an ingredient that has been used in traditional wellness practices for generations. Ginger has a long history of use in folk medicine, although modern research is still unclear about whether ginger itself provides meaningful relief for muscle or joint pain.

The main appeal of this remedy is its simplicity. You need only fresh ginger, water, a small saucepan, and a clean washcloth. Preparation takes about 10 minutes, making it an easy addition to a relaxing evening routine.

What Is a Warm Ginger Compress?

A warm ginger compress is a cloth soaked in warm ginger-infused water and placed over an area that feels tight or achy.

Unlike a ginger supplement, this method does not require you to eat or drink ginger. It is a traditional topical comfort practice. The warmth is an important part of the routine because heat is commonly used as a home-care option for back discomfort and muscle stiffness.

Think of it as a cozy self-care ritual rather than a medical treatment.

Why People Like This Traditional Home Remedy

Fresh ginger has a warm, spicy aroma that can make a simple home routine feel special. When combined with a comfortably warm cloth, it can be a relaxing way to slow down at the end of the day.

There are also a few practical reasons this remedy is popular:

  • It uses inexpensive kitchen ingredients.
  • It takes only a few minutes to prepare.
  • You control the temperature and application time.
  • It does not require special equipment.
  • It can fit easily into an evening self-care routine.
  • The warm compress can feel comforting on areas affected by everyday muscle tension.

It is important to keep expectations realistic. Research does not currently establish topical ginger as an effective treatment for muscle or joint pain.

Ingredients You’ll Need

You only need a few basic ingredients and supplies.

  • 2–3 inches of fresh ginger
  • 3 cups of water
  • 1 clean cotton washcloth
  • Small saucepan
  • Clean bowl or plate
  • Optional kitchen tongs for handling the hot cloth

Fresh ginger works well because you can slice it directly into the water.

How to Make a Warm Ginger Compress Step by Step

Step 1: Wash the Ginger

Rinse the fresh ginger under cool running water to remove dirt from the surface.

You can peel it if you prefer, but peeling is not required when the ginger is washed well.

Step 2: Slice the Ginger

Cut about 2–3 inches of ginger into thin slices.

Thin pieces allow the ginger to infuse into the water more easily during simmering.

Step 3: Heat the Water

Pour 3 cups of water into a small saucepan and add the sliced ginger.

Bring the mixture to a gentle boil.

Step 4: Simmer for 10 Minutes

Reduce the heat and let the ginger simmer gently for about 10 minutes.

This creates a warm, fragrant ginger-infused liquid without requiring a complicated preparation.

Step 5: Let It Cool Slightly

Remove the saucepan from the heat and allow the liquid to cool until it is comfortably warm.

This step matters because the cloth will be placed directly against your skin.

The compress should feel pleasantly warm, never painfully hot.

Step 6: Soak the Washcloth

Place the clean washcloth into the warm ginger water.

Let it soak thoroughly, then carefully remove it.

Wring out excess liquid so the cloth is damp rather than dripping.

Step 7: Apply the Compress

Place the warm cloth over the area that feels tight or achy.

A common choice is the lower back, upper back, shoulders, or another area of everyday muscle tension.

Keep the compress in place for approximately 10–15 minutes.

Step 8: Re-Warm if Needed

If the cloth becomes cool before you finish, soak it again in the warm liquid.

Always check the temperature with your hand before putting it back on your skin.

Step 9: Finish With Gentle Movement

After removing the compress, stand up slowly and move comfortably.

A short, easy walk can be a better choice than staying in bed for a long period when dealing with uncomplicated back discomfort. MedlinePlus advises staying as active as possible when there are no warning signs of a serious problem.

When to Try This Comfort Routine

A warm ginger compress may fit well into a relaxing evening after ordinary activities such as:

  • Sitting at a computer for several hours
  • Spending the day doing household chores
  • Gardening
  • Walking or exercising
  • Standing for long periods
  • Feeling generally tight after a busy day

The goal is comfort, not forcing the body to relax.

If the warmth feels unpleasant, remove the compress and stop.

Important Safety Tips

Natural ingredients still require sensible precautions.

Never place a very hot compress directly against your skin. Excessive heat can cause burns.

Do not apply the compress over cuts, irritated skin, rashes, or areas with reduced sensation.

Do not sleep with a heating compress on your body.

If you have a condition that affects your ability to feel temperature, ask a healthcare professional whether heat-based self-care is appropriate for you.

Ginger can also cause skin irritation in some people. If you notice burning, redness, itching, or discomfort, remove the compress and wash the area with clean water. NCCIH notes that ginger products may be safe for topical use, but research on topical ginger is limited.

When Back Pain Needs Medical Attention

A home comfort remedy should never delay medical care when symptoms suggest something more serious.

Contact a healthcare professional if your back pain is severe, follows an injury, or does not improve. MedlinePlus also recommends prompt medical attention for symptoms such as weakness, numbness, loss of bladder or bowel control, fever, severe pain, or pain traveling down the leg.

If the pain is sudden and severe or accompanied by serious symptoms, seek urgent medical care instead of relying on a home remedy.

The Bottom Line

Grandma’s warm ginger compress is a simple traditional wellness idea that requires very little preparation. Fresh ginger, warm water, and a clean washcloth are enough to create a comforting routine in about 10 minutes.

The warmth may feel soothing when ordinary muscle tightness or back discomfort has left you feeling stiff after a busy day. However, ginger itself has not been proven to treat back pain or muscle pain when applied to the skin.

Use this idea as a gentle self-care practice, listen to your body, and seek professional advice when pain is severe, persistent, or accompanied by warning signs.

Frequently Asked Questions

1. How long does it take to prepare a warm ginger compress?

It takes about 10 minutes to simmer the sliced ginger and prepare the warm infusion.

2. How long should I leave the compress on?

Keep it on the affected area for about 10–15 minutes while making sure the temperature remains comfortably warm.

3. Can I use a ginger compress for lower back discomfort?

You can use gentle warmth as a comfort measure for ordinary muscle tightness, but persistent or severe back pain should be evaluated by a healthcare professional.

4. Does ginger actually treat muscle pain?

Current evidence is not strong enough to show that topical ginger treats muscle or joint pain.

5. Can I use powdered ginger instead of fresh ginger?

Fresh ginger is the simplest choice for this compress because it can be sliced and simmered directly in water.

6. How hot should the ginger water be?

The water should be comfortably warm rather than very hot, because excessive heat can burn the skin.

7. Can I use the compress every day?

If your skin tolerates it, occasional use as a comfort routine may be reasonable, but ongoing or worsening pain should not be managed only with home remedies.

8. When should I see a doctor for back pain?

Seek medical care for severe pain, pain after an injury, weakness or numbness, bowel or bladder changes, fever, or pain that does not improve.

Mediterranean 5 Min Easy Stuffed Zucchini Boats

Mediterranean 5-Min Easy Stuffed Zucchini Boats

Looking for a quick way to turn everyday zucchini into a delicious and satisfying dish? These Mediterranean 5-Min Easy Stuffed Zucchini Boats are packed with creamy ricotta, earthy mushrooms, fresh spinach, garlic, herbs, and melted mozzarella. Everything comes together inside tender roasted zucchini for a simple recipe that looks beautiful and tastes even better.

The filling is creamy without being overly heavy, while oregano, fresh basil or parsley, extra virgin olive oil, and optional chili flakes give the dish a fresh Mediterranean character. Parmesan creates a golden, savory finish that makes every bite comforting and flavorful.

These zucchini boats are ideal for a quick family dinner, healthy lunch, weekend brunch, or an easy side dish. They also make a wonderful option when you have extra zucchini and want a recipe that feels special without requiring complicated preparation.

Prep Time: 5 minutes
Cook Time: 15 minutes
Total Time: 20 minutes
Servings: 4
Cuisine: Mediterranean-Inspired
Course: Main Dish, Side Dish, Lunch
Calories: Approximately 220 calories per serving

Ingredients

Base & Produce

4 medium zucchinis, halved lengthwise with centers hollowed out

8 ounces mushrooms, diced or sliced

2 cups fresh baby spinach, chopped

1 teaspoon minced garlic, approximately 2 cloves

Dairy & Fillings

½ cup to 1 cup ricotta cheese, part-skim or whole milk

¼ cup shredded mozzarella cheese, for melting on top

¼ cup grated Parmesan cheese, optional, for topping

Pantry & Seasonings

2 tablespoons extra virgin olive oil, divided for sautéing and brushing

½ teaspoon dried oregano or Italian seasoning

1 tablespoon fresh chopped basil or parsley, for garnish

¼ teaspoon kosher salt, plus more to taste

A pinch of freshly cracked black pepper

Optional: a pinch of red chili flakes or a tiny grating of nutmeg

Instructions

Prepare the Zucchini

Preheat the oven to 425°F (220°C). Lightly grease a baking dish or line a baking sheet with parchment paper.

Wash and dry the zucchinis. Slice each zucchini in half lengthwise. Using a small spoon, carefully scoop out the soft center, leaving a sturdy border around the edges so the zucchini maintains its shape while baking.

Roughly chop the scooped zucchini flesh and reserve it for the filling. Avoid removing too much of the outer flesh because the zucchini boats need enough structure to hold the creamy filling.

Place the zucchini halves cut-side up on the prepared baking sheet. Brush them lightly with some of the olive oil and season with a small pinch of salt and black pepper.

Prepare the Vegetable Filling

Heat the remaining olive oil in a skillet over medium-high heat.

Add the mushrooms and cook for approximately 3–4 minutes, stirring occasionally, until they soften and begin to release their moisture.

Add the chopped zucchini flesh and cook for another 1–2 minutes. Stir in the minced garlic and cook briefly until fragrant.

Add the chopped baby spinach and cook until it wilts, which should take about 1–2 minutes.

Remove the skillet from the heat. Allow the vegetables to cool slightly so they are easier to combine with the ricotta.

Make the Ricotta Filling

Transfer the sautéed vegetables to a mixing bowl.

Add ½ to 1 cup ricotta cheese, depending on how creamy you want the filling to be. Stir in the dried oregano, kosher salt, black pepper, and optional red chili flakes or nutmeg.

Mix until the vegetables and ricotta are evenly combined.

Taste the filling and adjust the seasoning as needed. If using Parmesan inside the filling, you can add a small amount at this stage, although it can also be reserved entirely for the topping.

Fill the Zucchini Boats

Spoon the ricotta and vegetable mixture generously into each hollowed zucchini half.

Do not pack the filling down too firmly. A light, generous mound creates a more attractive finished dish and allows the cheese to melt beautifully across the top.

Sprinkle the shredded mozzarella evenly over the filled zucchini boats.

Add the grated Parmesan if using.

Bake Until Golden

Place the zucchini boats in the preheated oven and bake for approximately 12–15 minutes, or until the zucchini is tender and the cheese is melted and lightly golden.

For a more deeply browned cheese topping, switch the oven to broil for the final 1–2 minutes. Watch carefully because the cheese can brown very quickly under the broiler.

Remove the zucchini boats from the oven and allow them to rest for a couple of minutes.

Garnish and Serve

Finish with freshly chopped basil or parsley.

Add another small drizzle of extra virgin olive oil if desired, along with a light sprinkle of black pepper or red chili flakes.

Serve warm as a light main course, side dish, lunch, or appetizer.

Tips

Choose Medium-Sized Zucchini

Medium zucchini are ideal because they are large enough to hold a generous amount of filling without becoming watery or difficult to cook. Very large zucchini can have larger seeds and a softer center.

Do Not Hollow Them Too Deeply

Leave a reasonable layer of zucchini around the edges and underneath the filling. This keeps the boats sturdy and prevents them from becoming floppy during baking.

Cook the Mushrooms Properly

Mushrooms naturally release moisture while cooking. Give them enough time to soften and allow excess moisture to evaporate before adding the spinach and ricotta. This helps prevent a watery filling.

Do Not Overcook the Spinach

Spinach only needs a short time in the skillet. Once wilted, remove it from the heat. Overcooking can make it lose its fresh flavor and release additional moisture.

Use the Right Amount of Ricotta

For a lighter filling, use around ½ cup ricotta. If you prefer an especially creamy, rich filling, increase it toward 1 cup.

Season in Layers

A small amount of salt on the zucchini, vegetables, and ricotta filling creates a more balanced flavor than adding all the seasoning at the end.

Drain Watery Ricotta

If your ricotta looks particularly wet, let it drain briefly before mixing it with the vegetables. This keeps the filling thick and creamy.

Avoid Overfilling

Although it is tempting to pile the filling high, too much can spill over during baking. Fill each zucchini boat generously but keep the mixture relatively stable.

Watch the Broiler

If you use the broiler to brown the mozzarella and Parmesan, stay close to the oven. The topping can go from golden to burnt very quickly.

Rest Before Serving

Allowing the zucchini boats to rest for a couple of minutes after baking helps the filling settle and makes them easier to serve.

Variations

Mediterranean Feta Version

Replace part of the ricotta with crumbled feta cheese. Add chopped Kalamata olives and a little fresh oregano for a stronger Mediterranean flavor.

Tomato and Basil Version

Add finely diced sun-dried tomatoes to the filling and use fresh basil instead of parsley. The tomatoes add concentrated sweetness and a pleasant chewy texture.

Spicy Zucchini Boats

Increase the red chili flakes or add finely diced fresh chili pepper to the mushroom and spinach mixture for extra heat.

Protein-Rich Version

Add cooked shredded chicken, turkey, or lentils to the filling. Make sure any meat is fully cooked before mixing it into the ricotta mixture.

Vegan Version

Use a plant-based ricotta alternative and dairy-free mozzarella and Parmesan substitutes. Keep the vegetable filling the same for a completely dairy-free option.

Garlic Herb Version

Increase the garlic slightly and add fresh thyme, oregano, basil, or parsley. This creates a particularly fragrant filling.

Mushroom Lover’s Version

Use a combination of cremini, button, shiitake, or oyster mushrooms. Different mushrooms add extra depth and texture.

Crunchy Topping Version

Add a tablespoon or two of seasoned breadcrumbs over the cheese before baking. The breadcrumbs become golden and crisp while the filling remains creamy.

Q&A

Can I make these zucchini boats ahead of time?

Yes. Prepare and fill the zucchini boats several hours ahead, cover them, and refrigerate. Bake when ready to serve, adding a few extra minutes if they are going directly from the refrigerator into the oven.

Can I use frozen spinach?

Yes. Thaw it completely and squeeze out as much excess water as possible before adding it to the filling. Fresh spinach is preferred for texture, but frozen spinach works well.

Can I use cottage cheese instead of ricotta?

Yes. Cottage cheese can replace ricotta, although the texture will be slightly different. For a smoother filling, blend the cottage cheese briefly before using it.

How do I prevent watery zucchini boats?

Avoid overcooking the zucchini before filling, cook the mushrooms until excess moisture evaporates, drain wet ricotta, and avoid adding watery vegetables to the filling.

Can I make this recipe without mushrooms?

Absolutely. You can replace the mushrooms with finely chopped bell peppers, tomatoes, corn, artichokes, or additional spinach.

What cheese can replace mozzarella?

Provolone, Monterey Jack, fontina, mild cheddar, or a Mediterranean cheese blend can work well. Mozzarella provides the best classic melting texture.

Can I freeze stuffed zucchini boats?

They can be frozen, although the zucchini may become softer after thawing. For the best texture, freeze them after baking, cool completely, and reheat in the oven.

What should I serve with stuffed zucchini boats?

They pair well with grilled chicken, baked fish, roasted potatoes, quinoa, couscous, rice, or a simple Mediterranean salad.

Can I make them more filling?

Yes. Add cooked chicken, lentils, chickpeas, quinoa, or another protein-rich ingredient to the ricotta filling.

Why is my filling watery?

The most common causes are excess moisture from mushrooms, spinach, zucchini, or ricotta. Cook the vegetables well and drain wet ingredients before combining them.

Nutrition

Approximate nutrition per serving:

Calories: 220 kcal
Protein: 12 g
Carbohydrates: 14 g
Fat: 14 g
Saturated Fat: 5 g
Fiber: 4 g
Sugar: 7 g
Sodium: 430 mg

Nutrition values are estimates and can vary depending on the amount and type of ricotta, mozzarella, Parmesan, olive oil, and other ingredients used.

Conclusion

If you love easy recipes that combine fresh vegetables with creamy, comforting flavors, these Mediterranean Stuffed Zucchini Boats deserve a place on your menu. The tender zucchini provides a naturally mild base for a flavorful mixture of mushrooms, spinach, garlic, ricotta, and herbs, while melted mozzarella and Parmesan create a delicious golden topping.

The recipe is flexible enough to customize with your favorite vegetables, cheeses, herbs, or spices. Serve the boats as a simple vegetarian main course or make them part of a larger Mediterranean-inspired spread with salad, grains, grilled vegetables, or your favorite protein.

Fresh, colorful, creamy, and wonderfully easy to prepare, these zucchini boats are a delicious way to make vegetables the centerpiece of the meal.

#StuffedZucchini #MediterraneanRecipes #HealthyDinner #EasyVegetarianRecipes #ZucchiniBoats

Charred Peach & Burrata Flatbread with Black Lava Salt & Hot Honey

Charred Peach & Burrata Flatbread with Black Lava Salt & Hot Honey

There is something irresistible about the combination of juicy summer peaches, creamy burrata, crisp flatbread, and a touch of chili heat. This Charred Peach & Burrata Flatbread brings all of those flavors together in one beautiful dish, finished with homemade hot honey, fresh herbs, toasted nuts, and striking black lava salt.

The peaches are quickly grilled until their natural sugars caramelize and their edges develop a delicious smoky char. They are then layered over a golden toasted flatbread and generous pieces of burrata. The warm fruit gently contrasts with the cool, creamy cheese, while spicy honey adds a sweet and slightly fiery finish.

This recipe is perfect when you want something impressive without spending hours in the kitchen. It works beautifully for summer parties, casual entertaining, brunch, date-night dinners, or an easy appetizer served with chilled drinks. The colors and textures also make it especially attractive for a food table or recipe photo.

Fresh mint or basil adds a refreshing herbal note, while pistachios or walnuts provide crunch. A final sprinkle of black lava salt completes the dish with a sophisticated salty finish.

Prep Time: 15 minutes
Cook Time: 12 minutes
Total Time: 27 minutes
Servings: 4
Cuisine: Mediterranean-Inspired / Italian-Inspired
Course: Appetizer, Brunch, Lunch
Calories: Approximately 430 calories per serving

Ingredients

For the Flatbread

2 large naan or flatbreads, or 8–10 oz fresh pizza dough rolled out thin

1 tablespoon olive oil, for brushing and toasting the crust

For the Charred Peaches

2 ripe peaches, cut into even slices or wedges

1 teaspoon olive oil, for coating the peaches

½ teaspoon cinnamon, optional

For the Homemade Hot Honey

¼ cup honey

½ to 1 teaspoon red chili flakes, adjusted to taste

For the Toppings & Garnish

8 oz burrata cheese, torn apart and spread across the base

1–2 teaspoons black lava salt

Fresh mint or basil leaves, roughly torn or left whole

2 tablespoons toasted pistachios or walnuts, optional

Instructions

Prepare the Hot Honey

Add the honey and red chili flakes to a small saucepan. Warm the mixture gently over low heat for 2–3 minutes. Stir occasionally and make sure the honey does not boil.

Remove it from the heat and let it rest for several minutes. This gives the chili flakes time to infuse the honey with their spicy flavor.

Taste the honey once infused. Add more chili flakes if you prefer additional heat, then set aside.

Char the Peaches

Wash and dry the peaches. Slice them into evenly sized wedges or slices. Keeping the pieces relatively thick helps them remain intact while grilling.

Place the peaches into a bowl and toss gently with 1 teaspoon olive oil. Add the optional cinnamon and toss again until the slices are lightly coated.

Heat a grill pan, outdoor grill, or heavy skillet over medium-high heat. Once hot, arrange the peach slices in a single layer.

Cook for approximately 2–3 minutes on each side. The peaches should develop dark grill marks, caramelized edges, and a slightly softened center.

Transfer the charred peaches to a plate and keep them aside while preparing the flatbread.

Toast the Flatbread

Preheat the oven to 425°F or 220°C.

Place the naan or flatbreads on a baking sheet and lightly brush them with olive oil.

Bake for 5–7 minutes, until the edges are crisp and golden. Fresh pizza dough can also be used. Roll it thin before baking and cook until the crust is golden and crisp around the edges.

Keep an eye on the flatbread during the final minutes because thin dough can brown quickly.

Build the Flatbread

Remove the toasted flatbread from the oven and let it rest briefly.

Tear the burrata into pieces and distribute it generously over the warm crust. Avoid spreading it too thin because larger pockets of burrata make the finished flatbread especially creamy.

Arrange the charred peach slices over the cheese.

Scatter toasted pistachios or walnuts over the peaches if using.

Add fresh mint or basil leaves for a bright, fragrant finish.

Drizzle the homemade hot honey over the entire flatbread, concentrating on the peaches and burrata.

Finish with a light sprinkling of black lava salt.

Slice into wedges and serve immediately.

Tips

Pick Firm-Ripe Peaches

The ideal peaches should smell fragrant and feel slightly soft when gently pressed. They should not be overly soft. Firm-ripe peaches hold their shape better and create better grill marks.

Preheat Your Cooking Surface

A properly heated grill or skillet is essential for achieving caramelization. If the surface is not hot enough, the peaches may release moisture and become soft before developing char.

Avoid Moving the Peaches Too Much

Place the peaches on the hot surface and let them cook undisturbed for a couple of minutes. This allows the sugars to caramelize and creates more defined grill marks.

Do Not Bake the Burrata

Burrata is best added after the flatbread has finished baking. Excessive heat can cause it to lose the fresh, creamy texture that makes it special.

Make the Crust Crisp

The flatbread should have enough structure to support the burrata and peaches. A crisp crust also provides a pleasant contrast to the soft toppings.

Control the Heat

Hot honey becomes more intense as the chili flakes infuse. Start conservatively, taste, and add more chili if necessary.

Toast Nuts for Better Flavor

A few minutes in a dry skillet can transform the flavor of pistachios or walnuts. Remove them from the heat as soon as they become fragrant.

Do Not Over-Salt

Burrata already has a delicate salty character, and the hot honey adds sweetness. Use black lava salt as a finishing ingredient rather than heavily seasoning the dish.

Serve Fresh

For the best combination of crisp crust and creamy toppings, assemble the flatbread just before serving.

Variations

Peach and Prosciutto

Add thin ribbons of prosciutto for a salty, savory component. The combination of prosciutto and peaches is especially delicious with hot honey.

Fresh Arugula Topping

Add fresh arugula after the flatbread has been assembled. Its peppery flavor cuts through the richness of the burrata.

Balsamic Finish

A small drizzle of balsamic glaze can be added with the hot honey for a sweet-tart flavor. Keep the amount modest to avoid overwhelming the peaches.

Goat Cheese Flatbread

Use creamy goat cheese instead of burrata for a tangier version. Goat cheese pairs particularly well with caramelized fruit.

Jalapeño Peach Flatbread

Add finely sliced jalapeño peppers for a fresh, vibrant heat. This variation is ideal for people who enjoy a stronger spicy flavor.

Summer Herb Version

Combine basil and mint with a little fresh thyme. The mixture creates a fragrant finish that works beautifully with grilled peaches.

Peach and Fig Combination

Add thinly sliced fresh figs to the charred peaches. The figs provide a naturally sweet, jam-like texture and make the flatbread even more seasonal.

Q&A

What type of peaches are best for this recipe?

Fresh, ripe but firm peaches are ideal. They should be juicy and fragrant while still firm enough to hold their shape during grilling.

Can nectarines be used instead of peaches?

Yes. Nectarines are an excellent substitute and do not need to be peeled. They also grill beautifully and offer a slightly firmer texture.

Can I prepare the hot honey ahead of time?

Yes. Prepare it in advance and store it in an airtight container. Gently warm it before drizzling if it becomes thick.

What if I cannot find burrata?

Fresh mozzarella, ricotta, goat cheese, or whipped feta can be substituted. Each will give the recipe a slightly different character.

Can I use store-bought hot honey?

Absolutely. Homemade hot honey is quick to make, but a good-quality prepared hot honey works perfectly when you want to save time.

Can I skip the black lava salt?

Yes. Use flaky sea salt instead. The black lava salt is primarily used for its striking appearance and distinctive finishing flavor.

Can I grill the flatbread instead of baking it?

Yes. A sturdy naan or pizza dough can be grilled carefully until crisp. Watch the heat closely because flatbread can char quickly.

How far ahead can I make this dish?

The hot honey and grilled peaches can be prepared ahead, but the flatbread should ideally be toasted and assembled shortly before serving.

Can I make it nut-free?

Yes. Simply omit the pistachios or walnuts. The flatbread will still have plenty of flavor and texture from the peaches, burrata, herbs, and crisp crust.

Is cinnamon necessary?

No. Cinnamon is completely optional. It adds warmth and encourages a deeper caramelized flavor but is not essential.

Nutrition

Approximate nutrition per serving, assuming the recipe serves four and includes the optional nuts:

Calories: 430 kcal
Protein: 14 g
Carbohydrates: 45 g
Fat: 22 g
Saturated Fat: 9 g
Fiber: 3 g
Sugar: 18 g
Sodium: 600 mg

These values are estimates. Actual nutrition will vary depending on the type of flatbread, amount of burrata, honey, olive oil, nuts, and salt used.

Conclusion

This Charred Peach & Burrata Flatbread is the kind of recipe that makes simple ingredients feel extraordinary. Juicy peaches become smoky and caramelized on the grill, while creamy burrata adds richness and a luxurious texture. The homemade hot honey ties everything together with a beautiful sweet-spicy contrast.

Fresh herbs brighten each bite, toasted pistachios or walnuts provide crunch, and black lava salt gives the finished flatbread an elegant final touch. It is quick enough for a weeknight meal but beautiful enough to serve at a summer gathering.

Serve it fresh from the oven, slice it into wedges, and let everyone enjoy the combination of creamy, crisp, sweet, savory, smoky, and spicy flavors in every bite. This is an easy seasonal recipe that truly celebrates the best of summer produce.

#CharredPeaches #BurrataFlatbread #HotHoney #SummerAppetizer #EasyEntertaining

5 Healthy Food Swaps That Actually Taste Good

Five healthy food swaps including Greek yogurt, oatmeal with berries, air-popped popcorn, fresh fruit, and sparkling water.

5 Healthy Food Swaps That Actually Taste Good

Making healthier food choices does not mean giving up the foods you enjoy. Small changes in everyday meals can help you build better eating habits without making food feel boring or restrictive. The best healthy food swaps keep the flavor, texture, and comfort you like while adding more nutritious ingredients.

If you are trying to eat better, start with familiar foods instead of changing your entire diet at once. A creamy sandwich spread can be replaced with a lighter option, a sugary breakfast can become more balanced, and a salty snack can be switched for something crunchy and satisfying.

These five simple swaps are easy to use in an American kitchen and work well for breakfast, lunch, dinner, and snacks. Try one at a time and choose the changes that fit your routine.

1. Swap Mayonnaise for Plain Greek Yogurt

Mayonnaise adds a rich, creamy texture to sandwiches, wraps, dips, and salads. Plain Greek yogurt can provide a similar creamy feel while also adding protein to your meal.

Choose unsweetened plain Greek yogurt rather than flavored yogurt. Its mild tang works especially well with chicken salad, tuna salad, coleslaw, and homemade dips.

Step-by-step swap

  1. Start with the same amount of plain Greek yogurt you would normally use for mayonnaise.
  2. Add a small squeeze of lemon juice for extra brightness.
  3. Mix in garlic powder, black pepper, or fresh herbs if you want more flavor.
  4. Taste the mixture before adding additional salt.
  5. Use it immediately or refrigerate it until your meal is ready.

Easy ways to use it

  • Spread it on a turkey sandwich.
  • Mix it into chicken salad.
  • Use it as a veggie dip.
  • Add it to a wrap with grilled chicken and vegetables.
  • Stir it into a simple homemade dressing.

This swap is useful when you want a creamy ingredient without making a major change to the meal.

2. Swap Sugary Cereal for Oatmeal With Fresh Berries

A quick bowl of cereal is a common breakfast choice, but some cereals can contain a lot of added sugar. Oatmeal with fresh fruit is a simple alternative that can make breakfast more filling.

Use old-fashioned oats or quick oats based on the texture and cooking time you prefer. Add strawberries, blueberries, raspberries, or sliced banana for natural sweetness and extra flavor.

Step-by-step swap

  1. Cook oats with water or your preferred milk.
  2. Add fresh or frozen berries after cooking.
  3. Sprinkle in cinnamon for extra flavor.
  4. Add chopped nuts or seeds for crunch.
  5. If needed, use a small amount of honey instead of several spoonfuls of sugar.

Simple topping combinations

  • Blueberries + walnuts + cinnamon
  • Strawberries + sliced almonds
  • Banana + peanut butter
  • Raspberries + chia seeds
  • Apple + cinnamon + chopped pecans

The goal is not to make breakfast complicated. A few simple toppings can turn basic oatmeal into a flavorful meal that is easy to prepare on busy mornings.

3. Swap Potato Chips for Air-Popped Popcorn

If you enjoy crunchy snacks, you do not have to eliminate them to make a healthier choice. Air-popped popcorn can satisfy the desire for something crisp while giving you a whole-grain snack option.

The key is how you prepare and season it. Heavy amounts of butter, salt, or sugary coatings can quickly change the nutrition of the snack.

Step-by-step swap

  1. Prepare plain air-popped popcorn.
  2. Place it in a large bowl while it is still warm.
  3. Add a light amount of seasoning.
  4. Toss the popcorn well so the flavor spreads evenly.
  5. Store extra popcorn in an airtight container for later.

Flavor ideas

  • Garlic powder + black pepper
  • Cinnamon + a small amount of honey
  • Smoked paprika + light seasoning
  • Nutritional yeast + garlic powder
  • Italian herbs + black pepper

This swap works well for movie nights, afternoon snacks, or when you want something crunchy between meals.

4. Swap Sour Cream for Plain Greek Yogurt

Sour cream is a popular topping for baked potatoes, tacos, chili, and Mexican-inspired dishes. Plain Greek yogurt has a similar creamy consistency and tangy taste, making it an easy substitution.

You can use it directly from the container or season it to match your meal.

Step-by-step swap

  1. Spoon plain Greek yogurt into a small bowl.
  2. Add lime juice for tacos or burrito bowls.
  3. Mix in cilantro, garlic, or green onions if desired.
  4. Add black pepper or a small amount of seasoning.
  5. Use it as a topping just as you would sour cream.

Try it with

  • Baked potatoes
  • Tacos
  • Burrito bowls
  • Chili
  • Roasted vegetables
  • Homemade dips

This simple change can make familiar comfort foods fit more easily into a balanced eating routine.

5. Swap Sugary Soda for Sparkling Water With Fresh Fruit

Soda can be an easy drink to reach for, especially with lunch or dinner. If you enjoy carbonation, sparkling water can provide the fizz without the added sugar found in regular sugary soda.

Choose plain or unsweetened sparkling water and add fruit for flavor. Lemon, lime, orange, berries, cucumber, and mint can all make the drink more interesting.

Step-by-step swap

  1. Fill a glass with ice.
  2. Add a few slices of fresh fruit.
  3. Pour in chilled sparkling water.
  4. Add fresh mint or a squeeze of citrus if desired.
  5. Serve immediately for the best fizz.

Refreshing combinations

  • Lemon + mint
  • Lime + cucumber
  • Strawberry + lemon
  • Orange + lime
  • Blueberry + lemon

If you usually drink several sugary beverages each day, replacing even one with an unsweetened option is a simple place to begin.

How to Make Healthy Food Swaps Stick

The easiest way to build better eating habits is to make changes that feel realistic. You do not need to replace everything in your pantry or completely redesign your meals.

Step 1: Choose one swap

Pick the food you eat most often and start there. A small change is easier to repeat than a strict plan that feels difficult to maintain.

Step 2: Keep the replacement available

Buy Greek yogurt, oats, berries, popcorn, sparkling water, and other alternatives during your regular grocery trip. Having them ready makes the healthier choice more convenient.

Step 3: Keep your favorite flavors

Use herbs, spices, citrus, garlic, and fresh produce to make simple ingredients more enjoyable. Healthy eating should still taste good.

Step 4: Adjust portions and ingredients

A healthier ingredient can still contribute calories, sugar, sodium, or saturated fat depending on the product and serving size. Check nutrition labels when comparing packaged foods.

Step 5: Build variety

Do not rely on the same foods every day. Rotate fruits, vegetables, whole grains, protein foods, and healthy toppings to keep meals interesting.

Why Small Food Changes Matter

Healthy eating is often easier when you focus on what you can add or replace rather than what you must completely avoid. Adding fruit to breakfast, choosing whole grains more often, and replacing sugary drinks are practical steps that can fit into everyday life.

You can also use these swaps as a starting point for other meals. Once you find a replacement that works, look for another small change. Over time, several simple choices can create a more balanced kitchen routine.

Remember that food needs vary from person to person. If you have a medical condition, food allergy, or specific dietary requirement, choose substitutions that fit your individual needs and ask a qualified healthcare professional for personalized guidance.

Frequently Asked Questions

1. What are the easiest healthy food swaps to start with?

Start with one familiar change, such as Greek yogurt instead of sour cream or sparkling water instead of sugary soda.

2. Is Greek yogurt healthier than mayonnaise?

Plain Greek yogurt can provide protein and may contain less saturated fat than mayonnaise, but nutrition varies by product, so compare labels.

3. Is oatmeal a healthy breakfast choice?

Oatmeal can be a nutritious breakfast, especially when paired with fruit, nuts, seeds, or another protein-rich food.

4. Is air-popped popcorn a healthy snack?

Plain air-popped popcorn is a whole-grain snack, but large amounts of butter, salt, or sweet toppings can add significant calories and sodium.

5. Can I use Greek yogurt instead of sour cream?

Yes, plain Greek yogurt works well as a topping for tacos, baked potatoes, chili, dips, and many other dishes.

6. Is sparkling water better than soda?

Unsweetened sparkling water does not contain the added sugar found in regular soda, making it a useful beverage swap.

7. Do healthy food swaps have to be expensive?

Not necessarily; affordable staples such as oats, beans, popcorn, seasonal produce, and plain yogurt can support budget-friendly meals.

8. How many food swaps should I make at once?

Start with one or two swaps that fit your routine, then add more as they become easy and familiar.

Roasted Beet, Avocado and Feta Salad

Roasted Beet, Avocado and Feta Salad

Bright, colorful, and packed with contrasting flavors, this Roasted Beet, Avocado and Feta Salad is a simple dish that can make any meal feel special. Tender roasted beets bring natural sweetness, creamy avocado adds richness, feta contributes a salty tang, and toasted walnuts provide the perfect crunch.

Everything is finished with a quick balsamic vinaigrette made with olive oil, balsamic vinegar, and a touch of honey or maple syrup. The dressing is light but flavorful enough to complement every ingredient without overpowering the fresh greens.

Prep Time: 15 minutes
Cook Time: 40–50 minutes
Total Time: 55–65 minutes
Servings: 4–6
Cuisine: Mediterranean-inspired
Calories: Approximately 320 calories per serving

Ingredients

Base & Salad Ingredients

3–4 medium red beets, scrubbed, roasted, peeled, and cubed

1–2 ripe avocados, peeled and sliced or diced

¼–½ cup crumbled feta cheese

3–4 cups mixed baby greens or peppery arugula

¼–½ cup raw or toasted walnuts or pecans

Balsamic Vinaigrette Dressing

2–3 tablespoons extra-virgin olive oil

1–2 tablespoons balsamic vinegar

1 teaspoon honey or maple syrup

Salt, to taste

Freshly cracked black pepper, to taste

Instructions

Roast the Beets

Preheat the oven to 400°F (200°C).

Wash and scrub the beets thoroughly. Dry them and place them in foil or a baking dish.

Wrap the beets individually in foil or cover the baking dish. Roast for approximately 40–50 minutes, depending on their size.

Test them with a knife or fork. They should be tender all the way through.

Remove from the oven and allow them to cool until they are comfortable to handle.

Peel and Cube the Beets

Gently remove the beet skins using your fingers or a small knife.

Cut the beets into bite-sized cubes or wedges.

Allow them to cool completely before assembling the salad.

Toast the Walnuts

Place raw walnuts in a dry skillet over medium-low heat.

Toast for three to five minutes, tossing frequently, until fragrant and lightly golden.

Transfer them to a plate immediately so they do not continue cooking in the hot pan.

Make the Balsamic Dressing

Combine the extra-virgin olive oil, balsamic vinegar, honey or maple syrup, salt, and black pepper in a small bowl or jar.

Whisk or shake until emulsified.

Taste the dressing and adjust the seasoning or sweetness as needed.

Prepare the Greens

Add the mixed baby greens or arugula to a large serving bowl.

Make sure the greens are thoroughly dry before dressing them.

Build the Salad

Arrange the roasted beets over the greens.

Add the avocado slices or cubes.

Sprinkle the feta and toasted walnuts over the top.

Keep the ingredients in distinct sections if you want a colorful presentation.

Add the Dressing

Drizzle the balsamic vinaigrette over the salad immediately before serving.

Gently toss everything together or serve the dressing separately.

Add extra feta, walnuts, or black pepper if desired and serve fresh.

Tips

Select Good Beets

Choose firm, medium-sized beets without soft spots or damaged areas. Similar-sized beets will roast more evenly.

Let the Beets Cool

Allow roasted beets to cool before adding them to the greens. This prevents the greens from wilting and helps maintain the salad’s fresh texture.

Prepare Beets in Advance

Roasted beets can easily be prepared a day ahead. Store them covered in the refrigerator until ready to use.

Protect the Other Ingredients from Beet Juice

For a colorful presentation, add the beets last and gently fold them through the salad. This helps prevent the entire salad from turning pink.

Pick the Right Avocado

Use an avocado that is ripe enough to be creamy but firm enough to hold its shape. Very soft avocado can become mushy when tossed.

Keep the Greens Dry

Water left on the greens can dilute the vinaigrette and make the salad limp. Use a salad spinner or clean kitchen towel to dry them thoroughly.

Toast the Nuts Freshly

Freshly toasted walnuts have better aroma and crunch. Keep the heat moderate and watch them closely.

Dress at the Last Moment

For the best texture, add the balsamic vinaigrette immediately before eating.

Variations

Beet and Goat Cheese Salad

Swap feta for goat cheese for an especially creamy and tangy combination.

Citrus Beet Salad

Add orange or grapefruit segments for a refreshing citrus twist.

Apple and Beet Salad

Add thin slices of crisp apple. The combination of sweet beet, tart apple, salty feta, and balsamic dressing is delicious.

Fresh Herb Variation

Add chopped parsley, mint, basil, or dill for extra freshness.

Protein-Rich Version

Add chickpeas, cooked lentils, quinoa, or grilled chicken to turn the salad into a more complete meal.

Mediterranean Variation

Add Kalamata olives, cucumber, cherry tomatoes, and thinly sliced red onion.

Crunchy Seed Version

Replace some or all of the walnuts with pumpkin seeds, sunflower seeds, or pistachios.

Fully Vegan Version

Use maple syrup instead of honey and omit the feta or replace it with a plant-based feta alternative.

Q&A

Can I make the roasted beets ahead of time?

Yes. Roast, cool, peel, and refrigerate the beets in an airtight container until needed.

Can I use store-bought cooked beets?

Yes. Plain cooked beets are a convenient shortcut and work very well in this salad.

What other type of beet can I use?

Golden beets and candy-striped beets are both excellent alternatives to red beets.

Can I prepare the entire salad ahead?

It is best to prepare the individual components ahead and assemble the salad shortly before serving. Keep the avocado and dressing separate until the last moment.

How can I keep avocado fresh?

Add avocado immediately before serving. A small amount of lemon juice can also help slow browning.

Can I replace arugula?

Yes. Baby spinach, spring greens, mixed lettuce, or finely shredded kale are good alternatives.

Which nuts work best?

Walnuts and pecans are classic choices, but almonds, pistachios, and hazelnuts can also be used.

What main dishes pair well with this salad?

Serve it alongside grilled chicken, roasted fish, salmon, grilled vegetables, quinoa, couscous, or crusty bread.

Nutrition

Approximate nutrition per serving:

Calories: 320 kcal
Protein: 7 g
Fat: 24 g
Saturated Fat: 5 g
Carbohydrates: 22 g
Fiber: 7 g
Sugar: 11 g
Sodium: 390 mg

Nutrition information is an estimate and may vary according to the exact quantities and brands of ingredients used.

Conclusion

A beautiful salad does not need complicated ingredients, and this roasted beet combination is a perfect example. The earthy sweetness of roasted beets, buttery avocado, salty feta, peppery greens, and crunchy walnuts create a wonderful mix of flavors and textures in every bite.

The balsamic vinaigrette adds a bright finishing touch that brings the sweet and savory elements together. Whether you serve it as a light lunch, a side for a family dinner, or part of a larger spread, this salad is fresh, colorful, satisfying, and easy to customize.

#RoastedBeets #BeetFetaSalad #HealthyRecipes #FreshSalad #EasySalad

Ultimate Vegan Omelette Made with Just 6 Basic Ingredients

Ultimate Vegan Omelette Made with Just 6 Basic Ingredients

Looking for a simple plant-based breakfast that is hearty, flavorful, and easy to prepare? This Ultimate Vegan Omelette uses just six basic ingredients to create a delicious egg-free alternative. Chickpea flour gives the omelette its satisfying structure, while Kala Namak adds the distinctive savory flavor that makes it taste surprisingly similar to an egg-based omelette.

The filling is made with tender sautéed mushrooms and sweet white onion, but the recipe is easy to customize. Add fresh spinach for color, vegan cheese for extra richness, or fresh herbs for a bright finish. Whether served for breakfast, brunch, or a quick light meal, this simple recipe is a delicious way to add more plant-based meals to your menu.

Prep Time: 5 minutes
Cook Time: 15 minutes
Total Time: 20 minutes
Servings: 1 large omelette
Cuisine: Vegan / Plant-Based
Calories: Approximately 300 calories per serving

Ingredients

For the Batter Base

¼ cup (40g) chickpea flour, also called gram flour or besan

¼ teaspoon black salt (Kala Namak)

⅓ cup (85ml) water

For the Sautéed Filling

80g mushrooms, sliced

½ white onion (40g), diced or thinly sliced

½ tablespoon olive oil, for the vegetables

1 tablespoon olive oil, for cooking the omelette

Optional Additions

Fresh spinach, sautéed with the mushrooms

Approximately 30g vegan Cheddar or shredded vegan cheese

Fresh chives or parsley, finely chopped

Instructions

Make the Chickpea Batter

Add the chickpea flour and black salt to a mixing bowl.

Slowly add the water while whisking until the mixture becomes completely smooth.

The consistency should be thin and pourable, similar to crepe batter. Allow it to rest for about five minutes before cooking.

Prepare the Mushroom Filling

Heat ½ tablespoon olive oil in a non-stick skillet over medium heat.

Add the mushrooms and onion and sauté for five to seven minutes.

Continue cooking until the mushrooms are tender and the onion has softened.

If using spinach, add it near the end and cook until wilted.

Transfer the cooked vegetables to a plate.

Cook the Omelette

Return the skillet to medium-low heat and add 1 tablespoon olive oil.

Whisk the chickpea batter once more, then pour it into the skillet.

Gently rotate the pan to spread the batter into an even round.

Cook for approximately three to five minutes until the edges begin to firm up and the surface looks mostly set.

Fill the Omelette

Place the sautéed mushroom and onion mixture over one half of the omelette.

Add the vegan cheese if using.

Continue cooking for another minute or two, allowing the bottom to become lightly golden and the cheese to soften.

Fold and Serve

Carefully fold the empty half over the filling.

Cook for another 30 seconds to one minute, then transfer to a serving plate.

Garnish with fresh parsley or chives and serve immediately.

Tips

Make a Smooth Batter

Whisk the chickpea flour and water gradually rather than adding all the liquid at once. This helps prevent lumps.

Use the Right Pan

A non-stick skillet is the easiest option for this recipe. Make sure the cooking surface is lightly coated with olive oil before adding the batter.

Keep the Heat Moderate

High heat can cause the omelette to brown too quickly. Medium-low to medium heat allows the inside to cook while the outside develops a pleasant golden finish.

Rest the Batter

Even a short resting period allows the chickpea flour to absorb the water and creates a more consistent texture.

Keep the Omelette Relatively Thin

A thin layer cooks more evenly and folds more easily. Add a small amount of water if the batter becomes noticeably thick after resting.

Use Kala Namak Sparingly

Black salt has a powerful sulfurous flavor. The recommended amount is enough to provide an egg-like character without overwhelming the other ingredients.

Remove Moisture from the Mushrooms

Cook the mushrooms until their moisture evaporates before using them as a filling. This keeps the omelette from becoming watery.

Variations

Spinach and Mushroom

Sauté fresh spinach together with the mushrooms and onion for a colorful and nutrient-rich filling.

Vegan Cheesy Omelette

Add approximately 30g vegan Cheddar or another melting vegan cheese before folding.

Fresh Herb Omelette

Mix chopped parsley, chives, dill, or basil into the filling or sprinkle them over the finished omelette.

Spicy Version

Add chili flakes, cayenne, hot sauce, or fresh chopped chili to the mushroom mixture.

Mediterranean Style

Use mushrooms, spinach, chopped tomatoes, olives, parsley, and oregano for a Mediterranean-inspired filling.

Garden Vegetable Omelette

Add finely diced bell peppers, zucchini, green onions, or tomatoes. Cook the vegetables first to remove excess moisture.

Omelette Breakfast Wrap

Cook the chickpea batter as a thinner round and use it as a wrap. Fill with sautéed vegetables, avocado, fresh greens, and vegan cheese.

Q&A

Is this vegan omelette completely egg-free?

Yes. The base contains no eggs or dairy. Chickpea flour provides the structure, while Kala Namak creates an egg-like flavor.

Why does black salt taste like eggs?

Kala Namak contains sulfur compounds that give it a distinctive aroma and flavor similar to cooked eggs.

Can regular salt be used?

Yes, but regular salt will not provide the same egg-like flavor.

Can I prepare the batter the night before?

Yes. Store the prepared batter in a covered container in the refrigerator. Stir or whisk it thoroughly before cooking.

How can I stop the omelette from sticking?

Use a quality non-stick skillet, make sure there is enough olive oil, and cook over moderate heat rather than high heat.

Can I add vegan cheese?

Yes. About 30g of shredded vegan cheese works well. Add it over the vegetables shortly before folding.

What other fillings can I use?

Spinach, bell peppers, zucchini, tomatoes, green onions, herbs, olives, and vegan cheese are all excellent options.

Is chickpea flour naturally gluten-free?

Yes. Pure chickpea flour is naturally gluten-free, although packaged products and optional additions should be checked for cross-contamination or added ingredients if this is important to you.

Nutrition

Approximate nutrition per serving without optional additions:

Calories: 300 kcal
Protein: 11 g
Fat: 18 g
Saturated Fat: 3 g
Carbohydrates: 25 g
Fiber: 5 g
Sugar: 6 g
Sodium: 650 mg

Nutrition information is approximate and can change based on the specific ingredients and optional additions used.

Conclusion

With only a handful of everyday ingredients, this vegan omelette delivers plenty of flavor and texture without relying on eggs. The chickpea flour creates a tender, satisfying base, Kala Namak provides its signature savory egg-like note, and the mushroom and onion filling makes every bite hearty and flavorful.

It is a flexible recipe that can easily change depending on what you have in the refrigerator. Add spinach, vegan cheese, herbs, or colorful vegetables, or keep it simple with the original six-ingredient combination. This is an easy plant-based breakfast that is quick, affordable, and satisfying enough to enjoy any day of the week.

#VeganBreakfast #VeganOmelette #PlantBasedBreakfast #EasyVeganRecipes #HealthyRecipes

Oven Baked Chicken Mushroom Cheese Casserole Oven Baked Chicken Mushroom Cheese Casserole

Oven Baked Chicken Mushroom Cheese Casserole

When you need a warm, hearty dinner that everyone around the table will enjoy, this Oven Baked Chicken Mushroom Cheese Casserole is an excellent choice. Tender pieces of chicken are combined with golden mushrooms, sweet onion, fresh garlic, and a silky cream sauce before being covered with Parmesan and plenty of melted cheese.

As it bakes, the sauce becomes rich and creamy while the cheese melts into a golden, bubbling layer across the top. Every spoonful has tender chicken, flavorful mushrooms, creamy sauce, and gooey cheese. It is the perfect comfort food for a cozy evening and pairs wonderfully with simple sides.

Prep Time: 15 minutes
Cook Time: 35 minutes
Total Time: 50 minutes
Servings: 6
Cuisine: American / Comfort Food
Calories: Approximately 570 calories per serving

Ingredients

Main Ingredients

1.5 lbs boneless, skinless chicken breasts or thighs, cubed

8 oz fresh white button or cremini mushrooms, sliced

1 medium onion, diced

4 cloves garlic, minced

The Creamy Sauce Base

2 tablespoons butter

2 tablespoons olive oil, for searing

2 tablespoons all-purpose flour

1 cup chicken broth

1 cup heavy cream

The Cheeses & Garnish

1½ cups shredded Cheddar or Mozzarella cheese

½ cup grated Parmesan cheese

A small handful fresh parsley, finely chopped

Seasonings

1 teaspoon salt

½ teaspoon black pepper

1 teaspoon Italian seasoning, or a pinch of dried thyme

Instructions

Prepare the Chicken

Preheat the oven to 375°F (190°C).

Pat the cubed chicken dry with paper towels. Season with half of the salt and black pepper.

Heat the olive oil in a large oven-safe skillet over medium-high heat. Add the chicken and sear for several minutes, turning occasionally, until lightly golden on the outside.

The chicken does not have to be fully cooked because it will continue cooking in the oven. Transfer it to a plate and set aside.

Cook the Mushrooms and Aromatics

Add the butter to the same skillet and reduce the heat to medium.

Add the diced onion and cook for three to four minutes until softened.

Add the sliced mushrooms and cook for five to seven minutes. Let them release their moisture and develop some golden color.

Stir in the minced garlic and cook for approximately 30 seconds, until fragrant.

Make the Creamy Sauce

Sprinkle the flour over the mushroom mixture and stir continuously for about one minute.

Slowly add the chicken broth while stirring constantly. Continue stirring as the liquid is incorporated.

Pour in the heavy cream and stir until the sauce becomes smooth.

Add the remaining salt, black pepper, and Italian seasoning.

Allow the sauce to gently simmer for a few minutes until slightly thickened. Do not let it boil vigorously.

Combine Everything

Return the seared chicken and any juices from the plate to the skillet.

Stir gently until the chicken and mushrooms are evenly coated in the creamy sauce.

If you are not using an oven-safe skillet, transfer the mixture to a lightly greased casserole dish.

Spread everything into an even layer.

Add the Cheese

Sprinkle Parmesan evenly over the chicken mixture.

Cover the top with shredded Cheddar or Mozzarella.

Make sure the cheese reaches across most of the surface so it creates a rich, golden topping during baking.

Bake

Place the casserole in the preheated oven and bake uncovered for 20–25 minutes.

The casserole is ready when the chicken is cooked through and the cheese is melted, bubbling, and lightly golden.

For a deeper golden finish, broil for one to two minutes at the end, keeping a close eye on it.

Rest and Garnish

Remove the casserole from the oven and allow it to rest for approximately five minutes.

Scatter freshly chopped parsley over the top.

Serve warm with your favorite side dishes.

Tips

Sear the Chicken Properly

Patting the chicken dry before cooking helps it brown instead of steaming. Avoid overcrowding the skillet, as this can prevent the chicken from developing a flavorful golden exterior.

Take Your Time with the Mushrooms

Well-browned mushrooms add wonderful depth to the casserole. Cook them until their excess moisture has evaporated and their edges begin to turn golden.

Keep the Sauce Smooth

Add the broth gradually and stir continuously after adding the flour. This simple step helps prevent lumps and produces a smoother creamy sauce.

Do Not Boil the Cream Sauce Aggressively

A gentle simmer is enough to thicken the sauce. High heat can cause cream-based sauces to separate.

Grate Cheese Freshly When Possible

Freshly grated cheese usually melts more evenly. Mozzarella provides a mild, stretchy topping, while Cheddar adds more pronounced flavor.

Check the Chicken

Because chicken pieces vary in size, cooking time can vary slightly. The chicken should reach a safe internal temperature of 165°F (74°C).

Rest Before Serving

A short resting period allows the sauce to settle and makes the casserole easier to portion without the sauce immediately running across the plate.

Variations

Creamy Spinach Chicken

Add fresh spinach to the mushroom sauce and cook until wilted before returning the chicken to the skillet.

Chicken Mushroom Broccoli Casserole

Add cooked or lightly steamed broccoli florets to the casserole before adding the cheese. Cheddar works particularly well with this variation.

Italian-Style Chicken Casserole

Use Italian seasoning, Parmesan, mozzarella, and a little extra garlic. Fresh basil or parsley can be added after baking.

Spicy Chicken Mushroom Casserole

Add red pepper flakes, cayenne, or your favorite chili seasoning to the sauce for a spicy version.

Vegetable Loaded Version

Add sliced bell peppers, zucchini, spinach, or broccoli to increase the vegetable content and create an even heartier casserole.

Chicken Thigh Version

Use boneless, skinless chicken thighs for a richer and juicier result. Cut them into evenly sized pieces so they cook consistently.

Lighter Version

Replace some of the heavy cream with whole milk and use olive oil instead of some of the butter. The result will be lighter while remaining creamy.

Q&A

Can I use chicken breasts or thighs?

Both work well. Chicken breasts offer a leaner option, while boneless chicken thighs tend to stay particularly juicy and tender.

Can I use pre-cooked chicken?

Yes. If using cooked chicken, reduce the initial searing step and add the chicken when combining the sauce. Avoid baking it for too long so it does not become dry.

What mushrooms should I use?

White button and cremini mushrooms are excellent choices. Baby bella, shiitake, or mixed mushrooms can also be used.

Can I use half-and-half instead of heavy cream?

Yes. Half-and-half will create a lighter sauce. The finished casserole may be slightly less rich and thick.

Can I make this without flour?

You can use cornstarch as an alternative thickener. Mix a small amount with cold broth or water first to create a slurry before adding it to the sauce.

What should I serve with chicken mushroom casserole?

Crusty bread, mashed potatoes, roasted potatoes, rice, pasta, steamed vegetables, or a fresh green salad are all delicious options.

How long will leftovers last?

Keep leftovers refrigerated in an airtight container and consume within about three days.

Can I freeze the casserole?

Yes, although the texture of the cream sauce may change slightly after freezing and thawing. Cool completely before freezing and thaw overnight in the refrigerator before reheating.

Nutrition

Approximate nutrition per serving:

Calories: 570 kcal
Protein: 42 g
Fat: 38 g
Saturated Fat: 19 g
Carbohydrates: 12 g
Fiber: 1 g
Sugar: 4 g
Sodium: 850 mg

Nutrition information is estimated and may change depending on the exact ingredients, brands, cheese, cream, and portion sizes used.

Conclusion

Few things are more comforting than a bubbling casserole fresh from the oven, and this chicken and mushroom version delivers plenty of cozy flavor. The creamy sauce brings the chicken and mushrooms together, while Parmesan and melted Cheddar or Mozzarella create a deliciously cheesy finish.

Whether you are cooking for your family, preparing a satisfying Sunday dinner, or simply craving something creamy and hearty, this casserole is an easy recipe to keep in your rotation. Serve it with warm bread or your favorite side dish and enjoy a comforting homemade meal straight from the oven.

#ChickenCasserole #MushroomChicken #CheesyCasserole #FamilyDinner #EasyChickenRecipes

Peach Yogurt Parfait

Peach yogurt parfait layered with fresh sliced peaches, creamy Greek yogurt, and crunchy granola in a clear glass

Peach Yogurt Parfait

A Peach Yogurt Parfait is a quick, fresh, and creamy breakfast or dessert made with ripe peaches, yogurt, and crunchy granola. Each spoonful combines juicy fruit, smooth yogurt, and a satisfying crunch.

This easy peach parfait takes about 15 minutes to assemble and needs no cooking. It works well for busy mornings, afternoon snacks, or a light summer dessert.

Using Greek yogurt gives the parfait a thick texture and adds protein, while fresh peaches provide natural sweetness and a juicy bite. A small drizzle of honey or maple syrup can add extra sweetness when needed.

The layers also make this recipe easy to serve for brunch, family breakfasts, or casual gatherings. Prepare the ingredients ahead of time and assemble the glasses shortly before serving for the best texture.

Why You’ll Love This Peach Yogurt Parfait

This recipe uses simple ingredients that are easy to find at most U.S. grocery stores. You can also adjust the layers based on the fruit, yogurt, or toppings you have available.

Fresh peaches bring a naturally sweet flavor without needing much added sugar. Greek yogurt adds creaminess and helps make each serving more filling.

Granola adds texture and turns a simple bowl of yogurt and fruit into a more satisfying meal. Honey or maple syrup can be added according to the sweetness of the peaches.

The recipe is also flexible enough for different diets. Use dairy-free yogurt for a plant-based version or choose a lower-sugar granola if you want to reduce added sugar.

Ingredients

For 2–3 servings, you will need:

  • 2 large ripe peaches, diced or thinly sliced
  • 2 cups plain or Greek yogurt
  • 1 cup granola
  • 2–3 tablespoons honey or maple syrup
  • Fresh mint leaves, for garnish

Optional Add-Ins

  • 1 tablespoon chia seeds for extra fiber
  • 2 tablespoons chopped pistachios or nuts for additional crunch
  • ¼ teaspoon ground cinnamon for warm flavor
  • 1 tablespoon sweetened condensed milk for a richer dessert-style parfait
  • A little lemon zest for a bright citrus note

Choose peaches that feel slightly soft when gently pressed. Very firm peaches may not provide the same juicy texture.

How to Make Peach Yogurt Parfait

Prepare the Peaches

Wash the peaches under cool running water and pat them dry. Cut each peach in half, remove the pit, and dice or thinly slice the fruit.

Keep the pieces fairly even so the layers are easy to build and each spoonful contains a good mix of ingredients.

Sweeten the Yogurt

Taste the yogurt before adding sweetener. If it tastes too tart, stir in about 1 tablespoon of honey or maple syrup.

Plain Greek yogurt works especially well because its thick consistency holds the layers together without becoming watery.

Build the First Layer

Place about 2–3 tablespoons of yogurt into the bottom of each clear glass, jar, or dessert cup.

Spread it gently into an even layer so the next ingredients remain visible from the outside.

Add Peaches and Granola

Add a layer of diced peaches over the yogurt. Follow with a small handful of granola.

Avoid adding too much granola at once because thick layers can make the parfait difficult to eat with a spoon.

Repeat the Layers

Continue with another layer of yogurt, peaches, and granola until the glasses are almost full.

Finish with peaches and a light sprinkle of granola for an attractive presentation.

Add Toppings and Serve

Drizzle a small amount of honey or maple syrup over the top. Add chopped pistachios, chia seeds, cinnamon, or a fresh mint leaf if desired.

Serve immediately for crisp granola and fresh peaches.

Tips for the Best Peach Parfait

Choose ripe peaches: Ripe fruit provides more flavor, moisture, and natural sweetness than underripe peaches.

Use thick yogurt: Greek yogurt creates sturdy layers and gives the parfait a rich, creamy texture.

Add granola at the right time: Layer granola immediately before serving if you want it to stay crunchy.

Taste before sweetening: Very ripe peaches may provide enough sweetness that you need little or no honey.

Keep the layers moderate: Thin layers make it easier to get yogurt, fruit, and granola in every bite.

Chill the ingredients: Cold yogurt and peaches make the finished parfait especially refreshing.

Use clear serving glasses: Transparent cups highlight the colorful layers and make the parfait look more appealing.

Prepare toppings separately: Keep nuts, granola, and other crunchy toppings dry until assembly.

Easy Variations

Berry Peach Parfait

Add fresh blueberries or sliced strawberries between the peach layers. The berries provide extra color and a mild tart flavor.

Peach Almond Parfait

Use almond granola or sprinkle toasted sliced almonds between the layers for a nutty finish.

Tropical Peach Parfait

Add diced mango and unsweetened coconut flakes for a tropical combination that works especially well in warm weather.

Peach Chia Parfait

Sprinkle chia seeds over the yogurt or stir them into the yogurt before assembling the glasses.

Protein Peach Parfait

Mix a serving of your preferred protein powder into the yogurt before layering. Choose a plain or vanilla variety that complements the peaches.

Dairy-Free Peach Parfait

Replace regular yogurt with coconut, almond, soy, or another dairy-free yogurt. Use maple syrup instead of honey for a fully plant-based option.

Peach Cinnamon Parfait

Add a light sprinkle of cinnamon between the yogurt and peach layers for a warm, lightly spiced flavor.

Dessert-Style Peach Parfait

Top the parfait with a small amount of whipped cream and crushed cookies when you want a sweeter after-dinner treat.

How to Store Peach Yogurt Parfait

A prepared parfait can be refrigerated in a covered container for up to 24 hours. However, the granola will soften as it sits in the yogurt and fruit.

For the best texture, store the yogurt and peaches separately from the granola. Assemble the parfait shortly before eating.

If you are preparing parfaits for breakfast, portion the yogurt and peaches into containers the night before and keep the granola in a separate small container.

Can You Make Peach Parfait Ahead of Time?

Yes, you can prepare most of the ingredients ahead of time. Wash and cut the peaches, portion the yogurt, and measure the granola separately.

For the freshest texture, assemble the layers shortly before serving. This keeps the granola crisp and prevents excess moisture from softening it.

For meal prep, mason jars with separate dry toppings are a convenient option for taking breakfast to work or school.

Serving Ideas

Serve this peach parfait for breakfast with scrambled eggs, whole-grain toast, or a cup of coffee. It also fits well on a brunch table alongside fresh fruit and other light breakfast dishes.

For dessert, use smaller glasses and add cinnamon, pistachios, or a small spoonful of whipped cream.

This recipe is also easy to scale for guests. Simply multiply the ingredients based on the number of servings and prepare the components in advance.

Frequently Asked Questions

Can I use canned peaches for this parfait?

Yes. Drain canned peaches thoroughly and choose peaches packed in juice rather than heavy syrup for a fresher flavor.

What yogurt is best for a peach parfait?

Plain or vanilla Greek yogurt works well because it is thick, creamy, and rich in protein.

Can I make this recipe without honey?

Yes. Skip the honey if your peaches and yogurt are sweet enough, or use maple syrup as an alternative.

How long does a yogurt parfait last in the refrigerator?

A prepared parfait can be refrigerated for up to 24 hours, but the granola will become softer over time.

Can I use frozen peaches?

Yes. Thaw frozen peaches completely and drain excess liquid before adding them to the parfait.

How can I keep the granola crunchy?

Add the granola immediately before serving, or store it separately and sprinkle it over the parfait when ready to eat.

Can I make this parfait dairy-free?

Yes. Use coconut, almond, soy, or another dairy-free yogurt and replace honey with maple syrup if needed.

What fruit goes well with peaches?

Blueberries, strawberries, mango, pineapple, and bananas all pair well with the sweet flavor of peaches.

Nutrition Information

Approximate nutrition per serving:

  • Calories: 280
  • Protein: 12 g
  • Carbohydrates: 40 g
  • Fiber: 4 g
  • Fat: 8 g
  • Sugar: 22 g

Nutrition values vary based on the type of yogurt, granola, fruit, and sweetener used. Check individual product labels for more precise information.

Final Thoughts

Peach Yogurt Parfait is a simple way to turn fresh summer peaches into a creamy, colorful, and satisfying breakfast or dessert. The combination of thick yogurt, juicy fruit, and crunchy granola gives every layer a different texture.

The recipe takes only a few minutes to assemble and can be adjusted with berries, nuts, chia seeds, cinnamon, or dairy-free yogurt. For the best results, use ripe peaches and add the granola just before serving.

Whether you need a quick weekday breakfast, a refreshing snack, or an easy dessert for guests, this layered peach treat is a practical recipe to keep on hand.

Baked Salmon in Foil with Asparagus and Lemon Garlic Sauce

Bilkul. Numbers aur bullet dots remove karke, end mein Top 5 Hashtags add kar raha hoon.

Baked Salmon in Foil with Asparagus and Lemon Garlic Sauce

This Baked Salmon in Foil with Asparagus and Lemon Garlic Sauce is an easy, flavorful dinner that brings together tender salmon, crisp-tender asparagus, buttery garlic, fresh lemon, and a touch of hot sauce. Everything cooks together in a foil packet, allowing the salmon to stay moist while the asparagus absorbs all those delicious lemon-garlic flavors.

It is perfect for busy weeknights because there is very little preparation and almost no cleanup. Simply assemble the foil packets, bake, and open them at the table for a fresh, restaurant-style meal. Serve it with rice, roasted potatoes, quinoa, or crusty bread for a complete dinner.

Prep Time: 10 minutes
Cook Time: 15–20 minutes
Total Time: 25–30 minutes
Servings: 4
Cuisine: American-inspired / Mediterranean-style
Calories: Approximately 430 calories per serving

Ingredients

Main Components

1 pound (450g) salmon fillets, divided into 4 portions
1 pound (450g) medium-thick asparagus, woody ends trimmed

Lemon Garlic Sauce & Seasonings

4 teaspoons minced garlic, about 4 cloves
3–4 tablespoons butter, diced into small cubes, or ghee
2 tablespoons vegetable broth or chicken broth
1½ tablespoons fresh lemon juice
Extra lemon slices, for garnish
1 tablespoon hot sauce, such as Sriracha
2 tablespoons fresh parsley or cilantro, finely chopped
Salt, to taste
Freshly ground black pepper, to taste

Instructions

Prepare the Oven

Preheat your oven to 400°F (200°C). Prepare four large sheets of aluminum foil, making sure each piece is large enough to completely enclose one portion of salmon and asparagus.

For easier cleanup, you can place a sheet of parchment paper inside each piece of foil before adding the ingredients.

Prepare the Asparagus

Wash the asparagus thoroughly and pat it dry. Trim or snap off the woody ends.

Divide the asparagus evenly among the four foil sheets and arrange it in the center of each sheet. Season lightly with salt and freshly ground black pepper.

If your asparagus is especially thick, slice the spears lengthwise or blanch them briefly so they cook at the same rate as the salmon.

Make the Lemon Garlic Sauce

Add the minced garlic, vegetable broth or chicken broth, fresh lemon juice, and hot sauce to a small bowl.

Stir until well combined. The butter will be divided directly among the packets, allowing it to melt over the salmon and asparagus as they cook.

Assemble the Packets

Place one salmon fillet over each portion of asparagus.

Season the salmon with salt and freshly ground black pepper.

Spoon the lemon-garlic mixture over the salmon and asparagus. Divide the diced butter between the packets, placing the cubes directly over each salmon fillet.

Sprinkle the chopped parsley or cilantro over the top and add a couple of lemon slices to each packet.

Seal the Foil

Bring the long sides of the foil together over the salmon and fold them down securely. Fold the shorter sides inward to create a sealed packet.

Do not wrap the foil directly against the salmon. Leave some room inside so steam can circulate properly.

Bake the Salmon

Place the sealed packets on a baking sheet and transfer them to the preheated oven.

Bake for approximately 15–20 minutes, depending on the thickness of the salmon.

Thinner fillets may cook in around 12–15 minutes, while thicker portions may require closer to 20 minutes.

Check for Doneness

Carefully open one packet because hot steam will escape.

The salmon should be opaque and should flake easily with a fork. For the most accurate result, check the thickest part with an instant-read thermometer.

The FDA recommends cooking salmon and other finfish to an internal temperature of 145°F (63°C).

Serve

Transfer each salmon portion and asparagus to a serving plate.

Spoon the buttery lemon-garlic sauce from the bottom of the packet over the salmon.

Garnish with additional fresh herbs and lemon slices and serve immediately.

Tips

Choose Good Quality Salmon

Fresh salmon fillets with an even thickness are best because they cook more consistently. Atlantic salmon, sockeye, and coho are all suitable choices.

If using frozen salmon, thaw it completely in the refrigerator and pat it very dry before seasoning.

Avoid Overcooking

Salmon can become dry when cooked too long. Start checking the fish toward the lower end of the suggested cooking time, particularly when using thin fillets.

Cooking time is determined mostly by the thickness of the salmon rather than its total weight.

Use Fresh Lemon

Freshly squeezed lemon juice gives the sauce a much brighter flavor than bottled lemon juice. Adding a little lemon zest can make the citrus flavor even more noticeable.

Trim Asparagus Properly

The bottom ends of asparagus can be tough and fibrous. Snap off the woody ends naturally or trim approximately one to two inches from the bottom.

Try to choose asparagus spears of similar thickness so they cook evenly.

Seal the Packets Properly

A good seal traps the steam and keeps the salmon juicy. Make sure there are no large gaps around the edges.

At the same time, leave enough space inside the packet for steam to move around the ingredients.

Be Careful with Steam

Always open the packets carefully and away from your face. The steam trapped inside can be extremely hot.

Allowing the packets to rest for a minute before opening them can also make them easier to handle.

Adjust the Spice Level

Sriracha adds a pleasant spicy kick. For a milder dish, reduce the amount or leave it out completely.

For more heat, add a pinch of red pepper flakes or a little extra hot sauce.

Variations

Mediterranean Salmon Foil Packets

Add halved cherry tomatoes, Kalamata olives, and crumbled feta before sealing the packets. Finish with fresh oregano or dill for a delicious Mediterranean-inspired version.

Honey Garlic Salmon

Add one tablespoon of honey to the lemon-garlic sauce. The sweetness balances the lemon and spicy Sriracha beautifully.

Herb Butter Salmon

Combine softened butter with minced garlic, parsley, dill, lemon zest, salt, and pepper. Place the herb butter over the salmon before sealing the packets.

Creamy Lemon Salmon

After baking, serve the salmon with a simple sauce made from Greek yogurt, lemon juice, garlic, salt, and fresh herbs.

Salmon with Extra Vegetables

Add thinly sliced zucchini, bell peppers, green beans, broccoli florets, or cherry tomatoes. Choose vegetables that cook relatively quickly so everything finishes at approximately the same time.

Dairy-Free Salmon

Replace the butter with extra-virgin olive oil or a plant-based butter alternative. Olive oil gives the dish a lighter Mediterranean flavor.

Parchment Salmon Packets

If you prefer not to cook with aluminum foil, use parchment paper instead. Fold the parchment securely around the salmon and vegetables to create a sealed cooking packet.

Q&A

Can I use frozen salmon?

Yes. Thaw the salmon completely in the refrigerator before cooking and pat it dry with paper towels to remove excess moisture.

How do I know when the salmon is done?

The salmon should be opaque and flake easily with a fork. For the safest and most accurate measurement, cook it to an internal temperature of 145°F (63°C).

Can I prepare the packets ahead of time?

Yes. You can assemble them several hours ahead and keep them refrigerated until ready to bake. Keep the uncooked salmon properly refrigerated and bake it the same day.

Can I use olive oil instead of butter?

Yes. Extra-virgin olive oil is an excellent substitute and pairs especially well with the lemon, garlic, herbs, and salmon.

What should I serve with this salmon?

Rice, quinoa, couscous, roasted potatoes, mashed potatoes, crusty bread, or a simple green salad are all excellent choices.

Can I leave out the Sriracha?

Absolutely. The recipe is delicious without it. You can also replace it with a small pinch of red pepper flakes for a gentler spicy flavor.

Why is my asparagus still firm?

Very thick asparagus can require more time to become tender. Choose medium-thick spears or cut very thick stalks lengthwise before cooking.

Which herbs work best?

Parsley, dill, basil, oregano, thyme, cilantro, and chives all work well. Dill and parsley are especially delicious with lemon and salmon.

Nutrition

Approximate nutrition per serving:

Calories: 430 kcal
Protein: 36 g
Fat: 29 g
Saturated Fat: 8 g
Carbohydrates: 8 g
Fiber: 4 g
Sugar: 3 g
Sodium: 500–650 mg

Nutrition information is an estimate and can vary depending on the salmon variety, butter quantity, broth, hot sauce, and seasonings used.

Conclusion

Baked Salmon in Foil with Asparagus and Lemon Garlic Sauce is a simple way to prepare a flavorful, tender, and satisfying dinner with minimal effort. The salmon cooks gently inside the foil while the asparagus absorbs the buttery lemon-garlic sauce, creating a delicious combination in every bite.

With just a few basic ingredients and around 30 minutes, you can have a wholesome meal that feels special enough for guests but is easy enough for a busy weeknight. Serve it with your favorite grain, potatoes, or fresh salad, spoon the flavorful sauce over the salmon, and finish with fresh lemon and herbs.

#BakedSalmon #SalmonRecipe #HealthyDinner #EasyDinner #MediterraneanRecipes

Creamy Chicken & Mushroom Dish

Creamy Chicken & Mushroom Dish

Tender chicken, earthy mushrooms, and colorful bell peppers come together in this delicious skillet dish coated in a savory, glossy black pepper sauce. With garlic, ginger, soy sauce, and oyster sauce adding layers of flavor, this easy chicken recipe is perfect when you want a quick homemade dinner that feels special and satisfying.

Prep Time: 20 minutes
Marinating Time: 15 minutes
Cook Time: 15 minutes
Total Time: 50 minutes
Servings: 4
Cuisine: Asian-Inspired
Category: Main Course, Chicken, Stir-Fry

Ingredients

Main Stir-Fry Ingredients

1 to 1½ pounds boneless, skinless chicken breasts or thighs, cut into bite-sized cubes

8 ounces white button or cremini mushrooms, thickly sliced

1 red bell pepper, cut into chunks or thick strips

1 green bell pepper, cut into chunks or thick strips

3 to 4 cloves garlic, minced

1 teaspoon fresh ginger, minced

2 tablespoons vegetable oil or avocado oil

Chicken Marinade

1 tablespoon soy sauce

1 tablespoon cornstarch

½ teaspoon ground black pepper

½ teaspoon salt

1 egg white, optional

Glossy Black Pepper Sauce

1 to 2 teaspoons freshly cracked or coarsely crushed black peppercorns

2 tablespoons soy sauce

1 tablespoon oyster sauce

1 teaspoon brown sugar or honey

1 teaspoon cornstarch

¼ cup water or chicken broth

Instructions

Begin by preparing the chicken. Cut the chicken breasts or thighs into evenly sized bite-sized cubes and place them in a medium bowl.

Add the soy sauce, cornstarch, ground black pepper, salt, and optional egg white. Mix gently until every piece of chicken is coated. Cover the bowl and allow the chicken to marinate for about 15 minutes.

While the chicken marinates, prepare the vegetables. Thickly slice the mushrooms, cut both bell peppers into chunks or strips, mince the garlic, and finely mince the fresh ginger.

Next, prepare the black pepper sauce. In a small bowl, combine the freshly cracked black pepper, soy sauce, oyster sauce, brown sugar or honey, cornstarch, and water or chicken broth. Whisk until the cornstarch dissolves completely. Set the sauce aside.

Heat 1 tablespoon of oil in a large skillet or wok over medium-high heat. Once the pan is hot, add the marinated chicken in a single layer.

Cook the chicken for approximately 5 to 7 minutes, turning occasionally, until the outside becomes golden and the chicken is almost fully cooked. Avoid overcrowding the pan. If your skillet is small, cook the chicken in batches.

Transfer the chicken to a clean plate and set it aside.

Add the remaining tablespoon of oil to the same skillet. Add the mushrooms and cook for approximately 3 to 4 minutes. The mushrooms will initially release moisture before becoming golden and tender.

Add the red and green bell peppers and continue stir-frying for another 2 to 3 minutes. The peppers should soften slightly while maintaining a pleasant crisp texture.

Add the minced garlic and ginger. Stir continuously for approximately 30 seconds until fragrant. Be careful because garlic can burn quickly.

Return the chicken to the skillet with the vegetables. Give the prepared sauce another quick whisk because the cornstarch may settle at the bottom.

Pour the black pepper sauce over the chicken and vegetables. Stir everything together over medium heat for approximately 2 to 3 minutes.

As the sauce heats, it will become glossy and slightly thick. Continue stirring until every piece of chicken and every vegetable is coated.

Check that the chicken is fully cooked and reaches an internal temperature of 165°F (74°C). If the sauce becomes too thick, add a small splash of water or chicken broth.

Remove the skillet from the heat and serve immediately. This dish is delicious with steamed jasmine rice, brown rice, noodles, fried rice, or roasted vegetables.

Tips

Cut the chicken evenly: Similar-sized chicken pieces cook more evenly and prevent smaller pieces from becoming dry before larger pieces are fully cooked.

Do not skip the marinade: The soy sauce adds flavor, while cornstarch helps create a light coating that keeps the chicken tender and helps the sauce stick.

Use a hot skillet: Stir-frying works best when the pan is properly heated before adding the chicken. A hot skillet helps create a golden exterior.

Avoid overcrowding: Too much chicken in the skillet at one time will lower the temperature and cause the chicken to steam instead of brown.

Use freshly cracked black pepper: Freshly cracked pepper has a much stronger aroma and flavor than finely ground pepper. Adjust the amount according to your preferred level of heat.

Cook mushrooms properly: Allow mushrooms enough time in the pan to release their moisture. Once the excess liquid evaporates, they can begin developing a deeper golden flavor.

Add garlic and ginger near the end: These ingredients cook quickly and can become bitter if burned. Adding them after the vegetables helps preserve their fresh flavor.

Whisk the sauce before adding: Cornstarch settles quickly, so always stir or whisk the sauce immediately before pouring it into the skillet.

Control the sauce thickness: If the sauce becomes too thick, add broth one tablespoon at a time. If it is too thin, allow it to simmer for an additional minute.

Taste before adding extra salt: Soy sauce and oyster sauce contain salt, so taste the finished dish before adding more.

Variations

Spicy Black Pepper Chicken: Add sliced chili peppers, crushed red pepper flakes, or chili garlic sauce for additional heat.

Creamy Mushroom Version: Stir a small amount of heavy cream into the finished sauce for a richer and creamier dish.

Extra Vegetable Version: Add broccoli, snow peas, snap peas, zucchini, carrots, or baby corn for additional color and nutrition.

Chicken and Noodle Version: Toss the finished chicken and sauce with cooked noodles for an easy one-pan noodle dinner.

Honey Garlic Version: Increase the honey slightly and add an additional clove of garlic for a sweeter garlic-forward flavor.

Ginger Chicken Version: Double the amount of fresh ginger for a stronger, fresh, aromatic taste.

Low-Carb Version: Serve the chicken and vegetables with cauliflower rice or steamed greens instead of regular rice.

Tofu Version: Replace chicken with firm tofu. Press it well before cutting and pan-frying until golden.

Shrimp Version: Use peeled and deveined shrimp instead of chicken. Cook shrimp quickly and return them to the sauce just before serving.

Q&A

Can I use chicken thighs instead of chicken breasts?

Yes. Boneless, skinless chicken thighs are an excellent choice because they remain juicy and have a rich flavor.

Is the egg white necessary?

No. It is optional, but it can help create a softer and more tender texture.

Can I make this recipe ahead of time?

Yes. You can chop the vegetables, prepare the sauce, and marinate the chicken ahead of time. Cook the dish fresh for the best texture.

How do I know when the chicken is fully cooked?

Chicken should reach an internal temperature of 165°F (74°C).

Can I use regular black pepper?

Yes, but freshly cracked or coarsely crushed black pepper provides a stronger and more distinctive flavor.

What can I serve with this dish?

Steamed rice, brown rice, noodles, fried rice, quinoa, or cauliflower rice are all excellent choices.

Can I make this gluten-free?

Yes. Use gluten-free soy sauce or tamari and make sure your oyster sauce is certified gluten-free.

How do I store leftovers?

Store cooled leftovers in an airtight container in the refrigerator for up to 3 days. Reheat gently in a skillet or microwave.

Nutrition

Approximate nutrition per serving, based on 4 servings:

Calories: 380 kcal
Protein: 39g
Carbohydrates: 18g
Fat: 17g
Saturated Fat: 3g
Fiber: 3g
Sugar: 6g
Sodium: 850mg
Cholesterol: 105mg

Nutrition values are approximate and may vary depending on the type of chicken and exact ingredients used.

Conclusion

With its juicy chicken, tender mushrooms, crisp peppers, and glossy black pepper sauce, this recipe delivers plenty of flavor with simple everyday ingredients. The combination of garlic, ginger, soy sauce, and oyster sauce creates a delicious balance that makes every bite satisfying.

It is also a versatile dish that can be served with different grains, noodles, or vegetables and easily adjusted to suit your preferred spice level. Whether prepared for a quick weeknight meal or included in your weekly meal plan, this flavorful chicken and mushroom dish is a comforting recipe worth making again.

#MushroomChickenRecipe
#EasyStirFry
#ChickenDinnerIdeas
#QuickHomemadeMeals
#FlavorfulFood

Garlic Soy Chicken & Green Veggie Brown Rice Bowl Garlic Soy Chicken & Green Veggie Brown Rice Bowl

Garlic Soy Chicken & Green Veggie Brown Rice Bowl

Tender chicken and vibrant vegetables are tossed in a rich garlic soy glaze and served over fluffy brown rice in this easy homemade bowl. It is a fresh, flavorful, and satisfying recipe that works beautifully for healthy dinners and make-ahead lunches.

If you enjoy simple stir-fry meals packed with vegetables, this bowl is a delicious choice. Broccoli, asparagus, snap peas, colorful bell peppers, and juicy chicken are quickly cooked to preserve their texture before being coated in a savory sauce with a hint of sweetness from honey.

Prep Time: 20 minutes
Cook Time: 35 minutes
Total Time: 55 minutes
Servings: 4 to 6
Cuisine: Asian-Inspired
Category: Main Course, Rice Bowl, Meal Prep

Ingredients

Brown Rice Base

1½ cups brown rice

3 cups water

½ teaspoon salt

Chicken & Vegetables

2 boneless chicken breasts, cut into bite-sized cubes

2 cups broccoli florets

1 bunch asparagus, trimmed and cut into bite-sized pieces

1 cup snap peas or green beans

½ red bell pepper, thinly sliced

½ yellow bell pepper, thinly sliced

½ cup onion, chopped

3 cloves garlic, minced

2 tablespoons vegetable oil or olive oil

Black sesame seeds, optional, for garnish

Garlic Soy Sauce

3 tablespoons soy sauce

1 tablespoon honey

1 tablespoon oyster sauce

1 teaspoon cornstarch

½ cup chicken broth

¼ teaspoon black pepper

Instructions

Start by cooking the brown rice because it takes longer than the chicken and vegetables. Rinse the brown rice under cold water until the water runs mostly clear. This helps remove excess surface starch.

Add the rinsed brown rice, water, and salt to a medium saucepan. Bring the mixture to a boil over medium-high heat. Once boiling, reduce the heat to low, cover the pan with a tight-fitting lid, and allow the rice to simmer.

Cook the rice for approximately 35 to 40 minutes, or according to the package instructions. Once the rice is tender and the liquid has been absorbed, remove the saucepan from the heat and allow it to rest, covered, for 10 minutes. Fluff the rice gently with a fork before serving.

While the rice is cooking, prepare all the chicken, vegetables, and sauce ingredients. Cut the chicken breasts into evenly sized cubes so they cook at approximately the same rate. Chop the vegetables and mince the garlic.

In a small bowl, prepare the garlic soy sauce. Combine the soy sauce, honey, oyster sauce, cornstarch, chicken broth, and black pepper. Whisk well until the cornstarch is completely dissolved. Set the sauce aside.

Heat 1 tablespoon of oil in a large skillet or wok over medium-high heat. Add the chicken cubes in a single layer. Avoid overcrowding the pan. If necessary, cook the chicken in batches.

Cook the chicken for approximately 5 to 7 minutes, turning occasionally, until it becomes golden on the outside and is fully cooked. The internal temperature should reach 165°F (74°C). Transfer the cooked chicken to a plate and set it aside.

Add the remaining tablespoon of oil to the same skillet. Add the chopped onion and cook for about 2 minutes until it begins to soften.

Add the broccoli and asparagus. Stir-fry for approximately 3 to 4 minutes. These vegetables should become bright and slightly tender while maintaining some crispness.

Add the snap peas or green beans and continue cooking for another 2 minutes. Add the red and yellow bell peppers and stir-fry for another 1 to 2 minutes.

Add the minced garlic during the final minute of cooking. Stir constantly so the garlic becomes fragrant without burning.

Return the cooked chicken to the skillet with the vegetables. Give the prepared garlic soy sauce another quick whisk because the cornstarch may settle at the bottom of the bowl.

Pour the sauce into the skillet and toss everything together. Reduce the heat slightly and cook for approximately 2 to 3 minutes. The sauce will begin to bubble and thicken as the cornstarch activates.

Continue stirring until the chicken and vegetables are evenly coated in the glossy sauce. If the sauce becomes thicker than desired, add a small splash of chicken broth or water.

To assemble the bowls, divide the warm brown rice among four to six serving bowls. Spoon the garlic soy chicken and colorful vegetables over the rice.

Drizzle any remaining sauce from the skillet over the top. Finish with a light sprinkle of black sesame seeds if desired.

Serve immediately while warm. This bowl is also excellent for meal prep and can be divided into individual containers for convenient lunches and dinners.

Tips

Cook the brown rice first: Brown rice usually requires more cooking time than white rice, so starting it first allows the rest of the meal to come together easily.

Cut the chicken evenly: Similar-sized pieces cook more evenly and give the finished bowl a better texture. Bite-sized cubes are ideal because they are easy to eat and cook quickly.

Use a hot skillet: A properly heated skillet helps the chicken develop a golden surface. If the pan is not hot enough, the chicken may release moisture and steam rather than brown.

Do not overcrowd the pan: Too much food in the skillet lowers the temperature. Cook the chicken in batches if your skillet is small.

Keep the vegetables slightly crisp: Stir-frying vegetables quickly over medium-high heat preserves their bright color and natural texture. Overcooked vegetables can become soft and lose their fresh appearance.

Add garlic near the end: Garlic burns quickly, especially in a hot skillet. Adding it during the final stage gives you plenty of fresh garlic flavor without bitterness.

Whisk the sauce before adding: Cornstarch naturally settles to the bottom of the bowl. Give the sauce another whisk immediately before pouring it into the skillet.

Control the sauce thickness: Cornstarch thickens quickly. If your sauce becomes too thick, add chicken broth one tablespoon at a time until you achieve a smooth consistency.

Adjust the sweetness: The honey balances the salty soy sauce and savory oyster sauce. If you prefer a less sweet flavor, reduce the honey slightly.

Use low-sodium soy sauce if preferred: Regular soy sauce can make the finished dish quite salty. Low-sodium soy sauce is a useful option if you want greater control over the seasoning.

Keep meal-prep vegetables crisp: If making this recipe for several days of meals, avoid overcooking the vegetables. They will soften slightly again when reheated.

Variations

Spicy Garlic Soy Chicken Bowl: Add red pepper flakes, sliced fresh chili, chili garlic sauce, or a small amount of sriracha to the sauce. Start with a small amount and adjust according to your preferred level of heat.

Teriyaki-Style Bowl: Replace part of the soy sauce with teriyaki sauce and add a little fresh ginger. This creates a sweeter, more familiar teriyaki-style flavor.

Ginger Garlic Chicken Bowl: Add 1 teaspoon of freshly grated ginger along with the garlic. Ginger brings a bright and aromatic flavor that pairs perfectly with soy sauce.

Extra Green Vegetable Bowl: Add spinach, bok choy, edamame, zucchini, or Brussels sprouts. Use a combination of vegetables for more color, texture, and nutrients.

Chicken-Free Version: Replace the chicken with firm tofu. Press the tofu well, cut it into cubes, and cook until golden before combining it with the vegetables and sauce.

Shrimp Version: Use peeled and deveined shrimp instead of chicken. Shrimp cooks quickly, so cook it for only a few minutes until pink and opaque before adding it back to the sauce.

Low-Carb Version: Replace the brown rice with cauliflower rice. This significantly reduces the carbohydrate content while keeping the chicken and vegetable mixture flavorful and filling.

Whole-Grain Alternative: Use quinoa, farro, or wild rice instead of brown rice for a different texture and nutritional profile.

Peanut Garlic Version: Stir 1 tablespoon of natural peanut butter into the sauce and add a little extra chicken broth. The result is a richer, nutty sauce that pairs beautifully with vegetables and rice.

Meal-Prep Version: Divide the brown rice, chicken, and vegetables into individual containers. Store them in the refrigerator and reheat when needed. Add sesame seeds after reheating for the best texture.

Q&A

Can I use chicken thighs instead of chicken breasts?

Yes. Boneless, skinless chicken thighs are an excellent substitute. They are naturally juicy and have a richer flavor than chicken breasts.

Can I use white rice instead of brown rice?

Absolutely. White rice cooks faster and works perfectly with the garlic soy chicken and vegetables. Jasmine rice is especially delicious for an Asian-inspired bowl.

How do I know when the chicken is cooked?

The safest method is to check the thickest piece with a food thermometer. Chicken should reach an internal temperature of 165°F (74°C).

Can I make this recipe ahead of time?

Yes. This is an excellent meal-prep recipe. Prepare the rice, chicken, vegetables, and sauce, then divide everything into airtight containers.

How long do leftovers last?

Store leftovers in airtight containers in the refrigerator for up to 3 to 4 days. Reheat until hot before serving.

Can I freeze this recipe?

The cooked chicken and rice freeze well. However, vegetables such as asparagus and snap peas may become softer after freezing and reheating. For the best texture, prepare fresh vegetables when possible.

What can I use instead of oyster sauce?

Hoisin sauce can provide a sweeter alternative, while a combination of soy sauce and a small amount of honey can also work. The final flavor will be slightly different.

Is this recipe gluten-free?

It can be made gluten-free by using certified gluten-free soy sauce or tamari and checking that the oyster sauce and other packaged ingredients are also gluten-free.

Why is my sauce too thick?

Cornstarch thickens quickly when heated. Simply add a little chicken broth or water while stirring until the sauce reaches your preferred consistency.

Can I add more vegetables?

Yes. This recipe is very flexible. Bok choy, mushrooms, zucchini, edamame, spinach, and carrots are all excellent additions.

Nutrition

Approximate nutrition per serving, based on 6 servings:

Calories: 410 kcal

Protein: 27g

Carbohydrates: 51g

Fat: 12g

Saturated Fat: 2g

Fiber: 6g

Sugar: 7g

Sodium: 720mg

Cholesterol: 55mg

Nutrition values are approximate and can vary depending on the type of chicken, soy sauce, oyster sauce, rice, vegetables, and serving sizes used.

Conclusion

Garlic Soy Chicken & Green Veggie Brown Rice Bowl is a practical, flavorful recipe that turns simple ingredients into a colorful and satisfying meal. The savory garlic sauce gives the chicken and vegetables plenty of flavor, while the brown rice makes the bowl hearty and filling.

It is easy to customize with different vegetables, proteins, or grains, and it is especially useful for meal preparation. Whether you serve it fresh for dinner or pack it for lunch, this bowl offers a delicious combination of tender chicken, crisp vegetables, and wholesome brown rice.

#HealthyBowlRecipe
#ChickenAndVeggies
#BrownRiceRecipes
#HomemadeHealthyFood
#QuickDinnerIdeas

Healthy Zucchini Pizza Casserole

Healthy Zucchini Pizza Casserole

Healthy Zucchini Pizza Casserole is a delicious pizza-inspired meal made with a flavorful zucchini crust instead of traditional dough. The combination of fresh zucchini, seasoned meat, rich marinara sauce, and melted cheese creates a comforting casserole that is both satisfying and packed with wholesome ingredients. It is a great option for family dinners, meal prep, or anyone who wants to enjoy pizza flavors in a lighter way.

Prep Time: 25 minutes
Cook Time: 40 minutes
Resting Time: 10 minutes
Total Time: 1 hour 15 minutes
Servings: 8
Cuisine: Italian-American
Category: Main Course, Casserole, Low-Carb

Ingredients

Zucchini Crust Base

4 cups shredded zucchini, about 2 to 3 medium zucchinis, unpeeled

½ teaspoon salt

2 large eggs, beaten

½ cup grated Parmesan cheese

½ cup shredded mozzarella cheese

Savory Pizza Meat Filling

1 pound lean ground meat, such as lean ground beef, Italian sausage, or ground turkey

½ cup finely chopped onion

2 cloves garlic, minced

2 cups sugar-free marinara or pizza sauce

1 teaspoon Italian seasoning

½ teaspoon dried oregano

¼ teaspoon black pepper

Salt, to taste

½ cup chopped green or red bell peppers, optional

½ cup sliced mushrooms, optional

Cheese Topping & Garnish

1½ cups shredded mozzarella cheese, divided

1 cup shredded cheddar cheese

Fresh basil or parsley, chopped for garnish

Instructions

Preheat your oven to 400°F (200°C). Lightly grease a 9 × 13-inch baking dish with olive oil or cooking spray.

The most important step in making a successful zucchini pizza casserole is removing excess moisture from the zucchini. Place the shredded zucchini in a large bowl and sprinkle it with ½ teaspoon of salt. Mix gently and allow it to sit for approximately 10 to 15 minutes. The salt will draw moisture from the zucchini.

After resting, place the zucchini in a clean kitchen towel, cheesecloth, or several layers of paper towels. Squeeze firmly over the sink until as much liquid as possible has been removed. This step is essential because excess moisture can make the casserole soft and watery.

Return the squeezed zucchini to a clean bowl. Add the beaten eggs, grated Parmesan, and ½ cup shredded mozzarella. Mix until everything is evenly combined.

Transfer the zucchini mixture to the prepared baking dish and press it firmly into an even layer. Bake for approximately 18 to 20 minutes, or until the zucchini base is set and lightly golden around the edges.

While the zucchini crust is baking, prepare the savory pizza filling. Heat a large skillet over medium-high heat and add the ground meat. Cook while breaking it into small pieces.

When the meat is mostly cooked, add the chopped onion. Continue cooking for 3 to 4 minutes until the onion becomes soft. Add the minced garlic and cook for about 30 seconds until fragrant.

If you are using bell peppers or mushrooms, add them to the skillet and cook for several minutes until slightly softened. Drain any excess fat or liquid from the skillet if necessary.

Add the marinara or pizza sauce, Italian seasoning, dried oregano, black pepper, and salt to taste. Stir everything together and allow the mixture to simmer gently for approximately 5 minutes. The filling should be thick and flavorful rather than watery.

Remove the zucchini crust from the oven. Spread approximately ½ cup of shredded mozzarella over the baked zucchini base. Spoon the meat and sauce mixture evenly over the cheese.

Sprinkle the remaining mozzarella and all of the shredded cheddar cheese evenly over the top.

Return the casserole to the oven and bake at 400°F (200°C) for approximately 18 to 22 minutes, or until the cheese has completely melted and the casserole is bubbling around the edges.

For a beautifully golden pizza-like topping, switch the oven to broil for the final 1 to 2 minutes. Watch carefully because cheese can brown very quickly under the broiler.

Remove the casserole from the oven and allow it to rest for about 10 minutes before cutting. This gives the layers time to settle and makes serving much easier.

Garnish with freshly chopped basil or parsley and serve warm. Enjoy this casserole on its own or pair it with a fresh green salad for a complete meal.

Tips

Remove as much zucchini moisture as possible: This is the single most important tip. Zucchini naturally contains a lot of water, and squeezing it thoroughly helps create a firm and sliceable base.

Do not skip the pre-bake: Baking the zucchini mixture before adding the filling helps set the crust. If you add the sauce directly onto uncooked zucchini, the base may become too soft.

Use freshly shredded zucchini: Fresh zucchini has the best texture. Frozen shredded zucchini can also work, but it must be completely thawed and squeezed extremely well.

Press the crust evenly: Use the back of a spoon or clean hands to press the zucchini mixture into an even layer. A consistent thickness helps it bake evenly.

Choose lean ground meat: Lean ground beef, ground turkey, or chicken helps keep the casserole lighter. If you use sausage, drain excess fat after cooking.

Keep the filling thick: Watery sauce can make the zucchini base soggy. Simmer the meat sauce briefly to reduce excess liquid before layering it over the crust.

Shred your own cheese when possible: Freshly shredded mozzarella and cheddar usually melt more smoothly than pre-shredded cheese.

Let the casserole rest: Allowing the casserole to sit for about 10 minutes after baking makes it easier to cut clean portions.

Use a large enough baking dish: A 9 × 13-inch dish provides enough space for a thin, evenly cooked zucchini crust and generous layers of filling.

Season the meat properly: The zucchini base has a mild flavor, so the Italian seasoning, oregano, garlic, onion, and sauce help create the familiar flavor of a pizza.

Add toppings carefully: If adding vegetables with high water content, such as fresh tomatoes, cook or drain them first to avoid adding excess moisture.

Variations

Vegetarian Zucchini Pizza Casserole: Omit the ground meat and use mushrooms, bell peppers, onions, spinach, olives, and zucchini for a vegetable-packed version. Cook the vegetables first to remove excess moisture.

Pepperoni Pizza Casserole: Add sliced turkey pepperoni or regular pepperoni over the meat layer before adding the final cheese topping.

Chicken Pizza Casserole: Replace the ground meat with cooked shredded chicken. Mix the chicken with marinara sauce and Italian seasoning before layering.

Spicy Pizza Casserole: Add crushed red pepper flakes, sliced jalapeños, or spicy Italian sausage for extra heat.

Mediterranean Version: Use ground chicken or turkey and add olives, roasted red peppers, spinach, feta cheese, and oregano. Replace some of the mozzarella with crumbled feta.

Mushroom Lovers Version: Add extra sautéed mushrooms to the filling. Mushrooms provide a rich, savory flavor that works especially well with mozzarella and Parmesan.

Extra Veggie Version: Add finely chopped spinach, cooked broccoli, bell peppers, mushrooms, onions, or roasted eggplant. Always cook and drain vegetables that contain a lot of water.

Four Cheese Version: Add provolone, fontina, or Monterey Jack along with mozzarella, cheddar, and Parmesan for an extra-rich casserole.

Low-Fat Version: Use lean ground turkey, reduced-fat mozzarella, and a lighter marinara sauce. The casserole will still be flavorful while containing less saturated fat.

Meat Lovers Version: Combine lean ground beef with cooked sausage or turkey pepperoni for a more indulgent pizza-style casserole.

Q&A

Can I make this casserole ahead of time?

Yes. You can prepare and bake the zucchini crust and make the meat filling ahead. Store them separately in the refrigerator, then assemble and bake when ready. You can also assemble the entire casserole several hours ahead and refrigerate it before baking.

Why is my zucchini casserole watery?

The most common reason is not squeezing enough moisture from the shredded zucchini. Salt the zucchini, let it sit, and squeeze it very thoroughly before mixing it with the eggs and cheese.

Can I use frozen zucchini?

Yes, but thaw it completely first. Frozen zucchini releases even more water than fresh zucchini, so squeeze it very thoroughly.

Can I make this recipe without meat?

Absolutely. Use sautéed mushrooms, bell peppers, spinach, onions, olives, or other pizza vegetables instead.

Can I freeze Zucchini Pizza Casserole?

Yes. Allow the casserole to cool completely, divide it into portions, and store it in freezer-safe containers. Freeze for up to 2 months for the best quality.

How do I reheat leftovers?

Reheat individual portions in the microwave or warm larger portions in the oven at 350°F (175°C) until heated through.

Can I use another cheese instead of cheddar?

Yes. Provolone, Monterey Jack, fontina, or additional mozzarella can be used. Choose cheeses that melt well.

Is this casserole keto-friendly?

It can fit into a low-carb eating pattern because the zucchini base replaces a traditional flour crust. However, check the nutrition label on the marinara sauce and choose one without added sugar if you want to keep carbohydrates lower.

What should I serve with it?

A crisp green salad, roasted vegetables, garlic green beans, or a simple cucumber salad are excellent choices.

Can I add traditional pizza toppings?

Yes. Cooked sausage, pepperoni, olives, peppers, mushrooms, and onions all work well. Avoid adding large amounts of watery ingredients.

Nutrition

Approximate nutrition per serving, based on 8 servings:

Calories: 390 kcal
Protein: 28g
Carbohydrates: 11g
Fat: 26g
Saturated Fat: 12g
Fiber: 2g
Sugar: 6g
Sodium: 670mg
Cholesterol: 130mg

Nutrition values are estimates and can vary depending on the type of meat, marinara sauce, cheese, and serving size used.

Conclusion

This Healthy Zucchini Pizza Casserole proves that a vegetable-based meal can still be cheesy, hearty, and full of delicious flavor. By removing excess moisture from the zucchini and baking the base before adding the toppings, you can create a casserole with a tender but satisfying texture. Customize it with your favorite meats, vegetables, or pizza toppings and enjoy a comforting homemade meal that is perfect for any day of the week.

#ZucchiniRecipes
#HealthyCasserole
#PizzaInspired
#LowCarbRecipes
#FamilyDinner

Lemon & Garlic Chicken Bites Delicious

Lemon & Garlic Chicken Bites

If you’re looking for an easy chicken recipe that delivers plenty of flavor without requiring complicated ingredients, these Lemon & Garlic Chicken Bites are an excellent choice. Small pieces of chicken cook quickly in a hot skillet, creating a golden exterior while staying tender and juicy inside.

Fresh lemon adds a bright and refreshing flavor that balances the richness of the garlic butter beautifully. With simple herbs and seasonings, this dish comes together in very little time and can be paired with almost any side dish. Serve it with steamed rice, roasted potatoes, fresh vegetables, pasta, or a crisp salad for a delicious and satisfying homemade meal.

Prep Time: 15 minutes
Cook Time: 15 minutes
Total Time: 30 minutes
Servings: 4 to 6
Cuisine: American / Mediterranean-Inspired
Category: Main Course, Chicken

Ingredients

Main Ingredients

1½ lbs (700g) boneless, skinless chicken breasts or thighs, cut into 1-inch cubes

2 tablespoons olive oil or vegetable oil

2 tablespoons butter, unsalted or salted

4 to 6 cloves garlic, finely minced

1 medium lemon, using both the juice and zest

Seasoning Blend

1 teaspoon Italian seasoning

¾ teaspoon salt, or to taste

½ teaspoon black pepper

½ teaspoon paprika, optional

Garnish

1 tablespoon fresh flat-leaf parsley, finely chopped

Instructions

Start by preparing the chicken. Pat the chicken dry with paper towels before cutting it into approximately 1-inch cubes. Dry chicken browns much better in the skillet and develops a beautiful golden exterior.

Place the chicken pieces in a large bowl. Add the Italian seasoning, salt, black pepper, and paprika. Toss everything together until all the chicken pieces are evenly coated with the seasoning.

Heat the olive oil in a large skillet over medium-high heat. Allow the skillet to become properly hot before adding the chicken. A hot pan helps create a golden crust instead of steaming the chicken.

Add the chicken bites to the skillet in a single layer. Avoid overcrowding the pan because too many pieces will release moisture and prevent proper browning. If necessary, cook the chicken in two batches.

Cook the chicken for approximately 6 to 8 minutes, turning the pieces occasionally so they brown on several sides. The exact cooking time will depend on the size of the chicken pieces. The chicken should be golden on the outside and cooked through, reaching an internal temperature of 165°F (74°C).

Once the chicken is cooked, reduce the heat to medium-low. Add the butter to the skillet and allow it to melt around the chicken.

Add the finely minced garlic and stir continuously for about 30 to 60 seconds. Garlic can burn quickly, so keep the heat moderate and do not leave it unattended. The garlic should become fragrant without turning dark brown.

Add the fresh lemon juice and lemon zest. Toss the chicken bites well so every piece becomes coated in the buttery lemon-garlic sauce. Allow the mixture to cook for another 1 to 2 minutes, letting the sauce lightly coat the chicken.

Taste and adjust the seasoning if necessary. Add a little more salt, black pepper, or lemon juice according to your preference.

Remove the skillet from the heat and sprinkle the chicken with freshly chopped parsley. Serve immediately while the chicken is warm and the lemon garlic butter sauce is fresh and glossy.

These chicken bites are delicious served over fluffy rice, creamy mashed potatoes, buttered pasta, couscous, or quinoa. They also make a fantastic filling for wraps, sandwiches, and grain bowls.

Tips

Pat the chicken dry first: Moisture is one of the biggest reasons chicken fails to brown properly. Use paper towels to remove excess moisture before seasoning the chicken. This simple step helps create beautifully golden chicken bites.

Cut the chicken evenly: Try to cut all the chicken pieces into similar sizes. Even pieces cook at approximately the same rate, helping you avoid some pieces becoming dry while others remain undercooked.

Do not overcrowd the skillet: Give the chicken enough room to cook. Overcrowding causes the temperature of the skillet to drop and the chicken will steam in its own juices rather than develop a flavorful golden crust.

Use medium-high heat for browning: High enough heat creates color and flavor, but extremely high heat can burn the spices or dry out the chicken. Medium-high heat usually provides the best balance.

Add garlic after cooking the chicken: Garlic cooks very quickly. Adding it at the beginning may cause it to burn before the chicken finishes cooking. Adding it near the end gives you fresh, aromatic garlic flavor.

Use fresh lemon whenever possible: Fresh lemon juice and zest give this recipe its bright, natural flavor. Bottled lemon juice can work in an emergency, but fresh lemon provides a much better result.

Zest the lemon before juicing: It is much easier to zest a whole lemon than one that has already been squeezed. Use only the bright yellow outer layer and avoid the bitter white pith underneath.

Do not overcook the chicken: Chicken breasts are lean and can become dry if cooked for too long. Check the internal temperature and remove the chicken once it reaches 165°F (74°C).

Choose chicken thighs for extra juiciness: Boneless chicken thighs contain slightly more fat and remain very tender. They are an excellent choice if you prefer richer, juicier chicken bites.

Adjust the lemon flavor: Start with the juice of one medium lemon. If you love a stronger citrus flavor, add a little extra juice at the end. For a milder flavor, use only half the lemon juice and keep the zest.

Serve immediately: The buttery sauce is at its best when freshly made. If it thickens while sitting, gently reheat the chicken with a small splash of water or chicken broth.

Variations

Spicy Lemon Garlic Chicken Bites: Add ½ teaspoon of crushed red pepper flakes, cayenne pepper, or your favorite chili seasoning. The combination of spicy heat and bright lemon creates a delicious contrast.

Creamy Lemon Garlic Chicken: After adding the lemon juice, stir in ½ cup of heavy cream and simmer gently for a few minutes. This creates a rich, creamy sauce that is excellent with pasta or mashed potatoes.

Honey Lemon Garlic Chicken: Add 1 to 2 tablespoons of honey along with the lemon juice. The honey balances the acidity and creates a sweet and savory glaze around the chicken.

Air Fryer Version: Season the chicken as directed and lightly coat the air fryer basket with oil. Air fry at 400°F (200°C) for approximately 10 to 12 minutes, shaking the basket halfway through. Prepare the garlic, butter, and lemon sauce in a skillet and toss the cooked chicken in the sauce before serving.

Dairy-Free Version: Replace the butter with additional olive oil or a plant-based butter alternative. The chicken will still have plenty of garlic and lemon flavor.

Herb Lemon Chicken: Add fresh thyme, oregano, rosemary, or basil along with the parsley. Fresh herbs give the dish a more Mediterranean-style flavor.

Lemon Garlic Chicken and Vegetables: Add zucchini, asparagus, broccoli, bell peppers, or green beans to the skillet. Cook the vegetables separately or remove the chicken temporarily to ensure everything cooks evenly.

Parmesan Lemon Chicken: Sprinkle freshly grated Parmesan over the finished chicken just before serving. Parmesan adds a salty, savory flavor that pairs beautifully with garlic and lemon.

Lemon Garlic Chicken Pasta: Toss the finished chicken bites with cooked spaghetti, linguine, penne, or fettuccine. Add a little pasta water if needed to help the lemon butter sauce coat the pasta.

Low-Carb Version: Serve the chicken with cauliflower rice, zucchini noodles, roasted broccoli, or a large green salad instead of traditional pasta or rice.

Q&A

Can I use chicken thighs instead of chicken breasts?

Yes. Boneless, skinless chicken thighs work wonderfully in this recipe. They are naturally juicy and flavorful and are less likely to dry out during cooking.

How do I know when the chicken bites are fully cooked?

The safest method is to use a meat thermometer. The thickest part of the chicken should reach 165°F (74°C).

Can I prepare Lemon & Garlic Chicken Bites ahead of time?

Yes. You can cut and season the chicken several hours ahead and keep it covered in the refrigerator. Cook it fresh when you are ready to serve for the best texture.

Can I store leftovers?

Yes. Store cooled leftovers in an airtight container in the refrigerator for up to 3 days. Reheat gently in a skillet or microwave until hot.

Can I freeze the cooked chicken?

Yes. Allow the chicken to cool completely, then store it in a freezer-safe container. Freeze for up to 2 months for the best quality. Thaw overnight in the refrigerator before reheating.

Why did my chicken release so much water?

This usually happens when the skillet is overcrowded, the chicken was not dried properly, or the pan was not hot enough. Cook in batches if necessary.

Can I make this recipe without butter?

Absolutely. Use olive oil or a dairy-free butter substitute. The recipe will still have delicious lemon and garlic flavor.

What should I serve with Lemon Garlic Chicken Bites?

Rice, roasted potatoes, mashed potatoes, pasta, couscous, quinoa, steamed vegetables, roasted broccoli, asparagus, or a fresh salad all work beautifully.

Can I use bottled lemon juice?

Fresh lemon juice is recommended for the best flavor, especially because this recipe also uses lemon zest. However, bottled lemon juice can be used if fresh lemons are unavailable.

Nutrition

Approximate nutrition per serving, based on 6 servings:

Calories: 290 kcal
Protein: 33g
Carbohydrates: 3g
Fat: 16g
Saturated Fat: 5g
Fiber: 1g
Sugar: 1g
Sodium: 430mg
Cholesterol: 110mg

These nutrition values are approximate and may vary depending on the type of chicken used, the amount of butter and oil, and the exact serving size.

Conclusion

Lemon & Garlic Chicken Bites are proof that a simple combination of fresh ingredients can create an incredibly delicious meal. The golden chicken, aromatic garlic, buttery sauce, and fresh citrus come together to create a dish that is both comforting and refreshing.

This recipe is easy enough for a busy weekday but flavorful enough to serve when you want something special. You can also customize it by adding chili for heat, vegetables for extra nutrition, or your favorite herbs for a different flavor. Serve the chicken fresh from the skillet and enjoy every bite with your favorite side dish.

#LemonChickenRecipe
#GarlicChicken
#EasyChickenDinner
#QuickDinnerIdeas
#HomemadeMeals

Cottage Cheese Chicken, Mushroom & Spinach Casserole

Cottage Cheese Chicken, Mushroom & Spinach Casserole

Description

This hearty baked casserole combines juicy chicken, sautéed mushrooms, and nutritious spinach in a creamy cottage cheese sauce, topped with melted cheese for a golden finish. It’s high in protein, low in carbs, and perfect for a comforting yet balanced meal.

Time Required

Prep time: 15 minutes

Cook time: 30–35 minutes

Total time: 45–50 minutes

Servings: 4–6

Ingredients

2 cups cooked chicken (shredded or diced)

1 cup cottage cheese (full-fat or low-fat)

1½ cups mushrooms (sliced)

2 cups fresh spinach (or 1 cup frozen, thawed & drained)

1 cup shredded mozzarella or cheddar cheese

½ cup grated Parmesan cheese

Flavor Base

1 small onion (finely chopped)

2 cloves garlic (minced)

1 tbsp olive oil or butter

Creamy Mixture

½ cup milk or cream

1 egg (optional, for structure)

½ tsp salt

½ tsp black pepper

½ tsp dried oregano or Italian seasoning

½ tsp paprika (optional)

Instructions

Prepare oven

Preheat oven to 180°C (350°F).

Lightly grease a baking dish.

Cook vegetables

Heat oil in a pan over medium heat.

Sauté onion until soft (3–4 minutes).

Add mushrooms and cook until browned.

Stir in garlic and spinach and cook until wilted.

Remove from heat.

Make creamy mixture

In a large bowl, combine:

Cottage cheese

Milk or cream

Egg (if using)

Salt, pepper, paprika, oregano

Mix until smooth.

Assemble casserole

Add cooked chicken and sautéed vegetables to the bowl.

Mix well.

Transfer to baking dish.

Top with mozzarella and Parmesan.

Bake

Bake uncovered for 30–35 minutes until bubbly and golden.

Rest 5–10 minutes before serving.

Serving Suggestions

Serve with garlic bread or toasted flatbread.

Pair with a fresh cucumber or green salad.

Great with brown rice or quinoa if you want a fuller meal.

Tips & Variations

Add cooked pasta or rice for a heartier casserole.

Use rotisserie chicken for quick prep.

Add chili flakes for heat.

Swap mushrooms for broccoli or zucchini.

Use Greek yogurt instead of some cottage cheese for extra creaminess.

Frequently Asked Questions

Can I make this ahead of time?

Yes — assemble, cover, and refrigerate up to 24 hours before baking.

Can I freeze this casserole?

Yes. Freeze before or after baking for up to 2 months. Thaw overnight before reheating.

Can I skip the egg?

Yes. The casserole will be slightly softer but still delicious.

How do I reduce moisture?

Drain spinach well and cook mushrooms until water evaporates.

Nutritional Information (Approx. per serving)

Calories: 320–380 kcal

Protein: 35–40 g

Carbohydrates: 8–12 g

Fat: 16–20 g

Fiber: 2–3 g

Easy Tuscan Chicken Orzo Recipe 

Easy Tuscan Chicken Orzo Recipe 

Description

Easy Tuscan Chicken Orzo is a creamy, comforting, and flavorful Italian-inspired one-pan meal that combines juicy seasoned chicken, tender orzo pasta, sun-dried tomatoes, spinach, garlic, and Parmesan cheese in a rich Tuscan-style sauce. This restaurant-quality dish brings together simple ingredients to create a cozy homemade dinner that is perfect for busy weeknights, family meals, or special occasions. The tender chicken is seasoned with herbs and spices, then paired with creamy orzo that absorbs all the delicious flavors from the garlic, broth, and Parmesan sauce. Sun-dried tomatoes add a sweet and tangy depth, while fresh spinach brings color, freshness, and extra nutrients. This recipe is a perfect balance of protein, creamy texture, and Mediterranean-inspired flavors. Unlike traditional pasta dishes, orzo cooks quickly and creates a risotto-like texture while still being easy to prepare. It is a great option for anyone who loves creamy pasta dishes but wants something unique and flavorful. Serve this Tuscan Chicken Orzo with a side salad, roasted vegetables, or crusty bread to complete the meal. Whether you are cooking for your family or preparing a comforting dinner for guests, this easy Tuscan recipe will quickly become a favorite.

Ingredients For the Chicken

  • 1½ pounds boneless, skinless chicken breasts or thighs
  • 2 tablespoons olive oil
  • 1 teaspoon Italian seasoning
  • 1 teaspoon paprika
  • 1 teaspoon garlic powder
  • ½ teaspoon onion powder
  • 1 teaspoon salt
  • ½ teaspoon black pepper

For the Tuscan Orzo

  • 2 cups uncooked orzo pasta
  • 3 cloves garlic, minced
  • 1 small onion, finely diced
  • 3 cups chicken broth
  • 1 cup heavy cream
  • 1 cup grated Parmesan cheese
  • 1 cup sun-dried tomatoes, chopped
  • 3 cups fresh spinach
  • 1 tablespoon butter
  • 1 teaspoon Italian seasoning
  • ½ teaspoon red pepper flakes (optional)
  • Fresh basil or parsley for garnish

Optional Additions

  • Mushrooms
  • Cherry tomatoes
  • Mozzarella cheese
  • Extra spinach
  • Lemon zest
  • Fresh oregano

Step-by-Step Instructions

  1. Season the chicken breasts or thighs with Italian seasoning, paprika, garlic powder, onion powder, salt, and black pepper. Make sure the chicken is evenly coated.
  2. Heat olive oil in a large skillet over medium-high heat.
  3. Add the chicken and cook for 5–7 minutes per side until golden brown and fully cooked. Remove the chicken from the pan and set aside.
  4. In the same skillet, add butter and diced onion. Cook for 2–3 minutes until softened.
  5. Add minced garlic and cook for 30 seconds until fragrant.
  6. Stir in the uncooked orzo pasta and lightly toast for 1 minute to enhance the flavor.
  7. Pour in chicken broth and bring the mixture to a gentle simmer.
  8. Cook the orzo for 8–10 minutes, stirring occasionally, until tender and most of the liquid is absorbed.
  9. Add heavy cream, Parmesan cheese, Italian seasoning, and sun-dried tomatoes. Stir until the sauce becomes creamy.
  10. Add fresh spinach and cook until wilted.
  11. Slice the cooked chicken and place it back into the skillet over the creamy Tuscan orzo.
  12. Simmer for another 2–3 minutes so the flavors combine.
  13. Garnish with fresh basil, parsley, extra Parmesan, or lemon zest before serving.

Tips, Notes & Q/A

  • Use chicken thighs for a juicier result or chicken breast for a leaner version.
  • Do not rinse orzo before cooking because the starch helps create a creamy texture.
  • Stir the orzo occasionally while cooking to prevent sticking.
  • Freshly grated Parmesan melts better and creates a smoother sauce.
  • Add extra chicken broth if the orzo absorbs too much liquid before becoming tender.
  • For a lighter version, replace heavy cream with half-and-half or evaporated milk.
  • Add mushrooms or roasted vegetables for extra flavor and nutrition.
  • Let the dish rest for a few minutes before serving so the sauce thickens naturally.
  • Store leftovers in an airtight container in the refrigerator for up to 4 days.
  • Reheat gently with a splash of broth or cream to bring back the creamy texture.

Can I use rotisserie chicken?
Yes, shredded rotisserie chicken can be added at the end for a faster version.

Can I make this recipe gluten-free?
Yes, use gluten-free orzo or another gluten-free pasta alternative.

Can I freeze Tuscan Chicken Orzo?
Cream-based pasta dishes are best fresh, but leftovers can be frozen. The texture may slightly change after reheating.

What can I serve with this dish?
It pairs well with garlic bread, Caesar salad, roasted vegetables, or steamed greens.

Can I add more vegetables?
Yes, zucchini, mushrooms, broccoli, or bell peppers work beautifully.

Servings & Nutrition

This recipe makes approximately 6 servings. Each serving contains an estimated 520–600 calories, 40–45g protein, 45–55g carbohydrates, 22–30g fat, and 4–6g fiber, depending on ingredients used. Chicken provides lean protein, while spinach and sun-dried tomatoes add vitamins, minerals, and antioxidants. Parmesan cheese adds calcium and rich flavor, while orzo provides satisfying energy. Easy Tuscan Chicken Orzo is a delicious, creamy, and wholesome meal perfect for family dinners, meal prep, and comforting Italian-inspired cooking.

Mexican Street Corn White Chicken Chilli

Mexican Street Corn White Chicken Chilli

This Mexican street corn white chicken chilli is creamy, comforting, and packed with bold flavour. Inspired by the flavours of elote (Mexican street corn), this dish combines tender shredded chicken, a rich and creamy broth, sweet corn, jalapeño heat, and cheesy goodness in every spoonful. It’s hearty enough for dinner, cosy enough for cold nights, and flavourful enough to become a family favourite.

Ingredients

  • 4 boneless, skinless chicken breasts
  • 1 yellow onion, chopped
  • 1 jalapeño, diced (remove seeds for less heat)
  • 4 cups chicken bone broth
  • 1½ cups sour cream
  • ½ cup shredded Monterey Jack cheese (or a Monterey Jack + mild cheddar blend)
  • 4 cloves garlic, minced
  • 2 cups corn kernels (fresh, frozen, or canned and drained)
  • 1 tablespoon olive oil
  • 1 teaspoon cumin
  • 1 teaspoon chili powder
  • ½ teaspoon smoked paprika
  • Salt and black pepper to taste
  • Juice of 1 lime
  • Fresh coriander for garnish
  • Optional topping: cotija cheese, tortilla strips, avocado slices

Instructions

  1. Heat olive oil in a large pot over medium heat. Add chopped onion and sauté for 3–4 minutes until softened.
  2. Add minced garlic and jalapeño. Cook for another 30–60 seconds until fragrant.
  3. Stir in cumin, chilli powder, smoked paprika, salt, and black pepper.
  4. Add chicken breasts and pour in chicken bone broth. Bring to a gentle boil, then reduce heat and simmer for 20–25 minutes until chicken is fully cooked and tender.
  5. Remove chicken, shred it using two forks, and return it to the pot.
  6. Stir in corn and simmer for 5–10 minutes so flavours combine.
  7. Lower heat and mix in sour cream and shredded cheese until the chilli becomes creamy and smooth. Do not boil after adding dairy.
  8. Finish with lime juice and adjust seasoning if needed.
  9. Serve warm, garnished with cilantro and optional toppings like cotija cheese, tortilla strips, or avocado.

Description Notes

This chilli brings together the smoky, creamy, and tangy flavours of Mexican street corn in a warm, hearty bowl. The bone broth adds depth, while sour cream and cheese create a silky texture. Corn adds natural sweetness, and jalapeño gives just the right amount of heat.

Helpful Tips

  • Use rotisserie chicken for a quicker version.
  • Don’t let the chilli boil after adding sour cream to prevent curdling.
  • Fresh lime juice brightens the entire dish.
  • Add extra cheese for a thicker, richer texture.
  • For more spice, include extra jalapeño or a pinch of cayenne.

Servings

Serves 6–8 people.

Nutritional Information (Approximate Per Serving)

  • Calories: 420
  • Protein: 38g
  • Carbohydrates: 14g
  • Fat: 24g
  • Fiber: 2g
  • Sugar: 4g

Benefits of This Recipe

  • High in protein for muscle support and fullness.
  • Bone broth adds collagen and nutrients.
  • Corn provides fibre and natural sweetness.
  • Jalapeños may boost metabolism.
  • A comforting, balanced one-pot meal.

Questions & Answers

Q: Can I make this ahead of time?
Yes, it reheats well and can be stored for up to 4 days in the fridge.

Q: Can I freeze this chilli?
It can be frozen, but add sour cream and cheese after reheating for best texture.

Q: Can I use rotisserie chicken?
Absolutely. Add shredded chicken during the final simmer stage.

Q: How can I make it thicker?
Simmer longer or add extra cheese or a small cornflour slurry.

Q: Is this recipe spicy?
It’s mild to medium, but you can adjust heat by changing the jalapeño amount.

Q: What toppings work best?
Cotija cheese, avocado, lime wedges, cilantro, and tortilla strips all work great.

This Mexican Street Corn White Chicken Chilli is creamy, bold, and deeply satisfying — a cosy bowl of comfort with a bright, zesty twist.

Cheesy Low-Calorie Vegetable Casserole

Cheesy Low-Calorie Vegetable Casserole

A Colorful, Creamy & Satisfying Vegetable Bake

This cheesy low-calorie vegetable casserole is loaded with colourful vegetables, a light and creamy herb sauce, and a delicious golden cheese topping.

The casserole shown is packed with tender broccoli, juicy cherry tomatoes, sweet bell peppers, and red onion. Everything is coated in a creamy, herb-seasoned sauce and baked until the vegetables are tender and the cheese is melted and bubbly.

It makes a wonderful lunch, light dinner, or healthy side dish. You can also customise the vegetables based on what you have at home.

Important note: This recipe can be part of a balanced, calorie-conscious eating plan, but eating one food “day and night” does not guarantee rapid weight loss. Sustainable results usually come from an overall balanced diet and appropriate portions.

 Ingredients

For the Vegetable Casserole

  • 4 cups broccoli florets
  • 1½ cups cherry tomatoes
  • 1 large yellow or orange bell pepper, chopped
  • 1 red bell pepper, chopped
  • ½ medium red onion, sliced
  • 1 tablespoon olive oil
  • ½ teaspoon salt, or to taste
  • ¼ teaspoon black pepper
  • ½ teaspoon garlic powder
  • ½ teaspoon dried Italian herbs

For the Creamy Herb Sauce

  • 1 cup plain Greek yogurt
  • ½ cup low-fat cottage cheese
  • 2 cloves garlic, finely minced
  • 1 tablespoon fresh lemon juice
  • 2 tablespoons fresh parsley, finely chopped
  • 1 tablespoon fresh dill, chopped
  • ½ teaspoon dried oregano
  • ¼ teaspoon black pepper
  • Salt, to taste

For the Cheese Topping

  • ¾ cup shredded mozzarella cheese
  • ¼ cup grated Parmesan cheese

Optional Additions

  • 1 teaspoon Dijon mustard
  • Red pepper flakes for heat
  • 1 cup sliced mushrooms
  • 1 small zucchini, sliced
  • Fresh basil
  • Extra herbs for garnish

 Instructions

Step 1: Preheat the oven.

Preheat your oven to 400°F (200°C).

Lightly grease a large baking dish with a small amount of olive oil or cooking spray.

A casserole dish measuring approximately 9×13 inches works well for this recipe.

Step 2: Prepare the Broccoli

Wash the broccoli thoroughly and cut it into medium-sized florets.

Try to keep the pieces relatively similar in size so they cook evenly.

If your broccoli florets are very large, cut them into smaller pieces. This helps them become tender without overcooking the other vegetables.

Place the prepared broccoli into a large mixing bowl.

Step 3: Prepare the Remaining Vegetables

Wash the cherry tomatoes and leave them whole.

Cut the yellow or orange bell pepper into bite-sized chunks.

Chop the red bell pepper.

Thinly slice the red onion.

Add all the vegetables to the bowl with the broccoli.

Drizzle with 1 tablespoon olive oil and season with salt, black pepper, garlic powder, and dried Italian herbs.

Toss everything together until the vegetables are lightly coated.

Step 4: Make the Creamy Herb Sauce

In a medium bowl, combine:

  • Greek yogurt
  • Cottage cheese
  • Minced garlic
  • Fresh lemon juice
  • Chopped parsley
  • Fresh dill
  • Dried oregano
  • Black pepper
  • Salt

Mix well until combined.

For an extra-smooth sauce, you can blend the cottage cheese and Greek yoghurt together before adding the remaining ingredients.

The sauce should be creamy but thick enough to coat the vegetables.

If it seems extremely thick, add 1–2 tablespoons of water or milk to loosen it slightly.

Step 5: Combine the Vegetables and Sauce

Pour about three-quarters of the creamy herb sauce over the vegetables.

Toss gently until the broccoli, peppers, onion, and tomatoes are lightly coated.

Do not worry if every piece is not completely covered. The vegetables will release some moisture as they bake, creating a delicious creamy mixture.

Transfer the vegetables to your prepared casserole dish.

Spread them evenly across the dish.

Step 6: Add the Remaining Sauce

Spoon the remaining creamy herb sauce over the top of the vegetables.

Use the back of a spoon to spread it gently.

This creates a rich and creamy layer throughout the casserole without requiring a large amount of heavy cream.

Step 7: Add the Cheese

Sprinkle the shredded mozzarella evenly over the vegetables.

Finish with the grated Parmesan cheese.

The mozzarella creates a delicious melted topping, while the Parmesan adds extra savoury flavour and helps the surface become lightly golden.

Step 8: Bake the Casserole

Cover the baking dish loosely with foil.

Bake for 20 minutes.

After 20 minutes, remove the foil and continue baking for another 10–15 minutes.

The casserole is ready when:

  • The broccoli is tender but still has some texture.
  • The tomatoes are soft and juicy.
  • The peppers are tender.
  • The cheese is melted and lightly golden.

For a more golden cheese topping, place the casserole under the broiler for 1–2 minutes.

Watch it carefully during broiling because the cheese can brown quickly.

Step 9: Rest Before Serving

Remove the casserole from the oven and allow it to rest for 5–10 minutes.

This gives the creamy sauce time to settle slightly.

Sprinkle with fresh parsley, dill, or basil before serving if desired.

Serve warm and enjoy!

 Recipe Description

This vegetable casserole is a wonderful example of how simple vegetables can be transformed into a comforting and satisfying meal.

The broccoli provides a hearty base, while the colourful bell peppers add natural sweetness. Cherry tomatoes become soft and juicy during baking, creating little bursts of flavour throughout the dish.

Red onion adds a mild savoury flavour that becomes sweeter as it cooks.

The creamy Greek yoghurt and cottage cheese mixture provides richness while also adding protein. Fresh herbs, garlic, and lemon juice brighten the flavour and prevent the casserole from tasting heavy.

Finally, a modest layer of mozzarella and Parmesan creates the delicious melted cheese topping that makes this dish feel comforting and satisfying.

 Recipe Notes

Use Fresh Vegetables

Fresh broccoli and firm bell peppers work especially well in this casserole.

Frozen broccoli can also be used, but it should be thawed and drained well first. Frozen vegetables often release extra water during baking.

Don’t Overcook the Broccoli

The broccoli should become tender but should not turn completely mushy.

Keep an eye on the casserole during the final few minutes of baking.

Cooking time may vary depending on the size of your vegetable pieces and your oven.

Choose Thick Greek Yogurt

Thick Greek yoghurt works best for the creamy sauce.

Very thin yoghurt may release additional liquid during baking.

If your yoghurt is thin, you can strain it briefly before using.

Cottage Cheese Adds Creaminess

Cottage cheese gives the sauce a creamy texture and adds protein.

If you do not enjoy its texture, blend it before mixing it with the other sauce ingredients.

This creates a smoother, creamier result.

 Helpful Tips

1. Cut Vegetables Evenly

Try to cut the broccoli and peppers into similar-sized pieces.

This helps everything cook evenly.

Large pieces may remain firm while smaller pieces become too soft.

2. Don’t Add Too Much Oil

Vegetables do not need a large amount of oil to roast successfully.

One tablespoon is usually enough to lightly coat the vegetables.

This helps keep the recipe lighter while still adding flavour.

3. Add More Protein

If you want to turn this casserole into a more filling main meal, add one of the following:

  • 1½ cups cooked shredded chicken
  • 1 can chickpeas, drained and rinsed
  • 1 cup cooked white beans
  • Lean ground turkey
  • Cooked lentils

Add cooked protein before baking.

4. Make It Vegetarian

The basic recipe is vegetarian.

For a vegetarian meal, make sure any Parmesan or cheese you use fits your preferred dietary requirements.

5. Make It Lower in Dairy

You can reduce the amount of cheese or use your preferred lower-fat cheese.

For a dairy-free version, experiment with a plant-based yoghurt and cheese alternative suitable for baking.

The texture and flavour may vary.

6. Add More Vegetables

This recipe is easy to customise.

Try adding:

  • Zucchini
  • Mushrooms
  • Cauliflower
  • Spinach
  • Green beans
  • Brussels sprouts

Be aware that watery vegetables such as zucchini may release additional moisture.

 Serving Suggestions

This casserole can be enjoyed in several ways.

As a Light Main Dish

Serve a generous portion with a fresh side salad.

For additional protein, add grilled chicken, fish, beans, or chickpeas.

As a Side Dish

Pair it with:

  • Grilled chicken
  • Baked salmon
  • Turkey
  • Lean beef
  • Mediterranean-style fish

For Meal Prep

Divide the cooled casserole into individual containers.

Pair each serving with your preferred protein source for convenient lunches.

 Servings

This recipe makes approximately the following:

6 servings as a side dish

or

4 servings as a light main meal

Serving sizes can be adjusted depending on what else you serve with the casserole.

 Preparation and Cooking Time

Preparation Time: 20 minutes
Cooking Time: 30–35 minutes
Resting Time: 5–10 minutes

Total Time: Approximately 55–65 minutes

 Nutritional Information

Approximate nutrition per serving

Based on 6 servings:

  • Calories: 180–230 kcal
  • Protein: 11–14 g
  • Carbohydrates: 16–20 g
  • Fat: 8–11 g
  • Fiber: 4–6 g
  • Sugar: 7–10 g
  • Sodium: Varies depending on the cheese and added salt

These values are estimates and may vary depending on the exact brands, ingredients, and serving sizes used.

Adding chicken, beans, extra cheese, or other ingredients will change the nutritional values.

 Potential Benefits

1. Contains a Variety of Vegetables

This casserole includes broccoli, tomatoes, peppers, and onion.

Including a variety of vegetables can add different flavours, textures, vitamins, minerals, and fibre to your overall eating pattern.

2. Provides Dietary Fiber

Vegetables naturally contribute dietary fibre.

Fibre is an important part of a balanced diet and can help support normal digestion and contribute to feelings of fullness.

3. Contains Protein

Greek yoghurt, cottage cheese, and cheese contribute protein to the recipe.

If you need a higher-protein meal, you can add chicken, beans, or another protein source.

4. Lower in Calories Than Many Creamy Casseroles

Traditional creamy casseroles may use large amounts of butter, heavy cream, or rich sauces.

This version uses Greek yoghurt and cottage cheese to create creaminess without relying entirely on heavy cream.

However, the total calorie content still depends on portion size and the exact ingredients used.

5. Colorful and Satisfying

A variety of colourful vegetables can make meals more visually appealing and enjoyable.

The creamy sauce and melted cheese also make the vegetables feel comforting and satisfying.

 Frequently Asked Questions

Q1: Can I make this casserole ahead of time?

Yes.

You can prepare the vegetables and creamy sauce ahead of time.

Store them separately in the refrigerator and assemble before baking.

For the best texture, bake the casserole shortly before serving.

Q2: Can I use frozen broccoli?

Yes.

Thaw the frozen broccoli first and drain it well.

Excess water can make the casserole watery.

Q3: Can I add chicken?

Absolutely!

Add approximately 1½ to 2 cups of cooked shredded or diced chicken.

Mix it with the vegetables before adding the sauce and baking.

Q4: Can I make this recipe vegan?

Yes, with substitutions.

Use a thick plant-based yoghurt, a dairy-free cottage cheese alternative if available, and plant-based shredded cheese.

The final flavour and texture may differ from the original recipe.

Q5: Why is my casserole watery?

Vegetables naturally release moisture during cooking.

To reduce excess liquid:

  • Dry-washed vegetables well.
  • Avoid overcrowding the dish.
  • Use thick Greek yoghurt.
  • Drain frozen vegetables thoroughly.
  • Avoid adding too much extra liquid.

Q6: Can I use cauliflower instead of broccoli?

Yes!

Cauliflower works very well in this recipe.

You can replace all or half of the broccoli with cauliflower florets.

Q7: How do I store leftovers?

Allow the casserole to cool completely.

Store leftovers in an airtight container in the refrigerator for up to 3 days.

Q8: How do I reheat it?

Reheat individual portions in the microwave until hot.

For a larger amount, reheat in the oven at 350°F (175°C) until warmed through.

You may cover the dish with foil while reheating to prevent the cheese from becoming too brown.

Q9: Can I freeze this casserole?

Freezing is possible, but the texture of the vegetables and yoghurt-based sauce may change after thawing.

For the best texture, this casserole is recommended fresh or refrigerated for a few days.

Q10: Will eating this casserole alone make me lose weight quickly?

No single recipe can guarantee quick weight loss.

This casserole can be a nutritious, lower-calorie meal option, but weight changes depend on many factors, including your overall diet, portion sizes, activity level, and individual needs.

For sustainable results, enjoy a variety of balanced foods rather than relying on only one dish day and night.

 Final Thoughts

This cheesy low-calorie vegetable casserole is fresh, colourful, creamy, and incredibly satisfying.

With tender broccoli, juicy cherry tomatoes, sweet peppers, savoury onion, a creamy herb sauce, and a golden melted cheese topping, it’s a delicious way to enjoy more vegetables.

Cranberry Almond Feta Orzo Salad

Cranberry Almond Feta Orzo Salad

Description

Cranberry Almond Feta Orzo Salad is a colorful Mediterranean-inspired salad that brings together tender orzo pasta, fresh spinach, sweet dried cranberries, crunchy sliced almonds, and creamy, salty feta cheese. Everything is tossed in a bright homemade lemon-herb dressing that gives the salad a fresh, tangy flavor.

This salad is especially delicious because every bite has a different texture. The orzo is soft and satisfying, cranberries add chewy sweetness, almonds provide crunch, spinach brings freshness, and feta adds a creamy, savory finish. The combination of sweet, salty, tangy, and nutty flavors makes this a salad that feels much more special than an ordinary pasta salad.

It works beautifully as a light lunch, side dish, potluck recipe, meal-prep option, or Mediterranean-inspired dinner. It can be served slightly warm, at room temperature, or chilled.

 Ingredients

For the Orzo Salad

  • 1½ cups dry orzo
  • 3 cups fresh baby spinach, roughly chopped
  • ¾ cup dried cranberries
  • ½ cup sliced almonds
  • ¾ cup crumbled feta cheese
  • ¼ cup fresh parsley, chopped
  • 2 tablespoons fresh mint, chopped, optional
  • ¼ cup thinly sliced red onion
  • ½ cup cucumber, diced, optional

For the Lemon-Herb Dressing

  • ⅓ cup extra-virgin olive oil
  • 3 tablespoons fresh lemon juice
  • 1 teaspoon lemon zest
  • 1 tablespoon red wine vinegar
  • 1 teaspoon Dijon mustard
  • 1 teaspoon honey or maple syrup
  • 1 small garlic clove, finely minced
  • ½ teaspoon dried oregano
  • ¼ teaspoon black pepper
  • ¼ teaspoon salt, or to taste

Optional Garnishes

  • Extra feta
  • Extra toasted almonds
  • Fresh parsley
  • Lemon zest
  • Lemon wedges
  • A drizzle of olive oil

 How to Make Cranberry Almond Feta Orzo Salad

Step 1: Cook the Orzo

Bring a large pot of salted water to a boil. Add the orzo and cook according to the package instructions until al dente.

Avoid overcooking the orzo because soft pasta can make the salad mushy. Once cooked, drain thoroughly.

For a chilled salad, rinse the orzo briefly under cool water to stop the cooking process. For a warmer salad, simply drain it and allow it to cool slightly.

Transfer the cooked orzo to a large mixing bowl.

Step 2: Toast the Almonds

While the orzo cooks, place the sliced almonds in a dry skillet over medium-low heat.

Toast for approximately 3–5 minutes, stirring frequently. The almonds should become lightly golden and fragrant.

Watch them carefully because sliced almonds can burn quickly.

Remove them from the skillet immediately and allow them to cool.

Toasting the almonds is optional, but it gives them a deeper nutty flavor and makes the salad much more aromatic.

Step 3: Prepare the Dressing

In a small bowl or jar, combine:

  • Olive oil
  • Fresh lemon juice
  • Lemon zest
  • Red wine vinegar
  • Dijon mustard
  • Honey
  • Garlic
  • Oregano
  • Black pepper
  • Salt

Whisk vigorously until the dressing becomes smooth and slightly emulsified.

Taste the dressing and adjust it according to your preference. Add more lemon for brightness, a little honey for sweetness, or extra black pepper for more flavor.

Step 4: Combine the Salad

Add the fresh spinach, dried cranberries, toasted almonds, red onion, parsley, and optional cucumber to the bowl with the orzo.

Pour approximately three-quarters of the dressing over the mixture.

Toss gently until everything is evenly coated.

The slightly warm orzo can absorb the dressing beautifully, helping the flavors develop throughout the salad.

Step 5: Add the Feta

Gently fold in the crumbled feta cheese.

Don’t overmix after adding the feta because you want some larger pieces of cheese to remain visible throughout the salad.

Reserve a little feta and a few almonds for the top.

Step 6: Rest Before Serving

Allow the salad to rest for approximately 10–15 minutes before serving.

This gives the orzo time to absorb the lemon-herb dressing and allows the cranberries to soften slightly.

Taste again before serving. Add the remaining dressing if needed.

Finish with fresh parsley, extra feta, toasted almonds, and a little lemon zest.

 Servings

Serves: 6–8 as a side dish
Serves: 4–5 as a light main meal

This recipe is easy to double for parties, family gatherings, picnics, or potlucks.

 Recipe Timing

Prep Time: 15 minutes
Cook Time: 10–12 minutes
Cooling/Resting: 10–15 minutes
Total Time: Approximately 35–40 minutes


🌿 Why You’ll Love This Salad

There are many reasons this recipe deserves a place in your regular meal rotation.

1. Easy to Make

The entire recipe comes together with simple ingredients and straightforward preparation. There are no complicated cooking techniques.

2. Beautiful Presentation

The green spinach, ruby-red cranberries, white feta, golden almonds, and pale orzo create a colorful dish that looks beautiful on a serving table.

3. Amazing Texture

The combination of tender orzo, chewy cranberries, crunchy almonds, fresh spinach, and creamy feta makes every bite interesting.

4. Great for Gatherings

This salad can easily be prepared in advance, making it excellent for potlucks, picnics, barbecues, holidays, and family dinners.

5. Versatile

You can easily change the ingredients depending on what you have available.

 Important Recipe Tips

Don’t Overcook the Orzo

Orzo cooks quickly. Check it a minute or two before the package’s recommended cooking time. You want it tender but still slightly firm.

Toast Your Almonds

Although optional, toasted almonds make a noticeable difference. Their nutty aroma and crunchy texture elevate the entire salad.

Use Fresh Lemon

Freshly squeezed lemon juice provides a much brighter flavor than bottled lemon juice.

Add Feta Last

Feta can break down if tossed too aggressively. Fold it in gently toward the end.

Don’t Overdress

Start with most of the dressing and reserve some for later. Orzo absorbs liquid as it sits, so you may want to add additional dressing just before serving.

Taste Before Adding Salt

Feta and dried cranberries can already contribute plenty of flavor, so taste the salad before adding more salt.

 Recipe Variations

Mediterranean Chickpea Version

Add 1 cup drained and rinsed chickpeas for additional texture and a more filling salad.

Chicken Orzo Salad

Add approximately 1½ cups cooked diced or grilled chicken to transform this side dish into a complete meal.

Lemon-herb grilled chicken works particularly well.

Spinach-Free Version

If you don’t have spinach, substitute arugula, baby kale, chopped romaine, or mixed greens.

Nut Substitutions

Replace almonds with:

  • Walnuts
  • Pecans
  • Pistachios
  • Cashews
  • Pumpkin seeds

Pistachios are especially delicious with cranberries and feta.

Add Fresh Fruit

For a sweeter summer version, add diced apple, pear, grapes, or fresh orange segments.

Add More Mediterranean Flavor

Try adding:

  • Kalamata olives
  • Roasted red peppers
  • Artichoke hearts
  • Cherry tomatoes
  • Cucumber
  • Fresh basil
  • Fresh mint

 Dressing Adjustments

The lemon-herb dressing is one of the most important components of this recipe.

For a more tangy dressing, increase the lemon juice.

For a sweeter dressing, add another teaspoon of honey or maple syrup.

For a more savory dressing, increase the garlic and oregano.

For a spicier dressing, add a pinch of red pepper flakes.

For a stronger Mediterranean flavor, add a little more extra-virgin olive oil and dried oregano.

 Make-Ahead Instructions

This salad is excellent for meal preparation.

You can cook the orzo and prepare the dressing several hours ahead of time. Store them separately until you’re ready to assemble the salad.

If making the entire salad ahead, refrigerate it in an airtight container.

Before serving, allow it to sit at room temperature for approximately 10–15 minutes and toss gently.

The orzo may absorb some of the dressing while refrigerated. If the salad seems dry, add another splash of olive oil and lemon juice.

 Storage

Store leftovers in an airtight container in the refrigerator.

The salad is best enjoyed within approximately 3 days.

Because spinach can soften over time, the freshest texture comes from eating the salad within the first day or two.

If preparing this specifically for meal prep, consider keeping the spinach separate and mixing it in shortly before serving.

 Approximate Nutritional Information

Nutrition varies depending on the exact ingredients and portion size.

Estimated per serving:

  • Calories: 350–400
  • Protein: 9–12 g
  • Carbohydrates: 40–45 g
  • Fat: 18–21 g
  • Saturated Fat: 4–5 g
  • Fiber: 3–4 g
  • Sugar: 9–11 g
  • Sodium: 350–450 mg

Adding chicken or chickpeas will increase the protein and overall calorie content.

 Benefits of the Ingredients

This recipe contains a variety of nutrient-rich ingredients, although it should still be viewed as a balanced meal or side rather than a specific health treatment.

Spinach

Fresh spinach contributes fiber and several vitamins and minerals while adding beautiful color and freshness.

Almonds

Almonds provide plant-based protein, fiber, and unsaturated fats. They also add satisfying crunch.

Feta

Feta contributes protein and calcium along with its characteristic salty, tangy flavor.

Cranberries

Dried cranberries provide sweetness and chewy texture. Many commercially available varieties contain added sugar, so reduced-sugar versions can be used if preferred.

Olive Oil

Extra-virgin olive oil contributes monounsaturated fats and is a staple of Mediterranean-style cooking.

Lemon

Fresh lemon juice adds acidity and brightness, helping balance the richness of the olive oil and feta.

Herbs

Parsley, mint, and oregano add fresh flavor without needing large amounts of salt or heavy sauces.

 Frequently Asked Questions

Can I make this salad ahead of time?

Yes. In fact, the flavors often become even better after resting. Prepare it several hours ahead and refrigerate until ready to serve.

Can I serve it warm?

Absolutely. Serve the orzo slightly warm with fresh spinach, feta, cranberries, and almonds. The spinach will soften slightly from the warmth of the pasta.

Should I rinse the orzo?

For a cold pasta salad, rinsing the cooked orzo under cool water helps stop the cooking process and cool it quickly. For a warm salad, draining without rinsing works well.

Can I use another pasta?

Yes. Small pasta shapes such as pearl couscous, small shells, ditalini, or farfalle can work well.

Can I use fresh cranberries?

Dried cranberries are recommended because they provide the chewy sweetness that balances the feta. Fresh cranberries are much more tart and have a different texture.

Can I make it dairy-free?

Yes. Omit the feta or use a dairy-free feta alternative.

Can I make it vegetarian?

Yes. The basic recipe is vegetarian as written.

Can I add chicken?

Definitely. Grilled lemon-herb chicken is an excellent addition and turns the salad into a satisfying main course.

Can I use baby kale instead of spinach?

Yes. Baby kale works particularly well, although it has a slightly stronger flavor and firmer texture.

How can I prevent the salad from becoming dry?

Reserve some dressing when initially mixing the salad. Add it shortly before serving if the orzo absorbs too much moisture.

What cheese can replace feta?

Goat cheese is a great substitute. Crumbled ricotta salata can also work, although the flavor will be different.

Is this good for a party?

Absolutely. Its colorful appearance and make-ahead convenience make it an excellent potluck or party salad.

Can I make it gluten-free?

Yes, use certified gluten-free orzo or substitute it with a gluten-free grain such as quinoa or rice.