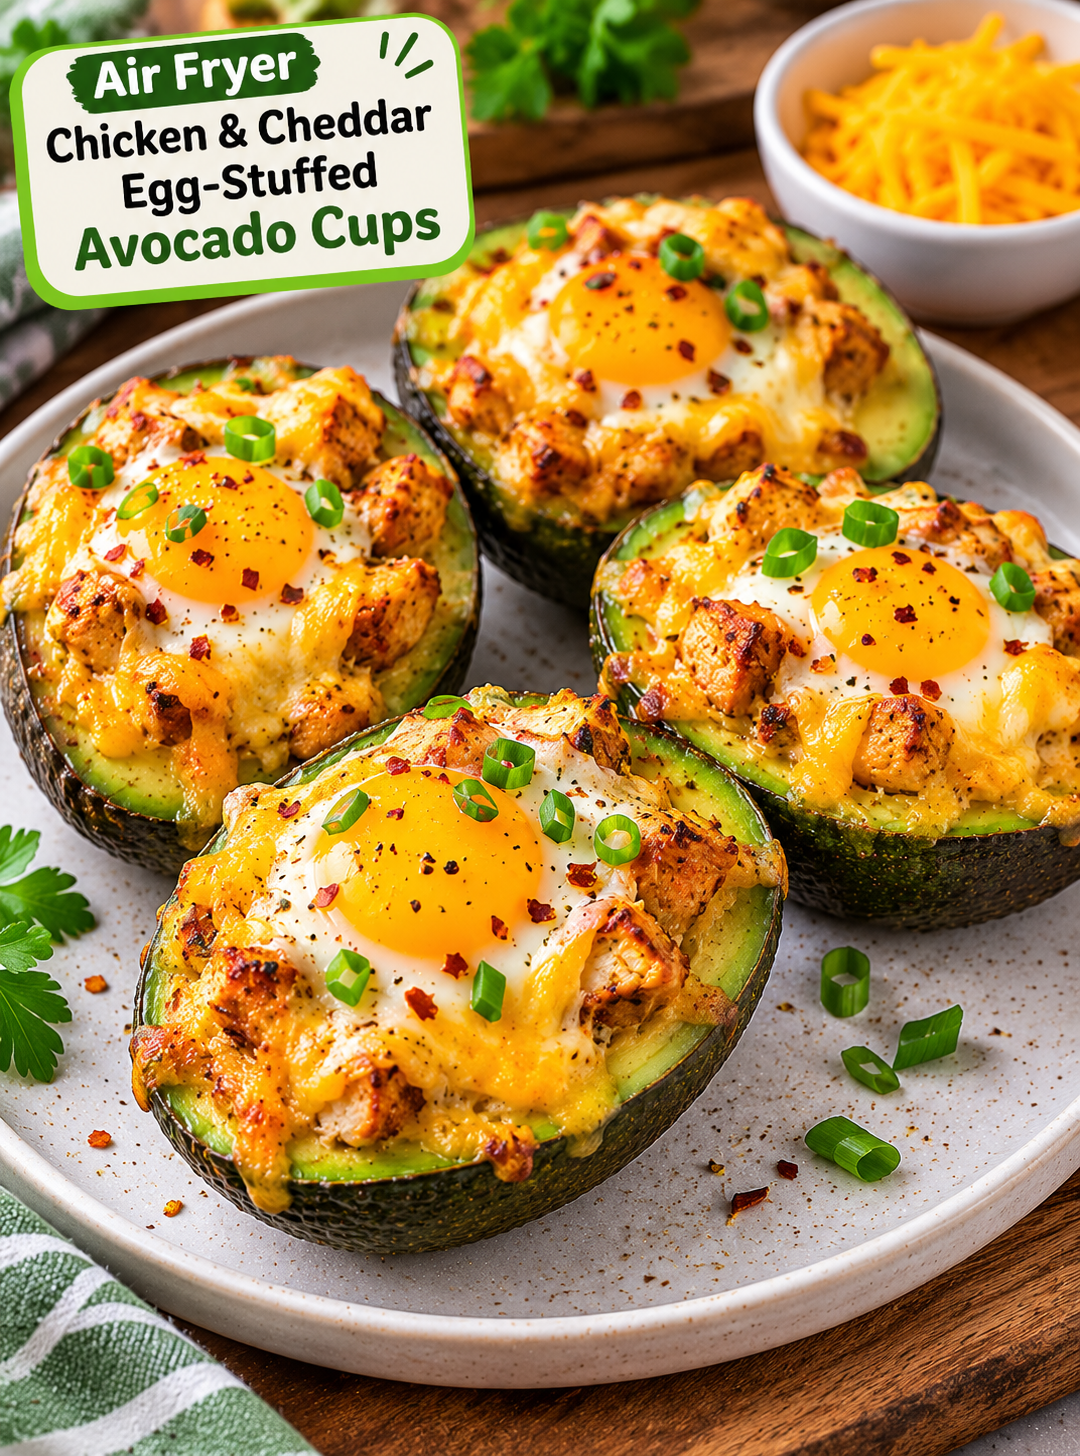
Air Fryer Crispy Chicken & Cheddar Egg-Stuffed Avocado Cups

Air Fryer Crispy Chicken & Cheddar Egg-Stuffed Avocado Cups

If you love crispy chicken, melted cheese, and creamy avocado, these Air Fryer Crispy Chicken & Cheddar Egg-Stuffed Avocado Cups are worth trying. Each avocado half holds a savory filling of crispy chicken, a perfectly cooked egg, and sharp cheddar cheese. The air fryer brings everything together with less mess and no need to heat up your oven.

This recipe is a delicious choice for breakfast, brunch, or a quick lunch. It combines protein-rich ingredients with healthy fats from fresh avocado, creating a satisfying meal in a small serving.

You can also use leftover cooked chicken to save time. Add your favorite seasonings, prepare the avocado halves, and let the air fryer handle the cooking. The result is a warm, cheesy dish with creamy avocado and flavorful chicken in every bite.

Why You’ll Love These Crispy Chicken Avocado Cups

These stuffed avocado cups are easy to prepare and simple to customize.

  • Quick air fryer cooking: The air fryer cooks the filling without requiring a full-size oven.
  • Crispy chicken flavor: Seasoned chicken adds a savory bite that pairs well with creamy avocado.
  • Melted cheddar cheese: Sharp cheddar gives the filling a rich, cheesy finish.
  • Protein-packed ingredients: Chicken, egg, and cheese contribute protein to the meal.
  • Naturally low in carbohydrates: Avocado and chicken make a filling combination without bread or tortillas.
  • Easy to customize: Add jalapeños, green onions, or your favorite spices.
  • Great for breakfast or lunch: Serve these cups on their own or with a fresh side salad.

Fresh Ingredients You’ll Need

Choose ripe but firm avocados so they hold their shape during air frying. Prepare all the ingredients before assembling the cups.

For the Avocado Cups

  • 2 medium avocados: Choose ripe avocados that are slightly soft but not mushy.
  • 4 small eggs: Small eggs fit more easily inside avocado halves. You may not need all the egg white if the cavities are small.
  • 1 cup cooked crispy chicken: Use finely chopped air-fried or baked chicken pieces.
  • 1/2 cup shredded sharp cheddar cheese: Cheddar melts well and adds a bold flavor.
  • 1 tablespoon olive oil: A light coating helps prevent sticking.
  • 2 tablespoons chopped green onions: These add a fresh, mild onion flavor.
  • 1/4 teaspoon garlic powder: Adds savory flavor to the filling.
  • 1/4 teaspoon smoked paprika: Gives the chicken a warm, smoky taste.
  • Salt and black pepper: Season to taste.

Optional Toppings

  • Chopped fresh parsley
  • A pinch of red pepper flakes
  • Diced jalapeños
  • A little hot sauce
  • Extra shredded cheddar

Ingredient Tip: If using leftover chicken, make sure it is fully cooked and has been stored safely. Chop it into small pieces so it fits neatly inside the avocado halves.

How to Make Air Fryer Crispy Chicken & Cheddar Egg-Stuffed Avocado Cups Step by Step

Follow these simple steps to prepare evenly filled avocado cups with melted cheese and properly cooked eggs.

Step 1: Prepare the Air Fryer

Preheat your air fryer to 325°F for about 3 minutes, following your appliance instructions.

Lightly grease a small air fryer-safe dish or line the basket with an approved perforated parchment liner. Make sure the liner does not block airflow or touch the heating element.

Step 2: Prepare the Avocados

Wash and dry the avocados. Slice each avocado lengthwise and carefully remove the pit.

Use a spoon to scoop out a little flesh from the center of each half. Make enough room for the chicken, egg, and cheese without breaking the avocado skin.

Brush the cut surfaces lightly with olive oil. Season with a small amount of salt and black pepper.

Step 3: Season the Crispy Chicken

Place the cooked chicken pieces in a small bowl.

Add garlic powder, smoked paprika, black pepper, and a little salt. Toss until the chicken is evenly coated.

If your chicken is already seasoned, adjust the extra salt to avoid making the filling too salty.

Step 4: Fill the Avocado Halves with Chicken

Arrange the avocado halves in a small air fryer-safe dish so they sit upright.

Divide the seasoned chicken evenly between the four avocado halves. Press the pieces gently into the center, leaving enough room for the egg.

Avoid overfilling the avocado cups because the egg needs space to cook.

Step 5: Add the Eggs

Carefully crack one small egg into each avocado half.

If the avocado cavity is too small, separate the egg and add only enough egg white to fit, followed by the yolk. Save any extra egg for another recipe.

Keep the eggs inside the avocado cavities to reduce spilling during cooking.

Step 6: Add Cheddar Cheese

Sprinkle shredded cheddar around the chicken and egg filling.

Keep most of the cheese near the edges so the egg yolk remains visible. Add a little extra cheese if you prefer a richer, cheesier topping.

Finish with a light sprinkle of smoked paprika or black pepper.

Step 7: Air Fry Until the Eggs Are Set

Carefully place the dish in the air fryer basket.

Air fry at 325°F for approximately 8–12 minutes. Cooking time depends on the size of the eggs, avocado halves, and your air fryer model.

Check the cups near the end of cooking. The egg whites should be fully set, and the cheese should be melted.

For food safety, cook the eggs until both the whites and yolks are firm. Use a food thermometer if needed; egg dishes should reach 160°F in the center.

Step 8: Garnish and Serve

Carefully remove the dish from the air fryer and let the avocado cups rest for 2 minutes.

Sprinkle chopped green onions or fresh parsley over the top. Add red pepper flakes or hot sauce if you enjoy a little heat.

Serve warm while the cheddar is melted and the avocado is creamy.

Helpful Tips for Perfect Stuffed Avocado Cups

A few simple adjustments can help you get better results every time.

  • Choose firm-ripe avocados: Very soft avocados may collapse during cooking.
  • Use small eggs: They fit better inside avocado halves and are less likely to overflow.
  • Chop chicken finely: Smaller pieces are easier to arrange around the egg.
  • Secure the avocado halves: Place them in a small oven-safe dish or suitable ramekins so they stay upright.
  • Avoid overfilling: Leave enough room for the egg to cook without spilling.
  • Check your air fryer early: Some models cook faster than others.
  • Use freshly shredded cheese: It melts smoothly and gives the cups a better texture.
  • Serve immediately: Avocado tastes best fresh and may darken after cutting.

Delicious Ways to Serve Chicken and Egg Avocado Cups

These savory avocado cups can be served in several ways depending on the meal.

  • For breakfast: Pair one or two cups with fresh berries and black coffee.
  • For brunch: Serve with roasted tomatoes, cucumber slices, or a simple green salad.
  • For lunch: Add a side of grilled vegetables or a light chicken soup.
  • For a low-carb meal: Enjoy the cups with leafy greens and a lemon dressing.
  • For extra flavor: Add salsa, hot sauce, or a spoonful of plain Greek yogurt.
  • For a filling plate: Serve with roasted sweet potato wedges or whole-grain toast.

Easy Storage and Reheating Instructions

These avocado cups are best enjoyed fresh because avocado can change color and texture after storage. If you have leftovers, follow these guidelines.

Refrigerator: Let the cups cool, then place them in an airtight container. Refrigerate within 2 hours and eat within 1–2 days for best quality.

Reheating: Reheat in an air fryer at 300°F for a few minutes until warmed through. Check the center before serving. The avocado may become softer after reheating.

Freezing: Freezing is not recommended. Avocado can become watery and mushy after thawing, while cooked eggs may develop a rubbery texture.

Meal Prep Tip: Cook and season the chicken ahead of time. Store it in the refrigerator, then prepare and fill the avocados just before cooking for the freshest result.

Nutrition Information

The following values are estimates for one avocado half, assuming the recipe makes four cups. Actual nutrition depends on the chicken, cheese, egg size, and avocado used.

  • Serving Size: 1 stuffed avocado half
  • Calories: Approximately 250–300
  • Protein: Approximately 16–20g
  • Carbohydrates: Approximately 8–10g
  • Fat: Approximately 17–21g
  • Fiber: Approximately 5–7g

For accurate nutrition information, calculate the recipe using the exact brands and ingredient quantities you use.

Frequently Asked Questions

1. Can I use leftover chicken for this recipe?

Yes. Fully cooked leftover chicken works well when chopped into small pieces and seasoned before filling.

2. What temperature should I use in the air fryer?

Start at 325°F and adjust the cooking time based on your air fryer and egg size.

3. How do I stop the eggs from spilling out?

Use small eggs, scoop enough space in each avocado, and keep the halves upright in an air fryer-safe dish.

4. Can I use a different cheese?

Yes. Monterey Jack, mozzarella, or pepper jack are good alternatives to cheddar.

5. How do I know when the eggs are cooked?

The egg whites and yolks should be firm. For food safety, the center should reach 160°F.

6. Can I make these avocado cups spicy?

Yes. Add diced jalapeños, cayenne pepper, red pepper flakes, or your favorite hot sauce.

7. Are these avocado cups good for meal prep?

They are best prepared fresh, but you can cook and season the chicken ahead of time to make assembly quicker.

8. Can I make this recipe without an air fryer?

Yes. Arrange the filled avocado halves in a small oven-safe dish and bake at 350°F until the eggs are fully set.

Final Thoughts

Air Fryer Crispy Chicken & Cheddar Egg-Stuffed Avocado Cups bring together creamy avocado, savory chicken, and melted cheddar in one easy meal. They are simple enough for a weekday breakfast and tasty enough to serve at weekend brunch.

Prepare the chicken ahead of time, use small eggs, and keep the avocado halves steady while cooking. Serve them warm with your favorite toppings for a satisfying homemade meal.

Important recipe note: Article mein cooking time ko approximate rakha gaya hai kyun ke air fryer models aur egg sizes different hote hain. Publish karne se pehle test batch bana kar timing aur nutrition values verify kar lena.
Air Fryer Crispy Chicken Hummus Bowls

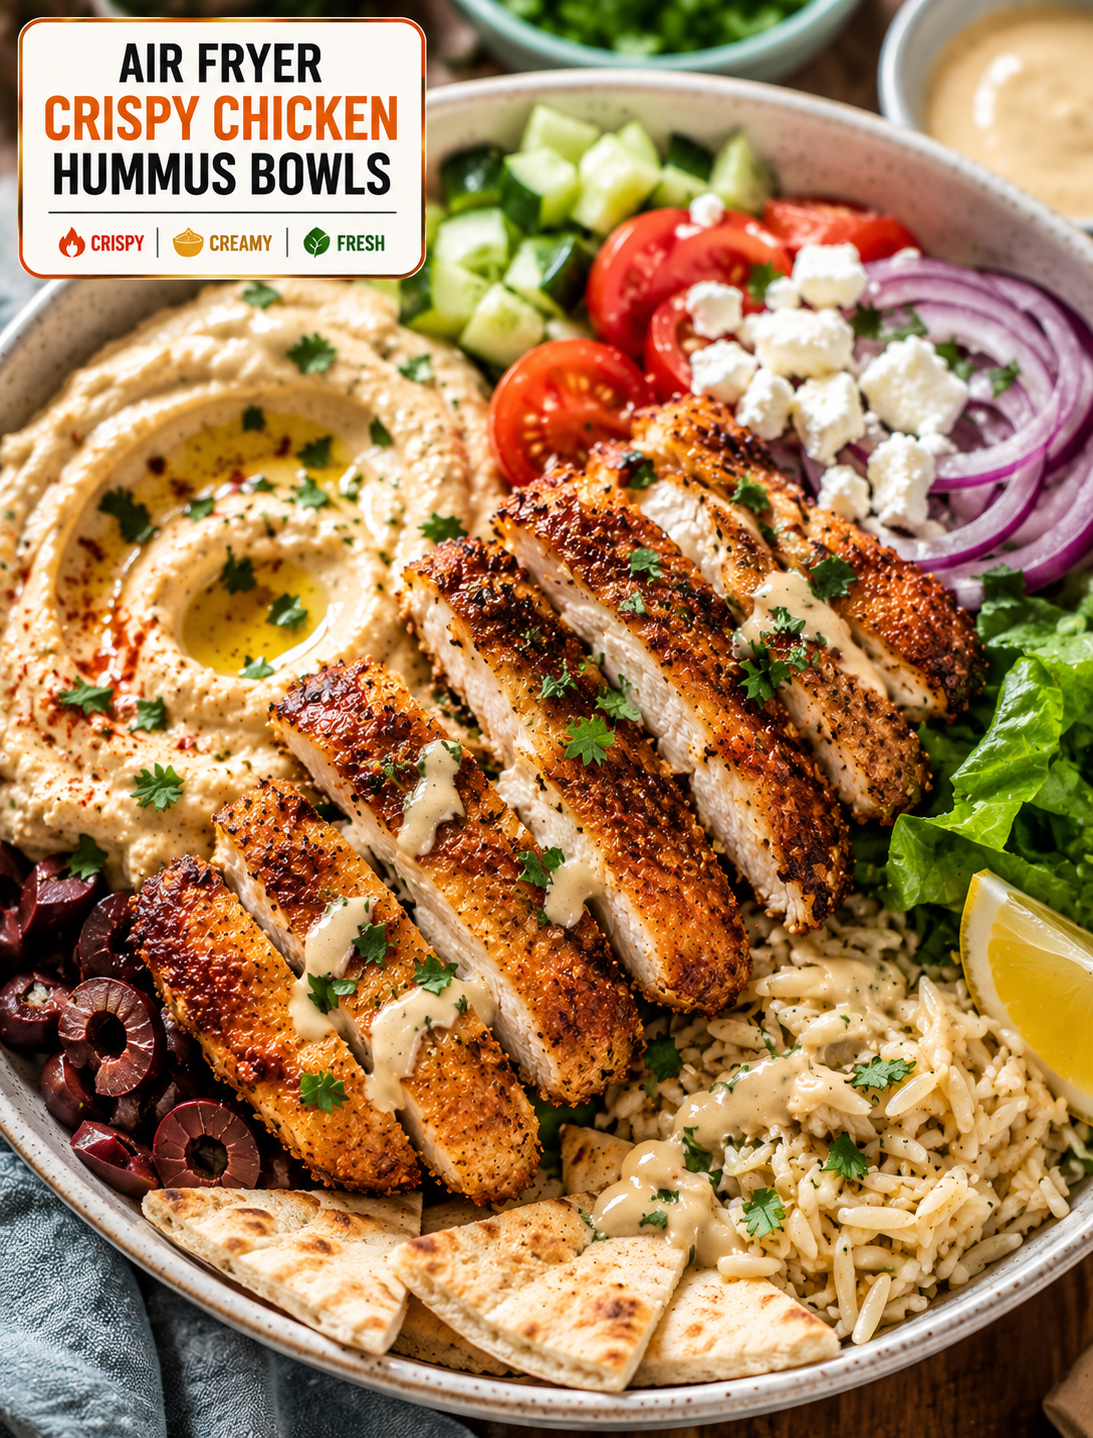
Air fryer crispy chicken hummus bowl with golden chicken, creamy hummus, cucumber, tomatoes, feta, greens, herbs, and lemon

Air Fryer Crispy Chicken Hummus Bowls

Looking for a quick meal that is crispy, creamy, fresh, and filling? These Air Fryer Crispy Chicken Hummus Bowls bring together golden chicken, smooth hummus, crunchy vegetables, and warm pita in one easy meal.

The chicken is coated with a simple blend of spices and cooked in the air fryer until the outside is golden and crisp. It stays tender inside while the seasoning adds plenty of savory flavor.

A generous spoonful of creamy hummus forms the base of each bowl. Fresh cucumber, tomatoes, red onion, leafy greens, and herbs add color and crunch. A drizzle of lemon-tahini dressing brings everything together.

This recipe is inspired by Mediterranean-style flavors but uses simple ingredients that are easy to find at most U.S. grocery stores.

It works well for lunch, dinner, meal prep, or a casual weekend meal when you want something satisfying without spending hours in the kitchen.

Why You’ll Love These Hummus Bowls

These bowls offer a great mix of textures in every bite.

The chicken is crisp and seasoned, while the hummus is smooth and creamy. Fresh vegetables add crunch, and lemon gives the bowl a bright finish.

The air fryer also makes the chicken without the need for deep frying. A small amount of oil helps the coating brown while the circulating hot air creates a crisp exterior.

Another benefit is flexibility. You can change the vegetables, add grains, use different seasonings, or adjust the dressing to suit your taste.

The bowls can also be prepared ahead of time. Keep the chicken, hummus, vegetables, and dressing separate until serving to maintain the best texture.

Ingredients You’ll Need

Crispy Chicken

  • 1½ pounds boneless, skinless chicken breasts
  • Olive oil 1 tablespoon
  • 1 teaspoon paprika
  • 1 teaspoon garlic powder
  • ½ teaspoon ground cumin
  • ½ teaspoon onion powder
  • ½ teaspoon dried oregano
  • ½ teaspoon black pepper
  • ½ teaspoon salt
  • 2 tablespoons cornstarch

For the Bowls

  • Hummus 2 cups
  • 2 cups cooked quinoa or rice, optional
  • Cucumber 1 , diced
  • 1 cup cherry tomatoes, halved
  • Red onion ½ small , thinly sliced
  • 2 cups chopped romaine or mixed greens
  • ½ cup crumbled feta cheese
  • ¼ cup fresh parsley, chopped
  • Kalamata olives ¼ cup , optional
  • 2 whole wheat or regular pita breads
  • Lemon wedges for serving

Lemon-Tahini Dressing

  • ¼ cup tahini
  • 2 tablespoons fresh lemon juice
  • 1 tablespoon olive oil
  • Honey 1 teaspoon
  • 1 small garlic clove, finely minced
  • 2–3 tablespoons warm water
  • Pinch of salt
  • Pinch of black pepper

You can use store-bought hummus to save time or make your own if you prefer.

Chicken breasts create lean, tender pieces, while boneless chicken thighs provide a richer texture.

Quinoa or rice is optional, but either one makes the bowl more filling and works well as a meal-prep base.

How to Make Air Fryer Crispy Chicken Hummus Bowls

1. Prepare the Chicken

Pat the chicken dry with paper towels.

Cut it into bite-sized pieces that are similar in size so they cook evenly.

Place the chicken in a large bowl and add olive oil, paprika, garlic powder, cumin, onion powder, oregano, black pepper, salt, and cornstarch.

Toss until each piece is evenly coated.

The cornstarch creates a light coating that helps the chicken develop a crisp exterior in the air fryer.

2. Preheat the Air Fryer

Preheat the air fryer to 400°F if your model requires preheating.

Lightly spray the basket with cooking spray.

Arrange the chicken pieces in a single layer. Avoid stacking or overcrowding them because the hot air needs room to circulate.

Cook in batches if necessary.

3. Air Fry the Chicken

Cook the chicken at 400°F for about 10–14 minutes.

Shake the basket or turn the chicken halfway through cooking.

The outside should become golden and lightly crisp.

Use a food thermometer to check the thickest piece. Chicken should reach an internal temperature of 165°F for food safety.

Cooking time may vary depending on the size of the chicken pieces and your air fryer model.

Allow the chicken to rest for a few minutes before assembling the bowls.

4. Prepare the Vegetables

While the chicken cooks, prepare the vegetables.

Dice the cucumber and tomatoes, slice the red onion, and chop the greens.

Wash and dry the vegetables thoroughly before assembling the bowls.

Fresh parsley adds a bright herbal flavor, while Kalamata olives provide a salty Mediterranean-style touch.

You can remove the onion if you prefer a milder bowl.

5. Make the Lemon-Tahini Dressing

Add tahini, lemon juice, olive oil, honey, garlic, salt, and black pepper to a small bowl.

Whisk until combined.

The tahini will initially become thick when mixed with lemon juice.

Add warm water one tablespoon at a time while whisking until the dressing reaches a smooth, pourable consistency.

Taste and adjust the lemon juice or salt according to your preference.

6. Warm the Pita

Cut the pita into wedges.

Warm the pieces in the air fryer for about 1–2 minutes at 350°F or heat them briefly in a dry skillet.

Keep a close eye on them because pita can become crisp quickly.

You can also skip this step and serve the pita at room temperature.

7. Assemble the Bowls

Spread about ½ cup of hummus into each bowl.

Add cooked quinoa or rice if using.

Arrange the crispy chicken over the hummus.

Add cucumber, tomatoes, red onion, greens, feta, parsley, and olives.

Drizzle with lemon-tahini dressing.

Finish with a squeeze of fresh lemon and serve with warm pita wedges.

How to Make Extra Crispy Chicken

The key to crisp chicken starts with removing excess moisture.

Pat the chicken dry before adding the seasoning.

Cut the chicken into small, even pieces so more surface area can brown.

Use a thin coating of cornstarch rather than a heavy layer.

Do not overcrowd the air fryer basket.

Turn the chicken halfway through cooking so the pieces brown evenly.

For the best texture, assemble the bowl shortly after the chicken finishes cooking.

Adding dressing directly onto the chicken can soften the crispy coating, so drizzle it around the bowl or add it just before eating.

Best Hummus for Chicken Bowls

Classic hummus works well because its mild chickpea and tahini flavor complements the seasoned chicken.

Roasted garlic hummus adds a deeper savory taste.

Red pepper hummus gives the bowl a slightly sweet and smoky flavor.

For a spicy version, use jalapeño or chili hummus.

You can also mix a spoonful of harissa into plain hummus for extra heat.

Choose a hummus with a smooth texture if you want an easy-to-spread bowl base.

What Vegetables Work Best?

Fresh vegetables make these bowls colorful and crunchy.

Cucumber provides a cool, crisp texture.

Cherry tomatoes add juicy sweetness.

Red onion gives a sharp bite that balances the creamy hummus.

Romaine lettuce provides crunch without overpowering the other ingredients.

You can also add shredded carrots, bell peppers, radishes, cabbage, or spinach.

For a roasted version, add air-fried zucchini, bell peppers, or cauliflower.

Using a mix of raw and cooked vegetables gives the bowl more variety.

Easy Bowl Variations

There are many ways to customize this meal.

A spicy bowl, add crushed red pepper, hot sauce, or harissa.

Extra freshness, add mint, parsley, or cilantro.

More crunch, sprinkle roasted chickpeas or pumpkin seeds over the top.

Dairy-free bowl, leave out the feta cheese.

Low-carb option, skip the rice and pita and add extra greens and vegetables.

Heartier meal, add quinoa, brown rice, or roasted potatoes.

You can also replace chicken with air-fried chickpeas if you want a vegetarian version.

How to Make These Bowls for Meal Prep

These bowls are easy to prepare ahead of time.

Cook the chicken and grain base in advance and allow them to cool before storing.

Place the hummus in separate containers or small compartments.

Keep fresh vegetables separate from the warm ingredients when possible.

Store the dressing in a small sealed container and add it just before eating.

Keep pita separate so it does not become soft from moisture.

When ready to eat, reheat the chicken and grains, then add the chilled vegetables, hummus, dressing, and herbs.

This method keeps the different textures fresh and prevents the bowl from becoming soggy.

What to Serve With Hummus Bowls

These bowls are filling on their own, but several simple sides work well.

Serve them with warm pita, roasted vegetables, cucumber salad, or a simple tomato salad.

A small bowl of olives or pickled vegetables adds a salty and tangy contrast.

For a larger meal, add lentil soup or a light vegetable soup.

You can also serve the chicken and hummus separately as a platter for family-style dining.

Tips for the Best Results

Dry the chicken before seasoning it.

Keep chicken pieces similar in size.

Use a light layer of cornstarch for better browning.

Avoid overcrowding the air fryer basket.

Check the chicken with a food thermometer before serving.

Use fresh lemon juice for the dressing.

Thin tahini gradually with warm water.

Keep dressing separate during meal prep.

Add fresh vegetables shortly before eating.

Serve the chicken warm for the best contrast with cool hummus and vegetables.

Storage and Reheating

Store cooked chicken and grains in airtight containers in the refrigerator.

Keep fresh vegetables, hummus, and dressing in separate containers.

Reheat the chicken in the air fryer at about 350°F for 3–5 minutes until hot.

Avoid microwaving the chicken if you want to maintain its crisp texture.

Add fresh hummus and vegetables after reheating.

Use refrigerated leftovers within a safe storage period and discard food that develops an unusual smell, appearance, or texture.

The Bottom Line

Air Fryer Crispy Chicken Hummus Bowls combine golden seasoned chicken, creamy hummus, fresh vegetables, herbs, and a bright lemon-tahini dressing for a satisfying meal.

The air fryer gives the chicken a crisp exterior without deep frying, while hummus provides a creamy base that brings all the ingredients together.

The recipe is flexible enough for weeknight dinners, meal prep, lunches, and casual entertaining. You can add grains for extra substance or keep the bowl lighter with more greens and vegetables.

With simple ingredients and easy preparation, this is a practical way to bring Mediterranean-inspired flavors into your everyday kitchen.

Frequently Asked Questions

1. How long should chicken cook in the air fryer?

Bite-sized chicken pieces usually take about 10–14 minutes at 400°F, depending on their size and your air fryer.

2. What temperature should the chicken reach?

Chicken should reach an internal temperature of 165°F in the thickest piece for safe consumption.

3. Can I use chicken thighs instead of chicken breast?

Yes. Boneless, skinless chicken thighs work well and provide a richer, more tender texture.

4. Can I make these hummus bowls dairy-free?

Yes. Simply leave out the feta or replace it with a dairy-free alternative.

5. What hummus tastes best with crispy chicken?

Classic hummus, roasted garlic hummus, red pepper hummus, and spicy hummus all pair well with seasoned chicken.

6. Can I prepare these bowls ahead of time?

Yes. Prepare the chicken and grains ahead, but keep hummus, vegetables, and dressing separate until serving.

7. How can I make the chicken extra crispy?

Pat the chicken dry, use a light cornstarch coating, avoid overcrowding the basket, and turn the pieces halfway through cooking.

8. What can I use instead of tahini?

You can make a simple lemon dressing with olive oil, lemon juice, garlic, and a little honey if tahini is unavailable.

Final Thoughts

Air Fryer Crispy Chicken Hummus Bowls are a simple combination of bold flavor, fresh ingredients, and satisfying textures.

The crispy seasoned chicken pairs beautifully with creamy hummus, crunchy vegetables, salty feta, and bright lemon-tahini dressing. Every component adds something different without making the recipe complicated.

Make the bowls your own by changing the vegetables, adding grains, increasing the spice, or switching the hummus flavor.

For the best results, keep the chicken crisp, the vegetables fresh, and the dressing separate until the moment you serve.

A colorful bowl, crispy chicken, creamy hummus, and plenty of fresh flavor make this an easy meal worth adding to your weekly rotation.

Air Fryer Protein Fajita Bowls

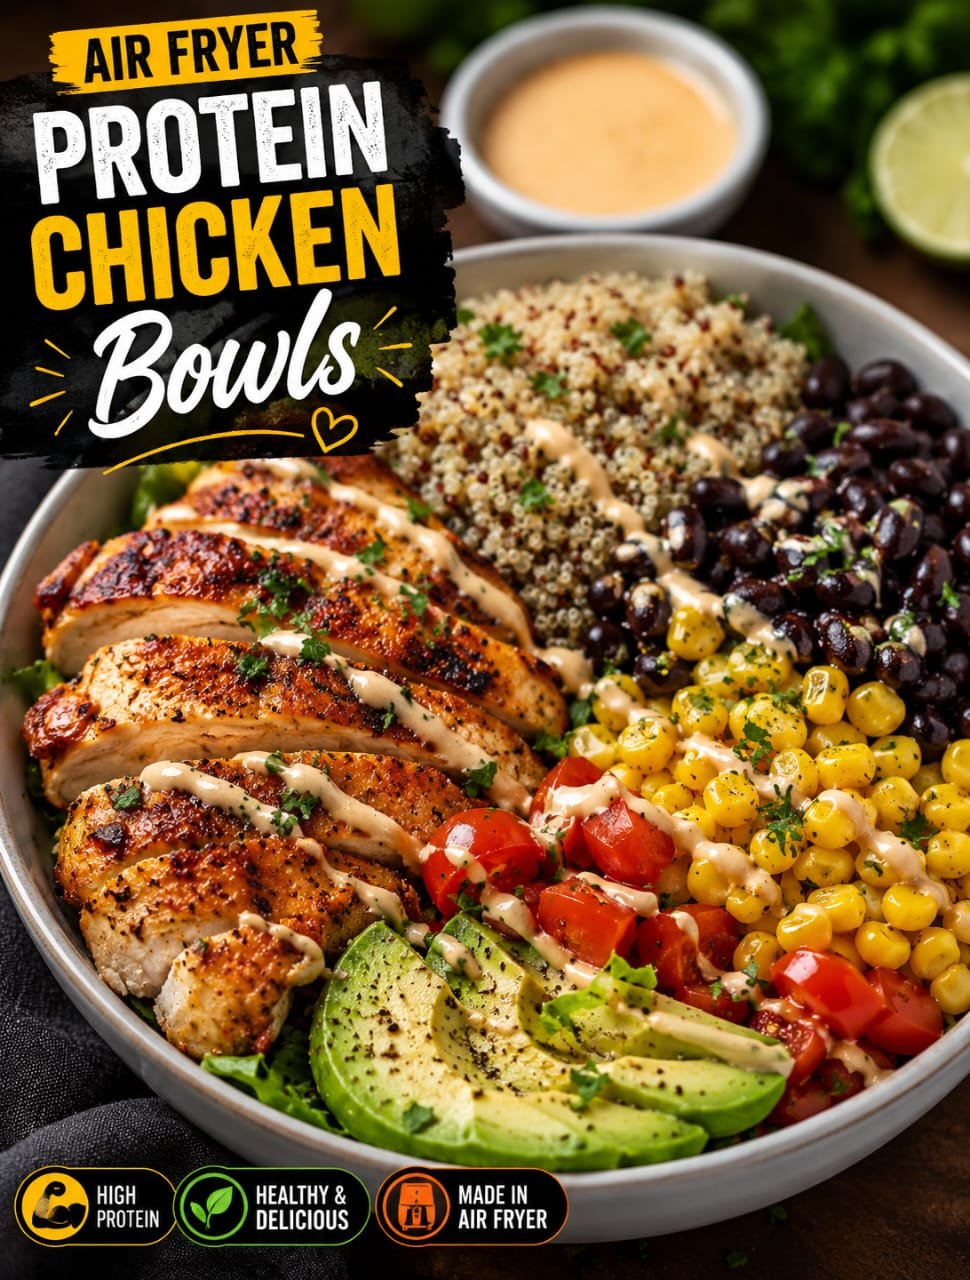
Air fryer protein fajita bowl with seasoned chicken, bell peppers, onions, rice, avocado, and fresh lime

Air Fryer Protein Fajita Bowls

Air Fryer Protein Fajita Bowls are a quick and satisfying dinner made with seasoned chicken, colorful bell peppers, onions, and your favorite grain. Everything comes together with simple spices and a few fresh toppings for a meal that feels fresh, filling, and easy to make.

The air fryer gives the chicken golden, flavorful edges while the peppers and onions become tender with lightly roasted spots. Served over warm rice and finished with avocado, salsa, cilantro, and lime, this bowl has plenty of texture and flavor in every bite.

It is a great option for busy weeknights, easy lunches, or meal prep. You can also change the ingredients to match what you have in your kitchen.

Why You’ll Love This Recipe

This recipe is designed for busy home cooks who want a flavorful meal without a long cooking process. The chicken and vegetables cook quickly in the air fryer, so there is no need to heat a large skillet or spend a lot of time at the stove.

The seasoning blend gives the chicken a smoky fajita flavor using everyday pantry spices. Bell peppers and onions add sweetness, color, and texture to the bowl.

Another benefit is how easy the recipe is to customize. You can use white rice, brown rice, quinoa, cauliflower rice, or lettuce as the base. Add black beans or corn for extra texture, or change the toppings to create a different bowl each time.

Ingredients

For the Chicken and Vegetables

  • 1 pound boneless, skinless chicken breast
  • 1 red bell pepper
  • 1 green bell pepper
  • 1 small yellow or white onion
  • 1 tablespoon olive oil

Fajita Seasoning

  • 1 teaspoon chili powder
  • 1 teaspoon smoked paprika
  • 1 teaspoon ground cumin
  • ½ teaspoon garlic powder
  • ½ teaspoon onion powder
  • ½ teaspoon salt
  • ¼ teaspoon black pepper

For the Bowls

  • 3 cups cooked white or brown rice
  • 1 avocado, sliced
  • ½ cup pico de gallo or salsa
  • ¼ cup chopped fresh cilantro
  • 1 lime, cut into wedges

Optional Toppings

  • Black beans
  • Corn
  • Shredded Mexican cheese
  • Plain Greek yogurt
  • Sliced jalapeños
  • Hot sauce
  • Fresh diced tomatoes

How to Make Air Fryer Protein Fajita Bowls

Start by preheating your air fryer to 400°F for about 3 minutes. A preheated basket helps the chicken begin cooking right away and promotes better browning.

Cut the chicken breast into thin, evenly sized strips. Try to keep the pieces similar in thickness so they finish cooking at roughly the same time.

Slice the red bell pepper, green bell pepper, and onion into medium strips. Avoid cutting them too thin because they can become overly soft during cooking.

Add the chicken, peppers, and onions to a large bowl. Pour in the olive oil and sprinkle the chili powder, smoked paprika, cumin, garlic powder, onion powder, salt, and black pepper over the ingredients.

Toss everything thoroughly until the chicken and vegetables are evenly coated with oil and seasoning.

Place the mixture in the air fryer basket in a single, even layer. Do not overcrowd the basket because too many ingredients can trap steam and reduce browning.

Air fry at 400°F for 10 to 14 minutes, shaking the basket around the halfway point.

The exact cooking time depends on the thickness of the chicken pieces and your air fryer model. Check the thickest chicken piece with an instant-read thermometer and make sure it reaches 165°F.

Once the chicken is cooked, let it rest for a couple of minutes. This helps the juices settle before you build the bowls.

How to Assemble the Bowls

Start each bowl with about ¾ cup of warm cooked rice. Brown rice, white rice, quinoa, or cauliflower rice can also be used.

Add a generous portion of the cooked chicken, peppers, and onions.

Top the bowl with avocado slices, pico de gallo or salsa, and fresh cilantro. Add black beans or corn if you want a heartier meal.

Finish with a squeeze of fresh lime juice. The acidity from the lime helps balance the smoky seasoning and rich toppings.

For extra creaminess, add a spoonful of plain Greek yogurt. Shredded cheese or a few slices of jalapeño can also be added according to taste.

Best Rice and Bowl Base Options

White rice is a simple choice when you want a classic fajita bowl. Its mild flavor lets the seasoned chicken and vegetables remain the focus.

Brown rice gives the bowl a slightly nutty flavor and adds more fiber. It works especially well for meal prep because it holds its texture after reheating.

Quinoa is another good option when you want a grain with plant-based protein. Its light texture pairs well with chicken, vegetables, and fresh salsa.

Cauliflower rice is ideal when you prefer a lower-carbohydrate base. Season it lightly with salt, pepper, lime juice, or a little of the fajita seasoning.

For a fresh salad-style bowl, use chopped romaine or mixed greens. Add the cooked fajita mixture while it is still warm and finish with salsa and avocado.

Tips for Perfect Air Fryer Chicken

Use chicken pieces that are similar in size. Smaller pieces cook faster, while thick pieces need more time and can cause uneven results.

Avoid putting too much food into the basket at once. If the chicken and vegetables are crowded, cook them in batches for better airflow.

Shake the basket halfway through cooking. This helps expose different sides of the chicken and vegetables to the circulating hot air.

Do not judge doneness by color alone. Chicken can look browned on the outside while remaining undercooked inside, so always check the internal temperature.

For extra flavor, let the seasoned chicken and vegetables rest for 10 to 15 minutes before air frying. This gives the spices a little more time to coat the ingredients.

Fresh lime juice should be added after cooking rather than before. This keeps the flavor bright and fresh.

Easy Meal Prep

These bowls are convenient for preparing several lunches or dinners at once.

Cook the chicken and vegetables according to the recipe, then prepare your chosen rice or grain separately.

Divide the cooked ingredients between airtight meal-prep containers. Keep avocado, salsa, cilantro, lime, and other fresh toppings in separate small containers when possible.

When you are ready to eat, reheat the rice, chicken, and vegetables until hot. Add the fresh toppings after reheating.

Keeping the toppings separate helps maintain their texture and prevents the rice from becoming watery.

Recipe Variations

You can easily change the protein without changing the basic seasoning.

Use boneless, skinless chicken thighs for a richer and juicier bowl. Make sure the chicken reaches 165°F before serving.

Shrimp is another quick option, but it cooks much faster than chicken. Watch it closely to prevent overcooking.

For a vegetarian version, replace the chicken with firm tofu, black beans, mushrooms, or extra vegetables. Press tofu before seasoning so it develops better texture during air frying.

Add zucchini, mushrooms, corn, or extra peppers for more vegetables. Sliced jalapeños are a good choice if you enjoy spicy meals.

For a milder version, reduce the chili powder and use mild salsa. For more heat, add cayenne pepper, hot sauce, or fresh jalapeños.

You can also use the cooked filling in tacos, burritos, wraps, quesadillas, or salads.

Storage and Reheating

Store leftover chicken and vegetables in an airtight container in the refrigerator. Keep fresh toppings separate when possible.

Reheat the chicken and vegetables until steaming hot. The air fryer can help bring back some of the roasted texture, while a microwave is convenient for quick lunches.

Add fresh avocado, salsa, cilantro, and lime after reheating.

For meal prep, portion the ingredients into individual containers so each serving is ready to heat and eat.

Frequently Asked Questions

Can I use chicken thighs instead of chicken breast?

Yes. Boneless, skinless chicken thighs work well and should reach an internal temperature of 165°F.

How long should chicken cook in the air fryer?

Cook sliced chicken at 400°F for about 10 to 14 minutes, shaking the basket halfway through.

Can I make these bowls ahead of time?

Yes. Prepare the chicken, vegetables, and rice ahead of time and store them in separate airtight containers.

What can I use instead of rice?

Quinoa, cauliflower rice, lettuce, brown rice, or another grain can be used as the bowl base.

Can I add black beans?

Yes. Black beans add extra texture and make the bowl more filling.

How can I make the bowls spicy?

Add cayenne pepper to the seasoning or top the finished bowl with jalapeños and hot salsa.

Can I make a vegetarian version?

Yes. Replace the chicken with seasoned tofu, black beans, mushrooms, or additional vegetables.

What toppings taste best with fajita bowls?

Avocado, salsa, Pico de Gallo, cilantro, lime, Greek yogurt, cheese, and jalapeños all pair well with the smoky fajita flavors.

Final Thoughts

Air Fryer Protein Fajita Bowls are a simple way to turn everyday ingredients into a flavorful, satisfying meal. The seasoned chicken cooks quickly, the peppers and onions develop delicious roasted edges, and the fresh toppings bring everything together.

The best part is the flexibility. You can keep the bowl classic with rice, salsa, avocado, and lime or create your own version with quinoa, black beans, corn, cauliflower rice, or extra vegetables.

For busy weeknights and meal prep, this recipe is easy to repeat without feeling boring. Once you have the basic fajita seasoning and air fryer method down, you can change the toppings and bowl base whenever you want a fresh combination.