Simple Cauliflower and Egg Skillet

Simple cauliflower and egg skillet with tomatoes, spring onions, and creamy sour cream sauce

Simple Cauliflower and Egg Skillet

If you need a quick, filling meal made with simple ingredients, this Simple Cauliflower and Egg Skillet is a great choice. Tender cauliflower, fresh tomatoes, eggs, spring onions, and a creamy sour cream mixture come together in one pan for a comforting homemade dish.

This skillet works well for breakfast, lunch, or a light dinner. The cauliflower gives the dish a hearty texture, while the eggs add protein and help bring the ingredients together. A short simmer allows the garlic, black pepper, and sour cream to coat every bite.

The recipe takes about 35 minutes from start to finish, including preparation and cooking. It serves four people and is easy enough for a busy weekday meal.

Why You’ll Love This Cauliflower and Egg Skillet

  • Simple ingredients: Most of the ingredients are easy to find at a regular grocery store.
  • One-pan cooking: After boiling the cauliflower, the main dish comes together in one skillet.
  • Creamy and savory: Sour cream, garlic, and black pepper create a rich sauce without complicated steps.
  • Family-friendly: Mild flavors and tender vegetables make this a practical meal for the whole family.
  • Flexible serving option: Enjoy it on its own or pair it with toast, a green salad, or roasted vegetables.

Ingredients You’ll Need

  • 1 medium cauliflower: Choose a firm cauliflower with compact, white florets.
  • 3 large eggs: Eggs add protein and help make the skillet more satisfying.
  • 2 medium tomatoes: Fresh tomatoes add moisture, acidity, and a bright flavor.
  • Spring onions: Chop them finely so they spread evenly through the dish.
  • 3 tablespoons sour cream: Sour cream creates the creamy base for the skillet.
  • Black pepper: Add it to taste for gentle heat.
  • Dried garlic: Use according to your preferred garlic flavor.
  • Salt: Season the cauliflower water and sour cream mixture.
  • Olive oil: Use enough to lightly coat the skillet for browning.

How to Make Simple Cauliflower and Egg Skillet

Step 1: Prepare the Cauliflower

  • Remove the leaves and thick stem from the cauliflower.
  • Cut the cauliflower into small, evenly sized florets.
  • Rinse the florets under cool running water.
  • Bring a large pot of water to a boil.
  • Add about 1 teaspoon of salt to the boiling water.
  • Add the cauliflower and boil for 5 minutes.
  • Drain the florets thoroughly and allow excess water to evaporate.

Parboiling softens the cauliflower before it reaches the skillet. Draining it well is important because excess water can prevent the florets from browning properly.

Step 2: Prepare the Eggs and Vegetables

  • Crack the 3 eggs into a medium bowl.
  • Beat the eggs until the yolks and whites are fully combined.
  • Dice the tomatoes into small cubes.
  • Wash and finely chop the spring onions.
  • Set the prepared vegetables aside while you make the creamy mixture.

Keep the tomato pieces fairly small so they soften quickly during cooking without overpowering the cauliflower.

Step 3: Brown the Cauliflower

  • Place a large skillet over medium heat.
  • Add a small amount of olive oil.
  • Once the oil is warm, add the drained cauliflower florets.
  • Spread the florets into an even layer.
  • Cook for about 3–5 minutes, turning as needed.
  • Continue until the cauliflower develops light golden-brown edges.

Browning adds extra flavor and gives the cauliflower a more appealing texture. Avoid overcrowding the skillet if you want better browning.

Step 4: Make the Sour Cream Mixture

  • Add 3 tablespoons of sour cream to a small bowl.
  • Season with black pepper, dried garlic, and a little salt.
  • Stir until the mixture is smooth and evenly seasoned.

The sour cream mixture provides the creamy element of the dish. Adjust the garlic and pepper to suit your taste.

Step 5: Combine the Ingredients

  • Lower the heat after the cauliflower has browned.
  • Spoon or pour the sour cream mixture over the cauliflower.
  • Add the diced tomatoes.
  • Sprinkle the chopped spring onions over the top.
  • Stir gently to distribute the ingredients without breaking the cauliflower florets.

The tomatoes release moisture as they cook, helping create a light sauce with the sour cream.

Step 6: Cook the Skillet

  • Cover the skillet if you have a suitable lid.
  • Cook over low heat for about 15 minutes.
  • Stir gently once or twice during cooking.
  • Check that the cauliflower is tender and the tomatoes have softened.
  • Keep the heat low so the sour cream mixture does not cook too aggressively.

The slow simmer gives the vegetables time to absorb the savory flavors of garlic, pepper, and sour cream.

Step 7: Add and Cook the Eggs

  • Pour the beaten eggs evenly over the cauliflower mixture.
  • Gently stir or move the ingredients so the eggs spread throughout the skillet.
  • Cook until the eggs are fully set and no longer look runny.
  • Remove the skillet from the heat as soon as the eggs are cooked through.

Cooking the eggs at the end keeps them tender while allowing them to bind with the creamy vegetable mixture.

Step 8: Garnish and Serve

  • Taste the skillet and adjust the salt or black pepper if needed.
  • Sprinkle fresh herbs or additional spring onions over the top.
  • Serve the dish hot.
  • Divide into four portions for a simple family meal.

For a complete breakfast, serve it with whole-grain toast. For lunch or dinner, pair it with a crisp green salad or another vegetable side.

Tips for the Best Results

Use fresh cauliflower for the best texture and flavor. Cut the florets into similar sizes so they cook evenly.

Do not skip the draining step after boiling. Wet cauliflower can release too much water into the skillet and make browning difficult.

Keep the skillet at medium heat while browning, then reduce the temperature before adding the creamy mixture. Gentle heat helps prevent the sour cream from becoming overly thin or separating.

Add the eggs near the end of cooking. This prevents them from becoming dry while the cauliflower and tomatoes finish simmering.

You can also add a small amount of paprika, fresh parsley, or shredded cheese if you want to change the flavor while keeping the basic recipe intact.

Storage and Reheating

Allow leftovers to cool before placing them in an airtight container. Refrigerate within two hours of cooking and use within 3–4 days.

Reheat individual portions in a skillet over low heat or in the microwave until heated through. Add a small splash of water if the mixture seems dry during reheating.

Nutrition Information

This recipe makes approximately 4 servings, with about 150 calories per serving based on the provided recipe information. Actual nutrition can vary depending on the amount of olive oil, sour cream, and other ingredients used.

Frequently Asked Questions

Can I use frozen cauliflower?

Yes. Thaw frozen cauliflower first and drain it well before adding it to the skillet to reduce excess moisture.

Can I make this recipe without sour cream?

Yes. Plain Greek yogurt can be used as an alternative, although it may give the dish a slightly tangier flavor.

How do I prevent watery cauliflower?

Drain the boiled cauliflower thoroughly and let it steam-dry briefly before placing it in the hot skillet.

Can I add cheese to this skillet?

Yes. Sprinkle shredded cheddar, mozzarella, or Parmesan over the skillet near the end and allow it to melt before serving.

Can I prepare this recipe ahead of time?

You can chop the vegetables and prepare the sour cream mixture ahead, then cook the skillet when you are ready to serve it.

What can I serve with cauliflower and eggs?

Serve it with whole-grain toast, avocado, a fresh green salad, or roasted vegetables for a more complete meal.

Can I add other vegetables?

Yes. Bell peppers, spinach, mushrooms, or zucchini can be added, but cook vegetables that need more time before adding the eggs.

Is this recipe suitable for breakfast?

Yes. The combination of cauliflower, eggs, tomatoes, and creamy seasoning makes it a satisfying savory breakfast or brunch option.

Final Thoughts

This Simple Cauliflower and Egg Skillet turns everyday vegetables and eggs into a warm, creamy meal with very little fuss. Parboiling the cauliflower first helps create tender florets, while browning adds a deeper savory flavor. Fresh tomatoes bring brightness, spring onions add freshness, and the sour cream mixture ties everything together.

With straightforward preparation and about 35 minutes of total cooking time, this recipe is practical for busy mornings, relaxed weekend brunches, or an easy family dinner.

Air Fryer Chocolate Banana Breakfast Roll-Ups

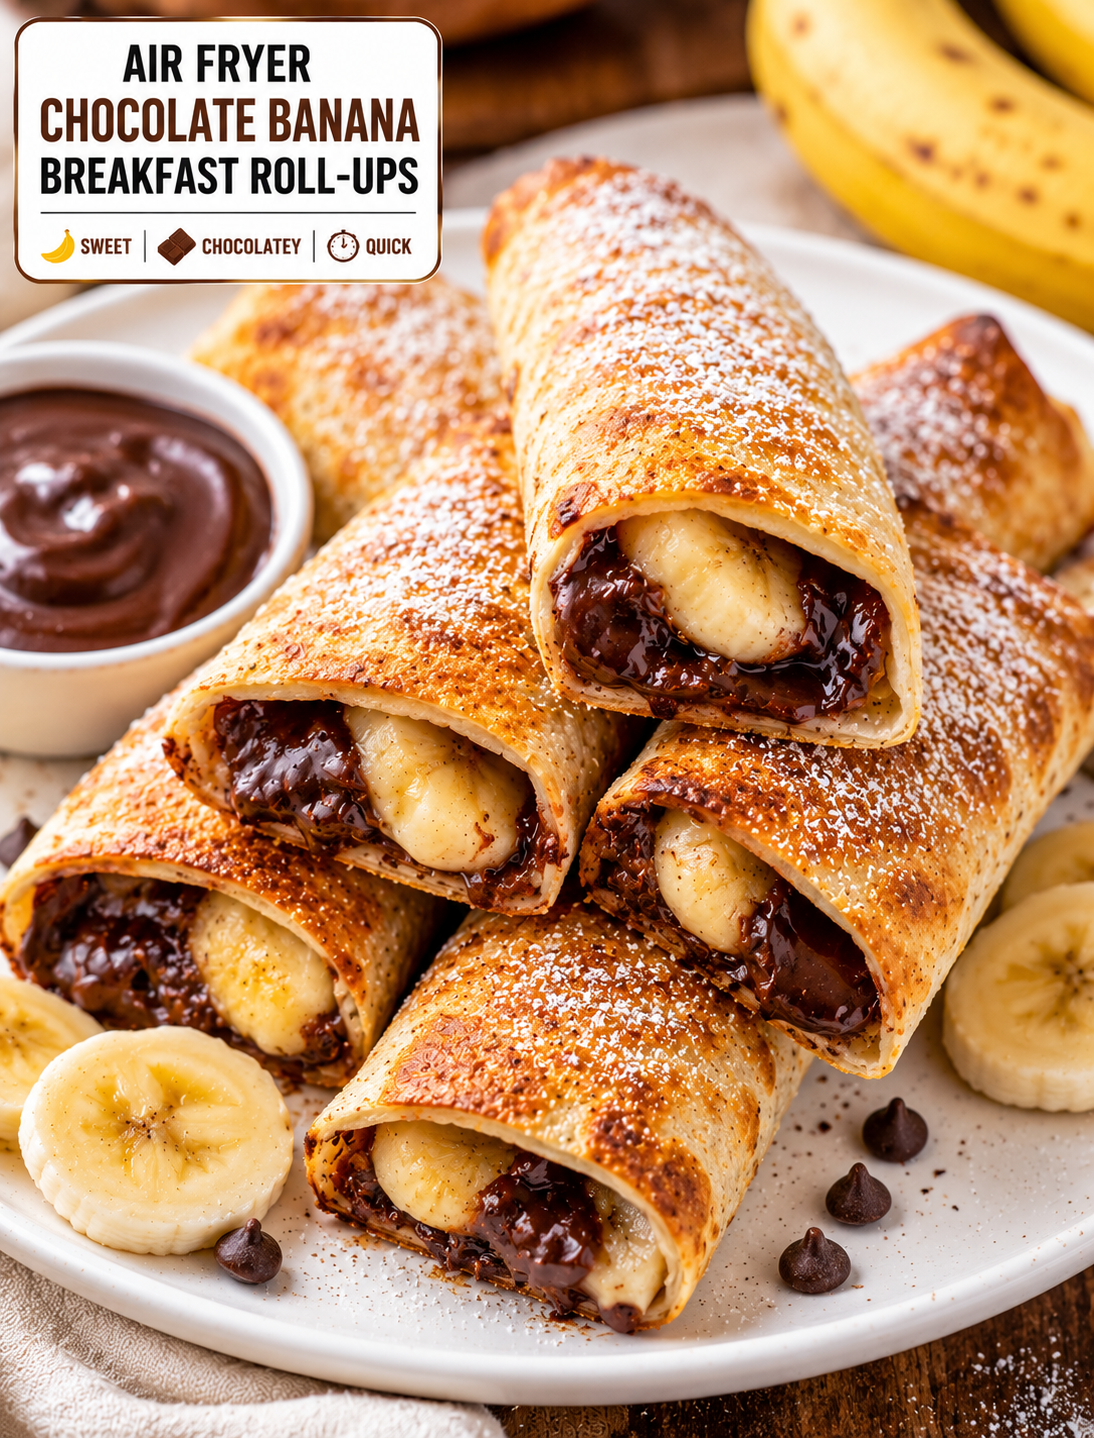
Golden air fryer chocolate banana breakfast roll-ups dusted with powdered sugar, showing melted chocolate and warm banana filling

Air Fryer Chocolate Banana Breakfast Roll-Ups

These Air Fryer Chocolate Banana Breakfast Roll-Ups are a fun way to start the morning with warm bananas, melted chocolate, and a golden crispy tortilla. They use simple ingredients and take only a few minutes to prepare.

Soft flour tortillas are filled with banana slices and chocolate, rolled tightly, lightly brushed with butter, and air fried until golden. The outside becomes crisp while the chocolate melts around the warm banana.

This easy breakfast recipe also works as a quick snack or simple dessert. You can prepare a batch for busy mornings, weekend brunch, after-school treats, or family gatherings.

A little powdered sugar on top gives the roll-ups a sweet finish. You can also serve them with Greek yogurt, fresh berries, peanut butter, or a small drizzle of honey.

Why You’ll Love These Breakfast Roll-Ups

These roll-ups combine a few ingredients into a warm and satisfying treat.

The banana provides natural sweetness and a soft texture, while chocolate adds a rich flavor that melts during air frying. The tortilla creates a crisp outer layer that contrasts with the warm filling.

The air fryer makes this recipe especially convenient. You do not need a frying pan filled with oil, and the roll-ups cook quickly.

They are also easy to customize. Use dark chocolate for a deeper flavor, milk chocolate for a sweeter version, or chocolate chips when you want a quick filling.

Peanut butter, almond butter, cinnamon, coconut, and chopped nuts can also be added for different flavors and textures.

Because the roll-ups are individually portioned, they are easy to serve and share.

Ingredients You’ll Need

  • 4 medium flour tortillas
  • 2 ripe bananas
  • ½ cup semi-sweet chocolate chips
  • 2 tablespoons creamy peanut butter, optional
  • 1 tablespoon melted butter
  • ½ teaspoon ground cinnamon
  • 1 tablespoon granulated sugar, optional
  • Powdered sugar for serving

Optional Toppings

  • Fresh strawberries
  • Blueberries
  • Greek yogurt
  • Honey
  • Maple syrup
  • Chopped walnuts
  • Chopped pecans
  • Shredded coconut
  • Extra melted chocolate

Use ripe but firm bananas. Very soft bananas can release too much moisture and make the tortillas harder to crisp.

Semi-sweet chocolate gives the roll-ups a balanced flavor. Dark or milk chocolate can be used depending on your preference.

Medium flour tortillas are flexible enough to roll without tearing. Avoid tortillas that are dry or cracked.

How to Make Air Fryer Chocolate Banana Breakfast Roll-Ups

1. Prepare the Bananas

Peel the bananas and slice them lengthwise or into thin rounds.

If using very large bananas, cut the slices into smaller pieces so they fit neatly inside the tortillas.

Set the banana pieces aside while preparing the tortillas.

2. Prepare the Tortillas

Place the tortillas on a clean work surface.

Warm each tortilla in the microwave for about 10–15 seconds.

This makes the tortillas softer and easier to roll.

Do not overheat them because very hot tortillas can become sticky or difficult to handle.

3. Add the Filling

Spread a thin layer of peanut butter across the center of each tortilla if using it.

Arrange banana slices over the peanut butter.

Sprinkle chocolate chips evenly over the banana.

Add a small pinch of cinnamon.

Do not spread the filling all the way to the edges. Leaving space around the outside makes the roll-up easier to seal.

Avoid adding too much filling because excess chocolate or banana can leak during cooking.

4. Roll the Tortillas

Fold the sides of the tortilla inward.

Fold the bottom edge over the filling and roll upward tightly.

Keep the roll compact without squeezing the filling out.

Place each finished roll-up seam-side down while you prepare the remaining pieces.

Keeping the seam underneath helps the tortilla stay closed during air frying.

5. Add the Butter Coating

Brush each roll-up lightly with melted butter.

Mix the cinnamon with sugar if you want a lightly sweet crust, then sprinkle a small amount over the buttered surface.

You can also use cooking spray instead of butter.

A thin coating is enough to help the tortilla develop a golden finish.

6. Air Fry Until Golden

Preheat your air fryer to 375°F if your model requires preheating.

Place the roll-ups in the basket with the seam-side down.

Leave a little space between each piece so hot air can circulate.

Air fry for approximately 5–8 minutes, turning them carefully halfway through cooking.

The roll-ups should be golden brown and crisp on the outside.

Check them early because tortillas can brown quickly.

Cooking time may vary depending on the air fryer model and the size of the roll-ups.

7. Finish and Serve

Carefully remove the hot roll-ups from the air fryer.

Allow them to cool for 1–2 minutes before serving.

Dust them lightly with powdered sugar.

Cut them in half diagonally to reveal the warm banana and melted chocolate inside.

Serve with fresh berries, Greek yogurt, peanut butter, or a small drizzle of honey.

How to Make Them Extra Crispy

The texture depends on keeping the tortilla relatively dry.

Use only a small amount of filling so the tortilla can crisp properly.

Avoid using overly ripe bananas that release a lot of moisture.

Do not add too much peanut butter because a thick layer can soften the tortilla.

Keep space between the roll-ups in the air fryer basket.

Turn them halfway through cooking for more even browning.

A light butter coating helps create a golden exterior without making the roll-ups greasy.

For the best texture, serve them soon after cooking.

Best Chocolate to Use

Semi-sweet chocolate chips are a simple choice because they provide enough sweetness without overpowering the banana.

Dark chocolate works well when you prefer a richer, less sweet flavor.

Milk chocolate creates a sweeter and creamier filling.

Mini chocolate chips are useful because they spread evenly throughout the roll-up.

Chocolate chunks can also be used, but large pieces may create uneven melting.

White chocolate provides a sweeter flavor and pairs well with banana and cinnamon.

You can even combine two types of chocolate for a more interesting filling.

Easy Flavor Variations

There are several ways to change these roll-ups.

Peanut butter banana version, spread a thin layer of peanut butter beneath the banana.

A cinnamon banana version, increase the cinnamon and add a small amount of brown sugar.

Chocolate coconut version, sprinkle unsweetened shredded coconut over the chocolate.

Nutty version, add finely chopped walnuts or pecans.

Berry version, add a few thin strawberry slices with the banana.

For a s’mores-inspired version, add mini marshmallows and crushed graham crackers, using a small amount to prevent leaking.

For a breakfast-style version, serve the finished roll-ups with Greek yogurt and fresh berries.

How to Prevent Chocolate From Leaking

Chocolate can melt quickly during air frying, so the filling needs to be placed carefully.

Keep chocolate away from the outer edges of the tortilla.

Do not overfill the roll-ups.

Roll the tortilla tightly so there are no large gaps around the filling.

Place the seam underneath when cooking.

If you notice a small amount of chocolate escaping, reduce the filling slightly in the next batch.

A few melted chocolate spots are normal and can add to the caramelized appearance of the finished roll-ups.

What to Serve With Chocolate Banana Roll-Ups

These roll-ups can be served on their own or paired with simple sides.

Fresh strawberries, blueberries, and raspberries add a bright fruit flavor.

Greek yogurt provides a cool contrast to the warm roll-ups.

Peanut butter or almond butter works well for dipping.

A small drizzle of maple syrup adds extra sweetness.

For brunch, serve the roll-ups with scrambled eggs, fresh fruit, and coffee.

A dessert-style plate, add vanilla ice cream and a little chocolate drizzle.

Children, cut the roll-ups into smaller pieces after they have cooled enough to handle.

Can You Make Them Ahead?

You can prepare the filling and assemble the roll-ups a short time before cooking.

For the best texture, keep the uncooked roll-ups covered and refrigerated until you are ready to air fry them.

Avoid assembling them too far in advance because the banana can release moisture into the tortilla.

If you are preparing breakfast for several people, assemble the roll-ups while the air fryer preheats.

Cook them in batches if your basket cannot hold all the pieces in one layer.

Freshly air-fried roll-ups have the best crisp texture.

Can You Freeze Them?

These roll-ups can be frozen, but the tortilla may not be quite as crisp after freezing and reheating.

To freeze, prepare the roll-ups without powdered sugar and place them in a single layer on a parchment-lined tray.

Freeze until firm, then transfer them to a freezer-safe container.

When ready to cook, air fry from frozen at about 350°F, adding a few extra minutes as needed.

Check the center before serving because the banana and chocolate should be warm.

Avoid thawing the roll-ups at room temperature because moisture can soften the tortillas.

Storage and Reheating

Store leftover roll-ups in an airtight container in the refrigerator.

For the best texture, reheat them in the air fryer at 350°F for 2–4 minutes.

The air fryer helps restore some of the crisp exterior while warming the chocolate and banana.

Avoid using the microwave if you want a crisp tortilla because microwave heating can make the exterior soft.

Allow the roll-ups to cool slightly before eating because melted chocolate can be very hot.

Discard leftovers that have an unusual smell, appearance, or texture.

Tips for the Best Results

Use ripe but firm bananas.

Warm the tortillas before rolling.

Keep the filling in the center.

Do not overfill each tortilla.

Roll the tortillas tightly.

Keep the seam facing down during cooking.

Use a light coating of butter or cooking spray.

Avoid overcrowding the air fryer basket.

Turn the roll-ups halfway through cooking.

Check them early because tortillas brown quickly.

Allow them to cool briefly before serving.

Add powdered sugar and toppings after cooking.

The Bottom Line

Air Fryer Chocolate Banana Breakfast Roll-Ups are a simple way to turn bananas, chocolate, and tortillas into a warm, crispy treat.

The air fryer creates a golden exterior while the banana softens and the chocolate melts inside. A little cinnamon and powdered sugar add extra flavor without requiring a complicated recipe.

These roll-ups work well for breakfast, brunch, snacks, and simple desserts. You can also customize them with peanut butter, nuts, berries, coconut, or different types of chocolate.

For the best results, use firm ripe bananas, avoid overfilling the tortillas, and serve the roll-ups soon after cooking.

Frequently Asked Questions

1. How long do chocolate banana roll-ups take in the air fryer?

Air fry them at 375°F for about 5–8 minutes, turning halfway, until the tortillas are golden and crisp.

2. Can I use corn tortillas?

Flour tortillas work best because they are flexible and easier to roll without cracking.

3. What chocolate works best with bananas?

Semi-sweet chocolate chips are a balanced choice, but milk, dark, or white chocolate can also be used.

4. Can I make these without peanut butter?

Yes. Simply fill the tortillas with banana, chocolate, and cinnamon without adding peanut butter.

5. How do I keep the roll-ups from opening?

Roll them tightly and place them seam-side down in the air fryer basket before cooking.

6. Can I use frozen bananas?

Fresh bananas work better because thawed frozen bananas release extra moisture that can soften the tortilla.

7. Can I freeze chocolate banana roll-ups?

Yes. Freeze assembled roll-ups in a single layer and air fry them from frozen, adding extra cooking time as needed.

8. How do I reheat leftover roll-ups?

Reheat them in the air fryer at 350°F for about 2–4 minutes to restore some of the crisp texture.

Final Thoughts

Air Fryer Chocolate Banana Breakfast Roll-Ups are an easy recipe for mornings when you want something warm, sweet, and satisfying without spending a lot of time in the kitchen.

The combination of crispy tortilla, soft banana, melted chocolate, and cinnamon creates a simple treat that can work for breakfast or dessert.

Keep the filling light, seal the tortillas tightly, and avoid overcrowding the air fryer for the best golden finish.

Serve them with fresh berries, yogurt, peanut butter, or a light dusting of powdered sugar.

Crispy, chocolatey, and packed with banana flavor, these roll-ups are a simple treat that can make an ordinary morning feel a little more special.

Peach Yogurt Parfait

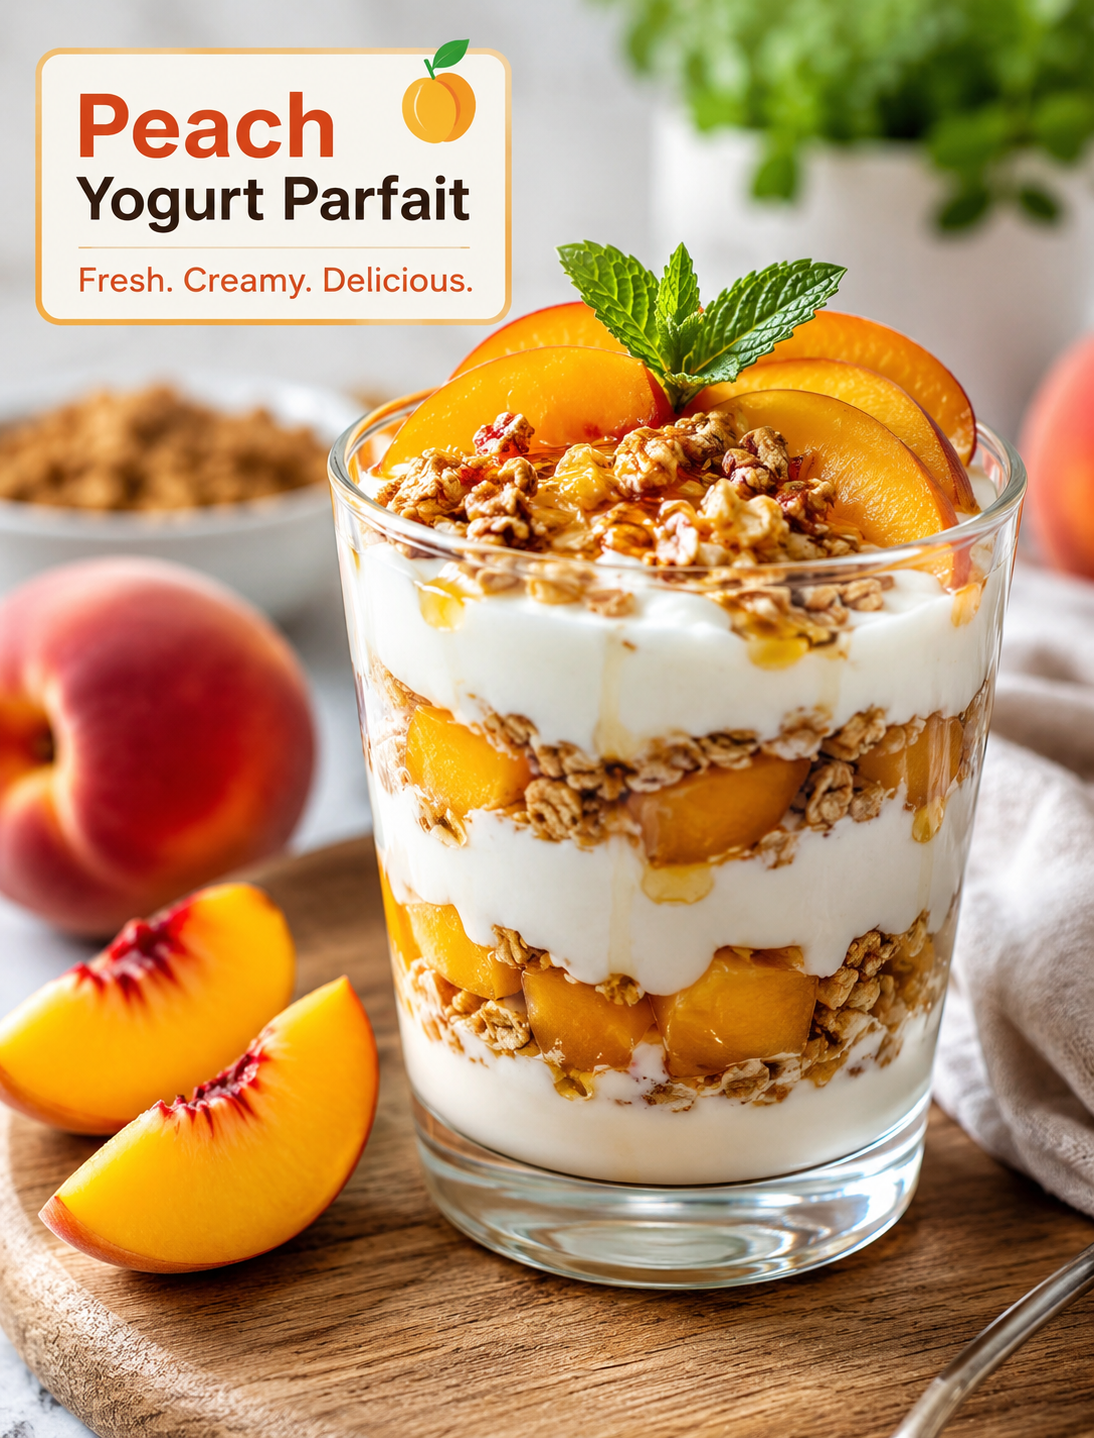
Peach yogurt parfait layered with fresh sliced peaches, creamy Greek yogurt, and crunchy granola in a clear glass

Peach Yogurt Parfait

A Peach Yogurt Parfait is a quick, fresh, and creamy breakfast or dessert made with ripe peaches, yogurt, and crunchy granola. Each spoonful combines juicy fruit, smooth yogurt, and a satisfying crunch.

This easy peach parfait takes about 15 minutes to assemble and needs no cooking. It works well for busy mornings, afternoon snacks, or a light summer dessert.

Using Greek yogurt gives the parfait a thick texture and adds protein, while fresh peaches provide natural sweetness and a juicy bite. A small drizzle of honey or maple syrup can add extra sweetness when needed.

The layers also make this recipe easy to serve for brunch, family breakfasts, or casual gatherings. Prepare the ingredients ahead of time and assemble the glasses shortly before serving for the best texture.

Why You’ll Love This Peach Yogurt Parfait

This recipe uses simple ingredients that are easy to find at most U.S. grocery stores. You can also adjust the layers based on the fruit, yogurt, or toppings you have available.

Fresh peaches bring a naturally sweet flavor without needing much added sugar. Greek yogurt adds creaminess and helps make each serving more filling.

Granola adds texture and turns a simple bowl of yogurt and fruit into a more satisfying meal. Honey or maple syrup can be added according to the sweetness of the peaches.

The recipe is also flexible enough for different diets. Use dairy-free yogurt for a plant-based version or choose a lower-sugar granola if you want to reduce added sugar.

Ingredients

For 2–3 servings, you will need:

  • 2 large ripe peaches, diced or thinly sliced
  • 2 cups plain or Greek yogurt
  • 1 cup granola
  • 2–3 tablespoons honey or maple syrup
  • Fresh mint leaves, for garnish

Optional Add-Ins

  • 1 tablespoon chia seeds for extra fiber
  • 2 tablespoons chopped pistachios or nuts for additional crunch
  • ¼ teaspoon ground cinnamon for warm flavor
  • 1 tablespoon sweetened condensed milk for a richer dessert-style parfait
  • A little lemon zest for a bright citrus note

Choose peaches that feel slightly soft when gently pressed. Very firm peaches may not provide the same juicy texture.

How to Make Peach Yogurt Parfait

Prepare the Peaches

Wash the peaches under cool running water and pat them dry. Cut each peach in half, remove the pit, and dice or thinly slice the fruit.

Keep the pieces fairly even so the layers are easy to build and each spoonful contains a good mix of ingredients.

Sweeten the Yogurt

Taste the yogurt before adding sweetener. If it tastes too tart, stir in about 1 tablespoon of honey or maple syrup.

Plain Greek yogurt works especially well because its thick consistency holds the layers together without becoming watery.

Build the First Layer

Place about 2–3 tablespoons of yogurt into the bottom of each clear glass, jar, or dessert cup.

Spread it gently into an even layer so the next ingredients remain visible from the outside.

Add Peaches and Granola

Add a layer of diced peaches over the yogurt. Follow with a small handful of granola.

Avoid adding too much granola at once because thick layers can make the parfait difficult to eat with a spoon.

Repeat the Layers

Continue with another layer of yogurt, peaches, and granola until the glasses are almost full.

Finish with peaches and a light sprinkle of granola for an attractive presentation.

Add Toppings and Serve

Drizzle a small amount of honey or maple syrup over the top. Add chopped pistachios, chia seeds, cinnamon, or a fresh mint leaf if desired.

Serve immediately for crisp granola and fresh peaches.

Tips for the Best Peach Parfait

Choose ripe peaches: Ripe fruit provides more flavor, moisture, and natural sweetness than underripe peaches.

Use thick yogurt: Greek yogurt creates sturdy layers and gives the parfait a rich, creamy texture.

Add granola at the right time: Layer granola immediately before serving if you want it to stay crunchy.

Taste before sweetening: Very ripe peaches may provide enough sweetness that you need little or no honey.

Keep the layers moderate: Thin layers make it easier to get yogurt, fruit, and granola in every bite.

Chill the ingredients: Cold yogurt and peaches make the finished parfait especially refreshing.

Use clear serving glasses: Transparent cups highlight the colorful layers and make the parfait look more appealing.

Prepare toppings separately: Keep nuts, granola, and other crunchy toppings dry until assembly.

Easy Variations

Berry Peach Parfait

Add fresh blueberries or sliced strawberries between the peach layers. The berries provide extra color and a mild tart flavor.

Peach Almond Parfait

Use almond granola or sprinkle toasted sliced almonds between the layers for a nutty finish.

Tropical Peach Parfait

Add diced mango and unsweetened coconut flakes for a tropical combination that works especially well in warm weather.

Peach Chia Parfait

Sprinkle chia seeds over the yogurt or stir them into the yogurt before assembling the glasses.

Protein Peach Parfait

Mix a serving of your preferred protein powder into the yogurt before layering. Choose a plain or vanilla variety that complements the peaches.

Dairy-Free Peach Parfait

Replace regular yogurt with coconut, almond, soy, or another dairy-free yogurt. Use maple syrup instead of honey for a fully plant-based option.

Peach Cinnamon Parfait

Add a light sprinkle of cinnamon between the yogurt and peach layers for a warm, lightly spiced flavor.

Dessert-Style Peach Parfait

Top the parfait with a small amount of whipped cream and crushed cookies when you want a sweeter after-dinner treat.

How to Store Peach Yogurt Parfait

A prepared parfait can be refrigerated in a covered container for up to 24 hours. However, the granola will soften as it sits in the yogurt and fruit.

For the best texture, store the yogurt and peaches separately from the granola. Assemble the parfait shortly before eating.

If you are preparing parfaits for breakfast, portion the yogurt and peaches into containers the night before and keep the granola in a separate small container.

Can You Make Peach Parfait Ahead of Time?

Yes, you can prepare most of the ingredients ahead of time. Wash and cut the peaches, portion the yogurt, and measure the granola separately.

For the freshest texture, assemble the layers shortly before serving. This keeps the granola crisp and prevents excess moisture from softening it.

For meal prep, mason jars with separate dry toppings are a convenient option for taking breakfast to work or school.

Serving Ideas

Serve this peach parfait for breakfast with scrambled eggs, whole-grain toast, or a cup of coffee. It also fits well on a brunch table alongside fresh fruit and other light breakfast dishes.

For dessert, use smaller glasses and add cinnamon, pistachios, or a small spoonful of whipped cream.

This recipe is also easy to scale for guests. Simply multiply the ingredients based on the number of servings and prepare the components in advance.

Frequently Asked Questions

Can I use canned peaches for this parfait?

Yes. Drain canned peaches thoroughly and choose peaches packed in juice rather than heavy syrup for a fresher flavor.

What yogurt is best for a peach parfait?

Plain or vanilla Greek yogurt works well because it is thick, creamy, and rich in protein.

Can I make this recipe without honey?

Yes. Skip the honey if your peaches and yogurt are sweet enough, or use maple syrup as an alternative.

How long does a yogurt parfait last in the refrigerator?

A prepared parfait can be refrigerated for up to 24 hours, but the granola will become softer over time.

Can I use frozen peaches?

Yes. Thaw frozen peaches completely and drain excess liquid before adding them to the parfait.

How can I keep the granola crunchy?

Add the granola immediately before serving, or store it separately and sprinkle it over the parfait when ready to eat.

Can I make this parfait dairy-free?

Yes. Use coconut, almond, soy, or another dairy-free yogurt and replace honey with maple syrup if needed.

What fruit goes well with peaches?

Blueberries, strawberries, mango, pineapple, and bananas all pair well with the sweet flavor of peaches.

Nutrition Information

Approximate nutrition per serving:

  • Calories: 280
  • Protein: 12 g
  • Carbohydrates: 40 g
  • Fiber: 4 g
  • Fat: 8 g
  • Sugar: 22 g

Nutrition values vary based on the type of yogurt, granola, fruit, and sweetener used. Check individual product labels for more precise information.

Final Thoughts

Peach Yogurt Parfait is a simple way to turn fresh summer peaches into a creamy, colorful, and satisfying breakfast or dessert. The combination of thick yogurt, juicy fruit, and crunchy granola gives every layer a different texture.

The recipe takes only a few minutes to assemble and can be adjusted with berries, nuts, chia seeds, cinnamon, or dairy-free yogurt. For the best results, use ripe peaches and add the granola just before serving.

Whether you need a quick weekday breakfast, a refreshing snack, or an easy dessert for guests, this layered peach treat is a practical recipe to keep on hand.

Air Fryer Cheesy Egg Muffins

Fluffy air fryer cheesy egg muffins with melted cheddar, bell peppers, and green onions served on a breakfast plate

Air Fryer Cheesy Egg Muffins

Air Fryer Cheesy Egg Muffins are an easy breakfast option when you want something warm, savory, and filling without spending much time in the kitchen. They are made with simple ingredients and cook quickly in the air fryer, making them ideal for busy mornings.

These egg muffins have a soft, fluffy center with melted cheese in every bite. You can add vegetables, cooked bacon, sausage, or herbs to create different flavors without changing the basic method.

Unlike traditional baked egg cups, these mini breakfast muffins do not require a large oven or long cooking time. The air fryer provides steady circulating heat that helps the eggs cook evenly while the cheese melts into a golden topping.

They are also easy to prepare ahead of time. Make a batch on the weekend, refrigerate the cooked muffins, and reheat them for a quick breakfast during the week.

Ingredients

The ingredients for these cheesy egg bites are simple and easy to find at most American grocery stores.

  • 6 large eggs
  • ½ cup shredded cheddar cheese
  • ¼ cup milk
  • ¼ cup diced bell pepper
  • 2 tablespoons finely chopped green onion
  • ¼ teaspoon garlic powder
  • ¼ teaspoon black pepper
  • ¼ teaspoon salt
  • Cooking spray

Cheddar cheese gives the muffins a rich, classic flavor, but you can use mozzarella, Monterey Jack, Colby, or a Mexican-style cheese blend.

Whole milk creates a soft texture, while low-fat milk also works if that is what you have available.

For vegetables, bell peppers and green onions add color and mild flavor without releasing too much moisture. If you use watery vegetables such as zucchini or fresh tomatoes, remove excess moisture before adding them to the egg mixture.

How to Make Air Fryer Cheesy Egg Muffins

Step 1: Prepare the Egg Mixture

Crack the eggs into a medium mixing bowl and add the milk, salt, black pepper, and garlic powder.

Whisk until the yolks and whites are fully combined and the mixture looks smooth.

Avoid over-whisking because excessive air can cause the egg mixture to puff dramatically during cooking and then collapse as it cools.

Step 2: Add the Fillings

Stir the shredded cheddar cheese, diced bell pepper, green onion into the eggs.

Reserve a small amount of cheese for sprinkling over the tops if you want a more golden finish.

Keep the fillings finely chopped so each muffin cooks evenly and holds together when removed from the basket.

Step 3: Prepare the Molds

Use silicone egg molds or small silicone muffin cups that are safe for your air fryer.

Lightly coat the molds with cooking spray to make removing the cooked egg muffins easier.

Do not fill the cups completely because the egg mixture expands slightly as it cooks. Filling each cup about three-quarters full leaves enough room for the eggs to rise.

Step 4: Fill the Cups

Carefully divide the egg mixture between the prepared silicone cups.

Try to distribute the cheese and vegetables evenly so every muffin contains a good balance of egg and filling.

Place a little extra shredded cheese on top if desired.

Step 5: Air Fry

Preheat the air fryer to 330°F for about 3 minutes if your model recommends preheating.

Place the filled silicone cups carefully inside the air fryer basket.

Cook at 330°F for approximately 8 to 12 minutes, or until the eggs are set in the center and the tops are lightly golden.

Cooking time can vary between air fryer models and cup sizes. Start checking around 8 minutes and continue cooking until the centers no longer look wet.

Step 6: Cool and Serve

Remove the silicone cups carefully because they will be hot.

Let the egg muffins rest for 2 to 3 minutes before removing them from the molds.

Serve them warm with fresh fruit, toast, avocado, breakfast potatoes, or your favorite breakfast sauce.

Why These Egg Muffins Work in an Air Fryer

An air fryer is useful for small egg recipes because it heats the food quickly without requiring a full-size oven.

The circulating hot air cooks the individual portions from all sides, helping the egg mixture set while the cheese melts.

Using silicone cups also keeps the portions contained and makes serving simple. Each muffin can be removed individually, which makes this recipe convenient for meal preparation.

The moderate cooking temperature is important because eggs can become rubbery when exposed to excessive heat. Cooking them gently gives the center a softer and more tender texture.

Best Cheese for Egg Muffins

Cheddar is one of the easiest choices because it melts well and provides a strong savory flavor.

Mozzarella creates a milder flavor with a stretchy melted texture. Monterey Jack melts smoothly and adds a creamy taste without overpowering the eggs.

Pepper Jack is a good choice if you enjoy a little heat. For a breakfast-inspired flavor, try a combination of cheddar and Monterey Jack.

Freshly shredded cheese often melts more smoothly than some pre-shredded varieties because packaged shredded cheese may contain anti-caking ingredients.

Easy Add-Ins and Variations

These breakfast egg cups are easy to customize with ingredients you already have.

For a sausage version, add cooked breakfast sausage that has been drained of excess grease.

For a bacon and cheddar version, use crispy crumbled bacon with sharp cheddar cheese.

For a vegetable version, add finely chopped spinach, bell peppers, mushrooms, or green onions.

For a spicy version, add diced jalapeño, a pinch of red pepper flakes, or Pepper Jack cheese.

For a Mediterranean-style version, add spinach, feta cheese, and a small amount of chopped roasted red pepper.

For a cheese version, add finely diced cooked ham and Swiss or cheddar cheese.

Always cook raw meat before adding it to the egg mixture. The air fryer cooking time is designed to cook the egg mixture, not raw meat safely.

Tips for Fluffy Egg Muffins

Use fresh eggs for the best flavor and texture.

Whisk the eggs and milk until combined, but do not whip excessive air into the mixture.

Cut vegetables and meats into small pieces so they distribute evenly.

Do not overfill the silicone cups because the eggs need room to expand.

Cook at a moderate temperature instead of using maximum heat.

Check the center before removing the muffins because the tops can look finished while the middle still needs more time.

Allow the muffins to rest briefly after cooking so the eggs can finish setting.

If your first batch comes out too firm, reduce the cooking time slightly on the next batch.

How to Serve Cheesy Egg Muffins

These savory egg bites are versatile enough for breakfast, brunch, or a quick snack.

Serve them with fresh berries and toast for a balanced breakfast. Pair them with crispy breakfast potatoes and fruit when you want a more filling morning meal.

For brunch, arrange the muffins on a serving platter with avocado slices, tomatoes, toast, and a simple dipping sauce.

They are also convenient for busy mornings because each muffin can be eaten without utensils.

For a quick lunch, serve two or three egg muffins with a side salad or roasted vegetables.

How to Store and Reheat

Allow the cooked muffins to cool completely before storing them.

Place them in an airtight container and refrigerate for up to 3 to 4 days.

For longer storage, wrap individual muffins and freeze them in a freezer-safe container or bag.

To reheat refrigerated muffins, place them in the air fryer at 300°F for about 2 to 4 minutes.

Frozen muffins can be thawed overnight in the refrigerator before reheating for the best texture.

Avoid overheating the eggs because prolonged high heat can make them dry and rubbery.

Common Mistakes to Avoid

One of the most common mistakes is using too much milk. Excess liquid can make the egg muffins watery and prevent them from setting properly.

Another mistake is adding vegetables without removing excess moisture. Watery ingredients can release liquid as they cook and change the texture.

Overfilling the silicone cups can also cause the mixture to spill as it expands.

Cooking at a very high temperature may brown the cheese quickly while making the eggs tough.

Finally, do not remove the muffins immediately if the centers still look wet. Give them another minute or two of cooking time and check again.

Frequently Asked Questions

Can I make egg muffins without milk?

Yes, you can omit the milk, although a small amount helps create a softer and more tender texture.

What temperature is best for air fryer egg muffins?

330°F is a good starting temperature because it cooks the eggs gently without quickly over-browning the cheese.

How long do egg muffins take in an air fryer?

Most individual egg muffins take about 8 to 12 minutes, depending on the cup size and air fryer model.

Can I use silicone muffin cups?

Yes, food-safe silicone cups designed for cooking are convenient because they prevent sticking and make the muffins easy to remove.

Why are my egg muffins rubbery?

Egg muffins can become rubbery when they are overcooked or exposed to excessive heat, so check them early and remove them once the centers are set.

Can I freeze cheesy egg muffins?

Yes, cooked egg muffins can be frozen in an airtight freezer-safe container and reheated when needed.

What vegetables work best in egg muffins?

Bell peppers, spinach, mushrooms, and green onions work well when finely chopped and drained of excess moisture.

Can I make these egg muffins ahead of time?

Yes, prepare a batch ahead and refrigerate them for up to 3 to 4 days for quick breakfasts.

Final Thoughts

Air Fryer Cheesy Egg Muffins are a simple way to make a warm, protein-rich breakfast in convenient individual portions. The combination of fluffy eggs, melted cheese, and colorful vegetables makes each bite satisfying without requiring complicated preparation.

The key to good results is using the right amount of filling, avoiding excess moisture, and cooking the muffins at a moderate temperature. Silicone cups make the process even easier by keeping the mixture contained and helping the cooked muffins release cleanly.

You can keep the recipe simple with cheddar and green onions or customize it with  sausage, vegetables, ham, or spicy cheese. Make a batch ahead of time and keep them refrigerated for an easy breakfast whenever your morning gets busy.

For a quick American-style breakfast that is easy to customize and simple to reheat, these cheesy air fryer egg muffins are a recipe worth keeping in your regular meal rotation.

Air Fryer Mini Cinnamon Roll Bites

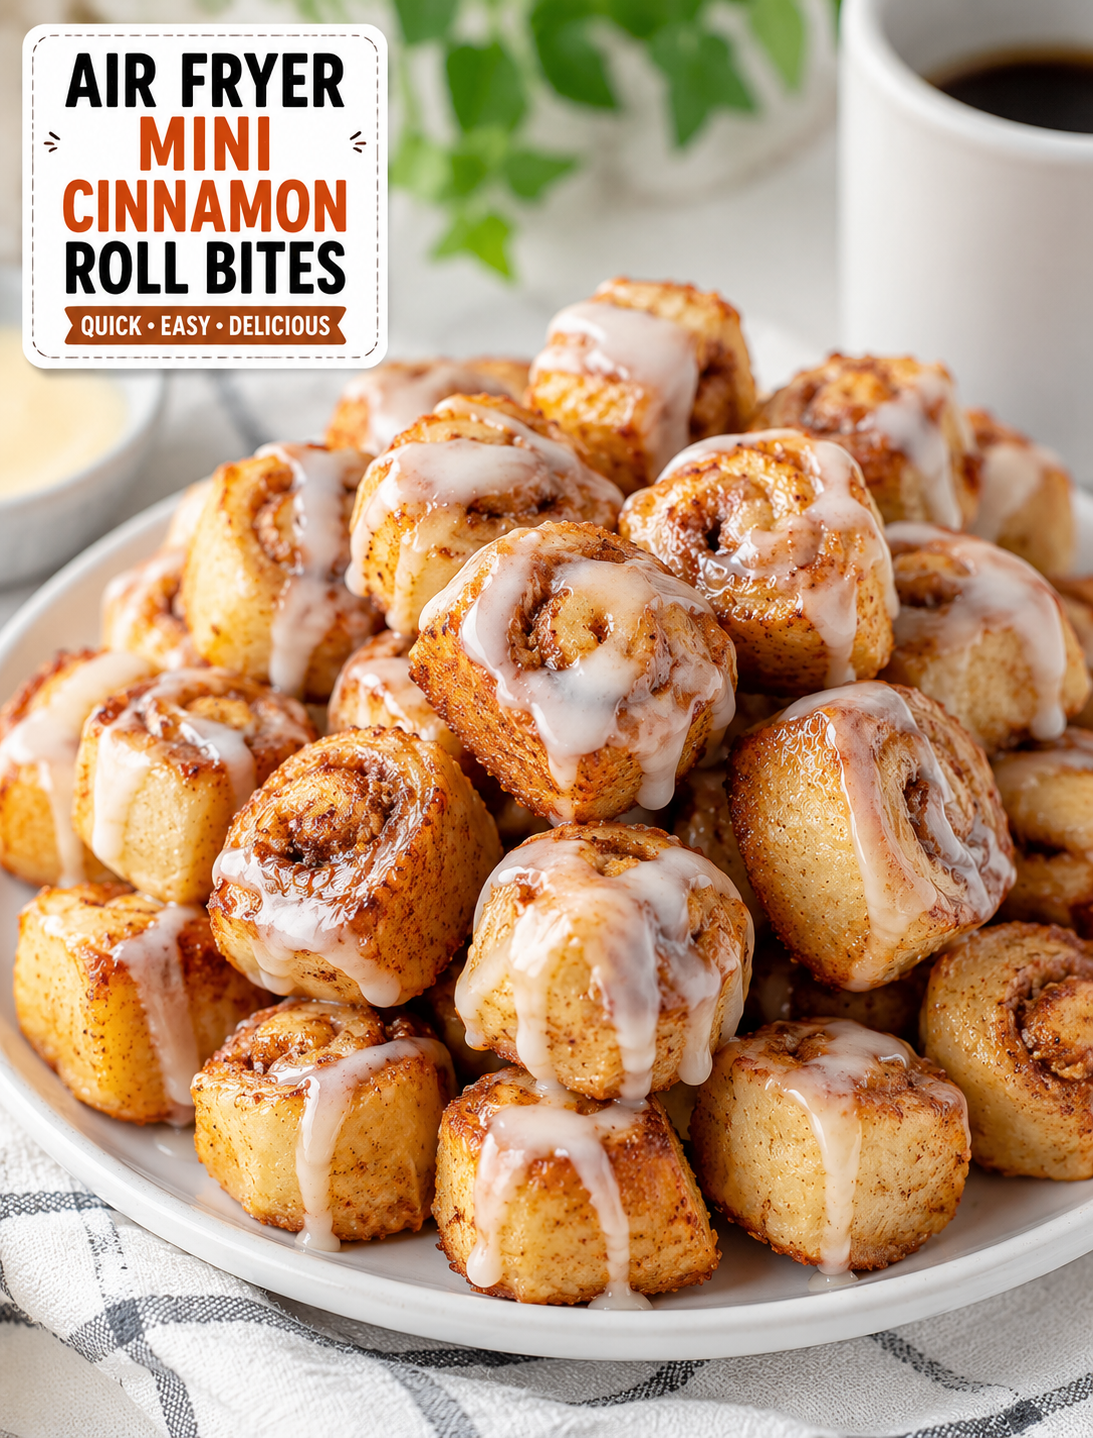
Golden mini cinnamon roll bites with cinnamon sugar and sweet icing served on a white plate

Air Fryer Mini Cinnamon Roll Bites

These Air Fryer Mini Cinnamon Roll Bites are a quick way to enjoy warm, gooey cinnamon rolls without making a full batch from scratch. Each bite has a soft center, golden edges, sweet cinnamon flavor, and a simple glaze that makes them hard to resist.

Using an air fryer keeps the cooking time short and gives the little cinnamon bites a lightly crisp outside while keeping the inside tender. They are perfect for breakfast, brunch, an afternoon snack, or a quick dessert when a sweet craving hits.

The recipe uses refrigerated cinnamon roll dough, so there is no need to wait for yeast to rise. Cut the dough into small pieces, air fry until golden, and finish with the included icing or a quick homemade glaze.

Ingredients

You only need a few everyday ingredients to make these bite-sized cinnamon treats.

  • 1 can refrigerated cinnamon roll dough with icing
  • 1 tablespoon melted butter
  • 1 teaspoon ground cinnamon
  • 1 tablespoon brown sugar
  • Cooking spray, as needed
  • Optional: powdered sugar for extra sweetness

If your cinnamon roll dough already contains plenty of cinnamon filling, you can reduce the additional cinnamon and brown sugar. The extra mixture is mainly useful when you want a stronger cinnamon flavor and slightly caramelized edges.

For the best texture, use refrigerated dough that is still cold when you begin cutting it. Cold dough is easier to handle and keeps its shape better in the air fryer.

How to Make Air Fryer Mini Cinnamon Roll Bites

Step 1: Prepare the Dough

Open the refrigerated cinnamon roll package and separate the dough pieces. Keep the icing aside for later.

Place the dough on a clean cutting board and gently unroll each piece if needed. Cut each cinnamon roll into several small pieces, depending on how large you want the bites.

Aim for pieces that are similar in size. Even pieces cook at the same rate and help prevent some bites from becoming too dark while others remain undercooked.

Step 2: Add Extra Cinnamon Flavor

Combine the brown sugar and ground cinnamon in a small bowl.

Lightly brush the dough pieces with melted butter, then sprinkle them with the cinnamon-sugar mixture. Toss gently so the coating stays on the dough instead of falling away.

Do not add too much butter. A thin coating is enough to help the sugar mixture stick and encourage golden browning.

Step 3: Preheat the Air Fryer

Preheat your air fryer to 330°F to 350°F for about 3 minutes if your model recommends preheating.

The exact temperature can vary between air fryer brands. A moderate temperature works better than very high heat because the small dough pieces cook quickly.

Step 4: Arrange the Cinnamon Bites

Lightly spray the air fryer basket with cooking spray if needed.

Place the dough pieces in the basket in a single layer. Leave a little space between them so hot air can circulate around each bite.

Avoid overcrowding the basket. If you are making a large batch, cook the bites in multiple batches for more even browning.

Step 5: Air Fry

Air fry the cinnamon roll bites at 330°F to 350°F for about 6 to 9 minutes.

Check them around the 6-minute mark because small pieces can brown quickly. The bites are ready when they are puffed, golden on the outside, and cooked through in the center.

If your air fryer cooks aggressively, use the lower temperature and check early. Cooking times can also change based on the size of the dough pieces.

Step 6: Add the Icing

Remove the warm cinnamon bites from the basket and let them cool for a minute or two.

Drizzle the included cinnamon roll icing over the top while the bites are still warm. The gentle heat helps the icing soften and coat the pieces.

For easier serving, place the bites on a plate or small serving tray before adding the glaze.

Why These Mini Cinnamon Roll Bites Work

The air fryer is ideal for small portions of refrigerated dough because it circulates hot air around the food. This helps the outside brown quickly while the center becomes soft and tender.

Cutting the cinnamon rolls into small pieces also increases the amount of golden surface area. Each bite gets more caramelized edges compared with one large cinnamon roll.

The short cooking time makes this recipe especially useful when you want a warm breakfast or dessert without turning on a full-size oven.

Another benefit is portion flexibility. You can make only as many bites as you need and save the remaining refrigerated dough for another recipe if the package allows.

Tips for the Best Cinnamon Roll Bites

Cut evenly sized pieces. Uniform dough pieces cook more consistently and reduce the chance of burnt edges.

Do not overcrowd the basket. Good airflow helps the bites puff and brown properly.

Check early. Small pieces can go from golden to over-browned quickly.

Use moderate heat. Extremely high temperatures can brown the outside before the center finishes cooking.

Avoid excessive butter. Too much butter can cause the sugar to spread and make the bites greasy.

Add icing after cooking. This keeps the glaze smooth and prevents it from burning in the air fryer.

Serve warm. The texture is best shortly after cooking while the centers are soft and the icing is slightly melted.

Easy Variations

These cinnamon bites are easy to customize with different toppings and flavors.

For cream cheese cinnamon bites, mix softened cream cheese with powdered sugar, vanilla extract, and a small splash of milk for a quick homemade frosting.

For pecan cinnamon bites, sprinkle finely chopped pecans over the dough before air frying. Press them gently into the dough so they stay attached.

For apple cinnamon bites, add a small amount of finely diced cooked apple to the center before shaping the pieces. Avoid adding too much filling because excess moisture can affect the dough.

For maple cinnamon bites, replace part of the glaze with a light drizzle of maple syrup after cooking.

For extra crunch, add chopped walnuts or pecans to the finished bites.

You can also add a small pinch of nutmeg to the cinnamon-sugar mixture for a warmer spice flavor.

How to Serve Cinnamon Roll Bites

These mini treats work well for casual breakfasts and special occasions.

Serve them with scrambled eggs, fresh fruit, yogurt, or breakfast sausage for a simple brunch spread. They also pair nicely with coffee, hot chocolate, tea, or a cold glass of milk.

For dessert, arrange the bites on a serving plate and drizzle them with icing. A light dusting of powdered sugar can make them look extra inviting.

They are also convenient for parties because guests can grab individual pieces without needing a knife or fork.

For a weekend breakfast, place the warm bites in a basket or serving bowl and let everyone add extra icing according to taste.

How to Store and Reheat

If you have leftovers, allow the cinnamon roll bites to cool completely before placing them in an airtight container.

Keep them at room temperature for short-term storage or refrigerate them if you want to keep them longer. Follow the storage directions on the refrigerated dough package for any unused dough.

To reheat cooked bites, place them back in the air fryer at 300°F for 2 to 4 minutes. Check them frequently so the icing does not become overly hot or burn.

You can also warm them briefly in the microwave, but the air fryer does a better job of restoring the lightly crisp exterior.

Common Mistakes to Avoid

One common mistake is cutting the dough into pieces that are too large. Larger pieces need more time to cook and may brown unevenly.

Another mistake is filling the basket too tightly. When the dough pieces touch or overlap, the trapped steam can make them softer instead of lightly crisp.

Cooking at excessive heat can also cause problems. The sugar may brown too quickly while the center is still doughy.

Finally, avoid adding icing before cooking. Most cinnamon roll icing is meant to be used after baking, and direct air fryer heat can cause it to melt or scorch.

Frequently Asked Questions

Can I use any refrigerated cinnamon roll dough?

Yes, most standard refrigerated cinnamon roll dough works well, but cooking time may vary based on the dough thickness and piece size.

What temperature should I use for mini cinnamon roll bites?

A temperature between 330°F and 350°F works well for small pieces because it allows the centers to cook without quickly burning the sugar.

How long do cinnamon roll bites take in an air fryer?

Most small pieces take about 6 to 9 minutes, but check early because air fryer models and dough sizes vary.

Do I need to preheat the air fryer?

Preheating can help the dough begin cooking evenly, but it is not required for every air fryer model.

Can I make these without extra butter?

Yes, you can skip the extra butter if the refrigerated dough already has enough filling and fat for your preferred texture.

Why are my cinnamon roll bites still doughy inside?

The pieces may be too large or need additional cooking time; return them to the air fryer for 1 to 2 minutes and check again.

Can I use homemade cinnamon roll dough?

Yes, homemade dough works, but you may need to adjust the cooking time because homemade dough can differ in thickness and moisture.

How do I keep cinnamon roll bites soft?

Store cooled bites in an airtight container and reheat them gently to help maintain a soft center.

Final Thoughts

These Air Fryer Mini Cinnamon Roll Bites are proof that you do not need a complicated recipe to make something special. Refrigerated cinnamon roll dough, a little cinnamon, and a few minutes in the air fryer can turn into warm, bite-sized treats with golden edges and a soft center.

The most important steps are cutting the dough evenly, leaving space between the pieces, and checking them early during cooking. These simple details help prevent over-browning and give the bites a better texture.

Finish them with the included icing, homemade cream cheese glaze, chopped nuts, or your favorite topping. Whether you serve them for a relaxed weekend breakfast, a holiday brunch, or an easy after-dinner treat, these little cinnamon bites are made for sharing.

Save this recipe whenever you need a quick air fryer dessert or breakfast treat that delivers warm cinnamon flavor without the long preparation time.

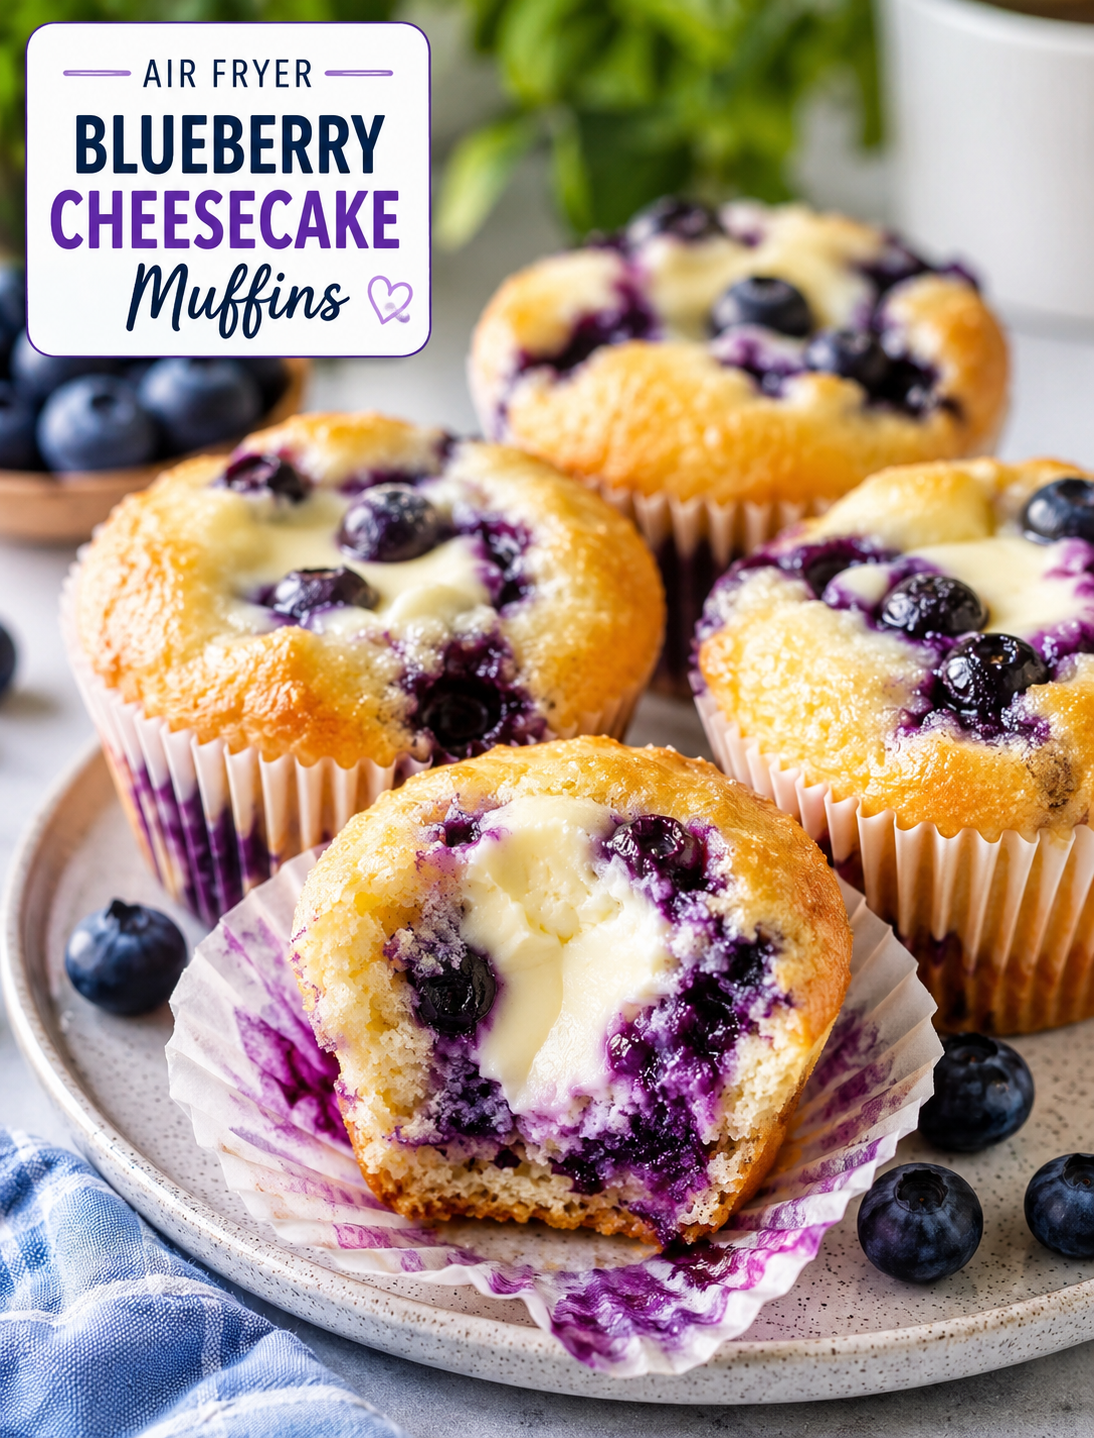
Air Fryer Blueberry Cheesecake Muffins

Air Fryer Blueberry Cheesecake Muffins with juicy blueberries and creamy cheesecake filling

Air Fryer Blueberry Cheesecake Muffins

These Air Fryer Blueberry Cheesecake Muffins are soft, fluffy, and filled with juicy blueberries and a creamy cheesecake center. They have golden tops, tender crumbs, and a sweet cream cheese filling in every bite. The air fryer makes a small batch quickly, so you do not need to heat the whole oven.

This easy muffin recipe is perfect for breakfast, brunch, afternoon snacks, or a simple homemade dessert. Fresh or frozen blueberries both work well, and the ingredients are easy to find at any U.S. grocery store.

Why You’ll Love This Recipe

  • Quick to make: The muffins cook in about 12–16 minutes.
  • Small-batch friendly: The recipe makes about 8 muffins, making it useful for smaller households.
  • Creamy center: Sweetened cream cheese creates a cheesecake-style filling.
  • Fresh blueberry flavor: Blueberries add natural sweetness and a juicy texture.
  • No large oven needed: An air fryer handles the baking with less preheating.
  • Easy ingredients: Most items are pantry and refrigerator staples.
  • Great for meal prep: Store the finished muffins in the refrigerator for easy breakfasts or snacks.

Ingredients

For the Muffins

  • 1 cup all-purpose flour
  • 1/2 cup granulated sugar
  • 1 teaspoon baking powder
  • 1/4 teaspoon baking soda
  • 1/4 teaspoon salt
  • 1 large egg
  • 1/3 cup whole milk
  • 1/4 cup melted unsalted butter
  • 1 teaspoon vanilla extract
  • 3/4 cup fresh blueberries

For the Cheesecake Filling

  • 4 ounces softened cream cheese
  • 3 tablespoons granulated sugar
  • 1/2 teaspoon vanilla extract
  • 1 tablespoon all-purpose flour

Optional Topping

  • 1 tablespoon coarse sugar
  • 1/4 cup powdered sugar for a simple glaze

How to Make Air Fryer Blueberry Cheesecake Muffins

Step 1: Prepare the Cheesecake Filling

Place the softened cream cheese in a small bowl. Add the sugar, vanilla extract, and flour.

Mix until the filling is smooth and creamy. Set it aside while you prepare the muffin batter.

  • Use softened cream cheese for a smooth filling.
  • Do not overmix once the ingredients are combined.
  • If the cream cheese is cold, let it sit at room temperature for about 20–30 minutes.

Step 2: Mix the Dry Ingredients

Add the flour, sugar, baking powder, baking soda, and salt to a medium mixing bowl.

Whisk the ingredients until evenly combined. Breaking up any flour lumps at this stage helps create a smooth muffin batter.

Step 3: Mix the Wet Ingredients

In a separate bowl, whisk together the egg, milk, melted butter, and vanilla extract.

Make sure the melted butter has cooled slightly before adding the egg. Very hot butter can partially cook the egg.

Step 4: Make the Batter

Pour the wet mixture into the bowl of dry ingredients.

Stir gently with a spatula until the flour is almost incorporated. Avoid overmixing because it can make the muffins dense instead of tender.

Fold in the blueberries carefully so they remain whole.

  • Fresh blueberries work best for a firm batter.
  • If using frozen berries, add them directly from the freezer.
  • Do not thaw frozen blueberries because they can release too much liquid.

Step 5: Fill the Muffin Cups

Place silicone muffin cups or sturdy paper liners into your air fryer basket if your model allows them.

Add a small spoonful of batter to each cup. Place about 1 tablespoon of cheesecake filling in the center, then cover it with more muffin batter.

Fill each cup about two-thirds to three-quarters full.

Sprinkle a little coarse sugar over the tops if you want a lightly crisp finish.

Step 6: Preheat the Air Fryer

Preheat the air fryer to 320°F for about 3 minutes.

Air fryer models vary, so check the manufacturer’s instructions before using silicone cups, liners, or baking accessories.

Step 7: Air Fry the Muffins

Carefully place the filled muffin cups into the air fryer basket.

Cook at 320°F for 12–16 minutes.

Start checking around the 12-minute mark. The tops should look golden, and a toothpick inserted into the muffin portion should come out mostly clean.

Avoid inserting the toothpick directly into the cheesecake center because the filling will remain soft.

Step 8: Cool Before Serving

Remove the muffins carefully and place them on a cooling rack.

Let them cool for at least 10 minutes before serving. The cheesecake filling becomes thicker as it cools, making the center easier to enjoy.

Tips for the Best Results

  • Do not overmix: Stir only until the dry ingredients are incorporated.
  • Use room-temperature cream cheese: It creates a smoother cheesecake filling.
  • Watch the cooking time: Smaller air fryers may cook muffins faster.
  • Leave space between cups: Good airflow helps the muffins cook evenly.
  • Use a light touch with blueberries: Gentle folding prevents crushed berries.
  • Check early: Air fryers can differ in temperature and cooking speed.
  • Cool completely: The creamy center sets as the muffins cool.
  • Avoid overcrowding: Cook in batches if the basket does not have enough room.

Fresh vs. Frozen Blueberries

Both fresh and frozen blueberries can be used in this recipe.

Fresh blueberries provide a bright flavor and usually keep the batter cleaner. Frozen blueberries are convenient and work especially well when fresh berries are out of season.

If using frozen berries, do not thaw them first. Add them directly to the batter and fold them in gently.

Serving Suggestions

Serve these muffins warm or chilled depending on your preference.

For breakfast, pair one with coffee, tea, or a glass of milk. For brunch, arrange them on a serving platter with fresh blueberries and a light dusting of powdered sugar.

You can also add a simple glaze by mixing powdered sugar with a small amount of milk or lemon juice. Drizzle it over completely cooled muffins.

For a dessert-style serving, add a few fresh berries and a spoonful of whipped cream.

Storage and Reheating

Because the muffins contain cream cheese, store leftovers in an airtight container in the refrigerator.

They are best enjoyed within 3–4 days.

To warm one muffin, place it in the air fryer at 300°F for 2–3 minutes. Let it cool briefly before eating because the cheesecake center can become very hot.

You can also enjoy them cold straight from the refrigerator for a firmer cheesecake texture.

Nutrition Facts

Approximate nutrition per muffin, based on 8 muffins:

  • Calories: 245
  • Protein: 4g
  • Carbohydrates: 31g
  • Fat: 12g
  • Saturated Fat: 7g
  • Sugar: 16g
  • Fiber: 1g
  • Sodium: 180mg

Nutrition values are estimates and can change depending on the brands and ingredients used.

Frequently Asked Questions

Can I use frozen blueberries?

Yes. Add frozen blueberries directly to the batter without thawing them to prevent excess moisture.

What temperature should I use for these muffins?

Cook them at 320°F for about 12–16 minutes, checking early because air fryer models vary.

Can I make these muffins without paper liners?

Yes. Silicone muffin cups are a good alternative, but make sure they fit securely inside your air fryer basket.

How do I know when the muffins are done?

The tops should be lightly golden, and a toothpick inserted into the muffin portion should come out mostly clean.

Can I use low-fat cream cheese?

Yes, but full-fat cream cheese gives the filling a richer texture and smoother cheesecake flavor.

Why are my muffins dense?

Overmixing the batter can develop too much gluten and make the muffins dense. Stir just until the ingredients are combined.

How should I store leftover muffins?

Store them in an airtight container in the refrigerator for up to 3–4 days because the filling contains cream cheese.

Can I freeze these muffins?

Yes. Cool them completely, wrap them individually, and freeze them in a sealed freezer-safe container for up to about 2 months.

Final Thoughts

These Air Fryer Blueberry Cheesecake Muffins combine everything you want in an easy homemade treat: fluffy muffin batter, juicy blueberries, and a creamy cheesecake center. The air fryer keeps the process simple and works especially well when you want a small batch without turning on a full-size oven.For the best texture, avoid overmixing, use softened cream cheese, and check the muffins early during cooking. Serve them with coffee for breakfast, add them to a weekend brunch spread, or enjoy one as a sweet afternoon snack.

Blueberry Oat Muffins

Blueberry Oat Muffins

Blueberry Oat Muffins

Soft, Easy & Wholesome Homemade Breakfast

Make soft and delicious Blueberry Oat Muffins with juicy blueberries, wholesome oats, and simple ingredients. An easy breakfast or snack recipe ready in 40 minutes.

Blueberry Oat Muffins

These Blueberry Oat Muffins are soft, tender, lightly sweet, and filled with juicy blueberries in every bite. Made with oats, eggs, milk, honey or maple syrup, and melted butter, they are an easy homemade breakfast that feels comforting without being overly rich.

Blending the oats into oat flour creates a delicate texture while keeping the hearty flavor of oats. You can also leave some oats partially whole if you prefer a slightly rustic and chewy muffin.

Fresh blueberries are ideal when they are in season, but frozen blueberries work just as well. For an extra-special finish, add an optional oat streusel topping that bakes into a golden, crunchy layer.

These homemade muffins are perfect for breakfast, brunch, lunchboxes, afternoon snacks, or make-ahead meal prep.

Prep Time: 15 minutes
Bake Time: 20–25 minutes
Total Time: About 40 minutes
Yield: 10–12 muffins

Why You’ll Love These Blueberry Oat Muffins

  • Easy to prepare with everyday ingredients
  • Ready in about 40 minutes
  • Soft and tender with juicy blueberries
  • Naturally sweetened with honey or maple syrup
  • Can be made with fresh or frozen blueberries
  • Optional oat streusel adds bakery-style crunch
  • Easy to customize with lemon, cinnamon, nuts, or chocolate chips
  • Great for breakfast, snacks, and lunchboxes

Ingredients

For the Blueberry Oat Muffins
  • 1½ cups old-fashioned or quick oats
  • 1 cup fresh or frozen blueberries
  • 2 large eggs
  • ½ cup milk
  • ⅓ cup honey or pure maple syrup
  • ¼ cup unsalted butter, melted and slightly cooled

Optional Oat Streusel Topping

  • ⅓ cup rolled oats
  • ⅓ cup all-purpose flour
  • ⅓ cup light brown sugar
  • 4 tablespoons unsalted butter, melted

How to Make Blueberry Oat Muffins

1. Prepare the Oven and Muffin Pan

Preheat the oven to 350°F (175°C). Line a standard 12-cup muffin pan with paper liners or lightly grease the cups.

2. Make the Oat Flour

Place the oats in a blender or food processor. Blend until they resemble a fine flour.

For a more rustic muffin, blend most of the oats but leave a small portion whole.

3. Mix the Wet Ingredients

Add the eggs, milk, honey or maple syrup, and cooled melted butter to a large bowl.

Whisk until the mixture is smooth and evenly combined.

4. Combine the Batter

Add the oat flour to the wet ingredients. Stir gently just until combined.

Do not overmix. A little mixing is enough to create a tender muffin.

5. Fold in the Blueberries

Gently fold the blueberries into the batter using a spatula.

If using frozen blueberries, add them straight from the freezer. There is no need to thaw them first.

6. Prepare the Streusel

For the optional topping, combine the rolled oats, flour, brown sugar, and melted butter in a small bowl.

Use a fork to mix until coarse crumbs form.

7. Fill the Muffin Cups

Divide the batter evenly between the prepared muffin cups, filling each approximately three-quarters full.

Sprinkle the oat streusel over the tops if using.

8. Bake

Bake for 20–25 minutes, or until the tops look set and a toothpick inserted into the center comes out clean or with a few moist crumbs.

Frozen blueberries may require a few extra minutes.

9. Cool and Serve

Let the muffins cool in the pan for about 5 minutes. Transfer them to a wire rack and allow them to cool for another 10–15 minutes.

Serve warm or at room temperature.

Expert Tips for Better Blueberry Oat Muffins

Use Fresh or Frozen Blueberries

Both options work well. Frozen blueberries are particularly useful when fresh berries are unavailable.

Don’t Thaw Frozen Blueberries

Adding frozen berries directly to the batter reduces the amount of liquid released before baking and helps the berries retain their shape.

Avoid Overmixing

Once the oat flour has been incorporated, stop stirring. Overmixing can result in heavier, denser muffins.

Measure Oats Before Blending

Measure the oats first and then blend them. Using too much oat flour can make the finished muffins dry.

Cool the Melted Butter

Allow melted butter to cool for several minutes before adding it to the eggs. This prevents the butter from being hot enough to partially cook the eggs.

Don’t Overfill the Cups

Filling the muffin cups around three-quarters full provides enough room for the muffins to rise without spilling over.

Check Before Removing From the Oven

Because blueberries add moisture, check the center carefully with a toothpick. The toothpick should not have wet batter attached to it.

Easy Blueberry Muffin Variations

Lemon Blueberry Oat Muffins

Add 1 teaspoon of finely grated lemon zest to give the muffins a bright citrus flavor.

Blueberry Banana Oat Muffins

Add mashed ripe banana for additional moisture and natural sweetness.

Cinnamon Blueberry Muffins

Add ½ teaspoon ground cinnamon to the batter for a warm, cozy flavor.

Blueberry Chocolate Chip Muffins

Fold ¼–½ cup mini chocolate chips into the batter along with the blueberries.

Blueberry Nut Muffins

Add approximately ¼ cup chopped walnuts or pecans for extra crunch.

Almond Blueberry Muffins

Add a small amount of almond extract and sliced almonds to the topping.

Mixed Berry Oat Muffins

Replace part of the blueberries with raspberries, blackberries, or chopped strawberries.

How to Store Blueberry Oat Muffins

Allow the muffins to cool completely before storing them.

For short-term storage, place them in an airtight container at room temperature for up to 2 days.

For longer storage, refrigerate them in an airtight container for several days. Refrigeration can slightly firm the texture, so gently warming the muffins before serving can improve their softness.

Can You Freeze Blueberry Oat Muffins?

Yes. Cool the muffins completely, then place them in a freezer-safe container or bag.

Freeze for up to approximately 3 months for best quality.

To serve, thaw at room temperature or warm gently in the microwave until heated through.

Frequently Asked Questions

Can I use frozen blueberries in blueberry oat muffins?

Yes. Frozen blueberries work very well. Add them directly to the batter without thawing. This helps limit excess moisture and keeps the berries from becoming too soft before baking.

Can I make these muffins without streusel?

Absolutely. The streusel is optional. Without it, the muffins have a simpler finish and less added sugar and fat.

Can I use quick oats?

Yes. Quick oats can be used. They may produce a somewhat softer texture than traditional rolled oats. Both varieties can also be blended into oat flour.

Why are my oat muffins dense?

Dense muffins can result from using too much oat flour, overmixing the batter, or not using enough liquid. Measure carefully and mix only until the ingredients are incorporated.

Can I replace honey with maple syrup?

Yes. Honey and maple syrup can be substituted for one another in this recipe. Maple syrup gives the muffins a slightly deeper flavor.

How do I stop blueberries from sinking?

A moderately thick batter helps keep blueberries suspended. For fresh blueberries, you can also toss them lightly with a small amount of the oat flour before folding them into the batter.

Can I make mini blueberry oat muffins?

Yes. Divide the batter among mini muffin cups and start checking them after about 10–14 minutes because smaller muffins bake more quickly.

What can I serve with blueberry oat muffins?

Serve them with Greek yogurt, fresh fruit, nut butter, cream cheese, or a cup of coffee or tea for a satisfying breakfast or snack.

Nutrition Facts

Approximate nutrition per muffin, based on 12 muffins and including the optional topping:

  • Calories: Approximately 220
  • Protein: 5 g
  • Carbohydrates: 30 g
  • Fat: 9 g
  • Saturated Fat: 4 g
  • Fiber: 3 g
  • Sugar: 13 g
  • Sodium: 115 mg

Nutrition Disclaimer: These values are estimates and can vary depending on the brands and types of oats, milk, sweetener, butter, blueberries, and other ingredients used. Portion size and whether the optional streusel is included will also affect the final nutritional values.

Serving Suggestions

Enjoy these blueberry oat muffins:

  • Warm with a little butter
  • Alongside Greek yogurt and fresh berries
  • With peanut or almond butter
  • As part of a weekend brunch
  • Packed into a lunchbox
  • With coffee, tea, or milk
  • As a quick afternoon snack

Final Thoughts

These Blueberry Oat Muffins are an easy homemade treat that combines hearty oats with sweet, juicy blueberries and a tender muffin texture. The recipe uses simple ingredients and doesn’t require complicated baking techniques, making it suitable for everyday breakfasts and weekend baking alike.

The optional oat streusel gives the muffins a crisp, bakery-style topping, while lemon zest, cinnamon, banana, nuts, or chocolate chips can be used to create different flavor combinations.

Whether you enjoy them warm from the oven, pack them for a quick snack, or freeze a batch for later, these muffins are a convenient and comforting way to enjoy homemade blueberry goodness.

Recipe Summary

Soft oats + juicy blueberries + gentle sweetness + optional crunchy streusel = an easy homemade muffin everyone can enjoy.