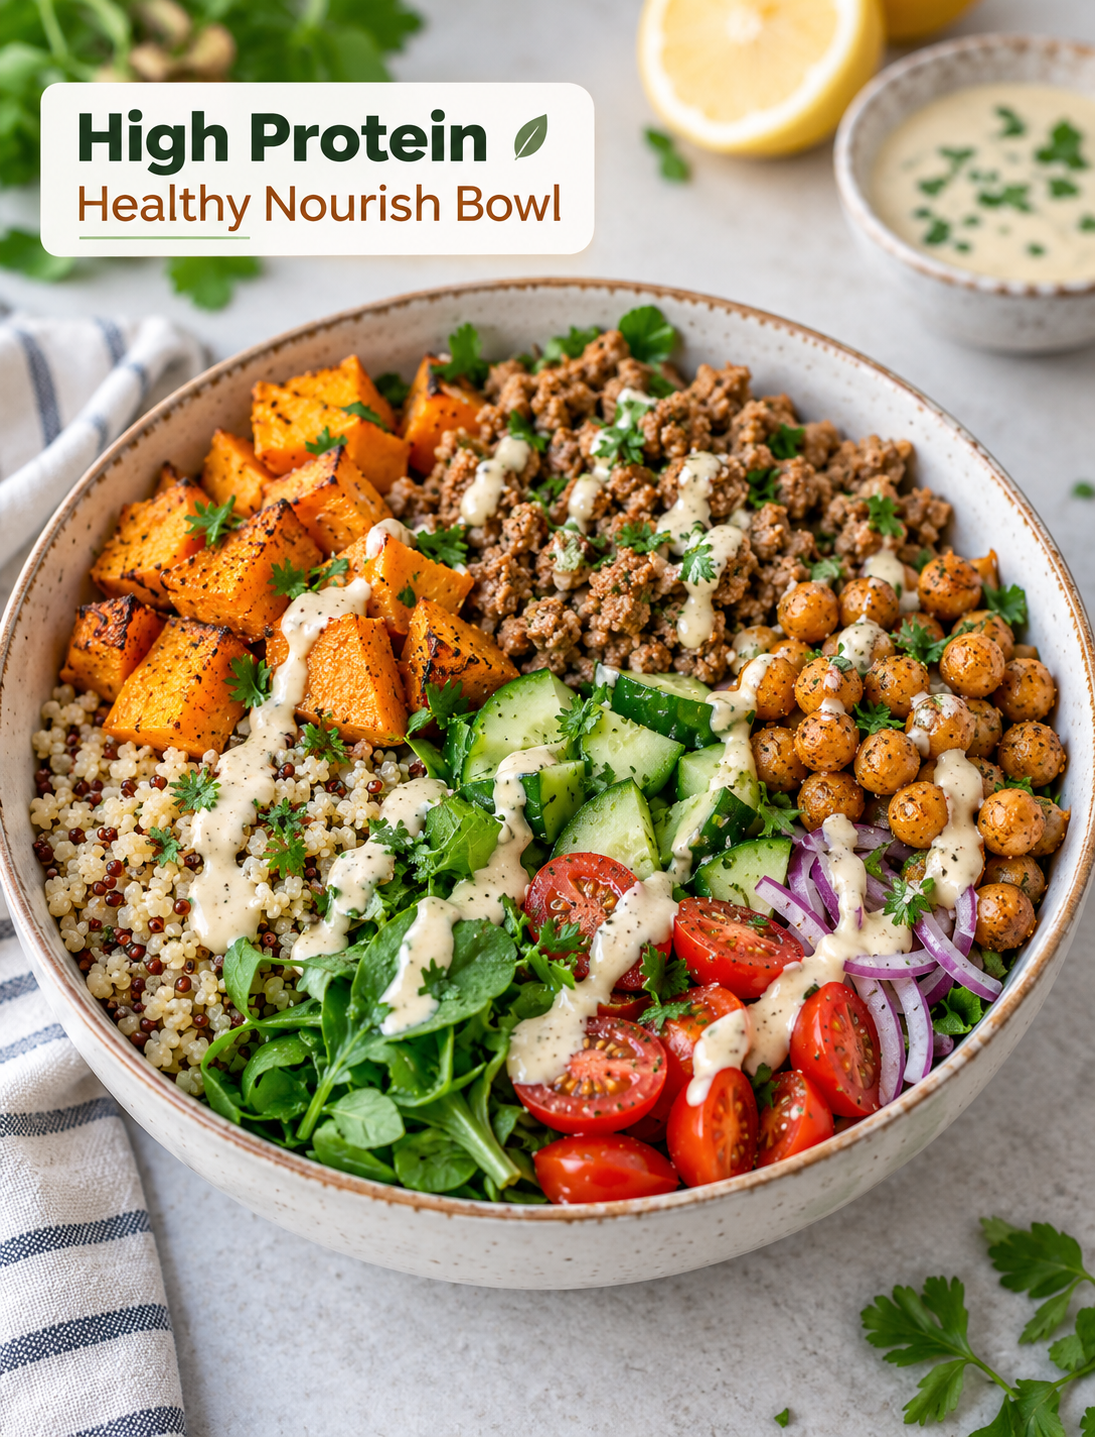
High Protein Healthy Nourish Bowl

High Protein Healthy Nourish Bowl

High Protein Healthy Nourish Bowl

A high protein healthy nourish bowl is an easy way to build a balanced meal with lean protein, whole grains, vegetables, and fiber-rich chickpeas. This bowl combines seasoned ground turkey with roasted pumpkin, quinoa, fresh vegetables, leafy greens, and a creamy lemon tahini dressing.

The roasted pumpkin adds natural sweetness, while cumin and smoked paprika give the turkey and chickpeas a warm, savory flavor. Fresh cucumber, cherry tomatoes, red onion, and herbs add crunch and freshness to every bite.

This healthy nourish bowl works well for lunch or dinner and can also be prepared ahead for busy weekdays. Each serving provides about 35 grams of protein and 9 grams of fiber, making it a filling choice for a balanced meal.

Why You’ll Love This Healthy Nourish Bowl

This recipe brings several useful ingredients together in one simple meal.

  • High in protein: Lean ground turkey provides a strong source of protein to help make the meal satisfying.
  • Rich in fiber: Chickpeas, vegetables, leafy greens, and whole grains add dietary fiber.
  • Colorful and fresh: Pumpkin, tomatoes, cucumber, greens, and herbs create a bright and appealing bowl.
  • Easy to customize: You can use quinoa, brown rice, or couscous as the grain base.
  • Meal prep friendly: Most components can be cooked ahead and stored separately.
  • Balanced flavor: Savory turkey, sweet roasted pumpkin, earthy chickpeas, and lemon tahini work well together.

Ingredients You’ll Need

Ground Turkey

  • 300 g (10 oz) lean ground turkey
  • 1 tablespoon olive oil
  • 1 teaspoon garlic powder
  • 1 teaspoon ground cumin
  • ½ teaspoon smoked paprika
  • ½ teaspoon salt
  • ½ teaspoon black pepper

Roasted Pumpkin

  • 2 cups peeled and cubed pumpkin or butternut squash
  • 1 tablespoon olive oil
  • ½ teaspoon paprika
  • ½ teaspoon salt
  • ¼ teaspoon black pepper

Chickpeas

  • 1 can (15 oz / 425 g) chickpeas, drained and rinsed
  • ½ teaspoon cumin
  • ½ teaspoon paprika
  • Pinch of salt

Bowl Base and Fresh Vegetables

  • 1 cup cooked quinoa, brown rice, or couscous
  • 2 cups spinach, arugula, or kale
  • 1 small cucumber, diced
  • 1 cup cherry tomatoes, halved
  • ¼ red onion, thinly sliced
  • 2 tablespoons chopped fresh parsley or cilantro

Lemon Tahini Dressing

  • 2 tablespoons tahini
  • 1 tablespoon lemon juice
  • 1 tablespoon olive oil
  • 1–2 tablespoons water
  • 1 small garlic clove, minced
  • Salt and black pepper to taste

How to Make a High Protein Nourish Bowl

1: Roast the Pumpkin

  1. Preheat the oven to 400°F (200°C).
  2. Place the pumpkin cubes on a baking tray.
  3. Add olive oil, paprika, salt, and black pepper.
  4. Toss until the pumpkin is evenly coated.
  5. Spread the cubes into a single layer.
  6. Roast for 20–25 minutes, turning once halfway through.
  7. Remove when the pumpkin is tender with lightly caramelized edges.

2: Cook the Ground Turkey

  1. Heat 1 tablespoon of olive oil in a skillet over medium heat.
  2. Add the ground turkey.
  3. Break the turkey into small pieces as it cooks.
  4. Cook for about 6–8 minutes until browned and fully cooked.
  5. Add garlic powder, cumin, smoked paprika, salt, and black pepper.
  6. Stir well and cook for another minute so the spices coat the turkey evenly.

3: Prepare the Chickpeas

  1. Drain and rinse the chickpeas well.
  2. Add them to a skillet over medium heat.
  3. Season with cumin, paprika, and a pinch of salt.
  4. Cook for 5–7 minutes, stirring often.
  5. Continue cooking until the chickpeas are warm with lightly crisp edges.

4: Make the Lemon Tahini Dressing

  1. Add tahini, lemon juice, olive oil, minced garlic, salt, and pepper to a small bowl.
  2. Whisk the ingredients until smooth.
  3. Add water one tablespoon at a time.
  4. Continue whisking until the dressing reaches a pourable consistency.
  5. Taste and adjust the seasoning before serving.

5: Prepare the Fresh Ingredients

  1. Dice the cucumber into bite-sized pieces.
  2. Cut the cherry tomatoes in half.
  3. Thinly slice the red onion.
  4. Chop the parsley or cilantro.
  5. Keep the vegetables fresh until the bowls are ready to assemble.

6: Assemble the Bowl

  1. Divide the cooked quinoa, brown rice, or couscous between serving bowls.
  2. Add the leafy greens.
  3. Arrange the roasted pumpkin and seasoned chickpeas around the bowl.
  4. Add the cooked ground turkey.
  5. Top with cucumber, tomatoes, red onion, and fresh herbs.
  6. Drizzle with lemon tahini dressing.
  7. Serve while the warm ingredients are still fresh and flavorful.

Tips for the Best Nourish Bowl

Use pumpkin cubes that are similar in size so they cook evenly. Smaller pieces will roast faster and develop more caramelized edges.

Choose lean ground turkey for a lighter protein option without losing the savory flavor of the dish.

For extra texture, roast the chickpeas instead of sautéing them. Pat them dry first, season them, and roast until crisp.

Keep the dressing separate when preparing meals ahead. This helps the greens and fresh vegetables stay crisp.

Add chili flakes or a small amount of harissa if you enjoy a spicy flavor.

Easy Ingredient Swaps

Pumpkin can be replaced with butternut squash or sweet potatoes when needed. These options also roast well and provide natural sweetness.

Ground chicken can replace turkey while keeping the bowl high in lean protein.

Quinoa, brown rice, and couscous can each work as the grain base. Quinoa is especially useful when you want additional plant-based protein.

For a plant-based version, replace the turkey with roasted tofu or seasoned lentils.

You can also use spinach, kale, or arugula depending on the flavor and texture you prefer.

Meal Prep and Storage

This bowl is convenient for weekday meal preparation because the main components can be cooked separately.

Prepare the turkey, pumpkin, chickpeas, and grain ahead of time. Store them in separate airtight containers in the refrigerator for up to 3 days.

Keep fresh vegetables and leafy greens separate from the warm ingredients. Store the lemon tahini dressing in a small sealed container.

When ready to eat, reheat the turkey, pumpkin, chickpeas, and grains, then add the fresh vegetables, greens, herbs, and dressing.

For freezing, the cooked turkey and roasted pumpkin are suitable for freezing. Fresh vegetables and greens should be added after reheating for better texture.

Nutrition Information

Approximate nutrition per serving:

  • Calories: 480 kcal
  • Protein: 35 g
  • Fat: 18 g
  • Saturated Fat: 3 g
  • Carbohydrates: 42 g
  • Sugar: 6 g
  • Fiber: 9 g

Nutrition values can vary based on the specific brands, portion sizes, grain choice, and dressing amount used.

Frequently Asked Questions

Can I use ground chicken instead of turkey?

Yes. Ground chicken is an easy substitute and works well with the same garlic, cumin, and paprika seasoning.

Is this nourish bowl good for meal prep?

Yes. Cooked turkey, pumpkin, chickpeas, and grains can be prepared ahead and stored separately for up to 3 days.

Can I make this bowl without grains?

Yes. Skip the quinoa, rice, or couscous and add extra leafy greens or vegetables for a lower-carbohydrate version.

Can I make this recipe vegetarian?

Yes. Replace the turkey with roasted tofu or seasoned lentils for a satisfying plant-based bowl.

Can I freeze the leftovers?

The cooked turkey and roasted pumpkin freeze well, while fresh vegetables and greens are best added after reheating.

What can I use instead of pumpkin?

Butternut squash and sweet potatoes are excellent substitutes because they roast well and provide a naturally sweet flavor.

What dressing goes well with this bowl?

Lemon tahini adds creamy, nutty, and fresh flavors, while yogurt garlic sauce, balsamic vinaigrette, or avocado dressing can also work.

How can I make the bowl more flavorful?

Use fresh herbs, lemon juice, smoked paprika, cumin, chili flakes, or harissa to add more flavor without making the recipe complicated.
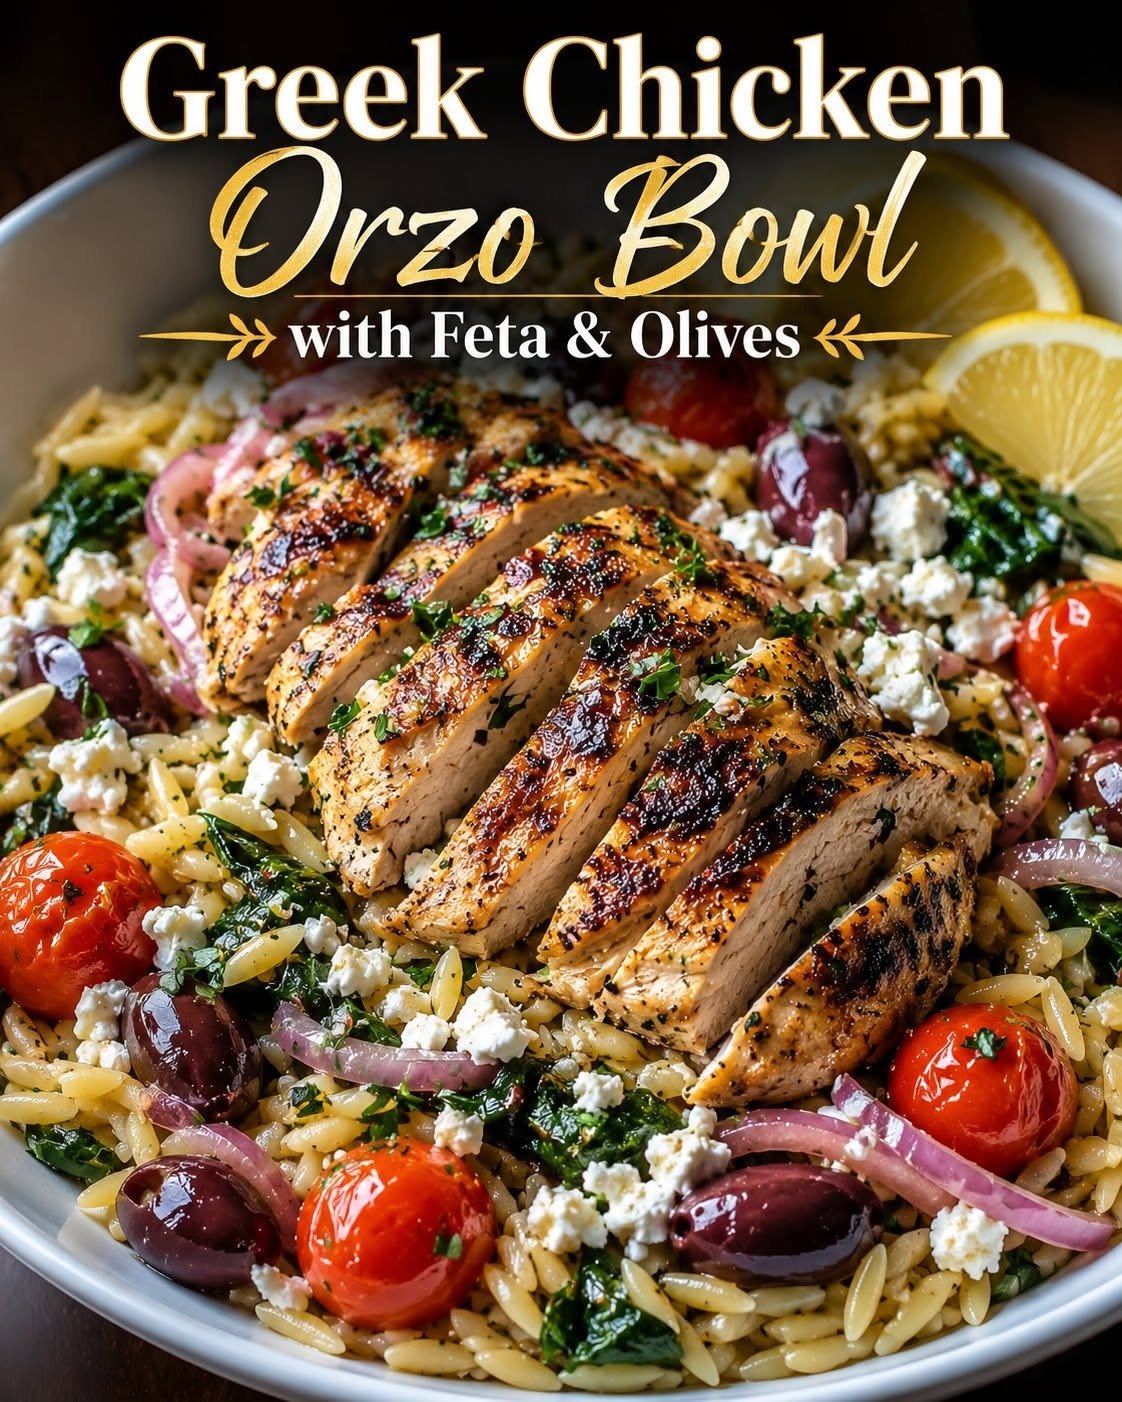
Greek Chicken Orzo Bowl with Feta & Olives

Greek Chicken Orzo Bowl with Feta & Olives

Greek Chicken Orzo Bowl with Feta & Olives

Description

This Greek Chicken Orzo Bowl with Feta & Olives is a fresh, colorful Mediterranean-inspired meal packed with juicy lemon-herb chicken, tender orzo, crisp vegetables, briny Kalamata olives, and creamy feta cheese. Everything comes together with a bright homemade lemon-oregano dressing that gives every bite a delicious balance of savory, tangy, and fresh flavors. The combination of protein-rich chicken, satisfying orzo, vegetables, and olive oil makes these bowls filling enough for dinner while still feeling light and vibrant. They’re perfect for busy weeknights, summer lunches, healthy meal prep, or serving family-style when you want something impressive without complicated cooking.

Ingredients For the Greek Chicken

  • 1½ lbs boneless, skinless chicken breasts or thighs
  • 2 tbsp extra-virgin olive oil
  • 2 tbsp fresh lemon juice
  • 3 garlic cloves, minced
  • 1½ tsp dried oregano
  • 1 tsp smoked paprika
  • ½ tsp ground cumin
  • ¾ tsp salt
  • ½ tsp freshly ground black pepper
  • 1 tsp lemon zest

Orzo

  • 1½ cups dry orzo pasta
  • 4 cups water or low-sodium chicken broth
  • 1 tbsp extra-virgin olive oil
  • 1 tbsp fresh lemon juice
  • 2 tbsp fresh parsley, chopped
  • ¼ tsp salt
  • ¼ tsp black pepper

For the Bowl Toppings

  • 1½ cups cherry tomatoes, halved
  • 1 large cucumber, diced
  • ½ small red onion, thinly sliced
  • ¾ cup Kalamata olives, pitted and halved
  • 1 cup crumbled feta cheese
  • ¼ cup fresh parsley, chopped
  • 2 tbsp fresh dill, chopped, optional
  • Lemon wedges, for serving

Lemon-Oregano Dressing

  • ¼ cup extra-virgin olive oil
  • 3 tbsp fresh lemon juice
  • 1 tbsp red wine vinegar
  • 1 garlic clove, finely minced
  • 1 tsp dried oregano
  • 1 tsp Dijon mustard
  • ½ tsp honey
  • ¼ tsp salt
  • ¼ tsp freshly ground black pepper

Step-by-Step Instructions

Begin by preparing the chicken marinade. In a large bowl, combine olive oil, lemon juice, minced garlic, oregano, smoked paprika, cumin, salt, black pepper, and lemon zest.

Add the chicken and toss thoroughly until every piece is coated in the marinade.

Cover and refrigerate for at least 30 minutes. For deeper flavor, marinate for up to several hours in the refrigerator.

While the chicken marinates, prepare the lemon-oregano dressing.

Add olive oil, lemon juice, red wine vinegar, garlic, oregano, Dijon mustard, honey, salt, and black pepper to a small jar.

Close tightly and shake vigorously until emulsified. Set aside.

Bring water or chicken broth to a boil in a medium saucepan.

Add the orzo and cook according to the package directions until al dente, stirring occasionally.

Drain the orzo thoroughly.

Transfer it to a large bowl and immediately toss with olive oil, lemon juice, parsley, salt, and black pepper.

Set aside and allow it to cool slightly while preparing the chicken.

Heat a large skillet or grill pan over medium-high heat.

Remove the chicken from the marinade, allowing excess marinade to drip away. Discard any marinade that contacted raw chicken.

Place the chicken in the hot skillet.

Cook for approximately 5–7 minutes per side, depending on thickness.

Continue cooking until the thickest part reaches an internal temperature of 165°F (74°C).

Transfer the cooked chicken to a clean cutting board.

Allow it to rest for 5–10 minutes before slicing. This helps keep the chicken juicy.

Meanwhile, prepare the vegetables.

Halve the cherry tomatoes, dice the cucumber, thinly slice the red onion, and halve the Kalamata olives.

For a milder onion flavor, soak the sliced red onion in cold water for approximately 10 minutes, then drain thoroughly.

Divide the warm or room-temperature lemon-herb orzo among four large serving bowls.

Arrange cucumber, cherry tomatoes, red onion, and Kalamata olives around the orzo.

Slice the rested chicken into strips or bite-sized pieces.

Place a generous portion of Greek chicken over each bowl.

Sprinkle crumbled feta generously over the chicken and vegetables.

Add fresh parsley and optional dill.

Drizzle the lemon-oregano dressing over each bowl.

Finish with freshly ground black pepper and an extra squeeze of lemon.

Serve immediately with lemon wedges on the side.

Tips

  • Don’t overcook the chicken. Use an instant-read thermometer and remove it once the center reaches 165°F (74°C).
  • Chicken thighs are an excellent alternative to breasts and tend to remain especially juicy.
  • Cooking orzo in chicken broth instead of water gives it additional savory flavor.
  • Toss warm orzo with lemon juice and olive oil immediately after draining so it absorbs the flavor.
  • Use good-quality Kalamata olives for their rich, briny flavor.
  • Block feta crumbled by hand often has a creamier texture than pre-crumbled feta.
  • Add the dressing shortly before serving if you want the vegetables to remain especially crisp.
  • For additional crunch, add sliced bell peppers or chopped romaine.

Notes

These Greek chicken orzo bowls are excellent for meal prep. Prepare the chicken, orzo, dressing, and vegetables ahead and refrigerate them in separate airtight containers. Assemble the bowls when ready to eat. For the freshest texture, keep the dressing separate and add it immediately before serving. Refrigerate cooked chicken promptly and enjoy leftovers within 3–4 days.
For an even more Mediterranean-style bowl, add hummus, tzatziki, roasted red peppers, chickpeas, artichoke hearts, or pepperoncini. You can also substitute quinoa or brown rice for the orzo if desired.

Q&A

Can I make this bowl ahead of time?
Yes. It is an excellent meal-prep recipe. Store the components separately and assemble when ready to eat.
Can I serve the orzo cold?
Absolutely. This bowl is delicious with warm, room-temperature, or chilled orzo.
Can I use rotisserie chicken?
Yes. For a shortcut, season shredded rotisserie chicken with lemon juice, oregano, olive oil, and black pepper before adding it to the bowls.
Can I make it vegetarian?
Yes. Replace the chicken with chickpeas, grilled tofu, or roasted vegetables.
What can I use instead of Kalamata olives?
Green olives or another Mediterranean-style olive can be substituted, or simply leave them out.
What sauce goes well with this bowl?
The lemon-oregano dressing is excellent, but homemade tzatziki also makes a delicious creamy addition.

Servings

Makes approximately 4 generous servings

Nutrition (Approx. Per Serving)

  • Calories: 620
  • Protein: 45g
  • Carbohydrates: 57g
  • Fat: 25g
  • Saturated Fat: 7g
  • Fiber: 6g
  • Sugar: 7g
  • Sodium: 850mg
  • Cholesterol: 115mg
  • Potassium: 820mg
    Nutritional values are estimates and may vary depending on chicken, feta, olives, orzo, dressing, and portion size.

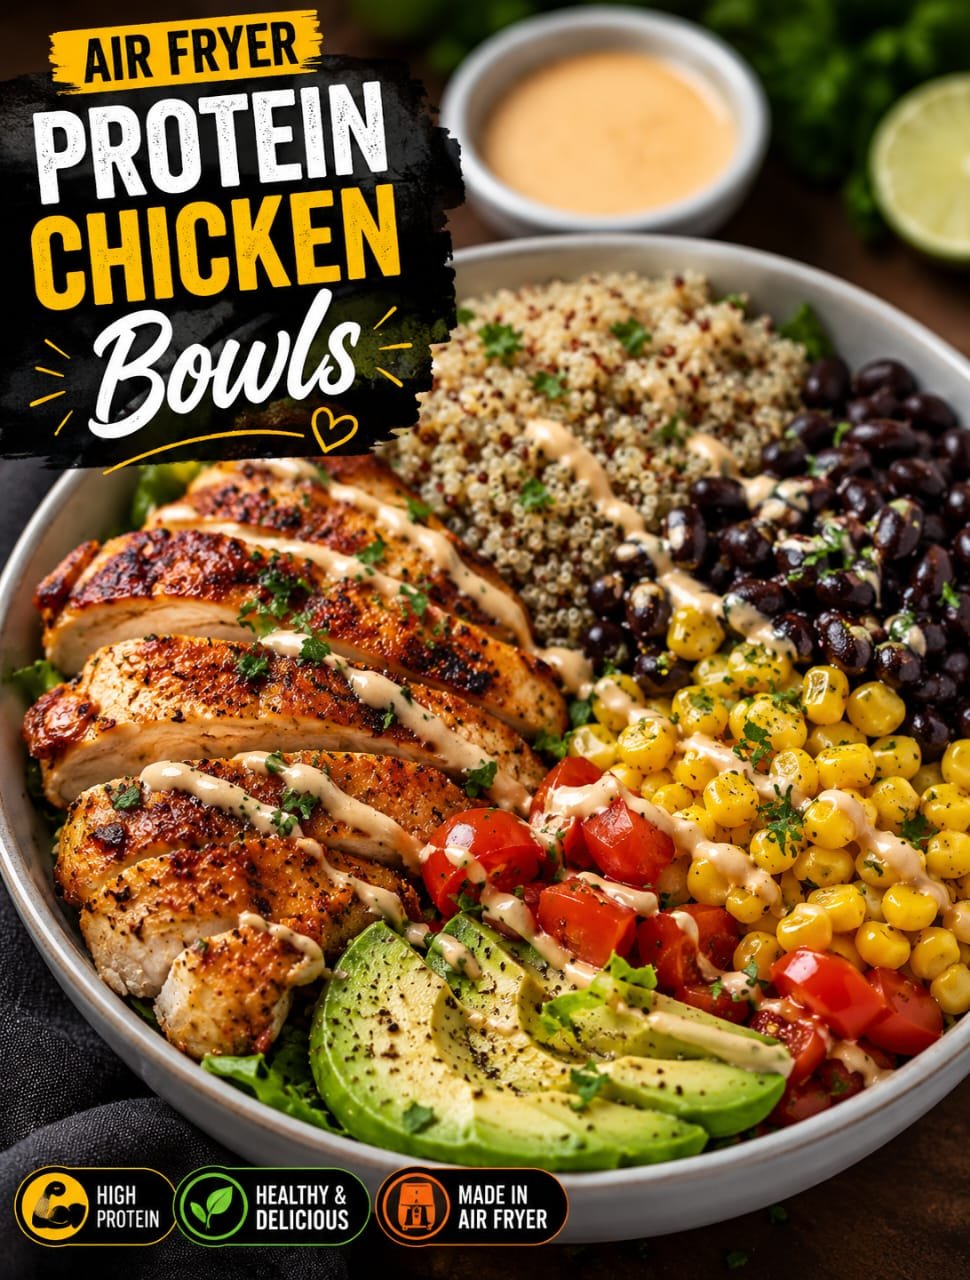
Air Fryer Lemon Pepper Chicken Protein Bowls

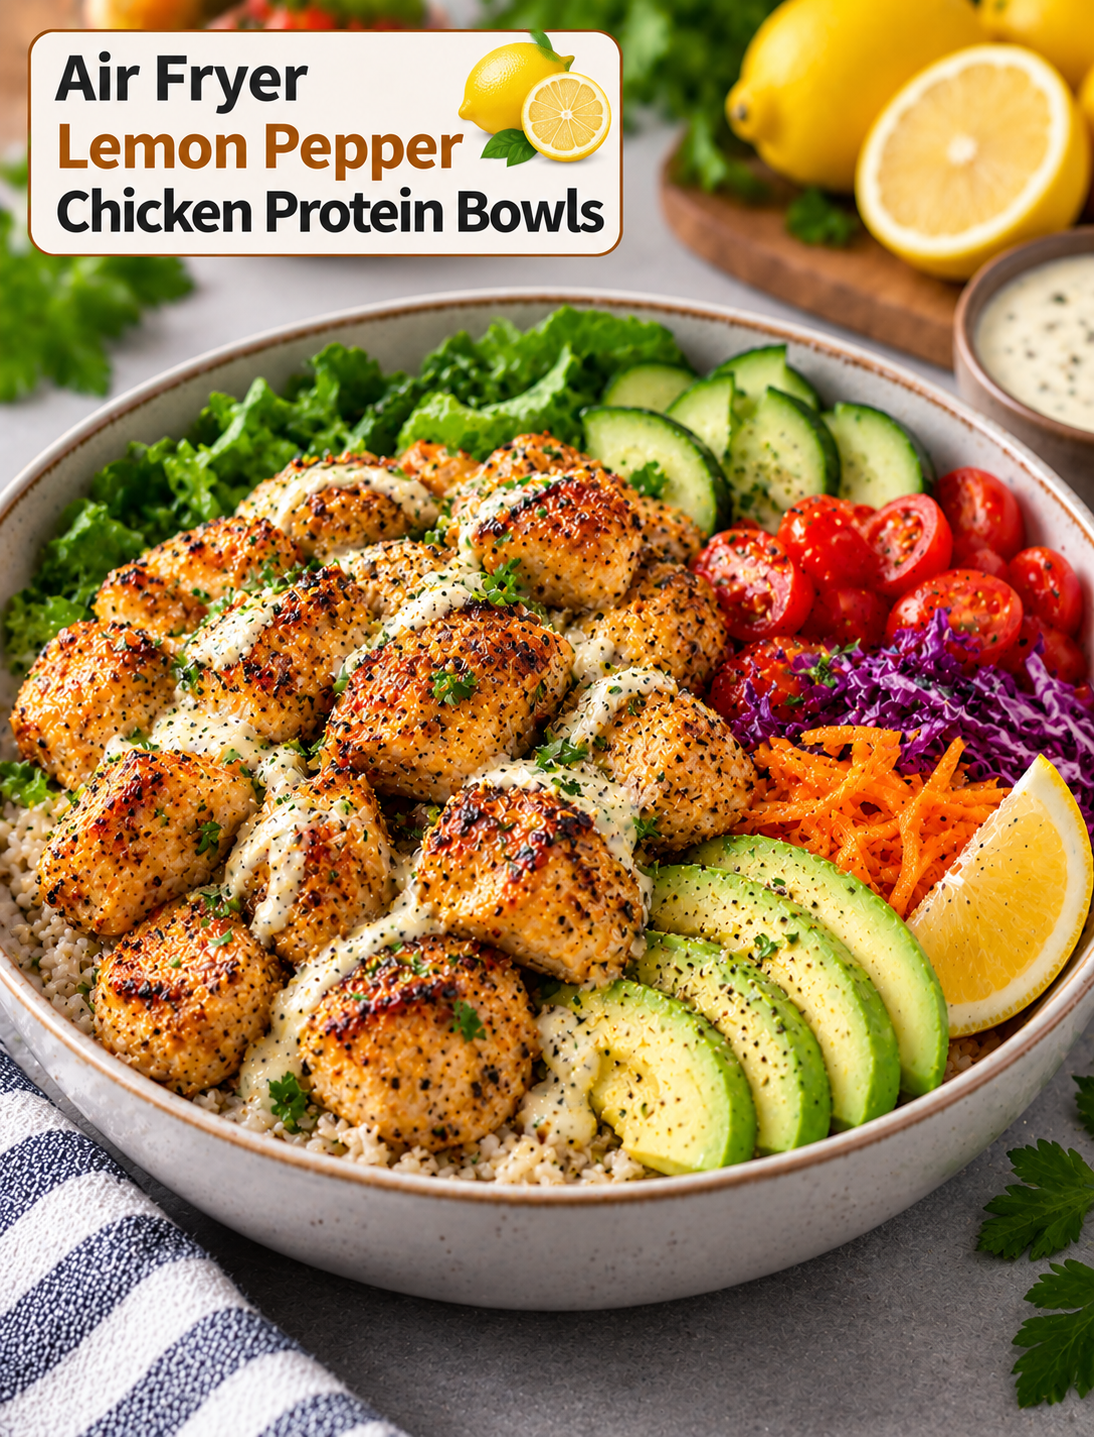
Air fryer lemon pepper chicken protein bowl with rice, avocado, fresh vegetables, greens, and creamy lemon dressing

Air Fryer Lemon Pepper Chicken Protein Bowls

Air Fryer Lemon Pepper Chicken Protein Bowls combine juicy seasoned chicken with fresh vegetables, grains, and a bright lemon dressing for a balanced meal. The chicken develops a lightly crisp outside in the air fryer while the inside stays tender and flavorful.

This easy bowl recipe is ideal for lunch, meal prep, or a quick weeknight dinner. Each bowl can include lean chicken, cooked rice or quinoa, crunchy vegetables, leafy greens, and a simple lemon-based sauce.

The combination of protein, fiber, healthy fats, and fresh produce makes these bowls filling without requiring complicated cooking. You can also change the ingredients based on what you have available.

Why You’ll Love These Protein Bowls

These chicken bowls are easy to customize and simple enough for busy weekdays. The air fryer cooks the seasoned chicken quickly while giving it a flavorful golden exterior.

Lemon and black pepper create a fresh, zesty flavor that keeps the chicken from tasting heavy. Garlic powder and herbs add extra savory notes without overpowering the citrus.

The bowl format also makes portioning easy. You can build each serving with your preferred amount of chicken, grains, vegetables, and dressing.

This recipe is also useful for meal prep. Cook the chicken and grains ahead, prepare the vegetables, and assemble individual portions when needed.

Ingredients You’ll Need

Chicken

Use boneless, skinless chicken breasts for a lean protein option. Chicken thighs can also be used if you prefer a richer flavor and softer texture.

Cut the chicken into evenly sized bite-size pieces so they cook at a similar rate.

Lemon

Fresh lemon juice gives the chicken its bright citrus flavor. Freshly grated lemon zest can also be added to intensify the lemon aroma.

Black Pepper

Freshly ground black pepper provides the signature peppery taste. Use more or less depending on your preferred level of spice.

Olive Oil

A small amount of olive oil helps the seasoning coat the chicken and supports browning in the air fryer.

Seasonings

Garlic powder, onion powder, paprika, salt, and dried oregano complement the lemon and pepper. A small amount of parsley can also be used for a fresh herb note.

Rice or Quinoa

Cooked white rice, brown rice, jasmine rice, or quinoa can form the base of the bowl. Choose the grain based on your preferred texture and flavor.

Vegetables

Use a mix of fresh or roasted vegetables such as cucumber, cherry tomatoes, broccoli, bell peppers, carrots, spinach, or shredded cabbage.

Avocado

Sliced avocado adds creamy texture and healthy fats. Add it immediately before serving to keep it fresh.

Greek Yogurt

Plain Greek yogurt can be used as the base for a creamy lemon dressing. It also adds extra protein and a cool contrast to the seasoned chicken.

How to Make Air Fryer Lemon Pepper Chicken Protein Bowls

Prepare the Chicken

Pat the chicken dry with paper towels. Removing surface moisture helps the seasoning stick and improves browning.

Place the chicken pieces in a bowl and add olive oil, fresh lemon juice, lemon zest, black pepper, garlic powder, onion powder, paprika, oregano, and salt.

Toss until every piece is evenly coated. Let the chicken sit for a few minutes while you prepare the air fryer.

Avoid soaking the chicken in lemon juice for a long period because the acidic marinade can affect the texture of the meat.

Air Fry the Chicken

Preheat the air fryer according to your model’s instructions. Arrange the seasoned chicken pieces in a single layer.

Leave space between the pieces so hot air can circulate around them. Lightly spray the basket or chicken with cooking spray if needed.

Air fry until the chicken is golden on the outside and reaches an internal temperature of 165°F.

Cooking time depends on the size of the chicken pieces and your air fryer model. Check the largest piece with an instant-read thermometer rather than relying only on color.

Allow the chicken to rest for a few minutes before adding it to the bowls. Resting helps the juices stay inside the meat.

Prepare the Bowl Ingredients

While the chicken cooks, prepare the grain base and vegetables.

Use warm cooked rice or quinoa as the bottom layer. Add fresh greens, cucumber, tomatoes, bell peppers, broccoli, or other vegetables around the bowl.

Slice avocado just before serving to reduce browning. You can also add roasted vegetables if you prefer a warmer bowl.

Make the Lemon Yogurt Dressing

Add plain Greek yogurt to a small bowl with fresh lemon juice, lemon zest, black pepper, garlic powder, and a small amount of olive oil.

Stir until smooth. Add a splash of water if the dressing is too thick for drizzling.

Taste and adjust the lemon, pepper, or salt as needed. Keep the dressing refrigerated until the bowls are ready to serve.

Assemble the Bowls

Add rice or quinoa to each serving bowl. Arrange the air-fried chicken over the grain base.

Add the vegetables, leafy greens, and avocado around the chicken. Drizzle with the lemon yogurt dressing just before serving.

Finish with fresh parsley, extra black pepper, or a small squeeze of lemon for added brightness.

Tips for Juicy Air Fryer Chicken

Cut the chicken into similar-sized pieces so they cook evenly. Very small pieces can dry out before larger pieces are fully cooked.

Pat the chicken dry before seasoning. Excess moisture can prevent the surface from browning properly.

Use enough oil to coat the chicken lightly without making it greasy. A small amount is usually enough for air frying.

Do not overcrowd the basket. Overcrowding reduces airflow and can leave the chicken less browned.

Check the internal temperature before removing the chicken. Poultry should reach 165°F for safe consumption.

Avoid prolonged cooking after the chicken reaches the correct temperature. Overcooking can make lean chicken breast dry.

Best Vegetables for Chicken Protein Bowls

Fresh cucumber adds a cool, crunchy texture that balances the warm chicken.

Cherry tomatoes provide sweetness and acidity that pair naturally with lemon and pepper.

Broccoli works well roasted or steamed. Roasting gives it browned edges and a deeper flavor.

Bell peppers add color and natural sweetness. Use red, yellow, orange, or green peppers depending on your preference.

Spinach provides a simple leafy green base and can be served fresh or lightly wilted.

Shredded cabbage adds crunch and holds up well in meal-prep containers.

Carrots can be sliced thinly or roasted for a slightly sweet side component.

Choose three or four vegetables rather than adding too many ingredients. A simple combination keeps the flavors balanced.

Healthy Topping Ideas

Avocado is an easy way to add creamy texture to the bowl. Slice it shortly before serving for the best appearance.

Pumpkin seeds or sunflower seeds provide a crunchy topping. Use a small portion to add texture without overwhelming the other ingredients.

Fresh parsley, cilantro, or green onions can add a fresh finish.

A spoonful of Greek yogurt can provide extra creaminess. You can also add hummus for a Mediterranean-inspired variation.

For additional citrus flavor, grate a little fresh lemon zest over the finished bowl.

Easy Variations to Try

Mediterranean Chicken Bowl

Use quinoa as the base and add cucumber, tomatoes, red onion, spinach, feta, and a lemon-herb dressing.

Spicy Lemon Pepper Bowl

Add cayenne pepper or red pepper flakes to the chicken seasoning. Top the finished bowl with sliced jalapeños for extra heat.

Southwest Chicken Bowl

Use brown rice with black beans, corn, tomatoes, avocado, and a lime-based dressing. Add chili powder to the chicken for a smoky flavor.

Green Goddess Chicken Bowl

Build the bowl with mixed greens, cucumber, broccoli, avocado, and herbs. Use a creamy herb dressing instead of the lemon yogurt sauce.

Low-Carb Chicken Bowl

Replace rice or quinoa with cauliflower rice or extra greens. Add avocado and roasted vegetables for a satisfying meal without a grain base.

Meal Prep Instructions

Cook the chicken and grain base ahead of time and allow them to cool before storing.

Divide the rice or quinoa into individual meal-prep containers. Add cooked chicken and sturdy vegetables such as broccoli, carrots, and bell peppers.

Keep fresh ingredients such as avocado, cucumber, and dressing separate until serving. This helps prevent the vegetables from becoming watery or soft.

Store the components in the refrigerator and assemble each bowl when ready to eat.

Reheat the chicken and grains until hot, then add the fresh vegetables and dressing. This creates a better contrast between warm and chilled ingredients.

How to Store and Reheat

Store cooked chicken in an airtight container in the refrigerator and use it within a few days for the best quality.

Keep dressing in a separate sealed container. This prevents the grain and vegetables from absorbing excess moisture.

Reheat the chicken in the air fryer for a few minutes or use a microwave until heated through.

Avoid repeatedly reheating the same portion because repeated heating can dry out the chicken.

Fresh avocado should be added after reheating rather than stored with the hot ingredients.

Common Mistakes to Avoid

Do not use oversized chicken pieces because they can cook unevenly in the air fryer.

Avoid adding too much lemon juice to the raw chicken. A moderate amount provides flavor without making the surface overly acidic.

Do not overcrowd the air fryer basket. Proper airflow is essential for browning.

Avoid adding dressing too early when preparing bowls for later. Extra moisture can make grains and vegetables soggy.

Do not skip the food thermometer. Chicken should reach 165°F at the thickest point before serving.

Frequently Asked Questions

Can I use chicken thighs instead of chicken breast?

Yes, boneless, skinless chicken thighs work well and provide a richer flavor with a naturally tender texture.

How long does chicken take in the air fryer?

Cooking time varies by piece size and appliance, so cook until the thickest piece reaches 165°F internally.

Can I use frozen chicken?

Thaw the chicken completely before cutting and seasoning it to promote even cooking and accurate temperature control.

What grain works best for protein bowls?

Rice and quinoa are both excellent choices, while brown rice and cauliflower rice offer different textures and nutritional profiles.

Can I make these bowls ahead of time?

Yes, prepare the chicken, grain, and sturdy vegetables ahead, then add fresh toppings and dressing just before eating.

How do I keep meal-prep bowls from getting soggy?

Store wet toppings and dressing separately and add them after reheating the chicken and grains.

Can I make the recipe dairy-free?

Yes, replace the Greek yogurt dressing with a dairy-free yogurt or a simple lemon, olive oil, and herb dressing.

What can I use instead of avocado?

Hummus, olives, pumpkin seeds, or a small portion of feta can provide different textures and flavors when avocado is unavailable.

Final Thoughts

Air Fryer Lemon Pepper Chicken Protein Bowls are a simple way to build a flavorful meal around tender chicken, fresh vegetables, and a satisfying grain base. Lemon and black pepper give the chicken a bright flavor, while the air fryer creates a lightly browned exterior.

The recipe works well for both fresh dinners and meal prep. Choose a few vegetables, prepare your favorite grain, and finish each bowl with a fresh lemon dressing.

For the best texture, keep wet ingredients separate until serving and avoid overcrowding the air fryer. With simple ingredient swaps, you can create Mediterranean, spicy, Southwest, low-carb, or green vegetable versions using the same basic method.

Air Fryer Crispy Chicken Hummus Bowls

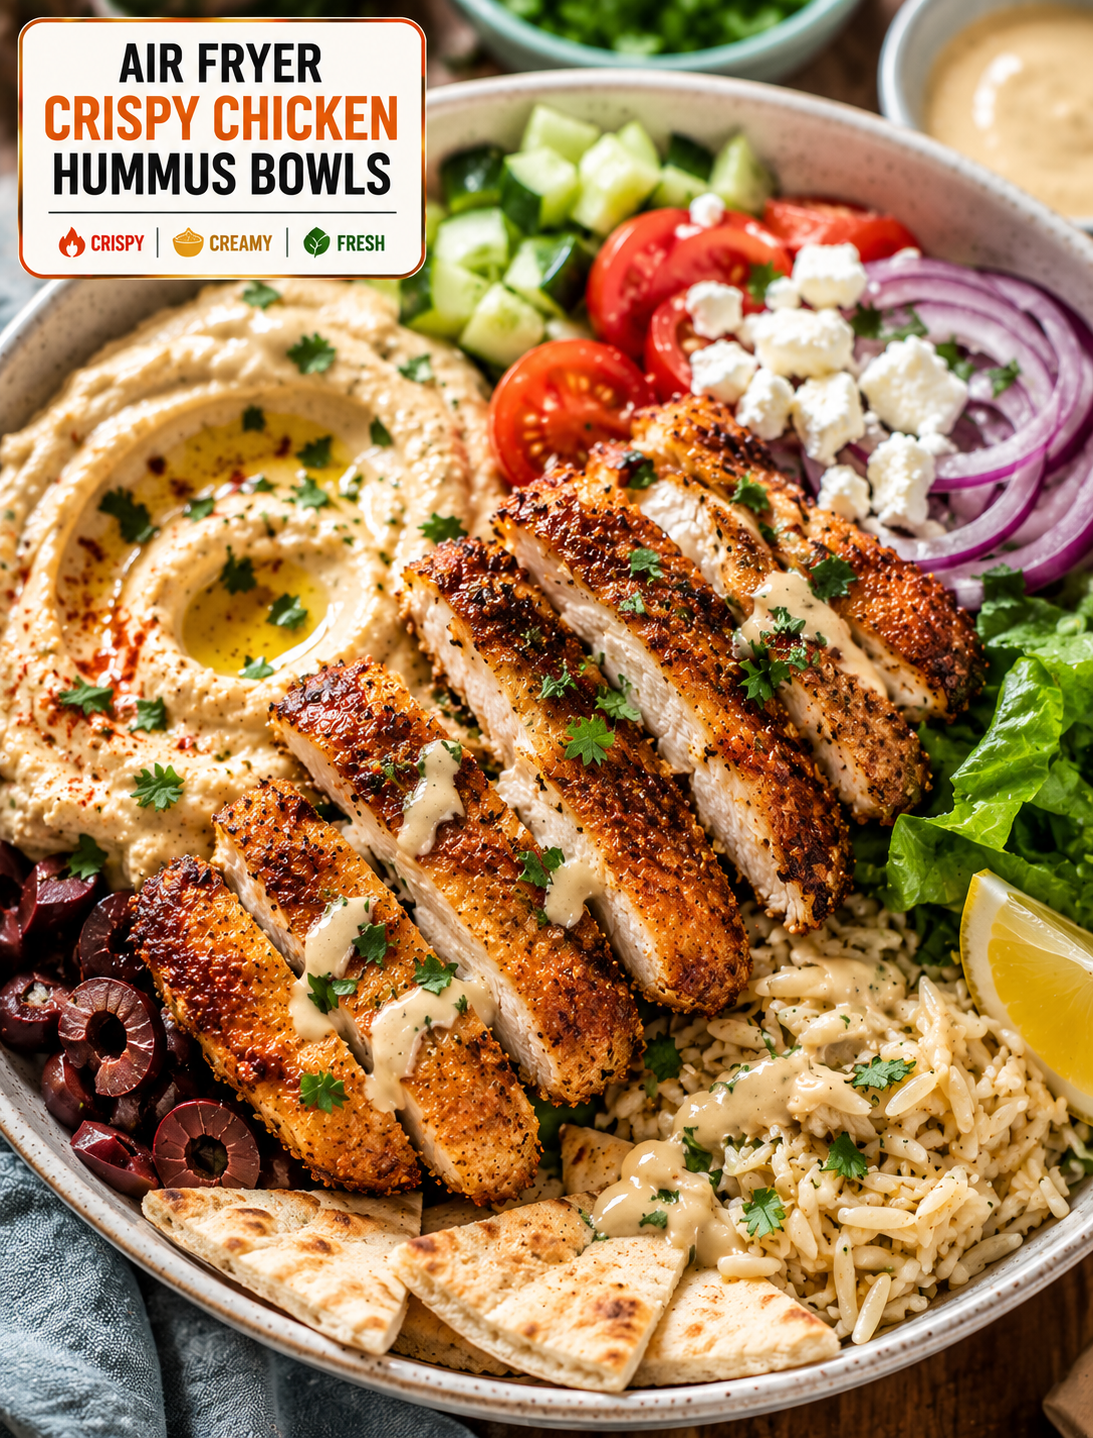
Air fryer crispy chicken hummus bowl with golden chicken, creamy hummus, cucumber, tomatoes, feta, greens, herbs, and lemon

Air Fryer Crispy Chicken Hummus Bowls

Looking for a quick meal that is crispy, creamy, fresh, and filling? These Air Fryer Crispy Chicken Hummus Bowls bring together golden chicken, smooth hummus, crunchy vegetables, and warm pita in one easy meal.

The chicken is coated with a simple blend of spices and cooked in the air fryer until the outside is golden and crisp. It stays tender inside while the seasoning adds plenty of savory flavor.

A generous spoonful of creamy hummus forms the base of each bowl. Fresh cucumber, tomatoes, red onion, leafy greens, and herbs add color and crunch. A drizzle of lemon-tahini dressing brings everything together.

This recipe is inspired by Mediterranean-style flavors but uses simple ingredients that are easy to find at most U.S. grocery stores.

It works well for lunch, dinner, meal prep, or a casual weekend meal when you want something satisfying without spending hours in the kitchen.

Why You’ll Love These Hummus Bowls

These bowls offer a great mix of textures in every bite.

The chicken is crisp and seasoned, while the hummus is smooth and creamy. Fresh vegetables add crunch, and lemon gives the bowl a bright finish.

The air fryer also makes the chicken without the need for deep frying. A small amount of oil helps the coating brown while the circulating hot air creates a crisp exterior.

Another benefit is flexibility. You can change the vegetables, add grains, use different seasonings, or adjust the dressing to suit your taste.

The bowls can also be prepared ahead of time. Keep the chicken, hummus, vegetables, and dressing separate until serving to maintain the best texture.

Ingredients You’ll Need

Crispy Chicken

  • 1½ pounds boneless, skinless chicken breasts
  • Olive oil 1 tablespoon
  • 1 teaspoon paprika
  • 1 teaspoon garlic powder
  • ½ teaspoon ground cumin
  • ½ teaspoon onion powder
  • ½ teaspoon dried oregano
  • ½ teaspoon black pepper
  • ½ teaspoon salt
  • 2 tablespoons cornstarch

For the Bowls

  • Hummus 2 cups
  • 2 cups cooked quinoa or rice, optional
  • Cucumber 1 , diced
  • 1 cup cherry tomatoes, halved
  • Red onion ½ small , thinly sliced
  • 2 cups chopped romaine or mixed greens
  • ½ cup crumbled feta cheese
  • ¼ cup fresh parsley, chopped
  • Kalamata olives ¼ cup , optional
  • 2 whole wheat or regular pita breads
  • Lemon wedges for serving

Lemon-Tahini Dressing

  • ¼ cup tahini
  • 2 tablespoons fresh lemon juice
  • 1 tablespoon olive oil
  • Honey 1 teaspoon
  • 1 small garlic clove, finely minced
  • 2–3 tablespoons warm water
  • Pinch of salt
  • Pinch of black pepper

You can use store-bought hummus to save time or make your own if you prefer.

Chicken breasts create lean, tender pieces, while boneless chicken thighs provide a richer texture.

Quinoa or rice is optional, but either one makes the bowl more filling and works well as a meal-prep base.

How to Make Air Fryer Crispy Chicken Hummus Bowls

1. Prepare the Chicken

Pat the chicken dry with paper towels.

Cut it into bite-sized pieces that are similar in size so they cook evenly.

Place the chicken in a large bowl and add olive oil, paprika, garlic powder, cumin, onion powder, oregano, black pepper, salt, and cornstarch.

Toss until each piece is evenly coated.

The cornstarch creates a light coating that helps the chicken develop a crisp exterior in the air fryer.

2. Preheat the Air Fryer

Preheat the air fryer to 400°F if your model requires preheating.

Lightly spray the basket with cooking spray.

Arrange the chicken pieces in a single layer. Avoid stacking or overcrowding them because the hot air needs room to circulate.

Cook in batches if necessary.

3. Air Fry the Chicken

Cook the chicken at 400°F for about 10–14 minutes.

Shake the basket or turn the chicken halfway through cooking.

The outside should become golden and lightly crisp.

Use a food thermometer to check the thickest piece. Chicken should reach an internal temperature of 165°F for food safety.

Cooking time may vary depending on the size of the chicken pieces and your air fryer model.

Allow the chicken to rest for a few minutes before assembling the bowls.

4. Prepare the Vegetables

While the chicken cooks, prepare the vegetables.

Dice the cucumber and tomatoes, slice the red onion, and chop the greens.

Wash and dry the vegetables thoroughly before assembling the bowls.

Fresh parsley adds a bright herbal flavor, while Kalamata olives provide a salty Mediterranean-style touch.

You can remove the onion if you prefer a milder bowl.

5. Make the Lemon-Tahini Dressing

Add tahini, lemon juice, olive oil, honey, garlic, salt, and black pepper to a small bowl.

Whisk until combined.

The tahini will initially become thick when mixed with lemon juice.

Add warm water one tablespoon at a time while whisking until the dressing reaches a smooth, pourable consistency.

Taste and adjust the lemon juice or salt according to your preference.

6. Warm the Pita

Cut the pita into wedges.

Warm the pieces in the air fryer for about 1–2 minutes at 350°F or heat them briefly in a dry skillet.

Keep a close eye on them because pita can become crisp quickly.

You can also skip this step and serve the pita at room temperature.

7. Assemble the Bowls

Spread about ½ cup of hummus into each bowl.

Add cooked quinoa or rice if using.

Arrange the crispy chicken over the hummus.

Add cucumber, tomatoes, red onion, greens, feta, parsley, and olives.

Drizzle with lemon-tahini dressing.

Finish with a squeeze of fresh lemon and serve with warm pita wedges.

How to Make Extra Crispy Chicken

The key to crisp chicken starts with removing excess moisture.

Pat the chicken dry before adding the seasoning.

Cut the chicken into small, even pieces so more surface area can brown.

Use a thin coating of cornstarch rather than a heavy layer.

Do not overcrowd the air fryer basket.

Turn the chicken halfway through cooking so the pieces brown evenly.

For the best texture, assemble the bowl shortly after the chicken finishes cooking.

Adding dressing directly onto the chicken can soften the crispy coating, so drizzle it around the bowl or add it just before eating.

Best Hummus for Chicken Bowls

Classic hummus works well because its mild chickpea and tahini flavor complements the seasoned chicken.

Roasted garlic hummus adds a deeper savory taste.

Red pepper hummus gives the bowl a slightly sweet and smoky flavor.

For a spicy version, use jalapeño or chili hummus.

You can also mix a spoonful of harissa into plain hummus for extra heat.

Choose a hummus with a smooth texture if you want an easy-to-spread bowl base.

What Vegetables Work Best?

Fresh vegetables make these bowls colorful and crunchy.

Cucumber provides a cool, crisp texture.

Cherry tomatoes add juicy sweetness.

Red onion gives a sharp bite that balances the creamy hummus.

Romaine lettuce provides crunch without overpowering the other ingredients.

You can also add shredded carrots, bell peppers, radishes, cabbage, or spinach.

For a roasted version, add air-fried zucchini, bell peppers, or cauliflower.

Using a mix of raw and cooked vegetables gives the bowl more variety.

Easy Bowl Variations

There are many ways to customize this meal.

A spicy bowl, add crushed red pepper, hot sauce, or harissa.

Extra freshness, add mint, parsley, or cilantro.

More crunch, sprinkle roasted chickpeas or pumpkin seeds over the top.

Dairy-free bowl, leave out the feta cheese.

Low-carb option, skip the rice and pita and add extra greens and vegetables.

Heartier meal, add quinoa, brown rice, or roasted potatoes.

You can also replace chicken with air-fried chickpeas if you want a vegetarian version.

How to Make These Bowls for Meal Prep

These bowls are easy to prepare ahead of time.

Cook the chicken and grain base in advance and allow them to cool before storing.

Place the hummus in separate containers or small compartments.

Keep fresh vegetables separate from the warm ingredients when possible.

Store the dressing in a small sealed container and add it just before eating.

Keep pita separate so it does not become soft from moisture.

When ready to eat, reheat the chicken and grains, then add the chilled vegetables, hummus, dressing, and herbs.

This method keeps the different textures fresh and prevents the bowl from becoming soggy.

What to Serve With Hummus Bowls

These bowls are filling on their own, but several simple sides work well.

Serve them with warm pita, roasted vegetables, cucumber salad, or a simple tomato salad.

A small bowl of olives or pickled vegetables adds a salty and tangy contrast.

For a larger meal, add lentil soup or a light vegetable soup.

You can also serve the chicken and hummus separately as a platter for family-style dining.

Tips for the Best Results

Dry the chicken before seasoning it.

Keep chicken pieces similar in size.

Use a light layer of cornstarch for better browning.

Avoid overcrowding the air fryer basket.

Check the chicken with a food thermometer before serving.

Use fresh lemon juice for the dressing.

Thin tahini gradually with warm water.

Keep dressing separate during meal prep.

Add fresh vegetables shortly before eating.

Serve the chicken warm for the best contrast with cool hummus and vegetables.

Storage and Reheating

Store cooked chicken and grains in airtight containers in the refrigerator.

Keep fresh vegetables, hummus, and dressing in separate containers.

Reheat the chicken in the air fryer at about 350°F for 3–5 minutes until hot.

Avoid microwaving the chicken if you want to maintain its crisp texture.

Add fresh hummus and vegetables after reheating.

Use refrigerated leftovers within a safe storage period and discard food that develops an unusual smell, appearance, or texture.

The Bottom Line

Air Fryer Crispy Chicken Hummus Bowls combine golden seasoned chicken, creamy hummus, fresh vegetables, herbs, and a bright lemon-tahini dressing for a satisfying meal.

The air fryer gives the chicken a crisp exterior without deep frying, while hummus provides a creamy base that brings all the ingredients together.

The recipe is flexible enough for weeknight dinners, meal prep, lunches, and casual entertaining. You can add grains for extra substance or keep the bowl lighter with more greens and vegetables.

With simple ingredients and easy preparation, this is a practical way to bring Mediterranean-inspired flavors into your everyday kitchen.

Frequently Asked Questions

1. How long should chicken cook in the air fryer?

Bite-sized chicken pieces usually take about 10–14 minutes at 400°F, depending on their size and your air fryer.

2. What temperature should the chicken reach?

Chicken should reach an internal temperature of 165°F in the thickest piece for safe consumption.

3. Can I use chicken thighs instead of chicken breast?

Yes. Boneless, skinless chicken thighs work well and provide a richer, more tender texture.

4. Can I make these hummus bowls dairy-free?

Yes. Simply leave out the feta or replace it with a dairy-free alternative.

5. What hummus tastes best with crispy chicken?

Classic hummus, roasted garlic hummus, red pepper hummus, and spicy hummus all pair well with seasoned chicken.

6. Can I prepare these bowls ahead of time?

Yes. Prepare the chicken and grains ahead, but keep hummus, vegetables, and dressing separate until serving.

7. How can I make the chicken extra crispy?

Pat the chicken dry, use a light cornstarch coating, avoid overcrowding the basket, and turn the pieces halfway through cooking.

8. What can I use instead of tahini?

You can make a simple lemon dressing with olive oil, lemon juice, garlic, and a little honey if tahini is unavailable.

Final Thoughts

Air Fryer Crispy Chicken Hummus Bowls are a simple combination of bold flavor, fresh ingredients, and satisfying textures.

The crispy seasoned chicken pairs beautifully with creamy hummus, crunchy vegetables, salty feta, and bright lemon-tahini dressing. Every component adds something different without making the recipe complicated.
Make the bowls your own by changing the vegetables, adding grains, increasing the spice, or switching the hummus flavor.

For the best results, keep the chicken crisp, the vegetables fresh, and the dressing separate until the moment you serve.

A colorful bowl, crispy chicken, creamy hummus, and plenty of fresh flavor make this an easy meal worth adding to your weekly rotation.

Air Fryer Protein Fajita Bowls

Air fryer protein fajita bowl with seasoned chicken, bell peppers, onions, rice, avocado, and fresh lime

Air Fryer Protein Fajita Bowls

Air Fryer Protein Fajita Bowls are a quick and satisfying dinner made with seasoned chicken, colorful bell peppers, onions, and your favorite grain. Everything comes together with simple spices and a few fresh toppings for a meal that feels fresh, filling, and easy to make.

The air fryer gives the chicken golden, flavorful edges while the peppers and onions become tender with lightly roasted spots. Served over warm rice and finished with avocado, salsa, cilantro, and lime, this bowl has plenty of texture and flavor in every bite.

It is a great option for busy weeknights, easy lunches, or meal prep. You can also change the ingredients to match what you have in your kitchen.

Why You’ll Love This Recipe

This recipe is designed for busy home cooks who want a flavorful meal without a long cooking process. The chicken and vegetables cook quickly in the air fryer, so there is no need to heat a large skillet or spend a lot of time at the stove.

The seasoning blend gives the chicken a smoky fajita flavor using everyday pantry spices. Bell peppers and onions add sweetness, color, and texture to the bowl.

Another benefit is how easy the recipe is to customize. You can use white rice, brown rice, quinoa, cauliflower rice, or lettuce as the base. Add black beans or corn for extra texture, or change the toppings to create a different bowl each time.

Ingredients

For the Chicken and Vegetables

  • 1 pound boneless, skinless chicken breast
  • 1 red bell pepper
  • 1 green bell pepper
  • 1 small yellow or white onion
  • 1 tablespoon olive oil

Fajita Seasoning

  • 1 teaspoon chili powder
  • 1 teaspoon smoked paprika
  • 1 teaspoon ground cumin
  • ½ teaspoon garlic powder
  • ½ teaspoon onion powder
  • ½ teaspoon salt
  • ¼ teaspoon black pepper

For the Bowls

  • 3 cups cooked white or brown rice
  • 1 avocado, sliced
  • ½ cup pico de gallo or salsa
  • ¼ cup chopped fresh cilantro
  • 1 lime, cut into wedges

Optional Toppings

  • Black beans
  • Corn
  • Shredded Mexican cheese
  • Plain Greek yogurt
  • Sliced jalapeños
  • Hot sauce
  • Fresh diced tomatoes

How to Make Air Fryer Protein Fajita Bowls

Start by preheating your air fryer to 400°F for about 3 minutes. A preheated basket helps the chicken begin cooking right away and promotes better browning.

Cut the chicken breast into thin, evenly sized strips. Try to keep the pieces similar in thickness so they finish cooking at roughly the same time.

Slice the red bell pepper, green bell pepper, and onion into medium strips. Avoid cutting them too thin because they can become overly soft during cooking.

Add the chicken, peppers, and onions to a large bowl. Pour in the olive oil and sprinkle the chili powder, smoked paprika, cumin, garlic powder, onion powder, salt, and black pepper over the ingredients.

Toss everything thoroughly until the chicken and vegetables are evenly coated with oil and seasoning.

Place the mixture in the air fryer basket in a single, even layer. Do not overcrowd the basket because too many ingredients can trap steam and reduce browning.

Air fry at 400°F for 10 to 14 minutes, shaking the basket around the halfway point.

The exact cooking time depends on the thickness of the chicken pieces and your air fryer model. Check the thickest chicken piece with an instant-read thermometer and make sure it reaches 165°F.

Once the chicken is cooked, let it rest for a couple of minutes. This helps the juices settle before you build the bowls.

How to Assemble the Bowls

Start each bowl with about ¾ cup of warm cooked rice. Brown rice, white rice, quinoa, or cauliflower rice can also be used.

Add a generous portion of the cooked chicken, peppers, and onions.

Top the bowl with avocado slices, pico de gallo or salsa, and fresh cilantro. Add black beans or corn if you want a heartier meal.

Finish with a squeeze of fresh lime juice. The acidity from the lime helps balance the smoky seasoning and rich toppings.

For extra creaminess, add a spoonful of plain Greek yogurt. Shredded cheese or a few slices of jalapeño can also be added according to taste.

Best Rice and Bowl Base Options

White rice is a simple choice when you want a classic fajita bowl. Its mild flavor lets the seasoned chicken and vegetables remain the focus.

Brown rice gives the bowl a slightly nutty flavor and adds more fiber. It works especially well for meal prep because it holds its texture after reheating.

Quinoa is another good option when you want a grain with plant-based protein. Its light texture pairs well with chicken, vegetables, and fresh salsa.

Cauliflower rice is ideal when you prefer a lower-carbohydrate base. Season it lightly with salt, pepper, lime juice, or a little of the fajita seasoning.

For a fresh salad-style bowl, use chopped romaine or mixed greens. Add the cooked fajita mixture while it is still warm and finish with salsa and avocado.

Tips for Perfect Air Fryer Chicken

Use chicken pieces that are similar in size. Smaller pieces cook faster, while thick pieces need more time and can cause uneven results.

Avoid putting too much food into the basket at once. If the chicken and vegetables are crowded, cook them in batches for better airflow.

Shake the basket halfway through cooking. This helps expose different sides of the chicken and vegetables to the circulating hot air.

Do not judge doneness by color alone. Chicken can look browned on the outside while remaining undercooked inside, so always check the internal temperature.

For extra flavor, let the seasoned chicken and vegetables rest for 10 to 15 minutes before air frying. This gives the spices a little more time to coat the ingredients.

Fresh lime juice should be added after cooking rather than before. This keeps the flavor bright and fresh.

Easy Meal Prep

These bowls are convenient for preparing several lunches or dinners at once.

Cook the chicken and vegetables according to the recipe, then prepare your chosen rice or grain separately.

Divide the cooked ingredients between airtight meal-prep containers. Keep avocado, salsa, cilantro, lime, and other fresh toppings in separate small containers when possible.

When you are ready to eat, reheat the rice, chicken, and vegetables until hot. Add the fresh toppings after reheating.

Keeping the toppings separate helps maintain their texture and prevents the rice from becoming watery.

Recipe Variations

You can easily change the protein without changing the basic seasoning.

Use boneless, skinless chicken thighs for a richer and juicier bowl. Make sure the chicken reaches 165°F before serving.

Shrimp is another quick option, but it cooks much faster than chicken. Watch it closely to prevent overcooking.

For a vegetarian version, replace the chicken with firm tofu, black beans, mushrooms, or extra vegetables. Press tofu before seasoning so it develops better texture during air frying.

Add zucchini, mushrooms, corn, or extra peppers for more vegetables. Sliced jalapeños are a good choice if you enjoy spicy meals.

For a milder version, reduce the chili powder and use mild salsa. For more heat, add cayenne pepper, hot sauce, or fresh jalapeños.

You can also use the cooked filling in tacos, burritos, wraps, quesadillas, or salads.

Storage and Reheating

Store leftover chicken and vegetables in an airtight container in the refrigerator. Keep fresh toppings separate when possible.

Reheat the chicken and vegetables until steaming hot. The air fryer can help bring back some of the roasted texture, while a microwave is convenient for quick lunches.

Add fresh avocado, salsa, cilantro, and lime after reheating.

For meal prep, portion the ingredients into individual containers so each serving is ready to heat and eat.

Frequently Asked Questions

Can I use chicken thighs instead of chicken breast?

Yes. Boneless, skinless chicken thighs work well and should reach an internal temperature of 165°F.

How long should chicken cook in the air fryer?

Cook sliced chicken at 400°F for about 10 to 14 minutes, shaking the basket halfway through.

Can I make these bowls ahead of time?

Yes. Prepare the chicken, vegetables, and rice ahead of time and store them in separate airtight containers.

What can I use instead of rice?

Quinoa, cauliflower rice, lettuce, brown rice, or another grain can be used as the bowl base.

Can I add black beans?

Yes. Black beans add extra texture and make the bowl more filling.

How can I make the bowls spicy?

Add cayenne pepper to the seasoning or top the finished bowl with jalapeños and hot salsa.

Can I make a vegetarian version?

Yes. Replace the chicken with seasoned tofu, black beans, mushrooms, or additional vegetables.

What toppings taste best with fajita bowls?

Avocado, salsa, Pico de Gallo, cilantro, lime, Greek yogurt, cheese, and jalapeños all pair well with the smoky fajita flavors.

Final Thoughts

Air Fryer Protein Fajita Bowls are a simple way to turn everyday ingredients into a flavorful, satisfying meal. The seasoned chicken cooks quickly, the peppers and onions develop delicious roasted edges, and the fresh toppings bring everything together.

The best part is the flexibility. You can keep the bowl classic with rice, salsa, avocado, and lime or create your own version with quinoa, black beans, corn, cauliflower rice, or extra vegetables.

For busy weeknights and meal prep, this recipe is easy to repeat without feeling boring. Once you have the basic fajita seasoning and air fryer method down, you can change the toppings and bowl base whenever you want a fresh combination.

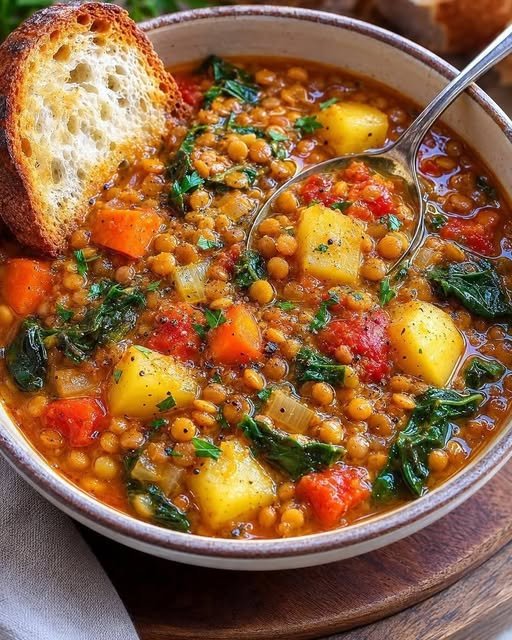
Turmeric Lentil Soup – Easy, Cozy & Nourishing Red Lentil Soup

Turmeric Lentil Soup – Easy, Cozy & Nourishing Red Lentil Soup

Turmeric Lentil Soup – Easy, Cozy & Nourishing Red Lentil Soup

A warm, cozy, and nourishing soup made with red lentils, vegetables, and comforting spices. This golden soup is hearty, healthy, and perfect for busy weeknights or meal prep. The turmeric and ginger add rich flavor while the lentils create a naturally creamy texture without any dairy.

Ingredients

  • 2 tablespoons olive oil
  • 1 medium yellow onion, diced
  • 2 carrots, diced
  • 2 celery stalks, diced
  • 4 garlic cloves, minced
  • 1 tablespoon fresh ginger, grated
  • 2 teaspoons ground turmeric
  • 1 teaspoon ground cumin
  • ½ teaspoon smoked paprika (optional)
  • 2 tablespoons tomato paste
  • 1 cup red lentils, rinsed
  • 6 cups vegetable broth or water
  • Salt and black pepper, to taste
  • Juice of ½ lemon
  • Fresh parsley or cilantro for garnish

Instructions

1. Cook the Vegetables

Heat the olive oil in a large pot over medium heat. Add the diced onion, carrots, and celery. Cook for about 6–8 minutes, stirring occasionally, until the vegetables soften and the onion becomes translucent.

2. Add Garlic and Spices

Stir in the minced garlic and grated ginger. Cook for 1 minute until fragrant. Add the turmeric, cumin, and smoked paprika, stirring well so the spices coat the vegetables evenly.

3. Build the Flavor

Mix in the tomato paste and cook for another minute. This helps deepen the flavor and gives the soup a rich, savory taste.

4. Simmer the Soup

Add the rinsed red lentils and pour in the vegetable broth. Stir well and bring the soup to a gentle boil. Reduce the heat to low and simmer uncovered for 25–30 minutes, stirring occasionally, until the lentils are soft and creamy.

5. Blend if Desired

For a smoother soup, blend part of the soup with an immersion blender. Leave it chunky if you prefer a rustic texture.

6. Finish and Serve

Season with salt and black pepper to taste. Stir in the lemon juice for brightness. Ladle into bowls and garnish with fresh parsley or cilantro. Serve warm with crusty bread or naan.

Q & A

Can I use green or brown lentils?

Yes, but they take longer to cook and the texture will be less creamy than red lentils.

How do I store leftovers?

Store in an airtight container in the refrigerator for up to 4 days.

Can I freeze this soup?

Absolutely. Freeze for up to 3 months and thaw overnight before reheating.

Can I make it spicy?

Yes. Add chili flakes or cayenne pepper for extra heat.

Nutrition (Approx. Per Serving)

  • Calories: 220
  • Protein: 10g
  • Carbohydrates: 28g
  • Fiber: 9g
  • Fat: 7g
  • Sodium: 520mg
  • Vitamin A: 70% DV
  • Iron: 20% DV

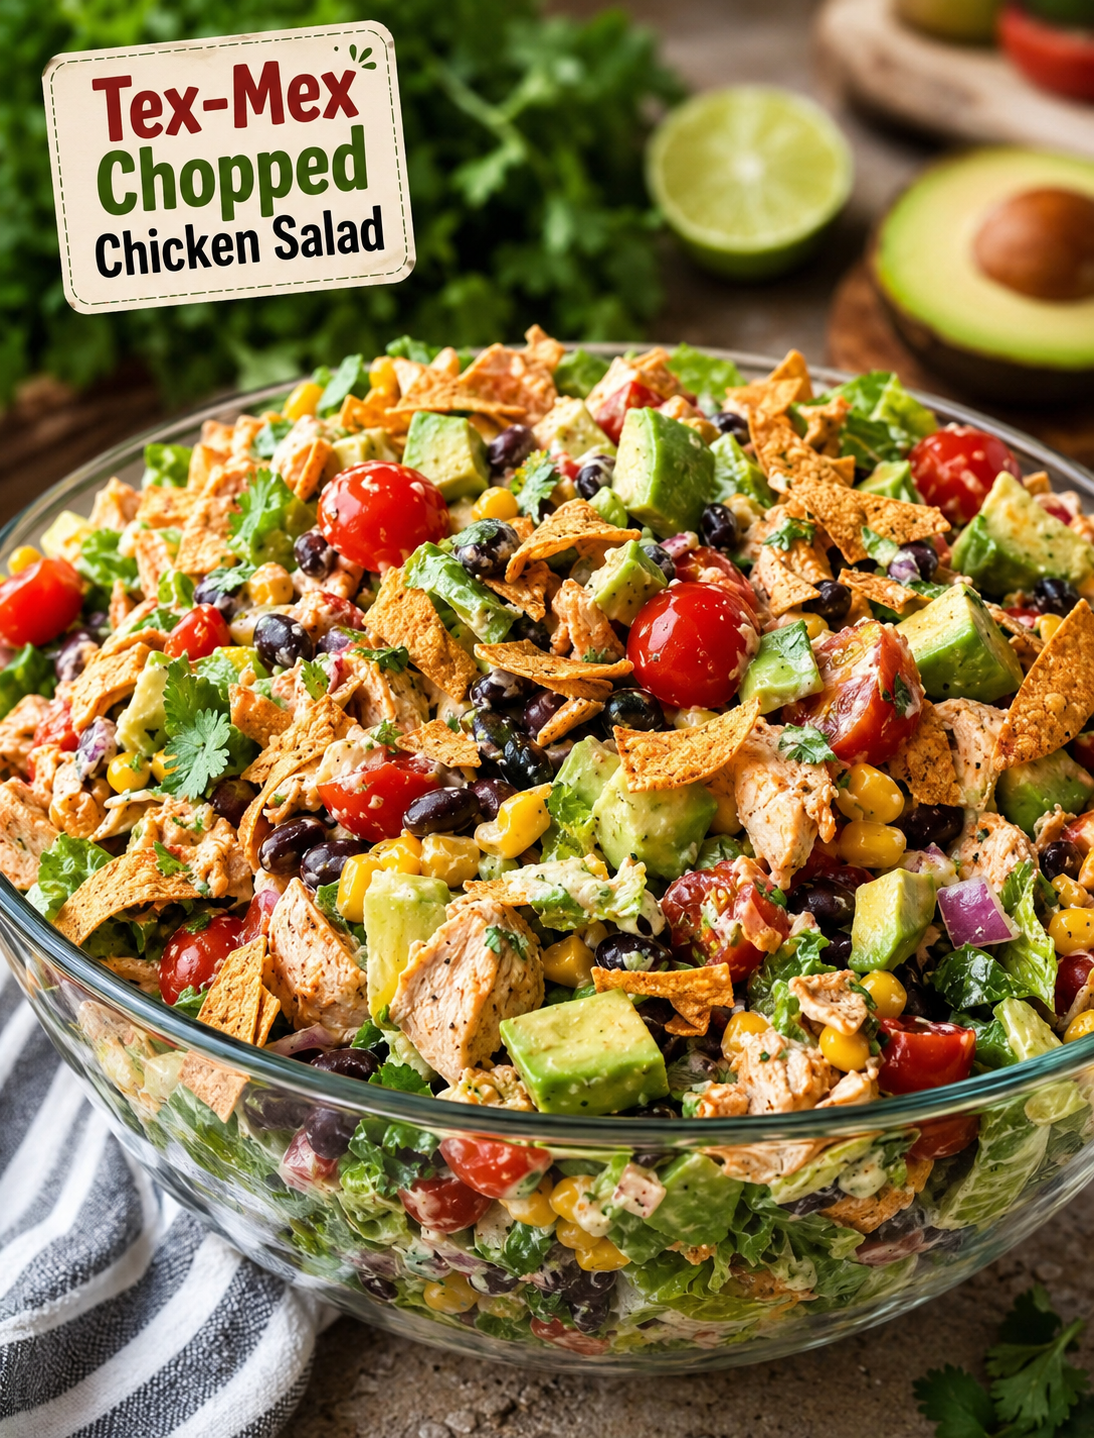
Tex-Mex Chopped Chicken Salad

Tex-Mex Chopped Chicken Salad

Tex-Mex Chopped Chicken Salad

Description

This Tex-Mex chopped chicken salad is a fresh, colourful, protein-packed meal loaded with juicy seasoned chicken, crisp lettuce, sweet corn, black beans, tomatoes, avocado, crunchy peppers, and creamy cheese. Everything is tossed together with a zesty homemade lime dressing that brings all the smoky, tangy, and fresh flavours together.

It’s hearty enough for lunch or dinner while still feeling light and refreshing. The combination of lean chicken, beans, vegetables, and avocado makes it satisfying, while the Tex-Mex seasoning gives it plenty of bold flavour.

This salad is also excellent for meal prep. Keep the dressing separate until you’re ready to eat so the vegetables stay crisp.

Recipe Details

Prep Time: 20 minutes
Cook Time: 15 minutes
Total Time: 35 minutes
Servings: 4
Course: Lunch / Dinner / Main Salad
Cuisine: Tex-Mex
Difficulty: Easy

Ingredients For:

Chicken;

  • 1½ pounds boneless, skinless chicken breasts
  • 1 tablespoon olive oil
  • 1 teaspoon chili powder
  • 1 teaspoon smoked paprika
  • ½ teaspoon ground cumin
  • ½ teaspoon garlic powder
  • ½ teaspoon onion powder
  • ½ teaspoon salt
  • ¼ teaspoon black pepper
  • ¼ teaspoon cayenne pepper, optional
  • 1 tablespoon fresh lime juice

Salad;

  • 6 cups chopped romaine lettuce
  • 1 cup cherry tomatoes, halved
  • 1 cup black beans, drained and rinsed
  • 1 cup corn, fresh, frozen, or canned
  • 1 red bell pepper, diced
  • ½ small red onion, finely diced
  • 1 avocado, diced
  • ½ cup shredded cheddar cheese
  • ¼ cup fresh cilantro, chopped
  • ¼ cup sliced jalapeños, optional
  • ¼ cup tortilla strips or crushed tortilla chips, optional

Creamy Lime Dressing;

  • ½ cup plain Greek yogurt
  • 2 tablespoons olive oil
  • 2 tablespoons fresh lime juice
  • 1 tablespoon mayonnaise, optional
  • 1 small garlic clove, minced
  • 1 teaspoon honey or maple syrup
  • ½ teaspoon chili powder
  • ¼ teaspoon ground cumin
  • ¼ teaspoon salt
  • ⅛ teaspoon black pepper
  • 1–2 tablespoons water, as needed

Instructions

1. Prepare the Chicken

Pat the chicken breasts dry with paper towels.

If the breasts are very thick, gently pound them to an even thickness. This helps them cook evenly and prevents the thinner portions from becoming dry.

Place the chicken in a bowl.

Add olive oil, chilli powder, smoked paprika, cumin, garlic powder, onion powder, salt, black pepper, cayenne pepper, and lime juice.

Rub the seasoning mixture evenly over both sides of the chicken.

Let the chicken sit for about 10 minutes while you prepare the remaining ingredients.

2. Cook the Chicken

Heat a large skillet or grill pan over medium-high heat.

Add the seasoned chicken and cook for approximately 5–7 minutes per side, depending on thickness.

The chicken should develop a beautiful golden-brown exterior.

The safest way to check doneness is with a meat thermometer. The thickest part should reach 165°F (74°C).

Remove the chicken from the skillet and let it rest for 5 minutes.

Resting allows the juices to redistribute, helping keep the chicken moist.

Once rested, chop the chicken into bite-sized pieces or slice it into strips.

3. Prepare the Vegetables

While the chicken is cooking, prepare the salad ingredients.

Chop the romaine lettuce and place it into a large salad bowl.

Add:

  • Cherry tomatoes
  • Black beans
  • Corn
  • Red bell pepper
  • Red onion
  • Avocado
  • Cheddar cheese
  • Cilantro

Add jalapeños if you enjoy extra heat.

Gently toss everything together.

4. Make the Creamy Lime Dressing

In a small bowl, whisk together the Greek yoghurt, olive oil, lime juice, mayonnaise, garlic, honey, chilli powder, cumin, salt, and black pepper.

Add water, one tablespoon at a time, until the dressing reaches your preferred consistency.

Taste and adjust For;

More tanginess, add extra lime juice.

Heat, add chilli powder or cayenne.

A slightly sweeter dressing, add another small drizzle of honey.

5. Assemble the Salad

Add the warm or cooled chopped chicken to the salad bowl.

Pour approximately half of the dressing over the salad.

Gently toss until everything is evenly coated.

Add more dressing according to your preference.

Finish with fresh cilantro and, if desired, tortilla strips or crushed tortilla chips for crunch.

Serve immediately.

Recipe Notes

Use freshly squeezed lime juice

Fresh lime juice gives the dressing a much brighter flavour than bottled lime juice.

Don’t overdress the salad

Start with half the dressing and add more as needed. This keeps the vegetables crisp and prevents the salad from becoming heavy.

Let the chicken rest

Don’t cut the chicken immediately after cooking. A five-minute resting period makes a noticeable difference in juiciness.

Add avocado last

Avocado can become mushy when aggressively tossed. Add it near the end and gently fold it through the salad.

Make it extra crunchy

Add toasted pepitas, tortilla strips, crushed tortilla chips, or roasted corn for additional texture.

Helpful Tips For;

Juicy chicken: Avoid cooking chicken breasts over excessively high heat for too long.

Extra flavour: marinate the seasoned chicken for 30 minutes before cooking.

Smoky flavour: Grill the chicken instead of pan-cooking it.

Meal prep: Store the dressing separately and add avocado just before serving.

Spicy salad: Add fresh jalapeño, cayenne, hot sauce, or chipotle powder.

For a milder version: Skip the cayenne and jalapeños.

More protein: Add extra chicken or another ½ cup of black beans.

Delicious Variations

Chipotle Chicken Salad

Add 1 teaspoon minced chipotle peppers in adobo sauce to the chicken seasoning and another small spoonful to the dressing.

Southwest Chicken Salad

Add sliced cucumber, roasted red peppers, and crunchy tortilla strips.

Fajita Chicken Salad

Cook the chicken with sliced onions and bell peppers before adding it to the salad.

Creamy Avocado Dressing

Blend half an avocado with Greek yoghurt, lime juice, cilantro, garlic, and a little water.

Vegetarian Version

Replace the chicken with extra black beans, chickpeas, grilled vegetables, or roasted sweet potatoes.

Serving Suggestions

This salad is filling enough to serve as a complete meal, but you can also pair it with:

  • Homemade tortilla chips
  • Corn on the cob
  • Black bean soup
  • Vegetable soup
  • Grilled vegetables
  • Brown rice
  • Quinoa
  • Fresh fruit
  • A small bowl of salsa and guacamole

For a lower-carbohydrate option, simply omit the corn and tortilla strips and add extra leafy greens, cucumber, peppers, or avocado.

Meal Prep Instructions

This salad is excellent for meal preparation.

Prepare the chicken and allow it to cool completely.

Divide the lettuce, tomatoes, black beans, corn, peppers, and onion among four meal-prep containers.

Store the chicken separately if possible.

Keep the dressing in small airtight containers.

Add avocado and dressing immediately before eating.

The prepared components will generally keep well in the refrigerator for 3–4 days, provided they are stored properly.

Storage

Store leftover dressed salad in the refrigerator and consume as soon as possible because the lettuce and avocado will soften.

For the best results, store the components separately.

Cooked chicken: Refrigerate for up to 3–4 days.

Prepared dressing: Refrigerate for up to 4–5 days.

Undressed salad vegetables: Generally best within 2–3 days for maximum freshness.

Nutritional Information

Approximate nutrition per serving, based on 4 servings:

  • Calories: 520
  • Protein: 47 g
  • Carbohydrates: 36 g
  • Fat: 23 g
  • Fiber: 10 g
  • Sugar: 7 g
  • Sodium: Approximately 700 mg
  • Calcium: Approximately 260 mg
  • Iron: Approximately 4 mg

Nutrition will vary depending on the specific chicken size, cheese, dressing ingredients, and toppings used.

Benefits of Tex-Mex Chopped Chicken Salad

High in Protein

Chicken, Greek yoghurt, beans, and cheese provide protein that helps make this salad satisfying and filling.

Rich in Fiber

Black beans, vegetables, avocado, and lettuce contribute dietary fibre, which supports digestive health and can help promote fullness.

Healthy Fats

Avocado and olive oil provide predominantly unsaturated fats.

Plenty of Vegetables

The combination of lettuce, tomatoes, peppers, onion, corn, and cilantro provides a colourful variety of plant foods.

Vitamin-Rich

The vegetables and avocado provide several vitamins and minerals, including vitamin C, vitamin K, folate, and potassium.

Balanced Meal

The salad combines protein, fibre-rich carbohydrates, vegetables, and healthy fats, making it a well-rounded lunch or dinner.

Frequently Asked Questions

Can I use chicken thighs instead of chicken breast?

Absolutely. Boneless, skinless chicken thighs work beautifully and tend to be especially juicy. Adjust the cooking time according to their size and thickness.

Can I use rotisserie chicken?

Yes. Rotisserie chicken makes this recipe incredibly quick. Simply shred or chop approximately 3–4 cups of cooked chicken and toss it with a little of the Tex-Mex seasoning.

Can I make the dressing without mayonnaise?

Yes. Simply omit the mayonnaise and add another tablespoon of Greek yoghurt or olive oil.

Can I use sour cream instead of Greek yoghurt?

Yes. Sour cream works well and produces a richer, creamier dressing.

Can I make this salad dairy-free?

Yes. Use dairy-free yoghurt and omit the cheese or replace it with a dairy-free alternative.

Can I make it gluten-free?

Yes. The basic ingredients are naturally gluten-free. If using tortilla strips or packaged seasonings, check the labels to ensure they are certified gluten-free if needed.

Can I use canned corn?

Yes. Drain it well before adding it to the salad.

Should I rinse canned black beans?

Yes. Drain and rinse canned black beans under cool running water before using them.

Can I make the salad ahead of time?

Yes, but keep the dressing, avocado, and crunchy toppings separate until you’re ready to eat.

How can I make it spicier?

Add diced jalapeños, cayenne pepper, chipotle powder, hot sauce, or a little chopped chipotle in adobo.

What if I don’t like cilantro?

Simply leave it out or replace it with fresh parsley.

Can I serve this warm?

Definitely. Warm freshly cooked chicken over the cool, crisp vegetables creates a delicious contrast.

 A Little Recipe Love

If you love getting delicious, easy recipes like this one, please like, comment, save, and share this recipe with someone who would enjoy it! Your support means so much and helps me keep bringing you more tasty recipes. Must express something to keep getting my recipes — thank you! ❤️🥰

Final Thoughts

This Tex-Mex Chopped Chicken Salad is the kind of meal that makes healthy eating feel anything but boring. Juicy seasoned chicken, creamy avocado, sweet corn, hearty black beans, crisp vegetables, cheddar cheese, and a zesty creamy lime dressing come together in every colourful bite.