Peanut Butter Protein Energy Balls

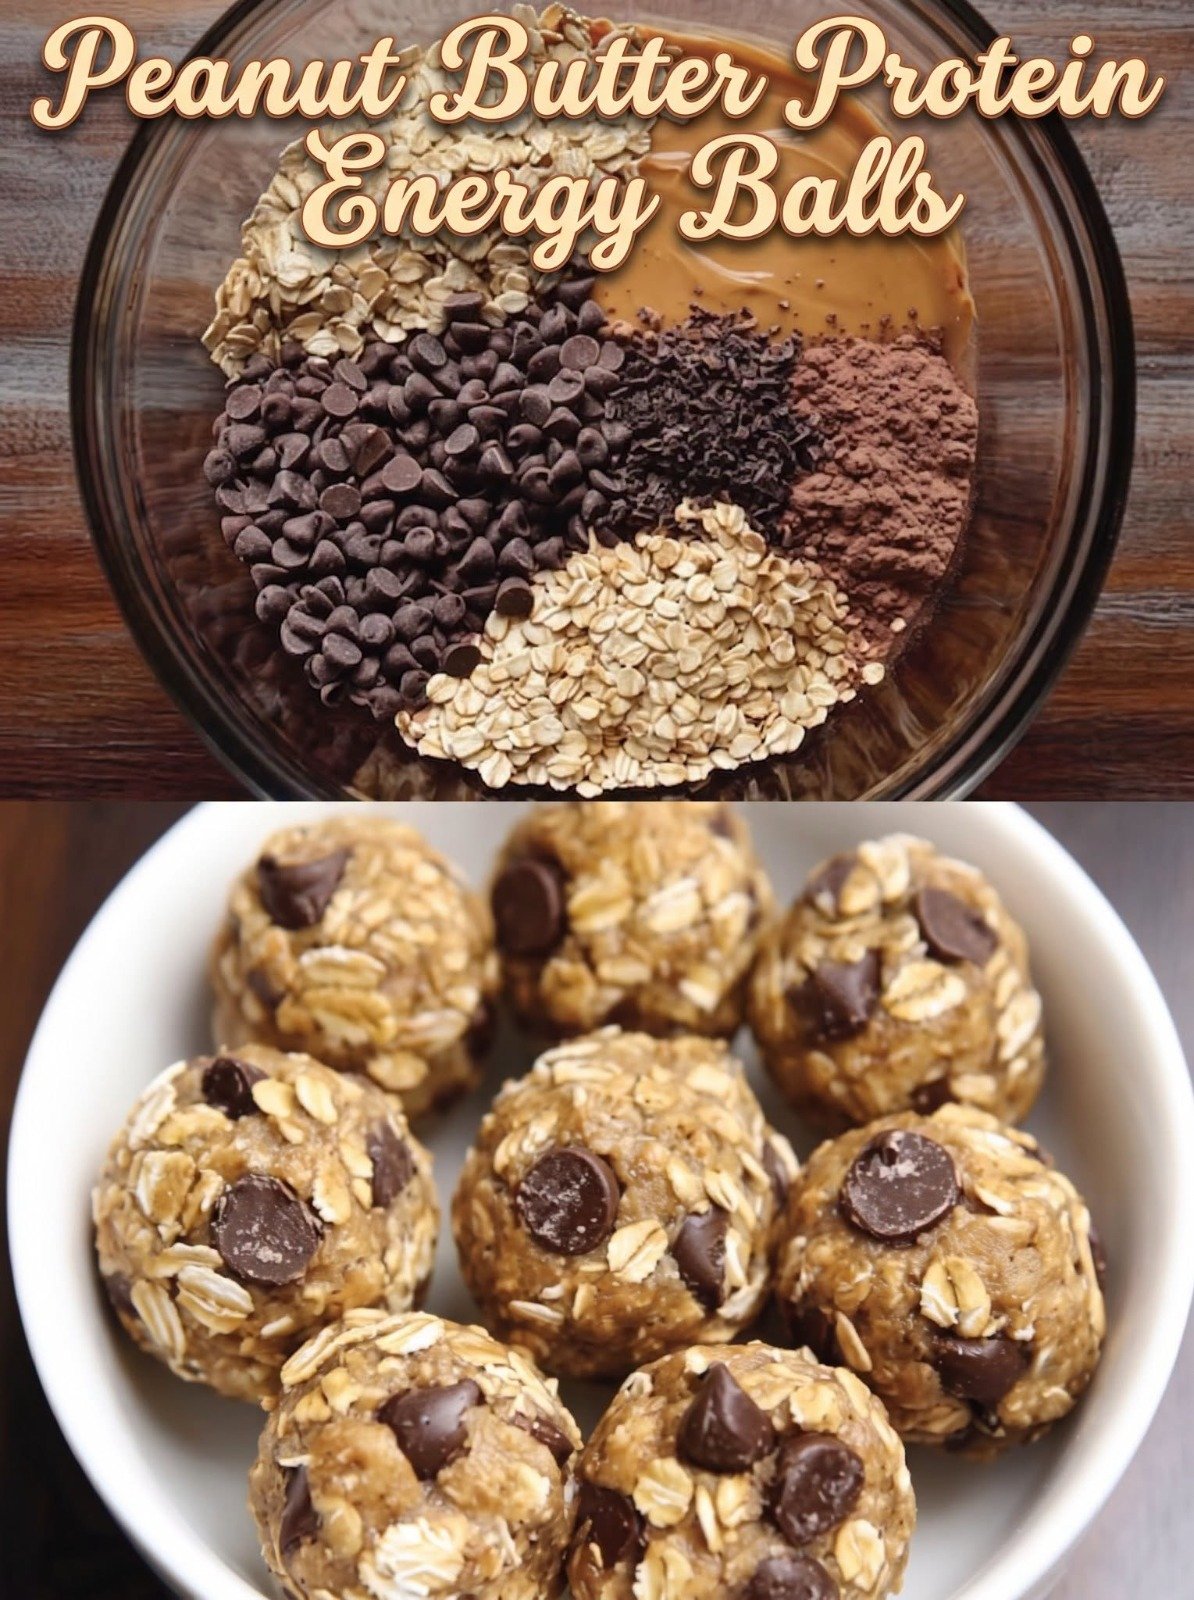
Protein Energy Balls with peanut butter, rolled oats, protein powder, chocolate chips, and a soft chewy texture

Peanut Butter Protein Energy Balls

Protein Energy Balls are an easy no-bake snack made with peanut butter, rolled oats, protein powder, chocolate chips, and a touch of sweetness. They are soft, chewy, satisfying, and perfect for busy mornings, lunchboxes, meal prep, or an afternoon snack. Protein Energy Balls come together in one bowl and require no oven, making them a practical recipe when you want something homemade without much effort.

Prep Time: 15 minutes
Chill Time: 20 minutes
Total Time: About 35 minutes
Servings: 16 balls

Ingredients

For the Energy Balls

  • 1 cup creamy peanut butter
  • 1 1/2 cups rolled oats
  • 1/2 cup vanilla or chocolate protein powder
  • 1/3 cup mini chocolate chips
  • 1/4 cup honey or maple syrup
  • 2 tablespoons cocoa powder
  • 2 tablespoons chia seeds or ground flaxseed
  • 1 teaspoon vanilla extract
  • 1/4 teaspoon salt
  • 2 to 4 tablespoons milk, as needed

Optional Add-Ins

  • 1/4 cup chopped peanuts
  • 2 tablespoons shredded coconut
  • 1 tablespoon cacao nibs
  • 1 tablespoon hemp seeds
  • 1/2 teaspoon cinnamon
  • Pinch of sea salt for topping

Why You’ll Love This Recipe

Protein Energy Balls are quick, portable, and easy to prepare with pantry staples. The peanut butter gives them a rich, creamy base, while the oats provide a chewy texture and the protein powder makes them more filling.

Another reason to love Protein Energy Balls is their flexibility. You can change the flavor with different protein powders, add nuts or seeds, reduce the chocolate chips, or make them a little sweeter depending on your preference.

They are also ideal for meal prep because they store well in the refrigerator and can be frozen for longer storage easily.

How to Make Protein Energy Balls

Step 1: Prepare the Mixing Bowl

Place the peanut butter, honey or maple syrup, and vanilla extract in a large mixing bowl.

Stir until the mixture is smooth and evenly combined.

If your peanut butter is very firm, warm it for a few seconds so it becomes easier to mix.

Step 2: Add the Dry Ingredients

Add the rolled oats, protein powder, cocoa powder, chia seeds or flaxseed, and salt.

Stir with a sturdy spoon or spatula.

The mixture will begin to thicken as the oats and protein powder absorb moisture.

Step 3: Add the Chocolate Chips

Fold in the mini chocolate chips.

Using mini chips makes it easier to shape the mixture into small balls, but regular chocolate chips can also be chopped before adding.

Step 4: Check the Texture

Squeeze a small amount of the mixture between your fingers.

It should hold together easily without feeling overly wet.

If the mixture is too dry and crumbly, add milk 1 tablespoon at a time.

If it feels too sticky, add a small amount of oats.

The mixture for Protein Energy Balls should be soft, thick, and easy to roll.

Step 5: Chill the Mixture

Cover the bowl and refrigerate for about 15 to 20 minutes.

Chilling gives the oats time to soften slightly and helps the mixture become easier to shape.

Step 6: Portion the Mixture

Use a small cookie scoop or tablespoon to portion the mixture evenly.

Aim for about 1 to 1 1/2 tablespoons per ball.

Step 7: Roll Into Balls

Roll each portion gently between your palms until smooth.

If the mixture sticks to your hands, lightly dampen your palms with water.

You should get approximately 16 Protein Energy Balls, depending on the size.

Step 8: Add Optional Toppings

Roll the finished balls in chopped peanuts, coconut, cocoa powder, or crushed oats if desired.

You can also press a few extra chocolate chips into the outside for a bakery-style look.

Step 9: Chill Again

Place the shaped balls on a plate or tray and refrigerate for another 10 minutes.

This helps them firm up and hold their shape.

Step 10: Serve

Serve Protein Energy Balls chilled or at cool room temperature.

Keep any extras refrigerated until ready to enjoy.

Serving Suggestions

Protein Energy Balls are easy to pair with other breakfast and snack foods.

Serve them with fresh berries, banana slices, apple wedges, Greek yogurt, or cottage cheese for a more complete snack.

For breakfast, pair two or three balls with coffee, tea, milk, or a smoothie.

They also work well in lunchboxes alongside fruit, cheese, or a small salad.

For a post-workout snack, enjoy them with a glass of milk or yogurt for additional protein.

For another comforting dinner, try our Heavenly Oven-Baked Rosemary Chicken with Garlic Potatoes for a juicy, herby meal with golden roasted potatoes.

Recipe Tips

Use a peanut butter with a smooth, creamy consistency. Natural peanut butter works, but stir it thoroughly before measuring so the oil is evenly mixed.

Choose a protein powder that you already enjoy. The flavor of the powder will noticeably affect the finished snack.

For softer Protein Energy Balls, use quick oats or pulse rolled oats briefly in a food processor.

For a chunkier texture, leave the rolled oats whole.

Add milk slowly because different protein powders absorb different amounts of moisture.

Do not add too much liquid at once.

Chill the mixture before rolling if it feels sticky.

Use a small cookie scoop for evenly sized portions.

Easy Variations

Protein Energy Balls are easy to customize.

For a chocolate version, use chocolate protein powder and add an extra tablespoon of cocoa powder.

A peanut crunch variation can be made by mixing in chopped roasted peanuts.

To create a coconut version, stir shredded coconut into the mixture and roll the finished balls in additional coconut.

Add cinnamon and a pinch of nutmeg for a warm, lightly spiced variation.

You can also swap peanut butter for almond butter, cashew butter, or sunflower seed butter if needed.

For less sweetness, reduce the chocolate chips and use a smaller amount of honey.

You may also enjoy our 3-Ingredient Slow Cooker French Dip Sandwiches for an easy, tender, and flavorful slow cooker meal.

Make-Ahead Instructions

These are excellent for meal prep.

Prepare Protein Energy Balls at the beginning of the week and keep them refrigerated in an airtight container.

You can also portion the mixture, roll the balls, and freeze them on a parchment-lined tray.

Once firm, transfer them to a freezer-safe container or bag.

Making a double batch is useful if you want quick snacks ready for several weeks.

Storage and Freezing

Store Protein Energy Balls in an airtight container in the refrigerator for up to 7 days.

Place parchment between layers if stacking them.

For longer storage, freeze them for up to 2 months.

Thaw frozen balls in the refrigerator overnight or let one sit at room temperature for about 10 to 15 minutes before eating.

Avoid leaving them in a warm place for long periods because the peanut butter and chocolate can soften.

Nutrition Information

Approximate nutrition per ball:

Calories: 175
Protein: 8 g
Carbohydrates: 17 g
Fat: 10 g
Saturated Fat: 2 g
Fiber: 3 g
Sugar: 7 g
Sodium: 90 mg

Nutrition values are estimates and may vary depending on the peanut butter, protein powder, sweetener, chocolate chips, and portion size.

Frequently Asked Questions

Can I make Protein Energy Balls without protein powder?

Yes. Replace the protein powder with additional oat flour or finely ground oats. The protein content will be lower, but the texture will still work.

Can I use quick oats?

Yes. Quick oats create a softer, more uniform texture.

Can I use maple syrup instead of honey?

Yes. Maple syrup works well, although the mixture may be slightly softer.

Can I make these without chocolate chips?

Yes. Replace them with chopped nuts, raisins, cacao nibs, or shredded coconut.

Why are my energy balls falling apart?

The mixture is probably too dry. Add a small amount of milk or extra peanut butter and mix again.

Can I freeze them?

Yes. Protein Energy Balls freeze very well and can be stored for up to 2 months.

Are they suitable for meal prep?

Yes. They are especially convenient because they require no reheating and can be packed quickly.

Final Thoughts

Protein Energy Balls are a simple no-bake snack that combines creamy peanut butter, chewy oats, protein powder, and chocolate chips in a portable bite.

Because Protein Energy Balls are quick to prepare and easy to customize, they fit well into breakfast routines, lunchboxes, snack boxes, and meal-prep plans.

Keep this Protein Energy Balls recipe handy for busy mornings, after-school snacks, or days when you need something easy to grab from the refrigerator.

With their soft texture, rich peanut butter flavor, and flexible add-ins, Protein Energy Balls are a practical homemade snack that can be prepared ahead and enjoyed throughout the week.
Air Fryer Crispy Avocado Fries with Lime Aioli

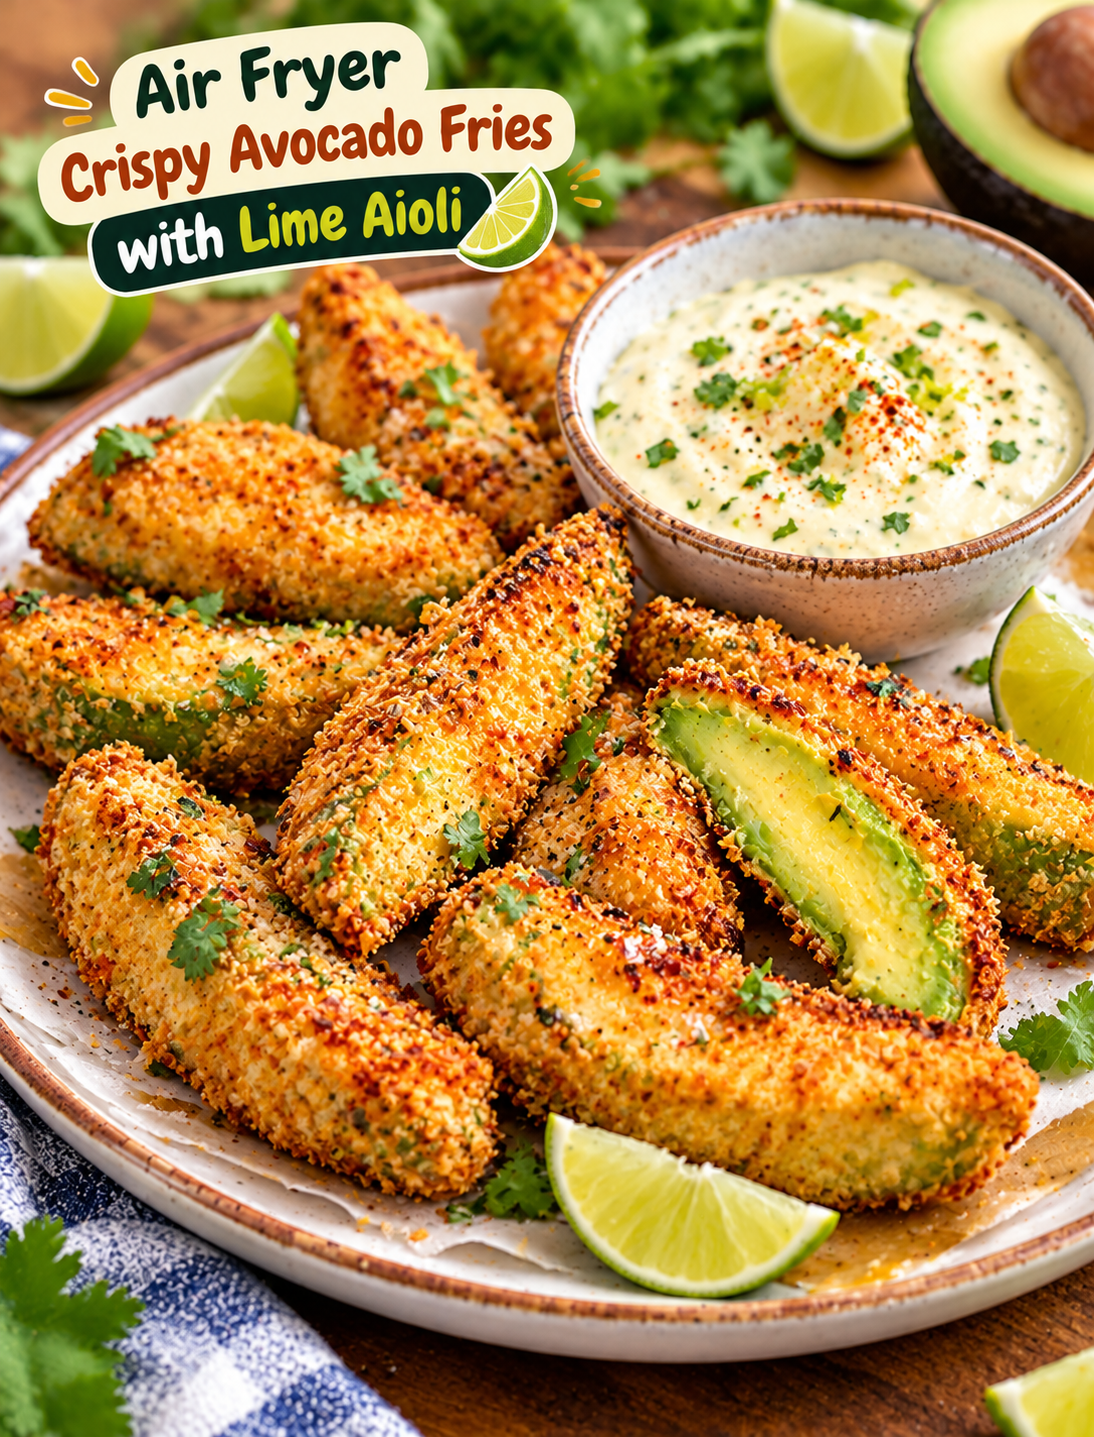
Air Fryer Crispy Avocado Fries with Lime Aioli

Looking for a crunchy snack with a creamy center and a fresh citrus dip? These Air Fryer Crispy Avocado Fries with Lime Aioli are an easy recipe that brings together buttery avocado, golden breadcrumbs, and a tangy homemade sauce.

Each avocado slice gets coated in seasoned flour, egg, and crispy panko breadcrumbs. The air fryer turns the outside golden and crunchy while keeping the inside soft and creamy. You get the texture of classic fries without deep-frying them in a pot of oil.

The lime aioli makes this recipe even better. It combines mayonnaise, fresh lime juice, garlic, and a little lime zest for a creamy dip with a bright citrus flavor.

These avocado fries work well as an afternoon snack, party appetizer, or side dish for burgers and sandwiches. They are also easy to customize with your favorite spices and dipping sauces.

If you enjoy simple air fryer snacks, this recipe is a delicious way to use ripe but firm avocados.

Why You Will Love This Recipe

  • Crispy outside: Panko breadcrumbs create a crunchy coating without deep frying.
  • Creamy center: Avocado stays soft and buttery inside the golden crust.
  • Easy preparation: The ingredients are simple, and the coating process takes only a few minutes.
  • Fresh citrus flavor: Lime juice and zest give the homemade aioli a refreshing taste.
  • Perfect for sharing: Serve these fries as a party appetizer or family snack.
  • Customizable seasoning: Add smoked paprika, cayenne pepper, or garlic powder to change the flavor.
  • Air fryer friendly: A little cooking spray helps the breadcrumb coating become golden and crisp.

Ingredients You Will Need

You only need a few basic ingredients to make crispy avocado fries and their creamy lime dipping sauce.

For the Avocado Fries

  1. Avocados – 2 medium: Choose ripe but firm avocados that hold their shape when sliced.
  2. All-purpose flour – ½ cup: Flour creates a dry surface that helps the egg coating stick.
  3. Large eggs – 2: Beaten eggs help the breadcrumbs attach to each avocado slice.
  4. Panko breadcrumbs – 1 cup: Panko creates a light, crunchy coating during air frying.
  5. Garlic powder – ½ teaspoon: Adds a savory flavor to the breadcrumb coating.
  6. Smoked paprika – ½ teaspoon: Gives the fries a mild smoky taste and warm color.
  7. Black pepper – ¼ teaspoon: Adds a gentle peppery flavor.
  8. Salt – ¼ teaspoon: Balances the creamy avocado and seasoned coating.
  9. Olive oil cooking spray: Helps the breadcrumb coating brown evenly in the air fryer.

For the Lime Aioli

  1. Mayonnaise – ½ cup: Creates a rich and creamy base for the dipping sauce.
  2. Fresh lime juice – 1 tablespoon: Adds a bright citrus flavor.
  3. Lime zest – ½ teaspoon: Gives the sauce a fresh lime aroma.
  4. Garlic – 1 small clove, minced: Adds a savory garlic flavor.
  5. Black pepper – a pinch: Adds mild seasoning.
  6. Salt – a small pinch: Adjust according to your taste.

Ingredient tip: Use fresh lime juice instead of bottled juice for a brighter flavor. Avoid using overripe avocados because they can become too soft during breading.

Kitchen Tools You Need

Gather these tools before starting:

  • Air fryer
  • Sharp kitchen knife
  • Cutting board
  • Three shallow bowls
  • Small mixing bowl
  • Fork or small whisk
  • Measuring cups and spoons
  • Silicone spatula or spoon
  • Tongs
  • Parchment paper designed for air fryers, if needed

Make sure any parchment paper is secured under the food and does not block airflow or touch the heating element.

How to Make Air Fryer Crispy Avocado Fries with Lime Aioli

Follow these simple steps to prepare crunchy avocado fries with a creamy citrus dip.

Step 1: Prepare the Avocados

Wash and dry the avocados before cutting them.

Slice each avocado lengthwise and carefully remove the pit. Peel away the skin and cut each half into approximately ½-inch-thick wedges.

Try to keep the slices similar in size so they cook evenly.

Choose avocados that yield slightly when pressed but are not mushy. Very soft avocado slices can break during the coating process.

Step 2: Prepare the Breading Station

Set out three shallow bowls on your kitchen counter.

  • Bowl 1: Add the all-purpose flour.
  • Bowl 2: Crack the eggs and whisk until smooth.
  • Bowl 3: Combine panko breadcrumbs, garlic powder, smoked paprika, black pepper, and salt.

Mix the seasoned breadcrumbs well so the spices are evenly distributed.

Keeping the ingredients in separate bowls makes the coating process easier and less messy.

Step 3: Coat the Avocado Slices

Take one avocado wedge and lightly coat it in flour. Shake off any excess.

Dip the floured slice into the beaten egg, making sure all sides are covered.

Next, press the slice gently into the seasoned panko breadcrumbs. Turn it carefully so the entire surface gets an even coating.

Repeat with the remaining avocado wedges.

Place the coated slices on a clean plate or tray in a single layer.

Helpful tip: Use one hand for dry ingredients and the other for wet ingredients. This prevents the breadcrumbs from forming sticky clumps on your fingers.

Step 4: Preheat the Air Fryer

Preheat your air fryer to 375°F (190°C) for about 3 minutes if your model recommends preheating.

Lightly spray the air fryer basket with olive oil cooking spray.

Arrange the coated avocado wedges in a single layer. Leave space between the pieces so hot air can circulate.

Avoid stacking the fries because crowded slices may cook unevenly.

Step 5: Air Fry Until Golden and Crispy

Lightly spray the tops of the avocado wedges with olive oil cooking spray.

Air fry at 375°F (190°C) for approximately 7–9 minutes.

Carefully turn the fries halfway through cooking if needed for more even browning.

Check the coating around the 7-minute mark. The outside should look golden and crisp, while the avocado inside should remain creamy.

Cooking time may vary depending on the thickness of the slices and your air fryer model.

Avoid overcooking because avocado can become too soft when exposed to heat for too long.

Step 6: Prepare the Lime Aioli

While the avocado fries are cooking, prepare the dipping sauce.

Add mayonnaise, fresh lime juice, lime zest, minced garlic, black pepper, and a small pinch of salt to a mixing bowl.

Stir until the mixture becomes smooth and creamy.

Taste the sauce and adjust the lime juice or seasoning if needed.

For a stronger garlic flavor, let the aioli rest in the refrigerator for about 10 minutes before serving.

Step 7: Plate and Serve

Carefully remove the golden avocado fries from the air fryer using tongs.

Arrange them on a serving plate while they are still warm.

Place the lime aioli in a small dipping bowl beside the fries.

Garnish with a little extra lime zest, chopped fresh cilantro, or a light sprinkle of smoked paprika.

Serve immediately for the best crunchy texture.

Air Fryer Cooking Time and Temperature

Use this cooking guide as a starting point for your avocado fries.

Cooking Detail Recommendation
Temperature 375°F (190°C)
Preparation Time 15 minutes
Cooking Time 7–9 minutes
Sauce Preparation 5 minutes
Total Time 27–29 minutes
Serving Size 4 servings

Cooking tip: Start checking the fries at 7 minutes. A light golden coating is ideal because the avocado inside should stay soft rather than become overcooked.

Expert Tips for the Best Results

Use these simple tips to get a crunchy coating and creamy avocado center.

  • Choose firm avocados: Slightly firm fruit is easier to slice and coat without breaking.
  • Cut even wedges: Similar-sized pieces cook at a more consistent rate.
  • Dry the avocado surface: Gently pat the slices with a paper towel if they are very wet before breading.
  • Use panko breadcrumbs: Their larger flakes create a crunchier coating than regular breadcrumbs.
  • Press the breadcrumbs gently: A light press helps the coating stick to each slice.
  • Do not overcrowd the basket: Space between the fries allows better hot-air circulation.
  • Use cooking spray: A light coating helps the breadcrumbs turn golden.
  • Serve immediately: The coating is crispest right after cooking.

Variations and Substitutions

You can easily adjust this recipe to match your preferred flavors.

1. Spicy Avocado Fries

Add ¼ teaspoon of cayenne pepper or chili powder to the breadcrumb mixture. This gives the fries a little heat without overpowering the avocado.

2. Parmesan Avocado Fries

Mix ¼ cup of finely grated Parmesan cheese into the panko breadcrumbs. The cheese adds a savory flavor and helps create a rich, golden coating.

3. Italian Herb Avocado Fries

Add dried oregano, basil, and a little thyme to the breadcrumb mixture. Serve with marinara sauce for an Italian-inspired snack.

4. Gluten-Free Avocado Fries

Replace the all-purpose flour and panko breadcrumbs with gluten-free alternatives. Check the packaging to make sure all ingredients are certified gluten-free if needed.

5. Dairy-Free Lime Aioli

Use a dairy-free mayonnaise alternative to prepare the dipping sauce. The lime and garlic still provide plenty of flavor.

6. Cilantro Lime Aioli

Add one tablespoon of finely chopped fresh cilantro to the mayonnaise mixture. This creates a fresh, herb-filled dipping sauce.

What to Serve with Avocado Fries

These crispy avocado wedges pair well with many everyday meals and snacks.

  • Turkey burgers: Serve alongside a juicy turkey burger for a satisfying lunch.
  • Grilled chicken: Add avocado fries as a crunchy side dish.
  • Fish tacos: Their creamy center and lime flavor complement fish tacos.
  • Chicken sandwiches: Replace regular fries with avocado wedges for a different side.
  • Fresh salad: Serve with a green salad for a lighter meal.
  • Fresh salsa: Pair with tomato salsa or pico de gallo for extra freshness.

For a party appetizer platter, serve the fries with lime aioli, fresh salsa, and a few lime wedges.

How to Store and Reheat

Avocado fries taste best immediately after cooking because their coating is at its crispiest.

Refrigeration

Allow leftover fries to cool slightly before placing them in an airtight container.

Refrigerate within 2 hours of cooking and use within 1–2 days for the best quality.

Keep the lime aioli in a separate airtight container in the refrigerator.

Reheating in the Air Fryer

Arrange the refrigerated fries in a single layer inside the air fryer basket.

Reheat at 350°F (175°C) for approximately 2–3 minutes.

Check the coating and add a little more time if necessary. Avoid overheating because the avocado can become very soft.

Reheating in the Oven

Place the fries on a baking sheet in a single layer.

Reheat at 350°F until warmed through and the coating becomes crisp again.

Can You Freeze Them?

Freezing cooked avocado fries is not recommended because avocado can become watery and soft after thawing.

For the best texture, prepare and cook them fresh.

Common Mistakes to Avoid

Avoid these mistakes to keep your avocado fries crispy and flavorful.

  1. Using overripe avocados: Very soft avocados can fall apart during slicing and breading.
  2. Cutting uneven wedges: Different sizes can lead to uneven cooking.
  3. Skipping the flour coating: Flour helps the egg and breadcrumbs stick properly.
  4. Using too little cooking spray: A dry breadcrumb coating may remain pale instead of turning golden.
  5. Overcrowding the basket: Crowded slices prevent proper air circulation.
  6. Cooking for too long: Excessive heat can make the avocado mushy.
  7. Preparing the sauce too late: Mix the aioli before cooking so it is ready when the fries come out.

Frequently Asked Questions

1. Can you cook avocado fries in an air fryer?

Yes. Coat firm avocado wedges in flour, egg, and seasoned panko, then air fry at 375°F until golden.

2. Which avocados are best for avocado fries?

Choose ripe but firm avocados that hold their shape when sliced and coated.

3. How long do avocado fries take in the air fryer?

They usually take 7–9 minutes at 375°F, depending on slice thickness and air fryer model.

4. Why are my avocado fries not crispy?

Insufficient cooking spray, wet avocado surfaces, and overcrowding can prevent the breadcrumbs from becoming crisp.

5. Can I make avocado fries without eggs?

Yes. Use a suitable plant-based egg replacement or a thick milk-based coating to help the breadcrumbs stick.

6. Can I prepare avocado fries ahead of time?

You can prepare the lime aioli ahead, but bread and cook the avocado shortly before serving for the best texture.

7. What can I use instead of panko breadcrumbs?

Regular breadcrumbs or crushed cornflakes can work, although the final texture may be different.

8. What is the best dipping sauce for avocado fries?

Lime aioli is a great choice, but ranch dressing, chipotle mayo, and fresh salsa also pair well.

Final Thoughts

These Air Fryer Crispy Avocado Fries with Lime Aioli are a delicious way to turn fresh avocados into a crunchy, shareable snack. The seasoned panko coating adds texture, while the soft avocado center creates a creamy contrast in every bite.

The homemade lime aioli brings everything together with fresh citrus and garlic flavor. You can also change the seasoning, add Parmesan, or make a spicy version to suit your taste.

Serve them warm as an appetizer, afternoon snack, or side dish with your favorite meal.

If you try this recipe, let us know in the comments: Would you dip your avocado fries in lime aioli, ranch, or spicy chipotle sauce?


Air Fryer Roasted Cinnamon Apple Slices with Walnuts

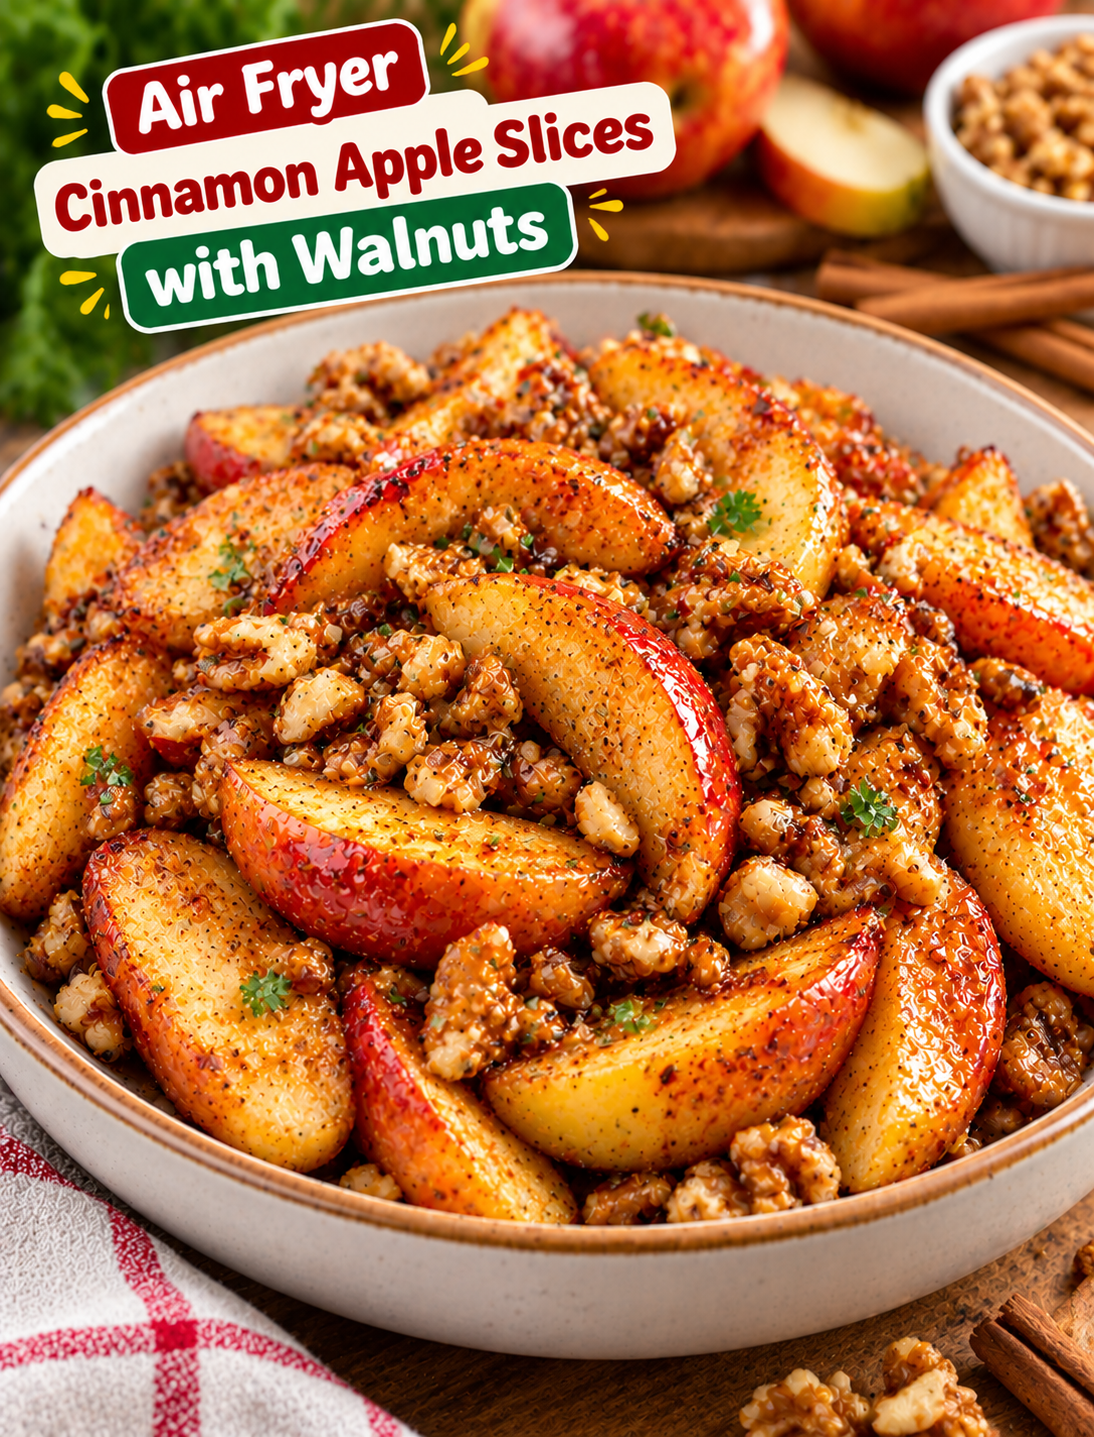
Air fryer roasted cinnamon apple slices topped with chopped walnuts and a light maple syrup glaze in a serving bowl.
Air Fryer Roasted Cinnamon Apple Slices with Walnuts

Enjoy the warm flavor of baked apples without turning on your oven. These Air Fryer Roasted Cinnamon Apple Slices with Walnuts are tender, lightly caramelized, and coated with cinnamon, a touch of maple syrup, and crunchy walnuts.

The air fryer softens the apples while helping their edges turn golden. Cinnamon adds a cozy flavor, while chopped walnuts bring a nutty crunch to every bite. The result is a simple fall-inspired treat that works just as well for breakfast as it does for dessert.

This recipe uses everyday ingredients and takes only a few minutes to prepare. Serve the warm apple slices on their own, spoon them over oatmeal, or add them to Greek yogurt for an easy snack. You can also pair them with vanilla ice cream when you want a simple dessert.

Why You’ll Love This Recipe

These cinnamon apples are easy to make and offer plenty of ways to serve them.

  • Quick preparation: Slice the apples, add the seasonings, and let the air fryer do the work.
  • Warm cinnamon flavor: Ground cinnamon gives the apples a classic fall-inspired taste.
  • Sweet and nutty texture: Maple syrup adds sweetness, while walnuts provide a pleasant crunch.
  • No oven needed: The air fryer is convenient for small batches.
  • Easy to customize: Add nutmeg, vanilla, or a pinch of ginger to change the flavor.
  • Versatile serving options: Enjoy the apples for breakfast, as a snack, or as a dessert topping.
  • Simple ingredients: Fresh apples, walnuts, cinnamon, and a few pantry staples are all you need.

Ingredients You’ll Need

For the Cinnamon Apple Slices

  • 3 medium apples
  • 1 tablespoon melted unsalted butter or coconut oil
  • 1 tablespoon pure maple syrup
  • 1 teaspoon ground cinnamon
  • ¼ teaspoon ground nutmeg, optional
  • ½ teaspoon vanilla extract
  • 1 teaspoon fresh lemon juice
  • A small pinch of salt

Firm apples work best because they hold their shape during air frying. Honeycrisp, Fuji, Gala, and Pink Lady apples are good options. Granny Smith apples also work if you prefer a tart flavor.

For the Walnut Topping

  • ⅓ cup chopped walnuts
  • 1 teaspoon maple syrup, optional
  • ⅛ teaspoon ground cinnamon
  • 1 tablespoon raisins, optional

Walnuts add a rich, nutty flavor that pairs well with warm cinnamon apples. Chop them into small pieces so they are easy to sprinkle over the finished dish.

If you prefer a softer walnut texture, add them during the final few minutes of cooking. If you want a stronger toasted flavor, add them near the beginning and watch closely to prevent burning.

How to Make Air Fryer Roasted Cinnamon Apple Slices with Walnuts

Step 1: Wash and Slice the Apples

Rinse the apples under cool running water and pat them dry.

Remove the cores and seeds, then cut the apples into wedges or slices about ¼ to ½ inch thick.

Try to keep the slices close to the same thickness so they cook evenly. Thicker pieces stay firmer, while thinner slices soften more quickly.

You can leave the apple skins on for extra texture and color. Peel them first if you prefer a softer finish.

Step 2: Prepare the Cinnamon Mixture

Place the melted butter or coconut oil in a medium mixing bowl.

Add the maple syrup, ground cinnamon, nutmeg, vanilla extract, lemon juice, and a small pinch of salt.

Whisk until the mixture is evenly combined.

The lemon juice adds brightness and balances the sweetness, while the butter helps the cinnamon mixture coat the apple slices.

Step 3: Coat the Apple Slices

Add the sliced apples to the bowl.

Toss gently until each piece is coated with the cinnamon mixture.

Use a spatula or clean hands to spread the seasoning evenly without breaking the slices.

If the apples release a little juice, that is normal. Avoid adding extra liquid because too much moisture can make the apples soft instead of lightly caramelized.

Step 4: Preheat the Air Fryer

Preheat your air fryer to 350°F for about 3 minutes, if recommended by your appliance’s instructions.

Lightly grease the basket with an air-fryer-safe cooking spray if needed.

A preheated basket helps the apples begin cooking evenly as soon as they are added.

Step 5: Arrange the Apples in the Basket

Place the coated apple slices in the air fryer basket in a mostly single layer.

A little overlap is fine, but avoid piling the slices too high. Crowding can trap moisture and prevent the edges from browning.

If you have a small air fryer, cook the apples in batches for more even results.

Step 6: Air Fry Until Tender

Air fry the apples at 350°F for 8–12 minutes.

Shake the basket or turn the slices gently halfway through cooking.

Start checking after 8 minutes. The apples should be tender when pierced with a fork, with lightly golden edges and a warm cinnamon coating.

Cooking time depends on the apple variety, slice thickness, and air fryer model. Add another 2–3 minutes if you prefer softer apples.

Step 7: Add the Walnuts

While the apples cook, mix the chopped walnuts with the optional maple syrup and a pinch of cinnamon.

Sprinkle the walnut mixture over the apples during the final 2–3 minutes of cooking.

This timing helps the walnuts warm and toast lightly without burning.

If you prefer a stronger crunch, toast the walnuts separately in a dry skillet over medium-low heat for a few minutes, then sprinkle them over the cooked apples.

Step 8: Serve Warm

Carefully transfer the apples to a serving bowl.

Sprinkle with the optional raisins and any remaining walnuts.

Taste a slice and add a little extra cinnamon if desired.

Serve the apples warm on their own or with Greek yogurt, oatmeal, pancakes, or vanilla ice cream.

Tips for Perfect Cinnamon Apples

A few simple steps help the apples cook evenly and develop the best texture.

  • Choose firm apples: Honeycrisp, Fuji, and Pink Lady hold their shape well.
  • Cut evenly: Similar-sized slices cook at the same rate.
  • Avoid excess liquid: Too much syrup or butter can make the apples soggy.
  • Do not overcrowd the basket: Air circulation helps the edges brown.
  • Add walnuts near the end: This reduces the risk of burnt nuts.
  • Check early: Thin slices can soften faster than thick wedges.
  • Adjust the sweetness: Taste the apples before adding extra maple syrup.
  • Serve soon after cooking: The apples taste best while warm and the walnuts retain their crunch.

Easy Recipe Variations

Honey Cinnamon Apples

Replace the maple syrup with honey for a different sweet flavor. Use a small amount because honey can brown quickly.

Brown Sugar Cinnamon Apples

Replace the maple syrup with 1 tablespoon of light brown sugar. Toss well so the sugar coats the apple slices evenly.

Cinnamon Apple Slices with Pecans

Swap the walnuts for chopped pecans. Pecans offer a buttery flavor that works well with cinnamon and maple syrup.

Apple Pie Spice Version

Replace the ground cinnamon and nutmeg with about 1 teaspoon of apple pie spice. Check the blend first because some versions already contain nutmeg and ginger.

Vanilla Cinnamon Apples

Add an extra ¼ teaspoon of vanilla extract for a warmer dessert-style flavor.

Cinnamon Apples with Oats

Sprinkle a small amount of toasted rolled oats over the finished apples for added texture. Toast the oats separately because they may not cook evenly with the moist fruit.

What to Serve With Cinnamon Apple Slices

These air fryer apples work with both sweet breakfasts and simple desserts.

Try serving them with:

  • Plain Greek yogurt
  • Warm oatmeal
  • Overnight oats
  • Pancakes or waffles
  • French toast
  • Vanilla ice cream
  • Cottage cheese
  • Whole-grain toast with nut butter
  • Chia pudding

For breakfast, spoon the warm apples over oatmeal and finish with chopped walnuts. For dessert, serve them with a small scoop of vanilla ice cream and a light drizzle of maple syrup.

Storage and Reheating

Let the apples cool before placing them in an airtight container.

Refrigerate leftovers for up to 3–4 days.

To reheat, place the apples in the air fryer at 325°F for about 2–4 minutes, checking to make sure they do not become too soft.

You can also warm them in the microwave in short intervals, although the walnuts may lose some of their crunch.

For the best texture, store extra walnuts separately and add them after reheating.

Meal Prep Tips

These apples can be prepared ahead for easy breakfasts and snacks.

  • Wash and core the apples in advance.
  • Mix the cinnamon seasoning shortly before cooking.
  • Cook a batch and divide it into individual containers.
  • Refrigerate the cooked apples promptly.
  • Store walnuts separately to keep them crunchy.
  • Reheat a portion when you are ready to serve.

If cutting the apples ahead of time, toss them with a little lemon juice and refrigerate them in a sealed container to help slow browning.

Common Mistakes to Avoid

Cutting the Apples Too Thin

Very thin slices can become mushy before the edges brown. Cut the apples into evenly sized wedges or slices.

Using Too Much Syrup

Excess syrup creates more liquid in the basket and can prevent the apples from caramelizing. Start with the recommended amount and add more only after cooking if needed.

Overcrowding the Air Fryer

A packed basket traps steam and produces softer apples. Cook in batches if necessary.

Adding Walnuts Too Early

Walnuts can burn before the apples finish cooking. Add them during the last few minutes or toast them separately.

Cooking at Too High a Temperature

High heat can darken the outside before the center becomes tender. A moderate temperature of 350°F gives the apples time to soften.

Forgetting to Check the Apples

Different apple varieties soften at different rates. Check the slices early and adjust the cooking time to match your preferred texture.

Frequently Asked Questions

Which apples work best for air frying?

Honeycrisp, Fuji, Gala, and Pink Lady apples hold their shape well and offer a good balance of sweetness and tartness.

Do I need to peel the apples?

No. Apple skins are edible and help the slices hold their shape, but you can peel them for a softer texture.

How long do cinnamon apples take in the air fryer?

Most ¼- to ½-inch slices take about 8–12 minutes at 350°F, depending on their thickness and variety.

Can I make this recipe without maple syrup?

Yes. Omit the syrup for a less-sweet result or replace it with a small amount of honey or brown sugar.

Can I use pecans instead of walnuts?

Yes. Chopped pecans work well and provide a buttery, slightly sweet flavor.

How do I stop the apples from becoming mushy?

Cut the slices evenly, avoid excess liquid, cook in a single layer, and begin checking after 8 minutes.

Can I make these cinnamon apples ahead of time?

Yes. Cook them ahead, refrigerate them in an airtight container, and reheat briefly before serving.

What can I serve with roasted cinnamon apples?

Serve them with oatmeal, Greek yogurt, pancakes, waffles, or vanilla ice cream for a simple breakfast or dessert.

Final Thoughts

These Air Fryer Roasted Cinnamon Apple Slices with Walnuts are a simple way to enjoy warm fruit with cozy cinnamon flavor and a crunchy nut topping. The air fryer softens the apples, lightly browns the edges, and makes this recipe convenient for small batches.

For the best results, choose firm apples, cut them evenly, use a light coating of maple syrup and butter, and add the walnuts near the end. Serve the apples warm over oatmeal, with yogurt, or alongside vanilla ice cream for an easy treat that works throughout the year.

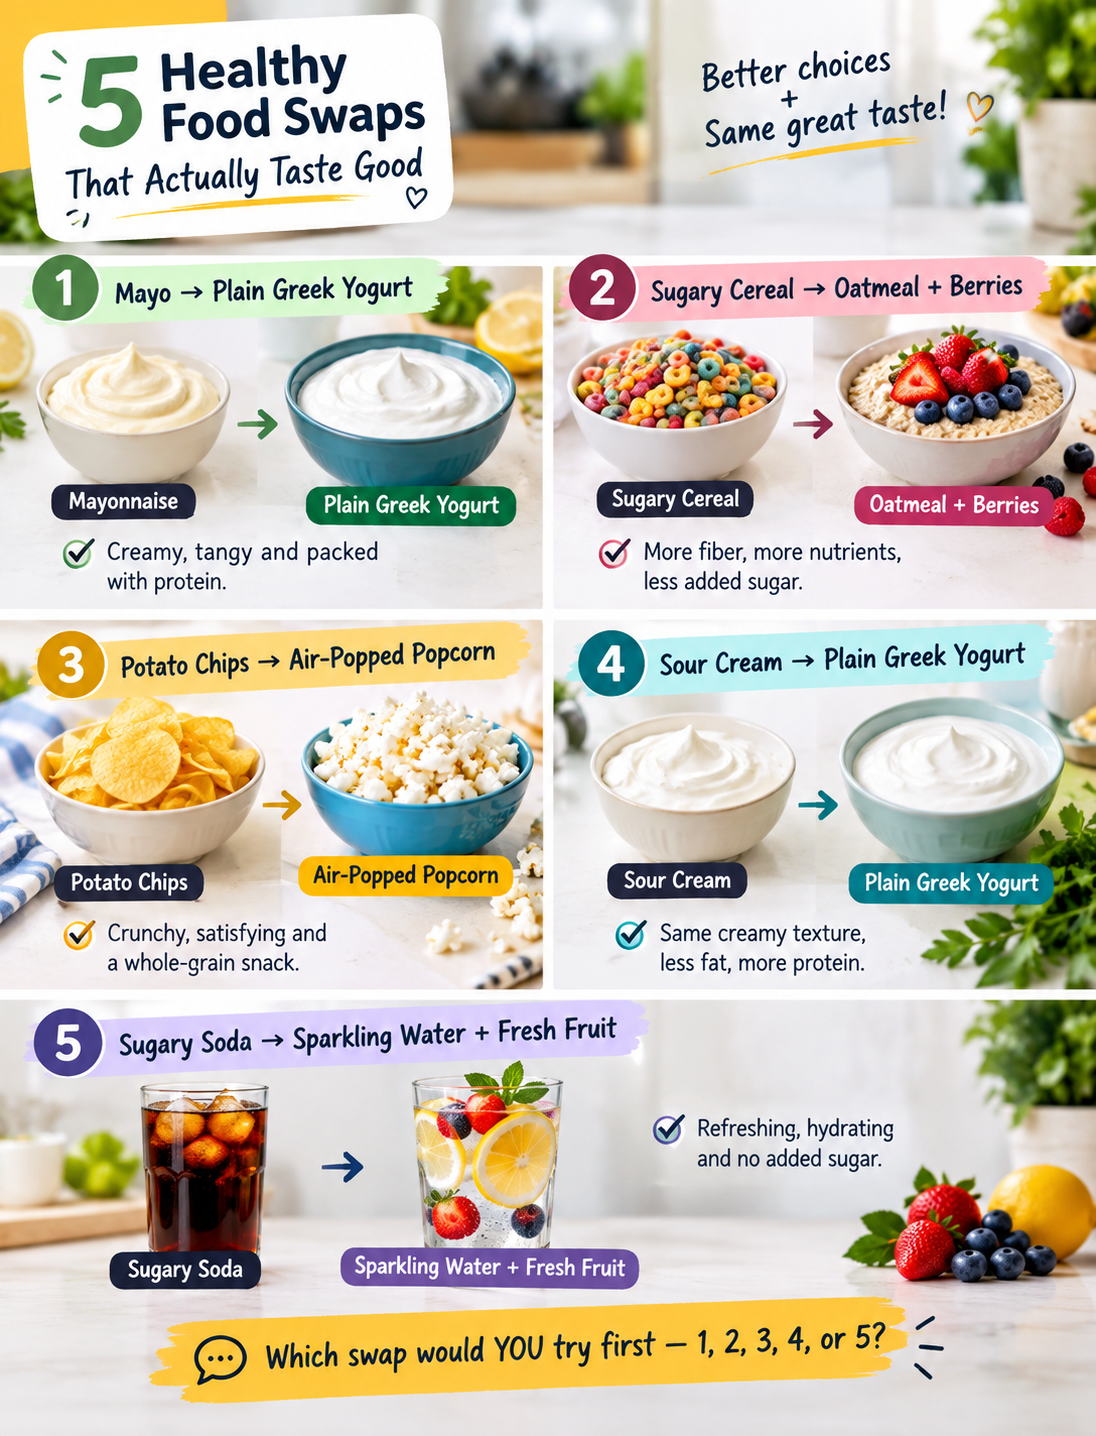
5 Healthy Food Swaps That Actually Taste Good

Five healthy food swaps including Greek yogurt, oatmeal with berries, air-popped popcorn, fresh fruit, and sparkling water.

5 Healthy Food Swaps That Actually Taste Good

Making healthier food choices does not mean giving up the foods you enjoy. Small changes in everyday meals can help you build better eating habits without making food feel boring or restrictive. The best healthy food swaps keep the flavor, texture, and comfort you like while adding more nutritious ingredients.

If you are trying to eat better, start with familiar foods instead of changing your entire diet at once. A creamy sandwich spread can be replaced with a lighter option, a sugary breakfast can become more balanced, and a salty snack can be switched for something crunchy and satisfying.

These five simple swaps are easy to use in an American kitchen and work well for breakfast, lunch, dinner, and snacks. Try one at a time and choose the changes that fit your routine.

1. Swap Mayonnaise for Plain Greek Yogurt

Mayonnaise adds a rich, creamy texture to sandwiches, wraps, dips, and salads. Plain Greek yogurt can provide a similar creamy feel while also adding protein to your meal.

Choose unsweetened plain Greek yogurt rather than flavored yogurt. Its mild tang works especially well with chicken salad, tuna salad, coleslaw, and homemade dips.

Step-by-step swap

  1. Start with the same amount of plain Greek yogurt you would normally use for mayonnaise.
  2. Add a small squeeze of lemon juice for extra brightness.
  3. Mix in garlic powder, black pepper, or fresh herbs if you want more flavor.
  4. Taste the mixture before adding additional salt.
  5. Use it immediately or refrigerate it until your meal is ready.

Easy ways to use it

  • Spread it on a turkey sandwich.
  • Mix it into chicken salad.
  • Use it as a veggie dip.
  • Add it to a wrap with grilled chicken and vegetables.
  • Stir it into a simple homemade dressing.

This swap is useful when you want a creamy ingredient without making a major change to the meal.

2. Swap Sugary Cereal for Oatmeal With Fresh Berries

A quick bowl of cereal is a common breakfast choice, but some cereals can contain a lot of added sugar. Oatmeal with fresh fruit is a simple alternative that can make breakfast more filling.

Use old-fashioned oats or quick oats based on the texture and cooking time you prefer. Add strawberries, blueberries, raspberries, or sliced banana for natural sweetness and extra flavor.

Step-by-step swap

  1. Cook oats with water or your preferred milk.
  2. Add fresh or frozen berries after cooking.
  3. Sprinkle in cinnamon for extra flavor.
  4. Add chopped nuts or seeds for crunch.
  5. If needed, use a small amount of honey instead of several spoonfuls of sugar.

Simple topping combinations

  • Blueberries + walnuts + cinnamon
  • Strawberries + sliced almonds
  • Banana + peanut butter
  • Raspberries + chia seeds
  • Apple + cinnamon + chopped pecans

The goal is not to make breakfast complicated. A few simple toppings can turn basic oatmeal into a flavorful meal that is easy to prepare on busy mornings.

3. Swap Potato Chips for Air-Popped Popcorn

If you enjoy crunchy snacks, you do not have to eliminate them to make a healthier choice. Air-popped popcorn can satisfy the desire for something crisp while giving you a whole-grain snack option.

The key is how you prepare and season it. Heavy amounts of butter, salt, or sugary coatings can quickly change the nutrition of the snack.

Step-by-step swap

  1. Prepare plain air-popped popcorn.
  2. Place it in a large bowl while it is still warm.
  3. Add a light amount of seasoning.
  4. Toss the popcorn well so the flavor spreads evenly.
  5. Store extra popcorn in an airtight container for later.

Flavor ideas

  • Garlic powder + black pepper
  • Cinnamon + a small amount of honey
  • Smoked paprika + light seasoning
  • Nutritional yeast + garlic powder
  • Italian herbs + black pepper

This swap works well for movie nights, afternoon snacks, or when you want something crunchy between meals.

4. Swap Sour Cream for Plain Greek Yogurt

Sour cream is a popular topping for baked potatoes, tacos, chili, and Mexican-inspired dishes. Plain Greek yogurt has a similar creamy consistency and tangy taste, making it an easy substitution.

You can use it directly from the container or season it to match your meal.

Step-by-step swap

  1. Spoon plain Greek yogurt into a small bowl.
  2. Add lime juice for tacos or burrito bowls.
  3. Mix in cilantro, garlic, or green onions if desired.
  4. Add black pepper or a small amount of seasoning.
  5. Use it as a topping just as you would sour cream.

Try it with

  • Baked potatoes
  • Tacos
  • Burrito bowls
  • Chili
  • Roasted vegetables
  • Homemade dips

This simple change can make familiar comfort foods fit more easily into a balanced eating routine.

5. Swap Sugary Soda for Sparkling Water With Fresh Fruit

Soda can be an easy drink to reach for, especially with lunch or dinner. If you enjoy carbonation, sparkling water can provide the fizz without the added sugar found in regular sugary soda.

Choose plain or unsweetened sparkling water and add fruit for flavor. Lemon, lime, orange, berries, cucumber, and mint can all make the drink more interesting.

Step-by-step swap

  1. Fill a glass with ice.
  2. Add a few slices of fresh fruit.
  3. Pour in chilled sparkling water.
  4. Add fresh mint or a squeeze of citrus if desired.
  5. Serve immediately for the best fizz.

Refreshing combinations

  • Lemon + mint
  • Lime + cucumber
  • Strawberry + lemon
  • Orange + lime
  • Blueberry + lemon

If you usually drink several sugary beverages each day, replacing even one with an unsweetened option is a simple place to begin.

How to Make Healthy Food Swaps Stick

The easiest way to build better eating habits is to make changes that feel realistic. You do not need to replace everything in your pantry or completely redesign your meals.

Step 1: Choose one swap

Pick the food you eat most often and start there. A small change is easier to repeat than a strict plan that feels difficult to maintain.

Step 2: Keep the replacement available

Buy Greek yogurt, oats, berries, popcorn, sparkling water, and other alternatives during your regular grocery trip. Having them ready makes the healthier choice more convenient.

Step 3: Keep your favorite flavors

Use herbs, spices, citrus, garlic, and fresh produce to make simple ingredients more enjoyable. Healthy eating should still taste good.

Step 4: Adjust portions and ingredients

A healthier ingredient can still contribute calories, sugar, sodium, or saturated fat depending on the product and serving size. Check nutrition labels when comparing packaged foods.

Step 5: Build variety

Do not rely on the same foods every day. Rotate fruits, vegetables, whole grains, protein foods, and healthy toppings to keep meals interesting.

Why Small Food Changes Matter

Healthy eating is often easier when you focus on what you can add or replace rather than what you must completely avoid. Adding fruit to breakfast, choosing whole grains more often, and replacing sugary drinks are practical steps that can fit into everyday life.

You can also use these swaps as a starting point for other meals. Once you find a replacement that works, look for another small change. Over time, several simple choices can create a more balanced kitchen routine.

Remember that food needs vary from person to person. If you have a medical condition, food allergy, or specific dietary requirement, choose substitutions that fit your individual needs and ask a qualified healthcare professional for personalized guidance.

Frequently Asked Questions

1. What are the easiest healthy food swaps to start with?

Start with one familiar change, such as Greek yogurt instead of sour cream or sparkling water instead of sugary soda.

2. Is Greek yogurt healthier than mayonnaise?

Plain Greek yogurt can provide protein and may contain less saturated fat than mayonnaise, but nutrition varies by product, so compare labels.

3. Is oatmeal a healthy breakfast choice?

Oatmeal can be a nutritious breakfast, especially when paired with fruit, nuts, seeds, or another protein-rich food.

4. Is air-popped popcorn a healthy snack?

Plain air-popped popcorn is a whole-grain snack, but large amounts of butter, salt, or sweet toppings can add significant calories and sodium.

5. Can I use Greek yogurt instead of sour cream?

Yes, plain Greek yogurt works well as a topping for tacos, baked potatoes, chili, dips, and many other dishes.

6. Is sparkling water better than soda?

Unsweetened sparkling water does not contain the added sugar found in regular soda, making it a useful beverage swap.

7. Do healthy food swaps have to be expensive?

Not necessarily; affordable staples such as oats, beans, popcorn, seasonal produce, and plain yogurt can support budget-friendly meals.

8. How many food swaps should I make at once?

Start with one or two swaps that fit your routine, then add more as they become easy and familiar.