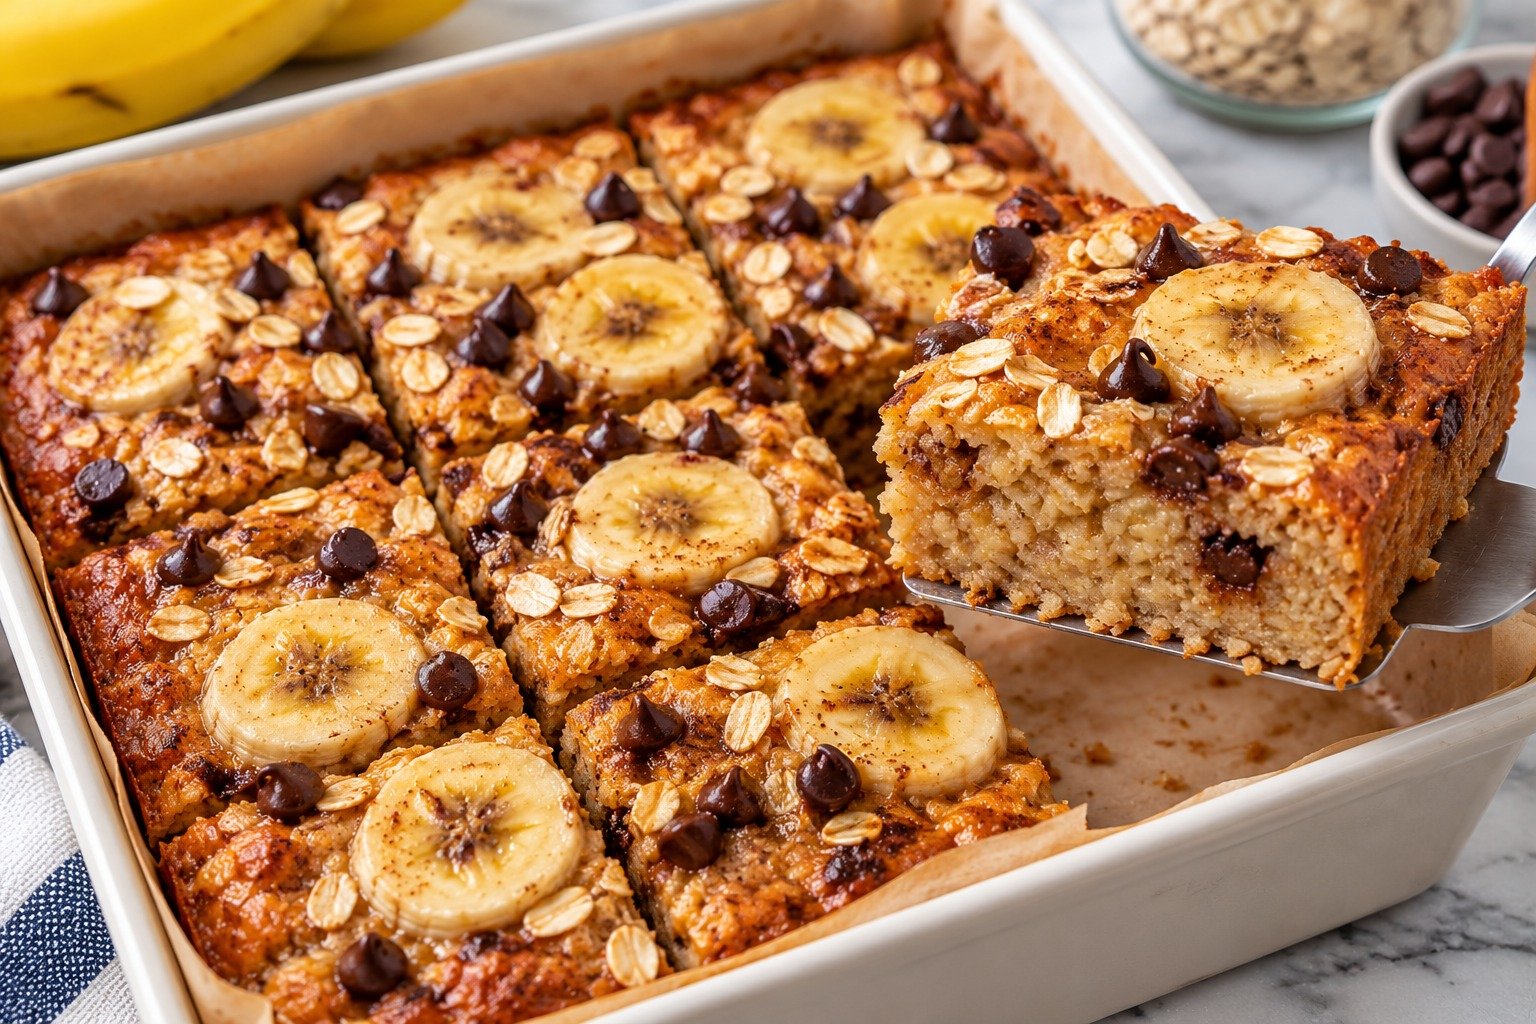
Banana Oat Pan Snack

Banana Oat Pan Snack with ripe bananas, rolled oats, cinnamon, berries, nuts, and a soft golden pan-cooked texture

Banana Oat Pan Snack

Banana Oat Pan Snack is a soft, naturally sweet, and easy stovetop treat made with ripe bananas, rolled oats, eggs, cinnamon, and simple pantry ingredients. It cooks in one pan and works well for breakfast, an afternoon snack, or a quick homemade treat without turning on the oven.

This Banana Oat Pan Snack has a tender center, lightly golden edges, and plenty of cozy banana flavor. Keep it simple or add chocolate chips, nuts, berries, or yogurt on top.

Prep Time: 10 minutes
Cook Time: 12–15 minutes
Total Time: 25 minutes
Servings: 4

Ingredients

For the Pan Snack

  • 2 large ripe bananas
  • 1 1/2 cups rolled oats
  • 2 large eggs
  • 1/2 cup milk of choice
  • 1 teaspoon vanilla extract
  • 1 teaspoon ground cinnamon
  • 1/2 teaspoon baking powder
  • 1 tablespoon honey or maple syrup, optional
  • 1 tablespoon melted butter or neutral oil
  • Pinch of salt

Optional Add-Ins

  • 1/4 cup dark chocolate chips
  • 1/4 cup chopped walnuts or pecans
  • 1/3 cup blueberries
  • 2 tablespoons raisins
  • 1 tablespoon chia seeds
  • 1 tablespoon shredded coconut

For Serving

  • Banana slices
  • Greek yogurt
  • Nut butter
  • Honey or maple syrup
  • Fresh berries
  • Ground cinnamon

Why You’ll Love This Recipe

Banana Oat Pan Snack is quick, filling, and made with ingredients many people already keep at home. Banana provides natural sweetness, while oats give the snack a satisfying texture that feels more substantial than a simple pancake.

Another reason to love Banana Oat Pan Snack is its flexibility. Make it sweeter for dessert, lightly sweet for breakfast, or add nuts and seeds for extra texture. Everything cooks in one skillet, so cleanup is easy.

How to Make Banana Oat Pan Snack

Step 1: Mash the Bananas

Peel the bananas and place them in a large mixing bowl.

Mash thoroughly with a fork until mostly smooth. A few small banana pieces are fine and add extra texture.

Very ripe bananas work best for Banana Oat Pan Snack because they are softer, sweeter, and easier to combine with the other ingredients.

Step 2: Add the Wet Ingredients

Add the eggs, milk, vanilla, honey or maple syrup if using, and melted butter or oil.

Whisk until well combined. The mixture should look smooth and slightly loose.

Step 3: Add the Dry Ingredients

Stir in the rolled oats, cinnamon, baking powder, and salt.

Mix until all the oats are coated.

Let the mixture rest for 5 minutes. This gives the oats time to absorb some liquid and helps Banana Oat Pan Snack cook into a soft, cohesive layer instead of a loose oatmeal mixture.

Step 4: Add Optional Extras

Fold in chocolate chips, nuts, blueberries, raisins, chia seeds, or coconut if desired.

Use one or two add-ins rather than too many so the mixture cooks evenly.

Step 5: Heat the Pan

Place a nonstick or well-seasoned skillet over low to medium-low heat.

Lightly grease the pan with butter or oil.

A 9- or 10-inch skillet works well because it gives Banana Oat Pan Snack enough thickness to stay tender inside while the bottom becomes golden.

Step 6: Add the Batter

Pour the mixture into the skillet and spread it into an even layer with a spatula.

Cover with a lid and cook over low heat for 7 to 9 minutes, or until the edges look set and the bottom is golden.

Keep the heat low because banana and oats can brown quickly.

Step 7: Flip Carefully

Once the bottom is firm, slide the snack onto a large plate.

Place the skillet upside down over the plate, then carefully flip everything so the uncooked side lands back in the pan.

If you prefer not to flip it, continue cooking covered over very low heat until the center sets.

Step 8: Finish Cooking

Cook the second side for 4 to 6 minutes.

Banana Oat Pan Snack is ready when both sides are lightly golden and the center feels set when gently pressed.

Avoid cooking it too long because the oats can become dry.

Step 9: Rest Before Slicing

Transfer the cooked snack to a board or plate.

Let it rest for 5 minutes before slicing.

This allows Banana Oat Pan Snack to firm slightly, making it easier to cut into wedges or squares.

Step 10: Add Toppings and Serve

Top with banana slices, berries, Greek yogurt, peanut butter, or a small drizzle of honey.

Serve warm or at room temperature.

Serving Suggestions

Banana Oat Pan Snack can be served differently depending on whether you want breakfast, a snack, or dessert.

For breakfast, enjoy it with Greek yogurt, fresh berries, and a spoonful of peanut or almond butter.
As an afternoon snack, Banana Oat Pan Snack pairs well with milk, coffee, or tea.
For a sweeter treat, mix in dark chocolate chips and finish with banana slices and a light drizzle of maple syrup.

Once cooled completely, you can also cut it into small squares for lunchboxes or grab-and-go snacks.

For another cozy and flavorful slow-cooker meal, try our Crockpot Apple Cider Pulled Pork with tender meat and warm fall-inspired flavor.

Recipe Tips

Use very ripe bananas with plenty of brown spots for the best sweetness and moisture.

Keep the heat low so the bottom does not burn before the center sets.

Use a lid during the first part of cooking to trap gentle heat.

Let the oat mixture rest before cooking so the oats soften slightly.

If the batter looks too thick, add one or two tablespoons of milk.

For the best Banana Oat Pan Snack texture, avoid overcooking.

If adding berries, use a moderate amount because too much fruit can release excess moisture.

A wide spatula or plate makes flipping much easier.

Easy Variations

Banana Oat Pan Snack can be customized in many simple ways.

For a chocolate version, add 1 tablespoon cocoa powder and a few dark chocolate chips.

For a nutty version, add chopped walnuts, pecans, or almonds with a spoonful of peanut butter.

Make a berry version using blueberries, raspberries, or diced strawberries.

For extra fiber, add chia seeds or ground flaxseed.

For warmer flavor, add a pinch of nutmeg, ginger, or cardamom.

You can also make Banana Oat Pan Snack with dairy-free milk and oil instead of butter.

If you enjoy hearty protein-packed meals, you may also like our Loaded Purple Sweet Potato with Steak & Eggs.

Make-Ahead Instructions

This recipe can be prepared ahead for busy mornings.

Mix the dry ingredients the night before and keep them covered at room temperature. Mash the banana and combine the full batter shortly before cooking for the best texture.

You can also cook the entire snack ahead, cool it completely, and refrigerate it in an airtight container.

Storage and Reheating

Store leftover Banana Oat Pan Snack in an airtight container in the refrigerator for up to 3 days.

Reheat slices in a dry skillet over low heat for a few minutes per side, or microwave them in short intervals until warm.

For longer storage, freeze individual slices between pieces of parchment for up to 2 months. Thaw overnight in the refrigerator or reheat gently from frozen.

Nutrition Information

Approximate nutrition per serving without optional toppings:

Calories: 285
Protein: 9 g
Carbohydrates: 44 g
Fat: 9 g
Saturated Fat: 3 g
Fiber: 5 g
Sugar: 14 g
Sodium: 180 mg

Nutrition values are estimates and may vary depending on the milk, sweetener, toppings, and add-ins used.

Frequently Asked Questions

Can I use quick oats instead of rolled oats?

Yes. Quick oats create a softer, more uniform texture, while rolled oats give a slightly chewier bite.

Can I make this without eggs?

Yes. Flax eggs can work, although the finished snack may be softer and more delicate when flipping.

Can I bake it instead?

Yes. Pour the mixture into a greased baking dish and bake at 350°F or 175°C until set and lightly golden.

Can I make it dairy-free?

Yes. Use unsweetened plant-based milk and replace butter with oil.

How do I stop it from sticking?

Use a good nonstick skillet, grease it lightly, and allow the first side to become fully set before flipping.

Can I make it without added sugar?

Yes. Very ripe bananas may provide enough sweetness without honey or maple syrup.

Is it good for meal prep?

Yes. Banana Oat Pan Snack stores well in the refrigerator and can be reheated in individual portions.

Final Thoughts

Banana Oat Pan Snack is a simple way to turn ripe bananas and oats into a warm homemade breakfast or snack without using the oven. The texture is soft, lightly sweet, and easy to customize with chocolate, nuts, berries, seeds, or spices.

Because it uses basic ingredients and cooks in one skillet, it is especially useful for busy mornings and quick snack preparation.

Keep this Banana Oat Pan Snack recipe handy whenever you want an easy, comforting, and customizable oat-based treat.
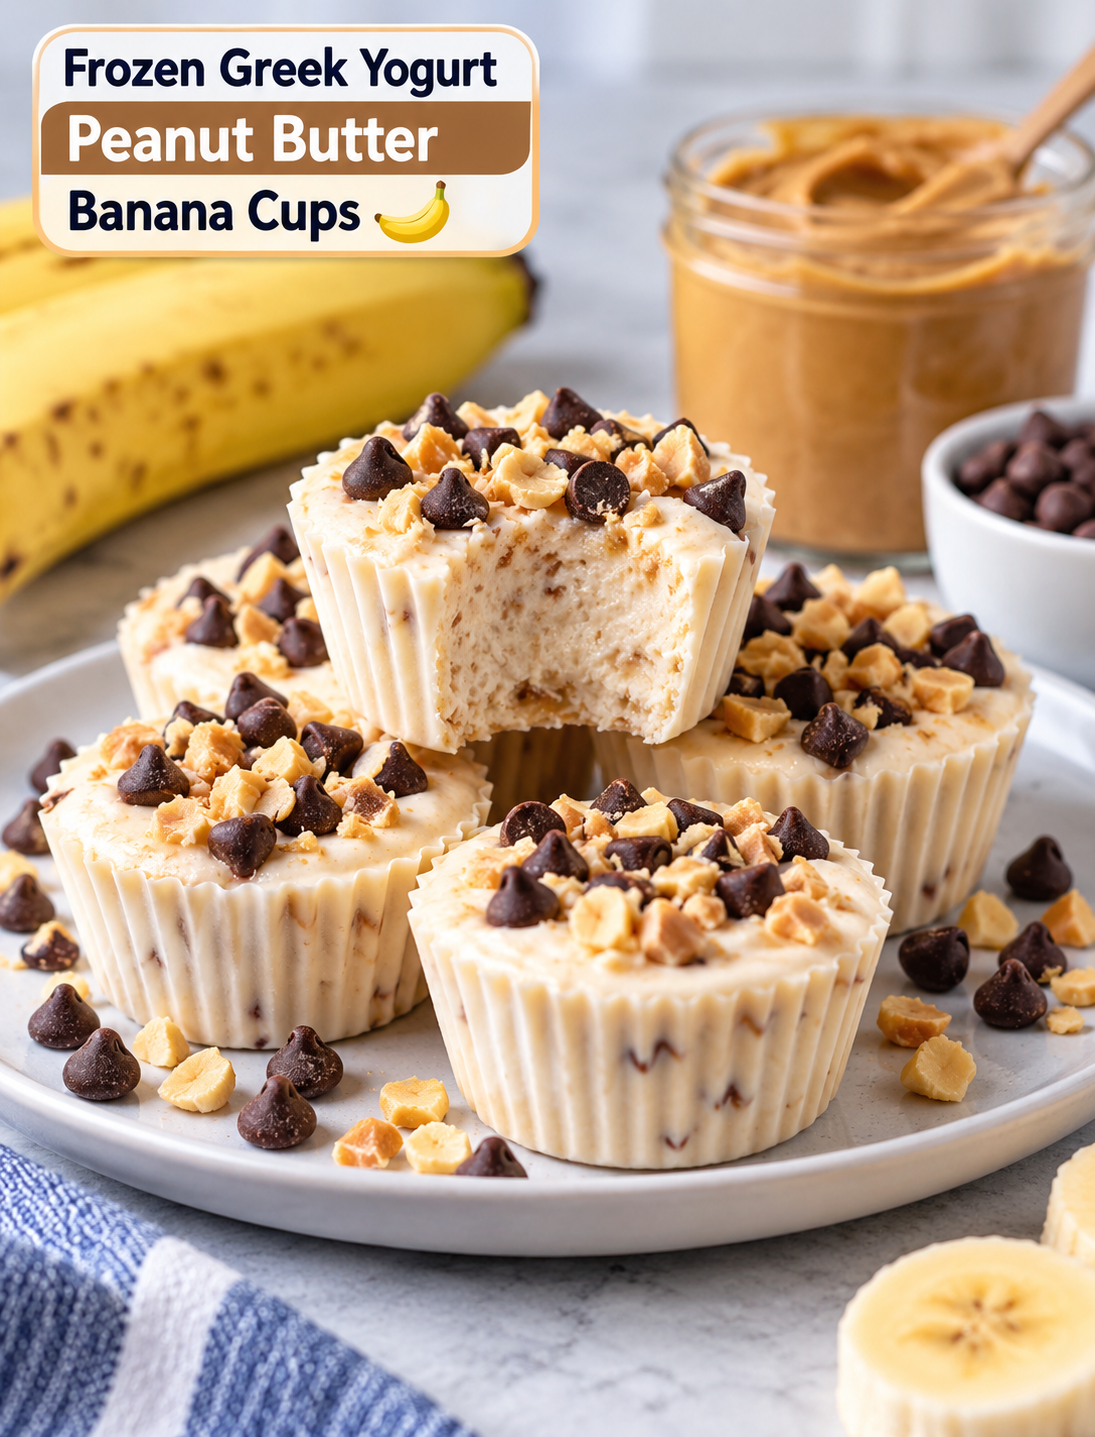
Frozen Greek Yogurt Peanut Butter Banana Cups

Frozen Greek yogurt peanut butter banana cups topped with chocolate chips and crushed peanuts

Frozen Greek Yogurt Peanut Butter Banana Cups

Introduction

These Frozen Greek Yogurt Peanut Butter Banana Cups are an easy frozen snack made with creamy Greek yogurt, ripe banana, and peanut butter. The combination gives you a soft, creamy center with a naturally sweet peanut butter and banana flavor.

They are a simple choice when you want something cold and satisfying without making a complicated dessert. Each bite combines protein-rich Greek yogurt, healthy fats from peanut butter, and the natural sweetness of banana.

You only need a few basic ingredients and about 10 minutes of prep time. After that, the freezer does the rest of the work. These frozen yogurt cups are also easy to portion, making them useful for an afternoon snack, quick breakfast bite, or simple after-dinner treat.

For busy families, they are especially convenient because you can prepare a batch ahead of time and keep the cups frozen for up to one month.

Prep & Freeze Time

  • Prep Time: 10 minutes
  • Freeze Time: 2 hours
  • Total Time: 2 hours 10 minutes
  • Servings: 12 mini cups or 6 standard muffin cups

Ingredients

  • 1 ripe banana: Use a ripe banana with plenty of natural sweetness for the best flavor.
  • ¾ cup plain or vanilla Greek yogurt: Greek yogurt creates a thick, creamy texture and adds protein.
  • ¼ cup natural peanut butter: Choose creamy or crunchy peanut butter based on your preferred texture.
  • 1–2 teaspoons honey or maple syrup: Add this only if you want extra sweetness.
  • ½ teaspoon vanilla extract: Vanilla adds a smooth dessert-like flavor.
  • Pinch of salt: A small amount balances the sweetness and brings out the peanut butter flavor.
  • ¼ cup mini chocolate chips or chopped dark chocolate: Use as an optional topping for a richer finish.
  • Crushed peanuts or granola: Add these optional toppings for extra crunch.

For the creamiest result, use thick Greek yogurt rather than a thin yogurt variety. If your peanut butter is very thick, stir it well before adding it to the mixture.

Instructions

1. Prepare the filling

Start by peeling the ripe banana and mashing it in a medium mixing bowl until mostly smooth. Small pieces of banana are fine and can add extra texture.

Add the Greek yogurt, peanut butter, vanilla extract, and a pinch of salt. Stir the ingredients together until the mixture looks creamy and evenly combined.

Taste the mixture before adding sweetener. A very ripe banana may provide enough sweetness on its own. If you want a sweeter snack, mix in 1–2 teaspoons of honey or maple syrup.

Helpful point: Do not overmix the ingredients for too long. Stir just until everything is evenly blended.

2. Line your tray

Place silicone or paper liners into a muffin tin. Use a mini muffin tin for small bite-size cups or a standard muffin tin for larger portions.

Silicone liners make the frozen cups easier to remove, while paper liners are convenient and easy to use.

Make sure the tray sits on a flat surface before filling it. A level tray helps the mixture freeze evenly.

3. Fill the cups

Spoon the yogurt mixture into each prepared liner.

For mini cups, use about 1–2 tablespoons of filling per liner. For standard muffin cups, use about 3–4 tablespoons.

Leave a little room at the top if you plan to add several toppings. Gently tap the muffin tray against the counter to help the mixture settle and level.

Helpful point: Keep the portions similar in size so all of the cups freeze at about the same rate.

4. Add toppings

Sprinkle the cups with mini chocolate chips, chopped dark chocolate, crushed peanuts, or granola.

For a chocolate-peanut butter flavor, drizzle a small amount of melted dark chocolate over the tops before freezing.

You can also leave some cups plain if you want different flavors in the same batch.

Helpful point: Add crunchy toppings before freezing so they stick to the creamy mixture.

5. Freeze

Place the muffin tray in the freezer and freeze the cups for at least 2 hours, or until they are firm and completely set.

Keep the tray level while the cups freeze. Avoid opening the freezer repeatedly during the first hour because temperature changes can slow the freezing process.

Once frozen, transfer the cups to an airtight container or freezer-safe bag if you want to save freezer space.

6. Serve

Remove the frozen cups from the freezer about 2–3 minutes before eating. This short resting time allows the center to soften slightly while keeping the snack cold and firm.

Enjoy them straight from the freezer as a quick snack or sweet treat.

For easy portion control, take out only the number of cups you plan to eat and return the rest to the freezer immediately.

Tips

Use a ripe banana: A ripe banana gives the cups more natural sweetness and a stronger banana flavor.

Try frozen banana: Using frozen banana can create a thicker and creamier mixture, although the banana should be thawed enough to mash and blend smoothly.

Choose thick Greek yogurt: A thick yogurt helps the frozen cups hold their shape and gives them a richer texture.

Adjust the sweetness: Start without honey or maple syrup, taste the mixture, and add a small amount only if needed.

Make a chocolate version: Add a little unsweetened cocoa powder to the mixture for a chocolate peanut butter flavor.

Try different nut butters: Almond butter, cashew butter, or sunflower seed butter can replace peanut butter.

Add cinnamon: A small pinch of cinnamon works well with the banana and peanut butter combination.

Create a layered treat: Add a thin layer of melted dark chocolate to the bottom of each liner, let it firm up, then add the yogurt mixture for a peanut butter cup-inspired dessert.

Make them kid-friendly: Let children choose their own toppings, such as mini chocolate chips, granola, or crushed peanuts.

Store properly: Keep the frozen cups in a sealed freezer-safe container or bag for up to 1 month for the best texture and flavor.

Nutrition

The approximate nutrition for one mini cup is:

  • Calories: 80
  • Protein: 4g
  • Fat: 4.5g
  • Carbohydrates: 6g
  • Sugar: 4g
  • Fiber: 1g

Nutrition values can vary depending on the Greek yogurt, peanut butter, sweetener, chocolate, and toppings you use.

Q&A

Q: Can I make these frozen yogurt cups dairy-free?
Yes. Use a thick dairy-free Greek-style yogurt made from coconut, almond, or another suitable plant-based option.

Q: Can I add protein powder?
Yes. Add 1–2 tablespoons of vanilla or unflavored protein powder and mix until smooth.

Q: Can I use regular yogurt instead of Greek yogurt?
Yes, but Greek yogurt provides a thicker texture, so regular yogurt may produce softer frozen cups.

Q: How long can I keep them in the freezer?
Store them in an airtight freezer-safe container for up to 1 month for the best quality.

Q: Can I make these without honey or maple syrup?
Yes. A ripe banana can provide enough natural sweetness, so extra sweetener is optional.

Q: Can I use almond butter instead of peanut butter?
Yes. Almond butter works well and gives the cups a slightly different nutty flavor.

Q: How do I make them taste more like Reese’s cups?
Add a thin dark chocolate layer and peanut butter topping for a chocolate-peanut butter cup-style flavor.

Q: Are these suitable for kids?
Yes. They are easy to portion and can be made with simple toppings that kids enjoy.

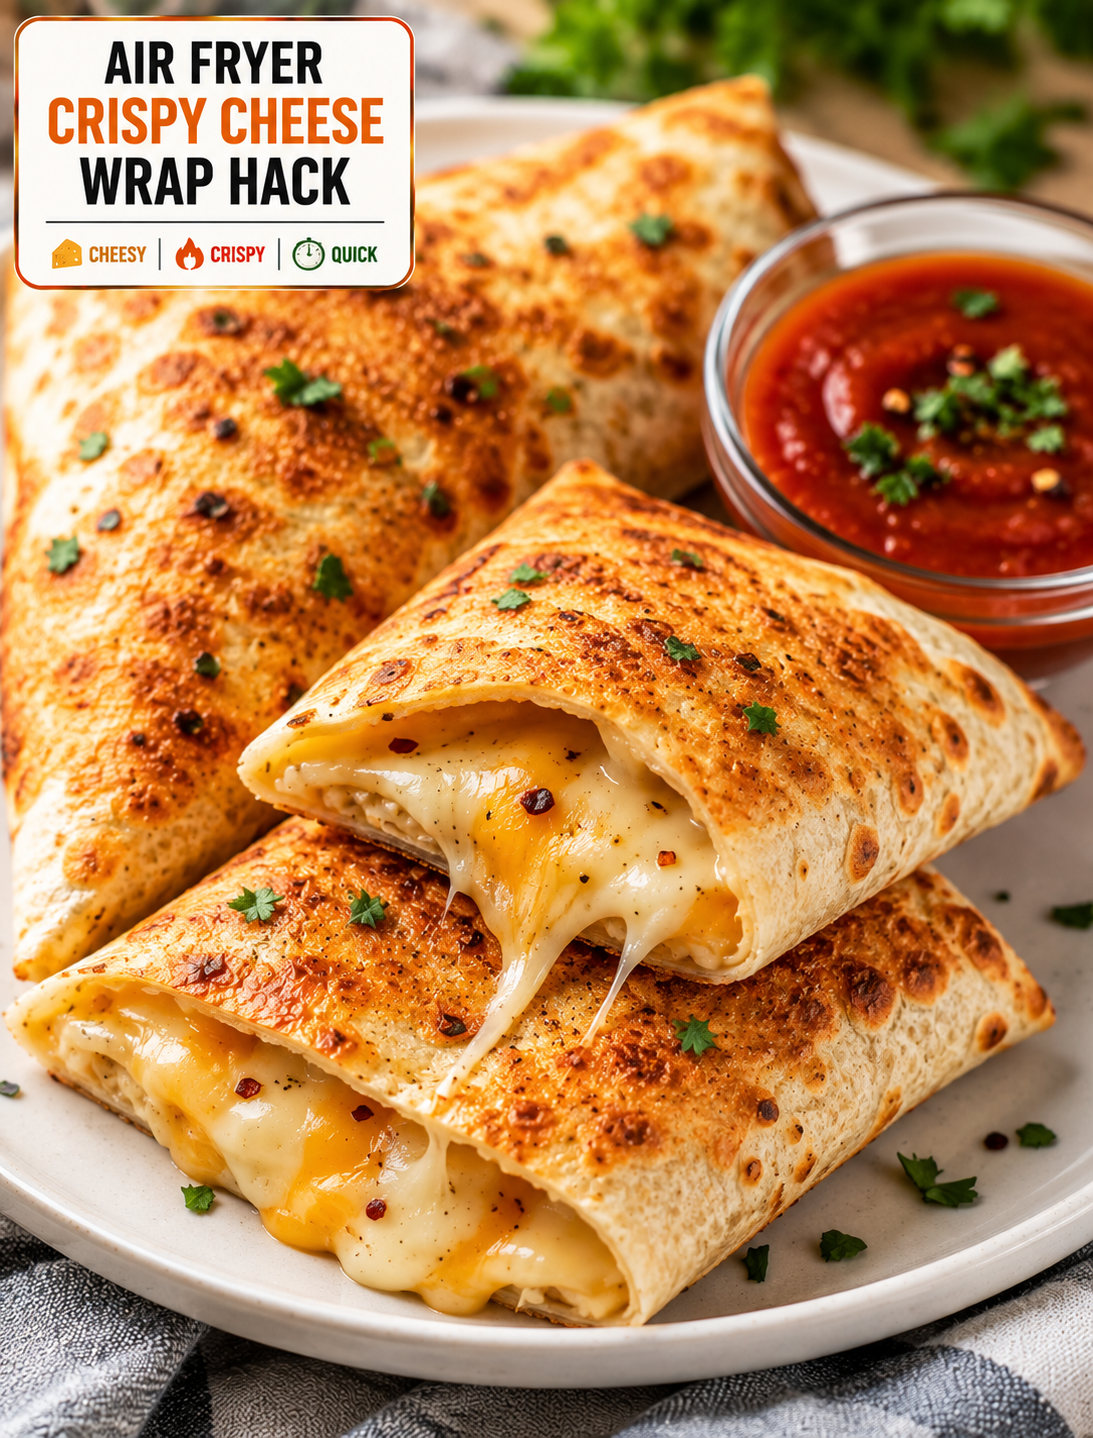
Air Fryer Crispy Cheese Wrap Hack

Golden crispy air fryer cheese wrap sliced open to reveal gooey melted cheese, served with dipping sauce and fresh herbs

Air Fryer Crispy Cheese Wrap Hack

Want a quick snack that turns a few simple ingredients into something crispy, cheesy, and seriously satisfying? This Air Fryer Crispy Cheese Wrap Hack is an easy recipe for busy days, quick lunches, after-school snacks, and casual gatherings.

A soft flour tortilla is filled with shredded cheese and simple seasonings, folded into a compact wrap, and cooked in the air fryer until the outside becomes golden and crisp. Inside, the cheese melts into a warm, gooey filling.

The recipe is easy to change based on what you already have in the refrigerator. Add cooked chicken, turkey, vegetables, jalapeños, or leftover taco meat for a more filling version.

The air fryer is the key to getting a crisp finish without deep frying. A light coating of oil or cooking spray is enough to help the tortilla brown evenly.

Why You’ll Love This Crispy Cheese Wrap

This recipe is fast, simple, and made with everyday ingredients.

The tortilla becomes crisp around the edges while the cheese melts inside. That combination gives the wrap a texture similar to a crispy quesadilla but with a tighter, snack-friendly shape.

You can prepare one wrap when you are hungry or make several for a family snack.

The recipe is also budget-friendly because it does not require expensive ingredients. Basic flour tortillas, shredded cheese, and seasonings are enough to make a tasty snack.

Another advantage is flexibility. Use cheddar for a sharp flavor, Monterey Jack for a smooth melt, or pepper Jack for extra heat.

You can also use small tortillas for snack-size wraps or larger tortillas when you want a more filling meal.

Ingredients You’ll Need

  • 4 large flour tortillas
  • 1½ cups shredded cheddar cheese
  • 1 cup shredded Monterey Jack cheese
  • Melted butter or olive oil 1 tablespoon
  • Garlic powder ½ teaspoon
  • Smoked paprika ½ teaspoon
  • ¼ teaspoon black pepper
  • Dried oregano ¼ teaspoon
  • 2 tablespoons chopped green onions
  • 1 small jalapeño, finely sliced, optional
  • Cooking spray

Optional Add-Ins

  • 1 cup cooked shredded chicken
  • Cooked taco meat ½ cup
  • Diced bell peppers ½ cup
  • ½ cup cooked corn
  • ¼ cup chopped black olives
  • 2 tablespoons chopped fresh cilantro
  • Sliced turkey

For the best texture, avoid adding too many wet ingredients. Excess moisture can make the tortilla soft instead of crisp.

Freshly shredded cheese usually melts smoothly and evenly. You can also use a pre-shredded blend when convenience matters.

How to Make the Air Fryer Cheese Wrap

1. Prepare the Cheese Filling

Add the cheddar and Monterey Jack cheese to a bowl.

Mix in garlic powder, smoked paprika, black pepper, oregano, and chopped green onions.

If you want extra heat, add finely sliced jalapeño.

Stir everything together so the seasonings are distributed throughout the cheese.

If you are adding chicken or taco meat, make sure it is already cooked and not overly wet.

2. Warm the Tortillas

Place the tortillas on a microwave-safe plate.

Warm them for about 10–15 seconds.

This makes the tortillas more flexible and helps prevent cracking when you fold them.

Keep the remaining tortillas covered with a clean kitchen towel while working.

3. Fill the Tortilla

Place one tortilla on a clean work surface.

Add about ¾ cup of the cheese mixture near the center.

Leave a border around the edges so the cheese does not spill out during cooking.

If adding chicken, vegetables, or meat, use a small amount so the wrap remains easy to fold.

Do not overfill the tortilla because a thick wrap takes longer to crisp and may open during cooking.

4. Fold the Wrap

Left side fold and right sides of the tortilla toward the center.

Fold the bottom edge over the filling.

Roll the tortilla upward tightly until the filling is enclosed.

Place the finished wrap seam-side down while you prepare the remaining wraps.

Keeping the seam underneath helps prevent the tortilla from opening in the air fryer.

5. Brush With Oil

Lightly brush the outside of each wrap with melted butter or olive oil.

You can also use cooking spray.

A thin coating is enough. Too much oil can make the tortilla greasy instead of crisp.

For extra flavor, mix a pinch of garlic powder and smoked paprika into the melted butter before brushing.

6. Air Fry Until Golden

Preheat your air fryer to 375°F if your model requires preheating.

Place the wraps seam-side down in the basket.

Leave space between each wrap so hot air can circulate properly.

Air fry for about 6–9 minutes, turning carefully halfway through.

The wraps are ready when the tortillas are golden brown and crisp and the cheese is fully melted.

Air fryer models vary, so begin checking around the six-minute mark.

7. Rest and Slice

Carefully remove the hot wraps from the basket.

Let them rest for about 1–2 minutes.

This gives the melted cheese time to settle slightly.

Slice each wrap diagonally and serve immediately.

The contrast between the crisp tortilla and warm melted cheese is best when the wraps are fresh.

The Best Cheese for Crispy Wraps

Cheese choice can change the texture and flavor of the finished wrap.

Cheddar provides a rich, slightly sharp flavor and melts well.

Monterey Jack has a mild taste and creates a smooth, creamy filling.

Pepper Jack adds both creaminess and a noticeable spicy kick.

Mozzarella creates a stretchy cheese center with a mild flavor.

Colby Jack is another good option because it melts easily and has a balanced taste.

For the best result, combine two cheeses. A sharp cheese paired with a mild melting cheese creates more flavor without becoming overpowering.

How to Make the Wrap Extra Crispy

The biggest mistake is adding too much filling.

A thinner layer of cheese allows the tortilla to cook evenly and become crisp.

Keep the outside of the tortilla relatively dry before adding the light oil coating.

Do not overcrowd the air fryer basket.

Leave enough space around each wrap for hot air to circulate.

Turn the wraps halfway through cooking to brown both sides.

For an even crunchier finish, add another 1–2 minutes of cooking time, but watch closely because tortillas can brown quickly.

Serve the wraps soon after cooking because steam from the hot filling can soften the exterior if they sit too long.

Easy Add-Ins to Try

This recipe is a great way to use small amounts of leftovers.

Add cooked shredded chicken for a simple chicken cheese wrap.

Use leftover taco meat with cheddar and jalapeño for a Tex-Mex version.

Add cooked bell peppers and onions for extra flavor and texture.

Corn adds a mild sweetness that works well with pepper Jack.

Chopped spinach can add color without changing the recipe very much.

For a breakfast version, add scrambled eggs, cooked bacon, and cheddar.

Deli-style wrap, use sliced turkey, Swiss cheese, and a little mustard.

Keep add-ins fairly dry so the tortilla can still become crisp.

Dipping Sauces for Cheese Wraps

A crispy cheese wrap becomes even better with the right dipping sauce.

Ranch dressing provides a cool and creamy contrast.

Salsa adds fresh tomato flavor and a little acidity.

Guacamole works well with Tex-Mex versions.

Quest creates an extra-cheesy combination for serious cheese lovers.

Hot sauce is an easy choice when you want more heat.

Chipotle mayo adds smoky spice and creaminess.

For kids, ketchup or a mild creamy dip can be served on the side.

Place several sauces on the table when serving a group so everyone can choose a favorite.

What to Serve With Crispy Cheese Wraps

These wraps can be served as a snack or as part of a larger meal.

Pair them with a fresh green salad for a simple lunch.

Serve them with tomato soup for a comforting combination.

For a Tex-Mex meal, add black beans, corn salsa, guacamole, and fresh pico de gallo.

Air fryer potato wedges also make a great side.

For breakfast, serve a cheese and egg version with fresh fruit.

For game day, cut the wraps into smaller pieces and serve them with several dipping sauces.

Can You Make These Wraps Ahead?

Yes, you can prepare the wraps ahead of time.

Assemble them and place them in the refrigerator in a covered container.

For the best texture, air fry them shortly before serving.

Avoid leaving assembled wraps at room temperature for long periods when they contain cooked meat or other perishable ingredients.

If you are preparing several wraps for a gathering, make the filling ahead and assemble the tortillas closer to cooking time.

This helps prevent moisture from softening the tortillas.

Storage and Reheating

Store leftover cooked wraps in an airtight container in the refrigerator.

For the best texture, reheat them in the air fryer at 350°F for about 3–5 minutes.

The air fryer helps bring back some of the crisp texture while warming the cheese.

Avoid using the microwave when possible because microwave heating can make the tortilla soft.

If you are reheating a wrap containing chicken or other cooked meat, make sure the filling is heated thoroughly before serving.

Discard leftovers that have an unusual smell, appearance, or texture.

Simple Variations

Spicy Jalapeño Cheese Wrap

Add sliced jalapeños, pepper Jack cheese, and a pinch of crushed red pepper.

Chicken Ranch Wrap

Add shredded cooked chicken, cheddar cheese, and ranch seasoning.

Taco Cheese Wrap

Combine cooked taco meat, cheddar, Monterey Jack, and a little salsa.

Breakfast Cheese Wrap

Fill the tortilla with scrambled eggs, cheddar, and cooked bacon.

Pizza Cheese Wrap

Add mozzarella, a small amount of pizza sauce, and Italian seasoning.

BBQ Chicken Wrap

Combine shredded chicken, cheddar, and a small amount of barbecue sauce.

These variations allow you to use the same basic air fryer method while creating completely different flavors.

Tips for the Best Results

Use soft flour tortillas that fold without cracking.

Warm the tortillas briefly before filling them.

Do not overfill the wraps.

Keep wet ingredients to a minimum.

Use a light layer of oil or cooking spray.

Place the wraps seam-side down in the basket.

Leave space between the wraps.

Turn them halfway through cooking.

Watch carefully during the final minutes because tortillas can brown quickly.

Allow the wraps to rest briefly before slicing.

Serve them while warm for the best crisp texture.

The Bottom Line

Air Fryer Crispy Cheese Wraps are an easy solution when you want something quick, cheesy, and crunchy without complicated preparation.

A few basic ingredients turn into a golden snack with a crisp tortilla and warm, melted cheese. The recipe is flexible enough to include chicken, taco meat, vegetables, eggs, or whatever leftovers you have available.

The air fryer makes the process especially simple. A light coating of oil, enough space in the basket, and a short cooking time are all you need for a delicious result.

Serve these wraps with ranch, salsa, guacamole, hot sauce, or your favorite dip.

Frequently Asked Questions

1. How long do cheese wraps take in the air fryer?

Cook them at 375°F for about 6–9 minutes, turning halfway, until the tortilla is golden and the cheese has melted.

2. What tortillas work best for this recipe?

Soft flour tortillas are ideal because they fold easily and become crisp without breaking.

3. How do I stop the cheese from leaking out?

Avoid overfilling the tortilla, leave a border around the filling, and roll the wrap tightly with the seam underneath.

4. Can I add chicken to the cheese wrap?

Yes. Add a small amount of fully cooked shredded chicken for a more filling chicken and cheese version.

5. Can I make these wraps spicy?

Yes. Use pepper Jack cheese, jalapeños, hot sauce, or crushed red pepper for extra heat.

6. Can I prepare cheese wraps ahead of time?

Yes. Assemble them ahead and refrigerate them, then air fry shortly before serving for the best crisp texture.

7. What dipping sauce goes with crispy cheese wraps?

Ranch, salsa, guacamole, quest, chipotle mayo, and hot sauce are all excellent choices.

8. Can I reheat leftover cheese wraps?

Yes. Reheat them in the air fryer at about 350°F for 3–5 minutes to restore some of the crisp texture.

Final Thoughts

This Air Fryer Crispy Cheese Wrap Hack proves that you do not need a complicated recipe to make something seriously satisfying.

The tortilla turns golden and crunchy while the cheese melts into a warm, gooey center. With a few simple add-ins, the same recipe can become a chicken wrap, taco wrap, breakfast wrap, or spicy snack.

For the crispiest result, keep the filling light, use a small amount of oil, and give each wrap enough room in the air fryer.

Crispy outside, melty inside, and ready in minutes—this is an easy recipe to keep in your back pocket for those cheesy cravings.