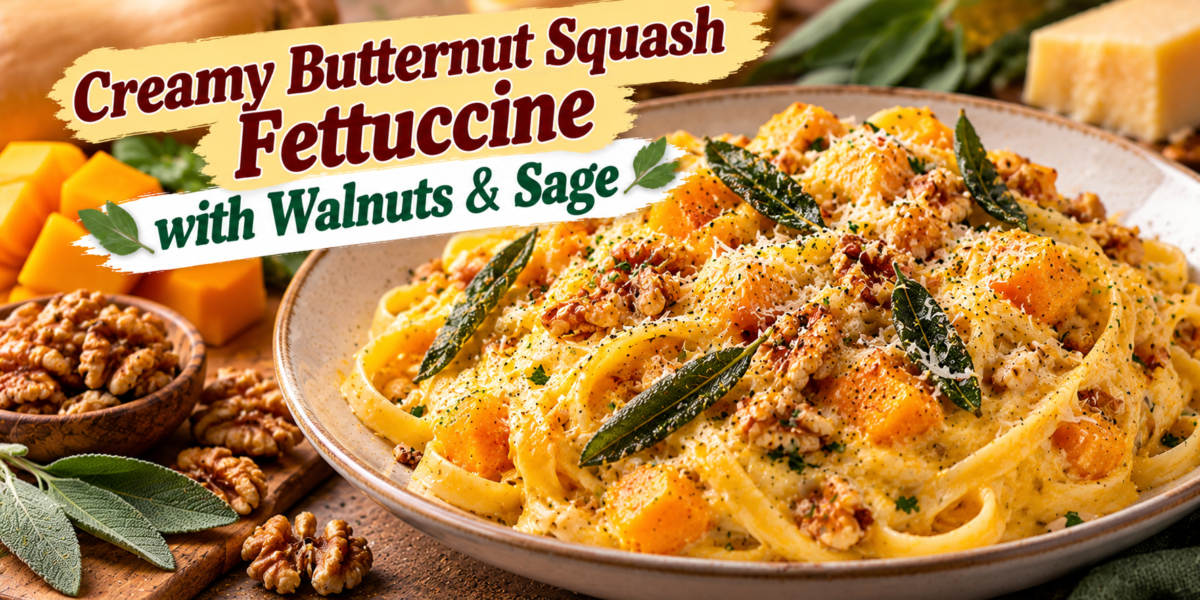
Creamy Butternut Squash Fettuccine with Walnuts & Sage

Butternut Squash Fettuccine with creamy squash sauce, Parmesan, toasted walnuts, fresh sage, and tender pasta

Creamy Butternut Squash Fettuccine with Walnuts & Sage

Butternut Squash Fettuccine is a cozy pasta dish made with silky roasted squash, garlic, Parmesan, fresh sage, toasted walnuts, and tender ribbons of fettuccine. The sauce is naturally creamy from the squash, so you get a rich texture without needing a heavy amount of cream. Sweet squash, nutty Parmesan, earthy sage, and crunchy walnuts make every bite balanced and comforting.

This Butternut Squash Fettuccine is perfect for fall dinners, holiday meals, or any night when you want a restaurant-style pasta that still feels easy to make at home. It works beautifully as a vegetarian main dish and pairs well with salads, roasted vegetables, or simple grilled protein.

Prep Time: 20 minutes
Cook Time: 35 minutes
Total Time: 55 minutes
Servings: 4

Ingredients

For the Butternut Squash Sauce

  • 3 cups peeled and cubed butternut squash
  • 2 tablespoons extra virgin olive oil
  • 1 small yellow onion, diced
  • 3 garlic cloves, minced
  • 1 teaspoon fresh sage, finely chopped
  • 1/2 teaspoon dried thyme
  • 1/2 teaspoon salt
  • 1/4 teaspoon black pepper
  • 1/8 teaspoon ground nutmeg
  • 1 1/2 cups vegetable broth
  • 1/2 cup whole milk or half-and-half
  • 1/2 cup freshly grated Parmesan cheese

For the Pasta

  • 12 ounces fettuccine
  • 1/2 cup reserved pasta water
  • 1 tablespoon butter
  • 1/3 cup walnuts, roughly chopped
  • 6 to 8 fresh sage leaves
  • 1 tablespoon fresh lemon juice

Why You’ll Love This Recipe

Butternut Squash Fettuccine has a creamy texture without relying on a heavy cream sauce. Roasted or sautéed squash blends into a naturally smooth base, while Parmesan adds savory richness.

Another reason to love Butternut Squash Fettuccine is the contrast of textures. Tender pasta and silky sauce pair with crunchy walnuts and crisp sage for a dish that feels more interesting than a basic weeknight pasta.

How to Make Butternut Squash Fettuccine

Step 1: Cook the Butternut Squash

Heat 1 tablespoon olive oil in a large skillet or Dutch oven over medium heat.

Add the butternut squash, onion, salt, and black pepper. Cook for 8 to 10 minutes, stirring occasionally, until the onion softens and the squash begins to brown lightly.

Add the garlic, chopped sage, thyme, and nutmeg. Cook for about 30 seconds until fragrant.

This aromatic base gives Butternut Squash Fettuccine its warm, savory flavor.

Step 2: Simmer Until Tender

Pour in the vegetable broth.

Bring the mixture to a gentle simmer, cover, and cook for 10 to 12 minutes, or until the squash is very tender when pierced with a fork.

Step 3: Blend the Sauce

Carefully transfer the squash mixture to a blender, or use an immersion blender directly in the pot.

Add the milk or half-and-half and blend until completely smooth.

Return the sauce to the skillet and keep it over low heat.

The sauce for Butternut Squash Fettuccine should be silky and pourable, not overly thick.

Step 4: Cook the Fettuccine

While the sauce simmers, bring a large pot of salted water to a boil.

Cook the fettuccine until al dente according to the package directions.

Before draining, reserve about 1/2 cup of pasta water.

Drain the pasta and set it aside.

Step 5: Toast the Walnuts

In a small dry skillet over medium heat, toast the chopped walnuts for 3 to 4 minutes, stirring often.

Remove them as soon as they smell fragrant and look lightly golden.

Toasted walnuts add a deep, nutty flavor that works especially well with Butternut Squash Fettuccine.

Step 6: Crisp the Sage

Add the butter to the same skillet.

Once melted, add the whole sage leaves and cook for 30 to 60 seconds per side, until crisp.

Transfer the leaves to a paper towel.

Step 7: Finish the Sauce

Stir the Parmesan into the warm squash sauce until melted.

Add lemon juice and taste for seasoning.

If the sauce is too thick, stir in a little reserved pasta water until it reaches a smooth consistency.

Butternut Squash Fettuccine tastes best when the sauce lightly coats the noodles instead of sitting too heavily on them.

Step 8: Toss with the Pasta

Add the cooked fettuccine to the skillet.

Use tongs to toss until every strand is coated.

Cook over low heat for 1 to 2 minutes so the pasta absorbs some of the sauce.

Step 9: Add Walnuts and Sage

Fold in half of the toasted walnuts.

Transfer the pasta to serving bowls and top with the remaining walnuts and crisp sage leaves.

Serve Butternut Squash Fettuccine immediately with extra Parmesan and black pepper.

Serving Suggestions

Butternut Squash Fettuccine is satisfying enough to serve as a vegetarian main dish.

Pair it with a crisp arugula salad, roasted Brussels sprouts, green beans, or garlic bread for a complete dinner.

For extra protein, serve Butternut Squash Fettuccine with grilled chicken, roasted salmon, shrimp, or white beans.

For a sweet brunch or dessert option, try our Blueberry Cream Cheese Loaf with juicy berries and a creamy cheese center.

Recipe Tips

Cut the squash into similar-size cubes so it cooks evenly.

Cook the squash until very soft before blending.

Fresh sage gives Butternut Squash Fettuccine the best flavor, especially when some leaves are crisped for garnish.

Use freshly grated Parmesan because it melts more smoothly.

Reserve pasta water before draining the noodles.

Add pasta water gradually so the sauce does not become too thin.

Toast walnuts carefully because they can burn quickly.

Serve the pasta immediately because the sauce thickens as it cools.

Easy Variations

For extra vegetables, add baby spinach to the finished sauce and stir until wilted.

Butternut Squash Fettuccine is also delicious with sautéed mushrooms, roasted broccoli, or caramelized onions.

For a richer version, replace the milk with half-and-half or add a small splash of cream.

Pecans or hazelnuts can replace the walnuts.

For extra heat, add red pepper flakes.

You can also stir in cooked chicken sausage, grilled chicken, or crispy pancetta if you do not need the recipe to stay vegetarian.

Make-Ahead Instructions

Butternut Squash Fettuccine can be partially prepared ahead.

Make the sauce up to 3 days in advance and refrigerate it in an airtight container.

Toast the walnuts and store them separately at room temperature.

When ready to serve, cook fresh pasta, gently reheat the sauce, and add a splash of broth or milk if it has thickened.

Storage and Reheating

Store leftover Butternut Squash Fettuccine in an airtight container in the refrigerator for up to 3 days.

Reheat gently in a skillet over low heat with a splash of milk, broth, or water.

You can also microwave individual portions in short intervals, stirring between each one.

The sauce will thicken in the refrigerator, so adding a little liquid is important.

Freezing the sauce alone works better than freezing the finished pasta. Freeze the sauce for up to 2 months, then thaw overnight before reheating.

Nutrition Information

Approximate nutrition per serving:

Calories: 560
Protein: 17 g
Carbohydrates: 76 g
Fat: 22 g
Saturated Fat: 7 g
Fiber: 8 g
Sugar: 9 g
Sodium: 620 mg

Nutrition values are estimates and may vary depending on the pasta, milk, Parmesan, walnuts, and serving size.

Frequently Asked Questions

Can I use frozen butternut squash?

Yes. Frozen squash works well. Cook it until completely tender and allow excess moisture to evaporate before blending.

Can I make the sauce dairy-free?

Yes. Use unsweetened oat milk or another neutral dairy-free milk and replace Parmesan with a dairy-free alternative or nutritional yeast.

Can I use another pasta shape?

Yes. Linguine, tagliatelle, penne, rigatoni, or spaghetti can all replace fettuccine.

How do I make the sauce thinner?

Add reserved pasta water, broth, or milk a few tablespoons at a time until the sauce reaches the texture you prefer.

Can I roast the squash instead?

Yes. Roast the squash at 425°F or 220°C until tender and caramelized, then blend it with the remaining sauce ingredients.

What can I use instead of walnuts?

Pecans, hazelnuts, almonds, pumpkin seeds, or pine nuts are all good substitutes.

Can I add protein?

Yes. Chicken, shrimp, salmon, white beans, or chicken sausage pair well with the creamy squash sauce.

Final Thoughts

Butternut Squash Fettuccine is a cozy pasta that combines sweet squash, savory Parmesan, garlic, fresh sage, and crunchy walnuts in a smooth, creamy sauce.

Because Butternut Squash Fettuccine can be customized with extra vegetables, different nuts, or added protein, it is easy to adapt for both weeknight dinners and special occasions.

Keep this Butternut Squash Fettuccine recipe in your fall rotation whenever you want a comforting pasta that feels elegant but is still simple enough to make at home.

If you enjoy savory breakfast and brunch recipes, you may also like our Sun-Dried Tomato, Spinach & Goat Cheese Frittata.
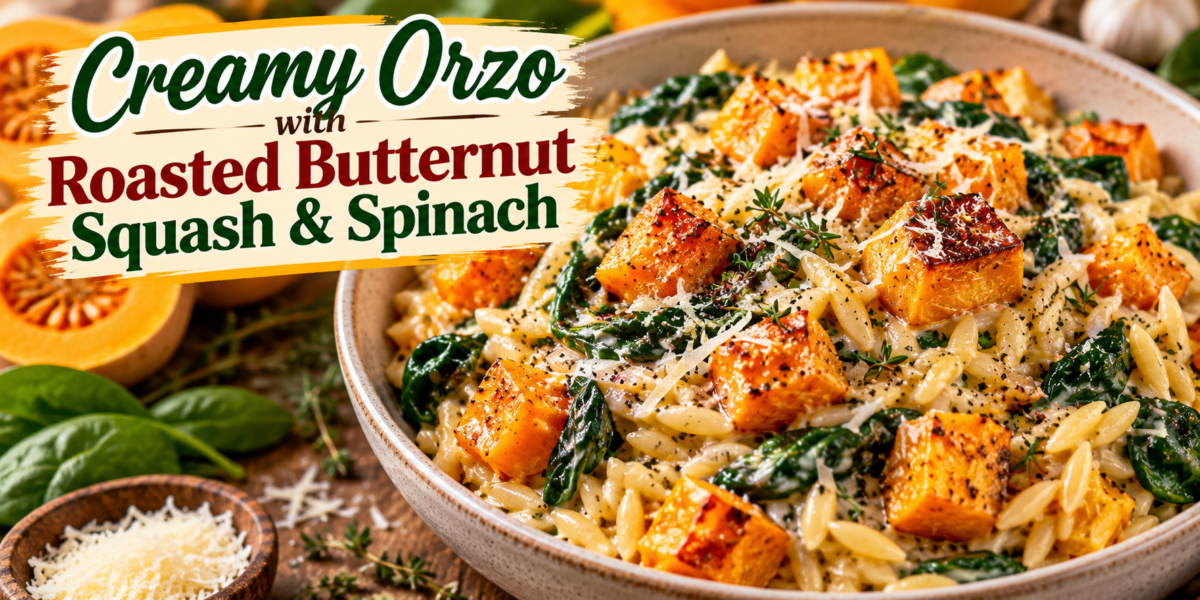
Creamy Orzo with Roasted Butternut Squash & Spinach

Creamy Orzo with roasted butternut squash, spinach, Parmesan, garlic, and fresh herbs

Creamy Orzo with Roasted Butternut Squash & Spinach

This Creamy Orzo recipe combines tender orzo pasta with golden roasted butternut squash, silky spinach, garlic, Parmesan, fresh thyme, and a lightly creamy sauce. The roasted squash brings natural sweetness and caramelized edges, while spinach adds freshness and color. Parmesan gives the dish a rich savory finish, and a little lemon keeps the sauce bright instead of heavy.

This Creamy Orzo is a cozy one-pan-inspired meal that feels elegant enough for guests while remaining simple enough for a weeknight dinner. The texture is somewhere between creamy pasta and a comforting risotto, but the small rice-shaped orzo cooks much faster. Each spoonful of Creamy Orzo brings together tender pasta, roasted squash, wilted greens, herbs, and plenty of Parmesan.

Prep Time: 20 minutes
Roasting Time: 25 minutes
Cooking Time: 20 minutes
Total Time: 1 hour 5 minutes
Servings: 6

Ingredients

For the Roasted Butternut Squash

3 cups peeled butternut squash, cut into ¾-inch cubes

1½ tablespoons extra virgin olive oil

½ teaspoon dried thyme

½ teaspoon garlic powder

¼ teaspoon smoked paprika

½ teaspoon sea salt

¼ teaspoon freshly ground black pepper

For the Orzo

1½ cups dry orzo pasta

2 tablespoons extra virgin olive oil

3 garlic cloves, finely minced

1 small yellow onion, finely diced

4 cups low-sodium vegetable broth

½ cup heavy cream

3 cups fresh baby spinach

¾ cup freshly grated Parmesan cheese

1 tablespoon fresh lemon juice

1 teaspoon lemon zest

1 teaspoon fresh thyme leaves

¼ teaspoon red pepper flakes, optional

½ teaspoon black pepper

Salt, to taste

For Garnishing

Extra Parmesan

Fresh thyme

Freshly cracked black pepper

A drizzle of extra virgin olive oil

A few roasted squash cubes

Lemon wedges, optional

Step-by-Step Instructions

1. Prepare the Oven

Preheat the oven to 425°F (220°C). Line a large rimmed baking sheet with parchment paper. A hot oven is important because the squash needs enough heat to become tender inside while developing browned, caramelized edges for Creamy Orzo.

2. Season the Squash

Place the cubed butternut squash in a large bowl. Add olive oil, dried thyme, garlic powder, smoked paprika, salt, and black pepper. Toss thoroughly until every piece is lightly coated.

Spread the squash over the prepared baking sheet in a single layer. Leave a little space between the cubes whenever possible. If the pieces are crowded, they will release steam instead of roasting and may not develop the golden edges that give the finished dish so much flavor.

3. Roast the Butternut Squash

Roast the squash for 20–25 minutes. Turn the pieces once halfway through cooking so multiple sides can brown evenly.

The squash is ready when it can be pierced easily with a fork and the edges are golden brown. Do not worry if a few corners become deeply caramelized. Those browned pieces add a wonderful sweet and savory flavor.

Reserve a few of the prettiest roasted cubes for the final garnish, especially when presenting Creamy Orzo for guests.

4. Start the Orzo Base

While the squash roasts, heat two tablespoons of olive oil in a large deep skillet or wide saucepan over medium heat.

Add the diced onion and cook for 3–4 minutes until it becomes soft and translucent. Add the minced garlic and cook for another 30–45 seconds, stirring constantly so the garlic becomes fragrant without browning.

Add the dry orzo and stir for approximately one minute. Lightly coating the pasta in the oil helps develop its flavor and keeps the grains from sticking together too quickly.

5. Add the Broth

Pour the vegetable broth into the skillet and stir well. Bring the mixture to a gentle simmer.

Cook for approximately 8–10 minutes, stirring frequently. Orzo can settle on the bottom of the pan, so regular stirring is important. Keep the heat moderate rather than allowing the liquid to boil aggressively.

As the pasta cooks, it absorbs the broth and releases starch. This creates the naturally creamy texture that makes this dish so comforting.

6. Make It Creamy

When the orzo is almost tender but still has a little bite, reduce the heat to low. Stir in the heavy cream and continue cooking for another 2–3 minutes.

Add the Parmesan gradually, stirring until it melts into the sauce. The mixture should become glossy and creamy.

For the best Creamy Orzo, avoid adding the Parmesan over very high heat. Gentle heat allows the cheese to melt smoothly without becoming stringy.

7. Add the Spinach

Add the fresh baby spinach in handfuls. Stir gently until the leaves wilt into the warm pasta.

This usually takes only 1–2 minutes. The spinach should remain vibrant rather than becoming overcooked.

Add lemon juice, lemon zest, fresh thyme, black pepper, and optional red pepper flakes. Taste and adjust the salt if needed.

The lemon is important because it cuts through the richness of the cream and Parmesan while bringing out the sweetness of the roasted squash in Creamy Orzo.

8. Combine the Squash and Pasta

Reserve some roasted squash for decoration and gently fold the remaining cubes into the pasta.

Do not stir too aggressively because the squash is tender and can break apart. A few smaller pieces naturally blend into the sauce, which is perfectly fine and adds even more squash flavor to the Creamy Orzo.

The Creamy Orzo should now have a thick but spoonable consistency. If it seems too thick, add two or three tablespoons of warm vegetable broth and stir gently.

9. Rest Briefly

Remove the skillet from the heat and let it rest for 3–5 minutes. During this short resting period, the sauce will thicken slightly while the flavors settle.

If the pasta becomes thicker than you prefer, loosen it with a small splash of warm broth or cream.

10. Garnish and Serve

Spoon the finished pasta into warm bowls. Top each serving with reserved roasted butternut squash, extra Parmesan, fresh thyme, and freshly cracked black pepper.

For a brighter presentation, add a small drizzle of olive oil and a lemon wedge on the side.

Tips for the Best Creamy Orzo

Cut the Squash Evenly

Try to keep the squash cubes close to the same size. Uniform pieces roast more evenly and make the finished dish look more attractive.

Very large cubes may remain firm while small pieces become overly soft. Around ¾ inch is a useful size for this recipe.

Do Not Overcrowd the Baking Sheet

Give the squash enough space to roast properly. If necessary, use two baking sheets.

A crowded pan traps moisture and produces softer vegetables. Proper spacing encourages caramelization and gives the squash its delicious golden edges.

Stir the Orzo Frequently

Unlike long pasta, orzo cooks directly in the broth and can settle on the bottom of the pan. Stir every minute or two during the main cooking stage.

Frequent stirring also helps distribute the starch, which contributes to the creamy consistency of Creamy Orzo.

Keep the Heat Moderate

High heat can cause the broth to evaporate before the orzo becomes tender. A gentle simmer gives the pasta time to absorb the liquid evenly.

For the best Creamy Orzo, keep the heat low once the cream and Parmesan are added.

Adjust the Consistency

Orzo continues absorbing liquid even after it leaves the stove. Therefore, the finished dish should look slightly looser than the consistency you ultimately want.

If it becomes too thick while sitting, add a splash of warm broth and stir gently.

Serving Suggestions

Serve this Creamy Orzo as a complete vegetarian meal with a crisp green salad dressed with lemon and olive oil. The fresh salad provides a pleasant contrast to the rich pasta and makes Creamy Orzo feel lighter.

For extra protein, add grilled chicken, roasted chickpeas, white beans, or pan-seared salmon to Creamy Orzo. The mild flavor of the pasta allows these additions to work without overpowering the squash and spinach.

This dish also makes a beautiful holiday side. Place it in a large serving bowl and finish with Parmesan, thyme, roasted squash, and freshly cracked pepper.

For a Mediterranean-inspired table, serve Creamy Orzo alongside roasted vegetables, cucumber salad, olives, warm bread, and a simple tomato salad.

Make-Ahead Instructions

The roasted squash can be prepared up to one day ahead. Once cooled, store it in an airtight container in the refrigerator.

The onion and garlic can also be chopped ahead, and the Parmesan can be grated in advance.

Because the orzo continues absorbing liquid as it sits, Creamy Orzo is best served soon after cooking. If you need to prepare it earlier, keep the sauce slightly looser and reserve some warm broth for reheating.

When reheating, place the pasta in a skillet over low heat and add a splash of vegetable broth. Stir gently until warmed through and creamy again.

Storage Instructions

Store leftovers in an airtight container in the refrigerator for up to three days.

The Creamy Orzo will become thicker after refrigeration because the pasta continues absorbing the sauce. Add a splash of vegetable broth or milk when reheating.

Warm leftovers gently on the stovetop or in the microwave, stirring occasionally. Avoid overheating because excessive heat can make the cream sauce too thick.

For the freshest texture, add a little fresh Parmesan, black pepper, and thyme after reheating Creamy Orzo.

Freezing is not recommended because the creamy sauce and spinach may change texture after thawing.

Frequently Asked Questions

Can I use frozen butternut squash?

Yes. Thaw it first and drain away excess moisture. Frozen squash may soften more quickly, so watch it closely during roasting.

Can I replace the heavy cream?

Yes. Half-and-half, evaporated milk, or unsweetened cooking cream can be used. For a lighter version, use additional vegetable broth and a little extra Parmesan.

Can I make this recipe vegetarian?

Yes. Use a vegetarian Parmesan if needed and make sure your vegetable broth is vegetarian.

Can I make it vegan?

Use plant-based cream, vegan Parmesan, and vegetable broth. Choose a dairy-free alternative that melts smoothly into the pasta.

Can I add protein?

Absolutely. Grilled chicken, roasted chickpeas, white beans, shrimp, or salmon can turn this into a more substantial meal.

Can I use another green?

Yes. Kale, Swiss chard, or arugula can replace spinach. Tougher greens may require a few extra minutes of cooking.

Why did my orzo become too thick?

Orzo continues absorbing liquid after cooking. Add warm broth a little at a time until the desired consistency returns.

Nutrition Information

Approximate nutrition per serving:

Calories: 465 kcal
Protein: 16g
Carbohydrates: 58g
Fat: 19g
Fiber: 6g
Sugar: 7g
Sodium: 620mg

Nutrition values are estimates and may vary according to ingredient brands, serving sizes, and substitutions.

Flavor Variations

For a stronger garlic flavor, roast a few whole garlic cloves alongside the squash and mash them into the finished pasta.

For extra heat, increase the red pepper flakes or add a small amount of chili oil just before serving.

For a Mediterranean twist, add sun-dried tomatoes, chopped olives, or a little crumbled feta.

For additional crunch, sprinkle toasted pine nuts, walnuts, or pumpkin seeds over each bowl.

For a brighter autumn flavor, add a small amount of fresh sage with the thyme. Sage pairs beautifully with roasted squash and Parmesan.

If you want a deeper savory flavor, replace part of the vegetable broth with mushroom broth.

Final Thoughts

This Creamy Orzo brings together some of the most comforting flavors of the season in one satisfying bowl. Roasted butternut squash provides natural sweetness and caramelized edges, while spinach adds freshness and color.

The small orzo pasta absorbs the seasoned vegetable broth as it cooks, creating a creamy texture without requiring complicated risotto techniques. Parmesan adds savory richness, while lemon juice and zest keep the dish balanced.

The roasted squash is especially important because it adds a deeper flavor than simply simmering raw squash with the pasta. Its browned edges provide little bursts of caramelized sweetness throughout the dish.

Another advantage of this recipe is its versatility. It can be served as a vegetarian main course, a holiday side, or a comforting weeknight dinner. You can easily add chicken, beans, chickpeas, shrimp, or salmon when you want additional protein.

For the best result, roast the squash until the edges are golden, stir the orzo regularly, and add the Parmesan over gentle heat. Keep a little warm broth nearby so you can adjust the consistency before serving.

This Creamy Orzo is best enjoyed warm, topped with extra Parmesan, fresh thyme, black pepper, and a few beautifully roasted squash cubes. A small squeeze of lemon just before eating can make the flavors even brighter.

Whether served as a cozy family dinner or placed in the center of a festive table, this Creamy Orzo offers a delicious balance of creamy pasta, sweet roasted squash, tender spinach, fragrant herbs, and savory Parmesan. It is comforting, colorful, and easy to customize for different occasions.

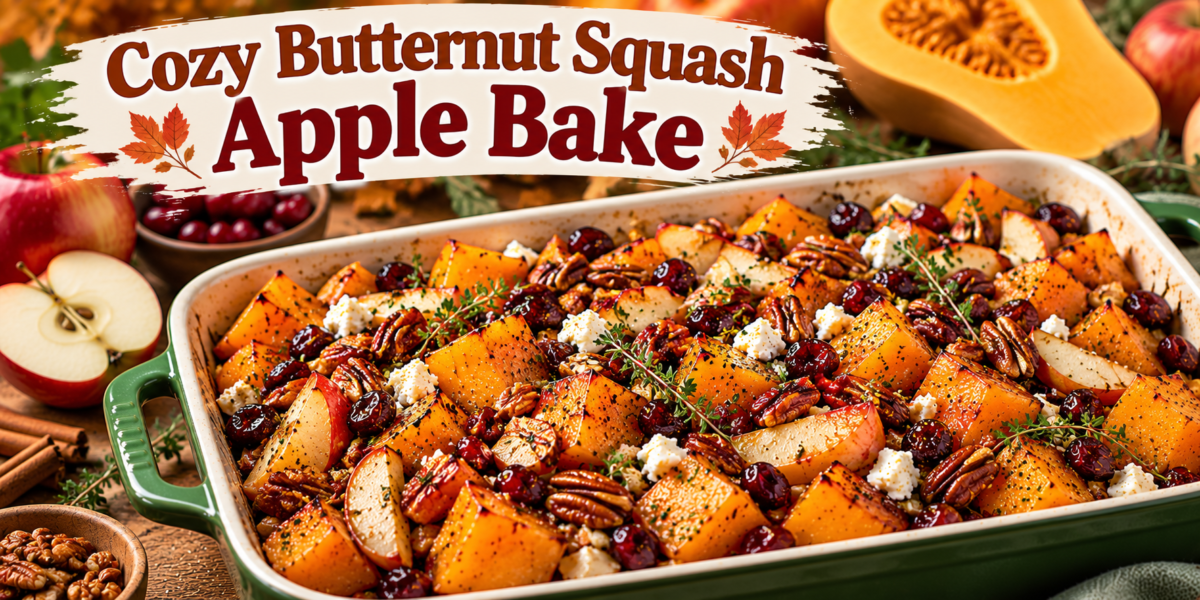
Cozy Butternut Squash Apple Bake

Butternut Squash Apple Bake with roasted squash, apples, cranberries, pecans, cinnamon, and maple glaze

Cozy Butternut Squash Apple Bake

This Butternut Squash Apple Bake is a cozy seasonal dish that combines tender roasted butternut squash, crisp apples, warm cinnamon, fragrant herbs, crunchy pecans, and a light maple glaze. The contrast between savory squash and naturally sweet fruit makes every bite comforting without becoming overly heavy. It is an inviting recipe for autumn dinners, weekend lunches, holiday gatherings, or any meal when you want something warm and colorful on the table.

The beauty of this Butternut Squash Apple Bake is its simplicity. Most of the preparation involves chopping the vegetables and apples, mixing a quick seasoning, and allowing the oven to create caramelized edges. As the ingredients roast, their natural flavors deepen, while the apples soften and release a little juice that blends beautifully with the maple glaze.

This recipe can be served as a vegetarian side dish or as part of a larger meal. It pairs especially well with roasted chicken, turkey, baked salmon, lentils, quinoa, or a crisp green salad. Feta can be added for a salty contrast, while pecans provide a pleasant crunch.

Prep Time: 20 minutes
Cook Time: 40–45 minutes
Total Time: About 1 hour 5 minutes
Servings: 6–8

Ingredients

For the Bake

  • 3 cups peeled butternut squash, cut into bite-sized cubes
  • 3 medium apples, cored and sliced
  • 2 tablespoons extra virgin olive oil
  • 2 tablespoons pure maple syrup
  • 1 teaspoon ground cinnamon
  • ½ teaspoon dried thyme
  • ½ teaspoon garlic powder
  • ½ teaspoon sea salt
  • ¼ teaspoon black pepper
  • ½ teaspoon ground nutmeg
  • ½ cup dried cranberries
  • ½ cup chopped pecans
  • ½ cup crumbled feta cheese, optional
  • 2 tablespoons fresh parsley, chopped

For the Optional Maple Finishing Glaze

  • 1 tablespoon pure maple syrup
  • 1 tablespoon fresh lemon juice
  • 1 teaspoon apple cider vinegar
  • Pinch of cinnamon
  • Small pinch of sea salt

Step-by-Step Instructions

1. Prepare the Oven

First, preheat the oven to 425°F (220°C). Lightly grease a large baking dish or rimmed sheet pan with olive oil.

A hot oven is important because it helps the squash develop caramelized edges instead of simply steaming. Choose a pan large enough to hold the ingredients in a mostly single layer. Overcrowding can trap moisture and prevent proper browning.

2. Prepare the Butternut Squash

Peel the butternut squash carefully and remove the seeds. Cut the flesh into cubes that are approximately the same size.

Place the squash in a large mixing bowl. Add olive oil, maple syrup, cinnamon, thyme, garlic powder, salt, black pepper, and nutmeg. Toss until each piece is evenly coated.

For the best Butternut Squash Apple Bake, make sure the seasoning is distributed evenly. The combination of cinnamon and thyme creates a warm flavor that works with both the sweet apples and savory squash.

3. Begin Roasting

Spread the seasoned squash across the prepared pan. Keep the pieces in a single layer and leave small spaces between them whenever possible.

Roast for 15 minutes. This initial roasting period gives the squash a head start because it generally takes longer to become tender than apples.

After 15 minutes, carefully remove the pan and turn the squash with a spatula.

4. Add the Apples

Add the sliced apples to the partially roasted squash. Toss them gently with the warm squash and seasoning already on the pan.

Return the dish to the oven and roast for another 15 minutes.

Choose apples that hold their shape during baking. Honeycrisp, Pink Lady, Gala, or Granny Smith are all suitable. A slightly tart apple creates a particularly pleasant contrast with maple syrup and dried cranberries.

Adding the apples after the squash has begun roasting helps prevent them from becoming excessively soft.

5. Add Cranberries and Pecans

Remove the pan again after the second roasting period. Scatter the dried cranberries and chopped pecans over the squash and apples.

Return everything to the oven for another 8–12 minutes. The squash should be fork-tender, the apples should be softened but recognizable, and the pecans should smell toasted.

Watch the nuts carefully during the final minutes. If they appear to be browning too quickly, cover the pan loosely with foil.

At this stage, the Butternut Squash Apple Bake should have golden edges and a fragrant cinnamon-maple aroma.

6. Prepare the Optional Finishing Glaze

While the bake finishes, whisk together one tablespoon of maple syrup, lemon juice, apple cider vinegar, cinnamon, and a small pinch of salt.

The lemon juice and vinegar keep the glaze from tasting overly sweet. Instead, they create a bright finishing sauce that complements the roasted fruit and vegetables.

If you prefer a sweeter dish, add another teaspoon of maple syrup. For a more savory result, increase the lemon juice slightly.

7. Finish the Bake

Remove the pan from the oven and let it cool for approximately five minutes.

Drizzle the optional glaze over the warm ingredients. Then sprinkle feta cheese and fresh parsley across the top.

The feta adds a creamy, salty contrast to the naturally sweet apples and squash. If you prefer a dairy-free version, simply omit it or use a suitable plant-based alternative.

8. Rest Before Serving

Allow the Butternut Squash Apple Bake to rest for another five to ten minutes before serving. This gives the juices time to settle and allows the flavors to blend.

Serve directly from the baking dish or transfer the mixture to a wide serving platter. Garnish with additional parsley, pecans, or a few fresh thyme leaves if desired.

Tips for the Best Results

Cut the Squash Evenly

Try to cut the squash into similarly sized cubes. Large pieces take longer to cook, while very small pieces can become soft too quickly.

Consistent pieces help the Butternut Squash Apple Bake cook evenly and make the finished dish look more attractive.

Choose the Right Apples

Firm apples generally work better than very soft varieties. They should become tender while still retaining enough structure to remain visible after roasting.

For a sweeter dish, choose Honeycrisp or Gala. For more tartness, Granny Smith works beautifully.

Avoid Overcrowding

Use a large baking dish or sheet pan. If the ingredients are packed tightly together, the moisture released by the squash and apples can cause steaming.

Roasting with enough space encourages caramelization and gives the finished dish deeper flavor.

Balance the Sweetness

The maple syrup, apples, and cranberries already provide plenty of natural sweetness. The lemon juice, apple cider vinegar, herbs, and feta help balance that sweetness.

For a more savory version, reduce the maple syrup and increase the thyme and black pepper.

Add the Nuts at the End

Pecans can burn if exposed to high heat for too long. Adding them during the later stage of roasting gives them enough time to toast without becoming bitter.

Walnuts, almonds, or pumpkin seeds can also be used.

Serving Suggestions

This Butternut Squash Apple Bake works beautifully beside roasted chicken, turkey, pork, baked salmon, or grilled fish. The combination of tender vegetables and fruit provides a colorful contrast to savory main dishes.

For a vegetarian meal, serve it with quinoa, wild rice, lentils, chickpeas, or a simple arugula salad. Warm crusty bread can also be served alongside the dish to soak up the maple-infused juices.

During a holiday meal, arrange the bake on a large platter and garnish it with extra pecans, cranberries, fresh herbs, and feta. The orange squash, red cranberries, and green herbs create an attractive seasonal presentation.

For brunch, serve smaller portions with eggs, whole-grain toast, and a fresh fruit salad.

Make-Ahead Instructions

The squash can be peeled and cubed several hours before cooking. Store it in an airtight container in the refrigerator.

The apples should preferably be sliced shortly before roasting to maintain their fresh appearance. However, you can slice them earlier and toss them with a little lemon juice to reduce browning.

The seasoning mixture and finishing glaze can both be prepared ahead. Keep the glaze refrigerated and bring it close to room temperature before using.

For the best texture, roast the dish shortly before serving. The Butternut Squash Apple Bake can be assembled in stages, which makes it convenient for entertaining.

Storage and Reheating

Store leftovers in an airtight container in the refrigerator for up to four days.

To reheat, place the leftovers in an oven-safe dish and warm them at 350°F (175°C) for approximately 10–15 minutes. Reheating in the oven helps preserve the roasted edges better than microwaving.

If using a microwave, heat individual portions in short intervals until warmed through. Add a few fresh pecans or herbs after reheating to restore some texture.

The Butternut Squash Apple Bake can be served warm or at room temperature. It is also suitable for packed lunches when stored and transported safely.

Freezing is not recommended because the apples and squash can become noticeably softer after thawing.

Frequently Asked Questions

Can I use frozen butternut squash?

Yes. Thaw it completely and drain excess moisture before roasting. Frozen squash may soften faster, so begin checking it earlier than fresh squash.

Can I use pears instead of apples?

Yes. Firm pears can replace apples. They provide a softer, slightly floral sweetness that pairs nicely with squash, cinnamon, and maple.

Can I make this recipe vegan?

Yes. Use maple syrup instead of honey if you make any substitutions involving sweeteners, and omit the feta or use a plant-based alternative.

Can I use another type of squash?

Yes. Acorn squash, delicata squash, or pumpkin can be substituted. Cooking time may vary depending on the variety and size of the pieces.

Can I add onions?

Absolutely. Thinly sliced red or yellow onion can be roasted with the squash. The onion becomes sweet and caramelized and adds a savory layer.

Can I make it less sweet?

Yes. Reduce the maple syrup and dried cranberries, then increase the thyme, black pepper, and lemon juice slightly. The result will be more savory.

Can I use walnuts instead of pecans?

Yes. Walnuts are an excellent substitute. Toast them lightly before adding them to the finished dish.

Nutrition Information

Approximate nutrition per serving:

Calories: 285 kcal
Protein: 5g
Carbohydrates: 42g
Fat: 12g
Fiber: 6g
Sugar: 24g
Sodium: 260mg

Nutrition values are estimates and can vary depending on ingredient brands, portion sizes, and optional toppings.

Flavor Variations

For a warmer autumn flavor, add a small pinch of ground cloves or allspice to the seasoning. Use these spices sparingly because their flavors can become strong after roasting.

For a savory variation, add thinly sliced red onion and a little fresh rosemary. The combination works especially well with feta.

For extra crunch, add toasted pumpkin seeds along with the pecans. Sunflower seeds can also be used.

If you enjoy a little heat, add a pinch of red pepper flakes before roasting. The gentle heat creates an interesting contrast with the maple and fruit.

For a brighter finish, add fresh orange zest with the parsley. Orange pairs beautifully with cranberry, apple, and roasted squash.

Final Thoughts

This Butternut Squash Apple Bake is a simple seasonal recipe that turns familiar ingredients into a warm and inviting dish. Roasted squash provides a creamy, earthy foundation, while apples contribute freshness and natural sweetness.

Cranberries bring a tart, chewy element, and toasted pecans provide satisfying crunch. Cinnamon and thyme add warmth, while lemon juice and apple cider vinegar keep the flavors balanced.

The optional feta is especially useful when you want a stronger sweet-and-savory contrast. Its salty creaminess works beautifully with the maple glaze and roasted fruit.

Another advantage of this recipe is its flexibility. You can adjust the fruit, nuts, herbs, cheese, and spices according to the ingredients you already have. The Butternut Squash Apple Bake can therefore fit easily into weeknight dinners as well as festive meals.

For the best result, keep the vegetables spread out, roast the squash before adding the apples, and add the pecans during the final stage. These simple techniques encourage caramelization while protecting the delicate ingredients.

Serve the finished dish warm alongside your favorite protein, grain, or salad. For a holiday table, add extra cranberries, pecans, feta, and fresh herbs just before serving.

With its golden roasted edges, tender vegetables, sweet apples, tart cranberries, and crunchy nuts, this Butternut Squash Apple Bake offers a comforting balance of flavors and textures. It is easy to prepare, attractive enough for entertaining, and versatile enough for everyday meals.

This Butternut Squash Apple Bake looks inviting. The Butternut Squash Apple Bake suits weeknights. Serve the Butternut Squash Apple Bake with grains. The Butternut Squash Apple Bake travels well. Keep the Butternut Squash Apple Bake warm. Fresh salad makes the Butternut Squash Apple Bake lighter. Feta gives the Butternut Squash Apple Bake savory flavor. Fresh herbs make the Butternut Squash Apple Bake festive. Leftovers make the Butternut Squash Apple Bake convenient. The Butternut Squash Apple Bake works for potlucks. Enjoy the Butternut Squash Apple Bake with family and friends.

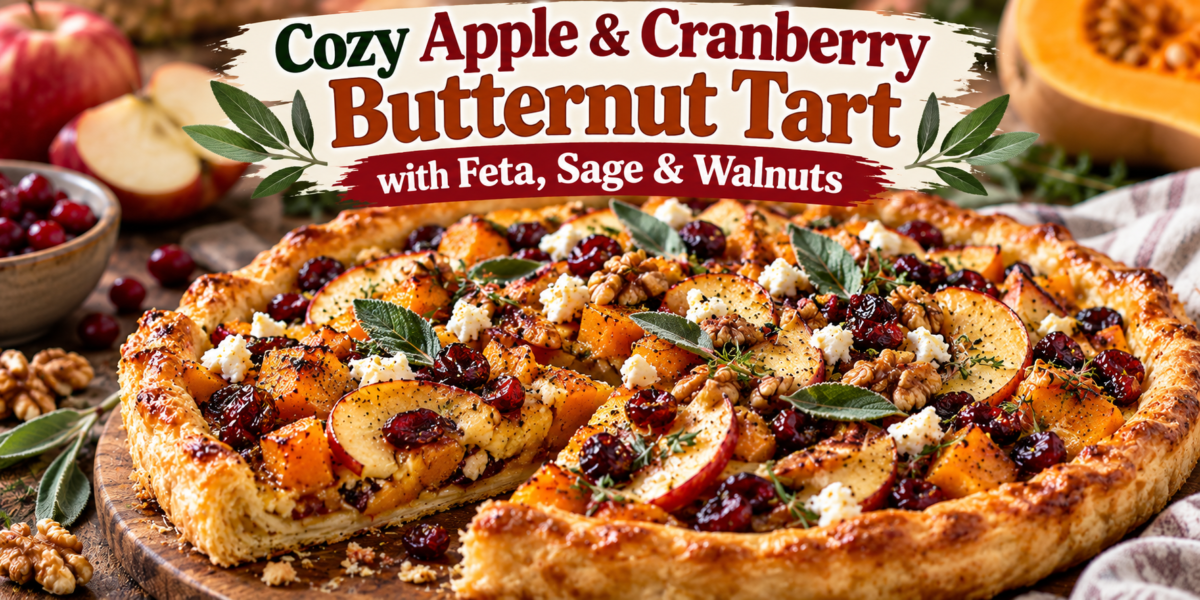
Cozy Apple & Cranberry Butternut Tart with Feta, Sage & Walnuts

Cozy Apple and Cranberry Butternut Tart with feta, sage, walnuts, and roasted butternut squash

Cozy Apple & Cranberry Butternut Tart with Feta, Sage & Walnuts

This Butternut Tart brings together roasted butternut squash, crisp apples, tart dried cranberries, creamy feta, fragrant sage, and toasted walnuts on a golden pastry crust. Every slice offers a delicious contrast between sweet roasted vegetables, tangy cheese, buttery pastry, and crunchy nuts. The result is cozy enough for a cool evening yet elegant enough for a holiday table or weekend gathering.

The beauty of this Butternut Tart is that it looks impressive without requiring complicated techniques. The butternut squash can be roasted while the pastry is prepared, and the remaining ingredients come together quickly. Apple adds freshness and a gentle sweetness, while cranberries provide little bursts of tart flavor. Fresh sage gives the tart a warm, earthy aroma that pairs especially well with roasted squash.

This Butternut Tart works beautifully as a vegetarian main course, a brunch centerpiece, or a generous side dish. Serve it with a crisp green salad for lunch, or place it beside roasted vegetables and a simple soup for a comforting dinner.

Prep Time: 25 minutes
Cook Time: 45 minutes
Total Time: 1 hour 10 minutes
Servings: 8 slices

Ingredients

For the Butternut Filling

  • 3 cups peeled butternut squash, cut into small cubes
  • 1 medium apple, thinly sliced
  • ½ cup dried cranberries
  • ¾ cup crumbled feta cheese
  • ½ cup walnuts, roughly chopped
  • 1 tablespoon fresh sage, finely chopped
  • 2 tablespoons extra virgin olive oil
  • 1 tablespoon honey or maple syrup
  • ½ teaspoon ground cinnamon
  • ¼ teaspoon ground nutmeg
  • ½ teaspoon sea salt
  • ¼ teaspoon black pepper

For the Tart Base

  • 1 sheet refrigerated puff pastry or pie pastry
  • 1 egg, beaten
  • 1 tablespoon all-purpose flour, for dusting
  • 1 tablespoon olive oil or melted butter for brushing

Optional Finishing Ingredients

  • Extra crumbled feta
  • Fresh sage leaves
  • A small drizzle of honey
  • Freshly cracked black pepper
  • A few toasted walnut pieces
  • Fresh thyme leaves

Step-by-Step Instructions

1. Prepare the Oven

First, preheat the oven to 400°F (200°C). Line a large baking sheet with parchment paper. If you are using a tart pan, lightly grease it and keep it ready for the pastry.

For the best Butternut Tart, avoid placing the tart into a cold oven because the pastry may become greasy before it has a chance to puff and brown.

2. Roast the Butternut Squash

Place the cubed butternut squash on the prepared baking sheet. Drizzle with one tablespoon of olive oil, then add the cinnamon, nutmeg, salt, and black pepper. Toss until the cubes are evenly coated.

Spread the squash into a single layer. Roast for 20–25 minutes, turning once halfway through. The edges should become golden and lightly caramelized while the centers remain tender.

3. Toast the Walnuts

While the squash roasts, place the chopped walnuts in a dry skillet over medium-low heat. Toast them for 3–5 minutes, stirring frequently.

The walnuts are ready when they smell fragrant and become lightly browned. Transfer them to a plate immediately so they stop cooking.

Toasted walnuts give the Butternut Tart a deeper nutty flavor and a satisfying crunch. Watch them carefully because nuts can burn quickly.

4. Prepare the Apple

Wash the apple, remove the core, and slice it thinly. There is no need to peel it unless you prefer a softer texture.

Toss the apple slices gently with the remaining tablespoon of olive oil and honey or maple syrup. Set them aside.

Choose an apple with a balance of sweetness and acidity. A slightly tart variety provides a pleasant contrast with the sweet squash and cranberries.

5. Prepare the Pastry

Lightly dust your work surface with flour. Gently roll out the pastry if needed until it is large enough to fit your tart pan or baking sheet.

Transfer the pastry carefully to the prepared pan. Press it gently into the corners without stretching it.

Trim any excess pastry around the edges. If you are making a free-form tart, simply fold the edges inward slightly to create a rustic border.

Prick the center of the pastry several times with a fork. This helps prevent the middle from puffing excessively during baking.

6. Build the Filling

Once the squash has roasted, allow it to cool for a few minutes. Place it in a bowl with the apple slices, dried cranberries, chopped sage, and toasted walnuts.

Add about half of the feta and gently toss everything together. Avoid stirring too aggressively because the roasted squash should remain in recognizable pieces.

This combination creates the heart of the Butternut Tart. The squash provides a creamy roasted texture, apples add brightness, cranberries add tart sweetness, and walnuts contribute crunch.

7. Assemble the Tart

Spread the vegetable and fruit mixture evenly over the pastry, leaving about a 1-inch border around the edges.

Scatter the remaining feta over the top. Arrange a few apple slices visibly across the surface for an attractive finish.

Fold the pastry border slightly inward if you are making a rustic tart. Brush the exposed pastry with beaten egg.

8. Bake

Place the assembled tart in the preheated oven. Bake for approximately 20–25 minutes, or until the pastry is puffed and deeply golden and the filling is hot.

The Butternut Tart should have crisp edges and a golden base. The feta will soften and lightly brown, while the apples become tender and the cranberries warm.

9. Finish with Fresh Sage

Remove the tart from the oven and allow it to cool for 8–10 minutes. Scatter fresh sage leaves or additional chopped sage over the top.

For a slightly sweeter finish, drizzle a very small amount of honey over the warm tart. Add freshly cracked black pepper and a few extra toasted walnuts.

10. Slice and Serve

Use a sharp knife to cut the tart into eight slices. A serrated knife works particularly well if you want to preserve the crisp pastry.

Serve the Butternut Tart warm or at room temperature. It can be enjoyed as a vegetarian main dish, a side, or a brunch recipe.

Tips for the Best Butternut Tart

Keep the Squash Right for a Butternut Tart

Cutting the squash into similar-sized cubes ensures that everything roasts evenly. Smaller pieces also distribute more easily across the pastry.

However, avoid making the cubes extremely small because they can become too soft before the pastry finishes baking.

Avoid a Watery Butternut Tart

Butternut squash and apples can release moisture during cooking. Roasting the squash first is therefore important because it removes excess moisture and intensifies the flavor.

For a crisp Butternut Tart, make sure the roasted squash is not steaming hot when it goes onto the pastry.

Do Not Overload the Pastry

A generous filling is appealing, but too much can make the pastry difficult to bake properly. Keep the filling relatively shallow and spread it evenly.

Leaving a clean border also gives the finished tart a defined crust and attractive presentation.

Balance the Sweetness in the Butternut Tart

Honey and cranberries already contribute sweetness. If you prefer a more savory tart, reduce the honey and add extra black pepper or a pinch of chili flakes.

For a sweeter version, add a little more honey after baking rather than increasing the amount inside the tart.

Use Fresh Sage in the Butternut Tart

Fresh sage provides a stronger and more aromatic flavor than dried sage. Chop it finely for the filling and reserve a few whole leaves for decoration.

If fresh sage is unavailable, use dried sage sparingly because its flavor is more concentrated.

Serving Suggestions for the Butternut Tart

Serve the Butternut Tart with a simple arugula salad dressed with lemon juice and olive oil. The peppery greens provide a fresh contrast to the sweet roasted filling.

For a larger vegetarian meal, pair it with lentil salad, roasted Brussels sprouts, green beans, or a warm grain salad.

It also makes an excellent brunch dish with scrambled eggs, fresh fruit, and yogurt.

Make-Ahead Instructions

The butternut squash can be roasted one day ahead and stored in an airtight container in the refrigerator. The walnuts can also be toasted in advance.

When you are ready to assemble the Butternut Tart, allow the roasted squash to come close to room temperature before placing it on the pastry.

The tart can be assembled several hours ahead and refrigerated before baking. If the pastry becomes very cold, add a few extra minutes to the baking time.

Storage Instructions

Store leftover tart in an airtight container in the refrigerator for up to three days.

To reheat, place individual slices on a baking sheet and warm them at 350°F (175°C) for approximately 8–12 minutes. This method helps restore some of the pastry’s crispness.

Avoid reheating for too long because the apples and squash may become overly soft.

The Butternut Tart can also be served cold or at room temperature. However, reheating in the oven generally gives the best pastry texture.

Freezing is possible, but the texture of the fruit and vegetables may soften after thawing. If freezing, wrap individual portions securely and use them within one month.

Frequently Asked Questions

Can I use frozen butternut squash?

Yes. Thaw it completely and drain away excess liquid before roasting. Frozen squash may need slightly less roasting time, so check it regularly.

Can I use a different cheese?

Absolutely. Goat cheese works particularly well, while ricotta creates a softer filling. Parmesan can also be sprinkled over the top for a stronger savory flavor.

Can I use pears instead of apples?

Yes. Pears provide a softer and sweeter flavor. Choose firm pears so they maintain their shape during baking.

Can I make this tart without nuts?

Yes. Simply omit the walnuts. For crunch, use pumpkin seeds or sunflower seeds instead.

Can I use dried herbs?

Yes, although fresh sage provides the best aroma. If using dried sage, start with a small amount and adjust according to taste.

Can I make it dairy-free?

Yes. Replace the feta with a dairy-free cheese alternative or omit it entirely. Use pastry that contains no dairy ingredients.

Flavor and Texture Notes

The contrast between textures is one of the highlights of this Butternut Tart. The pastry should be crisp around the edges, while the roasted squash remains tender and slightly caramelized. Thin apple slices soften in the oven without completely disappearing, giving each bite a delicate fruit texture. Cranberries add a chewy, tart element, and toasted walnuts provide a satisfying crunch.

For a richer Butternut Tart, crumble a little extra feta over each serving. The salty cheese cuts through the sweetness of the honey and fruit. A squeeze of lemon can also brighten the finished dish, especially when serving it alongside rich holiday foods.

If you prefer stronger savory flavors, add a pinch of rosemary or thyme with the sage. For a warmer spice profile, a tiny amount of allspice can complement the cinnamon and nutmeg without overwhelming the fruit.

This balance makes the recipe suitable for both casual meals and special occasions at home or gatherings. It is easy to customize.

Nutrition Information

Approximate nutrition per serving:

Calories: 340 kcal
Protein: 7g
Carbohydrates: 42g
Fat: 17g
Fiber: 5g
Sugar: 17g
Sodium: 430mg

Nutrition values are estimates and may vary depending on the pastry, cheese, fruit, and other ingredients used.

Final Thoughts

This Butternut Tart is a wonderful example of how simple seasonal ingredients can become an elegant meal. Roasted squash provides a naturally creamy base, while apples and cranberries introduce bright fruit flavors. Feta adds salty richness, sage contributes an earthy aroma, and walnuts complete the dish with a satisfying crunch.

The pastry provides a buttery foundation that holds all the ingredients together while becoming crisp and golden in the oven. Because the filling is roasted before assembly, the final tart develops deeper flavor without becoming overly wet.

For a cozy family dinner, serve the tart with a green salad and warm soup. For a holiday gathering, cut it into smaller squares and place them on a serving platter with fresh herbs and toasted walnuts.

With its golden crust, colorful filling, and balance of sweet and savory flavors, the Butternut Tart makes an inviting centerpiece for many occasions. It is comforting enough for everyday meals yet attractive enough for entertaining.

Prepare the components ahead when possible, keep the filling reasonably dry, and allow the baked tart to rest before slicing. Those simple steps help preserve the crisp pastry and clean layers.

Whether served warm for dinner, at room temperature for brunch, or alongside a holiday spread, this tart offers a satisfying combination of roasted vegetables, fruit, cheese, herbs, and nuts in every bite.