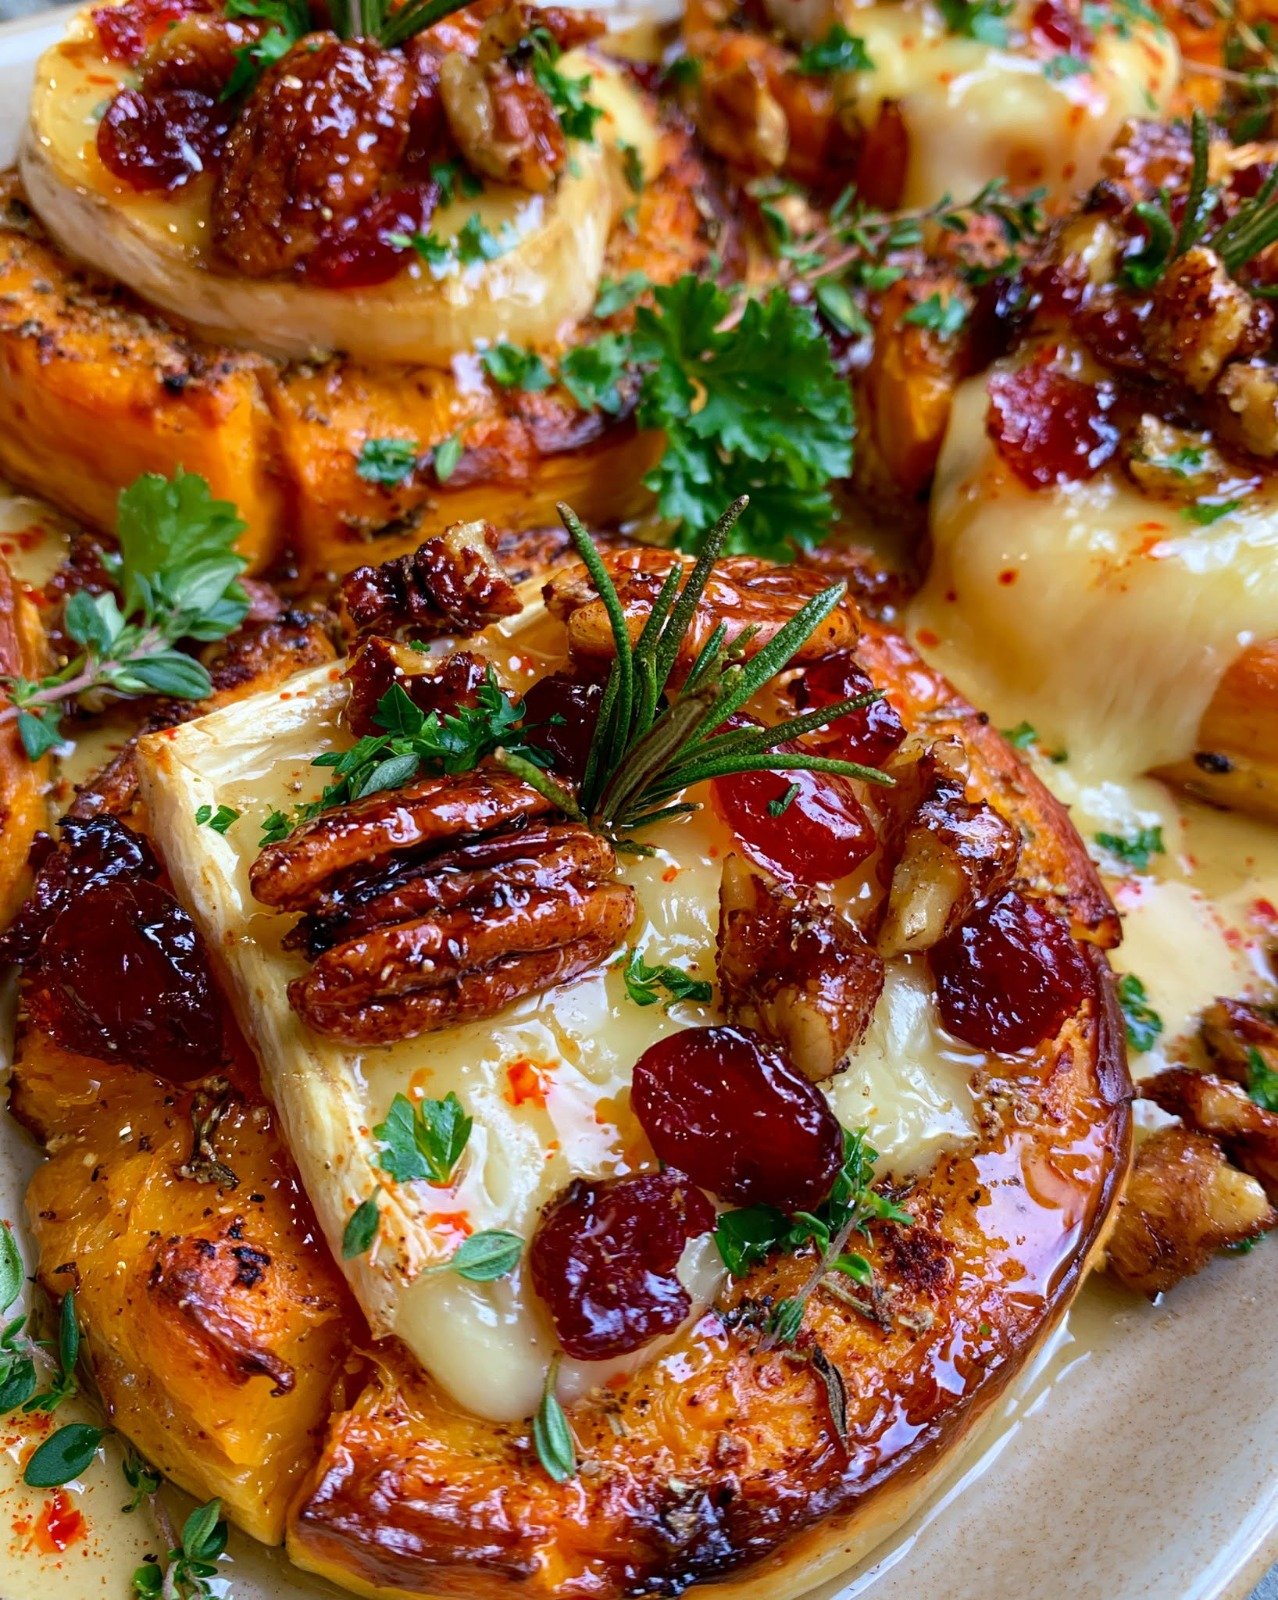
The Ultimate Crispy Sweet Potato & Butternut Smash with Brie, Cranberries & Hot Honey Pecans

Sweet Potato Smash with butternut squash, melted brie, cranberries, pecans, herbs, and hot honey

The Ultimate Crispy Sweet Potato & Butternut Smash with Brie, Cranberries & Hot Honey Pecans

Sweet Potato Smash is a colorful, crispy, and comforting fall-inspired dish made with roasted sweet potatoes, butternut squash, creamy brie, tart cranberries, and crunchy hot honey pecans. Sweet Potato Smash works beautifully as a holiday side dish, vegetarian centerpiece, or cozy weekend recipe when you want something a little special without using complicated techniques.

Prep Time: 25 minutes

Cook Time: 45 to 50 minutes
Total Time: About 1 hour 15 minutes
Servings: 6

Ingredients

For the Vegetables

  • 2 medium sweet potatoes, peeled and cut into thick rounds
  • 3 cups butternut squash, peeled and cut into large cubes
  • 2 tablespoons olive oil
  • 1 teaspoon smoked paprika
  • 1 teaspoon dried thyme
  • 1/2 teaspoon garlic powder
  • 1/2 teaspoon salt
  • 1/4 teaspoon black pepper

Ingredients For the Hot Honey Pecans

  • 3/4 cup pecan halves
  • 1 tablespoon honey
  • 1 teaspoon hot sauce
  • 1 teaspoon melted butter
  • Pinch of salt
  • Pinch of cayenne, optional

For Topping

  • 6 ounces brie, cut into small pieces
  • 1/2 cup dried cranberries
  • 2 tablespoons chopped fresh parsley
  • 1 tablespoon fresh thyme leaves
  • Extra hot honey, for drizzling
  • Freshly cracked black pepper

Why You’ll Love This Recipe

Sweet Potato Smash gives you a wonderful mix of textures in every bite. The centers stay creamy and soft, while the edges become crisp and caramelized in the oven.

Another reason to love Sweet Potato Smash is the balance of flavors. Sweet vegetables, rich brie, tart cranberries, nutty pecans, herbs, and a little hot honey create a dish that feels festive without becoming overly sweet.

How to Make Sweet Potato Smash

Step 1: Preheat the Oven

Preheat the oven to 425°F or 220°C.

Line a large rimmed baking sheet with parchment paper and lightly brush or spray it with oil.

Step 2: Prepare the Sweet Potatoes

Peel the sweet potatoes and cut them into thick rounds, about 1 inch wide.

Step 3: Prepare the Butternut Squash

Peel and seed the butternut squash.

Cut it into large cubes or thick chunks.

Step 4: Season the Vegetables

Place the sweet potatoes and butternut squash in a large bowl.

Add olive oil, smoked paprika, thyme, garlic powder, salt, and black pepper.

Toss until every piece is lightly coated.

Step 5: Roast Until Tender

Arrange the vegetables in a single layer on the prepared baking sheet.

Roast for 20 to 25 minutes, turning once halfway through, until the vegetables are tender enough to press with a fork but not falling apart.

Step 6: Smash the Vegetables

Remove the pan from the oven.

Use the bottom of a sturdy glass or measuring cup to gently flatten each sweet potato round and squash piece.

Do not press too hard. The goal is to create rough edges without completely breaking the vegetables apart.

Those rough edges are what make Sweet Potato Smash especially crispy during the second roast.

Step 7: Add a Little More Oil

Brush the tops lightly with olive oil.

Season with another small pinch of salt and black pepper if desired.

Step 8: Roast Again

Return the tray to the oven and roast for another 15 to 20 minutes.

The edges should become golden brown, crisp, and slightly caramelized.

Step 9: Make the Hot Honey Pecans

While the vegetables crisp, combine pecans, honey, hot sauce, melted butter, salt, and cayenne in a small bowl.

Spread them on a small parchment-lined tray or oven-safe dish.

Bake for 5 to 7 minutes, stirring once, until lightly toasted and glossy.

Watch carefully because honey can darken quickly.

Step 10: Add the Brie

Remove the roasted vegetables from the oven.

Place small pieces of brie over the warm vegetables.

Return the tray to the oven for 2 to 3 minutes, just until the brie softens and begins to melt.

Step 11: Add Cranberries and Pecans

Scatter the dried cranberries and hot honey pecans over the tray.

The cranberries bring tart sweetness, while the pecans add crunch and a gentle spicy finish.

Step 12: Garnish and Serve

Sprinkle with parsley, fresh thyme, and cracked black pepper.

Drizzle lightly with extra hot honey before serving Sweet Potato Smash warm.

Serving Suggestions

Sweet Potato Smash is perfect for Thanksgiving, Christmas, fall dinners, or any meal where you want a colorful seasonal side.

Serve Sweet Potato Smash with roast chicken, turkey, glazed ham, pork tenderloin, or a hearty vegetarian main dish.

It also pairs well with roasted Brussels sprouts, green beans, a crisp salad, or a simple grain dish such as quinoa or wild rice.

If you want a hearty and comforting pasta dinner, try this One-Pot Sausage and Fennel Rigatoni with savory sausage, tender fennel, and rich sauce in one easy pot.

Recipe Tips

Choose sweet potatoes that are firm and similar in size for even cooking.

Cut the squash into large pieces so it does not become too soft before the second roast.

For the best Sweet Potato Smash, make sure the vegetables are tender before smashing but still structured enough to hold together.

Do not crowd the baking sheet. Space allows hot air to circulate and helps the edges crisp rather than steam.

Use a firm but creamy brie so it melts gently without becoming too runny.

Add the brie only at the end so it stays soft and creamy instead of disappearing into the pan.

Easy Variations

Sweet Potato Smash is easy to adapt with different cheeses, nuts, and dried fruits.

Replace brie with goat cheese, feta, blue cheese, or sharp cheddar.

To make Sweet Potato Smash less spicy, leave out the hot sauce and cayenne and use plain honey pecans.

For more heat, add chili flakes or a little extra hot honey.

You can replace pecans with walnuts, almonds, or pumpkin seeds.

Dried cherries or chopped dates can replace cranberries for a different sweet-tart flavor.

For extra savory depth, add caramelized onions or roasted garlic.

For a cozy fall meal, try this Roasted Acorn Squash Stuffed with Chicken, Apples, Cheddar & Maple Pecan Crumble with tender squash, savory chicken, sweet apples, melted cheese, and crunchy pecans.

Make-Ahead Instructions

Sweet Potato Smash can be prepared in stages to make holiday cooking easier.

Roast the sweet potatoes and butternut squash until tender up to one day ahead.

Let them cool and store them covered in the refrigerator.

Prepare the hot honey pecans separately and keep them in an airtight container.

When ready to serve, smash the vegetables, brush with oil, and complete the second roasting step.

Add brie, cranberries, pecans, and herbs just before serving.

Storage and Reheating

Store leftover Sweet Potato Smash in an airtight container in the refrigerator for up to 4 days.

For the best texture, reheat it in the oven at 375°F or 190°C for 10 to 15 minutes.

Microwaving is possible, but the vegetables and pecans will be softer.

If possible, store extra pecans separately and add them after reheating to preserve their crunch.

Nutrition Information

Approximate nutrition per serving:

Calories: 390
Protein: 8 g
Carbohydrates: 47 g
Fat: 20 g
Saturated Fat: 7 g
Fiber: 7 g
Sugar: 19 g
Sodium: 420 mg

Nutrition values are estimates and may vary depending on the brie, honey, pecans, and serving size.

Frequently Asked Questions

Can I make Sweet Potato Smash without butternut squash?

Yes. You can use all sweet potatoes or replace the squash with carrots, pumpkin, or another firm roasting vegetable.

Can I use another cheese?

Yes. Goat cheese, feta, blue cheese, cheddar, or Gruyère all work well.

Can I make Sweet Potato Smash nut-free?

Yes. Replace the pecans with pumpkin seeds or sunflower seeds, or simply leave them out.

Can I make it vegan?

Yes. Use plant-based cheese and butter, and replace honey with maple syrup.

How do I keep the vegetables from falling apart?

Do not overcook them during the first roast. They should be fork-tender but still firm enough to hold their shape when pressed.

Can I make Sweet Potato Smash in an air fryer?

Yes. Cook the vegetables in batches, then smash and air fry again until crisp. Add the cheese during the final few minutes.

What kind of hot sauce works best?

A mild to medium hot sauce works well because it adds heat without overpowering the honey and vegetables.

Can I serve it at room temperature?

Yes. It is best warm but also tastes good slightly cooled.

Final Thoughts

Sweet Potato Smash combines crisp roasted edges, creamy centers, melted brie, tart cranberries, and spicy-sweet pecans in one beautiful seasonal dish.

Because Sweet Potato Smash can be prepared partly ahead, it works especially well for holidays, entertaining, and busy fall dinners.

Keep Sweet Potato Smash in your seasonal recipe collection whenever you want a colorful side dish with plenty of texture, warm flavor, and an impressive finish.

Cranberry Apple Pecan Stuffed Sweet Potatoes

Stuffed Sweet Potatoes with apples, dried cranberries, pecans, cinnamon, and maple syrup

Cranberry Apple Pecan Stuffed Sweet Potatoes

Stuffed Sweet Potatoes are a cozy, colorful, and satisfying recipe filled with tender roasted sweet potatoes, juicy apples, tart cranberries, crunchy pecans, warm cinnamon, and a touch of maple syrup. Stuffed Sweet Potatoes work beautifully as a holiday side dish, a light vegetarian meal, or a comforting fall-inspired lunch.

The combination of naturally sweet potatoes and fruit creates plenty of flavor without requiring a long ingredient list. Pecans add texture, cinnamon brings warmth, and a little maple syrup ties everything together with a glossy finish.

Prep Time: 15 minutes

Cook Time: 50 to 60 minutes
Total Time: About 1 hour 15 minutes
Servings: 4

Ingredients

For the Sweet Potatoes

  • 4 medium sweet potatoes
  • 1 tablespoon olive oil
  • Pinch of salt

Ingredients For the Apple Cranberry Filling

  • 2 medium apples, diced
  • 1/2 cup dried cranberries
  • 1/2 cup chopped pecans
  • 1 tablespoon butter or olive oil
  • 1 tablespoon maple syrup
  • 1 teaspoon ground cinnamon
  • 1/4 teaspoon ground nutmeg
  • Pinch of salt
  • 1 teaspoon fresh lemon juice
  • 1/2 teaspoon vanilla extract, optional

For Finishing

  • Extra pecans
  • Extra dried cranberries
  • Maple syrup, for drizzling
  • Fresh parsley or thyme, optional

Why You’ll Love This Recipe

Stuffed Sweet Potatoes are easy to prepare and use simple ingredients that are widely available during fall and winter. The sweet potatoes roast until soft and creamy inside, while the apple cranberry mixture adds a bright contrast.

Another reason to love Stuffed Sweet Potatoes is their flexibility. They can be served beside roast chicken, turkey, pork, or a vegetarian main dish, and they also work well on a brunch or holiday table.

The recipe can also be adapted with walnuts, raisins, pears, orange zest, or different warm spices depending on what you have at home.

How to Make Stuffed Sweet Potatoes

Step 1: Preheat the Oven

Preheat the oven to 400°F or 200°C.

Line a baking sheet with parchment paper or foil.

Step 2: Prepare the Sweet Potatoes

Wash and scrub the sweet potatoes well.

Pat them dry, pierce each one several times with a fork, and rub lightly with olive oil and a pinch of salt.

Place them on the prepared baking sheet.

Step 3: Roast Until Tender

Bake for 45 to 60 minutes, depending on size.

Stuffed Sweet Potatoes are easiest to prepare when the potatoes are fully tender and can be pierced easily with a knife.

Remove them from the oven and let them cool for about 5 minutes.

Step 4: Prepare the Apples

While the potatoes are roasting, peel the apples if desired.

Core and dice them into small pieces so they soften quickly and fit neatly inside the potatoes.

Step 5: Cook the Filling

Heat butter or olive oil in a skillet over medium heat.

Add the diced apples and cook for about 4 to 5 minutes until they begin to soften.

Stir in the dried cranberries, cinnamon, nutmeg, salt, lemon juice, maple syrup, and vanilla if using.

Cook for another 2 to 3 minutes.

Step 6: Add the Pecans

Stir in the chopped pecans.

Cook for about 1 minute, just long enough to warm them and bring out their nutty flavor.

Remove the skillet from the heat.

Step 7: Open the Sweet Potatoes

Carefully slice each roasted sweet potato lengthwise without cutting all the way through.

Gently press the ends toward the center to open them.

Use a fork to fluff the soft flesh inside.

Step 8: Season the Centers

Add a tiny pinch of salt and cinnamon to the inside of each potato if desired.

You can also drizzle a small amount of maple syrup into the center before adding the filling.

Step 9: Add the Filling

Spoon the warm apple cranberry mixture generously into each potato.

Stuffed Sweet Potatoes should look full and colorful, with some of the filling mounded slightly over the top.

Step 10: Return to the Oven

Place the filled potatoes back in the oven for 5 to 8 minutes.

This helps the flavors come together and keeps everything warm for serving.

Step 11: Garnish

Remove the potatoes from the oven.

Top with extra cranberries and pecans.

Add a light drizzle of maple syrup if you want a sweeter finish.

Step 12: Serve

Serve Stuffed Sweet Potatoes warm.

They are especially good when the sweet potato is soft and creamy and the apple mixture is still slightly warm and fragrant.

Serving Suggestions

Stuffed Sweet Potatoes are a natural fit for Thanksgiving, Christmas, fall dinners, and cozy family meals.

Serve Stuffed Sweet Potatoes with roasted turkey, baked chicken, pork tenderloin, glazed ham, or a lentil-based vegetarian main.

For a lighter meal, pair them with a crisp green salad, roasted Brussels sprouts, sautéed spinach, or a simple soup.

They also work nicely as part of a brunch spread with eggs, yogurt, fresh fruit, and warm bread.

If you want a fresh and colorful side dish, try this Apple Cranberry Carrot Salad with crisp apples, shredded carrots, sweet cranberries, crunchy nuts, and a light creamy dressing.

Recipe Tips

Choose sweet potatoes that are similar in size so they finish roasting at the same time.

Do not underbake the potatoes. The centers should be very soft before filling.

For the best Stuffed Sweet Potatoes, use firm apples such as Honeycrisp, Fuji, Pink Lady, or Granny Smith.

Cut the apples into small pieces so they cook evenly.

Toast the pecans briefly in a dry skillet if you want deeper flavor.

Taste the filling before stuffing the potatoes and adjust the maple syrup or cinnamon to suit your preference.

Easy Variations

Stuffed Sweet Potatoes are easy to customize.

For a pear version, replace half of the apples with diced pear.

To make them more savory, add a small amount of crumbled feta or goat cheese on top.

For extra warmth, add a pinch of ginger, cloves, or cardamom.

You can replace pecans with walnuts, almonds, or pumpkin seeds.

If you prefer more tartness, add a spoonful of fresh cranberry sauce to the filling.

For a filling breakfast or snack, try this High Protein Greek Yogurt Banana Bread made with ripe bananas, creamy Greek yogurt, eggs, and protein powder.

Make-Ahead Instructions

Stuffed Sweet Potatoes can be partially prepared ahead to save time.

Roast the sweet potatoes up to 2 days in advance and refrigerate them in an airtight container.

Prepare the apple cranberry filling separately and refrigerate it for up to 2 days.

When ready to serve, warm the potatoes, fill them, and return them to the oven until heated through.

For the best texture, add the final pecan garnish just before serving.

Storage and Reheating

Store leftover Stuffed Sweet Potatoes in an airtight container in the refrigerator for up to 4 days.

To reheat in the oven, place them in a baking dish and warm at 350°F or 175°C for about 15 minutes.

Individual portions can also be reheated in the microwave.

If the filling looks dry after refrigeration, add a teaspoon of maple syrup or a small splash of water before reheating.

Freezing is possible, but the apple texture may become softer after thawing.

Nutrition Information

Approximate nutrition per serving:

Calories: 360
Protein: 5 g
Carbohydrates: 63 g
Fat: 11 g
Saturated Fat: 2 g
Fiber: 9 g
Sugar: 29 g
Sodium: 120 mg

Nutrition values are estimates and may vary depending on the size of the potatoes and the amount of maple syrup and nuts used.

Frequently Asked Questions

Can I make Stuffed Sweet Potatoes without pecans?

Yes. Leave them out or replace them with walnuts, almonds, sunflower seeds, or pumpkin seeds.

Can I use fresh cranberries?

Yes, but they are much more tart than dried cranberries. Cook them a little longer with the apples and add extra maple syrup if needed.

Can I make this recipe vegan?

Yes. Use olive oil or plant-based butter instead of dairy butter.

What apples work best?

Firm apples such as Honeycrisp, Fuji, Pink Lady, or Granny Smith are excellent because they soften without becoming mushy.

Can I make them ahead for Thanksgiving?

Yes. Roast the potatoes and prepare the filling a day or two ahead, then assemble and reheat shortly before serving.

Can I add cheese?

Yes. Feta, goat cheese, or a small amount of blue cheese can add a savory contrast to the sweet filling.

Can I use walnuts instead of pecans?

Absolutely. Walnuts work very well and give a slightly more earthy flavor.

Are Stuffed Sweet Potatoes good for meal prep?

Yes. Store individual portions in covered containers and reheat as needed for quick lunches or side dishes.

Final Thoughts

Stuffed Sweet Potatoes bring together creamy roasted sweet potatoes, juicy apples, tart cranberries, crunchy pecans, cinnamon, and maple syrup in one colorful dish.

Because Stuffed Sweet Potatoes can be prepared ahead and customized easily, they are a practical choice for holiday meals, fall dinners, and meal prep.

Keep Stuffed Sweet Potatoes in your seasonal recipe collection whenever you want a warm, festive side dish with sweet, tart, nutty, and comforting flavors.

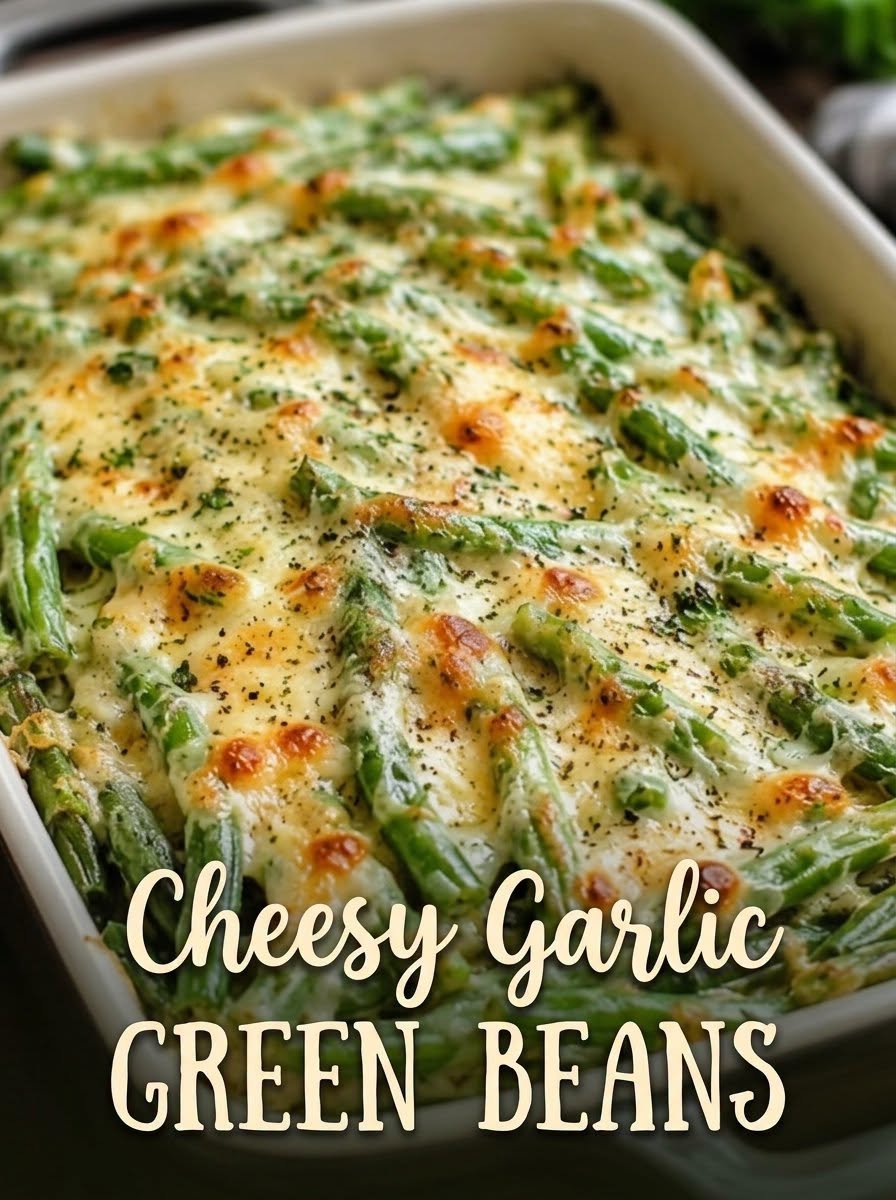
Cheesy Garlic Green Beans

Cheesy Green Beans with creamy garlic sauce, mozzarella, Parmesan, herbs, and golden baked cheese

Cheesy Garlic Green Beans

Cheesy Green Beans are a creamy, savory vegetable side dish made with tender green beans, garlic, cream cheese, mozzarella, Parmesan, and simple herbs. Cheesy Green Beans combine fresh green beans with a rich garlic cheese sauce and a golden baked topping, creating a side dish that pairs well with chicken, beef, turkey, pork, or fish.

Prep Time: 20 minutes
Cook Time: 30 minutes
Total Time: About 50 minutes
Servings: 6

Ingredients

For the Green Beans

  • 1 1/2 pounds fresh green beans, trimmed
  • 1 tablespoon olive oil
  • 1/2 teaspoon salt
  • 1/4 teaspoon black pepper
  • 1/2 teaspoon garlic powder

For the Creamy Garlic Cheese Sauce

  • 2 tablespoons unsalted butter
  • 4 garlic cloves, minced
  • 2 tablespoons all-purpose flour
  • 1 1/2 cups whole milk
  • 4 ounces cream cheese, softened
  • 1 cup shredded mozzarella cheese
  • 1/2 cup grated Parmesan cheese
  • 1/2 teaspoon Italian seasoning
  • 1/4 teaspoon onion powder
  • 1/4 teaspoon black pepper
  • Pinch of red pepper flakes, optional

For the Topping

  • 1/2 cup shredded mozzarella cheese
  • 1/4 cup grated Parmesan cheese
  • 1 tablespoon chopped fresh parsley
  • Extra black pepper, optional

Why You’ll Love This Recipe

Cheesy Green Beans are easy to prepare and turn a simple vegetable into a creamy, crowd-friendly side dish. The beans stay tender with a little bite, while the sauce adds garlic, cheese, and herb flavor without completely covering the freshness of the vegetables.

Another reason to love this dish is how well it works for holidays and make-ahead meals. You can blanch the beans, prepare the sauce, assemble the casserole, and refrigerate it before baking. That makes this recipe especially convenient for Thanksgiving, Christmas, Easter, or busy family dinners.

How to Make Cheesy Green Beans

Step 1: Preheat the Oven

Preheat the oven to 375°F or 190°C.

Lightly grease a 9-by-13-inch baking dish with butter, olive oil, or cooking spray.

Step 2: Prepare the Green Beans

Trim the ends from the green beans and rinse them well under cold water.

Bring a large pot of salted water to a boil.

Add the green beans and cook for 4 to 5 minutes, just until they turn bright green and become slightly tender.

Step 3: Cool the Beans

Drain the beans and transfer them immediately to a bowl of ice water.

Let them sit for 2 to 3 minutes, then drain well and pat dry.

This stops the cooking process and helps Cheesy Green Beans keep a better texture after baking.

Step 4: Season the Beans

Place the dried green beans in the prepared baking dish.

Drizzle with olive oil and season with salt, black pepper, and garlic powder.

Toss gently so the beans are evenly coated.

Step 5: Start the Garlic Sauce

Melt the butter in a medium saucepan over medium heat.

Add the minced garlic and cook for about 30 seconds, stirring constantly, until fragrant.

Do not let the garlic brown too much.

Step 6: Add the Flour

Sprinkle the flour over the butter and garlic.

Whisk continuously for about 1 minute.

The mixture should look smooth and bubbly.

Step 7: Add the Milk

Slowly pour in the milk while whisking constantly.

Continue cooking for 3 to 4 minutes, stirring frequently, until the sauce begins to thicken.

The sauce for Cheesy Green Beans should be creamy but still easy to pour.

Step 8: Add the Cheese

Reduce the heat to low.

Add the cream cheese, 1 cup mozzarella, and 1/2 cup Parmesan.

Stir until the cheeses are melted and the sauce is smooth.

Add Italian seasoning, onion powder, black pepper, and optional red pepper flakes.

Step 9: Combine the Beans and Sauce

Pour the cheese sauce evenly over the green beans.

Use a spoon or spatula to gently toss the beans so they are coated with the sauce.

At this stage, Cheesy Green Beans should look creamy and evenly covered without being soupy.

Step 10: Add the Topping

Sprinkle the remaining mozzarella and Parmesan over the top.

Add a little extra black pepper if desired.

Step 11: Bake

Bake uncovered for 20 to 25 minutes, or until the sauce is bubbling around the edges and the cheese on top is melted and lightly golden.

For more browning, broil for 1 to 2 minutes at the end while watching closely.

Step 12: Rest and Serve

Remove Cheesy Green Beans from the oven and let them rest for about 5 minutes.

Sprinkle with chopped parsley before serving.

Serving Suggestions

Cheesy Green Beans pair well with roasted chicken, baked turkey, grilled steak, pork chops, meatloaf, ham, or salmon.

For a holiday meal, serve Cheesy Green Beans alongside mashed potatoes, stuffing, roasted carrots, cranberry sauce, and dinner rolls.

They also work well with pasta, rice, roasted potatoes, or a simple green salad for an easy family dinner.

For another Italian-inspired dinner, try our Crispy Parmesan Chicken Cutlets with melted mozzarella, fresh tomatoes, basil, and sweet balsamic glaze.

Recipe Tips

Use fresh green beans when possible because they hold their texture better than canned beans.

Blanch the beans only until slightly tender. They will continue cooking in the oven.

Dry the beans well after the ice bath so excess water does not thin the sauce.

Freshly grated Parmesan and mozzarella usually melt more smoothly than many pre-shredded cheeses.

For the best Cheesy Green Beans texture, keep the sauce creamy but not overly thin before pouring it over the beans.

Taste the cheese sauce before adding extra salt because Parmesan can already be salty.

If the top is browning too quickly, cover the dish loosely with foil.

Easy Variations

Cheesy Green Beans are easy to customize.

For extra crunch, sprinkle toasted breadcrumbs over the cheese before baking.

For a mushroom version, sauté sliced mushrooms with the garlic before making the sauce.

You can make Cheesy Green Beans with cheddar, Monterey Jack, Gruyère, or a combination of cheeses instead of mozzarella.

For a slightly smoky flavor, add cooked crumbled bacon or a pinch of smoked paprika.

For extra vegetables, mix in sautéed mushrooms, roasted red peppers, or a small amount of spinach.

A spicy version can include jalapeño, cayenne, or extra red pepper flakes.

You may also enjoy our Tortilla Wraps with Ground Beef for a hearty family meal filled with seasoned beef, melted cheese, onions, peppers, and soft tortillas.

Make-Ahead Instructions

This recipe can be prepared in advance.

Blanch the beans, make the sauce, and assemble Cheesy Green Beans in the baking dish up to 24 hours before serving.

Cover tightly and refrigerate.

When ready to bake, let the dish sit at room temperature for about 20 minutes while the oven preheats.

You may need to add 5 to 10 minutes to the baking time if the casserole is still cold.

Storage and Reheating

Store leftover Cheesy Green Beans in an airtight container in the refrigerator for up to 3 days.

Reheat a larger portion in a 350°F or 175°C oven until hot.

Individual portions can be reheated in the microwave in short intervals.

If the sauce thickens too much after refrigeration, stir in a small splash of milk before reheating.

Freezing is possible, but the cheese sauce may become slightly grainy after thawing, so refrigerated leftovers usually have the best texture.

Nutrition Information

Approximate nutrition per serving:

Calories: 290
Protein: 14 g
Carbohydrates: 17 g
Fat: 20 g
Saturated Fat: 11 g
Fiber: 5 g
Sugar: 7 g
Sodium: 520 mg

Nutrition values are estimates and may vary depending on the cheeses, milk, green beans, and serving size.

Frequently Asked Questions

Can I use frozen green beans?

Yes. Thaw them first, drain well, and pat dry before assembling the dish. They may be slightly softer than fresh beans.

Can I use canned green beans?

Yes, but drain them thoroughly and skip the blanching step. The finished texture will be softer.

Can I make Cheesy Green Beans ahead?

Yes. Assemble the dish up to one day in advance, refrigerate, and bake shortly before serving.

Can I use cheddar cheese?

Yes. Cheddar works well and gives the dish a sharper flavor.

Why is my cheese sauce too thin?

The sauce may need another minute or two of cooking before the cheese is added. It will also thicken slightly as it bakes.

Can I add bacon?

Yes. Cooked crumbled bacon can be mixed into the beans or sprinkled over the top before baking.

Can I make this gluten-free?

Yes. Use a gluten-free all-purpose flour blend or cornstarch to thicken the sauce.

Final Thoughts

Cheesy Green Beans are an easy way to turn fresh green beans into a creamy, comforting side dish with plenty of garlic and cheese flavor.

Because Cheesy Green Beans combine tender vegetables, garlic, cream cheese, mozzarella, Parmesan, and herbs, they work for both everyday dinners and special occasions.

Keep this Cheesy Green Beans recipe handy for holidays, potlucks, family dinners, or anytime you want a vegetable side that feels warm and satisfying.

With tender green beans, creamy garlic sauce, melted cheese, and a golden baked top, Cheesy Green Beans are simple to prepare, easy to customize, and delicious enough to earn a regular place on the dinner table.

Cheesy Asparagus Casserole

Cheesy Asparagus Casserole

Asparagus Casserole is a creamy, cheesy, oven-baked side dish made with fresh asparagus, a rich homemade sauce, and plenty of melted cheese. It is simple enough for weeknight dinners but elegant enough for Easter, Thanksgiving, Christmas, or spring gatherings.

This Asparagus Casserole combines tender asparagus with garlic, cream, Parmesan, mozzarella, and herbs for a warm, comforting dish with a lightly golden top. It pairs beautifully with chicken, beef, fish, or other roasted vegetables.

Prep Time: 15 minutes
Cook Time: 30–35 minutes
Total Time: About 50 minutes
Servings: 6

Ingredients

the Asparagus

  • 2 pounds fresh asparagus
  • 1 tablespoon olive oil
  • 1/2 teaspoon salt
  • 1/4 teaspoon black pepper

the Creamy Sauce

  • 2 tablespoons unsalted butter
  • 3 garlic cloves, minced
  • 2 tablespoons all-purpose flour
  • 1 1/2 cups whole milk
  • 1/2 cup heavy cream
  • 1/2 teaspoon onion powder
  • 1/2 teaspoon dried thyme
  • 1/4 teaspoon smoked paprika
  • 1/4 teaspoon black pepper
  • 1/2 teaspoon salt

the Cheese Layer

  • 1 cup shredded mozzarella cheese
  • 1 cup shredded cheddar cheese
  • 1/2 cup grated Parmesan cheese

Finishing

  • 1 tablespoon chopped fresh parsley
  • Fresh thyme, optional
  • Red pepper flakes, optional

Why You’ll Love This Recipe

Asparagus Casserole is easy to assemble and turns a simple vegetable into a rich, comforting side dish. The sauce is creamy without being too heavy, while the cheese adds a savory finish and a golden top.

Another reason to love Asparagus Casserole is how well it fits into different meals. Serve it with roasted chicken, baked salmon, steak, turkey, or a vegetarian main. It can also be prepared ahead, which is useful for holidays and family gatherings.

How to Make Asparagus Casserole

Step 1: Preheat the Oven

Preheat the oven to 375°F or 190°C.

Lightly grease a 9 x 13-inch baking dish with butter, olive oil, or cooking spray.

Step 2: Prepare the Asparagus

Wash the asparagus and dry it thoroughly.

Trim off the woody ends. If the spears are unusually thick, lightly peel the lower portion with a vegetable peeler.

Arrange the asparagus in the prepared baking dish in an even layer.

Step 3: Season the Asparagus

Drizzle the asparagus with olive oil.

Sprinkle with salt and black pepper, then toss gently so the spears are lightly coated.

Keeping everything evenly seasoned helps Asparagus Casserole taste balanced from edge to edge.

Step 4: Start the Cream Sauce

Melt the butter in a medium saucepan over medium heat.

Add the minced garlic and cook for about 30 seconds, just until fragrant.

Do not allow the garlic to brown because burnt garlic can make the finished sauce bitter.

Step 5: Add the Flour

Sprinkle the flour over the melted butter and garlic.

Whisk continuously for about 1 minute.

This creates a simple roux that thickens the sauce and helps Asparagus Casserole stay creamy instead of watery.

Step 6: Add the Milk and Cream

Slowly pour in the milk while whisking constantly.

Add the heavy cream and continue whisking until smooth.

Cook for 3 to 5 minutes, stirring frequently, until the sauce begins to thicken enough to lightly coat the back of a spoon.

Step 7: Season the Sauce

Add onion powder, dried thyme, smoked paprika, salt, and black pepper.

Stir well and taste.

Adjust the seasoning if necessary, remembering that Parmesan and other cheeses will add extra saltiness.

Step 8: Add the Parmesan

Stir the Parmesan into the warm sauce.

Continue stirring until the cheese melts and the sauce becomes smooth and creamy.

Remove the saucepan from the heat.

Step 9: Pour the Sauce Over the Asparagus

Pour the creamy sauce evenly over the asparagus.

Use a spoon to spread it gently so most of the spears are coated.

The sauce should settle around the asparagus without completely hiding the fresh green tips.

Step 10: Add the Cheese

Sprinkle mozzarella and cheddar evenly over the top.

This creates the rich, golden finish that makes Asparagus Casserole especially comforting.

Step 11: Bake

Place the baking dish in the oven and bake uncovered for 25 to 30 minutes.

The sauce should bubble gently around the edges, the asparagus should become tender, and the cheese should be completely melted.

Step 12: Brown the Top

For a deeper golden finish, switch the oven to broil for 1 to 2 minutes.

Watch the casserole carefully because melted cheese can go from golden to burned very quickly.

Step 13: Rest Before Serving

Remove Asparagus Casserole from the oven and let it rest for 5 to 10 minutes.

This short resting period allows the creamy sauce to settle and thicken slightly, making the casserole easier to serve.

Step 14: Garnish and Serve

Sprinkle the top with chopped parsley, fresh thyme, or a pinch of red pepper flakes.

Serve warm while the cheese is soft and melted.

Serving Suggestions

Asparagus Casserole is a versatile side dish that pairs well with roasted chicken, turkey, baked salmon, grilled steak, pork tenderloin, or white fish.

For a vegetarian meal, pair Asparagus Casserole with lentils, quinoa, roasted potatoes, stuffed mushrooms, or a crisp green salad.

It also fits naturally on holiday tables alongside mashed potatoes, roasted carrots, green beans, stuffing, or warm dinner rolls.

A fresh tomato salad or lemony leafy salad provides a bright contrast to the creamy sauce and melted cheese.

For another cheesy vegetable side, try our Cheesy Cauliflower & Broccoli Veggie Casserole with tender vegetables and a rich, comforting cheese sauce.


Recipe Tips

Choose fresh asparagus with firm stalks and tightly closed tips.

Trim the woody ends before cooking because they can stay tough even after baking.

Dry the asparagus well after washing. Extra water can thin the sauce.

Use freshly shredded cheese when possible because it usually melts more smoothly than pre-shredded varieties.

Do not boil or blanch the asparagus first. It cooks directly in the casserole and stays firmer this way.

For the best Asparagus Casserole, keep the asparagus in a fairly even layer so every spear gets enough sauce and cheese.

If the casserole seems loose immediately after baking, let it rest for 10 minutes before serving.

Easy Variations

Asparagus Casserole can be customized with different toppings, vegetables, and cheeses.

For extra crunch, sprinkle buttery breadcrumbs or crushed crackers over the cheese before baking.

For stronger savory flavor, add sautéed mushrooms or caramelized onions.

A spicy version can include red pepper flakes, cayenne pepper, or pepper jack cheese.

For Mediterranean flavor, add feta, mozzarella, sun-dried tomatoes, and oregano.

You can also add cooked chicken, ham, or bacon to make the casserole more substantial.

For a lower-carb version, skip breadcrumbs and keep the topping focused on cheese, herbs, and Parmesan.

Make-Ahead Instructions

Asparagus Casserole can be prepared ahead, making it useful for busy holidays and entertaining.

Assemble the casserole through the cheese layer, cover the baking dish tightly, and refrigerate for up to 24 hours.

When ready to cook, let the dish sit at room temperature for about 20 minutes while the oven preheats.

A chilled casserole may require an additional 5 to 10 minutes of baking.

Storage and Reheating

Store leftover Asparagus Casserole in an airtight container in the refrigerator for up to 4 days.

To reheat a larger portion, place it in a baking dish, cover loosely with foil, and warm at 350°F or 175°C for 15 to 20 minutes.

Individual portions can be reheated in the microwave.

Avoid overheating because asparagus can become overly soft and creamy cheese sauces may separate when exposed to excessive heat.

Nutrition Information

Approximate nutrition per serving:

Calories: 330
Protein: 16 g
Carbohydrates: 14 g
Fat: 24 g
Saturated Fat: 14 g
Fiber: 4 g
Sugar: 6 g
Sodium: 620 mg

Nutrition values are estimates and may vary depending on the cheese, cream, asparagus, and exact serving size.

Frequently Asked Questions

Can I use frozen asparagus?

Yes, but fresh asparagus gives the best texture. If using frozen asparagus, thaw it completely and drain it very well before assembling the dish.

Can I make this without heavy cream?

Yes. Replace the heavy cream with additional whole milk. The sauce will be slightly lighter but will still work.

Why is my casserole watery?

The asparagus may contain excess moisture, or the cream sauce may not have thickened enough before baking. Dry the asparagus thoroughly and cook the sauce until it coats a spoon.

Can I add breadcrumbs?

Yes. Mix breadcrumbs with a small amount of melted butter and sprinkle them over the cheese before baking.

Can I use another cheese?

Yes. Gruyère, Monterey Jack, provolone, Swiss, or a mild Italian cheese blend all work well.

Can I make it ahead?

Yes. Assemble the dish, cover it, refrigerate for up to 24 hours, and bake when needed.

Can I freeze leftovers?

You can, but the sauce and asparagus may become softer after thawing. Refrigerated leftovers usually have the best texture.

Final Thoughts

Asparagus Casserole is a simple way to turn fresh asparagus into a creamy, cheesy side dish that feels both comforting and special.

Because Asparagus Casserole can be prepared ahead and paired with many different main courses, it works well for holidays, family dinners, and spring gatherings.

Keep this Asparagus Casserole recipe handy whenever you want an easy vegetable side with a rich sauce and golden cheese topping.

With tender asparagus, creamy garlic sauce, melted cheese, and fresh herbs, Asparagus Casserole is a dependable baked side dish that brings plenty of flavor to the table.

You may also enjoy our Spinach & Mushroom Breakfast Casserole for an easy make-ahead breakfast packed with vegetables and savory flavor.

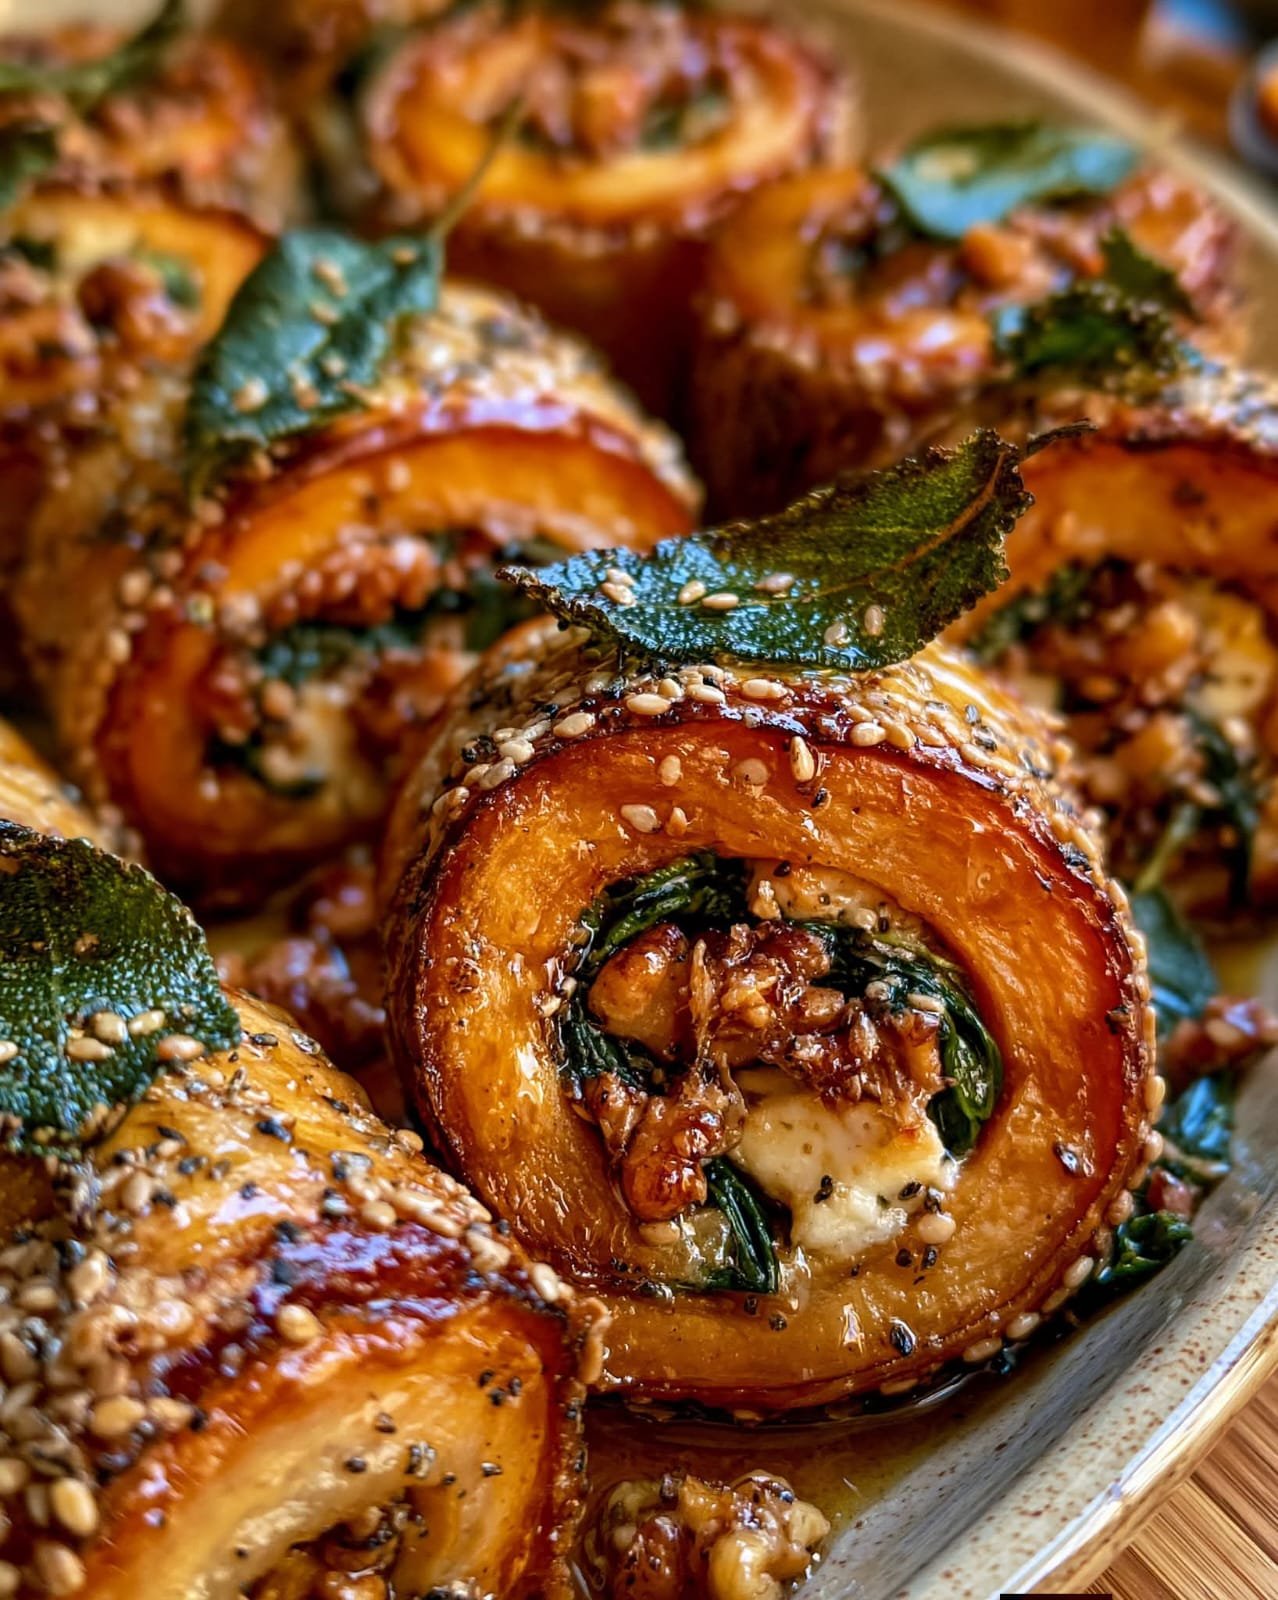
Crispy Sweet Potato & Butternut Rosti Rolls with Feta, Spinach, Walnuts & Hot Honey Sage Butter + Sesame Crust

Sweet Potato Rosti Rolls with butternut squash, feta, spinach, walnuts, sesame seeds, and hot honey sage butter

Crispy Sweet Potato & Butternut Rosti Rolls with Feta, Spinach, Walnuts & Hot Honey Sage Butter + Sesame Crust

Sweet Potato Rosti Rolls are a crispy, golden recipe made with shredded sweet potato, butternut squash, feta, spinach, walnuts, sesame seeds, and warm hot honey sage butter. They look impressive on a holiday table yet remain simple enough for brunch.

These Sweet Potato Rosti Rolls combine crisp roasted edges with a soft, cheesy center. Sweet potato and butternut create a sweet base, while feta, spinach, walnuts, sage, and hot honey add salty, earthy, nutty flavor.

Prep Time: 30 minutes
Cook Time: 40–45 minutes
Total Time: About 1 hour 15 minutes
Servings: 6

Ingredients

 the Rosti Mixture

  • 2 medium sweet potatoes, peeled and coarsely grated
  • 2 cups butternut squash, peeled and coarsely grated
  • 2 large eggs
  • 1/3 cup grated Parmesan cheese
  • 1/3 cup fine breadcrumbs
  • 1 teaspoon garlic powder
  • 1/2 teaspoon smoked paprika
  • 1/2 teaspoon dried thyme
  • 1/2 teaspoon salt
  • 1/4 teaspoon black pepper

the Filling

  • 2 cups baby spinach
  • 1 teaspoon olive oil
  • 1 cup crumbled feta cheese
  • 1/2 cup chopped toasted walnuts
  • 1 small garlic clove, minced
  • 1 tablespoon chopped fresh parsley
  • 1/4 teaspoon black pepper

the Sesame Crust

  • 3 tablespoons sesame seeds
  • 1 tablespoon olive oil
  • 2 tablespoons grated Parmesan, optional

 the Hot Honey Sage Butter

  • 3 tablespoons unsalted butter
  • 6 fresh sage leaves
  • 3 tablespoons honey
  • 1/2 teaspoon red pepper flakes
  • 1 teaspoon lemon juice
  • Pinch of salt

Why You’ll Love This Recipe

Sweet Potato Rosti Rolls bring several textures together in one dish. The outside becomes crisp and lightly caramelized, the inside stays tender, and the filling is creamy from feta with extra crunch from walnuts.

Another reason to love Sweet Potato Rosti Rolls is their presentation. The spiraled shape looks elegant without requiring pastry dough or complicated shaping. Serve them as a side, appetizer, vegetarian centerpiece, or brunch dish.

How to Make Sweet Potato Rosti Rolls

Step 1: Preheat the Oven

Preheat the oven to 400°F or 200°C. Line a baking sheet with parchment paper and brush or spray it with olive oil.

Step 2: Grate the Vegetables

Peel the sweet potatoes and butternut squash. Grate them using the large holes of a box grater or a food processor. Transfer the vegetables to a clean kitchen towel.

Step 3: Remove Excess Moisture

Gather the towel around the shredded vegetables and squeeze firmly over the sink.

Remove as much liquid as possible. This is important because dry vegetables help Sweet Potato Rosti Rolls become crisp instead of soft and watery.

Step 4: Make the Rosti Mixture

Place the squeezed vegetables in a large bowl. Add eggs, Parmesan, breadcrumbs, garlic powder, smoked paprika, thyme, salt, and black pepper.

Mix until evenly combined and the mixture holds together when pressed.

Step 5: Shape the Base

Spread the mixture over the baking sheet in a thin rectangle, about 1/3 inch thick. Press firmly with your hands or a spatula.

Keeping the layer even helps Sweet Potato Rosti Rolls cook consistently and makes rolling easier.

Step 6: Add the Sesame Crust

Brush the top lightly with olive oil. Sprinkle sesame seeds and Parmesan over the surface, then press gently so they stay attached.

Step 7: Bake Until Golden

Bake for 22 to 25 minutes, or until the edges are golden and the center feels set. Remove from the oven and cool for 5 minutes.

Step 8: Prepare the Spinach Filling

Heat olive oil in a skillet over medium heat. Add the spinach and cook for 1 to 2 minutes until wilted. Stir in the garlic and cook for 30 seconds.

Transfer to a bowl and cool slightly.

Step 9: Mix the Filling

Add feta, toasted walnuts, parsley, and black pepper to the spinach.

Mix gently. The filling for Sweet Potato Rosti Rolls should be moist but not wet. If necessary, squeeze excess liquid from the spinach first.

Step 10: Add the Filling

Spread the spinach and feta mixture evenly over the baked rosti sheet, leaving a small border around the edges. Do not overfill.

Step 11: Roll Carefully

Starting from one long side, use the parchment paper to help lift and roll the rosti sheet into a tight log.

Work slowly. If small cracks appear, press them back together as you roll.

Step 12: Slice the Rolls

Let the log rest for 5 minutes, then cut it into thick rounds with a sharp knife.

Arrange the slices cut-side up on the baking sheet. This spiral shape gives Sweet Potato Rosti Rolls their attractive presentation.

Step 13: Bake Again

Return the rolls to the oven and bake for another 12 to 15 minutes, until the edges are crisp and the feta is warm.

Step 14: Make the Hot Honey Sage Butter

Melt the butter in a small saucepan over medium-low heat. Add sage leaves and cook for 1 to 2 minutes until fragrant and lightly crisp.

Stir in honey, red pepper flakes, lemon juice, and salt. Warm gently without boiling.

Step 15: Finish and Serve

Transfer Sweet Potato Rosti Rolls to a serving platter. Spoon the hot honey sage butter over the top.

Finish with crisp sage leaves, sesame seeds, chopped walnuts, or extra feta if desired. Serve warm.

Serving Suggestions

Sweet Potato Rosti Rolls pair well with roasted chicken, turkey, grilled lamb, baked salmon, or pork tenderloin.

A vegetarian meal, serve them with green salad, lentil salad, roasted vegetables, hummus, or chickpeas.

when entertaining, arrange Sweet Potato Rosti Rolls on a platter and add the hot honey sage butter just before serving.

You may also enjoy our Golden Butternut & Spinach Rosti Rolls with Feta, Caramelized Onion, Sage & Walnut Sesame Crust.

Recipe Tips

Squeeze the grated vegetables thoroughly before mixing.

Use firm feta for the best texture.

Toast the walnuts to deepen their flavor.

Do not spread the rosti layer too thick.

Let the baked sheet cool briefly before adding the filling.

Keep the hot honey sage butter warm without boiling it.

Add the final drizzle immediately before serving.

Easy Variations

Sweet Potato Rosti Rolls can be customized in several ways.

Swap walnuts for pecans, pistachios, or hazelnuts.

Use goat cheese instead of feta for a softer, tangier filling.

Add sautéed mushrooms for extra savory flavor.

A small amount of dried cranberries can add a festive autumn flavor. Extra red pepper flakes or cayenne make the dish spicier, while rosemary or thyme can deepen the sage butter.

For a lighter cheesy option, try our Light Baked Ricotta with Burst Cherry Tomatoes for a fresh Mediterranean-style side.

Make-Ahead Instructions

Sweet Potato Rosti Rolls can be partially prepared ahead.

Bake the rosti sheet and prepare the filling up to one day in advance. Store them separately in the refrigerator.

When ready to serve, add the filling, roll, slice, and complete the second bake. Reheat the hot honey sage butter gently before serving.

Storage and Reheating

Store leftover Sweet Potato Rosti Rolls in an airtight container in the refrigerator for up to 3 days.

Reheat in a 375°F or 190°C oven for 8 to 10 minutes. An air fryer also works well and helps restore crisp edges.

Microwaving is faster, but the exterior will be softer. Store extra hot honey sage butter separately and add it after reheating.

Nutrition Information

Approximate nutrition per serving:

Calories: 365
Protein: 11 g
Carbohydrates: 39 g
Fat: 20 g
Saturated Fat: 8 g
Fiber: 6 g
Sugar: 13 g
Sodium: 590 mg

Nutrition values are estimates and may vary depending on the feta, walnuts, vegetables, butter, and serving size.

Frequently Asked Questions

Can I use only sweet potato?

Yes. Replace the butternut squash with additional sweet potato, though the texture may be slightly denser.

Why did my rosti sheet fall apart?

The vegetables may have contained too much moisture, or the sheet may have been too thick. Squeeze the vegetables well and press the mixture firmly.

Can I make this without feta?

Yes. Goat cheese, ricotta, or a firm dairy-free alternative can work.

Can I make the rolls without hot honey?

Yes. Use browned sage butter, maple butter, or a lemon-herb drizzle instead.

Can I freeze them?

Yes. Freeze the baked rolls, thaw, and reheat in a hot oven or air fryer.

Can I add meat?

Yes. Finely chopped cooked chicken or turkey can be added to the filling.

Are they good for holidays?

Yes. Sweet Potato Rosti Rolls suit fall and holiday meals because they combine sweet potato, squash, sage, nuts, and warm honey flavors.

Final Thoughts

Sweet Potato Rosti Rolls are a creative way to turn sweet potato and butternut squash into a crisp, elegant dish with a creamy feta and spinach center.

Because Sweet Potato Rosti Rolls can be prepared ahead and customized, they work well for brunch, family dinners, Thanksgiving, or festive gatherings.

Keep this Sweet Potato Rosti Rolls recipe handy whenever you want a side dish that looks special but uses familiar ingredients.

With golden sesame-coated edges, creamy feta, tender spinach, toasted walnuts, and warm hot honey sage butter, Sweet Potato Rosti Rolls deliver a beautiful balance of sweet, salty, savory, spicy, and crunchy flavors.

If you enjoy sweet-and-savory butternut recipes, you may also like our Crispy Honey-Roasted Butternut with Cranberries, Feta & Pumpkin Seeds.

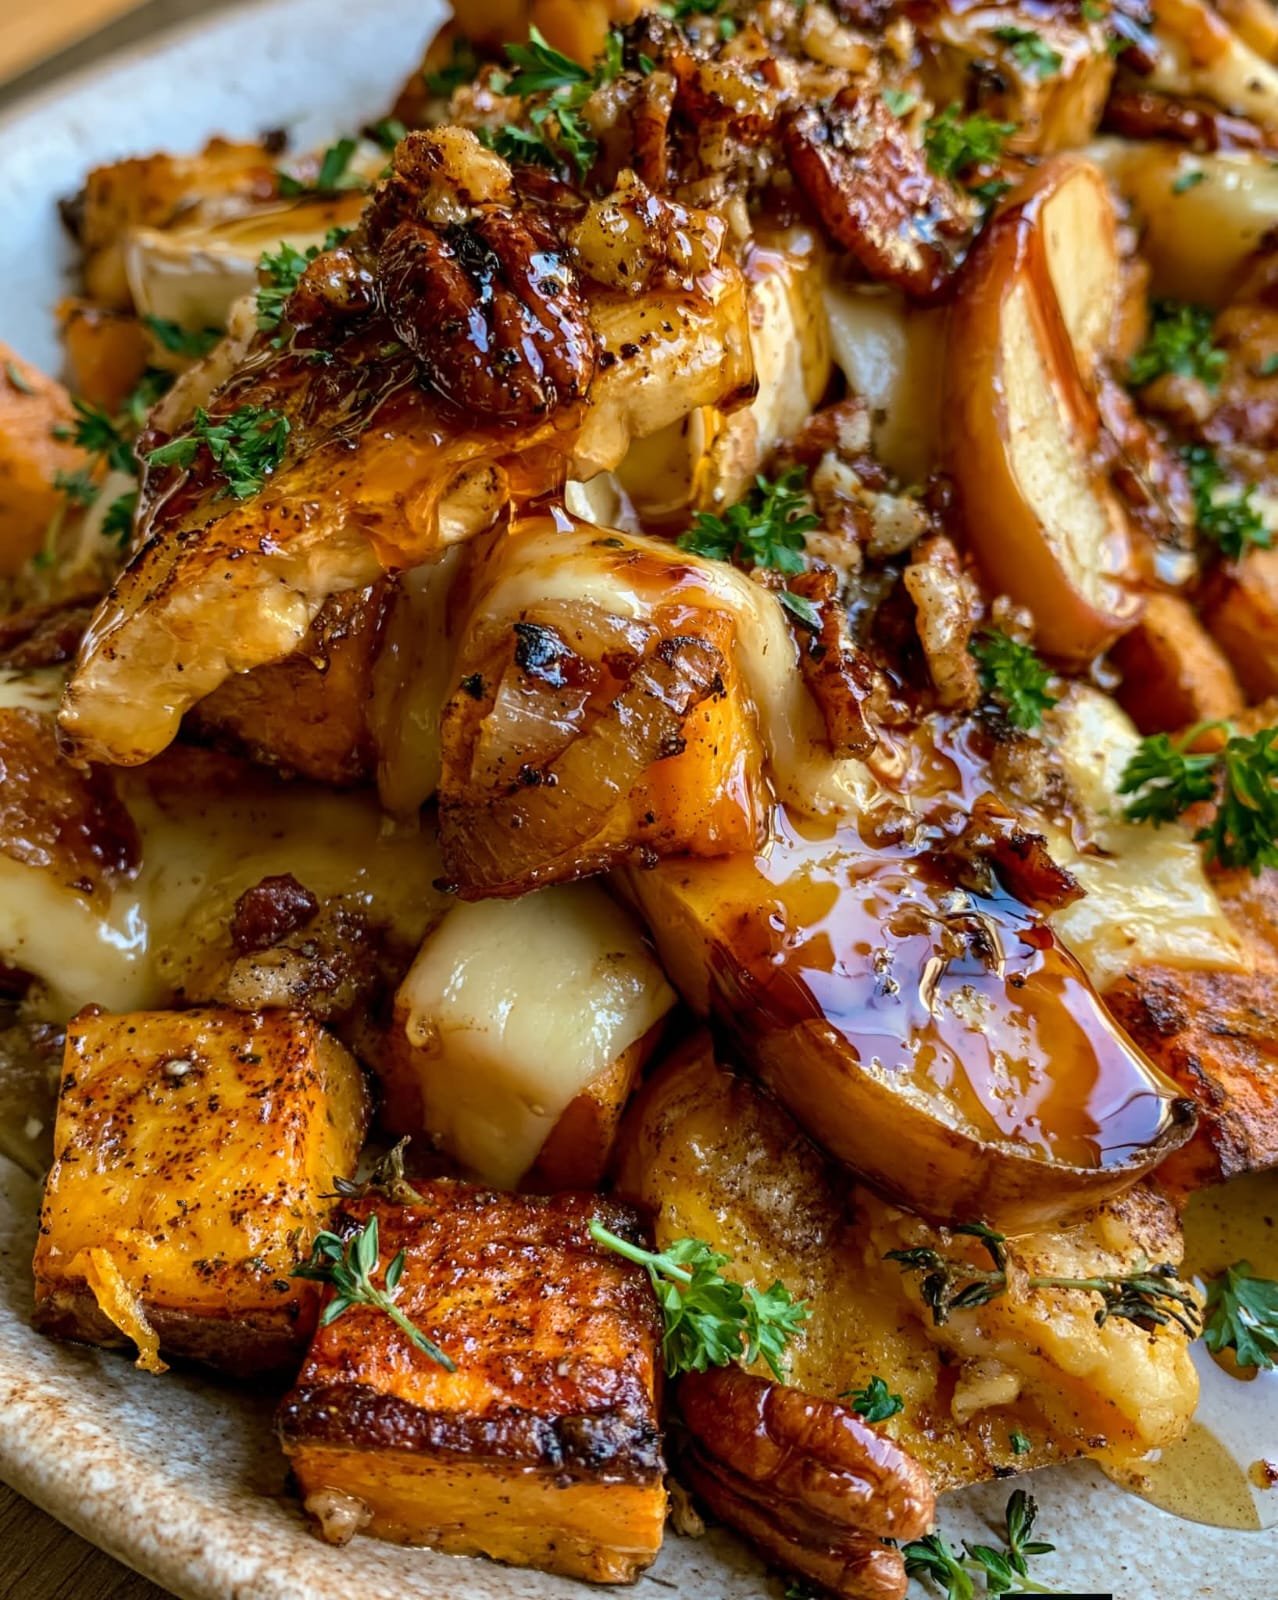
Best Sweet Potato, Butternut & Apple Smash with Brie, Pecan & Hot Honey

Sweet Potato Apple Smash with roasted sweet potato, butternut squash, apples, creamy Brie, toasted pecans, and hot honey

Best Sweet Potato, Butternut & Apple Smash with Brie, Pecan & Hot Honey

Sweet Potato Apple Smash is a warm, cozy side dish made with roasted sweet potatoes, butternut squash, apples, creamy Brie, toasted pecans, and a drizzle of hot honey. It brings together sweet, savory, creamy, crunchy, and slightly spicy flavors in one colorful recipe that works beautifully for fall dinners, holiday tables, or special family meals.

This recipe is easy to prepare, naturally comforting, and simple to customize. The roasted vegetables create a soft, caramelized base, while the apples add brightness and the Brie melts into rich pockets throughout the dish.

Prep Time: 20 minutes
Cook Time: 40 minutes
Total Time: 1 hour
Servings: 6

Ingredients

the Roasted Base

  • 2 medium sweet potatoes, peeled and cubed
  • 3 cups butternut squash, peeled and cubed
  • 2 medium Honeycrisp or Gala apples, cored and chopped
  • 2 tablespoons olive oil
  • 1/2 teaspoon salt
  • 1/4 teaspoon black pepper
  • 1/2 teaspoon ground cinnamon
  • 1/4 teaspoon smoked paprika
  • 1/4 teaspoon dried thyme

 the Smash

  • 2 tablespoons unsalted butter
  • 1/4 cup warm milk or cream
  • 4 ounces Brie, rind removed and chopped
  • 1/3 cup chopped toasted pecans
  • 1 tablespoon chopped fresh parsley or thyme

 the Hot Honey

  • 1/4 cup honey
  • 1/2 teaspoon red pepper flakes
  • 1 teaspoon apple cider vinegar
  • Pinch of salt

Why You’ll Love This Recipe

Sweet Potato Apple Smash feels special enough for a holiday table but is easy enough for a weeknight side dish. The sweet potatoes and butternut squash become creamy after roasting, while the apples add a fresh, lightly tart note that keeps the dish from tasting too heavy.

Another reason to love Sweet Potato Apple Smash is the contrast of textures. Brie melts into the warm mash, pecans add crunch, and hot honey brings a sweet-spicy finish.

How to Make Sweet Potato Apple Smash

Step 1: Preheat the Oven

Preheat the oven to 425°F or 220°C.

Line a large baking sheet with parchment paper or lightly grease it with olive oil.

Step 2: Prepare the Sweet Potatoes and Squash

Peel the sweet potatoes and butternut squash, then cut them into similar-size cubes.

Place them on the baking sheet.

Drizzle with olive oil and season with salt, black pepper, cinnamon, smoked paprika, and dried thyme.

Toss well so each piece is lightly coated.

Step 3: Start Roasting

Spread the vegetables in a single layer.

Roast for 20 minutes.

Step 4: Add the Apples

Remove the baking sheet from the oven.

Add the chopped apples and gently toss everything together.

Return the tray to the oven and roast for another 15 to 20 minutes, or until the sweet potatoes and squash are very tender and the apples are lightly caramelized.

The roasted fruit gives Sweet Potato Apple Smash a naturally sweet flavor without needing much added sugar.

Step 5: Make the Hot Honey

While the vegetables roast, combine honey and red pepper flakes in a small saucepan over low heat.

Warm gently for 2 to 3 minutes.

Remove from the heat and stir in apple cider vinegar and a pinch of salt.

Step 6: Transfer to a Mixing Bowl

Transfer the roasted sweet potatoes, squash, and apples to a large mixing bowl.

Let them cool for 2 to 3 minutes.

Letting steam escape helps Sweet Potato Apple Smash stay creamy instead of watery.

Step 7: Add Butter and Milk

Add the butter and warm milk or cream.

Use a potato masher to mash everything together.

Keep some small pieces visible if you prefer a rustic texture, or continue mashing until smoother.

Step 8: Fold in the Brie

Add the chopped Brie while the mixture is still hot.

Fold gently until the cheese starts to soften and melt into the mash.

The Brie gives Sweet Potato Apple Smash a rich, creamy flavor without overpowering the sweetness of the roasted vegetables and fruit.

Step 9: Add the Pecans

Stir in about half of the toasted pecans.

Save the rest for topping.

Step 10: Transfer to a Serving Dish

Spoon Sweet Potato Apple Smash into a warm serving bowl or shallow casserole dish.

Smooth the top gently with the back of a spoon.

Step 11: Add the Final Toppings

Scatter the remaining pecans over the top.

Add a few extra small pieces of Brie if desired and let them soften from the heat.

Drizzle with hot honey and finish with chopped parsley or thyme.

Step 12: Serve Warm

Serve immediately while the Brie is soft and the hot honey is glossy.

Serving Suggestions

Sweet Potato Apple Smash pairs beautifully with roasted chicken, turkey, pork tenderloin, baked ham, or grilled sausages.

It also works well beside green beans, Brussels sprouts, roasted carrots, or a crisp salad.

For a holiday meal, serve Sweet Potato Apple Smash with stuffing, cranberry sauce, and your favorite roasted vegetables.

Recipe Tips

Cut the sweet potatoes and squash into similar-size pieces so they roast evenly.

Use a firm apple such as Honeycrisp, Pink Lady, Gala, or Fuji.

Do not add the apples at the beginning of roasting or they may become too soft.

Warm the milk before adding it to the mash so the mixture stays hot.

For the creamiest Sweet Potato Apple Smash, add the Brie while the vegetables are still warm.

Toast the pecans before using them for deeper flavor and better crunch.

Add the hot honey just before serving so the drizzle stays visible and glossy.

Easy Variations

Sweet Potato Apple Smash can be adjusted in several easy ways.

Swap pecans for walnuts, almonds, pistachios, or pumpkin seeds.

Use goat cheese instead of Brie if you prefer a tangier flavor.

For a savory version, reduce the hot honey and add extra thyme, rosemary, black pepper, and Parmesan.

For more sweetness, add a small amount of maple syrup to the mash.

You can also add roasted pears in place of the apples for a softer, more floral flavor.

A little orange zest can brighten Sweet Potato Apple Smash and make it especially festive for holiday meals.

Make-Ahead Instructions

Sweet Potato Apple Smash can be prepared ahead with a few simple adjustments.

Roast the vegetables and apples one day ahead and refrigerate them.

Reheat, mash with butter and warm milk, then fold in the Brie.

Prepare the hot honey separately and store it at room temperature in a covered jar.

Add pecans and hot honey shortly before serving so the topping stays crisp and fresh.

Storage and Reheating

Store leftover Sweet Potato Apple Smash in an airtight container in the refrigerator for up to 4 days.

Reheat individual portions in the microwave in short intervals, stirring once or twice.

For larger amounts, cover and warm at 350°F or 175°C for 15 to 20 minutes.

If the mixture seems dry after refrigeration, stir in a splash of milk or cream.

Keep extra hot honey and pecans separate when possible and add them after reheating.

For another sweet-and-savory dish with feta and sweet potato, try our Golden Baked Feta & Spinach Puff Pastry Braid with Sweet Potato & Cranberry Sesame Crust.

Nutrition Information

Approximate nutrition per serving:

Calories: 360
Protein: 7 g
Carbohydrates: 49 g
Fat: 17 g
Saturated Fat: 7 g
Fiber: 7 g
Sugar: 21 g
Sodium: 330 mg

Nutrition values are estimates and vary by ingredients and portions.

Frequently Asked Questions

Can I use pre-cut butternut squash?

Yes. Pre-cut squash saves preparation time.

What apples work best?

Honeycrisp, Pink Lady, Fuji, and Gala are all good choices because they hold their shape during roasting.

Can I make this without Brie?

Yes. Goat cheese, cream cheese, feta, or a mild shredded cheese can work instead.

Can I make it dairy-free?

Yes. Use olive oil or dairy-free butter, plant-based milk, and a dairy-free cheese alternative.

Is the hot honey very spicy?

No. The amount of red pepper flakes gives the drizzle mild heat. Add more or less depending on your preference.

Can I make this ahead for Thanksgiving?

Yes. Sweet Potato Apple Smash is a good make-ahead holiday side. Prepare the roasted base in advance, then reheat, mash, and add the cheese and toppings before serving.

Can I freeze it?

You can freeze the mashed vegetable base, but the texture of Brie and apples may change slightly after thawing. For the best result, freeze before adding the cheese, nuts, and hot honey.

Final Thoughts

Sweet Potato Apple Smash is a cozy side dish that combines roasted sweet potatoes, butternut squash, apples, creamy Brie, crunchy pecans, and sweet-spicy hot honey.

Because Sweet Potato Apple Smash can be prepared ahead and customized with different cheeses, nuts, herbs, and fruit, it works beautifully for family dinners, fall gatherings, Thanksgiving, and holiday entertaining.

Keep this Sweet Potato Apple Smash recipe handy whenever you want a warm, colorful side dish that feels both comforting and a little special.

With creamy vegetables, caramelized apples, melty Brie, toasted pecans, and glossy hot honey, Sweet Potato Apple Smash delivers a delicious mix of sweet, savory, creamy, and crunchy flavors in every serving.