Spinach and Cheese Stuffed Portobello

Stuffed Portobello with spinach, ricotta, mozzarella, Parmesan, garlic, herbs, and tender baked mushrooms

Spinach and Cheese Stuffed Portobello

Stuffed Portobello is a hearty, oven-baked vegetarian dish made with large portobello mushrooms, creamy spinach, ricotta, mozzarella, Parmesan, garlic, and herbs. It is simple enough for a weeknight dinner but elegant enough for brunch, holidays, or casual entertaining. Stuffed Portobello also works well as a low-carb main course or a flavorful side dish alongside chicken, fish, or salad.

The mushrooms become tender and juicy in the oven, while the cheesy spinach filling turns creamy and golden on top.

Prep Time: 20 minutes
Cook Time: 30 minutes
Total Time: About 50 minutes
Servings: 4

Ingredients

For the Portobello Mushrooms

  • 4 large portobello mushroom caps
  • 1 tablespoon olive oil
  • 1/2 teaspoon salt
  • 1/4 teaspoon black pepper
  • 1/2 teaspoon Italian seasoning

Ingredients For the Spinach and Cheese Filling

  • 2 cups fresh spinach, chopped
  • 1 tablespoon olive oil
  • 2 garlic cloves, minced
  • 3/4 cup ricotta cheese
  • 1/2 cup shredded mozzarella cheese
  • 1/3 cup grated Parmesan cheese
  • 2 tablespoons cream cheese, softened
  • 1 tablespoon chopped fresh parsley
  • 1 teaspoon lemon zest
  • 1/2 teaspoon dried oregano
  • 1/4 teaspoon black pepper
  • Pinch of red pepper flakes, optional

For the Topping

  • 1/2 cup shredded mozzarella cheese
  • 2 tablespoons grated Parmesan cheese
  • 1 tablespoon chopped parsley
  • Cherry tomatoes or sun-dried tomatoes, optional

Why You’ll Love This Recipe

Stuffed Portobello is rich, cheesy, and satisfying without requiring complicated ingredients. The mushrooms provide a savory, meaty texture, while the spinach and cheese filling stays creamy and flavorful.

Another reason to love Stuffed Portobello is its flexibility. You can add sun-dried tomatoes, artichokes, cooked chicken, sausage, or extra vegetables depending on what you have available.

It is also easy to prepare ahead, making it useful for busy evenings or entertaining.

How to Make Stuffed Portobello

Step 1: Preheat the Oven

Preheat the oven to 400°F or 200°C.

Lightly grease a baking dish or line a rimmed baking sheet with parchment paper.

Step 2: Clean the Mushrooms

Wipe the portobello caps gently with a damp paper towel.

Remove the stems by twisting them carefully.

Use a spoon to scrape out the dark gills if you prefer a cleaner-looking filling, although this step is optional.

Step 3: Season the Mushrooms

Brush both sides of the mushroom caps with olive oil.

Season with salt, black pepper, and Italian seasoning.

Arrange them cavity-side up in the prepared baking dish.

Step 4: Pre-Bake the Mushrooms

Bake the mushroom caps for 10 minutes.

Remove them from the oven and carefully pour off any liquid that collects inside.

Pre-baking helps Stuffed Portobello avoid becoming watery once the filling is added.

Step 5: Cook the Spinach

Heat 1 tablespoon olive oil in a skillet over medium heat.

Add the garlic and cook for about 30 seconds.

Add the chopped spinach and cook for 1 to 2 minutes until wilted.

Remove the skillet from the heat and let the spinach cool slightly.

Step 6: Make the Cheese Filling

In a mixing bowl, combine ricotta, mozzarella, Parmesan, cream cheese, parsley, lemon zest, oregano, black pepper, and red pepper flakes if using.

Add the cooked spinach and mix until evenly combined.

The filling for Stuffed Portobello should be creamy and thick enough to hold its shape.

Step 7: Fill the Mushroom Caps

Divide the spinach and cheese mixture evenly among the mushroom caps.

Spoon the filling into the center and gently spread it to the edges.

Do not press too firmly.

Step 8: Add the Topping

Sprinkle the remaining mozzarella and Parmesan over the filled mushrooms.

Add chopped sun-dried tomatoes or halved cherry tomatoes if desired.

At this stage, Stuffed Portobello should look generously filled and ready to bake.

Step 9: Bake

Return the mushrooms to the oven.

Bake for 15 to 20 minutes, or until the filling is hot and the cheese is melted.

Step 10: Broil for Extra Color

For a golden finish, switch the oven to broil for 1 to 2 minutes.

Watch closely so the cheese does not burn.

Step 11: Rest Before Serving

Remove Stuffed Portobello from the oven and let it rest for 5 minutes.

This helps the filling set slightly and makes the mushrooms easier to serve.

Step 12: Garnish and Serve

Sprinkle with fresh parsley, extra Parmesan, black pepper, or red pepper flakes.

Serve warm.

Serving Suggestions

Stuffed Portobello is filling enough to serve as a vegetarian main course.

Pair it with a crisp green salad, roasted asparagus, garlic green beans, quinoa, couscous, or crusty bread.

You can also serve Stuffed Portobello alongside grilled chicken, baked salmon, or roasted turkey as a hearty side dish.

For a Mediterranean-style plate, add tomato cucumber salad, olives, hummus, and warm pita.

For a cool and creamy dessert, try our Creamy Avocado Ice Cream made with ripe avocado, heavy cream, condensed milk, lime, and vanilla.

Recipe Tips

Choose large portobello caps that feel firm and heavy for their size.

Avoid soaking mushrooms in water because they absorb moisture quickly. Wipe them clean instead.

Pre-bake the mushroom caps before filling to remove some excess liquid.

Drain or squeeze cooked spinach if it releases a lot of moisture.

Use whole-milk ricotta for the creamiest Stuffed Portobello filling.

Freshly grated Parmesan melts more smoothly and gives better flavor.

Do not overbake the mushrooms. They should be tender but still sturdy enough to hold the filling.

Let the dish rest briefly before serving.

Easy Variations

Stuffed Portobello is easy to customize with different cheeses, vegetables, and proteins.

For a Mediterranean variation, add crumbled feta, sun-dried tomatoes, olives, and oregano.

For extra vegetables, mix in chopped artichoke hearts, roasted red peppers, zucchini, or sautéed onions.

You can make Stuffed Portobello heartier by adding cooked ground turkey, shredded chicken, or Italian sausage.

For a sharper cheese flavor, replace some mozzarella with provolone or Gruyère.

A small spoonful of pesto can be stirred into the filling for extra basil and garlic flavor.

For a spicy version, increase the red pepper flakes or add chopped jalapeño.

You may also enjoy our Classic Italian Spaghetti Pasta Salad for a fresh and colorful side dish with tender pasta, crisp vegetables, olives, Parmesan, and zesty Italian dressing.

Make-Ahead Instructions

This dish is convenient for make-ahead meals.

Clean and pre-bake the mushroom caps, prepare the spinach filling, and assemble the dish up to one day in advance.

Cover tightly and refrigerate.

When ready to bake, let the dish sit at room temperature while the oven preheats.

Add about 5 extra minutes to the baking time if the mushrooms are still very cold.

Storage and Reheating

Store leftovers in an airtight container in the refrigerator for up to 3 days.

For the best texture, reheat the mushrooms in a 350°F or 175°C oven for about 10 to 12 minutes, until the centers are hot and the cheese softens again.

You can also microwave individual portions in short intervals, although the mushrooms may become softer.

Freezing is possible, but the texture of mushrooms and ricotta may change after thawing, so refrigerated leftovers are usually best.

Nutrition Information

Approximate nutrition per serving:

Calories: 310
Protein: 18 g
Carbohydrates: 12 g
Fat: 22 g
Saturated Fat: 10 g
Fiber: 3 g
Sugar: 5 g
Sodium: 620 mg

Nutrition values are estimates and may vary depending on the cheeses, mushroom size, toppings, and serving size.

Frequently Asked Questions

Do I need to remove the mushroom gills?

No. The gills are edible, but removing them creates more room for filling and keeps the mixture lighter in color.

Can I use frozen spinach?

Yes. Thaw it completely and squeeze out as much moisture as possible before mixing it with the cheeses.

Can I make this without ricotta?

Yes. Cottage cheese, goat cheese, or extra cream cheese can be used, although the texture will change slightly.

Can I add meat?

Yes. Cooked chicken, turkey, sausage, or ground beef can be mixed into the filling.

Why are my mushrooms watery?

Portobellos naturally release moisture while baking. Pre-baking and draining the caps before filling helps reduce excess liquid.

Can I make this gluten-free?

Yes. The basic recipe is naturally gluten-free, but always check packaged cheese and seasonings if needed.

Final Thoughts

Stuffed Portobello is an easy way to turn simple mushrooms into a rich, cheesy, vegetable-packed meal.

Because Stuffed Portobello combines tender mushrooms, spinach, ricotta, mozzarella, Parmesan, garlic, herbs, and lemon, every bite is savory and satisfying.

Keep this Stuffed Portobello recipe handy whenever you want a vegetarian dinner that feels comforting without requiring pasta or a heavy casserole.

With juicy mushrooms, creamy spinach filling, melted cheese, garlic, herbs, and a golden top, Stuffed Portobello delivers a flavorful oven-baked meal that works for both everyday dinners and special occasions.
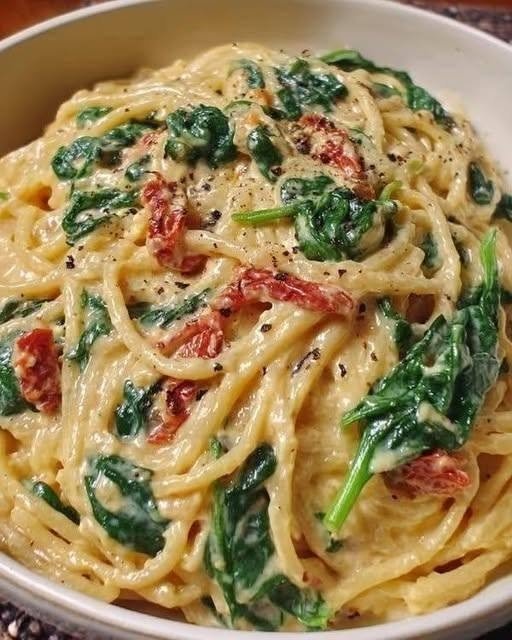
Creamy Spinach & Sun-Dried Tomato Pasta

Spinach Tomato Pasta with baby spinach, sun-dried tomatoes, creamy Parmesan sauce, garlic, and tender pasta

Creamy Spinach & Sun-Dried Tomato Pasta

Spinach Tomato Pasta is a creamy, comforting dinner made with tender pasta, baby spinach, sun-dried tomatoes, garlic, Parmesan, and a silky cream sauce. It comes together with simple ingredients but still feels rich and restaurant-style. Spinach Tomato Pasta is perfect for busy weeknights, cozy weekends, or an easy meatless meal when you want something satisfying without a lot of prep.

The sweetness of sun-dried tomatoes balances the creamy sauce, while spinach adds freshness and color. A little garlic, Italian seasoning, and Parmesan bring everything together.

Prep Time: 15 minutes
Cook Time: 25 minutes
Total Time: About 40 minutes
Servings: 4 to 6

Ingredients

For the Pasta

  • 12 ounces penne, fettuccine, rigatoni, or rotini
  • 1 tablespoon salt for the pasta water

For the Creamy Sauce

  • 2 tablespoons olive oil
  • 1 tablespoon unsalted butter
  • 4 garlic cloves, minced
  • 3/4 cup sun-dried tomatoes, drained and sliced
  • 2 tablespoons all-purpose flour
  • 1 1/2 cups whole milk
  • 3/4 cup heavy cream
  • 1 cup freshly grated Parmesan cheese
  • 1 teaspoon Italian seasoning
  • 1/2 teaspoon smoked paprika
  • 1/4 teaspoon red pepper flakes, optional
  • 1/2 teaspoon salt, or to taste
  • 1/4 teaspoon black pepper
  • 4 cups baby spinach
  • 1/2 cup reserved pasta water, as needed
  • 1 tablespoon fresh lemon juice
  • 2 tablespoons chopped fresh parsley or basil

Why You’ll Love This Recipe

Spinach Tomato Pasta is creamy, colorful, and easy to make with ingredients that are available in most grocery stores. The sauce is rich without being overly heavy, and the sun-dried tomatoes add concentrated flavor to every bite.

Another reason to love Spinach Tomato Pasta is how flexible it is. You can add chicken, shrimp, mushrooms, artichokes, or extra vegetables, or keep it simple for a vegetarian dinner.

The entire dish comes together in one pan after the pasta is cooked, which means less cleanup and an easier dinner routine.

How to Make Spinach Tomato Pasta

Step 1: Cook the Pasta

Bring a large pot of salted water to a boil.

Add the pasta and cook according to the package directions until al dente.

Before draining, reserve about 1 cup of pasta water.

Drain the pasta and set it aside.

Step 2: Prepare the Sun-Dried Tomatoes

If your sun-dried tomatoes are packed in oil, drain them well and slice them into thin strips.

If they are very large, chop them into smaller pieces so they distribute evenly throughout the sauce.

Step 3: Sauté the Garlic

Heat the olive oil and butter in a large skillet over medium heat.

Add the minced garlic and cook for about 30 seconds, stirring constantly.

Do not let the garlic brown.

Step 4: Add the Sun-Dried Tomatoes

Add the sliced sun-dried tomatoes to the skillet.

Cook for 1 to 2 minutes so they soften slightly and release their flavor into the oil.

This step gives Spinach Tomato Pasta a deeper, richer tomato flavor.

Step 5: Add the Flour

Sprinkle the flour over the garlic and tomatoes.

Stir constantly for about 1 minute.

This creates a light roux that helps thicken the sauce.

Step 6: Add Milk and Cream

Slowly pour in the milk while whisking or stirring.

Add the heavy cream and continue stirring until the mixture is smooth.

Cook for 3 to 4 minutes, or until the sauce begins to thicken.

Step 7: Season the Sauce

Add Italian seasoning, smoked paprika, red pepper flakes, salt, and black pepper.

Stir well and reduce the heat to low.

Step 8: Add the Parmesan

Add the grated Parmesan a little at a time.

Stir continuously until the cheese melts into the sauce.

The sauce for Spinach Tomato Pasta should be smooth, creamy, and thick enough to coat the back of a spoon.

Step 9: Add the Spinach

Add the baby spinach in batches.

Stir after each addition until the leaves wilt into the sauce.

This usually takes only 2 to 3 minutes.

Step 10: Add the Pasta

Add the cooked pasta to the skillet.

Toss gently until every piece is coated in the creamy sauce.

If the sauce is too thick, add a splash of reserved pasta water.

Spinach Tomato Pasta should look creamy and glossy rather than dry.

Step 11: Add Lemon Juice

Stir in the fresh lemon juice.

The acidity helps balance the richness of the cream and Parmesan.

Taste and adjust the salt, pepper, or red pepper flakes if needed.

Step 12: Garnish and Serve

Remove the skillet from the heat.

Sprinkle with chopped parsley or basil and extra Parmesan.

Serve Spinach Tomato Pasta immediately while the sauce is warm and creamy.

Serving Suggestions

Spinach Tomato Pasta is filling enough to serve on its own, but fresh sides help balance the richness.

Serve Spinach Tomato Pasta with a crisp green salad, Caesar salad, roasted asparagus, steamed broccoli, or garlic bread.

For extra protein, serve it with grilled chicken, baked salmon, shrimp, or sliced Italian sausage.

A simple tomato cucumber salad also pairs well with the creamy sauce.

For an easy no-bake dessert, try our No Bake Twix Bars with a buttery biscuit base, gooey caramel, and smooth chocolate topping.

Recipe Tips

Use freshly grated Parmesan whenever possible because it melts more smoothly than pre-shredded cheese.

Cook the pasta only until al dente so it stays firm after being tossed with the hot sauce.

Reserve pasta water before draining. The starchy water is useful for loosening the sauce without making it watery.

Add the spinach gradually so it wilts evenly.

For the best texture, keep the heat low after adding Parmesan. High heat can cause creamy cheese sauces to separate.

Drain oil-packed sun-dried tomatoes well so the finished dish does not become greasy.

Taste before adding extra salt because Parmesan and sun-dried tomatoes can both be salty.

Easy Variations

Spinach Tomato Pasta is easy to customize with different proteins and vegetables.

Add cooked chicken breast for a heartier meal.

Shrimp also works well and pairs naturally with the garlic cream sauce.

For extra vegetables, add mushrooms, zucchini, roasted red peppers, peas, or artichoke hearts.

You can turn Spinach Tomato Pasta into a spicy version by adding more red pepper flakes or a little cayenne pepper.

For extra tang, add a spoonful of cream cheese or a small amount of crumbled feta.

If you want a lighter sauce, replace part of the heavy cream with whole milk.

You can also use whole-wheat pasta, chickpea pasta, or gluten-free pasta.

You may also enjoy our Comfort Food Stuffed Eggplant Bake for a hearty dinner with tender eggplant, savory beef, tomatoes, ricotta, and melted cheese.

Make-Ahead Instructions

Spinach Tomato Pasta is best served fresh, but several parts can be prepared in advance.

Slice the sun-dried tomatoes and grate the Parmesan up to two days ahead.

The sauce can be made several hours ahead and stored in the refrigerator. Reheat it gently over low heat with a splash of milk before adding the pasta.

If making the entire dish ahead, slightly undercook the pasta so it does not become too soft when reheated.

Storage and Reheating

Store leftover Spinach Tomato Pasta in an airtight container in the refrigerator for up to 3 days.

Reheat it gently in a skillet over medium-low heat.

Add a small splash of milk, cream, or water to loosen the sauce as it warms.

You can also microwave individual portions in short intervals, stirring between each interval.

Avoid overheating because creamy sauces can separate if they become too hot.

Nutrition Information

Approximate nutrition per serving:

Calories: 570
Protein: 19 g
Carbohydrates: 60 g
Fat: 29 g
Saturated Fat: 15 g
Fiber: 5 g
Sugar: 8 g
Sodium: 720 mg

Nutrition values are estimates and may vary depending on the pasta, cream, Parmesan, sun-dried tomatoes, and serving size.

Frequently Asked Questions

Can I use frozen spinach?

Yes. Thaw it completely and squeeze out as much liquid as possible before adding it to the sauce.

Can I make this without heavy cream?

Yes. Use whole milk or half-and-half, but the sauce will be slightly lighter.

What pasta shape works best?

Penne, rigatoni, rotini, farfalle, and fettuccine all work well because they hold the creamy sauce nicely.

Can I add chicken?

Yes. Sliced grilled or sautéed chicken makes the dish more filling and adds extra protein.

Why did my sauce become too thick?

The sauce naturally thickens as it sits. Add reserved pasta water or milk a little at a time until the desired consistency returns.

Can I make this spicy?

Yes. Add more red pepper flakes, cayenne pepper, or chili oil.

Can I freeze it?

Cream sauces can change texture after freezing, so refrigerated leftovers are usually better.

Final Thoughts

Spinach Tomato Pasta is a simple way to turn pantry staples and fresh spinach into a creamy, satisfying dinner.

Because Spinach Tomato Pasta can be customized with chicken, shrimp, vegetables, or different pasta shapes, it is easy to adapt for different meals and occasions.

Keep this Spinach Tomato Pasta recipe handy whenever you want a quick meatless dinner that still feels rich and comforting.

With tender pasta, garlicky cream sauce, sweet sun-dried tomatoes, fresh spinach, and Parmesan, Spinach Tomato Pasta delivers cozy flavor with very little effort.

Ultimate Cheesy Veggie Casserole

Ultimate Cheesy Veggie Casserole

Cheesy Veggie Casserole is a colorful, creamy, oven-baked dish packed with broccoli, cauliflower, mushrooms, bell peppers, cherry tomatoes, and plenty of melted cheese. It is a practical way to serve several vegetables in one comforting recipe, making it ideal for family dinners, potlucks, holidays, or simple meal prep.

Prep Time: 20 minutes
Cook Time: 35–40 minutes
Total Time: About 1 hour
Servings: 6

Ingredients

the Vegetables

  • 2 cups broccoli florets
  • 2 cups cauliflower florets
  • 1 cup sliced mushrooms
  • 1 red bell pepper, sliced
  • 1 yellow bell pepper, sliced
  • 1 cup cherry tomatoes, halved
  • 1 small zucchini, sliced
  • 1 tablespoon olive oil
  • 1/2 teaspoon salt
  • 1/4 teaspoon black pepper

the Creamy Sauce

  • 2 tablespoons unsalted butter
  • 3 garlic cloves, minced
  • 2 tablespoons all-purpose flour
  • 1 1/2 cups whole milk
  • 1/2 cup heavy cream
  • 1 teaspoon Dijon mustard
  • 1/2 teaspoon onion powder
  • 1/2 teaspoon dried oregano
  • 1/2 teaspoon dried thyme
  • 1/4 teaspoon smoked paprika
  • Salt and black pepper, to taste

the Cheese Layer

  • 1 cup shredded mozzarella
  • 1 cup shredded cheddar
  • 1/2 cup grated Parmesan

Finishing

  • 2 tablespoons chopped fresh parsley
  • Fresh basil, optional
  • Red pepper flakes, optional

Why You’ll Love This Recipe

Cheesy Veggie Casserole is easy to prepare and works with many different vegetables. The creamy sauce adds richness without hiding the natural flavor of the broccoli, cauliflower, mushrooms, peppers, and tomatoes.

It is also a useful make-ahead recipe because the casserole can be assembled in advance and baked when needed. Cheesy Veggie Casserole also reheats well for busy days.

How to Make Cheesy Veggie Casserole

Step 1: Preheat the Oven

Preheat the oven to 375°F or 190°C.

Lightly grease a 9 x 13-inch baking dish with butter, olive oil, or cooking spray.

Step 2: Prepare the Vegetables

Wash and dry all of the vegetables.

Cut the broccoli and cauliflower into bite-size florets. Slice the mushrooms, peppers, and zucchini, then halve the cherry tomatoes.

Step 3: Lightly Cook the Firm Vegetables

Bring a large pot of water to a boil.

Add the broccoli and cauliflower and cook for 2 to 3 minutes.

Drain immediately and rinse briefly under cool water.

This short blanching step gives the firmer vegetables a head start without making them too soft.

Step 4: Sauté the Remaining Vegetables

Heat olive oil in a large skillet over medium heat.

Add the mushrooms, peppers, and zucchini.

Cook for 4 to 5 minutes, stirring occasionally, until they begin to soften.

Add the cherry tomatoes during the final minute.

Season lightly with salt and black pepper.

Step 5: Arrange the Vegetables

Spread the broccoli, cauliflower, mushrooms, peppers, zucchini, and tomatoes evenly in the prepared baking dish.

Step 6: Start the Creamy Sauce

Melt the butter in a medium saucepan over medium heat.

Add the minced garlic and cook for about 30 seconds, just until fragrant.

Sprinkle in the flour and whisk continuously for 1 minute.

This creates a simple roux that helps the sauce for Cheesy Veggie Casserole thicken smoothly.

Step 7: Add the Milk and Cream

Slowly pour in the milk while whisking constantly.

Add the heavy cream and continue stirring until the sauce becomes smooth.

Cook for 3 to 5 minutes, or until it thickens enough to lightly coat the back of a spoon.

Step 8: Season the Sauce

Stir in Dijon mustard, onion powder, oregano, thyme, smoked paprika, salt, and black pepper.

Taste and adjust the seasoning if needed.

Step 9: Add Parmesan

Stir the Parmesan into the warm sauce.

Mix until melted and smooth.

Remove the saucepan from the heat.

Step 10: Pour the Sauce Over the Vegetables

Pour the creamy sauce evenly over the vegetables.

Use a spoon to gently spread the sauce so it reaches most of the vegetables.

Step 11: Add the Cheese

Sprinkle mozzarella and cheddar evenly over the top.

The cheese layer gives Cheesy Veggie Casserole its rich, golden finish. Cheesy Veggie Casserole looks especially inviting once the top turns lightly browned.

Step 12: Bake

Place the baking dish on the center rack.

Bake uncovered for 25 to 30 minutes.

The sauce should bubble gently around the edges and the cheese should be fully melted.

Step 13: Brown the Top

For a more golden finish, switch the oven to broil for 1 to 2 minutes.

Watch closely so the cheese does not burn.

Step 14: Rest Before Serving

Remove Cheesy Veggie Casserole from the oven and let it rest for 10 minutes.

This short resting time allows the sauce to thicken slightly and makes the casserole easier to serve.

Step 15: Garnish

Sprinkle with chopped parsley, fresh basil, or red pepper flakes if desired.

Serve warm. Cheesy Veggie Casserole is best after a short rest.

Serving Suggestions

Cheesy Veggie Casserole works well as a vegetarian main dish or a hearty side.

Serve Cheesy Veggie Casserole with grilled chicken, roasted turkey, baked salmon, white fish, or steak for a complete dinner.

For a vegetarian meal, pair it with lentils, chickpeas, quinoa, brown rice, or a crisp green salad.

For a heartier casserole option, try our Cheesy Zucchini, Spinach & Sausage Casserole with tender vegetables, savory sausage, and plenty of melted cheese.

Recipe Tips

Dry the vegetables well after washing so the casserole does not become watery.

Do not overcook the broccoli and cauliflower before baking. They only need a quick blanch.

Sauté mushrooms before assembling because they release a lot of moisture.

Use freshly shredded cheese when possible because it melts more smoothly.

For the best Cheesy Veggie Casserole, keep the vegetables in an even layer and avoid overcrowding the baking dish.

Let the casserole rest before serving so the sauce has time to settle.

Easy Variations

Cheesy Veggie Casserole is easy to customize based on what you have available.

For extra greens, add spinach or kale.

For a Mediterranean-style version, add feta, olives, sun-dried tomatoes, oregano, and basil.

A spicy version can include jalapeños, red pepper flakes, cayenne, or pepper jack cheese.

For extra protein, add cooked shredded chicken, turkey, or white beans.

You can also replace cheddar with Gruyère, Monterey Jack, provolone, or an Italian cheese blend.

Make-Ahead Instructions

Cheesy Veggie Casserole can be assembled several hours before baking.

Prepare the vegetables, make the sauce, assemble the casserole, and add the cheese.

Cover tightly and refrigerate for up to 24 hours.

When ready to bake, let the dish sit at room temperature for about 20 minutes while the oven preheats.

A chilled casserole may need an extra 5 to 10 minutes in the oven.

Storage and Reheating

Store leftover Cheesy Veggie Casserole in an airtight container in the refrigerator for up to 4 days.

Reheat individual portions in the microwave until hot.

For a better texture, reheat larger portions in a covered baking dish at 350°F or 175°C for 15 to 20 minutes.

If the casserole seems dry after refrigeration, add a small spoonful of milk before reheating.

Nutrition Information

Approximate nutrition per serving:

Calories: 340
Protein: 17 g
Carbohydrates: 20 g
Fat: 23 g
Saturated Fat: 13 g
Fiber: 5 g
Sugar: 8 g
Sodium: 590 mg

Nutrition values are estimates and may vary depending on the vegetables, cheeses, cream, and exact serving size.

Frequently Asked Questions

Can I use frozen vegetables?

Yes. Thaw them completely and drain them well before assembling the casserole. Excess water can make the sauce thin.

Can I make this without heavy cream?

Yes. Replace the cream with extra whole milk for a lighter sauce.

Why is my casserole watery?

The vegetables may have released too much liquid. Dry them well, sauté mushrooms first, and avoid overcooking the vegetables before baking.

Can I add breadcrumbs?

Yes. Mix breadcrumbs with a little melted butter and sprinkle them over the cheese before baking for extra crunch.

Can I use different vegetables?

Yes. Green beans, spinach, asparagus, corn, carrots, squash, and eggplant can all work.

Can I make it ahead?

Yes. Assemble the dish, cover it, refrigerate for up to 24 hours, and bake when needed.

Can I freeze leftovers?

Yes, although the vegetables and cream sauce may become slightly softer after thawing. Refrigerated leftovers usually have the best texture.

Final Thoughts

Cheesy Veggie Casserole is an easy way to turn a colorful mix of vegetables into a creamy, comforting baked dish.

Because Cheesy Veggie Casserole can be customized with different vegetables and cheeses, it works well for family dinners, holidays, potlucks, and meal prep.

Keep this Cheesy Veggie Casserole recipe handy whenever you want a vegetable dish that feels hearty, cheesy, and satisfying.

With tender broccoli, cauliflower, mushrooms, peppers, tomatoes, creamy sauce, and melted cheese, Cheesy Veggie Casserole is a versatile recipe that can work as either a main dish or a flavorful side.

You may also enjoy our Cheesy Cauliflower & Broccoli Veggie Casserole for another creamy, veggie-packed dish with rich cheesy flavor.

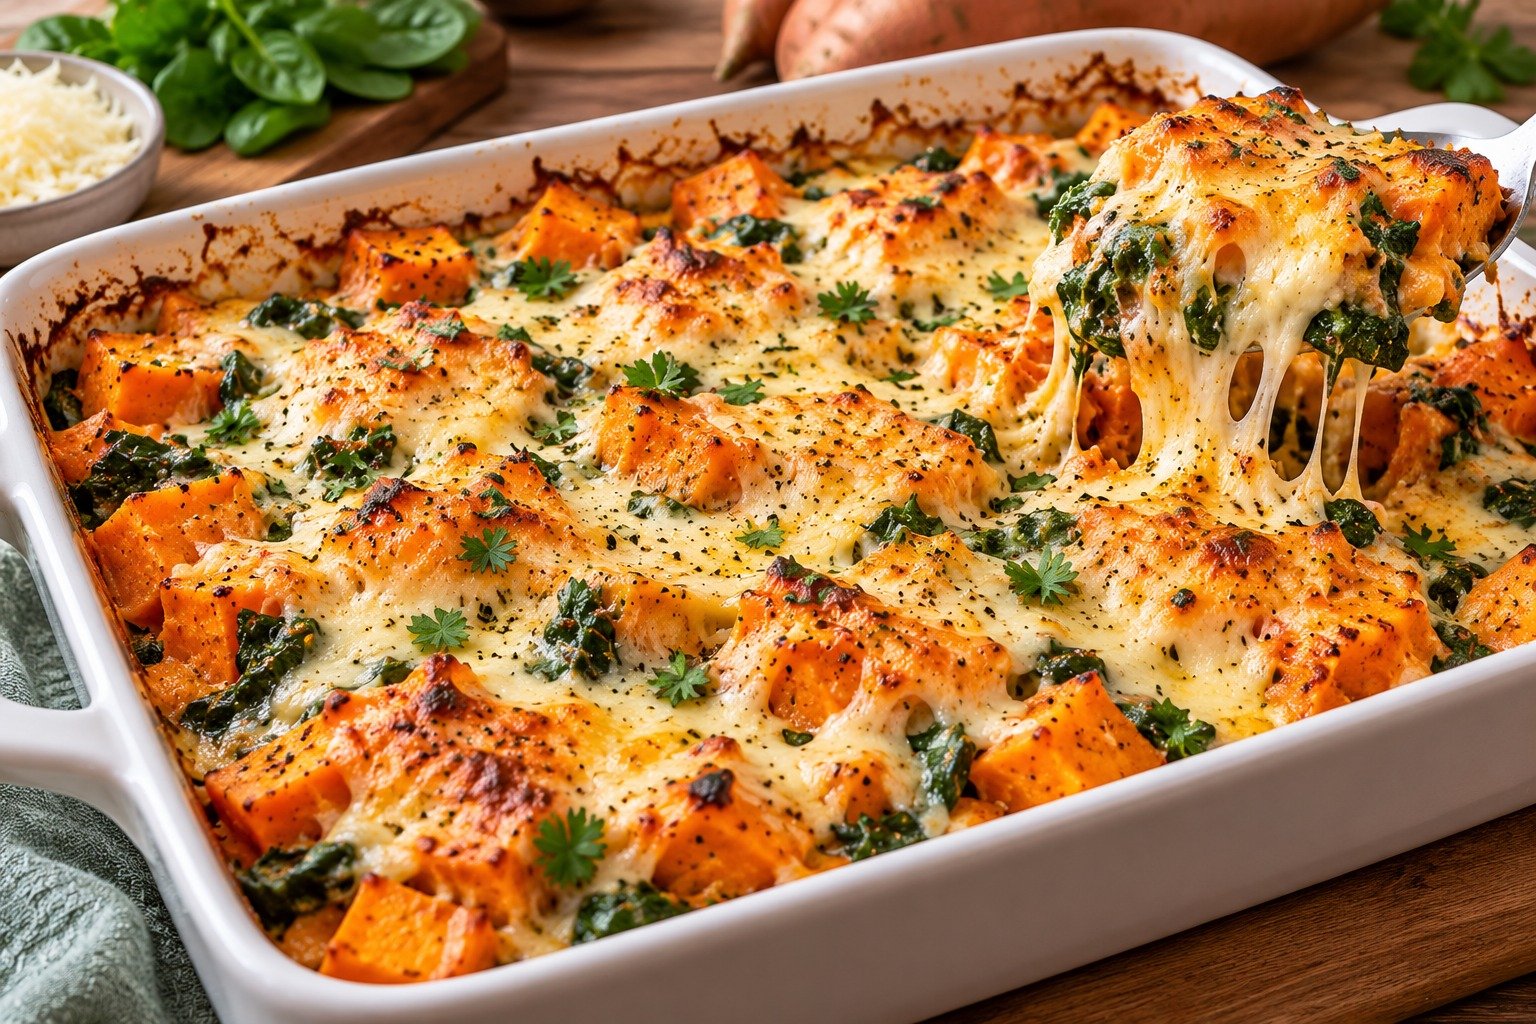
Cheesy Sweet Potato and Spinach Bake

Sweet Potato Spinach Bake with tender sweet potatoes, spinach, ricotta, mozzarella, cheddar, and golden melted cheese

Cheesy Sweet Potato and Spinach Bake

Sweet Potato Spinach Bake is a warm, cheesy, and comforting casserole made with tender sweet potatoes, fresh spinach, garlic, herbs, and plenty of melted cheese.

This Sweet Potato Spinach Bake combines naturally sweet potatoes with savory spinach and a creamy cheese mixture.

Prep Time: 20 minutes
Cook Time: 45–50 minutes
Total Time: About 1 hour 10 minutes
Servings: 6

Ingredients

For the Sweet Potatoes

  • 2 pounds sweet potatoes, peeled
  • 1 tablespoon olive oil
  • 1/2 teaspoon salt
  • 1/4 teaspoon black pepper
  • 1/2 teaspoon smoked paprika
  • 1/2 teaspoon dried thyme

For the Spinach Filling

  • 1 tablespoon olive oil
  • 3 garlic cloves, minced
  • 8 ounces fresh baby spinach
  • 1/4 teaspoon salt
  • Pinch of black pepper
  • 1/4 teaspoon red pepper flakes, optional

Ingredients For the Cheese Mixture

  • 1 cup ricotta cheese
  • 1/2 cup plain Greek yogurt
  • 1 large egg
  • 1 cup shredded mozzarella cheese, divided
  • 1/2 cup shredded cheddar cheese
  • 1/3 cup grated Parmesan cheese
  • 1/2 teaspoon garlic powder
  • 1/2 teaspoon dried oregano

For Finishing

  • 1 tablespoon chopped parsley
  • Extra Parmesan, optional
  • Fresh thyme, optional
  • Crushed red pepper, optional

Why You’ll Love This Recipe

Sweet Potato Spinach Bake is easy to assemble and uses everyday ingredients. The sweet potatoes provide a naturally creamy texture, while spinach adds color and a savory balance. Ricotta and Greek yogurt create a smooth filling, and mozzarella, cheddar, and Parmesan give the top a rich, golden finish.

How to Make Sweet Potato Spinach Bake

Step 1: Preheat the Oven

Preheat the oven to 375°F or 190°C.

Lightly grease a 9 x 13-inch baking dish with olive oil or cooking spray.

Step 2: Slice the Sweet Potatoes

Peel the sweet potatoes and slice them into thin rounds, about 1/8 to 1/4 inch thick.

Keeping the slices evenly sized helps Sweet Potato Spinach Bake cook evenly and prevents some pieces from staying firm while others become too soft.

Step 3: Season the Sweet Potatoes

Place the sweet potato slices in a large bowl.

Add olive oil, salt, black pepper, smoked paprika, and thyme.

Toss gently until every slice is lightly coated.

Step 4: Soften the Spinach

Heat 1 tablespoon olive oil in a large skillet over medium heat.

Add the garlic and cook for about 30 seconds.

Add the spinach in batches, stirring until wilted.

Season with salt, black pepper, and optional red pepper flakes.

Transfer the spinach to a plate and let it cool slightly.

Step 5: Remove Excess Moisture

Once the spinach is cool enough to handle, squeeze out excess liquid with clean hands or a kitchen towel.

This step is important because too much moisture can make Sweet Potato Spinach Bake watery.

Roughly chop the drained spinach and set it aside.

Step 6: Make the Cheese Mixture

In a medium bowl, combine ricotta, Greek yogurt, egg, half of the mozzarella, cheddar, Parmesan, garlic powder, and oregano.

Stir until smooth.

Fold the chopped spinach into the cheese mixture.

Step 7: Build the First Layer

Arrange half of the sweet potato slices in the bottom of the prepared baking dish, overlapping them slightly.

Spread half of the spinach and cheese mixture over the potatoes.

Use the back of a spoon to distribute it evenly.

Step 8: Add the Second Layer

Arrange the remaining sweet potatoes over the cheese mixture.

Spread the rest of the spinach filling over the top.

Finish with the remaining mozzarella.

Step 9: Cover and Bake

Cover the baking dish tightly with foil.

Bake Sweet Potato Spinach Bake for 30 minutes.

The covered baking time traps steam, helping the sweet potatoes become tender without drying out.

Step 10: Uncover and Continue Baking

Remove the foil carefully.

Return the casserole to the oven and bake for another 15 to 20 minutes.

The cheese should be melted and lightly golden, and a knife should slide easily through the sweet potatoes.

Step 11: Broil if Desired

For a more deeply browned top, switch the oven to broil for 1 to 2 minutes.

Watch closely because cheese can brown quickly.

Step 12: Rest Before Serving

Remove Sweet Potato Spinach Bake from the oven and let it rest for 10 minutes.

Resting helps the layers settle and makes the casserole easier to slice neatly.

Garnish with parsley, fresh thyme, or a little extra Parmesan before serving.

Serving Suggestions

Sweet Potato Spinach Bake can be served as a hearty side dish or a vegetarian main course.

Pair it with roasted chicken, grilled chicken, turkey, baked salmon, white fish, or pork tenderloin for a balanced dinner.

For a vegetarian meal, serve Sweet Potato Spinach Bake with a crisp green salad, roasted broccoli, lentil salad, chickpeas, or tomato cucumber salad.

It also works well on a holiday table alongside roasted vegetables, green beans, stuffing, or a simple grain dish.

For another cheesy Mediterranean-style meal, try our Mediterranean Baked Feta & Veggie Pasta with roasted vegetables, creamy feta, herbs, and tender pasta.

Recipe Tips

For the best Sweet Potato Spinach Bake, keep the potato slices thin and remove as much moisture as possible from the spinach.

Slice the sweet potatoes thinly and evenly so they cook at the same rate.

A mandoline slicer can make this easier, but always use the safety guard.

Squeeze the cooked spinach thoroughly. Removing extra liquid is one of the best ways to prevent Sweet Potato Spinach Bake from becoming watery.

If the sweet potatoes are still slightly firm after the suggested baking time, cover the dish again and bake for another 5 to 10 minutes.

Easy Variations

Sweet Potato Spinach Bake is easy to customize with different vegetables, cheeses, and herbs.

For a stronger savory flavor, add sautéed mushrooms or caramelized onions to the spinach mixture.

You can replace ricotta with cottage cheese for a slightly lighter texture.

For extra greens, combine spinach with chopped kale or Swiss chard.

A Mediterranean version can include crumbled feta, sun-dried tomatoes, and oregano.

For extra crunch, sprinkle chopped walnuts, pecans, or pumpkin seeds over the top after baking.

If you enjoy a little heat, increase the red pepper flakes or add a small amount of chopped jalapeño.

You may also enjoy our 2-Ingredient Healthy Carrot Pancakes for a quick, flourless breakfast made with simple everyday ingredients.

Make-Ahead Instructions

Sweet Potato Spinach Bake can be assembled ahead of time, making it useful for holidays or busy evenings.

Prepare all the layers, cover the baking dish tightly, and refrigerate for up to 24 hours before baking.

When ready to cook, let the dish sit at room temperature for about 20 minutes while the oven preheats.

Because the casserole will be cold, Sweet Potato Spinach Bake may need an extra 5 to 10 minutes of covered baking time.

Storage and Reheating

Store leftover Sweet Potato Spinach Bake in an airtight container in the refrigerator for up to 4 days.

Reheat individual portions in the microwave until hot.

For a better texture, place larger portions in a covered baking dish and warm in a 350°F or 175°C oven for 15 to 20 minutes.

Nutrition Information

Approximate nutrition per serving:

Calories: 390
Protein: 19 g
Carbohydrates: 39 g
Fat: 18 g
Saturated Fat: 9 g
Fiber: 6 g
Sugar: 9 g
Sodium: 610 mg

Nutrition values are estimates and can vary depending on the cheeses, yogurt, sweet potatoes, and exact serving size.

Frequently Asked Questions

Can I use frozen spinach?

Yes. Thaw it completely and squeeze out as much liquid as possible before mixing it with the cheese.

Can I use regular potatoes instead of sweet potatoes?

Yes, but the flavor will be less sweet and the cooking time may vary slightly depending on the potato variety.

Why is my casserole watery?

The spinach may contain too much moisture, or the sweet potatoes may have released extra liquid. Draining the spinach well and allowing the casserole to rest before slicing will help.

Can I make this without ricotta?

Yes. Cottage cheese works well, or you can use a thicker Greek yogurt combined with a little extra mozzarella.

Can I add meat?

Yes. Cooked chicken, turkey, or crumbled sausage can be layered into the casserole for a heartier meal.

Can I prepare it the night before?

Yes. Assemble it, cover, refrigerate overnight, and bake the next day.

Can I freeze leftovers?

Yes. Freeze fully cooled portions in airtight containers for up to 2 months.

Final Thoughts

Sweet Potato Spinach Bake is a comforting way to combine tender sweet potatoes, savory spinach, creamy cheese, and simple herbs in one easy casserole.

Because Sweet Potato Spinach Bake can work as either a side dish or vegetarian main, it is a useful recipe for family dinners, holidays, meal prep, and casual gatherings.

Keep this Sweet Potato Spinach Bake recipe handy whenever you want something warm, cheesy, colorful, and easy to prepare.

With soft sweet potatoes, garlicky spinach, creamy ricotta, and melted cheese in every layer, Sweet Potato Spinach Bake is a satisfying oven-baked dish that fits easily into both everyday meals and special occasions.

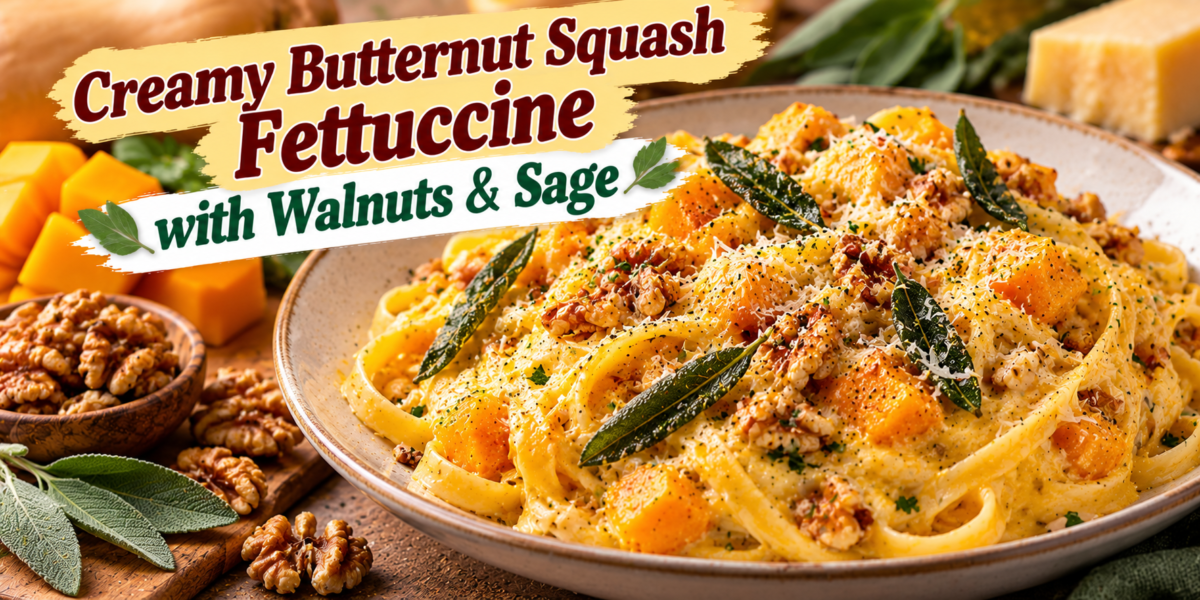
Creamy Butternut Squash Fettuccine with Walnuts & Sage

Butternut Squash Fettuccine with creamy squash sauce, Parmesan, toasted walnuts, fresh sage, and tender pasta

Creamy Butternut Squash Fettuccine with Walnuts & Sage

Butternut Squash Fettuccine is a cozy pasta dish made with silky roasted squash, garlic, Parmesan, fresh sage, toasted walnuts, and tender ribbons of fettuccine. The sauce is naturally creamy from the squash, so you get a rich texture without needing a heavy amount of cream. Sweet squash, nutty Parmesan, earthy sage, and crunchy walnuts make every bite balanced and comforting.

This Butternut Squash Fettuccine is perfect for fall dinners, holiday meals, or any night when you want a restaurant-style pasta that still feels easy to make at home. It works beautifully as a vegetarian main dish and pairs well with salads, roasted vegetables, or simple grilled protein.

Prep Time: 20 minutes
Cook Time: 35 minutes
Total Time: 55 minutes
Servings: 4

Ingredients

For the Butternut Squash Sauce

  • 3 cups peeled and cubed butternut squash
  • 2 tablespoons extra virgin olive oil
  • 1 small yellow onion, diced
  • 3 garlic cloves, minced
  • 1 teaspoon fresh sage, finely chopped
  • 1/2 teaspoon dried thyme
  • 1/2 teaspoon salt
  • 1/4 teaspoon black pepper
  • 1/8 teaspoon ground nutmeg
  • 1 1/2 cups vegetable broth
  • 1/2 cup whole milk or half-and-half
  • 1/2 cup freshly grated Parmesan cheese

For the Pasta

  • 12 ounces fettuccine
  • 1/2 cup reserved pasta water
  • 1 tablespoon butter
  • 1/3 cup walnuts, roughly chopped
  • 6 to 8 fresh sage leaves
  • 1 tablespoon fresh lemon juice

Why You’ll Love This Recipe

Butternut Squash Fettuccine has a creamy texture without relying on a heavy cream sauce. Roasted or sautéed squash blends into a naturally smooth base, while Parmesan adds savory richness.

Another reason to love Butternut Squash Fettuccine is the contrast of textures. Tender pasta and silky sauce pair with crunchy walnuts and crisp sage for a dish that feels more interesting than a basic weeknight pasta.

How to Make Butternut Squash Fettuccine

Step 1: Cook the Butternut Squash

Heat 1 tablespoon olive oil in a large skillet or Dutch oven over medium heat.

Add the butternut squash, onion, salt, and black pepper. Cook for 8 to 10 minutes, stirring occasionally, until the onion softens and the squash begins to brown lightly.

Add the garlic, chopped sage, thyme, and nutmeg. Cook for about 30 seconds until fragrant.

This aromatic base gives Butternut Squash Fettuccine its warm, savory flavor.

Step 2: Simmer Until Tender

Pour in the vegetable broth.

Bring the mixture to a gentle simmer, cover, and cook for 10 to 12 minutes, or until the squash is very tender when pierced with a fork.

Step 3: Blend the Sauce

Carefully transfer the squash mixture to a blender, or use an immersion blender directly in the pot.

Add the milk or half-and-half and blend until completely smooth.

Return the sauce to the skillet and keep it over low heat.

The sauce for Butternut Squash Fettuccine should be silky and pourable, not overly thick.

Step 4: Cook the Fettuccine

While the sauce simmers, bring a large pot of salted water to a boil.

Cook the fettuccine until al dente according to the package directions.

Before draining, reserve about 1/2 cup of pasta water.

Drain the pasta and set it aside.

Step 5: Toast the Walnuts

In a small dry skillet over medium heat, toast the chopped walnuts for 3 to 4 minutes, stirring often.

Remove them as soon as they smell fragrant and look lightly golden.

Toasted walnuts add a deep, nutty flavor that works especially well with Butternut Squash Fettuccine.

Step 6: Crisp the Sage

Add the butter to the same skillet.

Once melted, add the whole sage leaves and cook for 30 to 60 seconds per side, until crisp.

Transfer the leaves to a paper towel.

Step 7: Finish the Sauce

Stir the Parmesan into the warm squash sauce until melted.

Add lemon juice and taste for seasoning.

If the sauce is too thick, stir in a little reserved pasta water until it reaches a smooth consistency.

Butternut Squash Fettuccine tastes best when the sauce lightly coats the noodles instead of sitting too heavily on them.

Step 8: Toss with the Pasta

Add the cooked fettuccine to the skillet.

Use tongs to toss until every strand is coated.

Cook over low heat for 1 to 2 minutes so the pasta absorbs some of the sauce.

Step 9: Add Walnuts and Sage

Fold in half of the toasted walnuts.

Transfer the pasta to serving bowls and top with the remaining walnuts and crisp sage leaves.

Serve Butternut Squash Fettuccine immediately with extra Parmesan and black pepper.

Serving Suggestions

Butternut Squash Fettuccine is satisfying enough to serve as a vegetarian main dish.

Pair it with a crisp arugula salad, roasted Brussels sprouts, green beans, or garlic bread for a complete dinner.

For extra protein, serve Butternut Squash Fettuccine with grilled chicken, roasted salmon, shrimp, or white beans.

For a sweet brunch or dessert option, try our Blueberry Cream Cheese Loaf with juicy berries and a creamy cheese center.

Recipe Tips

Cut the squash into similar-size cubes so it cooks evenly.

Cook the squash until very soft before blending.

Fresh sage gives Butternut Squash Fettuccine the best flavor, especially when some leaves are crisped for garnish.

Use freshly grated Parmesan because it melts more smoothly.

Reserve pasta water before draining the noodles.

Add pasta water gradually so the sauce does not become too thin.

Toast walnuts carefully because they can burn quickly.

Serve the pasta immediately because the sauce thickens as it cools.

Easy Variations

For extra vegetables, add baby spinach to the finished sauce and stir until wilted.

Butternut Squash Fettuccine is also delicious with sautéed mushrooms, roasted broccoli, or caramelized onions.

For a richer version, replace the milk with half-and-half or add a small splash of cream.

Pecans or hazelnuts can replace the walnuts.

For extra heat, add red pepper flakes.

You can also stir in cooked chicken sausage, grilled chicken, or crispy pancetta if you do not need the recipe to stay vegetarian.

Make-Ahead Instructions

Butternut Squash Fettuccine can be partially prepared ahead.

Make the sauce up to 3 days in advance and refrigerate it in an airtight container.

Toast the walnuts and store them separately at room temperature.

When ready to serve, cook fresh pasta, gently reheat the sauce, and add a splash of broth or milk if it has thickened.

Storage and Reheating

Store leftover Butternut Squash Fettuccine in an airtight container in the refrigerator for up to 3 days.

Reheat gently in a skillet over low heat with a splash of milk, broth, or water.

You can also microwave individual portions in short intervals, stirring between each one.

The sauce will thicken in the refrigerator, so adding a little liquid is important.

Freezing the sauce alone works better than freezing the finished pasta. Freeze the sauce for up to 2 months, then thaw overnight before reheating.

Nutrition Information

Approximate nutrition per serving:

Calories: 560
Protein: 17 g
Carbohydrates: 76 g
Fat: 22 g
Saturated Fat: 7 g
Fiber: 8 g
Sugar: 9 g
Sodium: 620 mg

Nutrition values are estimates and may vary depending on the pasta, milk, Parmesan, walnuts, and serving size.

Frequently Asked Questions

Can I use frozen butternut squash?

Yes. Frozen squash works well. Cook it until completely tender and allow excess moisture to evaporate before blending.

Can I make the sauce dairy-free?

Yes. Use unsweetened oat milk or another neutral dairy-free milk and replace Parmesan with a dairy-free alternative or nutritional yeast.

Can I use another pasta shape?

Yes. Linguine, tagliatelle, penne, rigatoni, or spaghetti can all replace fettuccine.

How do I make the sauce thinner?

Add reserved pasta water, broth, or milk a few tablespoons at a time until the sauce reaches the texture you prefer.

Can I roast the squash instead?

Yes. Roast the squash at 425°F or 220°C until tender and caramelized, then blend it with the remaining sauce ingredients.

What can I use instead of walnuts?

Pecans, hazelnuts, almonds, pumpkin seeds, or pine nuts are all good substitutes.

Can I add protein?

Yes. Chicken, shrimp, salmon, white beans, or chicken sausage pair well with the creamy squash sauce.

Final Thoughts

Butternut Squash Fettuccine is a cozy pasta that combines sweet squash, savory Parmesan, garlic, fresh sage, and crunchy walnuts in a smooth, creamy sauce.

Because Butternut Squash Fettuccine can be customized with extra vegetables, different nuts, or added protein, it is easy to adapt for both weeknight dinners and special occasions.

Keep this Butternut Squash Fettuccine recipe in your fall rotation whenever you want a comforting pasta that feels elegant but is still simple enough to make at home.

If you enjoy savory breakfast and brunch recipes, you may also like our Sun-Dried Tomato, Spinach & Goat Cheese Frittata.

Mediterranean Simple Eggplant Rolls

Mediterranean Eggplant Rolls filled with ricotta and feta cheese in tomato sauce with fresh herbs

Mediterranean Simple Eggplant Rolls

Mediterranean Simple Eggplant Rolls are a delicious, light, and flavorful dish made with tender roasted eggplant, creamy ricotta, feta cheese, fresh herbs, garlic, and a bright tomato sauce. The eggplant slices become soft and flexible in the oven, making them perfect for rolling around the creamy filling.

These Eggplant Rolls are inspired by simple Mediterranean cooking. The recipe uses fresh vegetables, herbs, olive oil, and cheese to create a comforting meal without complicated preparation. Each roll has a soft eggplant exterior and a creamy, savory center.

This recipe is a great option for lunch, dinner, or a meatless family meal. You can also serve it as a side dish or a beautiful appetizer when entertaining guests. The ingredients are easy to find, and most of the preparation can be completed ahead of time.

The combination of roasted eggplant and tomato sauce creates a rich base. Meanwhile, ricotta and feta give the filling a creamy texture with a pleasant salty flavor. Fresh parsley and basil add color and freshness.

These Eggplant Rolls are also easy to customize. You can add spinach, olives, sun-dried tomatoes, or roasted peppers to the filling. If you prefer more protein, chickpeas or cooked lentils can be added.

The dish is baked until the sauce bubbles around the edges and the cheese becomes warm and lightly golden. A final sprinkle of fresh herbs makes the finished meal look bright and inviting.

If you enjoy Mediterranean flavors and simple vegetable recipes, this dish is a wonderful addition to your recipe collection.

Prep Time: 25 minutes
Cook Time: 40 minutes
Total Time: 1 hour 5 minutes
Servings: 6 servings

Ingredients

For the Eggplant

You will need 3 large eggplants for this recipe.

Add 3 tablespoons of olive oil to coat the eggplant slices.

Season them with 1/2 teaspoon of salt and 1/2 teaspoon of black pepper.

Finally, sprinkle 1/2 teaspoon of dried oregano over the eggplant for extra Mediterranean flavor.

For the Creamy Filling

1 1/2 cups ricotta cheese

3/4 cup crumbled feta cheese

1/2 cup freshly grated Parmesan cheese

2 cloves garlic, minced

1/4 cup fresh parsley, chopped

2 tablespoons fresh basil, chopped

1 large egg

1 tablespoon fresh lemon juice

1/2 teaspoon dried oregano

1/4 teaspoon black pepper

1/4 teaspoon salt

For the Tomato Sauce

2 tablespoons olive oil

1 small yellow onion, finely chopped

3 cloves garlic, minced

1/2 teaspoon dried basil

2 cups crushed tomatoes

1 tablespoon tomato paste

1/2 cup water or vegetable broth

1 teaspoon dried oregano

1/2 teaspoon salt

1/4 teaspoon black pepper

1/2 teaspoon red pepper flakes, optional

1/2 teaspoon paprika

For Topping

1/2 cup shredded mozzarella cheese

2 tablespoons grated Parmesan cheese

2 tablespoons fresh parsley

Fresh basil leaves

Step-by-Step Instructions

Prepare the Eggplant

Begin by washing the eggplants and drying them well.

Cut off both ends. Slice each eggplant lengthwise into thin strips. Aim for slices about 1/4 inch thick.

Try to keep the slices even. Very thin slices may become too soft, while thick slices can be difficult to roll.

Place the eggplant slices on a large baking sheet lined with parchment paper.

Brush both sides lightly with olive oil. Sprinkle with salt, black pepper, and dried oregano.

Let the seasoned eggplant rest for about 10 minutes.

This short resting time helps the seasoning settle into the vegetable.

Roast the Eggplant

Preheat the oven to 400°F (200°C).

Place the baking sheet in the oven.

Roast the eggplant for about 15 to 18 minutes. Turn the slices halfway through cooking.

The eggplant should become tender and flexible. It should not become so soft that it falls apart.

Allow the roasted slices to cool for a few minutes.

Properly roasted eggplant makes these Eggplant Rolls easy to assemble and helps the finished dish hold its shape.

Prepare the Tomato Sauce

While the eggplant is roasting, prepare the sauce.

Heat olive oil in a medium saucepan over medium heat.

Add the chopped onion and cook for 3 to 4 minutes. Stir occasionally until the onion becomes soft.

Add minced garlic and cook for about 30 seconds.

Next, add the crushed tomatoes and tomato paste.

Stir in dried oregano, dried basil, paprika, salt, black pepper, and red pepper flakes if desired.

Pour in the water or vegetable broth.

Bring the sauce to a gentle simmer.

Cook for 10 to 12 minutes. Stir occasionally.

The sauce should become slightly thicker but still remain easy to spread.

Taste and adjust the seasoning if needed.

A flavorful tomato base gives the Eggplant Rolls a bright Mediterranean character.

Make the Cheese Filling

Place the ricotta cheese in a medium bowl.

Add crumbled feta and grated Parmesan.

Mix in minced garlic, chopped parsley, chopped basil, oregano, black pepper, salt, and fresh lemon juice.

Crack the egg into the bowl.

Stir everything together until the filling becomes creamy and well combined.

Do not overmix the filling. A few small pieces of feta can remain for extra texture.

Taste a small amount and adjust the herbs or seasoning if needed.

The filling should taste savory, creamy, and fresh.

Assemble the Rolls

Spread a thin layer of tomato sauce across the bottom of a large baking dish.

Take one roasted eggplant slice and place it flat on a clean surface.

Add about 2 tablespoons of cheese filling near one end.

Roll the eggplant gently around the filling.

Place the roll seam-side down in the baking dish.

Repeat the process with the remaining eggplant slices and filling.

Arrange the rolls close together without crushing them.

Pour the remaining tomato sauce around and lightly over the rolls.

The sauce should cover the bottom of the dish and reach the sides of the rolls.

This arrangement helps the Eggplant Rolls stay moist while baking.

Add the Cheese Topping

Sprinkle shredded mozzarella over the top.

Add grated Parmesan for extra flavor.

If you prefer a lighter topping, use less mozzarella and add extra fresh herbs after baking.

The cheese will melt during baking and create a golden finish.

Bake the Dish

Reduce the oven temperature to 375°F (190°C).

Cover the baking dish loosely with foil.

Bake for 20 minutes.

Remove the foil and continue baking for another 10 to 15 minutes.

The sauce should bubble around the edges. The cheese should melt and become lightly golden.

For a deeper golden top, place the dish under the broiler for 1 to 2 minutes. Watch it carefully during this step.

Remove the dish from the oven.

Let it rest for 5 to 10 minutes before serving.

This short resting period allows the filling to settle and makes the Eggplant Rolls easier to serve.

Tips for the Best Eggplant Rolls

Choose firm eggplants with smooth, shiny skin. Avoid eggplants that feel very soft or have deep bruises.

Use a sharp knife to create even slices.

Do not cut the eggplant too thick. Thin slices are easier to roll after roasting.

Brush the eggplant lightly with olive oil. Too much oil can make the dish heavy.

Roast the eggplant until flexible rather than completely soft.

Allow the slices to cool slightly before adding the filling.

Keep the tomato sauce moderately thick. A watery sauce can make the finished dish loose.

Fresh herbs add a brighter Mediterranean flavor.

Use good-quality ricotta and feta for the best filling.

For extra flavor, add a small amount of lemon zest to the cheese mixture.

These simple tips will help your Eggplant Rolls stay tender, flavorful, and easy to serve.

Easy Variations

Spinach Eggplant Rolls

Add 1 cup of finely chopped cooked spinach to the cheese filling.

Make sure the spinach is squeezed well to remove excess moisture.

Mediterranean Vegetable Version

Add chopped roasted red peppers, olives, and sun-dried tomatoes to the filling.

These ingredients bring extra color and a stronger Mediterranean taste.

High-Protein Version

Add cooked lentils or mashed chickpeas to the cheese mixture.

You can also serve the dish with a side of Greek yogurt.

Spicy Version

Add extra red pepper flakes to the tomato sauce.

A small amount of cayenne pepper can also add heat.

Herb-Focused Version

Increase the fresh parsley and basil.

You can also add fresh mint for a refreshing flavor.

Dairy-Free Version

Use a dairy-free ricotta-style cheese and dairy-free mozzarella.

Check the ingredients of each product before using.

With these variations, Eggplant Rolls can easily fit different meal preferences.

Serving Suggestions

Serve the rolls warm with a fresh green salad.

A simple cucumber and tomato salad pairs especially well with the tomato sauce.

You can also serve warm pita bread on the side.

For a more complete Mediterranean meal, add hummus, olives, roasted vegetables, or a small bowl of Greek yogurt.

The dish works beautifully as a vegetarian main course.

It can also be served as a side dish alongside grilled chicken or fish.

For entertaining, arrange individual rolls on a serving platter.

Add fresh basil and parsley just before serving.

A drizzle of extra virgin olive oil can also add a pleasant finishing touch.

These Eggplant Rolls look especially attractive when served directly from a shallow baking dish.

Make-Ahead Instructions

This recipe is convenient to prepare ahead.

You can roast the eggplant and prepare the filling one day before baking.

Store the roasted eggplant slices in an airtight container in the refrigerator.

Keep the cheese filling covered and refrigerated.

The tomato sauce can also be prepared ahead.

When ready to cook, assemble the rolls in the baking dish.

Add the sauce and cheese topping.

Bake according to the recipe instructions.

If the ingredients are very cold, you may need to add a few extra minutes to the baking time.

Preparing the components ahead makes Eggplant Rolls a practical option for busy days and dinner gatherings.

Storage and Reheating

Allow leftovers to cool before storing.

Place the cooked rolls in an airtight container.

Refrigerate for up to 4 days.

For the best texture, reheat them in the oven.

Place the desired portion in a baking dish and cover loosely with foil.

Heat at 350°F (175°C) until warmed through.

You can also use a microwave for individual portions.

Heat in short intervals to prevent the cheese and sauce from becoming too hot.

Avoid reheating the entire dish multiple times.

If you plan to freeze the recipe, freeze it before adding the final fresh herb garnish.

Thaw overnight in the refrigerator before reheating.

The texture may be slightly softer after freezing, but the flavor remains delicious.

Health Benefits

Eggplant is a naturally low-calorie vegetable that provides fiber and several important nutrients.

Tomatoes provide vitamin C and antioxidant compounds.

Fresh herbs add flavor without requiring large amounts of salt.

Olive oil contributes unsaturated fats to the recipe.

Ricotta and feta provide protein and calcium.

Using vegetables as the main ingredient makes the dish a useful option when you want a meatless meal.

The recipe can also be made lighter by reducing the cheese topping.

Adding spinach or other vegetables increases the fiber and nutrient content.

These Eggplant Rolls combine vegetables, herbs, and moderate amounts of cheese in a comforting Mediterranean-style meal.

As with any recipe, portion size and individual ingredients affect the overall nutrition.

Common Mistakes to Avoid

Do not slice the eggplant too thick because thick slices can be difficult to roll.

Avoid roasting the slices until they become extremely soft.

Do not use too much filling. A small amount is enough for each roll.

Avoid making the tomato sauce too watery.

Do not skip the resting time after baking.

Be careful when using extra salt because feta and Parmesan are naturally salty.

If you broil the cheese, stay close to the oven because the topping can brown quickly.

Avoid packing the rolls too tightly.

These small details can make a big difference in the final texture of your Eggplant Rolls.

Cooking Notes

For the best results, use eggplants that are similar in size.

If your eggplants have many large seeds, choose younger, smaller eggplants when possible.

You can prepare the sauce while the eggplant roasts.

Freshly grated Parmesan melts more smoothly than pre-grated cheese.

Use fresh lemon juice in the filling for a brighter flavor.

Let the baked dish rest before serving.

Garnish with fresh herbs just before bringing the dish to the table.

If you want more sauce, prepare an extra half batch and serve it on the side.

Frequently Asked Questions

Can I make Eggplant Rolls without roasting the eggplant first?

Roasting is recommended because it softens the slices and makes them flexible enough to roll.

Can I use zucchini instead of eggplant?

Yes. Thin zucchini slices can be used, although the cooking time may change.

Can I make the filling without ricotta?

Yes. Cottage cheese can be blended until smooth and used as a substitute.

Can I use only mozzarella?

You can, but ricotta and feta provide a creamier and more flavorful filling.

Can I add meat?

Yes. Cooked ground chicken or turkey can be added to the filling.

How do I stop the rolls from becoming watery?

Use a thick tomato sauce and avoid adding vegetables with excess moisture to the filling.

Can I freeze the dish?

Yes. Allow it to cool completely and store it in a freezer-safe container.

How long will leftovers last?

Store leftovers in the refrigerator for up to 4 days.

Can I prepare this dish the night before?

Yes. Assemble the dish, cover it, and refrigerate it. Bake when ready.

What herbs work best?

Parsley and basil are excellent choices. Fresh mint, oregano, and dill can also work well.

Nutrition Information

Approximate nutrition per serving:

Calories: 360 kcal

Protein: 17g

Carbohydrates: 24g

Fat: 23g

Fiber: 7g

Sugar: 9g

Sodium: 690mg

Nutrition values are estimates. They can vary depending on the size of the eggplants, type of cheese, sauce ingredients, and serving size.

Final Thoughts

Mediterranean Simple Eggplant Rolls are a comforting and flavorful way to enjoy more vegetables in your everyday meals.

The tender eggplant wraps around a creamy ricotta and feta filling. A rich tomato sauce surrounds the rolls and adds bright Mediterranean flavor. Melted mozzarella creates a satisfying finish.

The recipe is flexible enough for family dinners, meal preparation, vegetarian gatherings, and special occasions.

You can keep the filling simple or add spinach, roasted peppers, olives, chickpeas, or fresh herbs.

The preparation may look special, but the steps are straightforward. Roast the eggplant, prepare the sauce, mix the filling, roll the slices, and bake everything together.

That simple process creates a beautiful dish with layers of texture and flavor.

For a fresh finish, add parsley, basil, and a squeeze of lemon just before serving.

These Eggplant Rolls are a wonderful choice when you want a Mediterranean-inspired meal that feels homemade, comforting, and colorful without relying on complicated ingredients.