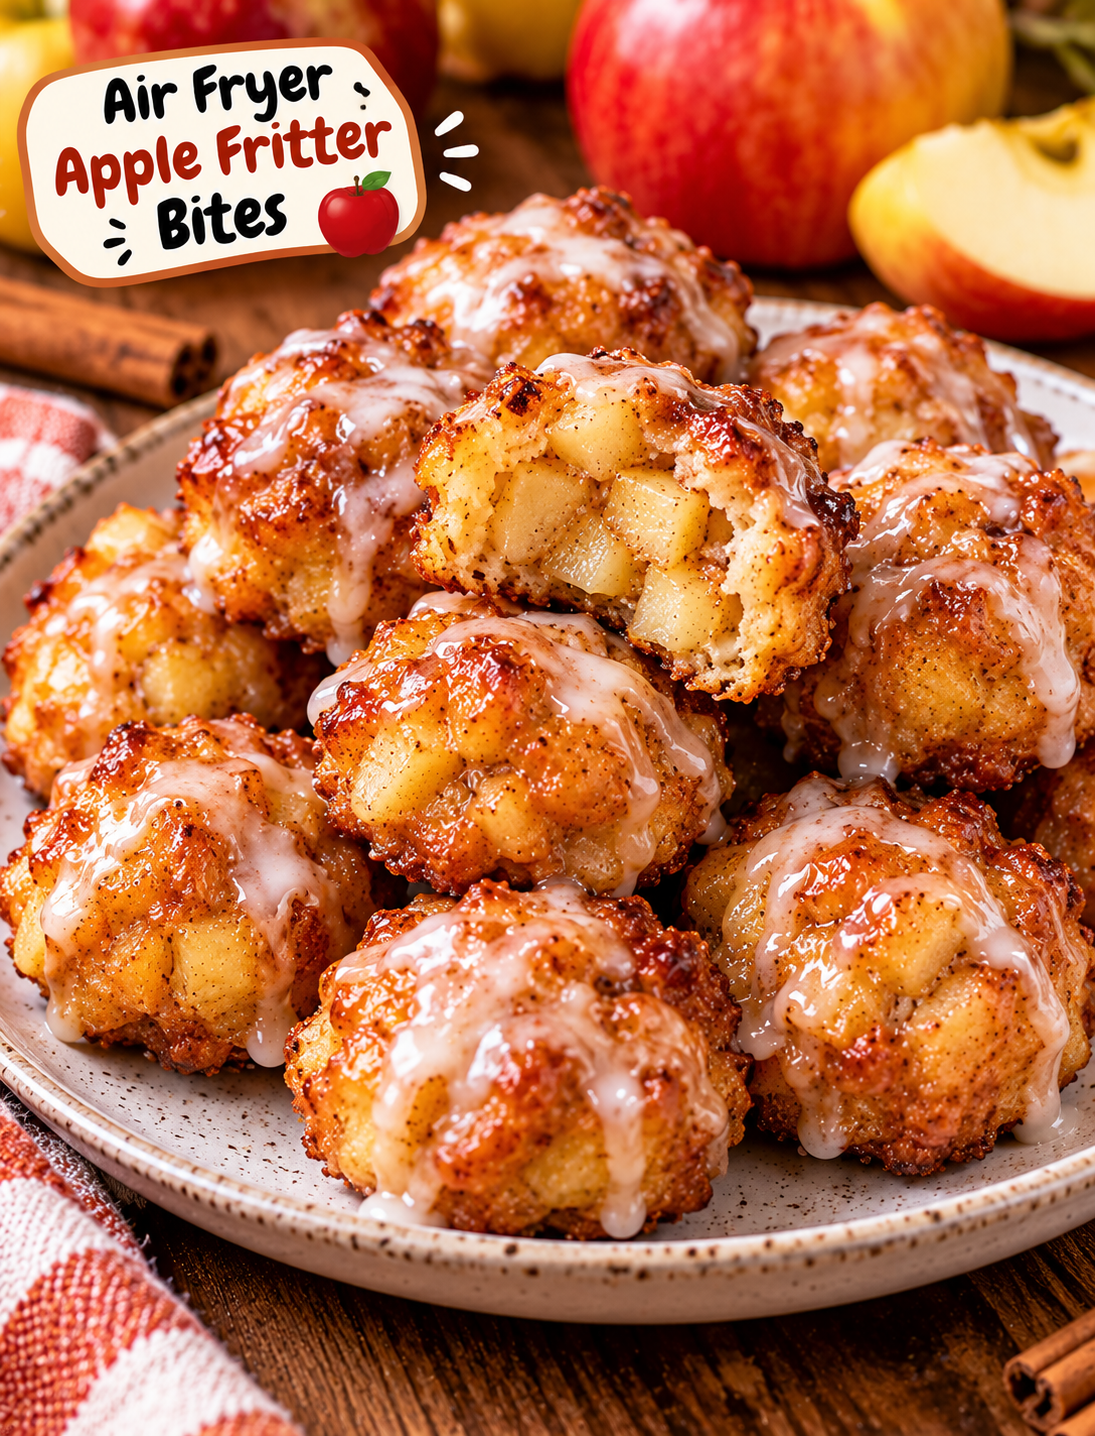
Air Fryer Apple Fritter Bites

Air Fryer Apple Fritter Bites with cinnamon apples, golden crisp edges, and sweet vanilla glaze

Air Fryer Apple Fritter Bites

These Air Fryer Apple Fritter Bites are a quick way to enjoy the warm flavor of classic apple fritters without deep frying. Each bite has a lightly crisp outside, a soft center, tender apple pieces, and a sweet vanilla glaze.

The recipe uses simple pantry ingredients and fresh apples. Air frying gives the bites a golden finish with much less oil than traditional fried fritters.

They are perfect for a fall breakfast, weekend brunch, afternoon snack, or easy dessert. Serve them warm with coffee, tea, or a cold glass of milk for a cozy treat.

Why You’ll Love This Recipe

  • Easy preparation: The batter comes together in one bowl with basic ingredients.
  • Less oil: Air frying uses only a light coating of cooking spray.
  • Small portions: Bite-sized fritters are easy to serve and share.
  • Fall flavor: Apples, cinnamon, nutmeg, and vanilla create a classic seasonal taste.
  • Quick cooking: The bites cook in about 8–10 minutes.
  • Sweet finish: A simple vanilla glaze adds the familiar apple-fritter flavor.
  • Family-friendly: The small size makes them easy for kids and adults to enjoy.
  • No deep fryer: You can make them without a pot of hot oil.

Ingredients You’ll Need

For the Apple Fritter Bites

  • 1 large crisp apple, peeled and finely diced
  • 1 cup all-purpose flour
  • ¼ cup granulated sugar
  • 1½ teaspoons baking powder
  • 1 teaspoon ground cinnamon
  • ¼ teaspoon ground nutmeg
  • ¼ teaspoon salt
  • 1 large egg
  • ⅓ cup whole milk
  • 1 teaspoon vanilla extract
  • 2 tablespoons unsalted butter, melted
  • Cooking spray

For the Vanilla Glaze

  • 1 cup powdered sugar
  • 1½ tablespoons milk
  • ½ teaspoon vanilla extract
  • ¼ teaspoon cinnamon, optional

Best Apples to Use

Choose an apple that stays slightly firm during cooking. Honeycrisp, Granny Smith, Pink Lady, and Fuji apples all work well.

A sweet-tart apple gives the fritter bites more flavor and balances the sugary glaze. Avoid very soft apples because they can release too much moisture into the batter.

How to Make Air Fryer Apple Fritter Bites

Step 1: Prepare the Apple

Peel the apple and remove the core.

Cut it into very small pieces, about ¼ inch in size.

Small pieces are important because they cook quickly and distribute evenly through the batter.

Pat the diced apple with a paper towel if it looks very wet. Removing excess moisture helps keep the batter thick.

Step 2: Mix the Dry Ingredients

Add the flour, granulated sugar, baking powder, cinnamon, nutmeg, and salt to a medium mixing bowl.

Whisk the ingredients together until the spices are evenly distributed.

This creates a consistent flavor throughout the fritter bites.

Step 3: Mix the Wet Ingredients

In a separate bowl, whisk the egg, milk, vanilla extract, and melted butter.

Make sure the melted butter has cooled slightly before adding it to the egg mixture.

Whisk until the mixture looks smooth.

Step 4: Make the Batter

Pour the wet ingredients into the dry ingredients.

Stir gently with a spatula until just combined.

Fold in the diced apple.

Do not overmix the batter. A few small lumps are fine, and gentle mixing helps keep the fritters tender.

The finished batter should be thick enough to hold its shape when scooped.

Step 5: Preheat the Air Fryer

Preheat your air fryer to 375°F for about 3 minutes.

Lightly spray the basket with cooking spray.

Preheating helps the outside begin browning quickly once the batter enters the basket.

Step 6: Form the Fritter Bites

Use a small cookie scoop or tablespoon to portion the batter.

Place small mounds of batter into the air fryer basket.

Leave space between each piece so hot air can circulate around the fritters.

Do not flatten them too much because a slightly rounded shape helps create a soft center.

Depending on your air fryer size, you may need to cook the bites in batches.

Step 7: Air Fry

Lightly spray the tops of the batter with cooking spray.

Air fry at 375°F for 4–5 minutes.

Carefully turn the bites using tongs or a small spatula.

Continue cooking for another 4–5 minutes, until the outside is golden brown and the center is cooked.

Cooking time can vary depending on the size of the bites and the air fryer model.

If the bites are still pale, cook them for another 1–2 minutes.

Step 8: Prepare the Glaze

While the fritters cook, add powdered sugar, milk, and vanilla extract to a small bowl.

Whisk until smooth.

For a thicker glaze, use slightly less milk. For a thinner drizzle, add a few drops of milk at a time.

Add a pinch of cinnamon if you want a stronger fall flavor.

Step 9: Glaze the Apple Fritter Bites

Let the cooked bites cool for about 2–3 minutes.

Dip the tops into the glaze or drizzle the glaze over the warm fritters.

Allow the glaze to sit for a minute or two before serving.

For an extra sweet finish, add a second thin layer of glaze after the first layer sets.

Step 10: Serve Warm

Serve the apple fritter bites while they are still slightly warm.

The outside should be lightly crisp, while the inside remains soft with tender apple pieces.

Pair them with coffee, hot tea, apple cider, or cold milk.

Tips for the Best Apple Fritter Bites

Dice the apple small. Large apple pieces can make the bites difficult to shape and may leave parts of the batter undercooked.

Keep the batter thick. A loose batter can spread in the air fryer and produce flat fritters.

Do not overcrowd the basket. Proper airflow helps the outside brown evenly.

Use a cookie scoop. Consistent portions cook at the same rate and make the finished batch look more uniform.

Do not overmix. Mixing only until the flour disappears helps prevent dense fritters.

Watch the final minutes. Small fritters can brown quickly once the air fryer is fully heated.

Glaze after cooking. Adding the glaze after air frying keeps the coating sweet and smooth instead of burning it during cooking.

How to Make Them Extra Crispy

For slightly crispier edges, keep the fritter portions small and avoid placing them too close together.

A light coating of cooking spray also helps the surface brown.

Do not add too much oil because excess oil can make the outside greasy instead of crisp.

If your air fryer has a strong heating element, check the fritters after 7 minutes to prevent over-browning.

Easy Recipe Variations

Cinnamon Sugar Apple Bites

Skip the glaze and toss the warm fritters in a mixture of granulated sugar and cinnamon.

This creates a simple coating similar to a cinnamon-sugar donut.

Maple Glazed Apple Bites

Replace part of the milk in the glaze with pure maple syrup.

The maple flavor pairs especially well with tart apples and cinnamon.

Caramel Apple Fritter Bites

Drizzle warm caramel sauce over the glazed fritters before serving.

Add a small amount of chopped pecans for crunch.

Apple Pie Fritter Bites

Add an extra ¼ teaspoon of cinnamon and a small pinch of ground ginger to the batter.

This gives the bites a flavor similar to classic apple pie.

Nutty Apple Bites

Fold 2 tablespoons of finely chopped pecans into the batter.

Keep the pieces small so they do not interfere with the shape of the fritters.

How to Store Leftovers

Let the fritter bites cool completely before storing them.

Place them in an airtight container and refrigerate for up to 3 days.

For the best texture, reheat them in the air fryer at 350°F for 2–3 minutes.

Add fresh glaze after reheating if the original glaze has absorbed into the fritters.

You can also freeze the cooked bites without glaze for up to 2 months.

Reheat frozen fritters in a 350°F air fryer until warmed through, then add the glaze before serving.

Frequently Asked Questions

Can I use different apples for this recipe?

Yes. Honeycrisp, Granny Smith, Fuji, and Pink Lady apples all work well for air fryer fritter bites.

Can I make apple fritter bites without eggs?

Yes, but the texture will change; use a suitable egg substitute designed for baking.

Why are my fritter bites too soft?

Overly wet batter, large apple pieces, or overcrowding the basket can prevent the outside from becoming crisp.

Can I use canned apples?

Fresh apples are preferred because canned apples contain more moisture and can make the batter too wet.

How do I know when the fritters are done?

They should be golden brown outside and fully set in the center when gently opened.

Can I make these ahead of time?

Yes. Cook them up to a day ahead, refrigerate them, and reheat them in the air fryer before serving.

Can I freeze apple fritter bites?

Yes. Freeze unglazed cooked fritters for up to 2 months and add fresh glaze after reheating.

What should I serve with apple fritter bites?

Serve them with maple syrup, caramel sauce, coffee, tea, whipped cream, or vanilla ice cream for dessert.

Final Thoughts

These Air Fryer Apple Fritter Bites are an easy way to enjoy the flavors of a classic apple fritter with less mess and no deep frying. The combination of crisp edges, tender apples, warm cinnamon, and sweet vanilla glaze makes them especially appealing during the fall season.

For the best results, use a firm apple, keep the batter thick, make small portions, and give each fritter enough room for proper airflow. Serve them warm with your favorite topping for a simple homemade treat that works for breakfast, brunch, snacks, or dessert.
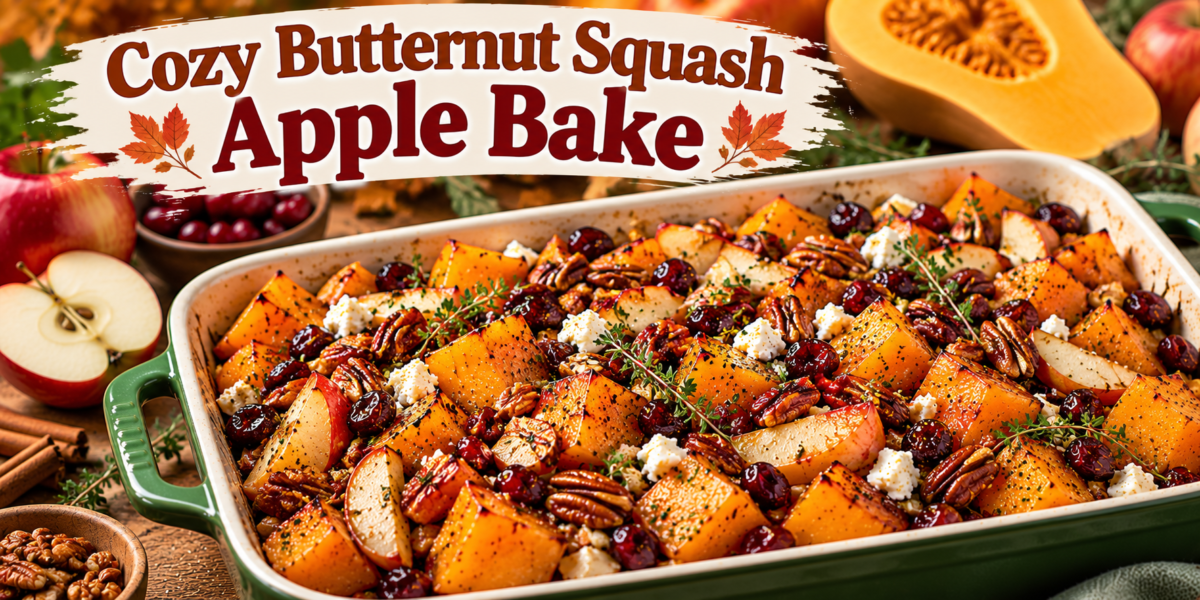
Cozy Butternut Squash Apple Bake

Butternut Squash Apple Bake with roasted squash, apples, cranberries, pecans, cinnamon, and maple glaze

Cozy Butternut Squash Apple Bake

This Butternut Squash Apple Bake is a cozy seasonal dish that combines tender roasted butternut squash, crisp apples, warm cinnamon, fragrant herbs, crunchy pecans, and a light maple glaze. The contrast between savory squash and naturally sweet fruit makes every bite comforting without becoming overly heavy. It is an inviting recipe for autumn dinners, weekend lunches, holiday gatherings, or any meal when you want something warm and colorful on the table.

The beauty of this Butternut Squash Apple Bake is its simplicity. Most of the preparation involves chopping the vegetables and apples, mixing a quick seasoning, and allowing the oven to create caramelized edges. As the ingredients roast, their natural flavors deepen, while the apples soften and release a little juice that blends beautifully with the maple glaze.

This recipe can be served as a vegetarian side dish or as part of a larger meal. It pairs especially well with roasted chicken, turkey, baked salmon, lentils, quinoa, or a crisp green salad. Feta can be added for a salty contrast, while pecans provide a pleasant crunch.

Prep Time: 20 minutes
Cook Time: 40–45 minutes
Total Time: About 1 hour 5 minutes
Servings: 6–8

Ingredients

For the Bake

  • 3 cups peeled butternut squash, cut into bite-sized cubes
  • 3 medium apples, cored and sliced
  • 2 tablespoons extra virgin olive oil
  • 2 tablespoons pure maple syrup
  • 1 teaspoon ground cinnamon
  • ½ teaspoon dried thyme
  • ½ teaspoon garlic powder
  • ½ teaspoon sea salt
  • ¼ teaspoon black pepper
  • ½ teaspoon ground nutmeg
  • ½ cup dried cranberries
  • ½ cup chopped pecans
  • ½ cup crumbled feta cheese, optional
  • 2 tablespoons fresh parsley, chopped

For the Optional Maple Finishing Glaze

  • 1 tablespoon pure maple syrup
  • 1 tablespoon fresh lemon juice
  • 1 teaspoon apple cider vinegar
  • Pinch of cinnamon
  • Small pinch of sea salt

Step-by-Step Instructions

1. Prepare the Oven

First, preheat the oven to 425°F (220°C). Lightly grease a large baking dish or rimmed sheet pan with olive oil.

A hot oven is important because it helps the squash develop caramelized edges instead of simply steaming. Choose a pan large enough to hold the ingredients in a mostly single layer. Overcrowding can trap moisture and prevent proper browning.

2. Prepare the Butternut Squash

Peel the butternut squash carefully and remove the seeds. Cut the flesh into cubes that are approximately the same size.

Place the squash in a large mixing bowl. Add olive oil, maple syrup, cinnamon, thyme, garlic powder, salt, black pepper, and nutmeg. Toss until each piece is evenly coated.

For the best Butternut Squash Apple Bake, make sure the seasoning is distributed evenly. The combination of cinnamon and thyme creates a warm flavor that works with both the sweet apples and savory squash.

3. Begin Roasting

Spread the seasoned squash across the prepared pan. Keep the pieces in a single layer and leave small spaces between them whenever possible.

Roast for 15 minutes. This initial roasting period gives the squash a head start because it generally takes longer to become tender than apples.

After 15 minutes, carefully remove the pan and turn the squash with a spatula.

4. Add the Apples

Add the sliced apples to the partially roasted squash. Toss them gently with the warm squash and seasoning already on the pan.

Return the dish to the oven and roast for another 15 minutes.

Choose apples that hold their shape during baking. Honeycrisp, Pink Lady, Gala, or Granny Smith are all suitable. A slightly tart apple creates a particularly pleasant contrast with maple syrup and dried cranberries.

Adding the apples after the squash has begun roasting helps prevent them from becoming excessively soft.

5. Add Cranberries and Pecans

Remove the pan again after the second roasting period. Scatter the dried cranberries and chopped pecans over the squash and apples.

Return everything to the oven for another 8–12 minutes. The squash should be fork-tender, the apples should be softened but recognizable, and the pecans should smell toasted.

Watch the nuts carefully during the final minutes. If they appear to be browning too quickly, cover the pan loosely with foil.

At this stage, the Butternut Squash Apple Bake should have golden edges and a fragrant cinnamon-maple aroma.

6. Prepare the Optional Finishing Glaze

While the bake finishes, whisk together one tablespoon of maple syrup, lemon juice, apple cider vinegar, cinnamon, and a small pinch of salt.

The lemon juice and vinegar keep the glaze from tasting overly sweet. Instead, they create a bright finishing sauce that complements the roasted fruit and vegetables.

If you prefer a sweeter dish, add another teaspoon of maple syrup. For a more savory result, increase the lemon juice slightly.

7. Finish the Bake

Remove the pan from the oven and let it cool for approximately five minutes.

Drizzle the optional glaze over the warm ingredients. Then sprinkle feta cheese and fresh parsley across the top.

The feta adds a creamy, salty contrast to the naturally sweet apples and squash. If you prefer a dairy-free version, simply omit it or use a suitable plant-based alternative.

8. Rest Before Serving

Allow the Butternut Squash Apple Bake to rest for another five to ten minutes before serving. This gives the juices time to settle and allows the flavors to blend.

Serve directly from the baking dish or transfer the mixture to a wide serving platter. Garnish with additional parsley, pecans, or a few fresh thyme leaves if desired.

Tips for the Best Results

Cut the Squash Evenly

Try to cut the squash into similarly sized cubes. Large pieces take longer to cook, while very small pieces can become soft too quickly.

Consistent pieces help the Butternut Squash Apple Bake cook evenly and make the finished dish look more attractive.

Choose the Right Apples

Firm apples generally work better than very soft varieties. They should become tender while still retaining enough structure to remain visible after roasting.

For a sweeter dish, choose Honeycrisp or Gala. For more tartness, Granny Smith works beautifully.

Avoid Overcrowding

Use a large baking dish or sheet pan. If the ingredients are packed tightly together, the moisture released by the squash and apples can cause steaming.

Roasting with enough space encourages caramelization and gives the finished dish deeper flavor.

Balance the Sweetness

The maple syrup, apples, and cranberries already provide plenty of natural sweetness. The lemon juice, apple cider vinegar, herbs, and feta help balance that sweetness.

For a more savory version, reduce the maple syrup and increase the thyme and black pepper.

Add the Nuts at the End

Pecans can burn if exposed to high heat for too long. Adding them during the later stage of roasting gives them enough time to toast without becoming bitter.

Walnuts, almonds, or pumpkin seeds can also be used.

Serving Suggestions

This Butternut Squash Apple Bake works beautifully beside roasted chicken, turkey, pork, baked salmon, or grilled fish. The combination of tender vegetables and fruit provides a colorful contrast to savory main dishes.

For a vegetarian meal, serve it with quinoa, wild rice, lentils, chickpeas, or a simple arugula salad. Warm crusty bread can also be served alongside the dish to soak up the maple-infused juices.

During a holiday meal, arrange the bake on a large platter and garnish it with extra pecans, cranberries, fresh herbs, and feta. The orange squash, red cranberries, and green herbs create an attractive seasonal presentation.

For brunch, serve smaller portions with eggs, whole-grain toast, and a fresh fruit salad.

Make-Ahead Instructions

The squash can be peeled and cubed several hours before cooking. Store it in an airtight container in the refrigerator.

The apples should preferably be sliced shortly before roasting to maintain their fresh appearance. However, you can slice them earlier and toss them with a little lemon juice to reduce browning.

The seasoning mixture and finishing glaze can both be prepared ahead. Keep the glaze refrigerated and bring it close to room temperature before using.

For the best texture, roast the dish shortly before serving. The Butternut Squash Apple Bake can be assembled in stages, which makes it convenient for entertaining.

Storage and Reheating

Store leftovers in an airtight container in the refrigerator for up to four days.

To reheat, place the leftovers in an oven-safe dish and warm them at 350°F (175°C) for approximately 10–15 minutes. Reheating in the oven helps preserve the roasted edges better than microwaving.

If using a microwave, heat individual portions in short intervals until warmed through. Add a few fresh pecans or herbs after reheating to restore some texture.

The Butternut Squash Apple Bake can be served warm or at room temperature. It is also suitable for packed lunches when stored and transported safely.

Freezing is not recommended because the apples and squash can become noticeably softer after thawing.

Frequently Asked Questions

Can I use frozen butternut squash?

Yes. Thaw it completely and drain excess moisture before roasting. Frozen squash may soften faster, so begin checking it earlier than fresh squash.

Can I use pears instead of apples?

Yes. Firm pears can replace apples. They provide a softer, slightly floral sweetness that pairs nicely with squash, cinnamon, and maple.

Can I make this recipe vegan?

Yes. Use maple syrup instead of honey if you make any substitutions involving sweeteners, and omit the feta or use a plant-based alternative.

Can I use another type of squash?

Yes. Acorn squash, delicata squash, or pumpkin can be substituted. Cooking time may vary depending on the variety and size of the pieces.

Can I add onions?

Absolutely. Thinly sliced red or yellow onion can be roasted with the squash. The onion becomes sweet and caramelized and adds a savory layer.

Can I make it less sweet?

Yes. Reduce the maple syrup and dried cranberries, then increase the thyme, black pepper, and lemon juice slightly. The result will be more savory.

Can I use walnuts instead of pecans?

Yes. Walnuts are an excellent substitute. Toast them lightly before adding them to the finished dish.

Nutrition Information

Approximate nutrition per serving:

Calories: 285 kcal
Protein: 5g
Carbohydrates: 42g
Fat: 12g
Fiber: 6g
Sugar: 24g
Sodium: 260mg

Nutrition values are estimates and can vary depending on ingredient brands, portion sizes, and optional toppings.

Flavor Variations

For a warmer autumn flavor, add a small pinch of ground cloves or allspice to the seasoning. Use these spices sparingly because their flavors can become strong after roasting.

For a savory variation, add thinly sliced red onion and a little fresh rosemary. The combination works especially well with feta.

For extra crunch, add toasted pumpkin seeds along with the pecans. Sunflower seeds can also be used.

If you enjoy a little heat, add a pinch of red pepper flakes before roasting. The gentle heat creates an interesting contrast with the maple and fruit.

For a brighter finish, add fresh orange zest with the parsley. Orange pairs beautifully with cranberry, apple, and roasted squash.

Final Thoughts

This Butternut Squash Apple Bake is a simple seasonal recipe that turns familiar ingredients into a warm and inviting dish. Roasted squash provides a creamy, earthy foundation, while apples contribute freshness and natural sweetness.

Cranberries bring a tart, chewy element, and toasted pecans provide satisfying crunch. Cinnamon and thyme add warmth, while lemon juice and apple cider vinegar keep the flavors balanced.

The optional feta is especially useful when you want a stronger sweet-and-savory contrast. Its salty creaminess works beautifully with the maple glaze and roasted fruit.

Another advantage of this recipe is its flexibility. You can adjust the fruit, nuts, herbs, cheese, and spices according to the ingredients you already have. The Butternut Squash Apple Bake can therefore fit easily into weeknight dinners as well as festive meals.

For the best result, keep the vegetables spread out, roast the squash before adding the apples, and add the pecans during the final stage. These simple techniques encourage caramelization while protecting the delicate ingredients.

Serve the finished dish warm alongside your favorite protein, grain, or salad. For a holiday table, add extra cranberries, pecans, feta, and fresh herbs just before serving.

With its golden roasted edges, tender vegetables, sweet apples, tart cranberries, and crunchy nuts, this Butternut Squash Apple Bake offers a comforting balance of flavors and textures. It is easy to prepare, attractive enough for entertaining, and versatile enough for everyday meals.

This Butternut Squash Apple Bake looks inviting. The Butternut Squash Apple Bake suits weeknights. Serve the Butternut Squash Apple Bake with grains. The Butternut Squash Apple Bake travels well. Keep the Butternut Squash Apple Bake warm. Fresh salad makes the Butternut Squash Apple Bake lighter. Feta gives the Butternut Squash Apple Bake savory flavor. Fresh herbs make the Butternut Squash Apple Bake festive. Leftovers make the Butternut Squash Apple Bake convenient. The Butternut Squash Apple Bake works for potlucks. Enjoy the Butternut Squash Apple Bake with family and friends.

Apple Cinnamon Morning Wellness Water

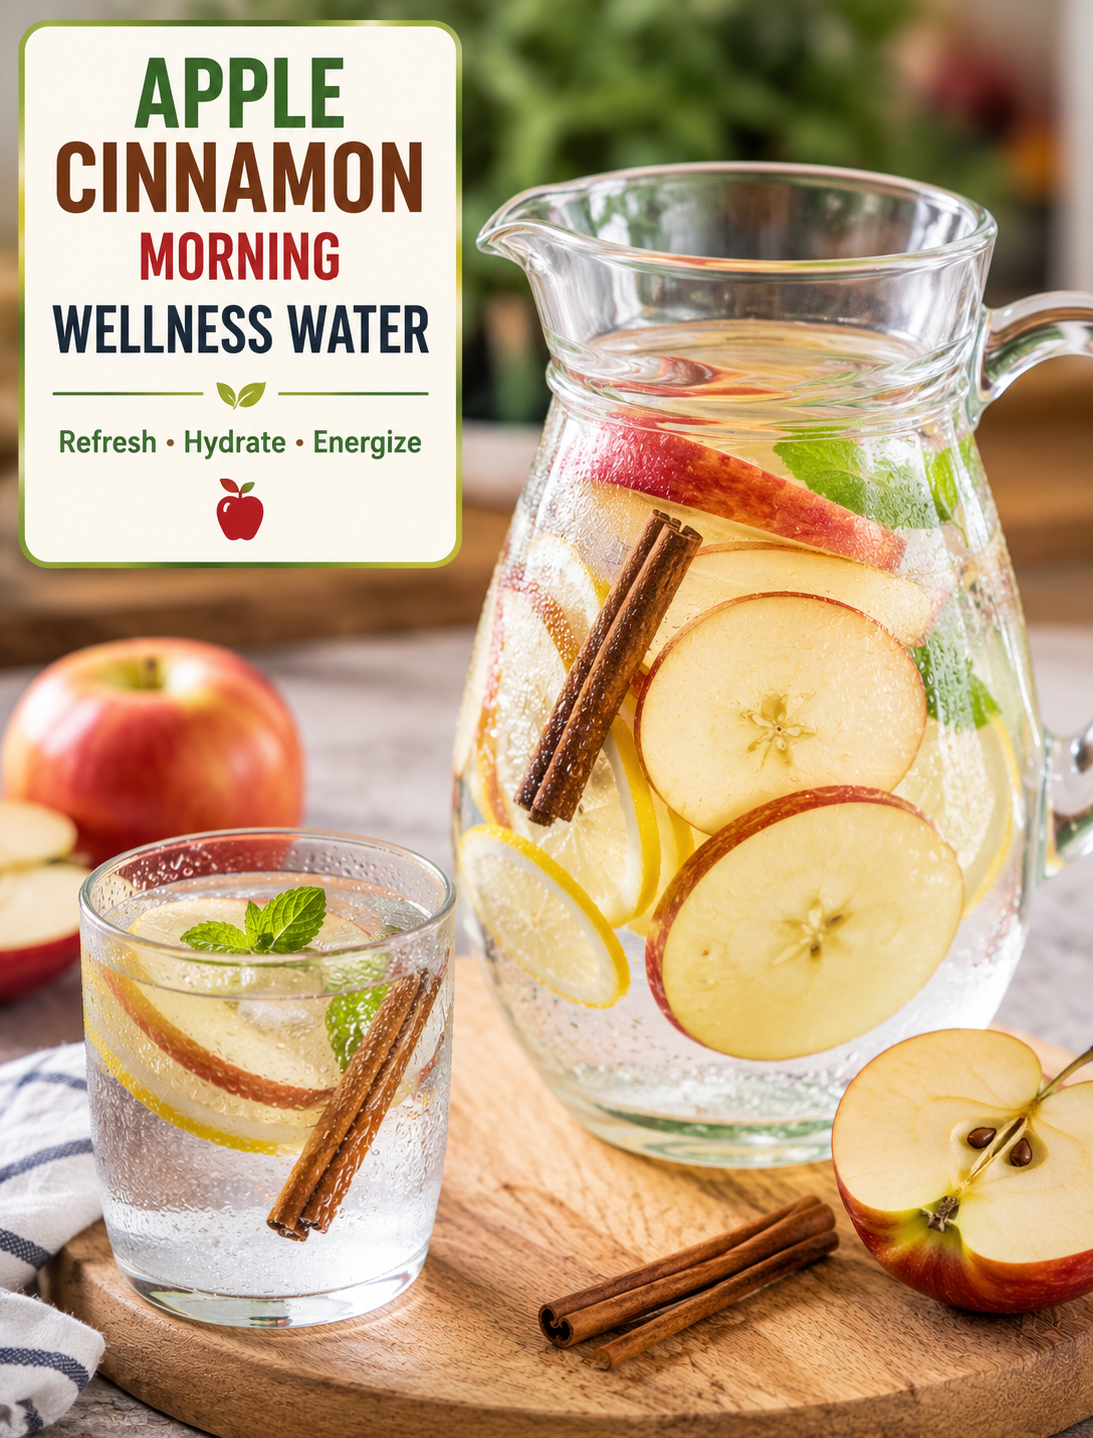
Apple cinnamon infused water with fresh apple slices, lemon, cinnamon sticks, and mint in a glass pitcher

Apple Cinnamon Morning Wellness Water

A refreshing glass of flavored water can make your morning routine feel a little more enjoyable. This Apple Cinnamon Morning Wellness Water combines crisp apple slices, cinnamon, fresh lemon, and cold water for a naturally flavored drink that is simple to prepare and easy to enjoy.

Unlike bottled sweet drinks, this homemade infusion contains no added sugar unless you choose to add some. The apple and cinnamon give the water a light, naturally sweet flavor, while lemon adds a bright citrus note.

This drink is not a magic detox or a cure for health problems. Its main benefit is that it can make plain water more appealing, which may help you drink more fluids throughout the day.

Keep a pitcher in the refrigerator overnight, and you will have a refreshing drink ready when you wake up.

Why Try Apple Cinnamon Wellness Water?

Plain water is essential for normal body functions, but many people find it boring. Adding fresh fruit and spices can create more flavor without turning water into a sugary beverage.

Apples contribute natural flavor and small amounts of nutrients, while cinnamon adds a warm, spicy aroma. Lemon provides a fresh citrus taste that balances the sweetness of the apple.

The ingredients are simple, inexpensive, and easy to find at most U.S. grocery stores.

This recipe can also be prepared ahead of time, making it convenient for busy mornings, workdays, and weekend meal preparation.

The biggest advantage is simplicity. You do not need special powders, supplements, or complicated ingredients to make a flavorful infused water.

Ingredients You’ll Need

  • 1 medium crisp apple
  • 1 cinnamon stick
  • ½ lemon, thinly sliced
  • 6–8 cups cold filtered water
  • Ice, optional
  • Fresh mint leaves, optional

Choose a crisp apple that you enjoy eating. Honeycrisp, Fuji, Gala, Pink Lady, and Granny Smith all work well.

A cinnamon stick is preferable to ground cinnamon because it infuses the water without leaving as much powder floating in the pitcher.

Fresh lemon gives the cleanest citrus flavor. If you prefer a milder taste, start with a few lemon slices and add more later.

Mint is optional, but it gives the drink a cooling finish that works especially well during warmer months.

How to Make Apple Cinnamon Morning Wellness Water

1. Wash the Ingredients

Rinse the apple and lemon thoroughly under cool running water.

Because the fruit will be sliced with the peel on, cleaning the outside well is important.

Pat the fruit dry with a clean towel before slicing.

2. Slice the Apple and Lemon

Cut the apple into thin wedges or rounds.

Remove the seeds and core pieces before adding the apple to the pitcher.

Slice half of the lemon into thin rounds. Thin slices allow the citrus flavor to spread through the water more easily.

There is no need to peel either fruit.

3. Combine Everything

Place the apple slices, lemon slices, and cinnamon stick into a large glass pitcher.

Add 6–8 cups of cold water and gently stir.

If using fresh mint, add a small handful of washed leaves.

4. Chill and Infuse

Cover the pitcher and place it in the refrigerator.

Allow the ingredients to infuse for at least 2 hours. For a stronger flavor, leave the mixture refrigerated overnight.

The longer the fruit sits in the water, the more noticeable the flavor becomes.

Add ice to individual glasses when serving.

Best Apples for Infused Water

Different apples create different flavor profiles.

Honeycrisp provides a crisp, naturally sweet taste that pairs nicely with cinnamon and lemon.

Fuji and Gala apples offer a softer sweetness and are useful when you want a mild drink.

Granny Smith apples create a sharper, more tart flavor that works especially well with lemon.

Pink Lady apples provide a balanced combination of sweetness and acidity.

You can also combine two apple varieties to create a more interesting flavor.

There is no need to use expensive apples for this recipe. Choose fresh fruit that is firm and free from major bruising.

What Does Cinnamon Add to the Drink?

Cinnamon gives infused water a warm aroma and mild spice without adding sugar.

The flavor becomes stronger as the cinnamon stick sits in the water. If you prefer a subtle cinnamon taste, remove the stick after a few hours.

Cinnamon is often discussed for its potential health properties, but adding cinnamon to water should not be viewed as a treatment for blood sugar problems, inflammation, or other medical conditions.

For this recipe, its main role is simple: it makes the drink taste more interesting.

That flavor can make a plain glass of water feel more satisfying without the need for soda or sweetened beverages.

Is Apple Cinnamon Water a Detox Drink?

The term “detox water” is popular online, but the body already has natural systems that process and remove waste.

Your liver, kidneys, lungs, digestive system, and other organs perform these important functions.

Apple cinnamon water does not flush toxins from the body or replace medical detoxification.

A more accurate way to describe this drink is fruit-infused water.

Its practical benefit is that it provides a flavorful, low-calorie alternative to many sweetened drinks and can be part of a healthy hydration routine.

Can You Drink It in the Morning?

Yes. This drink can be enjoyed first thing in the morning, with breakfast, or later in the day.

Starting your day with water can help you replenish fluids after several hours of sleep.

There is no special requirement to drink infused water on an empty stomach. If you prefer to drink it alongside breakfast, that works just as well.

For a balanced breakfast, pair the drink with foods containing protein, fiber, and healthy fats, such as eggs, Greek yogurt, oatmeal, nuts, seeds, or fresh fruit.

The drink should complement breakfast rather than replace a nutritious meal.

How to Make the Flavor Stronger

If your first batch tastes too mild, there are several easy ways to increase the flavor.

Add more apple slices for a stronger fruit taste. You can also add another cinnamon stick if you enjoy a more noticeable spice flavor.

A few additional lemon slices can make the water brighter and more refreshing.

Fresh ginger is another option that pairs well with apple and cinnamon. Add two or three thin slices for a gentle spicy note.

Fresh mint can provide a cool finish, especially when the drink is served over ice.

Avoid adding large amounts of honey or sugar if your goal is to keep the beverage low in added sugar.

Apple Cinnamon Water for Meal Prep

This recipe is ideal for preparing ahead.

Make a pitcher in the evening and refrigerate it overnight. The flavor will be ready by morning, so there is no extra preparation when you wake up.

For the best taste, prepare a fresh batch regularly instead of keeping the same fruit in the pitcher for many days.

If the apple slices become soft or the lemon develops a bitter taste, remove the fruit and make a fresh batch.

You can also prepare smaller individual jars if you prefer to take infused water to work, school, or outdoor activities.

Use clean, covered containers and keep the drink refrigerated.

How Long Does Infused Water Last?

For the best quality, drink homemade fruit-infused water within about 24 hours and keep it refrigerated.

The fruit can become soft after extended soaking, and citrus peel may create a bitter flavor over time.

If you notice an unusual smell, cloudy appearance, or unpleasant taste, discard the drink.

Always use clean utensils and containers when preparing infused water.

Keeping the pitcher cold is especially important because fresh fruit is perishable.

Simple Variations to Try

Once you have tried the basic recipe, you can create several variations.

Add fresh ginger for a stronger spice profile.

Use orange slices instead of lemon for a sweeter citrus flavor.

Add cucumber for a lighter, crisp taste.

Fresh berries can create a colorful summer version.

Pear slices can replace apples when you want a softer fruit flavor.

You can also add fresh rosemary or mint for a more herbal drink.

The key is to keep the combination simple so the flavors remain clean and refreshing.

Tips for the Best Apple Cinnamon Water

Use cold, clean water for the freshest taste.

Slice the fruit thinly so the flavors can infuse more easily.

Choose firm apples that are fresh and free from excessive bruising.

Use cinnamon sticks instead of large amounts of ground cinnamon.

Refrigerate the pitcher while it infuses.

Taste the water after two hours and adjust the ingredients if needed.

Remove the fruit when the flavor becomes strong enough for your preference.

Serve over ice for an extra-refreshing drink.

The Bottom Line

Apple Cinnamon Morning Wellness Water is a simple way to make everyday hydration more flavorful.

Fresh apple provides a naturally fruity taste, cinnamon adds warmth, and lemon creates a bright finish. Together, they turn ordinary water into an easy homemade beverage without requiring a complicated recipe.

While this drink should not be promoted as a detox treatment or cure, it can be a smart alternative to sugary beverages. The best approach is to enjoy it as part of a balanced lifestyle that includes nutritious food, regular movement, adequate sleep, and good hydration.

Prepare a pitcher the night before, keep it chilled, and enjoy a refreshing glass when you start your day.

Frequently Asked Questions

1. What is Apple Cinnamon Morning Wellness Water?

It is homemade infused water made with fresh apple slices, cinnamon, lemon, and cold water for a naturally flavored, refreshing beverage.

2. Can apple cinnamon water help with hydration?

Yes. It provides water, and the added fruit flavor may make drinking enough fluids more enjoyable.

3. Does apple cinnamon water detox the body?

No. The body naturally removes waste through organs such as the liver and kidneys; infused water simply supports normal hydration.

4. Can I drink apple cinnamon water every day?

Yes, as long as the ingredients are fresh and the drink fits comfortably into your overall diet and hydration routine.

5. How long should apple cinnamon water infuse?

Refrigerate it for at least 2 hours, or leave it overnight for a stronger flavor.

6. Can I use ground cinnamon instead of a cinnamon stick?

Yes, but ground cinnamon may settle at the bottom and create a cloudy texture, so a cinnamon stick is usually easier.

7. How long does apple cinnamon infused water last?

For the best flavor and quality, keep it refrigerated and use it within about 24 hours.

8. Can I add ginger or mint?

Yes. Fresh ginger and mint pair well with apple, cinnamon, and lemon and can add extra flavor without much sweetness.

Final Thoughts

Apple Cinnamon Morning Wellness Water is a simple, refreshing way to make everyday hydration more enjoyable. Fresh apple, cinnamon, and lemon create a naturally flavorful combination without needing added sugar.

While it is not a detox cure or a magic wellness drink, it can be a smart alternative to sugary beverages. Prepare it the night before, keep it chilled, and enjoy a fresh glass as part of a balanced morning routine.

Sometimes, the simplest healthy habits are the easiest ones to keep.