White Cheddar and Spinach Chicken

White cheddar and spinach chicken breasts in a creamy garlic cheese sauce served in a skillet

White Cheddar and Spinach Chicken

White Cheddar and Spinach Chicken is a creamy, flavorful dinner made with tender pan-seared chicken, fresh spinach, garlic, and sharp white cheddar cheese. The chicken is cooked until golden, then finished in a smooth cheese sauce that adds rich flavor without requiring complicated cooking techniques.

This easy chicken dinner is ready in about 30–35 minutes, making it a practical choice for busy weeknights. It also has an elegant look and rich flavor that works well for family dinners, casual gatherings, or guests.

The creamy spinach sauce pairs especially well with mashed potatoes, rice, pasta, or cauliflower mash. A simple green salad or roasted vegetables can also complete the meal.

Why You’ll Love This Recipe

  • Ready in about 30–35 minutes from start to finish.
  • Uses simple ingredients that are easy to find in most U.S. grocery stores.
  • Pan-seared chicken adds a golden, savory crust before the sauce is added.
  • Fresh spinach adds color, texture, and a mild earthy flavor.
  • Sharp white cheddar creates a rich and creamy cheese sauce.
  • The recipe can be made with chicken breasts or boneless chicken thighs.
  • Leftovers can be refrigerated and gently reheated for another meal.

Ingredients

For the Chicken

  • 4 boneless, skinless chicken breasts
  • Salt and black pepper, to taste
  • ½ teaspoon garlic powder
  • ½ teaspoon paprika
  • 2 tablespoons olive oil

For the White Cheddar Spinach Sauce

  • 2 tablespoons olive oil
  • 2 garlic cloves, minced
  • 2 tablespoons all-purpose flour
  • 1½ cups whole or 2% milk
  • 1 cup freshly grated sharp white cheddar cheese
  • ¼ cup grated Parmesan cheese, optional
  • 2 cups fresh spinach, chopped
  • ½ teaspoon Dijon mustard, optional
  • Salt and black pepper, to taste
  • 2 tablespoons chopped fresh parsley or basil, optional

How to Make White Cheddar and Spinach Chicken

Step 1: Prepare the Chicken

Pat the chicken breasts dry with paper towels before seasoning. Removing excess moisture helps the chicken develop a better golden-brown crust in the skillet.

Season both sides evenly with salt, black pepper, garlic powder, and paprika.

For quicker cooking, butterfly thick chicken breasts by slicing them horizontally through the center. Keep the two sides attached if preferred, or cut them into thinner portions.

Step 2: Sear the Chicken

Heat 2 tablespoons of olive oil in a large skillet over medium-high heat.

Place the seasoned chicken into the hot skillet without overcrowding the pan. Cook for about 5–6 minutes on each side, depending on thickness.

The chicken should be golden on the outside and reach an internal temperature of 165°F (74°C) in the thickest part.

Transfer the cooked chicken to a plate and cover loosely to keep it warm.

Helpful cooking points:

  • Use a large skillet so the chicken browns instead of steaming.
  • Avoid moving the chicken too often while it sears.
  • Use a meat thermometer for the most reliable doneness check.
  • Let very thick breasts cook a little longer over moderate heat.

Step 3: Start the Creamy Sauce

Reduce the heat to medium and use the same skillet. The browned bits left from the chicken add extra flavor to the sauce.

Add 2 tablespoons of olive oil, followed by the minced garlic. Cook for about 30 seconds until fragrant.

Add the flour and stir continuously for about 1 minute. This creates a simple roux that helps thicken the sauce.

Step 4: Add the Milk

Slowly pour the milk into the skillet while whisking. Adding the milk gradually helps prevent lumps.

Bring the mixture to a gentle simmer and cook for about 3–4 minutes. Stir often until the sauce becomes slightly thick and smooth.

Do not boil the sauce aggressively because high heat can make a cheese sauce separate.

Step 5: Add White Cheddar and Spinach

Lower the heat and add the grated sharp white cheddar. Stir until the cheese melts into the sauce.

Add the Parmesan cheese if using, followed by Dijon mustard for a subtle tangy flavor.

Stir in the chopped spinach and cook until it wilts, which usually takes about 1–2 minutes.

Taste the sauce and adjust the salt and black pepper as needed.

For the best sauce:

  • Grate the cheddar from a block for smoother melting.
  • Use sharp or aged white cheddar for stronger cheese flavor.
  • Keep the heat low after adding the cheese.
  • Add a small splash of milk if the sauce becomes too thick.

Step 6: Return the Chicken to the Skillet

Place the cooked chicken back into the skillet.

Spoon the creamy white cheddar and spinach sauce over each chicken breast. Let everything simmer gently for 2–3 minutes.

This short finishing step allows the chicken to warm through while the flavors blend together.

Garnish with chopped parsley or basil if desired.

What to Serve With This Chicken

The creamy sauce makes this dish especially good with simple sides that can soak up the extra sauce.

Try serving it with:

  • Creamy mashed potatoes
  • Steamed white or brown rice
  • Buttered pasta
  • Cauliflower mash
  • Roasted broccoli
  • Green beans
  • A crisp garden salad
  • Roasted carrots

For a lower-carbohydrate dinner, cauliflower mash and roasted vegetables are easy choices. For a heartier family meal, mashed potatoes, rice, or pasta work especially well.

Recipe Tips and Variations

Slicing the chicken horizontally can reduce cooking time and gives the creamy sauce more surface area to coat.

Boneless, skinless chicken thighs are a good alternative if you prefer darker meat. They stay juicy and bring a slightly richer flavor to the dish.

You can also add sautéed mushrooms for an earthy flavor or chopped sun-dried tomatoes for a sweet and tangy contrast.

If the sauce becomes too thick while reheating, stir in a small amount of milk or chicken broth until it reaches the desired consistency.

For a gluten-free version, replace the all-purpose flour with a gluten-free flour blend or use a cornstarch slurry made with 1 tablespoon cornstarch and 2 tablespoons cold water.

Storage and Reheating

Store leftover chicken and sauce in an airtight container in the refrigerator for up to 3 days.

Reheat gently on the stovetop over low to medium heat or in the microwave using short intervals. Add a splash of milk or chicken broth if the sauce thickens too much during storage.

Avoid high heat because it can cause the cheddar sauce to become oily or separate.

Nutrition Information

Approximate nutrition per serving:

  • Calories: 470 kcal
  • Protein: 38 g
  • Fat: 28 g
  • Carbohydrates: 6 g
  • Fiber: 1 g
  • Sodium: 420 mg

Nutrition values are estimates and can vary based on the specific chicken, cheese, milk, and other ingredients used.

Frequently Asked Questions

Can I use chicken thighs instead of chicken breasts?

Yes. Boneless, skinless chicken thighs work well and remain juicy while cooking in the creamy sauce.

Can I make this recipe ahead of time?

Yes. Cook the chicken and sauce separately, refrigerate them, then gently reheat and combine before serving.

How do I keep the cheddar sauce smooth?

Use freshly grated cheese and add it over low heat after the milk mixture has thickened.

Can I make this chicken gluten-free?

Yes. Replace the all-purpose flour with a gluten-free flour blend or use a cornstarch slurry to thicken the sauce.

What type of cheddar works best?

Sharp or aged white cheddar gives the sauce a stronger cheese flavor and melts well when freshly grated.

Can I add mushrooms to the recipe?

Yes. Sauté sliced mushrooms before making the sauce, then add them back to the skillet with the spinach.

How long does leftover chicken last?

Store leftovers in the refrigerator for up to 3 days in an airtight container and reheat them gently before serving.

What can I serve with creamy spinach chicken?

Mashed potatoes, rice, pasta, cauliflower mash, roasted vegetables, and green salad all pair well with the creamy sauce.

Final Thoughts

White Cheddar and Spinach Chicken brings together tender chicken, sharp cheese, garlic, and fresh spinach in one skillet. The recipe uses straightforward ingredients and simple cooking steps, so it can fit easily into a busy weeknight dinner routine.

For the best results, avoid overcooking the chicken, grate the cheddar yourself, and keep the sauce over gentle heat after adding the cheese. Serve it with your favorite side and spoon the extra creamy sauce over the top for a comforting, satisfying meal.
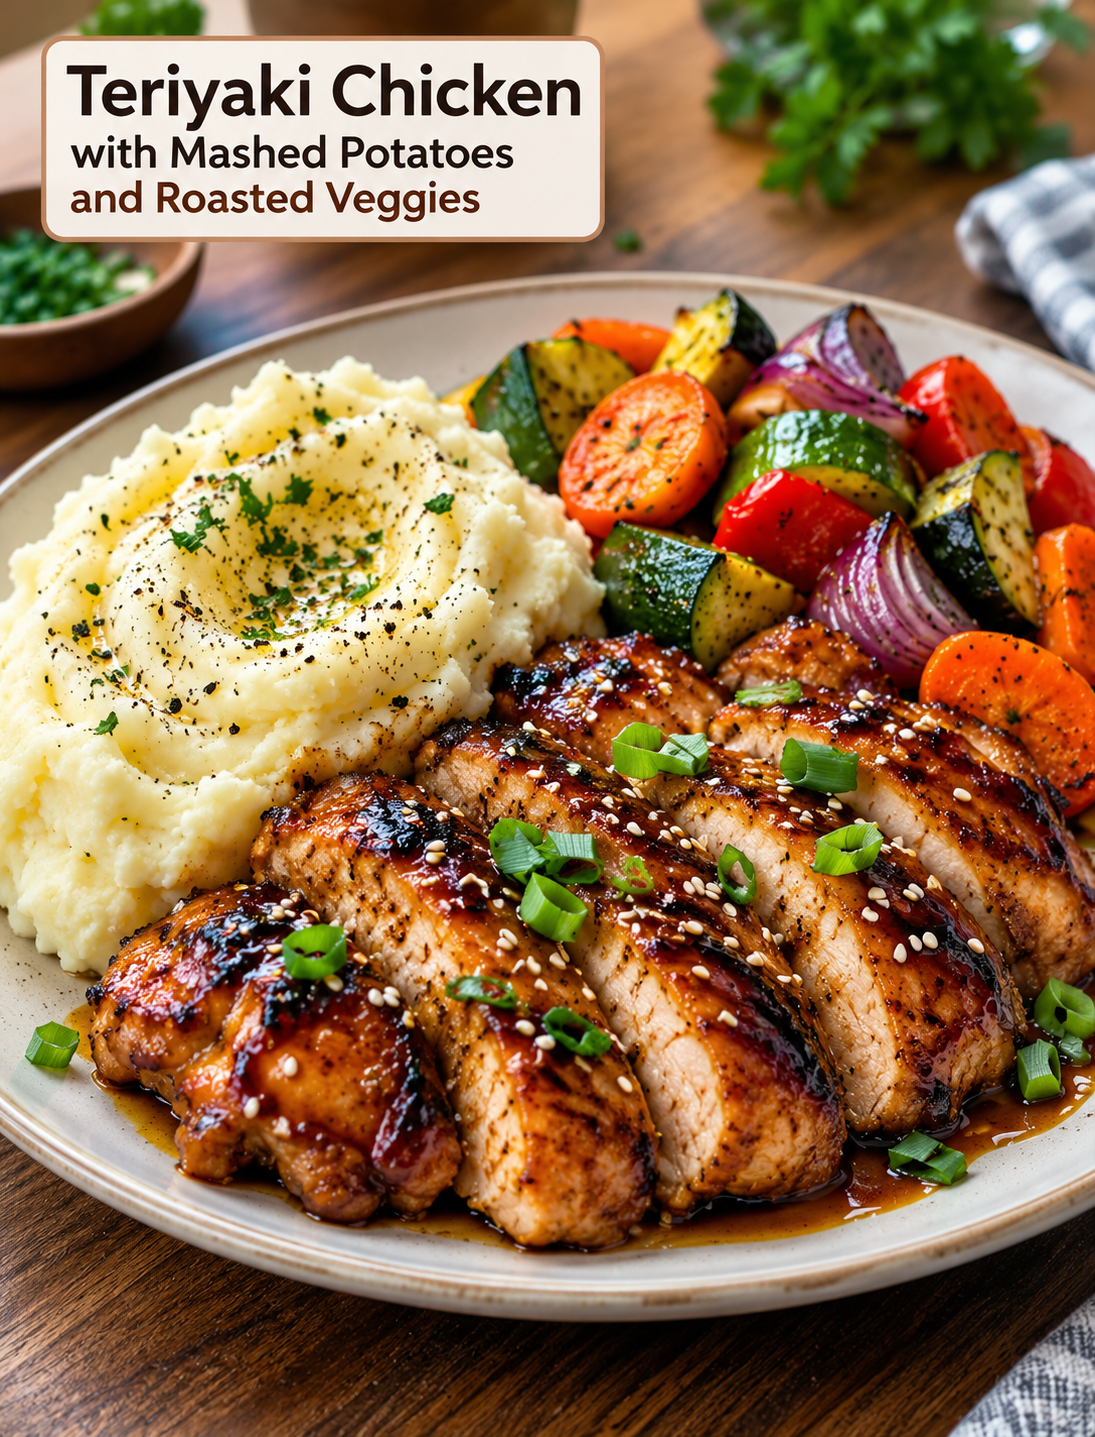
Teriyaki Chicken with Mashed Potatoes and Roasted Veggies

Teriyaki chicken served with creamy mashed potatoes and roasted carrots, zucchini, bell pepper, and red onion

Teriyaki Chicken with Mashed Potatoes and Roasted Veggies

Teriyaki Chicken with Mashed Potatoes and Roasted Veggies is a comforting dinner that combines juicy chicken thighs, creamy mashed potatoes, and colorful oven-roasted vegetables on one plate. The chicken is coated in a savory-sweet teriyaki marinade made with soy sauce, honey, garlic, ginger, and sesame oil.

This easy family dinner brings together Japanese-inspired flavors and classic American comfort food. The tender chicken pairs well with smooth potatoes, while roasted carrots, zucchini, bell pepper, and red onion add color, texture, and a fresh vegetable side.

The recipe serves four and works well for a weeknight dinner, weekend meal, or simple family gathering. Most of the cooking can also be done at the same time, making the meal easier to prepare.

Why You’ll Love This Dinner

  • Balanced plate: Chicken provides protein, potatoes add satisfying carbohydrates, and roasted vegetables bring fiber and nutrients.
  • Big flavor: Garlic, ginger, honey, soy sauce, and sesame oil create a rich sweet-and-savory glaze.
  • Family-friendly: The mild teriyaki flavor pairs easily with creamy potatoes and familiar vegetables.
  • Easy preparation: The chicken, potatoes, and vegetables use simple cooking methods.
  • Flexible ingredients: You can swap the vegetables or use chicken breast when needed.
  • Great for leftovers: Store extra portions in the refrigerator for an easy lunch or dinner.

Ingredients You’ll Need

For the Teriyaki Chicken

  • 4 boneless, skinless chicken thighs
  • 1/4 cup soy sauce
  • 2 tablespoons mirin or rice vinegar
  • 2 tablespoons honey or brown sugar
  • 1 tablespoon sesame oil
  • 2 garlic cloves, minced
  • 1 teaspoon fresh grated ginger
  • 1 teaspoon cornstarch
  • 2 tablespoons water
  • 1 teaspoon sesame seeds, optional
  • Sliced green onions for garnish

For the Mashed Potatoes

  • 4 large Russet or Yukon Gold potatoes
  • 1/2 cup whole milk or cream
  • 4 tablespoons olive oil
  • Salt and black pepper to taste

For the Roasted Vegetables

  • 2 carrots, sliced
  • 1 zucchini, chopped
  • 1 bell pepper, chopped
  • 1 red onion, quartered
  • 2 tablespoons olive oil
  • 1 teaspoon dried thyme or Italian seasoning
  • Salt and black pepper to taste

How to Make Teriyaki Chicken with Mashed Potatoes and Roasted Veggies

Step 1: Marinate the Chicken

Add soy sauce, mirin or rice vinegar, honey, sesame oil, minced garlic, and grated ginger to a bowl. Whisk until the honey is well mixed into the marinade.

Place the chicken thighs in the bowl and turn them several times so every piece is coated. Cover and refrigerate for at least 30 minutes. For deeper flavor, marinate the chicken for up to 8 hours.

Helpful point: Keep the chicken refrigerated while it marinates, and do not reuse raw marinade as a sauce unless it is thoroughly cooked first.

Step 2: Prepare the Roasted Vegetables

Preheat your oven to 400°F (200°C).

Place the carrots, zucchini, bell pepper, and red onion on a large baking sheet. Add olive oil, dried thyme or Italian seasoning, salt, and black pepper.

Toss everything until the vegetables are evenly coated. Spread them into a single layer so they roast instead of steaming.

Roast for 25–30 minutes, turning the vegetables halfway through cooking.

Helpful point: Cut the vegetables into similar-sized pieces so they cook more evenly.

Step 3: Make the Mashed Potatoes

Peel the potatoes and cut them into evenly sized chunks. Place them in a large pot and cover with cold water.

Add a generous pinch of salt and bring the water to a boil. Cook for about 15–20 minutes, or until the potatoes are tender when pierced with a fork.

Drain the potatoes well. Return them to the warm pot and mash until smooth.

Warm the milk or cream separately, then gradually mix it into the potatoes with olive oil. Season with salt and black pepper.

Helpful point: Avoid overmixing the potatoes because too much stirring can make them sticky instead of fluffy.

Step 4: Cook the Teriyaki Chicken

Remove the chicken from the marinade and let excess liquid drip off.

Heat a large skillet over medium-high heat. Add the chicken thighs and cook for about 4–5 minutes per side, depending on their thickness.

Continue cooking until the chicken reaches a safe internal temperature of 165°F (74°C) in the thickest part.

Transfer the cooked chicken to a clean plate and let it rest for a few minutes before slicing.

Step 5: Make the Teriyaki Glaze

If you want a thicker sauce, combine 1 teaspoon cornstarch with 2 tablespoons water to make a smooth slurry.

Pour the remaining marinade into a small saucepan and bring it to a full boil. Continue cooking until it reaches a safe temperature, then stir in the cornstarch mixture.

Simmer briefly until the sauce thickens into a glossy glaze.

Important point: Never pour uncooked marinade directly over finished chicken. Raw chicken marinade must be thoroughly cooked before serving.

Step 6: Assemble the Plate

Spoon a generous portion of mashed potatoes onto each plate. Add the roasted vegetables beside the potatoes.

Slice the rested chicken into strips and place it over or beside the mashed potatoes.

Drizzle a small amount of warm teriyaki glaze over the chicken. Finish with sesame seeds and sliced green onions for extra flavor and texture.

Tips for the Best Results

  • Use boneless chicken thighs for juicy, flavorful meat.
  • Do not overcrowd the baking sheet because the vegetables need space to brown.
  • Warm the milk before adding it to the potatoes for a smoother texture.
  • Use Yukon Gold potatoes for naturally creamy mashed potatoes.
  • Let the cooked chicken rest before slicing to help retain its juices.
  • Add the teriyaki glaze just before serving for the best texture.
  • Use low-sodium soy sauce if you want to reduce the saltiness.
  • For a gluten-free meal, choose certified gluten-free soy sauce or tamari.

Easy Ingredient Swaps

You can replace chicken thighs with boneless chicken breasts, but watch the cooking time because lean breast meat can dry out more quickly.

For the vegetables, broccoli, mushrooms, Brussels sprouts, green beans, or sweet potatoes can work well. Choose vegetables that roast at a similar rate or add quicker-cooking vegetables later.

For dairy-free mashed potatoes, use plant-based milk and a dairy-free butter alternative instead of regular dairy ingredients.

Storage and Reheating

Store leftover chicken, mashed potatoes, and roasted vegetables in separate airtight containers in the refrigerator. For the best quality, enjoy leftovers within 3–4 days.

Reheat the chicken and vegetables until hot throughout. Add a splash of milk to the mashed potatoes before reheating if they have become dry.

Keep the teriyaki glaze refrigerated in a covered container and warm it gently before serving.

Frequently Asked Questions

Can I use chicken breast instead of thighs?

Yes. Chicken breast works well, but cook it carefully because it can become dry if overcooked.

What vegetables can I use instead?

Broccoli, mushrooms, Brussels sprouts, green beans, and sweet potatoes are good substitutes for the listed vegetables.

Can I make this meal ahead of time?

Yes. Prepare the chicken, potatoes, vegetables, and sauce ahead of time, then refrigerate and reheat before serving.

Is this recipe gluten-free?

It can be gluten-free when you use certified gluten-free soy sauce or tamari and check all packaged ingredients.

How can I make the mashed potatoes dairy-free?

Use unsweetened plant-based milk and a dairy-free butter or olive-oil spread instead of regular dairy products.

Can I make the teriyaki sauce thicker?

Yes. Mix cornstarch with water and stir it into the thoroughly cooked marinade while simmering until the sauce thickens.

How do I know when the chicken is done?

Check the thickest part with a food thermometer; chicken should reach 165°F (74°C) for safe consumption.

Can I freeze the leftovers?

The chicken and roasted vegetables can be frozen, although mashed potatoes may change texture slightly after thawing and reheating.

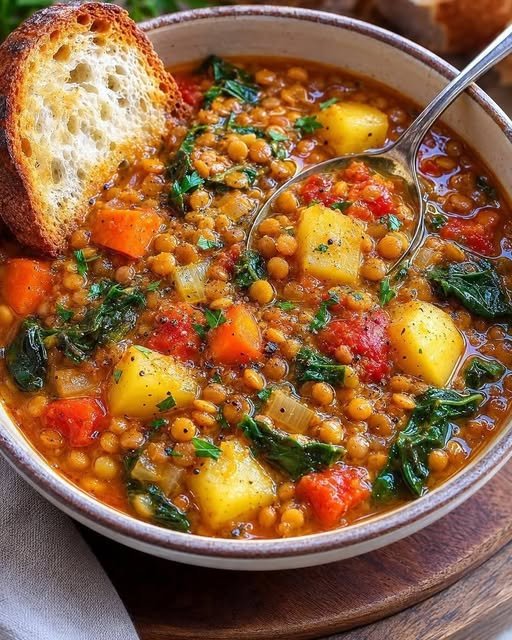
Turmeric Lentil Soup – Easy, Cozy & Nourishing Red Lentil Soup

Turmeric Lentil Soup – Easy, Cozy & Nourishing Red Lentil Soup

Turmeric Lentil Soup – Easy, Cozy & Nourishing Red Lentil Soup

A warm, cozy, and nourishing soup made with red lentils, vegetables, and comforting spices. This golden soup is hearty, healthy, and perfect for busy weeknights or meal prep. The turmeric and ginger add rich flavor while the lentils create a naturally creamy texture without any dairy.

Ingredients

  • 2 tablespoons olive oil
  • 1 medium yellow onion, diced
  • 2 carrots, diced
  • 2 celery stalks, diced
  • 4 garlic cloves, minced
  • 1 tablespoon fresh ginger, grated
  • 2 teaspoons ground turmeric
  • 1 teaspoon ground cumin
  • ½ teaspoon smoked paprika (optional)
  • 2 tablespoons tomato paste
  • 1 cup red lentils, rinsed
  • 6 cups vegetable broth or water
  • Salt and black pepper, to taste
  • Juice of ½ lemon
  • Fresh parsley or cilantro for garnish

Instructions

1. Cook the Vegetables

Heat the olive oil in a large pot over medium heat. Add the diced onion, carrots, and celery. Cook for about 6–8 minutes, stirring occasionally, until the vegetables soften and the onion becomes translucent.

2. Add Garlic and Spices

Stir in the minced garlic and grated ginger. Cook for 1 minute until fragrant. Add the turmeric, cumin, and smoked paprika, stirring well so the spices coat the vegetables evenly.

3. Build the Flavor

Mix in the tomato paste and cook for another minute. This helps deepen the flavor and gives the soup a rich, savory taste.

4. Simmer the Soup

Add the rinsed red lentils and pour in the vegetable broth. Stir well and bring the soup to a gentle boil. Reduce the heat to low and simmer uncovered for 25–30 minutes, stirring occasionally, until the lentils are soft and creamy.

5. Blend if Desired

For a smoother soup, blend part of the soup with an immersion blender. Leave it chunky if you prefer a rustic texture.

6. Finish and Serve

Season with salt and black pepper to taste. Stir in the lemon juice for brightness. Ladle into bowls and garnish with fresh parsley or cilantro. Serve warm with crusty bread or naan.

Q & A

Can I use green or brown lentils?

Yes, but they take longer to cook and the texture will be less creamy than red lentils.

How do I store leftovers?

Store in an airtight container in the refrigerator for up to 4 days.

Can I freeze this soup?

Absolutely. Freeze for up to 3 months and thaw overnight before reheating.

Can I make it spicy?

Yes. Add chili flakes or cayenne pepper for extra heat.

Nutrition (Approx. Per Serving)

  • Calories: 220
  • Protein: 10g
  • Carbohydrates: 28g
  • Fiber: 9g
  • Fat: 7g
  • Sodium: 520mg
  • Vitamin A: 70% DV
  • Iron: 20% DV

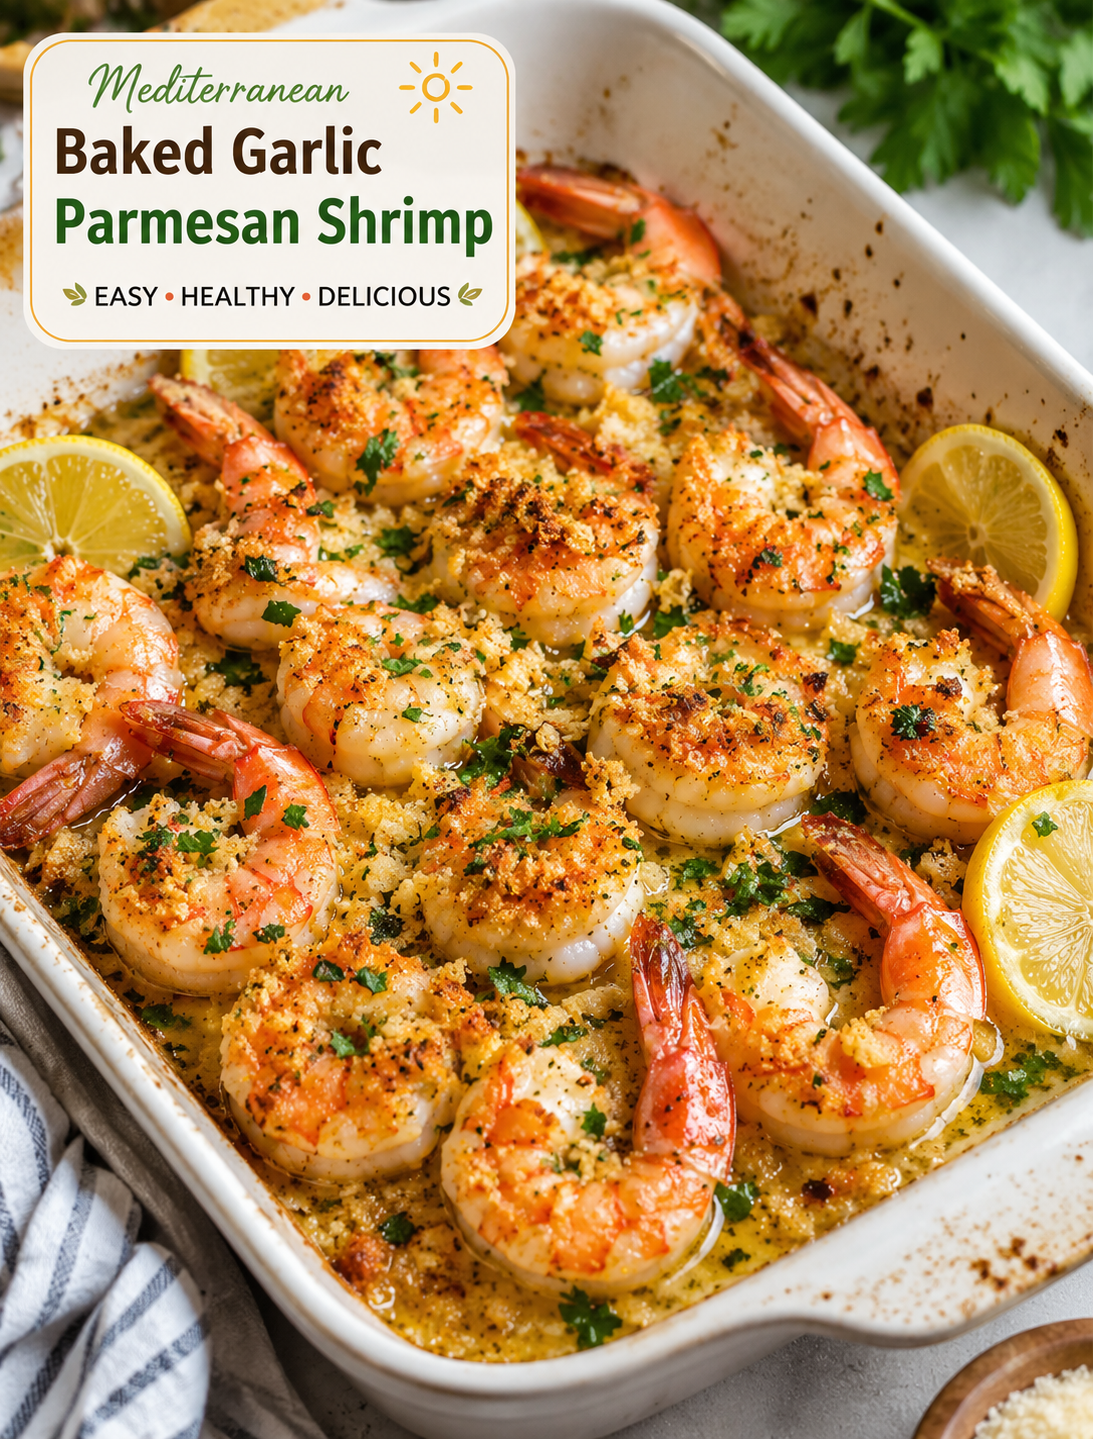
Mediterranean Baked Garlic Parmesan Shrimp

Mediterranean baked garlic Parmesan shrimp with lemon, herbs, and golden Parmesan topping served in a baking dish

Mediterranean Baked Garlic Parmesan Shrimp

Mediterranean Baked Garlic Parmesan Shrimp is a fast seafood dinner with bright lemon, fresh garlic, olive oil, herbs, and a golden Parmesan topping. The shrimp bake in one dish, so cleanup is simple and the meal is ready in about 25 minutes.

This easy shrimp recipe works well for busy weeknights, casual family dinners, or a simple appetizer when guests come over. The lemon adds freshness, while garlic, oregano, Parmesan, and paprika give the shrimp a rich savory flavor without making the dish heavy.

Mediterranean Baked Garlic Parmesan Shrimp Recipe

This baked shrimp dish uses simple ingredients that are easy to find at most U.S. grocery stores. Large or extra-large shrimp are ideal because they stay juicy while the Parmesan topping turns lightly golden.

For the best texture, use raw shrimp that have been peeled and deveined. Fresh shrimp are excellent, but frozen shrimp also work when they are fully thawed and dried before seasoning.

Prep Time

10 minutes

Bake Time

12–15 minutes

Total Time

25 minutes

Servings

4

Ingredients

  • 500 g (about 1 lb) raw shrimp, peeled and deveined
  • 2 tablespoons olive oil
  • 4 garlic cloves, finely minced
  • 2 tablespoons fresh lemon juice
  • ½ teaspoon lemon zest
  • ½ cup freshly grated Parmesan cheese
  • ¼ cup breadcrumbs or almond flour
  • 2 tablespoons fresh parsley, finely chopped
  • ½ teaspoon dried oregano
  • ½ teaspoon paprika
  • ½ teaspoon sea salt
  • ¼ teaspoon black pepper
  • Lemon wedges, for serving
  • Extra parsley, for garnish

Use freshly grated Parmesan when possible because it melts and browns more evenly than many pre-shredded varieties. Almond flour is a useful option when you want a lower-carb topping.

How to Make Mediterranean Baked Garlic Parmesan Shrimp

Start by heating your oven to 400°F (200°C). Lightly grease a baking dish with olive oil or line it with parchment paper for easier cleanup.

Pat the shrimp dry with paper towels. Removing excess moisture helps the garlic mixture cling to the shrimp and keeps the Parmesan topping from becoming watery.

Place the shrimp in the baking dish in one even layer. Avoid stacking them because crowded shrimp can cook unevenly.

In a small bowl, combine olive oil, minced garlic, lemon juice, lemon zest, oregano, paprika, salt, and black pepper. Stir until the mixture is well blended.

Pour the garlic and lemon mixture over the shrimp. Toss gently or turn the shrimp with a spoon so each piece gets an even coating.

In a separate bowl, mix Parmesan cheese, breadcrumbs or almond flour, and chopped parsley. Sprinkle the mixture evenly over the shrimp.

Bake uncovered for 12 to 15 minutes. The shrimp should become pink, opaque, and firm, while the topping should look lightly golden.

For a deeper golden crust, place the baking dish under the broiler for 1 to 2 minutes at the end. Watch closely because Parmesan can brown quickly.

Let the shrimp rest for about 2 minutes before serving. Add fresh parsley and lemon wedges for a bright finish.

Tips for the Best Baked Shrimp

Choose large or extra-large shrimp for a juicy texture and better presentation. Smaller shrimp can cook too quickly and become firm.

Do not overcook the seafood. Shrimp are ready when they are opaque and pink with a loose C-shaped curl.

Drying the shrimp before seasoning is an easy step that helps the topping stay flavorful and crisp.

Fresh garlic gives the strongest flavor, while freshly grated Parmesan creates a better crust.

Keep the shrimp in a single layer so heat reaches every piece evenly.

If you want more Mediterranean flavor, add sliced Kalamata olives, chopped cherry tomatoes, fresh basil, or a small pinch of red pepper flakes.

Use almond flour instead of breadcrumbs for a lower-carb version. Gluten-free breadcrumbs also work well if needed.

What to Serve With Garlic Parmesan Shrimp

Serve these shrimp with crusty bread to soak up the lemon-garlic juices. A simple green salad with cucumber, tomatoes, and a light vinaigrette adds freshness.

For a heartier dinner, serve the shrimp with rice, roasted potatoes, whole wheat pasta, or zucchini noodles. Roasted asparagus, green beans, or Mediterranean vegetables also make easy side dishes.

For an appetizer, arrange the baked shrimp on a serving platter with lemon wedges and fresh parsley. Serve them while warm for the best texture.

Easy Recipe Variations

Add cherry tomatoes before baking for extra color and natural sweetness.

Mix in crushed red pepper flakes if you enjoy a little heat with your seafood.

Replace Parmesan with Pecorino Romano for a sharper, saltier flavor.

Add chopped fresh basil or thyme for a different herb profile.

For extra Mediterranean character, add sliced olives or a small amount of crumbled feta after baking.

If you prefer a richer topping, add a light sprinkle of mozzarella before the final 2 minutes of baking.

Keep the shrimp tails on when serving guests for a more polished presentation.

Can You Make This Recipe Ahead?

You can prepare the shrimp and garlic-lemon mixture a few hours before cooking. Cover the prepared dish and refrigerate it until you are ready to bake.

For the best texture, add the Parmesan topping shortly before baking. Avoid leaving raw shrimp at room temperature for an extended period.

If using frozen shrimp, thaw them safely in the refrigerator and pat them completely dry before preparation.

Frequently Asked Questions

Can I use frozen shrimp for this recipe?

Yes. Thaw frozen shrimp completely, drain them well, and pat them dry before adding the garlic and Parmesan topping.

How do I know when the shrimp are fully cooked?

The shrimp should be pink, opaque, firm, and curled into a loose C shape when they are ready.

Can I make this recipe without breadcrumbs?

Yes. Replace breadcrumbs with almond flour for a lower-carb topping, or use gluten-free breadcrumbs if preferred.

Can I cook these shrimp in an air fryer?

Yes. Cook the prepared shrimp at 375°F for about 8–10 minutes, checking early because cooking time varies by shrimp size.

What size shrimp should I use?

Large or extra-large shrimp work best because they stay juicy and provide enough surface area for the Parmesan topping.

Can I use pre-cooked shrimp?

Raw shrimp are recommended because pre-cooked shrimp can become dry and rubbery when baked for a second time.

Is this baked shrimp recipe gluten-free?

It can be gluten-free when made with almond flour or certified gluten-free breadcrumbs instead of regular breadcrumbs.

What are the best side dishes for this shrimp?

Rice, pasta, crusty bread, roasted vegetables, zucchini noodles, and a fresh Mediterranean salad all pair well with the dish.

Nutrition Information

Approximate nutrition per serving:

  • Calories: 280
  • Protein: 32 g
  • Carbohydrates: 6 g
  • Fat: 14 g
  • Fiber: 1 g
  • Sugar: 1 g
  • Cholesterol: 220 mg

Nutrition values are estimates and can vary based on shrimp size, Parmesan, breadcrumbs, and serving portions.

Final Thoughts

Mediterranean Baked Garlic Parmesan Shrimp is an easy way to put a flavorful seafood dinner on the table without spending much time in the kitchen. The combination of juicy shrimp, garlic, lemon, herbs, olive oil, and Parmesan creates a balanced dish with plenty of fresh Mediterranean flavor.

Keep the preparation simple, avoid overbaking, and serve the shrimp immediately for the best texture. Add a salad, roasted vegetables, rice, or crusty bread to turn this quick recipe into a complete meal.

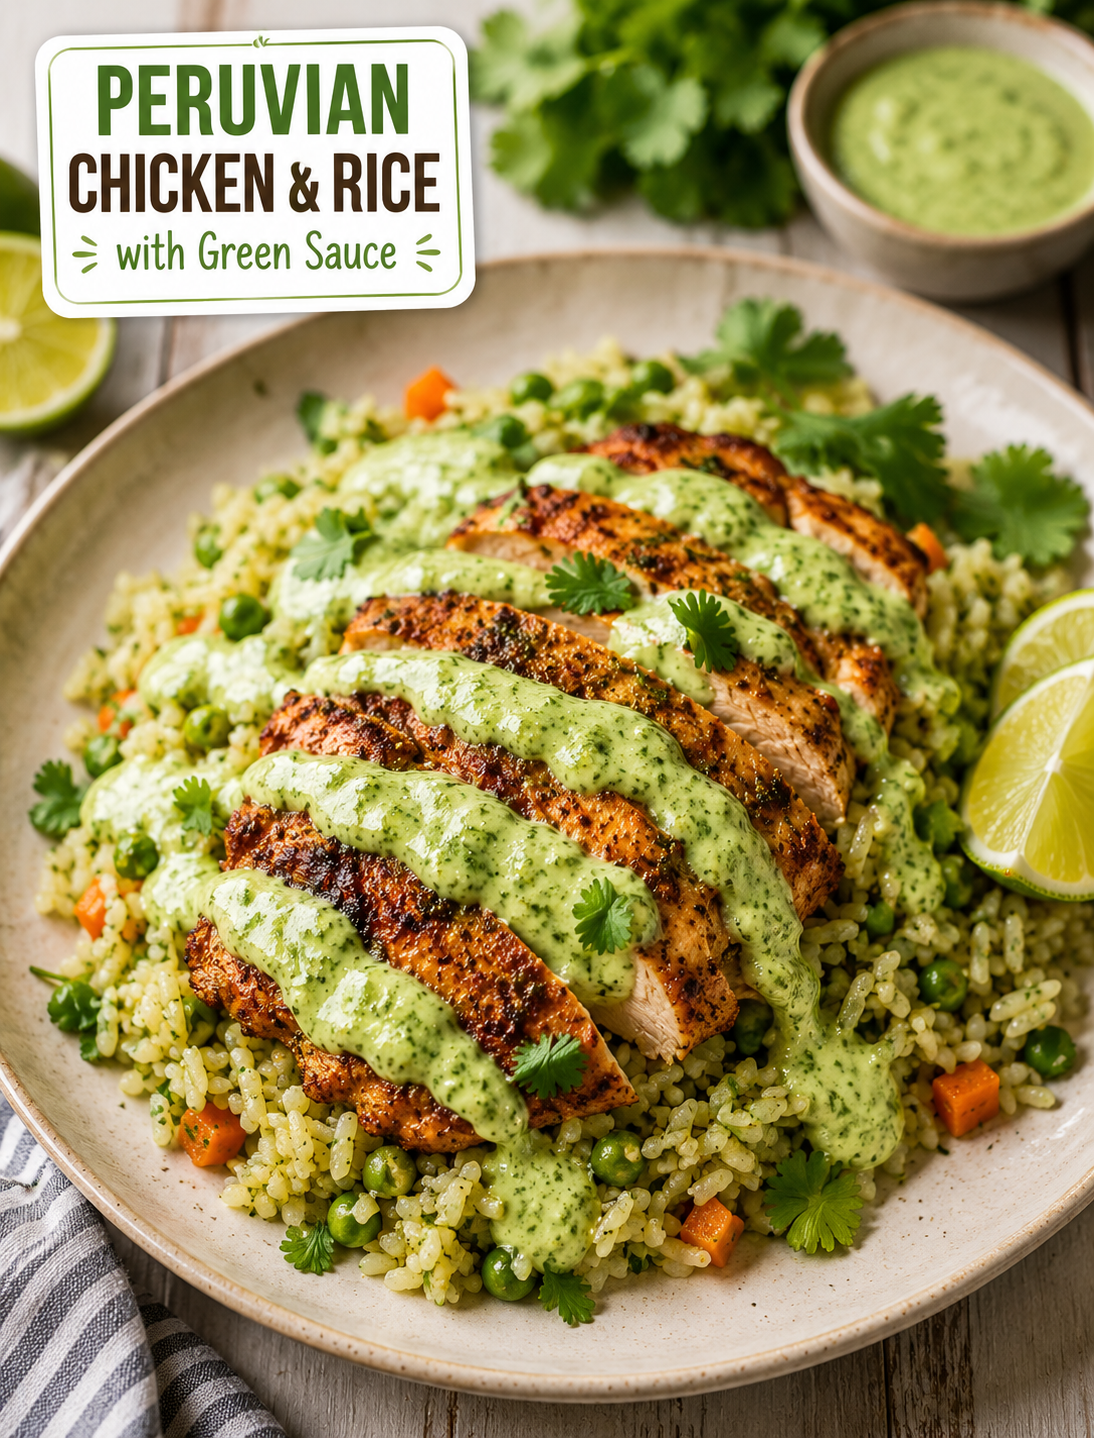
Peruvian Chicken and Rice with Green Sauce

Peruvian chicken and rice served with creamy cilantro jalapeño green sauce, fresh lime, and cilantro

Peruvian Chicken and Rice with Green Sauce

Peruvian Chicken and Rice with Green Sauce is a flavorful dinner that brings together juicy seasoned chicken, fluffy garlic rice, and a creamy cilantro-lime sauce. The dish is inspired by classic Peruvian flavors and uses simple ingredients that are easy to find in most U.S. grocery stores.

The chicken is coated with paprika, cumin, garlic, oregano, chili powder, and fresh lime juice before it is cooked until golden and juicy. The rice is prepared with chicken broth, garlic, cumin, peas, and carrots for extra flavor and color. A creamy jalapeño and cilantro sauce adds a fresh, tangy finish to every bite.

This easy Peruvian-inspired meal works well for busy weeknights, family dinners, meal prep, and casual entertaining. You can also adjust the heat, choose chicken thighs or breasts, and serve the components separately for an easy make-ahead dinner.

Ingredients

For the Chicken

  • 2 chicken breasts or boneless chicken thighs
  • 2 tablespoons olive oil
  • 1 teaspoon paprika
  • 1 teaspoon garlic powder
  • ½ teaspoon ground cumin
  • 1 teaspoon onion powder
  • ½ teaspoon dried oregano
  • ½ teaspoon chili powder
  • ½ teaspoon salt
  • ½ teaspoon black pepper
  • Juice of ½ lime

These spices create a savory, smoky coating without overpowering the chicken. Chicken thighs are especially good for this recipe because they stay tender during cooking.

For the Rice

  • 1½ cups long-grain white rice
  • 3 cups chicken broth
  • 2 tablespoons butter
  • 1 tablespoon olive oil
  • 3 cloves garlic, minced
  • ½ teaspoon ground cumin
  • ½ teaspoon turmeric, optional
  • ½ teaspoon salt
  • ¼ teaspoon black pepper
  • ½ cup frozen peas
  • ½ cup diced carrots
  • 2 tablespoons fresh cilantro, chopped

Chicken broth gives the rice more flavor than water, while garlic and cumin add a warm, savory taste. Peas and carrots provide color, texture, and extra vegetables.

For the Peruvian Green Sauce

  • 1 cup fresh cilantro leaves
  • 2 jalapeños, seeded for less heat
  • 2 garlic cloves
  • ½ cup mayonnaise
  • ¼ cup sour cream or plain Greek yogurt
  • 2 tablespoons olive oil
  • Juice of 1 lime
  • 2 tablespoons grated Parmesan cheese
  • ½ teaspoon salt
  • ¼ teaspoon black pepper

The creamy green sauce is bright, tangy, and slightly spicy. Removing the jalapeño seeds makes the sauce milder, while keeping some seeds adds more heat.

Equipment

You will need a large skillet or grill pan for the chicken, a medium saucepan with a lid for the rice, and a blender or food processor for the sauce.

A sharp knife, cutting board, measuring cups, and measuring spoons will also make preparation easier. A digital meat thermometer is useful for checking the chicken without cutting into it.

Preparation Time

  • Prep Time: 20 minutes
  • Cook Time: 35 minutes
  • Total Time: 55 minutes

The chicken can be marinated ahead of time to make dinner faster. For the best flavor, allow at least 30 minutes for the marinade to work.

Servings

Serves: 4

Each serving includes seasoned chicken, vegetable rice, and a generous spoonful of creamy green sauce.

Instructions

Step 1: Marinate the Chicken

Add olive oil, paprika, garlic powder, cumin, onion powder, oregano, chili powder, salt, black pepper, and lime juice to a bowl.

Mix well, then coat the chicken on all sides. Cover the bowl and refrigerate for at least 30 minutes. For deeper flavor, marinate the chicken for up to 8 hours.

Letting the chicken marinate gives the spices time to season the meat and helps create a flavorful crust during cooking.

Step 2: Prepare the Rice

Rinse the rice under cold water until the water is mostly clear. This removes excess surface starch and helps the cooked rice stay fluffy.

Heat butter and olive oil in a saucepan over medium heat. Add the garlic and cook for about 1 minute until fragrant.

Stir in the rice and toast it for about 2 minutes. Add cumin, turmeric if using, salt, and black pepper.

Pour in the chicken broth and bring the mixture to a boil. Reduce the heat to low, cover the saucepan, and simmer for 15 minutes.

Add the peas and carrots during the final 5 minutes of cooking. Turn off the heat and let the rice rest, covered, for another 10 minutes.

Fluff the rice gently with a fork and fold in the fresh cilantro before serving.

Step 3: Cook the Chicken

Heat a large skillet or grill pan over medium-high heat. Add the marinated chicken and cook until browned and fully cooked.

Boneless chicken generally needs about 6–7 minutes per side, depending on thickness. Bone-in pieces may need about 10–12 minutes per side.

The safest way to check doneness is with a meat thermometer. The thickest part of the chicken should reach 165°F (74°C).

Transfer the chicken to a plate and let it rest for 5 minutes before slicing. Resting helps the juices stay inside the meat.

Step 4: Make the Green Sauce

Add cilantro, jalapeños, garlic, mayonnaise, sour cream or Greek yogurt, olive oil, lime juice, Parmesan, salt, and black pepper to a blender.

Blend until the mixture is smooth and creamy. Taste the sauce and adjust the lime juice or salt as needed.

If the sauce is too thick, blend in a small amount of water until it reaches your preferred consistency.

For the freshest flavor, chill the sauce before serving. It can also be prepared ahead of time and kept refrigerated.

Step 5: Assemble

Spoon the warm rice onto four plates. Slice the rested chicken and arrange it over or beside the rice.

Drizzle the creamy green sauce over the chicken. Add fresh cilantro and lime wedges for a bright finishing touch.

Serve the meal while the chicken and rice are warm and the sauce is chilled.

Description

This Peruvian-inspired chicken dinner combines smoky, seasoned chicken with aromatic rice and a creamy cilantro-jalapeño sauce. Each component brings a different flavor and texture, creating a balanced meal without complicated cooking techniques.

The rice absorbs the savory flavor of chicken broth, garlic, and cumin, while peas and carrots add color and texture. The green sauce brings acidity and freshness from lime and cilantro, along with gentle heat from jalapeños.

For American home cooks, this recipe is easy to adapt. Use chicken breasts for a leaner option or thighs when you want extra tenderness. You can also serve the sauce on the side so everyone can control how much heat and creaminess they want.

Notes

Chicken thighs are a great choice when you want especially juicy meat. Fresh cilantro gives the sauce its signature herbal flavor, so dried cilantro is not a good substitute.

Remove the jalapeño seeds and membranes for a milder sauce. Keep some seeds if you prefer a stronger kick.

Fresh lime juice provides a brighter flavor than bottled lime juice. Let the chicken rest before slicing so the meat stays moist.

Tips

Marinate the chicken for several hours when possible for stronger seasoning. Toasting the rice briefly before adding the broth also improves its flavor.

Use a meat thermometer instead of relying only on cooking time because chicken thickness can vary. Blend the sauce until smooth for the best texture.

Keep the green sauce separate from the hot chicken and rice until serving. This keeps the sauce cool and fresh while preventing it from becoming watery.

If you are preparing the meal for several days, store the chicken, rice, and sauce in separate containers.

Storage Instructions

Refrigerator

Place cooked chicken and rice in airtight containers and refrigerate for up to 4 days. Keep the green sauce in a separate sealed container and use it within about 3 days for the best quality.

Freezer

Chicken and rice can be frozen for up to 3 months. The creamy green sauce is better prepared fresh because freezing may change its texture.

Reheating

Reheat the chicken and rice in the microwave or on the stovetop until hot. Add a small splash of chicken broth or water to the rice if it has dried out.

Keep the green sauce chilled and add it after reheating the main dish.

Nutritional Information (Approximate Per Serving)

  • Calories: 620
  • Protein: 39 g
  • Carbohydrates: 38 g
  • Fat: 34 g
  • Saturated Fat: 7 g
  • Fiber: 3 g
  • Sugar: 3 g
  • Sodium: 690 mg

Nutrition values are estimates and can change based on the chicken cut, mayonnaise, broth, cheese, and other ingredients used.

Health Benefits

Chicken provides high-quality protein that can help support muscle maintenance and fullness. Olive oil contributes unsaturated fat, while peas and carrots add fiber and essential nutrients.

Cilantro, garlic, jalapeños, and lime add flavor while helping the dish feel fresh and bright. Using homemade or low-sodium chicken broth can also help reduce the overall sodium content.

For a lighter meal, use Greek yogurt in the sauce and serve a smaller portion of rice with extra vegetables.

Delicious Variations

For a spicier version, leave some jalapeño seeds in the green sauce or add a small amount of serrano pepper.

For grilled chicken, cook the marinated pieces on an outdoor grill until they reach 165°F in the thickest section.

Brown rice can replace white rice, although it requires more liquid and a longer cooking time. For a lower-carbohydrate meal, serve the chicken and sauce over cauliflower rice.

You can also add bell peppers, corn, green beans, or extra carrots to the rice. Grilled shrimp or salmon can replace the chicken when you want a seafood variation.

Frequently Asked Questions (Q&A)

1. Can I use chicken thighs instead of chicken breasts?

Yes. Chicken thighs work very well and usually stay more tender and juicy during cooking.

2. Is Peruvian green sauce spicy?

The sauce has mild to medium heat, but removing the jalapeño seeds makes it much milder.

3. Can I prepare the green sauce ahead of time?

Yes. Prepare it up to 3 days ahead and keep it refrigerated in an airtight container.

4. Can I use Greek yogurt instead of sour cream?

Yes. Plain Greek yogurt provides a creamy texture with a slightly tangy flavor.

5. What temperature should the chicken reach?

Cook the chicken until the thickest part reaches 165°F (74°C) on a meat thermometer.

6. Can I grill the chicken?

Yes. Grilling adds smoky flavor and attractive char marks while following the same 165°F food-safety target.

7. Can I freeze the chicken and rice?

Yes. Store them in freezer-safe containers for up to 3 months, but prepare the green sauce fresh.

8. What can I serve with this meal?

A simple green salad, avocado, roasted vegetables, black beans, or fried plantains pair well with the chicken and rice.

Final Thoughts

Peruvian Chicken and Rice with Green Sauce is an easy way to bring bold South American-inspired flavors to your dinner table. The seasoned chicken provides a savory centerpiece, the garlic rice adds comfort, and the creamy cilantro-lime sauce brings everything together.

The recipe is flexible enough for weeknight dinners and meal prep while still feeling special enough for guests. With a short ingredient list, straightforward cooking steps, and several easy variations, this flavorful chicken and rice dinner can become a reliable favorite in your home kitchen.

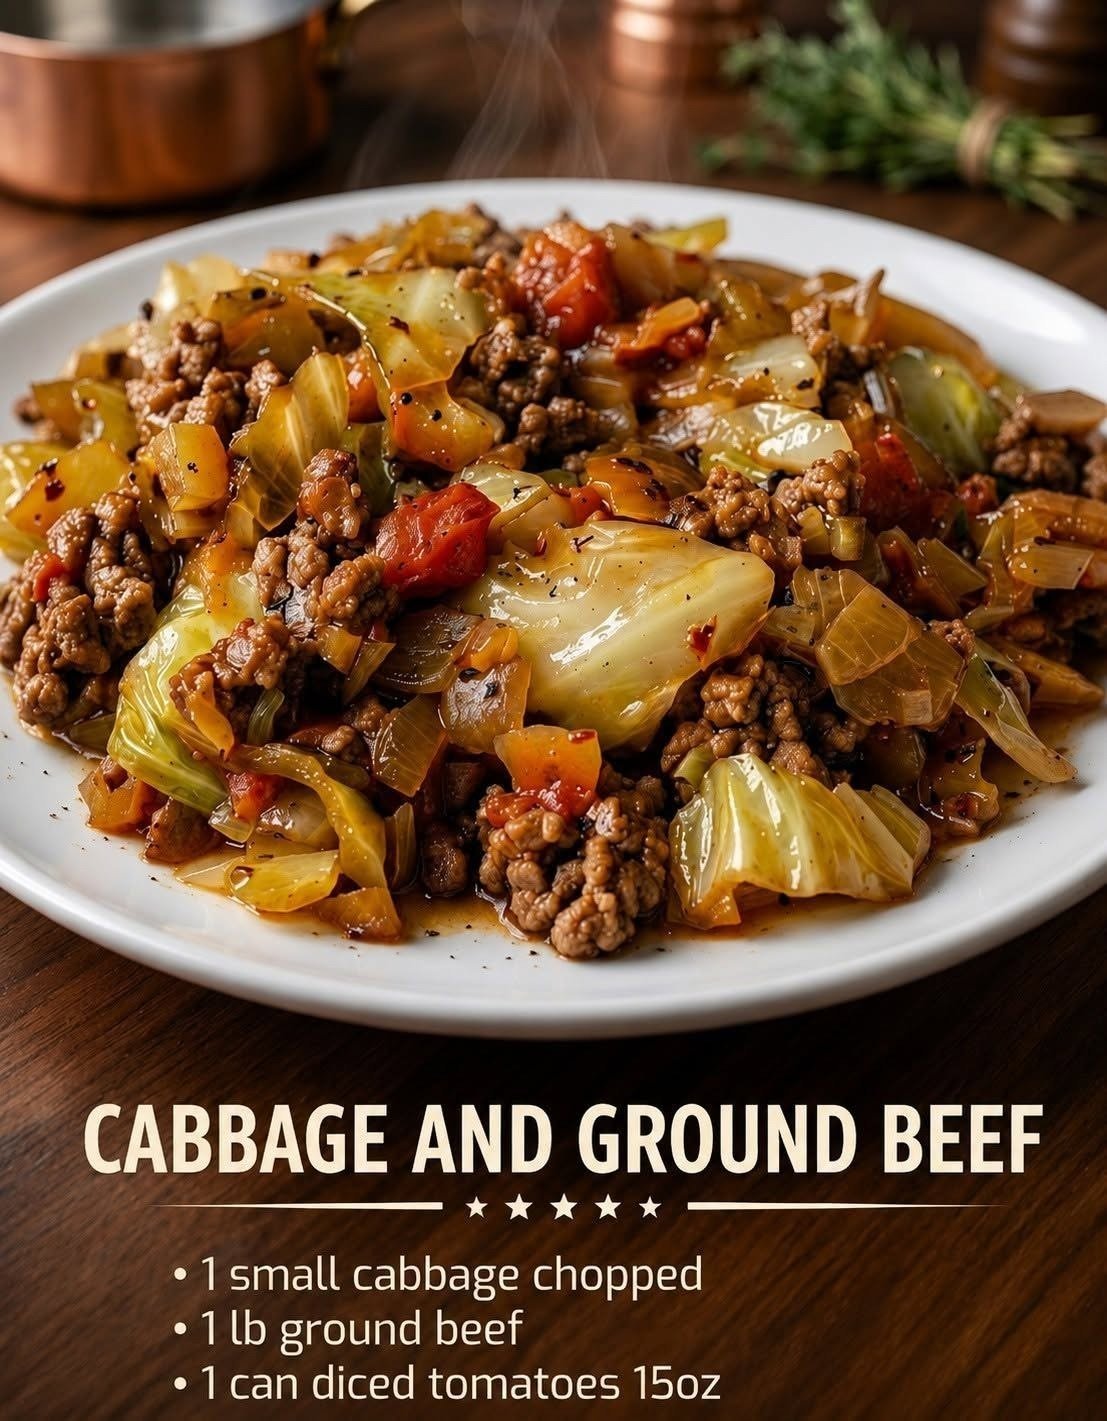
Ground Beef and Chopped Cabbage

Ground Beef and Chopped Cabbage

Ground Beef and Chopped Cabbage Skillet

Make this easy Ground Beef and Chopped Cabbage Skillet with tender cabbage, seasoned beef, tomatoes, garlic, and spices in one pan.

If you need a simple, filling, and budget-friendly dinner for a busy weeknight, this Ground Beef and Chopped Cabbage Skillet is an excellent choice. It combines browned ground beef, tender cabbage, tomatoes, onion, garlic, cumin, smoked paprika, and a touch of cayenne in one hearty skillet.

The recipe is especially convenient because everything cooks in the same pan. The beef develops a rich savory flavor while the cabbage becomes tender and absorbs the seasoned tomato juices. The result is a comforting homemade meal without complicated techniques or a long ingredient list.

The recipe takes about 15 minutes to prepare and 30 minutes to cook, making it suitable for busy weeknights. It serves approximately 4 to 6 people and has an easy difficulty level.

Why You’ll Love This Ground Beef and Cabbage Recipe

  • One-pan meal: Less cookware means easier cleanup.
  • Simple ingredients: Most ingredients are easy to find.
  • Budget-friendly: Ground beef and cabbage make a satisfying combination.
  • Weeknight-friendly: Straightforward preparation and cooking.
  • Customizable: Add vegetables or adjust the spice level.
  • Great leftovers: Perfect for meal preparation.

The cabbage adds plenty of volume while absorbing the savory flavors from the beef, tomatoes, garlic, and spices.

Ingredients

Main Ingredients
  • 1 small green cabbage, chopped
  • 1 pound ground beef
  • 1 can (15 ounces) diced tomatoes
  • 1 cup yellow onion, chopped
  • 2 garlic cloves, minced
Seasonings
  • 1 tablespoon beef or vegetable bouillon powder
  • ½ teaspoon ground cumin
  • ½ teaspoon smoked paprika
  • ¼ teaspoon cayenne pepper, or more to taste
  • Salt, to taste

These ingredients provide a balanced combination of savory, smoky, slightly spicy, and naturally sweet flavors.

How to Make Ground Beef and Chopped Cabbage

Prepare the Cabbage and Vegetables

Remove any damaged outer cabbage leaves. Cut the cabbage into quarters and remove the tough central core. Chop it into bite-sized pieces.

Dice the onion and mince the garlic.

Brown the Ground Beef

Place a large, deep skillet or Dutch oven over medium-high heat. Add the ground beef and break it apart with a wooden spoon or spatula.

Cook for approximately 6 to 8 minutes, stirring frequently, until the beef is browned and no longer pink.

If there is a large amount of excess fat, carefully drain some of it.

Cook the Onion and Garlic

Add the chopped onion to the browned beef. Cook for 3 to 4 minutes until it begins to soften.

Add the minced garlic and cook for another 30 to 60 seconds, just until fragrant.

Add the Seasonings

Sprinkle the cumin, smoked paprika, cayenne pepper, and bouillon powder over the beef and onion mixture.

Stir thoroughly so the seasonings are evenly distributed.

Add the Cabbage and Tomatoes

Add the chopped cabbage to the skillet. Don’t worry if the pan looks very full because cabbage will shrink as it cooks.

Pour in the diced tomatoes, including their juices. Stir everything together.

Simmer Until Tender

Reduce the heat to medium-low and cover the skillet.

Simmer for approximately 15 to 20 minutes, stirring every few minutes.

The cabbage should become tender while retaining a little texture.

If you prefer softer cabbage, cook for another 5 to 10 minutes.

The mixture becomes too dry, add a small splash of water or beef broth.

Too watery, remove the lid during the final few minutes.

Taste and Serve

Taste the skillet and adjust the salt if necessary.

Remove it from the heat and let it rest for 3 to 5 minutes before serving.

Serve hot on its own or with your favorite side dish.

Expert Tips for the Best Beef and Cabbage Skillet

Brown the beef properly: Allowing the ground beef to develop some color creates deeper savory flavor.

Don’t overcook the cabbage: Cook it until tender but not completely mushy.

Adjust the spice: Start with ¼ teaspoon cayenne and increase it if desired.

Be careful with salt: Bouillon can already contain considerable sodium, so taste before adding more salt.

Control the consistency: Simmer uncovered for a thicker skillet or add a little broth for a saucier texture.

Easy Variations

Cheesy Beef and Cabbage: Add 1 to 1½ cups shredded cheddar, Monterey Jack, or mozzarella and cover until melted.

Spicy Cabbage and Beef: Increase the cayenne or add red pepper flakes and diced jalapeños.

Mexican-Inspired Version: Add chili powder, extra cumin, diced bell peppers, and fresh lime juice.

Add More Vegetables: Add bell peppers or carrots for extra color, sweetness, and texture.

Cabbage Roll-Inspired Skillet: Add extra tomato sauce and cooked rice.

Turkey or Chicken Version: Replace the ground beef with ground turkey or chicken.

What to Serve With Ground Beef and Cabbage

This skillet is filling enough to enjoy by itself, but you can also serve it with:

  • Steamed white or brown rice
  • Mashed potatoes
  • Roasted potatoes
  • Crusty bread
  • Cornbread
  • A simple green salad

For a lower-carbohydrate option, enjoy the beef and cabbage without rice, potatoes, or bread.

Storage and Reheating

Refrigerator: Allow leftovers to cool before transferring them to an airtight container. Refrigerate and use within approximately 3 to 4 days.

Freezer: Cool the cooked mixture completely and place it in freezer-safe containers. For best quality, use within approximately 2 to 3 months.

Reheating: Reheat individual portions in the microwave or warm gently in a skillet until heated through.

Frequently Asked Questions

Can I use red cabbage instead of green cabbage?

Yes. Red cabbage can be used, although the color, flavor, and texture will be somewhat different. Green cabbage works best for the classic version.

Can I use pre-shredded cabbage?

Absolutely. Bagged shredded cabbage or coleslaw mix can save preparation time. A coleslaw mix containing carrots will add sweetness and color.

Can I make this recipe without bouillon?

Yes. Replace it with beef broth, vegetable broth, or additional herbs and seasonings. Taste before adding extra salt.

Why is my cabbage and beef mixture watery?

Cabbage naturally releases moisture while cooking. Remove the lid and continue simmering uncovered until the excess liquid evaporates.

Can I make this recipe in a slow cooker?

Yes. Browning the beef and onions first is recommended for better flavor. Then transfer the ingredients to the slow cooker and cook until the cabbage reaches your preferred tenderness.

Can I prepare this meal ahead of time?

Yes. Cook the recipe completely, allow it to cool, refrigerate it in an airtight container, and reheat portions when needed.

Nutrition Facts

Approximate nutrition per serving:

Calories: 330

Protein: 25g

Carbohydrates: 18g

Fat: 19g

Saturated Fat: 7g

Fiber: 5g

Sugar: 9g

Sodium: 620mg

Calcium: 9% Daily Value

Iron: 20% Daily Value

Nutritional values are estimates and may vary depending on the ground beef percentage, brands used, serving size, substitutions, and toppings.

Conclusion

This Ground Beef and Chopped Cabbage Skillet is an easy way to create a flavorful homemade dinner with simple ingredients. Savory browned beef, tender cabbage, juicy tomatoes, onion, garlic, and warm spices come together in one pan for a comforting meal.

It’s affordable, customizable, easy to prepare, and excellent for leftovers. Serve it as a complete meal, pair it with rice or potatoes, or customize it with cheese and additional vegetables.

If you’re looking for an easy ground beef and cabbage recipe for a busy weeknight, this one-pan skillet is definitely worth saving and adding to your regular dinner rotation.