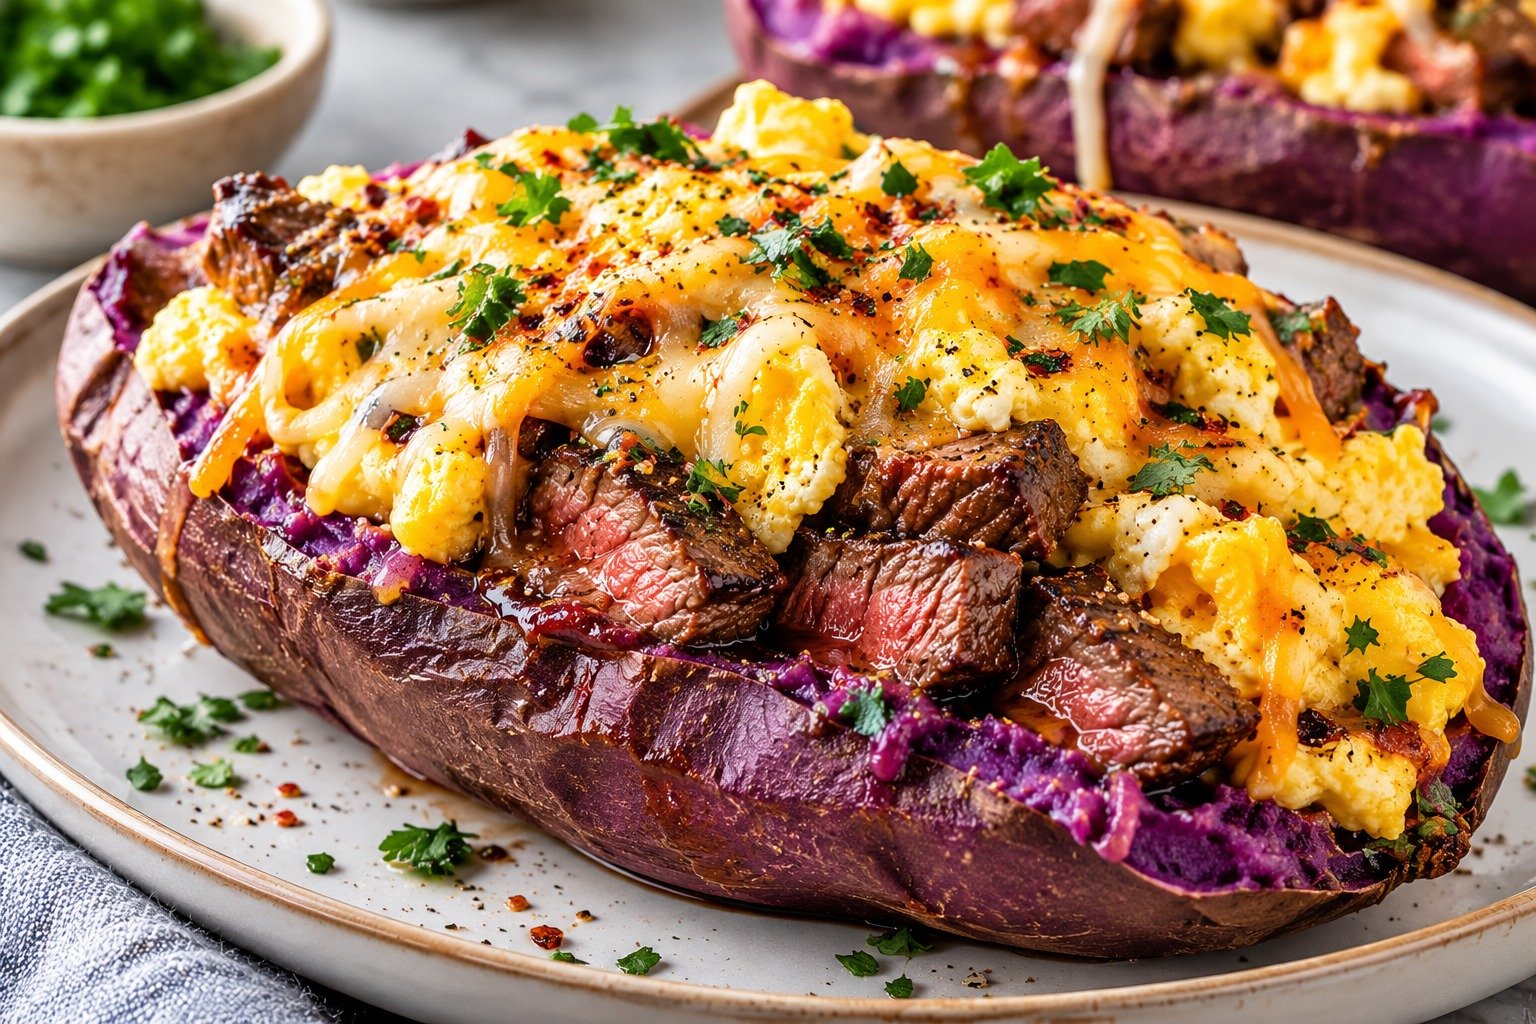
Loaded Purple Sweet Potato with Steak & Eggs

Purple Sweet Potato topped with sliced steak, fried eggs, avocado, cherry tomatoes, herbs, and savory seasonings

Loaded Purple Sweet Potato with Steak & Eggs

Purple Sweet Potato is the star of this colorful, protein-packed meal topped with juicy steak, perfectly cooked eggs, fresh avocado, herbs, and a simple savory sauce. The naturally sweet potato balances the richness of the beef and eggs, creating a satisfying breakfast, brunch, lunch, or dinner.

This recipe is ideal when you want something hearty and built around whole-food ingredients. You can bake the potatoes ahead, cook the steak quickly in a skillet, and finish everything with eggs and your favorite fresh toppings.

Prep Time: 20 minutes
Cook Time: 50 minutes
Total Time: 1 hour 10 minutes
Servings: 2

Ingredients

For the Purple Sweet Potatoes

  • 2 medium purple sweet potatoes
  • 1 tablespoon extra virgin olive oil
  • 1/2 teaspoon salt
  • 1/4 teaspoon black pepper

Ingredients For the Steak

  • 10 ounces sirloin, strip steak, or ribeye
  • 1 tablespoon olive oil
  • 1 teaspoon garlic powder
  • 1/2 teaspoon smoked paprika
  • 1/2 teaspoon dried thyme
  • 1/2 teaspoon salt
  • 1/4 teaspoon black pepper

For the Eggs

  • 2 large eggs
  • 1 teaspoon butter or olive oil
  • Pinch of salt
  • Pinch of black pepper

For the Toppings

  • 1 avocado, sliced
  • 1/2 cup cherry tomatoes, halved
  • 2 tablespoons sliced green onions
  • 2 tablespoons chopped fresh parsley or cilantro
  • 2 tablespoons crumbled feta, optional
  • Red pepper flakes, optional
  • Hot sauce or garlic yogurt sauce, optional
  • Lime or lemon wedges, for serving

Why You’ll Love This Recipe

Purple Sweet Potato makes this meal especially satisfying because it adds natural sweetness, creamy texture, fiber, and vibrant color. The steak brings savory richness, while the eggs add extra protein and make the dish feel complete.

Another reason to love Purple Sweet Potato is its versatility. You can serve it for breakfast with eggs, enjoy it as a post-workout lunch, or turn it into a filling dinner with extra vegetables. The toppings are easy to change depending on what you have available.

How to Make Purple Sweet Potato

Step 1: Preheat the Oven

Preheat the oven to 400°F or 200°C.

Line a baking sheet with parchment paper or foil for easier cleanup.

Wash and scrub the potatoes well, then dry them completely.

Step 2: Bake the Potatoes

Pierce each potato several times with a fork.

Rub the skins lightly with olive oil and sprinkle with salt.

Place them on the prepared baking sheet and bake for 45 to 55 minutes, depending on size.

Purple Sweet Potato is ready when a knife slides easily through the center and the flesh feels soft.

Step 3: Season the Steak

While the potatoes bake, pat the steak dry with paper towels.

Rub both sides with olive oil, garlic powder, smoked paprika, thyme, salt, and black pepper.

Let the steak sit at room temperature for about 15 minutes before cooking.

Step 4: Cook the Steak

Heat a heavy skillet over medium-high heat until hot.

Add the steak and cook for 3 to 5 minutes per side, depending on thickness and your preferred doneness.

For medium-rare, aim for about 130–135°F or 54–57°C before resting. For medium, cook to about 140–145°F or 60–63°C.

Step 5: Rest and Slice the Steak

Transfer the cooked steak to a cutting board.

Let it rest for 5 to 10 minutes before slicing thinly against the grain.

Resting helps the juices stay inside the meat and gives Purple Sweet Potato a more tender steak topping.

Step 6: Cook the Eggs

Heat butter or olive oil in a nonstick skillet over medium heat.

Crack in the eggs and cook them sunny-side up, over-easy, or to your preferred doneness.

Season lightly with salt and black pepper.

Step 7: Open the Potatoes

Remove the baked potatoes from the oven and let them cool for a few minutes.

Slice each one lengthwise without cutting completely through the bottom.

Use a fork to gently fluff the inside.

A soft and fluffy Purple Sweet Potato creates the perfect base for the steak and eggs.

Step 8: Add the Steak

Divide the sliced steak between the two potatoes.

Arrange the pieces so they sit inside and slightly over the top of the potato.

Spoon any resting juices from the cutting board over the steak for extra flavor.

Step 9: Add the Eggs and Fresh Toppings

Top each loaded potato with one cooked egg.

Add avocado, cherry tomatoes, green onions, herbs, feta, and red pepper flakes.

Purple Sweet Potato pairs especially well with creamy avocado and fresh herbs because they balance the sweet and savory flavors.

Step 10: Finish and Serve

Add hot sauce, garlic yogurt sauce, or a squeeze of lime or lemon if desired.

Serve immediately while the potato, steak, and egg are warm.

Serving Suggestions

Purple Sweet Potato with steak and eggs is filling enough to serve as a complete meal.

For extra vegetables, pair it with sautéed spinach, roasted broccoli, asparagus, or a simple green salad.

If you are serving brunch, add fresh fruit, yogurt, or a small cucumber-tomato salad on the side.

You can also serve Purple Sweet Potato with salsa, chimichurri, or a light herb sauce for even more flavor.

For another cozy slow-cooker meal, try our Crockpot Pumpkin Chili – Fall Special with warm spices and hearty fall flavor.

Recipe Tips

Choose potatoes that are similar in size so they finish baking at the same time.

Do not skip piercing the potatoes before baking.

Use a hot skillet for the steak so it develops a good sear.

Let the steak rest before slicing to keep it juicy.

Cut the steak against the grain for more tender bites.

For the best Purple Sweet Potato texture, bake rather than boil the potatoes.

Use ripe but firm avocado so the slices hold their shape.

Cook the eggs last so they are fresh and warm when the dish is assembled.

Easy Variations

Purple Sweet Potato can be customized with different proteins, toppings, and sauces.

Replace steak with grilled chicken, turkey, shrimp, or salmon.

For a vegetarian version, use black beans, chickpeas, sautéed mushrooms, or lentils instead of steak.

Add roasted bell peppers, corn, spinach, or kale for more vegetables.

For extra heat, add jalapeño, chili flakes, spicy salsa, or chipotle sauce.

You can also add shredded cheddar, goat cheese, or Parmesan instead of feta.

For a breakfast-style version, add scrambled eggs and turkey sausage.

If you enjoy rich and comforting slow-cooker dinners, you may also like our Slow Cooker Pulled Beef & Cheesy Mashed Potatoes.

Make-Ahead Instructions

Purple Sweet Potato is easy to prepare ahead for meal prep.

Bake the potatoes up to 3 days in advance and store them in an airtight container in the refrigerator.

Cook the steak up to 2 days ahead and refrigerate it separately.

Prepare the toppings ahead, but slice avocado and cook the eggs shortly before serving.

When ready to eat, reheat the potato and steak, then add fresh toppings.

Storage and Reheating

Store leftover Purple Sweet Potato and steak in separate airtight containers in the refrigerator for up to 3 days.

Reheat the potato in a 350°F or 175°C oven for 10 to 15 minutes, or microwave it until hot.

Warm the steak gently in a skillet over low heat to avoid overcooking.

Fresh eggs and avocado are best added after reheating rather than stored on the assembled dish.

Freezing is possible for the baked potato and cooked steak, but fresh toppings should not be frozen.

Nutrition Information

Approximate nutrition per serving:

Calories: 650
Protein: 42 g
Carbohydrates: 48 g
Fat: 32 g
Saturated Fat: 10 g
Fiber: 9 g
Sugar: 10 g
Sodium: 720 mg

Nutrition values are estimates and may vary depending on the steak cut, potato size, toppings, and sauces used.

Frequently Asked Questions

Can I use regular sweet potatoes instead?

Yes. Orange sweet potatoes work well and can be prepared using the same method.

What steak cut is best?

Sirloin is a lean and practical choice, while ribeye is richer and more tender. Strip steak also works very well.

Can I make this without eggs?

Yes. Simply leave them off or replace them with extra avocado, beans, or another protein.

How do I know when the potato is done?

The center should be very soft, and a knife should slide in easily without resistance.

Can I air fry the potatoes?

Yes. Air fry at about 390°F or 200°C until tender, usually 35 to 45 minutes depending on size.

Can I meal prep this recipe?

Yes. Purple Sweet Potato works especially well for meal prep when the potato, steak, and toppings are stored separately.

What sauce goes well with it?

Chimichurri, garlic yogurt sauce, salsa, hot sauce, or tahini-lemon sauce all work well.

Final Thoughts

Purple Sweet Potato turns a simple steak-and-egg meal into something colorful, hearty, and satisfying. The creamy potato, juicy steak, eggs, avocado, tomatoes, and herbs create a balanced combination of sweet, savory, rich, and fresh flavors.

Because Purple Sweet Potato can be customized with different proteins, vegetables, cheeses, and sauces, it works well for breakfast, brunch, lunch, dinner, or meal prep.

Keep this Purple Sweet Potato recipe handy whenever you want a protein-packed meal that feels comforting, colorful, and easy to personalize.
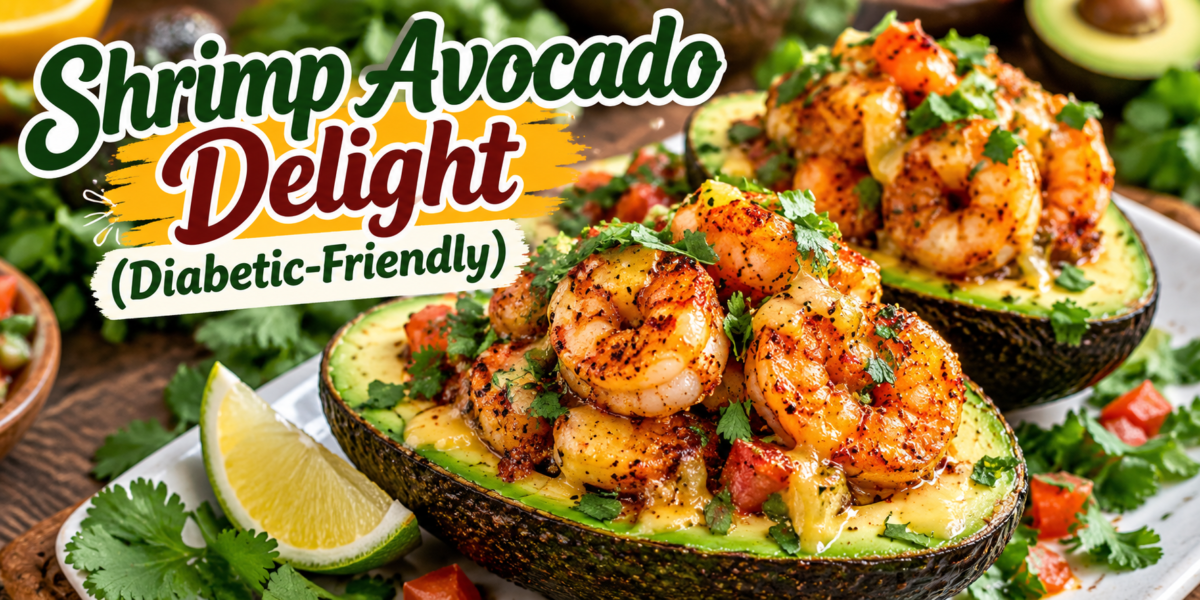
Shrimp Avocado Delight (Diabetic-Friendly)

Shrimp Avocado Delight with seasoned shrimp, creamy avocado, fresh herbs, tomatoes, lime, and a light dressing

Shrimp Avocado Delight (Diabetic-Friendly)

Shrimp Avocado Delight is a fresh, colorful, and satisfying meal made with juicy seasoned shrimp, creamy avocado, crisp vegetables, lime juice, herbs, and a light savory dressing. It comes together quickly and works well for lunch, dinner, or a simple meal-prep option.

This Shrimp Avocado recipe combines lean protein with avocado and non-starchy vegetables. The result is a flavorful meal that does not need a heavy sauce or a large amount of added sugar. If you are managing diabetes, remember that individual carbohydrate needs vary, so portion size and the full meal plan matter.

The bright flavors make this recipe feel satisfying rather than restrictive. Garlic, paprika, cumin, chili powder, lime, and fresh cilantro give the shrimp plenty of flavor. Tomatoes and cucumber add freshness, while avocado creates a creamy texture.

Prep Time: 15 minutes
Cook Time: 8 minutes
Total Time: 23 minutes
Servings: 4

Ingredients

For the Shrimp

1 1/2 pounds large shrimp, peeled and deveined
1 tablespoon olive oil
1 tablespoon fresh lime juice
2 cloves garlic, minced
1 teaspoon chili powder
1 teaspoon smoked paprika
1/2 teaspoon ground cumin
1/2 teaspoon garlic powder
1/2 teaspoon onion powder
1/2 teaspoon salt
1/4 teaspoon black pepper
1/4 teaspoon red pepper flakes, optional

For the Avocado Mixture

3 large ripe avocados
1 cup cherry tomatoes, halved
1/2 cup cucumber, diced
1/4 cup red onion, finely chopped
1/4 cup fresh cilantro, chopped
2 tablespoons fresh lime juice
1 tablespoon extra virgin olive oil
1/4 teaspoon salt
1/4 teaspoon black pepper

For the Optional Dressing

1/4 cup plain unsweetened Greek yogurt
1 tablespoon fresh lime juice
1 tablespoon chopped cilantro
1/2 teaspoon garlic powder
1/4 teaspoon cumin
2 tablespoons water
A pinch of salt

Step-by-Step Instructions

Prepare the Shrimp

Pat the shrimp dry with paper towels. This helps them brown instead of releasing too much water into the pan.

Place the shrimp in a bowl. Add olive oil, lime juice, garlic, chili powder, smoked paprika, cumin, garlic powder, onion powder, salt, black pepper, and red pepper flakes if using.

Toss until every shrimp is evenly coated. Let the shrimp rest for 5 minutes while you prepare the vegetables.

The seasoning gives this Shrimp Avocado dish a warm, smoky, and slightly spicy flavor.

Prepare the Fresh Ingredients

Cut the avocados in half and remove the pits. Scoop the flesh into a medium bowl and cut it into bite-sized pieces.

Add the cherry tomatoes, cucumber, red onion, and cilantro.

Drizzle with lime juice and olive oil. Add salt and black pepper.

Fold everything together gently. Avoid overmixing because the avocado can become mashed.

Keep the mixture chilled while you cook the shrimp.

Fresh vegetables are important because they give the Shrimp Avocado mixture a crisp texture that balances the tender shrimp.

Cook the Shrimp

Heat a large skillet over medium-high heat.

Place the seasoned shrimp in a single layer. Cook for about 2 minutes on the first side.

Turn the shrimp and cook for another 2 to 3 minutes.

The shrimp should become opaque and curl into a loose C shape. For food safety, cook shrimp to an internal temperature of 145°F.

Remove the skillet from the heat as soon as the shrimp are cooked. Overcooked shrimp can become firm and rubbery.

Let the shrimp rest for 2 minutes before assembling the dish.

The quick cooking method keeps this Shrimp Avocado meal tender and flavorful.

Make the Optional Dressing

Add Greek yogurt, lime juice, cilantro, garlic powder, cumin, water, and a pinch of salt to a small bowl.

Whisk until smooth.

Add another teaspoon of water if the dressing is too thick.

Taste and adjust the lime juice or salt.

Use plain unsweetened Greek yogurt rather than sweetened yogurt.

For a brighter Shrimp Avocado dressing, add a little extra fresh lime juice just before serving.

Assemble the Dish

Divide the avocado mixture among four plates or shallow bowls.

Place the warm shrimp on top.

Drizzle with the yogurt-lime dressing if using.

Finish with fresh cilantro and a squeeze of lime.

For extra color, add a few thin slices of red onion or a sprinkle of chili flakes.

The creamy avocado and warm shrimp create a satisfying contrast in every bite. This Shrimp Avocado combination is especially good when served immediately.

Tips for the Best Results

Choose avocados that are ripe but still firm. Very soft avocados can become mushy during mixing.

Pat the shrimp dry before seasoning. This small step helps them sear properly.

Do not overcrowd the skillet. Cook the shrimp in batches if your pan is small.

Use fresh lime juice for a brighter flavor.

Add the avocado shortly before serving to reduce browning.

Keep the dressing unsweetened.

If you prefer a milder dish, skip the red pepper flakes.

For more heat, add fresh jalapeño or extra chili flakes.

These simple steps help keep the Shrimp Avocado mixture fresh, colorful, and balanced.

For an even fresher finish, add chopped cilantro immediately before serving. The herb adds a clean aroma without making the dish complicated.

Ingredient Substitutions

Shrimp

Large shrimp work well, but medium shrimp can also be used. Adjust the cooking time because smaller shrimp cook faster.

Avocado

If you need a substitute, mashed white beans can provide creaminess, although the flavor will be different.

Greek Yogurt

Use plain unsweetened yogurt. You can also skip the dressing and serve the dish with extra lime.

Cilantro

Fresh parsley can replace cilantro if you prefer a milder herb flavor.

Cucumber

Try diced bell pepper or celery for additional crunch.

Lime

Fresh lemon juice can be used when lime is unavailable.

The flexible ingredients make this Shrimp Avocado recipe easy to adapt to what you already have.

Serving Suggestions

Serve the shrimp and avocado mixture as a complete light meal.

For a larger meal, add a small portion of brown rice, quinoa, or another whole grain that fits your eating plan.

You can also serve it with leafy greens to create a larger salad.

A side of roasted vegetables works well too.

For a lower-carbohydrate option, serve the mixture over lettuce leaves or cauliflower rice.

Avoid adding a sugary sauce. The lime, herbs, spices, and natural creaminess of avocado already provide plenty of flavor.

A squeeze of lime just before eating makes the dish taste brighter.

This Shrimp Avocado plate is also attractive enough for a casual lunch with guests.

Meal Prep Instructions

This recipe can be prepared in separate components.

Cook the shrimp and allow them to cool.

Store the shrimp in an airtight container in the refrigerator.

Prepare the cucumber, tomatoes, and onion separately.

Keep the avocado whole until you are ready to eat whenever possible.

Prepare the dressing and refrigerate it in a small sealed container.

When ready to serve, cut the avocado and combine it with the vegetables.

Add the chilled or gently warmed shrimp.

Drizzle with dressing just before eating.

For the best quality, use refrigerated cooked shrimp within 3 to 4 days.

Keeping the components separate helps maintain the texture of the Shrimp Avocado mixture.

Storage and Reheating

Store cooked shrimp in the refrigerator at 40°F or below.

Keep the avocado mixture in a separate airtight container.

Because avocado can brown and soften, it is best prepared close to serving time.

The shrimp can be eaten chilled or gently warmed.

If reheating, use short intervals and stop as soon as the shrimp are warm.

Do not repeatedly reheat shrimp.

The fresh vegetables and avocado should not be heated.

If the avocado mixture has darkened slightly on the surface, stir gently and check its smell and texture before serving. When in doubt about food safety, discard it.

Diabetes-Friendly Meal Notes

The recipe uses shrimp, avocado, vegetables, and unsweetened yogurt instead of a sugary sauce.

However, calling a recipe “diabetic-friendly” does not mean it is appropriate for every person with diabetes. Blood glucose responses vary from person to person.

If you are managing diabetes, consider your individual meal plan, medication, activity level, and portion size.

Adding rice, tortillas, bread, or other carbohydrate-rich foods will change the total carbohydrate content of the meal.

For a lower-carbohydrate plate, serve the shrimp and avocado over leafy greens.

For additional fiber, add non-starchy vegetables such as cucumber, bell pepper, broccoli, or leafy greens.

The key is to build the meal around ingredients that fit your personal nutrition goals.

This Shrimp Avocado recipe is easy to portion because the ingredients can be divided into four servings.

Flavor Variations

Spicy Lime Version

Add sliced jalapeño, extra red pepper flakes, and a little lime zest.

Garlic Herb Version

Increase the fresh garlic and add chopped parsley.

Mediterranean Version

Add cucumber, tomatoes, olives, feta, oregano, and parsley.

Creamy Version

Use the optional Greek yogurt dressing and add a small amount of avocado to the dressing.

Crunchy Version

Add chopped cucumber, radish, celery, or toasted pumpkin seeds.

Tropical Version

Add a small amount of diced mango. Remember that fruit adds carbohydrates, so adjust the portion according to your meal plan.

Each variation keeps the Shrimp Avocado base simple while giving you a different flavor.

Common Mistakes to Avoid

Do not overcook the shrimp.

Avoid using very soft avocados because they can become mushy.

Do not add the dressing too early.

Avoid sweetened yogurt or sugary sauces if you are trying to keep added sugar low.

Do not leave cooked shrimp at room temperature for long periods.

Avoid cutting all of the avocado several hours before serving.

Do not overcrowd the skillet.

Do not skip the lime juice because it helps balance the rich avocado.

Frequently Asked Questions

Can I use frozen shrimp?

Yes. Thaw the shrimp completely and pat them dry before seasoning.

Can I make this recipe without yogurt?

Yes. The yogurt dressing is optional. Lime juice, olive oil, and herbs are enough for a simple dressing.

Can I use cooked shrimp?

Yes. Add cooked shrimp near the end and warm them briefly. Avoid prolonged cooking.

Can I prepare the avocado ahead?

It is better to cut the avocado close to serving time. Fresh lime juice can help slow browning.

What can I serve with this recipe?

Leafy greens, roasted vegetables, cauliflower rice, or a measured portion of whole grains can work well.

Is this recipe low in carbohydrates?

The main ingredients are relatively low in carbohydrates, but total carbohydrate intake depends on portions and any side dishes. Individual nutrition needs vary.

Can I make it spicy?

Yes. Add jalapeño, cayenne, or extra red pepper flakes.

Can I use lemon instead of lime?

Yes. Lemon provides a slightly different but still fresh flavor.

How long does it keep?

For best quality, keep the cooked shrimp refrigerated and use them within 3 to 4 days. Prepare the avocado mixture closer to serving time.

Can I use chicken instead of shrimp?

Yes. Cooked chicken can replace shrimp, although the cooking method and time will change.

Nutrition Information

Approximate nutrition per serving, without optional rice or other sides:

Calories: 420 kcal
Protein: 32g
Carbohydrates: 18g
Fat: 27g
Fiber: 9g
Sugar: 3g
Sodium: 610mg

Nutrition values are estimates and can vary based on ingredient brands, avocado size, shrimp size, and serving portions.

Why You Will Love This Recipe

The biggest advantage of this recipe is how quickly it comes together.

The shrimp cook in only a few minutes.

The avocado mixture requires no cooking.

The dressing takes less than five minutes.

That makes the dish practical for busy days.

It is also colorful. Green avocado, red tomatoes, purple onion, fresh cilantro, and golden shrimp create an appealing plate.

The texture is just as enjoyable. Tender shrimp pair with creamy avocado and crisp vegetables.

The flavors are balanced without requiring a complicated sauce.

Lime adds brightness. Garlic provides savory depth. Smoked paprika adds warmth. Chili powder provides gentle heat.

This combination makes the Shrimp Avocado dish feel satisfying while keeping the preparation simple.

The recipe is also easy to adjust. You can increase the vegetables, change the herbs, or make the seasoning milder without changing the basic cooking method.

Final Thoughts

Shrimp Avocado Delight is a fresh and flexible recipe that can fit into many meal styles.

The seasoned shrimp bring protein and savory flavor.

Creamy avocado adds richness.

Cucumber and tomatoes provide freshness and crunch.

Lime juice keeps the flavors bright.

Fresh cilantro adds an aromatic finish.

The optional yogurt dressing creates an extra creamy layer without relying on a sugary sauce.

For meal preparation, keep the shrimp, vegetables, avocado, and dressing separate until you are ready to eat.

You can also change the seasoning to match your preferences. Add chili flakes for heat, herbs for freshness, or extra vegetables for more volume.

If you are managing diabetes, consider the full meal and your individual carbohydrate needs rather than relying on a recipe label alone.

The recipe is especially useful when you want something quick. It can move from refrigerator to table in a short time, and the colorful presentation makes it suitable for both everyday meals and casual entertaining.

For a lighter plate, serve it over leafy greens. For a more substantial meal, add a measured portion of whole grains or another side that fits your eating plan.

The combination of warm shrimp and cool avocado makes this Shrimp Avocado recipe especially enjoyable.

With simple ingredients, fresh flavors, and plenty of texture, Shrimp Avocado Delight can become an easy option for lunch, dinner, or meal prep.

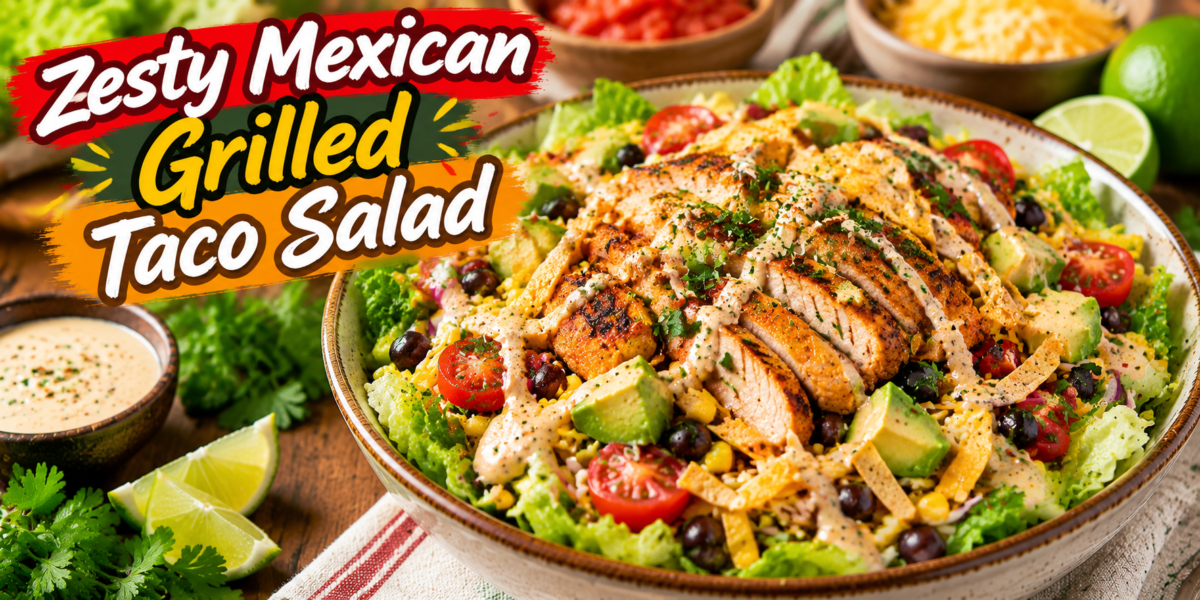
Zesty Mexican Grilled Taco Salad

Zesty Mexican Grilled Taco Salad with grilled chicken, vegetables, avocado, beans, and creamy dressing

Zesty Mexican Grilled Taco Salad

Zesty Mexican Grilled Taco Salad is a fresh, colorful, and flavorful meal that combines smoky grilled protein, crisp vegetables, creamy toppings, and delicious Mexican-inspired seasonings. This recipe brings together everything you love about classic tacos in a lighter and more refreshing bowl-style dish.

This Taco Salad is perfect for lunch, dinner, meal preparation, or family gatherings because it is easy to customize and packed with satisfying flavors. The combination of grilled meat, crunchy lettuce, juicy tomatoes, beans, corn, avocado, cheese, and a zesty dressing creates a perfect balance of textures.

Unlike traditional tacos served in tortillas, this version uses fresh greens as the base, making it a great option for anyone looking for a lighter meal without losing the delicious Mexican flavors. The smoky grilled ingredients add depth, while fresh toppings provide brightness and freshness.

This Taco Salad can be prepared quickly with simple ingredients available in most kitchens. Whether you are cooking for your family or preparing meals for the week, this recipe delivers a nutritious and satisfying option.

The homemade dressing adds the final touch with a combination of lime juice, spices, and creamy ingredients that bring all flavors together. Every bite provides a delicious mix of savory, spicy, creamy, and crunchy elements.

Preparation Time: 20 minutes
Cooking Time: 15 minutes
Total Time: 35 minutes
Servings: 4 servings

Ingredients

For the Grilled Protein

1 pound chicken breast, steak, or shrimp

Olive oil: 2 tablespoons

Fresh lime juice: 2 tablespoons

Chili powder: 2 teaspoons

Smoked paprika: 1 teaspoon

Ground cumin: 1 teaspoon

Garlic powder: 1 teaspoon

Salt: 1/2 teaspoon

Onion powder: 1/2 teaspoon

Black pepper: 1/2 teaspoon

For the Salad Base

1 cup sweet corn

1 red bell pepper, sliced

1/2 red onion, thinly sliced

1 avocado, diced

1 cup cherry tomatoes, halved

6 cups chopped romaine lettuce

1/2 cup shredded cheddar cheese

1/4 cup fresh cilantro, chopped

1 cup black beans, drained and rinsed

1 jalapeño, sliced (optional)

For the Mexican Dressing

1/3 cup Greek yogurt or sour cream

2 tablespoons lime juice

1 tablespoon olive oil

1/2 teaspoon cumin

1 small garlic clove, minced

1 teaspoon honey

Salt and pepper to taste

1 teaspoon chili powder

Step-by-Step Instructions

Prepare the Grilled Protein

Start by preparing the marinade for your protein. In a bowl, combine olive oil, lime juice, chili powder, smoked paprika, cumin, garlic powder, onion powder, salt, and black pepper.

Add the chicken, steak, or shrimp and coat evenly with the seasoning mixture. Allow the protein to marinate for at least 15 minutes. For stronger flavor, you can marinate it for several hours in the refrigerator.

Heat a grill pan or outdoor grill over medium-high heat.

Cook the protein until fully cooked and slightly charred on the outside. Chicken usually takes about 6 to 8 minutes per side, while shrimp cooks much faster.

Allow the grilled protein to rest for a few minutes before slicing. This helps keep the juices inside and creates a more tender texture.

Prepare the Salad Ingredients

Wash and dry the lettuce thoroughly before chopping. Fresh and crisp greens create the best base for the salad.

Prepare the vegetables by slicing tomatoes, bell peppers, onions, and jalapeños.

Drain and rinse the black beans to remove excess liquid.

Cut the avocado into cubes just before serving to prevent browning.

Place all prepared ingredients into a large salad bowl.

Make the Mexican Dressing

In a small bowl, combine Greek yogurt, lime juice, olive oil, honey, chili powder, cumin, garlic, salt, and pepper.

Whisk everything together until smooth and creamy.

Taste the dressing and adjust the seasoning according to your preference.

For extra heat, add a little hot sauce or additional chili powder.

Assemble the Salad

Add chopped romaine lettuce to a large serving bowl.

Top with grilled protein, black beans, corn, tomatoes, bell peppers, onion, avocado, cheese, and cilantro.

Drizzle the homemade dressing over the top.

Gently toss everything together until all ingredients are evenly coated.

Your Taco Salad is now ready to serve.

The combination of smoky grilled flavors, fresh vegetables, and creamy dressing creates a satisfying meal that everyone will enjoy.

Tips for Making the Best Taco Salad

Use fresh vegetables whenever possible because they provide better flavor and texture.

For the best grilled flavor, allow the protein to marinate before cooking.

Do not add dressing too early if you are preparing the salad ahead of time because the lettuce may become soft.

Keep avocado separate until serving to maintain freshness.

You can prepare all ingredients in advance and assemble the salad when ready to eat.

For extra crunch, add tortilla strips, crushed tortilla chips, or toasted corn.

Choose ripe avocados that are slightly soft but not overly mushy.

This Taco Salad tastes even better when served immediately after preparation while the ingredients are fresh and crisp.

Variations

Vegetarian Taco Salad

Replace grilled meat with roasted vegetables, extra beans, tofu, or grilled mushrooms for a delicious vegetarian version.

Low-Carb Taco Salad

Skip the beans and corn while adding extra vegetables, cheese, and protein.

Spicy Taco Salad

Add jalapeños, hot sauce, chipotle peppers, or spicy salsa for extra heat.

Seafood Version

Use grilled shrimp or fish instead of chicken for a lighter seafood option.

Creamy Avocado Dressing

Blend avocado with lime juice, yogurt, herbs, and spices to create a creamy homemade dressing.

Serving Suggestions

Serve this salad as a complete meal with fresh lime wedges on the side.

It pairs beautifully with homemade salsa, guacamole, or a refreshing Mexican drink.

For family dinners, prepare all ingredients separately and allow everyone to build their own bowl.

This Taco Salad is also perfect for summer gatherings because it is colorful, fresh, and easy to serve.

You can serve it with tortilla chips for extra crunch or alongside a bowl of Mexican rice for a larger meal.

Health Benefits

This recipe provides a good balance of protein, fiber, healthy fats, and fresh vegetables.

The grilled protein helps support muscle health and keeps you feeling satisfied.

Lettuce, tomatoes, peppers, and other vegetables provide vitamins, minerals, and antioxidants.

Black beans add plant-based protein and fiber that support digestion.

Avocado provides healthy fats that contribute to a balanced diet.

The homemade dressing allows you to control ingredients compared with many store-bought dressings that may contain extra additives.

This Taco Salad is a nutrient-rich meal option that can fit into many healthy eating plans.

Storage and Reheating Instructions

Store leftover ingredients separately for the best quality.

Keep the salad vegetables in an airtight container in the refrigerator for up to 3 days.

Store grilled protein separately and reheat gently before serving.

Keep dressing in a separate container until ready to eat.

Avoid freezing the assembled salad because fresh vegetables lose their texture after freezing.

For meal preparation, prepare individual containers with lettuce, vegetables, protein, and toppings separated.

This Taco Salad can be enjoyed fresh throughout the week when stored properly.

Why This Recipe Is Perfect for Every Occasion

This recipe is perfect because it combines convenience, nutrition, and incredible flavor in one meal.

It works well for busy weekdays because preparation is simple and quick.

Families enjoy it because everyone can customize their own toppings.

It is also a great choice for gatherings because the colorful presentation looks beautiful on any table.

The flexibility of this Taco Salad makes it suitable for different dietary preferences and taste choices.

Whether you prefer spicy flavors, extra vegetables, or different proteins, this recipe can easily be adjusted.

Cooking Notes

Always dry lettuce completely before assembling the salad.

Cook protein until it reaches the correct internal temperature for safety.

Add avocado and dressing right before serving for the freshest results.

Adjust spices according to your preferred heat level.

Fresh lime juice creates a brighter Mexican-inspired flavor.

Use high-quality ingredients because simple recipes depend on fresh flavors.

Frequently Asked Questions

Can I prepare Taco Salad ahead of time?

Yes, prepare all ingredients separately and combine them before serving.

What protein works best for this recipe?

Chicken, steak, shrimp, or turkey all work well depending on your preference.

Can I make this salad vegetarian?

Yes, replace the grilled protein with beans, tofu, or roasted vegetables.

How can I make the dressing healthier?

Use Greek yogurt instead of sour cream and reduce added sweeteners.

Can I use iceberg lettuce instead of romaine?

Yes, but romaine provides better texture and flavor.

Is Taco Salad good for weight management?

Yes, when prepared with balanced portions of protein, vegetables, and healthy toppings.

Nutrition Information (Per Serving)

Calories: 520 kcal

Protein: 38g

Carbohydrates: 42g

Fat: 26g

Fiber: 10g

Sugar: 7g

Sodium: 650mg approximately

Nutrition values may vary depending on ingredients and serving sizes.

Final Thoughts

Zesty Mexican Grilled Taco Salad is a delicious way to enjoy bold Mexican flavors in a fresh and satisfying meal. The combination of grilled protein, crunchy vegetables, creamy toppings, and homemade dressing creates a perfect balance of taste and nutrition.

This recipe is simple enough for everyday meals but impressive enough for entertaining guests.

With easy preparation, flexible ingredients, and plenty of customization options, this Taco Salad is a recipe you will want to make again and again.

Whether you are looking for a healthy lunch, quick dinner, or meal prep idea, this dish delivers amazing flavor in every bite.

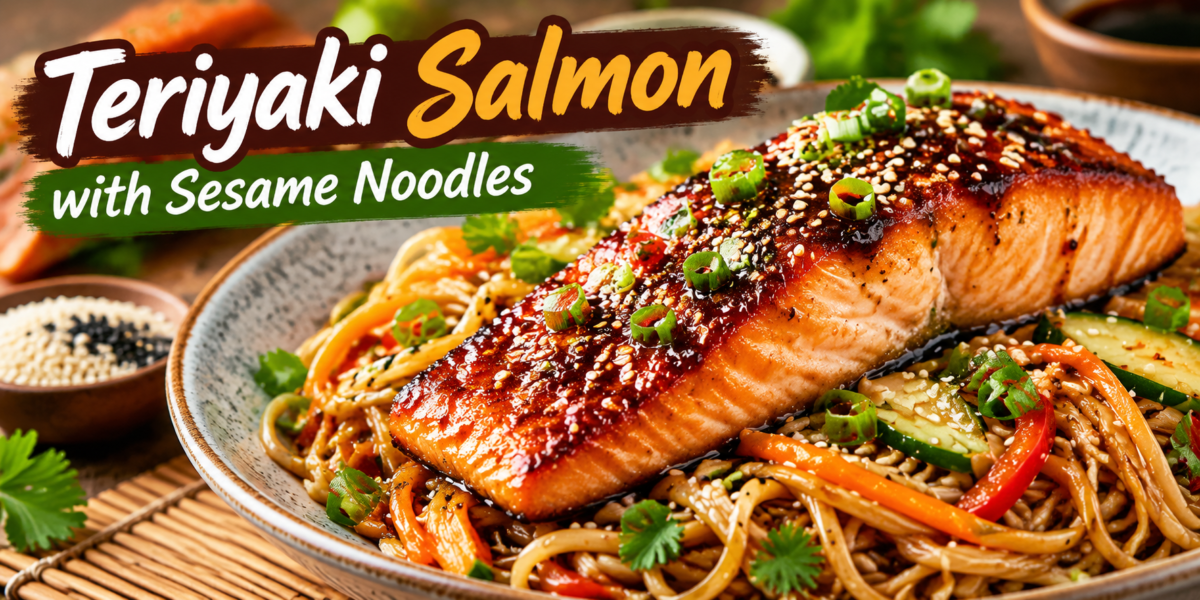
Teriyaki Salmon with Sesame Noodles Recipe

Teriyaki Salmon with Sesame Noodles served with sesame sauce and fresh vegetables

Teriyaki Salmon with Sesame Noodles Recipe

Teriyaki Salmon with Sesame Noodles is a delicious Asian-inspired meal that combines tender salmon fillets with a sweet, savory, and glossy teriyaki glaze served over flavorful sesame noodles. This recipe is perfect for anyone who loves restaurant-style flavors but wants to prepare a healthier homemade dinner.

The combination of fresh salmon, homemade sauce, and sesame noodles creates a balanced meal full of amazing textures and flavors. The salmon becomes juicy and flaky while the teriyaki coating adds a beautiful caramelized finish. The noodles provide a nutty sesame taste, while fresh vegetables add crunch and freshness.

This Teriyaki Salmon recipe is easy enough for a busy weeknight but impressive enough for family gatherings, dinner parties, or special occasions. It uses simple ingredients that are easy to find and requires minimal cooking experience.

Salmon is naturally rich in protein and omega-3 fatty acids, making this meal a nutritious choice for people who want a satisfying dinner without sacrificing flavor. The homemade sauce allows you to control sweetness and sodium levels compared with many restaurant versions.

Whether you are meal prepping for the week or preparing a quick family dinner, this recipe delivers a perfect balance of taste, nutrition, and convenience.

Preparation Time: 15 minutes
Cooking Time: 20 minutes
Total Time: 35 minutes
Servings: 4 servings

Ingredients

For Teriyaki Salmon

2 tablespoons honey

4 salmon fillets (6 ounces each)

1/3 cup low-sodium soy sauce

2 tablespoons rice vinegar

1 tablespoon sesame oil

2 tablespoons brown sugar

3 cloves garlic, minced

1 tablespoon fresh ginger, grated

1 tablespoon cornstarch

2 tablespoons water

1 tablespoon olive oil

1 teaspoon sesame seeds

2 green onions, sliced

Fresh cilantro for garnish (optional)

For Sesame Noodles

1 tablespoon rice vinegar

12 ounces soba noodles, spaghetti, or rice noodles

2 tablespoons sesame oil

3 tablespoons soy sauce

2 teaspoons chili sauce (optional)

2 cloves garlic, minced

1 tablespoon peanut butter or tahini

1 teaspoon grated ginger

1/2 cup shredded carrots

1/2 cup sliced cucumber

1 tablespoon honey

2 green onions, chopped

1 tablespoon sesame seeds

Step-by-Step Instructions

Prepare the Teriyaki Sauce

This Teriyaki Salmon is easy to prepare and delivers a restaurant-style flavor with minimal effort.

Begin by preparing the homemade sauce that creates the signature flavor of this dish. Add soy sauce, honey, brown sugar, rice vinegar, sesame oil, minced garlic, and grated ginger into a small saucepan.

Heat the mixture over medium heat and stir until the sugar dissolves completely. Allow the sauce to simmer gently for 2 to 3 minutes so all flavors combine together.

Mix cornstarch with water in a small bowl to create a smooth slurry. Slowly add the slurry into the sauce while stirring continuously.

Cook until the sauce becomes thick, glossy, and smooth. Remove from heat and keep it aside.

A good glaze should coat the salmon beautifully without being too watery or too thick.

Cook the Salmon

Pat the salmon fillets dry using a paper towel. This step helps create better browning and allows the sauce to stick properly.

Season the salmon lightly with black pepper. Avoid adding too much salt because soy sauce already provides enough seasoning.

Heat olive oil in a large skillet over medium heat. Place the salmon fillets into the pan.

Cook for 4 to 5 minutes on the first side until lightly golden. Carefully flip the salmon and cook for another 3 to 5 minutes.

Brush the prepared glaze over the fish and cook for an additional minute until the coating becomes slightly caramelized.

The perfect Teriyaki Salmon should be tender, moist, and easy to separate with a fork.

Prepare Sesame Noodles

Bring a large pot of water to boil and cook noodles according to package instructions.

Drain the noodles and rinse them briefly under cold water. This keeps the noodles from becoming too soft.

In a large bowl, combine sesame oil, soy sauce, rice vinegar, peanut butter, honey, chili sauce, garlic, and ginger.

Mix until the sauce becomes smooth.

Add cooked noodles and toss until completely coated.

Add shredded carrots, cucumber slices, green onions, and sesame seeds.

The noodles should have a delicious combination of creamy, nutty, and fresh flavors.

Assemble the Meal

Divide sesame noodles between serving bowls.

Place a glazed salmon fillet on top of each bowl.

Add extra sauce if desired and garnish with sesame seeds, green onions, and fresh herbs.

Serve immediately for the best taste and texture.

This Teriyaki Salmon combination works beautifully because the sweet glaze balances the savory sesame noodles perfectly.

Tips for Perfect Results

Choose fresh salmon whenever possible because it provides better flavor and texture. Frozen salmon can also work, but make sure it is completely thawed before cooking.

Do not overcook the fish. Salmon becomes dry when cooked for too long. The inside should remain juicy and flaky.

Allow the salmon to sit at room temperature for about 10 minutes before cooking. This helps it cook evenly.

Always cook the sauce slowly. High heat can burn the sugar and create a bitter taste.

Fresh garlic and ginger provide the best flavor, but powdered versions can be used if needed.

For extra crunch, add roasted peanuts, cashews, or additional vegetables.

You can prepare the sauce ahead of time and store it in the refrigerator until needed.

This Teriyaki Salmon recipe becomes even more flavorful when the glaze is allowed to sit on the fish for 15 minutes before cooking.

For the best results, cook the Teriyaki Salmon over medium heat to keep the fish moist and tender.

Variations

Spicy Teriyaki Salmon

Add sriracha, red pepper flakes, or chili paste to the sauce for a spicy version. The heat creates a delicious contrast with the sweet glaze.

You can customize this Teriyaki Salmon recipe with vegetables, spice, or different noodles.

Vegetable Teriyaki Bowl

Add broccoli, bell peppers, mushrooms, or edamame for extra nutrients and color.

Low-Carb Version

Replace noodles with cauliflower rice, zucchini noodles, or a fresh salad base.

Air Fryer Version

Cook salmon in an air fryer at 400°F for approximately 8 to 10 minutes. Add sauce halfway through cooking for a caramelized finish.

Serving Suggestions

This recipe can be served with many side dishes.

Steamed broccoli, roasted vegetables, cucumber salad, or miso soup pair beautifully with the flavors.

For a complete Asian-inspired dinner, serve it with green tea and a light dessert.

For meal preparation, divide noodles and salmon into separate containers and add fresh toppings before eating.

The colorful presentation of this Teriyaki Salmon makes it perfect for entertaining guests.

Serve this Teriyaki Salmon with fresh vegetables for a complete and balanced dinner.

Health Benefits

Salmon is one of the best sources of high-quality protein and healthy fats. It contains omega-3 fatty acids that support heart health and overall wellness.

This meal provides important nutrients including vitamin D, selenium, and B vitamins.

The vegetables in the noodles add fiber, antioxidants, and essential vitamins.

Garlic and ginger contain natural compounds that support a healthy diet.

Compared with many takeout options, homemade Teriyaki Salmon gives you better control over ingredients, portion sizes, and nutrition.

The protein content helps support muscle health, while healthy fats help keep you satisfied for longer.

This Teriyaki Salmon provides protein, omega-3 fatty acids, and essential nutrients.

Storage and Reheating Instructions

Store leftover salmon in an airtight container in the refrigerator for up to 3 days.

Sesame noodles can also be stored for 3 to 4 days.

Keep the salmon and noodles separate for the best texture.

To reheat salmon, warm it gently in the oven or microwave. Avoid overheating because it may become dry.

Warm noodles with a small amount of water or extra sauce to refresh their texture.

Leftover salmon can also be used in salads, wraps, or rice bowls.

Why This Recipe Is Perfect for Every Occasion

This recipe is perfect because it combines simplicity with incredible flavor.

It does not require complicated techniques, yet the final result looks like a restaurant-quality meal.

Families love this dish because it is filling, colorful, and easy to customize.

Busy professionals can prepare it quickly, while home cooks can enjoy experimenting with different ingredients.

The combination of salmon and sesame noodles creates a complete meal that satisfies both taste and nutrition needs.

This Teriyaki Salmon is also a great option for celebrations because it looks elegant when served with fresh herbs and sesame toppings.

Cooking Notes

Always dry salmon before cooking to achieve better texture.

Use low-sodium soy sauce if you want to reduce salt.

Adjust sweetness according to your preference.

If the sauce becomes too thick, add a tablespoon of water.

For extra flavor, toast sesame seeds before adding them.

Cook noodles until just tender to avoid a mushy texture.

Fresh ingredients will always create the best results.

Frequently Asked Questions

Can I use frozen salmon?

Yes, frozen salmon works well. Thaw it completely before cooking and remove excess moisture.

Can I make this recipe without soy sauce?

Yes, coconut aminos can be used as an alternative.

How long does cooked salmon last?

Cooked salmon stays fresh for around 3 days when properly stored.

Can I prepare the sauce earlier?

Yes, the sauce can be prepared several days ahead and refrigerated.

What noodles are best for this recipe?

Soba noodles provide the most traditional flavor, but spaghetti and rice noodles also work well.

Is Teriyaki Salmon healthy?

Yes, when prepared at home with balanced ingredients, it can be a nutritious meal rich in protein and healthy fats.

Nutrition Information (Per Serving)

Calories: 620 kcal

Protein: 42g

Carbohydrates: 58g

Fat: 25g

Fiber: 5g

Sugar: 12g

Omega-3 Fatty Acids: High

Sodium: Approximately 850mg

Nutrition values may vary depending on ingredients and portion sizes.

Final Thoughts

Teriyaki Salmon with Sesame Noodles is a flavorful, healthy, and satisfying meal that brings amazing Asian-inspired flavors directly to your kitchen.

The sweet and savory glaze, tender fish, and delicious sesame noodles create a perfect combination that works for everyday dinners and special occasions.

With simple ingredients, easy preparation, and impressive results, this recipe deserves a place in your regular meal rotation.

Preparing this Teriyaki Salmon at home allows you to enjoy restaurant-style taste while maintaining control over quality and nutrition.

Whether you are cooking for your family, preparing meals for the week, or serving guests, this dish offers everything you want from a complete dinner: flavor, freshness, and satisfaction.

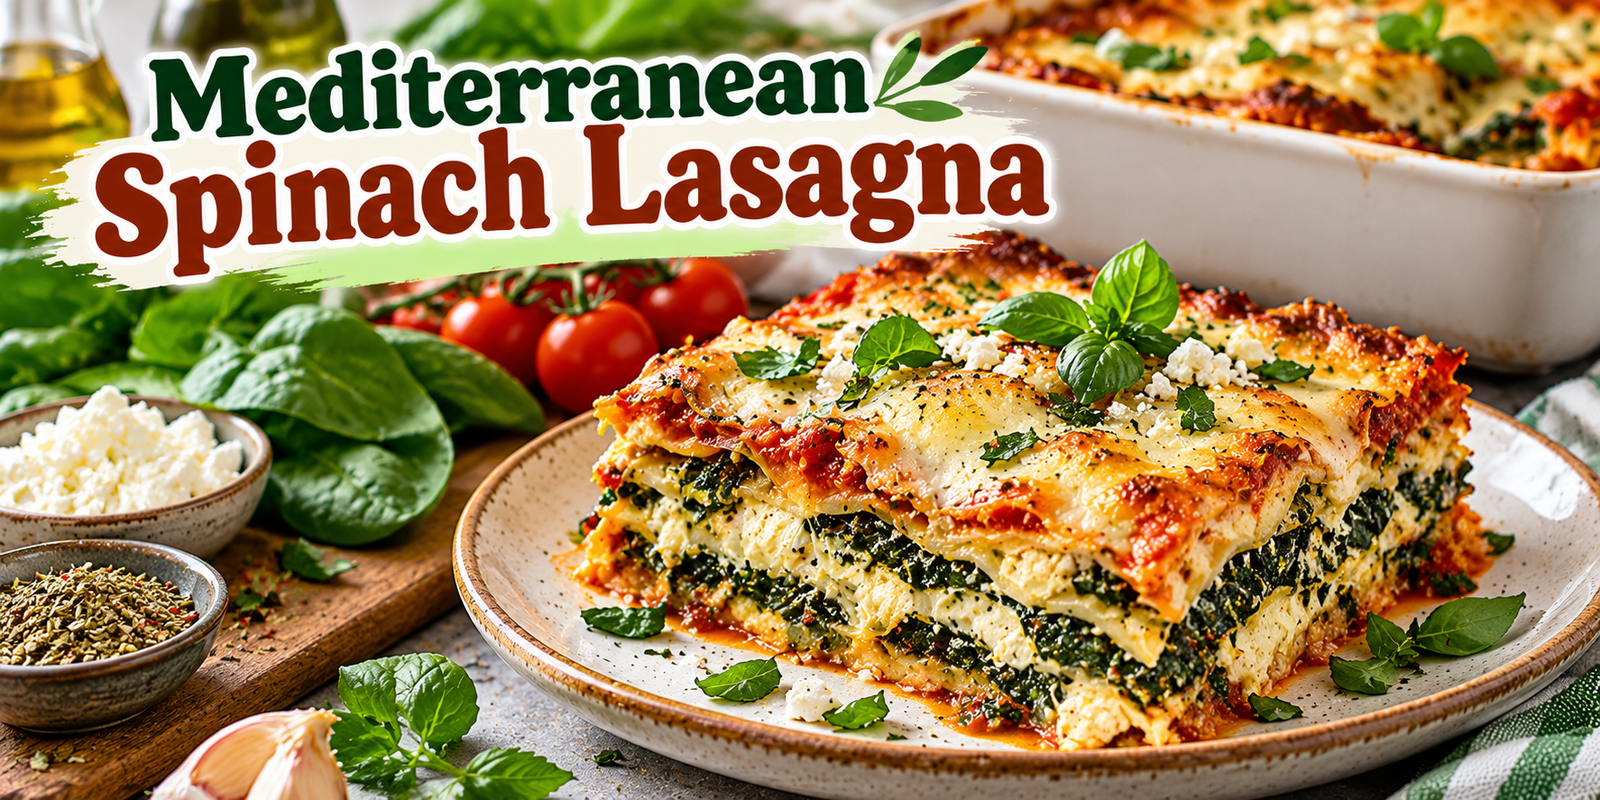
Mediterranean Spinach Lasagna

Mediterranean Spinach Lasagna with layers of spinach, ricotta, feta, mozzarella, tomato sauce, and fresh herbs

Mediterranean Spinach Lasagna

This Spinach Lasagna is a Mediterranean-inspired baked pasta dish layered with tender spinach, creamy ricotta, salty feta, mozzarella, flavorful tomato sauce, garlic, and herbs. It brings the comforting texture of classic lasagna together with ingredients and Mediterranean flavors. The result is a hearty vegetarian meal that works beautifully for family dinners, weekend cooking, or entertaining.

The filling is creamy without feeling overly heavy. Spinach adds freshness and color, while feta gives the dish a pleasantly salty flavor. Ricotta creates a soft, creamy center, and mozzarella melts into a golden topping. Garlic, oregano, basil, lemon zest, and lemon juice brighten the cheese mixture and keep every layer flavorful.

This Spinach Lasagna is also practical for busy cooks because several parts can be prepared ahead. The tomato sauce and spinach filling can be made separately, then assembled when convenient. Once baked, the casserole rests before slicing, allowing the layers to settle and making it easier to serve neat portions.

Prep Time: 30 minutes
Cook Time: 50 minutes
Resting Time: 15 minutes
Total Time: 1 hour 35 minutes
Servings: 8

Ingredients

For the Spinach Filling

  • 10 ounces fresh spinach, or 8 ounces frozen spinach
  • 15 ounces ricotta cheese
  • 1 cup crumbled feta cheese
  • 1 cup shredded mozzarella cheese
  • 2 garlic cloves, finely minced
  • 1 teaspoon dried oregano
  • ½ teaspoon dried basil
  • ½ teaspoon black pepper
  • ¼ teaspoon sea salt
  • ¼ teaspoon red pepper flakes, optional
  • 1 tablespoon fresh lemon juice
  • 1 teaspoon lemon zest

For the Tomato Sauce

  • 3 cups tomato passata or crushed tomatoes
  • 1 small yellow onion, finely chopped
  • 3 garlic cloves, minced
  • 2 tablespoons extra virgin olive oil
  • 1 teaspoon dried oregano
  • 1 teaspoon dried basil
  • ½ teaspoon smoked paprika
  • ½ teaspoon black pepper
  • ½ teaspoon sea salt
  • 1 teaspoon honey or maple syrup, optional
  • 2 tablespoons fresh parsley, chopped

For the Lasagna

  • 12 lasagna sheets
  • 1½ cups shredded mozzarella cheese
  • ½ cup crumbled feta cheese
  • 2 tablespoons grated Parmesan cheese, optional
  • Fresh basil or parsley for garnish
  • Extra virgin olive oil for finishing

Step-by-Step Instructions

1. Prepare the Spinach

Wash fresh spinach thoroughly and remove any tough stems. Heat a large skillet over medium heat. Add the spinach and cook for 2–3 minutes, stirring often, until the leaves wilt.

Transfer the spinach to a colander and allow it to cool slightly. Squeeze out as much liquid as possible, then roughly chop it.

If using frozen spinach, thaw it completely and squeeze it very well using a clean kitchen towel. Removing excess water is one of the most important steps because too much moisture can make the Spinach Lasagna watery.

2. Make the Spinach and Cheese Filling

Place the prepared spinach in a large mixing bowl. Add ricotta, feta, one cup of mozzarella, garlic, oregano, basil, black pepper, sea salt, red pepper flakes, lemon juice, and lemon zest.

Mix gently until everything is evenly combined. The filling should be creamy but not runny. If it looks too wet, let the spinach drain for a few more minutes before continuing.

Taste the mixture and adjust the seasoning if needed. Lemon adds freshness and balances the creamy cheeses, while oregano and basil provide the Mediterranean character that makes this Spinach Lasagna distinctive.

3. Prepare the Tomato Sauce

Heat two tablespoons of olive oil in a medium saucepan over medium heat. Add the chopped onion and cook for 4–5 minutes until softened.

Add the minced garlic and cook for another 30–60 seconds. Pour in the crushed tomatoes or passata. Add oregano, basil, smoked paprika, black pepper, and sea salt.

If the tomatoes taste especially acidic, add one teaspoon of honey or maple syrup. Bring the sauce to a gentle simmer and cook for 12–15 minutes, stirring occasionally.

Turn off the heat and stir in fresh parsley. The sauce should be thick enough to coat a spoon. A thick sauce is preferable because the spinach mixture already contains moisture.

4. Cook the Spinach Lasagna Sheets

Follow the package instructions for the Spinach Lasagna sheets. If using traditional pasta, cook the sheets in a large pot of salted boiling water until just tender. Avoid overcooking because the pasta will continue cooking in the oven.

Drain the sheets and lay them flat on a lightly oiled baking sheet or clean surface. If using oven-ready sheets, follow the package directions and skip the boiling step.

5. Prepare the Baking Dish

Preheat the oven to 375°F (190°C). Lightly grease a 9 × 13-inch baking dish with olive oil.

Spread a thin layer of tomato sauce across the bottom. This prevents the first pasta layer from sticking and gives the base plenty of flavor.

6. Build the Layers

Place a layer of Spinach Lasagna sheets over the sauce. Spread about one-third of the spinach and cheese mixture evenly over the pasta.

Add tomato sauce over the filling, followed by a small amount of mozzarella and feta. Continue with another layer of pasta, another third of the spinach mixture, more sauce, and a little cheese.

Repeat until the filling is used. Finish with the final layer of Spinach Lasagna sheets.

Spread the remaining tomato sauce over the top and make sure the pasta is completely covered. This helps prevent dry edges during baking.

The layered structure is what makes Spinach Lasagna so satisfying: every serving contains pasta, creamy spinach filling, tomato sauce, and melted cheese.

7. Add the Final Cheese

Sprinkle the remaining mozzarella evenly over the top. Add the remaining feta and Parmesan if using.

For extra flavor, add a small pinch of oregano and freshly cracked black pepper. The cheese will melt into a golden, bubbling layer while the casserole bakes.

8. Bake

Cover the baking dish tightly with aluminum foil. Bake for about 30 minutes.

Remove the foil carefully and return the dish to the oven. Bake for another 15–20 minutes, until the cheese is melted and lightly golden.

For a deeper golden finish, use the broiler for 1–2 minutes at the end. Watch closely because cheese can brown quickly.

The Spinach Lasagna should be hot and bubbling around the edges when it is ready.

9. Rest Before Slicing

Remove the baking dish from the oven and let it rest for at least 15 minutes. This allows the layers to settle and makes slicing much easier.

Cut into eight portions using a sharp knife. Garnish each serving with fresh basil or parsley and a small drizzle of extra virgin olive oil.

Tips for the Best Results

Remove Excess Spinach Water

The biggest secret to a successful Spinach Lasagna is controlling moisture. Spinach releases a surprising amount of water during cooking, and frozen spinach can contain even more.

Squeeze the spinach thoroughly before mixing it with the cheeses. If the filling still looks watery, let it drain before assembling the dish.

Use a Thick Tomato Sauce

A thin tomato sauce can make the finished dish watery. Simmer the sauce until it has a spoon-coating consistency. A thick sauce also provides better flavor between the pasta layers and helps the casserole hold its shape.

Do Not Overcook the Pasta

If you are boiling the pasta sheets, cook them only until just tender. Very soft sheets can tear during assembly and become mushy after baking.

Use Good-Quality Cheese

Feta gives the recipe its Mediterranean character, while ricotta provides creaminess and mozzarella creates the stretchy melted topping. If your feta is particularly salty, reduce the amount of added salt in the filling and sauce.

Serving Suggestions

Serve Spinach Lasagna with a crisp Mediterranean salad made with cucumber, tomatoes, red onion, olives, parsley, lemon juice, and olive oil.

A simple arugula salad with lemon dressing also works well because its fresh flavor balances the creamy pasta.

For a larger dinner, add roasted zucchini, eggplant, bell peppers, broccoli, or asparagus.

For a Mediterranean-inspired table, serve the lasagna alongside hummus, tzatziki, olives, roasted peppers, and a simple cucumber salad.

Recipe Variations

Mushroom Version

Sauté sliced mushrooms with garlic until their moisture evaporates, then fold them into the spinach filling. Mushrooms add an earthy flavor and make the vegetarian dish more substantial. This variation keeps Spinach Lasagna creamy while adding another savory vegetable.

Roasted Pepper Version

Add chopped roasted red peppers between the layers. Their sweetness and mild smoky flavor pair especially well with feta and spinach. This variation also gives the finished Spinach Lasagna beautiful color.

Spicy Version

Increase the red pepper flakes or add a pinch of cayenne to the tomato sauce. You can also drizzle a little chili oil over individual portions.

Make-Ahead Instructions

This Spinach Lasagna is excellent for preparing ahead of time. Assemble the entire dish, cover it tightly, and refrigerate it for up to 24 hours before baking.

When ready to cook, let the dish sit at room temperature for about 20–30 minutes. Bake according to the recipe, adding a few extra minutes if the center is still cold.

The tomato sauce and spinach filling can also be prepared one day ahead and stored separately in the refrigerator.

Storage Instructions

Allow leftover Spinach Lasagna to cool before transferring portions to airtight containers. Refrigerate for up to four days.

Reheat individual portions in the microwave until hot throughout. For better texture, place a portion in an oven-safe dish, cover loosely with foil, and heat at 350°F (175°C) until warmed through.

Freezing Instructions

This dish freezes well. For best results, assemble the lasagna in a freezer-safe baking dish and cover it tightly with plastic wrap followed by aluminum foil.

Freeze for up to three months. Thaw overnight in the refrigerator before baking.

You can also freeze baked portions individually. Wrap each portion securely and store them in freezer-safe containers.

Frequently Asked Questions

Can I use frozen spinach?

Yes. Frozen spinach works very well. Thaw it completely and squeeze out as much liquid as possible before making the filling. If the spinach remains wet, the final Spinach Lasagna may have too much moisture.

Can I make it without ricotta?

Yes. Cottage cheese can replace ricotta. For a smoother texture, blend the cottage cheese briefly before mixing it with the other filling ingredients.

Can I use only feta?

You can, but the result will be saltier and firmer. Ricotta provides the creamy texture that makes the filling soft and rich.

Can I make it vegan?

Yes. Use plant-based ricotta, vegan mozzarella, dairy-free feta, and suitable lasagna sheets.

Why is my Spinach Lasagna watery?

Excess spinach water and thin tomato sauce are the most common causes. Squeeze the spinach thoroughly and simmer the sauce until thick before assembling.

Can I add more vegetables?

Absolutely. Mushrooms, zucchini, roasted peppers, eggplant, and sun-dried tomatoes all work well. Always cook watery vegetables first so they do not release excessive liquid into the casserole.

Nutrition Information

Approximate nutrition per serving:

Calories: 430 kcal
Protein: 23g
Carbohydrates: 42g
Fat: 21g
Saturated Fat: 10g
Fiber: 6g
Sugar: 7g
Sodium: 720mg

Nutrition values are estimates and can vary depending on ingredient brands, portion sizes, and optional additions.

Final Thoughts

This Spinach Lasagna brings together creamy cheese, tender spinach, flavorful tomato sauce, herbs, and melted mozzarella in a comforting baked dish. The Mediterranean ingredients give the recipe a fresh character while keeping the familiar layered structure that makes lasagna so enjoyable.

The most important techniques are squeezing the spinach thoroughly, keeping the tomato sauce thick, avoiding overcooked pasta, and allowing the finished dish to rest before slicing.

Spinach Lasagna is flexible enough for weeknight dinners, meal preparation, family gatherings, and entertaining. You can keep it simple with spinach and cheese or customize it with mushrooms, roasted peppers, zucchini, sun-dried tomatoes, or cooked chicken.

Serve the finished casserole with a crisp salad, warm bread, olives, or hummus. The leftovers are just as useful because the flavors develop as the dish rests, and individual portions can be reheated throughout the week.

For the best presentation, garnish each serving with fresh basil or parsley, a few feta crumbles, and a light drizzle of olive oil. The bright herbs provide a beautiful contrast against the golden cheese and red tomato sauce.

This Spinach Lasagna is a satisfying Mediterranean-inspired recipe that uses familiar ingredients and straightforward preparation. Whether you make it for a quiet family dinner or prepare it ahead for guests, it delivers creamy layers, savory vegetables, bright herbs, and plenty of comforting flavor.

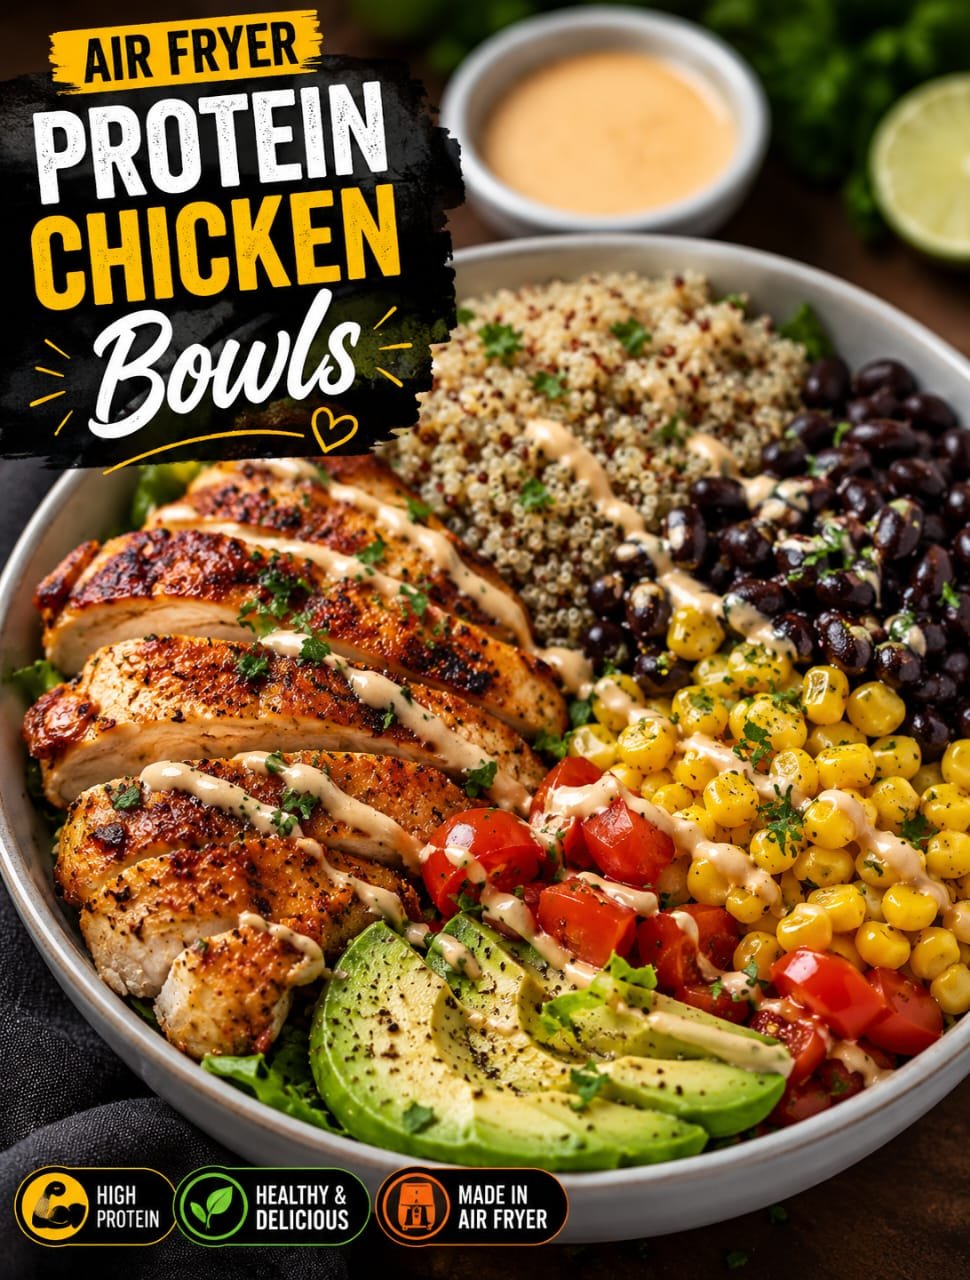
Air Fryer Protein Fajita Bowls

Air fryer protein fajita bowl with seasoned chicken, bell peppers, onions, rice, avocado, and fresh lime

Air Fryer Protein Fajita Bowls

Air Fryer Protein Fajita Bowls are a quick and satisfying dinner made with seasoned chicken, colorful bell peppers, onions, and your favorite grain. Everything comes together with simple spices and a few fresh toppings for a meal that feels fresh, filling, and easy to make.

The air fryer gives the chicken golden, flavorful edges while the peppers and onions become tender with lightly roasted spots. Served over warm rice and finished with avocado, salsa, cilantro, and lime, this bowl has plenty of texture and flavor in every bite.

It is a great option for busy weeknights, easy lunches, or meal prep. You can also change the ingredients to match what you have in your kitchen.

Why You’ll Love This Recipe

This recipe is designed for busy home cooks who want a flavorful meal without a long cooking process. The chicken and vegetables cook quickly in the air fryer, so there is no need to heat a large skillet or spend a lot of time at the stove.

The seasoning blend gives the chicken a smoky fajita flavor using everyday pantry spices. Bell peppers and onions add sweetness, color, and texture to the bowl.

Another benefit is how easy the recipe is to customize. You can use white rice, brown rice, quinoa, cauliflower rice, or lettuce as the base. Add black beans or corn for extra texture, or change the toppings to create a different bowl each time.

Ingredients

For the Chicken and Vegetables

  • 1 pound boneless, skinless chicken breast
  • 1 red bell pepper
  • 1 green bell pepper
  • 1 small yellow or white onion
  • 1 tablespoon olive oil

Fajita Seasoning

  • 1 teaspoon chili powder
  • 1 teaspoon smoked paprika
  • 1 teaspoon ground cumin
  • ½ teaspoon garlic powder
  • ½ teaspoon onion powder
  • ½ teaspoon salt
  • ¼ teaspoon black pepper

For the Bowls

  • 3 cups cooked white or brown rice
  • 1 avocado, sliced
  • ½ cup pico de gallo or salsa
  • ¼ cup chopped fresh cilantro
  • 1 lime, cut into wedges

Optional Toppings

  • Black beans
  • Corn
  • Shredded Mexican cheese
  • Plain Greek yogurt
  • Sliced jalapeños
  • Hot sauce
  • Fresh diced tomatoes

How to Make Air Fryer Protein Fajita Bowls

Start by preheating your air fryer to 400°F for about 3 minutes. A preheated basket helps the chicken begin cooking right away and promotes better browning.

Cut the chicken breast into thin, evenly sized strips. Try to keep the pieces similar in thickness so they finish cooking at roughly the same time.

Slice the red bell pepper, green bell pepper, and onion into medium strips. Avoid cutting them too thin because they can become overly soft during cooking.

Add the chicken, peppers, and onions to a large bowl. Pour in the olive oil and sprinkle the chili powder, smoked paprika, cumin, garlic powder, onion powder, salt, and black pepper over the ingredients.

Toss everything thoroughly until the chicken and vegetables are evenly coated with oil and seasoning.

Place the mixture in the air fryer basket in a single, even layer. Do not overcrowd the basket because too many ingredients can trap steam and reduce browning.

Air fry at 400°F for 10 to 14 minutes, shaking the basket around the halfway point.

The exact cooking time depends on the thickness of the chicken pieces and your air fryer model. Check the thickest chicken piece with an instant-read thermometer and make sure it reaches 165°F.

Once the chicken is cooked, let it rest for a couple of minutes. This helps the juices settle before you build the bowls.

How to Assemble the Bowls

Start each bowl with about ¾ cup of warm cooked rice. Brown rice, white rice, quinoa, or cauliflower rice can also be used.

Add a generous portion of the cooked chicken, peppers, and onions.

Top the bowl with avocado slices, pico de gallo or salsa, and fresh cilantro. Add black beans or corn if you want a heartier meal.

Finish with a squeeze of fresh lime juice. The acidity from the lime helps balance the smoky seasoning and rich toppings.

For extra creaminess, add a spoonful of plain Greek yogurt. Shredded cheese or a few slices of jalapeño can also be added according to taste.

Best Rice and Bowl Base Options

White rice is a simple choice when you want a classic fajita bowl. Its mild flavor lets the seasoned chicken and vegetables remain the focus.

Brown rice gives the bowl a slightly nutty flavor and adds more fiber. It works especially well for meal prep because it holds its texture after reheating.

Quinoa is another good option when you want a grain with plant-based protein. Its light texture pairs well with chicken, vegetables, and fresh salsa.

Cauliflower rice is ideal when you prefer a lower-carbohydrate base. Season it lightly with salt, pepper, lime juice, or a little of the fajita seasoning.

For a fresh salad-style bowl, use chopped romaine or mixed greens. Add the cooked fajita mixture while it is still warm and finish with salsa and avocado.

Tips for Perfect Air Fryer Chicken

Use chicken pieces that are similar in size. Smaller pieces cook faster, while thick pieces need more time and can cause uneven results.

Avoid putting too much food into the basket at once. If the chicken and vegetables are crowded, cook them in batches for better airflow.

Shake the basket halfway through cooking. This helps expose different sides of the chicken and vegetables to the circulating hot air.

Do not judge doneness by color alone. Chicken can look browned on the outside while remaining undercooked inside, so always check the internal temperature.

For extra flavor, let the seasoned chicken and vegetables rest for 10 to 15 minutes before air frying. This gives the spices a little more time to coat the ingredients.

Fresh lime juice should be added after cooking rather than before. This keeps the flavor bright and fresh.

Easy Meal Prep

These bowls are convenient for preparing several lunches or dinners at once.

Cook the chicken and vegetables according to the recipe, then prepare your chosen rice or grain separately.

Divide the cooked ingredients between airtight meal-prep containers. Keep avocado, salsa, cilantro, lime, and other fresh toppings in separate small containers when possible.

When you are ready to eat, reheat the rice, chicken, and vegetables until hot. Add the fresh toppings after reheating.

Keeping the toppings separate helps maintain their texture and prevents the rice from becoming watery.

Recipe Variations

You can easily change the protein without changing the basic seasoning.

Use boneless, skinless chicken thighs for a richer and juicier bowl. Make sure the chicken reaches 165°F before serving.

Shrimp is another quick option, but it cooks much faster than chicken. Watch it closely to prevent overcooking.

For a vegetarian version, replace the chicken with firm tofu, black beans, mushrooms, or extra vegetables. Press tofu before seasoning so it develops better texture during air frying.

Add zucchini, mushrooms, corn, or extra peppers for more vegetables. Sliced jalapeños are a good choice if you enjoy spicy meals.

For a milder version, reduce the chili powder and use mild salsa. For more heat, add cayenne pepper, hot sauce, or fresh jalapeños.

You can also use the cooked filling in tacos, burritos, wraps, quesadillas, or salads.

Storage and Reheating

Store leftover chicken and vegetables in an airtight container in the refrigerator. Keep fresh toppings separate when possible.

Reheat the chicken and vegetables until steaming hot. The air fryer can help bring back some of the roasted texture, while a microwave is convenient for quick lunches.

Add fresh avocado, salsa, cilantro, and lime after reheating.

For meal prep, portion the ingredients into individual containers so each serving is ready to heat and eat.

Frequently Asked Questions

Can I use chicken thighs instead of chicken breast?

Yes. Boneless, skinless chicken thighs work well and should reach an internal temperature of 165°F.

How long should chicken cook in the air fryer?

Cook sliced chicken at 400°F for about 10 to 14 minutes, shaking the basket halfway through.

Can I make these bowls ahead of time?

Yes. Prepare the chicken, vegetables, and rice ahead of time and store them in separate airtight containers.

What can I use instead of rice?

Quinoa, cauliflower rice, lettuce, brown rice, or another grain can be used as the bowl base.

Can I add black beans?

Yes. Black beans add extra texture and make the bowl more filling.

How can I make the bowls spicy?

Add cayenne pepper to the seasoning or top the finished bowl with jalapeños and hot salsa.

Can I make a vegetarian version?

Yes. Replace the chicken with seasoned tofu, black beans, mushrooms, or additional vegetables.

What toppings taste best with fajita bowls?

Avocado, salsa, Pico de Gallo, cilantro, lime, Greek yogurt, cheese, and jalapeños all pair well with the smoky fajita flavors.

Final Thoughts

Air Fryer Protein Fajita Bowls are a simple way to turn everyday ingredients into a flavorful, satisfying meal. The seasoned chicken cooks quickly, the peppers and onions develop delicious roasted edges, and the fresh toppings bring everything together.

The best part is the flexibility. You can keep the bowl classic with rice, salsa, avocado, and lime or create your own version with quinoa, black beans, corn, cauliflower rice, or extra vegetables.

For busy weeknights and meal prep, this recipe is easy to repeat without feeling boring. Once you have the basic fajita seasoning and air fryer method down, you can change the toppings and bowl base whenever you want a fresh combination.