Mediterranean Garlic Parmesan White Beans

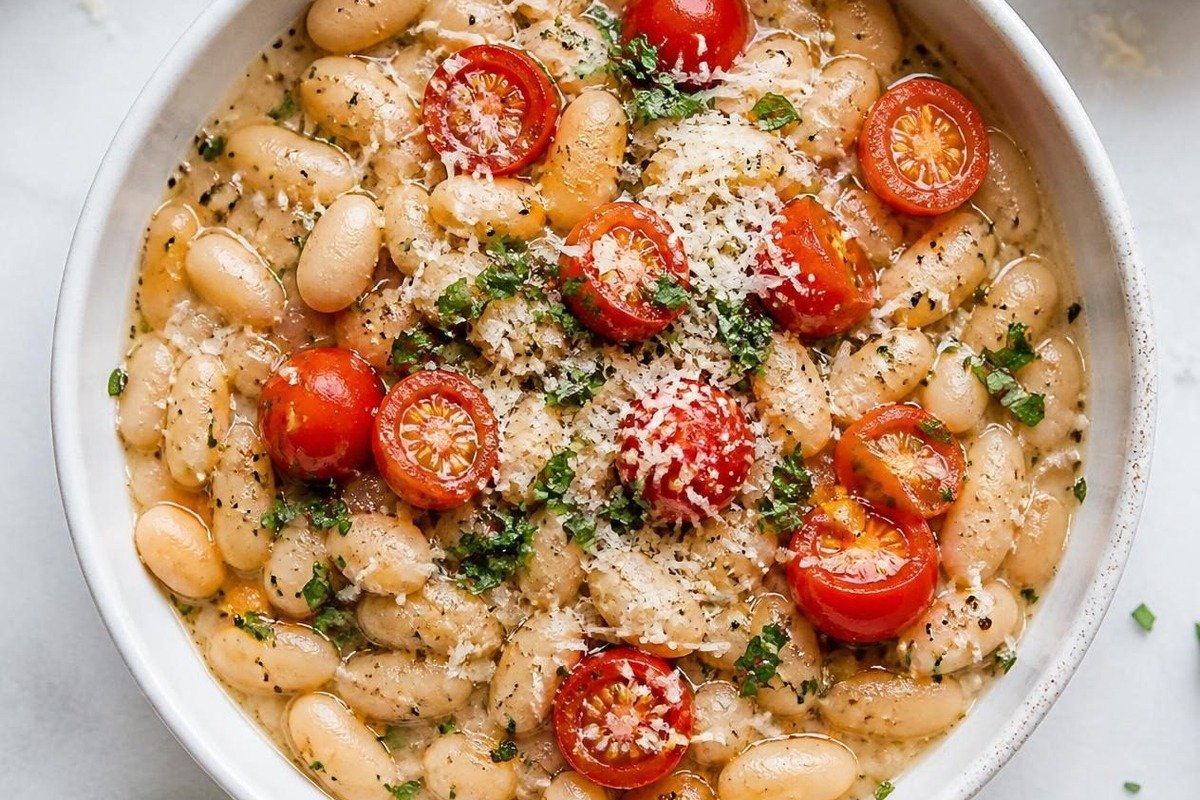
Garlic parmesan white beans with cherry tomatoes and herbs

Mediterranean Garlic Parmesan White Beans – 40g Protein Meal for Women 55+

Description

Mediterranean Garlic Parmesan White Beans are a warm, creamy, protein-rich meal made with simple Mediterranean ingredients. This recipe is especially useful for women over 55 who want a filling meal with plenty of protein, fiber, calcium, and healthy fats.

White beans provide plant-based protein and fiber, while Greek yogurt, Parmesan cheese, and spinach make the dish richer and more satisfying. Garlic, lemon, olive oil, and herbs give it a fresh Mediterranean flavor without making the recipe complicated.

This meal can work well for lunch or dinner. It is easy to prepare in one pan, takes about 25 minutes, and can provide around 40 grams of protein per serving, depending on the exact brands and quantities used.

Ingredients

For the White Beans

2 cups cooked cannellini beans or great northern beans, drained and rinsed

1 tablespoon extra virgin olive oil

4 garlic cloves, finely minced

2 cups fresh baby spinach

Low-sodium vegetable broth 1/2 cup

1/2 cup plain Greek yogurt

1/2 cup freshly grated Parmesan cheese

fresh lemon juice 1 tablespoon

Lemon zest 1 teaspoon

1 teaspoon dried oregano

1/2 teaspoon dried thyme

1/2 teaspoon smoked paprika

1/4 teaspoon black pepper

Salt to taste

For Extra Protein

1 cup low-fat cottage cheese, blended until smooth

For Serving

2 tablespoons chopped fresh parsley

Extra grated Parmesan, optional

Red pepper flakes, optional

Fresh lemon wedges

Step-by-Step Instructions

Step 1: Prepare the Beans

Drain and rinse the white beans under cold water.

Rinsing canned beans helps remove some of the extra sodium and gives the beans a cleaner flavor.

Set them aside while you prepare the sauce.

Step 2: Cook the Garlic

Heat the olive oil in a large skillet over medium-low heat.

Add the minced garlic.

Cook for about 30 to 60 seconds, stirring constantly.

Do not let the garlic burn because burnt garlic can make the dish taste bitter.

Step 3: Add the Beans

Add the drained white beans to the skillet.

Stir gently so the beans are coated with the garlic and olive oil.

Add the oregano, thyme, smoked paprika, black pepper, and a small amount of salt.

Cook for about 2 minutes.

Step 4: Add the Broth

Pour the vegetable broth into the pan.

Stir everything together.

Allow the beans to simmer for about 4 to 5 minutes.

Use the back of a spoon to gently mash a small portion of the beans.

This makes the sauce naturally thicker and creamier.

Step 5: Add the Spinach

Add the baby spinach.

Stir it into the beans and cook for about 2 minutes, or until the spinach becomes soft and wilted.

Step 6: Add the High-Protein Ingredients

Reduce the heat to low.

Stir in the blended cottage cheese.

Mix until it becomes smooth and creamy.

Remove the pan from direct high heat before adding the Greek yogurt. This helps prevent the yogurt from separating.

Add the Greek yogurt and Parmesan cheese.

Stir gently until the cheese melts and the sauce becomes creamy.

Step 7: Add Lemon

Add the lemon juice and lemon zest.

Taste the beans and adjust the salt, pepper, or herbs if needed.

The lemon adds freshness and balances the richness of the Parmesan cheese.

Step 8: Serve

Divide the Mediterranean Garlic Parmesan White Beans between two bowls.

Top with chopped parsley and a little extra Parmesan if desired.

Add red pepper flakes for a slightly spicy flavor.

Serve with a fresh lemon wedge on the side.

Estimated Macros Per Serving

This recipe makes approximately 2 large servings.

Approximate nutrition per serving:

Calories: 520–570

Protein: 38–42g

Carbohydrates: 55–60g

Fiber: 13–16g

Fat: 17–20g

Saturated Fat: 6–8g

Calcium: approximately 450–550mg

Iron: approximately 5–6mg

Nutrition can vary depending on the type of beans, Greek yogurt, cottage cheese, Parmesan, and broth you use.

Why This Recipe Can Be Helpful for Women 55+

Protein becomes especially important as adults get older because maintaining muscle mass supports strength, mobility, and everyday activity.

This recipe combines several protein sources instead of relying on beans alone.

White beans provide plant protein and fiber.

Greek yogurt and cottage cheese increase the protein while also adding calcium.

Parmesan adds extra protein, calcium, and flavor.

Spinach provides folate, vitamin K, iron, and other micronutrients.

Olive oil supplies Mediterranean-style unsaturated fats.

The combination of protein and fiber can also make this meal more filling than a simple pasta or bread-based lunch.

Storage Tips

Refrigerator

Allow the beans to cool completely.

Transfer them to an airtight container.

Store in the refrigerator for up to 3 to 4 days.

Reheating

Reheat gently in a saucepan over low heat.

Add 1 to 2 tablespoons of vegetable broth or water if the sauce becomes too thick.

You can also microwave individual portions in short intervals, stirring between each interval.

Avoid overheating because yogurt-based sauces can separate when exposed to very high heat.

Freezing

You can freeze the bean mixture, but dairy-based sauces may change slightly in texture after thawing.

For the best texture, freeze the beans before adding the Greek yogurt and Parmesan.

Store in a freezer-safe container for up to 2 months.

Thaw overnight in the refrigerator.

Reheat gently and then stir in the yogurt and Parmesan.

Tips and Notes

Use low-sodium beans and broth if you are watching your salt intake.

Cannellini beans work especially well because they are soft and creamy.

Great northern beans are another good option.

Do not boil the sauce after adding Greek yogurt.

For even more vegetables, add chopped zucchini, mushrooms, or kale.

If the sauce becomes too thick, add a splash of broth.

If it is too thin, mash a few more beans and simmer briefly before adding the yogurt.

Freshly grated Parmesan usually melts more smoothly than pre-shredded cheese.

For the freshest flavor, add lemon juice near the end of cooking.

Frequently Asked Questions

Can I make Mediterranean Garlic Parmesan White Beans without cottage cheese?

Yes. You can leave it out, but the protein content will be lower.

Can I use chickpeas instead of white beans?

Yes, although the finished dish will be slightly firmer and less creamy.

Can I make this recipe vegetarian?

Yes. Use vegetarian Parmesan or another vegetarian hard cheese if needed.

Can I prepare it ahead of time?

Yes. It works well for meal prep and can be kept in the refrigerator for several days.

How can I increase the protein even more?

You can serve it with grilled chicken, salmon, shrimp, tofu, or an extra spoonful of Greek yogurt.

Servings

Makes approximately 2 large high-protein servings.

Prep time: 10 minutes

Cook time: 15 minutes

Total time: approximately 25 minutes
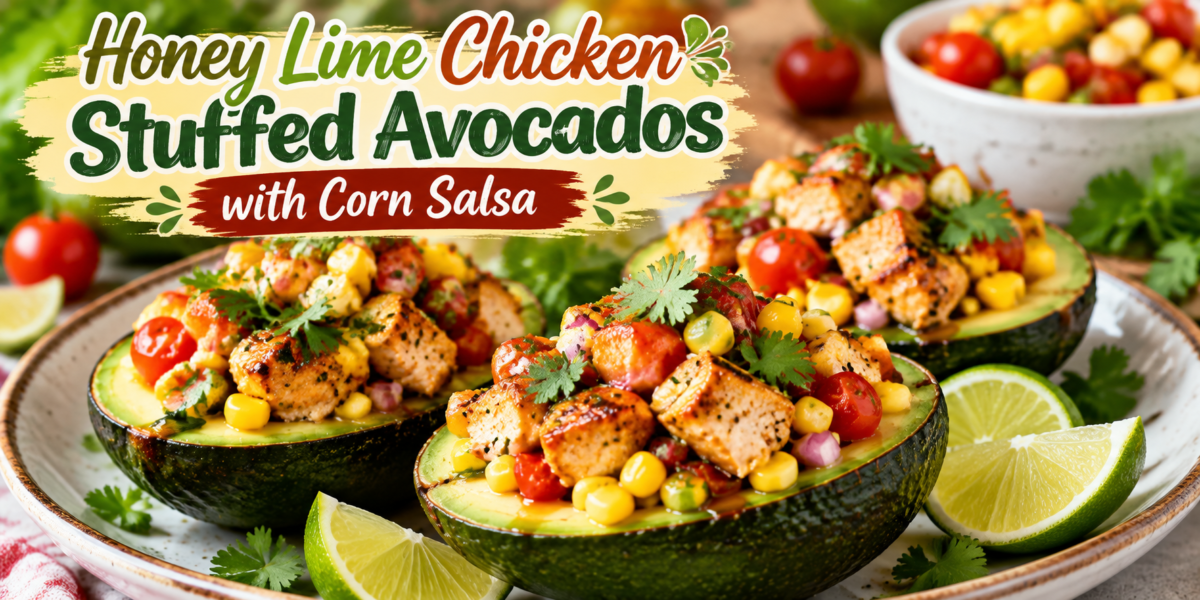
 

Honey Lime Chicken Stuffed Avocados with Corn Salsa

Stuffed Avocados filled with honey lime chicken, corn salsa, tomatoes, and fresh cilantro

Honey Lime Chicken Stuffed Avocados with Corn Salsa

Honey Lime Chicken Stuffed Avocados with Corn Salsa is a fresh, healthy, and flavorful recipe that combines juicy honey lime chicken, creamy avocados, sweet corn salsa, and vibrant Mexican-inspired flavors. This recipe is perfect for lunch, dinner, meal preparation, or a light summer meal.

The combination of tender chicken, creamy avocado, fresh vegetables, and a sweet-tangy honey lime dressing creates a balanced dish full of amazing textures and flavors. The natural creaminess of avocado pairs beautifully with the smoky seasoned chicken and refreshing corn salsa.

These Stuffed Avocados are a great choice for anyone who wants a nutritious meal without spending hours in the kitchen. The recipe uses simple ingredients but delivers restaurant-quality flavor.

Avocados provide healthy fats and a creamy base, while chicken adds lean protein to keep you satisfied. Fresh corn, tomatoes, onions, cilantro, and lime juice create a bright salsa that makes every bite refreshing.

This recipe is also easy to customize. You can add extra vegetables, adjust the spice level, or replace chicken with another protein according to your preference.

Whether you are looking for a quick weekday meal, a healthy party appetizer, or a colorful family dinner, these Stuffed Avocados are an excellent option.

Preparation Time: 20 minutes
Cooking Time: 15 minutes
Total Time: 35 minutes
Servings: 4 servings

Ingredients

For the Honey Lime Chicken

1 pound boneless skinless chicken breast, diced

2 tablespoons olive oil

3 tablespoons fresh lime juice

2 tablespoons honey

1/2 teaspoon salt

3 cloves garlic, minced

1 teaspoon chili powder

1 teaspoon smoked paprika

1/2 teaspoon cumin

1 tablespoon fresh cilantro, chopped

1/2 teaspoon black pepper

For the Corn Salsa

1 cup sweet corn kernels

1 cup cherry tomatoes, diced

1/4 cup red onion, finely chopped

1 small jalapeño, finely chopped (optional)

1/4 cup fresh cilantro, chopped

2 tablespoons fresh lime juice

1 tablespoon olive oil

Salt and pepper to taste

For the Stuffed Avocados

4 large ripe avocados

Extra cilantro for garnish

Lime wedges for serving

Step-by-Step Instructions

Prepare the Honey Lime Chicken

Start by preparing the chicken marinade.

In a medium bowl, combine olive oil, lime juice, honey, minced garlic, chili powder, smoked paprika, cumin, salt, and black pepper.

Add diced chicken and mix well until every piece is coated with the flavorful marinade.

Allow the chicken to rest for 15 to 20 minutes so the flavors can develop.

Heat a large skillet over medium heat.

Add the marinated chicken and cook for 8 to 10 minutes until the chicken is fully cooked and lightly browned.

Stir occasionally to cook the chicken evenly.

Remove the chicken from heat and add fresh cilantro.

The sweet and tangy honey lime flavor creates the perfect filling for these Stuffed Avocados.

Prepare the Corn Salsa

While the chicken is cooking, prepare the fresh corn salsa.

In a bowl, combine corn, diced tomatoes, red onion, jalapeño, and cilantro.

Add lime juice, olive oil, salt, and pepper.

Mix everything gently until the ingredients are well combined.

Allow the salsa to rest for a few minutes so the flavors blend together.

The fresh salsa adds a crunchy texture and refreshing taste to the creamy avocado.

Prepare the Avocados

Cut the avocados in half lengthwise.

Remove the pits carefully.

Use a spoon to slightly enlarge the center area if needed to create more space for the filling.

Keep the avocado flesh intact because it provides a beautiful presentation.

Brush a little lime juice over the avocado surface to help prevent browning.

Assemble the Stuffed Avocados

Fill each avocado half with the honey lime chicken mixture.

Top generously with the fresh corn salsa.

Add extra cilantro and serve with lime wedges.

Your Stuffed Avocados are now ready to enjoy.

The combination of creamy avocado, flavorful chicken, and fresh salsa creates a perfect balance of taste and nutrition.

Tips for Making the Best Stuffed Avocados

Choose ripe but firm avocados because they hold their shape better.

Do not prepare the avocados too far in advance because they can change color.

Use fresh lime juice for the best flavor.

Allow the chicken to marinate before cooking because it improves tenderness and taste.

For extra flavor, grill the chicken instead of cooking it in a skillet.

Add more jalapeño if you prefer a spicy version.

Keep the corn salsa chilled before serving for a refreshing contrast.

These Stuffed Avocados taste best when served immediately after preparation.

Variations

Shrimp Stuffed Avocados

Replace chicken with grilled shrimp seasoned with lime and spices.

Vegetarian Version

Replace chicken with black beans, chickpeas, or grilled vegetables.

Spicy Version

Add extra jalapeños, hot sauce, or cayenne pepper.

Cheese Version

Add shredded cheese, feta, or cotija cheese for extra flavor.

Tropical Version

Add diced mango or pineapple to the corn salsa for a sweet tropical twist.

Low-Carb Meal Option

This recipe is naturally low in carbohydrates and can be enjoyed as a light meal.

Serving Suggestions

Serve these Stuffed Avocados as a complete meal with a side salad or roasted vegetables.

They are also perfect as an appetizer for gatherings, summer parties, or family dinners.

Serve with tortilla chips, salsa, or a fresh cucumber salad.

For meal preparation, prepare the chicken and salsa separately, then assemble the avocados before eating.

A fresh lime drink or sparkling water pairs beautifully with this recipe.

Health Benefits

Avocados are rich in healthy fats, fiber, and important nutrients.

Chicken provides lean protein that helps support muscle health and keeps you feeling full.

Corn contains fiber and natural carbohydrates that provide energy.

Fresh vegetables provide vitamins, minerals, and antioxidants.

Lime juice adds fresh flavor while reducing the need for heavy sauces.

This recipe combines protein, healthy fats, and vegetables in one balanced meal.

These Stuffed Avocados are a nutritious option for anyone looking for a fresh and satisfying recipe.

Storage and Reheating Instructions

Store cooked chicken separately in an airtight container for up to 4 days.

Keep corn salsa refrigerated and use within 2 to 3 days.

It is best to prepare fresh avocados right before serving.

Do not freeze assembled avocados because the texture may change.

To reheat chicken, warm gently in a skillet or microwave.

Preparing ingredients separately helps maintain the freshness of these Stuffed Avocados.

Why This Recipe Is Perfect for Every Occasion

This recipe is perfect because it is simple, colorful, and packed with flavor.

It works well for quick lunches, healthy dinners, and special gatherings.

The presentation makes it look impressive while requiring minimal effort.

Families enjoy this recipe because everyone can customize their toppings.

The combination of creamy avocado, flavorful chicken, and fresh salsa makes these Stuffed Avocados a meal everyone will love.

It is also a great choice for warm weather because it feels light and refreshing.

Cooking Notes

Always use ripe avocados for the best creamy texture.

Avoid overcooking chicken because it can become dry.

Taste the salsa before serving and adjust seasoning if needed.

Fresh herbs create the best flavor.

If preparing ahead, keep each ingredient separate until serving.

Use a sharp knife when cutting avocados for cleaner presentation.

Frequently Asked Questions

Can I prepare Stuffed Avocados ahead of time?

You can prepare the chicken and salsa ahead, but assemble the avocados before serving.

How do I keep avocados from turning brown?

Adding fresh lime juice helps slow browning.

Can I use leftover chicken?

Yes, shredded leftover chicken works well in this recipe.

Are Stuffed Avocados healthy?

Yes, they provide protein, healthy fats, fiber, and fresh vegetables.

Can I make this recipe dairy-free?

Yes, the recipe is naturally dairy-free.

What other fillings can I use?

You can use shrimp, beans, vegetables, or turkey as alternative fillings.

Nutrition Information (Per Serving)

Calories: 430 kcal

Protein: 32g

Carbohydrates: 24g

Fat: 27g

Fiber: 10g

Sugar: 8g

Sodium: 520mg approximately

Nutrition values may vary depending on ingredients and portion sizes.

Final Thoughts

Honey Lime Chicken Stuffed Avocados with Corn Salsa is a delicious recipe that combines fresh ingredients with bold flavors.

The creamy avocado, sweet honey lime chicken, and colorful corn salsa create a meal that is both healthy and satisfying.

These Stuffed Avocados are easy enough for everyday cooking but impressive enough for serving guests.

With simple preparation, flexible variations, and nutritious ingredients, this recipe is a perfect addition to your healthy meal collection. It proves that wholesome food can be flavorful, beautiful, and enjoyable.

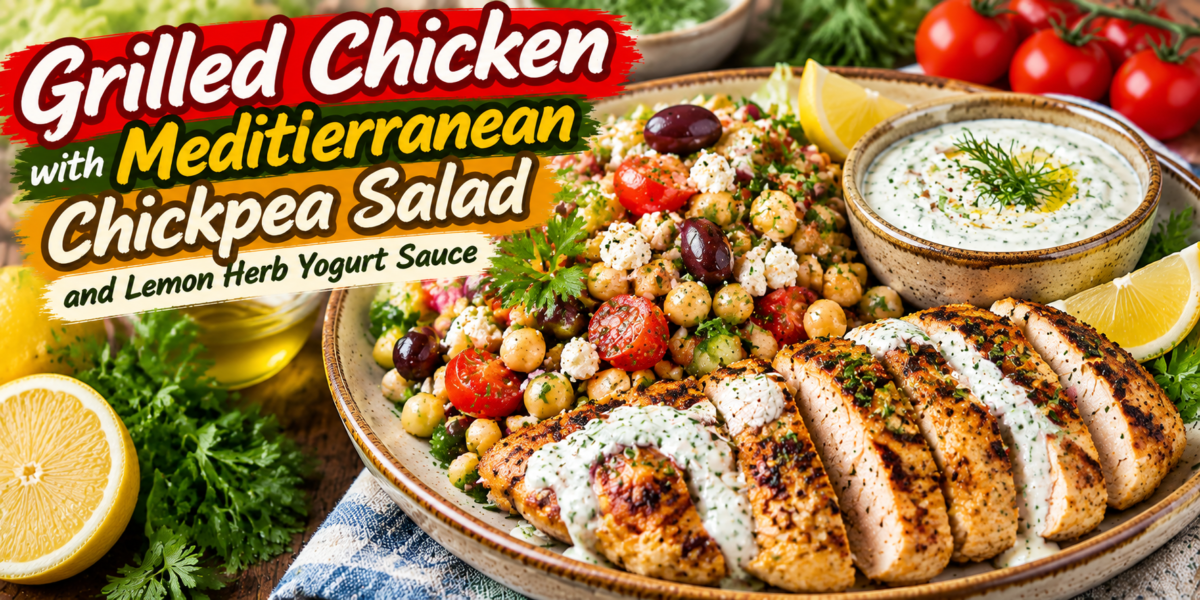
Grilled Chicken with Mediterranean Chickpea Salad and Lemon Herb Yogurt Sauce

Grilled Chicken served with Mediterranean chickpea salad and lemon herb yogurt sauce on a plate

Grilled Chicken with Mediterranean Chickpea Salad and Lemon Herb Yogurt Sauce

Grilled Chicken with Mediterranean Chickpea Salad and Lemon Herb Yogurt Sauce is a fresh, healthy, and flavorful meal packed with protein, vegetables, herbs, and creamy Mediterranean-inspired flavors. This recipe combines juicy chicken marinated with herbs and spices, a colorful chickpea salad filled with fresh ingredients, and a refreshing lemon herb yogurt sauce that brings everything together.

This Grilled Chicken recipe is perfect for lunch, dinner, meal preparation, or family gatherings because it is simple to make and full of nutritious ingredients. The tender chicken provides satisfying protein, while the chickpea salad adds fiber, vitamins, and minerals.

The Mediterranean flavors come from ingredients like olive oil, lemon juice, garlic, cucumber, tomatoes, parsley, and herbs. These ingredients create a bright and refreshing taste that makes this meal feel light yet filling.

Unlike heavy meals that leave you feeling tired, this dish provides a balanced combination of protein, healthy fats, and fresh vegetables. The creamy yogurt sauce adds a delicious tangy flavor without making the meal too heavy.

Whether you are looking for a healthy weekday dinner or a beautiful dish to serve guests, this recipe is an excellent choice. The ingredients are simple, the preparation is easy, and the final result is full of restaurant-style flavor.

This Grilled Chicken meal can also be customized with different vegetables, herbs, or grains depending on your preference.

Preparation Time: 20 minutes
Marinating Time: 30 minutes
Cooking Time: 15 minutes
Total Time: 65 minutes
Servings: 4 servings

Ingredients

For the Grilled Chicken Marinade:

Chicken breasts or thighs (boneless and skinless): 2 pounds

Olive oil: 3 tablespoons

Fresh lemon juice: 3 tablespoons

Garlic (minced): 3 cloves

Dried oregano: 1 teaspoon

Dried thyme: 1 teaspoon

Paprika: 1 teaspoon

Ground cumin: 1/2 teaspoon

Salt: 1 teaspoon

Black pepper: 1/2 teaspoon

Fresh parsley (chopped): 1 tablespoon

For the Mediterranean Chickpea Salad

2 cans chickpeas, drained and rinsed

1 cup cherry tomatoes, halved

1/2 cup feta cheese, crumbled

1/4 cup fresh parsley, chopped

2 tablespoons fresh mint, chopped

1/2 red onion, finely chopped

3 tablespoons olive oil

2 tablespoons lemon juice

1/2 cup Kalamata olives, sliced

1 cucumber, diced

1 teaspoon dried oregano

Salt and pepper to taste

For the Lemon Herb Yogurt Sauce

1 cup Greek yogurt

2 tablespoons lemon juice

1 tablespoon olive oil

2 garlic cloves, minced

2 tablespoons fresh parsley, chopped

1 tablespoon fresh dill

1 tablespoon fresh mint

1/2 teaspoon salt

1/4 teaspoon black pepper

Step-by-Step Instructions

Prepare the Chicken Marinade

Start by preparing the marinade for the chicken. In a bowl, combine olive oil, lemon juice, minced garlic, oregano, thyme, paprika, cumin, salt, black pepper, and fresh parsley.

Mix the ingredients well until everything is combined.

Add the chicken pieces and coat them completely with the marinade.

Cover the bowl and place it in the refrigerator for at least 30 minutes. For deeper flavor, you can marinate the chicken for up to 8 hours.

A good marinade helps create tender and flavorful Grilled Chicken with a beautiful herb-infused taste.

Grill the Chicken

Preheat your grill or grill pan over medium-high heat.

Remove the chicken from the marinade and allow excess liquid to drip off.

Place the chicken on the hot grill and cook for approximately 6 to 8 minutes per side, depending on thickness.

The chicken should develop a golden grilled surface while remaining juicy inside.

Check that the internal temperature reaches 165°F for safe cooking.

Remove the chicken from the grill and let it rest for 5 minutes before slicing.

Resting allows the juices to redistribute, creating tender and flavorful chicken.

Prepare the Mediterranean Chickpea Salad

While the chicken is cooking, prepare the salad.

Add chickpeas, cherry tomatoes, cucumber, red onion, olives, feta cheese, parsley, and mint to a large bowl.

In a separate small bowl, mix olive oil, lemon juice, oregano, salt, and pepper.

Pour the dressing over the salad ingredients and gently toss everything together.

Allow the salad to sit for a few minutes so the flavors can blend.

The chickpeas absorb the lemon and herb flavors, creating a refreshing Mediterranean taste.

Make the Lemon Herb Yogurt Sauce

Add Greek yogurt, lemon juice, olive oil, garlic, parsley, dill, mint, salt, and pepper to a bowl.

Mix until smooth and creamy.

Taste the sauce and adjust seasoning if needed.

If you prefer a thinner sauce, add a small amount of water or extra lemon juice.

The creamy yogurt sauce adds freshness and balances the smoky flavor of the grilled meat.

Assemble the Dish

Place a portion of Mediterranean chickpea salad on each plate.

Add sliced chicken beside the salad.

Drizzle lemon herb yogurt sauce over the chicken or serve it on the side.

Garnish with fresh herbs and a lemon wedge.

Your Grilled Chicken with Mediterranean flavors is ready to enjoy.

This combination creates the perfect balance of smoky chicken, refreshing salad, and creamy sauce.

Tips for Making the Best Grilled Chicken

Choose chicken pieces with similar thickness so they cook evenly.

Do not skip the marinating step because it helps improve flavor and tenderness.

Avoid cooking the chicken on extremely high heat because the outside may burn before the inside is fully cooked.

Allow the chicken to rest after grilling for better texture.

Fresh lemon juice provides a brighter flavor compared with bottled versions.

For extra Mediterranean flavor, add a pinch of crushed red pepper or extra herbs.

Prepare the yogurt sauce ahead of time and keep it chilled until serving.

This Grilled Chicken tastes even better when paired with fresh seasonal vegetables.

Variations

Mediterranean Chicken Bowl

Serve the chicken and chickpea salad over quinoa, brown rice, or couscous for a complete bowl meal.

Spicy Version

Add chili flakes, cayenne pepper, or hot paprika to the marinade for extra heat.

Vegetarian Option

Replace chicken with grilled tofu, halloumi cheese, or extra chickpeas.

Low-Carb Version

Serve the chicken with extra vegetables and salad instead of grains.

Wrap Style

Place sliced chicken, chickpea salad, and yogurt sauce inside pita bread for a Mediterranean wrap.

Serving Suggestions

Serve this meal with warm pita bread, roasted vegetables, or a simple green salad.

A side of hummus makes a great addition to the Mediterranean flavors.

For entertaining guests, arrange the chicken, salad, and sauce on a large serving platter.

This Grilled Chicken dish is also perfect for meal preparation because each component stores well separately.

Serve with sparkling water, lemon drinks, or fresh herbs for a complete Mediterranean-style meal.

Health Benefits

Chicken is a lean protein source that helps support muscle health and keeps you satisfied.

Chickpeas provide plant-based protein, fiber, and important minerals.

Fresh vegetables add antioxidants, vitamins, and hydration.

Greek yogurt contains protein and calcium while creating a creamy sauce without heavy ingredients.

Olive oil provides healthy fats that are commonly included in Mediterranean eating patterns.

This Grilled Chicken meal provides balanced nutrition by combining protein, vegetables, fiber, and healthy fats.

The fresh herbs and lemon also add flavor without requiring excessive salt or processed ingredients.

Storage and Reheating Instructions

Store grilled chicken in an airtight container in the refrigerator for up to 4 days.

Keep the chickpea salad and yogurt sauce stored separately.

Reheat chicken gently in a skillet, oven, or microwave until warmed through.

Avoid overheating because it may dry the chicken.

The salad can be served cold or at room temperature.

The yogurt sauce should remain refrigerated and should be used within 3 to 4 days.

This Grilled Chicken recipe is excellent for meal prep because it maintains flavor and texture when stored properly.

Why This Recipe Is Perfect for Every Occasion

This recipe is ideal because it combines healthy ingredients with incredible flavor.

It works for busy weeknight dinners because preparation is simple and efficient.

Families enjoy this meal because everyone can customize their plate.

It is also impressive enough for dinner parties because of its colorful presentation.

The Mediterranean flavors make this Grilled Chicken recipe different from ordinary chicken dishes.

It offers a fresh alternative to heavy meals while still providing comfort and satisfaction.

Cooking Notes

Always bring chicken close to room temperature before grilling.

Clean and oil the grill surface to prevent sticking.

Cut chicken into even pieces for consistent cooking.

Taste the salad dressing before mixing it with vegetables.

Fresh herbs create the best Mediterranean flavor.

Adjust lemon juice according to your taste preference.

Frequently Asked Questions

Can I use chicken thighs instead of chicken breasts?

Yes, chicken thighs work well and usually remain juicier after grilling.

How long should I marinate the chicken?

At least 30 minutes is recommended, but overnight marination creates deeper flavor.

Can I prepare this recipe ahead of time?

Yes, prepare all components separately and assemble before serving.

Can I freeze grilled chicken?

Yes, cooked chicken can be frozen for up to 3 months.

What can I serve instead of chickpea salad?

You can use quinoa salad, roasted vegetables, or a fresh green salad.

Is Grilled Chicken healthy?

Yes, when prepared with fresh ingredients, it provides protein, nutrients, and balanced flavors.

Nutrition Information (Per Serving)

Calories: 560 kcal

Protein: 48g

Carbohydrates: 32g

Fat: 28g

Fiber: 9g

Sugar: 6g

Sodium: 720mg approximately

Nutrition values may vary depending on ingredients and serving sizes.

Final Thoughts

Grilled Chicken with Mediterranean Chickpea Salad and Lemon Herb Yogurt Sauce is a delicious recipe that brings fresh Mediterranean flavors to your table.

The combination of juicy chicken, colorful chickpea salad, and creamy yogurt sauce creates a meal that is nutritious, satisfying, and easy to prepare.

Whether you are cooking for your family, preparing weekly meals, or serving guests, this recipe offers the perfect balance of flavor and nutrition.

With simple ingredients and flexible options, this Grilled Chicken recipe is a healthy addition to any meal plan. It proves that healthy food can be flavorful, beautiful, and enjoyable.

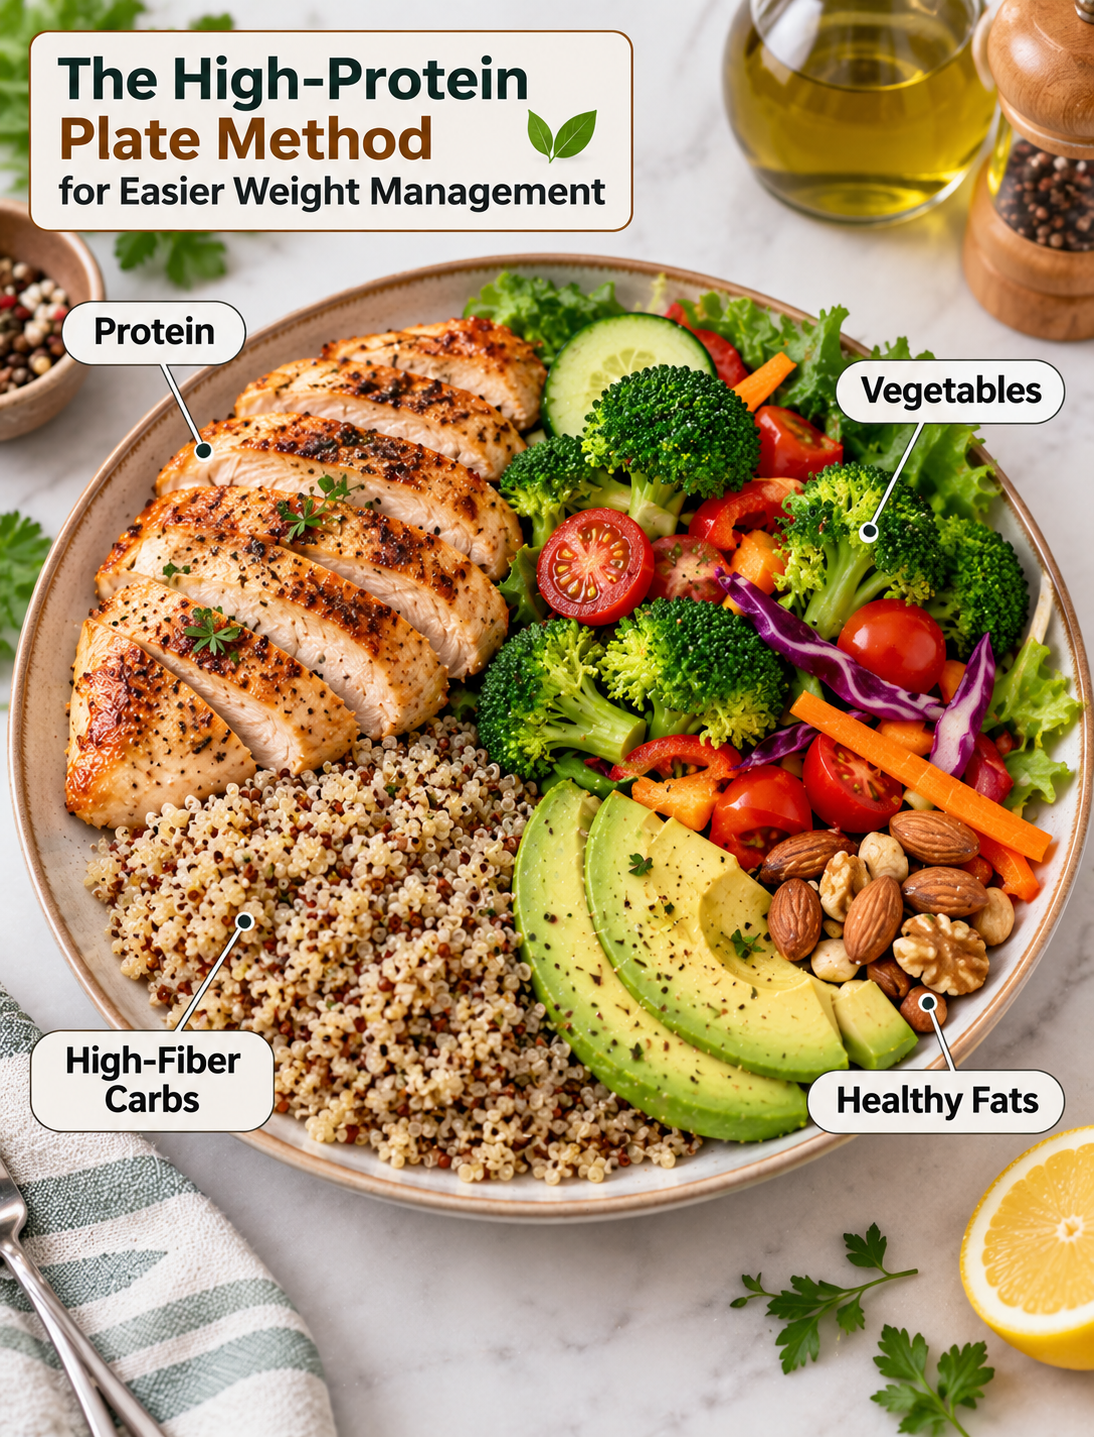
The High-Protein Plate Method for Easier Weight Management

Balanced high-protein plate with grilled chicken, colorful vegetables, brown rice, avocado, and healthy foods for meal planning

The High-Protein Plate Method for Easier Weight Management

The High-Protein Plate Method is a simple way to build balanced meals without weighing every ingredient or counting every calorie. It focuses on adding enough protein, vegetables, high-fiber carbohydrates, and healthy fats to each meal.

Protein plays an important role in a balanced eating pattern because it helps support muscles and can make meals more filling. Pairing protein with vegetables, whole grains, fruit, and healthy fats creates a meal with a mix of nutrients and flavors.

This plate method can be useful for people who want a more structured approach to everyday meals. It does not require special foods, complicated recipes, or strict meal plans.

The goal is to create portions that fit your needs while choosing mostly nutrient-dense foods. Your activity level, body size, age, food preferences, and health needs can all affect how much food you need.

What Is the High-Protein Plate Method?

The High-Protein Plate Method uses a visual plate guide to help organize a meal. Instead of focusing only on calories, you build the plate around a quality protein source and fill the remaining space with vegetables, fiber-rich carbohydrates, and healthy fats.

A simple starting point is to make about one-quarter of the plate protein, about one-half vegetables and other non-starchy produce, and about one-quarter high-fiber carbohydrates. Add a small portion of healthy fat based on the meal.

These portions are a flexible guide rather than strict rules. Some people may need more carbohydrates or protein depending on their activity and nutritional needs.

The method works with many eating styles. You can use chicken, fish, eggs, Greek yogurt, beans, lentils, tofu, lean beef, or other protein-rich foods.

Why Protein Matters in a Balanced Meal

Protein is found in foods such as poultry, seafood, eggs, dairy products, beans, lentils, soy foods, nuts, and seeds.

Including a protein source at meals can make a plate more satisfying and can help you create meals that are less dependent on refined carbohydrates or highly processed snacks.

Protein also supplies amino acids that the body uses for important functions, including maintaining and repairing body tissues.

The best approach is to choose a variety of protein foods instead of relying on one source every day. Rotating poultry, seafood, eggs, beans, lentils, dairy, and plant proteins can add variety to your meals.

For people with specific medical conditions or dietary needs, protein targets may need to be adjusted with guidance from a qualified health professional.

How to Build Your Plate

Start by choosing a protein source. The portion can be grilled chicken, salmon, turkey, eggs, tofu, lentils, beans, or another protein-rich food.

Next, add vegetables. Choose leafy greens, broccoli, cauliflower, carrots, bell peppers, tomatoes, zucchini, green beans, or other vegetables you enjoy.

Add a high-fiber carbohydrate such as brown rice, quinoa, oats, beans, lentils, sweet potatoes, or whole-grain bread.

Finish the meal with a small amount of healthy fat. Avocado, olive oil, nuts, seeds, and nut butters are practical choices.

You can also include fruit when it fits the meal. Berries, apples, oranges, peaches, and bananas can provide natural sweetness and additional nutrients.

Best High-Protein Foods to Use

Chicken and Turkey

Skinless chicken breast and turkey are versatile protein options for lunch and dinner. They can be grilled, baked, roasted, or prepared in an air fryer.

Use herbs, lemon, garlic, paprika, or other seasonings to add flavor without relying heavily on creamy sauces.

Fish and Seafood

Salmon, tuna, shrimp, cod, and other seafood can add protein along with different nutrients. Fatty fish such as salmon also provides omega-3 fats.

Use baked, grilled, or air-fried seafood for simple meal preparation.

Eggs

Eggs are an easy option for breakfast, lunch, or dinner. Pair scrambled or boiled eggs with vegetables and whole-grain toast for a balanced meal.

Greek Yogurt and Cottage Cheese

Plain Greek yogurt and cottage cheese can provide substantial protein in a convenient format. Choose plain varieties when you want more control over added sugar.

Add berries, nuts, or seeds for extra flavor and texture.

Beans and Lentils

Beans and lentils provide plant-based protein and fiber. Black beans, chickpeas, kidney beans, and lentils can be added to salads, bowls, soups, and wraps.

They are especially useful when you want to reduce how often you eat meat without removing protein from your meals.

Tofu and Tempeh

Tofu and tempeh provide plant-based protein and can absorb marinades and seasonings well. Add them to stir-fries, grain bowls, salads, or vegetable-based meals.

The Role of Vegetables

Vegetables help add volume, color, fiber, vitamins, minerals, and different textures to meals.

A large portion of non-starchy vegetables can make a plate feel generous without requiring a large amount of energy-dense food.

Try to use several colors throughout the week. Spinach, broccoli, carrots, tomatoes, peppers, cabbage, and cauliflower all bring different nutrients and textures.

Fresh vegetables are convenient, but frozen and canned vegetables can also be useful. If buying canned vegetables, look for options with little or no added sodium when available.

Roasting vegetables can bring out natural sweetness and make them more appealing. Steaming, grilling, sautéing, and air frying are also easy preparation methods.

Choosing Better Carbohydrates

Carbohydrates do not need to be removed from a balanced eating pattern. The type and portion can make a difference.

Choose foods such as brown rice, quinoa, oats, barley, whole-grain bread, sweet potatoes, beans, lentils, and whole fruits more often.

These foods can provide fiber and other nutrients that are useful in a balanced diet.

You can adjust the carbohydrate portion based on your hunger and activity level. Someone who exercises frequently may need more carbohydrate than someone with a less active routine.

Avoid turning the plate method into a rule that eliminates foods you enjoy. Flexible choices are easier to maintain over time.

Healthy Fats and Portion Control

Healthy fats can add flavor and help make meals more satisfying. Common options include avocado, olive oil, nuts, seeds, and natural nut butters.

Because fats are energy-dense, a small serving can add plenty of flavor to a meal.

Instead of pouring oil directly onto food, measure a small amount when you are learning portion sizes. This makes it easier to understand how much you are using.

You do not need to avoid fat to build a balanced plate. The goal is to include reasonable portions while choosing nutritious sources more often.

High-Protein Breakfast Ideas

Breakfast can be simple while still following the plate method.

Try scrambled eggs with spinach, tomatoes, and whole-grain toast. Add berries or another piece of fruit for extra variety.

Plain Greek yogurt can be paired with berries, oats, chia seeds, and a small amount of nuts.

For a savory option, make a breakfast bowl with eggs, black beans, avocado, salsa, and roasted vegetables.

If you prefer a quick breakfast, prepare hard-boiled eggs and cut vegetables ahead of time. Pair them with whole-grain toast or fruit when you are ready to eat.

High-Protein Lunch and Dinner Ideas

A chicken grain bowl can combine grilled chicken, brown rice, roasted broccoli, tomatoes, avocado, and a light dressing.

A salmon plate can include roasted salmon, green beans, sweet potato, and a fresh salad.

For a meat-free meal, combine lentils with roasted vegetables, quinoa, cucumber, tomatoes, and a yogurt-based dressing.

A turkey wrap can include lean turkey, lettuce, tomato, cucumber, avocado, and a whole-grain tortilla.

The same basic structure can be used for many cuisines. Change the seasonings, vegetables, sauces, and protein source to keep meals interesting.

Easy Meal Prep With the Plate Method

Meal prep becomes easier when you prepare ingredients instead of making complete meals every time.

Cook several portions of chicken, turkey, tofu, or another protein at once. Prepare a batch of brown rice, quinoa, beans, or roasted sweet potatoes.

Wash and cut vegetables so they are ready to add to meals. Keep sauces and dressings in separate containers when possible.

Store cooked foods safely in the refrigerator and use them within the recommended storage period.

Create different combinations from the same ingredients. Chicken can become a salad one day, a grain bowl the next day, and a wrap later in the week.

Common Mistakes to Avoid

Making Protein the Entire Meal

A high-protein meal still needs variety. Vegetables, fiber-rich carbohydrates, healthy fats, and fruit can contribute important nutrients.

Choosing Highly Processed Protein Every Time

Protein bars, processed meats, and packaged shakes can be convenient, but whole or minimally processed protein foods can provide a wider range of nutrients.

Ignoring Portion Needs

The plate method is a visual guide, not a fixed prescription. Adjust portions according to hunger, activity, personal needs, and professional guidance when appropriate.

Removing All Carbohydrates

Whole grains, beans, lentils, fruits, and starchy vegetables can fit into a balanced meal. Eliminating an entire food group is not required for this approach.

Forgetting Flavor

Healthy meals do not have to be bland. Use herbs, spices, citrus, garlic, vinegar, salsa, and homemade dressings to make meals enjoyable.

Expecting Overnight Results

Weight management is influenced by many factors and usually requires consistent habits over time. Focus on repeatable meals and routines rather than short-term extremes.

Frequently Asked Questions

How much protein should I eat per meal?

Protein needs vary by person, so use the plate method as a starting point and ask a qualified professional for a personalized target.

Can I use plant-based protein?

Yes, beans, lentils, tofu, tempeh, edamame, nuts, and seeds can all contribute protein to a balanced plate.

Is this method good for weight management?

It can provide a simple structure for balanced portions, but weight changes depend on overall eating patterns, activity, sleep, health, and other factors.

Do I need to count calories?

No, the plate method is designed as a visual approach, although calorie tracking may be useful for some people who prefer detailed monitoring.

Can I eat carbohydrates with high-protein meals?

Yes, whole grains, beans, lentils, fruit, and starchy vegetables can all fit into a balanced high-protein meal.

What vegetables are best?

There is no single best vegetable; choose a variety of colorful vegetables that you enjoy and can eat regularly.

Can I follow this method for meal prep?

Yes, prepare protein, vegetables, high-fiber carbohydrates, and healthy fats separately, then combine them into different meals during the week.

Is the plate method suitable for everyone?

It is a general meal-planning guide, but people with specific medical or dietary needs should seek individualized advice from a healthcare professional.

Final Thoughts

The High-Protein Plate Method offers a practical way to create balanced meals without making food preparation complicated. Start with a protein source, add plenty of vegetables, include a high-fiber carbohydrate, and finish with a reasonable amount of healthy fat.

The method is flexible enough for different foods, budgets, cooking styles, and dietary preferences. Chicken, fish, eggs, Greek yogurt, beans, lentils, tofu, and other protein-rich foods can all fit into the same basic structure.

For easier meal planning, prepare a few staple ingredients ahead of time and combine them in different ways throughout the week. Focus on meals that are satisfying, flavorful, and realistic for your daily routine.

A balanced approach is usually easier to maintain than strict food rules. Use the plate method as a simple framework, adjust portions to your individual needs, and focus on consistent habits rather than perfection.

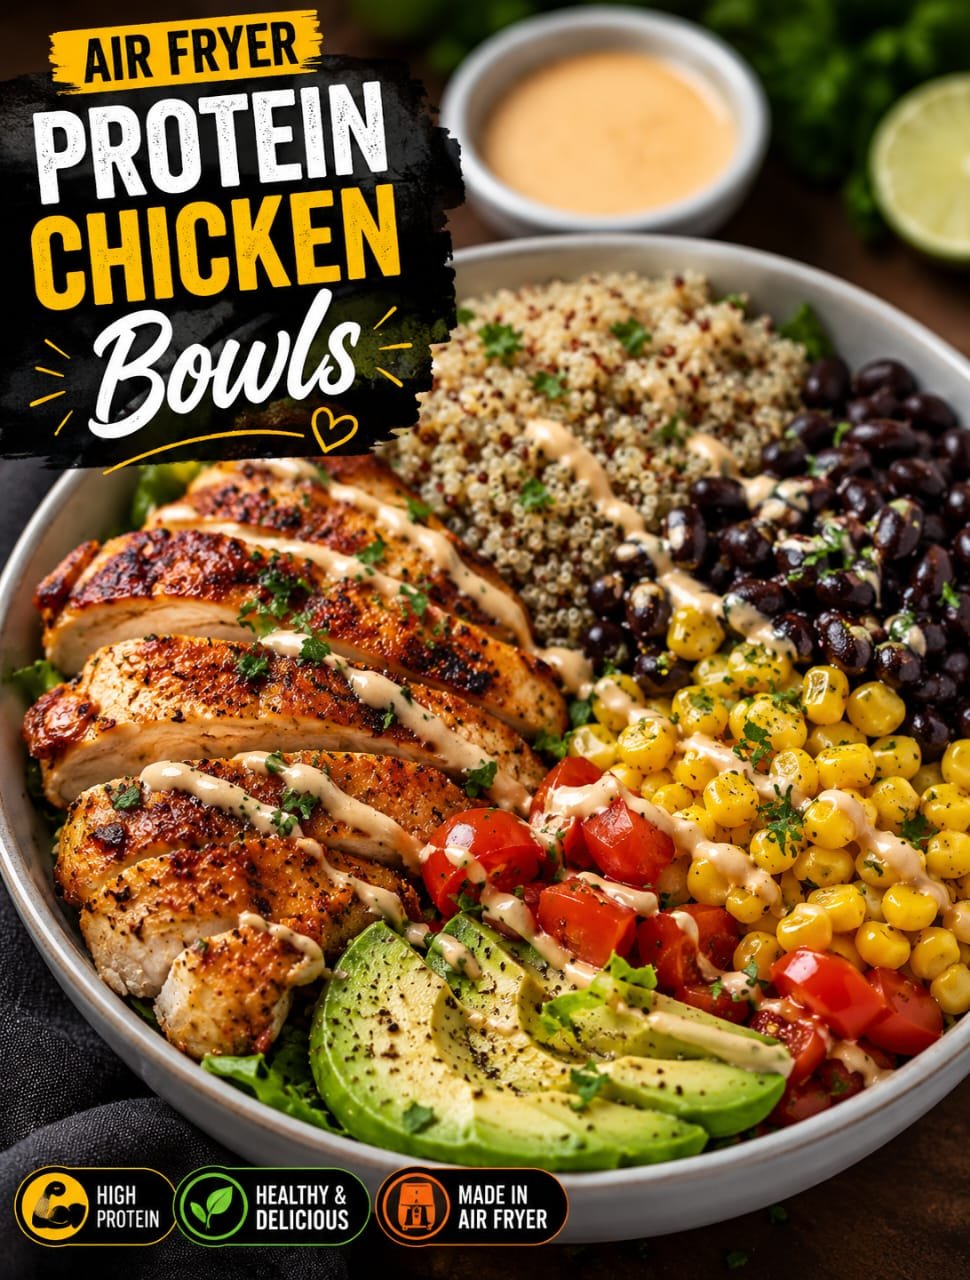
Air Fryer Protein Fajita Bowls

Air fryer protein fajita bowl with seasoned chicken, bell peppers, onions, rice, avocado, and fresh lime

Air Fryer Protein Fajita Bowls

Air Fryer Protein Fajita Bowls are a quick and satisfying dinner made with seasoned chicken, colorful bell peppers, onions, and your favorite grain. Everything comes together with simple spices and a few fresh toppings for a meal that feels fresh, filling, and easy to make.

The air fryer gives the chicken golden, flavorful edges while the peppers and onions become tender with lightly roasted spots. Served over warm rice and finished with avocado, salsa, cilantro, and lime, this bowl has plenty of texture and flavor in every bite.

It is a great option for busy weeknights, easy lunches, or meal prep. You can also change the ingredients to match what you have in your kitchen.

Why You’ll Love This Recipe

This recipe is designed for busy home cooks who want a flavorful meal without a long cooking process. The chicken and vegetables cook quickly in the air fryer, so there is no need to heat a large skillet or spend a lot of time at the stove.

The seasoning blend gives the chicken a smoky fajita flavor using everyday pantry spices. Bell peppers and onions add sweetness, color, and texture to the bowl.

Another benefit is how easy the recipe is to customize. You can use white rice, brown rice, quinoa, cauliflower rice, or lettuce as the base. Add black beans or corn for extra texture, or change the toppings to create a different bowl each time.

Ingredients

For the Chicken and Vegetables

  • 1 pound boneless, skinless chicken breast
  • 1 red bell pepper
  • 1 green bell pepper
  • 1 small yellow or white onion
  • 1 tablespoon olive oil

Fajita Seasoning

  • 1 teaspoon chili powder
  • 1 teaspoon smoked paprika
  • 1 teaspoon ground cumin
  • ½ teaspoon garlic powder
  • ½ teaspoon onion powder
  • ½ teaspoon salt
  • ¼ teaspoon black pepper

For the Bowls

  • 3 cups cooked white or brown rice
  • 1 avocado, sliced
  • ½ cup pico de gallo or salsa
  • ¼ cup chopped fresh cilantro
  • 1 lime, cut into wedges

Optional Toppings

  • Black beans
  • Corn
  • Shredded Mexican cheese
  • Plain Greek yogurt
  • Sliced jalapeños
  • Hot sauce
  • Fresh diced tomatoes

How to Make Air Fryer Protein Fajita Bowls

Start by preheating your air fryer to 400°F for about 3 minutes. A preheated basket helps the chicken begin cooking right away and promotes better browning.

Cut the chicken breast into thin, evenly sized strips. Try to keep the pieces similar in thickness so they finish cooking at roughly the same time.

Slice the red bell pepper, green bell pepper, and onion into medium strips. Avoid cutting them too thin because they can become overly soft during cooking.

Add the chicken, peppers, and onions to a large bowl. Pour in the olive oil and sprinkle the chili powder, smoked paprika, cumin, garlic powder, onion powder, salt, and black pepper over the ingredients.

Toss everything thoroughly until the chicken and vegetables are evenly coated with oil and seasoning.

Place the mixture in the air fryer basket in a single, even layer. Do not overcrowd the basket because too many ingredients can trap steam and reduce browning.

Air fry at 400°F for 10 to 14 minutes, shaking the basket around the halfway point.

The exact cooking time depends on the thickness of the chicken pieces and your air fryer model. Check the thickest chicken piece with an instant-read thermometer and make sure it reaches 165°F.

Once the chicken is cooked, let it rest for a couple of minutes. This helps the juices settle before you build the bowls.

How to Assemble the Bowls

Start each bowl with about ¾ cup of warm cooked rice. Brown rice, white rice, quinoa, or cauliflower rice can also be used.

Add a generous portion of the cooked chicken, peppers, and onions.

Top the bowl with avocado slices, pico de gallo or salsa, and fresh cilantro. Add black beans or corn if you want a heartier meal.

Finish with a squeeze of fresh lime juice. The acidity from the lime helps balance the smoky seasoning and rich toppings.

For extra creaminess, add a spoonful of plain Greek yogurt. Shredded cheese or a few slices of jalapeño can also be added according to taste.

Best Rice and Bowl Base Options

White rice is a simple choice when you want a classic fajita bowl. Its mild flavor lets the seasoned chicken and vegetables remain the focus.

Brown rice gives the bowl a slightly nutty flavor and adds more fiber. It works especially well for meal prep because it holds its texture after reheating.

Quinoa is another good option when you want a grain with plant-based protein. Its light texture pairs well with chicken, vegetables, and fresh salsa.

Cauliflower rice is ideal when you prefer a lower-carbohydrate base. Season it lightly with salt, pepper, lime juice, or a little of the fajita seasoning.

For a fresh salad-style bowl, use chopped romaine or mixed greens. Add the cooked fajita mixture while it is still warm and finish with salsa and avocado.

Tips for Perfect Air Fryer Chicken

Use chicken pieces that are similar in size. Smaller pieces cook faster, while thick pieces need more time and can cause uneven results.

Avoid putting too much food into the basket at once. If the chicken and vegetables are crowded, cook them in batches for better airflow.

Shake the basket halfway through cooking. This helps expose different sides of the chicken and vegetables to the circulating hot air.

Do not judge doneness by color alone. Chicken can look browned on the outside while remaining undercooked inside, so always check the internal temperature.

For extra flavor, let the seasoned chicken and vegetables rest for 10 to 15 minutes before air frying. This gives the spices a little more time to coat the ingredients.

Fresh lime juice should be added after cooking rather than before. This keeps the flavor bright and fresh.

Easy Meal Prep

These bowls are convenient for preparing several lunches or dinners at once.

Cook the chicken and vegetables according to the recipe, then prepare your chosen rice or grain separately.

Divide the cooked ingredients between airtight meal-prep containers. Keep avocado, salsa, cilantro, lime, and other fresh toppings in separate small containers when possible.

When you are ready to eat, reheat the rice, chicken, and vegetables until hot. Add the fresh toppings after reheating.

Keeping the toppings separate helps maintain their texture and prevents the rice from becoming watery.

Recipe Variations

You can easily change the protein without changing the basic seasoning.

Use boneless, skinless chicken thighs for a richer and juicier bowl. Make sure the chicken reaches 165°F before serving.

Shrimp is another quick option, but it cooks much faster than chicken. Watch it closely to prevent overcooking.

For a vegetarian version, replace the chicken with firm tofu, black beans, mushrooms, or extra vegetables. Press tofu before seasoning so it develops better texture during air frying.

Add zucchini, mushrooms, corn, or extra peppers for more vegetables. Sliced jalapeños are a good choice if you enjoy spicy meals.

For a milder version, reduce the chili powder and use mild salsa. For more heat, add cayenne pepper, hot sauce, or fresh jalapeños.

You can also use the cooked filling in tacos, burritos, wraps, quesadillas, or salads.

Storage and Reheating

Store leftover chicken and vegetables in an airtight container in the refrigerator. Keep fresh toppings separate when possible.

Reheat the chicken and vegetables until steaming hot. The air fryer can help bring back some of the roasted texture, while a microwave is convenient for quick lunches.

Add fresh avocado, salsa, cilantro, and lime after reheating.

For meal prep, portion the ingredients into individual containers so each serving is ready to heat and eat.

Frequently Asked Questions

Can I use chicken thighs instead of chicken breast?

Yes. Boneless, skinless chicken thighs work well and should reach an internal temperature of 165°F.

How long should chicken cook in the air fryer?

Cook sliced chicken at 400°F for about 10 to 14 minutes, shaking the basket halfway through.

Can I make these bowls ahead of time?

Yes. Prepare the chicken, vegetables, and rice ahead of time and store them in separate airtight containers.

What can I use instead of rice?

Quinoa, cauliflower rice, lettuce, brown rice, or another grain can be used as the bowl base.

Can I add black beans?

Yes. Black beans add extra texture and make the bowl more filling.

How can I make the bowls spicy?

Add cayenne pepper to the seasoning or top the finished bowl with jalapeños and hot salsa.

Can I make a vegetarian version?

Yes. Replace the chicken with seasoned tofu, black beans, mushrooms, or additional vegetables.

What toppings taste best with fajita bowls?

Avocado, salsa, Pico de Gallo, cilantro, lime, Greek yogurt, cheese, and jalapeños all pair well with the smoky fajita flavors.

Final Thoughts

Air Fryer Protein Fajita Bowls are a simple way to turn everyday ingredients into a flavorful, satisfying meal. The seasoned chicken cooks quickly, the peppers and onions develop delicious roasted edges, and the fresh toppings bring everything together.

The best part is the flexibility. You can keep the bowl classic with rice, salsa, avocado, and lime or create your own version with quinoa, black beans, corn, cauliflower rice, or extra vegetables.

For busy weeknights and meal prep, this recipe is easy to repeat without feeling boring. Once you have the basic fajita seasoning and air fryer method down, you can change the toppings and bowl base whenever you want a fresh combination.

Keto Flourless Cottage Cheese Flatbread

Keto flourless cottage cheese flatbread made with cottage cheese and eggs, baked until golden and crispy, served as a low-carb healthy bread alternative on a plate.

Keto Flourless Cottage Cheese Flatbread

If you want a simple bread alternative without flour, this Keto Cottage Cheese Flatbread is an easy recipe to keep in your weekly meal plan. It uses cottage cheese and eggs to create a soft, flexible flatbread with a mild flavor and a satisfying texture.

This recipe is naturally flourless, gluten free, and low carb, making it useful for many everyday meals. You can use it as a wrap for chicken, turkey, eggs, vegetables, or cheese, or serve it alongside soups and salads.

Unlike traditional bread recipes, this flatbread does not need wheat flour, yeast, or complicated preparation. A quick blend, a thin spread on a baking sheet, and a short bake are all you need.

What Is Cottage Cheese Flatbread?

Cottage cheese flatbread is a simple baked bread alternative made primarily with cottage cheese and eggs. The ingredients are blended until smooth, then baked into a thin, flexible layer.

The result is a tender flatbread with enough structure to hold fillings without relying on traditional flour. Cottage cheese also adds protein, while eggs help the flatbread set during baking.

This Flourless Cottage Cheese Flatbread works especially well when you want something bread-like without grains or a high amount of carbohydrates.

Why You’ll Love This Recipe

This Low Carb Flatbread Recipe needs only a few basic ingredients and does not require kneading or rising time.

The cottage cheese provides a creamy base and adds protein to each serving. Eggs help create a stable texture that can be sliced, folded, or rolled once the flatbread has cooled.

It is also a practical choice for meal prep because you can bake several pieces at once and store them for later meals.

The recipe is keto friendly, gluten free, and grain free, so it can fit into several eating styles without requiring specialty flour.

Ingredients You’ll Need

Cottage Cheese

Use plain cottage cheese for the best results. Full-fat cottage cheese gives the flatbread a richer texture, while low-fat cottage cheese can also work.

For a smoother batter, blend the cottage cheese well before baking.

Large Eggs

Large eggs provide structure and help bind the ingredients together. They also contribute protein and create a soft but flexible texture.

Garlic Powder

A small amount of garlic powder adds savory flavor without changing the texture. You can leave it out if you prefer a neutral flatbread for sweet or breakfast fillings.

Optional Seasonings

Salt, black pepper, Italian seasoning, dried herbs, or paprika can be added according to how you plan to serve the flatbread.

For a simple wrap, keep the seasoning mild so it works with different fillings.

How to Make Keto Flourless Cottage Cheese Flatbread

Blend the Ingredients

Add cottage cheese and large eggs to a blender or food processor. Blend until the mixture becomes smooth and evenly combined.

Add garlic powder and your preferred seasonings, then blend briefly again.

A smooth batter helps create an even flatbread with fewer visible pieces of cottage cheese.

Prepare the Baking Sheet

Line a baking sheet or flat baking pan with parchment paper. Lightly grease the parchment if needed to make removal easier.

Pour the blended mixture onto the center of the pan and spread it into a thin, even layer.

Keep the thickness consistent because very thin areas can become crisp before the center is fully set.

Bake Until Set

Bake in a preheated oven until the surface is firm and lightly golden around the edges.

The exact baking time can vary depending on the thickness of the batter and your oven.

Avoid removing the flatbread too early because the center needs enough time to set properly.

Cool Before Cutting

Let the flatbread cool for several minutes before lifting it from the parchment.

Cooling allows the texture to firm up and makes the flatbread easier to handle.

Cut it into rectangles for sandwiches or wraps, or leave it larger if you want to use it as a single flexible wrap.

What Makes This a Low Carb Flatbread?

Traditional bread is usually made with wheat flour, which contributes a significant amount of carbohydrates. This recipe skips wheat flour completely and uses cottage cheese and eggs as the main ingredients.

That makes it a useful option when you are looking for low carb wraps without relying on conventional bread.

The exact carbohydrate amount depends on the cottage cheese brand and serving size, so check the nutrition label of your ingredients if you are following a strict carbohydrate target.

Is This a High Protein Flatbread?

Yes, cottage cheese and eggs make this a naturally High Protein Flatbread compared with many traditional flour-based flatbreads.

Protein content will vary based on the ingredients and the number of servings you make. Choosing a cottage cheese with a higher protein content can increase the protein per serving.

This makes the recipe especially useful for breakfast wraps, lunch sandwiches, and quick post-workout meals.

Easy Ways to Use the Flatbread

Breakfast Wrap

Fill the flatbread with scrambled eggs, turkey, avocado, and a small amount of cheese for a filling breakfast.

Chicken Wrap

Add sliced grilled chicken, lettuce, tomato, cucumber, and a light dressing for an easy lunch.

Turkey and Cheese Roll-Up

Layer turkey and cheese over the flatbread, roll it tightly, and slice it into smaller pieces for a quick meal or snack.

Vegetable Wrap

Use roasted peppers, spinach, cucumber, avocado, and a protein source for a fresh vegetable wrap.

Pizza-Style Flatbread

Top the baked flatbread with a small amount of tomato sauce, mozzarella, and your favorite toppings, then bake until the cheese melts.

Tips for the Best Results

Use parchment paper to make the flatbread easier to remove after baking.

Blend the cottage cheese and eggs thoroughly so the batter has a smooth consistency.

Spread the mixture evenly because inconsistent thickness can lead to uneven cooking.

Do not overload the flatbread with wet fillings because excess moisture can make it difficult to roll.

Allow the flatbread to cool before filling it if you want maximum flexibility.

If you prefer a crispier texture, bake it slightly longer while watching the edges carefully.

For a more savory flavor, add herbs, garlic powder, onion powder, or smoked paprika.

Storage and Meal Prep

Let the flatbread cool completely before storing it.

Place parchment paper between individual pieces to prevent them from sticking together.

Store the flatbread in an airtight container in the refrigerator for several days.

You can also freeze individual portions for longer storage. Thaw them in the refrigerator and gently warm them before serving.

This makes the recipe convenient for preparing low carb wraps ahead of busy weekdays.

Keto and Gluten-Free Friendly

This Keto Flatbread Recipe contains no wheat flour or traditional grains. It can therefore be useful for people looking for a Gluten Free Cottage Cheese Wrap or a grain-free alternative to standard bread.

However, ingredient labels still matter if you have celiac disease or a serious gluten intolerance. Choose certified gluten-free ingredients when required and avoid cross-contact during preparation.

For a strict keto diet, check the carbohydrate information on your specific cottage cheese and other ingredients because nutritional values can vary between brands.

Can You Make a 2 Ingredient Cottage Cheese Flatbread?

Yes. The basic version can be made with cottage cheese and eggs, which is why it is often described as a 2 Ingredient Cottage Cheese Flatbread.

Seasonings such as garlic powder, salt, pepper, or dried herbs are optional and mainly add flavor rather than changing the basic structure.

This simple formula also makes it easy to customize the flatbread for breakfast, lunch, or dinner.

Why This Flourless Bread Recipe Is Useful

A traditional loaf can require flour, yeast, kneading, proofing, and a longer baking process. This Flourless bread recipe removes most of those steps.

The batter comes together quickly, and the finished flatbread can be used immediately after cooling.

It is a practical choice for anyone who wants a healthy flatbread without keeping specialty baking ingredients in the pantry.

Because the recipe uses familiar ingredients, it can also be a useful addition to a collection of simple cottage cheese recipes.

Frequently Asked Questions

Is cottage cheese flatbread keto?

Yes, it can fit a keto eating plan because it is flourless and relatively low in carbohydrates, but always check your specific ingredients for their carb content.

Is cottage cheese flatbread gluten free?

Yes, the basic recipe contains no wheat flour or gluten-containing grains, making it naturally gluten free when prepared with suitable ingredients.

How much protein is in cottage cheese flatbread?

Protein varies by serving size and the brands used, but cottage cheese and eggs make it a naturally protein-rich bread alternative.

Can I use low-fat cottage cheese?

Yes, low-fat cottage cheese can work, although full-fat cottage cheese may produce a richer and softer texture.

Can I use cottage cheese flatbread as a wrap?

Yes, once cooled, the flatbread can be filled with meat, eggs, vegetables, cheese, or other preferred wrap fillings.

How do I keep the flatbread from sticking?

Use parchment paper and allow the flatbread to cool slightly before carefully lifting it from the baking surface.

Can I freeze cottage cheese flatbread?

Yes, separate individual pieces with parchment paper, place them in a freezer-safe container, and thaw them before reheating.

Can I add different seasonings?

Yes, garlic powder, Italian herbs, paprika, black pepper, or dried parsley can add flavor without requiring flour.

Is this a grain-free bread?

Yes, the basic recipe contains no wheat, oats, rice, or other grains, making it a simple grain-free bread alternative.

Can I make this recipe without garlic powder?

Yes, garlic powder is optional, and leaving it out creates a more neutral flatbread suitable for a wider range of fillings.

Final Thoughts

This Keto Flourless Cottage Cheese Flatbread is a simple way to replace traditional bread with a flexible, protein-rich alternative. Cottage cheese and eggs create the foundation, while seasonings allow you to adjust the flavor for different meals.

Use it for breakfast wraps, chicken sandwiches, quick lunches, or simple snacks. With no traditional flour and a short ingredient list, this Grain Free Flatbread is an easy recipe to add to your regular meal rotation.