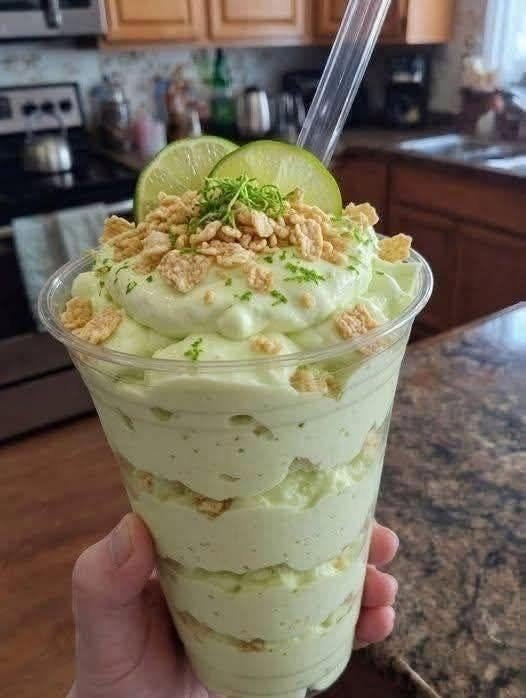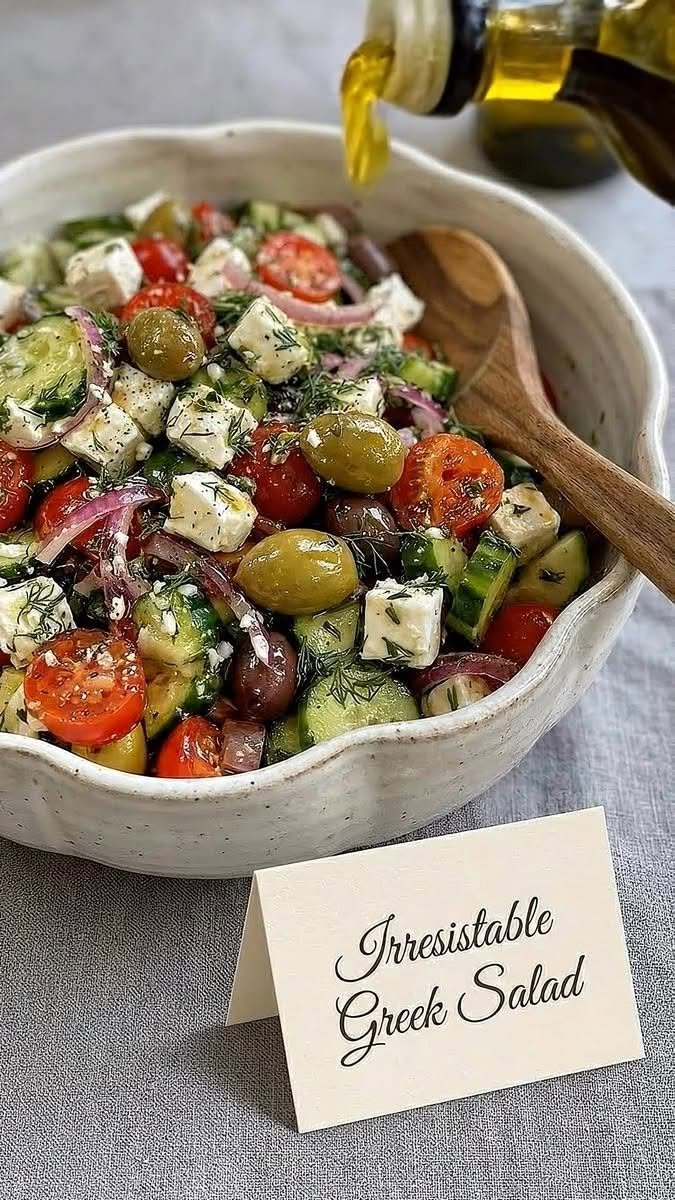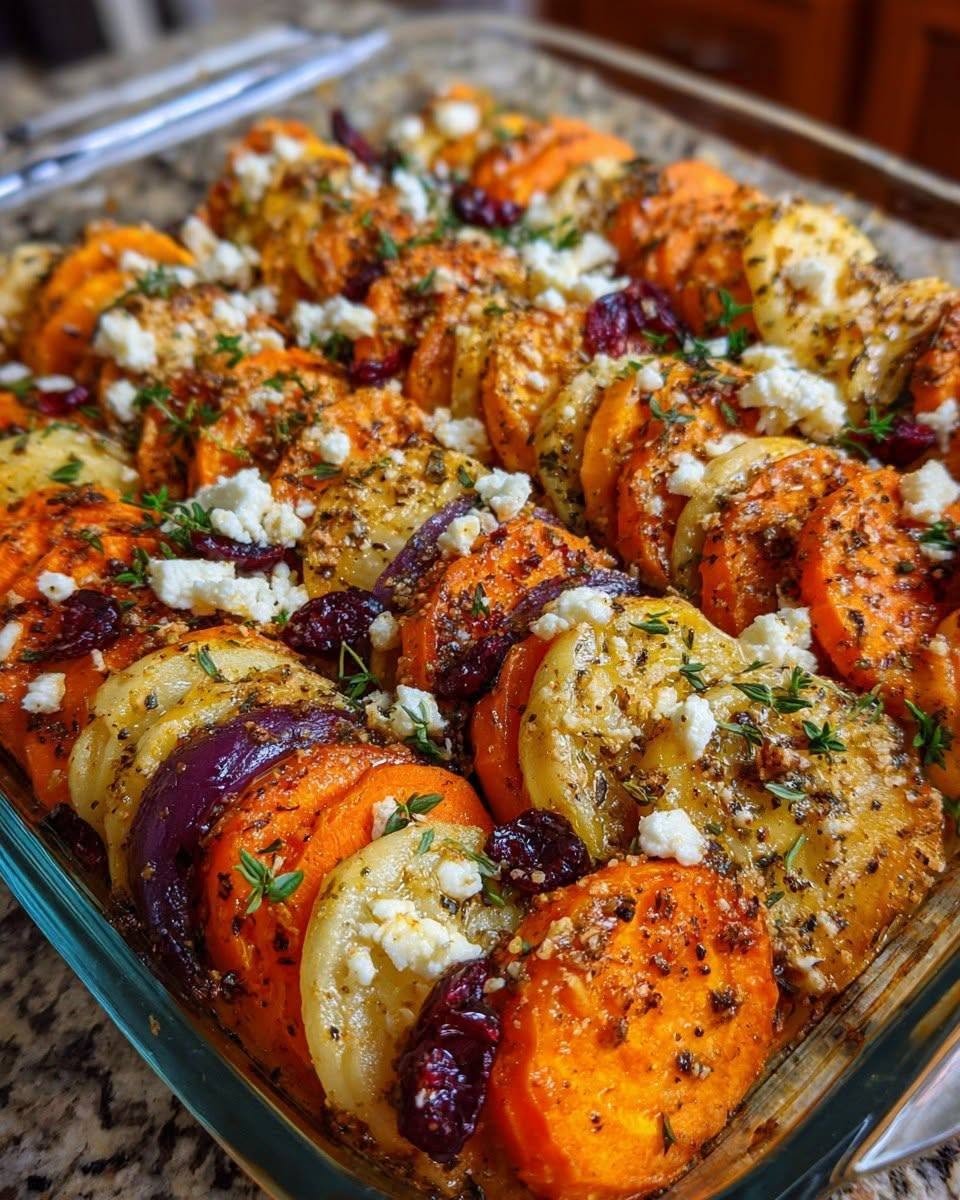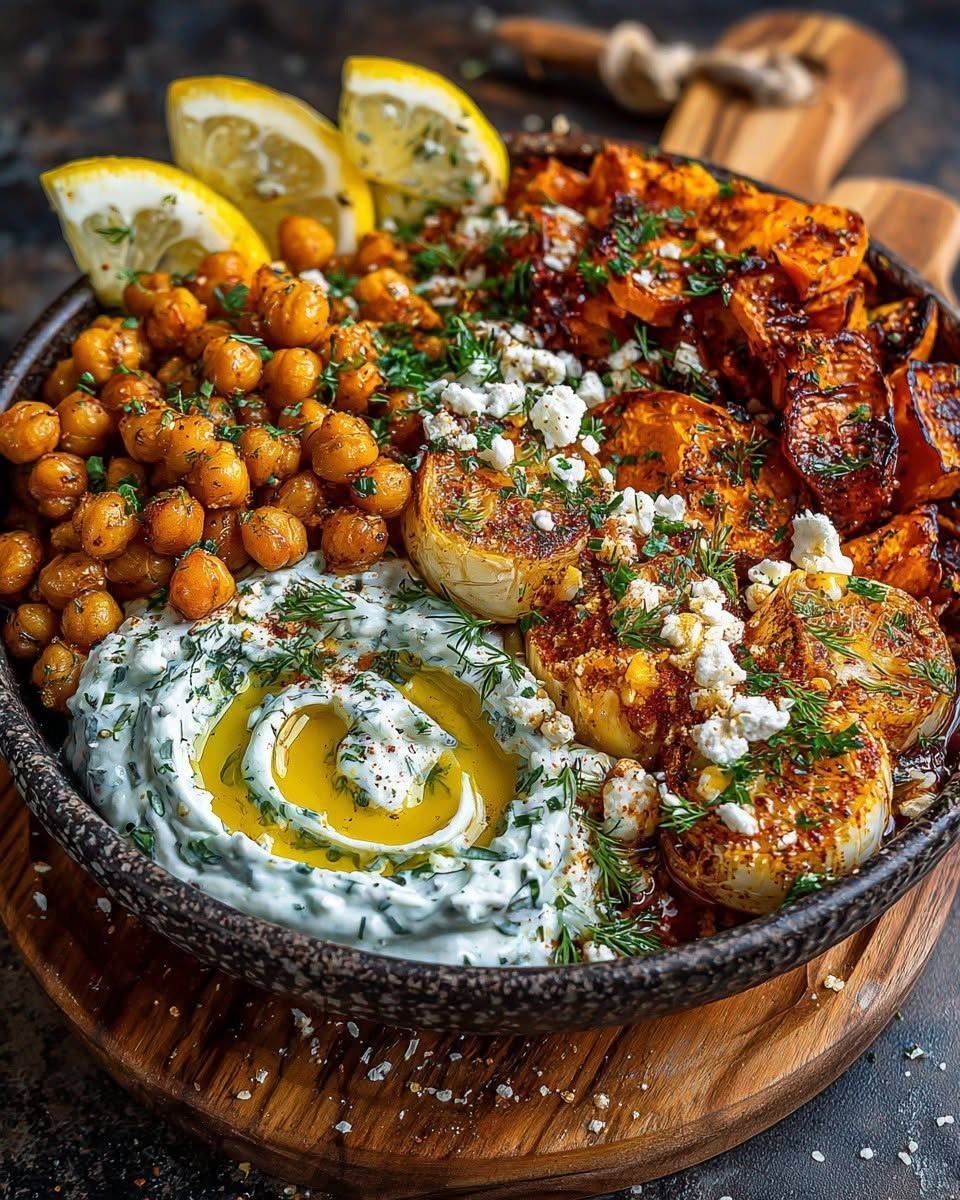
Creamy Mexican Street Corn Cups 

🌽 Creamy Mexican Street Corn Cups

Sweet, smoky corn coated in a creamy chili-lime sauce and topped with cheese — this easy Mexican-inspired snack is bursting with flavor in every bite! 🧀🍋✨

🛒 Ingredients

  • 🌽 4 cups corn kernels
  • 🧈 2 tbsp butter
  • 🥄 ¼ cup mayonnaise
  • 🥛 ¼ cup sour cream
  • 🧀 ½ cup Cotija or feta cheese, crumbled
  • 🧄 1 garlic clove, minced
  • 🍋 2 tbsp lime juice
  • 🌶️ 1 tsp chili powder or Tajín
  • 🌿 ¼ cup chopped cilantro
  • 🧂 Salt to taste
  • 👩‍🍳 Instructions

    1️⃣ Char the Corn

    ➡️ Melt butter in a skillet over medium-high heat.
    ➡️ Add corn and cook for 8–10 minutes until lightly charred and golden. 🌽🔥

    2️⃣ Make the Creamy Sauce

    ➡️ In a bowl, mix mayonnaise, sour cream, garlic, lime juice, chili powder, and salt. 🥄🍋

    3️⃣ Combine Everything

    ➡️ Add the warm corn to the sauce.
    ➡️ Stir in most of the cheese and cilantro until creamy and well coated. 🌿🧀

    4️⃣ Assemble the Cups

    ➡️ Spoon the corn mixture into serving cups.
    ➡️ Sprinkle extra chili powder, cheese, and cilantro on top. 🌶️✨

    5️⃣ Serve & Enjoy

    ➡️ Serve warm with lime wedges and enjoy every creamy, smoky bite! 🍋🥄

The Viral 4-Ingredient Baked Feta Pasta Recipe


🍝 The Viral 4-Ingredient Baked Feta Pasta Recipe

🛒 Ingredients

  • Cherry or Grape Tomatoes: 2 pints (approx. 4 cups) 🍅

  • Block Feta Cheese: 1 (7 to 8-ounce) block (Go for Greek sheep’s milk feta for maximum melt!) 🧀

  • Extra Virgin Olive Oil: 0.5 cup 🫒

  • Dry Pasta: 1 pound (16 oz), like penne or rigatoni 🌾

  • Fresh Garlic Cloves: 3 to 4, peeled and smashed 🧄

  • Red Chili Flakes: 1 teaspoon (or more if you like it spicy! 🔥)

  • Fresh Basil: 1 large bunch, chopped 🍃

  • Salt & Pepper: to taste 🧂


📝 Step-by-Step Instructions

  1. Preheat Your Oven: ➡️ Set your oven to $400^{\circ}\text{F}$ ($200^{\circ}\text{C}$). 🌡️

  2. Tomato Prep: ➡️ Place the cherry tomatoes, garlic cloves, and 0.25 cup of the olive oil in a large 9×13-inch baking dish. ➡️ Toss with half of the chili flakes, salt, and pepper. 🧂🌪️

  3. Center the Feta: ➡️ Nestle the block of feta cheese right in the center of the tomatoes. ➡️ Drizzle the top of the feta with the remaining 0.25 cup of olive oil, and sprinkle with the rest of the chili flakes. 🧀🫒

  4. Bake Until Bubbly: ➡️ Roast in the oven for 30 to 35 minutes, or until the tomatoes have burst and the feta looks soft, slightly melty, and golden-brown on the edges. ➡️ For a more caramelized top (like in the picture!), switch to broil for 2–3 minutes at the very end. 💡🔥

  5. Boil the Pasta: ➡️ While the feta bakes, cook your pasta in a pot of heavily salted water according to package directions. ➡️ Crucial Step: Before draining, save 1 full cup of the starchy pasta water! 🌾💧

  6. The Magic Stir: ➡️ Remove the baking dish from the oven. ➡️ Take your fork and/or wooden spoon (just like the photo!) and immediately mash and stir the baked feta and burst tomatoes together until a incredibly creamy, uniform sauce forms. 🥄🌪️

  7. Combine: ➡️ Add the cooked pasta directly to the sauce. ➡️ Fold in the chopped fresh basil. ➡️ Slowly stir in some of the reserved pasta water (about 0.25 to 0.5 cup) until the sauce is the perfect, luxurious consistency and clings to the pasta. 🌾✨

  8. Serve Immediately: ➡️ Garnish with more basil and a crack of black pepper. Enjoy that creamy, tangy perfection! 🍝❤️


❓ Common Questions & Answers

Q: Can I use crumbled feta instead of a block?

A: It works, but it won’t be nearly as creamy! Crumbled feta has non-caking agents that prevent it from melting properly. The solid block is the secret to that luscious sauce. 🧀

Q: My sauce is too thick. How do I fix it?

A: This is why we save that pasta water! Add an extra splash of the reserved starchy water to loosen it up and make it perfectly creamy. 💧

Q: Can I add extra proteins to this?

A: Yes! It’s delicious with chicken or shrimp, but cook those separately and fold them in at the end to keep the dish simple. 🐔🦐

2-Ingredient Pineapple Soft Serve Recipe

🍦 2-Ingredient Pineapple Soft Serve Recipe

🛒 Ingredients

  • Frozen Pineapple Chunks: 1 to 1.5 cups (Ensure they are completely frozen) 🧊

  • Liquid Base: 0.25 cup to 0.35 cup of your choice (e.g., coconut milk, regular milk, pineapple juice, or water) 🥛


📝 Step-by-Step Instructions

  1. Prep Your Blender: ➡️ Place your frozen pineapple chunks into a small blender or food processor. 🌪️

  2. Add the Liquid: ➡️ Pour in about 0.25 cup of your chosen liquid base. Tip: Start with less liquid to keep the texture thick and soft-serve-like. 🥥

  3. Blend and Blend: ➡️ Secure the lid and blend on high. You may need to stop the blender a few times to push down the pineapple chunks with a spatula so everything blends evenly. 🥄

  4. Adjust the Consistency: ➡️ If the blender is struggling or the mixture is too chunky, add an extra splash of liquid (around 1 tablespoon at a time) and blend again until smooth and creamy. 🔄

  5. Serve Immediately: ➡️ Scoop the smooth, velvety pineapple soft serve into a cup or bowl. Enjoy it right away before it melts! 🍍🍨


❓ Common Questions & Answers

Q: Can I make this ahead of time and store it in the freezer?

A: It is definitely best enjoyed immediately for that perfect “soft-serve” texture. If you freeze it for later, it will harden into a solid block. If that happens, just let it thaw on the counter for 10 to 15 minutes and give it a quick re-blend before serving! ⏳

Q: What is the best liquid to use?

A: Coconut milk gives it a rich, creamy, “Piña Colada” vibe. Pineapple juice or apple juice will make it sweeter and more intensely fruity. Regular milk or almond milk works perfectly fine too! 🥛

Q: My blender is getting stuck. What should I do?

A: Don’t worry! Since this is a smaller batch, a smaller blender cup or food processor works best. Just add a tiny bit more liquid to help the blades catch, or let the frozen pineapple sit on the counter for about 5 minutes to soften just a tiny bit before blending. 💡

Healthy Breakfast Power Bowl

Healthy Breakfast Power Bowl 🥑🫐🍌

A colorful, nutrient-packed breakfast bowl loaded with fluffy scrambled eggs, creamy avocado, fresh berries, banana slices, and crunchy chia seeds. Perfect for a healthy breakfast or post-workout meal!

🛒 Ingredients

  • 3 large eggs
  • 1 tbsp milk
  • 1 tsp butter or olive oil
  • Salt & black pepper to taste
  • 1/2 avocado, sliced
  • 1/2 banana, sliced
  • 1/4 cup blueberries
  • 1/4 cup blackberries
  • 1 tsp chia seeds
  • Fresh herbs or microgreens (optional)

👩‍🍳 Instructions

  1. Cook the Eggs
    Whisk eggs with milk, salt, and pepper. Heat butter in a pan over low-medium heat and cook the eggs slowly, stirring gently until soft and creamy.
  2. Prepare the Bowl
    Add the scrambled eggs to one side of a serving bowl.
  3. Add Fresh Toppings
    Arrange avocado slices, banana slices, blueberries, and blackberries around the eggs.
  4. Finish & Serve
    Sprinkle chia seeds on top and garnish with fresh herbs or microgreens if desired.

💡 Tips

  • Add toast or roasted potatoes for a heartier meal.
  • Drizzle honey for a sweet touch.
  • Sprinkle chili flakes for extra flavor.

⏱️ Time

  • Prep Time: 5 minutes
  • Cook Time: 5 minutes
  • Total Time: 10 minutes

🍽️ Servings

1–2 servings

Spiralized Cucumber & Carrot Sesame Salad

Spiralized Cucumber & Carrot Sesame Salad

🛒 Ingredients

🥒 For the Salad

  • 2 large English cucumbers (or 4–5 Persian cucumbers)
  • 2 large carrots, peeled
  • 1 tbsp toasted sesame seeds
  • 2 green onions, thinly sliced (optional)
  • Fresh cilantro or parsley, chopped

🥣 For the Tangy Sesame Dressing

  • 2 tbsp rice vinegar (or apple cider vinegar)
  • 1 tbsp sesame oil
  • 1 tbsp olive oil
  • 1 tbsp low-sodium soy sauce (or tamari for gluten-free)
  • ½ tsp fresh ginger, finely grated
  • 1 small garlic clove, minced
  • Salt & black pepper to taste

👩‍🍳 Step-by-Step Instructions

Step 1: Prepare the Vegetables 🔪

➡️ Wash the cucumbers and carrots thoroughly.

➡️ Using a spiralizer, julienne peeler, or mandoline, turn the cucumbers and carrots into long thin ribbons or noodle-like strands.

➡️ If the cucumbers seem watery, place them in a colander with a tiny pinch of salt for 5–10 minutes.

➡️ Pat gently with paper towels to remove extra moisture for a crisp salad texture.

💡 Leaving the cucumber skin on adds beautiful color and extra crunch!


Step 2: Make the Sesame Dressing 🥣

➡️ In a small bowl or jar, combine:

  • Rice vinegar
  • Sesame oil
  • Olive oil
  • Soy sauce
  • Ginger
  • Garlic

➡️ Whisk well until smooth and combined.

➡️ Taste and adjust with salt and pepper if needed.

✨ The dressing should taste tangy, savory, and slightly nutty.


Step 3: Toss Everything Together 🥢

➡️ Add the cucumber and carrot ribbons to a large mixing bowl.

➡️ Pour the dressing over the vegetables.

➡️ Toss gently until every ribbon is lightly coated.

💡 Use tongs for easy mixing without breaking the veggie strands.


Step 4: Garnish & Serve ✨

➡️ Sprinkle toasted sesame seeds, sliced green onions, and fresh herbs over the top.

➡️ Serve immediately for maximum crunch or chill for 10–15 minutes for deeper flavor.

🥒 Best enjoyed fresh and cold!


🌟 Optional Add-Ins

Want to make it even more filling? Try adding:

  • 🥜 Crushed peanuts or cashews
  • 🫛 Edamame
  • 🍗 Grilled chicken
  • 🍤 Shrimp
  • 🍳 Soft-boiled egg
  • 🍜 Rice noodles
  • 🌶️ Chili flakes for heat

❓ Frequently Asked Questions

Q: Can I make this salad ahead of time?

➡️ Yes, but for the freshest texture, keep the dressing separate until serving. Cucumbers naturally release water over time.


Q: What can I use instead of sesame oil?

➡️ Sesame oil gives the salad its signature flavor, but you can reduce the amount and replace part of it with olive oil if preferred.


Q: Is this salad gluten-free?

➡️ Yes! Simply use tamari or coconut aminos instead of regular soy sauce.


Q: How long does it stay fresh?

➡️ It tastes best within 1 day. Store leftovers in an airtight container in the refrigerator.


🥢 Serving Ideas

This refreshing sesame salad pairs wonderfully with:

  • Grilled salmon 🐟
  • Teriyaki chicken 🍗
  • Stir-fried rice 🍚
  • Dumplings 🥟
  • Asian-inspired noodle bowls 🍜

Enjoy every crunchy, flavorful bite! 🥒🥕✨

Zucchini Ricotta Involtini Recipe

🍽️ Zucchini Ricotta Involtini Recipe

🛒 Ingredients

For the Zucchini & Filling:

  • 3 large zucchini (straight ones work best for slicing)

  • 15 oz (425g) ricotta cheese

  • 1 cup fresh spinach, finely chopped

  • 1/2 cup parmesan cheese, grated

  • 1 large egg (to bind the filling)

  • 1 clove garlic, minced

  • Salt and black pepper to taste

For the Assembly:

  • 2 cups marinara sauce (homemade or your favorite store-bought brand)

  • 1 cup mozzarella cheese, shredded

  • Fresh basil or parsley, chopped (for garnish)


👩‍🍳 Step-by-Step Instructions

Step 1: Prep the Zucchini Slices 🔪

  • Cut off the ends of the zucchini. Using a mandoline slicer or a very sharp knife, slice the zucchini lengthwise into thin, flexible strips (about 1/8-inch thick).

  • Pro Tip: Lay the slices on paper towels and sprinkle a pinch of salt over them. Let them sit for 10 minutes, then pat dry. This draws out excess moisture so your dish doesn’t get watery!

Step 2: Mix the Filling 🥣

  • In a medium bowl, combine the ricotta cheese, chopped spinach, grated parmesan, minced garlic, and the egg.

  • Season with a pinch of salt and black pepper. Stir everything together until smooth and well combined.

Step 3: Sauce the Pan 🍅

  • Preheat your oven to 375°F (190°C).

  • Spread about 1.5 cups of the marinara sauce evenly across the bottom of a large baking dish.

Step 4: Roll Them Up 🌀

  • Lay out a zucchini slice on a clean cutting board.

  • Spoon about 1 tablespoon of the ricotta mixture onto the slice, spreading it gently along the length.

  • Starting from one end, carefully roll the zucchini strip up tightly around the filling.

  • Place the roll-up seam-side down into the prepared baking dish on top of the sauce. Repeat with the remaining slices.

Step 5: Top and Bake 🔥

  • Spoon the remaining marinara sauce over the tops of the zucchini rolls.

  • Sprinkle the shredded mozzarella cheese generously over everything.

  • Bake in the preheated oven for 20 to 25 minutes, or until the cheese is melted, bubbling, and perfectly golden brown.

Step 6: Garnish and Serve

  • Let the dish cool for about 5 minutes out of the oven. Garnish with fresh chopped basil or parsley, and enjoy!


❓ Frequently Asked Questions

Q: My zucchini rolls turned out a bit soggy. What went wrong? ➡️ A: Zucchini holds a lot of water! To prevent sogginess, make sure to do the salting step listed in Step 1. Letting them sweat on paper towels and patting them completely dry before rolling makes a massive difference.

Q: Can I make this dish ahead of time? ➡️ A: Absolutely! You can assemble the entire dish (up to Step 4), cover the baking dish tightly with foil, and keep it in the refrigerator for up to 24 hours. When you’re ready to eat, just top with cheese and bake—you may just need to add 5 extra minutes to the baking time since it’s starting cold.

Q: Can I add meat to this recipe? ➡️ A: Yes! If you want to add protein, you can brown some ground turkey, beef, or Italian sausage and mix it directly into the marinara sauce before layering it into the pan.

6 Benefits of Eating Cucumber at Night

6 Benefits of Eating Cucumber at Night

Cucumbers are incredibly low in calories but packed with essential vitamins, minerals, and water. Enjoying a few slices before bed can do wonders for your body while you sleep. Here is why it makes the perfect evening snack:

1. Promotes Deep Hydration

Cucumbers are made up of about 95% water. Eating them in the evening helps top off your hydration levels, ensuring your body stays refreshed and functions smoothly throughout the night.

2. Supports Better Digestion

Packed with soluble fiber and water, cucumbers help soothe the digestive tract. Eating them at night can promote regular bowel movements and help prevent that uncomfortable morning bloating.

3. Aids in Weight Management

If you get those late-night kitchen cravings, cucumbers are the ultimate guilt-free snack. They are extremely low in calories, meaning you can satisfy the urge to crunch without spiking your calorie intake or interrupting your health goals.

4. Flushes Out Toxins

The high water and potassium content in cucumbers acts as a natural diuretic. This helps your body flush out waste and excess sodium overnight, which can leave you feeling lighter and less puffy when you wake up.

5. Promotes Healthier, Glowing Skin

Cucumbers contain silica and antioxidants like vitamin C and beta-carotene. Nourishing your body with these nutrients before bed supports overnight skin cell rejuvenation, helping you wake up with a clearer, brighter complexion.

6. Helps Manage Blood Sugar Levels

Cucumbers have a very low glycemic index (GI), meaning they won’t cause a sudden spike in your blood sugar levels. Eating them at night helps keep your glucose stable, preventing late-night crashes and supporting overall metabolic health.


Quick Tip for Your Page: If you want to maximize the health benefits, encourage your followers to eat them with the peel on! Most of the fiber, vitamins, and minerals are packed right into that crisp green skin.

Creamy Bacon Pea Potato Salad Recipe

Creamy Bacon Pea Potato Salad Recipe

This creamy potato salad is loaded with crispy bacon, peas, cheese, and a rich dressing — perfect for BBQs, lunch, or family dinners 😍

🛒 Ingredients

  • 🥔 4 cups potatoes (boiled & cubed)
  • 🟢 1 cup green peas
  • 🥓 6 strips bacon (cooked crispy & chopped)
  • 🧀 1 cup shredded cheddar cheese
  • 🧅 ½ cup diced ham or turkey ham
  • 🥚 2 boiled eggs (optional)

For the Dressing

  • 🥛 1 cup mayonnaise
  • 🍶 2 tbsp sour cream or yogurt
  • 🟡 1 tbsp mustard
  • 🧂 Salt to taste
  • ⚫ Black pepper
  • 🌿 1 tsp dried herbs or parsley

👩‍🍳 Step-by-Step Recipe

1️⃣ Cook the Potatoes

  • Boil potatoes until fork tender.
  • Drain and let cool slightly. 🥔

2️⃣ Prepare the Bacon

  • Fry bacon until crispy. 🔥
  • Place on paper towel and chop into small pieces.

3️⃣ Make the Dressing

  • In a bowl mix:
    • mayonnaise
    • sour cream
    • mustard
    • salt
    • black pepper
    • herbs
  • Stir until creamy. 🥣

4️⃣ Combine Everything

  • In a large bowl add:
    • potatoes
    • peas
    • diced ham
    • cheese
    • eggs (if using)
  • Pour dressing over everything and mix gently.

5️⃣ Add Bacon

  • Sprinkle crispy bacon on top. 🥓
  • Add extra cheese if desired.

6️⃣ Chill & Serve

  • Refrigerate for at least 30 minutes before serving.
  • Serve cold and enjoy 😋

💡 Tips

  • Use chilled potatoes for best texture.
  • Don’t overmix or potatoes may break apart.
  • Add chopped pickles for extra flavor.

❓Q/A

❓Can I make it ahead of time?

✅ Yes, it tastes even better after chilling overnight.

❓Can I use frozen peas?

✅ Yes, just thaw them before mixing.

❓What potatoes work best?

✅ Yukon Gold or red potatoes hold their shape best.

High-Protein Triple Berry Bake


Mediterranean Greek Yogurt Marinated Chicken Skewers

Mediterranean Greek Yogurt Marinated Chicken Skewers

Servings: 4
Prep Time: 15 minutes
Marinate Time: 1 hour or overnight
Cook Time: 10–12 minutes

Ingredients

Chicken Marinade

  • 600 g chicken breast or thighs, cut into cubes
  • 1 cup Greek yogurt
  • 2 tbsp olive oil
  • 3 garlic cloves, minced
  • 1 tbsp lemon juice
  • 1 tsp dried oregano
  • 1 tsp paprika
  • ½ tsp cumin
  • ½ tsp salt
  • ½ tsp black pepper

Skewers

  • Wooden or metal skewers

Optional Yogurt Sauce

  • ½ cup Greek yogurt
  • 1 tbsp lemon juice
  • 1 tbsp olive oil
  • Pinch of salt
  • Chopped cucumber and dill, optional

Toppings

  • Fresh parsley
  • Lemon wedges
  • Extra oregano

Instructions

  1. In a large bowl, mix Greek yogurt, olive oil, garlic, lemon juice, oregano, paprika, cumin, salt, and black pepper.
  2. Add chicken cubes and coat well.
  3. Cover and marinate for at least 1 hour, or overnight for the best flavor.
  4. If using wooden skewers, soak them in water for 20–30 minutes.
  5. Thread the chicken evenly onto skewers.
  6. Preheat a grill or grill pan over medium-high heat.
  7. Cook skewers for 10–12 minutes, turning occasionally, until golden, lightly charred, and fully cooked through.
  8. In a small bowl, mix the optional yogurt sauce ingredients.
  9. Serve hot with yogurt sauce, lemon wedges, parsley, and extra oregano.

Tips

For juicier skewers, use chicken thighs. Do not overcook, and let the skewers rest for 3–5 minutes before serving.

Creamy Garlic Butter Salmon with Spinach & Mushrooms

Creamy Garlic Butter Salmon with Spinach & Mushrooms 🍣🍄🥬

This rich and comforting salmon dish is packed with flavour and comes together in under 30 minutes. Perfect for a healthy dinner that feels restaurant-quality at home!

🧾 Ingredients

For the Salmon

  • 4 salmon fillets
  • 1 tablespoon olive oil
  • 1 tablespoon butter
  • Salt, to taste
  • Black pepper, to taste
  • 1 teaspoon paprika
  • 1 teaspoon garlic powder

For the Creamy Sauce

  • 2 tablespoons butter
  • 3 cloves garlic, minced
  • 1 cup mushrooms, sliced
  • 2 cups fresh spinach
  • 1 cup heavy cream
  • ½ cup grated Parmesan cheese
  • ½ teaspoon Italian seasoning
  • Salt and black pepper, to taste

👩‍🍳 Instructions

1. Season the Salmon

Pat the salmon fillets dry with paper towels. Season both sides with salt, black pepper, paprika, and garlic powder.

2. Cook the Salmon

Heat olive oil and 1 tablespoon of butter in a large skillet over medium-high heat.

Place the salmon skin-side down and cook for about 4–5 minutes per side until golden brown and cooked through. Remove from the skillet and set aside.

3. Sauté the Mushrooms

In the same skillet, melt 2 tablespoons of butter. Add sliced mushrooms and cook for 3–4 minutes until soft and lightly browned.

4. Add Garlic & Spinach

Stir in the minced garlic and cook for 30 seconds until fragrant. Add spinach and cook until wilted.

5. Make the Creamy Sauce

Pour in the heavy cream and stir well. Add Parmesan cheese and Italian seasoning. Simmer for 2–3 minutes until the sauce thickens slightly.

6. Combine Everything

Return the salmon fillets to the skillet. Spoon the creamy mushroom sauce over the salmon and simmer for 2 minutes.

7. Serve

Garnish with chopped parsley if desired. Serve hot with rice, mashed potatoes, pasta, or roasted vegetables.

💡 Tips

  • Use fresh salmon for the best flavour and texture.
  • Don’t overcrowd the pan while cooking salmon.
  • For a lighter version, substitute half-and-half for heavy cream.
  • Add a squeeze of lemon juice before serving for extra freshness.
  • If the sauce gets too thick, add a splash of chicken broth or milk.

🍽️ Serving Suggestions

  • Garlic mashed potatoes
  • Butter rice
  • Roasted asparagus
  • Crusty bread for dipping into the sauce

Enjoy your creamy salmon dinner! 😋

Vibrant Pickled Beets

Vibrant Pickled Beets

Ingredients

  • 6-8 Medium Beets (fresh) 🌿

  • 1 cup Apple cider vinegar 🍎

  • ½ cup Water

  • 1 tsp Salt

  • ½ tsp Whole peppercorns

  • 1 Cinnamon stick (optional, for warmth)

  • 2 Whole cloves (optional)

  • Note: You can skip the sugar entirely for a tart, natural flavor!


Step-by-Step Instructions

  1. Cook the Beets ♨️

    • Leave about an inch of the stems on to prevent the color from “bleeding” out. Boil the beets in a large pot of water for 25–35 minutes until fork-tender.

    • ➡️ Pro Tip: Once cooked, plunge them into cold water. The skins will slide right off with just a little pressure from your thumbs!

  2. Slice and Pack 🔪

    • Slice the peeled beets into rounds or wedges as shown in your photo.

    • ➡️ Pack them tightly into clean, sterilized mason jars.

  3. Prepare the Brine 🧪

    • In a small saucepan, combine the vinegar, water, salt, peppercorns, and spices.

    • ➡️ Bring the mixture to a rolling boil for about 2 minutes to let the flavors infuse.

  4. Fill the Jars 🫙

    • Carefully pour the hot brine over the beets in the jars, ensuring they are completely submerged.

    • ➡️ Leave about half an inch of “headspace” at the top of the jar.

  5. Cool and Cure ❄️

    • Let the jars cool to room temperature on the counter.

    • ➡️ Seal the lids and place them in the refrigerator. For the best flavor, wait at least 24 hours before eating!


Common Questions & Answers

Q: How long do these stay fresh? A: These refrigerator pickled beets will stay delicious for up to 3–4 weeks when kept chilled.

Q: Can I add other vegetables to the jar? A: Absolutely! Sliced red onions or even cloves of garlic are wonderful additions that soak up that beautiful pink brine.

Q: Are these beets crunchy or soft? A: Since they are boiled before pickling, they will have a tender, smooth texture with just a slight “snap.”

Q: Do I have to use apple cider vinegar? A: You can use white vinegar for a sharper tang, but apple cider vinegar provides a smoother, fruitier finish that complements the earthiness of the beets. 🥗

Golden Beef & Herb Pastry Rolls

🥐 Golden Beef & Herb Pastry Rolls

Ingredients

For the Filling:

  • 500g Lean ground beef 🥩

  • 1 Small onion (finely diced)

  • 2 cloves Garlic (minced)

  • 1 cup Shredded mozzarella or cheddar cheese 🧀

  • ½ cup Fresh parsley (chopped) 🌿

  • 1 tsp Cumin

  • ½ tsp Paprika

  • Salt & Pepper to taste

For the Pastry & Assembly:

  • 1 pack Phyllo pastry or very thin flour tortillas/flatbreads 🫓

  • ¼ cup Melted butter or olive oil (for brushing)

  • 1 Egg (beaten, for the egg wash)


Step-by-Step Instructions

  1. Prepare the Filling 🍳

    • In a pan over medium heat, brown the ground beef with the diced onions and garlic.

    • ➡️ Drain any excess liquid to keep the pastry from getting soggy.

    • ➡️ Stir in the cumin, paprika, salt, and pepper. Let the mixture cool slightly.

  2. Layer the Pastry 📋

    • Lay out your pastry sheet or flatbread on a clean wooden board.

    • ➡️ If using phyllo, stack 3–4 sheets, brushing a little melted butter between each layer for extra flakiness.

  3. Assemble the Roll 👩‍🍳

    • Spread a thin, even layer of the beef mixture over the pastry, leaving a small border at the edges.

    • ➡️ Sprinkle the shredded cheese and a generous amount of fresh parsley over the meat.

    • ➡️ Starting from one end, roll the pastry tightly (as shown in your top photo) to create a long log.

  4. Baking 🔥

    • Place the rolls on a baking sheet lined with parchment paper.

    • ➡️ Brush the tops with the beaten egg wash for that shiny, golden finish.

    • ➡️ Bake at 190°C for 20–25 minutes until the pastry is puffed and deep golden brown.

  5. Slice and Garnish 🔪

    • Let the rolls rest for 5 minutes before slicing. This helps the cheese set so it doesn’t run out.

    • ➡️ Garnish with more fresh parsley and serve warm.


Common Questions & Answers

Q: Can I use a different meat for the filling? A: Definitely! Ground turkey or chicken works beautifully here as well. For a vegetarian version, a mix of sautéed mushrooms and spinach is a great choice.

Q: My pastry is breaking when I roll it. What should I do? A: If using phyllo, keep it covered with a damp cloth while working so it doesn’t dry out. If using flatbreads, a very light brush of oil can make them more pliable.

Q: Can I prepare these in advance? A: Yes! You can roll them up and keep them in the fridge (covered) for a few hours before baking. Just add the egg wash right before they go into the oven.

Q: What dip goes well with these? A: A cool yogurt dip with garlic or a simple marinara sauce complements the savory beef perfectly! 🥣

Crispy Salmon Strips & Herb Tartar Dip


🐟 Crispy Salmon Strips & Herb Tartar Dip

Ingredients

For the Salmon:

  • 1 lb Fresh salmon fillet (skin removed, cut into 1-inch wide strips)

  • 1 tbsp Olive oil

  • 1 tsp Smoked paprika

  • 1 tsp Garlic powder

  • ½ tsp Onion powder

  • ½ tsp Black pepper

  • A pinch of Salt

  • 1 tbsp Fresh parsley (finely chopped for garnish)

For the Herb Tartar Dip:

  • ½ cup Greek yogurt or Mayonnaise

  • 1 tbsp Capers (minced)

  • 1 tbsp Fresh dill (finely chopped)

  • 1 tsp Lemon juice

  • ½ tsp Dijon mustard


Step-by-Step Instructions

  1. Prep the Salmon 🔪

    • Pat the salmon dry with a paper towel. This is the secret to getting that crispy exterior!

    • Slice the fillet into even strips, roughly 1 inch thick.

    • ➡️ Place them in a bowl and coat with olive oil.

  2. Seasoning 🧂

    • In a small ramekin, mix the paprika, garlic powder, onion powder, salt, and pepper.

    • ➡️ Sprinkle the spice mix evenly over the salmon strips, ensuring all sides are coated.

  3. Cooking (Air Fryer or Pan-Sear) 🔥

    • Air Fryer: Arrange strips in a single layer at 200°C for 8–10 minutes until the edges are dark and crispy.

    • Pan-Sear: Heat a non-stick skillet over medium-high heat. Sear each side for about 2–3 minutes.

    • ➡️ Look for that beautiful deep golden-brown char shown in your photo.

  4. Whisk the Dip 🥣

    • While the salmon cooks, combine the yogurt/mayo, capers, dill, lemon juice, and mustard in a small bowl.

    • ➡️ Stir until smooth and top with a little extra parsley.

  5. Garnish & Serve

    • Plate the hot salmon strips and sprinkle with fresh parsley.

    • ➡️ Serve immediately with the chilled dip on the side.


Common Questions & Answers

Q: Can I use frozen salmon? A: Yes! Just ensure it is completely thawed and patted very dry before seasoning. If it’s too wet, it will steam rather than crisp up.

Q: How do I know when the salmon is done? A: The salmon should flake easily with a fork and have an internal temperature of about 63°C.

Q: What are some good side dishes for this? A: This pairs beautifully with a fresh cucumber salad, roasted asparagus, or even some garlic quinoa.

Q: Can I make the dip ahead of time? A: Absolutely. In fact, making it an hour early allows the herbs and lemon to meld together for a better flavor. Store it in the fridge! 🧊

Creamy Garlic Grilled Chicken & Broccoli Bowl

🥗 Creamy Garlic Grilled Chicken & Broccoli Bowl

Servings: 2 | Prep time: 10 mins | Cook time: 15 mins

🛒 Ingredients

The Base:

  • 2 Chicken breasts (sliced into thin strips)

  • 2 cups Broccoli florets (fresh or frozen) 🥦

  • 1 cup Cooked rice (white, brown, or cauliflower rice)

  • 1 tbsp Olive oil

  • Seasoning: ½ tsp garlic powder, ½ tsp paprika, salt, and black pepper.

The Creamy Sauce:

  • ¼ cup Plain Greek yogurt

  • 1 tbsp Dijon mustard

  • 1 tsp Fresh lemon juice 🍋

  • 1 clove Garlic (minced finely)

  • 1–2 tsp Water (for consistency)


👩‍🍳 Step-by-Step Instructions

  1. Season the Chicken ➡️ In a bowl, toss chicken strips with olive oil, garlic powder, paprika, salt, and pepper until fully coated.

  2. Grill to Perfection ➡️ Heat a grill pan or skillet over medium-high heat. Cook chicken for 4 minutes undisturbed to get those golden char marks, then flip and cook for another 4–5 minutes. 🍗

  3. Steam the Broccoli ➡️ Steam florets for 4–5 minutes until vibrant green and fork-tender. 🥦

  4. Whisk the Sauce ➡️ Combine yogurt, mustard, lemon juice, and minced garlic. Add water a teaspoon at a time until it reaches a smooth “drizzling” texture.

  5. Assemble the Bowl ➡️ Scoop rice into two bowls, add the broccoli to the sides, and place the grilled chicken in the center. 🥣

  6. The Final Touch ➡️ Drizzle that creamy garlic sauce over the top. Garnish with fresh parsley or red pepper flakes for a little kick! 🔥


❓ Common Questions & Answers

Q: Can I use different vegetables? A: Absolutely! ➡️ Asparagus, green beans, or sliced bell peppers work beautifully if you want to switch things up.

Q: How do I store leftovers? A: Store the chicken, rice, and broccoli in an airtight container for up to 3 days. ➡️ Pro-Tip: Keep the sauce in a separate small jar and add it after reheating to keep it creamy!

Q: Is there a substitute for Greek yogurt? A: You can use sour cream or a dairy-free plain yogurt alternative for a similar tangy profile. 🥣

Q: What if I don’t have a grill pan? A: No worries! ➡️ A regular non-stick skillet works perfectly; you’ll still get a delicious sear.


✨ Success Tips

  • Don’t Overcrowd: Give the chicken space in the pan so it sears rather than steams. 💨

  • Bright Broccoli: Rinse steamed broccoli under cold water briefly to stop the cooking and keep it bright green. 🥦

  • Flavor Boost: Grate some lemon zest into the sauce for an extra punch of freshness! 🍋

Berry Circulation Smoothie

Berry Circulation Smoothie

🛒 Ingredients

  • 1 cup Blueberries (fresh or frozen)

  • 1 Medium beetroot (peeled and chopped)

  • 1 Ripe banana

  • 1 cup Water or coconut water 🥥

  • 1 tbsp Honey (or maple syrup)

  • 1 tsp Chia seeds

  • Handful Ice cubes 🧊


👩‍🍳 Step-by-Step Recipe

  1. Prep the Produce ➡️ Wash the blueberries and beetroot thoroughly under cold water.

  2. Chop for Success ➡️ Peel the beetroot and dice it into small, uniform cubes. ⚠️ Tip: Small pieces ensure a perfectly smooth texture without “crunchy” surprises!

  3. Load the Blender ➡️ Place the blueberries, beetroot, banana, honey, chia seeds, and ice into your blender canister.

  4. Add Liquid ➡️ Pour in your water or coconut water. 💧

  5. The Big Blend ➡️ Start on a low speed and transition to high. Blend for 1–2 minutes until the color is a deep, vibrant magenta and the texture is silky.

  6. Consistency Check ➡️ If the smoothie is too thick to sip, add an extra splash of liquid and pulse for 10 seconds.

  7. Serve & Sip ➡️ Pour into a chilled glass. 🥂 Serve immediately to enjoy the peak flavor and texture!


❓ Q&A: Tips & Substitutions

Q: Can I make it without banana? A: Yes! ➡️ If you want to skip the banana, try adding 1/2 cup of Greek yogurt or 1/4 of an avocado to maintain that signature creamy texture. 🥑

Q: Can I store it for later? A: It’s best enjoyed fresh, but you can keep it in an airtight jar in the fridge for up to 24 hours. ➡️ Give it a quick shake before drinking as the chia seeds may thicken the mixture over time.

Q: What does beetroot do in the smoothie? A: Beetroot provides that incredible “vibe” and earthy depth. ➡️ It is often used in “circulation” smoothies because it contains natural nitrates that support blood flow!

Q: My blender is struggling with the raw beet. What should I do? A: You can lightly steam the beetroot chunks first and let them cool, or use a splash more liquid to help the blades catch the ingredients. 🌪️

Zucchini and Tomato Frittata

This zucchini and tomato frittata is a light, flavorful, and protein-packed dish that is perfect for breakfast, brunch, lunch, or even a quick dinner. Made with fresh zucchini, juicy cherry tomatoes, fluffy eggs, herbs, and melted mozzarella cheese, this Mediterranean-inspired recipe is simple to prepare and full of wholesome ingredients.

A frittata is similar to an omelet but baked gently until perfectly set, creating a soft and creamy texture with delicious golden edges. This version combines fresh vegetables and herbs for a healthy meal that feels both comforting and fresh.

Whether you are preparing a weekend brunch or meal-prepping for busy weekdays, this easy zucchini and tomato frittata is a versatile recipe the whole family will enjoy.

Discover more
Cookie
Eggs
Cheese
Egg
Cookies

Why You’ll Love This Recipe

  • Easy one-pan meal
  • High in protein
  • Packed with fresh vegetables
  • Perfect for meal prep
  • Naturally gluten-free
  • Great for breakfast, lunch, or dinner

Ingredients

  • 6 large eggs
  • ¼ cup milk (or dairy-free alternative)
  • 1 medium zucchini, thinly sliced
  • 1 cup cherry tomatoes, halved
  • ¼ cup fresh parsley, chopped
  • ½ cup shredded mozzarella cheese
  • 1 tablespoon olive oil
  • Salt and black pepper to taste

Optional additions:

Discover more
milk
herbs
Herbs & Spices

  • Crumbled feta cheese
  • Chili flakes
  • Spinach or mushrooms
  • Fresh basil

Instructions

Step 1: Preheat the oven.

Preheat your oven to 375°F (190°C).

Step 2: Prepare the Egg Mixture

In a medium bowl, whisk together the eggs, milk, chopped parsley, salt, and black pepper until light and fluffy.

Step 3: Cook the Vegetables

Heat olive oil in an oven-safe skillet over medium heat.

Discover more
Baked Goods
salad
Fruits & Vegetables

Add the sliced zucchini and cook for about 3–4 minutes until slightly softened.

Stir in the cherry tomatoes and cook for another 2 minutes until they begin to soften and release some juices.

Step 4: Add the Eggs

Pour the egg mixture evenly over the vegetables. Gently stir once to distribute everything evenly.

Sprinkle the shredded mozzarella cheese over the top.

Step 5: Bake the Frittata

Allow the frittata to cook on the stovetop for 2–3 minutes until the edges start to set.

Transfer the skillet to the preheated oven and bake for 10–12 minutes or until the center is fully set and the top is lightly golden.

Discover more
Salads
Dairy & Eggs
Desserts

Step 6: Serve

Remove from the oven and let cool slightly before slicing.

Garnish with extra parsley or fresh basil and serve warm.

Serving Suggestions

This frittata pairs beautifully with:

  • Fresh green salad
  • Toasted sourdough bread
  • Roasted potatoes
  • Avocado slices
  • Greek yogurt dip

Tips for the Best Frittata

Discover more
butter
garlic
Cakes

  • Use an oven-safe nonstick skillet for easy cooking
  • Avoid overbaking to keep the texture soft and creamy
  • Add feta cheese for extra Mediterranean flavor
  • Great when served warm or cold for meal prep

Storage Tips

Store leftovers in an airtight container in the refrigerator for up to 4 days. Reheat gently or enjoy cold.

Nutritional Information (Per Serving)

  • Calories: Approximately 190
  • Protein: 13g
  • Carbohydrates: 5g
  • Fat: 13g
  • Fiber: 1g

2-Ingredient Pineapple Soft Serve

🍦 2-Ingredient Pineapple Soft Serve (Creamy & Refreshing) 🍍✨

A quick, healthy frozen treat that tastes like tropical ice cream — made in just minutes with no ice cream machine needed! 🌴💛


🛒 Ingredients

  • 2 cups frozen pineapple chunks 🧊🍍
  • ½ cup unsweetened coconut milk 🥥

👉 Optional:

  • 1 tsp honey or maple syrup 🍯 (if extra sweetness is needed)
  • Tiny pinch of salt (enhances sweetness)

👩‍🍳 Step-by-Step Instructions

1️⃣ Freeze the Pineapple 🍍

If using fresh pineapple:
Cut into small chunks and freeze for at least 4–6 hours until solid.
(Pre-frozen store-bought pineapple works perfectly too!)


2️⃣ Add to Blender 🌪️

Place frozen pineapple and coconut milk into a high-speed blender or food processor.


3️⃣ Blend Slowly First 🥄

Start blending on low speed.
Stop occasionally to scrape down the sides so everything mixes evenly.


4️⃣ Make It Creamy ✨

Keep blending until the mixture becomes:

  • Smooth
  • Thick
  • Soft-serve texture 🍦

👉 If it’s too thick, add coconut milk 1 tablespoon at a time.


5️⃣ Adjust Taste 🍯

Taste and adjust:

  • Add a little honey if needed
  • Add a pinch of salt to enhance flavor

6️⃣ Serve Immediately 🍦✨

Scoop into bowls or glasses.
For a beautiful swirl look, pipe it using a star nozzle piping bag 🌀


❓ Q & A

Q: Can I use another milk instead of coconut milk?

➡️ Yes! Almond or oat milk works, but coconut milk gives the creamiest texture.

Q: Why is my soft serve not blending?

➡️ Let the pineapple sit for 3–5 minutes or add a splash more liquid.

Q: Can I store it?

➡️ It’s best fresh, but you can freeze it and re-blend before serving.


🌟 Pro Tip

Add a tiny pinch of salt or a splash of lime juice 🍋 — it makes the pineapple taste even more vibrant and tropical!


Enjoy your refreshing homemade pineapple soft serve! 🍍🍦💛

Roasted Beet & Feta Herb Salad

🥗 Roasted Beet & Feta Herb Salad

🛒 Ingredients

The Salad Base:

  • 3-4 medium Beets (peeled and cut into 1-inch cubes) ➡️ Red or golden beets work great!

  • 1 cup Feta cheese (cut into cubes or roughly crumbled) 🧀

  • 2 cups Fresh greens (arugula or mixed baby greens) 🥬

  • ½ cup Fresh dill and parsley (roughly chopped) 🌿

The Simple Vinaigrette:

  • 3 tbsp Extra virgin olive oil 🫒

  • 1 tbsp Balsamic vinegar or lemon juice 🍋

  • 1 tsp Honey or maple syrup 🍯

  • Salt and black pepper to taste


👩‍🍳 Step-by-Step Instructions

  1. Roast the Beets ➡️ Preheat your oven to 400°F (200°C). Toss the beet cubes with 1 tbsp of olive oil and a pinch of salt. Spread them on a baking sheet and roast for 35–45 minutes until tender when pierced with a fork. 🌡️🔥

  2. Cool Down ➡️ Let the beets cool to room temperature. This prevents the feta cheese from melting and the greens from wilting. ❄️

  3. Whisk the Dressing ➡️ In a small jar, combine the remaining olive oil, balsamic vinegar, honey, salt, and pepper. Shake well until combined. 🥣✨

  4. Layer the Greens ➡️ Place a bed of fresh greens on a large serving plate or in a shallow bowl. 🥬

  5. Assemble ➡️ Arrange the roasted beet cubes over the greens. Top with the feta cheese cubes. 🧀➡️🥗

  6. Garnish and Dress ➡️ Sprinkle the fresh dill and parsley generously over the top. Drizzle the vinaigrette evenly over the salad just before serving. 🌿🍯

  7. Serve ➡️ Toss lightly or serve as composed layers to maintain that striking color contrast! 🎨🍴


❓ Common Questions & Answers

Q: Can I use pre-cooked beets to save time? A: Absolutely! ➡️ You can find steamed or vacuum-packed beets in most grocery stores. Just cube them up and skip straight to the assembly! 🕒

Q: How do I stop the beets from staining the feta? A: To keep the white cheese looking bright, don’t toss the salad too vigorously. ➡️ Lay the beets down first, then place the feta on top right before serving. 🧀✨

Q: Can I add some crunch to this? A: Definitely. ➡️ Toasted walnuts, pine nuts, or even pumpkin seeds add a wonderful texture to this dish. 🥜

Q: Is this salad good for meal prep? A: Yes! ➡️ Keep the roasted beets, feta, and dressing in separate containers. Combine them when you’re ready to eat to keep everything fresh and crisp. 🥡

Enjoy your vibrant, nutrient-packed salad! 🥗🌿✨

Roasted Butternut Squash & Cranberry Medley

Roasted Butternut Squash & Cranberry Medley

🛒 Ingredients

The Roast:

  • 1 large Butternut squash (peeled and cubed into 1-inch pieces) ➡️ Look for a matte skin for the best ripeness!

  • 1 ½ cups Fresh or frozen cranberries 🍒

  • 2 tbsp Olive oil 🫒

  • 1 tbsp Maple syrup or honey 🍯

  • 1 tsp Dried thyme or rosemary (plus a fresh sprig for garnish) 🌿

  • Salt and black pepper to taste

The Toppings:

  • ½ cup Feta cheese (crumbled) 🧀

  • ½ cup Walnuts or pecans (toasted) 🥜

  • 2 tbsp Fresh parsley (chopped) 🌿


👩‍🍳 Step-by-Step Instructions

  1. Heat it Up ➡️ Preheat your oven to 400°F (200°C). Line a large rimmed baking sheet with parchment paper. 🌡️

  2. Toss and Season ➡️ In a large bowl, combine the butternut squash cubes, olive oil, maple syrup, dried herbs, salt, and pepper. Toss until every piece is glistening. 🥣✨

  3. The First Roast ➡️ Spread the squash in a single layer on the baking sheet. Roast for 20 minutes. 🎃🔥

  4. Add the Berries ➡️ Remove the tray and scatter the cranberries among the squash. Toss gently. Roast for another 10–15 minutes until the squash is tender and the cranberries have softened or burst. 🍒➡️⏲️

  5. Toast the Nuts ➡️ While the squash finishes, lightly toast your walnuts in a dry pan over medium heat for 3–5 minutes until fragrant. 🥜🍳

  6. Assemble ➡️ Transfer the warm squash and cranberries to a serving platter. Sprinkle generously with crumbled feta, toasted walnuts, and fresh parsley. 🧀✨

  7. Final Touch ➡️ Place a fresh rosemary sprig in the center for that beautiful professional look! 🌿📸


❓ Common Questions & Answers

Q: Can I use Sweet Potato instead of Butternut Squash? A: Absolutely! ➡️ Sweet potatoes or even Kabocha squash work perfectly with these exact same flavors.

Q: My cranberries are very tart—how can I balance that? A: You can toss the cranberries in a teaspoon of sugar or extra maple syrup before adding them to the tray. ➡️ This creates a lovely sweet-tart glaze! 🍯🍒

Q: Can I make this dish ahead of time? A: You can roast the squash and berries ahead of time. ➡️ However, wait to add the feta and walnuts until just before serving to keep the cheese fresh and the nuts crunchy. 🧀🥜

Q: Is this dish served hot or cold? A: It is delicious both ways! ➡️ It’s traditionally served warm as a side dish, but it also makes a fantastic cold salad the next day when tossed with some arugula or spinach. 🥗

Enjoy this vibrant and flavorful autumn-inspired dish! 🎃🍂✨

Zucchini Ricotta Roll-Ups

Zucchini Ricotta Roll-Ups

🛒 Ingredients

The Zucchini:

  • 3-4 large Zucchinis (sliced into thin, wide ribbons) ➡️ A mandoline works best for this!

  • 1 tbsp Olive oil 🫒

  • A pinch of salt and black pepper

The Savory Filling:

  • 1 ½ cups Ricotta cheese 🧀

  • ½ cup Parmesan cheese (grated)

  • 1 large Egg (lightly beaten)

  • 1 cup Fresh spinach (finely chopped) 🌿

  • 1 tsp Garlic powder or 2 cloves fresh garlic (minced) 🧄

  • 1 tbsp Fresh basil (chopped)

  • 1 cup Mozzarella cheese (shredded, divided) 🧀

The Base & Topping:

  • 2 cups Marinara sauce 🍅

  • Fresh basil leaves for garnish 🌿


👩‍🍳 Step-by-Step Instructions

  1. Prep the Zucchini ➡️ Slice your zucchinis into thin ribbons. Lay them on paper towels and sprinkle lightly with salt. Let them sit for 10 minutes, then pat dry to remove excess moisture. 🥒💨

  2. Soften the Ribbons ➡️ To make them easy to roll, lightly grill the ribbons for 1–2 minutes per side or roast them in the oven at 400°F (200°C) for 5 minutes until pliable.

  3. Mix the Filling ➡️ In a medium bowl, combine the ricotta, Parmesan, half of the mozzarella, egg, spinach, garlic, and herbs. Stir until well combined. 🥣🌿

  4. Sauce the Pan ➡️ Spread about 1 ½ cups of the marinara sauce on the bottom of a 9×13 inch baking dish. 🥘🍅

  5. Roll it Up ➡️ Lay a zucchini ribbon flat. Spread about 1 tablespoon of the cheese mixture along the ribbon, then roll it up tightly. 🥒➡️🌀

  6. Arrange and Bake ➡️ Place the rolls seam-side down in the baking dish. Top with the remaining marinara sauce and the rest of the mozzarella cheese. 🧀

  7. Cook to Perfection ➡️ Bake at 375°F (190°C) for 20–25 minutes until the cheese is bubbly and golden brown. 🌡️🔥

  8. Serve ➡️ Let it rest for 5 minutes, then garnish with fresh basil before serving. 🌿✨


❓ Common Questions & Answers

Q: Can I make this without egg? A: Yes! ➡️ The egg helps bind the cheese, but you can omit it. The filling will just be a bit softer and creamier.

Q: How do I stop it from being watery? A: The secret is the “salt and pat” method in Step 1. ➡️ Zucchini holds a lot of water, so removing it early keeps your sauce thick and rich! 🍅

Q: Can I add meat to this? A: Absolutely. ➡️ You can mix some cooked ground turkey or Italian sausage into the marinara sauce for extra heartiness. 🍖

Q: Is this good for freezing? A: It is best eaten fresh. ➡️ Zucchini can change texture when frozen and thawed, but you can certainly keep leftovers in the fridge for up to 3 days! ❄️

Enjoy this beautiful and flavorful meal! 🥒🇮🇹✨

Healthy Creamy Avocado Ice Cream

Healthy Creamy Avocado Ice Cream 🥑🍦✨

Cool, silky, and naturally creamy — this avocado ice cream is a refreshing dessert packed with healthy fats and tropical flavor! 🌿💚

🛒 Ingredients

The Creamy Base 🥑🥥

  • 2 ripe avocados
  • 1 can (13.5 oz) full-fat coconut milk, chilled overnight
  • ½ cup honey or maple syrup
  • 1 tbsp lime juice
  • 1 tsp vanilla extract

Toppings 🌿

  • 2 tbsp chopped pistachios
  • Honey for drizzling
  • Fresh mint leaves

👩‍🍳 Step-by-Step Instructions

1️⃣ Prepare the Coconut Cream 🥥

Open the chilled coconut milk can carefully.
Scoop out only the thick cream from the top and place it into a blender. Save the liquid for smoothies or drinks.

2️⃣ Add the Main Ingredients 🥑

Add:

  • Avocado flesh
  • Coconut cream
  • Honey or maple syrup
  • Lime juice
  • Vanilla extract

3️⃣ Blend Until Creamy 🌪️

Blend everything on high speed until the mixture becomes completely smooth and fluffy.
The texture should look rich and silky with no avocado chunks remaining.

4️⃣ Churn or Freeze 🍦

If using an ice cream maker:
➡️ Churn for about 15–20 minutes until thick and creamy.

For the no-churn method:
➡️ Pour the mixture into a shallow container and freeze for at least 4 hours.

5️⃣ Keep It Smooth ❄️

During the first 2 hours of freezing, stir the mixture every 45 minutes.
This helps create a softer and creamier texture.

6️⃣ Soften Before Serving 🥄

Let the ice cream sit at room temperature for 5–10 minutes before scooping for the best texture.

7️⃣ Garnish & Enjoy 🌿✨

Top with chopped pistachios, honey drizzle, and fresh mint leaves before serving.


❓Q & A

Q: Does avocado make the ice cream taste savory?

➡️ No! The avocado mainly adds creaminess while the vanilla, honey, and lime create a sweet tropical flavor.

Q: Can I make this dairy-free?

➡️ Yes! This recipe is naturally dairy-free because it uses coconut milk instead of cream.

Q: How do I keep the green color bright?

➡️ Lime juice helps prevent browning and keeps the ice cream vibrant green.

Q: How long can I store it?

➡️ Keep it in the freezer for up to 1 week. Let it soften slightly before scooping.

Enjoy your creamy homemade avocado ice cream! 🥑🍦💚

Preserved Tomatoes with Garlic & Cabbage 🍅🧄

Preserved Tomatoes with Garlic & Cabbage 🍅🧄

Ingredients

  • 2 kg small tomatoes
  • 1 medium cabbage, shredded
  • 6 garlic cloves
  • 2 tbsp salt
  • 1 tbsp sugar
  • 1 liter water
  • Black peppercorns (optional)
  • Bay leaves (optional)

Full Process

1. Prepare the Tomatoes

  • Wash tomatoes well.
  • Make a small X cut on the bottom of each tomato.

2. Prepare the Jars

  • Sterilize large glass jars with hot water.
  • Let them dry completely.

3. Layer the Ingredients

  • Add some shredded cabbage to the bottom.
  • Add tomatoes and garlic cloves.
  • Continue layering cabbage and tomatoes until jars are full.

4. Make the Brine

  • Mix water, salt, and sugar until dissolved.
  • Pour into jars until tomatoes are fully covered.

5. Seal & Store

  • Close jars tightly with lids.
  • Keep in a cool dark place for 7–10 days.

6. Ready to Enjoy

  • After fermentation, store in the refrigerator.
  • Serve chilled with meals or salads.

Fresh, tangy, and delicious all winter long! 😋🍅

Zucchini Fritters

These crispy zucchini fritters are golden on the outside, soft and  cheesy on the inside, and packed with fresh flavor. Made with grated zucchini, eggs, herbs, garlic, and melted mozzarella  cheese, they’re perfect for breakfast, lunch, dinner, or a quick savory snack. Serve them with yogurt sauce, sour cream, or a fresh salad for an easy and satisfying meal.

Cheese

Ingredients

  • 2 medium zucchinis, grated
  • 1 tsp salt
  • 2 large eggs
  • 1 cup shredded mozzarella cheese
  • 1/3 cup all-purpose flour
  • 2 tbsp chopped fresh dill or parsley
  • 2 garlic cloves, minced
  • 1/2 tsp black pepper
  • 2–3 tbsp oil for frying

Optional Add-Ins

  • Green onions
  • Parmesan cheese
  • Crumbled feta
  • Red pepper flakes

Instructions

Step 1: Prepare the Zucchini

Grate the zucchini into a bowl and sprinkle with salt. Let sit for 10 minutes to release excess moisture.

Dairy & Eggs

Step 2: Remove Moisture

Place the zucchini in a clean kitchen towel or cheesecloth and squeeze out as much liquid as possible. This helps make the fritters crispy.

Step 3: Make the Batter

In a large bowl, combine the squeezed zucchini, eggs, mozzarella cheese, flour, herbs, garlic, and black pepper. Mix until fully combined.

Cheese

Step 4: Cook the Fritters

Heat oil in a skillet over medium heat. Scoop about 2 tablespoons of batter for each fritter and flatten slightly.

Cook for 3–4 minutes per side until golden brown and cooked through.

Step 5: Serve

Serve warm with sour cream, garlic yogurt sauce, ranch dip, or fresh herbs.

Discover more
Slow Cookers
Crockpot
CrockPot

Tips

  • Drain zucchini well to avoid soggy fritters.
  • Add extra flour if the batter feels too wet.
  • Air fry at 375°F for 10–12 minutes for a lighter version.

Nutrition (Per Serving)

  • Calories: 220
  • Protein: 11g
  • Carbs: 10g
  • Fat: 15g
  • Fiber: 2g

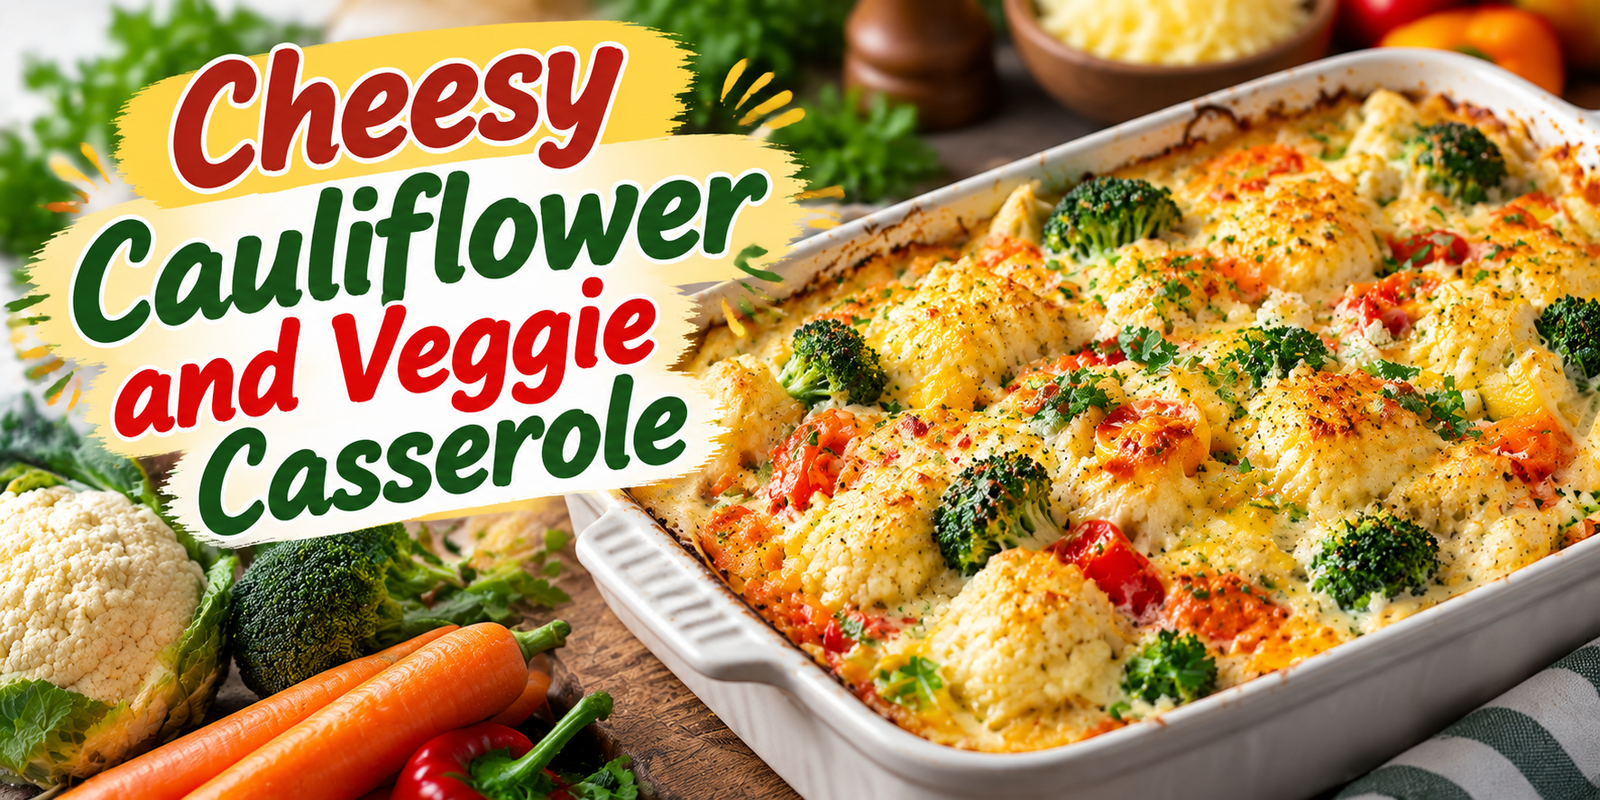
Golden Cabbage & Veggie Bake

Golden Cabbage & Veggie Bake

Description

Golden Cabbage & Veggie Bake is a warm, wholesome casserole filled with tender cabbage, colorful vegetables, creamy cheese, and a perfectly golden baked topping. This comforting dish is packed with flavor, texture, and nourishing ingredients, making it perfect as a vegetarian main course or hearty side dish. With its crispy top and soft savory center, this easy bake is ideal for family dinners, meal prep, or cozy comfort meals.

Ingredients For the Vegetable Bake

  • 4 cups cabbage, chopped
  • 1 cup carrots, shredded
  • 1 zucchini, diced
  • 1 bell pepper, chopped
  • 1 small onion, diced
  • 2 garlic cloves, minced
  • 2 tbsp olive oil
  • 1 tsp Italian seasoning
  • ½ tsp paprika
  • Salt and black pepper to taste

For the Creamy Mixture

  • 2 eggs
  • ½ cup milk
  • 1 cup shredded cheddar cheese
  • ¼ cup grated Parmesan cheese

Optional Topping

  • ½ cup breadcrumbs
  • Fresh parsley

Instructions

Step 1: Preheat Oven

Preheat oven to 375°F (190°C). Grease a baking dish.

Step 2: Sauté Vegetables

Heat olive oil in a skillet over medium heat. Cook onion and garlic for 2 minutes. Add cabbage, carrots, zucchini, and bell pepper. Sauté for 5–7 minutes until slightly softened.

Step 3: Season

Stir in Italian seasoning, paprika, salt, and black pepper.

Step 4: Make Cream Mixture

In a bowl, whisk eggs and milk together. Stir in cheddar cheese and Parmesan cheese.

Step 5: Assemble

Transfer vegetables into the prepared baking dish. Pour cheese mixture evenly over the vegetables. Sprinkle breadcrumbs on top if using.

Step 6: Bake

Bake for 30–35 minutes until golden brown and set.

Step 7: Serve

Garnish with parsley and serve warm.

Recipe Notes

  • Cabbage becomes tender and naturally sweet after baking.
  • Cheese creates a rich and creamy texture.
  • Breadcrumbs add delicious crunch on top.
  • Fresh vegetables give the best flavor and texture.

Tips for Best Results

  • Do not overcook vegetables before baking.
  • Drain excess moisture from zucchini if needed.
  • Use freshly shredded cheese for smoother melting.
  • Let the casserole rest for 5 minutes before slicing.

Servings

Serves: 6

Nutritional Information (Approx. Per Serving)

  • Calories: 220
  • Protein: 10g
  • Carbohydrates: 14g
  • Fat: 14g
  • Fiber: 4g
  • Sodium: 340mg

(Nutritional values may vary depending on ingredients used.)

Health Benefits

  • Cabbage is rich in fiber, vitamin C, and antioxidants.
  • Mixed vegetables provide important vitamins and minerals.
  • Homemade veggie bakes are filling and nutrient-dense.
  • Great vegetarian option with balanced nutrients.
  • Supports healthy digestion thanks to fiber-rich vegetables.

Q&A About Golden Cabbage & Veggie Bake

Q: Can I make this recipe vegan?

Yes, use plant-based cheese, milk, and egg substitutes.

Q: Can I add protein?

Absolutely. Chicken, turkey, or beans work well.

Q: What cheese works best?

Cheddar, mozzarella, Monterey Jack, or feta are great options.

Q: Can I prepare this ahead of time?

Yes, assemble the bake ahead and refrigerate until ready to cook.

Q: How long do leftovers last?

Store in the refrigerator for up to 4 days.

Q: Can I freeze this casserole?

Yes, freeze tightly wrapped portions for up to 2 months.

Q: What can I serve with this dish?

Soup, salad, roasted meat, or crusty bread pair beautifully.