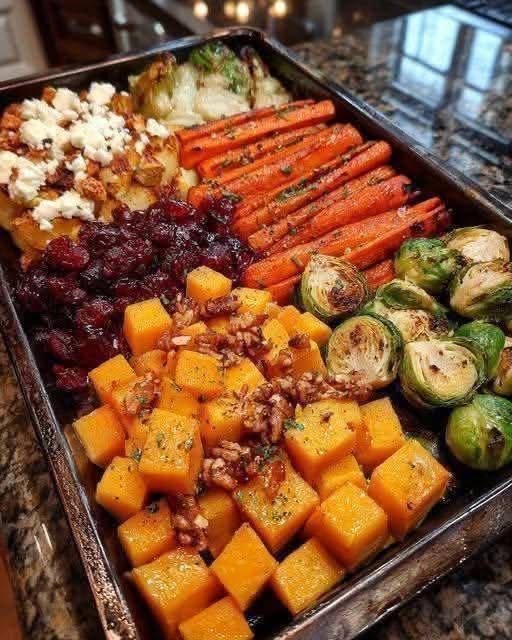
Roasted Veggie Tray BakeΒ 

πŸ₯•πŸ₯¦ Roasted Veggie Tray Bake

🧾 Ingredients

  • Carrots
  • Broccoli
  • Cauliflower
  • Brussels sprouts
  • Butternut squash (cubed)
  • Dried cranberries
  • Walnuts
  • Olive oil
  • Salt
  • Black pepper
  • Garlic (fresh or powder)
  • Dried herbs (thyme/rosemary)

πŸ‘©β€πŸ³ Step-by-Step Recipe

  • πŸ‘‰ Step 1:
    Preheat oven to 200Β°C (400Β°F) πŸ”₯ and line a large tray with parchment paper
  • πŸ‘‰ Step 2:
    Wash and cut everything into similar-sized pieces so they cook evenly πŸ”ͺπŸ₯•
  • πŸ‘‰ Step 3:
    Spread vegetables on the tray in a single layer with space between them (this helps crispiness) ✨
  • πŸ‘‰ Step 4:
    Drizzle olive oil evenly over everything πŸ«’
  • πŸ‘‰ Step 5:
    Add salt, black pepper, garlic, and herbs πŸŒΏπŸ§‚
  • πŸ‘‰ Step 6:
    Toss well until all pieces are nicely coated 🀲
  • πŸ‘‰ Step 7:
    Roast for 25–30 minutes, flipping halfway for even browning πŸ”„β³
  • πŸ‘‰ Step 8:
    Roast until edges are golden and slightly crispy πŸ”₯πŸ₯¦
  • πŸ‘‰ Step 9:
    Add dried cranberries and walnuts while still hot πŸ‡πŸŒ°
  • πŸ‘‰ Step 10:
    Let rest for 2–3 minutes, then serve warm πŸ˜‹

❓ Q&A

Q1: Why aren’t my veggies crispy?
πŸ‘‰ Most likely overcrowding or too little heatβ€”give them space and keep oven hot πŸ”₯

Q2: When should I add nuts?
πŸ‘‰ Always at the end to keep them crunchy 🌰

Q3: Can I make this ahead?
πŸ‘‰ Yes, but reheat in oven (not microwave) for best texture ♨️

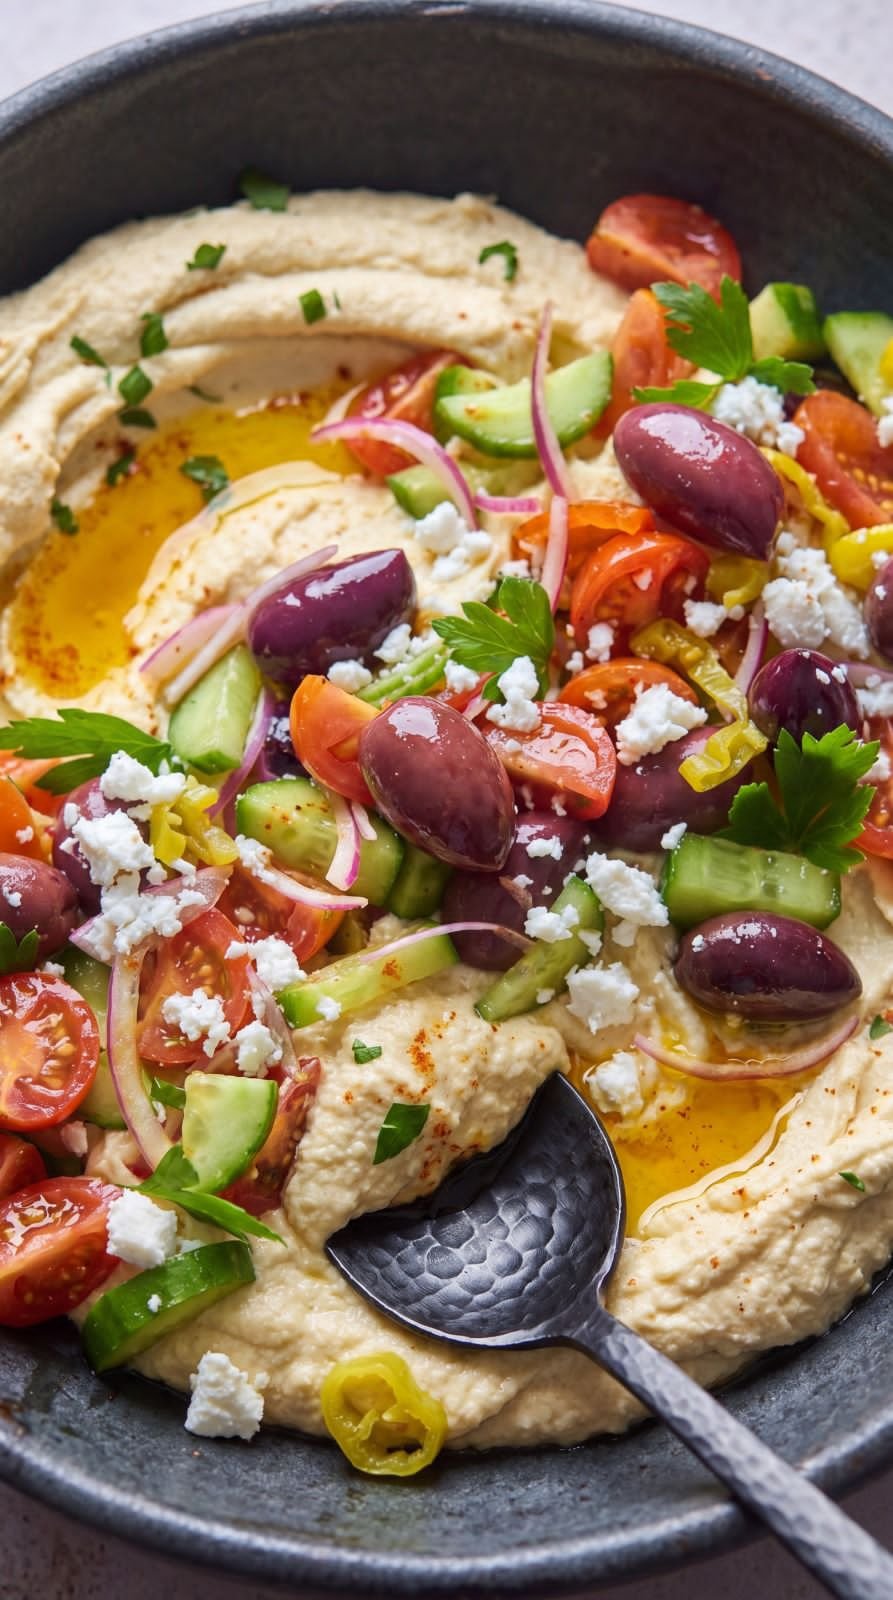
Mediterranean Hummus Platter wit Fresh

  • πŸ₯— Mediterranean Hummus Platter wit Fresh Toppings

Ingredients

The Hummus Base: 2 cups of smooth chickpea hummus (store-bought or homemade).


The Fresh Toppings: 1 cup cherry tomatoes (halved), 1 large English cucumber (diced), Β½ red onion (thinly sliced), and ΒΌ cup Kalamata olives (pitted).


The Finishers: ΒΌ cup crumbled feta cheese, fresh parsley (finely chopped), and mild pickled peppers.


The Seasoning: A drizzle of extra virgin olive oil, a sprinkle of paprika, and a pinch of dried oregano.


Step-by-Step Instructions

Prepare the Hummus Base πŸ₯£


Place a generous amount of hummus onto a large, flat platter. ➑️ Use the back of a spoon to spread it in a circular motion, creating “swirls” and deep wells to hold the oil and toppings.


Dice and Slice πŸ”ͺ


Halve the cherry tomatoes and dice the cucumber into bite-sized pieces. ➑️ Thinly slice the red onion to add a mild crunch. ➑️ Roughly chop the parsley.


Layer the Toppings πŸ₯—


Mound the fresh tomatoes, cucumbers, and red onions directly into the center of the hummus swirls. ➑️ Scatter the Kalamata olives and mild pickled peppers over the vegetables.


Add Flavor and Texture ✨


Generously sprinkle crumbled feta cheese across the entire dish. ➑️ Add a dusting of paprika and dried oregano for an earthy aroma.


The Final Drizzle πŸ«’


Drizzle high-quality extra virgin olive oil into the wells of the hummus. ➑️ Top with fresh parsley. ➑️ Serve with warm pita bread or crunchy vegetable sticks.


πŸ₯— Nutritional Benefits

Heart-Healthy Fats: Extra virgin olive oil and olives provide monounsaturated fats that support cardiovascular health.


Plant-Based Protein: Hummus is made from chickpeas, offering a good source of protein and essential fiber.


Vitamin Rich: The fresh vegetables provide high amounts of Vitamin C, Vitamin K, and antioxidants like lycopene from the tomatoes.


Digestive Support: The fiber found in chickpeas and fresh veggies promotes a healthy and efficient digestive system.


❓ Common Questions (Q&A)

Q: Can I make this ahead of time?

A: You can spread the hummus on the platter in advance, but it is best to add the fresh vegetable toppings just before serving to keep them crisp and prevent the hummus from getting watery.


Q: What can I use if I don’t like olives?

A: You can substitute olives with capers for a salty kick, or simply add more pickled peppers for extra tang.


Q: Is this dish suitable for vegetarians?

A: Yes, this is a naturally vegetarian dish. To make it vegan, simply omit the feta cheese or use a plant-based cheese alternative.


Q: How do I get my hummus to look like the picture?

A: Use a chilled spoon and apply firm, circular pressure while rotating the plate. The “wells” are essential for catching the olive oil and spices.

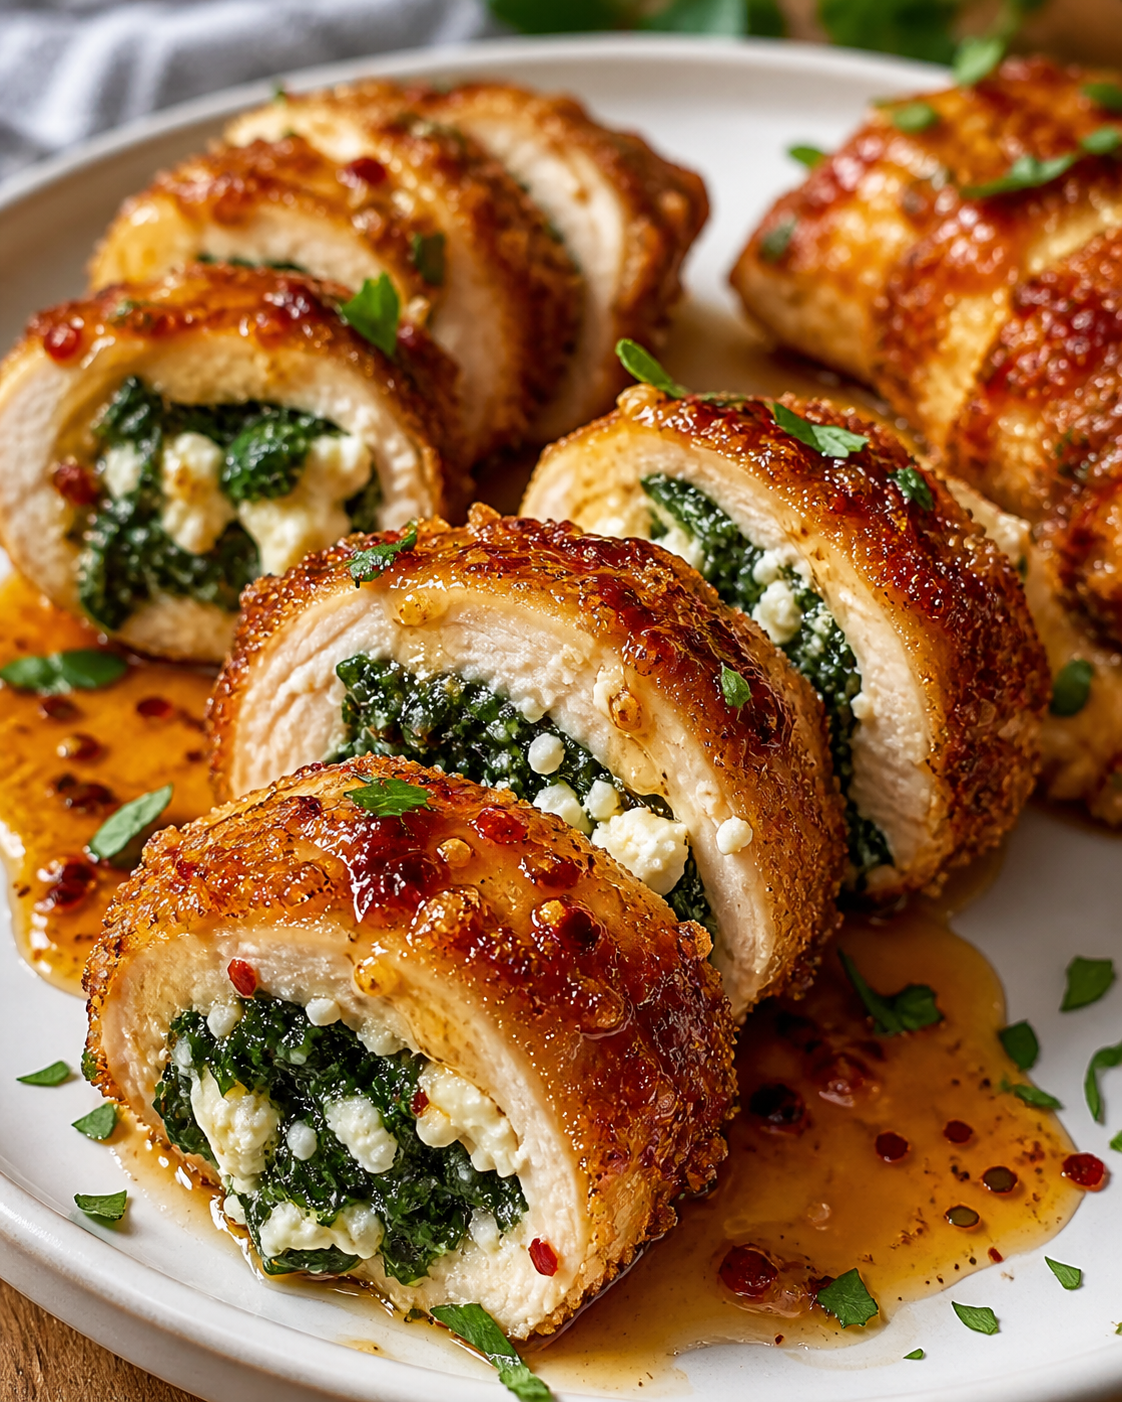
Crispy Stuffed Chicken Rolls with Spinach, Feta & Hot Honey Glaze

πŸ›’ Ingredients

  • 4 chicken breasts πŸ—
  • 2 cups fresh spinach 🌿
  • 1 cup crumbled feta cheese πŸ§€
  • 1 tsp garlic powder πŸ§„
  • 1 tsp onion powder πŸ§…
  • Salt & black pepper πŸ§‚
  • 1 cup breadcrumbs 🍞
  • 2 eggs πŸ₯š
  • Β½ cup flour
  • 2 tbsp olive oil πŸ«’
  • ΒΌ cup honey 🍯
  • 1 tsp chili flakes 🌢️
  • 1 tsp hot sauce πŸ”₯
  • Toothpicks or kitchen twine

πŸ‘©β€πŸ³ Step-by-Step Instructions

πŸ”ͺ Step 1: Prepare the Chicken

➑️ Place each chicken breast between plastic wrap.
➑️ Pound gently until evenly thin but not torn.
➑️ Season both sides with salt, pepper, garlic powder, and onion powder.


🌿 Step 2: Make the Filling

➑️ In a bowl, combine:

  • Fresh spinach
  • Crumbled feta cheese

➑️ Mix well until evenly combined.
➑️ The feta adds creaminess while spinach keeps it fresh and flavorful 😍


πŸ— Step 3: Stuff & Roll

➑️ Spoon the spinach-feta mixture onto the center of each chicken breast.
➑️ Carefully roll the chicken tightly like a log.
➑️ Secure with toothpicks or kitchen twine so the filling stays inside.


πŸ₯š Step 4: Bread the Rolls

➑️ Prepare 3 bowls:

  1. Flour
  2. Beaten eggs
  3. Breadcrumbs

➑️ Roll each chicken piece in flour first.
➑️ Dip into the eggs completely.
➑️ Coat generously in breadcrumbs for that crispy outer layer ✨


πŸ”₯ Step 5: Cook the Chicken Rolls

➑️ Heat olive oil in a skillet over medium heat.
➑️ Sear the chicken rolls on all sides until golden brown.

➑️ Transfer to a baking dish.
➑️ Bake at 375Β°F (190Β°C) for 20–25 minutes until fully cooked and crispy.


🍯 Step 6: Make the Hot Honey Glaze

➑️ In a small saucepan, combine:

  • Honey
  • Chili flakes
  • Hot sauce

➑️ Warm gently for 1–2 minutes while stirring.
➑️ The glaze should become smooth, glossy, sweet, and spicy πŸ”₯🍯


✨ Step 7: Finish & Serve

➑️ Remove toothpicks carefully.
➑️ Slice the chicken rolls into rounds for a beautiful presentation.
➑️ Drizzle generously with hot honey glaze.
➑️ Serve warm and enjoy the crispy, cheesy goodness πŸ˜‹


🍽️ Serving Ideas

πŸ₯” Mashed potatoes
πŸ₯— Garden salad
🍚 Herbed rice
πŸ₯¦ Roasted vegetables


❓Q & A

❓Can I use frozen spinach?

βœ… Yes, just thaw and squeeze out extra moisture first.

❓What cheese works besides feta?

βœ… Cream cheese, mozzarella, or goat cheese work wonderfully.

❓Can I air fry these?

βœ… Absolutely! Air fry at 375Β°F for about 18–20 minutes.


🌟 Pro Tips

✨ Chill the rolls for 10 minutes before breading to help them stay tight
✨ Use panko breadcrumbs for extra crunch
✨ Add chopped sun-dried tomatoes for more flavor πŸ’›

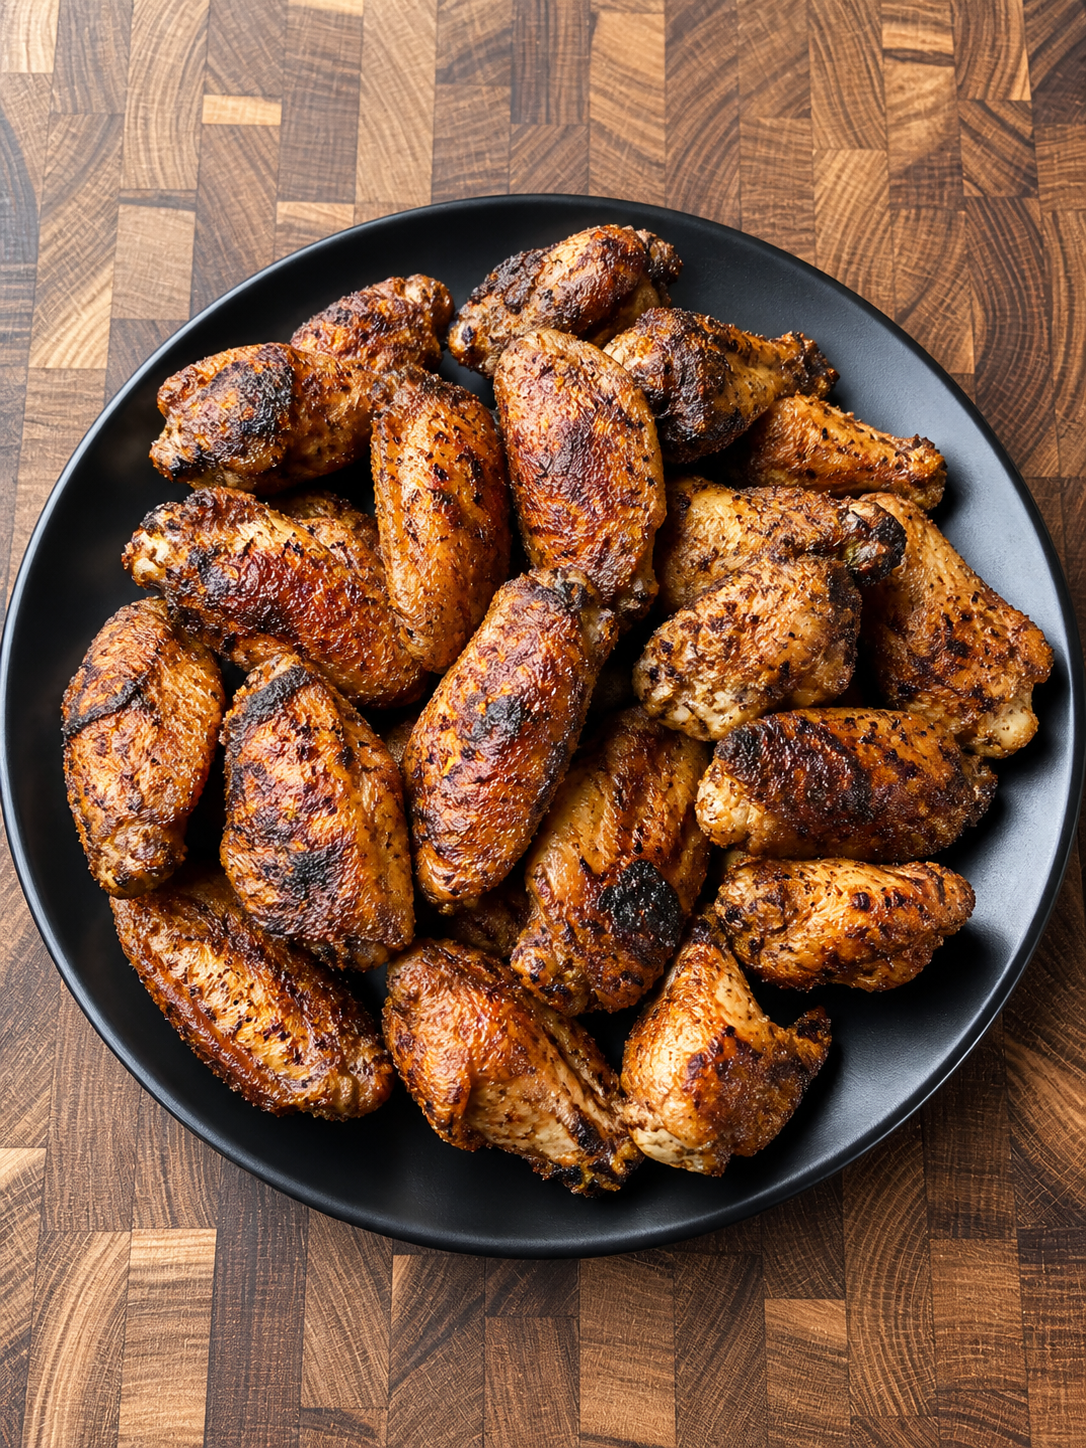
Crispy Seasoned Chicken Wings Recipe

Ingredients

  • 2 lbs chicken wings & drumettes πŸ—
  • 2 tbsp olive oil πŸ«’
  • 1 tsp garlic powder πŸ§„
  • 1 tsp onion powder πŸ§…
  • 1 tsp smoked paprika 🌢️
  • 1 tsp black pepper πŸ§‚
  • 1 tsp salt πŸ§‚
  • Β½ tsp chili flakes 🌢️
  • 1 tsp Italian seasoning 🌿
  • 1 tbsp baking powder (for extra crispiness) ✨
  • Optional: melted butter for brushing 🧈

πŸ‘©β€πŸ³ Step-by-Step Instructions

🧼 Step 1: Prep the Chicken

➑️ Wash and pat the chicken wings completely dry using paper towels.
➑️ Removing extra moisture helps the wings become beautifully crispy πŸ”₯


🌢️ Step 2: Season the Wings

➑️ In a large bowl, add:

  • Garlic powder
  • Onion powder
  • Smoked paprika
  • Salt
  • Black pepper
  • Chili flakes
  • Italian seasoning
  • Baking powder

➑️ Drizzle olive oil over the wings.
➑️ Toss everything together until every wing is evenly coated with seasoning 😍


❄️ Step 3: Rest for Better Flavor

➑️ Let the wings rest for about 15–20 minutes.
➑️ This helps the seasoning soak into the chicken for extra flavor πŸ’₯


πŸ”₯ Oven Method

πŸ— Step 4: Arrange the Wings

➑️ Preheat oven to 425°F (220°C).
➑️ Place wings on a wire rack over a baking tray.
➑️ Keep space between each piece for even crispiness.


⏲️ Step 5: Bake

➑️ Bake for 20 minutes.
➑️ Flip the wings carefully.
➑️ Bake another 20–25 minutes until golden brown and crispy ✨


🍳 Air Fryer Method

πŸ”₯ Step 4 Alternative

➑️ Preheat air fryer to 390°F (200°C).
➑️ Arrange wings in a single layer.

⏲️ Step 5 Alternative

➑️ Air fry for 18–22 minutes, flipping halfway through.
➑️ Cook until crispy and nicely browned πŸ˜‹


🧈 Step 6: Final Touch

➑️ Brush lightly with melted butter for extra shine and flavor.
➑️ Serve hot with your favorite dipping sauce πŸ₯£


πŸ˜‹ Serving Ideas

🍟 French fries
πŸ₯— Fresh salad
🌽 Corn on the cob
πŸ₯€ Cold drinks


❓Q & A

❓How do I make wings extra crispy?

βœ… Pat them very dry and use a little baking powder.

❓Can I make them spicy?

βœ… Yes! Add extra chili flakes or hot sauce.

❓Can I store leftovers?

βœ… Yes, refrigerate for up to 3 days and reheat in the oven or air fryer.

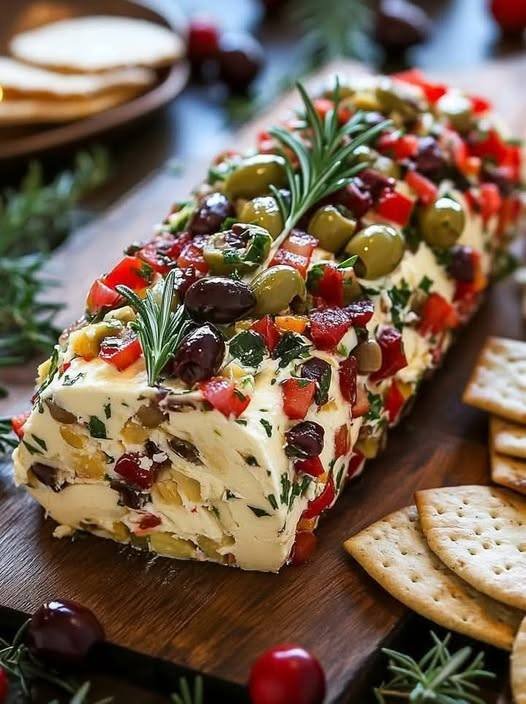
Festive Cream Cheese Appetizer Log

πŸ§€πŸŒΏ Festive Cream Cheese Appetizer Log

πŸ›’ Ingredients

  • πŸ§€ 2 blocks cream cheese
  • πŸ«’ Β½ cup green olives
  • πŸ«’ Β½ cup black olives
  • 🌢️ Β½ red bell pepper (finely chopped)
  • 🌿 Fresh parsley (chopped)
  • 🌿 Fresh rosemary sprigs
  • πŸ‡ 2 tbsp dried cranberries
  • πŸ§„ 1 garlic clove (minced)
  • πŸ§‚ Salt
  • 🌢️ Black pepper
  • 🍘 Crackers for serving

πŸ‘©β€πŸ³ Step-by-Step Recipe

πŸ”Ή Step 1: Soften the Cream Cheese

  • πŸ§€ Leave the cream cheese at room temperature for a few minutes until soft.
  • πŸ₯„ Place it into a mixing bowl and stir gently until creamy and smooth.

πŸ”Ή Step 2: Prepare the Mix-Ins

  • πŸ”ͺ Finely chop the olives and red bell pepper into tiny pieces.
  • 🌿 Chop the parsley for freshness and color.
  • πŸ§„ Mince the garlic very finely so it blends smoothly into the mixture.

πŸ”Ή Step 3: Mix Everything Together

  • πŸ₯£ Add the chopped olives, peppers, parsley, cranberries, and garlic into the cream cheese.
  • πŸ§‚ Season lightly with salt and black pepper.
  • πŸ₯„ Fold everything together gently until evenly mixed.

πŸ”Ή Step 4: Shape the Cheese Log

  • 🧻 Place the mixture onto plastic wrap or parchment paper.
  • βœ‹ Roll and shape it carefully into a log shape.
  • ✨ Smooth the sides gently so it looks neat and firm.

πŸ”Ή Step 5: Decorate the Outside

  • 🌿 Press extra chopped parsley, peppers, olives, and cranberries around the outside for a colorful coating.
  • 🌱 Add rosemary sprigs on top for a festive look.
  • 😍 The brighter and more colorful, the prettier it will look when served!

πŸ”Ή Step 6: Chill & Serve

  • ❄️ Refrigerate the cheese log for at least 1 hour to firm up.
  • 🍘 Serve chilled with crackers or toasted bread slices.
  • πŸ˜‹ Spread onto crackers and enjoy the creamy, savory flavor!

❓ Q/A

❓ Can I make this appetizer ahead of time?

  • ⏰ Yes! It can be prepared a day in advance and kept chilled.

❓ What else can I add?

  • 🌰 Chopped nuts or shredded cheese add extra flavor and texture.

❓ How should I store leftovers?

  • 🧊 Wrap tightly and refrigerate for up to 3 days.

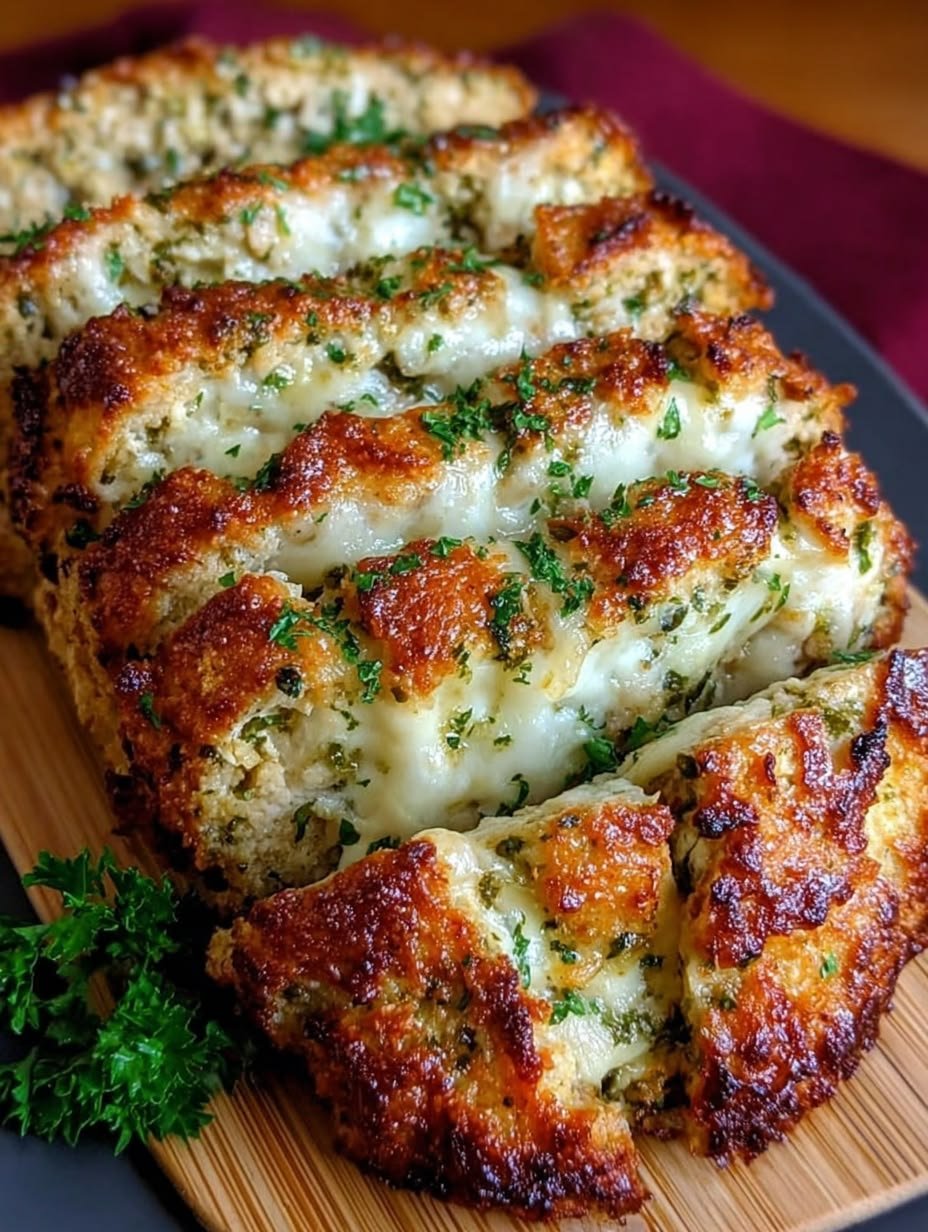
Parmesan Chicken Meatloaf

πŸ—πŸ§€ Parmesan Chicken Meatloaf

🧾 Ingredients

  • 1 lb (500g) ground chicken
  • Β½ cup breadcrumbs
  • Β½ cup grated Parmesan cheese πŸ§€
  • 1 egg πŸ₯š
  • 2 cloves garlic (minced) πŸ§„
  • ΒΌ cup milk
  • 2 tbsp fresh parsley (chopped) 🌿
  • 1 tsp Italian seasoning
  • Salt & pepper to taste

πŸ… Topping:

  • Β½ cup marinara sauce
  • ΒΌ cup mozzarella cheese (optional)

πŸ‘©β€πŸ³ Instructions

1. Mix

  • In a bowl combine:
    • Ground chicken
    • Breadcrumbs
    • Parmesan
    • Egg
    • Garlic
    • Milk
    • Herbs & seasoning
  • Mix until just combined (don’t overmix)

2. Shape

  • Form into a loaf shape
  • Place in a greased baking dish

3. Bake

  • Bake at 180Β°C (350Β°F) for 30 minutes

4. Add topping

  • Spread marinara sauce on top
  • Sprinkle mozzarella

5. Finish baking

  • Bake another 10–15 minutes
    πŸ‘‰ Until cooked through & golden

😍 Result

  • Juicy & tender inside
  • Cheesy, flavorful
  • Slightly crispy edges
  • Italian-style comfort food 🍝

πŸ’‘ Tips

  • Add chopped spinach for a healthy twist
  • Use panko for extra softness
  • Let it rest 5–10 min before slicing


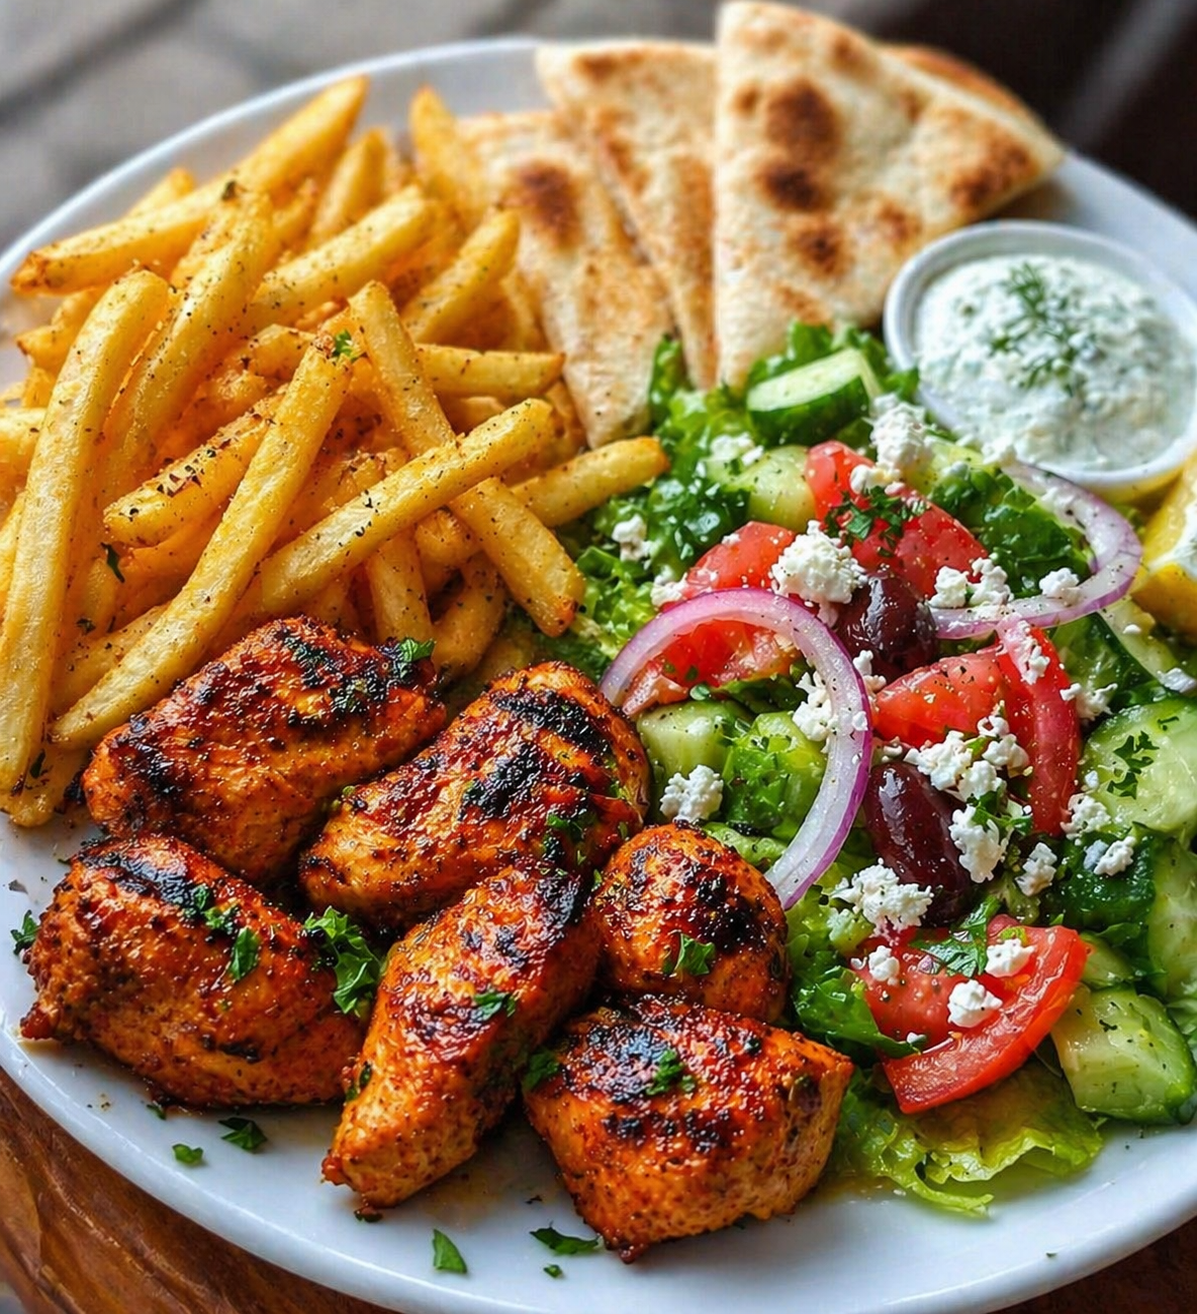
Grilled Chicken Plate with Fries, Greek Salad, Pita, and Tzatziki

Grilled Chicken Bites

Ingredients

  • 700 g boneless chicken breast or thighs, cut into bite-size chunks
  • 3 tablespoons olive oil
  • 2 tablespoons lemon juice
  • 4 garlic cloves, minced
  • 1 teaspoon paprika
  • 1 teaspoon smoked paprika
  • 1 teaspoon dried oregano
  • 1/2 teaspoon cumin
  • 1/2 teaspoon chili flakes, optional
  • 1 teaspoon salt
  • 1/2 teaspoon black pepper

Instructions

  1. In a bowl, mix olive oil, lemon juice, garlic, paprika, smoked paprika, oregano, cumin, chili flakes, salt, and black pepper.
  2. Add chicken pieces and coat well.
  3. Cover and marinate for at least 30 minutes. For deeper flavor, marinate 2 to 4 hours in the fridge.
  4. Heat a grill pan, skillet, or outdoor grill over medium-high heat.
  5. Cook chicken for 8 to 12 minutes, turning occasionally, until nicely charred and fully cooked.
  6. Rest for 2 minutes before serving.

2) Crispy Fries

Ingredients

  • 4 large potatoes
  • 2 tablespoons cornstarch
  • 1 teaspoon salt
  • 1/2 teaspoon paprika
  • 1/4 teaspoon black pepper
  • Oil for frying

Instructions

  1. Peel potatoes if desired, then cut into thin fries.
  2. Soak in cold water for 20 to 30 minutes.
  3. Drain and dry very well with a towel.
  4. Toss with cornstarch, salt, paprika, and pepper.
  5. Heat oil in a deep pan.
  6. Fry in batches for 4 to 5 minutes until pale and tender. Remove and rest 5 minutes.
  7. Fry a second time for 2 to 3 minutes until golden and crisp.
  8. Sprinkle with a little extra salt.

Oven option

Bake at 220Β°C / 425Β°F with 2 to 3 tablespoons oil for 30 to 40 minutes, turning halfway.


3) Greek Salad

Ingredients

  • 1 small romaine lettuce or mixed lettuce, chopped
  • 2 tomatoes, sliced
  • 1 cucumber, diced
  • 1/2 red onion, sliced into rings
  • 100 g feta cheese, crumbled
  • 8 to 10 olives, optional

Dressing

  • 3 tablespoons olive oil
  • 1 tablespoon lemon juice or red wine vinegar
  • 1/2 teaspoon dried oregano
  • 1/2 teaspoon salt
  • 1/4 teaspoon black pepper

Instructions

  1. Arrange lettuce, tomatoes, cucumber, onion, feta, and olives on a plate or bowl.
  2. Whisk dressing ingredients together.
  3. Drizzle over the salad just before serving.

4) Tzatziki Sauce

Ingredients

  • 1 cup thick yogurt or Greek yogurt
  • 1/2 cucumber, grated and squeezed dry
  • 1 garlic clove, minced
  • 1 tablespoon olive oil
  • 1 tablespoon lemon juice
  • 1 tablespoon chopped dill or mint
  • 1/4 teaspoon salt
  • 1/4 teaspoon black pepper

Instructions

  1. Mix yogurt, grated cucumber, garlic, olive oil, lemon juice, herbs, salt, and pepper.
  2. Chill for 10 to 15 minutes before serving.

5) Pita Bread

Ingredients

  • 4 pita breads
  • 1 tablespoon olive oil
  • Pinch of oregano, optional

Instructions

  1. Warm pita in a dry pan, oven, or directly over a flame for a few seconds.
  2. Brush lightly with olive oil and sprinkle oregano if desired.
  3. Cut into triangles.

To Assemble

Add fries to one side of the plate. Arrange grilled chicken bites beside them. Add Greek salad on the other side. Serve with warm pita and a spoonful of tzatziki.

Extra Tips

  • Chicken thighs stay juicier than breast.
  • Double-frying gives the crispiest fries.
  • Squeeze water from cucumber well for thick tzatziki.
  • Add a lemon wedge on the side for extra freshness.

Simple Serving Sauce Option

Mix:

  • 3 tablespoons mayo
  • 2 tablespoons yogurt
  • 1 teaspoon lemon juice
  • 1/2 teaspoon garlic powder
  • pinch of salt

This makes a quick creamy sauce for the fries and chicken.

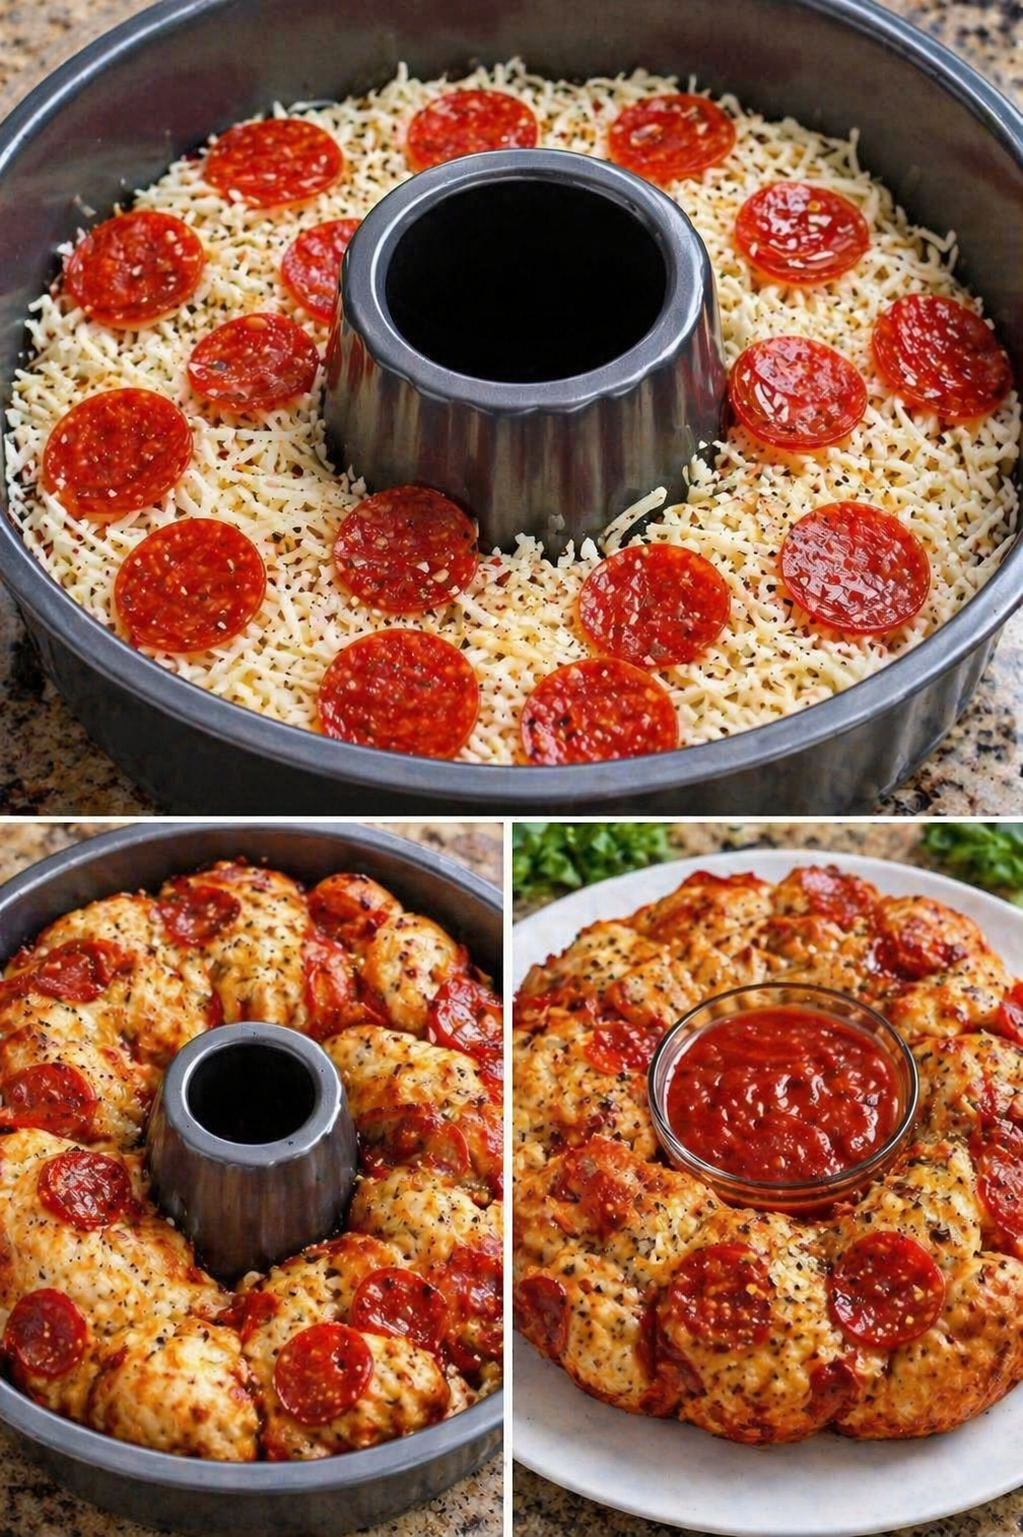
Pepperoni Pizza Monkey Bread Ring

Pepperoni Pizza Monkey Bread Ring

πŸ›’ Ingredients

The Base:

  • 2 cans (approx. 450g each) Refrigerated biscuit dough (or homemade pizza dough cut into 1-inch pieces)

  • 1/4 cup Unsalted butter, melted

  • 2 tbsp Olive oil

The Mix-ins:

  • 2 cups Shredded Mozzarella cheese

  • 1 cup Pepperoni slices (halved or quartered)

  • 1/2 cup Grated Parmesan cheese

  • 1 tbsp Italian seasoning (dried oregano, basil, parsley)

  • 1 tsp Garlic powder

The Dip:

  • 1 cup Marinara or Pizza sauce (warmed for serving)


πŸ‘¨β€πŸ³ Step-by-Step Instructions

  1. Prep the Pan & Oven 🌑️

    • Preheat your oven to 175Β°C (350Β°F).

    • Generously grease a 10-inch bundt pan with butter or non-stick spray. ➑️ This is crucial to ensure the ring slides out easily!

  2. Prepare the Dough Bites βœ‚οΈ

    • Cut each biscuit into quarters (or cut your fresh dough into small, golf-ball-sized pieces).

    • In a large bowl, toss the dough pieces with the melted butter and olive oil until coated.

  3. Seasoning Shake-up πŸ§‚

    • In a separate small bowl, mix the Parmesan cheese, Italian seasoning, and garlic powder.

    • Sprinkle this mixture over the buttered dough and toss again.

  4. Assemble the Ring πŸ—οΈ

    • Scatter a handful of pepperoni and mozzarella into the bottom of the bundt pan.

    • Layer about half of the dough pieces over the toppings.

    • Add another layer of cheese and pepperoni. ➑️ Repeat until all ingredients are used, ending with a few pepperoni slices on top.

  5. Bake to Golden Perfection πŸ”₯

    • Bake for 28–32 minutes.

    • The top should be deep golden brown, and the center should be firm to the touch. ➑️ If the top browns too quickly, cover loosely with foil.

  6. The Flip & Serve πŸ”ƒ

    • Let the pan cool for 5–10 minutesβ€”this allows the cheese to set slightly so the ring stays together.

    • Place a large plate over the top of the pan and carefully flip it over.

    • Lift the pan off to reveal your pizza ring!

  7. Add the Centerpiece πŸ…

    • Place a small bowl of warm marinara sauce in the center hole of the ring for dipping.


πŸ€” Common Questions (Q&A)

Q: Can I make this ahead of time? A: You can assemble it a few hours early and keep it covered in the fridge, but it is best baked fresh. Reheating is easy in the oven at 150°C for about 10 minutes. ⏰

Q: My center feels a bit doughy, what happened? A: Bundt pans vary in thickness. If the outside is brown but the inside is soft, lower the heat slightly and bake for an extra 5 minutes. You can also test the internal temperature with a thermometer; it should reach 88°C (190°F). 🌑️

Q: What other fillings can I add? A: Feel free to get creative! Finely chopped green peppers, black olives, or cooked sausage bits work beautifully alongside the pepperoni. πŸ«‘


Enjoy your pull-apart pizza party! πŸ•βœ¨

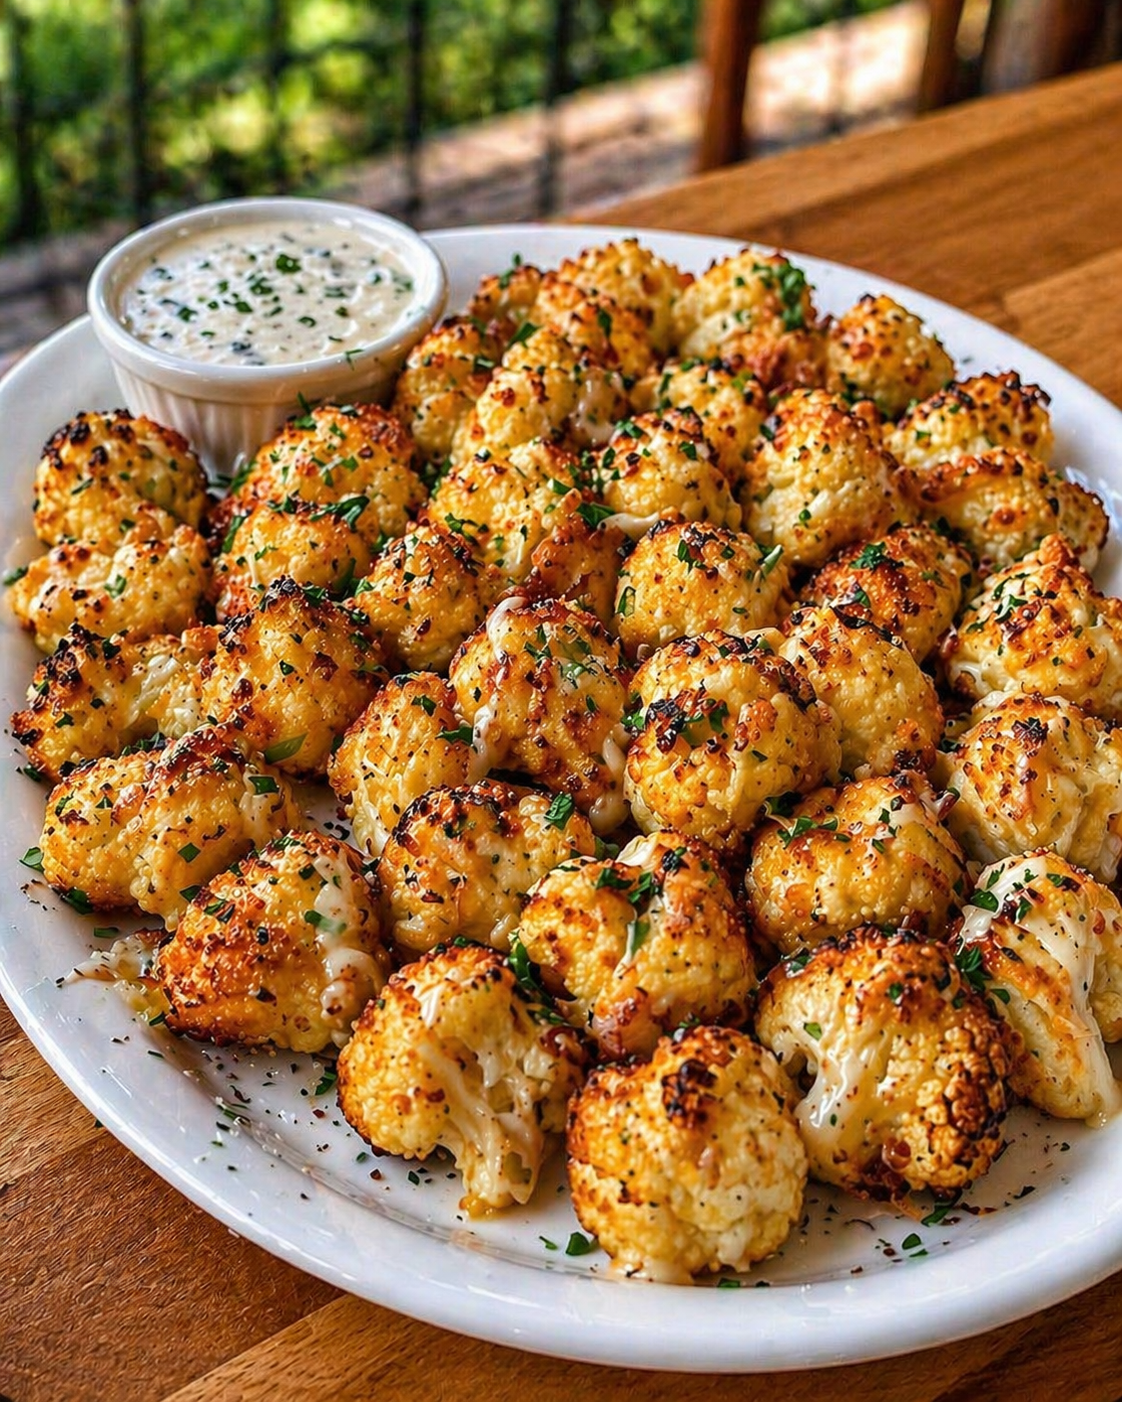
Crispy Garlic Parmesan Cauliflower

Crispy Garlic Parmesan Cauliflower

πŸ›’ Ingredients

The Roast:

  • 1 Large head of cauliflower (cut into bite-sized florets)

  • 3 tbsp Extra virgin olive oil

  • 1/2 cup Freshly grated Parmesan cheese

  • 1/2 cup Panko breadcrumbs (for extra crunch)

  • 1 tsp Garlic powder

  • 1 tsp Paprika (for that golden color) 🌢️

  • Salt and black pepper to taste

The Garlic Butter Drizzle:

  • 2 tbsp Unsalted butter (melted)

  • 2 Cloves garlic (minced)

  • 2 tbsp Fresh parsley (finely chopped) 🌿

For Serving:

  • Ranch dressing or a Garlic Aioli dip πŸ₯£


πŸ‘©β€πŸ³ Step-by-Step Instructions

1. Prep & Dry 🚿

  • Preheat your oven to 200Β°C. Line a large baking sheet with parchment paper.

  • Wash the cauliflower florets and pat them very dry with a kitchen towel. ➑️ Excess water will cause the cauliflower to steam rather than crisp up!

2. The Coating πŸ₯£

  • In a large mixing bowl, toss the florets with the olive oil until every piece is shiny.

  • In a small separate bowl, mix the Parmesan, Panko, garlic powder, paprika, salt, and pepper.

  • ➑️ Sprinkle the dry mix over the cauliflower and toss again until the crumbs stick to the oil-coated florets.

3. Arrange for Airflow πŸ’¨

  • Spread the cauliflower onto the baking sheet in a single layer.

  • ➑️ Make sure they aren’t touching each other! Space is the secret to getting those crispy, browned edges.

4. The Golden Bake πŸ”₯

  • Bake for 20–25 minutes.

  • Halfway through, use a spatula to flip the florets. ➑️ Bake until they are tender when pierced with a fork but dark golden-brown on the outside.

5. The Flavor Finish ✨

  • While the cauliflower is hot, mix the melted butter, minced garlic, and parsley in a small bowl.

  • ➑️ Drizzle this mixture over the roasted bites and give them a quick toss right on the tray.

6. Serve Hot 🍽️

  • Transfer to a platter and serve immediately while they are at peak crunchiness. ➑️ Pair with a cool dipping sauce to balance the warm garlic flavor!


❓ Common Questions (Q&A)

Q: Can I make these in an Air Fryer? A: Yes! Air fry at 190Β°C for 12–15 minutes, shaking the basket halfway through. They come out even crunchier this way! 🌬️πŸ”₯

Q: Why isn’t the coating sticking to my cauliflower? A: Usually, this happens if the florets are too dry or if there isn’t enough oil. Make sure the cauliflower is well-coated in oil before you add the dry Parmesan mixture. πŸ§€βœ”οΈ

Q: Is there a vegan alternative? A: Absolutely! Replace the Parmesan with nutritional yeast or a vegan parm alternative, and use olive oil or vegan butter for the final drizzle. 🌱✨


✨ Pro-Tips for Success:

  • Fresh is Best: Use a fresh block of Parmesan and grate it yourself. The pre-shredded kind in bags often has starch that prevents it from melting and crisping properly. πŸ§€πŸ”ͺ

  • The Squeeze: A tiny squeeze of fresh lemon juice right before serving can brighten up the heavy garlic and cheese flavors! πŸ‹

  • High Heat: Don’t be afraid of the high temperature; that’s what creates the “caramelization” (the brown bits) which carries all the flavor! 🌑️

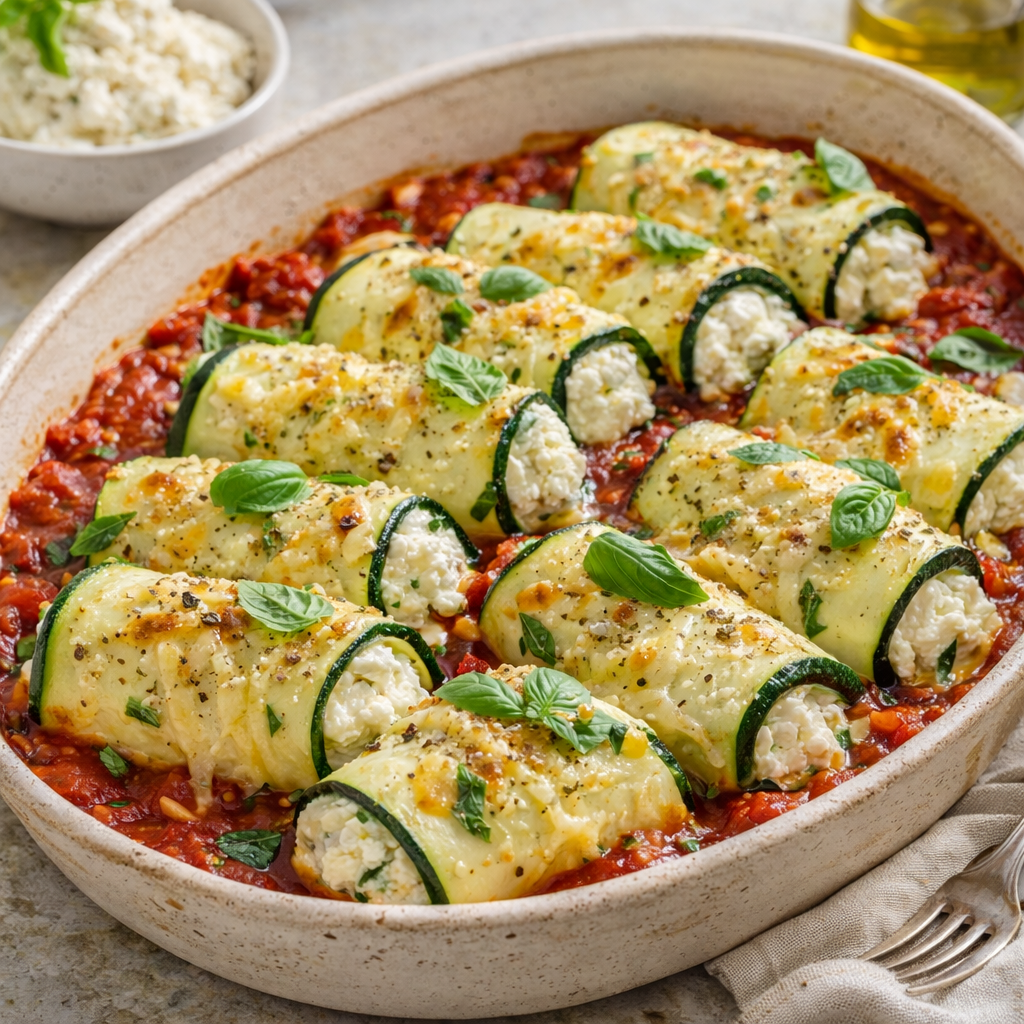
Zucchini Cannelloni with Ricotta

Zucchini Cannelloni with Ricotta

Β Description

Zucchini Cannelloni with Ricotta is a light, low-carb twist on classic Italian cannelloni. Instead of pasta tubes, thin slices of zucchini are rolled around a creamy ricotta filling, then baked in a rich tomato sauce and topped with melted cheese. It’s fresh, comforting, and perfect for a healthy yet satisfying meal.

Β Servings

  • Serves 3–4 people

Β Time Required

  • Prep time: 20 minutes
  • Cook time: 25–30 minutes
  • Total time: ~50 minutes

Β Ingredients

For the Cannelloni:

  • 2–3 large zucchinis (thinly sliced lengthwise)
  • 1 cup ricotta cheese
  • ΒΌ cup grated parmesan cheese
  • 1 egg
  • 2 tbsp fresh basil, chopped
  • 1 clove garlic, minced
  • Salt & black pepper to taste

For the Sauce:

  • 1Β½ cups tomato sauce (homemade or store-bought)
  • 1 tbsp olive oil
  • 1 clove garlic, minced

Topping:

  • Β½ cup shredded mozzarella
  • Extra parmesan (optional)
  • Fresh basil for garnish

Β Instructions

  1. Prepare zucchini
    Slice zucchini into thin strips using a knife or mandoline. Lightly salt and let sit for 10 minutes, then pat dry.
  2. Make filling
    In a bowl, mix ricotta, parmesan, egg, garlic, basil, salt, and pepper until smooth.
  3. Prepare sauce
    Heat olive oil in a pan, sautΓ© garlic, then add tomato sauce. Simmer for 5 minutes.
  4. Assemble cannelloni
    Spread a thin layer of ricotta mixture on each zucchini strip and roll it up.
  5. Arrange in dish
    Spread some tomato sauce in a baking dish. Place zucchini rolls seam-side down.
  6. Add toppings
    Pour remaining sauce over rolls and sprinkle mozzarella and parmesan.
  7. Bake
    Bake at 375Β°F (190Β°C) for 25–30 minutes, until cheese is bubbly and golden.
  8. Serve
    Garnish with fresh basil and serve warm.

Β Nutritional Information (Approx. per serving)

(Based on 4 servings)

  • Calories: 220–280 kcal
  • Protein: 12–15g
  • Carbs: 8–10g
  • Fat: 15–18g
  • Fiber: 2–3g

Β Health Benefits

  • Low-carb & gluten-free β†’ great for weight management
  • Zucchini β†’ rich in vitamins A & C, supports hydration
  • Ricotta cheese β†’ provides calcium and protein
  • Tomato sauce β†’ high in antioxidants like lycopene
  • Olive oil β†’ heart-healthy fats

Β Tips for Best Results

  • Slice zucchini thin and even to roll easily.
  • Remove excess moisture to avoid watery dish.
  • Don’t overfill rollsβ€”they may open while baking.
  • Use a mandoline for perfect slices.
  • Let dish rest 5 minutes before serving.

Β Notes

  • You can add spinach to the ricotta filling for extra nutrition.
  • Substitute ricotta with cottage cheese for a lighter option.
  • Works great as a keto-friendly meal.
  • Store leftovers in fridge for up to 3 days.

Β Q&A

Q1: Can I make this ahead of time?
A: Yes, assemble and refrigerate, then bake when ready.

Q2: Why is my dish watery?
A: Zucchini wasn’t dried properlyβ€”pat it well before use.

Q3: Can I freeze it?
A: Yes, but texture may soften after reheating.

Q4: Can I add meat?
A: Absolutelyβ€”ground beef or chicken works well in the filling.

Q5: What can I serve with it?
A: A fresh salad or garlic bread pairs perfectly.

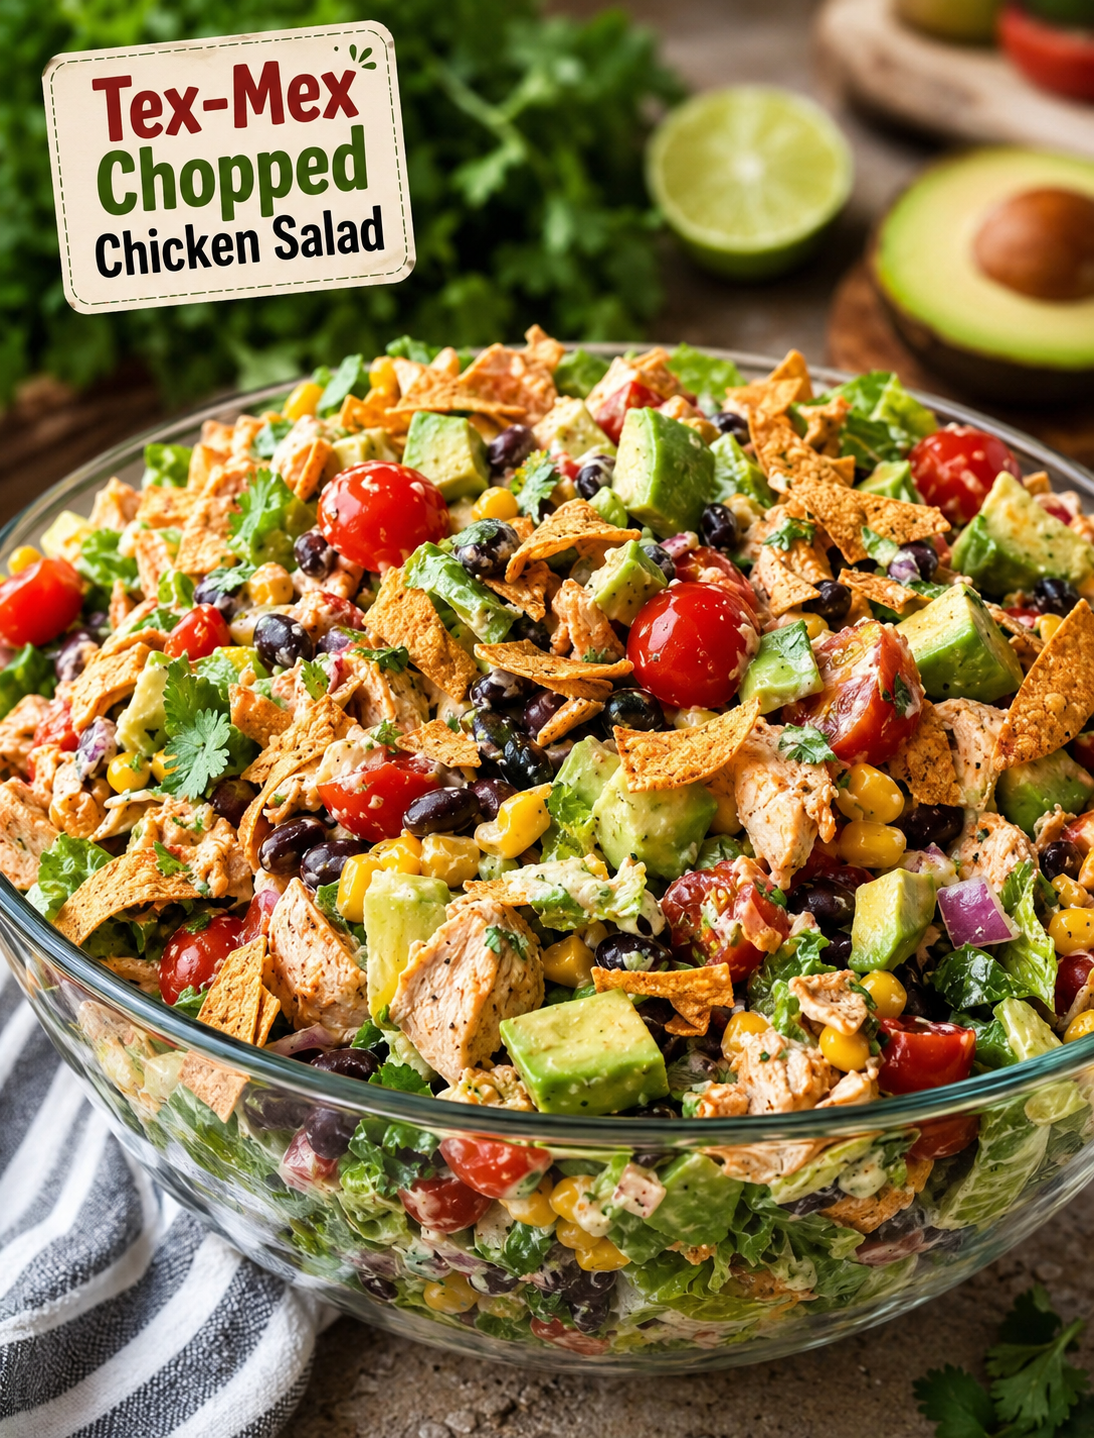
Tex-Mex Chopped Chicken Salad

Tex-Mex Chopped Chicken Salad

Tex-Mex Chopped Chicken Salad

Description

This Tex-Mex chopped chicken saladΒ is a fresh, colourful, protein-packed meal loaded with juicy seasoned chicken, crisp lettuce, sweet corn, black beans, tomatoes, avocado, crunchy peppers, and creamy cheese. Everything is tossed together with a zesty homemade lime dressing that brings all the smoky, tangy, and fresh flavours together.

It’s hearty enough for lunch or dinner while still feeling light and refreshing. The combination of lean chicken, beans, vegetables, and avocado makes it satisfying, while the Tex-Mex seasoning gives it plenty of bold flavour.

This salad is also excellent for meal prep. Keep the dressing separate until you’re ready to eat so the vegetables stay crisp.

Recipe Details

Prep Time: 20 minutes
Cook Time: 15 minutes
Total Time: 35 minutes
Servings: 4
Course: Lunch / Dinner / Main Salad
Cuisine: Tex-Mex
Difficulty: Easy

Ingredients For:

Chicken;

  • 1Β½ pounds boneless, skinless chicken breasts
  • 1 tablespoon olive oil
  • 1 teaspoon chili powder
  • 1 teaspoon smoked paprika
  • Β½ teaspoon ground cumin
  • Β½ teaspoon garlic powder
  • Β½ teaspoon onion powder
  • Β½ teaspoon salt
  • ΒΌ teaspoon black pepper
  • ΒΌ teaspoon cayenne pepper, optional
  • 1 tablespoon fresh lime juice

Salad;

  • 6 cups chopped romaine lettuce
  • 1 cup cherry tomatoes, halved
  • 1 cup black beans, drained and rinsed
  • 1 cup corn, fresh, frozen, or canned
  • 1 red bell pepper, diced
  • Β½ small red onion, finely diced
  • 1 avocado, diced
  • Β½ cup shredded cheddar cheese
  • ΒΌ cup fresh cilantro, chopped
  • ΒΌ cup sliced jalapeΓ±os, optional
  • ΒΌ cup tortilla strips or crushed tortilla chips, optional

Creamy Lime Dressing;

  • Β½ cup plain Greek yogurt
  • 2 tablespoons olive oil
  • 2 tablespoons fresh lime juice
  • 1 tablespoon mayonnaise, optional
  • 1 small garlic clove, minced
  • 1 teaspoon honey or maple syrup
  • Β½ teaspoon chili powder
  • ΒΌ teaspoon ground cumin
  • ΒΌ teaspoon salt
  • β…› teaspoon black pepper
  • 1–2 tablespoons water, as needed

Instructions

1. Prepare the Chicken

Pat the chicken breasts dry with paper towels.

If the breasts are very thick, gently pound them to an even thickness. This helps them cook evenly and prevents the thinner portions from becoming dry.

Place the chicken in a bowl.

Add olive oil, chilli powder, smoked paprika, cumin, garlic powder, onion powder, salt, black pepper, cayenne pepper, and lime juice.

Rub the seasoning mixture evenly over both sides of the chicken.

Let the chicken sit for about 10 minutes while you prepare the remaining ingredients.

2. Cook the Chicken

Heat a large skillet or grill pan over medium-high heat.

Add the seasoned chicken and cook for approximately 5–7 minutes per side, depending on thickness.

The chicken should develop a beautiful golden-brown exterior.

The safest way to check doneness is with a meat thermometer. The thickest part should reach 165Β°F (74Β°C).

Remove the chicken from the skillet and let it rest for 5 minutes.

Resting allows the juices to redistribute, helping keep the chicken moist.

Once rested, chop the chicken into bite-sized pieces or slice it into strips.

3. Prepare the Vegetables

While the chicken is cooking, prepare the salad ingredients.

Chop the romaine lettuce and place it into a large salad bowl.

Add:

  • Cherry tomatoes
  • Black beans
  • Corn
  • Red bell pepper
  • Red onion
  • Avocado
  • Cheddar cheese
  • Cilantro

Add jalapeΓ±os if you enjoy extra heat.

Gently toss everything together.

4. Make the Creamy Lime Dressing

In a small bowl, whisk together the Greek yoghurt, olive oil, lime juice, mayonnaise, garlic, honey, chilli powder, cumin, salt, and black pepper.

Add water, one tablespoon at a time, until the dressing reaches your preferred consistency.

Taste and adjust For;

More tanginess, add extra lime juice.

Heat, add chilli powder or cayenne.

A slightly sweeter dressing, add another small drizzle of honey.

5. Assemble the Salad

Add the warm or cooled chopped chicken to the salad bowl.

Pour approximately half of the dressing over the salad.

Gently toss until everything is evenly coated.

Add more dressing according to your preference.

Finish with fresh cilantro and, if desired, tortilla strips or crushed tortilla chips for crunch.

Serve immediately.

Recipe Notes

Use freshly squeezed lime juice

Fresh lime juice gives the dressing a much brighter flavour than bottled lime juice.

Don’t overdress the salad

Start with half the dressing and add more as needed. This keeps the vegetables crisp and prevents the salad from becoming heavy.

Let the chicken rest

Don’t cut the chicken immediately after cooking. A five-minute resting period makes a noticeable difference in juiciness.

Add avocado last

Avocado can become mushy when aggressively tossed. Add it near the end and gently fold it through the salad.

Make it extra crunchy

Add toasted pepitas, tortilla strips, crushed tortilla chips, or roasted corn for additional texture.

Helpful Tips For;

Juicy chicken: Avoid cooking chicken breasts over excessively high heat for too long.

Extra flavour: marinate the seasoned chicken for 30 minutes before cooking.

Smoky flavour: Grill the chicken instead of pan-cooking it.

Meal prep: Store the dressing separately and add avocado just before serving.

Spicy salad: Add fresh jalapeΓ±o, cayenne, hot sauce, or chipotle powder.

For a milder version: Skip the cayenne and jalapeΓ±os.

More protein: Add extra chicken or another Β½ cup of black beans.

Delicious Variations

Chipotle Chicken Salad

Add 1 teaspoon minced chipotle peppers in adobo sauce to the chicken seasoning and another small spoonful to the dressing.

Southwest Chicken Salad

Add sliced cucumber, roasted red peppers, and crunchy tortilla strips.

Fajita Chicken Salad

Cook the chicken with sliced onions and bell peppers before adding it to the salad.

Creamy Avocado Dressing

Blend half an avocado with Greek yoghurt, lime juice, cilantro, garlic, and a little water.

Vegetarian Version

Replace the chicken with extra black beans, chickpeas, grilled vegetables, or roasted sweet potatoes.

Serving Suggestions

This salad is filling enough to serve as a complete meal, but you can also pair it with:

  • Homemade tortilla chips
  • Corn on the cob
  • Black bean soup
  • Vegetable soup
  • Grilled vegetables
  • Brown rice
  • Quinoa
  • Fresh fruit
  • A small bowl of salsa and guacamole

For a lower-carbohydrate option, simply omit the corn and tortilla strips and add extra leafy greens, cucumber, peppers, or avocado.

Meal Prep Instructions

This salad is excellent for meal preparation.

Prepare the chicken and allow it to cool completely.

Divide the lettuce, tomatoes, black beans, corn, peppers, and onion among four meal-prep containers.

Store the chicken separately if possible.

Keep the dressing in small airtight containers.

Add avocado and dressing immediately before eating.

The prepared components will generally keep well in the refrigerator for 3–4 days, provided they are stored properly.

Storage

Store leftover dressed salad in the refrigerator and consume as soon as possible because the lettuce and avocado will soften.

For the best results, store the components separately.

Cooked chicken: Refrigerate for up to 3–4 days.

Prepared dressing: Refrigerate for up to 4–5 days.

Undressed salad vegetables: Generally best within 2–3 days for maximum freshness.

Nutritional Information

Approximate nutrition per serving, based on 4 servings:

  • Calories: 520
  • Protein: 47 g
  • Carbohydrates: 36 g
  • Fat: 23 g
  • Fiber: 10 g
  • Sugar: 7 g
  • Sodium: Approximately 700 mg
  • Calcium: Approximately 260 mg
  • Iron: Approximately 4 mg

Nutrition will vary depending on the specific chicken size, cheese, dressing ingredients, and toppings used.

Benefits of Tex-Mex Chopped Chicken Salad

High in Protein

Chicken, Greek yoghurt, beans, and cheese provide protein that helps make this salad satisfying and filling.

Rich in Fiber

Black beans, vegetables, avocado, and lettuce contribute dietary fibre, which supports digestive health and can help promote fullness.

Healthy Fats

Avocado and olive oil provide predominantly unsaturated fats.

Plenty of Vegetables

The combination of lettuce, tomatoes, peppers, onion, corn, and cilantro provides a colourful variety of plant foods.

Vitamin-Rich

The vegetables and avocado provide several vitamins and minerals, including vitamin C, vitamin K, folate, and potassium.

Balanced Meal

The salad combines protein, fibre-rich carbohydrates, vegetables, and healthy fats, making it a well-rounded lunch or dinner.

Frequently Asked Questions

Can I use chicken thighs instead of chicken breast?

Absolutely. Boneless, skinless chicken thighs work beautifully and tend to be especially juicy. Adjust the cooking time according to their size and thickness.

Can I use rotisserie chicken?

Yes. Rotisserie chicken makes this recipe incredibly quick. Simply shred or chop approximately 3–4 cups of cooked chicken and toss it with a little of the Tex-Mex seasoning.

Can I make the dressing without mayonnaise?

Yes. Simply omit the mayonnaise and add another tablespoon of Greek yoghurt or olive oil.

Can I use sour cream instead of Greek yoghurt?

Yes. Sour cream works well and produces a richer, creamier dressing.

Can I make this salad dairy-free?

Yes. Use dairy-free yoghurt and omit the cheese or replace it with a dairy-free alternative.

Can I make it gluten-free?

Yes. The basic ingredients are naturally gluten-free. If using tortilla strips or packaged seasonings, check the labels to ensure they are certified gluten-free if needed.

Can I use canned corn?

Yes. Drain it well before adding it to the salad.

Should I rinse canned black beans?

Yes. Drain and rinse canned black beans under cool running water before using them.

Can I make the salad ahead of time?

Yes, but keep the dressing, avocado, and crunchy toppings separate until you’re ready to eat.

How can I make it spicier?

Add diced jalapeΓ±os, cayenne pepper, chipotle powder, hot sauce, or a little chopped chipotle in adobo.

What if I don’t like cilantro?

Simply leave it out or replace it with fresh parsley.

Can I serve this warm?

Definitely. Warm freshly cooked chicken over the cool, crisp vegetables creates a delicious contrast.

Β A Little Recipe Love

If you love getting delicious, easy recipes like this one, please like, comment, save, and share this recipe with someone who would enjoy it! Your support means so much and helps me keep bringing you more tasty recipes. Must express something to keep getting my recipes β€” thank you! ❀️πŸ₯°

Final Thoughts

This Tex-Mex Chopped Chicken Salad is the kind of meal that makes healthy eating feel anything but boring. Juicy seasoned chicken, creamy avocado, sweet corn, hearty black beans, crisp vegetables, cheddar cheese, and a zesty creamy lime dressing come together in every colourful bite.