Fried Fish Tacos With Red Onion Tomato Salsa
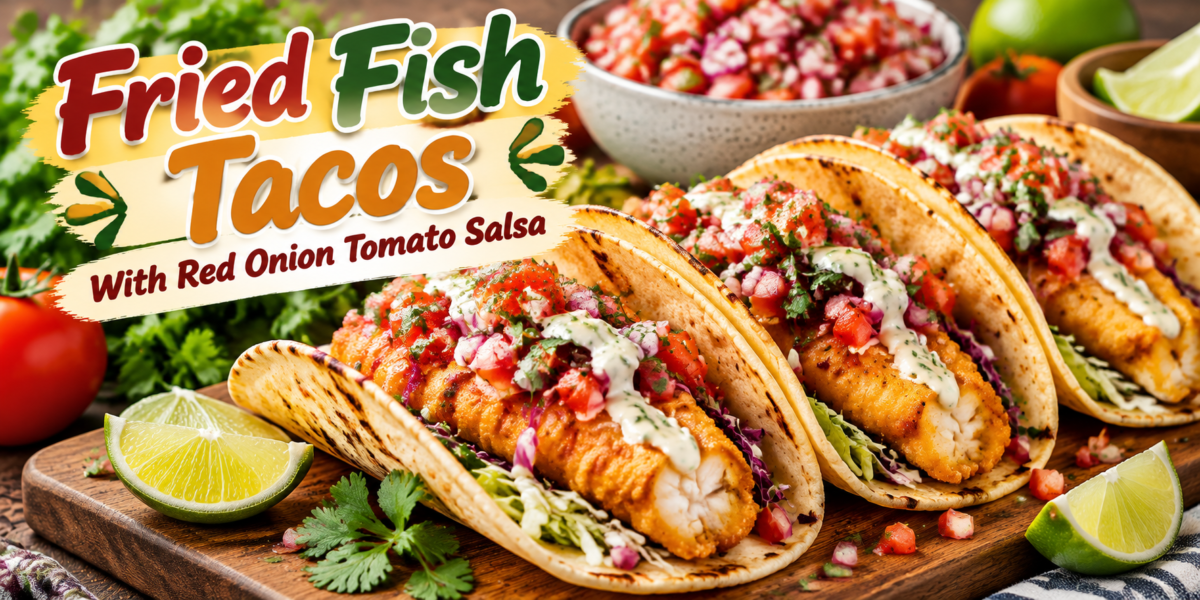
Fried Fish Tacos are a delicious combination of crispy golden fish, soft tortillas, fresh vegetables, and a flavorful red onion tomato salsa. This recipe brings together crunchy textures, juicy seafood, and refreshing toppings to create a perfect homemade meal inspired by coastal flavors.
The crispy fish coating creates a satisfying crunch while keeping the inside tender and flavorful. The fresh salsa made with tomatoes, red onions, cilantro, and lime juice adds brightness and balances the richness of the fried fish.
Fried Fish Tacos are perfect for family dinners, weekend lunches, parties, and casual gatherings. They are easy to customize with different toppings, sauces, and vegetables according to your taste.
This recipe uses simple ingredients but delivers impressive flavor. The combination of seasoned fish, warm tortillas, crunchy cabbage, and fresh salsa creates a restaurant-style dish that can be prepared easily at home.
Whether you are a seafood lover or simply looking for a fun and flavorful meal, this recipe provides a delicious way to enjoy fresh ingredients together.
These Fried Fish Tacos are a perfect choice for anyone who enjoys crispy seafood combined with fresh and flavorful toppings.
Preparation Time: 25 minutes
Cooking Time: 20 minutes
Total Time: 45 minutes
Servings: 8 tacos
Ingredients
For Crispy Fish
- 1 and 1/2 pounds white fish fillets (cod, tilapia, haddock, or mahi-mahi)
- 1 cup all-purpose flour
- 1/2 cup cornstarch
- 1 teaspoon paprika
- 1 teaspoon garlic powder
- 1/2 teaspoon onion powder
- 1/2 teaspoon cumin powder
- 1/2 teaspoon black pepper
- Salt according to taste
- 1 large egg
- 3/4 cup cold sparkling water
- Vegetable oil for frying
For Red Onion Tomato Salsa
- 2 cups fresh tomatoes, finely chopped
- 1 medium red onion, finely chopped
- 1/4 cup fresh cilantro, chopped
- 1 jalapeño, finely chopped (optional)
- 2 tablespoons fresh lime juice
- Salt according to taste
- 1/4 teaspoon black pepper
For Serving
- 8 small corn or flour tortillas
- 1 cup shredded cabbage
- 1/2 cup sour cream or yogurt sauce
- Lime wedges
- Fresh cilantro
- Avocado slices (optional)
Step-by-Step Instructions
Preparing the Fish
Start by preparing the fish fillets. Wash them gently and pat them completely dry using paper towels. Removing extra moisture helps the coating stick better and creates a crispier finish.
Cut the fish into small taco-sized pieces. Season lightly with salt and black pepper and allow the fish to rest while preparing the batter.
Making the Crispy Batter
In a large bowl, combine flour, cornstarch, paprika, garlic powder, onion powder, cumin, salt, and black pepper. Mix the dry ingredients until the seasoning is evenly distributed.
In another bowl, whisk the egg with cold sparkling water. Slowly add the wet mixture into the dry ingredients and gently mix until a smooth batter forms.
The batter should be thick enough to coat the fish but light enough to create a crispy texture after frying.
Frying the Fish
Heat vegetable oil in a deep pan over medium-high heat. The oil should be hot before adding the fish.
Dip each fish piece into the batter and make sure it is completely coated. Carefully place the coated fish into the hot oil.
Cook until the fish becomes golden brown and crispy, usually around 3–5 minutes depending on the size of the pieces.
Remove the fish and place it on a paper towel-lined plate to remove extra oil.
Freshly fried pieces create the best texture for Fried Fish Tacos, so serve them while they are still warm.
Preparing the Salsa
While the fish cooks, prepare the red onion tomato salsa. Combine chopped tomatoes, red onion, cilantro, jalapeño, lime juice, salt, and black pepper in a bowl.
Mix everything gently and allow the salsa to rest for a few minutes. This helps the flavors combine and creates a fresh topping.
The juicy tomatoes and crunchy onions add freshness that perfectly complements the crispy fish.
Assembling the Tacos
Warm tortillas in a dry skillet until soft and flexible.
Add shredded cabbage to each tortilla, then place crispy fish pieces on top. Add a generous spoonful of red onion tomato salsa.
Finish with yogurt sauce, fresh cilantro, avocado slices, and a squeeze of lime juice.
Serve immediately for the best combination of crispy texture and fresh flavors.
Tips for Perfect Results
For the best Fried Fish Tacos, always choose fresh fish with a firm texture. White fish varieties work especially well because they cook quickly and absorb flavors beautifully.
Dry the fish completely before adding the batter. Moisture can prevent the coating from becoming crispy.
Use cold sparkling water when preparing the batter because it helps create a lighter and crunchier coating.
Avoid overcrowding the frying pan. Cooking too many pieces together lowers the oil temperature and may result in soft coating.
Prepare the salsa close to serving time so the vegetables remain fresh and crunchy.
Serve immediately after frying because the crispy coating is at its best when freshly cooked.
For the best Fried Fish Tacos, focus on crispy coating, fresh ingredients, and proper frying temperature.
Variations
Fried Fish Tacos can be easily changed according to your preferences and available ingredients.
For a healthier option, bake or air fry the fish instead of deep frying. The texture will be lighter while still maintaining delicious flavor.
For a spicy version, add extra jalapeños, chili powder, or hot sauce to the salsa.
You can replace tomato salsa with mango salsa for a sweet and tropical flavor.
A creamy sauce made with yogurt, lime juice, garlic, and herbs can add extra richness.
Add sliced avocado, pickled onions, lettuce, or roasted vegetables for different textures.
Different seafood options such as shrimp or salmon can also be used for creative variations.
The best thing about Fried Fish Tacos is that they can be customized with different sauces, toppings, and seafood options.
Serving Suggestions
Serve Fried Fish Tacos with extra lime wedges and fresh salsa for a complete meal.
They pair well with Mexican rice, black beans, corn salad, or a fresh green salad.
For parties, prepare a taco station with different toppings so everyone can customize their own tacos.
A refreshing drink like lemonade, iced tea, or sparkling water complements the flavors perfectly.
These tacos are also great for weekend dinners because they are fun, colorful, and easy to share.
Serve Fried Fish Tacos with fresh salsa, lime wedges, and your favorite side dishes for a complete meal.
Health Benefits
Fried Fish Tacos provide several nutritional benefits when prepared with fresh ingredients.
Fish is a great source of high-quality protein that supports muscle health and keeps you satisfied.
Many fish varieties also contain omega-3 fatty acids, which are important nutrients for overall wellness.
Tomatoes provide antioxidants and vitamins, while red onions contain beneficial plant compounds.
Fresh cabbage adds fiber and nutrients while creating a crunchy texture.
Cilantro and lime juice add freshness along with additional vitamins and antioxidants.
Although the fish is fried, using quality ingredients and balanced toppings helps create a more complete meal.
Enjoying Fried Fish Tacos with fresh vegetables creates a balanced meal with protein and important nutrients.
Storage and Reheating Instructions
For best results, store each component separately. Keep fried fish, tortillas, and salsa in separate airtight containers.
The cooked fish can be refrigerated for up to two days. Reheat it in an oven or air fryer to help restore crispiness.
Avoid reheating fried fish in the microwave because it can make the coating soft.
The red onion tomato salsa can be stored in the refrigerator for up to three days.
Freshly assembled Fried Fish Tacos always provide the best taste and texture.
Leftover Fried Fish Tacos components can be stored separately to maintain freshness and texture.
Why This Recipe Is Perfect for Every Occasion
Fried Fish Tacos are perfect because they are flavorful, customizable, and enjoyable for different occasions.
They work well for family dinners, celebrations, summer gatherings, and casual weekend meals.
The recipe allows everyone to choose their favorite toppings, making it a fun interactive dining experience.
The combination of crispy fish and fresh salsa creates a balance of comfort and freshness that appeals to many tastes.
This dish is simple enough for beginners but impressive enough to serve guests.
Cooking Notes for Best Results
Always check the oil temperature before frying. Proper heat creates crispy coating without making the fish greasy.
Season the fish and batter well because each layer contributes to the final flavor.
Fresh lime juice should be added just before serving to maintain its bright flavor.
Use good-quality tortillas because they improve the overall eating experience.
Preparing all toppings before frying helps you serve the tacos immediately while they are still crispy.
Small cooking details make Fried Fish Tacos more flavorful, crispy, and enjoyable.
Questions and Answers
What fish is best for tacos?
Cod, tilapia, haddock, and mahi-mahi are excellent choices because they have mild flavor and firm texture.
Can I make these tacos without frying?
Yes, baking or air frying works well for a lighter version.
How do I keep the fish crispy?
Serve immediately and avoid covering the fried fish after cooking.
Can I prepare the salsa ahead?
Yes, prepare it a few hours before serving and keep it refrigerated.
Can frozen fish be used?
Yes, thaw completely and dry well before coating.
Nutrition Information
Approximate nutrition per serving:
Calories: 420
Protein: 28 grams
Carbohydrates: 42 grams
Fiber: 5 grams
Fat: 18 grams
Calcium: 90 mg
Nutrition values may vary depending on ingredients and portion sizes.
Meal Prep and Make-Ahead Tips
Fried Fish Tacos are a great option when you want to prepare parts of the meal ahead of time. To save time, you can prepare the red onion tomato salsa several hours before serving and keep it refrigerated. This allows the flavors of the tomatoes, onions, cilantro, and lime juice to combine beautifully.
The fish can also be prepared in advance by cutting and seasoning the fillets before cooking. However, for the best crispy texture, it is recommended to fry the fish shortly before serving.
When planning a taco night, prepare all toppings beforehand. Shredded cabbage, sauces, lime wedges, and fresh herbs can be arranged so the tacos can be assembled quickly when the fish is ready.
These tacos are also perfect for gatherings because guests can build their own tacos with their favorite toppings. Preparing ingredients separately makes serving easier and keeps everything fresh.
How to Make the Perfect Taco Experience
Creating the perfect Fried Fish Tacos is not only about the fish but also about balancing flavors and textures. The crispy coating provides a crunchy element, while the fresh salsa adds moisture and brightness.
Choosing the right tortilla can improve the overall experience. Soft corn tortillas provide a traditional flavor, while flour tortillas offer a slightly softer texture.
Adding different toppings can create exciting combinations. Creamy sauces, fresh vegetables, spicy toppings, and herbs allow you to customize every taco according to your preference.
A squeeze of fresh lime juice before eating enhances the seafood flavor and brings all the ingredients together.
For an extra special presentation, arrange the tacos on a large serving board with lime wedges, salsa bowls, and fresh cilantro. This creates a beautiful meal for family dinners and celebrations.
Common Mistakes to Avoid
One common mistake when preparing Fried Fish Tacos is not drying the fish properly before coating. Extra moisture can prevent the batter from becoming crispy.
Another mistake is using oil that is not hot enough. Proper oil temperature is important because it creates a golden coating while keeping the fish tender inside.
Avoid preparing the salsa too early because tomatoes release water over time. Freshly prepared salsa provides the best texture and flavor.
Do not overload the tortillas with too many toppings. A balanced amount of fish, salsa, cabbage, and sauce creates the best bite.
Allowing the fried fish to sit covered after cooking can also make the coating lose its crispiness. Serve immediately for the best results.
Final Thoughts
Fried Fish Tacos with Red Onion Tomato Salsa are a delicious homemade meal filled with crispy textures and fresh flavors. The combination of golden fish, colorful salsa, warm tortillas, and flavorful toppings creates a satisfying dish for any occasion.
This recipe shows that homemade tacos can be simple, exciting, and full of restaurant-style flavor. With easy preparation and flexible variations, these tacos can become a favorite meal for family and friends.
Whether prepared for dinner, parties, or weekend gatherings, Fried Fish Tacos deliver the perfect balance of crunch, freshness, and delicious seafood flavor.
Fried Fish Tacos are a delicious homemade recipe that brings restaurant-style flavors to your kitchen.