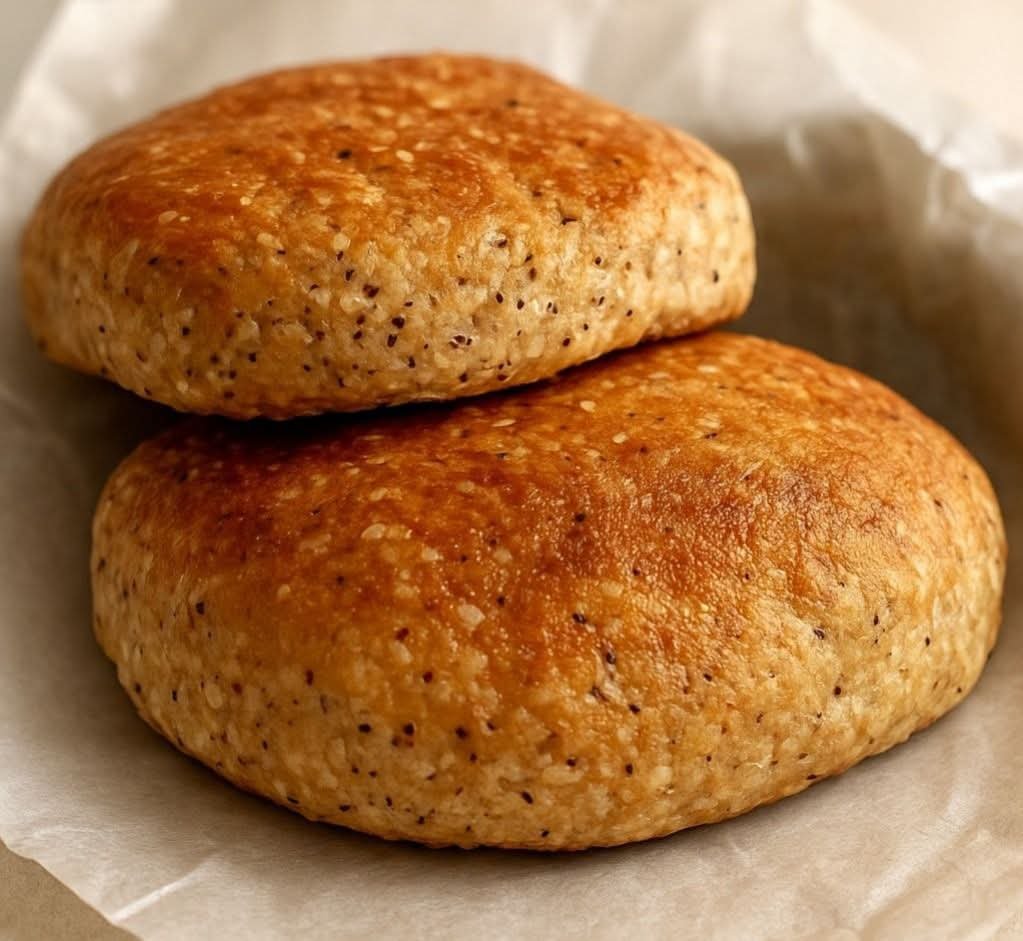
Flourless Oat and Chia Bread

Oat Chia Bread with oats, chia seeds, eggs, Greek yogurt, and a soft golden flourless texture

Flourless Oat and Chia Bread

Oat Chia Bread is a hearty, wholesome, flourless loaf made with rolled oats, chia seeds, eggs, Greek yogurt, baking powder, and a few simple pantry ingredients. It has a soft, slightly chewy crumb, a golden crust, and a naturally nutty flavor that works beautifully for breakfast, sandwiches, snacks, or as a side with soups and salads.

This Oat Chia Bread is especially useful when you want a homemade bread without traditional flour or yeast. The oats provide structure, the chia seeds help bind the mixture, and the eggs and yogurt keep the loaf moist and tender. It is simple to prepare, easy to slice, and convenient for meal prep.

Prep Time: 15 minutes
Rest Time: 10 minutes
Bake Time: 40–45 minutes
Total Time: About 1 hour 10 minutes
Servings: 10 slices

Ingredients

For the Bread

2 cups rolled oats

3 tablespoons chia seeds

3 large eggs

1 cup plain Greek yogurt

1/3 cup milk

2 tablespoons olive oil

1 tablespoon honey or maple syrup

2 teaspoons baking powder

1/2 teaspoon baking soda

1/2 teaspoon salt

1 teaspoon apple cider vinegar or lemon juice

Optional Toppings

1 tablespoon rolled oats

1 teaspoon chia seeds

1 teaspoon sesame seeds

Why You’ll Love This Recipe

Oat Chia Bread is a practical recipe when you want something more filling than ordinary toast. The combination of oats, chia seeds, eggs, and Greek yogurt gives the loaf a satisfying texture and makes each slice sturdy enough for toppings.

Another reason to love Oat Chia Bread is that it requires no kneading, yeast, or long rising time. Everything is mixed in a bowl, allowed to rest briefly, and then baked.

It is also flexible. You can keep it plain, add seeds, herbs, or spices, or make a slightly sweeter version for breakfast.

How to Make This Bread

Step 1: Preheat the Oven

Preheat the oven to 350°F or 175°C.

Line an 8 x 4-inch loaf pan with parchment paper, leaving some paper over the sides so the bread is easy to lift out after baking.

Lightly grease any exposed sides of the pan.

Step 2: Blend the Oats

Place the rolled oats in a blender or food processor.

Pulse until they become a coarse oat flour. The texture does not need to be perfectly fine.

This step helps Oat Chia Bread hold together while still keeping a little texture from the oats.

Step 3: Mix the Dry Ingredients

Add the ground oats to a large mixing bowl.

Stir in the chia seeds, baking powder, baking soda, and salt.

Mix well so the leavening ingredients are evenly distributed throughout the oat mixture.

Step 4: Mix the Wet Ingredients

In a separate bowl, whisk together the eggs, Greek yogurt, milk, olive oil, honey or maple syrup, and apple cider vinegar.

Whisk until the mixture is smooth and creamy.

The yogurt adds moisture, while the vinegar reacts with the baking soda to help Oat Chia Bread rise slightly in the oven.

Step 5: Combine Wet and Dry Mixtures

Pour the wet ingredients into the bowl with the dry ingredients.

Stir with a spatula until everything is evenly combined.

The batter will be thicker than cake batter but softer than traditional bread dough.

Do not worry if it looks a little sticky.

Step 6: Let the Batter Rest

Allow the batter to sit for about 10 minutes.

During this time, the chia seeds absorb liquid and the oats soften.

This resting step helps Oat Chia Bread develop a more stable texture and makes the batter easier to spread in the pan.

Step 7: Transfer to the Pan

Spoon the batter into the prepared loaf pan.

Smooth the top with the back of a spoon or spatula.

Sprinkle rolled oats, chia seeds, or sesame seeds over the top if desired.

Step 8: Bake Until Golden

Place the loaf in the center of the oven.

Bake for 40 to 45 minutes, or until the top is golden and a toothpick inserted into the center comes out clean.

The loaf should feel firm when gently pressed.

If the top browns too quickly, cover it loosely with foil during the final 10 minutes.

Step 9: Cool in the Pan

Remove the pan from the oven and let the loaf cool for 10 minutes.

Then use the parchment paper to lift it out of the pan.

Transfer it to a wire rack.

Step 10: Cool Completely Before Slicing

Let Oat Chia Bread cool completely before slicing.

This is important because flourless oat breads continue to set as they cool. Cutting too early may make the center seem overly soft or gummy.

Use a sharp serrated knife for clean slices.

Serving Suggestions

Oat Chia Bread is versatile enough for both savory and sweet toppings.

For breakfast, spread a slice with almond butter, peanut butter, Greek yogurt, cream cheese, or mashed avocado.

For a savory meal, top Oat Chia Bread with eggs, cottage cheese, sliced tomato, smoked salmon, hummus, or turkey.

It also works well beside soups, stews, and salads. Toasting the slices gives the edges a slightly crisp texture while keeping the center tender.

For another easy flourless bread idea, try our Healthy Bread in a Jar (No Flour, No Yeast, No Sugar) for a simple homemade option.

Recipe Tips

Use rolled oats rather than instant oats for the best structure.

Blend the oats into a coarse flour before mixing.

Let the batter rest so the chia seeds can absorb moisture.

Do not overmix once the wet and dry ingredients are combined.

Use thick Greek yogurt rather than a very thin yogurt.

For the best Oat Chia Bread texture, cool the loaf completely before cutting it.

If the center seems too moist after baking, return the loaf to the oven for another 5 to 10 minutes.

Store the bread only after it is completely cool to prevent condensation.

Easy Variations

Oat Chia Bread can be changed in several simple ways.

For a seedier loaf, add sunflower seeds, pumpkin seeds, flaxseed, or sesame seeds to the batter.

For a savory version, add garlic powder, dried rosemary, oregano, or grated Parmesan.

A sweeter breakfast loaf can include cinnamon, vanilla, raisins, or a little extra honey.

For more texture, stir in chopped walnuts or pecans.

You can also make Oat Chia Bread in muffin cups for individual portions. Reduce the baking time and begin checking them around 20 minutes.

Make-Ahead Instructions

Oat Chia Bread is well suited to meal prep because it keeps well for several days.

Bake the loaf, cool it completely, and slice it before storing.

You can prepare individual slices for quick breakfasts by placing parchment paper between them.

The bread can also be made the evening before and left to cool completely before refrigerating in the morning.

Storage and Freezing

Store Oat Chia Bread in an airtight container in the refrigerator for up to 5 days.

For longer storage, freeze individual slices for up to 2 months.

Place parchment paper between slices before freezing so you can remove only what you need.

Thaw a slice overnight in the refrigerator or reheat it directly from frozen in a toaster or toaster oven.

Nutrition Information

Approximate nutrition per slice:

Calories: 175
Protein: 8 g
Carbohydrates: 22 g
Fat: 7 g
Saturated Fat: 1.5 g
Fiber: 4 g
Sugar: 3 g
Sodium: 230 mg

Nutrition values are estimates and may vary depending on the yogurt, milk, sweetener, and toppings used.

Frequently Asked Questions

Can I make this without blending the oats?

Yes, but the loaf will have a rougher texture and may be more crumbly. Blending the oats helps the bread hold together.

Can I use quick oats?

Yes. Quick oats can work, although the finished loaf may be softer and slightly denser.

Can I make it dairy-free?

Yes. Use a thick dairy-free yogurt and unsweetened plant milk.

Why is my bread gummy in the middle?

It may need more baking time or more cooling time. Oat Chia Bread firms significantly as it cools.

Can I toast it?

Yes. Toasting gives the slices a crisp edge and makes them especially good for breakfast toppings.

Can I add extra seeds?

Yes. Pumpkin, sunflower, flax, and sesame seeds all work well.

Can I freeze it?

Yes. Freeze sliced Oat Chia Bread for up to 2 months and thaw or toast individual slices as needed.

Final Thoughts

Oat Chia Bread is a simple flourless loaf made with oats, chia seeds, eggs, yogurt, and everyday pantry ingredients.

Because this flourless loaf requires no yeast, kneading, or traditional flour, it is an easy option for homemade breakfasts, snacks, and sandwich-style meals.

Keep this Oat Chia Bread recipe handy whenever you want a tender, hearty loaf that is easy to prepare, easy to slice, and convenient for meal prep.

With its golden crust, soft center, and subtle nutty flavor, Oat Chia Bread is a satisfying homemade recipe that works just as well with sweet toppings as it does with savory ones.

If you love homemade bread recipes, explore our 26 Loaf Bread Recipes – Easy, Homemade & Absolutely Delicious for even more baking inspiration.
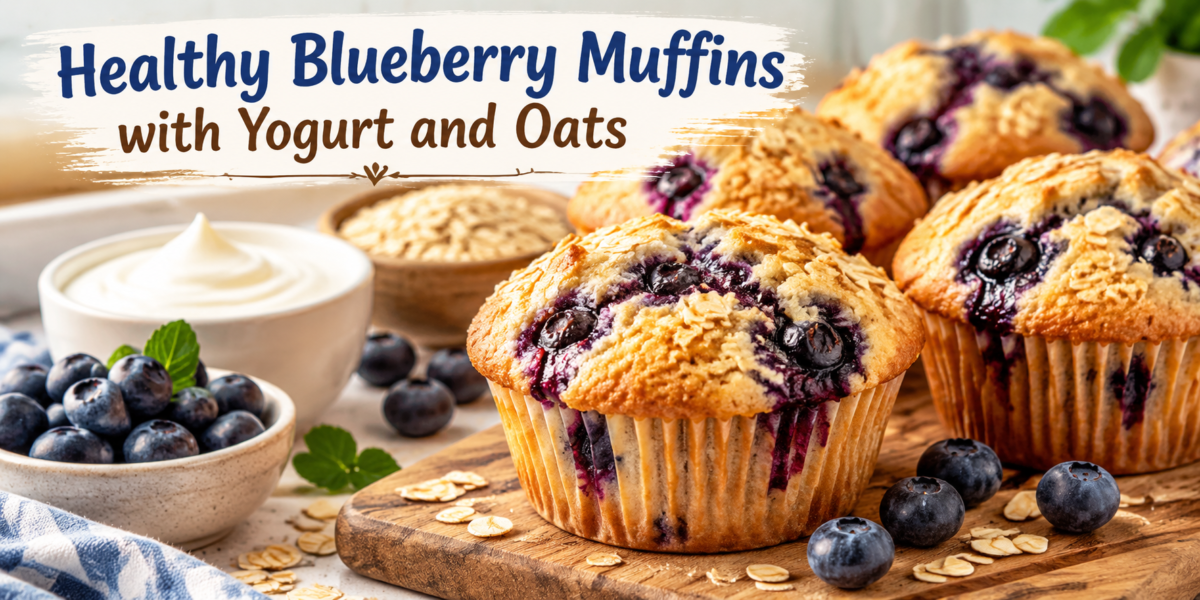
Healthy Blueberry Muffins with Yogurt and Oats

Healthy Blueberry Muffins with Yogurt and Oats on a wooden board with fresh blueberries

Healthy Blueberry Muffins with Yogurt and Oats

These Healthy Blueberry Muffins are a delicious combination of juicy blueberries, creamy yogurt, and wholesome oats, creating a perfect breakfast or snack option for the whole family. These muffins are soft, naturally sweet, and packed with nourishing ingredients that make them a better choice than many traditional bakery muffins. The addition of yogurt keeps the texture moist, while oats provide a satisfying fiber-rich base.

Unlike many sugar-loaded baked goods, these Healthy Blueberry Muffins focus on balanced ingredients that support a healthier lifestyle without sacrificing taste. Every bite offers a wonderful mix of sweetness from fresh blueberries, a gentle creamy flavor from yogurt, and a comforting oat texture.

Whether you enjoy them with your morning coffee, pack them for school lunches, or keep them ready for a quick afternoon snack, these muffins are simple to prepare and easy to customize. They are ideal for busy mornings because they can be made ahead and stored for several days.

These Healthy Blueberry Muffins are also a great recipe for anyone who wants to include more whole grains and fruit in their daily meals. The recipe uses simple pantry ingredients and creates bakery-style muffins at home with a healthier approach.

Preparation Time: 15 minutes

Cooking Time: 20–25 minutes

Total Time: 40 minutes

Servings: 12 muffins

Ingredients

  • 1 and 1/2 cups rolled oats
  • 1 cup all-purpose flour
  • 1 teaspoon baking powder
  • 1/2 teaspoon baking soda
  • 1/2 teaspoon cinnamon powder
  • A small pinch of salt
  • 1 cup plain Greek yogurt or regular yogurt
  • 2 large eggs
  • 1/3 cup honey or maple syrup
  • 1/4 cup milk
  • 1/4 cup melted coconut oil or vegetable oil
  • 1 teaspoon vanilla extract
  • 1 and 1/2 cups fresh blueberries (or frozen blueberries without thawing)
  • 2 tablespoons chopped walnuts or almonds (optional)
  • Lemon zest (optional, for extra fresh blueberry flavor)

Step-by-Step Instructions

To prepare Healthy Blueberry Muffins, begin by preheating your oven to 375°F (190°C). Line a 12-cup muffin tray with paper liners or lightly grease the muffin cups with oil.

In a large mixing bowl, combine rolled oats, flour, baking powder, baking soda, cinnamon powder, and salt. Stir these dry ingredients together until evenly mixed.

In another bowl, whisk yogurt, eggs, honey or maple syrup, milk, melted oil, and vanilla extract until the mixture becomes smooth. The yogurt creates a creamy texture that helps produce soft muffins.

Slowly add the wet mixture into the dry ingredients. Mix gently with a spatula until everything is combined. Avoid overmixing because too much stirring can make muffins dense instead of fluffy.

Carefully fold the blueberries into the batter. When baking Healthy Blueberry Muffins, mixing the berries gently helps prevent them from breaking and turning the batter completely purple.

Divide the batter evenly between the muffin cups, filling each cup about three-quarters full. Add a few extra blueberries on top if you want a beautiful bakery-style appearance.

Bake for 20–25 minutes or until a toothpick inserted into the center comes out clean. Allow the muffins to cool in the tray for about 5 minutes before transferring them to a cooling rack.

The final result should be soft, golden muffins with a slightly crisp top and a moist blueberry-filled center.

Tips for Perfect Muffins

For softer Healthy Blueberry Muffins, always use room-temperature ingredients because they blend more evenly and create a smoother batter.

Do not overmix the batter. A few small lumps are completely fine and will disappear during baking. Overmixing develops too much gluten and can make the muffins heavy.

If using frozen blueberries, add them directly to the batter without thawing. This helps maintain their shape and prevents excess liquid from affecting the texture.

For softer texture and better flavor, allow the oats to absorb some moisture before baking. You can mix the oats with yogurt for a few minutes before combining all ingredients.

If you want Healthy Blueberry Muffins with extra crunch, sprinkle chopped nuts or a small amount of oats on top before baking.

Store leftover muffins in an airtight container at room temperature for up to three days or refrigerate them for up to one week.

Recipe Variations

These Healthy Blueberry Muffins can be changed in many creative ways depending on your preferences.

For a higher protein version, add extra Greek yogurt or mix in a small amount of protein powder. This makes the muffins more filling and suitable after workouts.

For a gluten-free option, replace regular flour with gluten-free oat flour or almond flour. Always check that your oats are certified gluten-free if needed.

You can create chocolate blueberry muffins by adding a small amount of dark chocolate chips to the batter.

Another version of Healthy Blueberry Muffins includes mashed banana. Replace part of the honey with ripe banana for natural sweetness and extra moisture.

You can also add orange zest, lemon zest, or a little ginger powder to create a refreshing flavor combination with blueberries.

For a dairy-free variation, use plant-based yogurt and almond milk instead of regular yogurt and milk.

Serving Suggestions

Healthy Blueberry Muffins are perfect when served warm with a cup of tea, coffee, or a glass of milk. They make an excellent breakfast choice when paired with boiled eggs, fresh fruit, or a smoothie.

For children, these muffins can be packed into lunch boxes because they are easy to carry and naturally appealing due to their sweet blueberry flavor.

Adults can enjoy them as a quick office snack or a light dessert after meals. Adding a little yogurt or nut butter on top can make them even more satisfying.

These muffins are also great for meal preparation. Bake a batch on the weekend and store them for quick breakfasts throughout the week.

Health Benefits

Healthy Blueberry Muffins provide several nutritional advantages because they combine oats, yogurt, and blueberries in one recipe.

Blueberries contain antioxidants that help protect cells from oxidative stress. They are also a good source of vitamins and natural plant compounds.

Oats provide dietary fiber, especially beta-glucan fiber, which supports digestive health and helps you feel full for longer periods.

Yogurt contributes protein and calcium, which are important nutrients for maintaining strong bones and supporting muscle health.

The balanced combination of carbohydrates, protein, and healthy fats makes these muffins a more satisfying option compared with many processed snacks.

Eating Healthy Blueberry Muffins as part of a balanced diet can help increase fruit and whole grain intake while still allowing you to enjoy a delicious homemade treat.

Questions and Answers

Can I use frozen blueberries for this recipe?

Yes, frozen blueberries work very well. Add them directly to the batter without thawing to maintain the best texture.

Can I make these muffins without sugar?

Yes, you can reduce or replace honey with mashed banana, applesauce, or another natural sweetener according to your taste.

How long do these muffins stay fresh?

They stay fresh for about three days at room temperature and up to one week when stored in the refrigerator.

Can I freeze these muffins?

Yes, these muffins freeze well. Place cooled muffins in a freezer-safe container and store them for up to three months.

Are these muffins good for kids?

Yes, they are a family-friendly snack made with oats, fruit, and yogurt. They are easy to pack and enjoyable for children.

Why are my muffins dry?

Dry muffins usually happen because of too much flour or overbaking. Measure ingredients carefully and remove them from the oven when fully cooked.

Nutrition Information

Approximate nutrition per muffin:

Calories: 180

Protein: 5 grams

Carbohydrates: 28 grams

Fiber: 3 grams

Sugar: 10 grams

Fat: 6 grams

Calcium: 80 mg

The nutrition values may vary depending on the type of yogurt, sweetener, and additional ingredients used.

Final Thoughts

Making Healthy Blueberry Muffins at home is a simple way to enjoy a delicious baked treat while including nutritious ingredients in your routine. The combination of oats, yogurt, and blueberries creates a muffin that is soft, flavorful, and satisfying.

These muffins prove that healthier baking does not have to be boring. With natural sweetness, fresh fruit, and wholesome ingredients, they can become a favorite recipe for breakfast, snacks, and family gatherings.

Whether you prepare them for busy mornings, children’s lunch boxes, or a relaxing weekend breakfast, Healthy Blueberry Muffins offer a perfect balance of taste and nutrition.

With easy preparation, flexible variations, and a delicious homemade flavor, this recipe is one you can return to again and again.