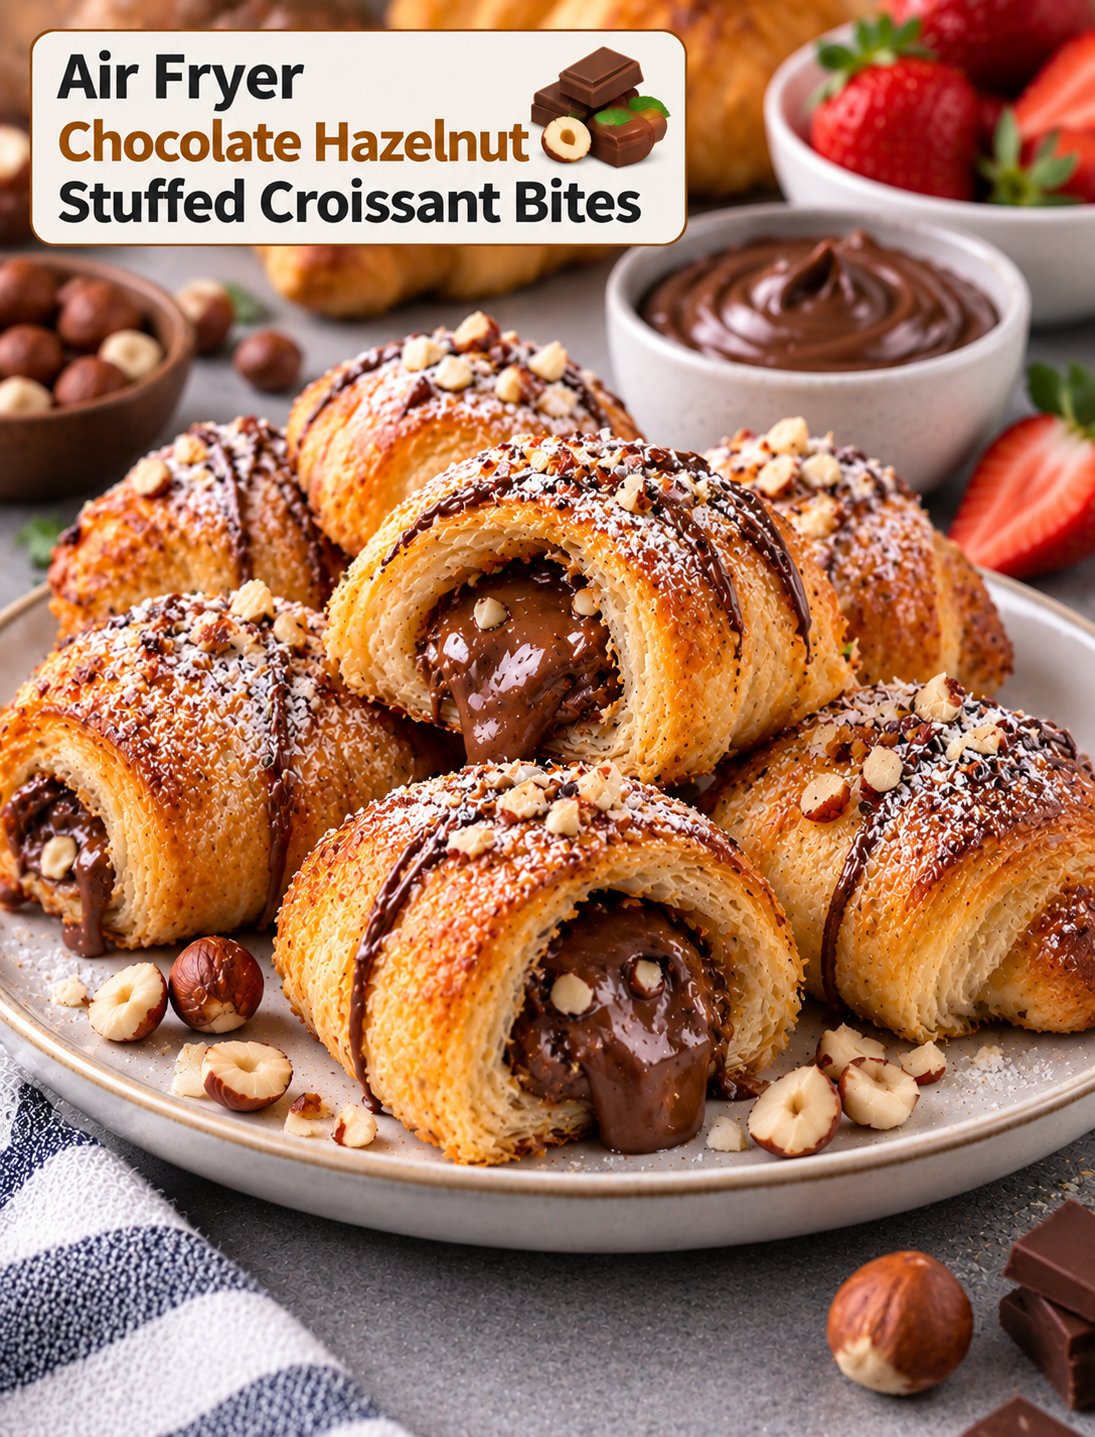
Air Fryer Chocolate Hazelnut Stuffed Croissant Bites

Golden air fryer croissant bites filled with melted chocolate hazelnut spread and topped with powdered sugar and chopped hazelnuts

Air Fryer Chocolate Hazelnut Stuffed Croissant Bites

Air Fryer Chocolate Hazelnut Stuffed Croissant Bites turn refrigerated crescent dough and creamy chocolate hazelnut spread into a warm, flaky dessert. Each bite has a golden exterior with a soft, rich chocolate center.

These small pastries are easy to prepare and cook quickly in the air fryer. The circulating heat helps the dough become crisp and golden without deep frying.

They are a great choice for breakfast treats, weekend brunch, afternoon snacks, holiday gatherings, or simple desserts. A light dusting of powdered sugar adds a bakery-style finish, while fresh berries can provide a bright contrast to the rich filling.

Why You’ll Love These Croissant Bites

These stuffed croissant bites combine flaky pastry with a smooth chocolate hazelnut center. The contrast between the crisp outside and soft filling makes each bite satisfying.

The recipe also requires only a few basic ingredients. Refrigerated crescent dough keeps preparation simple, while chocolate hazelnut spread provides most of the sweetness and chocolate flavor.

The small size makes these pastries easy to portion. You can make them for a family breakfast or prepare a larger batch for guests.

Air frying also makes cleanup easier than traditional frying. There is no large pot of hot oil, and the pastries can be cooked directly in the air fryer basket when your appliance allows it.

Ingredients You’ll Need

Crescent Dough

Refrigerated crescent roll dough provides a soft, buttery base that becomes flaky and golden during cooking. Use a fresh package that is easy to unroll and separate.

Puff pastry can also be used, but the texture will be lighter and more layered than crescent dough.

Chocolate Hazelnut Spread

A smooth chocolate hazelnut spread creates the creamy center. Use enough to provide a noticeable filling without making the dough difficult to seal.

Keep the spread chilled for a short time if it feels too soft to handle. A firmer filling is easier to portion onto small pieces of dough.

Butter

Melted butter can be brushed over the dough before air frying. It encourages browning and adds a richer pastry flavor.

Powdered Sugar

Powdered sugar provides a simple finishing touch. Add it after cooking so it stays bright and does not melt into the pastry.

Hazelnuts

Finely chopped toasted hazelnuts are optional but add crunch and reinforce the nutty flavor of the filling.

Optional Flavorings

A small amount of vanilla extract, cinnamon, or orange zest can add extra flavor. Use these additions lightly so they do not overpower the chocolate.

How to Make Air Fryer Chocolate Hazelnut Stuffed Croissant Bites

Prepare the Dough

Open the refrigerated crescent dough carefully and separate it into triangles along the existing perforations.

If the triangles are large, cut them into smaller pieces to create bite-sized pastries. Keep the pieces reasonably similar in size so they cook at the same rate.

Place each piece on a clean work surface with the wider end facing toward you.

Add the Chocolate Filling

Place a small amount of chocolate hazelnut spread near the wide end of each dough piece. Avoid adding too much because the filling can escape as the pastry cooks.

If using chopped hazelnuts, sprinkle a small amount over the spread.

Roll the dough toward the narrow tip, keeping the filling enclosed. Pinch the edges gently if needed to create a secure seal.

For smaller bites, tuck the ends inward slightly after rolling. This helps keep the filling inside during air frying.

Prepare the Air Fryer

Preheat the air fryer according to your model’s instructions if preheating is recommended.

Lightly grease the basket if necessary. Arrange the croissant bites in a single layer with space between each piece.

Do not stack the pastries. Proper airflow helps the dough become evenly browned and crisp.

Brush the tops lightly with melted butter. Avoid using too much because excess butter can make the pastry greasy.

Air Fry Until Golden

Cook the bites until the dough is puffed, golden brown, and fully cooked.

Cooking time depends on the size of the pastries, dough thickness, and air fryer model. Begin checking early during the first batch because smaller pieces can brown quickly.

If the outside becomes dark before the center is fully baked, reduce the temperature slightly and continue cooking until the dough is done.

Allow the bites to cool for several minutes before serving. The chocolate filling can remain extremely hot after cooking.

Tips for Flaky and Golden Croissant Bites

Keep the refrigerated dough cold until you are ready to use it. Cold dough is easier to handle and can produce a better flaky texture.

Use a small amount of filling in each pastry. Overfilled bites are more likely to split and leak chocolate.

Seal the dough carefully around the filling. Press the seams gently so there are no obvious openings.

Leave space between the pastries in the air fryer basket. Crowding can reduce airflow and cause uneven browning.

Brush the dough lightly with butter rather than soaking it. A thin coating is enough to support a golden exterior.

Watch the final minutes closely. Pastry can brown quickly once it reaches the right temperature.

How to Prevent Chocolate From Leaking

The most important step is controlling the amount of filling. A teaspoon or small spoonful is usually easier to contain than a large scoop.

Keep the spread toward the center of the dough and away from the edges. This gives you enough dough to close around the filling.

Do not stretch the dough too thin around the chocolate. Thin areas can tear during rolling.

Pinch or press the seams gently before placing the bites in the basket. Positioning the seam underneath can also help keep it closed.

If the chocolate hazelnut spread is very soft, chill it briefly before assembling the pastries. Firmer spread is easier to handle and less likely to run during preparation.

Best Toppings and Serving Ideas

Powdered sugar is one of the simplest toppings for these pastries. Dust it lightly over the cooled bites just before serving.

Fresh strawberries, raspberries, and blueberries add color and a slightly tart contrast to the sweet filling.

For extra crunch, sprinkle finely chopped toasted hazelnuts over the finished pastries.

A small drizzle of melted chocolate can create a richer dessert presentation. Allow the drizzle to set briefly before serving.

For brunch, serve the bites with fresh fruit, yogurt, coffee, or hot chocolate.

For dessert, pair them with vanilla ice cream or a small spoonful of whipped cream.

Easy Variations to Try

Chocolate Almond Bites

Replace the hazelnut spread with chocolate almond spread and add finely chopped toasted almonds to the filling.

Peanut Butter Chocolate Bites

Add a small amount of creamy peanut butter alongside the chocolate filling. Keep the portions small so the dough remains easy to seal.

Cinnamon Chocolate Bites

Add a light sprinkle of cinnamon to the filling before rolling. Cinnamon gives the chocolate a warm bakery-style flavor.

Strawberry Chocolate Bites

Add a very small piece of fresh strawberry with the chocolate spread. Pat the fruit dry first to reduce excess moisture.

Orange Chocolate Bites

Add a little finely grated orange zest to the chocolate filling. The citrus aroma provides a bright contrast to the rich pastry.

White Chocolate Hazelnut Bites

Use white chocolate hazelnut spread for a sweeter variation. Finish with chopped hazelnuts for extra texture.

How to Make Them for a Party

These croissant bites work well for brunches, birthdays, holiday breakfasts, and casual gatherings.

Prepare the pastries in several small batches instead of overcrowding the air fryer. This gives each piece enough room to brown evenly.

Arrange the finished bites on a serving platter and add powdered sugar shortly before guests arrive.

Serve different toppings on the side. Fresh berries, chopped nuts, chocolate drizzle, and whipped cream allow guests to customize their pastries.

For a breakfast spread, pair them with savory items such as scrambled eggs, breakfast potatoes, or turkey sausage. The sweet pastries can then serve as a simple dessert-style option.

How to Store and Reheat

Allow leftover pastries to cool completely before storing them. Place them in an airtight container and refrigerate if you plan to keep them for more than a short period.

The air fryer is the preferred method for reheating because it helps restore the flaky exterior.

Reheat the bites until warmed through, then allow them to cool briefly before eating. The chocolate center can become very hot during reheating.

Avoid adding powdered sugar before storage because moisture can cause it to disappear into the pastry.

If you want to freeze the finished bites, cool them completely and store them in a freezer-safe container. Reheat them in the air fryer until warm and crisp.

Common Mistakes to Avoid

Do not overfill the dough because excess chocolate can leak during cooking.

Avoid using dough that has become warm and difficult to handle. Refrigerated dough is easier to roll and seal.

Do not crowd the air fryer basket. Limited airflow can leave the pastries pale or unevenly cooked.

Avoid brushing the dough with too much butter because excess fat can make the exterior greasy.

Do not add powdered sugar while the pastries are extremely hot. Wait until they have cooled slightly for a cleaner finish.

Avoid eating the pastries immediately after cooking. The filling can stay much hotter than the pastry exterior.

Frequently Asked Questions

Can I use puff pastry instead of crescent dough?

Yes, puff pastry works well and creates a lighter, more layered texture than refrigerated crescent dough.

How much chocolate hazelnut spread should I use?

Use a small spoonful for each bite so the filling stays enclosed and does not leak during cooking.

Why did my chocolate filling leak out?

Overfilling, weak seams, or placing the spread too close to the dough edges can cause the filling to escape.

Can I make these ahead of time?

Yes, assemble the unbaked bites ahead and keep them refrigerated until you are ready to air fry them.

Can I freeze chocolate croissant bites?

Yes, cooled baked bites can be frozen in an airtight container and reheated in the air fryer.

How do I make them extra crispy?

Keep the dough cold, avoid overcrowding the basket, and lightly brush the pastries with butter before cooking.

Can I use other fillings?

Yes, peanut butter, almond spread, fruit preserves, caramel, or white chocolate spread can be used in small amounts.

What should I serve with these bites?

Fresh berries, coffee, hot chocolate, yogurt, whipped cream, or vanilla ice cream all pair well with the warm chocolate pastries.

Final Thoughts

Air Fryer Chocolate Hazelnut Stuffed Croissant Bites are an easy way to make a bakery-style treat with refrigerated dough and a creamy chocolate filling. The air fryer creates a golden exterior while keeping the center soft and rich.

The key to successful bites is simple: use a moderate amount of filling, seal the dough carefully, leave space between pastries, and watch the final minutes of cooking closely.

Serve them with powdered sugar and fresh berries for a simple breakfast treat, or add nuts and chocolate drizzle for a more indulgent dessert. With a few easy filling swaps, the same method can create several different sweet pastry variations.
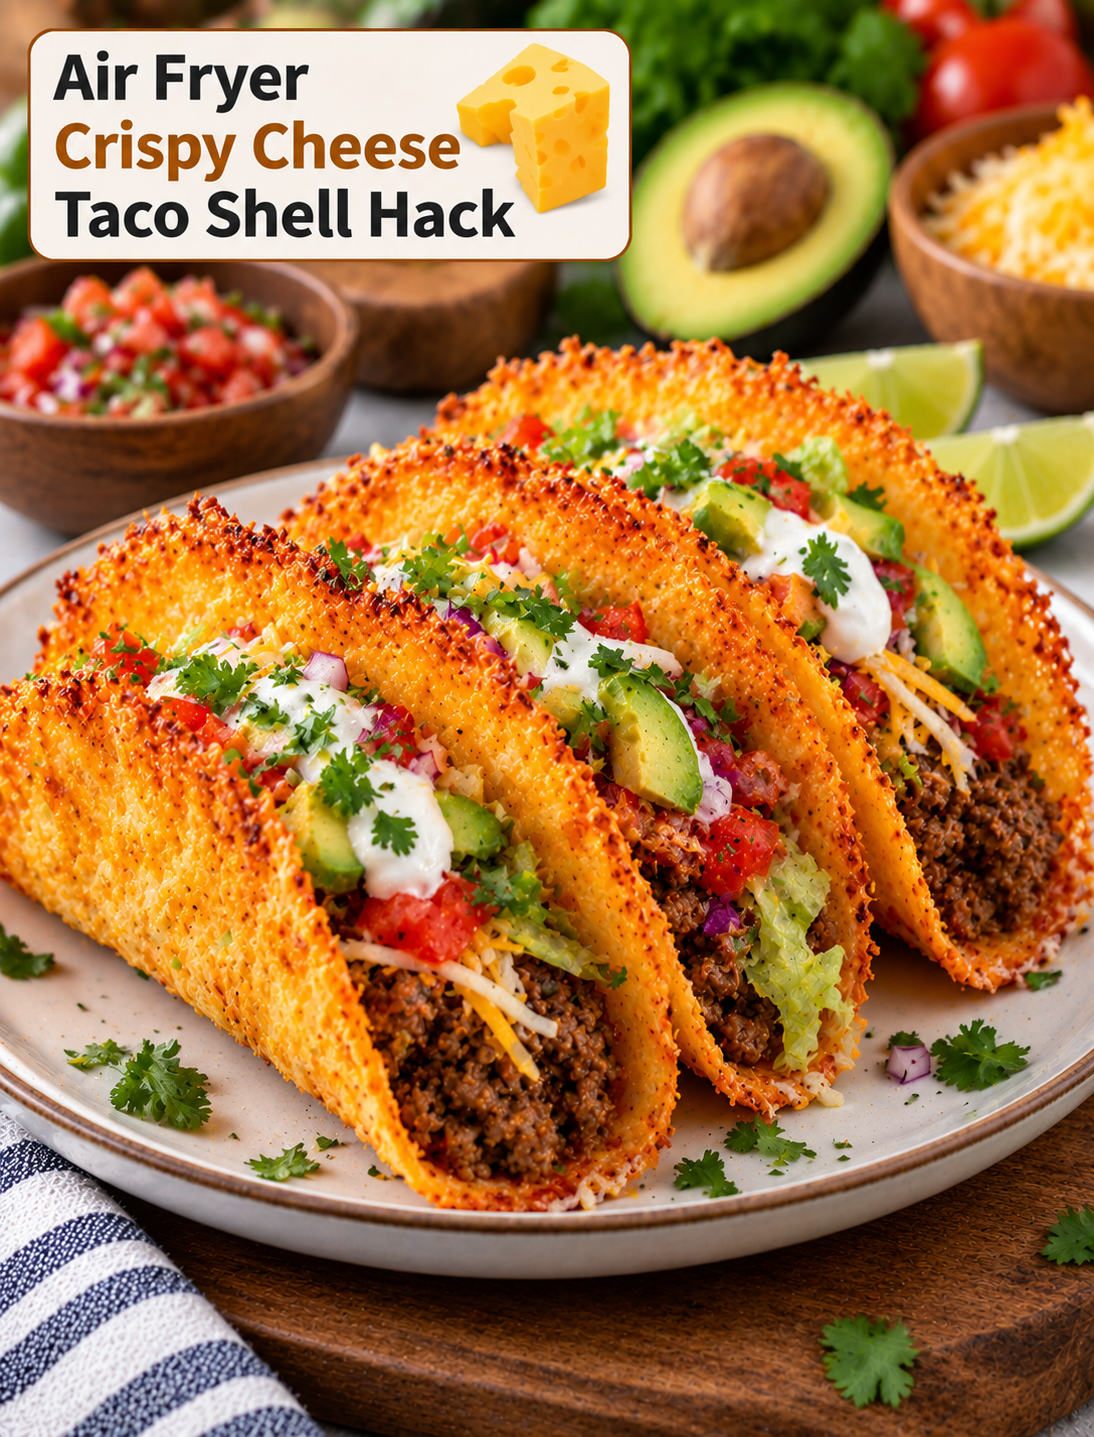
Air Fryer Crispy Cheese Taco Shell Hack

Crispy cheese taco shells filled with seasoned beef, lettuce, tomatoes, avocado, and salsa made in an air fryer

Air Fryer Crispy Cheese Taco Shell Hack

Air Fryer Crispy Cheese Taco Shell Hack is a simple way to turn shredded cheese into a crunchy, low-carb taco shell. The cheese melts, bubbles, and browns in the air fryer before becoming firm enough to hold your favorite taco fillings.

This easy taco shell idea uses just a few basic ingredients and does not require traditional corn or flour tortillas. The result is a crisp, savory shell with rich cheese flavor in every bite.

You can fill these homemade cheese shells with seasoned ground beef, shredded chicken, lettuce, tomatoes, avocado, salsa, sour cream, or your favorite taco toppings. They are also useful when you want a quick dinner with fewer ingredients.

Why You’ll Love This Cheese Taco Shell Hack

This recipe is fast, simple, and easy to customize. The air fryer melts the cheese evenly while helping the edges become golden and crisp.

The shells have a naturally savory flavor, so they can make even simple taco fillings taste more exciting. You can use cheddar, Monterey Jack, Colby Jack, or another cheese that melts and crisps well.

Another benefit is the texture. Traditional tortillas can become soft when loaded with juicy taco filling, but a properly cooked cheese shell stays crisp around the edges.

The shells are also naturally low in carbohydrates because the main ingredient is cheese. This makes them a useful option for people looking for a tortilla alternative.

Ingredients You’ll Need

Shredded Cheese

Use a cheese that melts evenly and develops a crisp edge. Cheddar, Monterey Jack, Colby Jack, and Mexican cheese blends are good choices.

Pre-shredded cheese is convenient, while freshly shredded cheese can melt more smoothly depending on the brand.

Seasonings

Seasonings are optional but can add extra flavor. Try taco seasoning, smoked paprika, garlic powder, onion powder, chili powder, or dried oregano.

Use a light amount because cheese already contains salt.

Taco Fillings

Choose cooked ground beef, chicken, turkey, beans, or another filling you enjoy. Keep the filling relatively dry so it does not soften the crispy shell too quickly.

Toppings

Lettuce, diced tomatoes, avocado, jalapeños, cilantro, salsa, sour cream, shredded cheese, and lime are easy toppings.

Use fresh toppings in moderate amounts so the shell remains sturdy.

How to Make Air Fryer Crispy Cheese Taco Shells

Prepare the Cheese

Preheat the air fryer according to your model’s instructions if preheating is recommended.

Line the air fryer basket or tray with a suitable piece of parchment designed for air-fryer use. Make sure the parchment does not extend beyond the food area or touch the heating element.

Place small piles of shredded cheese in the basket. Shape each pile into a thin, roughly circular layer.

Leave space between each cheese circle. The cheese will spread as it melts, so crowded pieces can join together.

Keep the cheese layer fairly even. A layer that is too thick may stay soft in the center, while an extremely thin layer can become brittle.

Cook Until Golden and Crisp

Air fry the cheese until it melts completely and the edges become golden brown.

Cooking time depends on the cheese type, thickness, and air fryer model. Start checking early because cheese can go from lightly browned to burnt quickly.

The cheese should look melted and bubbly with a firm, browned edge before you remove it.

Allow each piece to cool for a short time. The melted cheese will become firmer as it cools.

Shape the Taco Shells

While the cheese is still warm and flexible, carefully lift each round using a silicone spatula.

Drape the melted cheese over a wooden spoon, taco mold, or another heat-safe rounded surface to create the classic taco shape.

Hold it in place briefly while it cools and firms up. Do not wait too long because completely cooled cheese becomes difficult to shape without cracking.

Once firm, gently remove the shell from the mold and place it on a plate.

Tips for Extra Crispy Cheese Shells

Use a moderate amount of cheese for each shell. An overly thick layer can remain chewy instead of crisp.

Spread the cheese evenly so the center and edges cook at a similar rate.

Do not overcrowd the air fryer basket. Space allows hot air to move around each cheese round.

Watch the cheese closely near the end of cooking. The final stage can happen quickly.

Allow the cheese to cool enough to firm before adding filling. A warm shell may bend or break when loaded.

For maximum crunch, cook until the edges are deeply golden but stop before they become dark brown or bitter.

Best Cheeses for Crispy Taco Shells

Cheddar is one of the easiest options because it melts well and develops a strong savory flavor.

Monterey Jack has a mild taste and melts smoothly. It can create a slightly softer shell if not cooked long enough.

Colby Jack offers a balance of mild flavor and good browning. It also gives the shells an attractive marbled appearance.

A Mexican-style shredded cheese blend can provide a familiar taco flavor. Check the blend because different brands contain different cheese combinations.

For a stronger flavor, combine cheddar with Monterey Jack. A mixed cheese approach can provide both flavor and meltability.

How to Make the Taco Filling

While the cheese shells cook, prepare your preferred taco filling.

For ground beef tacos, brown lean ground beef in a skillet and drain excess grease if needed. Add taco seasoning and a small amount of water, then simmer until the seasoning coats the meat.

For chicken tacos, use cooked shredded chicken and season it with taco seasoning, cumin, garlic powder, and lime juice.

Black beans or pinto beans can provide a simple meat-free filling. Drain and season the beans before adding them to the shells.

Keep the filling warm but avoid adding large amounts of liquid. Juicy fillings can soften the cheese shell quickly.

Best Toppings for Cheese Taco Shells

Shredded lettuce adds crunch and helps separate the warm filling from the shell.

Diced tomatoes provide freshness and mild acidity. Drain excess tomato juice before adding them.

Avocado adds creamy texture and balances the salty cheese.

Fresh cilantro and lime juice provide a bright finish. Jalapeños can be added for heat.

Sour cream, salsa, or taco sauce can be served on the side. Adding too much sauce directly inside the shell can reduce its crispness.

For extra crunch, add diced onions, radishes, or crushed tortilla chips.

Easy Variations to Try

Spicy Cheese Taco Shells

Add a small amount of chili powder, cayenne, or crushed red pepper to the shredded cheese before air frying.

Taco Ranch Shells

Mix a small amount of dry ranch seasoning with the cheese for a creamy, tangy flavor that works well with chicken or beef filling.

Chicken Fajita Tacos

Fill the crispy shells with seasoned chicken, sautéed bell peppers, onions, avocado, and fresh lime.

Breakfast Taco Shells

Use scrambled eggs, cooked breakfast sausage, avocado, and a small amount of salsa for a crispy breakfast taco.

Buffalo Chicken Tacos

Fill the shells with shredded buffalo chicken, lettuce, and a small drizzle of ranch or blue cheese dressing.

Vegetarian Taco Shells

Use seasoned black beans, corn, avocado, tomatoes, lettuce, and salsa for a satisfying meat-free version.

How to Keep Cheese Taco Shells Crispy

Moisture is the biggest enemy of a crispy cheese shell. Keep wet ingredients such as salsa, sour cream, and juicy tomatoes under control.

Prepare the shells just before serving whenever possible. Freshly cooked shells provide the best crunch.

If preparing the components ahead, store the shells separately from the filling and toppings.

Add the filling immediately before eating. This keeps the cheese from absorbing moisture for too long.

For a party, serve the toppings separately so guests can build their own tacos. This also helps everyone control the amount of moisture inside each shell.

What to Serve With Cheese Tacos

A fresh tomato and avocado salad makes a light side for these crunchy tacos.

Mexican-style rice provides a hearty option for dinner. Black beans or pinto beans can also be served on the side.

For a casual gathering, serve the tacos with guacamole, salsa, pico de gallo, and a simple corn salad.

A squeeze of fresh lime over the finished tacos adds brightness and balances the richness of the cheese.

How to Store and Reheat

Cheese shells are best enjoyed immediately after cooking because their crisp texture can soften during storage.

If you have leftovers, allow them to cool completely before placing them in an airtight container. Separate individual shells with parchment paper to reduce sticking.

Store the shells away from moist taco fillings and sauces.

To restore some crispness, place the shells back into the air fryer for a short time. Watch them closely because cheese can brown quickly.

Avoid microwaving the shells because microwave heat can make melted cheese soft and chewy instead of crisp.

Common Mistakes to Avoid

Do not use too much cheese because a thick layer can stay soft in the middle.

Avoid placing cheese directly on an unprotected air fryer surface if your model requires a liner for this type of cooking. Follow your appliance instructions.

Do not leave parchment loose in the basket during preheating because circulating air can move it toward the heating element.

Avoid cooking at an excessively high temperature because the cheese can burn before becoming evenly crisp.

Do not shape the cheese after it has fully cooled. Warm cheese is flexible, while cold cheese becomes firm and more likely to crack.

Avoid adding wet toppings too early. Moisture can quickly turn a crunchy shell soft.

Frequently Asked Questions

What cheese is best for crispy taco shells?

Cheddar, Monterey Jack, Colby Jack, and Mexican cheese blends all work well when melted into thin, evenly shaped rounds.

Can I make cheese taco shells without an air fryer?

Yes, you can use an oven, but cooking time and temperature will vary depending on your oven and cheese thickness.

Why are my cheese shells not crispy?

The cheese layer may be too thick, undercooked, or exposed to excess moisture from the filling and toppings.

Can I use pre-shredded cheese?

Yes, pre-shredded cheese is convenient and works well, although freshly shredded cheese may melt more smoothly.

How do I shape the shells?

Shape the warm melted cheese over a taco mold, wooden spoon, or rounded heat-safe surface until it cools and becomes firm.

Can I make these shells ahead of time?

Yes, but store them separately from wet ingredients and keep them in an airtight container to help preserve their texture.

Are cheese taco shells low carb?

They can be a low-carbohydrate alternative to traditional tortilla shells because the shell is made primarily from cheese.

What fillings work best?

Seasoned beef, chicken, turkey, beans, scrambled eggs, lettuce, avocado, tomatoes, and fresh salsa all pair well with crispy cheese shells.

Final Thoughts

Air Fryer Crispy Cheese Taco Shell Hack is an easy way to create crunchy taco shells with a rich, cheesy flavor. A thin layer of melted cheese becomes firm and crisp as it cools, creating a sturdy base for your favorite fillings.

The key is controlling the cheese thickness, watching the browning closely, and shaping the rounds while they are still warm. Keeping wet toppings separate until serving also helps protect the crunch.

Try cheddar for a bold flavor, Monterey Jack for a mild shell, or a Mexican cheese blend for a taco-inspired finish. Add seasoned beef, chicken, beans, fresh vegetables, and your favorite toppings for a quick meal that is easy to customize.

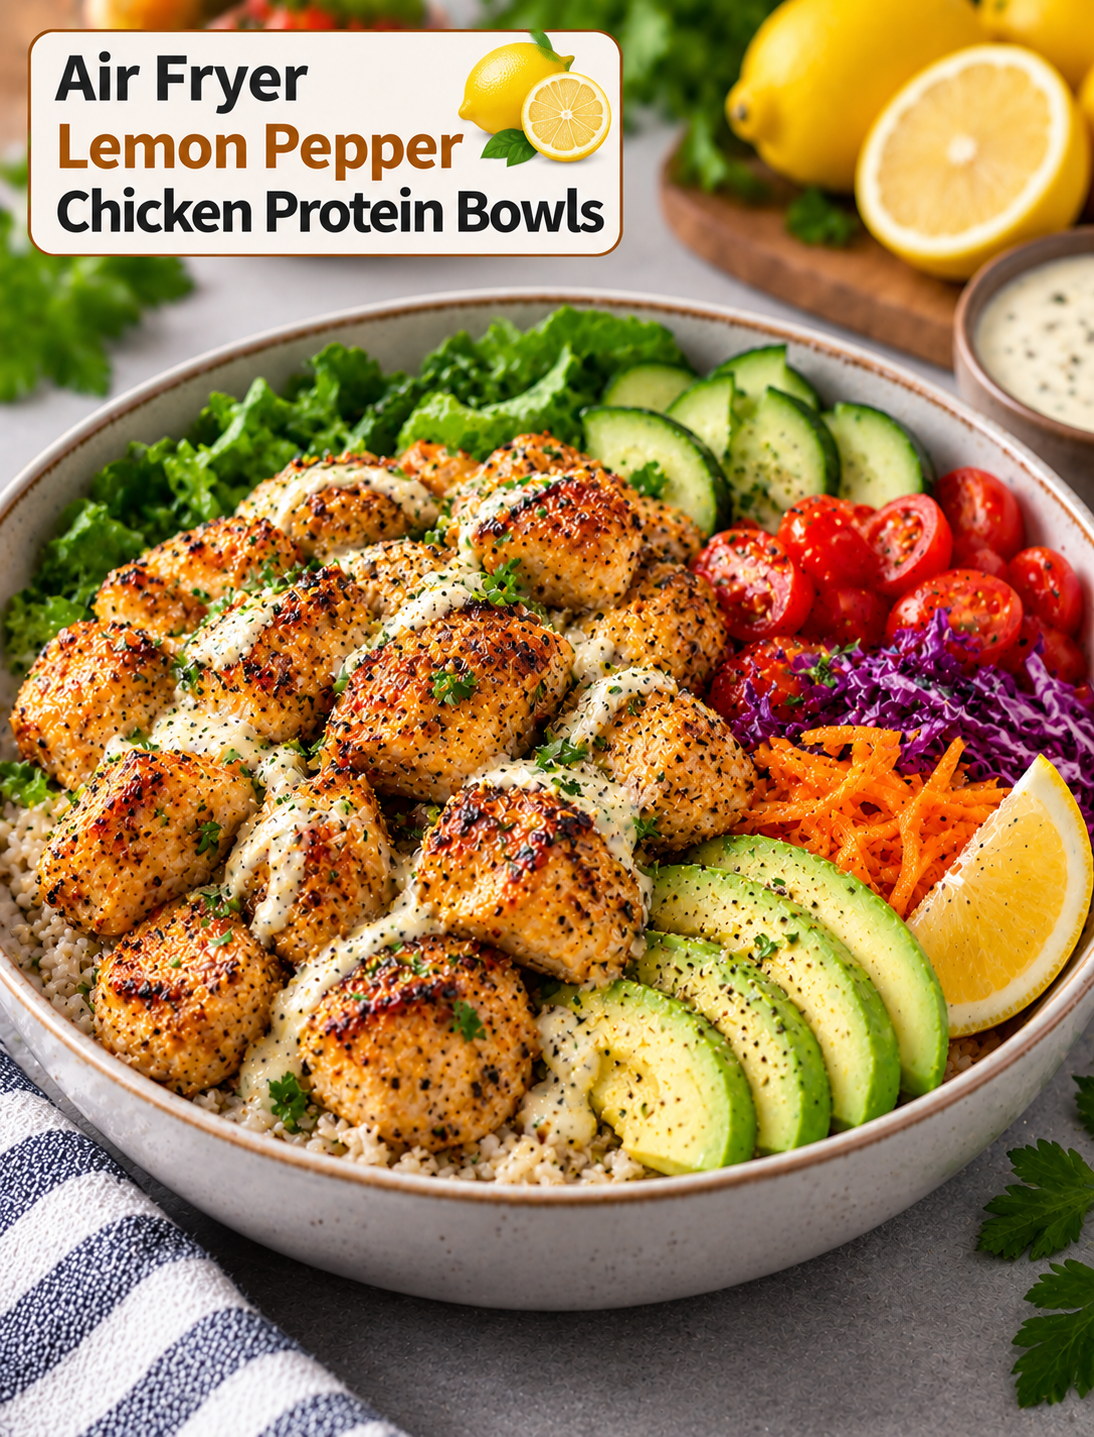
Air Fryer Lemon Pepper Chicken Protein Bowls

Air fryer lemon pepper chicken protein bowl with rice, avocado, fresh vegetables, greens, and creamy lemon dressing

Air Fryer Lemon Pepper Chicken Protein Bowls

Air Fryer Lemon Pepper Chicken Protein Bowls combine juicy seasoned chicken with fresh vegetables, grains, and a bright lemon dressing for a balanced meal. The chicken develops a lightly crisp outside in the air fryer while the inside stays tender and flavorful.

This easy bowl recipe is ideal for lunch, meal prep, or a quick weeknight dinner. Each bowl can include lean chicken, cooked rice or quinoa, crunchy vegetables, leafy greens, and a simple lemon-based sauce.

The combination of protein, fiber, healthy fats, and fresh produce makes these bowls filling without requiring complicated cooking. You can also change the ingredients based on what you have available.

Why You’ll Love These Protein Bowls

These chicken bowls are easy to customize and simple enough for busy weekdays. The air fryer cooks the seasoned chicken quickly while giving it a flavorful golden exterior.

Lemon and black pepper create a fresh, zesty flavor that keeps the chicken from tasting heavy. Garlic powder and herbs add extra savory notes without overpowering the citrus.

The bowl format also makes portioning easy. You can build each serving with your preferred amount of chicken, grains, vegetables, and dressing.

This recipe is also useful for meal prep. Cook the chicken and grains ahead, prepare the vegetables, and assemble individual portions when needed.

Ingredients You’ll Need

Chicken

Use boneless, skinless chicken breasts for a lean protein option. Chicken thighs can also be used if you prefer a richer flavor and softer texture.

Cut the chicken into evenly sized bite-size pieces so they cook at a similar rate.

Lemon

Fresh lemon juice gives the chicken its bright citrus flavor. Freshly grated lemon zest can also be added to intensify the lemon aroma.

Black Pepper

Freshly ground black pepper provides the signature peppery taste. Use more or less depending on your preferred level of spice.

Olive Oil

A small amount of olive oil helps the seasoning coat the chicken and supports browning in the air fryer.

Seasonings

Garlic powder, onion powder, paprika, salt, and dried oregano complement the lemon and pepper. A small amount of parsley can also be used for a fresh herb note.

Rice or Quinoa

Cooked white rice, brown rice, jasmine rice, or quinoa can form the base of the bowl. Choose the grain based on your preferred texture and flavor.

Vegetables

Use a mix of fresh or roasted vegetables such as cucumber, cherry tomatoes, broccoli, bell peppers, carrots, spinach, or shredded cabbage.

Avocado

Sliced avocado adds creamy texture and healthy fats. Add it immediately before serving to keep it fresh.

Greek Yogurt

Plain Greek yogurt can be used as the base for a creamy lemon dressing. It also adds extra protein and a cool contrast to the seasoned chicken.

How to Make Air Fryer Lemon Pepper Chicken Protein Bowls

Prepare the Chicken

Pat the chicken dry with paper towels. Removing surface moisture helps the seasoning stick and improves browning.

Place the chicken pieces in a bowl and add olive oil, fresh lemon juice, lemon zest, black pepper, garlic powder, onion powder, paprika, oregano, and salt.

Toss until every piece is evenly coated. Let the chicken sit for a few minutes while you prepare the air fryer.

Avoid soaking the chicken in lemon juice for a long period because the acidic marinade can affect the texture of the meat.

Air Fry the Chicken

Preheat the air fryer according to your model’s instructions. Arrange the seasoned chicken pieces in a single layer.

Leave space between the pieces so hot air can circulate around them. Lightly spray the basket or chicken with cooking spray if needed.

Air fry until the chicken is golden on the outside and reaches an internal temperature of 165°F.

Cooking time depends on the size of the chicken pieces and your air fryer model. Check the largest piece with an instant-read thermometer rather than relying only on color.

Allow the chicken to rest for a few minutes before adding it to the bowls. Resting helps the juices stay inside the meat.

Prepare the Bowl Ingredients

While the chicken cooks, prepare the grain base and vegetables.

Use warm cooked rice or quinoa as the bottom layer. Add fresh greens, cucumber, tomatoes, bell peppers, broccoli, or other vegetables around the bowl.

Slice avocado just before serving to reduce browning. You can also add roasted vegetables if you prefer a warmer bowl.

Make the Lemon Yogurt Dressing

Add plain Greek yogurt to a small bowl with fresh lemon juice, lemon zest, black pepper, garlic powder, and a small amount of olive oil.

Stir until smooth. Add a splash of water if the dressing is too thick for drizzling.

Taste and adjust the lemon, pepper, or salt as needed. Keep the dressing refrigerated until the bowls are ready to serve.

Assemble the Bowls

Add rice or quinoa to each serving bowl. Arrange the air-fried chicken over the grain base.

Add the vegetables, leafy greens, and avocado around the chicken. Drizzle with the lemon yogurt dressing just before serving.

Finish with fresh parsley, extra black pepper, or a small squeeze of lemon for added brightness.

Tips for Juicy Air Fryer Chicken

Cut the chicken into similar-sized pieces so they cook evenly. Very small pieces can dry out before larger pieces are fully cooked.

Pat the chicken dry before seasoning. Excess moisture can prevent the surface from browning properly.

Use enough oil to coat the chicken lightly without making it greasy. A small amount is usually enough for air frying.

Do not overcrowd the basket. Overcrowding reduces airflow and can leave the chicken less browned.

Check the internal temperature before removing the chicken. Poultry should reach 165°F for safe consumption.

Avoid prolonged cooking after the chicken reaches the correct temperature. Overcooking can make lean chicken breast dry.

Best Vegetables for Chicken Protein Bowls

Fresh cucumber adds a cool, crunchy texture that balances the warm chicken.

Cherry tomatoes provide sweetness and acidity that pair naturally with lemon and pepper.

Broccoli works well roasted or steamed. Roasting gives it browned edges and a deeper flavor.

Bell peppers add color and natural sweetness. Use red, yellow, orange, or green peppers depending on your preference.

Spinach provides a simple leafy green base and can be served fresh or lightly wilted.

Shredded cabbage adds crunch and holds up well in meal-prep containers.

Carrots can be sliced thinly or roasted for a slightly sweet side component.

Choose three or four vegetables rather than adding too many ingredients. A simple combination keeps the flavors balanced.

Healthy Topping Ideas

Avocado is an easy way to add creamy texture to the bowl. Slice it shortly before serving for the best appearance.

Pumpkin seeds or sunflower seeds provide a crunchy topping. Use a small portion to add texture without overwhelming the other ingredients.

Fresh parsley, cilantro, or green onions can add a fresh finish.

A spoonful of Greek yogurt can provide extra creaminess. You can also add hummus for a Mediterranean-inspired variation.

For additional citrus flavor, grate a little fresh lemon zest over the finished bowl.

Easy Variations to Try

Mediterranean Chicken Bowl

Use quinoa as the base and add cucumber, tomatoes, red onion, spinach, feta, and a lemon-herb dressing.

Spicy Lemon Pepper Bowl

Add cayenne pepper or red pepper flakes to the chicken seasoning. Top the finished bowl with sliced jalapeños for extra heat.

Southwest Chicken Bowl

Use brown rice with black beans, corn, tomatoes, avocado, and a lime-based dressing. Add chili powder to the chicken for a smoky flavor.

Green Goddess Chicken Bowl

Build the bowl with mixed greens, cucumber, broccoli, avocado, and herbs. Use a creamy herb dressing instead of the lemon yogurt sauce.

Low-Carb Chicken Bowl

Replace rice or quinoa with cauliflower rice or extra greens. Add avocado and roasted vegetables for a satisfying meal without a grain base.

Meal Prep Instructions

Cook the chicken and grain base ahead of time and allow them to cool before storing.

Divide the rice or quinoa into individual meal-prep containers. Add cooked chicken and sturdy vegetables such as broccoli, carrots, and bell peppers.

Keep fresh ingredients such as avocado, cucumber, and dressing separate until serving. This helps prevent the vegetables from becoming watery or soft.

Store the components in the refrigerator and assemble each bowl when ready to eat.

Reheat the chicken and grains until hot, then add the fresh vegetables and dressing. This creates a better contrast between warm and chilled ingredients.

How to Store and Reheat

Store cooked chicken in an airtight container in the refrigerator and use it within a few days for the best quality.

Keep dressing in a separate sealed container. This prevents the grain and vegetables from absorbing excess moisture.

Reheat the chicken in the air fryer for a few minutes or use a microwave until heated through.

Avoid repeatedly reheating the same portion because repeated heating can dry out the chicken.

Fresh avocado should be added after reheating rather than stored with the hot ingredients.

Common Mistakes to Avoid

Do not use oversized chicken pieces because they can cook unevenly in the air fryer.

Avoid adding too much lemon juice to the raw chicken. A moderate amount provides flavor without making the surface overly acidic.

Do not overcrowd the air fryer basket. Proper airflow is essential for browning.

Avoid adding dressing too early when preparing bowls for later. Extra moisture can make grains and vegetables soggy.

Do not skip the food thermometer. Chicken should reach 165°F at the thickest point before serving.

Frequently Asked Questions

Can I use chicken thighs instead of chicken breast?

Yes, boneless, skinless chicken thighs work well and provide a richer flavor with a naturally tender texture.

How long does chicken take in the air fryer?

Cooking time varies by piece size and appliance, so cook until the thickest piece reaches 165°F internally.

Can I use frozen chicken?

Thaw the chicken completely before cutting and seasoning it to promote even cooking and accurate temperature control.

What grain works best for protein bowls?

Rice and quinoa are both excellent choices, while brown rice and cauliflower rice offer different textures and nutritional profiles.

Can I make these bowls ahead of time?

Yes, prepare the chicken, grain, and sturdy vegetables ahead, then add fresh toppings and dressing just before eating.

How do I keep meal-prep bowls from getting soggy?

Store wet toppings and dressing separately and add them after reheating the chicken and grains.

Can I make the recipe dairy-free?

Yes, replace the Greek yogurt dressing with a dairy-free yogurt or a simple lemon, olive oil, and herb dressing.

What can I use instead of avocado?

Hummus, olives, pumpkin seeds, or a small portion of feta can provide different textures and flavors when avocado is unavailable.

Final Thoughts

Air Fryer Lemon Pepper Chicken Protein Bowls are a simple way to build a flavorful meal around tender chicken, fresh vegetables, and a satisfying grain base. Lemon and black pepper give the chicken a bright flavor, while the air fryer creates a lightly browned exterior.

The recipe works well for both fresh dinners and meal prep. Choose a few vegetables, prepare your favorite grain, and finish each bowl with a fresh lemon dressing.

For the best texture, keep wet ingredients separate until serving and avoid overcrowding the air fryer. With simple ingredient swaps, you can create Mediterranean, spicy, Southwest, low-carb, or green vegetable versions using the same basic method.

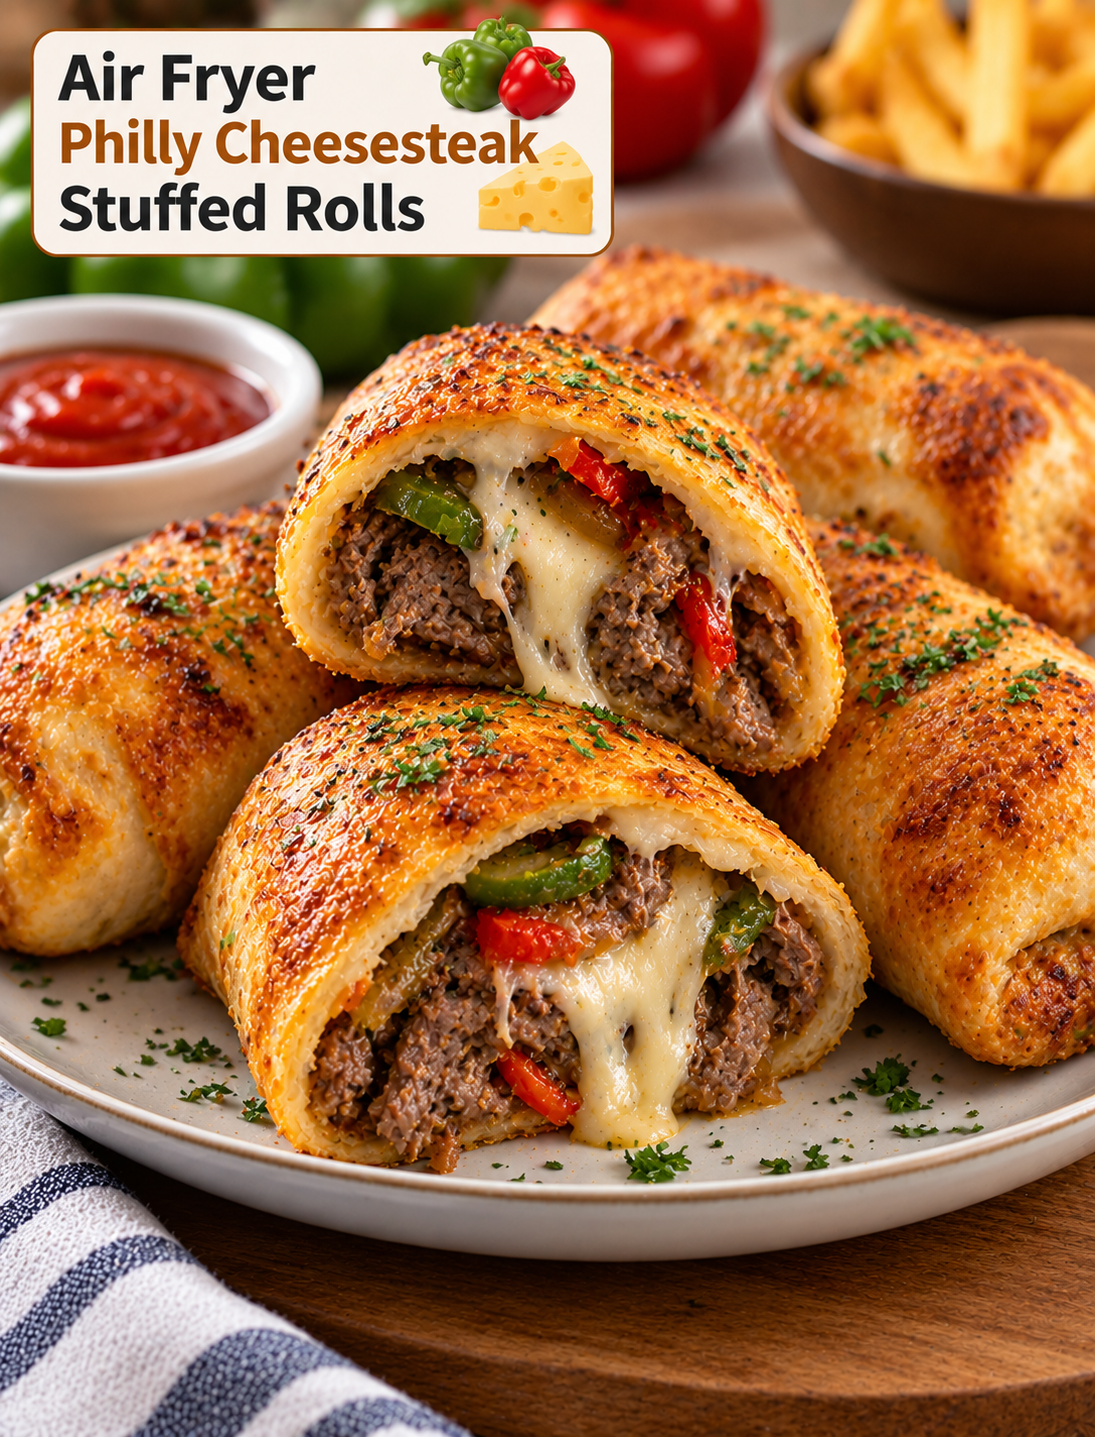
Air Fryer Crispy Philly Cheesesteak Stuffed Rolls

Golden crispy Philly cheesesteak stuffed rolls filled with tender beef, melted cheese, sautéed peppers and onions

Air Fryer Crispy Philly Cheesesteak Stuffed Rolls

Air Fryer Crispy Philly Cheesesteak Stuffed Rolls pack the classic flavors of a Philly cheesesteak into a golden, handheld roll. Thinly sliced beef, sautéed onions, peppers, and melted cheese are wrapped in soft dough and cooked until the outside becomes crisp and golden.

This easy recipe is a great choice when you want a hearty snack, quick lunch, party appetizer, or casual dinner. The air fryer gives the rolls a crunchy finish without deep frying, while the hot filling stays savory and cheesy.

The recipe uses simple ingredients that are easy to find at most U.S. grocery stores. You can use shaved steak, thinly sliced sirloin, or another tender cut of beef. Provolone is a classic cheese choice, but mozzarella or American cheese can also create a smooth, melty filling.

Why You’ll Love These Stuffed Rolls

These stuffed rolls combine several textures in one bite. The outside becomes crisp from the circulating hot air, while the center stays filled with tender beef, melted cheese, and flavorful vegetables.

The individual portions are also easy to serve. You can make smaller rolls for appetizers or larger ones for a filling meal.

Using an air fryer keeps the cooking process simple. There is no need to heat a large amount of oil, and the rolls can be cooked in batches when serving a crowd.

The filling is flexible, too. Add mushrooms for extra savory flavor, use hot peppers for a spicy version, or switch the cheese to match your preference.

Ingredients You’ll Need

Thinly Sliced Beef

Use shaved steak, thinly sliced ribeye, sirloin, or another tender beef cut. Thin slices cook quickly and make the filling easier to bite through.

If your beef is not already thinly sliced, place it in the freezer briefly before slicing. Slightly chilled meat is easier to cut into very thin strips.

Onion

Thinly sliced yellow or white onion adds the sweet, savory flavor associated with a classic cheesesteak. Cook the onion until softened and lightly browned for deeper flavor.

Bell Pepper

Green bell pepper adds freshness, mild sweetness, and color. Red or yellow peppers can be used if you prefer a sweeter taste.

Cheese

Provolone is a traditional choice for cheesesteak-style filling. American cheese creates a very creamy texture, while mozzarella provides plenty of stretch.

Refrigerated Dough

Use refrigerated pizza dough, crescent dough, or another sturdy refrigerated dough that can be rolled around the filling. Follow the package instructions for handling and cooking if needed.

Butter or Olive Oil

A small amount of melted butter or olive oil helps the outside of the rolls brown during air frying.

Seasonings

Salt, black pepper, garlic powder, and Italian seasoning provide a simple savory base. Worcestershire sauce can also be added to the beef for deeper flavor.

How to Make Air Fryer Crispy Philly Cheesesteak Stuffed Rolls

Cook the Beef and Vegetables

Heat a skillet over medium-high heat and add a small amount of oil. Add the thinly sliced beef and cook until it is browned and nearly cooked through.

Break up larger pieces with a spatula so the meat becomes evenly distributed throughout the filling.

Add the sliced onions and bell peppers. Cook until the vegetables soften and the beef is fully cooked.

Season the mixture with salt, black pepper, garlic powder, and a small amount of Worcestershire sauce if desired.

Remove the skillet from the heat and allow the filling to cool slightly. Excessively hot filling can make the dough difficult to handle.

Add the Cheese

Once the beef mixture has cooled slightly, add the cheese. You can place slices directly over the warm beef so they begin to melt, or mix shredded cheese into the filling.

Keep the filling reasonably dry. Excess liquid can make the dough soft and difficult to seal.

Prepare the Rolls

Unroll the refrigerated dough on a lightly floured surface. Divide it into portions based on the size of rolls you want.

Place a small amount of the cheesesteak mixture in the center of each piece. Avoid overfilling because too much filling can cause the dough to split during cooking.

Fold the dough around the filling and pinch the seams firmly closed. Place each roll seam-side down while preparing the remaining pieces.

Brush the outside lightly with melted butter or olive oil. A light coating encourages a golden, crisp surface.

Air Fry the Rolls

Preheat your air fryer according to the manufacturer’s instructions. Arrange the stuffed rolls in the basket with space between them.

Do not stack the rolls because they need direct exposure to circulating hot air. Cook until the dough is golden brown, crisp, and fully cooked.

Cooking time depends on the type and thickness of dough and the size of the rolls. Check the first batch early because air fryer models can vary considerably.

Let the rolls rest for a few minutes before serving. The cheese and beef filling will be very hot immediately after cooking.

Tips for Crispy Stuffed Rolls

Keep the filling relatively dry before adding it to the dough. Moisture is one of the main reasons stuffed dough becomes soft instead of crisp.

Do not overfill the rolls. A moderate amount of beef and cheese leaves enough dough around the filling for a secure seal.

Pinch every seam firmly. An open seam can allow melted cheese and juices to escape during cooking.

Leave space between the rolls in the basket. Good airflow helps the dough brown evenly on all sides.

Brush the outside lightly rather than heavily. Too much butter or oil can make the surface greasy instead of crisp.

If the rolls brown quickly but the dough is not fully cooked, reduce the air fryer temperature slightly and continue cooking until the center is done.

How to Get the Best Cheesesteak Flavor

Thinly sliced beef provides the most authentic cheesesteak-style texture. Avoid large chunks because they can make the rolls difficult to eat.

Cook the onions until they become soft and lightly caramelized. This adds natural sweetness without requiring extra sugar.

Provolone provides a mild, slightly tangy cheese flavor that works especially well with beef and onions.

For a richer filling, add a small amount of Worcestershire sauce while cooking the beef. Use it sparingly because its flavor is concentrated.

Freshly ground black pepper can also enhance the savory beef flavor without overpowering the cheese.

Easy Variations to Try

Mushroom Cheesesteak Rolls

Add thinly sliced mushrooms to the skillet with the onions and peppers. Cook until the mushrooms release their moisture and become lightly browned before adding them to the filling.

Spicy Cheesesteak Rolls

Add sliced jalapeños or banana peppers to the beef mixture. Pepper Jack cheese can replace provolone for an extra spicy and creamy filling.

Pizza Cheesesteak Rolls

Add a small amount of marinara sauce and mozzarella to the beef mixture. Keep the sauce limited so the dough does not become too wet.

Bacon Cheesesteak Rolls

Add finely chopped cooked bacon to the filling for smoky flavor. Use a moderate amount because bacon adds both salt and richness.

Chicken Cheesesteak Rolls

Replace the beef with thinly sliced cooked chicken. Provolone, peppers, and onions work well with the lighter protein.

Best Dips and Sauces

These stuffed rolls are flavorful enough to eat on their own, but a dipping sauce adds another layer of flavor.

Classic marinara works well with the cheesy filling. A creamy horseradish sauce adds tang and mild heat that pairs nicely with beef.

Ranch dressing is an easy option for casual gatherings. Garlic aioli provides a rich, savory dip for those who enjoy creamy sauces.

For a classic sandwich-inspired experience, serve the rolls with a small amount of ketchup, spicy mustard, or your favorite steak sauce.

Keep dipping sauces on the side rather than inside the rolls. Extra moisture inside the dough can prevent a crisp finish.

What to Serve With Cheesesteak Rolls

A fresh green salad provides a light contrast to the rich beef and cheese filling. Use lettuce, tomatoes, cucumbers, and a simple vinaigrette.

For a casual dinner, serve the rolls with air-fried French fries or potato wedges. Coleslaw can also add a cool, crunchy side.

For game day, arrange the rolls on a platter with several dipping sauces. Add pickle spears, vegetable sticks, or chips for an easy party spread.

Smaller rolls can be served as appetizers, while larger portions work well as a complete lunch or dinner.

How to Store and Reheat

Allow leftover rolls to cool before placing them in an airtight container. Refrigerate them promptly and use them within a few days for the best quality.

Reheat the rolls in the air fryer rather than the microwave when possible. The air fryer helps bring back some of the crisp texture of the dough.

Heat until the center is hot and the cheese is melted. Avoid excessive reheating because the beef can become dry.

If you are preparing them ahead, keep the cooked filling refrigerated and assemble the rolls shortly before air frying. This helps protect the dough from excess moisture.

Common Mistakes to Avoid

Do not use wet beef filling because excess juices can make the dough soggy and difficult to seal.

Avoid cutting the beef into thick chunks. Thin slices blend better with the onions, peppers, and cheese.

Do not overfill the dough. Too much filling can cause the seams to open and cheese to leak into the air fryer.

Avoid overcrowding the basket because limited airflow can leave the rolls unevenly browned.

Do not serve the rolls immediately after cooking. Allowing them to rest briefly reduces the chance of burning your mouth on the hot filling.

Frequently Asked Questions

What beef is best for cheesesteak rolls?

Thinly sliced ribeye or shaved steak gives the most tender texture, while thinly sliced sirloin is a leaner alternative.

What cheese should I use?

Provolone is a classic choice, but American, mozzarella, and Pepper Jack also melt well in the filling.

Can I use crescent roll dough?

Yes, crescent dough can be used, but handle it gently and avoid overfilling because it is softer than pizza dough.

How do I stop the filling from leaking?

Cool the filling slightly, avoid overfilling, and firmly pinch the dough seams closed before cooking.

Can I prepare these ahead of time?

Yes, prepare the filling ahead and refrigerate it, then assemble and air fry the rolls shortly before serving.

Can I freeze stuffed cheesesteak rolls?

Yes, cooled cooked rolls can be frozen in an airtight container and reheated in the air fryer until hot.

Can I add mushrooms and peppers?

Yes, mushrooms, green peppers, onions, and banana peppers are easy additions that complement the beef and cheese.

How do I make the rolls extra crispy?

Keep the filling dry, leave space between the rolls, and lightly brush the dough with butter or oil before air frying.

Final Thoughts

Air Fryer Crispy Philly Cheesesteak Stuffed Rolls turn a beloved sandwich combination into a convenient handheld recipe. Tender beef, sautéed onions and peppers, and melted cheese are wrapped in dough and air fried until golden and crisp.

The key to great results is controlling moisture and avoiding overfilling. Use thinly sliced beef, cook the vegetables until their excess moisture is gone, seal each roll carefully, and leave enough room for hot air to circulate.

Serve these rolls with your favorite dipping sauces for a satisfying appetizer, lunch, dinner, or game-day snack. With a few simple ingredient swaps, you can also create spicy, mushroom, bacon, chicken, or pizza-inspired versions.

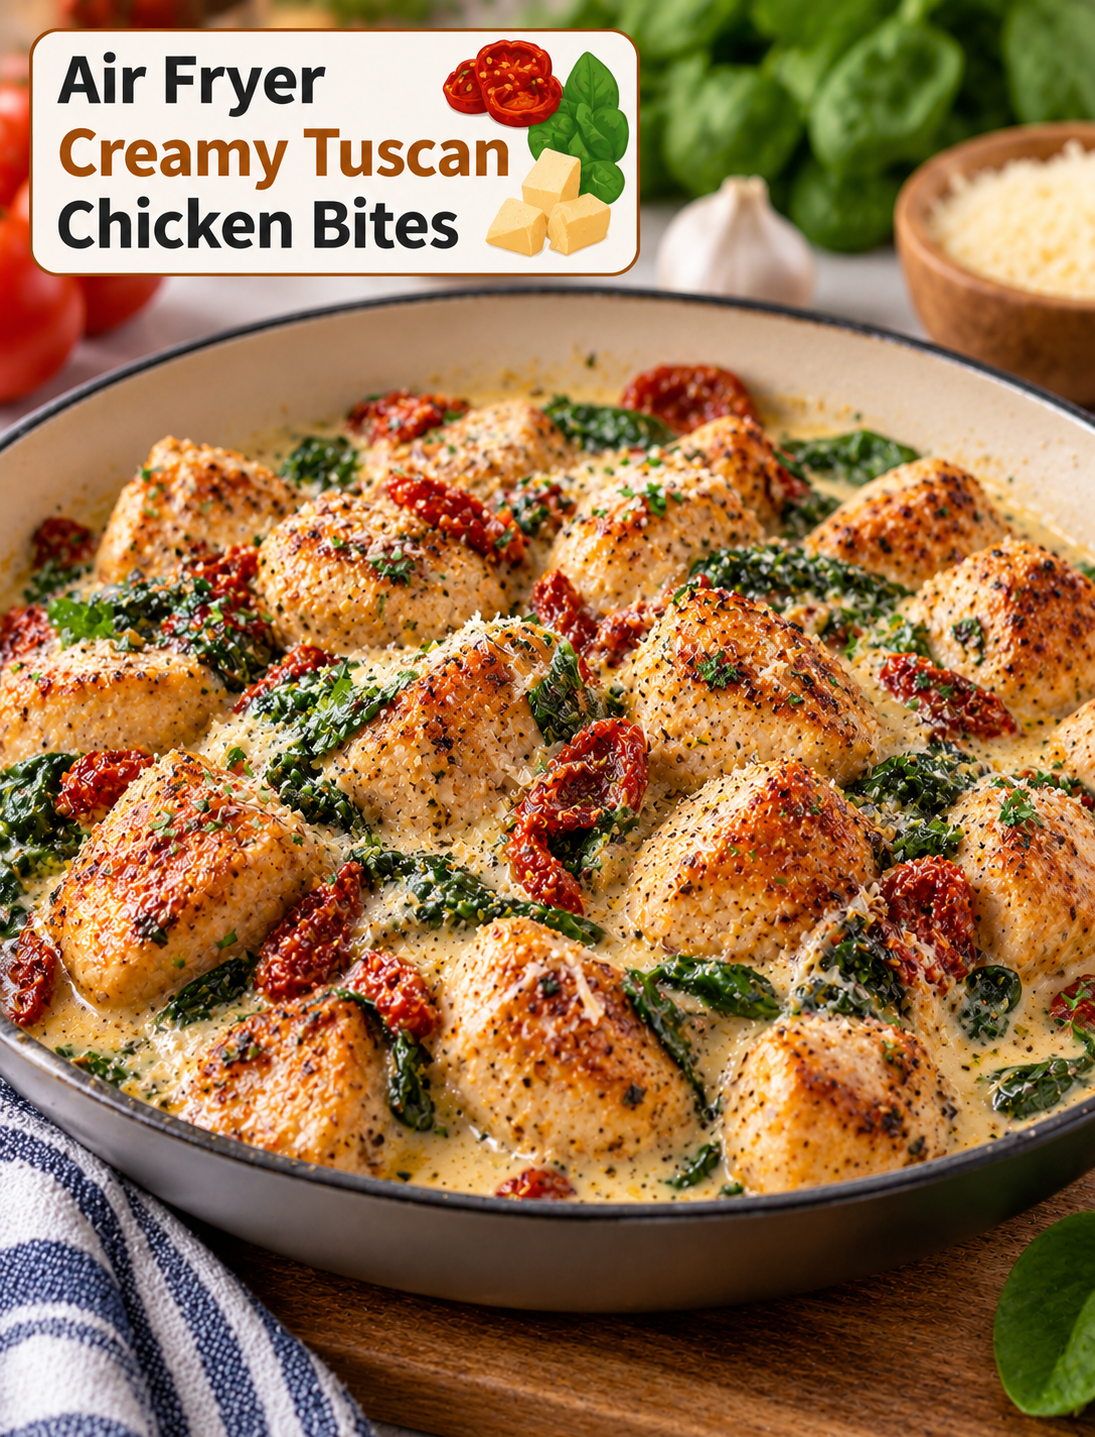
Air Fryer Creamy Tuscan Chicken Bites

Air fryer creamy Tuscan chicken bites in garlic Parmesan sauce with spinach and sun-dried tomatoes served in a skillet

Air Fryer Creamy Tuscan Chicken Bites

Air Fryer Creamy Tuscan Chicken Bites combine tender seasoned chicken, sun-dried tomatoes, spinach, Parmesan, and a rich creamy sauce in one easy meal. The chicken gets lightly golden in the air fryer before being coated in a flavorful Tuscan-style sauce.

This recipe brings the comforting flavors of Tuscan chicken to bite-sized pieces that cook quickly and are easy to serve. The creamy sauce has a savory garlic flavor, while sun-dried tomatoes add a slightly sweet and tangy taste.

These chicken bites work well for busy weeknight dinners, quick lunches, family meals, or casual entertaining. Serve them over pasta, rice, mashed potatoes, or crusty bread to turn the bites into a complete meal.

Why You’ll Love These Chicken Bites

These chicken bites are packed with familiar ingredients and bold flavor. The air fryer gives the chicken a lightly crisp outside while keeping the inside tender when cooked correctly.

The creamy Tuscan sauce adds richness without requiring complicated cooking steps. Garlic, Italian seasoning, Parmesan, and sun-dried tomatoes create the main flavor base.

The recipe is also flexible. You can add extra spinach, use a different cheese, adjust the seasoning, or make the sauce lighter with a suitable milk alternative.

Bite-sized chicken also makes this recipe easy to portion. Each piece gets coated with sauce, so every serving has a balanced mix of chicken and Tuscan flavors.

Ingredients You’ll Need

Chicken

Use boneless, skinless chicken breasts for firm, tender bites. Chicken thighs can also be used if you prefer darker meat with a richer flavor.

Cut the chicken into similar-sized pieces so they cook evenly in the air fryer.

Olive Oil

A small amount of olive oil helps the seasonings stick to the chicken and encourages browning during air frying.

Garlic

Fresh minced garlic provides a strong savory flavor for the creamy sauce. Use freshly chopped garlic when possible for the best aroma.

Italian Seasoning

Italian seasoning adds a simple blend of herbs that works well with chicken, Parmesan, and sun-dried tomatoes.

Sun-Dried Tomatoes

Sun-dried tomatoes provide concentrated tomato flavor with a slightly sweet and tangy taste. Chop them into small pieces so they distribute evenly through the sauce.

Heavy Cream

Heavy cream creates a smooth, rich sauce that coats the chicken well. For a lighter texture, you can use half-and-half, although the sauce may be less thick.

Parmesan Cheese

Finely grated Parmesan melts into the warm cream sauce and adds salty, nutty flavor. Freshly grated cheese usually blends more smoothly than larger packaged shreds.

Fresh Spinach

Fresh spinach adds color and a mild earthy flavor. It wilts quickly, so add it near the end of the sauce preparation.

Seasonings

Salt, black pepper, garlic powder, and a small amount of red pepper flakes can be used to balance the dish. Red pepper flakes are optional if you prefer a mild sauce.

How to Make Air Fryer Creamy Tuscan Chicken Bites

Prepare the Chicken

Pat the chicken pieces dry with paper towels. Removing excess moisture helps the outside brown better during air frying.

Place the chicken in a bowl and add olive oil, Italian seasoning, garlic powder, salt, and black pepper. Toss until every piece is evenly coated.

Keep the chicken pieces close in size so smaller pieces do not overcook while larger pieces are still finishing.

Air Fry the Chicken

Preheat your air fryer according to the manufacturer’s instructions. Lightly coat the basket with cooking spray if needed.

Place the seasoned chicken pieces in a single layer. Leave space between them so hot air can circulate around each piece.

Air fry until the chicken is golden on the outside and reaches an internal temperature of 165°F. Cooking time will vary depending on the size of the pieces and your air fryer model.

Turn or shake the basket during cooking if your appliance browns unevenly. Remove the chicken once it reaches a safe temperature and set it aside.

Make the Creamy Tuscan Sauce

Place a skillet over medium heat and add a small amount of olive oil or butter. Add the minced garlic and cook briefly until fragrant.

Stir in the chopped sun-dried tomatoes and cook for a short time to release their flavor.

Pour in the heavy cream and reduce the heat to medium-low. Stir gently while the cream warms.

Add Parmesan cheese and Italian seasoning. Continue stirring until the cheese melts and the sauce becomes smooth.

Add fresh spinach and cook until it wilts. If the sauce becomes too thick, add a small splash of milk or chicken broth to loosen it.

Combine the Chicken and Sauce

Add the cooked chicken bites to the skillet. Toss gently until each piece is covered with the creamy Tuscan sauce.

Allow the chicken to warm in the sauce for a few minutes without bringing the mixture to a hard boil. Excessive heat can cause a cream-based sauce to become grainy.

Taste the sauce and adjust the salt, black pepper, or red pepper flakes as needed.

Serve the chicken warm while the sauce is creamy and the chicken remains tender.

Tips for Tender and Crispy Chicken

Cut the chicken into evenly sized pieces before seasoning. Uniform pieces cook at a similar rate and are easier to check for doneness.

Do not overcrowd the air fryer basket. Too many pieces at once can trap moisture and reduce browning.

Pat the chicken dry before adding oil and seasoning. A dry surface helps create better color and texture.

Avoid overcooking the chicken. Once the thickest piece reaches 165°F, remove the chicken from the air fryer.

For a more golden exterior, lightly spray the seasoned chicken with cooking spray before cooking.

Keep the sauce at a gentle heat after adding Parmesan. High heat can cause dairy-based sauces to separate.

How to Make the Sauce Extra Creamy

Use heavy cream for the richest texture. It provides enough fat to create a smooth sauce that clings to the chicken.

Grate the Parmesan finely so it melts quickly into the warm cream. Add the cheese gradually while stirring instead of adding a large amount at once.

Keep the skillet over low to medium-low heat after adding the cheese. Gentle heat helps maintain a smooth consistency.

If the sauce becomes too thick, add a tablespoon of chicken broth or milk at a time until it reaches the texture you prefer.

For extra flavor, add a small amount of the oil from the sun-dried tomato jar. Use it sparingly because the oil can be strongly seasoned.

Easy Variations to Try

Spicy Tuscan Chicken Bites

Add red pepper flakes to the sauce for gentle heat. You can also add a pinch of cayenne if you prefer a stronger kick.

Mushroom Tuscan Chicken

Sauté sliced mushrooms before adding the garlic and cream. Mushrooms add a savory texture that pairs well with Parmesan sauce.

Lemon Tuscan Chicken

Add a small squeeze of fresh lemon juice after removing the sauce from the heat. The acidity helps balance the richness of the cream.

Bacon Tuscan Chicken

Add cooked, crumbled bacon to the finished sauce for smoky flavor. Use a moderate amount because bacon and Parmesan are both naturally salty.

Lighter Cream Sauce

Replace some of the heavy cream with half-and-half or low-sodium chicken broth. The result will be lighter but less rich.

What to Serve With Tuscan Chicken Bites

Pasta is one of the easiest sides for this creamy chicken. Penne, fettuccine, or rotini can hold the sauce well.

Rice provides a simple base that absorbs the creamy Parmesan sauce. White rice, brown rice, or seasoned rice can all work.

Mashed potatoes are another hearty option. The creamy sauce pairs naturally with soft potatoes.

For a lower-carb meal, serve the chicken with roasted vegetables, steamed broccoli, zucchini, or cauliflower.

Crusty Italian bread is useful for soaking up any remaining sauce. A simple green salad can add freshness and balance the richness of the dish.

How to Store and Reheat

Allow leftovers to cool before transferring them to an airtight container. Refrigerate the chicken and sauce promptly.

For the best quality, enjoy refrigerated leftovers within a few days.

Reheat the chicken gently in a skillet over low to medium-low heat. Add a small splash of milk or chicken broth if the sauce becomes too thick.

You can also reheat individual portions in the microwave using short intervals. Stir between intervals to distribute the heat evenly.

Avoid very high heat because prolonged heating can cause the creamy sauce to separate and make the chicken dry.

Common Mistakes to Avoid

Do not cut the chicken into very large pieces because the outside may brown before the center cooks through.

Avoid overcrowding the air fryer because restricted airflow can leave the chicken pale and less crisp.

Do not add Parmesan to a boiling cream mixture. Excessive heat can affect the texture of the cheese and sauce.

Avoid adding too much sun-dried tomato oil. A small amount adds flavor, while too much can make the dish greasy.

Do not rely on appearance alone to determine whether chicken is cooked. Check the thickest piece with an instant-read thermometer and make sure it reaches 165°F.

Frequently Asked Questions

Can I use chicken thighs?

Yes, boneless, skinless chicken thighs work well and provide a richer flavor and slightly more tender texture.

Can I make this recipe without heavy cream?

Yes, half-and-half can replace heavy cream, although the finished sauce will be lighter and less thick.

Can I use frozen chicken?

Thaw the chicken completely before cutting and seasoning it so the pieces cook evenly and safely.

What cheese works best?

Freshly grated Parmesan provides the classic savory flavor, but Pecorino Romano can also be used for a sharper taste.

Can I add mushrooms?

Yes, sauté sliced mushrooms before making the sauce and combine them with the chicken for extra savory flavor.

How do I prevent the sauce from separating?

Keep the sauce over low to medium-low heat and avoid boiling after adding the cream and Parmesan.

Can I make this dish ahead?

Yes, cook the chicken and sauce separately, refrigerate them, and gently reheat and combine them before serving.

What should I serve with Tuscan chicken bites?

Pasta, rice, mashed potatoes, crusty bread, roasted vegetables, and green salad all pair well with the creamy sauce.

Final Thoughts

Air Fryer Creamy Tuscan Chicken Bites offer a simple way to enjoy tender chicken with a rich garlic-Parmesan sauce. Sun-dried tomatoes and spinach add color, texture, and extra flavor without making the recipe complicated.

For the best results, cut the chicken evenly, avoid overcrowding the air fryer, and cook the cream sauce gently. Serve the finished bites with pasta, rice, potatoes, vegetables, or crusty bread for a satisfying meal.

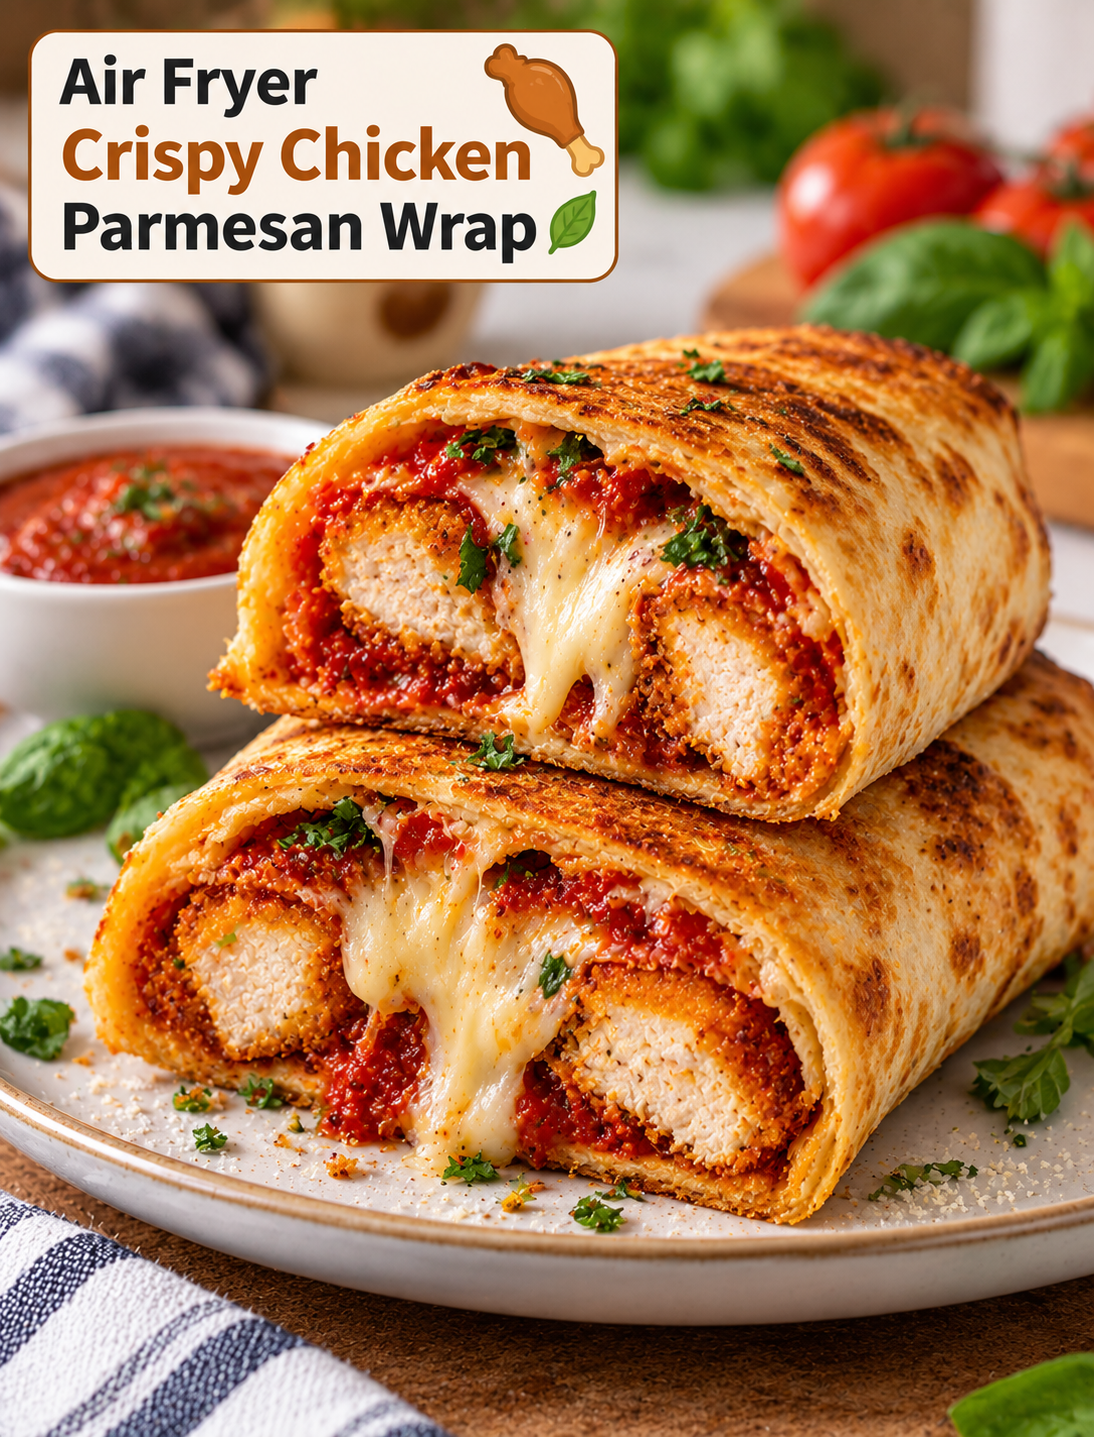
Air Fryer Crispy Chicken Parmesan Wrap

Crispy chicken Parmesan wrap with melted mozzarella, marinara sauce, Parmesan cheese, and fresh basil served on a plate

Air Fryer Crispy Chicken Parmesan Wrap

An Air Fryer Crispy Chicken Parmesan Wrap combines crunchy chicken, melted mozzarella, marinara sauce, and Parmesan cheese inside a warm tortilla. It brings the flavor of classic chicken Parmesan into an easy handheld meal.

The chicken is cooked in the air fryer until golden and crisp, then layered with rich tomato sauce and cheese. The assembled wrap goes back into the air fryer for a short finish, allowing the cheese to melt while the tortilla becomes lightly crisp.

This recipe is a practical choice for busy weeknights, quick lunches, casual dinners, or game-day meals. It uses familiar ingredients and takes less effort than making a traditional chicken Parmesan dinner with pasta.

Why You’ll Love This Chicken Parmesan Wrap

This wrap has several textures in one bite. The crispy chicken provides a crunchy coating, the mozzarella becomes soft and melty, and the tortilla adds a lightly toasted finish.

The recipe also gives you the classic flavors of chicken Parmesan without requiring a deep fryer. Air frying uses circulating hot air to brown the chicken and tortilla while keeping the cooking process simple.

It is easy to customize as well. You can use homemade or store-bought marinara, switch the cheese, add fresh basil, or make the chicken spicy with red pepper flakes.

The handheld format makes serving easy. You can cut each wrap in half and serve it with a small bowl of marinara for dipping.

Ingredients You’ll Need

Chicken

Use boneless, skinless chicken breasts or chicken tenders. Chicken breasts should be sliced or pounded to an even thickness so they cook at the same rate.

Breadcrumbs

Panko breadcrumbs create a crisp coating with plenty of crunch. Regular breadcrumbs can be used for a finer crust.

Parmesan Cheese

Grated Parmesan adds a salty, savory flavor to the chicken coating. Freshly grated Parmesan can provide a stronger flavor and better texture.

Mozzarella

Low-moisture mozzarella melts well without adding too much liquid to the wrap. Shredded mozzarella is convenient, while thin slices create a richer cheese layer.

Marinara Sauce

Use your favorite marinara or tomato pasta sauce. Choose a thick sauce because excess liquid can make the tortilla soggy.

Tortillas

Large flour tortillas are flexible enough to hold the chicken, sauce, and cheese without tearing. Burrito-size tortillas work especially well.

Egg

A beaten egg helps the breadcrumb mixture stick to the chicken and creates a more even crust.

Seasonings

Garlic powder, Italian seasoning, black pepper, and a small amount of salt give the chicken a classic Italian-inspired flavor.

Cooking Spray

A light coating of cooking spray helps the breadcrumb crust brown and crisp in the air fryer.

How to Make Air Fryer Crispy Chicken Parmesan Wrap

Prepare the Chicken

Pat the chicken dry with paper towels. If using chicken breasts, slice them horizontally or gently pound them until they are evenly thick.

Season both sides with garlic powder, Italian seasoning, black pepper, and a small amount of salt.

Dip each piece into beaten egg, allowing excess egg to drip back into the bowl. Press the chicken into the seasoned breadcrumbs and Parmesan until both sides are evenly coated.

Avoid pressing the coating too aggressively because a loose, even layer can become crispier during air frying.

Air Fry the Chicken

Preheat the air fryer according to your model’s instructions. Lightly spray the basket and place the breaded chicken pieces in a single layer.

Leave space between the pieces so hot air can circulate around the chicken. Lightly spray the top of the breading to encourage even browning.

Cook until the coating is crisp and the chicken reaches an internal temperature of 165°F. Cooking time depends on the thickness of the chicken and the air fryer model, so use an instant-read thermometer for accuracy.

Allow the chicken to rest for a few minutes before assembling the wraps.

Assemble the Wraps

Place a large flour tortilla on a clean surface. Spread a thin layer of marinara sauce over the center, leaving room around the edges for folding.

Add the crispy chicken, followed by shredded mozzarella and a sprinkle of Parmesan cheese.

For extra flavor, add a small amount of fresh basil or Italian seasoning. Do not add too much sauce because excess moisture can soften the tortilla.

Fold the sides toward the center, then roll the tortilla tightly from the bottom to create a secure wrap.

Crisp the Finished Wrap

Place the assembled wraps seam-side down in the air fryer basket. Cook until the tortilla becomes lightly golden and the cheese inside is melted.

Turn the wrap carefully if your air fryer browns more strongly on one side. Remove it when the outside is crisp and the filling is hot.

Let the wrap rest briefly before cutting. This helps the melted cheese settle and makes the wrap easier to handle.

Tips for the Crispiest Chicken

Use panko breadcrumbs when you want a lighter and crunchier coating. Their larger flakes create more surface texture than fine breadcrumbs.

Keep the chicken pieces similar in thickness. Even pieces cook more consistently and are less likely to become dry.

Do not overcrowd the air fryer basket. Crowded chicken traps moisture and can prevent the breading from becoming crisp.

A light coating of cooking spray helps the breadcrumbs brown without requiring a large amount of oil.

For the best texture, assemble the wrap shortly after the chicken finishes cooking. A long wait can allow steam to soften the crust.

How to Keep the Wrap From Getting Soggy

The amount and placement of sauce make a big difference. Use a moderate amount of thick marinara rather than soaking the tortilla.

Keep the sauce away from the outer edges of the tortilla. This gives you a clean surface for folding and helps prevent leaks.

Make sure the chicken is crisp before assembling the wrap. A soft coating can become even softer when combined with warm sauce and cheese.

A short final air-fryer step is also important. It helps remove surface moisture and gives the tortilla a toasted finish.

Easy Variations to Try

Spicy Chicken Parmesan Wrap

Add crushed red pepper flakes to the breadcrumb mixture or drizzle hot sauce over the chicken before wrapping. Pepper jack can also replace some of the mozzarella for extra heat.

Garlic Parmesan Wrap

Add extra garlic powder and Parmesan to the breading. Finish the cooked wrap with a small sprinkle of Parmesan and fresh parsley.

Pesto Chicken Parmesan Wrap

Spread a thin layer of basil pesto inside the tortilla along with the marinara. Use a small amount because pesto has a strong flavor.

Chicken Parmesan Caesar Wrap

Replace some of the marinara with Caesar dressing and add chopped romaine lettuce after the chicken has cooled slightly. This version should be served soon after assembly.

Extra-Cheesy Version

Use mozzarella and a little provolone for a richer cheese layer. Keep the filling balanced so the wrap remains easy to roll.

What to Serve With Chicken Parmesan Wraps

A simple side salad adds freshness to the rich chicken and cheese. Use mixed greens, tomatoes, cucumbers, and a light Italian dressing.

For a heartier meal, serve the wrap with air-fried potato wedges or roasted vegetables. Garlic bread also pairs well with the marinara flavor.

For dipping, warm extra marinara sauce in a small bowl. Ranch dressing can also work if you enjoy creamy dipping sauces with crispy chicken.

For lunch, serve the wrap with fresh fruit or a simple vegetable salad to keep the meal lighter.

How to Store and Reheat

Store leftover wraps in an airtight container and refrigerate them promptly. Keep the wraps separate from dipping sauce to protect the tortilla texture.

For the best reheating results, use the air fryer rather than the microwave. Air frying helps restore crispness to the tortilla and chicken coating.

Reheat until the center is hot and the cheese is melted. Avoid excessive reheating because the chicken can become dry.

If you plan to prepare the recipe ahead, keep the crispy chicken and tortillas separate from the sauce until you are ready to assemble and cook the wraps.

Common Mistakes to Avoid

Using chicken pieces with different thicknesses can lead to uneven cooking. Pound or slice the chicken so the pieces are similar in size.

Adding too much marinara can make the wrap difficult to roll and cause the tortilla to become soggy.

Overfilling the tortilla can cause the wrap to split during cooking. Keep the filling centered and leave enough space around the edges.

Skipping the final air-fryer step can leave the tortilla soft instead of lightly crisp.

Do not judge chicken doneness by color alone. Always check the thickest part with a food thermometer and make sure it reaches 165°F.

Frequently Asked Questions

Can I use chicken tenders?

Yes, chicken tenders are convenient because they are already small and cook evenly when arranged in a single layer.

Can I use frozen breaded chicken?

Yes, frozen breaded chicken can work, but cook it fully according to its package directions before assembling the wrap.

What cheese is best for chicken Parmesan wraps?

Low-moisture mozzarella melts smoothly, while Parmesan adds a savory flavor and crisp texture.

Can I make these wraps ahead of time?

Prepare the crispy chicken ahead, but assemble the wraps close to serving time to prevent the tortillas from becoming soggy.

How do I keep the tortilla crispy?

Use a moderate amount of thick marinara and air fry the assembled wrap briefly until the outside is lightly golden.

Can I use whole-wheat tortillas?

Yes, whole-wheat tortillas work well, although they may have a slightly firmer texture than regular flour tortillas.

Can I freeze chicken Parmesan wraps?

Freezing is possible, but the tortilla and breading may lose some crispness after thawing; reheating in an air fryer helps restore texture.

What sauce goes well with this wrap?

Marinara is the classic choice, but spicy tomato sauce, garlic sauce, or a small amount of pesto can also work well.

Final Thoughts

Air Fryer Crispy Chicken Parmesan Wraps make a classic comfort-food combination easier to enjoy on a busy day. Crispy seasoned chicken, tomato sauce, Parmesan, and melted mozzarella come together inside a toasted flour tortilla.

For the best results, focus on evenly cooked chicken, a crisp breadcrumb coating, moderate sauce, and a short final air-fryer step. Serve the wraps warm with extra marinara, a fresh salad, or your favorite side for a simple meal that delivers classic chicken Parmesan flavor in every bite.