Air Fryer Caramel Apple Pie Bites

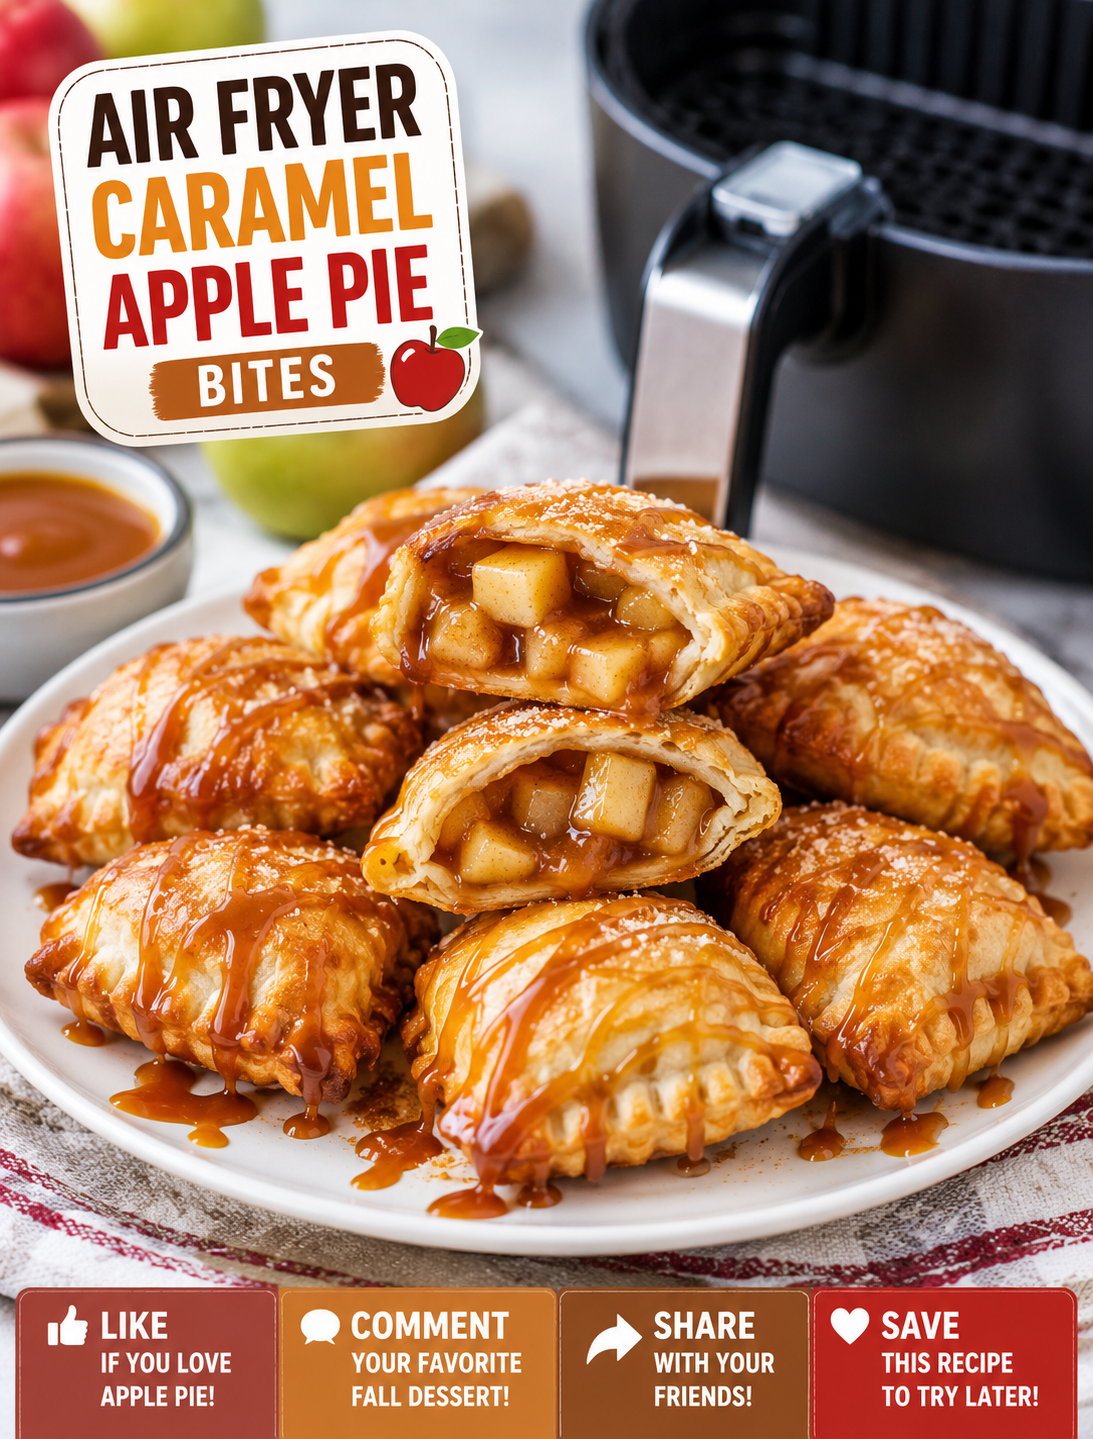
Golden air fryer caramel apple pie bites filled with cinnamon apples and caramel, served as a warm bite-sized fall dessert

Air Fryer Caramel Apple Pie Bites

If you love classic apple pie but want a faster dessert, these Air Fryer Caramel Apple Pie Bites are an easy treat to make at home. They combine warm cinnamon apples, gooey caramel, and flaky pie crust in small, golden bites.

Each bite has the cozy flavor of homemade apple pie without the work of making a full-size pie. The air fryer cooks the pastry quickly and gives the outside a crisp, golden finish while the apple filling becomes tender and sweet.

These mini apple pie bites are perfect for fall gatherings, Thanksgiving dessert tables, game nights, family snacks, or a simple weekend treat. They are also easy to serve because everyone can grab an individual bite without slicing a whole pie.

The recipe uses simple ingredients that are easy to find at most American grocery stores. Refrigerated pie crust keeps preparation quick, while fresh apples, caramel sauce, cinnamon, and brown sugar create the familiar apple pie flavor.

Why You’ll Love These Caramel Apple Pie Bites

These bite-sized desserts are made for anyone who wants homemade flavor without spending hours in the kitchen.

The air fryer shortens the cooking time compared with traditional baking. It also creates a crisp crust with a lightly browned surface that pairs well with the soft apple filling.

Another reason to love this dessert is portion size. Small pastry bites are easy to serve at parties and make it simple to enjoy a sweet treat without preparing a large pie.

The caramel adds extra richness to the apples and creates a delicious contrast between the buttery crust and warm cinnamon filling.

You can also adjust the recipe to match your taste. Use tart Granny Smith apples for a sharper flavor or Honeycrisp apples for a naturally sweet filling.

Ingredients You’ll Need

For the best texture, use firm apples that hold their shape during cooking.

  • 1 refrigerated pie crust, homemade or store-bought
  • 1 medium apple, peeled, cored, and finely diced
  • 2 tablespoons caramel sauce
  • 1 tablespoon brown sugar
  • 1/2 teaspoon ground cinnamon
  • 1/4 teaspoon vanilla extract
  • 1 tablespoon melted butter
  • 1 teaspoon lemon juice
  • 1 tablespoon all-purpose flour
  • Pinch of salt
  • 1 egg, beaten, for brushing
  • Optional: coarse sugar for topping
  • Optional: extra caramel sauce for drizzling

Use a thick caramel sauce when possible because a very thin sauce can spread during cooking. Finely diced apples also make the bites easier to fill and seal.

How to Make Air Fryer Caramel Apple Pie Bites

Prepare the Apple Filling

Start by peeling and coring the apple. Cut it into very small pieces so the filling cooks evenly inside the pastry.

Place the diced apple in a bowl and add brown sugar, cinnamon, vanilla, lemon juice, flour, and a small pinch of salt.

Stir until the apple pieces are evenly coated. The flour helps absorb some of the moisture released by the apples during cooking.

Add the caramel sauce and gently mix until the filling is combined.

Prepare the Pie Crust

Place the refrigerated pie crust on a lightly floured surface. Cut the dough into small circles using a round cookie cutter or the rim of a small glass.

Make each piece large enough to hold a small spoonful of filling while still leaving enough dough around the edges for sealing.

Place a small amount of apple filling in the center of each circle. Avoid overfilling because excess filling can leak through the crust.

Seal the Bites

Fold each dough circle over the filling to create a half-moon shape.

Press the edges firmly with your fingers, then use a fork to crimp the seal. A tight seal helps keep the caramel and apple mixture inside during cooking.

Brush the top of each pastry with beaten egg. This gives the crust a shiny, golden finish.

For extra sweetness and crunch, sprinkle a small amount of coarse sugar over the egg wash.

Cut a tiny slit in the top of each bite to allow steam to escape while cooking.

Air Fryer Cooking Instructions

Preheat your air fryer to 350°F if your model requires preheating.

Lightly spray the air fryer basket with cooking spray or use a suitable liner designed for air fryer use.

Arrange the apple pie bites in a single layer. Leave space between them so hot air can circulate around the pastry.

Air fry at 350°F for about 7 to 10 minutes, or until the crust is golden brown and crisp.

Cooking time can vary between air fryer models, so begin checking the bites around the 7-minute mark.

Carefully remove the finished pastries and let them rest for several minutes. The caramel filling can become extremely hot during cooking.

Drizzle the warm bites with additional caramel sauce just before serving if desired.

Best Apples for Mini Apple Pie Bites

Choosing the right apple can make a noticeable difference in the final texture.

Granny Smith apples provide a tart flavor that balances the sweetness of caramel and brown sugar. They also hold their shape well during cooking.

Honeycrisp apples offer a crisp texture and naturally sweet flavor. They are a good choice when you prefer a sweeter filling.

Pink Lady apples provide a balanced sweet-tart flavor and work well in small baked desserts.

Avoid apples that become very soft during cooking if you want noticeable apple pieces inside each bite.

Tips for Crispy Apple Pie Bites

Keep the pastry cold until you are ready to assemble the bites. Chilled dough is easier to handle and can help create a flaky crust.

Do not add too much filling to each pastry. A small amount is enough to give every bite a good balance of crust, apple, and caramel.

Seal the edges firmly before placing the bites in the air fryer. Leaking caramel can make cleanup difficult and may cause the pastry to stick.

Avoid overcrowding the basket. A single layer allows hot air to circulate around each pastry and helps the crust brown evenly.

Check the bites early during cooking because smaller pastries can brown quickly.

Let them cool slightly before eating. The caramel inside can remain much hotter than the pastry surface.

Easy Variations to Try

You can change this dessert in several simple ways without changing the basic cooking method.

Add a small pinch of nutmeg to the apple filling for a deeper fall flavor.

Mix finely chopped pecans or walnuts into the filling for extra crunch.

For a stronger caramel flavor, drizzle the finished bites with warm caramel sauce and add a tiny pinch of flaky sea salt.

You can also use puff pastry instead of pie crust for a lighter, more layered texture.

For a festive Thanksgiving version, add a little extra cinnamon and serve the bites with vanilla ice cream.

If you prefer a less sweet dessert, reduce the brown sugar and use a tart apple such as Granny Smith.

What to Serve With Caramel Apple Pie Bites

These warm apple pie bites taste great on their own, but a few simple toppings can turn them into a complete dessert.

Serve them with a scoop of vanilla ice cream for a classic apple pie combination.

Whipped cream adds a light, creamy contrast to the warm pastry and caramel filling.

A drizzle of caramel sauce works well for parties and dessert boards.

You can also sprinkle the finished bites with powdered sugar for a simple presentation.

For fall gatherings, arrange them on a serving platter with extra apple slices, caramel dip, and cinnamon sticks.

How to Store Leftover Apple Pie Bites

Allow the bites to cool completely before storing them.

Place leftovers in an airtight container and refrigerate them for up to 3 days.

To restore some of their crisp texture, reheat them in the air fryer at 325°F for about 2 to 4 minutes.

Avoid overheating the pastries because the caramel filling can become extremely hot.

For the best crust texture, use the air fryer rather than the microwave when reheating.

Common Mistakes to Avoid

One of the most common mistakes is overfilling the pastry. Too much apple or caramel can cause the seams to open during cooking.

Using large apple chunks can also make sealing difficult and may leave the filling undercooked.

Do not skip the egg wash if you want a deeply golden surface.

Avoid stacking the bites inside the air fryer basket because overlapping pastry prevents even browning.

Finally, do not eat the bites immediately after cooking. Give them a few minutes to cool so the hot caramel filling is safer to enjoy.

Frequently Asked Questions

Can I use store-bought pie crust?

Yes, refrigerated store-bought pie crust works well and makes these mini apple pie bites much faster to prepare.

What temperature should I use for air fryer apple pie bites?

Cook them at 350°F until the pastry is golden and crisp, usually about 7 to 10 minutes depending on your air fryer.

Can I use puff pastry instead of pie crust?

Yes, puff pastry can be used for a lighter and flakier version of these caramel apple bites.

Can I make these apple pie bites ahead of time?

Yes, assemble the uncooked bites several hours ahead, refrigerate them, and air fry them when you are ready to serve.

Why is my caramel leaking out?

Caramel can leak when the pastry is overfilled or the edges are not sealed tightly, so use a small amount of filling and crimp the seams well.

Can I freeze caramel apple pie bites?

Yes, freeze assembled uncooked bites in a single layer, then transfer them to a freezer-safe container for longer storage.

Can I use different apples?

Yes, Granny Smith, Honeycrisp, and Pink Lady apples are good choices because they provide flavor and hold their texture during cooking.

How do I reheat leftover apple pie bites?

Reheat them in an air fryer at 325°F for 2 to 4 minutes to bring back some of the crisp pastry texture.

Final Thoughts

Air Fryer Caramel Apple Pie Bites are a simple way to enjoy the flavors of classic apple pie in a quick, individual dessert. The combination of flaky pastry, cinnamon apples, and rich caramel makes every bite warm, sweet, and satisfying.

The recipe is especially useful when you want a homemade dessert without making a full pie. With store-bought pie crust and a few basic ingredients, you can have golden apple pie bites ready in minutes.

For the best results, keep the apple pieces small, avoid overfilling the pastry, seal each bite firmly, and give the finished desserts time to cool before serving.

Whether you make them for a family dinner, fall party, Thanksgiving gathering, or weekend treat, these bite-sized desserts are an easy crowd-pleaser. Serve them warm with vanilla ice cream and an extra caramel drizzle for an irresistible finishing touch.
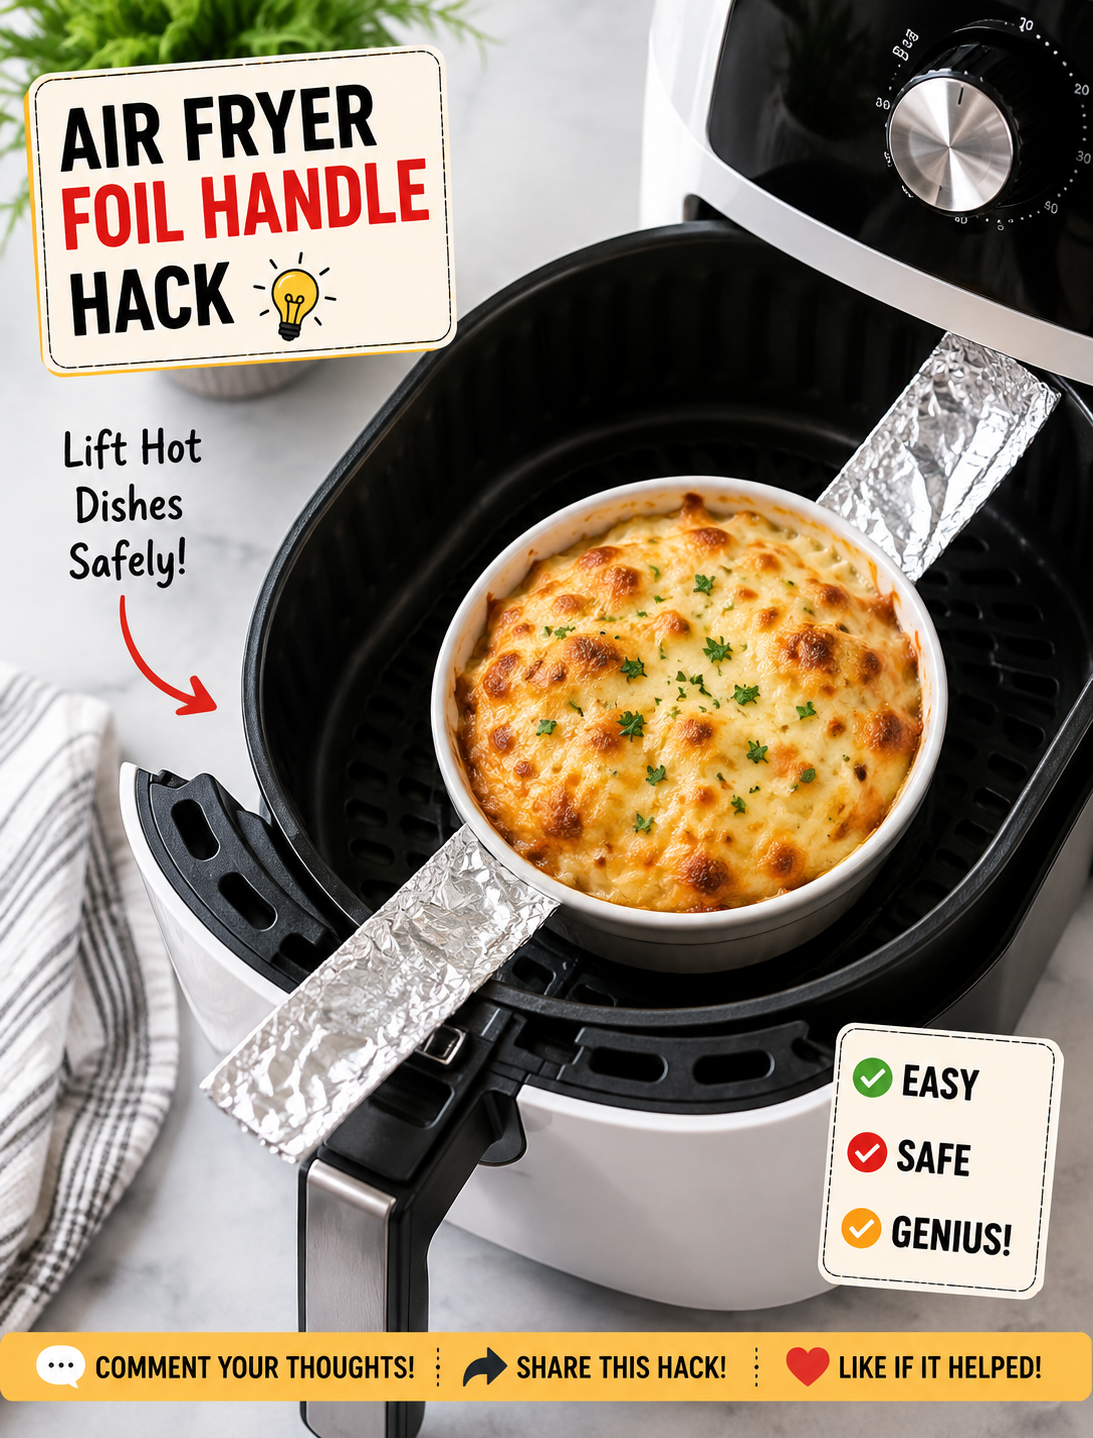
Air Fryer Foil Handle Hack

Air fryer foil handle hack showing folded aluminum foil used to lift food from a hot air fryer basket

Air Fryer Foil Handle Hack

An air fryer foil handle hack is a simple kitchen trick that can make certain air fryer recipes easier to lift, turn, and remove. By folding a small strip of aluminum foil into a sturdy handle, you can create a temporary lifting aid for foods that sit in a pan, dish, or liner inside the basket.

This trick is especially useful when cooking delicate foods that are difficult to grab with tongs. It can also help when you need to lift a small baking dish or food container from a hot air fryer basket.

The key is to use foil correctly. A foil handle should stay secure, avoid loose edges, and never interfere with the air fryer’s heating element or airflow. When used carefully, this kitchen shortcut can make everyday air frying more convenient.

What Is the Air Fryer Foil Handle Hack?

The air fryer foil handle hack uses folded aluminum foil to create a temporary handle that helps you lift food or a suitable oven-safe container from the basket.

Instead of reaching into a hot basket with your hands, you can use the folded strip as a grip point. This can be helpful for foods such as baked dips, casseroles, stuffed peppers, small cakes, and other recipes prepared in an oven-safe dish.

The method is simple, inexpensive, and does not require a special accessory. Most kitchens already have a roll of aluminum foil available.

However, foil should not be treated as a universal replacement for an air fryer basket, rack, or approved accessory. The foil must remain stable during cooking and should never be allowed to touch the heating element.

How to Make an Air Fryer Foil Handle

Making a foil handle takes only a few steps, but the strip should be folded firmly enough to support the food or container.

Step 1: Cut a Foil Strip

Tear off a long strip of heavy-duty aluminum foil. The strip should be long enough to extend under the food or dish while leaving two ends available for lifting.

A wider strip provides better support than a very narrow piece of foil.

Step 2: Fold the Foil

Fold the foil lengthwise several times to create a thick, sturdy band. Press the folds firmly so the strip does not unfold while you are handling the food.

Avoid leaving sharp foil points that could scratch a nonstick surface or catch on the basket.

Step 3: Position the Handle

Place the folded strip underneath the food or oven-safe container before cooking. Keep the two ends positioned where they can be reached easily after cooking.

Do not cover the entire basket with foil because air circulation is essential for proper air frying.

Step 4: Lift Carefully

Once the food is finished, allow the basket and food to cool enough for safe handling. Use heat-resistant gloves or silicone mitts when lifting anything hot.

Hold both ends of the foil evenly and lift slowly. If the food feels too heavy or unstable, stop and use a suitable heat-safe utensil instead.

Why This Air Fryer Hack Is Useful

The main benefit of this trick is easier handling. Some foods are fragile, deep, or difficult to grip without breaking.

A foil lifting strap can make it easier to remove items such as small baked dishes and delicate desserts. It may also reduce the need to reach deep into a hot air fryer basket.

This method can be particularly useful for recipes that use a small oven-safe pan. The foil strip acts as a temporary lifting aid, allowing you to raise the pan without touching its hot sides.

Another benefit is convenience. You do not need to purchase a separate lifting tool for occasional recipes.

Best Foods to Use With a Foil Handle

This method works best with foods or containers that have a stable shape and can safely be lifted from underneath.

Good examples include baked pasta, mini casseroles, stuffed vegetables, brownies, cakes, baked dips, and small oven-safe dishes.

A foil handle can also help with recipes prepared in silicone or metal baking containers, provided the container is rated for the air fryer’s temperature and fits properly inside the basket.

Avoid using the trick for very heavy foods. A thin foil strip can tear if it is carrying more weight than it can safely support.

Air Fryer Foil Safety Tips

Aluminum foil can be used in many air fryers, but incorrect placement can create problems. Always check your air fryer’s manufacturer’s instructions before using foil.

Never place loose foil directly against the heating element. A lightweight sheet can move because of the powerful airflow inside some air fryers.

Keep foil secured under food or inside an appropriate oven-safe container. Do not allow foil to cover the basket’s ventilation openings more than necessary.

Do not preheat an air fryer with loose foil inside unless the manufacturer specifically permits it. The airflow can move unsecured foil before food is added.

Foil should also never be used to completely seal the cooking basket. Air fryers depend on circulating hot air to cook food evenly and create crisp surfaces.

Use fresh foil that is free from tears when creating a lifting strap. If the foil becomes damaged, replace it before attempting to move hot food.

Common Mistakes to Avoid

One common mistake is using too little foil. A narrow or thin strip may tear when you lift a heavy dish.

Another mistake is placing the handle where it blocks too much airflow. Air needs room to circulate around the food for even cooking and browning.

Do not let the foil handle extend close to the heating element. Keep the material contained within the basket and away from exposed heating components.

Avoid pulling quickly when the food is hot. A slow, balanced lift gives you better control and reduces the chance of spilling.

Finally, do not assume every air fryer has the same design. Basket depth, heating element position, and manufacturer instructions vary between models.

Air Fryer Foil Handle Hack vs. Parchment Liners

Foil and parchment serve different purposes in an air fryer.

A foil handle is mainly a lifting aid. It can help remove food or a small cooking container from the basket.

Parchment liners are designed to help reduce sticking and make cleanup easier. Perforated air fryer parchment is often designed to support airflow around the food.

Neither material should completely block the basket’s airflow. For crisp results, the hot air needs enough space to move around the food.

If you use parchment, choose a product intended for cooking and follow its temperature and placement instructions. Do not use parchment as a substitute for a lifting handle unless the product specifically supports that use.

Tips for Getting Better Air Fryer Results

Use the foil handle only when it solves a real handling problem. Many foods can be removed safely with silicone-tipped tongs or a heat-resistant spatula.

Keep food arranged in a single layer when the recipe calls for maximum crispness. Overcrowding can prevent hot air from reaching all surfaces evenly.

Shake or turn food when the recipe requires it. A foil handle should never interfere with the movement needed during cooking.

Use an oven-safe container that fits comfortably inside the basket. Leave enough room around the container for hot air to circulate.

Always follow the temperature and cooking instructions for your specific recipe and air fryer model.

Is the Foil Handle Hack Worth Trying?

The air fryer foil handle hack is worth trying when you regularly cook foods that are difficult to lift. It is inexpensive, quick to prepare, and useful for certain baked recipes.

The biggest advantage is better control when removing hot food or a small cooking dish. The trick can also make some air fryer recipes less messy because you have a designated lifting point.

Still, it is not necessary for every recipe. If food can be removed easily with a safe utensil, there is no reason to add foil.

Think of this as a simple air fryer shortcut rather than a required cooking technique. Used properly, it can make your air fryer routine easier without adding another kitchen gadget.

Frequently Asked Questions

Can I use aluminum foil in an air fryer?

Yes, aluminum foil can be suitable for many air fryers when used correctly, but always follow the manufacturer’s instructions and keep foil away from the heating element.

Does foil affect air fryer cooking?

Foil can affect airflow if it covers too much of the basket, so use only the amount needed and keep ventilation areas as open as possible.

How thick should a foil handle be?

Fold the foil several times into a firm, wide strip so it can support the intended food or container without tearing.

Can I use the foil handle for heavy food?

A foil handle is best for light or moderately sized foods and small containers; use a proper heat-resistant utensil for heavy or unstable dishes.

Can the foil handle stay in the air fryer while cooking?

Yes, if your air fryer manufacturer allows foil and the handle is securely positioned away from the heating element and does not obstruct necessary airflow.

Can I use parchment paper instead of foil?

Parchment can help with sticking and cleanup, but it is not automatically a replacement for a foil lifting handle and should be used according to its product instructions.

Is this hack safe for every air fryer?

No air fryer is identical, so check your model’s manual before using foil and never allow loose material to contact the heating element.

What can I use instead of a foil handle?

Heat-resistant silicone tongs, a spatula, or an approved air fryer accessory can provide a safer and more durable lifting option for many recipes.

Final Thoughts

The air fryer foil handle hack is a simple way to make lifting certain foods and small baking dishes easier. It works best when you need extra control without buying another kitchen tool.

For the best results, fold the foil into a strong strip, keep it away from the heating element, and avoid blocking the air fryer’s airflow. Always check your model’s instructions before using aluminum foil.

Used carefully, this easy air fryer trick can make baked dishes, casseroles, desserts, and other delicate foods much easier to remove. It is a small kitchen shortcut that can save time and make air frying more convenient.

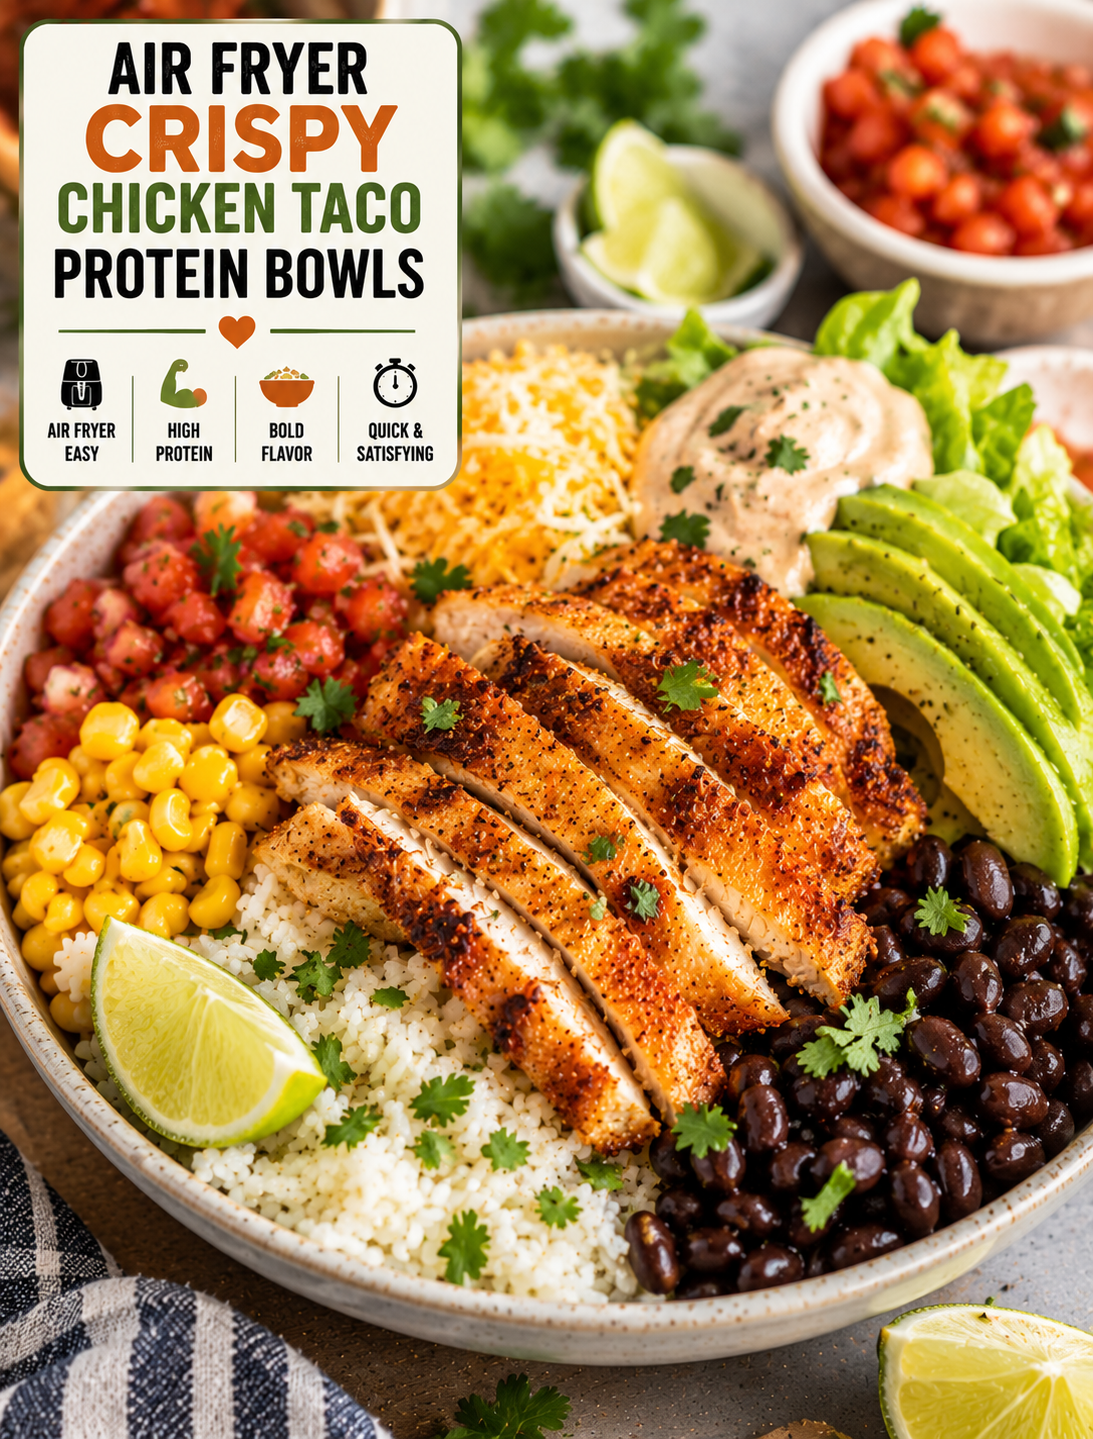
Air Fryer Crispy Chicken Taco Protein Bowls

Air fryer crispy chicken taco protein bowl with seasoned chicken, rice, black beans, corn, avocado, lettuce, tomatoes, and lime

Air Fryer Crispy Chicken Taco Protein Bowls

These Air Fryer Crispy Chicken Taco Protein Bowls are a flavorful way to turn simple ingredients into a filling weeknight meal. Seasoned chicken is air-fried until golden and crisp, then served over rice with black beans, corn, lettuce, tomatoes, avocado, and a creamy taco-inspired topping.

The chicken brings a smoky, savory flavor with crisp edges, while the fresh vegetables add crunch and color. Rice and beans make the bowl hearty, and lime juice adds a bright finish that keeps the flavors fresh.

This recipe is easy to customize for different tastes. You can make the chicken spicy, swap the rice for quinoa or cauliflower rice, or add your favorite taco toppings. The bowls also work well for meal prep because the main ingredients can be prepared ahead of time.

Why You’ll Love This Recipe

These chicken taco bowls bring the flavor of your favorite taco night into one convenient bowl. The air fryer gives the chicken a crisp outside without the need for deep frying.

The recipe uses familiar ingredients that are easy to find at most U.S. grocery stores. Cooked rice, canned black beans, frozen or fresh corn, and prepared salsa can make the meal even faster.

Each bowl combines several textures. You get crispy chicken, fluffy rice, creamy avocado, crunchy lettuce, juicy tomatoes, and tender beans in every serving.

The recipe is also flexible enough for family dinners. Keep toppings separate so everyone can build a bowl with the ingredients they enjoy.

For meal prep, prepare the chicken, rice, and beans ahead of time and add fresh toppings just before eating.

Ingredients You’ll Need

For the Crispy Chicken

  • 1 pound boneless, skinless chicken breast
  • 1 tablespoon olive oil
  • 1 teaspoon chili powder
  • 1 teaspoon smoked paprika
  • ½ teaspoon ground cumin
  • ½ teaspoon garlic powder
  • ½ teaspoon onion powder
  • ¼ teaspoon black pepper
  • ½ teaspoon salt
  • ¼ teaspoon cayenne pepper, optional
  • 1 tablespoon fresh lime juice

For the Protein Bowls

  • 3 cups cooked white or brown rice
  • 1 can black beans, drained and rinsed
  • Corn kernels 1 cup
  • 2 cups shredded romaine lettuce
  • Diced tomatoes 1 cup
  • 1 avocado, sliced
  • ½ cup shredded Mexican cheese blend
  • Salsa ½ cup
  • ¼ cup chopped cilantro
  • Lime wedges for serving

Optional Taco Bowl Sauce

  • ½ cup plain Greek yogurt
  • 2 tablespoons salsa
  • 1 tablespoon fresh lime juice
  • ¼ teaspoon chili powder
  • Pinch of salt

The chicken breast provides the main protein for the bowl, while black beans add another hearty component. Rice creates a neutral base that absorbs the taco seasoning and lime.

For a lighter bowl, cauliflower rice can replace some or all of the regular rice.

How to Make Air Fryer Crispy Chicken Taco Protein Bowls

Prepare the Chicken

Pat the chicken breasts dry with paper towels. Drying the surface helps the seasoning stick and encourages better browning in the air fryer.

If the chicken breasts are thick, slice them horizontally or pound them to an even thickness. Even pieces cook more consistently and are less likely to dry out.

Place the chicken in a bowl and add olive oil, chili powder, smoked paprika, cumin, garlic powder, onion powder, black pepper, salt, cayenne pepper, and lime juice.

Rub the seasoning mixture over every piece of chicken. Let it rest for about 5–10 minutes while the air fryer preheats.

Preheat the Air Fryer

Preheat the air fryer to 380°F for about 3 minutes.

A preheated basket helps the chicken begin browning quickly and can reduce the total cooking time.

Lightly grease the basket if needed to prevent sticking.

Air Fry the Chicken

Place the seasoned chicken in the air fryer basket without overlapping the pieces.

Air fry at 380°F for about 12–16 minutes, turning the chicken halfway through cooking. The exact time depends on the thickness of the chicken.

Cook until the chicken reaches an internal temperature of 165°F at the thickest part.

Remove the chicken and let it rest for about 5 minutes before slicing. Resting helps the juices stay inside the meat instead of running onto the cutting board.

Cut the chicken into bite-sized pieces or thin strips for easy serving.

Prepare the Bowl Ingredients

While the chicken cooks, warm the rice and black beans.

If using frozen corn, heat it until tender and drain any excess water. Fresh corn can be used raw for a crisp texture or lightly cooked for a sweeter flavor.

Shred the lettuce, dice the tomatoes, slice the avocado, and chop the cilantro.

For the optional sauce, mix Greek yogurt, salsa, lime juice, chili powder, and salt until smooth.

Assemble the Bowls

Divide the warm rice between four bowls.

Add black beans, corn, shredded lettuce, and diced tomatoes around the rice.

Top each bowl with sliced crispy chicken.

Add avocado, shredded cheese, salsa, and chopped cilantro.

Drizzle with the taco bowl sauce and finish with a squeeze of fresh lime juice.

Serve immediately while the chicken and rice are warm.

Tips for Extra Crispy Chicken

Pat the chicken dry before seasoning. Excess surface moisture can slow browning and make the exterior less crisp.

Do not overcrowd the air fryer basket. Leave space between the pieces so hot air can circulate around the chicken.

Use smoked paprika for deeper color and a mild smoky flavor.

For even cooking, keep the chicken pieces similar in thickness. Very thick pieces may require additional cooking time.

Do not rely only on cooking time to determine doneness. Use a food thermometer and check that the thickest part reaches 165°F.

For stronger taco flavor, let the seasoned chicken rest for a few extra minutes before air frying.

Adding a small amount of oil helps the spices coat the chicken and supports better browning.

Easy Ways to Customize Your Bowl

There are many ways to change these bowls without changing the basic cooking method.

For extra heat, add sliced jalapeños, hot salsa, chipotle seasoning, or a few dashes of hot sauce.

Southwest-style bowl, add roasted bell peppers, red onion, and a spoonful of corn salsa.

Extra creaminess, add avocado, Greek yogurt sauce, or a small amount of shredded cheese.

If you prefer more crunch, add tortilla strips or crushed baked tortilla chips just before serving.

You can also replace black beans with pinto beans or kidney beans.

Brown rice adds a nutty flavor, while quinoa gives the bowl a different texture. Cauliflower rice is another option when you want a vegetable-based base.

Best Toppings for Chicken Taco Bowls

Fresh toppings make these bowls more flavorful and colorful.

Try pico de gallo, diced avocado, shredded lettuce, cilantro, jalapeños, pickled onions, corn salsa, or fresh lime.

For a creamy topping, use Greek yogurt, avocado crema, or a small drizzle of cilantro-lime dressing.

Shredded cheddar, Monterey Jack, or a Mexican cheese blend works well with the seasoned chicken.

If you like a smoky flavor, add a spoonful of chipotle salsa.

For a fresh finish, sprinkle chopped cilantro over the bowl and serve with lime wedges.

Meal Prep and Storage

These bowls are convenient for weekday lunches because most of the components can be prepared ahead.

Cook the chicken and rice, then allow them to cool before placing them in airtight containers. Store fresh lettuce, avocado, tomatoes, and other toppings separately when possible.

Refrigerate cooked chicken and rice promptly and use them within 3–4 days.

For meal prep, keep salsa and creamy sauce in small separate containers so the rice and vegetables do not become soggy.

Reheat the chicken and rice until hot, then add the cold toppings after reheating.

Avocado is best added shortly before serving because it can brown and soften during storage.

Common Mistakes to Avoid

Overcrowding the air fryer is one of the easiest ways to lose the crispy texture. Cook the chicken in batches if necessary.

Using thick chicken pieces without adjusting the cooking time can lead to uneven results. Pound or slice thick breasts for more even cooking.

Too much oil can make the chicken greasy, while too little may leave the seasoning dry and uneven.

Do not cut the chicken immediately after cooking. A short resting period helps preserve its juices.

Adding lettuce, avocado, and creamy sauce before reheating can make the fresh toppings warm and soggy. Keep them separate until serving.

Finally, avoid cooking chicken based only on appearance. Confirm that it reaches 165°F internally for safe eating.

Frequently Asked Questions

Are these chicken taco bowls high in protein?

They provide protein from chicken, black beans, and optional Greek yogurt, with the exact amount depending on your serving sizes and toppings.

Can I use chicken thighs instead of chicken breast?

Yes, boneless skinless chicken thighs work well and provide a richer flavor while following the same basic seasoning method.

Can I make these bowls with brown rice?

Yes, brown rice is an excellent substitute and adds a firmer texture and nutty flavor to the taco bowl.

How long does chicken take in the air fryer?

At 380°F, chicken breast usually takes about 12–16 minutes, depending on thickness, and should reach 165°F internally.

Can I make these bowls ahead of time?

Yes, prepare the chicken, rice, beans, and corn ahead, then add fresh vegetables, avocado, salsa, and sauce when serving.

What sauce goes well with chicken taco bowls?

A lime Greek yogurt sauce, avocado crema, salsa, chipotle sauce, or cilantro-lime dressing pairs well with seasoned chicken.

Can I make this recipe low carb?

Yes, replace the rice and corn with cauliflower rice and additional low-carb vegetables while keeping the chicken and other preferred toppings.

Can I use leftover air fryer chicken?

Yes, slice leftover cooked chicken and reheat it in the air fryer until hot before adding it to the bowl.

Final Thoughts

Air Fryer Crispy Chicken Taco Protein Bowls are a simple way to enjoy bold taco flavors in a filling, customizable meal. The seasoned chicken develops crisp edges in the air fryer, while rice, beans, vegetables, avocado, and salsa create a satisfying mix of textures.

This recipe works especially well when you need a quick dinner that can be adjusted for different preferences. You can make it spicy, add more vegetables, switch the grain, or change the toppings without rebuilding the entire recipe.

For the best results, keep the chicken pieces even, avoid overcrowding the air fryer, and use a thermometer to confirm the chicken reaches 165°F. Add fresh toppings at the end so every bowl has a mix of warm, crispy, creamy, and crunchy elements.

Air Fryer Crispy Chicken Alfredo Taquitos

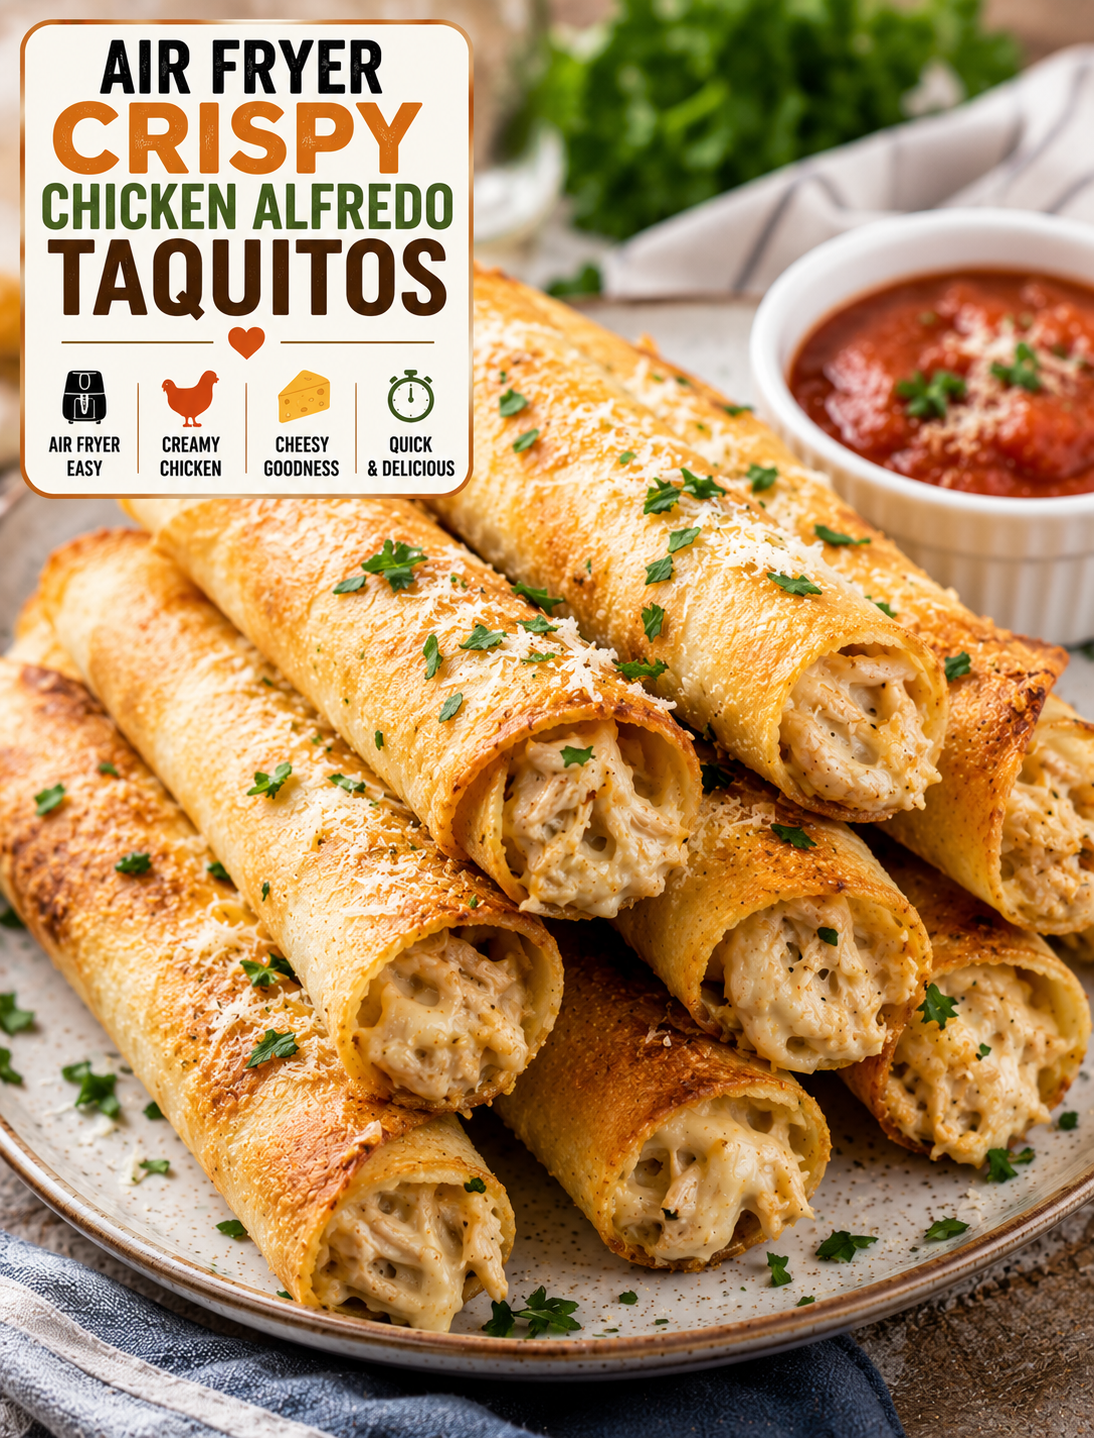
Crispy air fryer chicken Alfredo taquitos filled with creamy chicken, mozzarella, and Parmesan, served with marinara dipping sauce

Air Fryer Crispy Chicken Alfredo Taquitos

These Air Fryer Crispy Chicken Alfredo Taquitos turn creamy chicken Alfredo into a crunchy, handheld snack or easy dinner. Shredded chicken, rich Alfredo sauce, mozzarella, and Parmesan are wrapped in small flour tortillas and air-fried until golden and crisp.

The filling stays creamy while the tortilla develops a light crunch around the edges. A quick dip in warm marinara, extra Alfredo sauce, or ranch dressing makes these taquitos even more satisfying.

This recipe is a great way to use leftover cooked chicken. It comes together with simple ingredients and needs only a few minutes in the air fryer, making it useful for busy weeknights, game-day snacks, family lunches, or casual gatherings.

Why You’ll Love This Recipe

These chicken taquitos combine two comfort-food favorites in one easy recipe. The creamy Alfredo filling gives every bite a rich, cheesy flavor, while the air fryer creates the crisp texture you want without deep frying.

The recipe is also flexible. You can use rotisserie chicken, leftover baked chicken, or freshly cooked chicken breast. Flour tortillas work especially well because they roll tightly and become golden in the air fryer.

Another benefit is portion control. Instead of making a large pasta dish, you can prepare individual taquitos that are easy to serve and share.

They are also freezer-friendly when prepared correctly, so you can make a larger batch and save some for another meal.

Ingredients You’ll Need

For the Chicken Alfredo Filling

  • 2 cups cooked shredded chicken
  • ½ cup Alfredo sauce
  • ¾ cup shredded mozzarella cheese
  • ¼ cup grated Parmesan cheese
  • 2 cloves garlic, minced
  • 1 tablespoon chopped fresh parsley
  • ½ teaspoon Italian seasoning
  • ¼ teaspoon black pepper
  • ¼ teaspoon salt, or to taste
  • ¼ teaspoon red pepper flakes, optional

For the Taquitos

  • 10 small flour tortillas
  • 1 tablespoon melted butter or olive oil
  • 2 tablespoons grated Parmesan cheese
  • Fresh parsley for garnish

For the best texture, use cooked chicken that is tender and finely shredded. Rotisserie chicken is convenient because it already has plenty of flavor and saves preparation time.

Choose a thick Alfredo sauce rather than a very thin sauce. A thick filling stays inside the tortillas better and reduces the chance of soggy taquitos.

How to Make Air Fryer Crispy Chicken Alfredo Taquitos

Prepare the Chicken Filling

Add the shredded chicken to a medium mixing bowl.

Stir in Alfredo sauce, mozzarella, Parmesan, minced garlic, Italian seasoning, black pepper, salt, and red pepper flakes if you want some heat.

Mix until the chicken is evenly coated and the cheese is distributed throughout the filling.

Fold in the chopped parsley at the end. The filling should be creamy but thick enough to hold its shape when scooped.

Avoid adding too much Alfredo sauce. An overly wet filling can make the tortillas difficult to roll and may prevent them from becoming crisp.

Warm the Tortillas

Warm the tortillas for about 15–20 seconds in the microwave, covering them with a slightly damp paper towel.

Soft tortillas are easier to roll without cracking. This small step is especially helpful when using tortillas that have been refrigerated.

Keep the warmed tortillas covered while you assemble the taquitos so they remain flexible.

Fill and Roll the Taquitos

Place one tortilla on a clean work surface.

Add about 2 tablespoons of chicken Alfredo filling in a line slightly below the center of the tortilla. Do not overfill it because excess filling can escape during cooking.

Fold the bottom edge tightly over the filling.

Continue rolling the tortilla into a firm cylinder.

Place the taquito seam-side down while you prepare the remaining tortillas. Keeping the seam underneath helps prevent the rolls from opening before they reach the air fryer.

Prepare the Air Fryer

Preheat the air fryer to 375°F for about 3 minutes.

Lightly brush or spray the air fryer basket with oil if needed.

Arrange the taquitos seam-side down in a single layer. Leave a little space between each one so hot air can circulate evenly.

Avoid stacking the taquitos because overlapping tortillas will not crisp properly.

Air Fry Until Golden

Lightly brush the tops of the taquitos with melted butter or olive oil.

Air fry at 375°F for 7–10 minutes, turning them carefully halfway through cooking.

Continue cooking until the tortillas are golden brown and crisp.

Cooking time can vary between air fryer models and tortilla sizes, so start checking around the 7-minute mark.

Sprinkle the finished taquitos with Parmesan and fresh parsley before serving.

Tips for Extra Crispy Taquitos

The key to crisp taquitos is controlling moisture. Use just enough Alfredo sauce to coat the chicken without making the mixture runny.

Warm the tortillas before rolling. Cold tortillas are more likely to crack, which can cause the filling to leak.

Do not overcrowd the basket. Air needs room to move around each taquito to create an even golden crust.

A very light coating of oil or melted butter helps the tortillas brown beautifully. Too much oil can make them greasy instead of crisp.

Place the taquitos seam-side down before cooking. This helps keep their shape during the first few minutes of air frying.

Let the cooked taquitos rest for 1–2 minutes before serving. The filling will settle slightly, making them easier to handle.

Best Chicken to Use

Rotisserie chicken is one of the easiest options for this recipe. Remove the skin and bones, then shred the meat into small pieces.

Leftover roasted chicken also works well. Make sure it is fully cooked and refrigerated properly before using.

You can use chicken breast for a leaner filling or chicken thighs for a richer texture.

If cooking chicken specifically for the taquitos, season it simply with salt, pepper, garlic powder, and Italian seasoning. Cook until the chicken reaches 165°F internally, then shred it after resting.

Avoid using large chunks of chicken because they can make the tortillas difficult to roll evenly.

Easy Flavor Variations

For spicy chicken Alfredo taquitos, add diced jalapeños, cayenne pepper, or extra red pepper flakes to the filling.

For a spinach version, mix in finely chopped cooked spinach after squeezing out excess moisture.

For a bacon Alfredo variation, add a small amount of cooked and crumbled bacon to the chicken mixture.

You can also add finely chopped sun-dried tomatoes for a slightly sweet and tangy flavor.

For extra cheesiness, replace part of the mozzarella with provolone or Monterey Jack.

If you prefer a stronger garlic flavor, add roasted garlic instead of fresh minced garlic.

What to Serve With Chicken Alfredo Taquitos

These crispy rolls make an excellent appetizer, snack, or main dish when paired with simple sides.

Serve them with warm marinara sauce for dipping. The tomato flavor provides a bright contrast to the creamy Alfredo filling.

Ranch dressing, garlic aioli, or extra Alfredo sauce can also work as dipping options.

For a complete dinner, serve the taquitos with a green salad, roasted broccoli, steamed vegetables, or a simple Caesar salad.

Fresh parsley and a small sprinkle of Parmesan add a finished look without overpowering the chicken and cheese.

Make-Ahead and Storage Tips

You can prepare the chicken Alfredo filling several hours ahead and refrigerate it in an airtight container.

For assembled taquitos, place them in a covered container and refrigerate them until you are ready to cook. For the best texture, cook them within a day.

Store leftover cooked taquitos in the refrigerator and use them within 3–4 days.

Reheat them in the air fryer at 350°F for about 3–5 minutes. Air frying helps restore the crisp tortilla better than microwaving.

For freezing, assemble the uncooked taquitos and place them in a single layer on a tray until firm. Transfer them to a freezer-safe container or bag.

Frozen taquitos can be air-fried without thawing, although they may need several additional minutes of cooking time.

Common Mistakes to Avoid

Using too much filling is one of the most common problems. A small amount creates a tighter roll and reduces leaking.

Avoid using watery Alfredo sauce because excess moisture can soften the tortilla.

Do not skip preheating if your air fryer benefits from it. Starting with a hot basket helps the tortillas crisp faster.

Do not overcrowd the basket. Cook in batches when necessary to maintain good airflow.

Another mistake is overcooking the taquitos. Once the tortillas are golden and crisp, remove them to prevent the edges from becoming too hard.

Finally, let the filling cool slightly before eating. Melted cheese and hot Alfredo sauce can stay very hot inside the crispy shell.

Frequently Asked Questions

Can I use rotisserie chicken for these taquitos?

Yes, shredded rotisserie chicken is an easy option and adds plenty of flavor without requiring extra cooking.

What tortillas work best for chicken Alfredo taquitos?

Small flour tortillas work best because they roll easily and become crisp and golden in the air fryer.

How long should I air fry these taquitos?

Air fry them at 375°F for about 7–10 minutes, turning halfway, until the tortillas are crisp and golden.

Can I make these taquitos with leftover Alfredo chicken?

Yes, finely chop leftover chicken Alfredo and use it as the filling, adding cheese if the mixture needs more moisture or flavor.

Can I freeze chicken Alfredo taquitos?

Yes, freeze assembled uncooked taquitos in a single layer, then transfer them to a freezer-safe container for longer storage.

How do I reheat leftover taquitos?

Reheat refrigerated taquitos at 350°F for 3–5 minutes in the air fryer until the outside is crisp and the filling is hot.

Why are my taquitos not crispy?

Excess sauce, overcrowding, or too little cooking time can prevent crisping; use a thick filling and leave space between the rolls.

What can I use for dipping?

Marinara, ranch, garlic aioli, or warm Alfredo sauce all pair well with the creamy chicken and crispy tortilla.

Final Thoughts

Air Fryer Crispy Chicken Alfredo Taquitos are an easy way to turn familiar comfort-food flavors into a crunchy handheld meal. Creamy chicken, garlic, mozzarella, and Parmesan create a rich filling, while the air fryer gives the tortillas a golden finish.

The recipe is simple enough for a weeknight dinner but fun enough for parties, game days, and family gatherings. Rotisserie chicken makes preparation even faster, while different cheeses, vegetables, and seasonings let you create your own version.

For the crispiest results, keep the filling thick, warm the tortillas before rolling, avoid overcrowding the air fryer, and cook until the shells are lightly golden. Serve them hot with your favorite dipping sauce for an easy meal everyone can grab and enjoy.

Air Fryer Garlic Butter Shrimp & Rice Bowls

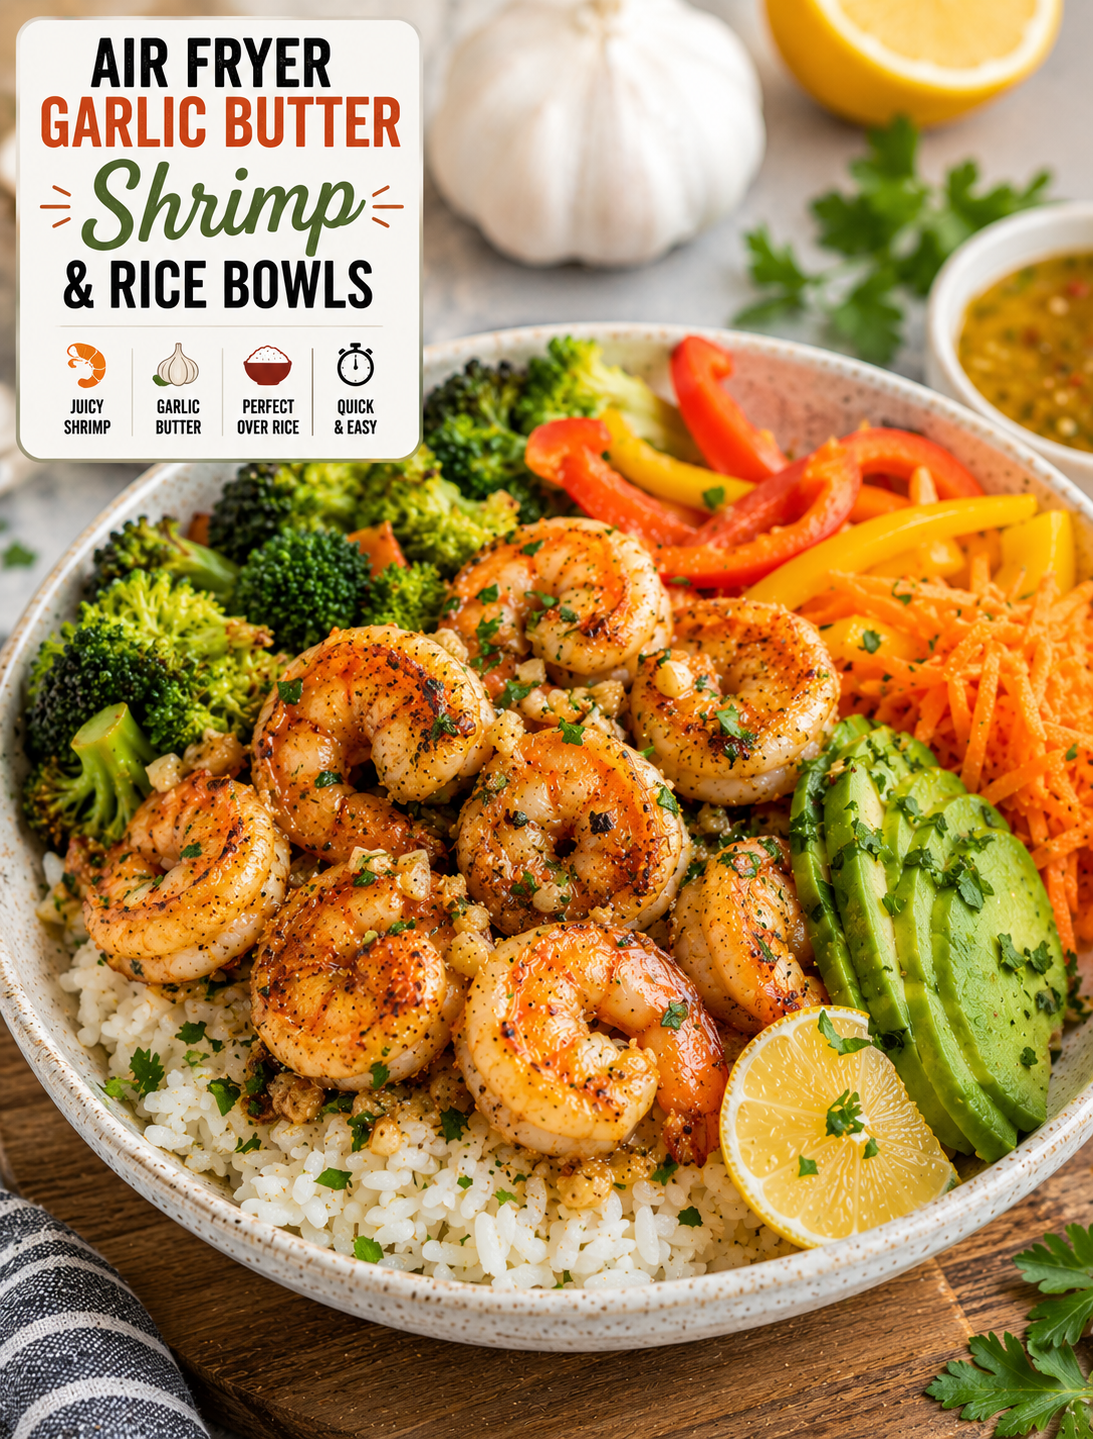
Air fryer garlic butter shrimp served over fluffy rice with broccoli, bell peppers, carrots, avocado, lemon, and fresh parsley

Air Fryer Garlic Butter Shrimp & Rice Bowls

When you want a quick dinner that feels special without spending hours in the kitchen, these Air Fryer Garlic Butter Shrimp & Rice Bowls are an easy choice. Juicy shrimp are coated in melted butter, fresh garlic, lemon juice, and simple seasonings, then air-fried until tender with lightly crisp edges.

The shrimp are served over fluffy rice with fresh vegetables and a spoonful of the buttery garlic sauce. Every bite combines savory shrimp, bright lemon, warm garlic, and soft rice for a balanced meal that works well for busy weeknights.

This recipe uses simple ingredients and takes only a short time to cook. It is also easy to customize with your favorite vegetables, grains, or toppings.

Why You’ll Love This Recipe

These shrimp rice bowls are designed for fast and flavorful home cooking. The air fryer cooks the shrimp quickly while helping the outside develop a lightly roasted texture.

Garlic butter gives the shrimp a rich, savory flavor without needing a long marinade. Fresh lemon juice adds acidity that keeps the dish from tasting too heavy.

The rice makes the bowl filling, while vegetables add color, crunch, and freshness. You can use white rice, brown rice, jasmine rice, basmati rice, or cauliflower rice depending on what you have available.

Another benefit is easy cleanup. The shrimp cook in the air fryer basket instead of a skillet filled with oil, making this recipe convenient for a weeknight meal.

Ingredients You’ll Need

For the Garlic Butter Shrimp

  • 1 pound large shrimp, peeled and deveined
  • 3 tablespoons unsalted butter, melted
  • 3 cloves garlic, finely minced
  • 1 tablespoon fresh lemon juice
  • 1 teaspoon paprika
  • ½ teaspoon Italian seasoning
  • ¼ teaspoon black pepper
  • ¼ teaspoon salt
  • ¼ teaspoon red pepper flakes, optional
  • 1 tablespoon chopped fresh parsley

For the Rice Bowls

  • 3 cups cooked rice
  • 1 cup broccoli florets
  • 1 cup sliced bell peppers
  • ½ cup shredded carrots
  • ½ cup cucumber slices
  • 1 avocado, sliced
  • Lemon wedges for serving
  • Extra parsley for garnish

Large shrimp work especially well because they stay juicy during air frying. Fresh or thawed frozen shrimp can be used as long as they are properly drained before seasoning.

How to Make Air Fryer Garlic Butter Shrimp & Rice Bowls

Prepare the Shrimp

Pat the shrimp dry with paper towels before seasoning. Removing excess moisture helps the garlic butter coating cling to the shrimp and improves browning.

Place the shrimp in a bowl and add melted butter, minced garlic, lemon juice, paprika, Italian seasoning, black pepper, salt, and red pepper flakes if using.

Toss gently until every shrimp is evenly coated. Let the mixture sit for about 5 minutes while the air fryer heats.

Preheat the Air Fryer

Preheat the air fryer to 400°F for about 3 minutes.

A hot cooking basket helps the shrimp begin cooking immediately and encourages lightly browned edges.

Avoid overcrowding the basket. Arrange the shrimp in a single layer so hot air can circulate around each piece.

Air Fry the Shrimp

Place the seasoned shrimp in the air fryer basket in a single layer.

Cook at 400°F for about 5–7 minutes, depending on the size of the shrimp. Shake the basket or turn the shrimp halfway through cooking for even browning.

Shrimp are ready when they are opaque, firm, and cooked through. For food safety, shrimp should reach 145°F internally.

Do not overcook them. Shrimp can become rubbery when left in the air fryer too long.

Remove the cooked shrimp and sprinkle with fresh parsley.

Build the Rice Bowls

Divide the warm cooked rice between four serving bowls.

Add broccoli, bell peppers, carrots, cucumber, and avocado around the rice. You can lightly steam the broccoli first or leave it crisp for extra texture.

Place the garlic butter shrimp on top of each bowl.

Finish with fresh lemon juice, chopped parsley, and a small drizzle of any remaining garlic butter from the cooking bowl.

Serve immediately while the shrimp and rice are warm.

Tips for Juicy Air Fryer Shrimp

Dry shrimp cook better than wet shrimp because excess water can prevent proper browning. Pat them thoroughly before adding the butter mixture.

Use shrimp that are similar in size so they finish cooking at about the same time. Smaller shrimp may need less cooking time.

Fresh garlic gives the strongest flavor, but jarred minced garlic can work when needed.

Do not add too much butter. A light coating is enough to flavor the shrimp while allowing the air fryer to brown the edges.

Keep the shrimp in one layer. Overlapping pieces can steam instead of roasting, which reduces the crisp texture.

Check the shrimp early because air fryer models vary. A few extra minutes can make a noticeable difference in texture.

Best Rice Options for Shrimp Bowls

Jasmine rice is a great choice when you want soft, fragrant rice with a slightly sweet flavor. It pairs especially well with garlic butter.

Brown rice adds a firmer texture and a nutty flavor. It also works well for meal-prep bowls because it holds its texture after refrigeration.

Basmati rice gives the bowl a light, fluffy texture and pairs nicely with lemon and herbs.

Cauliflower rice is a useful low-carb alternative when you want more vegetables in the bowl.

You can also use leftover cooked rice to make this dinner even faster. Reheat the rice thoroughly before assembling the bowls.

Easy Vegetable Add-Ins

The vegetables can be changed based on what is available in your refrigerator.

Try steamed green beans, roasted zucchini, corn, spinach, edamame, snap peas, cabbage, or cherry tomatoes.

For more crunch, add shredded red cabbage or sliced radishes. For a sweeter flavor, roasted carrots or corn are excellent choices.

If you prefer a simple bowl, use rice, shrimp, avocado, and fresh cucumber with lemon. The garlic butter shrimp provide enough flavor that you do not need a complicated sauce.

Flavor Variations

For a spicy version, increase the red pepper flakes or add a small amount of cayenne pepper to the seasoning mixture.

For a Mediterranean-style bowl, use oregano, parsley, cucumber, tomatoes, and a spoonful of plain Greek yogurt.

For a tropical twist, replace some of the vegetables with pineapple, mango, and shredded cabbage.

For a creamy bowl, add a small drizzle of avocado-lime dressing or a light garlic yogurt sauce.

You can also replace the rice with quinoa, couscous, or another cooked grain.

What to Serve With Garlic Butter Shrimp Bowls

These bowls are filling enough to serve as a complete meal, but a few simple sides can make dinner more substantial.

Serve them with a fresh green salad, roasted vegetables, garlic bread, or a light cucumber salad.

A simple lemon wedge is one of the best finishing touches because its acidity balances the richness of the butter.

For extra flavor, sprinkle the finished bowl with fresh parsley, green onions, toasted sesame seeds, or a little Parmesan cheese.

Meal Prep and Storage

These shrimp bowls are best when the shrimp are freshly cooked, but they can also be prepared ahead for quick lunches.

Store cooked shrimp, rice, and vegetables in separate airtight containers when possible. Refrigerate leftovers promptly and use them within 3–4 days.

For meal prep, keep avocado and fresh toppings separate until serving. This helps prevent them from becoming soft or watery.

Reheat the rice and shrimp until hot. Avoid repeatedly reheating the shrimp because this can make them tough.

If you are preparing several bowls for the week, slightly undercook vegetables that will be reheated so they retain some texture.

Common Mistakes to Avoid

One common mistake is putting wet shrimp directly into the air fryer. Excess moisture can reduce browning and make the seasoning slide off.

Another mistake is overcrowding the basket. Give the shrimp enough room for hot air to circulate.

Overcooking is also easy to do with shrimp because they cook quickly. Start checking them around the five-minute mark.

Using cold, dry rice without reheating it can make the finished bowl less enjoyable. Warm the rice before assembling.

Finally, do not skip the lemon. Its fresh acidity brings the garlic, butter, and shrimp flavors together.

Frequently Asked Questions

Can I use frozen shrimp for this recipe?

Yes, thaw frozen shrimp completely, drain them well, and pat them dry before adding the garlic butter seasoning.

How long do shrimp take in an air fryer?

Large shrimp generally take about 5–7 minutes at 400°F, but cooking time varies by shrimp size and air fryer model.

What rice is best for shrimp bowls?

Jasmine, basmati, brown rice, and cauliflower rice all work well; choose based on your preferred texture and flavor.

Can I make these shrimp bowls spicy?

Yes, add red pepper flakes, cayenne pepper, or your favorite hot sauce to give the garlic butter shrimp extra heat.

Can I prepare these bowls for meal prep?

Yes, refrigerate cooked shrimp, rice, and vegetables in airtight containers and use the prepared bowls within 3–4 days.

How do I keep air fryer shrimp from getting rubbery?

Cook shrimp just until opaque and firm, then remove them promptly; overcooking is the main cause of rubbery shrimp.

Can I use brown butter instead of regular melted butter?

Yes, brown butter adds a deeper nutty flavor, but watch it closely because browned milk solids can burn during cooking.

What vegetables go well with garlic butter shrimp?

Broccoli, bell peppers, carrots, cucumber, avocado, green beans, corn, zucchini, and cabbage all pair well with the shrimp and rice.

Final Thoughts

These Air Fryer Garlic Butter Shrimp & Rice Bowls bring together tender shrimp, fragrant garlic butter, fluffy rice, fresh vegetables, and bright lemon in one easy meal. The air fryer keeps the shrimp cooking time short while giving them flavorful, lightly browned edges.

The recipe is flexible enough for weeknight dinners, quick lunches, and meal prep. Change the vegetables, switch the rice, or increase the spice to create a bowl that fits your taste.

For the best results, start with dry shrimp, avoid overcrowding the air fryer, and watch the cooking time closely. Fresh lemon and parsley at the end add the finishing touch that makes this simple bowl taste fresh and complete.

Air Fryer Crispy Chicken Caprese Sandwich

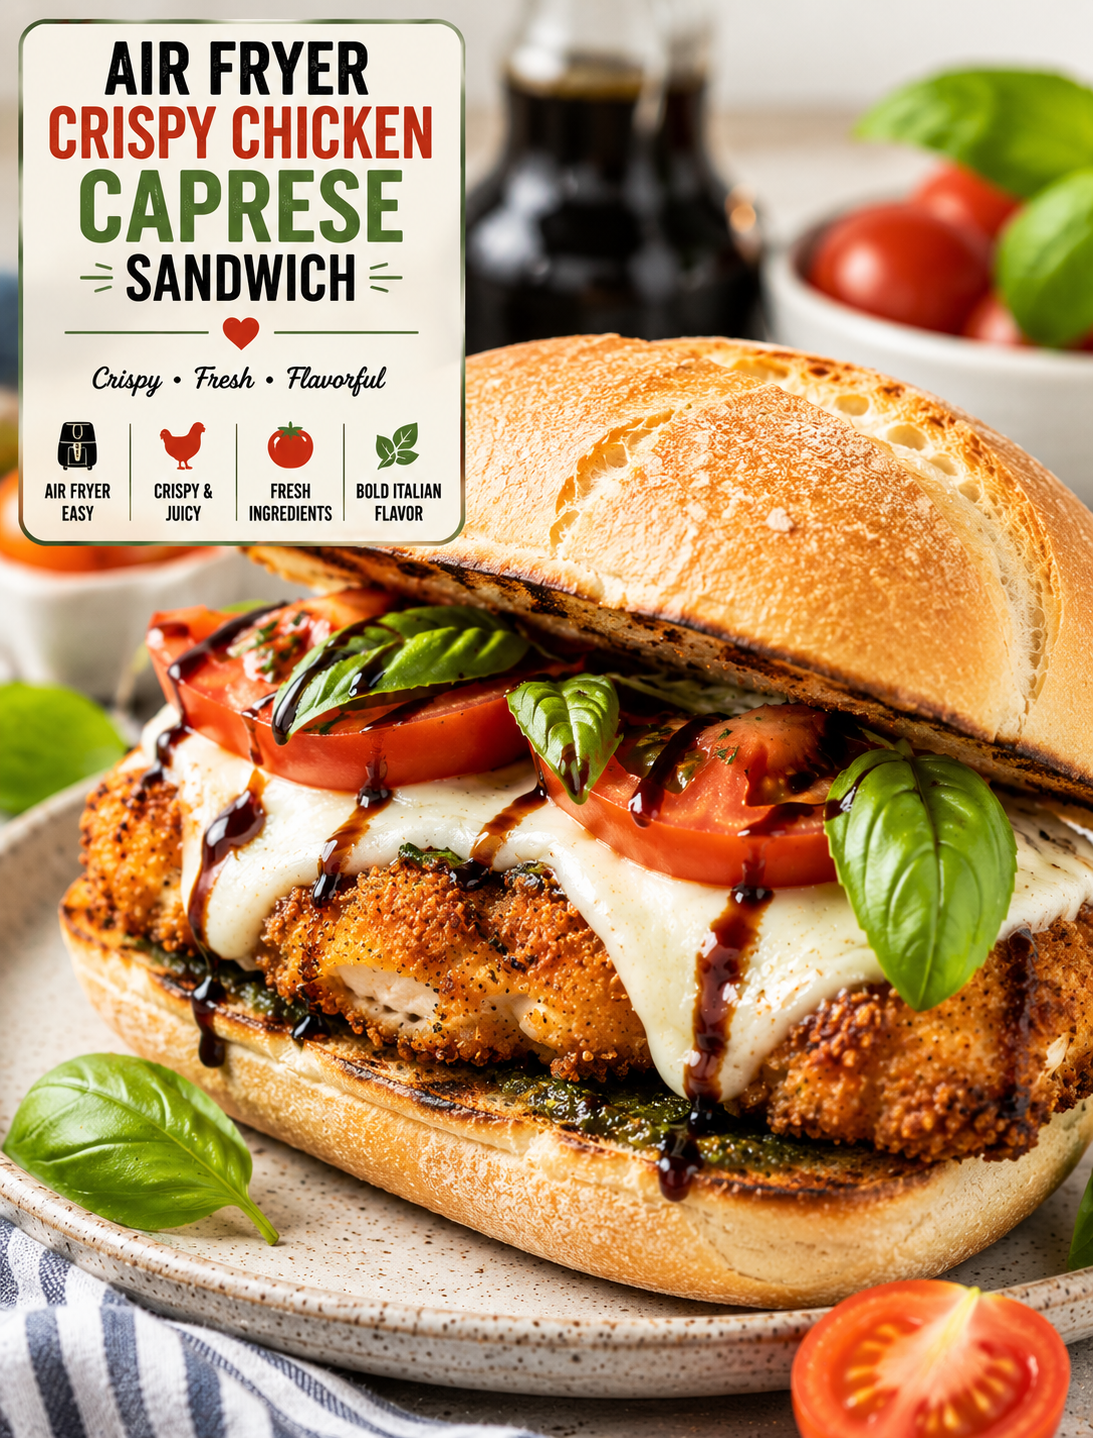
Crispy air fryer chicken Caprese sandwich with golden chicken, melted mozzarella, fresh tomato, basil, and balsamic glaze on toasted ciabatta

Air Fryer Crispy Chicken Caprese Sandwich

If you love crispy chicken and fresh Italian-inspired flavors, this Air Fryer Crispy Chicken Caprese Sandwich is an easy meal to add to your menu. It combines golden air-fried chicken with creamy mozzarella, juicy tomatoes, fresh basil, and a simple balsamic glaze.

The chicken develops a crisp coating in the air fryer while staying tender inside. Fresh tomato adds juicy sweetness, mozzarella brings a creamy texture, and basil gives the sandwich a bright herbal flavor.

A toasted ciabatta roll or crusty sandwich bun provides the perfect base for all the ingredients. A drizzle of balsamic glaze adds a sweet and tangy finish that ties everything together.

This sandwich is great for lunch, dinner, weekend meals, or casual entertaining. It feels like a restaurant-style sandwich but can be prepared in your own kitchen with simple ingredients.

Why You’ll Love This Caprese Chicken Sandwich

This sandwich brings together crispy, creamy, fresh, and tangy flavors in every bite.

The air-fried chicken gives the sandwich a crunchy texture without requiring a deep fryer. A light coating of breadcrumbs helps create a golden crust while hot air cooks the chicken evenly.

Fresh mozzarella melts slightly when placed on the hot chicken. The warm cheese pairs beautifully with cool, juicy tomato slices.

Fresh basil adds a fragrant flavor that makes the sandwich taste bright rather than heavy.

The balsamic glaze provides a sweet and tangy contrast to the savory chicken and creamy cheese.

Another benefit is how easy the sandwich is to customize. You can use chicken breasts or cutlets, swap the bread, add pesto, or increase the vegetables.

Ingredients You’ll Need

For the Crispy Chicken

  • 2 boneless, skinless chicken breasts
  • ½ cup all-purpose flour
  • 1 large egg
  • 1 cup panko breadcrumbs
  • ½ teaspoon garlic powder
  • ½ teaspoon Italian seasoning
  • ½ teaspoon paprika
  • ¼ teaspoon black pepper
  • ½ teaspoon salt
  • 1 tablespoon grated Parmesan cheese
  • Cooking spray
  • 1 tablespoon olive oil, optional

For the Sandwich

  • 2 ciabatta rolls or crusty sandwich buns
  • 4 slices fresh mozzarella
  • 1 large ripe tomato
  • ½ cup fresh basil leaves
  • 2 tablespoons balsamic glaze
  • 2 tablespoons pesto, optional
  • 1 tablespoon mayonnaise, optional
  • Freshly ground black pepper

Panko breadcrumbs create a light and crunchy coating. Regular breadcrumbs can also be used if that is what you have available.

Fresh mozzarella gives the sandwich a soft, creamy texture. Tomato and basil should be as fresh as possible because they provide much of the sandwich’s flavor.

How to Make Air Fryer Crispy Chicken Caprese Sandwich

1. Prepare the Chicken

If the chicken breasts are thick, slice them horizontally to create thinner cutlets.

You can also place the chicken between two sheets of plastic wrap and gently pound it to an even thickness.

An even thickness helps the chicken cook at the same rate.

Pat the chicken dry with paper towels before seasoning.

2. Set Up the Coating

Place flour in one shallow bowl.

Beat the egg in a second bowl.

In a third bowl, combine panko breadcrumbs, Parmesan, garlic powder, Italian seasoning, paprika, black pepper, and salt.

Mix the breadcrumb mixture until the seasonings are evenly distributed.

3. Coat the Chicken

Dip each chicken cutlet into the flour and shake off the excess.

Next, dip it into the beaten egg.

Finally, press it into the seasoned panko mixture.

Make sure both sides are completely coated.

Press the breadcrumbs gently onto the chicken so they stay attached during cooking.

4. Preheat the Air Fryer

Preheat your air fryer to 390°F if your model requires preheating.

Lightly spray the basket with cooking spray.

Place the coated chicken in a single layer.

Leave space between the pieces so hot air can circulate properly.

Avoid stacking the chicken because overcrowding can lead to uneven browning.

5. Air Fry the Chicken

Lightly spray the top of the breaded chicken with cooking spray.

Air fry at 390°F for approximately 10–14 minutes, turning halfway through cooking.

The exact cooking time depends on the thickness of the chicken.

Use a food thermometer to check the thickest part. Chicken should reach an internal temperature of 165°F for safe consumption.

Once cooked, allow the chicken to rest for a few minutes.

6. Prepare the Caprese Ingredients

While the chicken cooks, slice the tomato and fresh mozzarella.

Wash and dry the basil leaves.

If using pesto, prepare it or measure the amount you need.

Slice the ciabatta rolls in half.

Keep the tomato slices fairly thick so they do not make the bread soggy.

7. Toast the Bread

Place the cut rolls in the air fryer for about 1–2 minutes at 350°F.

Watch them carefully because bread can toast quickly.

A lightly crisped interior gives the sandwich more structure and helps prevent the bread from becoming soggy.

8. Melt the Mozzarella

Place fresh mozzarella slices over the hot chicken.

Return the chicken to the air fryer for about 1 minute, just until the cheese begins to soften.

You can skip this step if you prefer fresh mozzarella at room temperature.

9. Assemble the Sandwich

Spread pesto or mayonnaise over the toasted bread if desired.

Place the crispy chicken on the bottom half of each roll.

Add tomato slices and fresh basil.

Drizzle balsamic glaze over the top.

Season lightly with black pepper.

Place the second half of the roll on top.

Serve immediately while the chicken and mozzarella are still warm.

How to Make the Chicken Extra Crispy

The coating is important for creating a crunchy exterior.

Pat the chicken dry before coating it.

Use panko breadcrumbs for a lighter, crispier crust.

Press the breadcrumbs firmly onto the chicken.

Lightly spray the coating with cooking spray before air frying.

Avoid overcrowding the basket.

Turn the chicken halfway through cooking so both sides brown evenly.

For the best texture, assemble the sandwich shortly after the chicken finishes cooking.

Adding wet ingredients too early can soften the crispy coating.

Choosing the Best Bread

Ciabatta is an excellent choice because it has a crisp exterior and sturdy crumb.

A crusty Italian roll also works well.

Sourdough provides a slightly tangy flavor that pairs nicely with mozzarella and balsamic glaze.

A French-style baguette can be used for a longer sandwich.

Avoid very thin or soft bread if you plan to add plenty of filling because it may become difficult to hold.

Toasting the inside of the bread also gives it more structure.

Fresh Mozzarella vs. Low-Moisture Mozzarella

Fresh mozzarella has a soft texture and mild flavor.

It works especially well when paired with fresh tomatoes and basil.

Low-moisture mozzarella melts more easily and creates a stretchier cheese layer.

If using fresh mozzarella, pat it gently with paper towels before adding it to the sandwich.

Removing excess moisture helps prevent the bread from becoming soggy.

Both varieties work well, so choose based on the texture you prefer.

The Best Tomatoes for This Sandwich

Use ripe tomatoes with firm flesh.

Roma tomatoes have less moisture and are a good choice when you want to reduce sogginess.

Beefsteak tomatoes create larger slices and a juicy texture.

Heirloom tomatoes provide a colorful presentation and rich fresh flavor.

Slice the tomatoes just before assembling the sandwich.

If the tomato is very juicy, lightly pat the slices with a paper towel before adding them.

Easy Sauce Options

Balsamic glaze is the classic finishing touch for this sandwich.

Its sweet and tangy flavor balances the crispy chicken and creamy mozzarella.

Pesto adds basil, garlic, olive oil, and Parmesan flavor.

A thin layer of garlic aioli provides a creamy option.

Marinara sauce can be used for a more traditional Italian-inspired sandwich.

You can also combine pesto with a small amount of mayonnaise for a creamy basil spread.

Use sauces sparingly so the crispy chicken remains crunchy.

Easy Variations

Pesto Chicken Caprese Sandwich

Spread pesto over both sides of the toasted bread before adding the chicken.

Spicy Caprese Chicken Sandwich

Add crushed red pepper flakes or sliced Calabrian peppers for extra heat.

Garlic Parmesan Version

Add extra Parmesan and garlic powder to the breadcrumb coating.

Avocado Caprese Chicken Sandwich

Add thin slices of ripe avocado for a creamy texture.

Arugula Caprese Sandwich

Add fresh arugula for a peppery bite and extra greens.

Sun-Dried Tomato Version

Add chopped sun-dried tomatoes for a deeper tomato flavor.

Keep the added ingredients balanced so the sandwich remains easy to eat.

What to Serve With This Sandwich

This crispy chicken sandwich works well with simple sides.

Serve it with a green salad for a lighter meal.

Crispy air-fried potatoes make a hearty side.

A tomato and cucumber salad complements the fresh Caprese flavors.

Roasted vegetables provide another easy option.

For a casual lunch, serve the sandwich with fresh fruit and sparkling water.

For a game-day meal, cut the sandwiches into smaller portions and serve them with dipping sauces.

Meal Prep Tips

You can prepare several components ahead of time.

Bread the chicken and keep it refrigerated until you are ready to cook it.

Slice the mozzarella and prepare the sauce in advance.

Keep tomatoes and basil refrigerated until assembly.

For the best texture, cook the chicken shortly before serving.

Do not fully assemble the sandwiches too far ahead because tomato juice and sauces can soften the bread and coating.

If preparing lunches in advance, store the chicken, bread, vegetables, cheese, and sauce separately and assemble when ready to eat.

Storage and Reheating

Store leftover cooked chicken in an airtight container in the refrigerator.

Reheat the chicken in the air fryer at 350°F for about 3–5 minutes, or until heated through.

Avoid reheating the complete sandwich because the tomato and basil can become soft.

Toast fresh bread separately and assemble the sandwich after reheating the chicken.

For food safety, refrigerate perishable ingredients promptly and discard food that develops an unusual smell, appearance, or texture.

Tips for the Best Results

Use evenly sized chicken cutlets.

Pat the chicken dry before breading.

Use panko for extra crunch.

Press the coating firmly onto the chicken.

Do not overcrowd the air fryer.

Turn the chicken halfway through cooking.

Check the chicken with a food thermometer.

Pat fresh mozzarella dry if it contains excess moisture.

Use thick tomato slices.

Toast the bread lightly before assembly.

Add balsamic glaze just before serving.

Serve the sandwich while the chicken is warm and crisp.

The Bottom Line

Air Fryer Crispy Chicken Caprese Sandwich combines crispy seasoned chicken with fresh mozzarella, ripe tomatoes, basil, and balsamic glaze.

The air fryer makes the chicken golden and crunchy while keeping the cooking process simple.

Fresh Caprese ingredients bring brightness to the sandwich, while toasted ciabatta provides a sturdy base.

For the best result, keep wet ingredients controlled, toast the bread, and assemble the sandwich shortly before serving.

You can also customize it with pesto, arugula, avocado, spicy peppers, or sun-dried tomatoes.

Frequently Asked Questions

1. How long should chicken cook in the air fryer?

Chicken cutlets usually take about 10–14 minutes at 390°F, but cooking time depends on thickness; the center should reach 165°F.

2. Can I use chicken thighs?

Yes. Boneless, skinless chicken thighs work well, although their cooking time may differ from chicken breast cutlets.

3. What bread works best?

Ciabatta, crusty Italian rolls, sourdough, and other sturdy breads work well because they hold the filling without becoming too soft.

4. Can I use regular breadcrumbs?

Yes. Panko creates a crunchier coating, while regular breadcrumbs produce a finer, more compact crust.

5. Can I make this sandwich with pesto?

Yes. Pesto adds basil, garlic, Parmesan, and olive oil flavors that pair naturally with the Caprese ingredients.

6. How do I keep the sandwich from becoming soggy?

Pat wet ingredients dry, toast the bread, use sauces sparingly, and assemble the sandwich immediately before serving.

7. Can I use shredded mozzarella?

Yes. Shredded mozzarella melts quickly, although fresh mozzarella provides a more traditional Caprese texture.

8. Can I prepare the chicken ahead?

Yes. Cook the chicken ahead and refrigerate it, then reheat it in the air fryer before assembling the sandwich.

Final Thoughts

Air Fryer Crispy Chicken Caprese Sandwich is an easy way to turn simple ingredients into a meal that feels fresh and restaurant-worthy.

The crispy chicken provides a savory crunch, while fresh mozzarella, juicy tomato, and basil create the classic Caprese combination.

Balsamic glaze adds a sweet-tangy finish, and toasted ciabatta holds everything together with a satisfying bite.

For the crispiest chicken, use panko, avoid overcrowding the air fryer, and assemble the sandwich right before serving.

Crispy chicken, creamy mozzarella, fresh tomatoes, fragrant basil, and balsamic glaze make this sandwich a delicious choice for an easy lunch or dinner.