Tantuni (Turkish Steak Wraps)

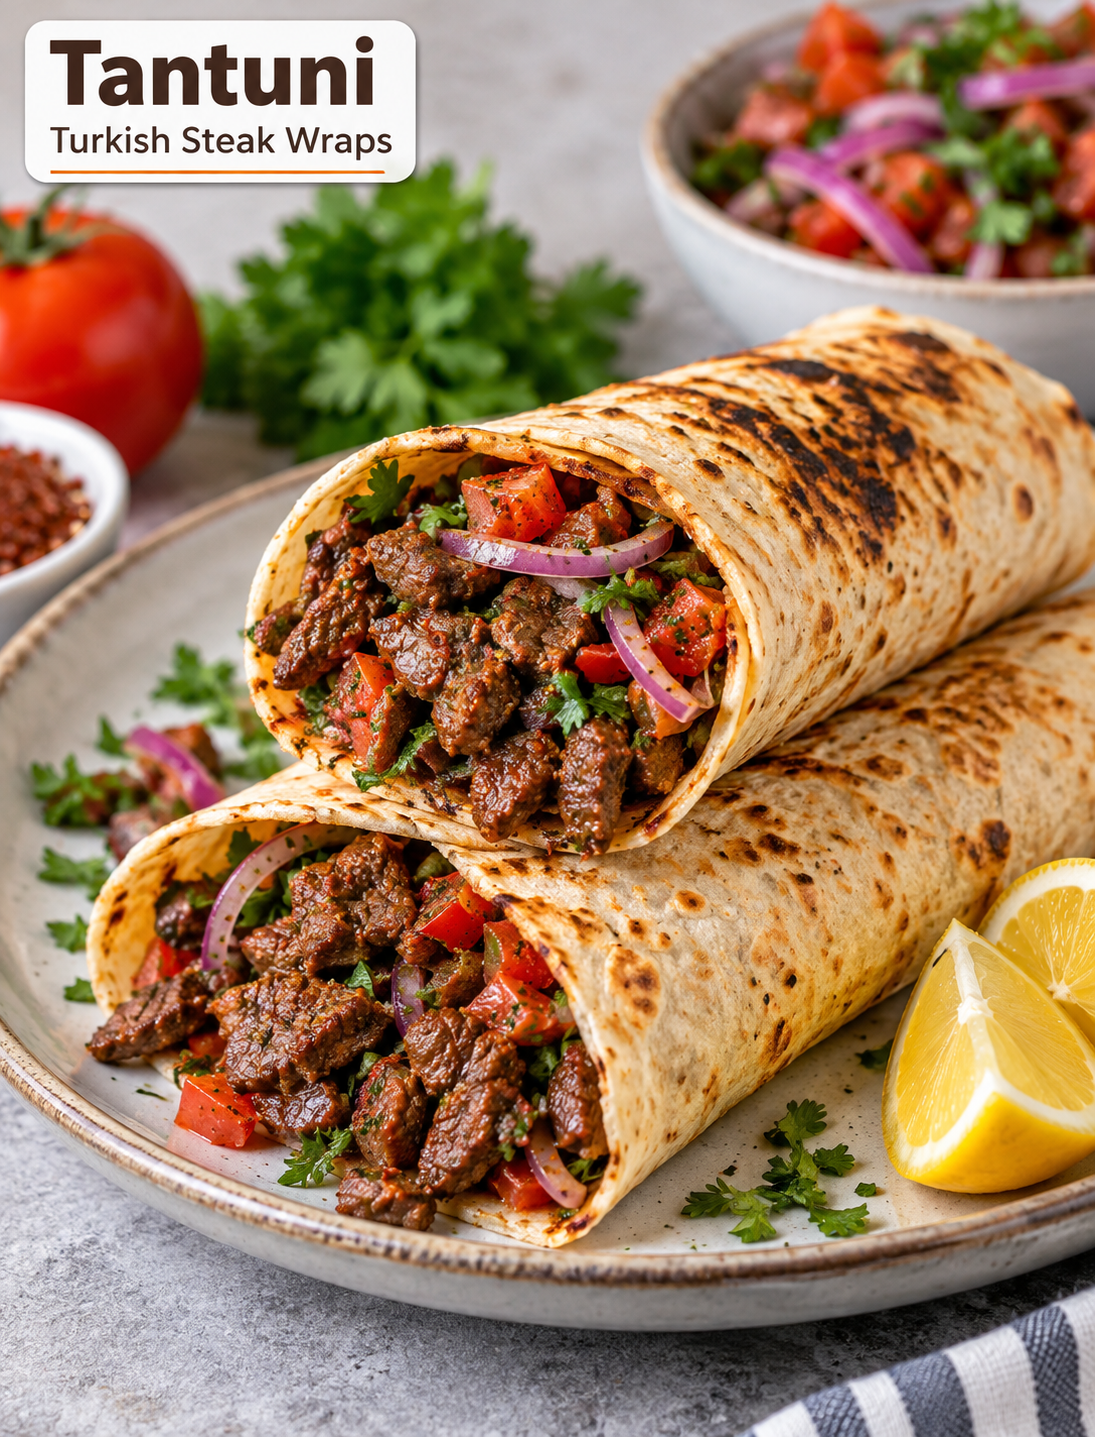
Tantuni Turkish steak wraps with seasoned beef, tomatoes, parsley, sumac onions, and lemon in soft lavash bread

Tantuni (Turkish Steak Wraps)

Tantuni is a flavorful Turkish street-food wrap made with small pieces of seared steak, seasoned oil, tomatoes, parsley, and tangy sumac onions. The meat is cooked quickly in a hot pan, then finished with paprika and hot water to create a rich, savory mixture that soaks into the flatbread.

This Tantuni recipe is easy to make at home and works well for a quick lunch, weeknight dinner, or casual family meal. Traditional tantuni is served in thin lavash bread, but large flour tortillas are a practical option when lavash is hard to find.

The combination of tender beef, fresh vegetables, lemon, and warm spices gives every bite a bright and satisfying flavor.

Why You’ll Love This Tantuni Recipe

  • Quick cooking: Small steak pieces cook in about 8 minutes.
  • Bold flavor: Paprika, sumac, lemon, and Aleppo pepper add depth.
  • Fresh topping: Tomato, parsley, and onion balance the rich beef.
  • Easy ingredients: Most items are available at regular U.S. grocery stores.
  • Flexible bread: Use lavash or large flour tortillas.
  • Great for sharing: Make several wraps for lunch, dinner, or gatherings.

Ingredients for Tantuni

For the Steak Wraps

  • 1½ pounds flank steak
  • ¼ cup extra virgin olive oil
  • 2 teaspoons paprika
  • ¾ cup hot water
  • 1 teaspoon Aleppo pepper, optional
  • 6 sheets homemade lavash or burrito-size flour tortillas
  • Kosher salt, to taste

For the Fresh Topping

  • 1 small red onion, thinly sliced into half moons
  • 2 teaspoons sumac
  • 3 Roma tomatoes, finely chopped
  • 1 bunch flat-leaf parsley, finely chopped
  • 2 lemons
  • Kosher salt, to taste

Step 1: Prepare the Sumac Onions

Place the thinly sliced red onion in a medium bowl. Add the sumac and a small pinch of kosher salt.

Use clean hands to gently massage the seasoning into the onions for about 1 minute. This softens the onion and helps the sumac spread through every slice.

Tip: Thin onion slices work best because they blend easily with the tomato and steak.

Step 2: Make the Fresh Salad

Add the chopped Roma tomatoes and parsley to the seasoned onions.

Add ½ teaspoon of Aleppo pepper if you want a mild, fruity heat. Squeeze the juice from one lemon over the mixture and season with additional salt.

Toss everything gently until the vegetables are evenly coated.

Cut the second lemon into wedges and set them aside for serving.

Tip: Prepare the salad before cooking the steak so the lemon and sumac have time to flavor the vegetables.

Step 3: Cut the Steak

Trim away any large pieces of excess fat from the flank steak.

Cut the beef into very small pieces, roughly the size of a sugar cube. Small pieces are important because traditional tantuni uses finely chopped beef that cooks quickly.

Tip: Place the steak in the freezer for about 15–20 minutes before cutting if you want firmer slices and easier chopping.

Step 4: Sear the Beef

Heat the olive oil in a medium skillet over medium-high heat.

When the oil starts to shimmer but is not smoking, add the chopped steak.

Cook the beef for about 8 minutes, stirring often. The pieces should become browned and release some of their juices before the liquid cooks back into the meat.

Important: Avoid overcrowding the pan because too much meat at once can cause steaming instead of browning.

Step 5: Season and Finish the Steak

Add the paprika, remaining Aleppo pepper if using, and about 1 teaspoon of kosher salt.

Stir well so the spices coat the beef evenly.

Pour in the hot water and reduce the heat to medium.

Let the steak mixture simmer for about 5 minutes. The liquid should reduce slightly while keeping the beef moist and flavorful.

Tip: The seasoned liquid is an important part of the wrap because it adds moisture and flavor to the bread.

Step 6: Warm and Soak the Lavash

Keep the beef in the skillet and reduce the heat to low.

Place one sheet of lavash over the meat.

Gently press the bread down with a spatula or your hands so it absorbs some of the hot, seasoned liquid. Let it warm for at least 30 seconds.

The bread should become soft, flexible, and lightly golden.

Note: If your lavash is too delicate to form the traditional U-shape, do not force it. A regular folded wrap works just as well.

Step 7: Fill the Wrap

Transfer the warm lavash to a serving plate with the moistened side facing upward.

Spoon a small amount of the seasoned liquid over the steak.

Place a thin line of the cooked beef near one edge of the lavash.

Add a line of the tomato, parsley, and onion salad beside the steak. Do not overfill the bread because too much filling makes rolling difficult.

Step 8: Roll the Tantuni

Pull the edge of the lavash toward you and roll it tightly around the beef and salad.

The finished wrap should be long and narrow, similar to a thin burrito.

If your lavash is flexible enough, gently curve the wrap into a U-shape.

Serve immediately with fresh lemon wedges.

Squeeze lemon juice into the open end as you eat so the citrus mixes with the warm steak and seasoned juices.

Step 9: Repeat and Serve

Repeat the filling and rolling process with the remaining lavash and steak.

Serve the tantuni while it is hot and fresh.

For a complete meal, pair the wraps with extra tomato salad, lemon wedges, pickled vegetables, or a simple side salad.

Tips for Making the Best Tantuni

  • Use flank steak: It cooks quickly and has a rich beef flavor.
  • Cut the beef small: Small pieces give the wrap its traditional texture.
  • Keep the pan hot: Proper heat helps the steak brown instead of becoming watery.
  • Do not skip the lemon: Fresh lemon cuts through the richness of the beef.
  • Use sumac: It gives the onion topping a bright, tangy flavor.
  • Do not overfill: A thin filling makes the wrap easier to roll.
  • Warm the bread: Soft lavash holds the filling better and absorbs the seasoned juices.
  • Serve immediately: Tantuni tastes best while the beef and bread are still warm.

What Can You Use Instead of Lavash?

Large flour tortillas are the easiest substitute for lavash in the United States. Choose burrito-size tortillas that are soft and flexible enough to fold without cracking.

The shape may not look exactly like traditional Turkish tantuni, but the combination of seasoned beef, fresh salad, and lemon will still deliver the same style of meal.

How to Store Leftover Tantuni

For the best texture, store the cooked steak and fresh salad separately in airtight containers in the refrigerator.

Reheat the beef in a skillet over medium heat until hot, then warm the lavash separately. Assemble the wrap just before serving.

Avoid storing a fully assembled wrap for too long because the bread can become soggy from the meat juices and tomato salad.

Frequently Asked Questions

What is Tantuni?

Tantuni is a popular Turkish street-food dish made with finely chopped beef, seasoned oil, spices, fresh vegetables, and lemon wrapped in lavash bread.

What cut of beef is best for Tantuni?

Flank steak works very well because it has good beef flavor and can be cut into small pieces for quick cooking.

Can I make Tantuni with flour tortillas?

Yes. Large burrito-size flour tortillas are a convenient substitute for lavash and are widely available in U.S. grocery stores.

Is Tantuni spicy?

Tantuni is usually mildly spiced, but Aleppo pepper can be increased or reduced depending on your preferred level of heat.

What does sumac add to Tantuni?

Sumac gives the onion topping a bright, tangy flavor that balances the richness of the seasoned beef.

Can I prepare Tantuni ahead of time?

You can prepare the steak and vegetable topping ahead, but assemble the wraps just before serving for the best texture.

What should I serve with Tantuni?

Serve Tantuni with lemon wedges, extra fresh salad, pickled vegetables, or a simple green salad for a balanced meal.

How do I keep the wrap from breaking?

Use soft lavash or flour tortillas, avoid overfilling them, and gently warm the bread before rolling.
Air Fryer Crispy Philly Cheesesteak Stuffed Rolls

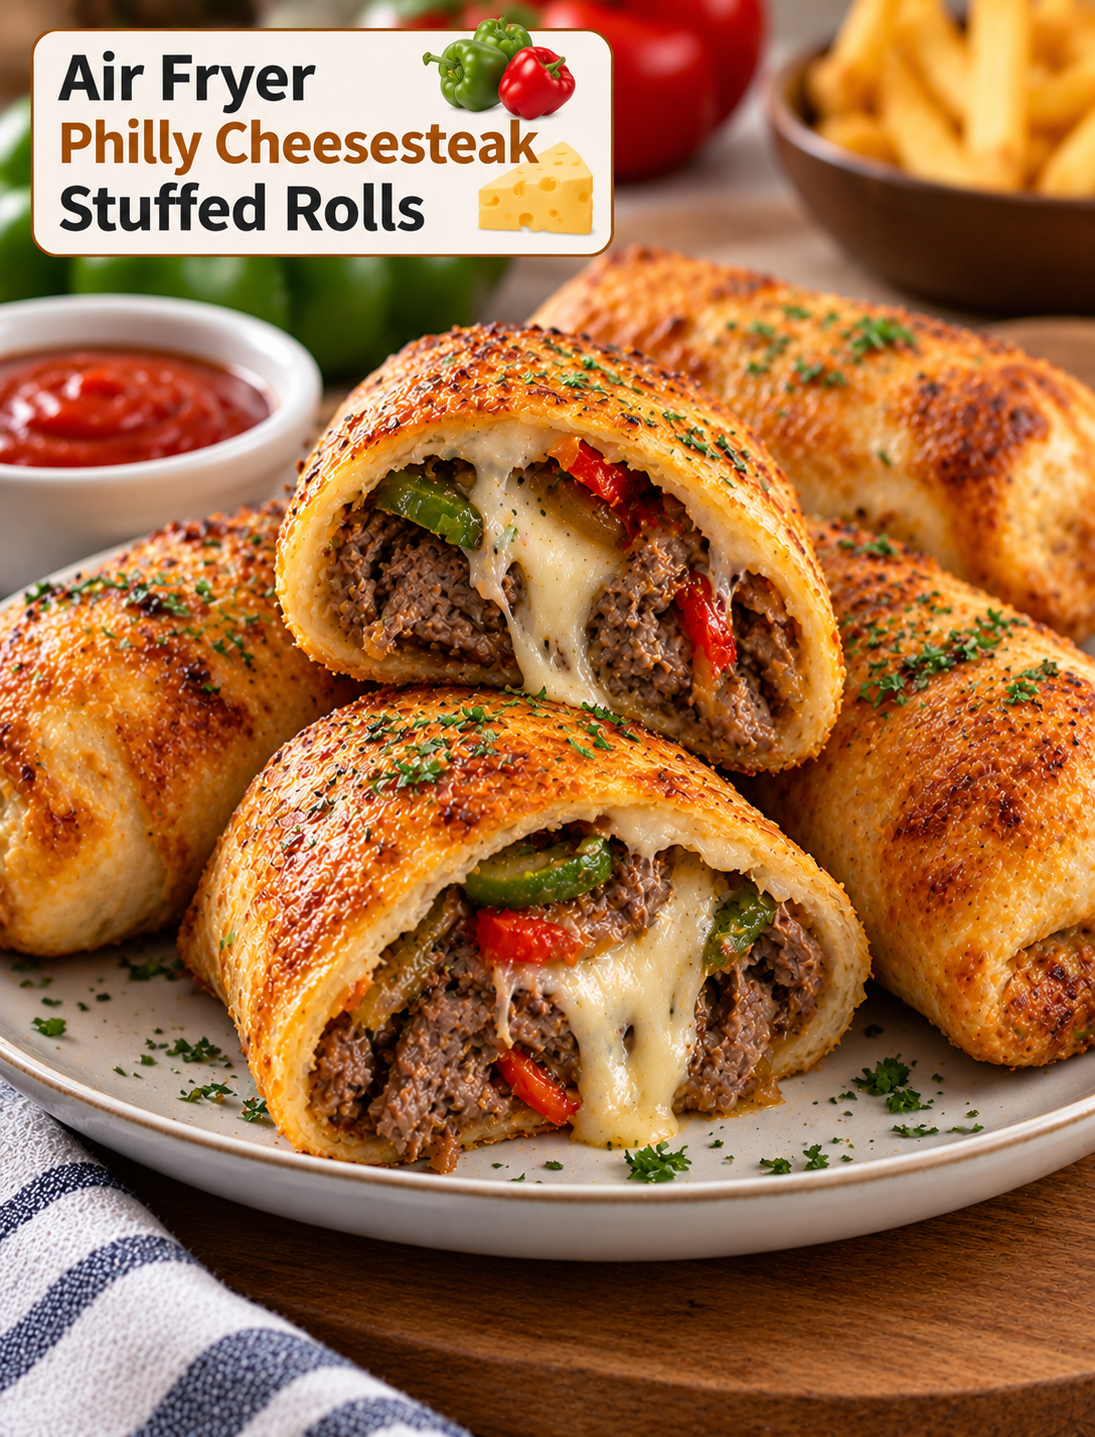
Golden crispy Philly cheesesteak stuffed rolls filled with tender beef, melted cheese, sautéed peppers and onions

Air Fryer Crispy Philly Cheesesteak Stuffed Rolls

Air Fryer Crispy Philly Cheesesteak Stuffed Rolls pack the classic flavors of a Philly cheesesteak into a golden, handheld roll. Thinly sliced beef, sautéed onions, peppers, and melted cheese are wrapped in soft dough and cooked until the outside becomes crisp and golden.

This easy recipe is a great choice when you want a hearty snack, quick lunch, party appetizer, or casual dinner. The air fryer gives the rolls a crunchy finish without deep frying, while the hot filling stays savory and cheesy.

The recipe uses simple ingredients that are easy to find at most U.S. grocery stores. You can use shaved steak, thinly sliced sirloin, or another tender cut of beef. Provolone is a classic cheese choice, but mozzarella or American cheese can also create a smooth, melty filling.

Why You’ll Love These Stuffed Rolls

These stuffed rolls combine several textures in one bite. The outside becomes crisp from the circulating hot air, while the center stays filled with tender beef, melted cheese, and flavorful vegetables.

The individual portions are also easy to serve. You can make smaller rolls for appetizers or larger ones for a filling meal.

Using an air fryer keeps the cooking process simple. There is no need to heat a large amount of oil, and the rolls can be cooked in batches when serving a crowd.

The filling is flexible, too. Add mushrooms for extra savory flavor, use hot peppers for a spicy version, or switch the cheese to match your preference.

Ingredients You’ll Need

Thinly Sliced Beef

Use shaved steak, thinly sliced ribeye, sirloin, or another tender beef cut. Thin slices cook quickly and make the filling easier to bite through.

If your beef is not already thinly sliced, place it in the freezer briefly before slicing. Slightly chilled meat is easier to cut into very thin strips.

Onion

Thinly sliced yellow or white onion adds the sweet, savory flavor associated with a classic cheesesteak. Cook the onion until softened and lightly browned for deeper flavor.

Bell Pepper

Green bell pepper adds freshness, mild sweetness, and color. Red or yellow peppers can be used if you prefer a sweeter taste.

Cheese

Provolone is a traditional choice for cheesesteak-style filling. American cheese creates a very creamy texture, while mozzarella provides plenty of stretch.

Refrigerated Dough

Use refrigerated pizza dough, crescent dough, or another sturdy refrigerated dough that can be rolled around the filling. Follow the package instructions for handling and cooking if needed.

Butter or Olive Oil

A small amount of melted butter or olive oil helps the outside of the rolls brown during air frying.

Seasonings

Salt, black pepper, garlic powder, and Italian seasoning provide a simple savory base. Worcestershire sauce can also be added to the beef for deeper flavor.

How to Make Air Fryer Crispy Philly Cheesesteak Stuffed Rolls

Cook the Beef and Vegetables

Heat a skillet over medium-high heat and add a small amount of oil. Add the thinly sliced beef and cook until it is browned and nearly cooked through.

Break up larger pieces with a spatula so the meat becomes evenly distributed throughout the filling.

Add the sliced onions and bell peppers. Cook until the vegetables soften and the beef is fully cooked.

Season the mixture with salt, black pepper, garlic powder, and a small amount of Worcestershire sauce if desired.

Remove the skillet from the heat and allow the filling to cool slightly. Excessively hot filling can make the dough difficult to handle.

Add the Cheese

Once the beef mixture has cooled slightly, add the cheese. You can place slices directly over the warm beef so they begin to melt, or mix shredded cheese into the filling.

Keep the filling reasonably dry. Excess liquid can make the dough soft and difficult to seal.

Prepare the Rolls

Unroll the refrigerated dough on a lightly floured surface. Divide it into portions based on the size of rolls you want.

Place a small amount of the cheesesteak mixture in the center of each piece. Avoid overfilling because too much filling can cause the dough to split during cooking.

Fold the dough around the filling and pinch the seams firmly closed. Place each roll seam-side down while preparing the remaining pieces.

Brush the outside lightly with melted butter or olive oil. A light coating encourages a golden, crisp surface.

Air Fry the Rolls

Preheat your air fryer according to the manufacturer’s instructions. Arrange the stuffed rolls in the basket with space between them.

Do not stack the rolls because they need direct exposure to circulating hot air. Cook until the dough is golden brown, crisp, and fully cooked.

Cooking time depends on the type and thickness of dough and the size of the rolls. Check the first batch early because air fryer models can vary considerably.

Let the rolls rest for a few minutes before serving. The cheese and beef filling will be very hot immediately after cooking.

Tips for Crispy Stuffed Rolls

Keep the filling relatively dry before adding it to the dough. Moisture is one of the main reasons stuffed dough becomes soft instead of crisp.

Do not overfill the rolls. A moderate amount of beef and cheese leaves enough dough around the filling for a secure seal.

Pinch every seam firmly. An open seam can allow melted cheese and juices to escape during cooking.

Leave space between the rolls in the basket. Good airflow helps the dough brown evenly on all sides.

Brush the outside lightly rather than heavily. Too much butter or oil can make the surface greasy instead of crisp.

If the rolls brown quickly but the dough is not fully cooked, reduce the air fryer temperature slightly and continue cooking until the center is done.

How to Get the Best Cheesesteak Flavor

Thinly sliced beef provides the most authentic cheesesteak-style texture. Avoid large chunks because they can make the rolls difficult to eat.

Cook the onions until they become soft and lightly caramelized. This adds natural sweetness without requiring extra sugar.

Provolone provides a mild, slightly tangy cheese flavor that works especially well with beef and onions.

For a richer filling, add a small amount of Worcestershire sauce while cooking the beef. Use it sparingly because its flavor is concentrated.

Freshly ground black pepper can also enhance the savory beef flavor without overpowering the cheese.

Easy Variations to Try

Mushroom Cheesesteak Rolls

Add thinly sliced mushrooms to the skillet with the onions and peppers. Cook until the mushrooms release their moisture and become lightly browned before adding them to the filling.

Spicy Cheesesteak Rolls

Add sliced jalapeños or banana peppers to the beef mixture. Pepper Jack cheese can replace provolone for an extra spicy and creamy filling.

Pizza Cheesesteak Rolls

Add a small amount of marinara sauce and mozzarella to the beef mixture. Keep the sauce limited so the dough does not become too wet.

Bacon Cheesesteak Rolls

Add finely chopped cooked bacon to the filling for smoky flavor. Use a moderate amount because bacon adds both salt and richness.

Chicken Cheesesteak Rolls

Replace the beef with thinly sliced cooked chicken. Provolone, peppers, and onions work well with the lighter protein.

Best Dips and Sauces

These stuffed rolls are flavorful enough to eat on their own, but a dipping sauce adds another layer of flavor.

Classic marinara works well with the cheesy filling. A creamy horseradish sauce adds tang and mild heat that pairs nicely with beef.

Ranch dressing is an easy option for casual gatherings. Garlic aioli provides a rich, savory dip for those who enjoy creamy sauces.

For a classic sandwich-inspired experience, serve the rolls with a small amount of ketchup, spicy mustard, or your favorite steak sauce.

Keep dipping sauces on the side rather than inside the rolls. Extra moisture inside the dough can prevent a crisp finish.

What to Serve With Cheesesteak Rolls

A fresh green salad provides a light contrast to the rich beef and cheese filling. Use lettuce, tomatoes, cucumbers, and a simple vinaigrette.

For a casual dinner, serve the rolls with air-fried French fries or potato wedges. Coleslaw can also add a cool, crunchy side.

For game day, arrange the rolls on a platter with several dipping sauces. Add pickle spears, vegetable sticks, or chips for an easy party spread.

Smaller rolls can be served as appetizers, while larger portions work well as a complete lunch or dinner.

How to Store and Reheat

Allow leftover rolls to cool before placing them in an airtight container. Refrigerate them promptly and use them within a few days for the best quality.

Reheat the rolls in the air fryer rather than the microwave when possible. The air fryer helps bring back some of the crisp texture of the dough.

Heat until the center is hot and the cheese is melted. Avoid excessive reheating because the beef can become dry.

If you are preparing them ahead, keep the cooked filling refrigerated and assemble the rolls shortly before air frying. This helps protect the dough from excess moisture.

Common Mistakes to Avoid

Do not use wet beef filling because excess juices can make the dough soggy and difficult to seal.

Avoid cutting the beef into thick chunks. Thin slices blend better with the onions, peppers, and cheese.

Do not overfill the dough. Too much filling can cause the seams to open and cheese to leak into the air fryer.

Avoid overcrowding the basket because limited airflow can leave the rolls unevenly browned.

Do not serve the rolls immediately after cooking. Allowing them to rest briefly reduces the chance of burning your mouth on the hot filling.

Frequently Asked Questions

What beef is best for cheesesteak rolls?

Thinly sliced ribeye or shaved steak gives the most tender texture, while thinly sliced sirloin is a leaner alternative.

What cheese should I use?

Provolone is a classic choice, but American, mozzarella, and Pepper Jack also melt well in the filling.

Can I use crescent roll dough?

Yes, crescent dough can be used, but handle it gently and avoid overfilling because it is softer than pizza dough.

How do I stop the filling from leaking?

Cool the filling slightly, avoid overfilling, and firmly pinch the dough seams closed before cooking.

Can I prepare these ahead of time?

Yes, prepare the filling ahead and refrigerate it, then assemble and air fry the rolls shortly before serving.

Can I freeze stuffed cheesesteak rolls?

Yes, cooled cooked rolls can be frozen in an airtight container and reheated in the air fryer until hot.

Can I add mushrooms and peppers?

Yes, mushrooms, green peppers, onions, and banana peppers are easy additions that complement the beef and cheese.

How do I make the rolls extra crispy?

Keep the filling dry, leave space between the rolls, and lightly brush the dough with butter or oil before air frying.

Final Thoughts

Air Fryer Crispy Philly Cheesesteak Stuffed Rolls turn a beloved sandwich combination into a convenient handheld recipe. Tender beef, sautéed onions and peppers, and melted cheese are wrapped in dough and air fried until golden and crisp.

The key to great results is controlling moisture and avoiding overfilling. Use thinly sliced beef, cook the vegetables until their excess moisture is gone, seal each roll carefully, and leave enough room for hot air to circulate.

Serve these rolls with your favorite dipping sauces for a satisfying appetizer, lunch, dinner, or game-day snack. With a few simple ingredient swaps, you can also create spicy, mushroom, bacon, chicken, or pizza-inspired versions.

Air Fryer Garlic Butter Steak Bites

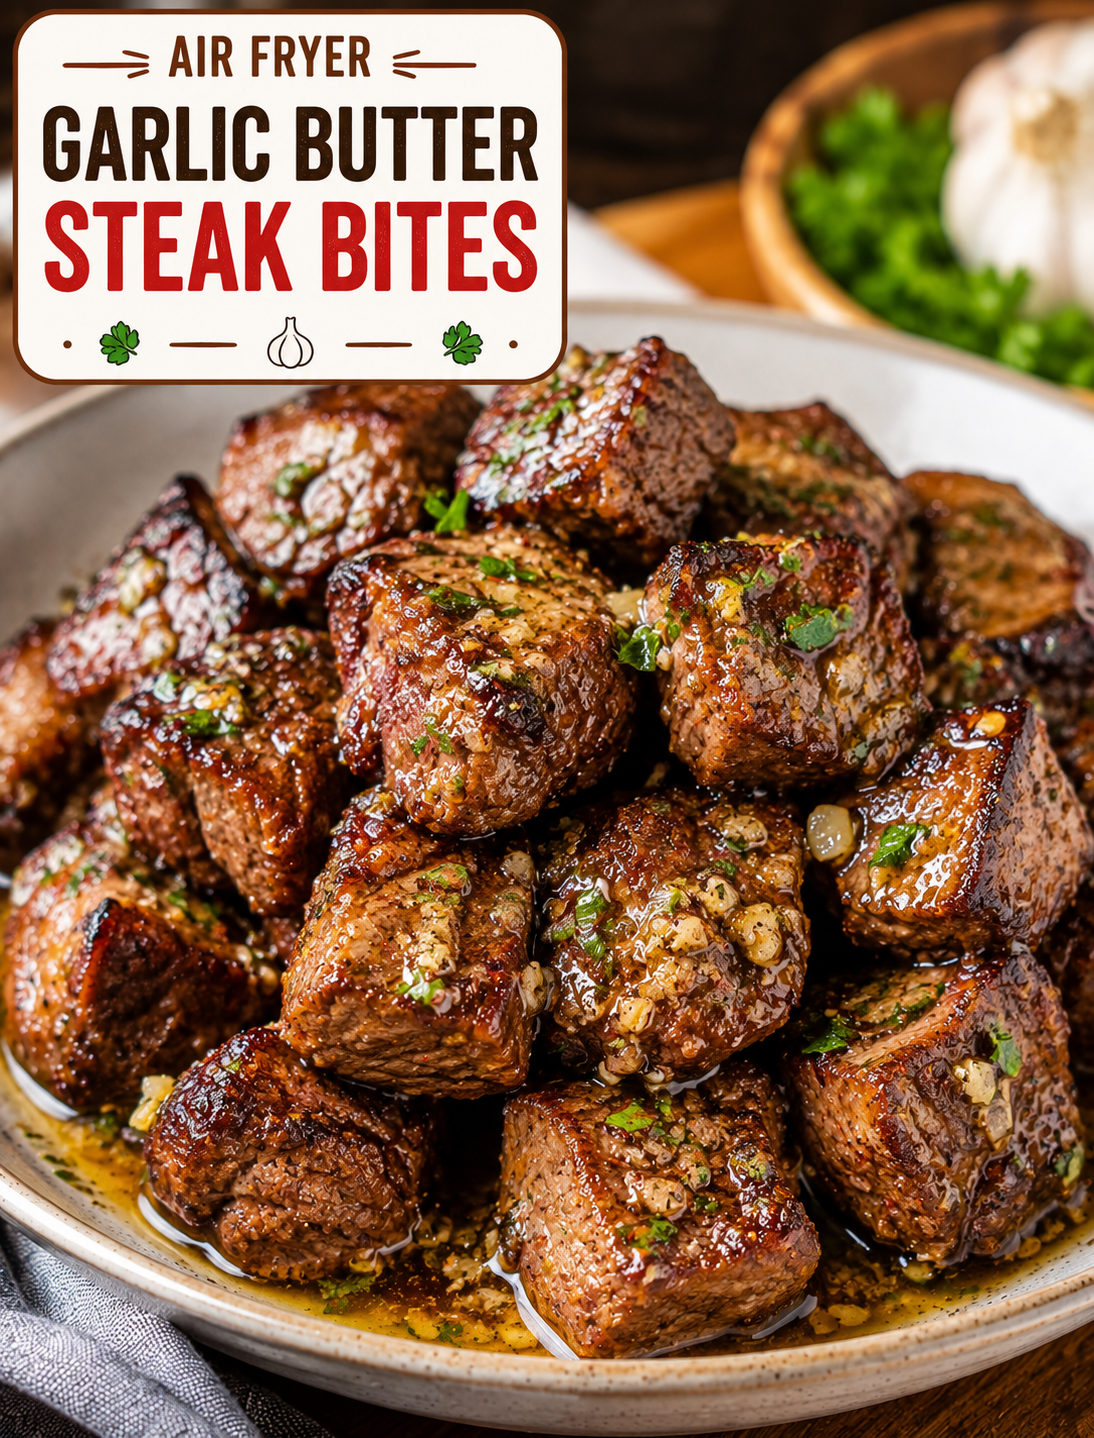
Air Fryer Garlic Butter Steak Bites with browned edges, melted garlic butter, fresh parsley, and herbs

Air Fryer Garlic Butter Steak Bites

Air Fryer Garlic Butter Steak Bites are tender, juicy, and packed with rich garlic butter flavor. Small pieces of steak cook quickly in the air fryer, creating browned edges while keeping the center juicy and flavorful.

This easy steak recipe is perfect for a quick weeknight dinner, game-day snack, party appetizer, or hearty side dish. The garlic butter sauce adds a savory finish without requiring a long list of ingredients.

Using the air fryer also makes this recipe simple and convenient. There is no need to stand over a hot skillet while the steak cooks. Once the steak is seasoned and the air fryer is hot, dinner can be ready in minutes.

Why You’ll Love This Recipe

  • Fast cooking: Small steak pieces cook much faster than a whole steak.
  • Big flavor: Garlic, butter, and herbs create a rich savory coating.
  • Tender texture: High heat quickly browns the outside while the center stays juicy.
  • Easy preparation: The recipe uses simple ingredients and basic kitchen tools.
  • Perfect for sharing: Serve the bites as an appetizer with toothpicks and dipping sauce.
  • Great for dinner: Pair them with potatoes, vegetables, rice, or a fresh salad.
  • Easy to customize: Add chili flakes, Parmesan, fresh herbs, or your favorite steak seasoning.

Ingredients

For the Steak Bites

  • 1 pound sirloin steak or another tender steak
  • 1 tablespoon olive oil
  • 1 teaspoon garlic powder
  • 1/2 teaspoon smoked paprika
  • 1/2 teaspoon onion powder
  • 1/2 teaspoon salt
  • 1/4 teaspoon black pepper

For the Garlic Butter

  • 3 tablespoons unsalted butter
  • 3 cloves fresh garlic, finely minced
  • 1 tablespoon chopped fresh parsley
  • 1/2 teaspoon Italian seasoning
  • 1 teaspoon lemon juice, optional

Optional Garnishes

  • Fresh parsley
  • Grated Parmesan cheese
  • Red pepper flakes
  • Extra black pepper
  • Lemon wedges

How to Make Air Fryer Garlic Butter Steak Bites

Step 1: Choose and Prepare the Steak

Sirloin is an excellent choice because it is tender, flavorful, and widely available in U.S. grocery stores.

Trim away large pieces of excess fat or tough connective tissue.

Cut the steak into bite-sized pieces that are roughly 1 to 1½ inches thick.

Try to keep the pieces similar in size so they cook evenly.

Pat the steak dry with paper towels before seasoning. Removing surface moisture helps the meat brown better in the air fryer.

Step 2: Season the Steak

Place the steak pieces in a large bowl.

Add olive oil, garlic powder, smoked paprika, onion powder, salt, and black pepper.

Toss until every piece is lightly coated with the seasoning mixture.

Do not add the garlic butter yet. The fresh garlic is added after cooking to prevent it from burning during the high-heat air-frying process.

Step 3: Preheat the Air Fryer

Preheat the air fryer to 400°F for about 3–5 minutes.

A hot cooking basket helps the steak begin browning as soon as it is added.

If your air fryer model does not require preheating, you can skip this step, but cooking time may vary slightly.

Step 4: Arrange the Steak

Place the seasoned steak bites in the air fryer basket in a single layer.

Leave some space between the pieces so hot air can circulate around them.

Avoid stacking the steak because crowded pieces can release moisture and steam instead of developing browned edges.

For a large batch, cook the steak in two rounds.

Step 5: Air Fry the Steak Bites

Cook the steak at 400°F for approximately 7–10 minutes, shaking the basket or turning the pieces halfway through.

The exact time depends on the size of the steak pieces and your preferred level of doneness.

Use an instant-read thermometer for the most accurate result. The USDA recommends a minimum internal temperature of 145°F with a three-minute rest for whole cuts of beef.

For steak bites cooked beyond medium, continue cooking for another minute or two and check the temperature again.

Step 6: Make the Garlic Butter

While the steak cooks, melt the butter in a small saucepan over low heat.

Add the minced garlic and Italian seasoning.

Cook for about 30–60 seconds, just until the garlic becomes fragrant.

Remove the pan from the heat and stir in the parsley and optional lemon juice.

Do not brown the garlic heavily because burnt garlic can taste bitter.

Step 7: Toss With Garlic Butter

Transfer the hot steak bites to a clean bowl.

Pour the warm garlic butter over the steak.

Toss gently until every piece is coated.

Let the steak rest for about 2 minutes before serving so the juices can settle.

Finish with fresh parsley, Parmesan, red pepper flakes, or a squeeze of lemon if desired.

Tips for Tender Steak Bites

The quality of the steak and the cooking method both affect the final texture.

  • Choose a tender cut: Sirloin, ribeye, strip steak, and tenderloin can all work well.
  • Cut evenly: Similar-sized pieces cook at the same rate.
  • Dry the steak first: Excess moisture can reduce browning.
  • Do not overcrowd: Space allows hot air to circulate around the meat.
  • Preheat the basket: Starting with high heat helps create browned edges.
  • Avoid overcooking: Small pieces can become dry quickly.
  • Rest briefly: A short rest helps retain moisture.
  • Add garlic butter after cooking: This protects the fresh garlic from burning.

Best Steak Cuts to Use

Sirloin is one of the best choices for this recipe because it offers a good balance of tenderness, flavor, and price.

Ribeye gives the bites a richer flavor because of its higher fat content.

New York strip provides a firm, beefy texture with enough marbling to stay flavorful.

Tenderloin creates very tender bites but is usually more expensive than sirloin.

Avoid very tough cuts unless they are properly prepared for a longer cooking method. Quick air frying works best with naturally tender cuts.

Easy Flavor Variations

Spicy Garlic Butter

Add 1/4 teaspoon of red pepper flakes or a small amount of cayenne pepper to the seasoning.

Parmesan Steak Bites

Sprinkle grated Parmesan over the hot steak immediately after tossing it with garlic butter.

Herb Butter Steak Bites

Add fresh rosemary, thyme, or parsley to the melted butter for a fresh herb flavor.

Cajun Steak Bites

Replace the regular seasoning with your favorite Cajun seasoning for a spicy Southern-style version.

Lemon Garlic Steak Bites

Add fresh lemon juice and a little lemon zest to the finished garlic butter for a brighter flavor.

What to Serve With Steak Bites

These flavorful bites pair well with classic American side dishes.

Serve them with mashed potatoes, roasted vegetables, baked potatoes, air fryer fries, rice, or a crisp green salad.

For an appetizer, place the steak bites on a serving platter with toothpicks and a small bowl of garlic butter, ranch dressing, or creamy horseradish sauce.

For a low-carb meal, serve them with steamed broccoli, asparagus, cauliflower, or a simple cucumber salad.

Storage and Reheating

Allow leftover steak bites to cool before placing them in an airtight container.

Refrigerate leftovers for up to 3–4 days.

To reheat, place the steak in the air fryer at 350°F for 2–4 minutes. Check frequently because reheating for too long can make the meat tough.

You can also reheat the bites in a skillet over medium-low heat with a small amount of butter.

For the best texture, avoid repeatedly reheating the same portion.

Make-Ahead Instructions

You can season and cut the steak several hours before cooking.

Keep the prepared steak covered in the refrigerator until you are ready to air fry it.

Prepare the garlic butter shortly before serving for the freshest garlic flavor.

Do not leave raw steak at room temperature for extended periods before cooking.

Common Mistakes to Avoid

  • Cutting the steak too small: Tiny pieces can overcook quickly.
  • Using wet steak: Surface moisture can prevent proper browning.
  • Overcrowding the basket: Crowding reduces airflow and can lead to steaming.
  • Adding fresh garlic too early: Garlic can burn at high air fryer temperatures.
  • Ignoring internal temperature: Cooking time alone does not guarantee the desired doneness.
  • Overcooking: Small steak pieces lose moisture quickly.
  • Skipping the rest: A brief rest helps the meat remain juicy.

Nutrition Facts

Approximate nutrition per serving will vary according to the steak cut, butter, and serving size.

  • Calories: 365
  • Protein: 30g
  • Carbohydrates: 3g
  • Fat: 27g
  • Saturated Fat: 11g
  • Fiber: 0g
  • Sugar: 1g
  • Sodium: 520mg

These values are estimates and can change based on the exact ingredients and brands used.

Frequently Asked Questions

What is the best steak for air fryer steak bites?

Sirloin is a great choice because it is tender, flavorful, and affordable, while ribeye provides a richer result.

How long should steak bites cook in an air fryer?

At 400°F, bite-sized pieces usually take about 7–10 minutes, depending on their size and desired doneness.

Should I marinate the steak first?

Marinating is optional because the seasoning and garlic butter provide plenty of flavor without a long marinade.

Why are my steak bites tough?

Overcooking, very small pieces, or using a tough cut can make the meat chewy or dry.

Can I use frozen steak?

Fresh or fully thawed steak is best because it cooks more evenly and develops better browning.

When should I add the garlic butter?

Add the garlic butter after air frying so the fresh garlic stays fragrant instead of burning.

Can I use garlic powder instead of fresh garlic?

Yes, but fresh minced garlic gives the butter sauce a stronger and more aromatic flavor.

How should I reheat leftover steak bites?

Reheat them at 350°F in the air fryer for about 2–4 minutes, checking often to prevent overcooking.

Final Thoughts

Air Fryer Garlic Butter Steak Bites are a simple way to enjoy tender, flavorful beef without spending a long time in the kitchen. The air fryer creates browned edges quickly, while homemade garlic butter adds a rich finish.

For the best results, use a tender steak, cut the pieces evenly, avoid overcrowding the basket, and check the internal temperature before serving. Pair the finished bites with potatoes, vegetables, rice, or your favorite dipping sauce for an easy meal or crowd-pleasing appetizer.