Air Fryer Crispy Cheese Taco Shell Hack
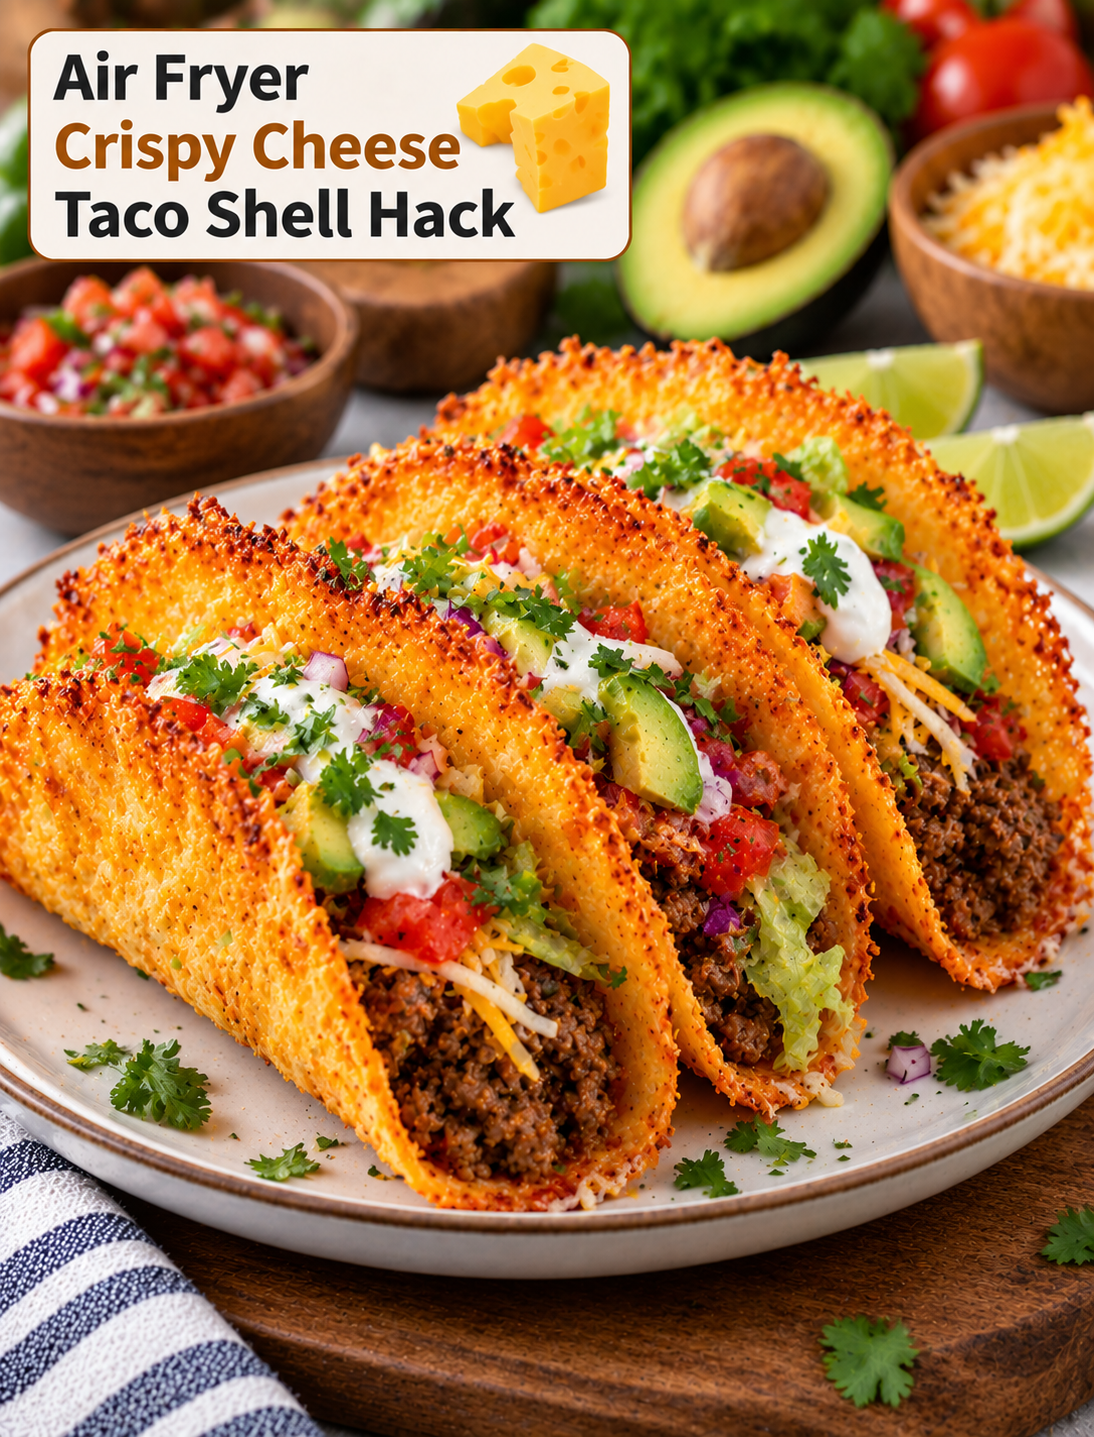
Air Fryer Crispy Cheese Taco Shell Hack is a simple way to turn shredded cheese into a crunchy, low-carb taco shell. The cheese melts, bubbles, and browns in the air fryer before becoming firm enough to hold your favorite taco fillings.
This easy taco shell idea uses just a few basic ingredients and does not require traditional corn or flour tortillas. The result is a crisp, savory shell with rich cheese flavor in every bite.
You can fill these homemade cheese shells with seasoned ground beef, shredded chicken, lettuce, tomatoes, avocado, salsa, sour cream, or your favorite taco toppings. They are also useful when you want a quick dinner with fewer ingredients.
Why You’ll Love This Cheese Taco Shell Hack
This recipe is fast, simple, and easy to customize. The air fryer melts the cheese evenly while helping the edges become golden and crisp.
The shells have a naturally savory flavor, so they can make even simple taco fillings taste more exciting. You can use cheddar, Monterey Jack, Colby Jack, or another cheese that melts and crisps well.
Another benefit is the texture. Traditional tortillas can become soft when loaded with juicy taco filling, but a properly cooked cheese shell stays crisp around the edges.
The shells are also naturally low in carbohydrates because the main ingredient is cheese. This makes them a useful option for people looking for a tortilla alternative.
Ingredients You’ll Need
Shredded Cheese
Use a cheese that melts evenly and develops a crisp edge. Cheddar, Monterey Jack, Colby Jack, and Mexican cheese blends are good choices.
Pre-shredded cheese is convenient, while freshly shredded cheese can melt more smoothly depending on the brand.
Seasonings
Seasonings are optional but can add extra flavor. Try taco seasoning, smoked paprika, garlic powder, onion powder, chili powder, or dried oregano.
Use a light amount because cheese already contains salt.
Taco Fillings
Choose cooked ground beef, chicken, turkey, beans, or another filling you enjoy. Keep the filling relatively dry so it does not soften the crispy shell too quickly.
Toppings
Lettuce, diced tomatoes, avocado, jalapeños, cilantro, salsa, sour cream, shredded cheese, and lime are easy toppings.
Use fresh toppings in moderate amounts so the shell remains sturdy.
How to Make Air Fryer Crispy Cheese Taco Shells
Prepare the Cheese
Preheat the air fryer according to your model’s instructions if preheating is recommended.
Line the air fryer basket or tray with a suitable piece of parchment designed for air-fryer use. Make sure the parchment does not extend beyond the food area or touch the heating element.
Place small piles of shredded cheese in the basket. Shape each pile into a thin, roughly circular layer.
Leave space between each cheese circle. The cheese will spread as it melts, so crowded pieces can join together.
Keep the cheese layer fairly even. A layer that is too thick may stay soft in the center, while an extremely thin layer can become brittle.
Cook Until Golden and Crisp
Air fry the cheese until it melts completely and the edges become golden brown.
Cooking time depends on the cheese type, thickness, and air fryer model. Start checking early because cheese can go from lightly browned to burnt quickly.
The cheese should look melted and bubbly with a firm, browned edge before you remove it.
Allow each piece to cool for a short time. The melted cheese will become firmer as it cools.
Shape the Taco Shells
While the cheese is still warm and flexible, carefully lift each round using a silicone spatula.
Drape the melted cheese over a wooden spoon, taco mold, or another heat-safe rounded surface to create the classic taco shape.
Hold it in place briefly while it cools and firms up. Do not wait too long because completely cooled cheese becomes difficult to shape without cracking.
Once firm, gently remove the shell from the mold and place it on a plate.
Tips for Extra Crispy Cheese Shells
Use a moderate amount of cheese for each shell. An overly thick layer can remain chewy instead of crisp.
Spread the cheese evenly so the center and edges cook at a similar rate.
Do not overcrowd the air fryer basket. Space allows hot air to move around each cheese round.
Watch the cheese closely near the end of cooking. The final stage can happen quickly.
Allow the cheese to cool enough to firm before adding filling. A warm shell may bend or break when loaded.
For maximum crunch, cook until the edges are deeply golden but stop before they become dark brown or bitter.
Best Cheeses for Crispy Taco Shells
Cheddar is one of the easiest options because it melts well and develops a strong savory flavor.
Monterey Jack has a mild taste and melts smoothly. It can create a slightly softer shell if not cooked long enough.
Colby Jack offers a balance of mild flavor and good browning. It also gives the shells an attractive marbled appearance.
A Mexican-style shredded cheese blend can provide a familiar taco flavor. Check the blend because different brands contain different cheese combinations.
For a stronger flavor, combine cheddar with Monterey Jack. A mixed cheese approach can provide both flavor and meltability.
How to Make the Taco Filling
While the cheese shells cook, prepare your preferred taco filling.
For ground beef tacos, brown lean ground beef in a skillet and drain excess grease if needed. Add taco seasoning and a small amount of water, then simmer until the seasoning coats the meat.
For chicken tacos, use cooked shredded chicken and season it with taco seasoning, cumin, garlic powder, and lime juice.
Black beans or pinto beans can provide a simple meat-free filling. Drain and season the beans before adding them to the shells.
Keep the filling warm but avoid adding large amounts of liquid. Juicy fillings can soften the cheese shell quickly.
Best Toppings for Cheese Taco Shells
Shredded lettuce adds crunch and helps separate the warm filling from the shell.
Diced tomatoes provide freshness and mild acidity. Drain excess tomato juice before adding them.
Avocado adds creamy texture and balances the salty cheese.
Fresh cilantro and lime juice provide a bright finish. Jalapeños can be added for heat.
Sour cream, salsa, or taco sauce can be served on the side. Adding too much sauce directly inside the shell can reduce its crispness.
For extra crunch, add diced onions, radishes, or crushed tortilla chips.
Easy Variations to Try
Spicy Cheese Taco Shells
Add a small amount of chili powder, cayenne, or crushed red pepper to the shredded cheese before air frying.
Taco Ranch Shells
Mix a small amount of dry ranch seasoning with the cheese for a creamy, tangy flavor that works well with chicken or beef filling.
Chicken Fajita Tacos
Fill the crispy shells with seasoned chicken, sautéed bell peppers, onions, avocado, and fresh lime.
Breakfast Taco Shells
Use scrambled eggs, cooked breakfast sausage, avocado, and a small amount of salsa for a crispy breakfast taco.
Buffalo Chicken Tacos
Fill the shells with shredded buffalo chicken, lettuce, and a small drizzle of ranch or blue cheese dressing.
Vegetarian Taco Shells
Use seasoned black beans, corn, avocado, tomatoes, lettuce, and salsa for a satisfying meat-free version.
How to Keep Cheese Taco Shells Crispy
Moisture is the biggest enemy of a crispy cheese shell. Keep wet ingredients such as salsa, sour cream, and juicy tomatoes under control.
Prepare the shells just before serving whenever possible. Freshly cooked shells provide the best crunch.
If preparing the components ahead, store the shells separately from the filling and toppings.
Add the filling immediately before eating. This keeps the cheese from absorbing moisture for too long.
For a party, serve the toppings separately so guests can build their own tacos. This also helps everyone control the amount of moisture inside each shell.
What to Serve With Cheese Tacos
A fresh tomato and avocado salad makes a light side for these crunchy tacos.
Mexican-style rice provides a hearty option for dinner. Black beans or pinto beans can also be served on the side.
For a casual gathering, serve the tacos with guacamole, salsa, pico de gallo, and a simple corn salad.
A squeeze of fresh lime over the finished tacos adds brightness and balances the richness of the cheese.
How to Store and Reheat
Cheese shells are best enjoyed immediately after cooking because their crisp texture can soften during storage.
If you have leftovers, allow them to cool completely before placing them in an airtight container. Separate individual shells with parchment paper to reduce sticking.
Store the shells away from moist taco fillings and sauces.
To restore some crispness, place the shells back into the air fryer for a short time. Watch them closely because cheese can brown quickly.
Avoid microwaving the shells because microwave heat can make melted cheese soft and chewy instead of crisp.
Common Mistakes to Avoid
Do not use too much cheese because a thick layer can stay soft in the middle.
Avoid placing cheese directly on an unprotected air fryer surface if your model requires a liner for this type of cooking. Follow your appliance instructions.
Do not leave parchment loose in the basket during preheating because circulating air can move it toward the heating element.
Avoid cooking at an excessively high temperature because the cheese can burn before becoming evenly crisp.
Do not shape the cheese after it has fully cooled. Warm cheese is flexible, while cold cheese becomes firm and more likely to crack.
Avoid adding wet toppings too early. Moisture can quickly turn a crunchy shell soft.
Frequently Asked Questions
What cheese is best for crispy taco shells?
Cheddar, Monterey Jack, Colby Jack, and Mexican cheese blends all work well when melted into thin, evenly shaped rounds.
Can I make cheese taco shells without an air fryer?
Yes, you can use an oven, but cooking time and temperature will vary depending on your oven and cheese thickness.
Why are my cheese shells not crispy?
The cheese layer may be too thick, undercooked, or exposed to excess moisture from the filling and toppings.
Can I use pre-shredded cheese?
Yes, pre-shredded cheese is convenient and works well, although freshly shredded cheese may melt more smoothly.
How do I shape the shells?
Shape the warm melted cheese over a taco mold, wooden spoon, or rounded heat-safe surface until it cools and becomes firm.
Can I make these shells ahead of time?
Yes, but store them separately from wet ingredients and keep them in an airtight container to help preserve their texture.
Are cheese taco shells low carb?
They can be a low-carbohydrate alternative to traditional tortilla shells because the shell is made primarily from cheese.
What fillings work best?
Seasoned beef, chicken, turkey, beans, scrambled eggs, lettuce, avocado, tomatoes, and fresh salsa all pair well with crispy cheese shells.
Final Thoughts
Air Fryer Crispy Cheese Taco Shell Hack is an easy way to create crunchy taco shells with a rich, cheesy flavor. A thin layer of melted cheese becomes firm and crisp as it cools, creating a sturdy base for your favorite fillings.
The key is controlling the cheese thickness, watching the browning closely, and shaping the rounds while they are still warm. Keeping wet toppings separate until serving also helps protect the crunch.
Try cheddar for a bold flavor, Monterey Jack for a mild shell, or a Mexican cheese blend for a taco-inspired finish. Add seasoned beef, chicken, beans, fresh vegetables, and your favorite toppings for a quick meal that is easy to customize.